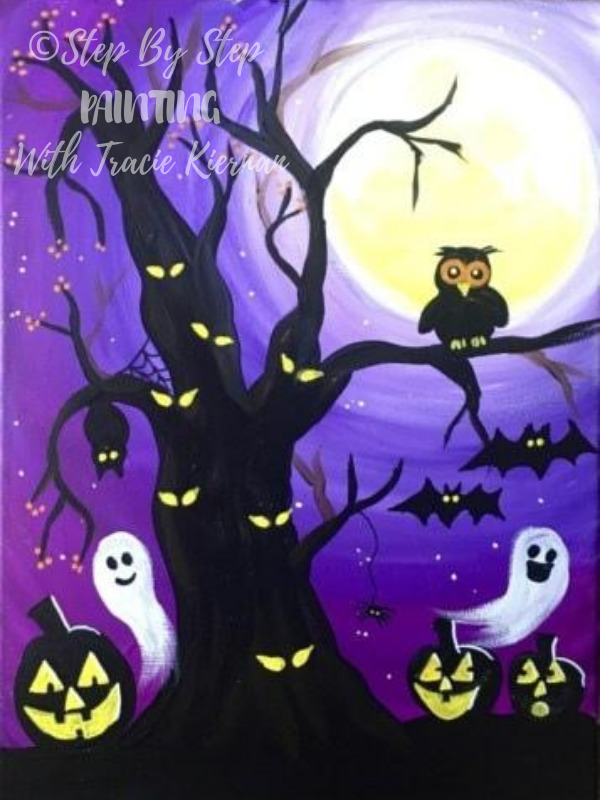
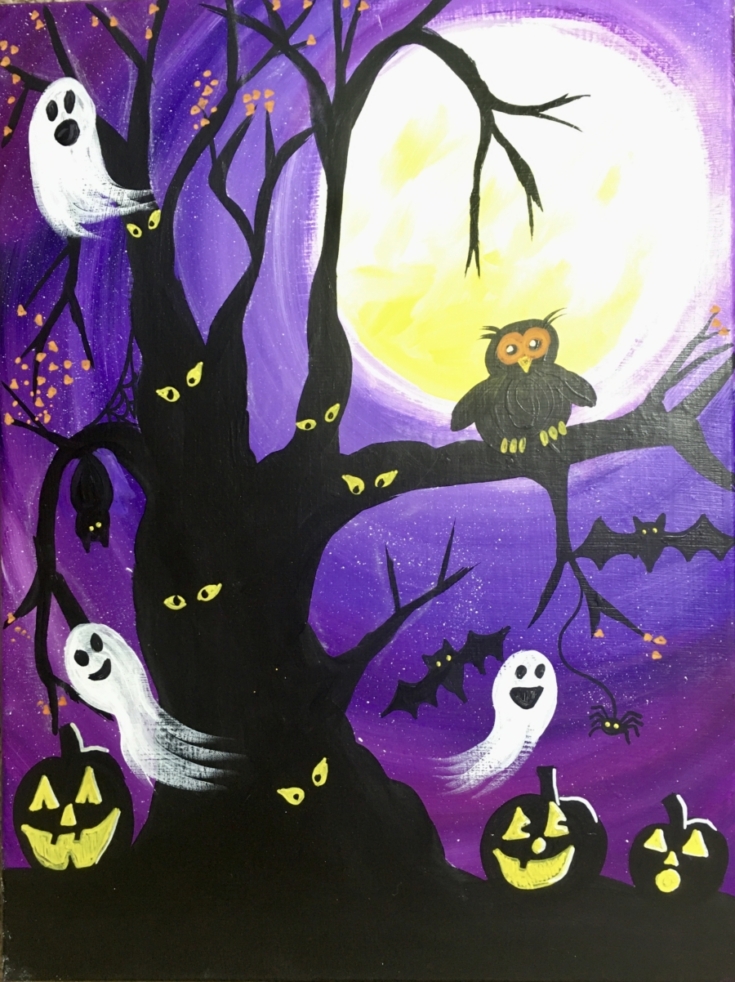
This is a very easy acrylic painting just in time for Halloween! You will learn how to paint the swirly moon background with a Halloween silhouette of a spooky tree in the foreground!
Would you like to save this?
There are a lot of fun simple details you can add to your spooky tree! Ghosts, bats, spider webs, an owl, you name it!

The level of this painting is very easy and it’s a great one you can do with the kids as well! Enjoy!
Materials:
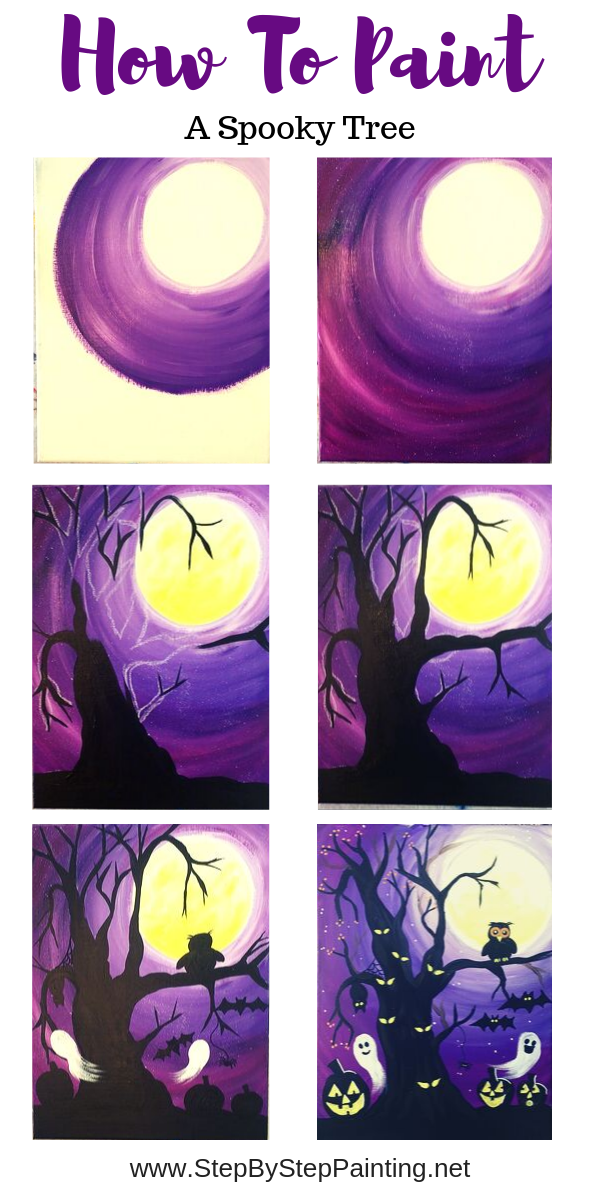
How To Paint A Spooky Tree
Materials
- 12" x 16" Canvas
- Acrylic Paint
- Paint Brushes
- POSCA Paint Pens (Optional)
- White Chalk
- FIve Inch Round Circle (I used a Tupperware lid)
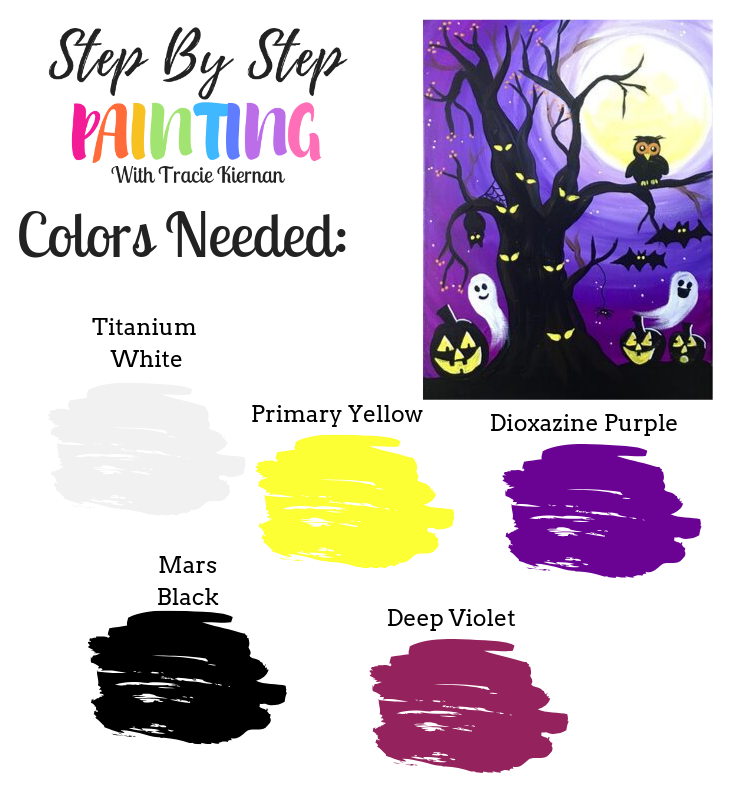
Colors
- Dioxazine Purple
- Deep Violet
- Mars Black
- Titanium White
- Primary Yellow
Brushes
Paint Pen Colors (Optional)
Recommended Products
As an Amazon Associate, Michaels Affiliate and a member of other affiliate programs, I earn from qualifying purchases.

Color Palette:
Directions At A Glance:
Video:
Step By Step Directions:
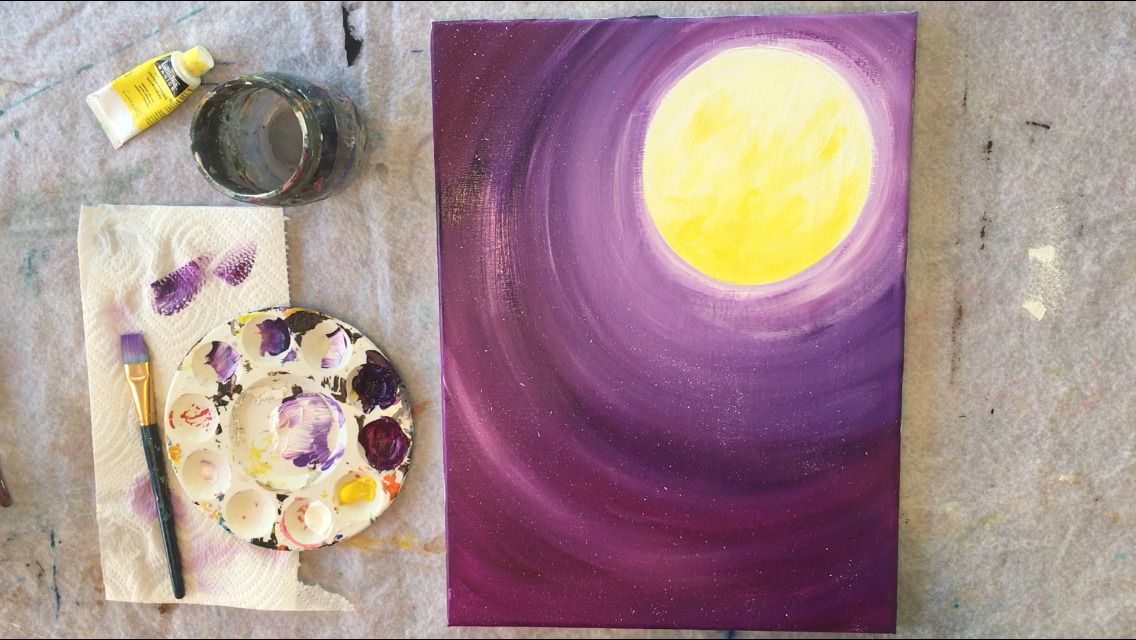
1. Trace A Circle For The Moon
For the moon circle, I used a Tupperware lid! The approximate diameter was 5″. You can locate a similar size circle or use a larger or smaller one. Lightly trace the circle with a pencil. 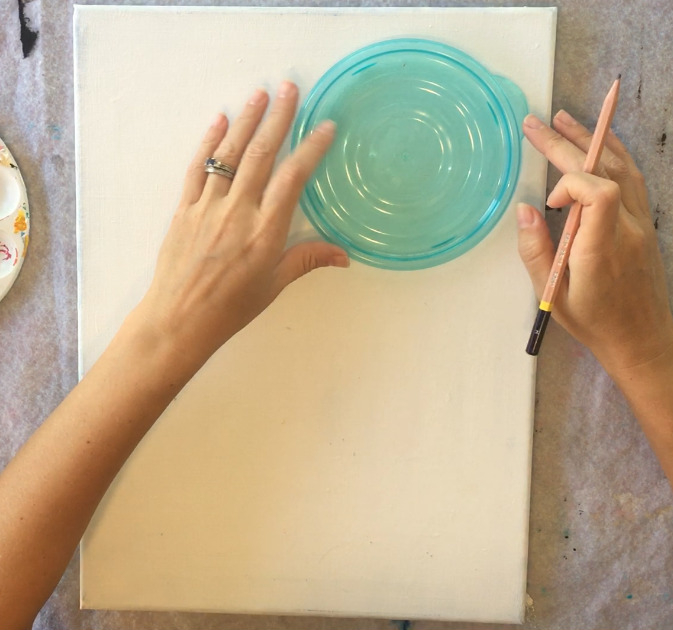
2. Paint A White Ring Around The Moon
Next use a 3/4″ flat brush and titanium white. Paint a white ring around the moon. This will be the lightest part of the sky and the white layer sets a basefor the light purple. 
3. Blend In The Dioxazine Purple
Next add a little bit of dioxazine purple to your not rinsed brush with the white on it. Gently blend the purple into the white so that it becomes a light purple. Continue to paint in circles around the moon. 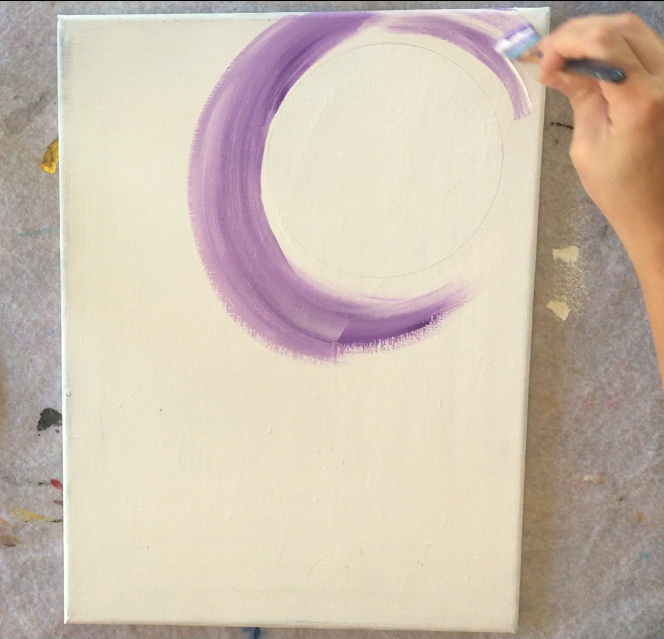
Then gradually add more dioxazine purple to the brush and less white so the purple gets darker as you work your way away from the circle. If you need to add more white to the brush, you may to help with the blending. Also, some of the white shows up in streaks because there is still white on the brush. Try not to blend all the purple into one solid color. 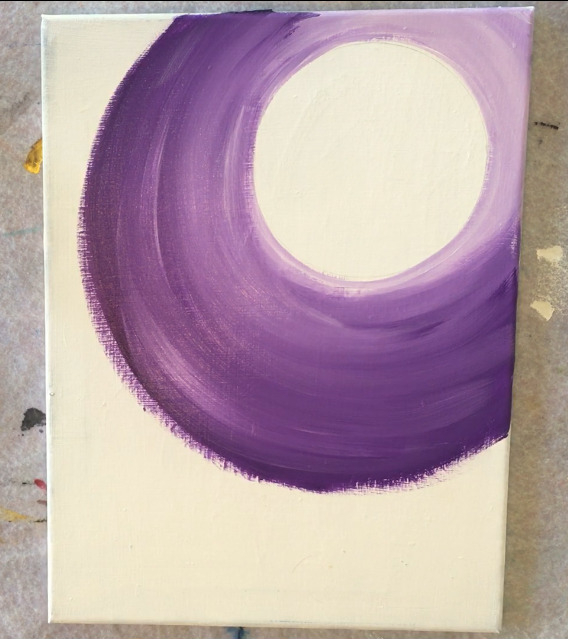
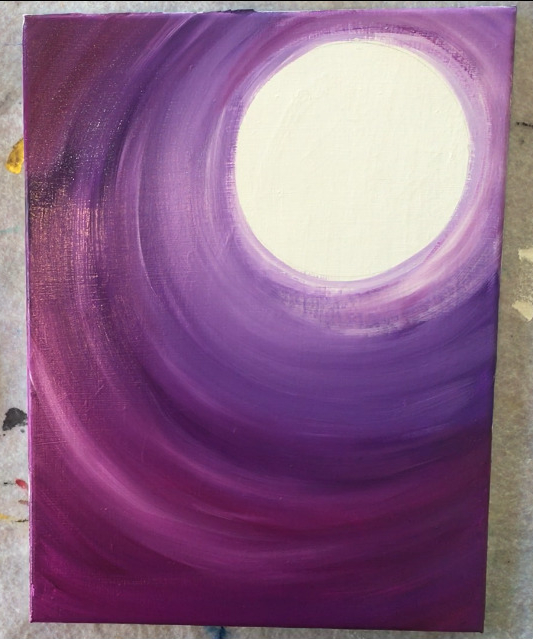
4. Blend In The Deep Violet
Next add deep violet to your brush. If you need to, rinse your brush to get all the white and dioxazine residue off. Blend it in with the dioxazine purple by painting over that area. You might need to add a little dioxazine purple to your brush to help it transition a little more smoothly. 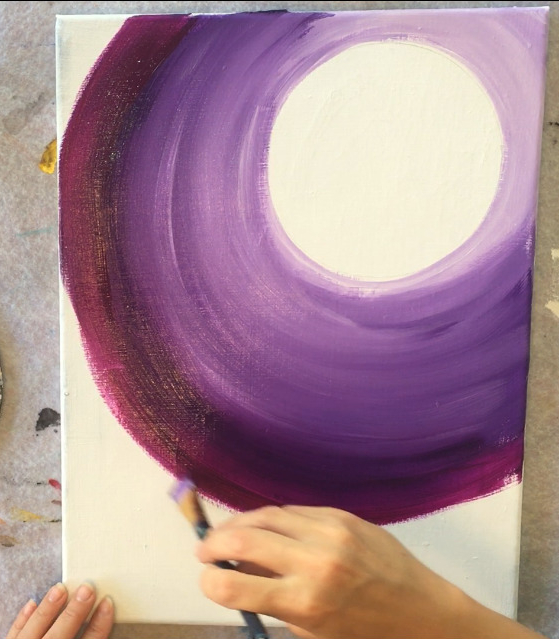
I also added a little bit of white to my brush with the deep violet to get a few white streaks in that area. The white also helps with the blending. Go all the way to the edge of the canvas with the deep violet. 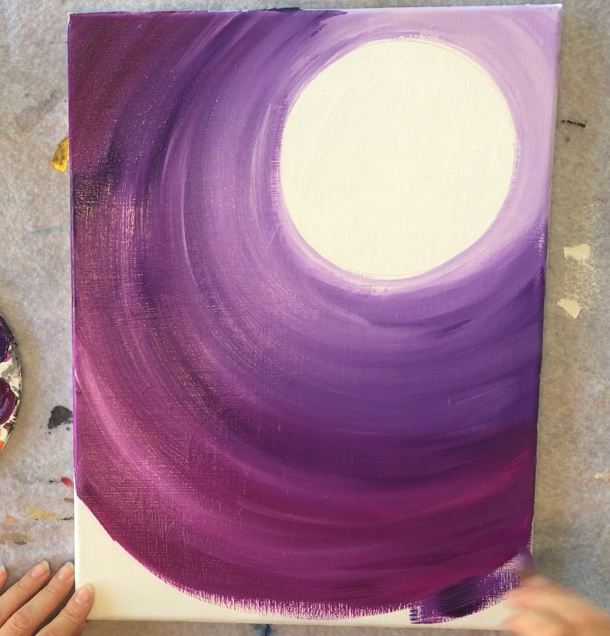
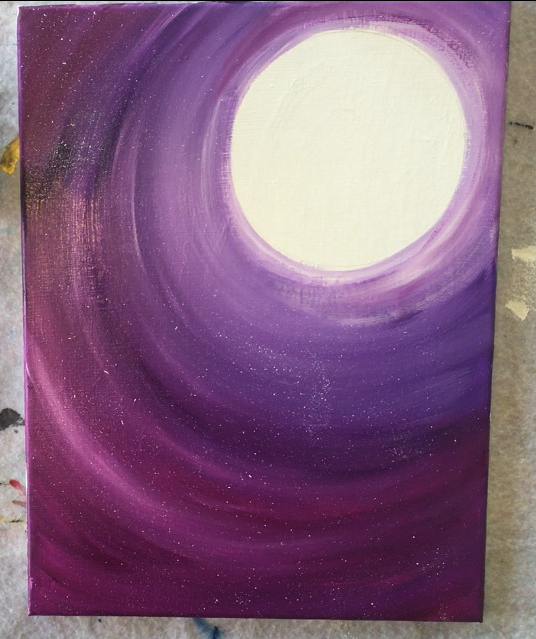
5. Spatter Paint Stars
Use a toothbrush to splatter white specks in the sky to represent stars. Basically dip your brush in the white and gently flick it. If the white paint is too thick you may want to add a tiny bit of water to it and test it out to see if it splatters. 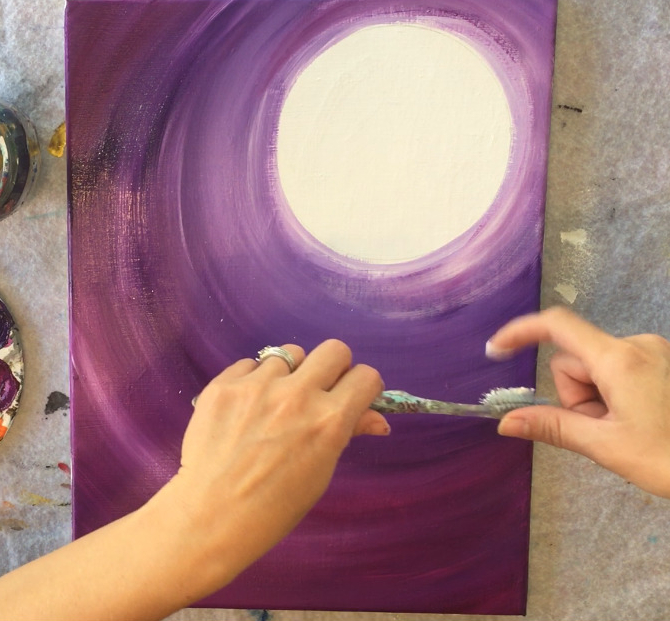
6. Paint The Moon
To paint the moon, I used a #12 bright brush and primary yellow. Start at the bottom of the moon and paint short little strokes (and strokes outlining the bottom edge of the circle). 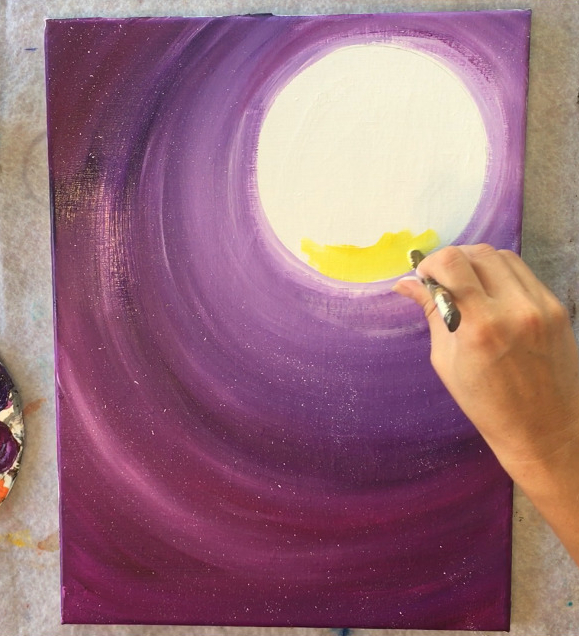
Then add titanium white to your not rinsed brush. Continue to paint short little strokes as you work your way up the moon. The yellow should get lighter as you go up. 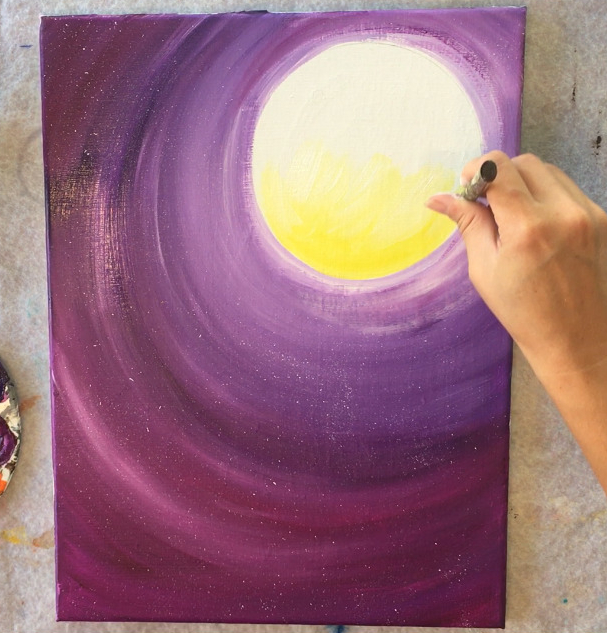
Then I did some more yellow strokes here and there to create some texture in the moon. 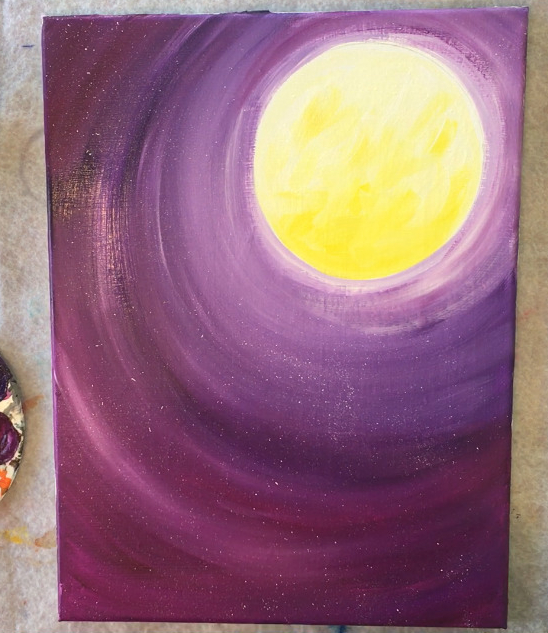
7. Draw The Ground & Tree With White Chalk
Next use a piece of white chalk to draw the ground. I drew a horizontal uneven line across the bottom of the canvas. 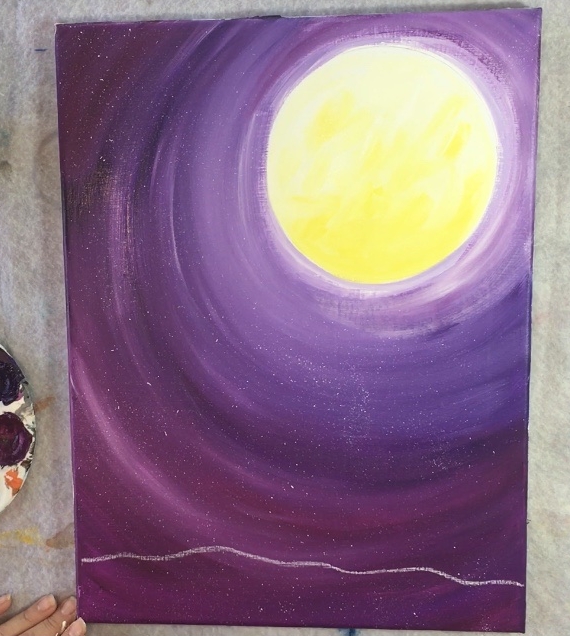
Then I drew the tree. Start at the bottom and make the tree wide. For the branches, I made one on the left sort of dangle down.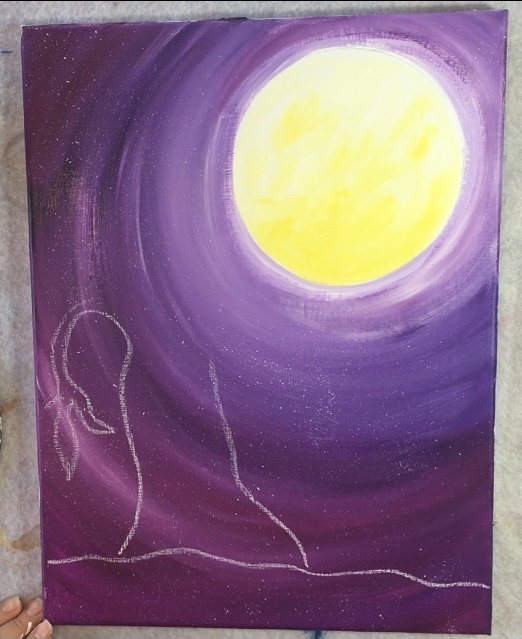
Then as you work your way to the top, the main trunk should get smaller and then branch off into smaller branches. I also made a tree branch go horizontally under the moon where the owl will be sitting. 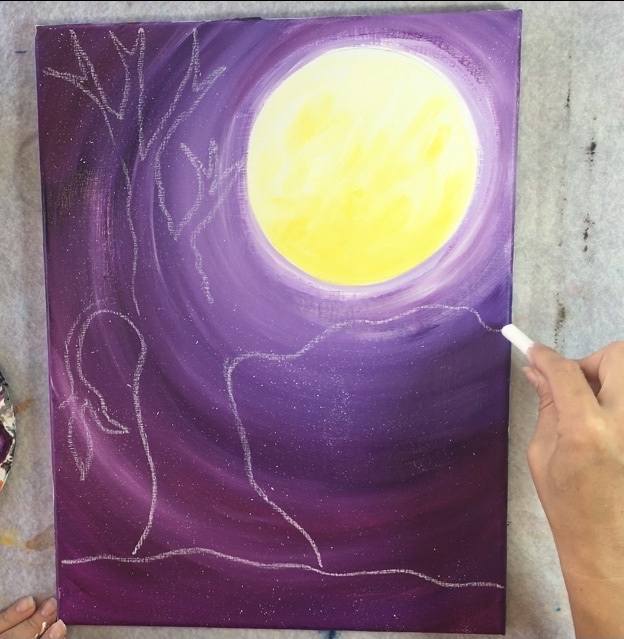

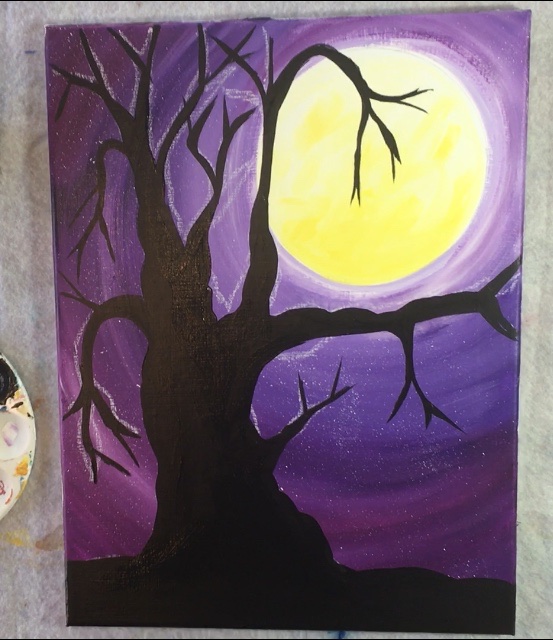
8. Paint The Ground & Tree Black
The next part is super easy! All you’ll need is mars black and your brush of choice to fill in the silhouette. I started at the bottom using my 3/4″ flat brush. Paint the entire ground. 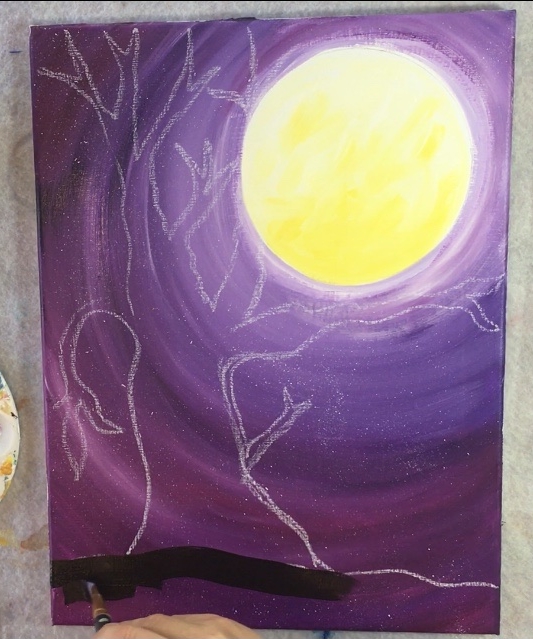
Then work your way up and fill in the tree. You don’t have to follow all your chalk lines, you can improvise and change your tree as you paint it in. 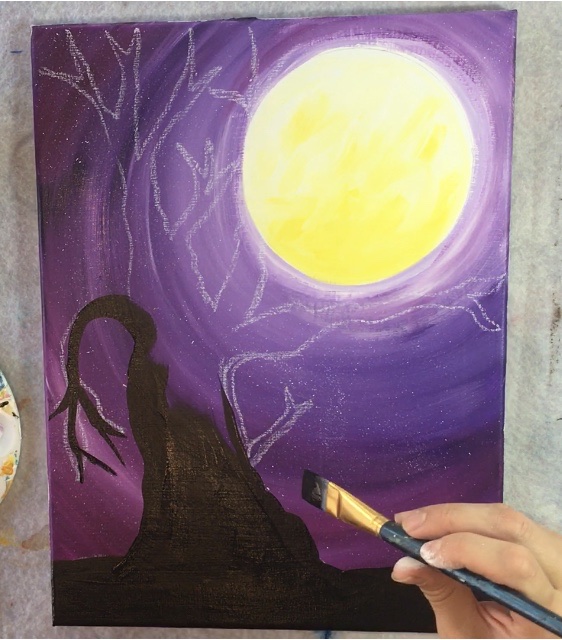
To get the branches to be smaller, use the tip of your brush on its side. Also, sometimes it’s helpful to paint the smaller tip of the branches first and then connect them to the main trunk. 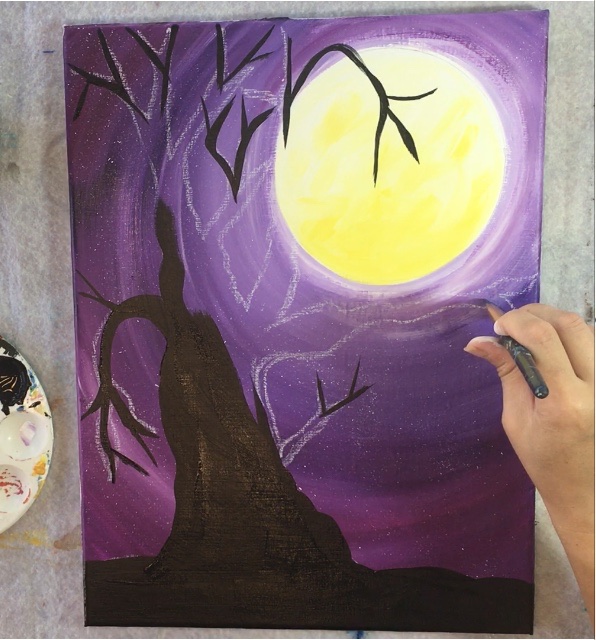
To really get that spooky effect, try making the edges of the branches kind of wavy and the tips of the branches pointed.
If there is any white chalk showing through, you can wait for the painting to dry and then use a wet paint brush to erase the chalk. (I did this later on)
9. Paint The Pumpkins, Owl & Bats
Next I used my #4 round brush and mars black to paint three pumpkins on the ground. There is a larger one on the left and two smaller ones on the right. 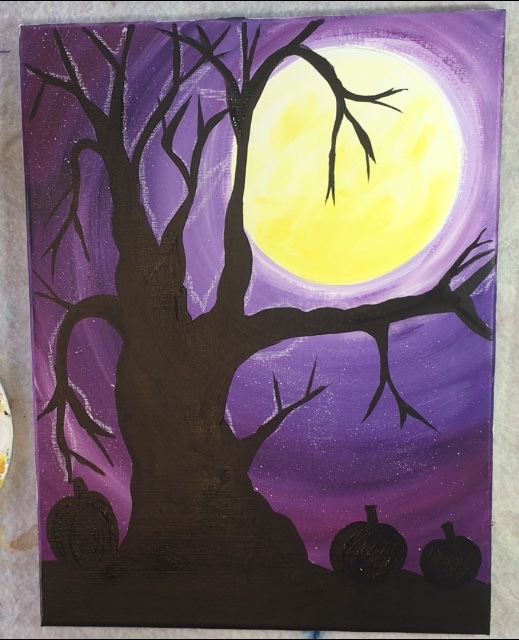
Then I painted the owl. Paint a larger circle on the bottom for its body and a smaller circle overlapping it on the top for the head. 
Then I painted the wings and two little lines on the head for the owl ears. For the bat, I used a black paint pen. You can also do this with mars black and a 10/0 liner. Start by drawing a teardrop shape and fill it in solid. Then draw the ears and two curved lines for the wings. 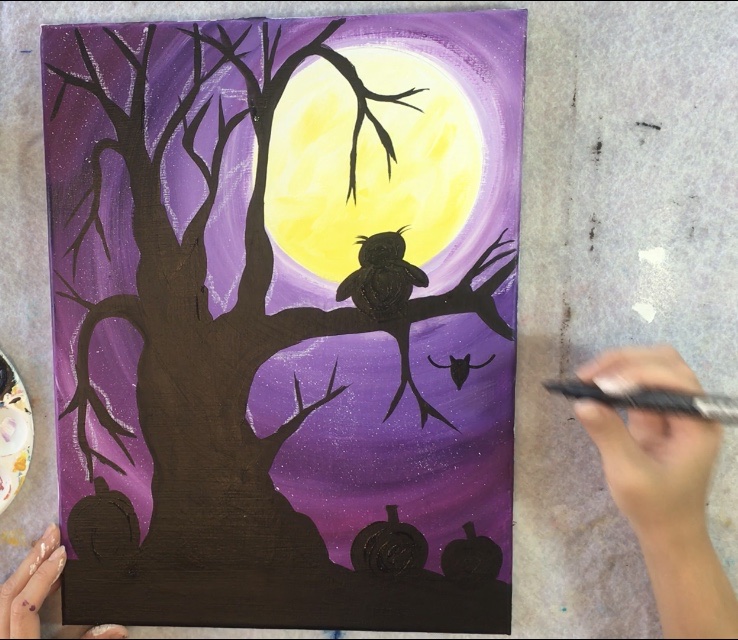
Continue to draw the outline of the bat wings.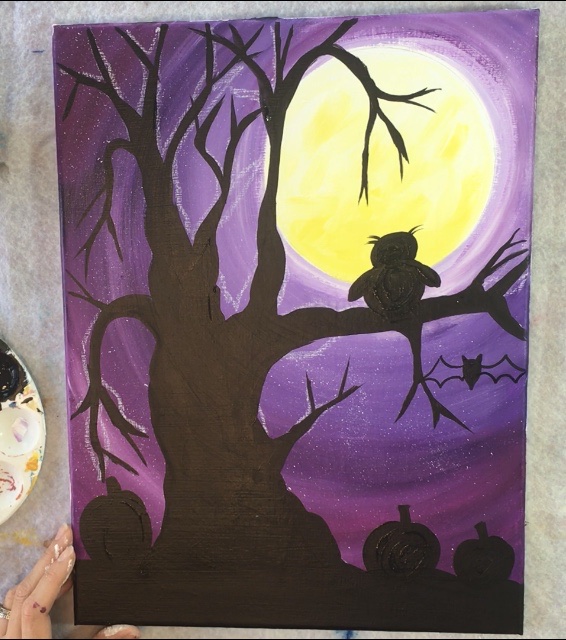
Then fill the bat in solid. You can either use the paint pen to fill it in solid or a round brush and mars black. 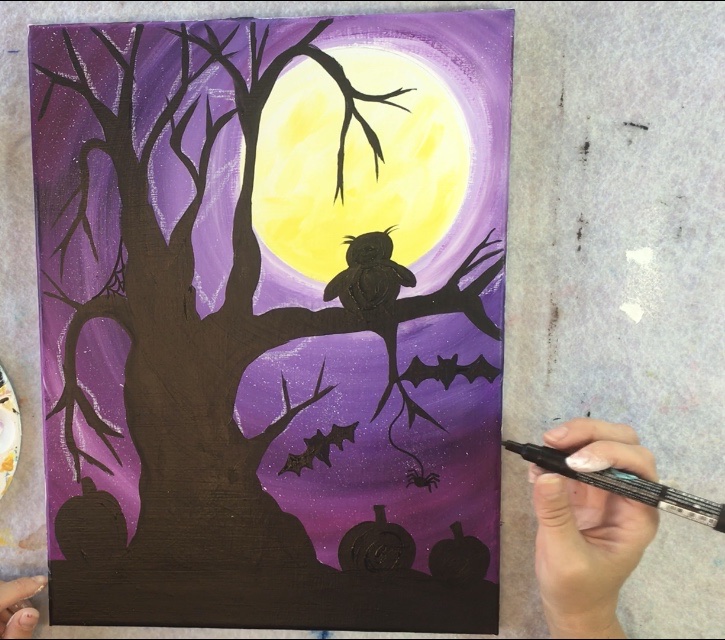
Then I drew other details with the black paint pen. I did a bat hanging upside down, a spiderweb within the branches and a spider hanging down from one of the branches. 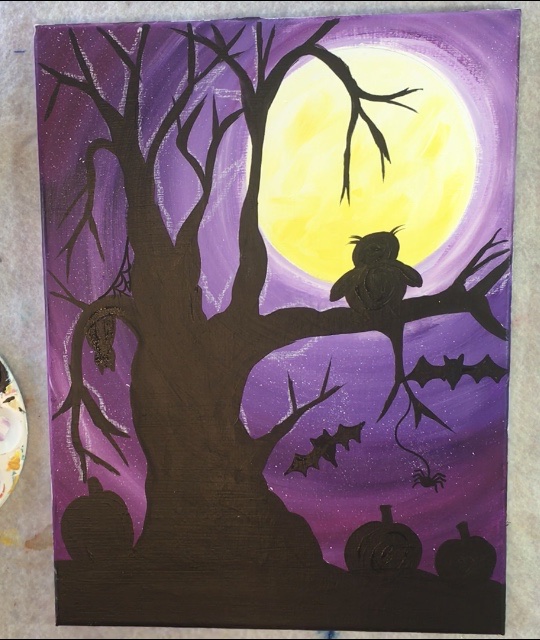
Note: Here is where I used a wet paint brush to erase excess chalk lines still showing.
10. Paint The Ghosts
To paint the ghosts use a #4 round brush and titanium white. (Make sure it is a very clean brush with no black residue on it). Paint a rounded head/ tear drop shape with a solid coat of the titanium white. Then to paint the tail, drag the brush and let it run dry out as you drag it. It helps to paint the stroke really fast to get the white to fade away and then let go of the pressure of the brush as you reach the tail tip. 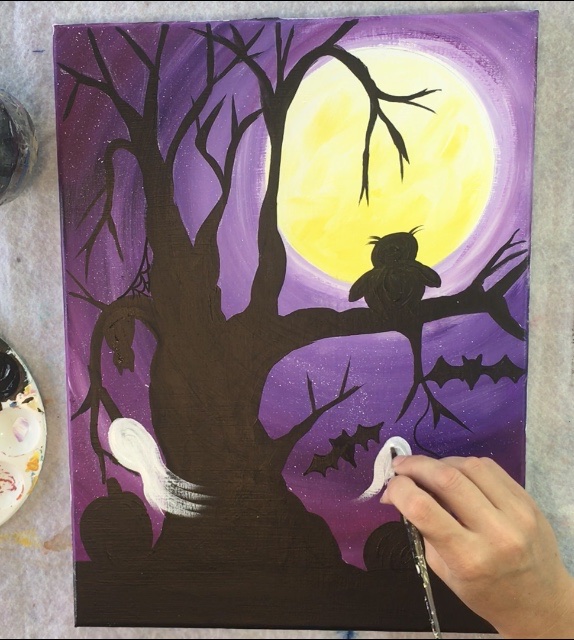
You can overlap the tree with the ghosts or make them look like they are behind the tree. I did overlapping with the ghost on the left. 
11. Draw with paint pen (or paint) the eyes on the tree, owl, bats & spider
Next you’ll want to ensure all your black is dry. Then use a yellow paint pen to paint the eyes on the tree, bats and owl. For the tree eyes, I did two cat eye shapes tilting in an angle. For the bat eyes, I only did two little dots. I also did eyes on the spider.
For the owl, I used an orange paint pen to draw two donut shaped circles. In the center of the circle, I did two white dots. 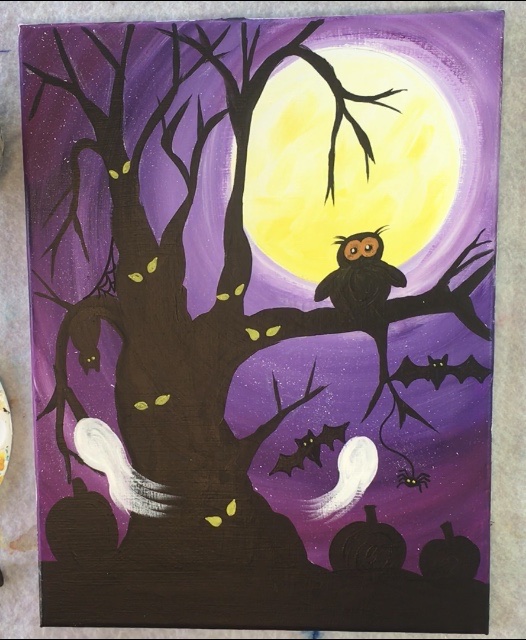
12. Draw Faces On Pumpkins & More Details On Owl
I then did a yellow triangle shape under the owl’s eyes and yellow talons holding onto the branch. Then I did the Jack O’ Lantern faces with the yellow paint pen. 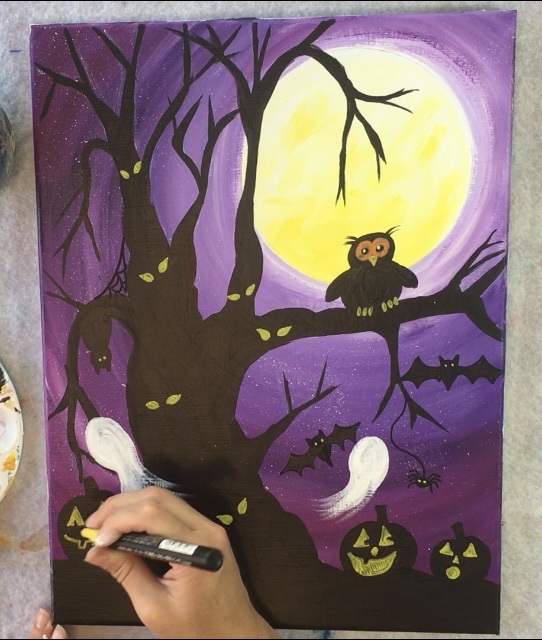
I also did a white line with the paint pen on the right side of the Jack O Lantern stem and the right side of the curve of the pumpkin. Then I did a white line on the inside right edges of the eyes, nose and mouth. This gives it a little bit of a glowing effect. 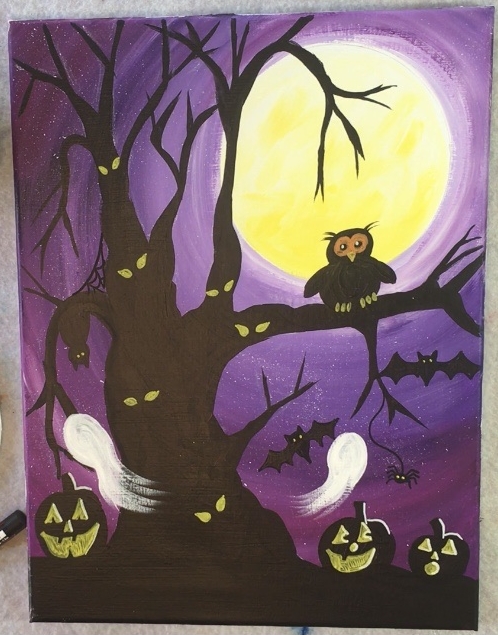
13. Draw Faces On Ghosts & Add Other Details
For the ghost faces, I used a black paint pen. I also painted another ghost higher in the tree. 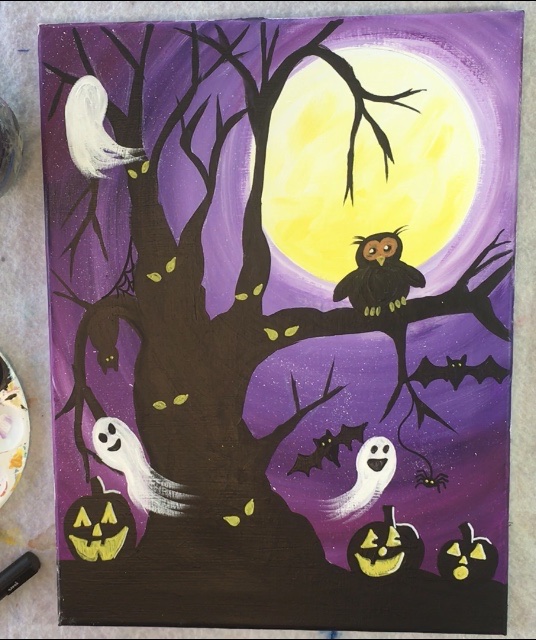
Another small detail I did was draw pupils in the yellow glowing eyes in the tree. And used an orange paint pen to paint little fall leaves on some of the branches (you’ll see that in the next photo). 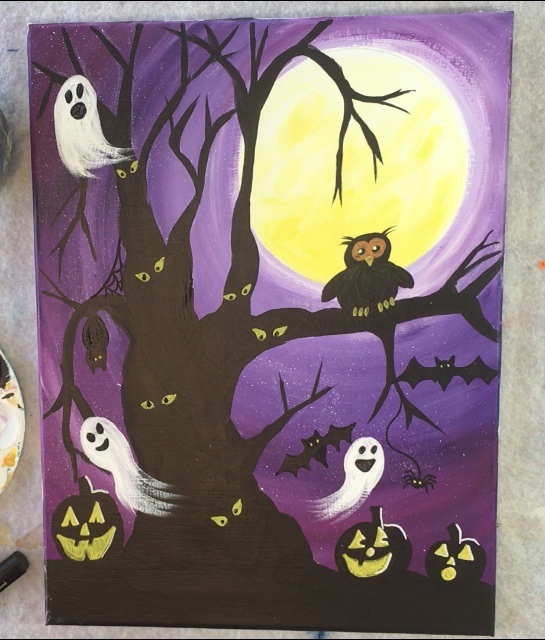
Finished!
Did you do this painting? Share Your Art!


See Also: