
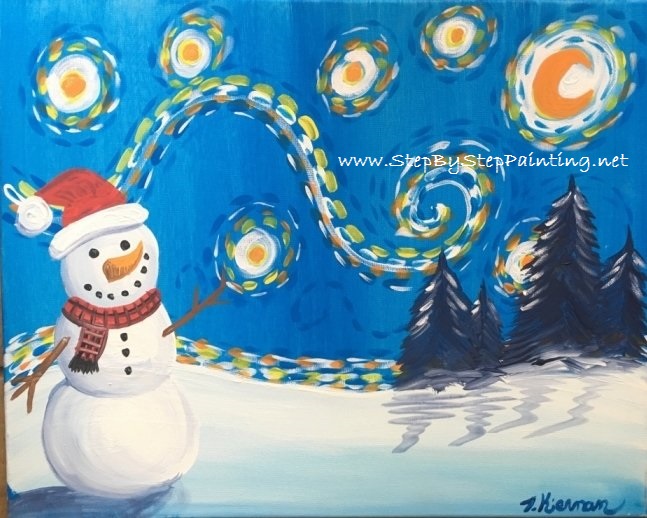
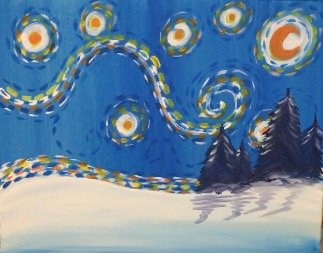
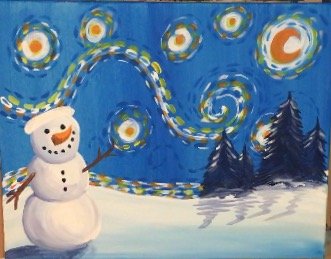
How To Paint Snowman Starry Night
Learn how to paint a super easy snowman painting in the style of Vincent Van Gogh’s Starry Night! This acrylic tutorial for beginners will guide you through the steps.
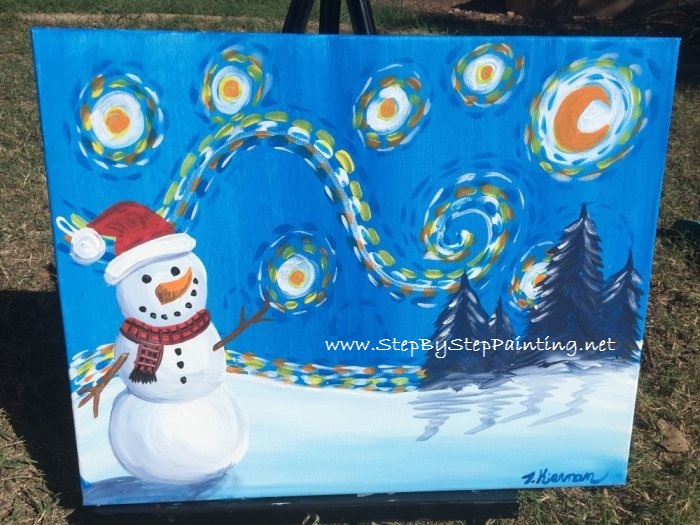
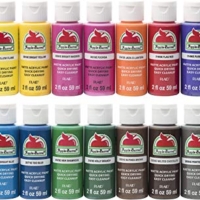
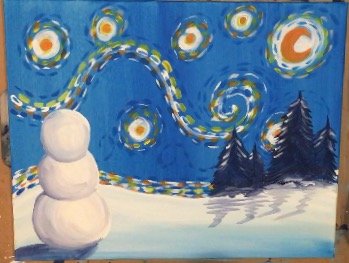
This painting was done on a 16″ x 20″ canvas with Apple Barrel Craft Paints. Perfect for a family holiday paint night! This design is also very easy to paint with the kids. 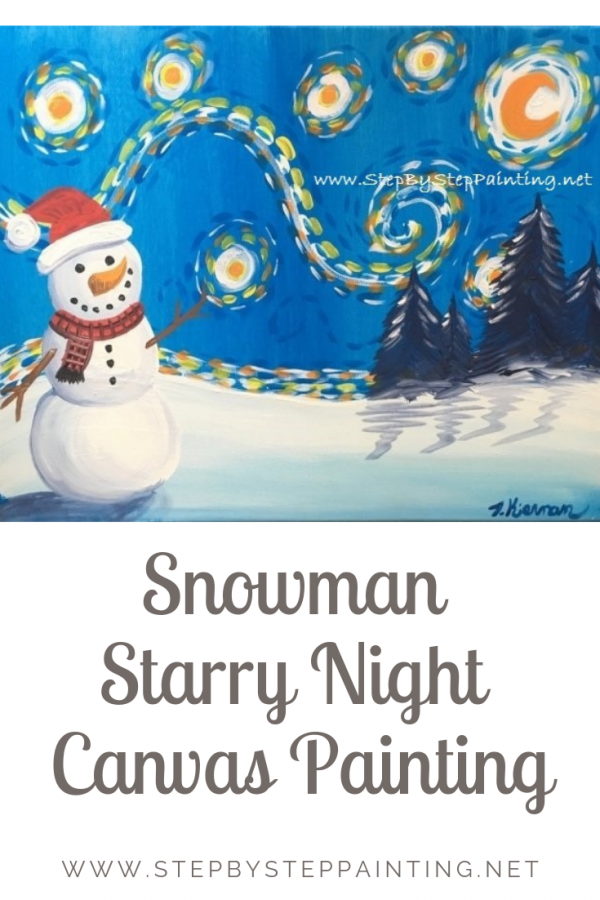
Other Snowy Paintings:

Inspiration for this painting came from one of my favorite winter children’s book Snowmen At Night by Caralyn Buehner and illustrated by Mark Buehner.

I’ve always been fond of this book because of the beautiful and whimsical illustrations of snowmen doing fun things at night like drinking hot cocoa and having snowball fights!
When I taught “shading” to my students during my Elementary Art Teacher years, I always used this book as a reference.
Sometimes painting snow and snowmen can be intimidating because of having to shade something that is supposed to be all white.
I hope that I can make it easy for you to learn how to paint snowmen with this tutorial! Also, if you have kids, they would LOVE to learn how to do this with you as well. Enjoy!

This Post Contains Affiliate Links From Amazon.com.
How To Paint Snowman Starry Night
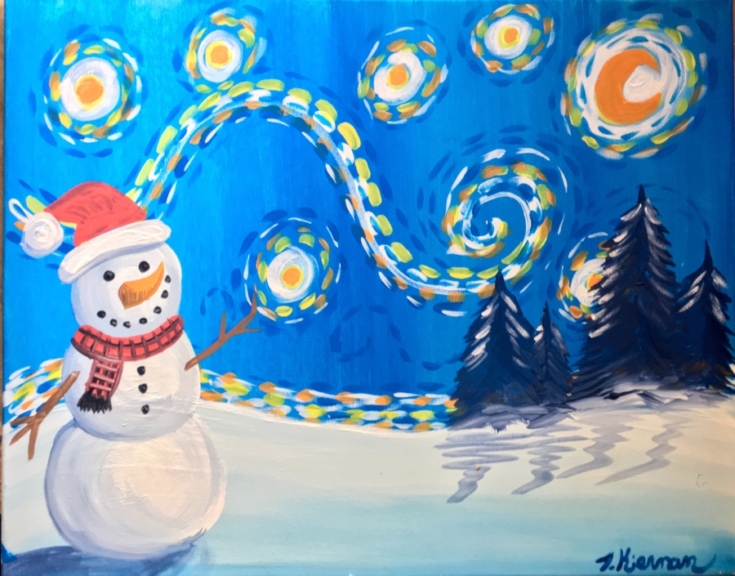
Paint a snowman starry night! This easy acrylic painting tutorial for beginners will guide you through the techniques of rendering your very own snowman painitng.
Materials
- Acrylic Paint
- 16 x 20 Canvas
Acrylic Colors (Apple Barrel)
- Flag Red
- Jack O Lantern
- Bright Yellow
- Bright Blue
- Too Blue
- Navy Blue
- White
- Black
- Nutmeg Brown
Brush Sizes
- 1” Flat or 3/4” Flat
- #6 Round
- #4 Bright
- 10/0 Round
Instructions
- Paint the horizon line
- Paint a wash in the sky with a 3/4 flat brush and Bright Blue
- Use a round brush to paint white circles in the sky to represent the stars.
- Paint white dash lines along the horizon line.
- Paint a large white spiral in the sky.
- Paint the moon yellow then paint the stars yellow.
- Paint yellow dash lines around the white circles.
- Paint orange on the moon and some orange on the stars.
- Paint orange dashes along the horizon.
- Paint orange dashes around the moon and stars.
- Paint dark blue dashes along the spirals and around the stars.
- Paint the snow starting at the bottom with blue and blend it up to white.
- Use navy blue to paint two trees in the distance then paint shadows under the trees.
- Paint the snowman.
- Paint shading on the snowman and a shadow under the snowman.
- Decorate the snowman with eyes, a carrot nose, a scarf, hat, etc.
Recommended Products
As an Amazon Associate, Michaels Affiliate and a member of other affiliate programs, I earn from qualifying purchases.
Color Palette 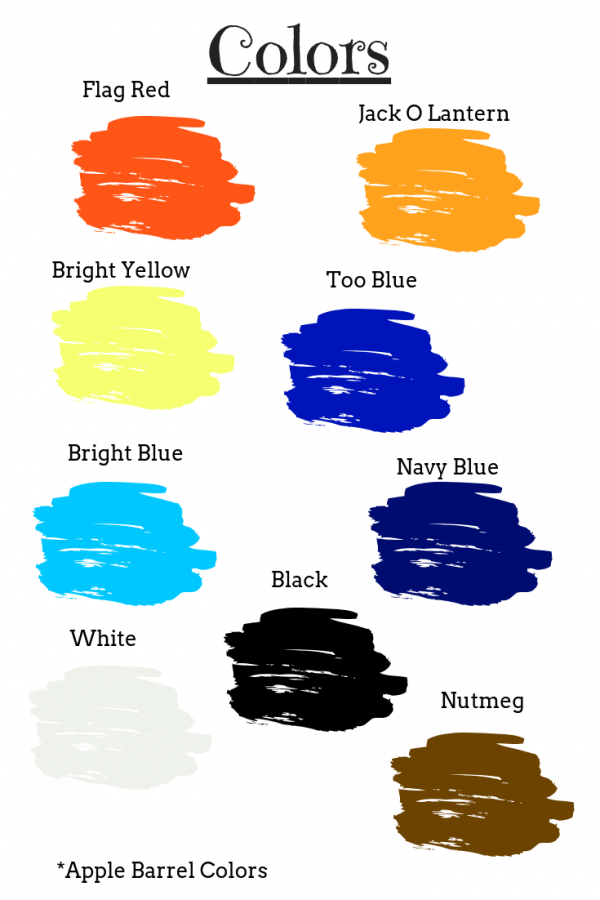

Directions At A Glance:

Video:
Step By Step Picture Directions:
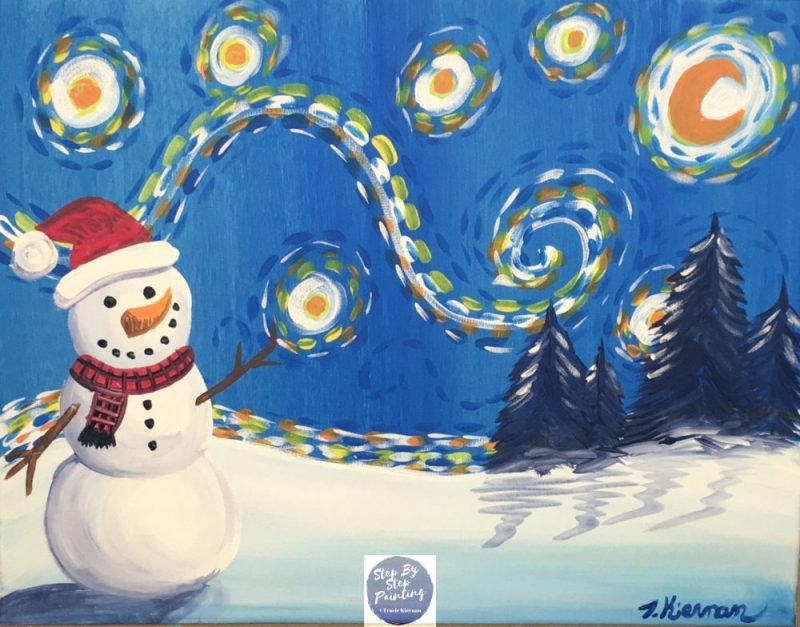
1. Paint The Horizon Line
With the canvas in “landscape” position, I painted the horizon line using a tiny brush and the color “bright blue”. Again, I’m using this brand of paint. The horizon line is about 5″ from the bottom of the canvas.
2. Paint A Wash in the Sky
Then, with a base coat brush (large flat brush), I applied water to the canvas. I wanted my sky to be kind of watered down/ translucent. I painted in up and down strokes.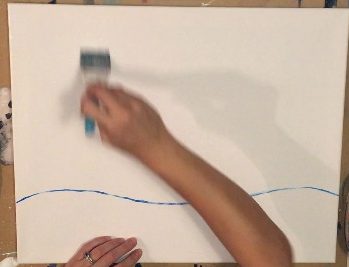
- Tip: when adding water & paint to the canvas like this, lay it flat to prevent the water & paint from dripping. If it does drip below the horizon line, don’t panic! We will be painting all that over later.
Then I applied the “bright blue” color paint with the same up & down strokes. The paint will spread fast and kind of thin because of the water.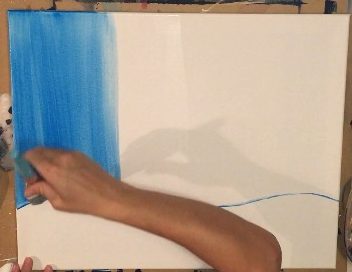
You can allow the paint to go below that horizon line a little because it will be painted over white on the bottom!
3. Paint Some Circles In The Sky
Next I got my pure white paint and a round brush. Ideally, you should wait until that blue dries a bit but I didn’t wait! Paint a large circle in the upper right (or upper left you’d like) for the moon.
Then paint some smaller circles in some random areas around the sky. These are the bases of the stars. Also note, I started from the CENTER of the circle and painted out!
4. Paint Dash Lines
Then I painted some “dash” lines right on the horizon line with a #4 bright (small flat brush).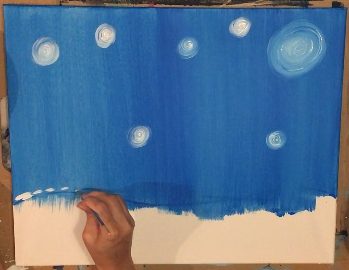
And I painted about four rows of those dashed lines. (mind the shadow of my plate palette in this picture!) These dashes really don’t have to be uniform/neat.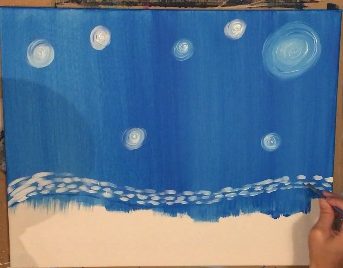
5. Paint A Big Swirl Line
Then I painted a large spiral line with a round brush. If you want to do this with chalk first, you may! Chalk will erase… This spiral is the main spiral in the sky so make it BIG!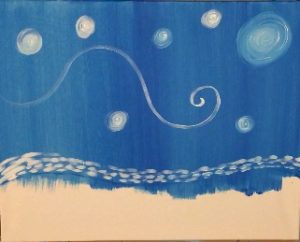
Next I painted dashed lines on the spiral with the #4 bright.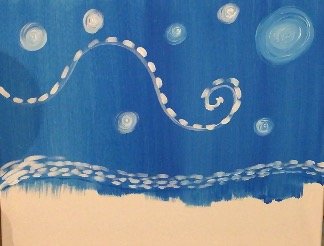
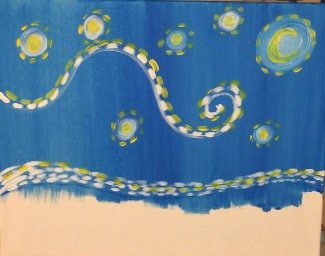
6. Paint A Moon & Stars
With bright yellow paint, I painted a moon on that larger circle and I painted small star circles in the other white circles. I did this with the round brush.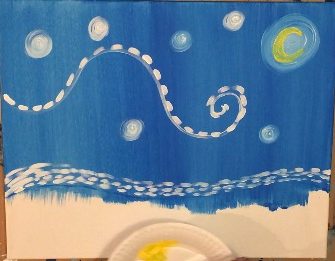
7. Paint More Dash Lines
Then I painted yellow dash lines around each star, on the horizon line, on the spiral and around the moon! All the dashes were done with the #4 bright.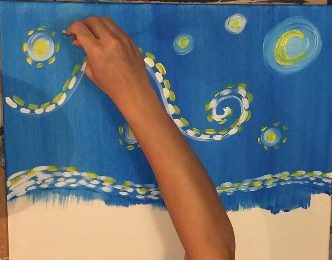 yellow dash lines
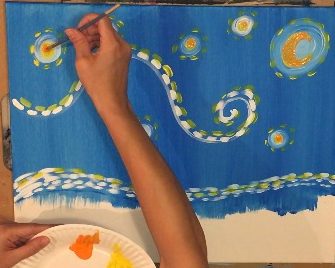
8. Paint Orange Moon & Stars
Next I got “Jack O’ Lantern” orange and painted over the moon. I also painted a smaller circle in each of the stars. This was done with a round brush.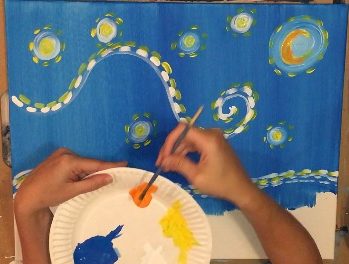 orange on moon
9. Paint Orange Dashes
And with that orange, I painted more dash lines on the horizon line, around the moon, around the stars and on that spiral!
Note, with these dash lines, some I painted over previously painted dashes, some I made their own row. It’s really up to you! The trick with starry night is to just keep painting layers of the colors with the impressionism “dashed stroke” style.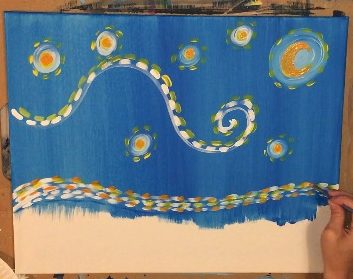

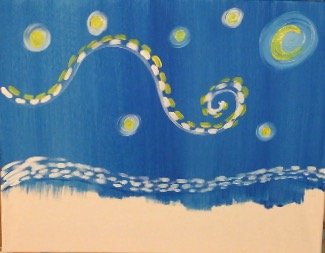
10. Paint Blue Dashes
Finally, I painted another set of dash lines with the same “bright” blue. It will show up on the background because this one is not watered down like the background was. If yours is not showing up, you can just find a darker blue to use.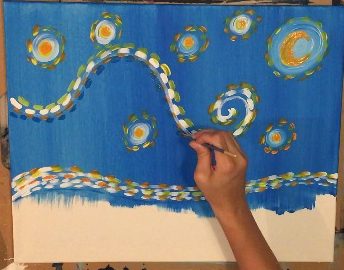
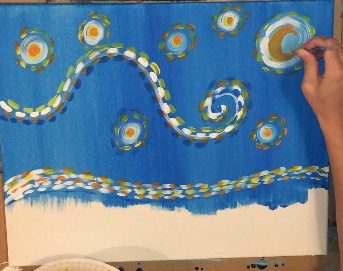
I added some spirals going in their own directions.
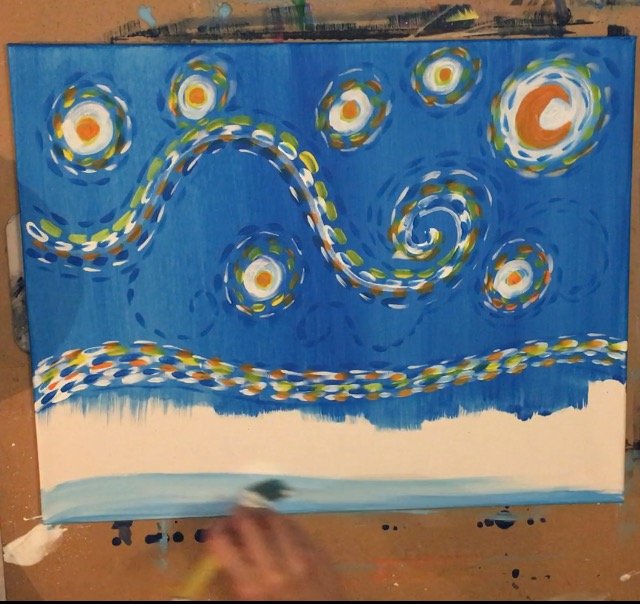
11. Paint The Snow
Next I painted the snow. Load your palette with bright blue and white. Paint a small bright blue line on the bottom of the painting. I used a medium flat brush (3/4″). Then fade that blue to white. 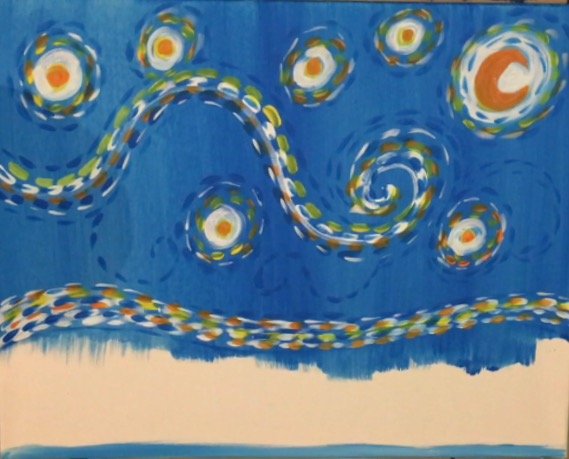 blue line on bottom
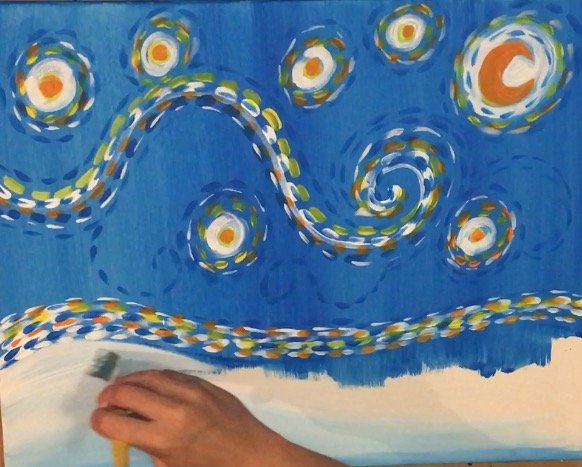
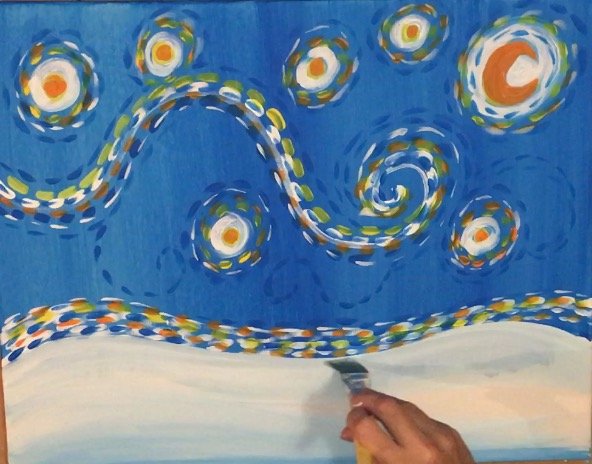
Then I dipped my brush in white (don’t clean the blue off). I painted from the bottom to the horizon. That white faded from blue to white.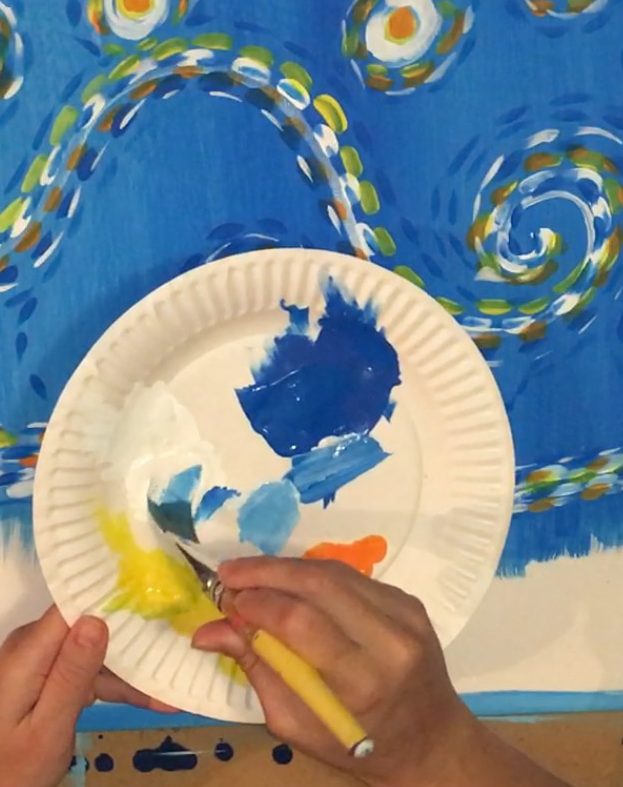 load brush with white (not yellow!)
 fade the bottom blue to white up to the horizon line

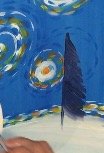
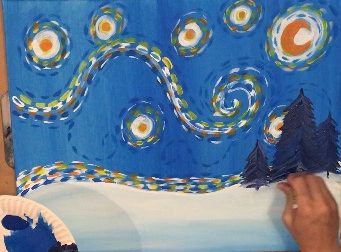
12. Paint The Trees
Next I painted trees. This color is Navy Blue. I used a 1/4″ flat brush (#4 bright) for this. First paint a vertical line.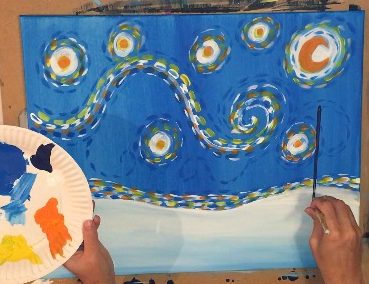
Then paint the branches forming a triangular shaped tree.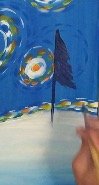

Paint a few more trees of varying sizes.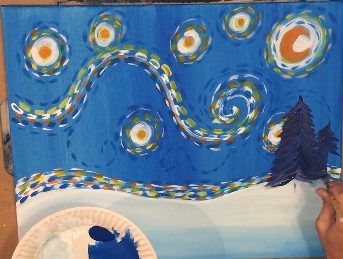
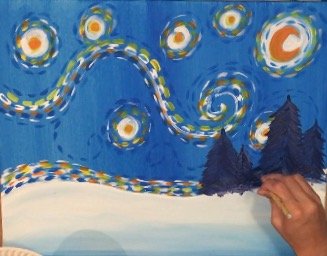
13. Paint The Tree Shadows & Highlights
To paint the shadows, I used watered down navy blue paint and did some “zigzag” lines on the snow. I used my #4 bright for this.
Then with a tiny 10/0 round brush, I painted some white lines on the trees.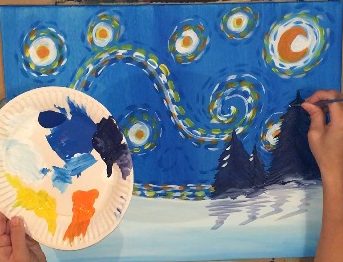
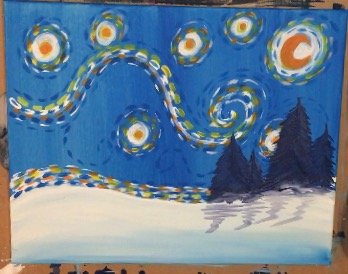
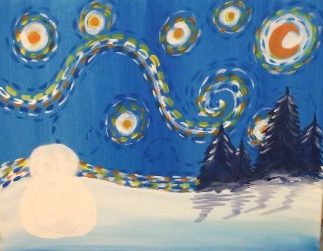
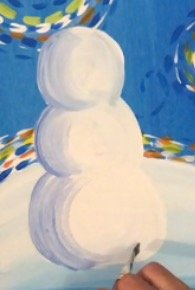
14. Paint The Snowman
Next I painted the snowman! Start out with pure white not mixed with anything! Paint each of the circles. It “should” show up because there should be enough blue in that snow to see each circle. You can use either a #4 bright or a round brush for this step.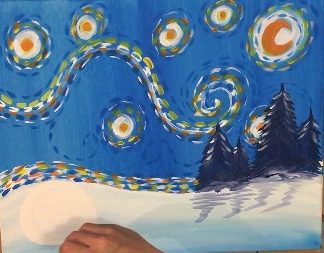
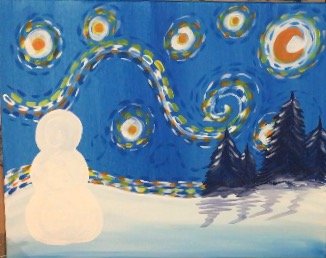
15. Paint The Snowman Shadow
To do the shadow, I started with painting a line on the left side of each circle. I used the color “too blue”. This is a lighter version of navy blue. If you don’t have that color, a navy blue or dark blue would work. I recommend using a #4 bright for the shadow part here.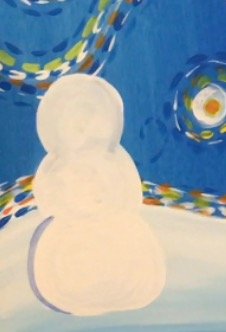
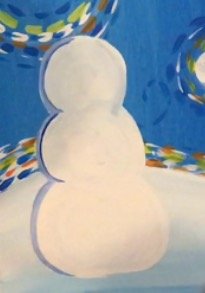
Then I blended that blue in with the white the same way I did the snow (load your brush with white after painting the blue). Try to make your strokes go in a circle to form the sphere illusion.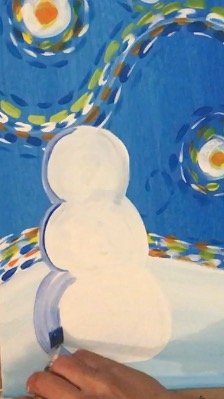
Keep blending that blue out until it turns to white. Also, emphasize some dark on the bottom of each circle.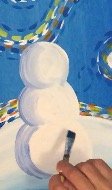
The shadow of the snowman was painted with watered down navy blue (the same color as the trees).
17. Paint The Snowman Face & Accessories
Finally the easy part! I painted the coal with black using a tiny detail brush (10/0). No shading involved with this step!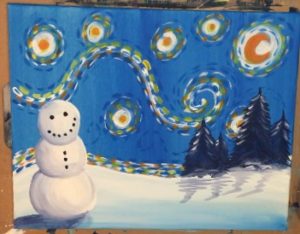
I painted the carrot nose.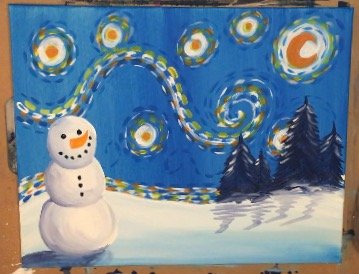
The stick arms were painted with nutmeg brown. Also I did the dark area of the carrot with this same brown (totally optional!).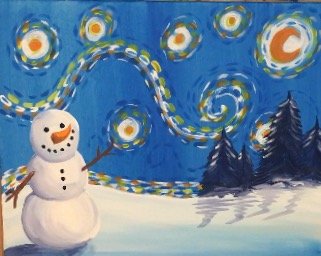
The hat was painted with white and flag red.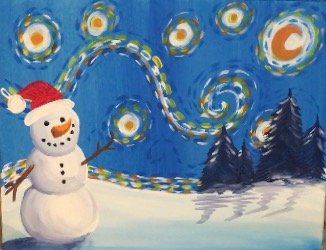
The scarf was also painted red. Of course you can customize any of this and do your own style and colors!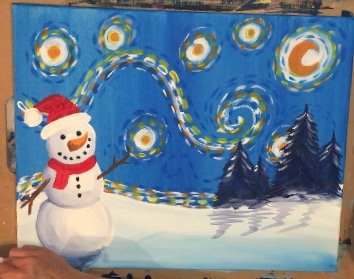
And, since I’m secretly obsessed with “buffalo check” pattern, I HAD to do his scarf in buffalo check! This was done simply by painting vertical and horizontal black lines.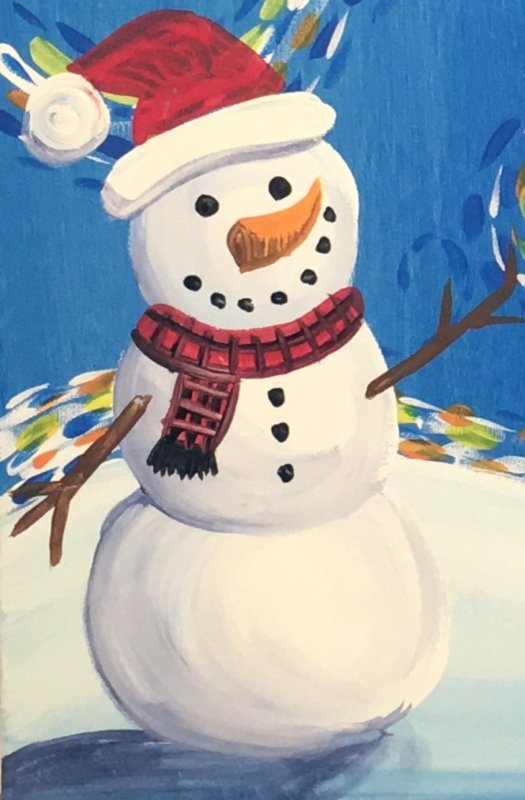
Finished!
 Finished! Sign your name on your masterpiece and share it on Pinterest or Facebook!
Share Your Art!


Thank you!
You’re welcome!!
This is awesome! Thanks so much for taking the time to break it down, step by step.
You’re welcome Kim!
Quick question. If I am using white construction paper, would I have my students use water first before painting the blue.
Depending on how heavy the construction paper is, it should be able to handle the pre-wash water first! I’ve done water color lessons on construction paper and white drawing paper and it’s usually fine with all that water! So yes, try the water first method and if it doesn’t work you can always just give the kids a watered down blue to paint the sky with. Hope this helps!
Wow!! I’m impressed!! What an outstanding job you have done breaking this down so someone like me can try this without being intimidated by a paint brunch!!! Thank you!!! I can’t wait to get started!!
You’re welcome!
Hi! I’m planning on doing the project with my class of 22 3rd graders. How much of each paint color do you suggest that I buy? Also, how would you break this up over the course of 4 or 5 days?
Thanks for your help! I’m excited for this project.
Thank you so much!
You’re welcome!