

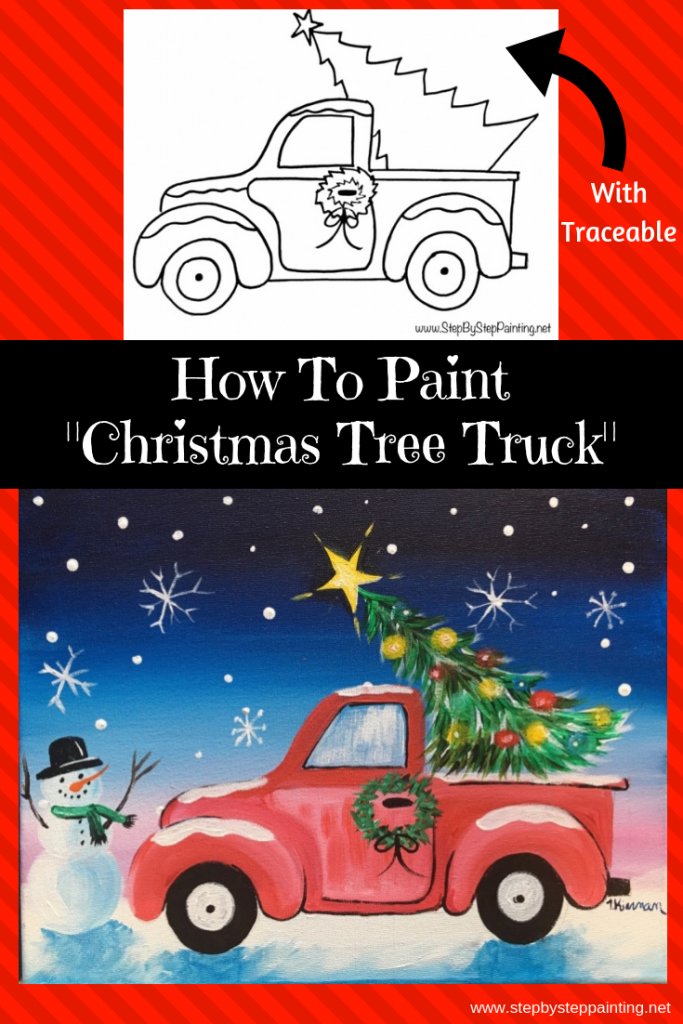
How To Paint A Christmas Tree Truck
Would you like to save this?
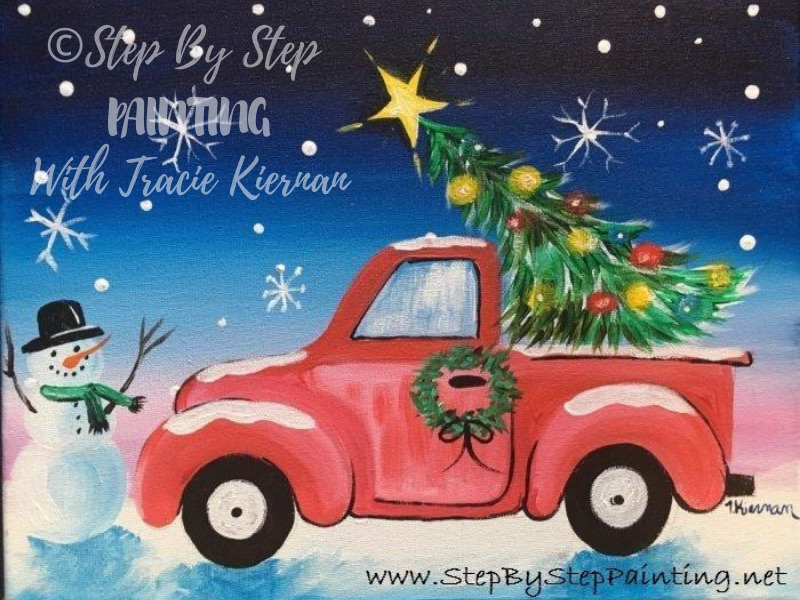
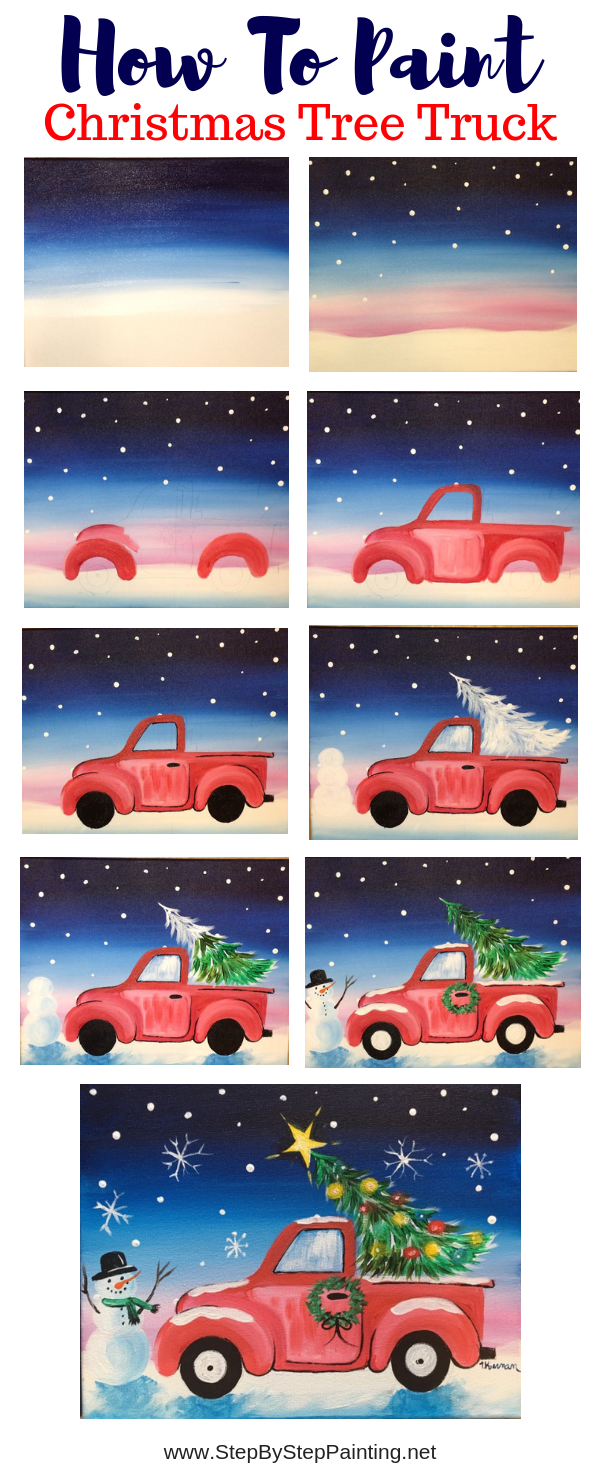
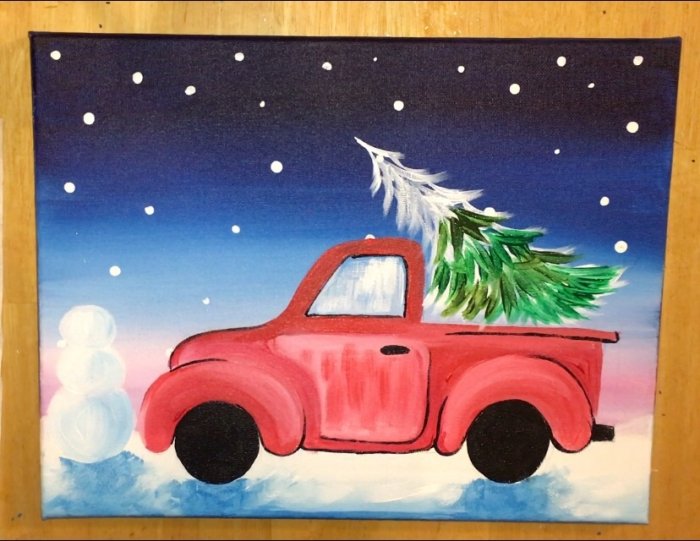
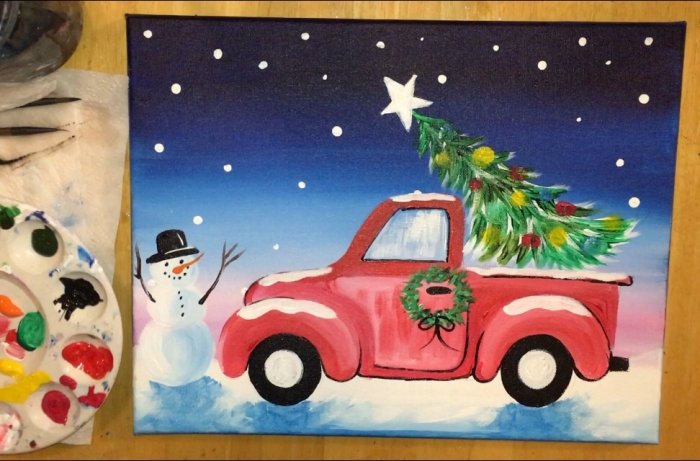
The classic Ford Truck is back again for the Christmas season! This time she is red and has a Christmas Tree in the back! This tutorial mimics my Vintage Pumpkin Truck Painting and they certainly look darling side by side!

This painting was done on an 11″ x 14″ stretched canvas with acrylic paints. I also use my truck traceable but tweaked it to have a Christmas tree in the bed as well as a wreath on the side door. That traceable is in this post as well.
Enjoy and happy painting! I can’t wait to see all of your Christmas trucks too!!!
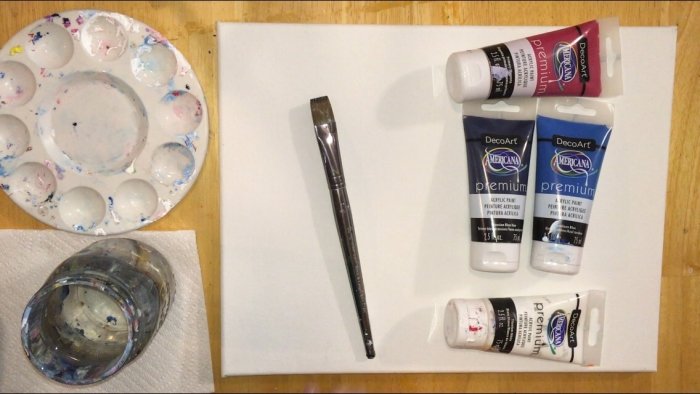
Materials:
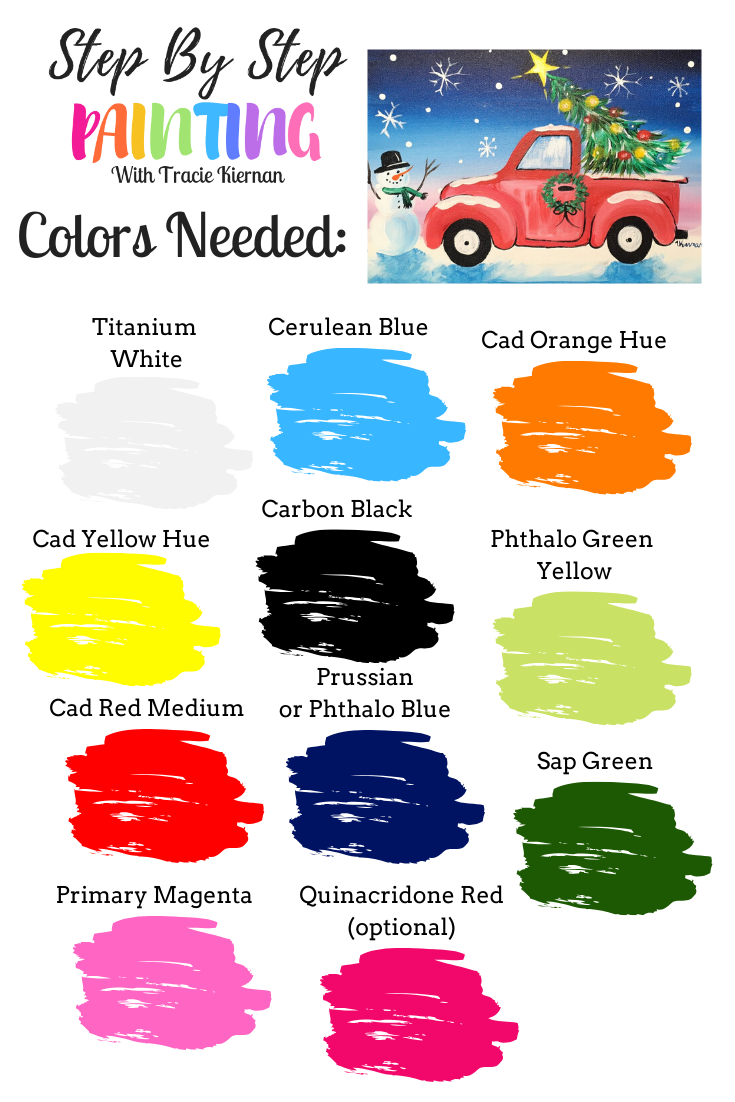
- Acrylic Paint (I used Decoart Americana Premium
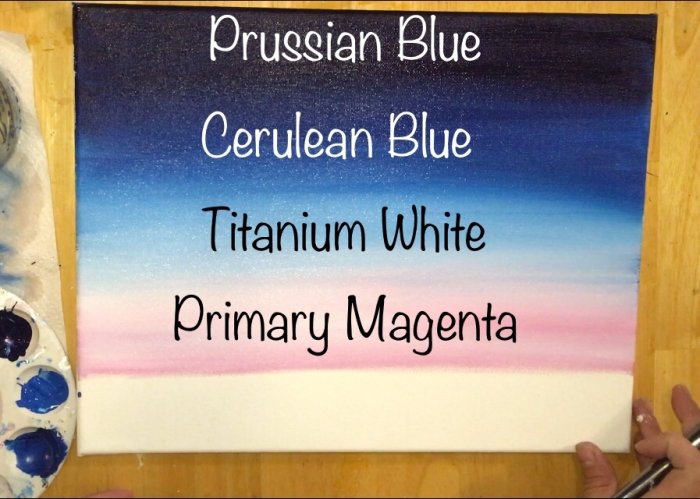
- Prussian Blue
- Cerulean Blue
- Titanium White
- Carbon Black (or Mars Black if you’re using BASICS)
- Primary Magenta (Or Medium Magenta if you’re using BASICS)
- Cadmium Red Medium
- Quinacridone Red (optional but I would use primary red for BASICS)
- Cadmium Orange Hue (this only shows up on the snowman’s nose!)
- Cadmium Yellow Hue
- Phthalo Green Yellow (or Light Green Permanent for BASICS)
- Sap Green (or Hooker’s Green if you’re using BASICS)
- Burnt Umber (optional: this only shows up on the snowman’s arms but you can use black!)
- Canvas 11″ x 14″
- Brushes (Royal & Langnickel Zen Brushes)
- Traceable Of Christmas Truck
- Graphite Paper
Color Palette:
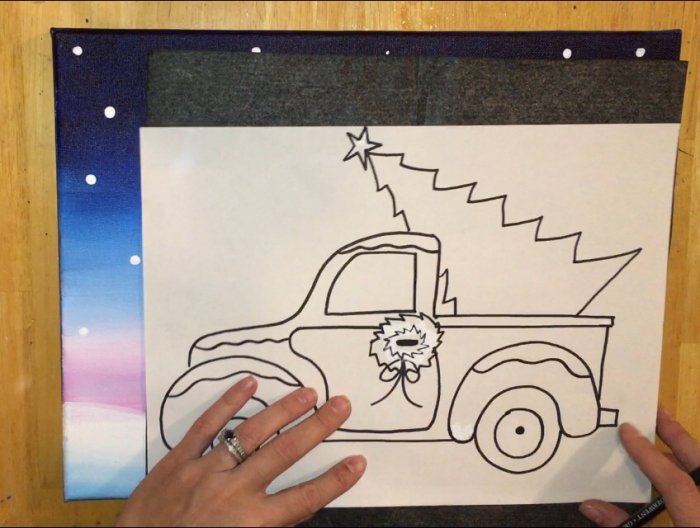
Traceable:
Directions: print on 8.5″ x 11″ computer paper. Trace on lower right of canvas. Go to my Traceable Library to find the PDF template. 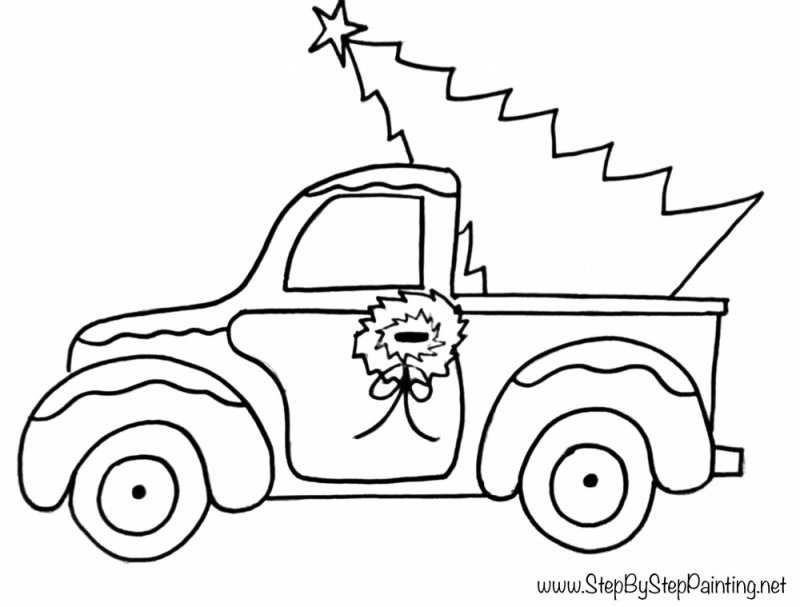
Directions At A Glance:
Video:
Step By Step Directions:
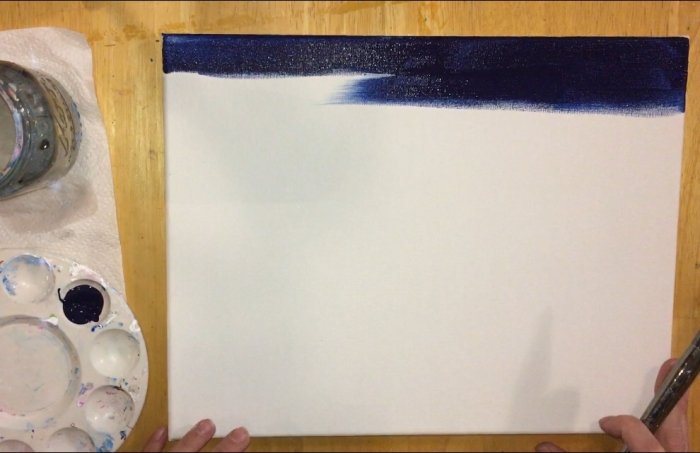
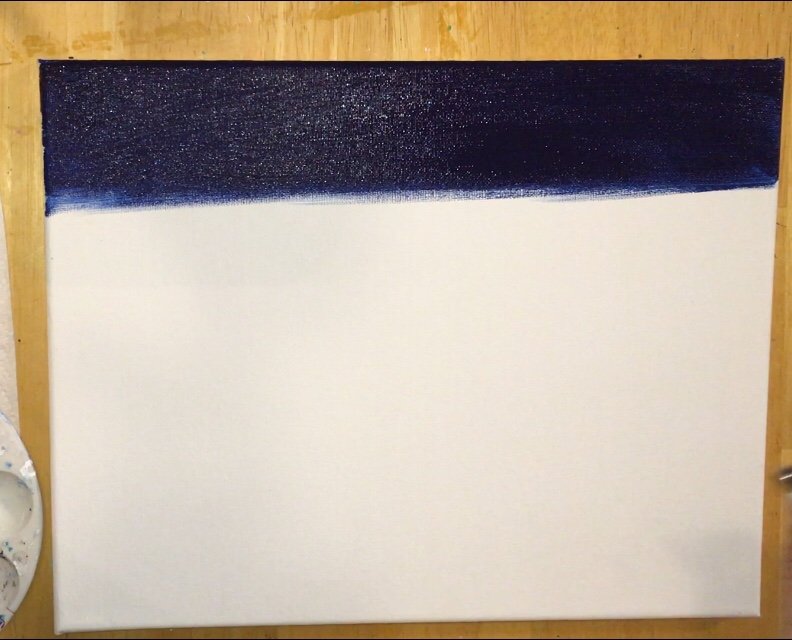
1. Gather colors for the sky and a 3/4″ Flat Brush.
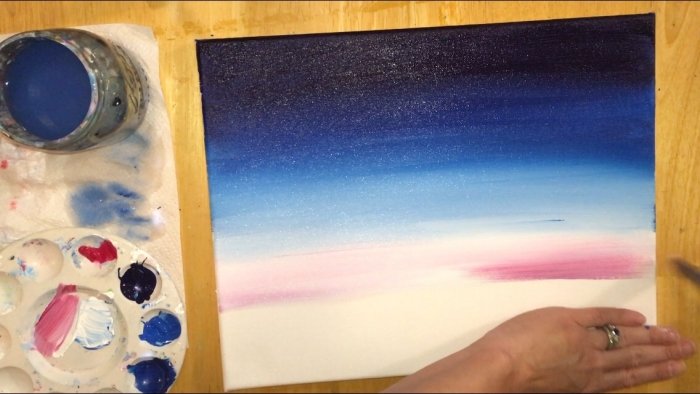
For this tutorial, I decided to use the DecoArt Americana premium paints. These tubes are great and you can get them on Amazon, Michaels and Joann. Of course you can use any paints you want for this! I used the colors: prussian blue, cerulean blue, titanium white and primary magenta for the sky. I also used a 3/4″ flat brush.
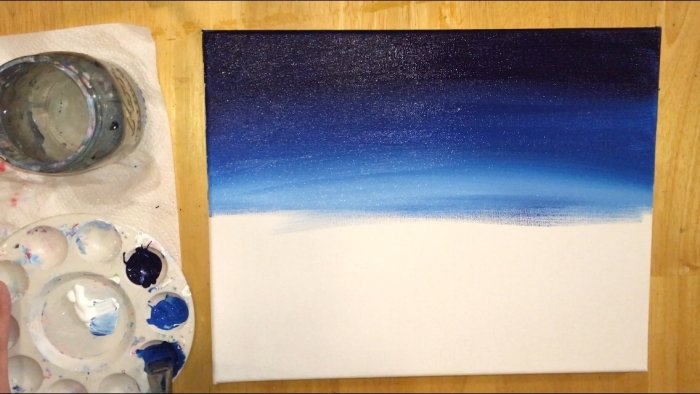
Paint the top portion of the sky with a solid prussian blue. Go down about 4 inches. Use left and right strokes, long and smooth so that no brush strokes are showing. If you want, you can curve the strokes to form an arc or just keep them horizontal.
2. Add cerulean blue to the brush and blend with the prussian.
Without rinsing the brush, load it with the cerulean blue. Lightly brush over the bottom part of the prussian to do “wet on wet” blending. As that blends, keep loading your brush with more cerulean blue and let the sky get lighter as you work your way down.
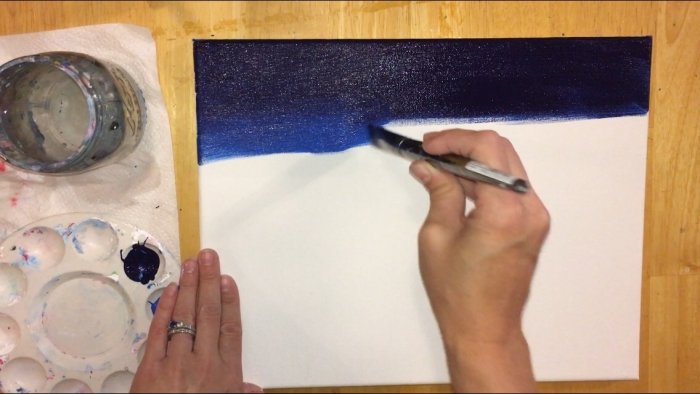
Continue adding cerulean blue until you are a little less than half way down the canvas.
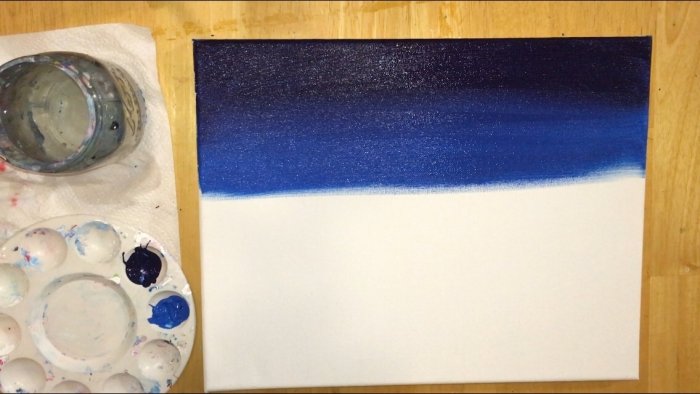
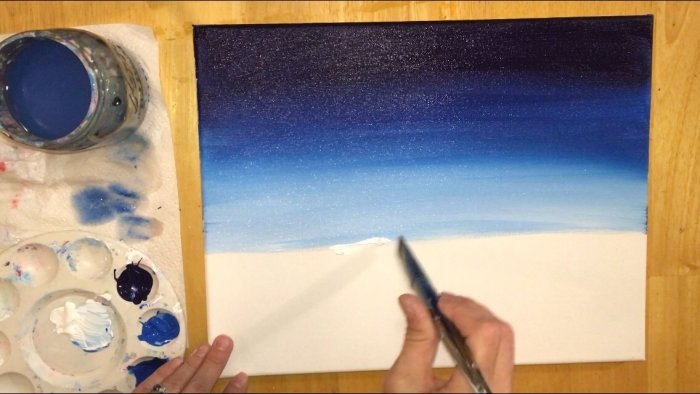
3. Add Titanium White
Wipe off excess blue off the brush but don’t rinse it. Add the color titanium white and do wet on wet blending with the cerulean. Gently add that white as you blend. Then continue down the canvas and reload your brush with more titanium white and let the blue get lighter.
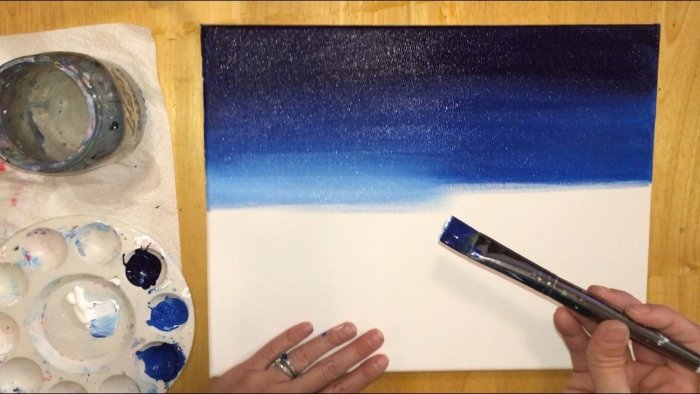
The sky should quickly be getting lighter as you go down the canvas with less blue on the brush and more white.
Rinse the blue off the brush. Then load it with titanium white. Continue to blend. This should create a very light area in the sky. Continue with the white until you are almost all the way down the canvas with about 4″ of blank space on the bottom.
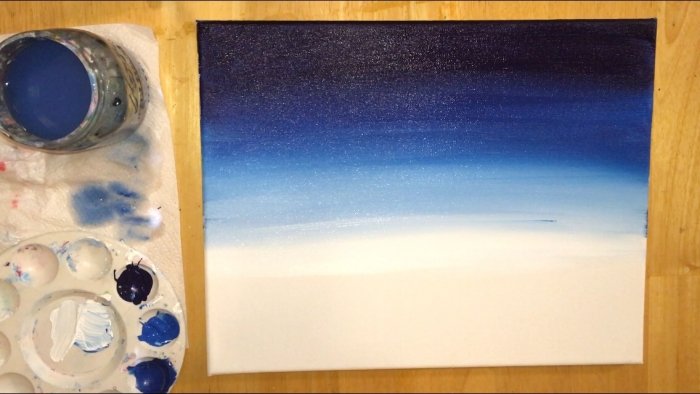
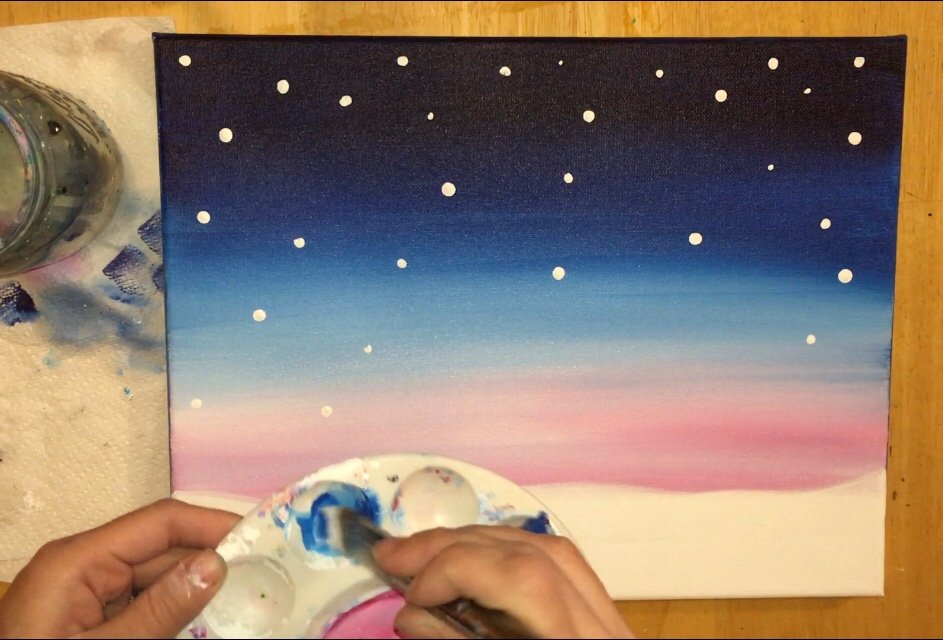
4. Add primary magenta
Load the brush with titanium white and primary magenta.
Lightly brush the white-magenta onto the sky in the white area you just painted. The white-pink on the brush should become a very light pink. Blend it into the rest of the sky and work your way down the canvas. Again, there is about 4 inches of space on the bottom.
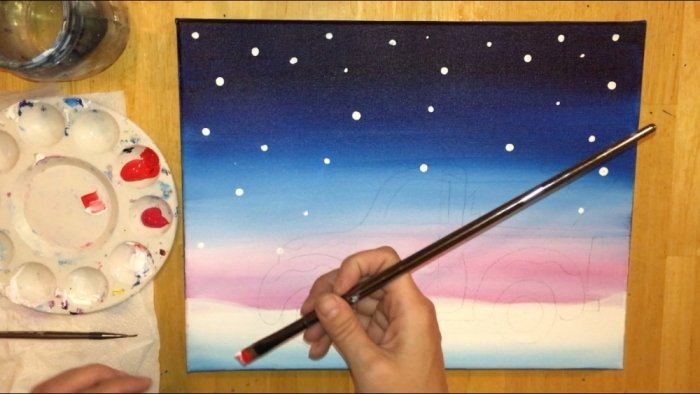
The bottom of the sky is slightly darker with a more pure form of primary magenta that blended out from the white. You can do this too or just let it get lighter. The point of the pink is to have just a bit of pink on the bottom of the horizon line. If you look at the finished results, it’s very subtle as the snowman and truck cover a lot of it.
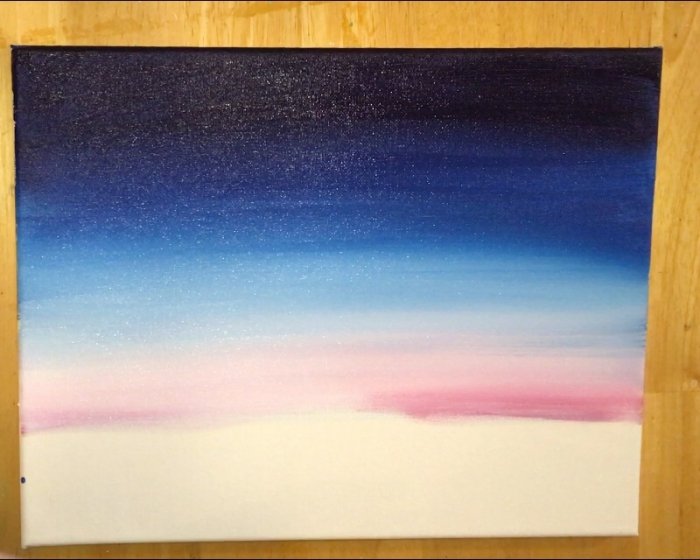
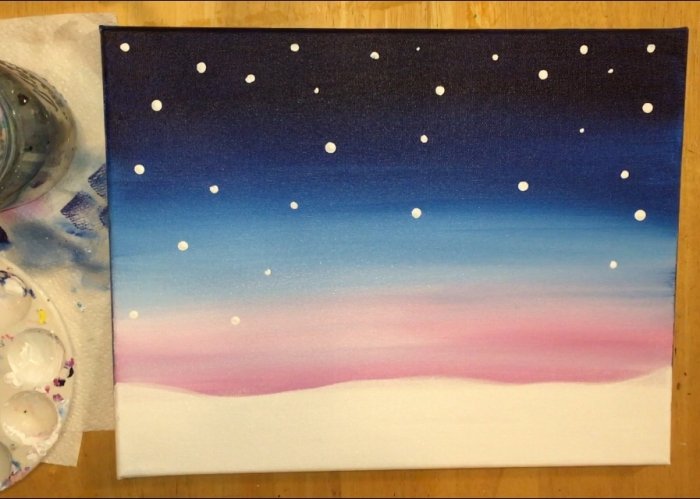
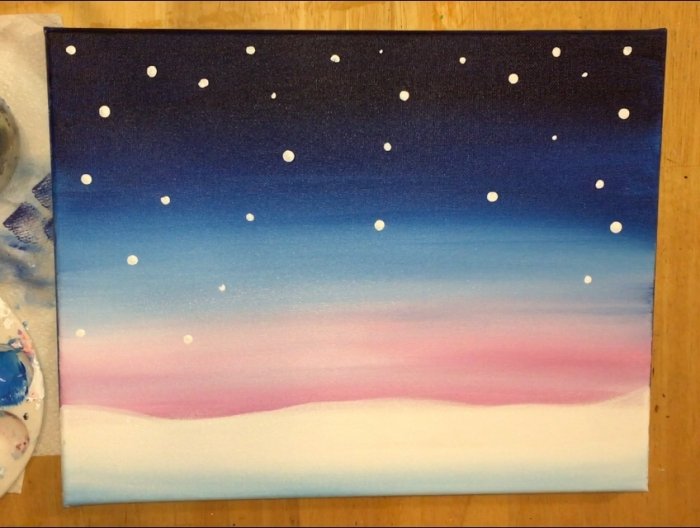
Here’s a recap of the colors in the sky. It started with prussian blue on the top, then blended to cerulean blue and then to white and then finally blended to primary magenta mixed with white.
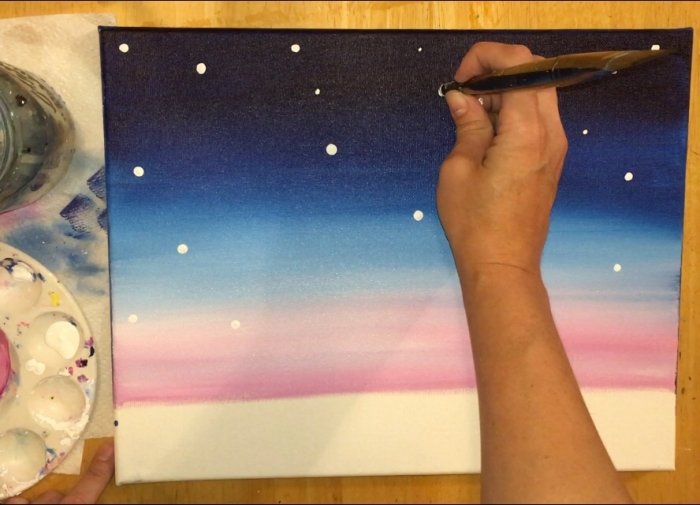
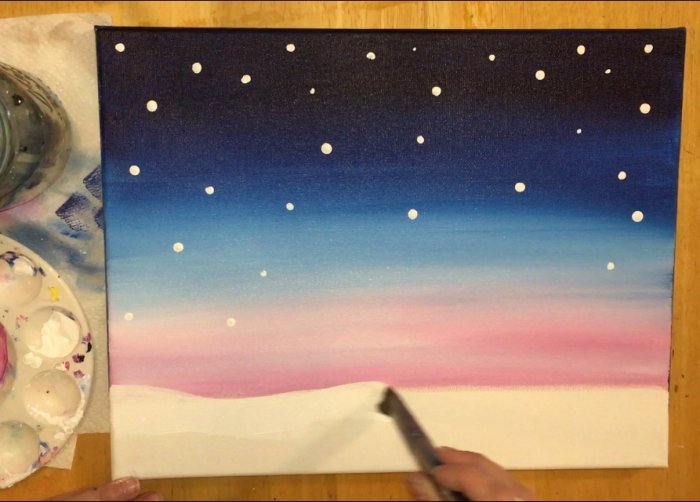
5. Use a paint brush handle to stamp on snow with titanium white.
You can use the back of any handle, but I used the 3/4″ flat handle. Basically dip the back handle in the titanium white and dot on the snowflakes.

The firmer you press the larger the snow dots and visa versa for the smaller snow dots.
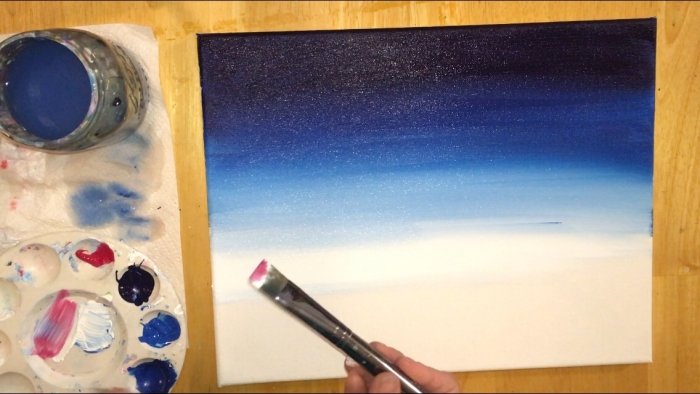
6. Paint a wavy snow horizon line with titanium white.
The bottom of the canvas should have about 4 inches (more or less) of space. I used the 3/4″ flat brush to paint the bottom with all titanium white. Paint a wavy line and then fill the rest of the area with white all the way to the bottom.
7. Optional: Paint the very bottom cerulean blue mixed with white.
Mix a lot of white with a little cerulean blue to make a light blue.
Paint the very bottom of the canvas with this light blue color and blend it back up into the white.
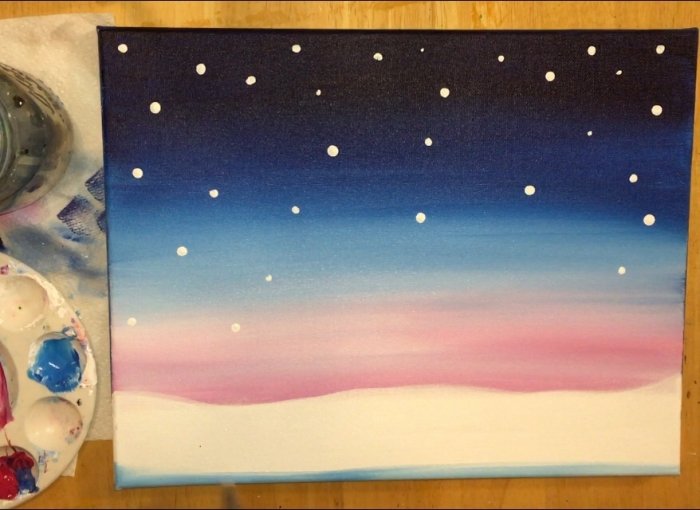
Do wet on wet blending to get that light blue to blend back up into the snow. Just add more titanium white to the brush and blend it back up.
Wait For Painting To Dry
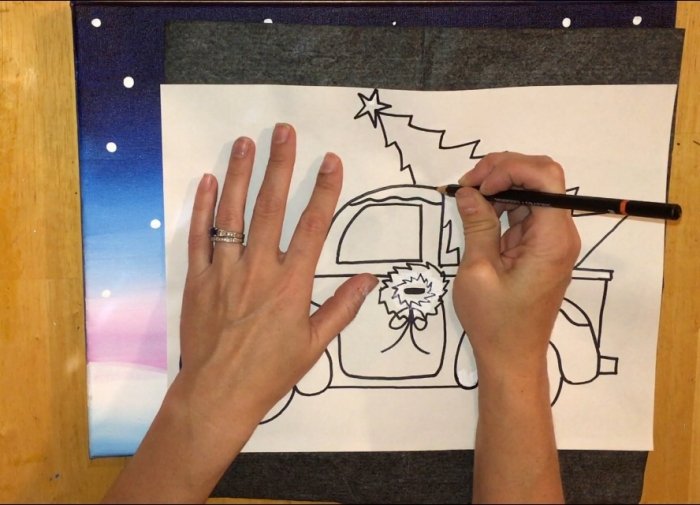
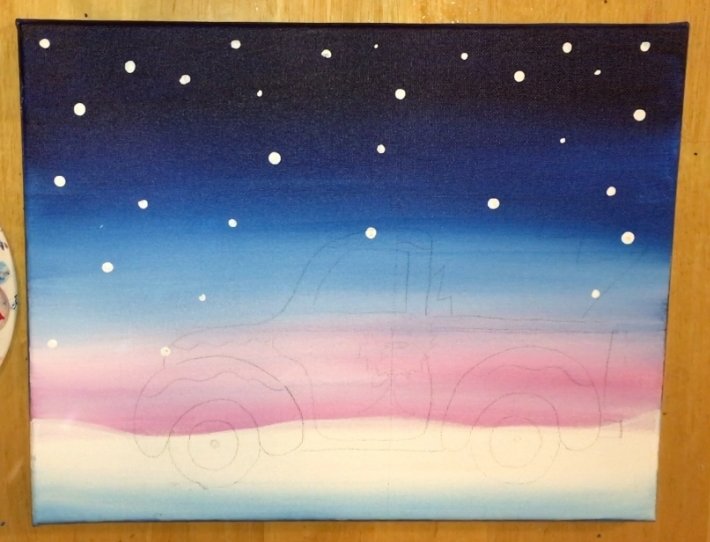
8. Transfer the truck onto the canvas using the provided traceable.
The truck was positioned on the lower right corner of the canvas.
Use a sheet of graphite paper under the traceable and trace the truck with a pencil.
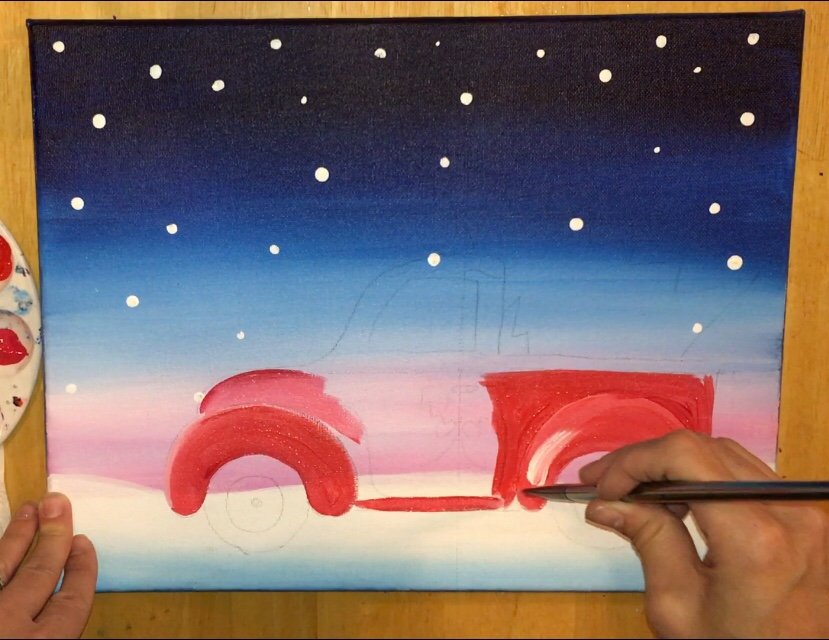
9. Paint the truck.
If you did my Pumpkin Truck, the technique is EXACTLY the same. This time I used the color cadmium red and quinacridone red. I chose two different reds to give some variety in the red. BUT quinacridone red is optional and you can do this painting simply with one red.
Anyhow, dip your #4 bright brush in cadmium red and dip the corner in white.
Start with the fenders. Let the cadmium red and white blend naturally on the canvas.
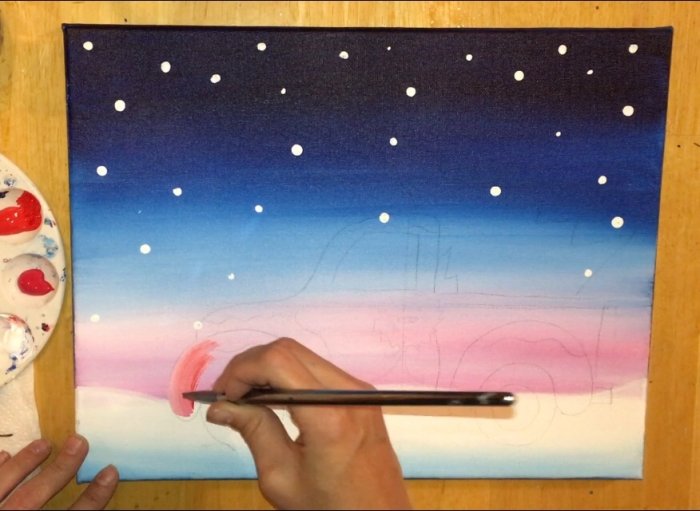
You’ll get a color variation with the red mixing with the white. Don’t let it mix all the way.
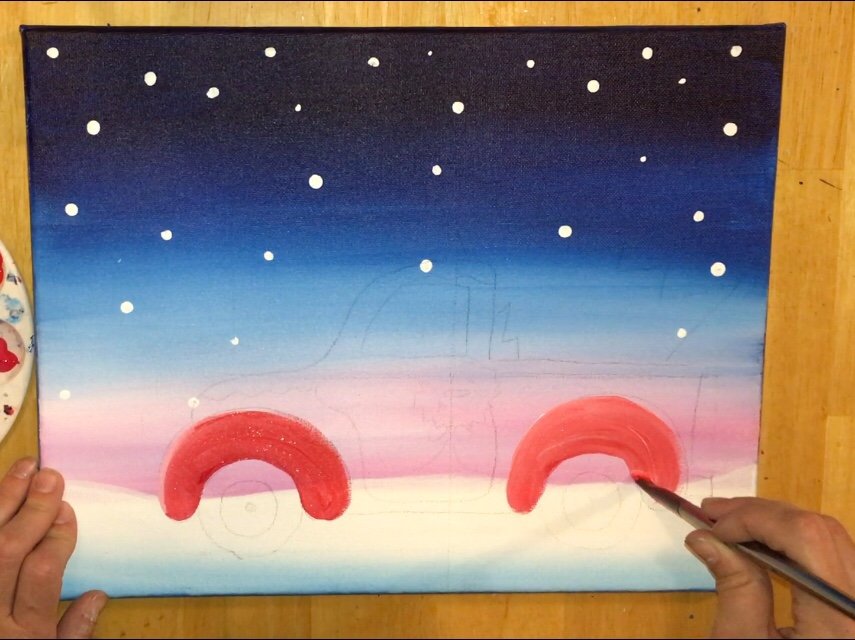
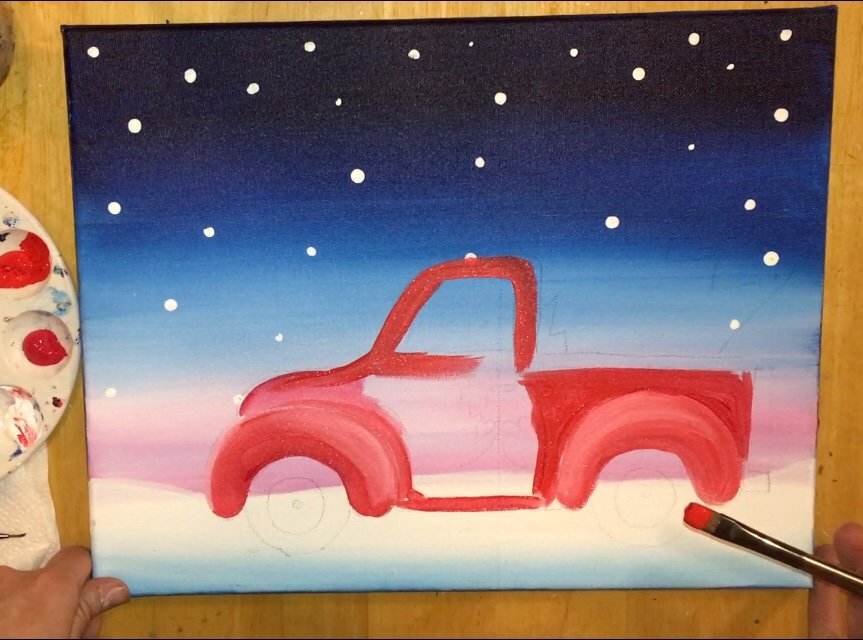
Paint the rest of the body and try to give “contrast” to areas by adding more white or more red to the brush. Above the fenders were painted lighter, for example, so the fenders will stand out.
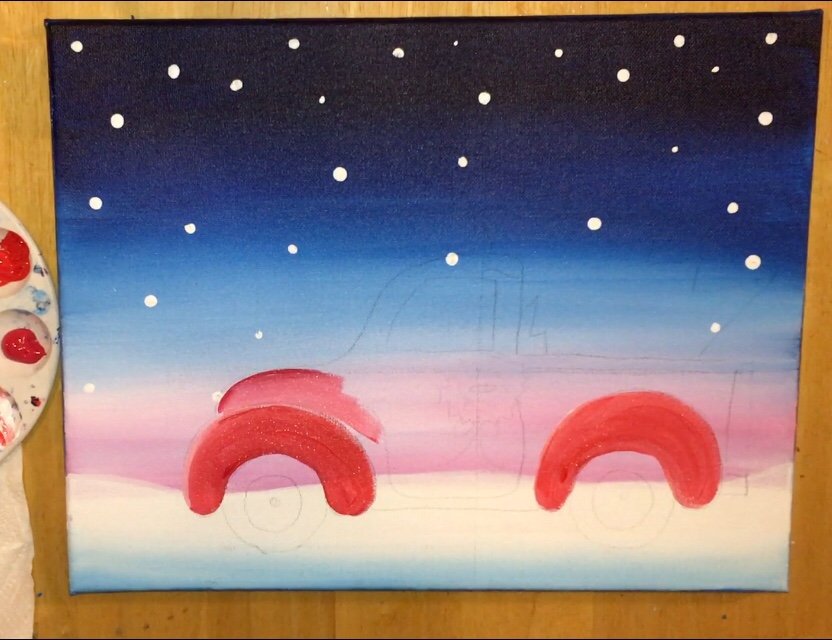
I also sparingly added “quinacridone red” to the brush to give the red some variety. Again, this is optional and it only made a subtle difference.
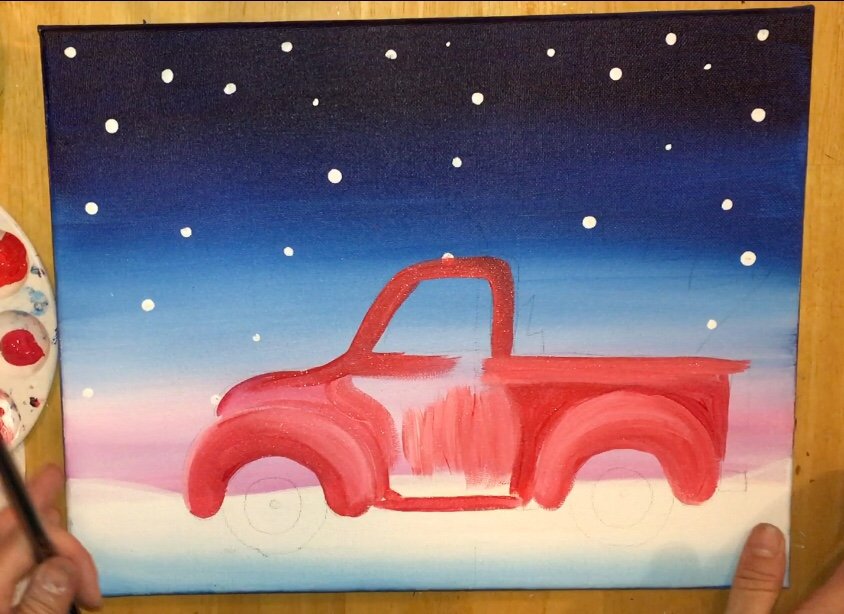
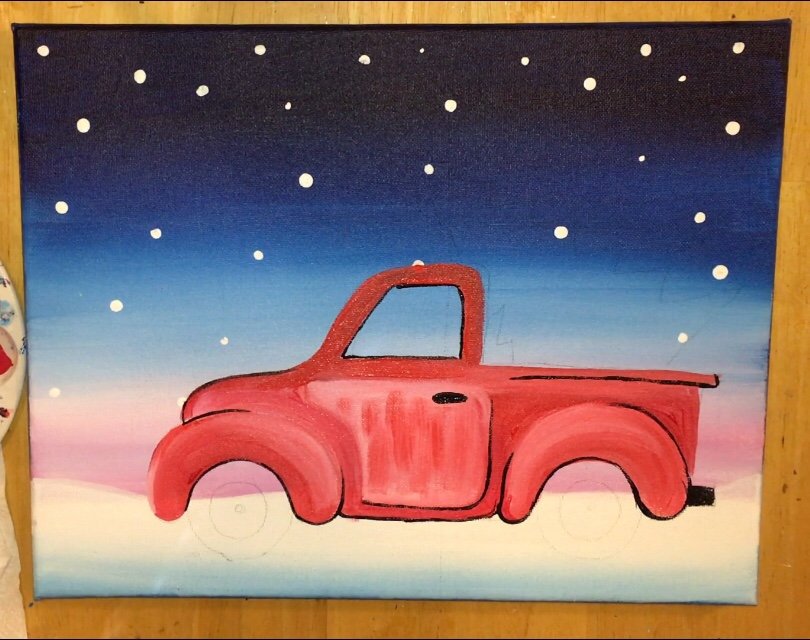
Continue filling in the truck letting your strokes contour the shape.
The door was painted last and I did that with up and down strokes and a bit more white.

10. Use a 10/0 liner to add some fine black outlines
I did not outline the entire truck, just some areas of the truck. I started with the bottom of the fenders and bottom line between the wheels. Use your 10/0 liner and black for this step.
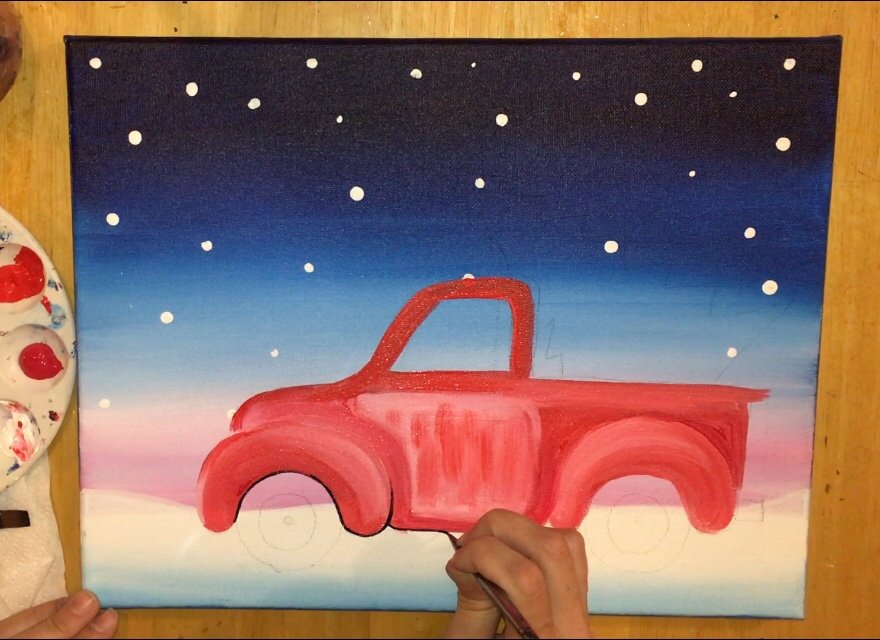
Then I outlined part of the hood, the exhaust and the handle.
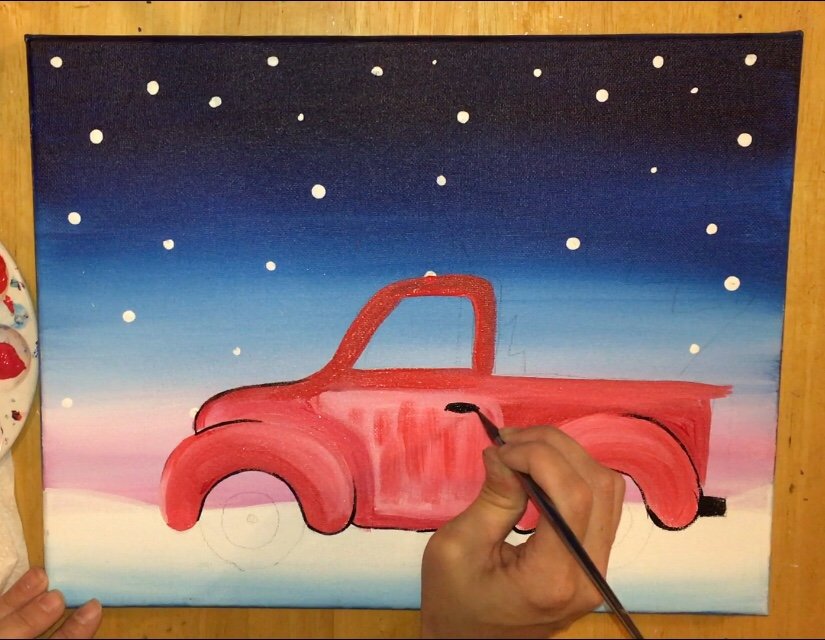
I also outlined the inside of the window, right side of the door and the top of the bed. Again, I didn’t outline everything, just some parts.
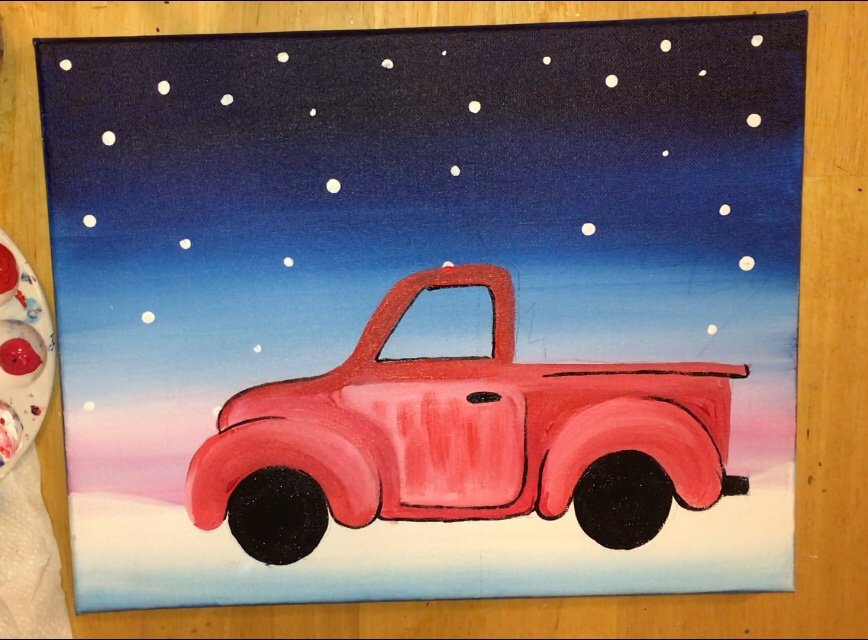
11. Paint the wheels carbon black.
I used the #4 bright brush to paint the wheels solid carbon black.
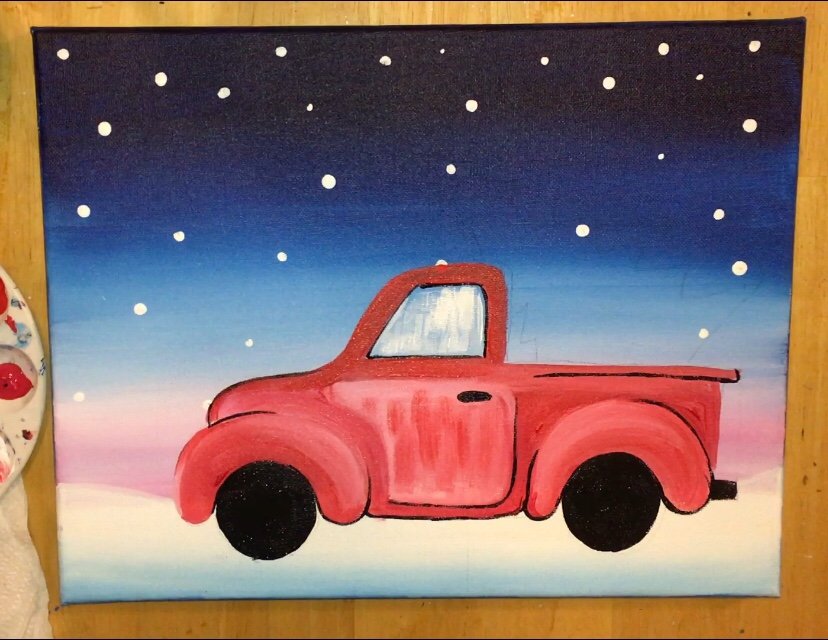
12. Paint the window
Then I did some “dry brushing” on the window with titanium white. Dry your #4 brush, add a little white to it and paint some dry strokes. These are just little up and down strokes of white with the blue still showing through.
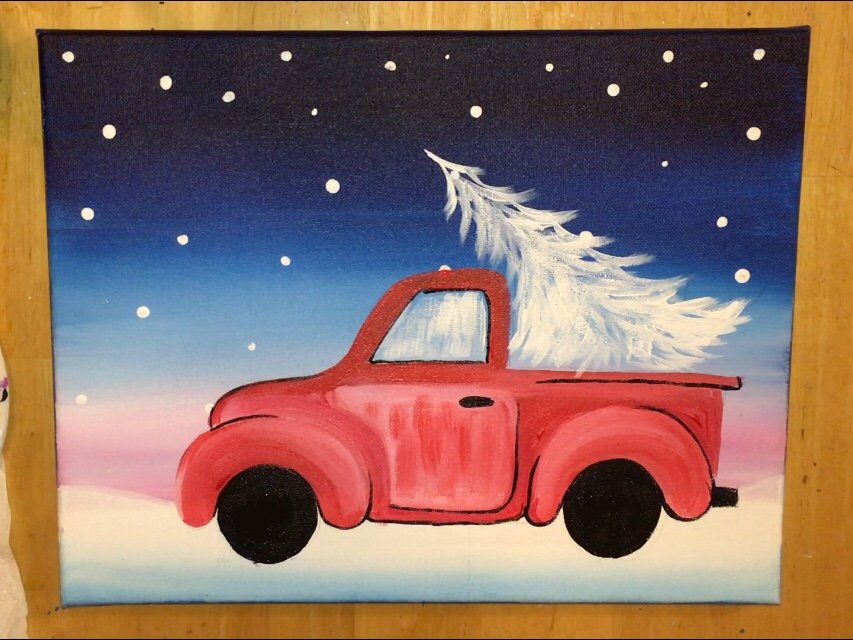
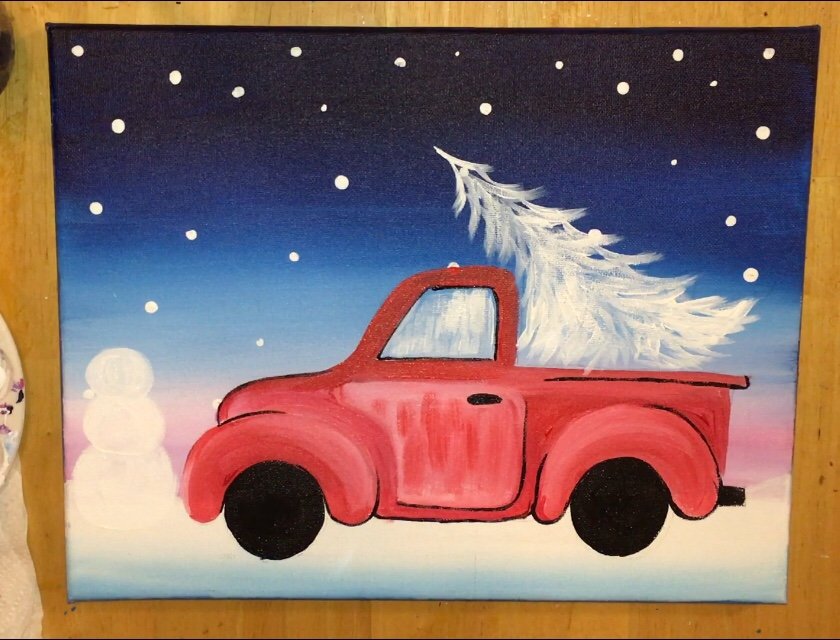
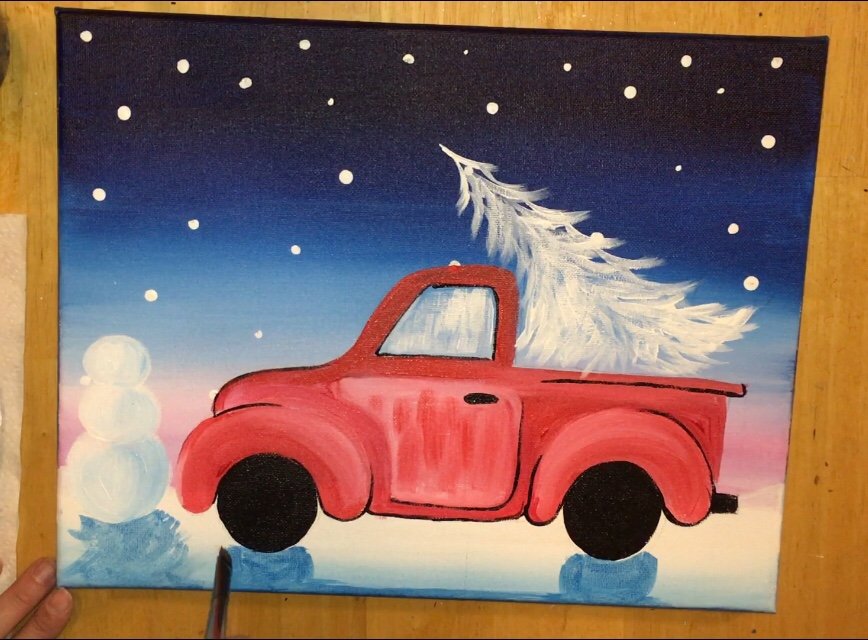
13. Use a #5 round brush to paint the tree.
To paint the tree, I started with the color “titanium white” and basically outlined the shape with that #5 round brush. You don’t have to outline the tree exactly – I know I went outside the lines.
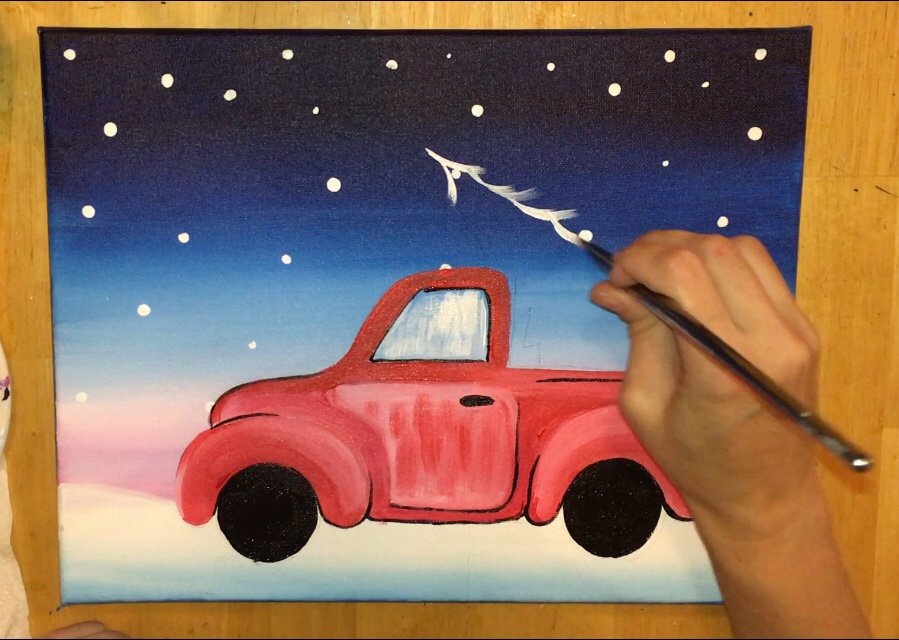
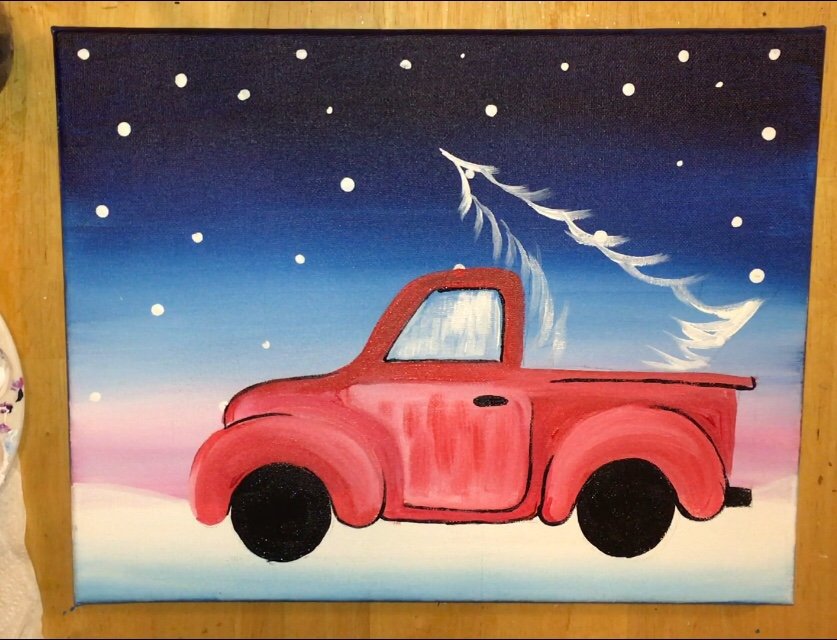
Then I “whited out” a lot of the inside of the tree with the round brush. Start at the bottom of the tree and drag rows of branch-like/curved strokes. You can also paint “X” or cross-hatch strokes to get the texture of the tree.
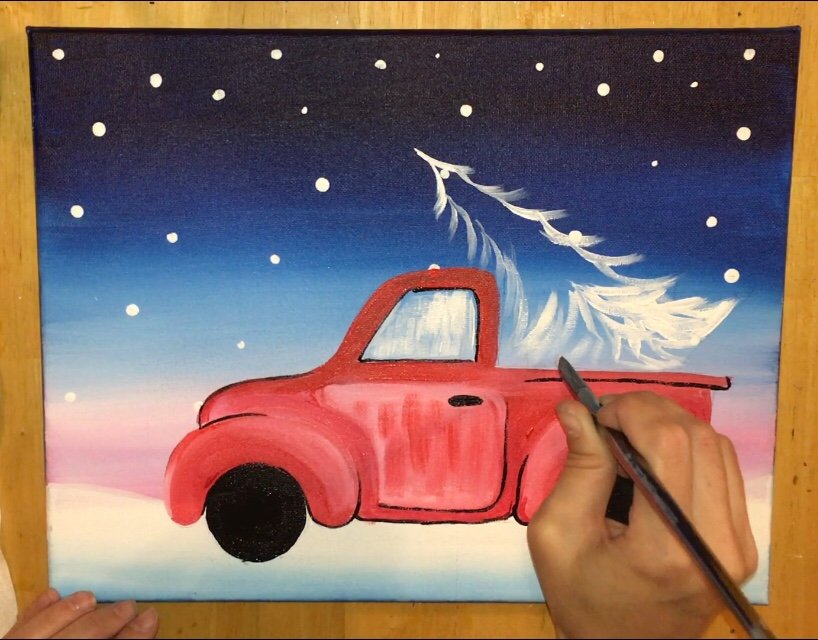
Basically this area is filled in white white and “texture” with the strokes but there is still blue showing through.
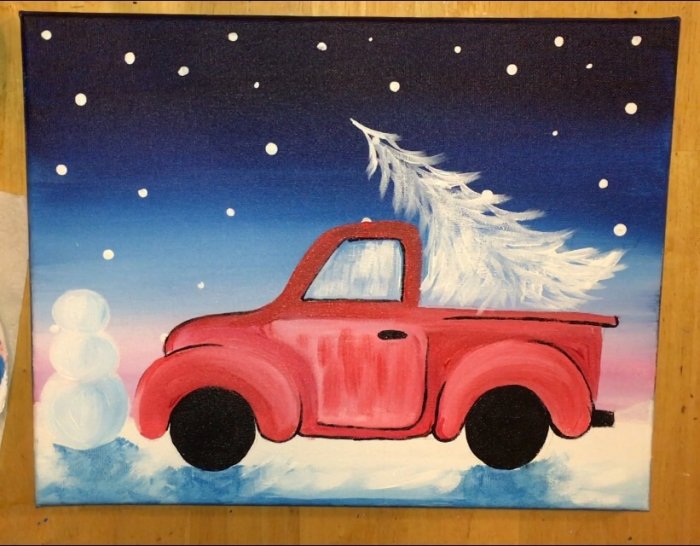
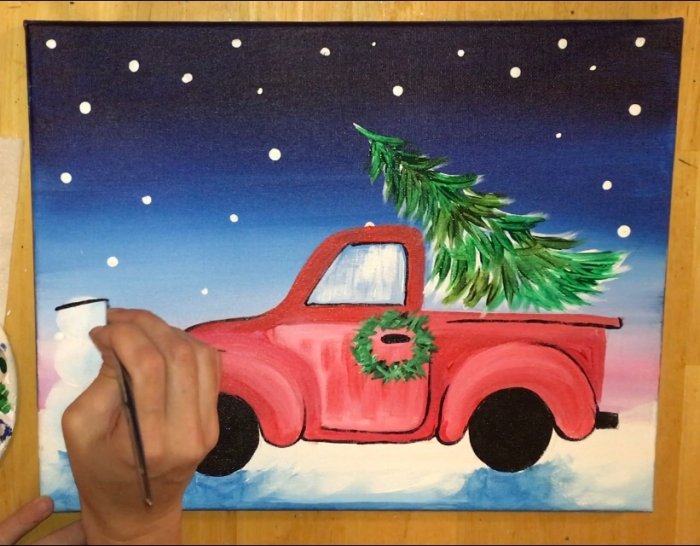
14. Paint the snowman.
Next I painted the snowman. You can use any brush for this. Use the color titanium white and paint three circles that slightly overlap each other.
Add some shading to the snowman by using your #4 bright flat brush and the color cerulean blue mixed with white. Paint a blue curve on the right side of each of the snowballs starting from the bottom and going up.
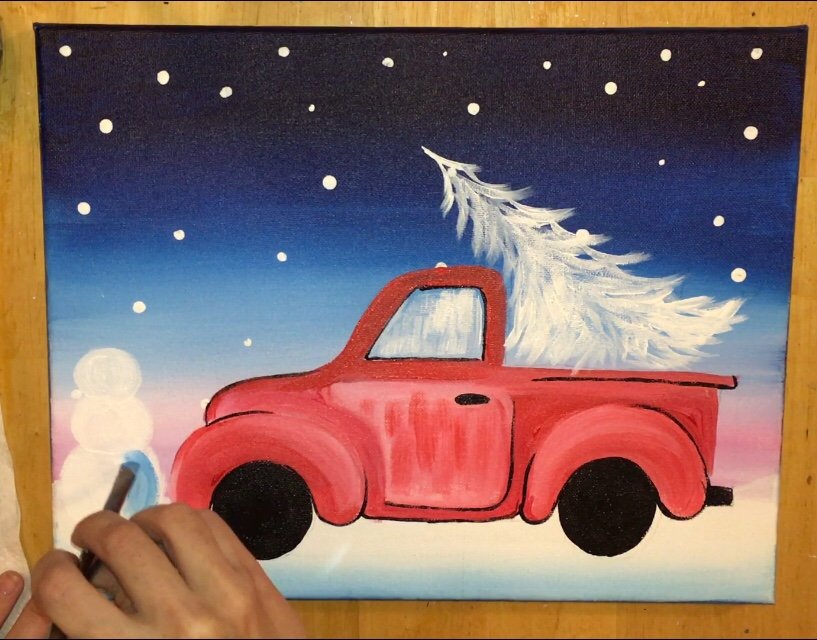
Blend the blue in with the white by adding more white and painting your strokes in a circle. Always work from the bottom snowball up so the snowballs will overlap each other. You can see more details about how I paint shading on snowmen in my Snowman Starry Night Tutorial.
15. Paint shadow under the truck and snowman.
I used cerulean blue for the shadow but watered it down to an ink/watercolor consistency. Use the #4 bright to paint the shadow under the tires.

Also paint a horizontal line of shadow on the bottom. Then paint a shadow under the snowman. The shadow is the shape of the object.
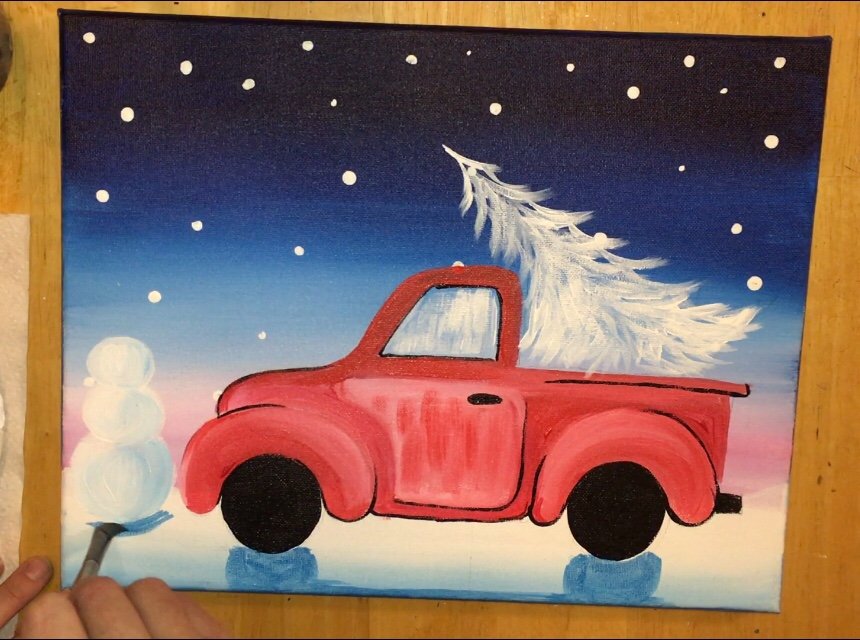
Optional: Then I went back in and added some more white and did some “X” strokes to blend the shadow in some more into the snow. This was just to give some “texture” in the snow.
Recap: The shadows were painted with watered down cerulean blue and then with white, I painted “x” strokes for texture and to blend the area where the shadows and the snow meet.
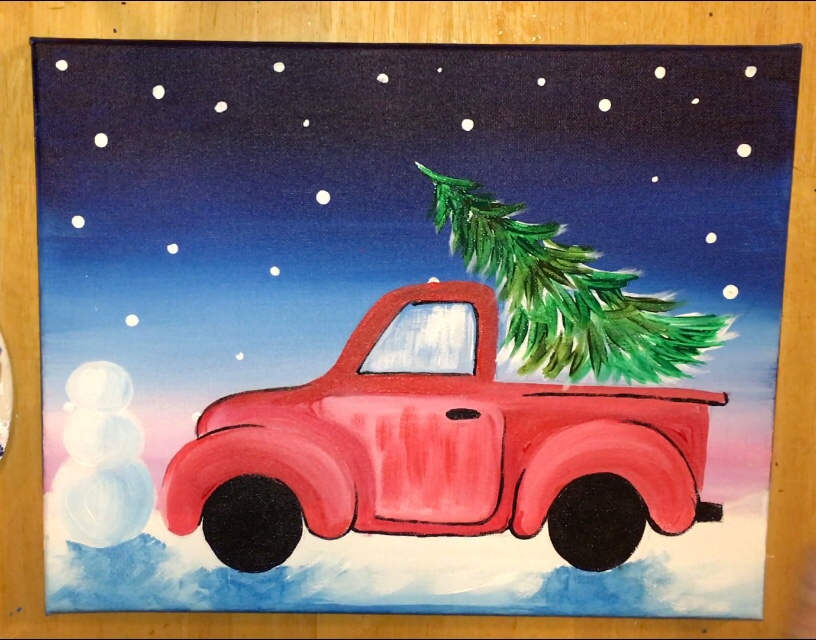
16. Use a #4 Bright to paint the tree.
I used two different greens for this tree: “phthalo green yellow” and “sap green”. Basically one is a lighter green and one is a darker. I used my #4 bright flat brush, started on the bottom and painted one row of “phthalo green yellow” branches by dragging each stroke down.
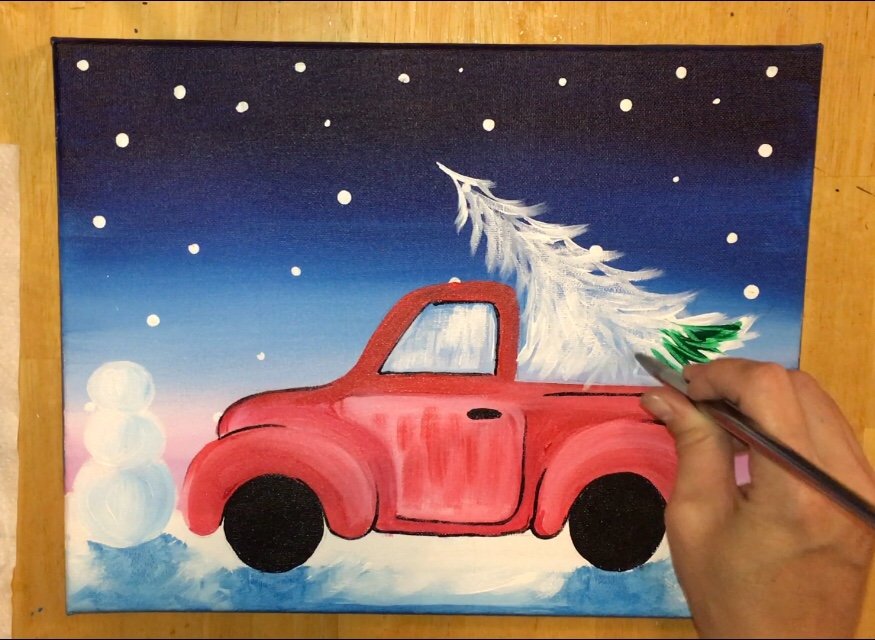
Then I alternated to the next green (rinsing brush is optional, I didn’t rinse my brush). The next row was painted with “sap green”. Again, I dragged each stroke down.
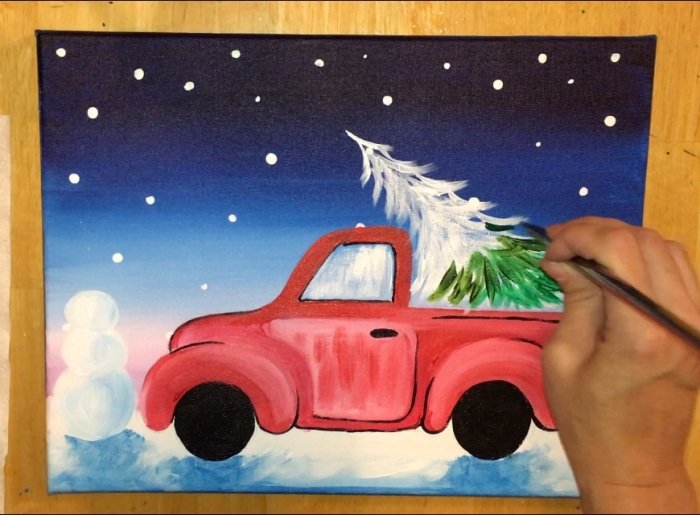
The rows were painted from bottom to the top of the tree so the branches can look like they are overlapping. I alternated between the colors “phthalo green yellow” and “sap green”. Also each stroke is painted down.
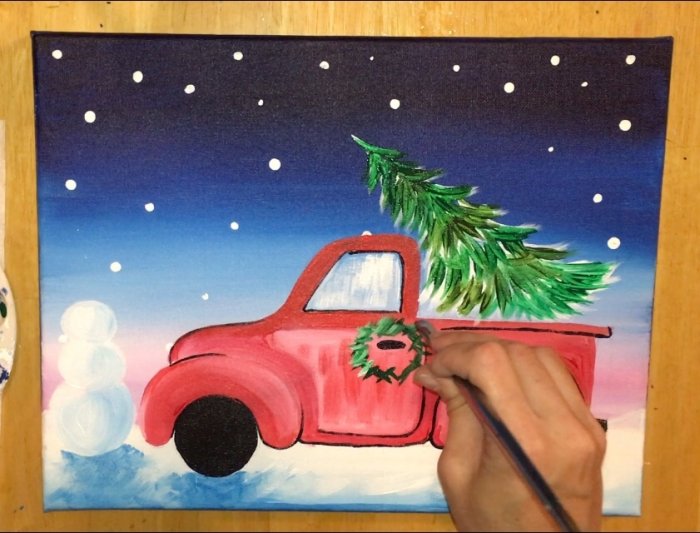
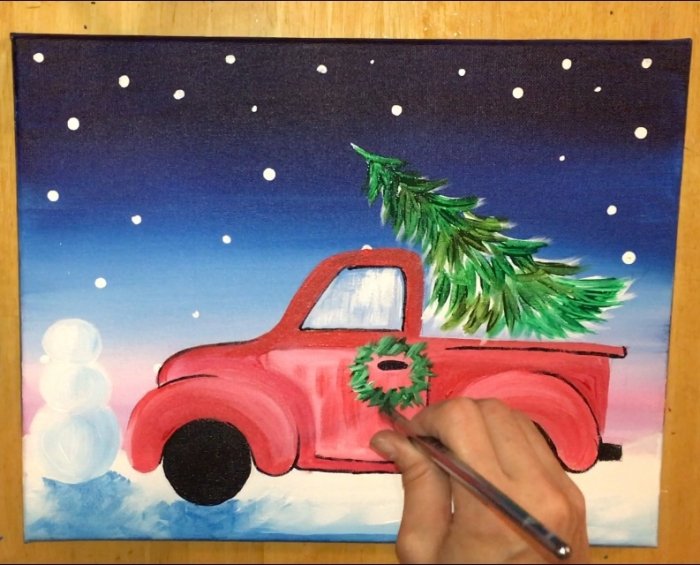
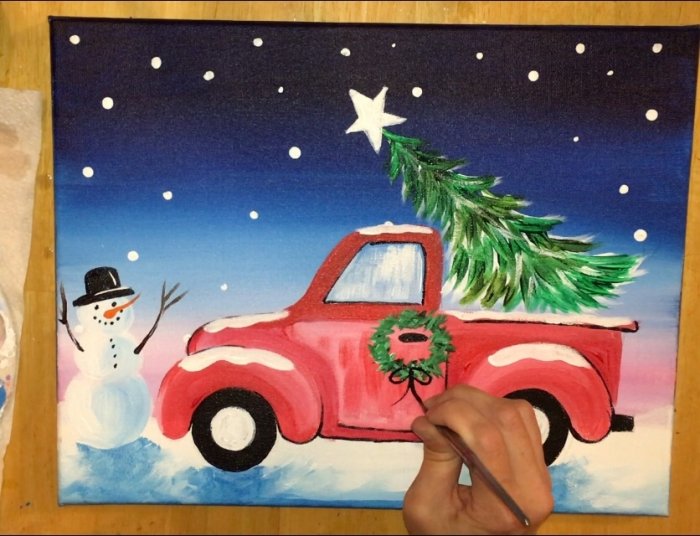
17. Paint the wreath
Use any brush you want for this step, I believe I used a #4 bright. Paint little “X’s” in a circle around the truck door handle.
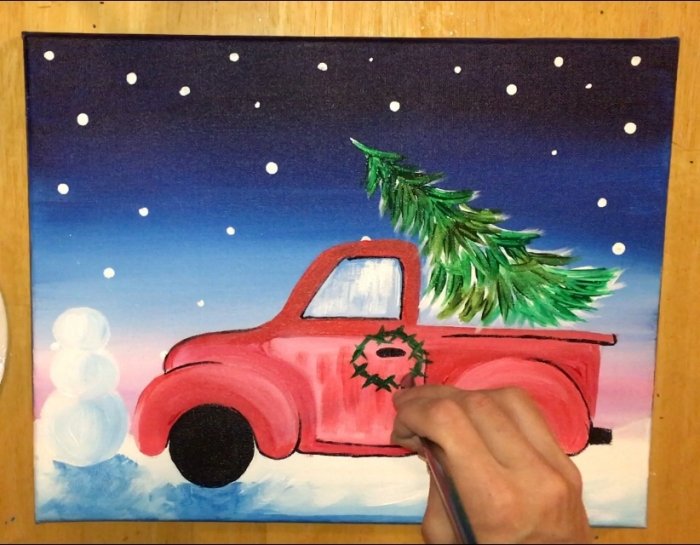
Add in some titanium white over those “X’s” before the green dries.
18. Add details to the snowman.
You’ll want to use your 10/0 liner for this step! I started with the hat.
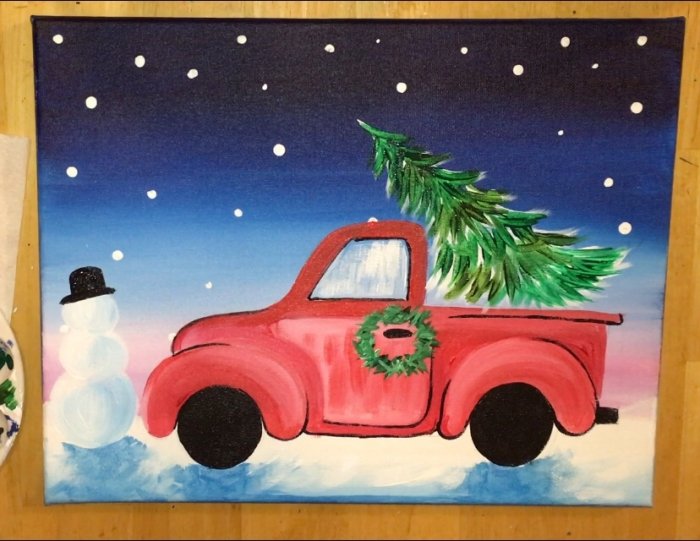
Then I did the eyes, mouth and buttons.
Next I painted the arms with burnt umber. You can also use black for this step!
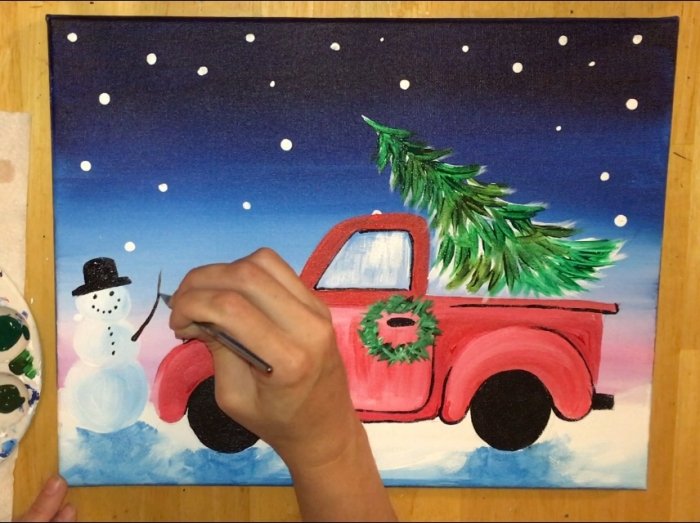
The nose was painted with cadmium orange.
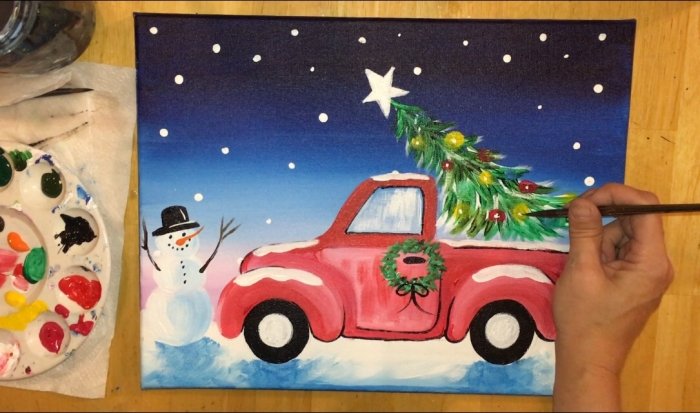
19. Paint snow on the truck.
With a #5 round and titanium white, I painted snow on the truck in all the top flat areas.
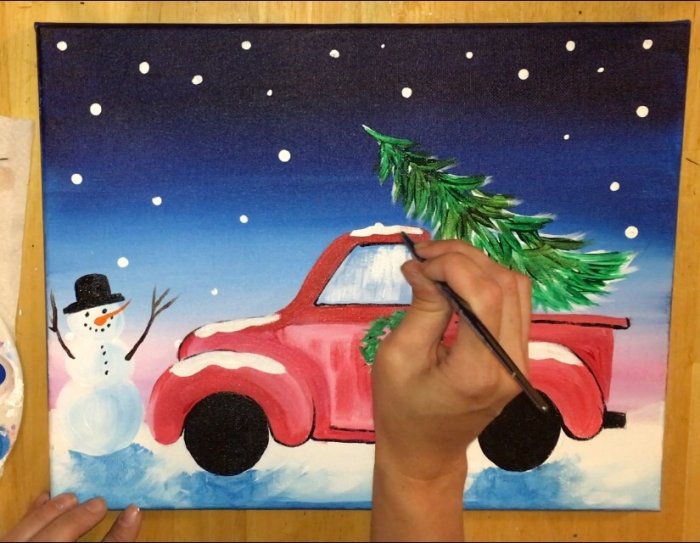
Paint the white part of the tires as well (as long as that black is dry)!
20. Paint a star on the tree.
Next I used my 10/0 liner to sketch out a star on the top of the tree.
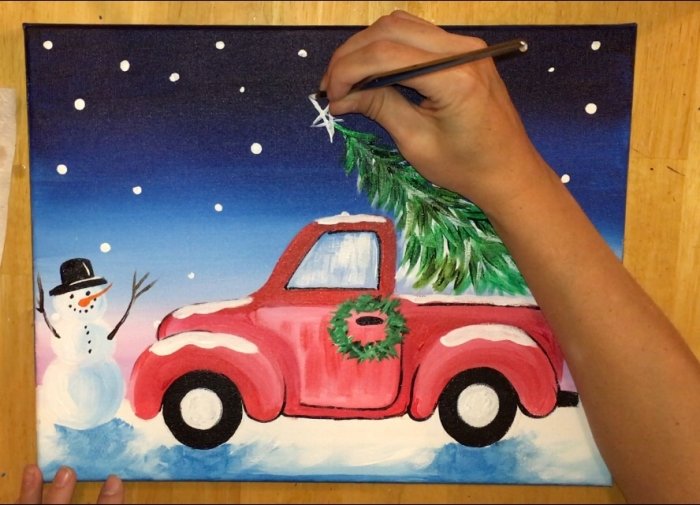
I filled the star in solid white.
I also added a bow on the wreath.
21. Use your fingers to paint lights on the tree.
This is just like painting fireflies from my Mason Jar tutorial! Basically dip your finger in the color (I started with cadmium yellow) and press and smear out into a circle.
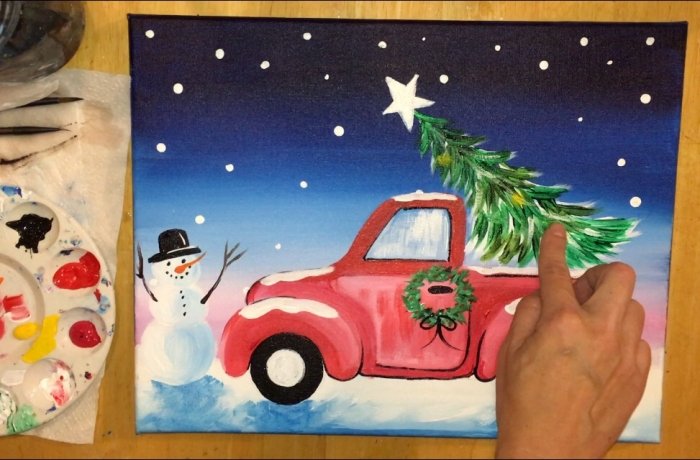
I also used cerulean blue and red to paint some more colored lights.
Then I used my 10/0 liner to paint a little white dot in the center.
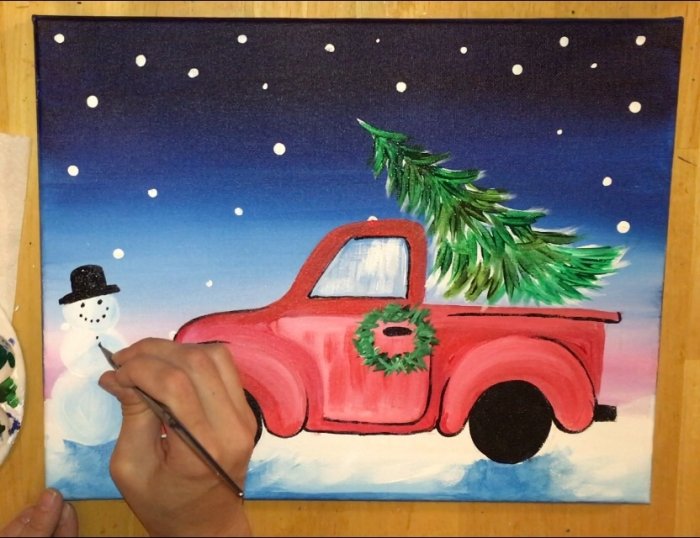
22. Paint snowflakes and a scarf on the snowman.
Use your 10/0 liner for this. Paint out each of the snowflakes. Also, I painted the yellow star in.
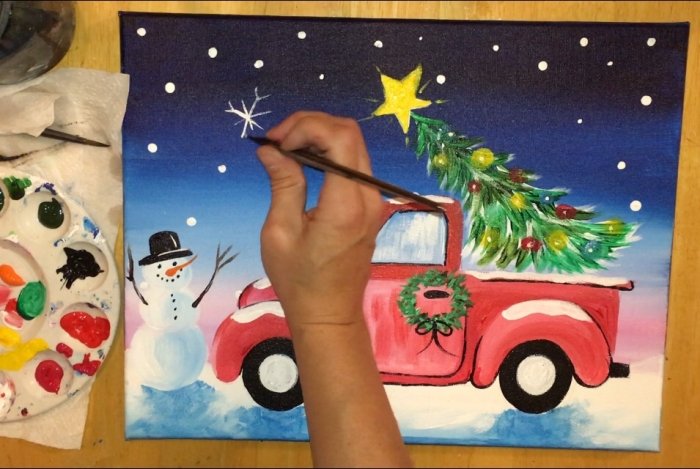
I also added a green scarf on the snowman! You can use any color but I chose green.
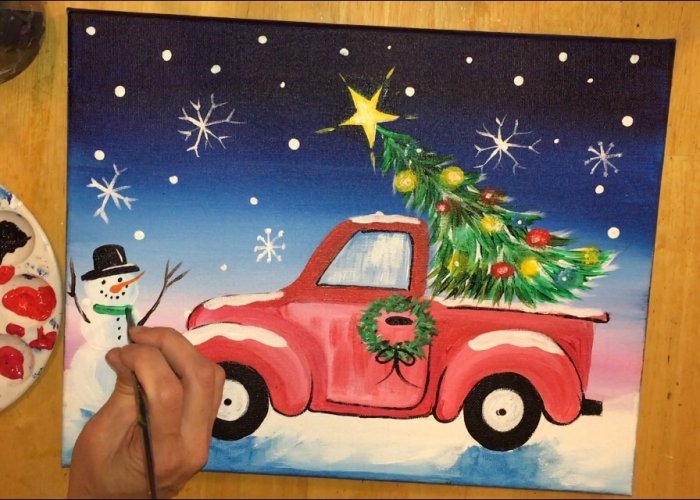
So many small but easy details in this painting!
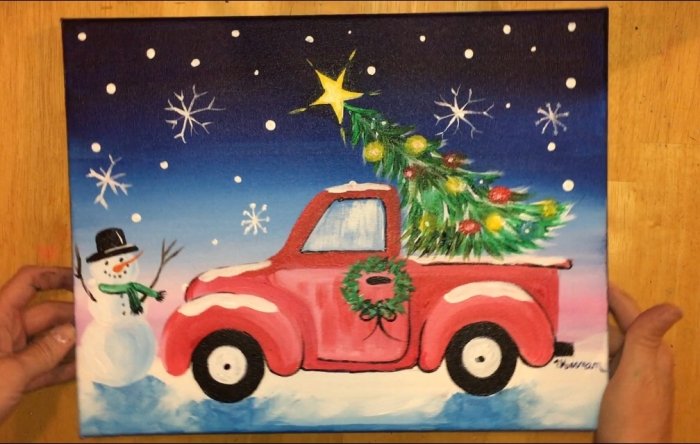
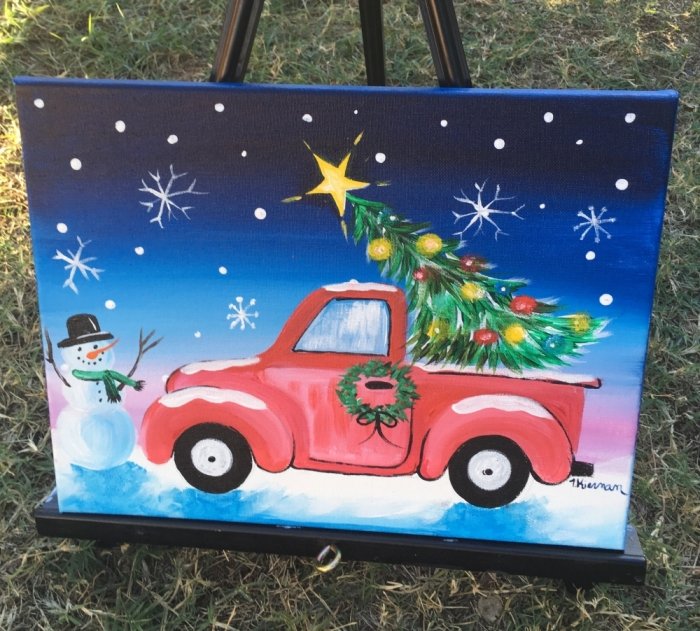
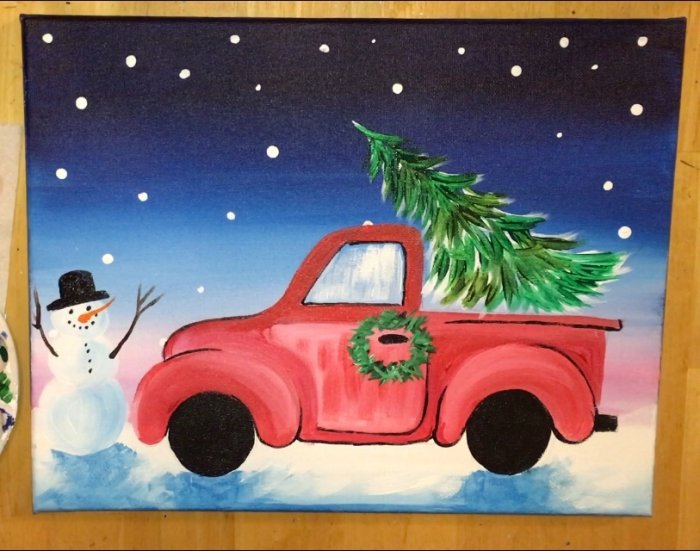
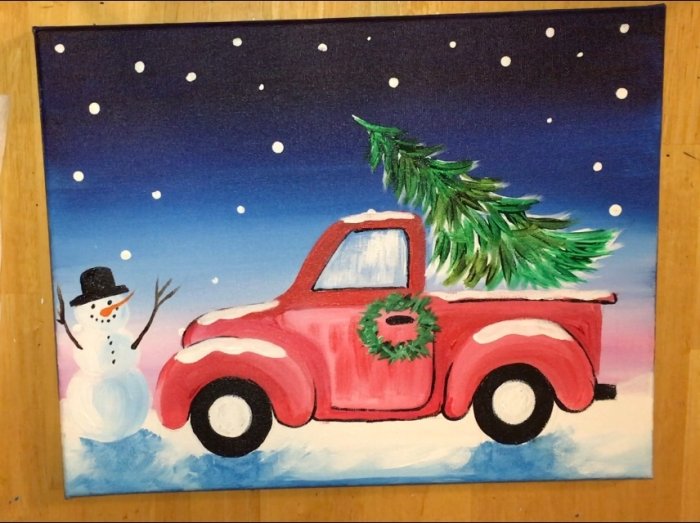
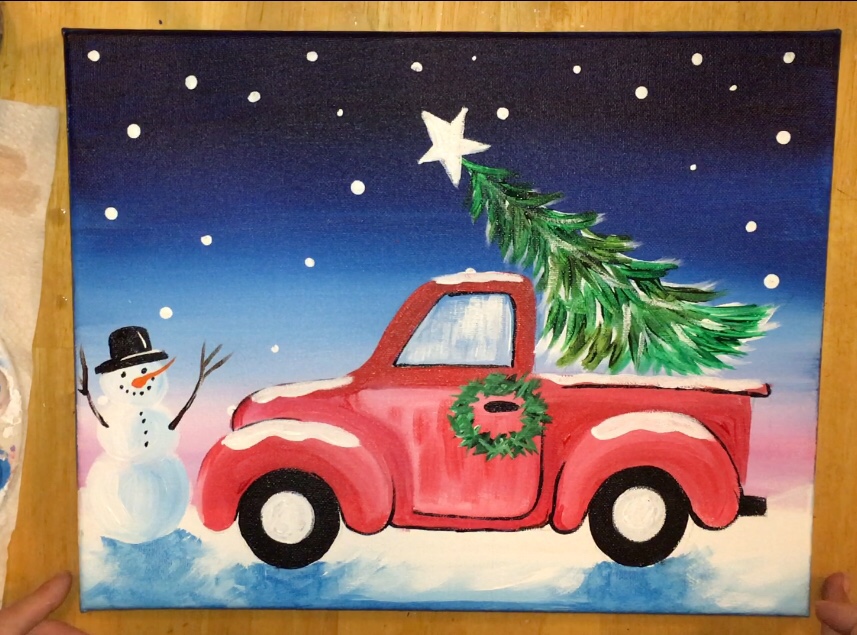
Finished!
Sign your art and share!
Would you like to save this?
Share this tutorial!
Step By Step Painting has been successful thanks to YOU sharing with friends and family on Pinterest, Facebook and other social media platforms. So THANK YOU, THANK YOU , THANK YOU for sharing and spreading the word! 
Share your art with us! We love seeing pictures!


Loved your tutorial. Can’t wait to watch them all. U make it look so easy! Thank you! Can’t wait to try them all!
Thanks Brenda!
Excited about trying this. I think I can do it step by step like you.
Yay Kay!! Sending creative vibes your way, you can do this!!!
I did it! I’m hooked.
Yay!!!!
Trying to figure out how to post my painting
Kay if you have Facebook you can do it that way or post it on Pinterest or email me at contact@stepbysteppainting.net. I don’t have a way to post it on the website yet but that would be a fun idea!
Thank you for posting this! I’ve painted two and have prepared two more canvases. I’ll share one of them. I’m an just so excited to try more of your tutorials. They are great.
I just want to say I love your tutorials. I have been trying to teach my self to draw and paint and you are wonderful. I have done three of your painting tutorials. I don’t know how to send you pictures of my paintings as I dont do social media websites. I would love to share them with you and ask some additional question.
Hi Linda! Thank you. If you have email you can send questions and pictures that way ?. My email address is tracieannekiernan @ Gmail . Com
Thank you this was wonderful!
You’re welcome!!
Hi,
Do you have kits for sale?
No yet ? it is something we will be exploring eventually though.
Have watched several tutorials, love them all, easy to follow instructions. I have painted several things from your tutorials and they look fabulous! Thank you
Thanks so much Karen! I’m glad you’ve had so much fun painting!