
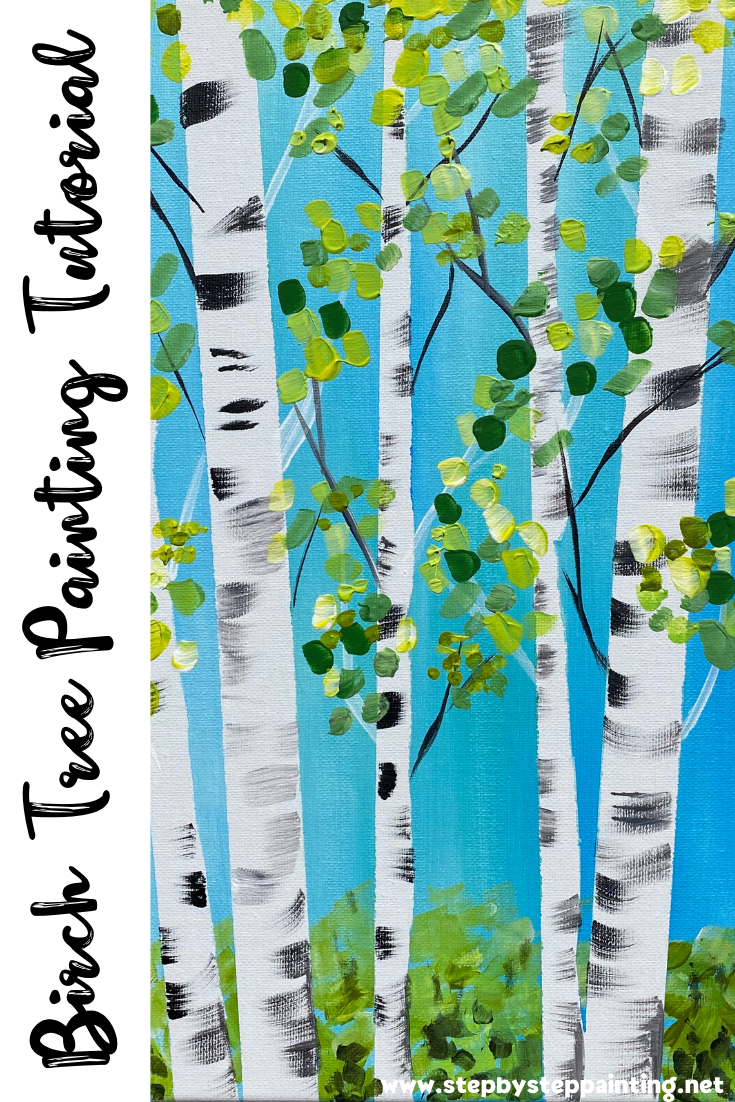
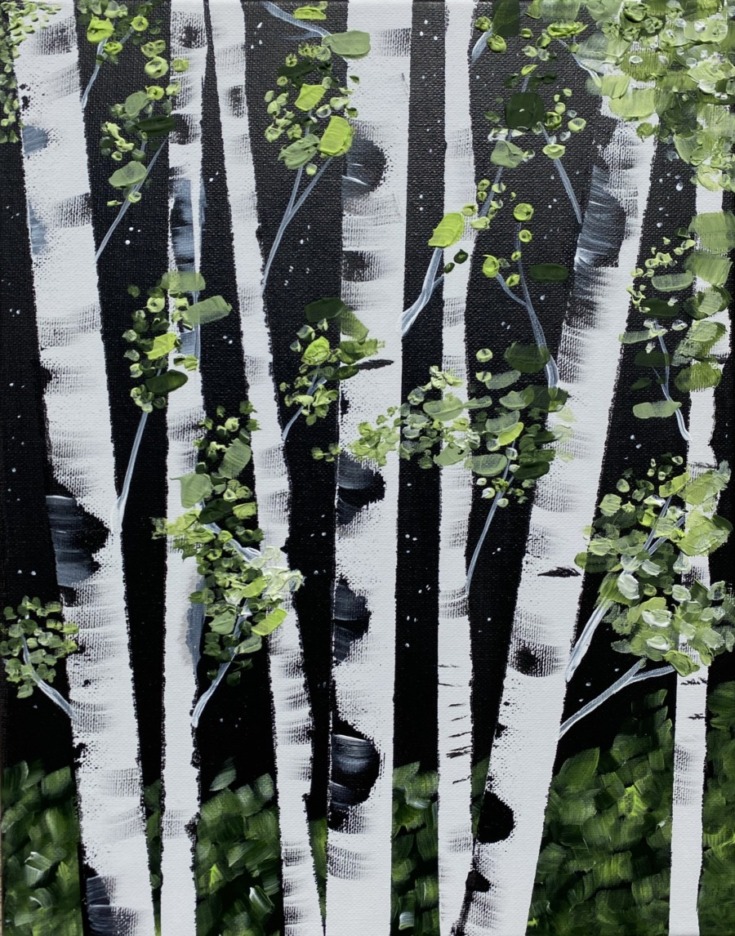
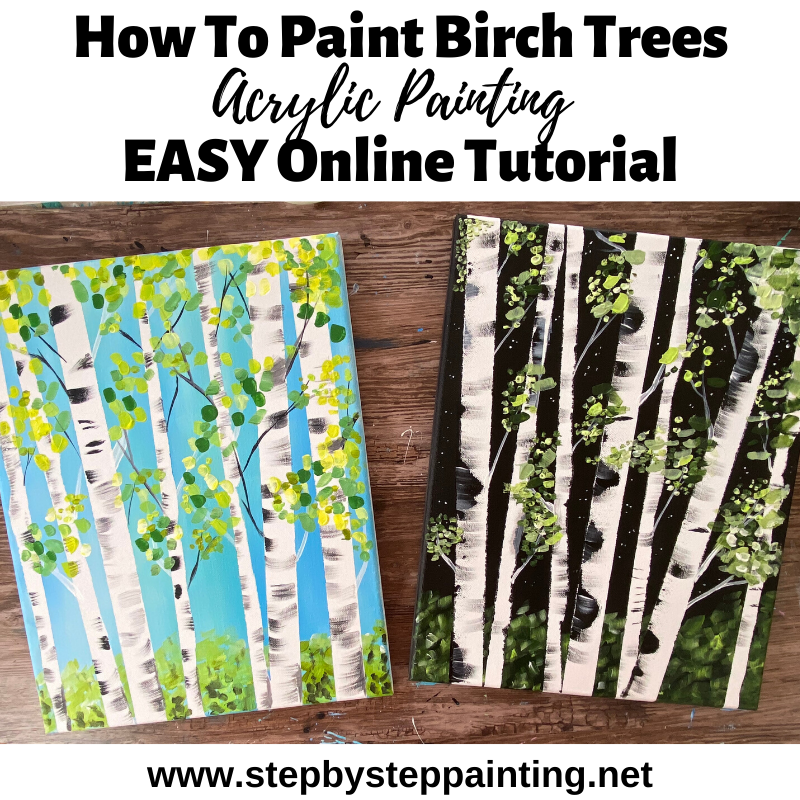
How To Paint Birch Trees – With (optional) “Impasto Technique”
These birch trees are one of my favorite types of paintings to teach because they have such a high success rate!
Would you like to save this?
I did a tutorial like this back in 2017, my Fall Birch Trees Painting! Basically, you use masking tape to mask off the tree trunks, paint over the canvas and then pull the tape off to reveal the trees. It’s so easy and fun!

This time around I decided to experiment with some modeling paste medium to make the leaves more of an “impasto” style.
What is impasto?
The word “Impasto” is Italian for “dough”. As an art term, it means applying paint thickly to the canvas in order for it to stand out. If you love texture and the look of thick brush strokes jumping off the canvas, this the technique for you!
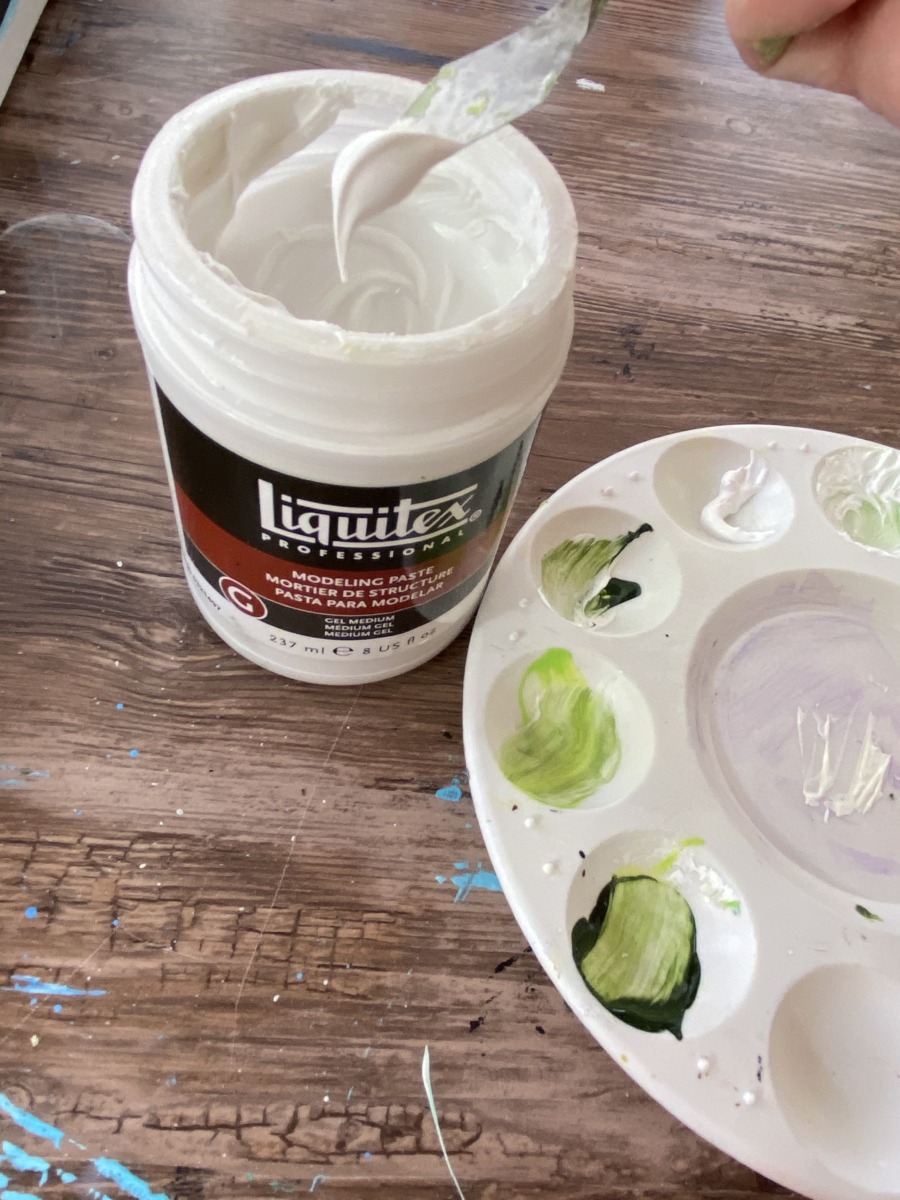
I used Liquitex Modeling Paste Gel Medium. It is an opaque finish and is thick like frosting! You simply mix it with your paint on your palette first and then apply it to the canvas. And the stroke that you make will stay and dry that way!!
What if I don’t have or want to use the medium?
No problem! You can still do this tutorial and not add the modeling paste medium to the paints. Follow the lesson steps as described. You can also still create thick brush strokes simply by applying the acrylic paint thick to the canvas without a medium.
Materials
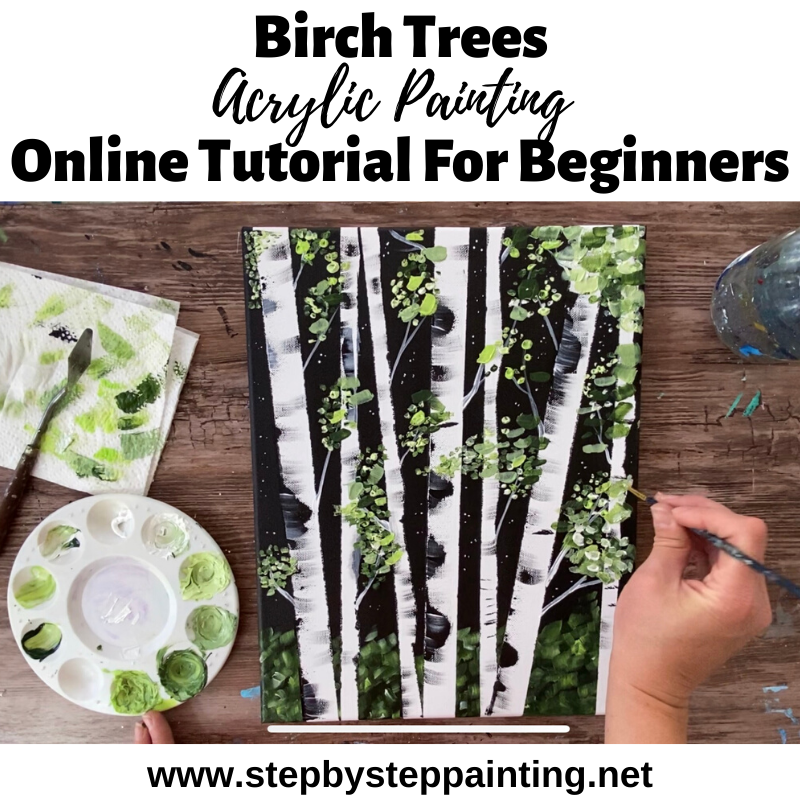
Spring Birch Trees - With Impasto Technique
Learn how to paint birch trees using a simple technique of applying masking tape to the canvas. Then use an impasto method to apply thick leaf brush strokes.
Materials
- Canvas 11 x 14 (or any size)
- Acrylic Paint
- Masking Tape
- Modeling Paste Medium (If you are doing the impasto technique)
- Scissors
- Old Gift Card/ Credit Card
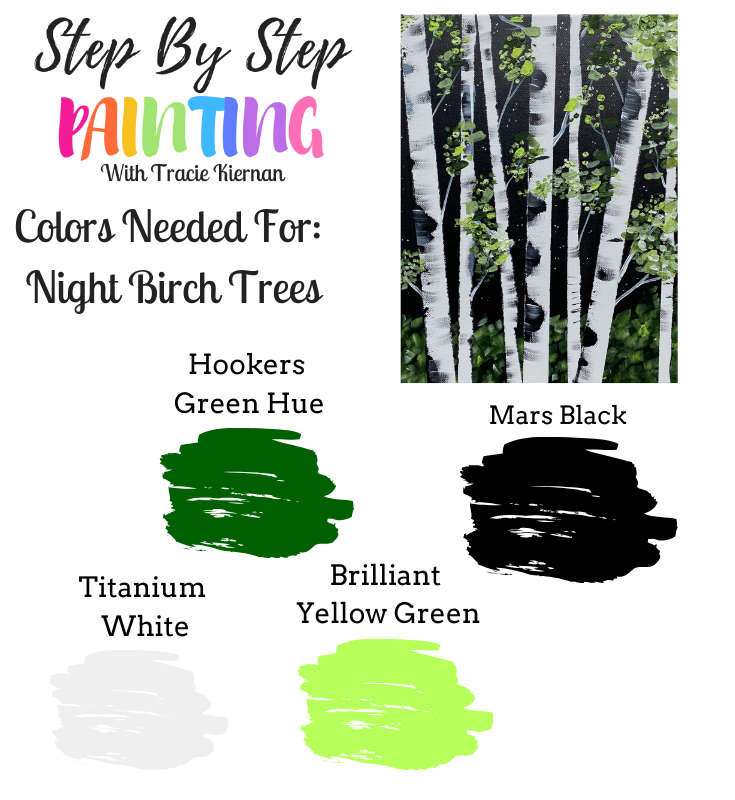
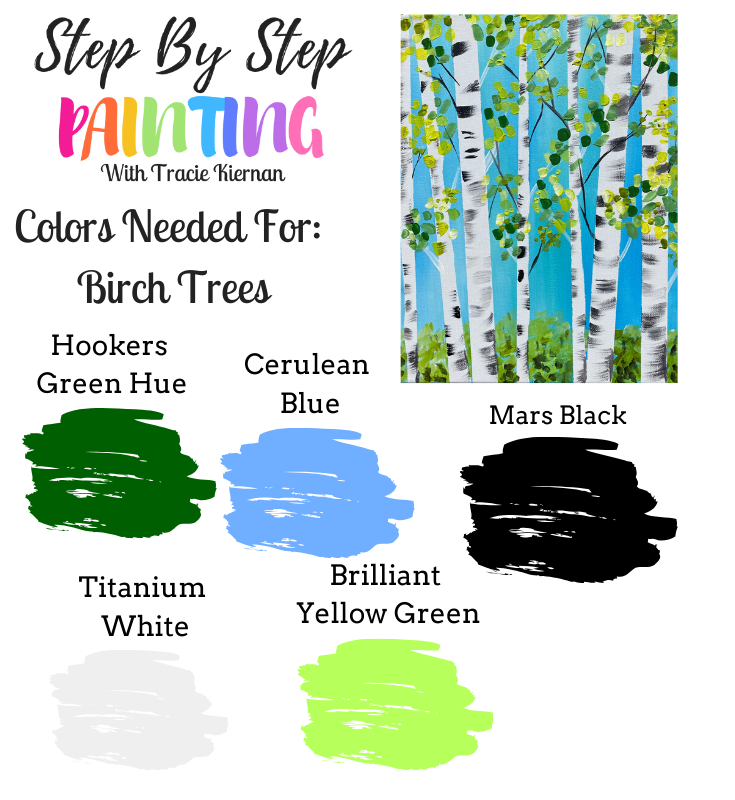
Colors
- Brilliant Yellow Green
- Hookers Green Hue
- Mars Black
- Titanium White
- Cerulean Blue (If you are doing a blue background)
Brushes
- 3/4 Wash
- 12 Bright
- 4 Round
- Palette Knife (Optional)
Instructions
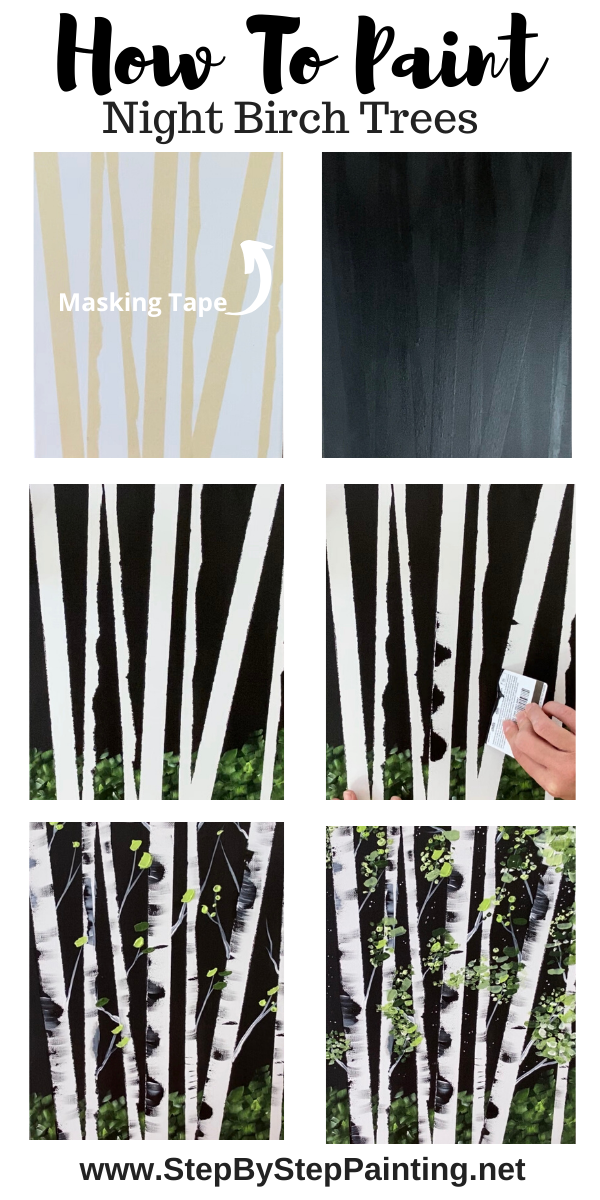
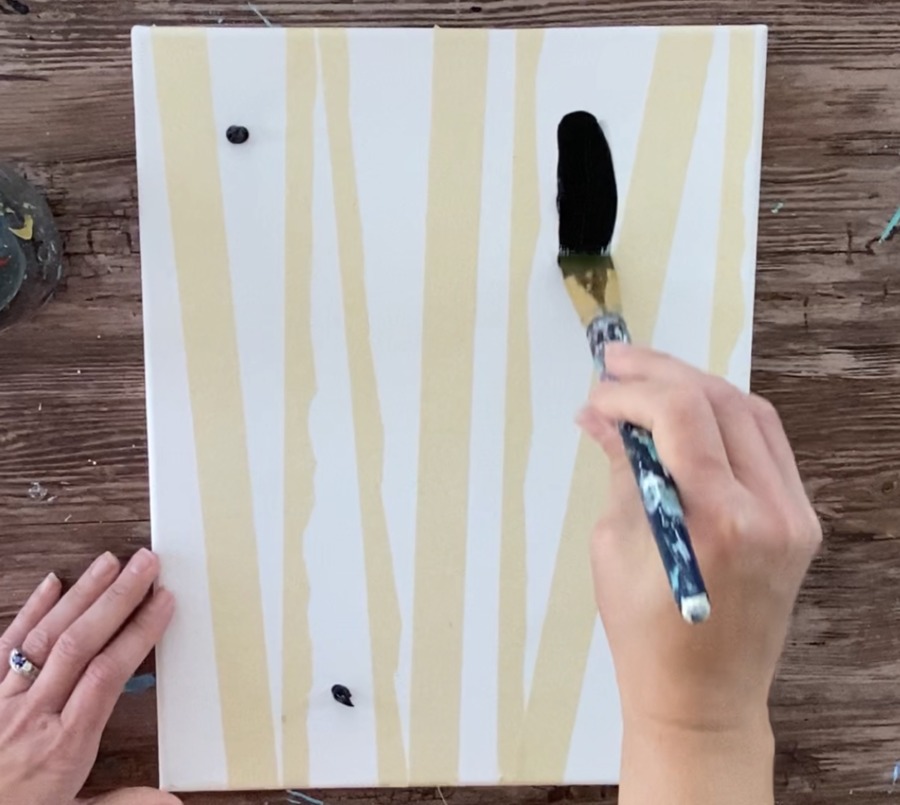
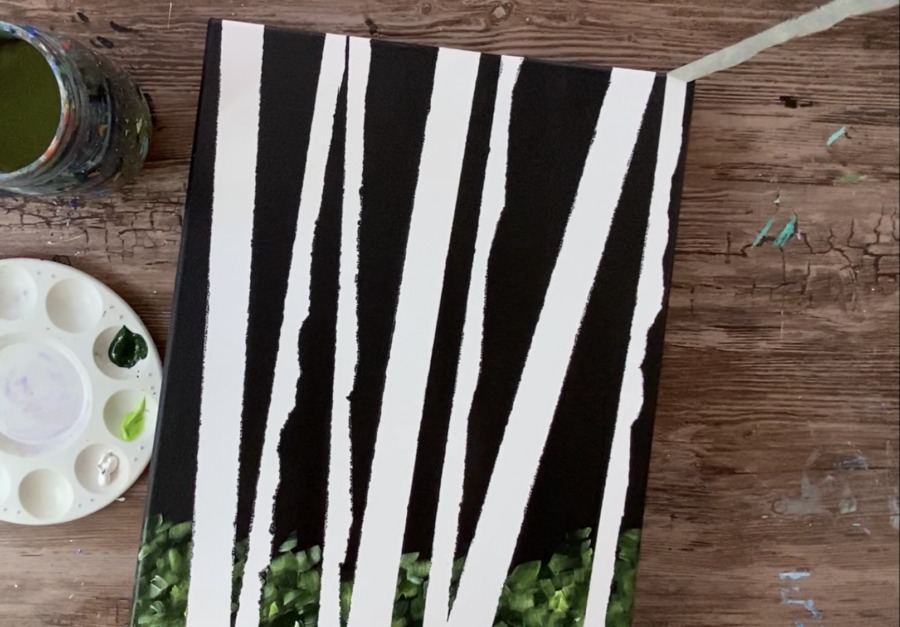
- Apply masking tape vertically across the canvas. Make multiple tape lines that go slightly diagonal. To get the tape thinner, rip or cut the tape lengthwise.
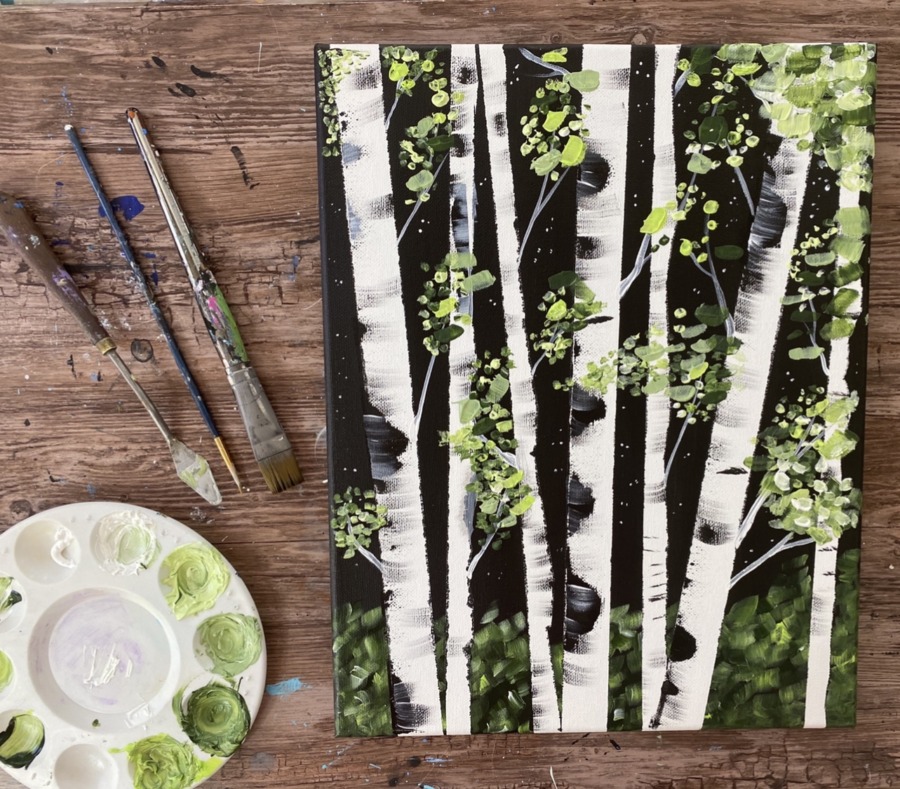
- Paint the entire canvas a solid color. You can do black for a night scene or cerulean blue mixed with titanium white for a day scene.
- Let the painting dry.
- Use a 12 bright brush to make small strokes of hookers green hue permanent, brilliant yellow green and titanium white all in the bottom area of the painting.
- Let the painting dry.
- Carefully pull the masking tape off.
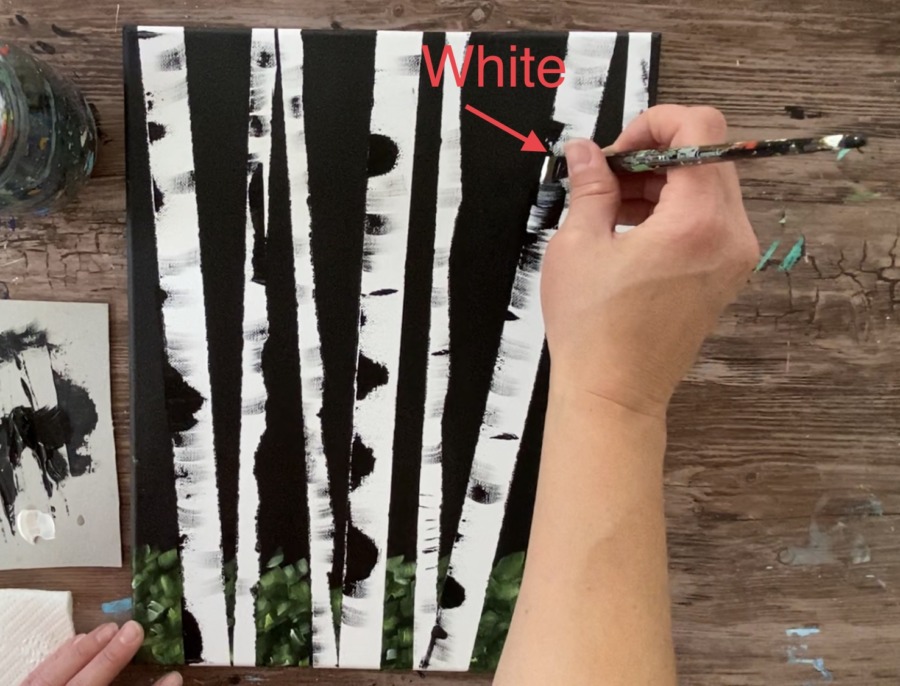
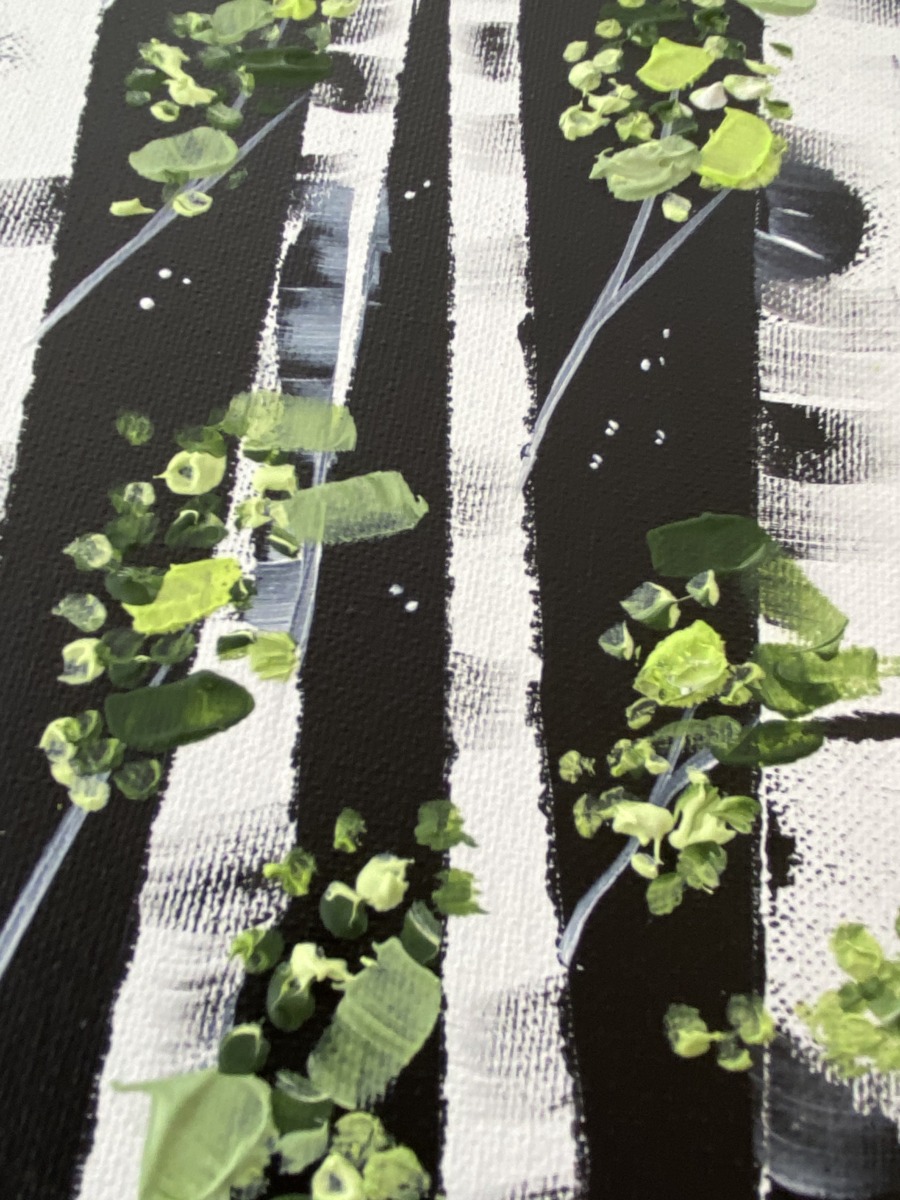
- Use an old gift card and dip the side in black paint. Then drag it on the trees to make the marks.
- Use a 12 Bright and do some dry brush strokes on the trees as well.
- Use titanium white to paint branches on the birch trees. If you did the day version, you can make black branches as well.
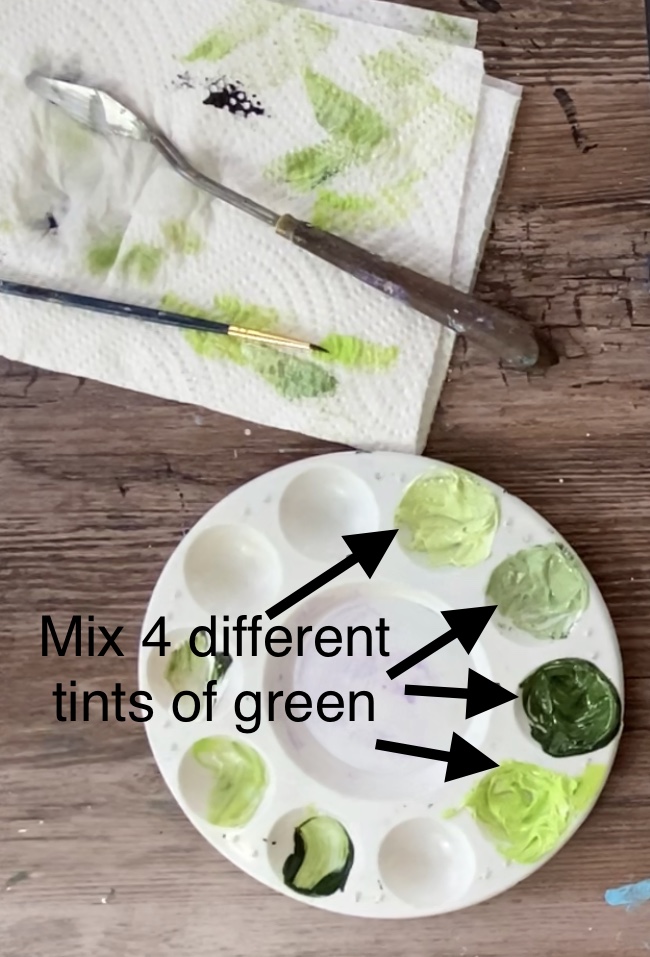
- Mix 3-4 different shades of green using the modeling paste and mixing it with hookers green, brilliant yellow green and titanium white. Mix about 2 parts modeling paste and 1 part paint.
- Use a 12 bright, 4 round and/or a palette knife to paint the leafs. They are simple small strokes of the thick paint in clusters around the branches. Make the leaves all different shades of greens.
- Paint little stars in the background using a tiny brush and titanium white (if you are doing the night version).
Color Palette
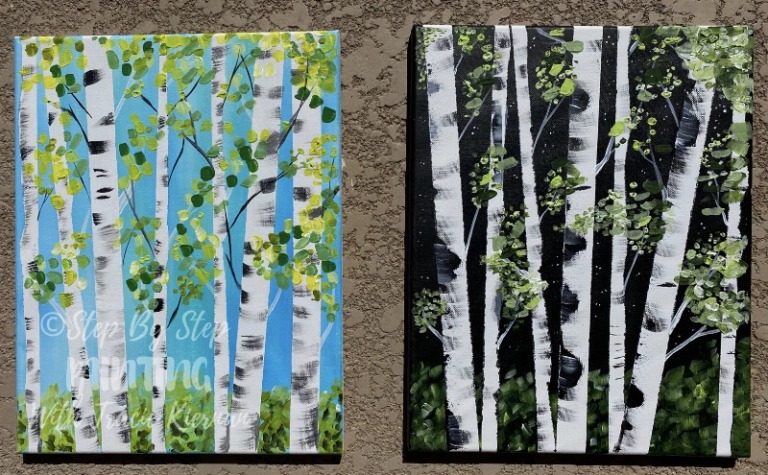
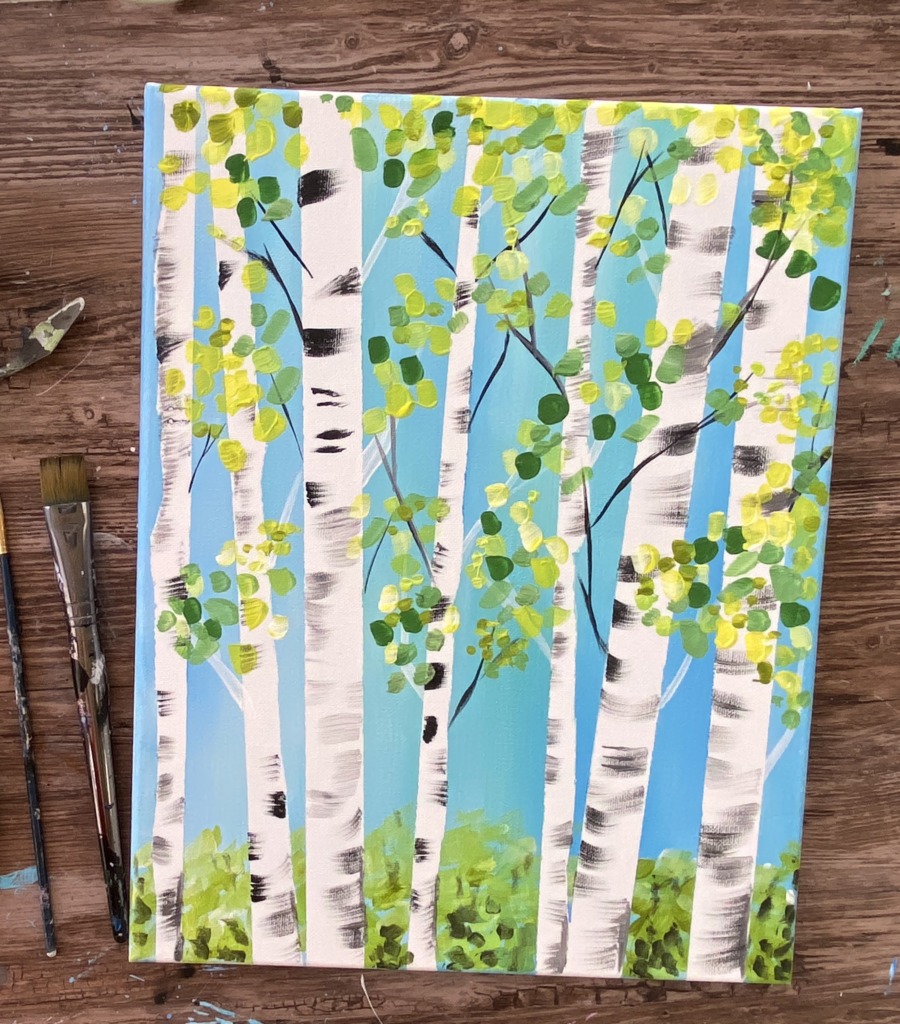
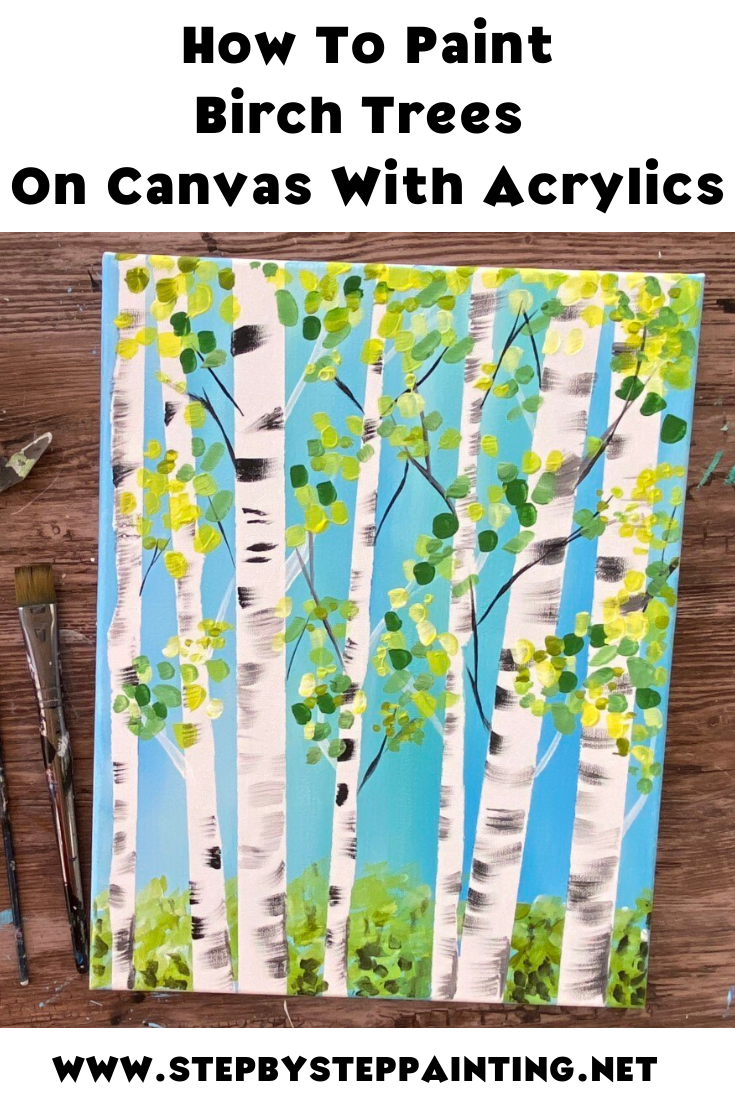
I did a night version and a day version! For the day version, do the background with a little cerulean blue mixed with a lot of white.
For the night version, the sky is all mars black.
You can pretty much do any color for this, even a sunset!
Night Version Colors:
Day Version Colors:
Directions At A Glance
Video
Step By Step Instructions
1. Apply Your Masking Tape
Lay your canvas vertically. Apply 2-3 full strips of masking take that go up the canvas but slightly diagonal in the fashion of a birch tree.
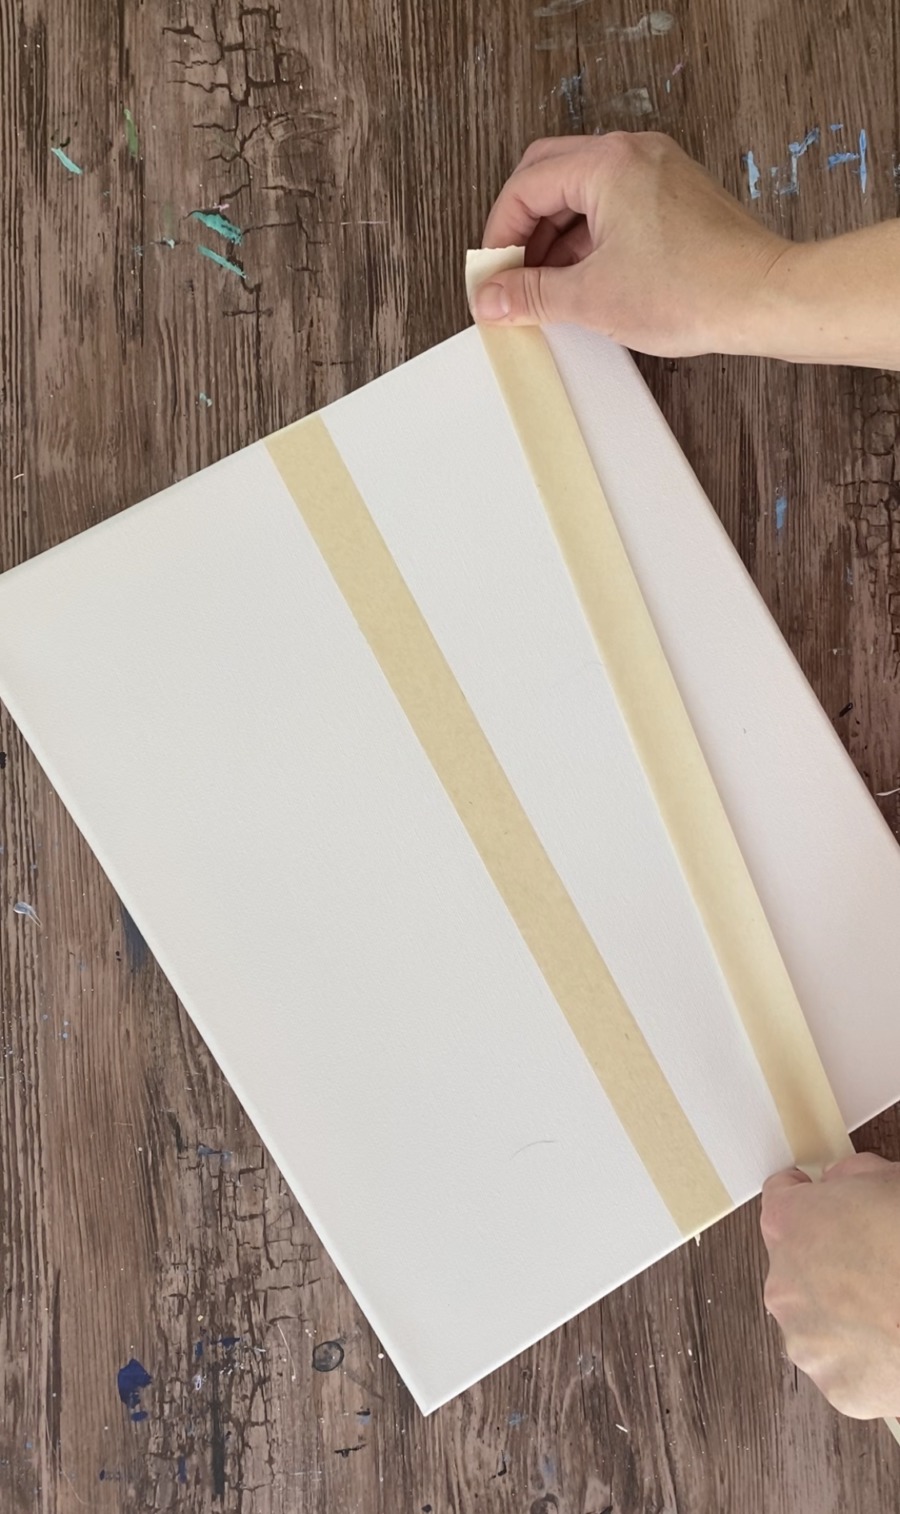
Then use scissors to cut 2-3 strips in half lengthwise.

Don’t worry about cutting the tape evenly, the uneven edges make for some great tree texture!
You can also tear the tape.
I did 3 full width tape lines and 4 half width tape lines. Notice how they are staggered in different directions.
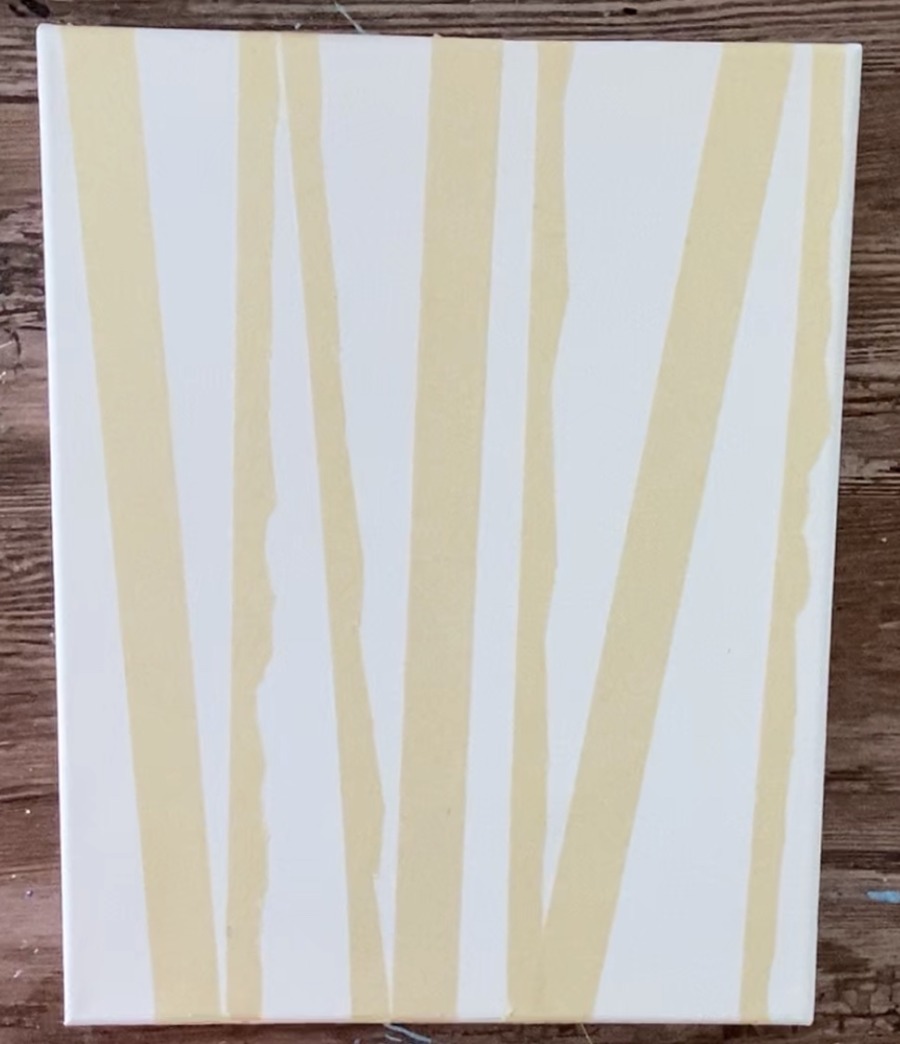
2. Paint The Entire Canvas
Next you will need to paint the entire canvas using a 3/4 wash brush and (in this example) mars black. I poured out 4 dollops of black paint on the canvas.
I am demonstrating the night version in these steps, however, If you are doing the day version, apply 3 dollops of white and one of cerulean blue.
Cover the entire canvas, over the tape! Use your 3/4 wash brush to paint up and down strokes. If you are doing the day version, let the blue and white blend together to look kind of “streaky” and unmixed.
Tip: try not to water your paint too much because watery paint will seep under the tape.
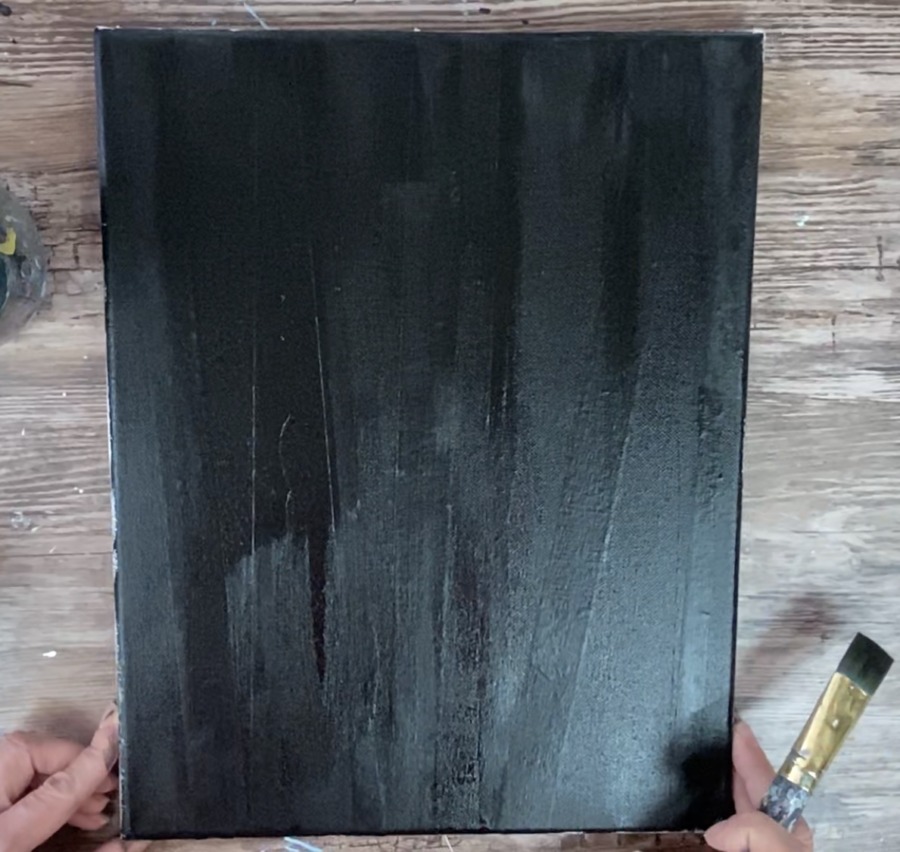
Now wait for this to dry.
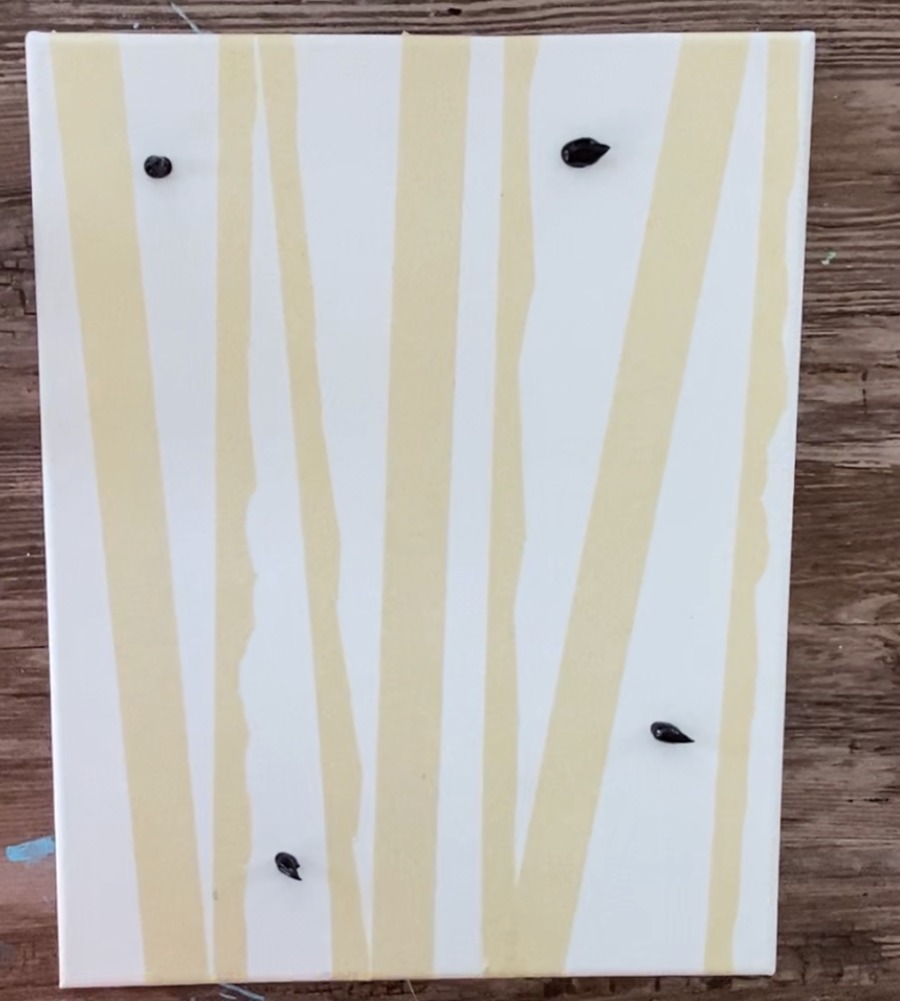
3. Paint some greenery on the bottom
We will do this before lifting the tape because this greenery is behind the trees!
Load your palette with hookers green, brilliant yellow green and titanium white.
Use your 12 bright brush to paint short strokes on the bottom.
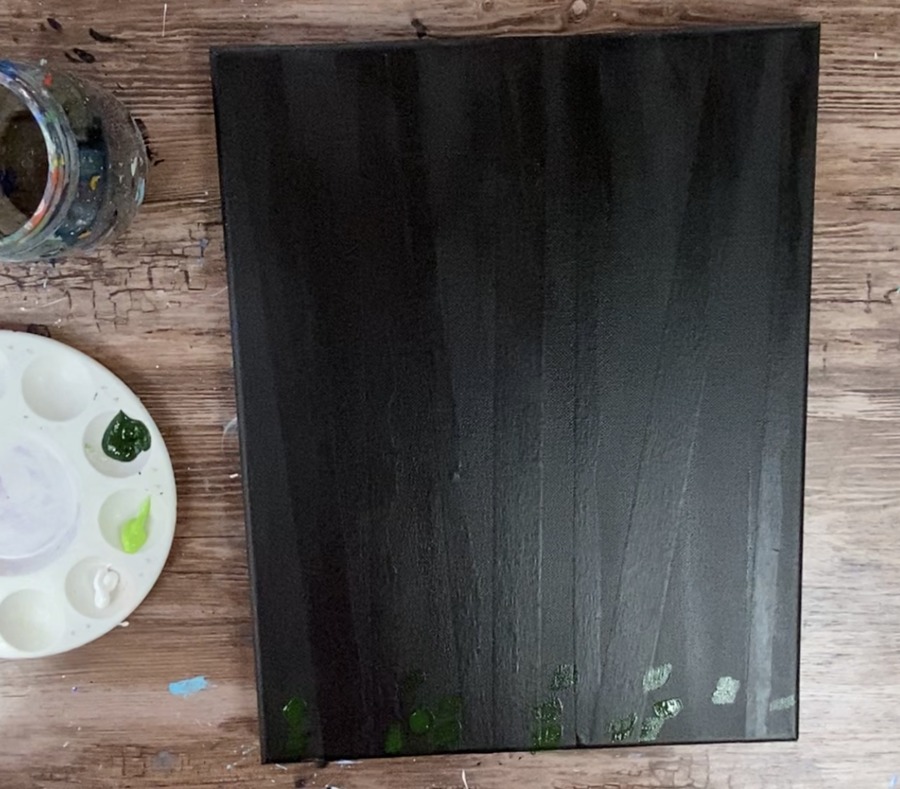
Start with one of the green colors and then move on to the other green. Add a tiny bit of titanium white in there and let it blend on the canvas to make some pretty light green strokes.
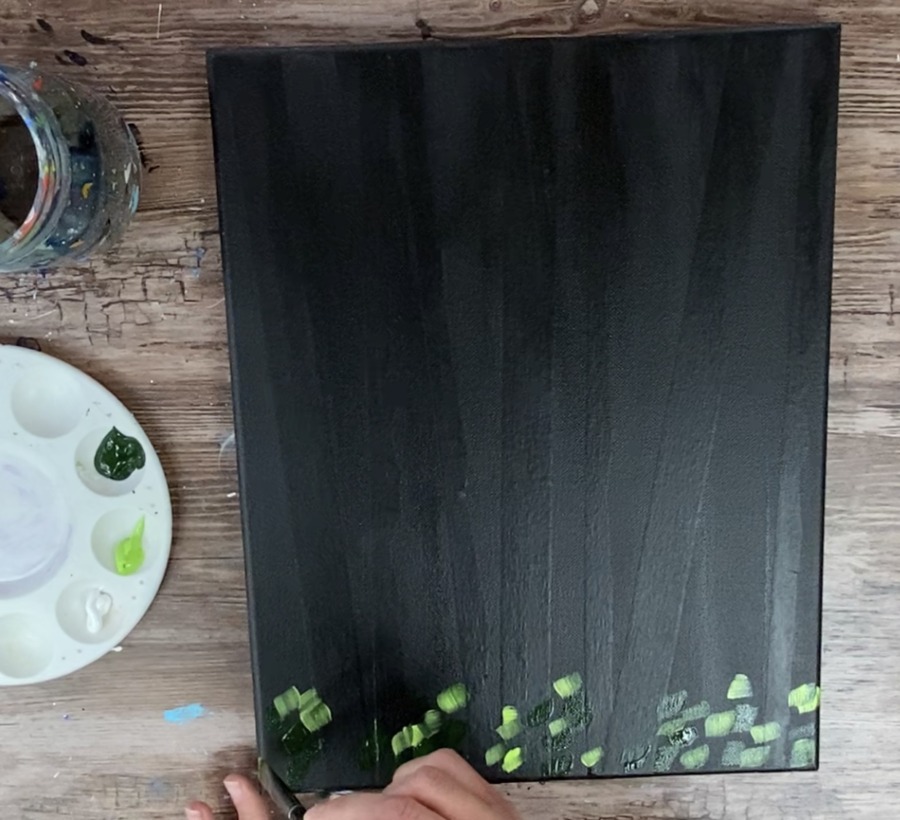
You don’t need to rinse your brush between strokes because the greens will blend together to create nice color variation.

It should show up nice against that black!
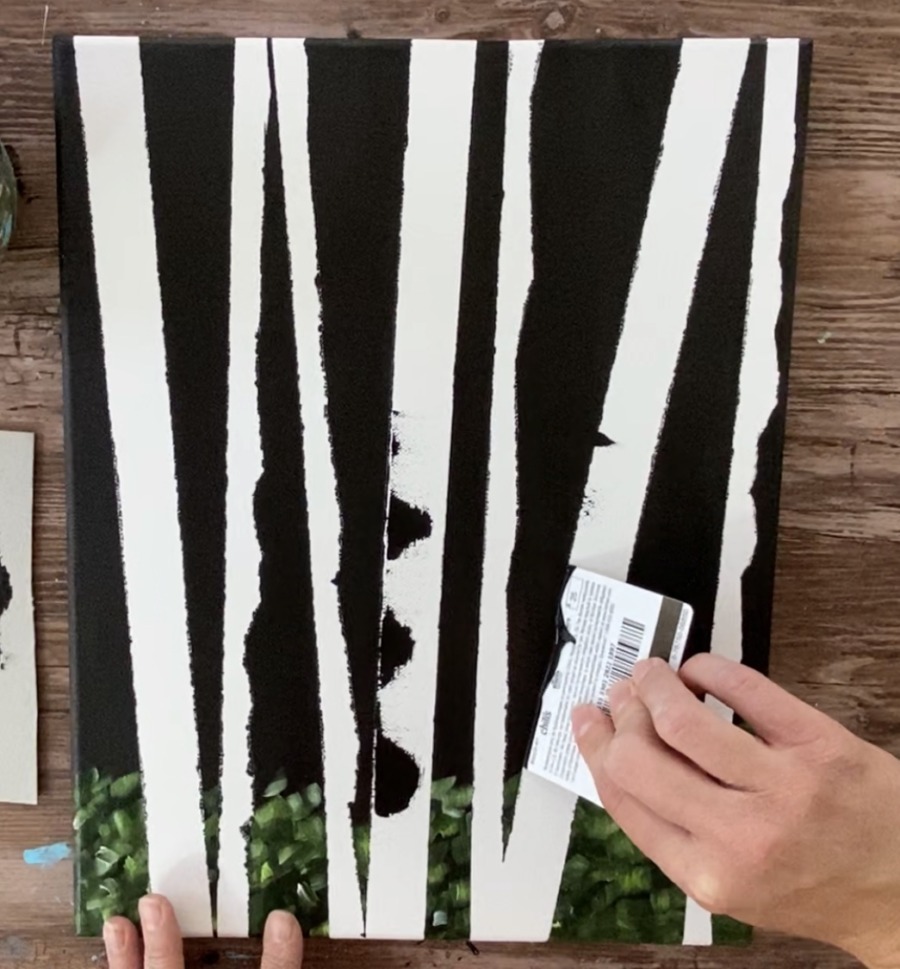
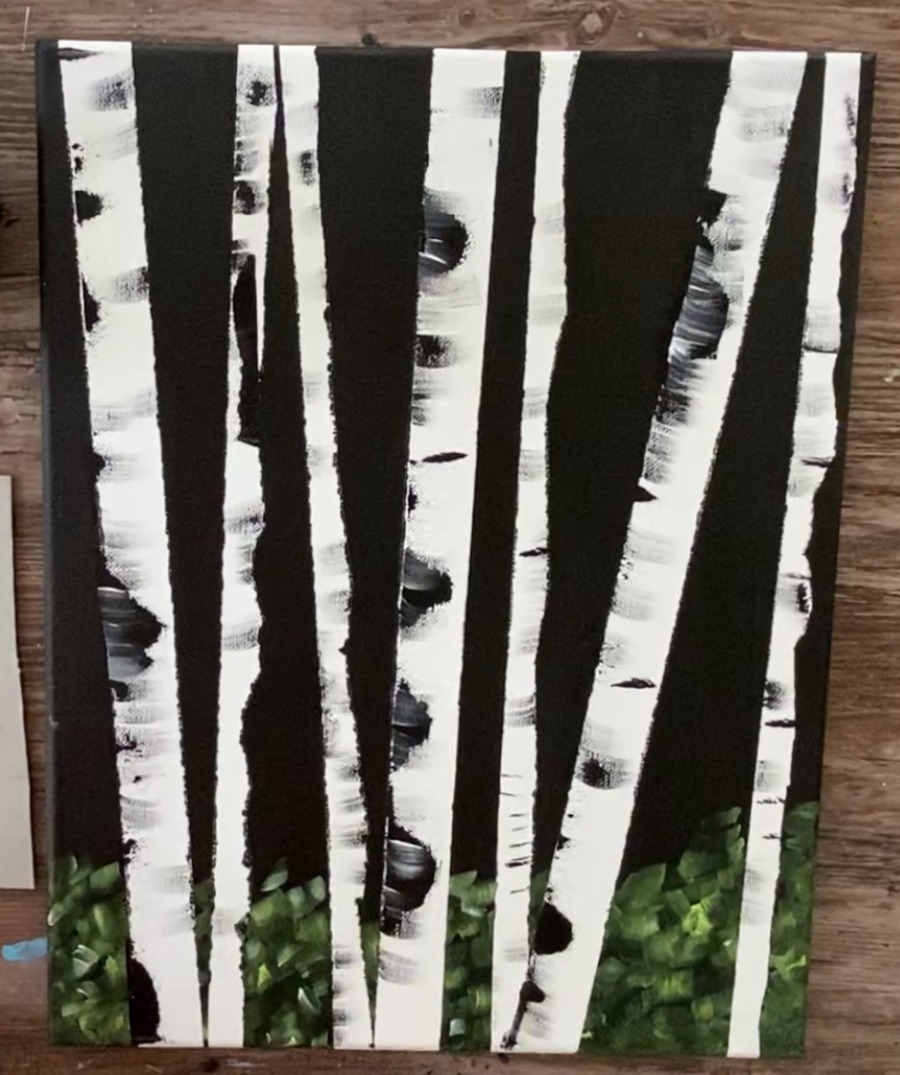
4. Pull Off The Masking Tape
Gently pull all the masking tape off to reveal the birch trees!
5. Paint the black marks
You can use an old gift card or credit card but it is not required! You can also do these marks with a dry brush technique. I did both.
To use the plastic card, first squeeze some paint on a flat surface. Then dip the side of the plastic card in the paint.
Drag the card on the birch to to create the black marks.
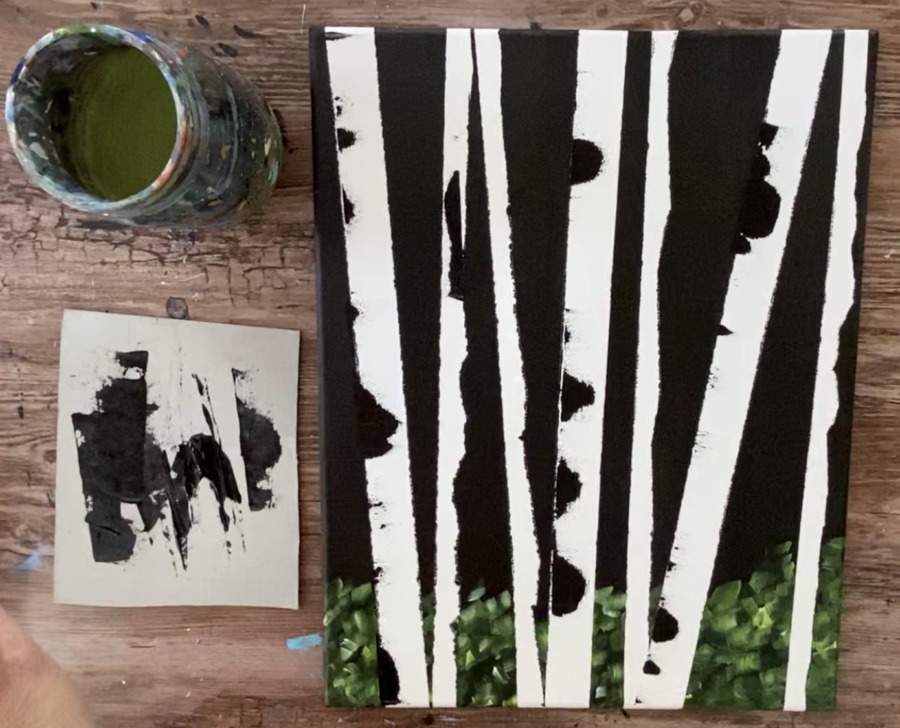
Then, you can do different kinds of marks with the dry brush technique. Use a 12 bright brush, dip it in mars black and wipe some paint off the brush with a paper towel.
Then use the tip of the brush to drag the paint. Your stroke should be very dry and feathery against that white!
Then, to add some more fun color variation in these marks, I went back over some of the bold black marks with some dry brush titanium white.
Tip: if your black is too thick and wet, you may want to let it dry a bit before adding some white over it.
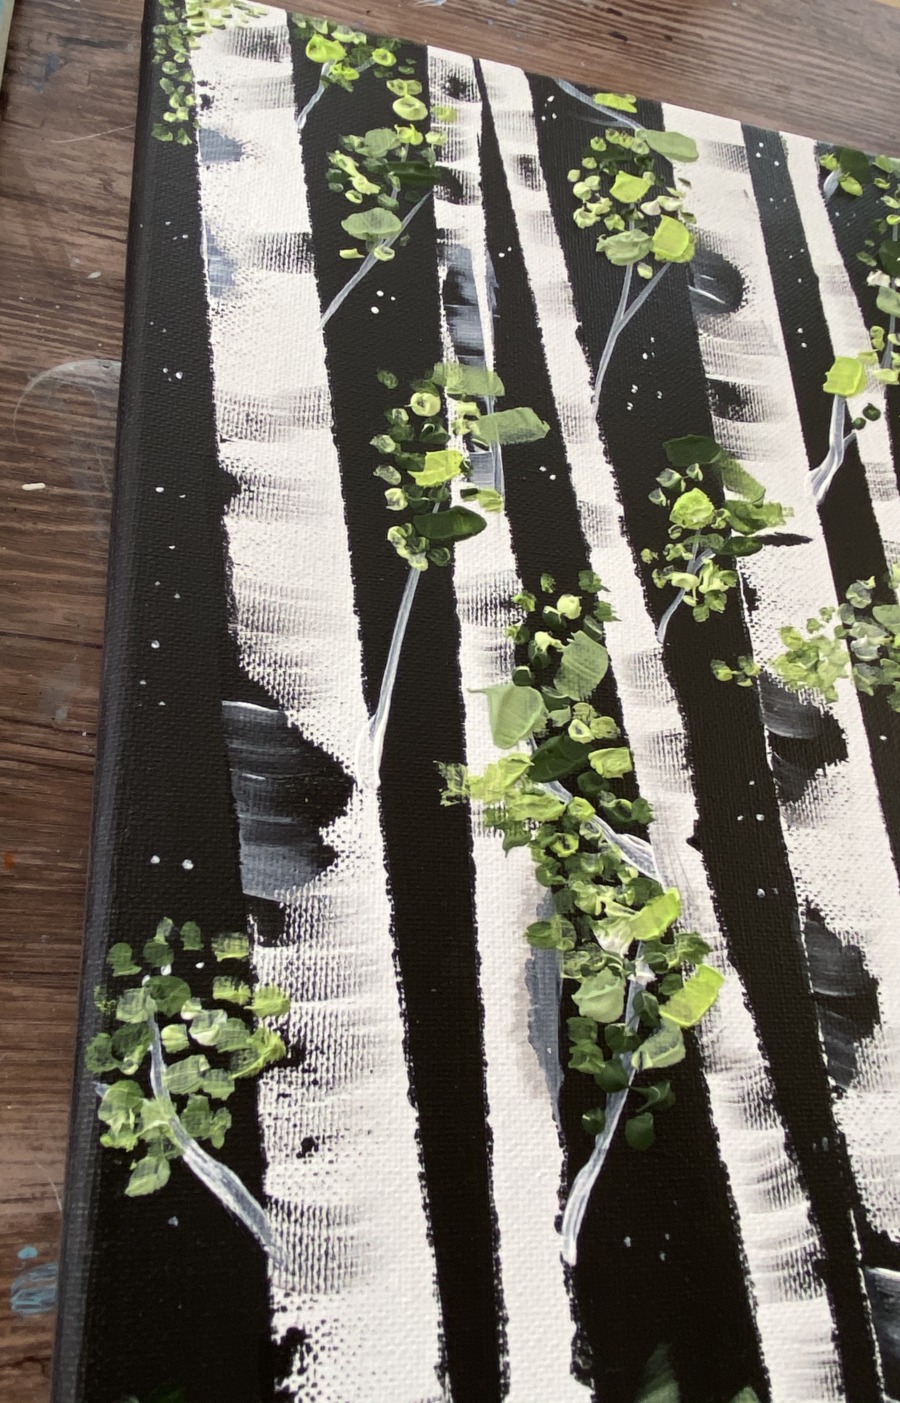
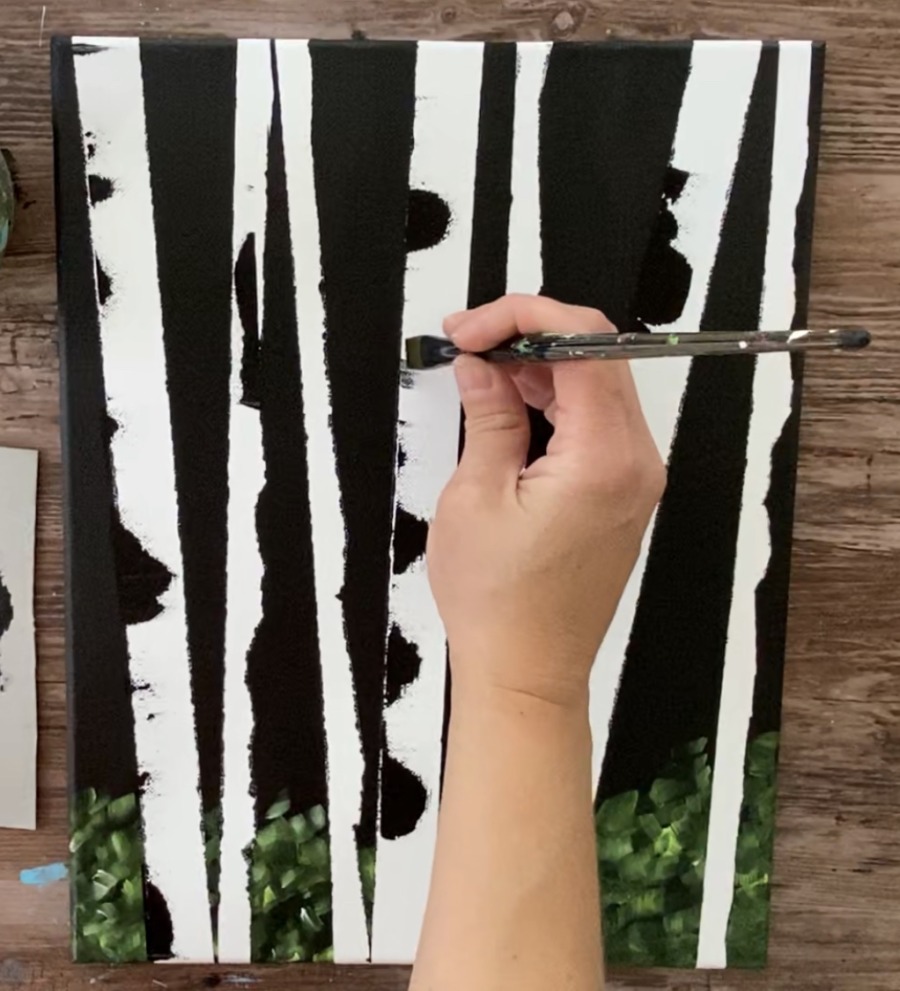
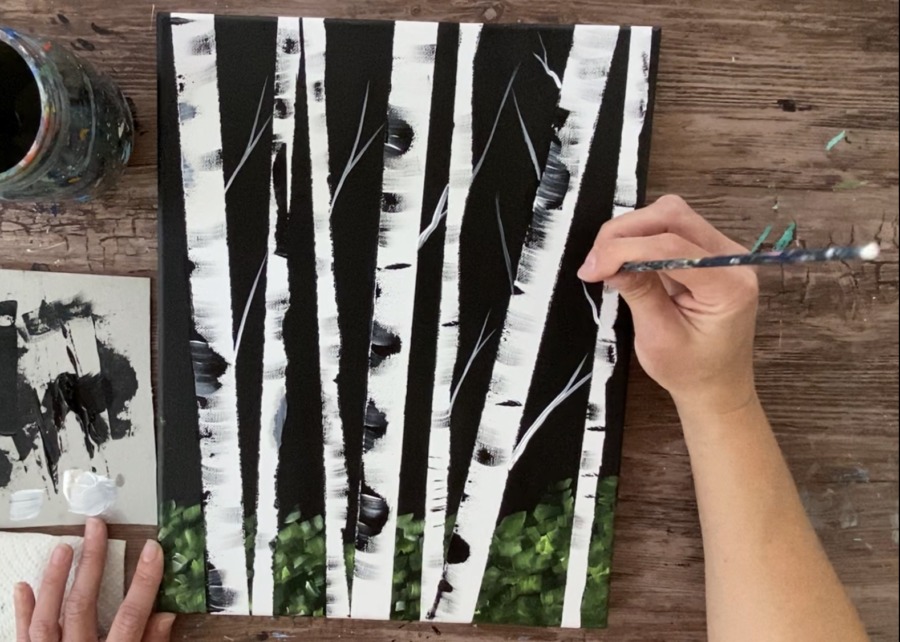
6. Paint Some Branches
Then paint some branches with titanium white. Use the tip of your bright brush or a round brush to do this.
Paint small branches that go diagonally.
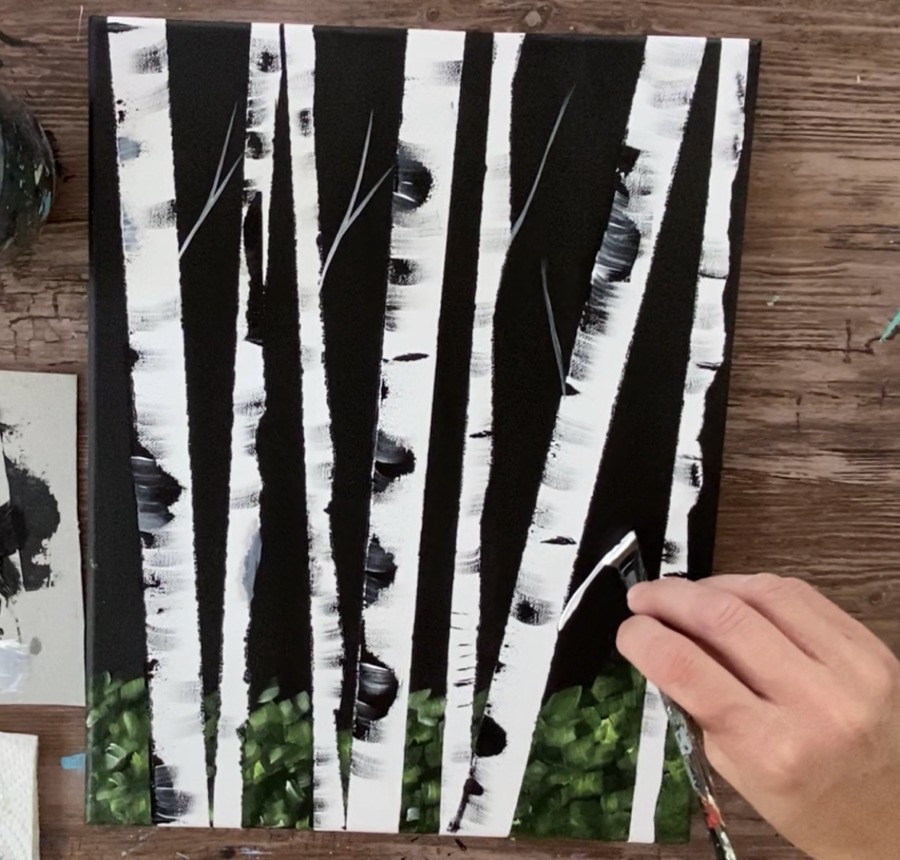
Tip: if you are doing the day version, paint some black branches in there as well!
7. Paint The Impasto Leaves
Tip: If you are NOT doing this with the medium, still follow the directions but don’t add the medium to the paint.
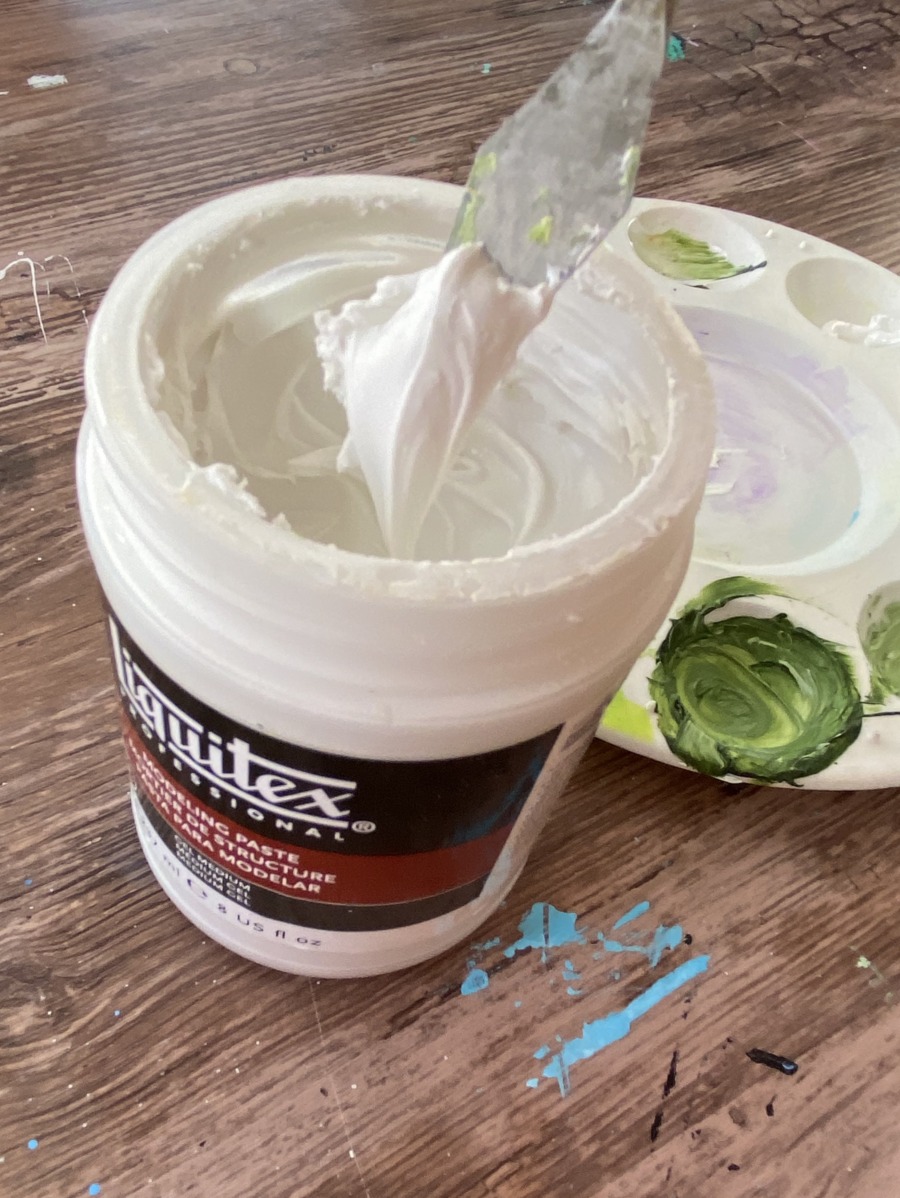
I used a palette to hold 4 scoops of model paste medium. Use a palette knife (or a popsicle stick) to scoop it out!
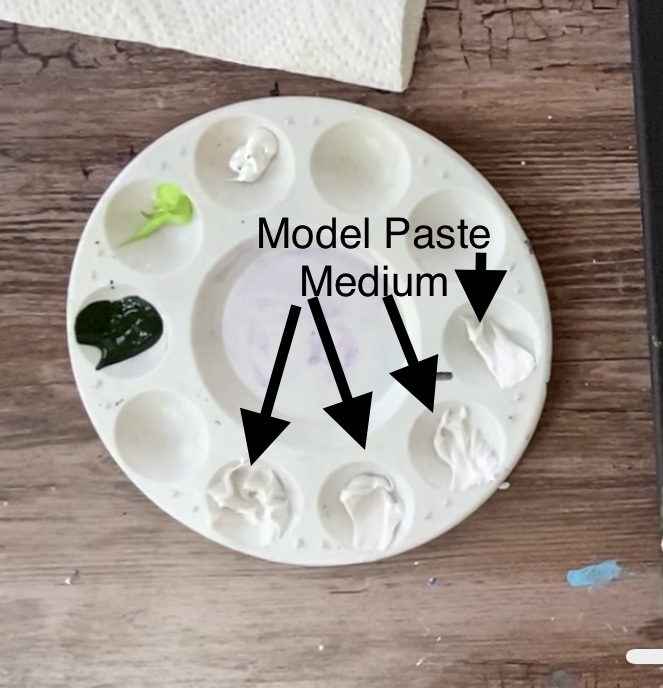
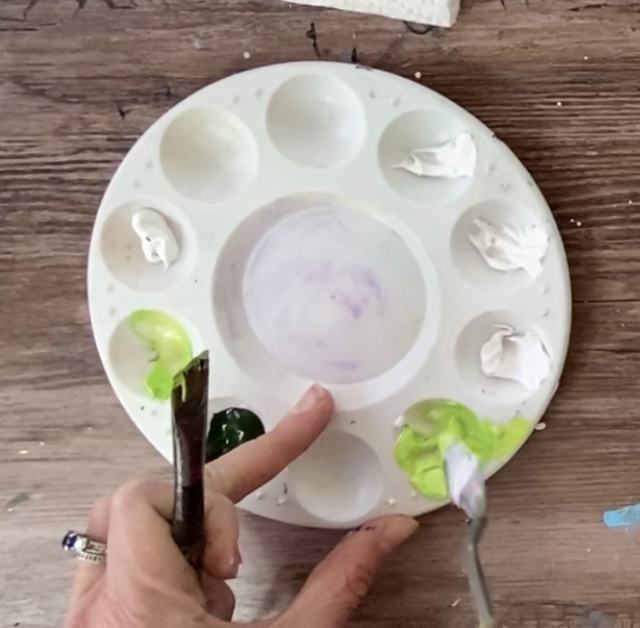
Then mix the paint in with the medium. I want to say I used 3 parts medium and 1 part paint but this does not have to be exact.
The paint mixes VERY WELL with the medium. And the more modeling paste you use, the thicker it will be.
The paint should be thick like frosting for a cake!
To paint the leaves, I used a combo of my 12 bright, 4 round and palette knife. You can use one or all of those tools depending on the look you are going for.
I was more curious with experimenting with all three!
First I took my bright brush and scooped up one of the greens. I painted the same kind of strokes that I painted for the greenery that’s in the background.
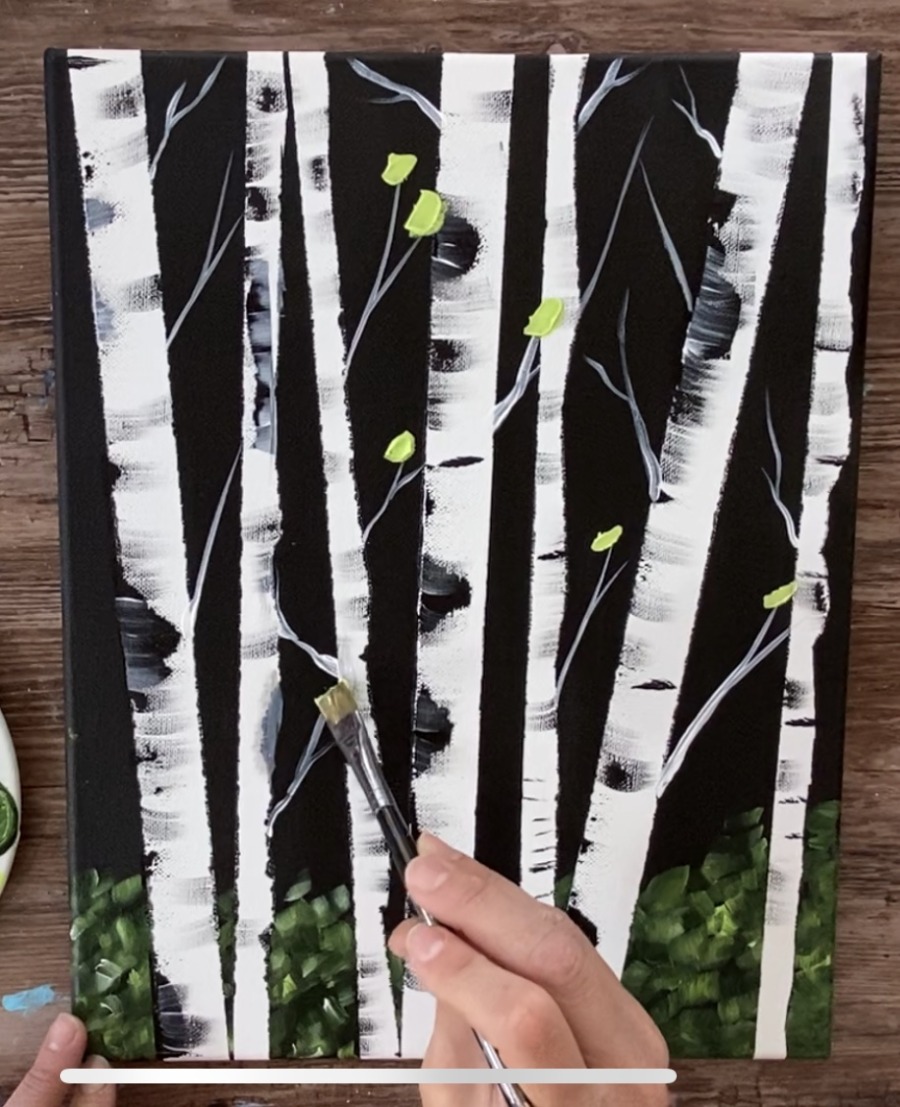
If you like this look, you can do all the leaves with the bright brush!
I decided to try some more with the palette knife.
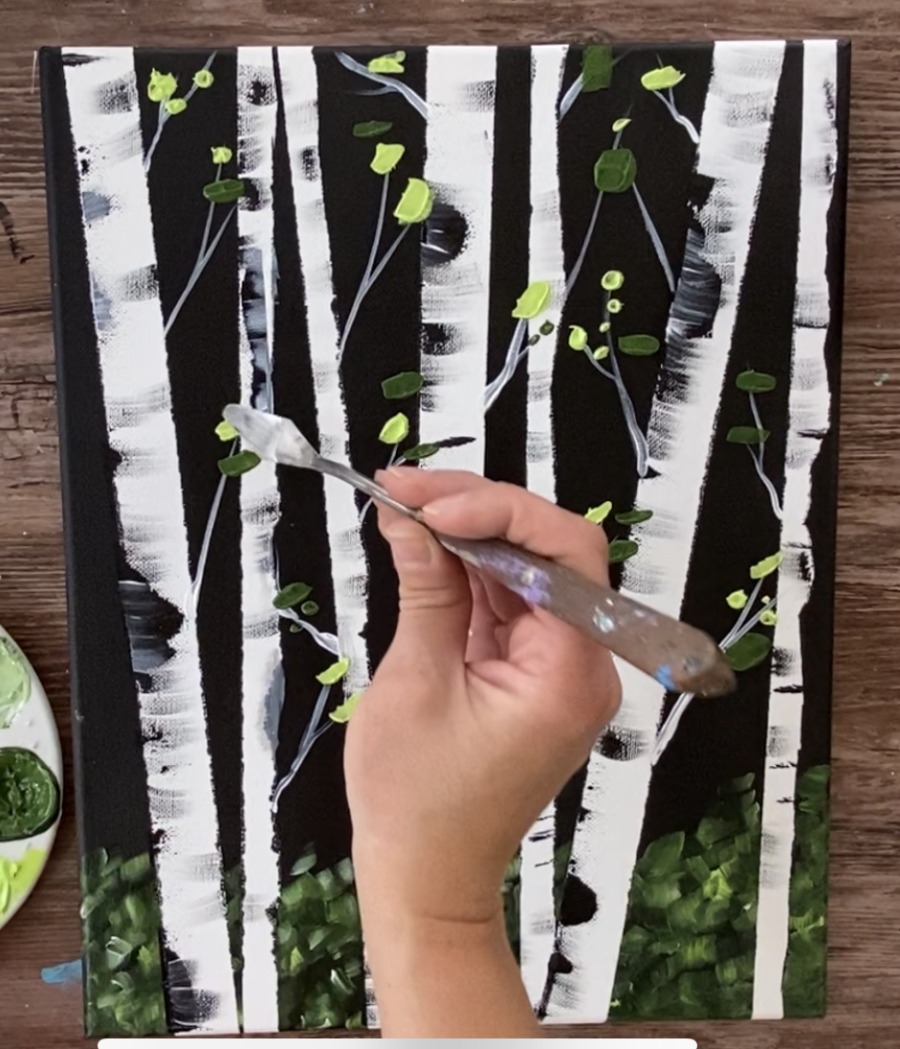
Try applying paint to just the tip of the palette knife and applying it on the canvas.
You can also make smaller, tiny leaves with a round brush.
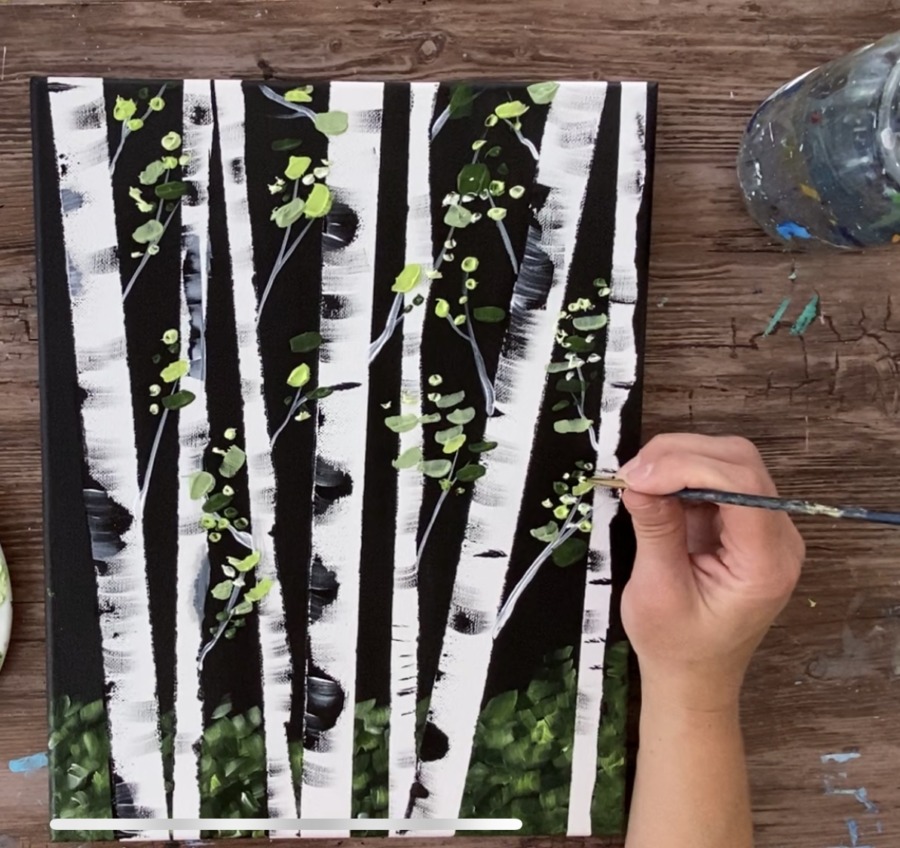
Then you pretty much keep going! Keep applying multiple colors of leaves. You can even add some titanium white in there for some brighter tints!

8. Some final touch ups
I decided to add tiny dots of white for stars since it is a night background!
Now…this would have been a lot easier way back in step 3! You could even do some splatter in there before pulling the tape off.
Use a tiny round brush and a steady hand to paint clusters of tiny dots for stars.
Finished!
Share Your Art Here


Share This Post!

I tried the happy path one. Hoe do I send you copy?
Maria you can email me: Tracieannekiernan@gmail.com
I love this website!! I’m learning so many new skills and never thought I’d actually be able to paint like this. This birch tree one is my fav I’ve done by far!! Thank you so much!
Thanks!! The birch trees are one of my favorites too! ?
OMW!!! I am so happy to have found this site! I also watch your youtube channel! I am having so much fun, and learning too!
Hi Sarah! So glad you found me!!! Enjoy!! ?
HI there,
I am trying to find the video to paint the birch trees with the blue background. Is it here somewhere?
Thanks!!
Hi Paula! The birch tree video shows the black background but it’s the same technique, just paint the background light blue instead of black.
Thank you!! That makes sense. 🙂 Excited to give it a try!
Brilliant! Looking forward to trying my hand at birch trees! Thank you! You inspire me!