

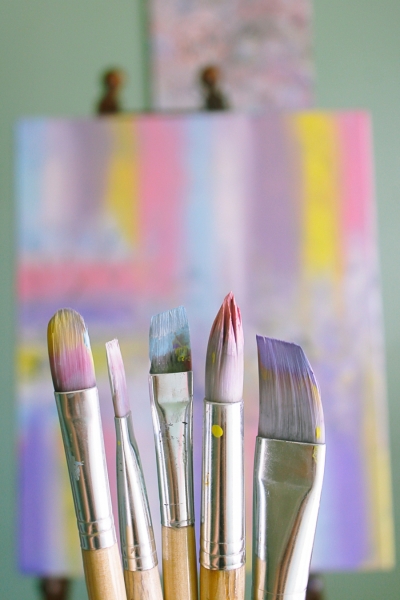
Acrylic Painting Techniques
Would you like to save this?
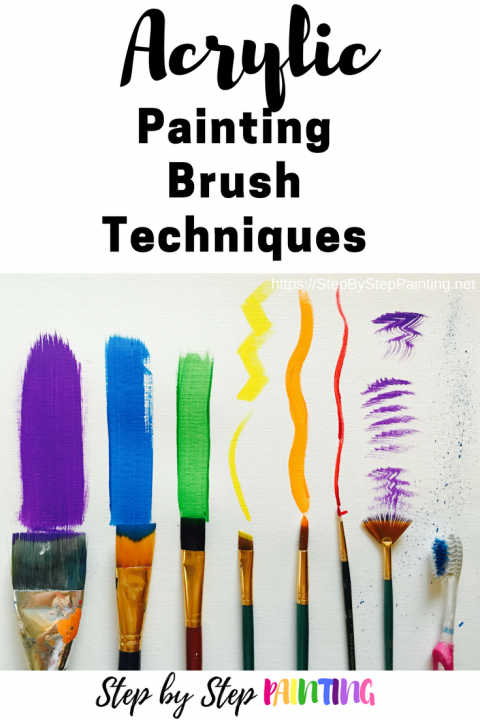
There are various types of acrylic painting techniques that artists use to create different effects. To create those different effects, we grab different sizes and shapes of brushes.
If you are the absolute beginner to acrylic painting, this post is meant to help you build some basic skills when it comes to selecting brush type and its purpose.
Brushes I Use:
There are so many brands of brushes on the market ranging from all sorts of price ranges. Just like most things that you invest in, the higher the brush price the most likely it will be of greater quality and the longer they’ll last.
I like to grab a mid range price of brushes and personally love the Royal And Langnickel ones. The line I use often for my tutorials is their Zen line. I also really like their Royal Majestic and Moderna line. Recently I started using mostly the Princeton Velvetouch Touch brushes! I love that this set includes the most common brushes so that you don’t have to purchase them separately.
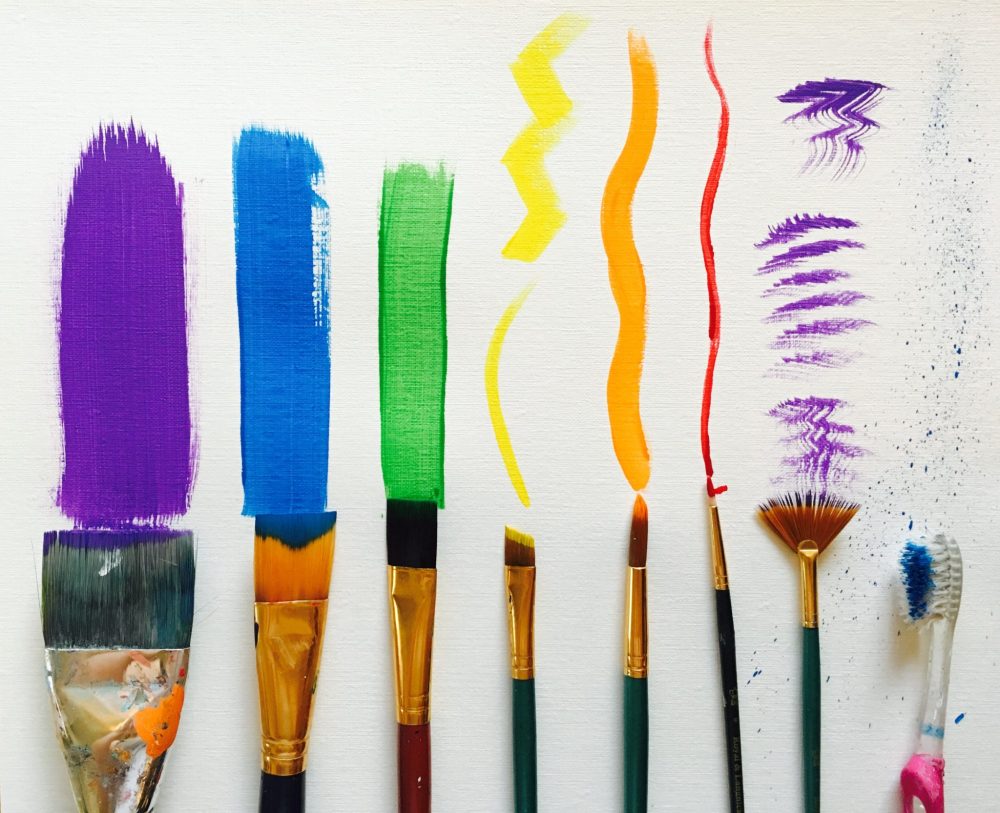
![]()
![]()

The above graphic is by no means a list of all the brushes that exist! I left out the filbert brush which is like a flat but has a rounded tip.
A palette knife can be used as a brush to apply thick “impasto” strokes. There’s even odd shaped brushes like zig-zag edged and v-shaped!

![]()
Different Brushes Create Different Effects
See My Post About Using A Round Brush and Using A Flat Brush
How are brushes labeled?
Sometimes it depends on the brand. Wouldn’t it be more interesting if brushes were called fun names like “Harry” and “Louie”? Or if they were just color coded. That way we’d all know exactly which one!
Brushes are typically labeled with names like “flat” or “round” or “bright” or “shader” or “fan” or “angle” (you get my gist) and a number.
Usually the smaller the number, the smaller the brush! The larger the number the larger the brush. Everyday objects like old toothbrushes & cotton swabs can be used too!
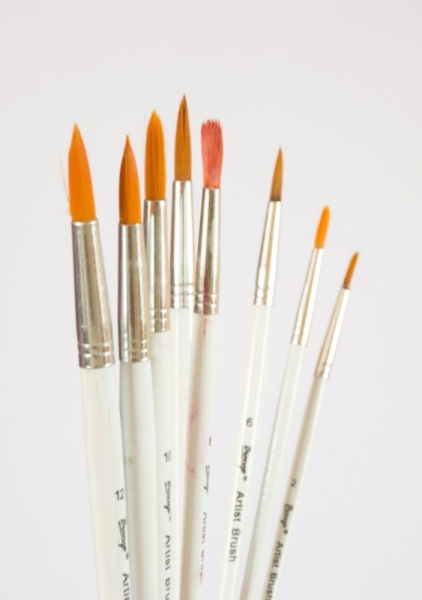
Common Brushes

![]()
- Basecoat/ Wash: Basecoat brushes can be used for painting an entire canvas with gesso or varnish. It can also be used to paint an extremely large area or if you want to paint the entire canvas one color like black! You may also see a “wash” which is a large flat used for covering large areas.
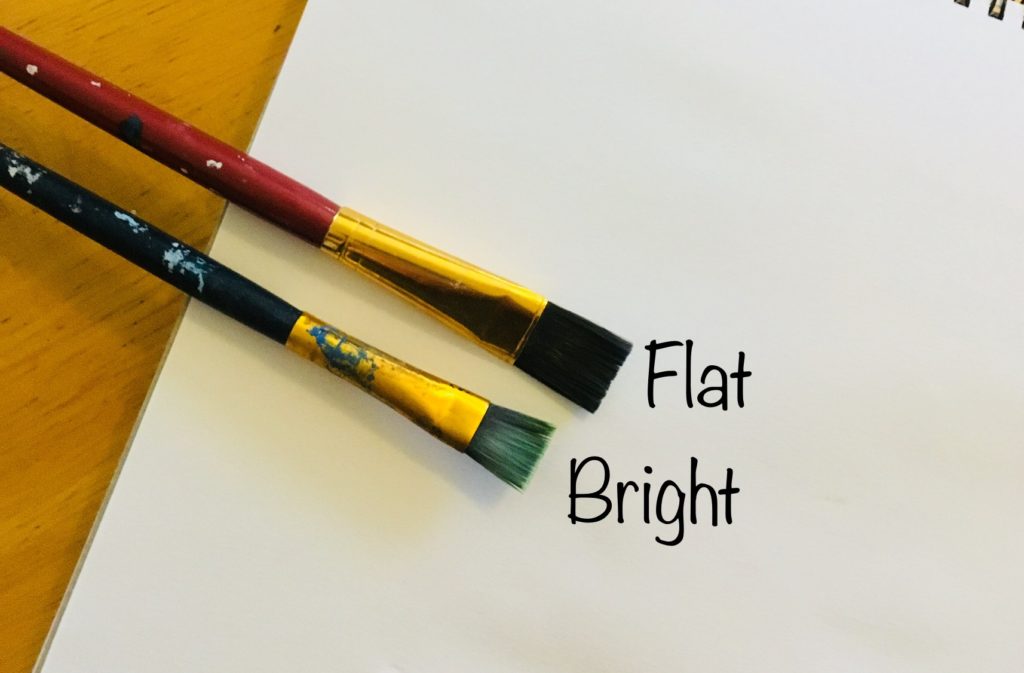
- Flat or Bright:Flat brushes are used to get a sharp edge or if you want to paint a large area. They vary in sizes and usually are labeled with a number or how many inches wide they are (1″, 3/4″, etc.). Often times we hear “bright” used. A bright is also a flat brush but the bristles are shorter. A bright tends to be easier to control because the bristles are shorter. You may also see “shader” and that is typically with longer bristles. There is also a “chisel” which is a flat that is very short!
- Angle: An angle brush has many uses! I like to use this when I want my paint strokes to come to a fine point (like tree branches or pine needles). It’s also perfect for “cutting in” sharp edges or creating zig-zag strokes and double loading for a blended look!
- Round/ Liner: Round brushes are typically labeled with a number. The smaller the number, the smaller the brush. Use round brushes for filling in small areas. Also use them for fine details and tiny stokes! The very tiny round brushes are often labeled as “liners”. You may see 10/0 or 20/0 for these very small brushes.
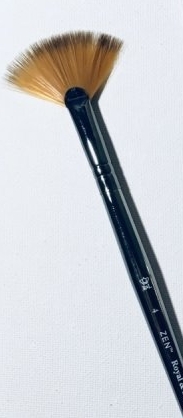
- Fan Brush: A fan brush is fun to experiment with! I don’t use it often but they are great for painting palm tree branches, pine trees, waterfalls, etc. I once used it to paint a “tutu” in one of my painting tutorials! They are also labeled with a number.
- Filbert: Similar to a flat but has a rounded top. Great for blending and creating smooth edged strokes.

![]()
- Everyday Objects: Use an old tooth brush for a splatter paint effect! This is great for painting stars in a night sky. A lot of everyday objects can also be used as a brush: Q-Tips, sticks, feathers, fingers… You can even do some wonderful techniques, such as a galaxy, using an artist sponge!
Brush Techniques
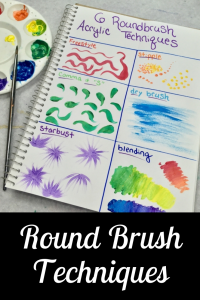
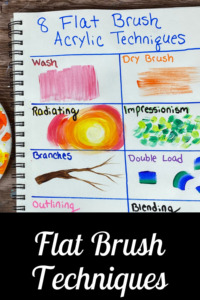
This is not an inclusive list at all as there are many! These are just some of the ones that I love using in my paintings! In fact, I created posts all about the different techniques you can create with just the round brush and a flat brush.
- Dry Brush
- Round Brush Techniques
- Angle Brush Techniques
- Flat Brush Techniques
- Cross-hatching
- Double And Triple Loading
- Blending
- Stippling
- Using A Fan Brush
- Splatter Painting
Dry Brush

Dry brushing is a technique used by artists to make the paint look “feathery” or “dry”. Any brush can be used for this technique.
When you do a dry brush stroke, use a clean brush with no water on it. Dry it with a paper towel.
Load just the tip with a little bit of paint. You only need to get paint on the tip! If you load too much paint, wipe some off with a paper towel.

Then lightly apply the paint on the canvas! The strokes always remind me of a crayola marker that is running out of ink. It looks translucent and you can see the texture of the canvas or the color underneath.
Some examples of instances when a dry brush technique would look great are: sunset clouds, grass, waterfall, wood texture and more!
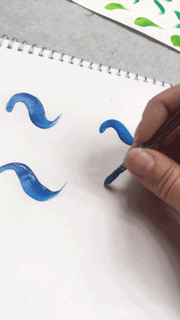
Round Brush
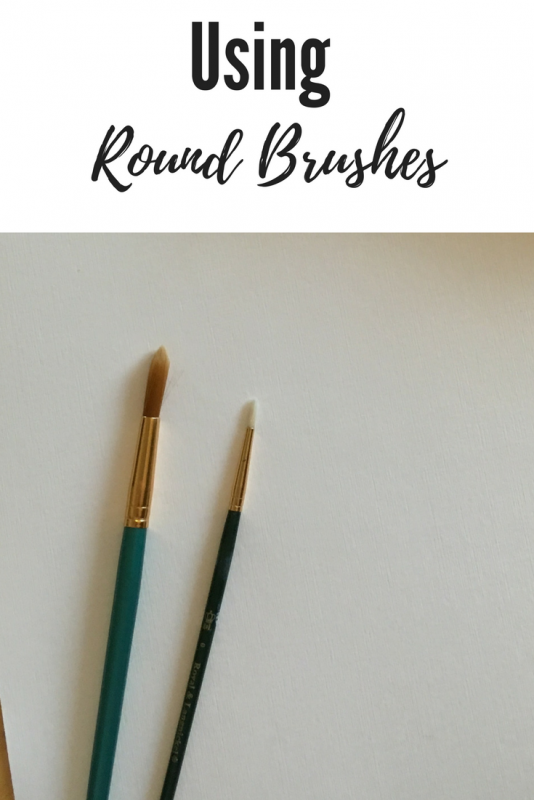
Typically, you use a round brush for small strokes and filling in smaller areas. Round brushes come in several different sizes and most brush brands label them with a number. The smaller the number, the smaller the brush.
Use a size 0 brush to paint tiny strokes. There are brushes that are smaller than size 0! You may see them labeled with a number like 5/0, 10/0, etc.
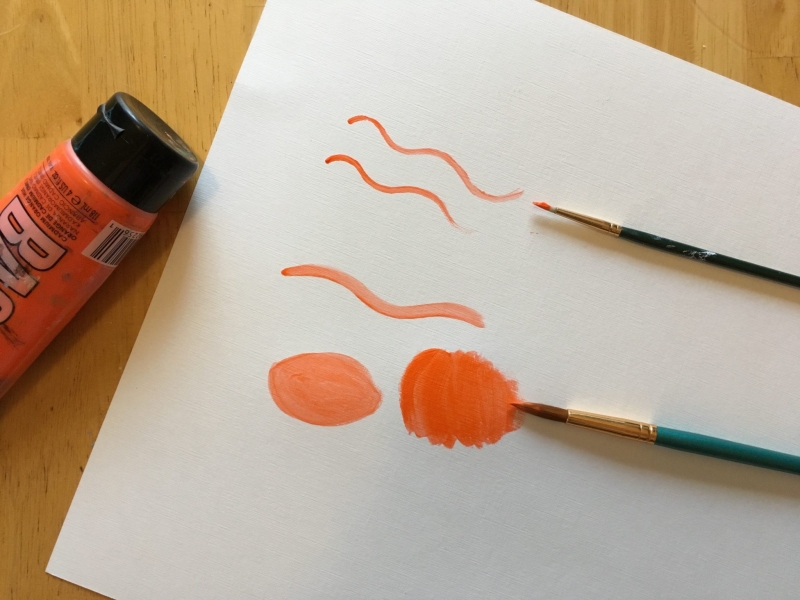
Use a larger number if you are filling in a medium to larger area (such as a silhouette). Or, use it to create medium rounded “free-style looking” strokes.
You can see more in depth strokes you can do with a round brush here.
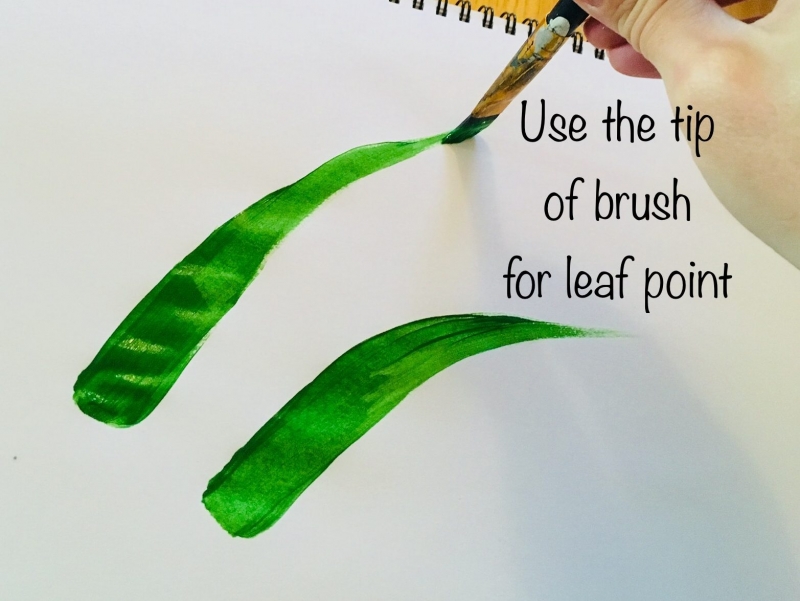
Angle Brush

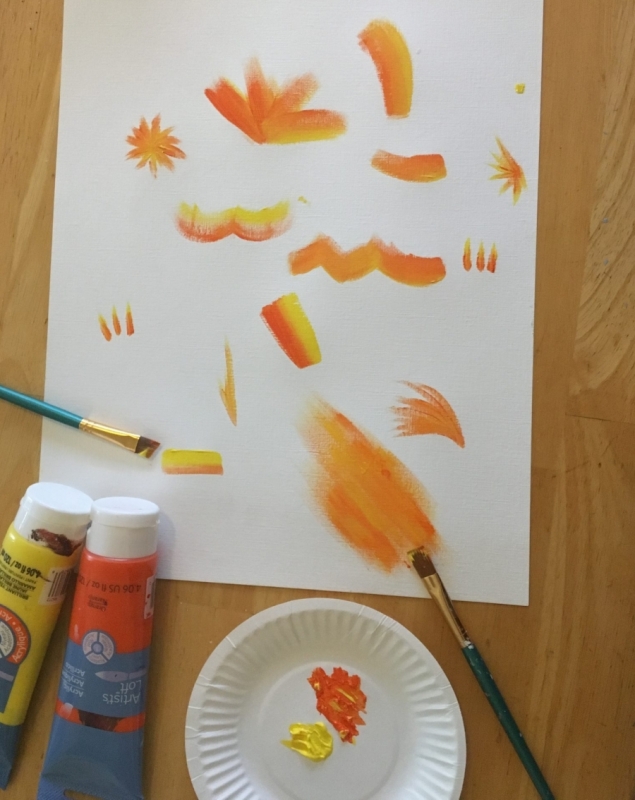
An angle brush is a handy brush to grab if you are painting trees or want to achieve a nice zig-zag stroke! I like to grab it when I want to “cut in” when painting a large object.
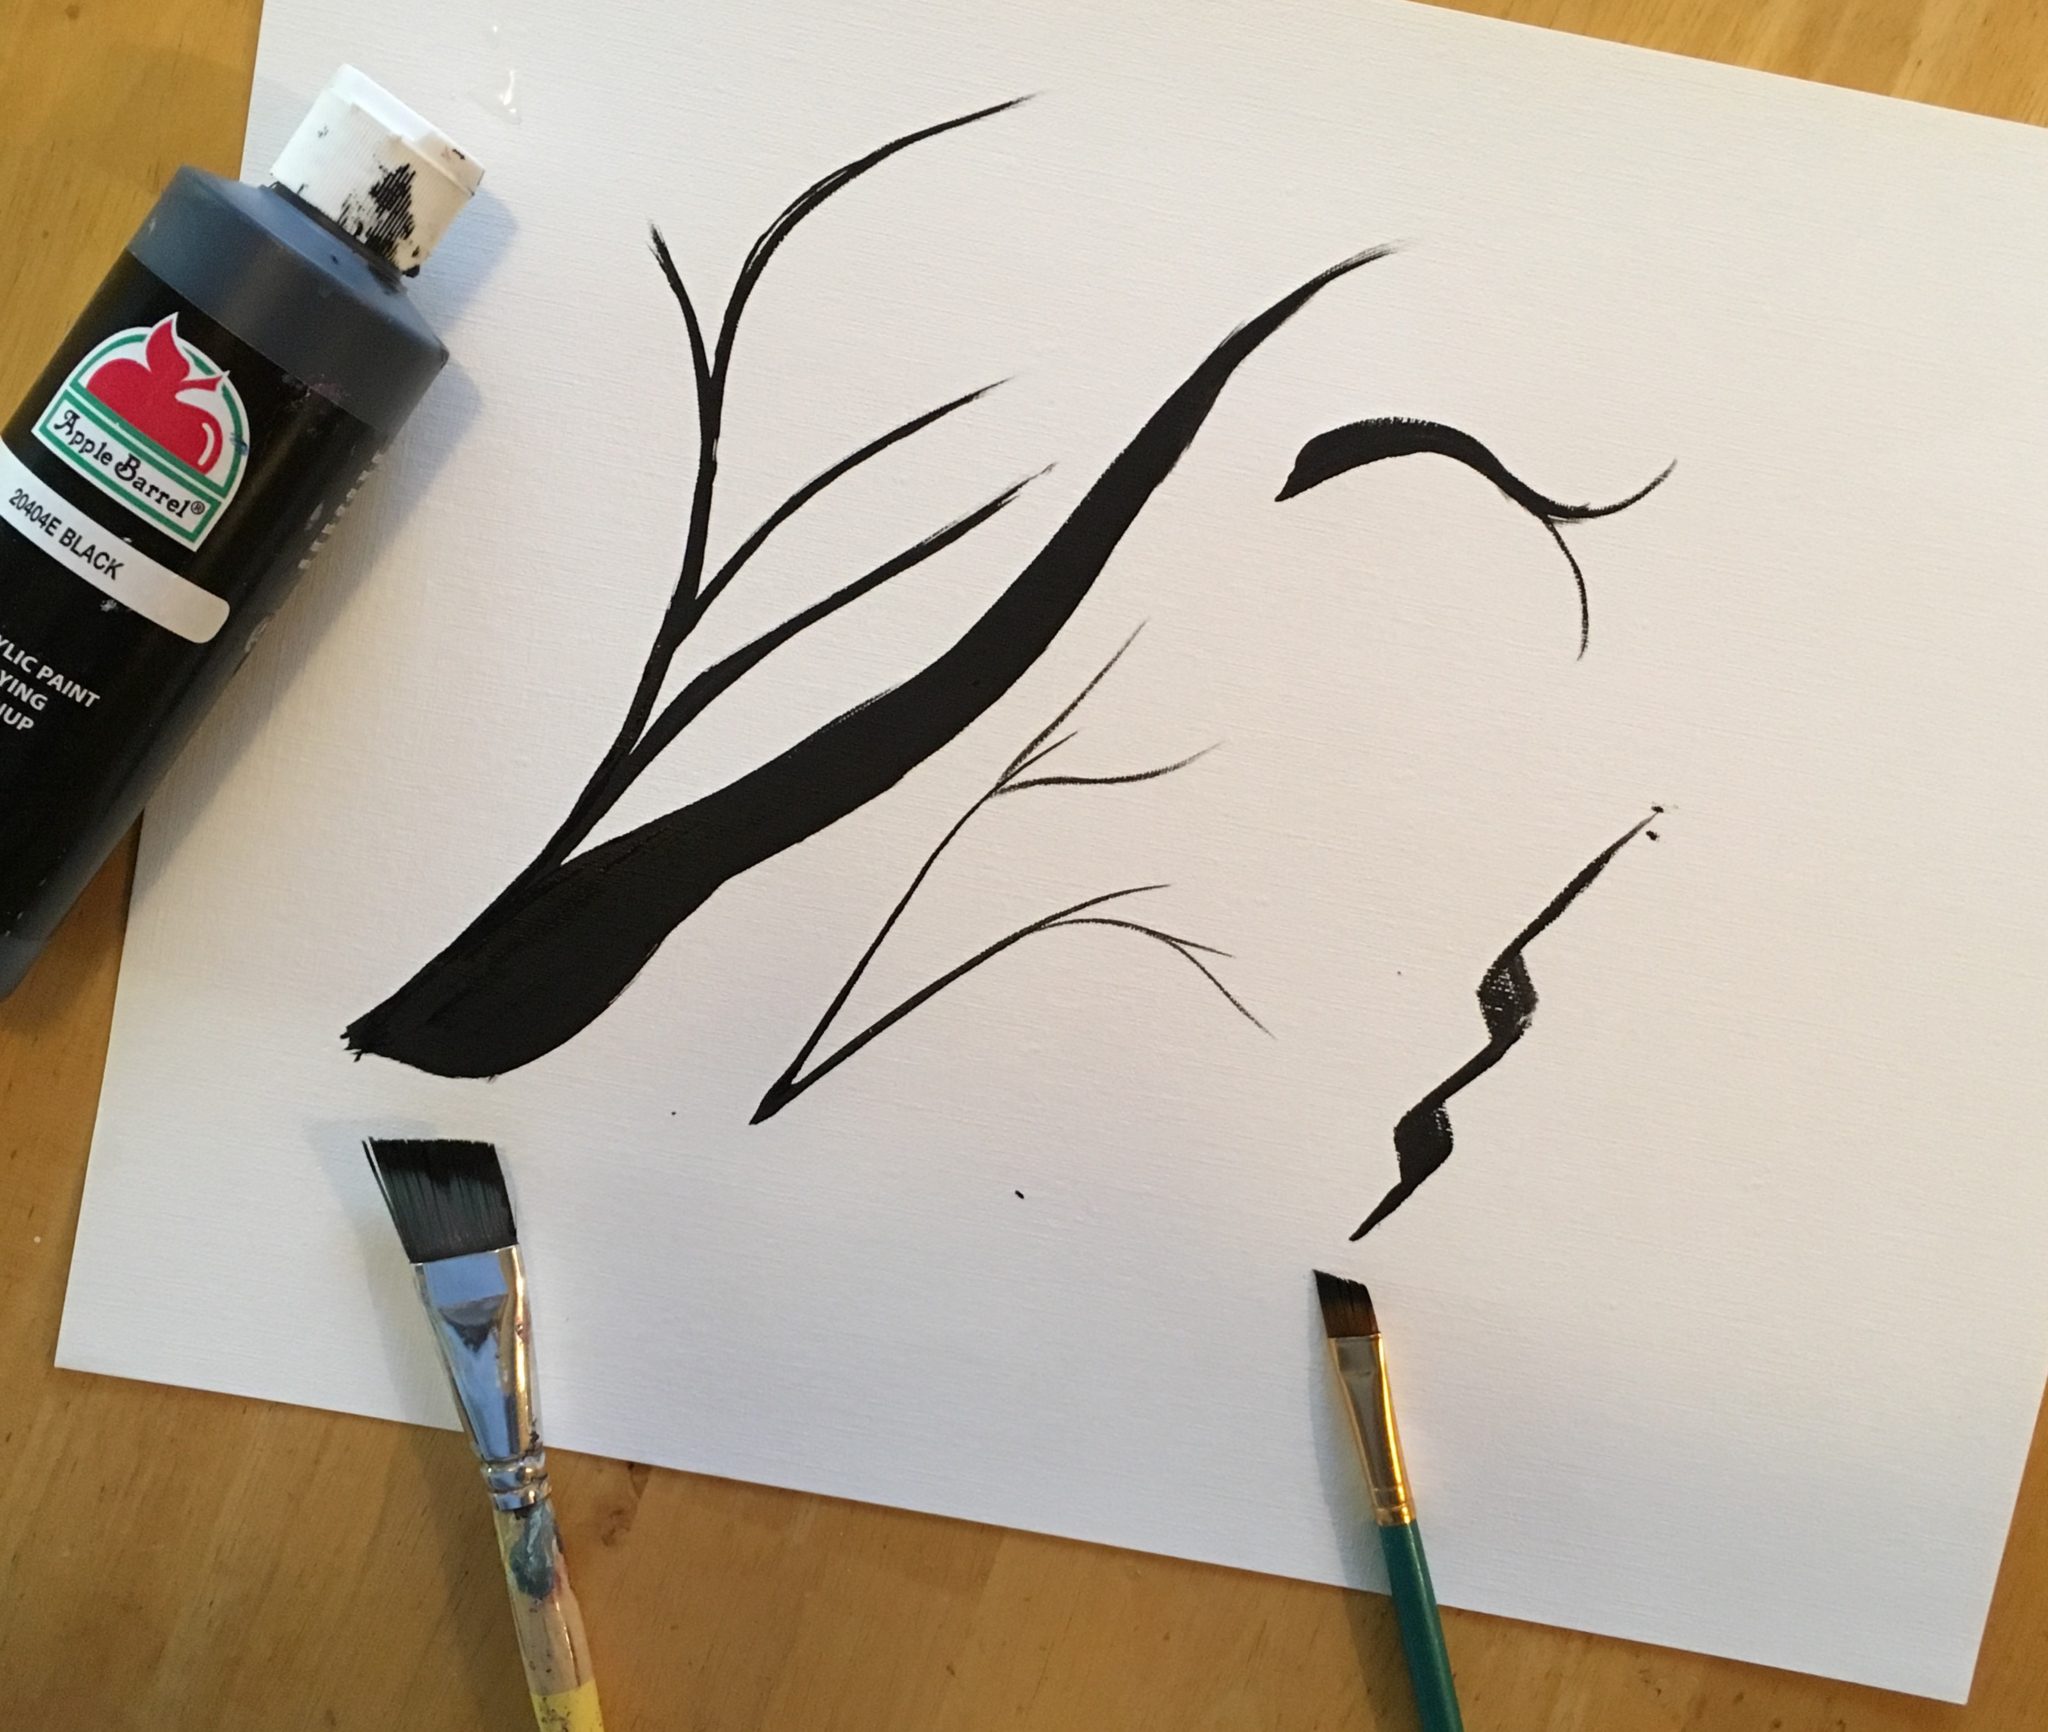
When you use an angle brush, try experimenting with the pressure of how you are holding it. See what happens when you press hard verses if you press light!
Experiment with turning your hand at different angles. The line will get thicker and then thinner when you turn your hand.
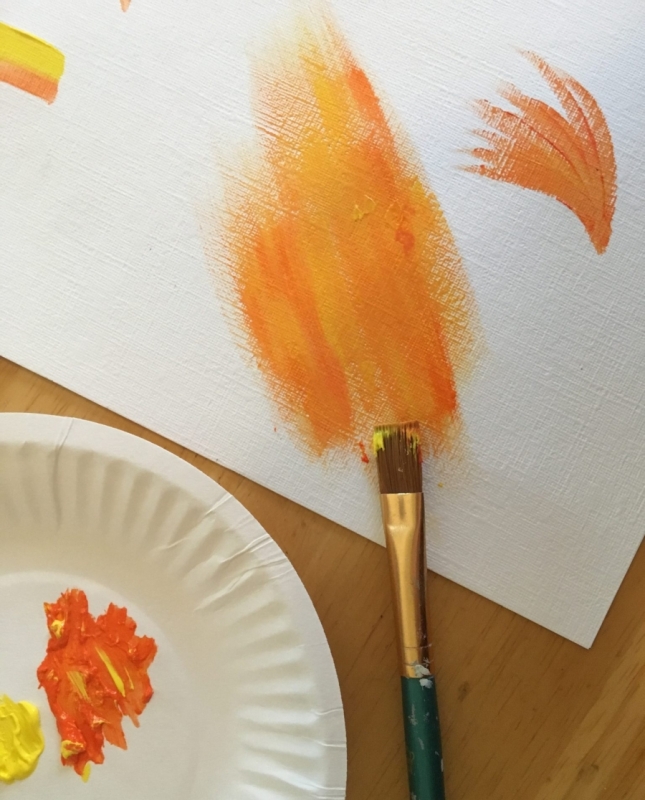
Try using the very tip (highest corner point in the angle) to paint fine lines. When I painted the smaller tree branches above, I pressed lightly only using the highest bristles of the brush!
You can also use an angle brush for double loading! I will be demonstrating how to double and triple load next in this guide!
Double Load
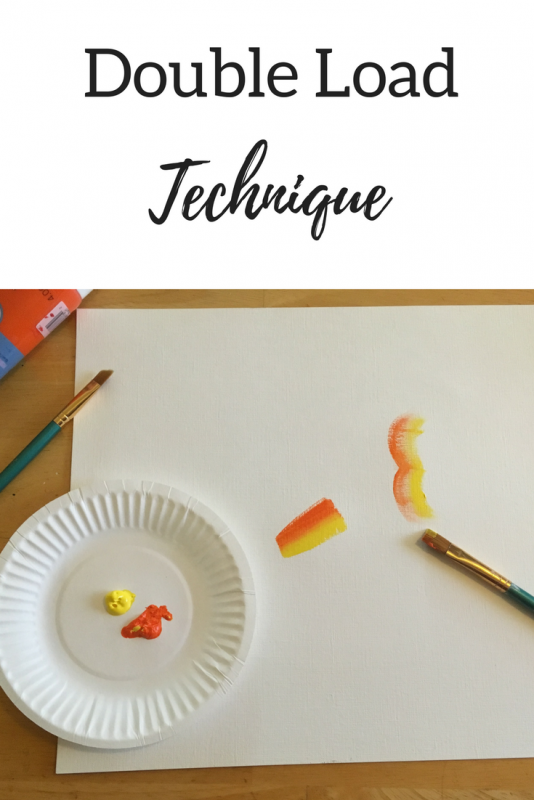
When you double load a brush, you are essentially adding two different colors to the brush without them mixing together.
You can use a flat brush or an angle brush for a double load. Actually, I’ve even used round brushes for this!
First dip one corner of the bristles in one color. Then dip the other corner in the other color.
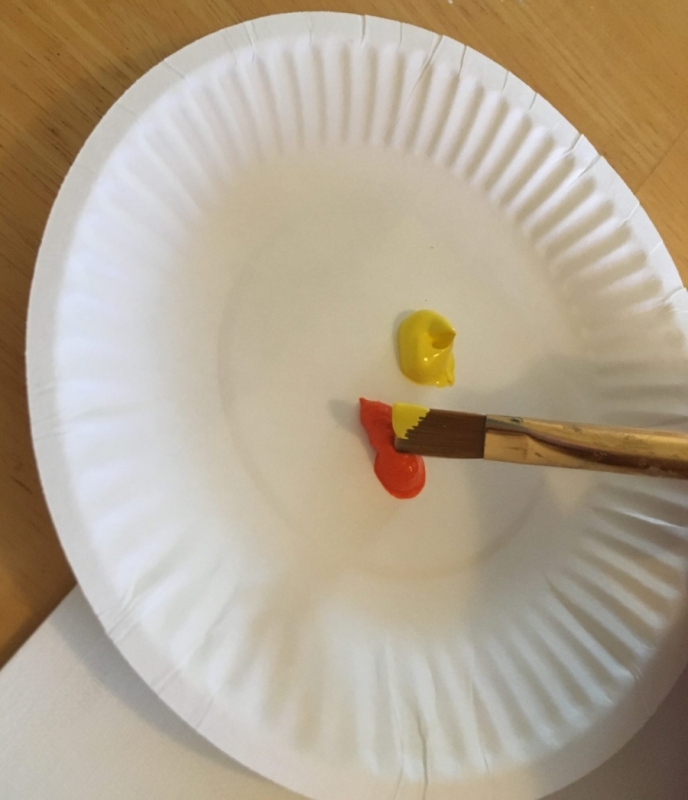
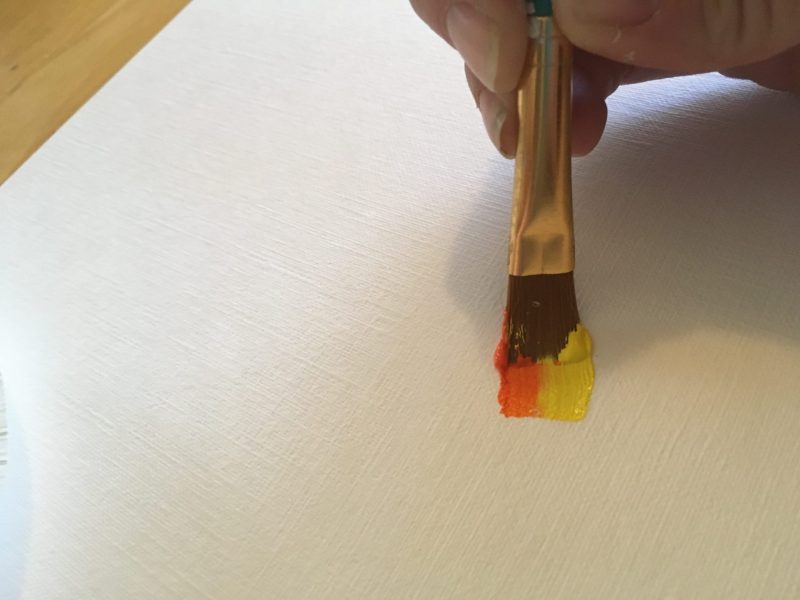
When you paint a stroke, the two colors will naturally blend together!
Try experimenting with this a bit! I like to double load when I’m painting a sunset. The colors will mix together on the canvas!
See what happens when you use an angle brush for double load! One side will be thicker than the other.
Experiment with different lines, curves, zig-zags, etc.!
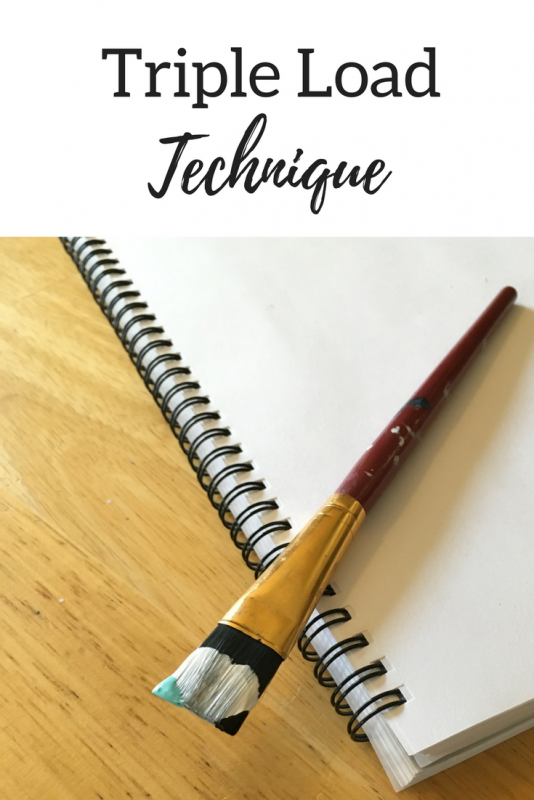
Triple Load
One of my favorite ways to blend acrylic paint is letting them just mesh together right on the canvas (or paper)! Adding three colors to the tip of a flat brush is one way to do this.
When you triple load a brush, dip the entire tip in one color first. Then, like a double load, dip each corner in a different color!
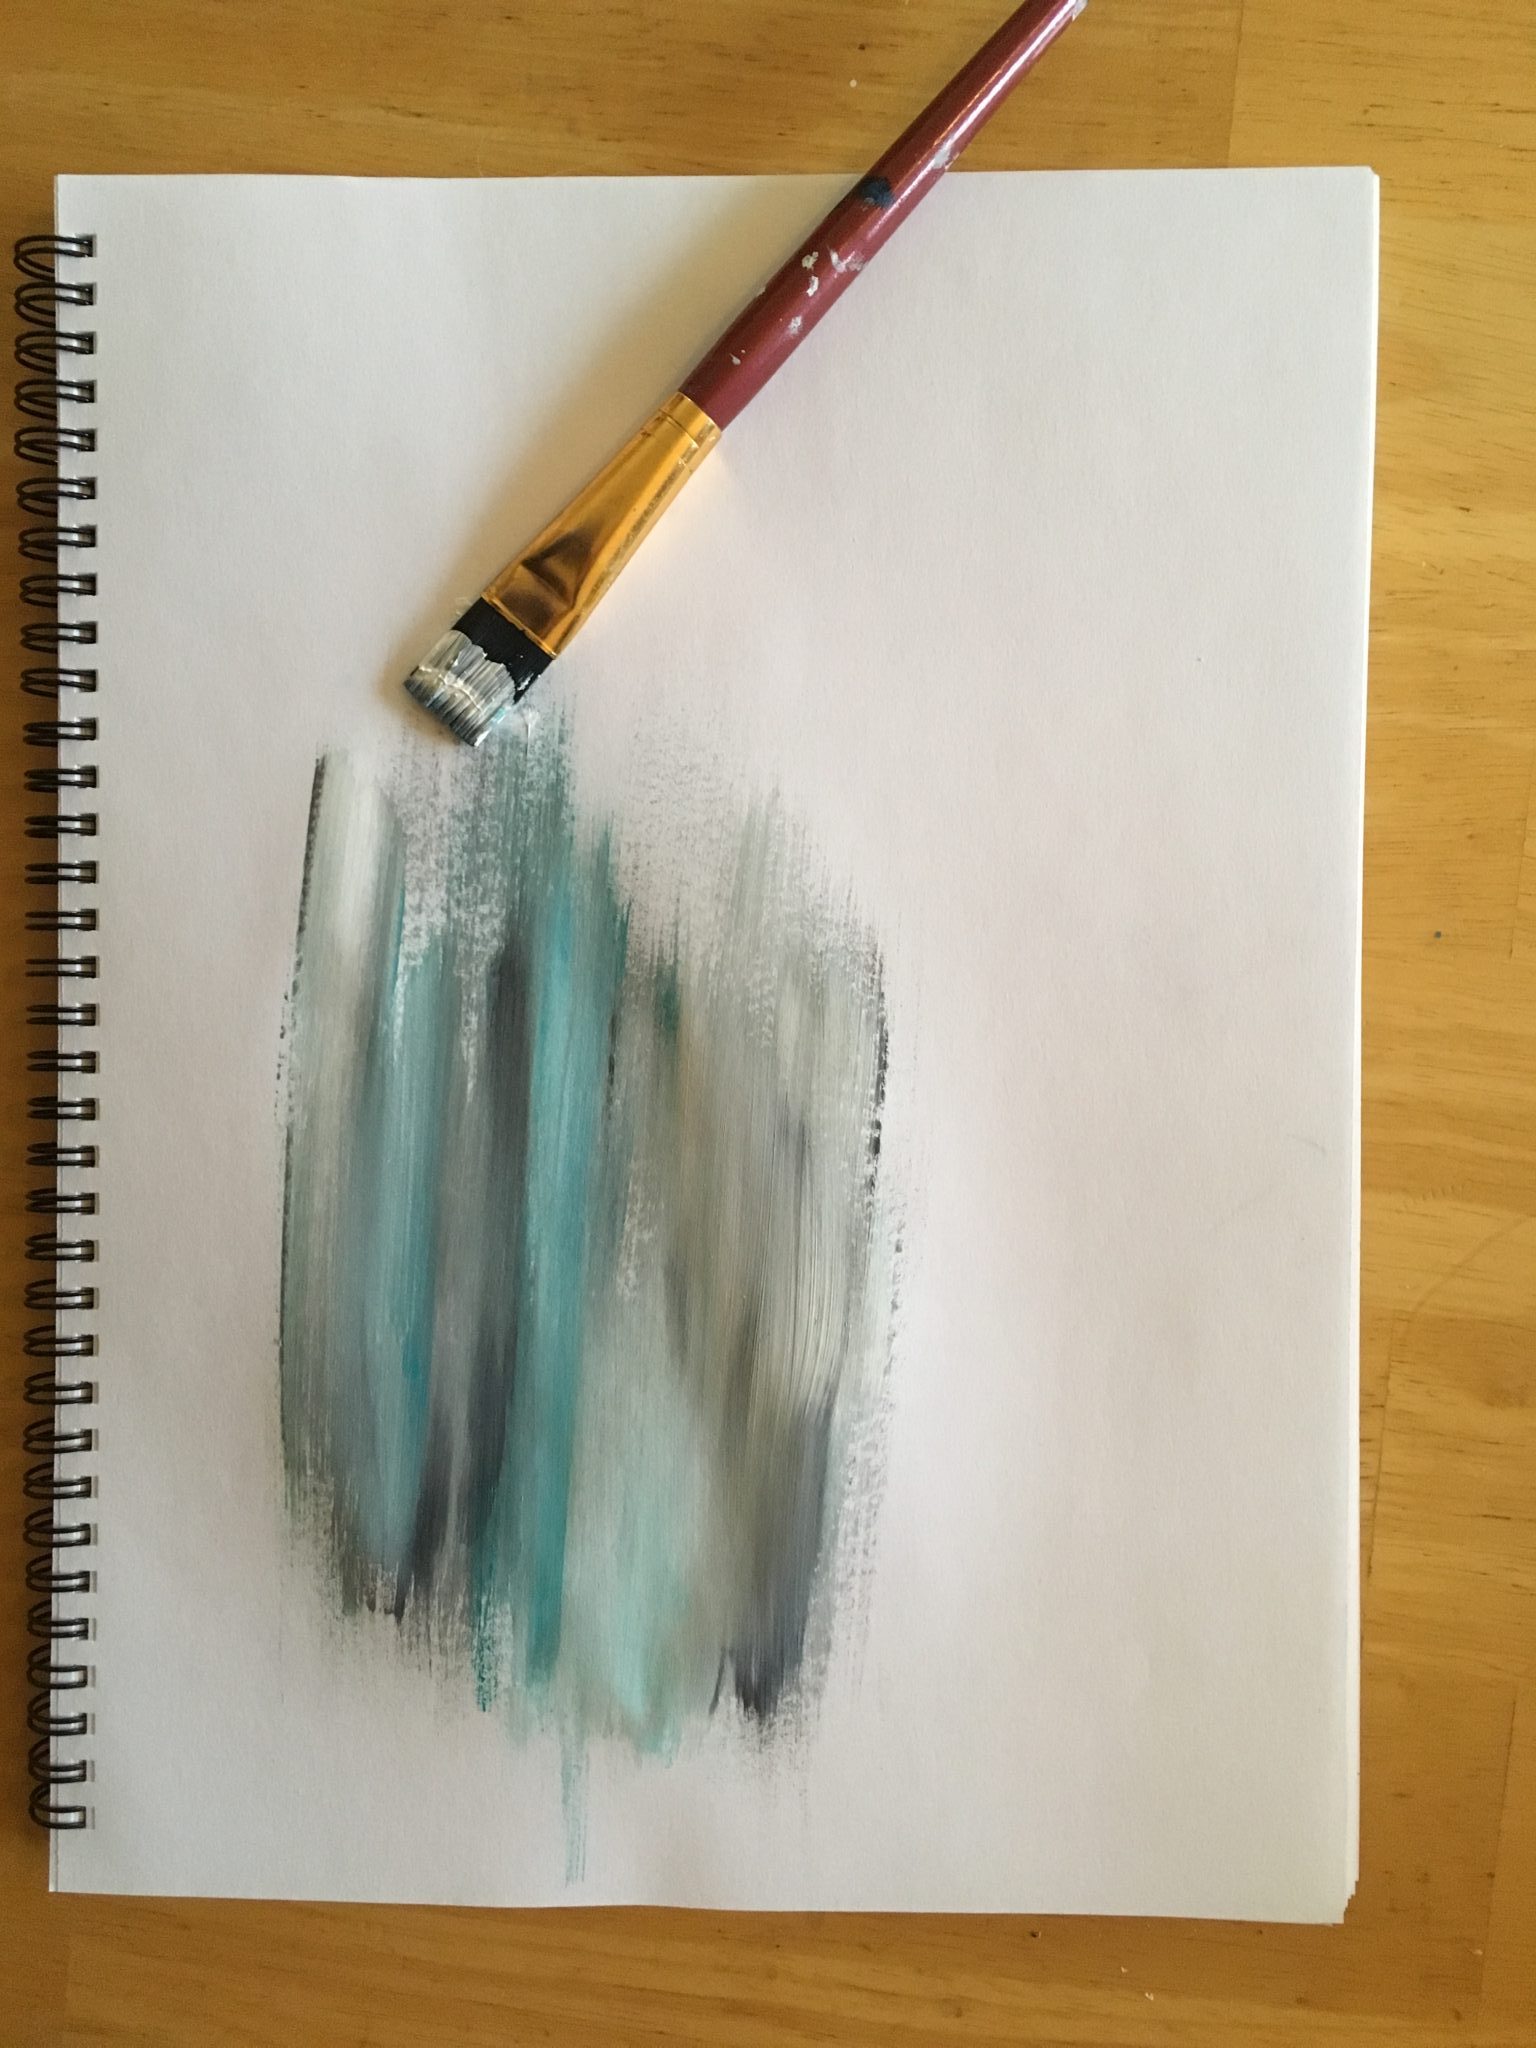
Try experimenting with three colors you think will mesh well together! I like using a triple load for the base of a lot of my paintings! The above graphic is a triple loaded brush with black, white and turquoise painted with all up and down strokes.
Flat brushes
Flat brushes are such a versatile brush that it deserved an entire blog post about how to use it. Use one when you are filling up large spaces such as sky or water. I will demonstrate two of my favorite ways below.
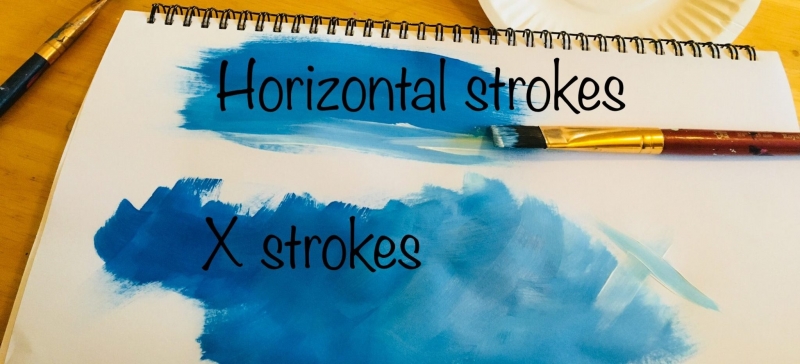
Painting a sky
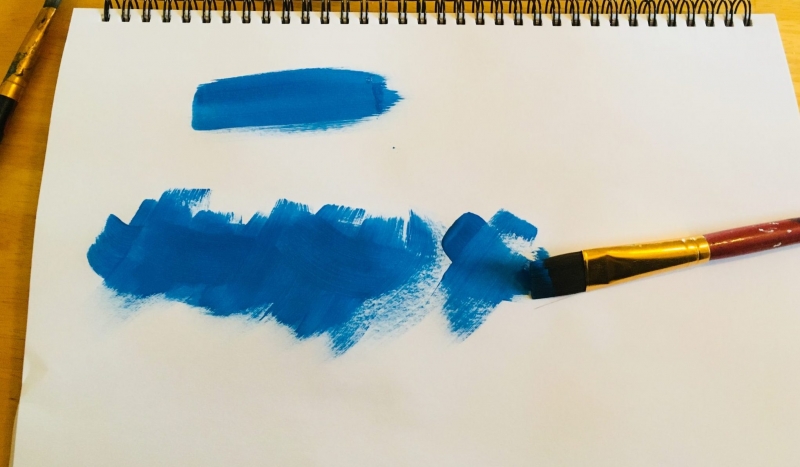
I like to use flat brushes for blending colors directly on the canvas when I’m painting a sky. In the graphic you see below, I used the flat brush two different ways. Horizontal strokes and “X” strokes. Those “X” strokes are also called “cross-hatching”.
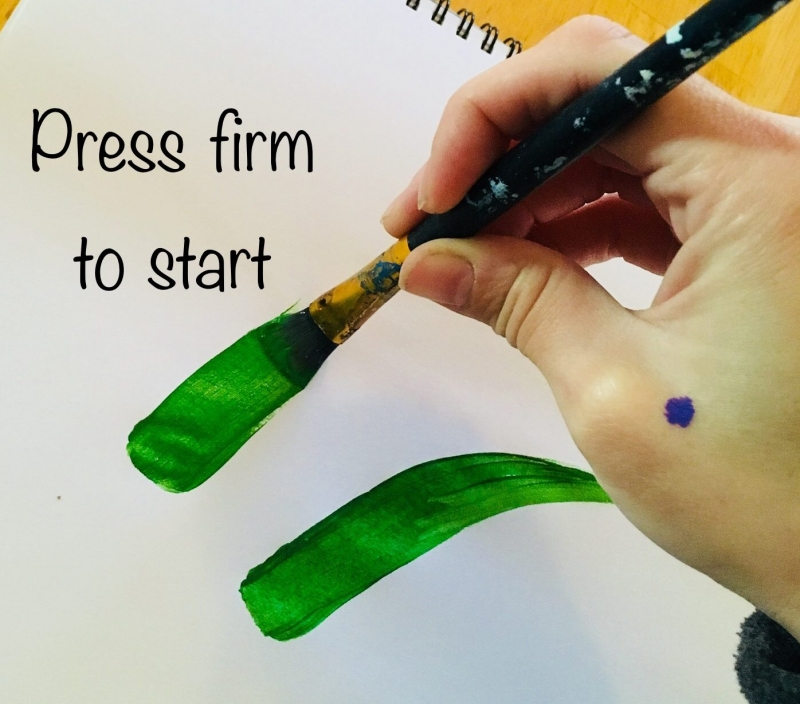
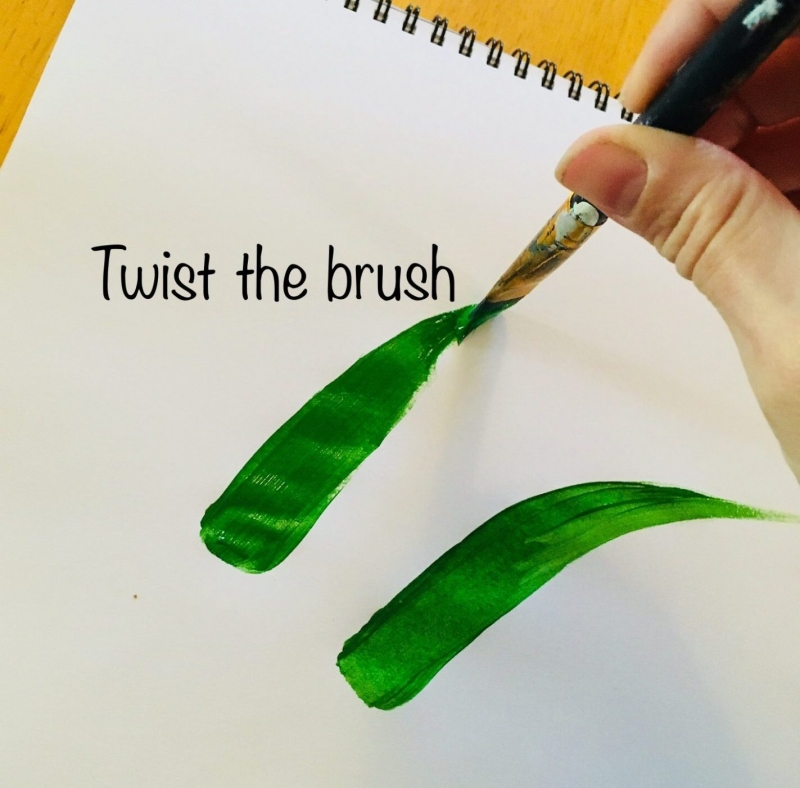
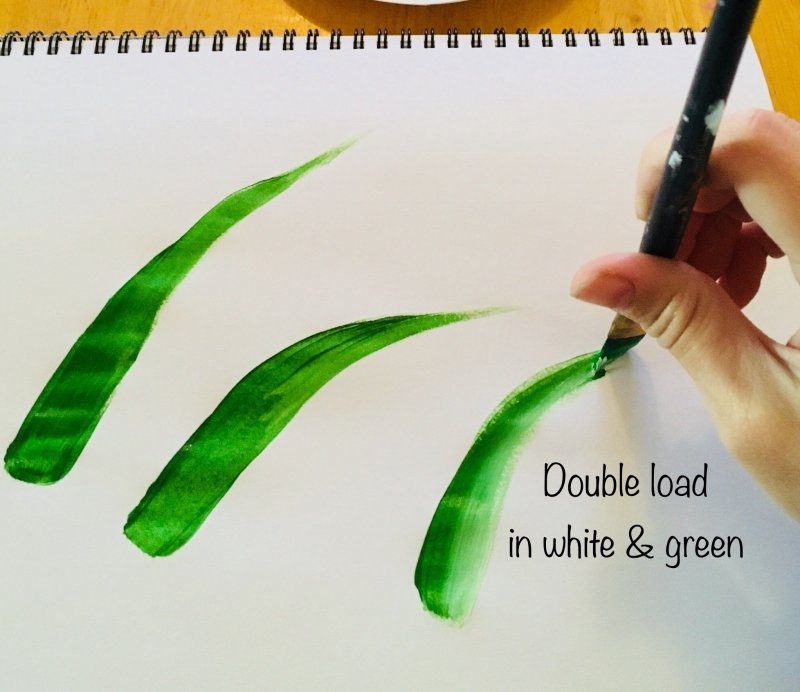
Painting Thick then Thin Strokes with a flat brush
First press firm on the bristles. Then twist the brush and stroke up to use just the side of the flat brush. The stroke starts out very thick and then gets thin.
Try doing the same thing but with a double load! In the graphic below, I double loaded a flat brush with white and green.
Flat Vs. Bright
Is there a difference between a flat and a bright? Yes! Bright brushes have slightly shorter bristles which allow for better control.
If you’re a beginner, then bright brushes are your best friend! Flat brushes have longer bristles which could hold more paint, making them great for painting skies and filling in large areas!
Cross-Hatching
Cross hatching simply means that strokes are overlapping going in two different directions. There are many combinations you can do with cross hatching.
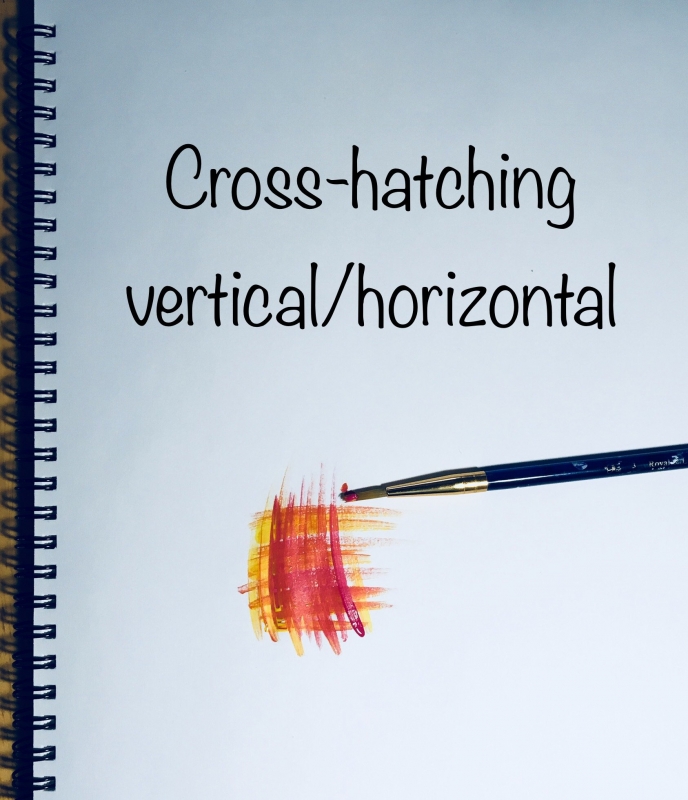 Vertical and horizontal cross hatching is one way. I don’t typically use this technique in my paintings but it is a unique way to blend colors or add interesting texture to a painting.
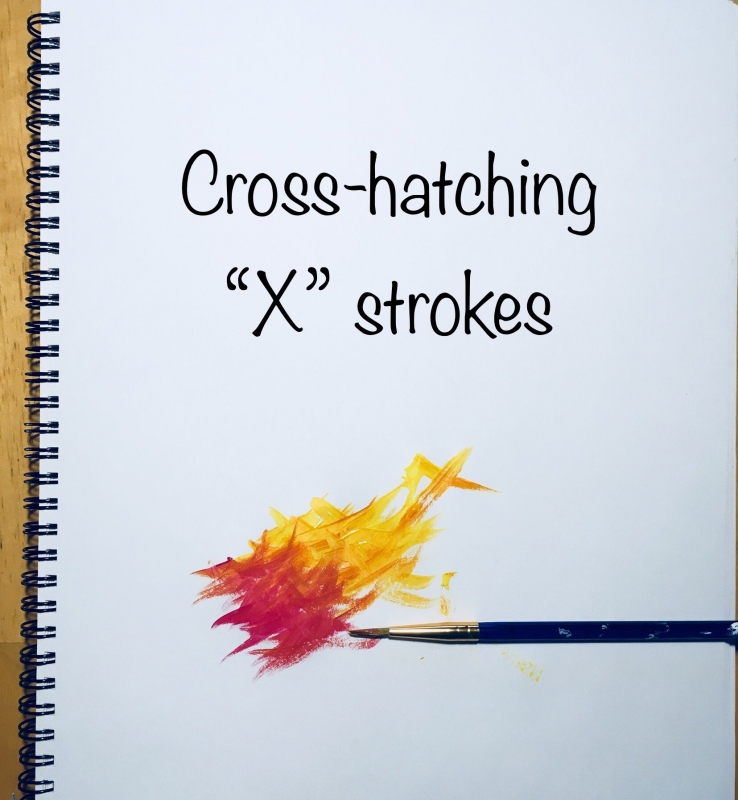 Cross hatching in “X” strokes is a technique I do love and use a lot! Any brush works for cross-hatching, I just happened to use a #3 round brush for this demonstration. In the above graphic, I cross hatched phthalo red and yellow together to create a unique texture and blending style.
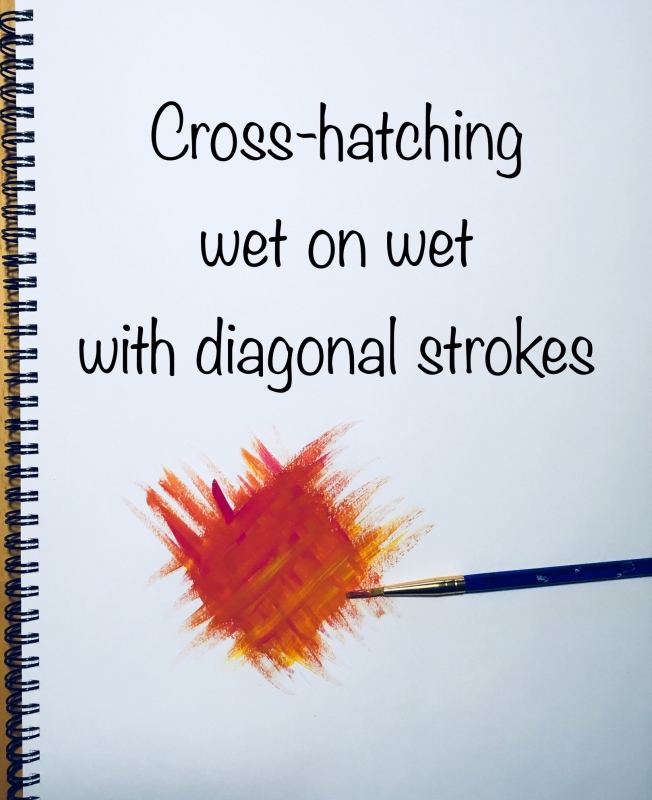 You can also play around with wet on wet, wet on dry, etc. In the above graphic, I experimented with using diagonal cross hatching strokes. I added multiple layers of the cross hatching pattern without waiting for the under-layer to dry (wet on wet).
Splatter Paint
Call me a crazy former Elementary Art teacher but I LOVE splatter painting! If I could add splatters to all my paintings, I probably would.
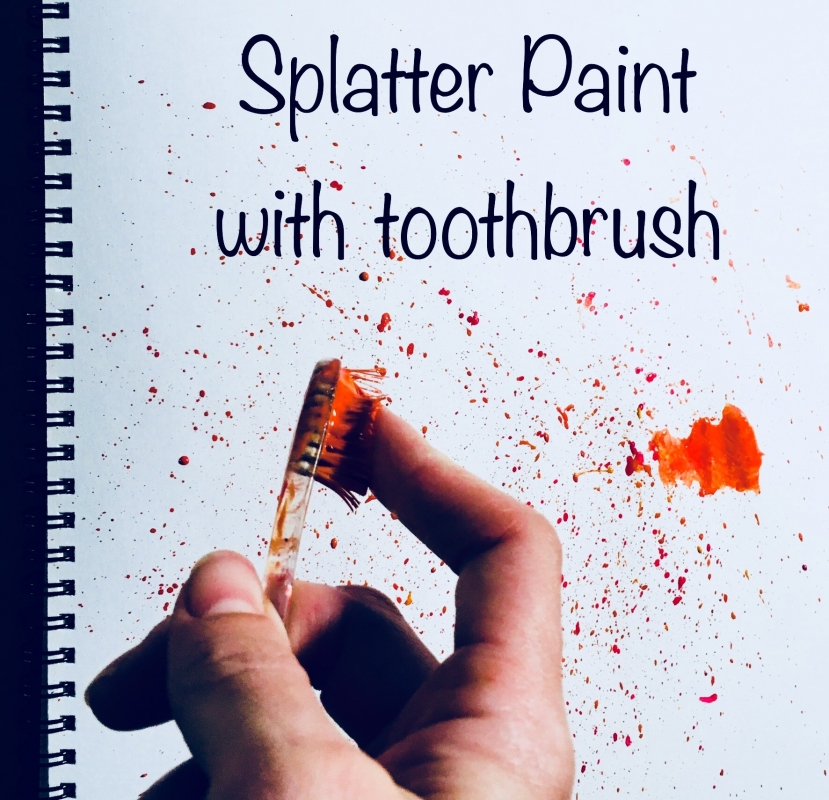 The best tool, I think, to splatter with is an old toothbrush. I find that wetting it SLIGHTLY helps. If you put too much water on the toothbrush, you’ll get undesirable large drips everywhere. Try experimenting with the angle of the toothbrush or the amounts of paint. Also, it’s best to try on a separate paper first before throwing it on the canvas.
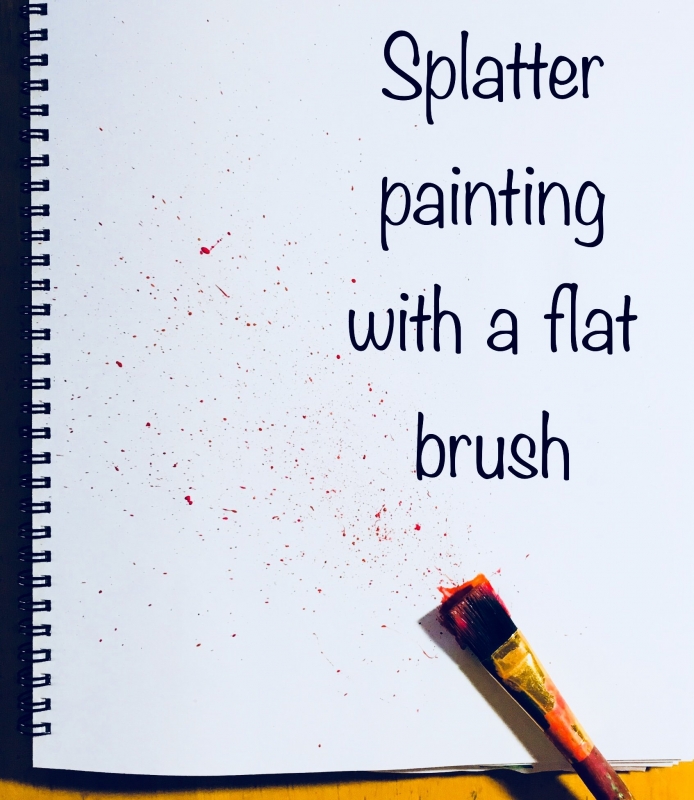 If you don’t want to use a toothbrush, using a regular brush works too! I sometimes grab a flat brush to splatter with because I want more control in where I want my splatters to go.
Stippling
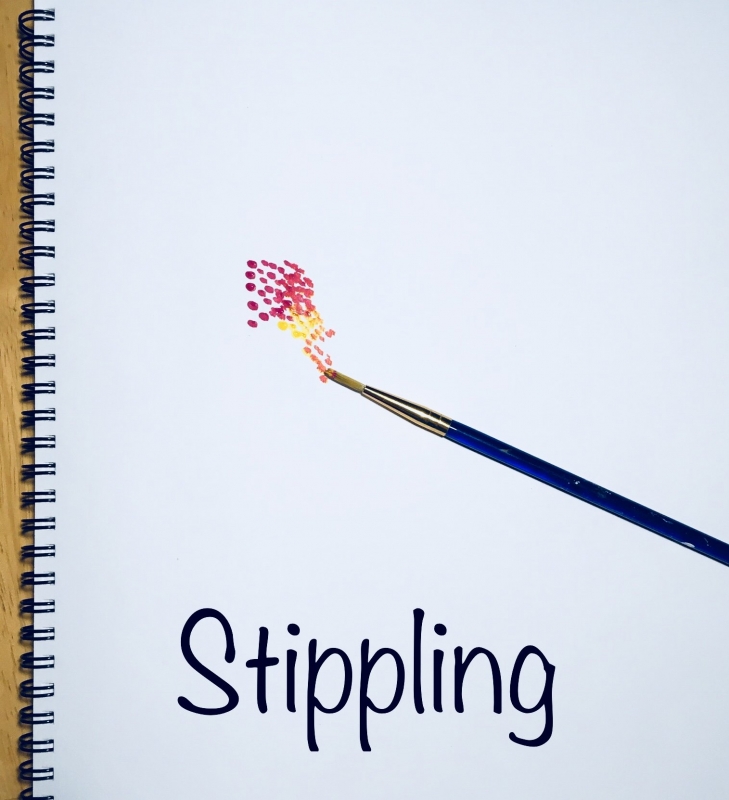
I use the stippling technique sparingly in my paintings. I think this technique is more effective in other mediums like oil pastels so I don’t use it all too often with acrylic paint. Basically, you are painting little tiny dots using the tip of a round brush! It can be an effective, yet tedious, way to blend colors together.
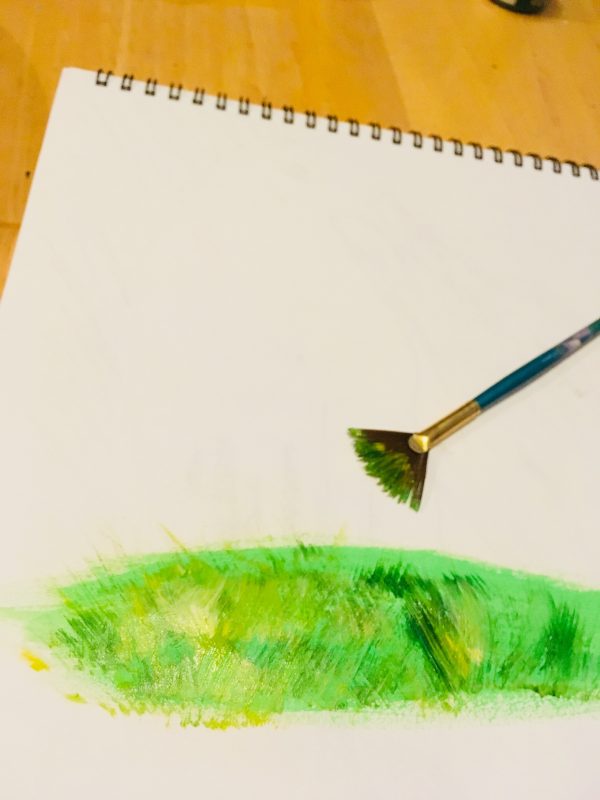
Using A Fan Brush
A fan brush can be used to create a lot of different techniques. One of my favorite fan brush techniques is painting pine trees.
To do this, I used a round tiny detail brush to paint the vertical trunk. Then I used the fan brush tips like a stamp and from the top to bottom I painted the branches. You can see my separate post “How To Paint Pine Trees With A Fan Brush” here. 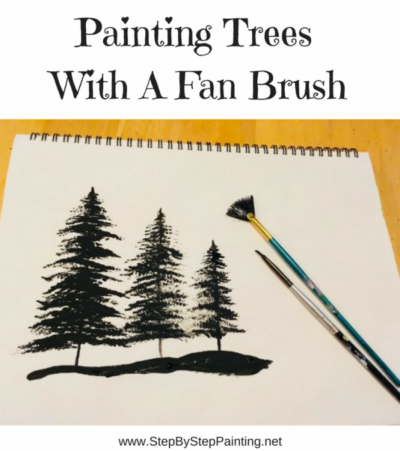
A fan brush can also be used for creating grass effects and other interesting ground and natural textures. You can even use your fan brush if you are painting a waterfall!

Some Final Thoughts:
I think having a sketchbook is important to practicing brush and stroke techniques. I use a basic sketchbook with regular drawing paper and I don’t really worry about the paper crumbling from the paint because it’s just practice.
Do basic exercises frequently in your sketchbook to help refine your skills. Acrylic painting takes practice and the more you train your hand and mind and spirit with the skills, the better you will get!
Hi Tracie, thank you very much for your detailed explanations, tutorials and traceables! Now that art classes have been stopped due to the pandemic, my son is learning from your site.
I bought the paint colours and brushes according to your tutorial and he has just finished a background. So pretty and we’re thrilled!
Thank you loads again and we wish you all the best!
I’m a beginner and have found this to be extremely helpful & the best tutorial since April 2020. Thank you very much. Hope to be able to use this tutorial for a long time & looking forward to more demonstrations. I could go on & on, however, I am so excited to start a practicing scrapbook. Than you very much.
You’re welcome Sue!
Thanks so much for this information!! Very helpful!
Great info, Thxs Tracie!
Bought more paints and ready
to try more tutorials! Cat
Thank you Tracie,
This tutorial was extremely helpful.
Angela
Hi Tracie.
Thank you for offering such a wonderfully easy and effective beginners tutorial!
I am painting onto denim fabric, and was wondering if you could suggest best paint and brushes to use before I invest?
Many thanks,
Roz
Thanks so much for your helpful instructions, I am teaching a basic beginner class and even though I know this info it was most helpful to put it in your words, thanks again
thanks…awesome..verry helpful for beginner like me.
What is a good BOOK for learning different brushes and brush strokes. For someone without computer or phone access.