
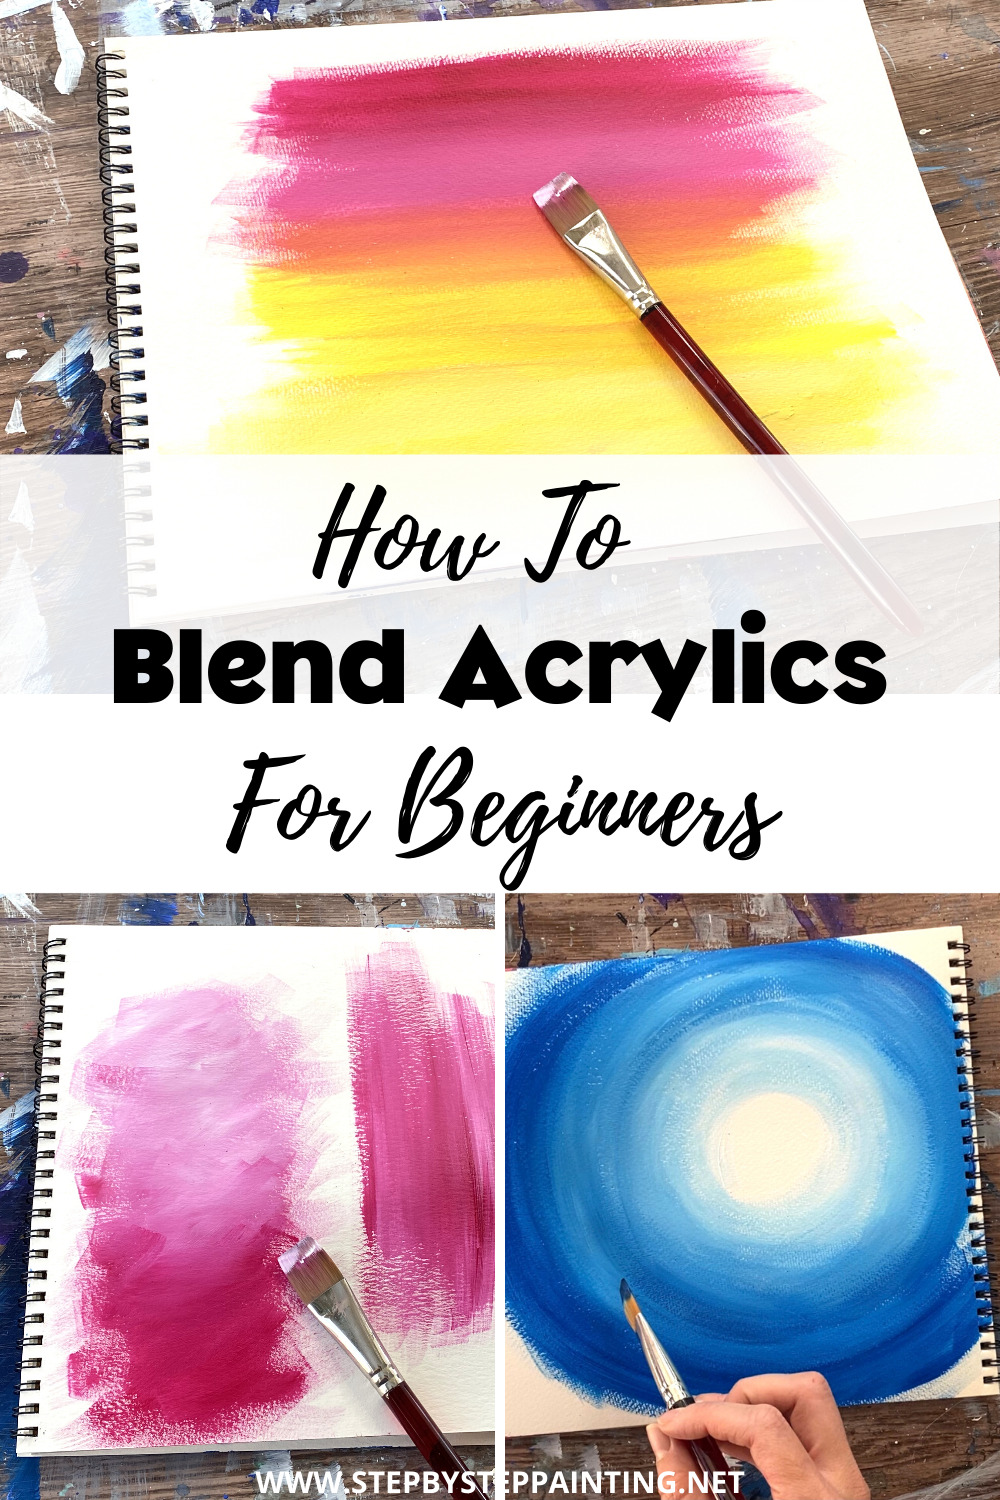
Learn three basic techniques for how to blend acrylic paint on any surface!
Blending acrylic paint is the process of having two colors mesh together to blend into each other, creating a new color. It is a technique that creates stunning, vibrant results that can be used in backgrounds, skies and other areas of a painting.
Would you like to save this?
The technique discussed in this post is “wet on wet” blending. Basically that means you will be blending the colors together while they are still wet.
This type of blending is an effective technique and the fasted way to blend! However, it does require you to work fast.
What if my paints are drying too fast?
You may find that your paint is drying too fast while you are trying to blend. This is a VERY common frustration for beginners.
Here are some ways you can slow the drying time so you can work more on your blending:
- You can use a fine mist spray on your palette to make sure the paints on your palette are not drying fast.
- You can use a “Stay Wet” palette which basically utilizes a wet sponge underneath that keeps the paints moist.
- You can mix a “slow dry medium” into your paint and that will slow the drying time to make the paint more workable for blending.
- You can use paint that already has a “slow dry” medium into it. They are a little pricier and are called “open acrylics”.
Materials For Blending Techniques:
How To Blend Acrylic Paint

Learn three techniques for how to blend acrylic paint on any surface. This tutorial will show you three common techniques used often in paintings.
Materials
- 3/4" Flat Wash Brush
- Surface to paint on (I use water color paper)
- Acrylic Paints
- Water
- Palette
Instructions
- Technique 1: "Wet On Wet" Horizontal Blending. Select at least two colors to blend together using horizontal strokes.
- Technique 2: "Wet On Wet" Circular Blending. Select at least two colors to blend together starting at a circle and having the colors get darker as you paint in circular strokes outwards.
- Technique 3: "Wet on Wet" Double Load Technique. Select at least two colors to blend together on the canvas to create abstract backgrounds or two-toned effects.
Video:
How To Blend Acrylic Paint
Technique 1: Horizontal Wet-On-Wet Blending
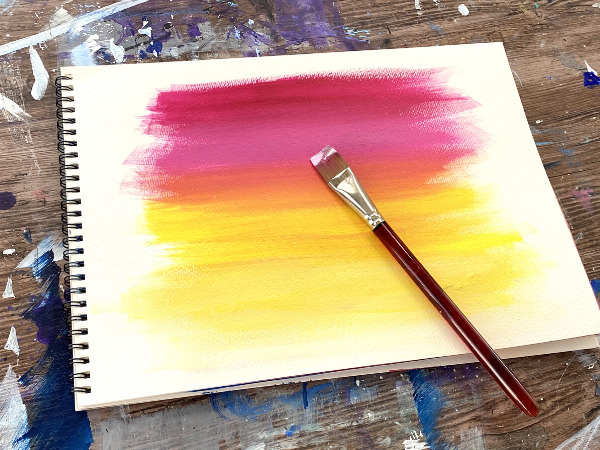
This technique is often used for skies, sunsets and filling an entire background. I did this technique with my Sunset Hot Air Balloons Painting Tutorial.
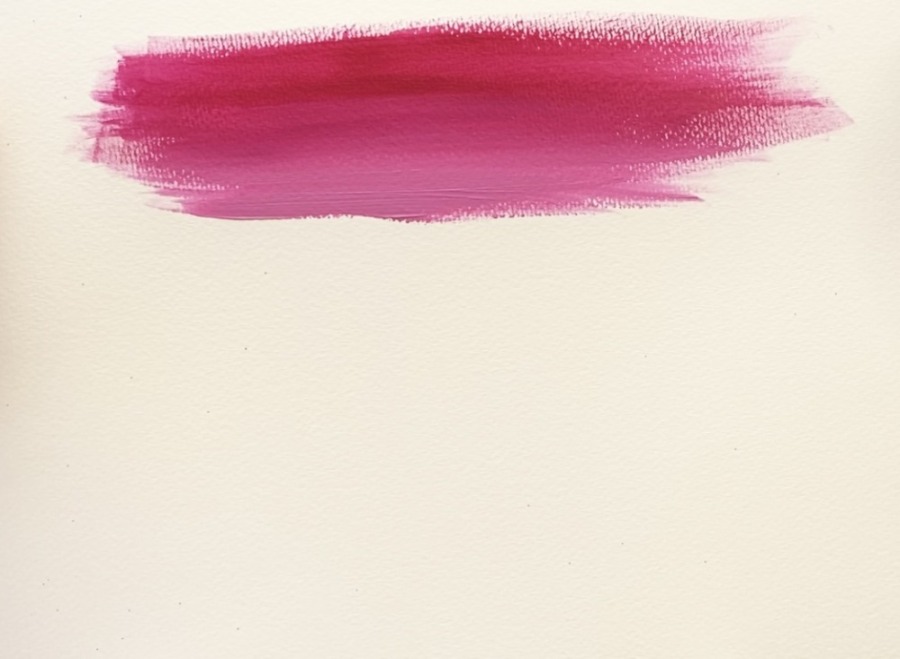
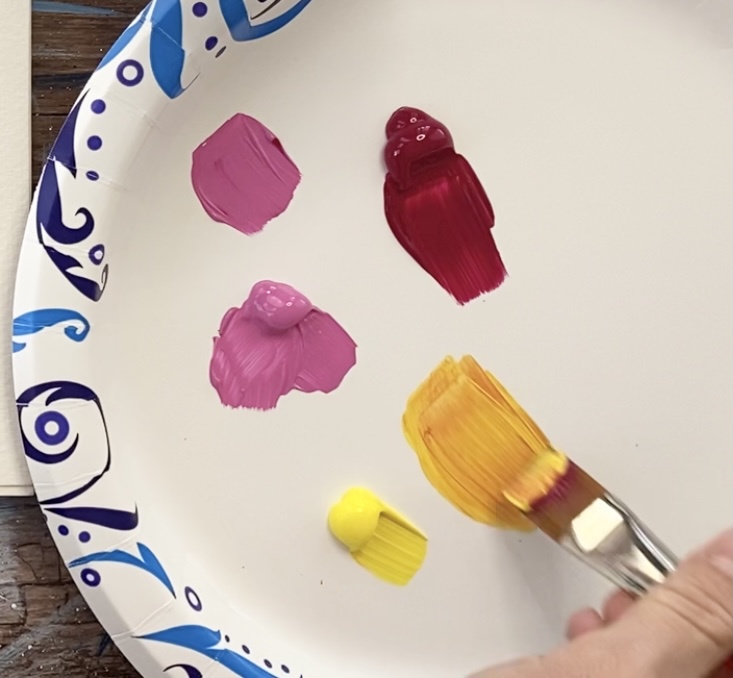
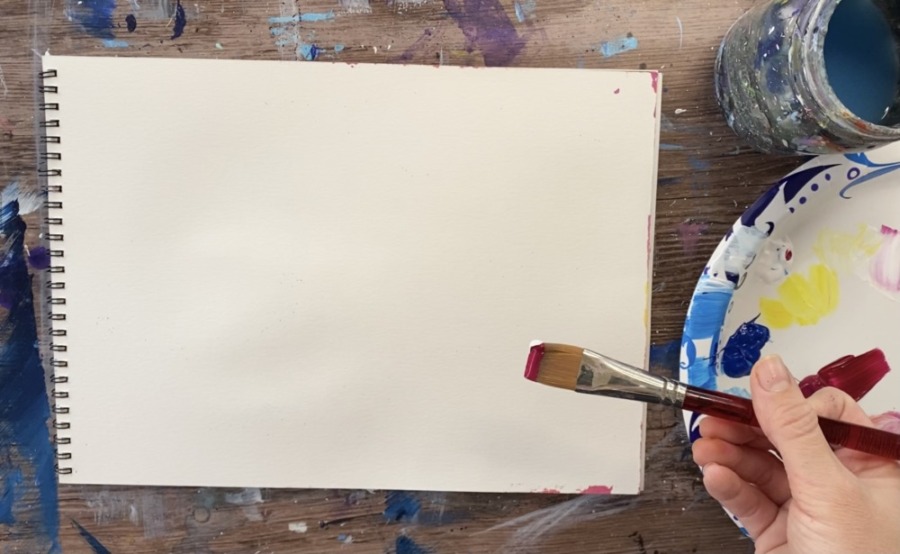
In this demonstration I used the colors: quinacridone magenta, medium magenta, lemon yellow and titanium white. I also used a 3/4″ flat wash brush.
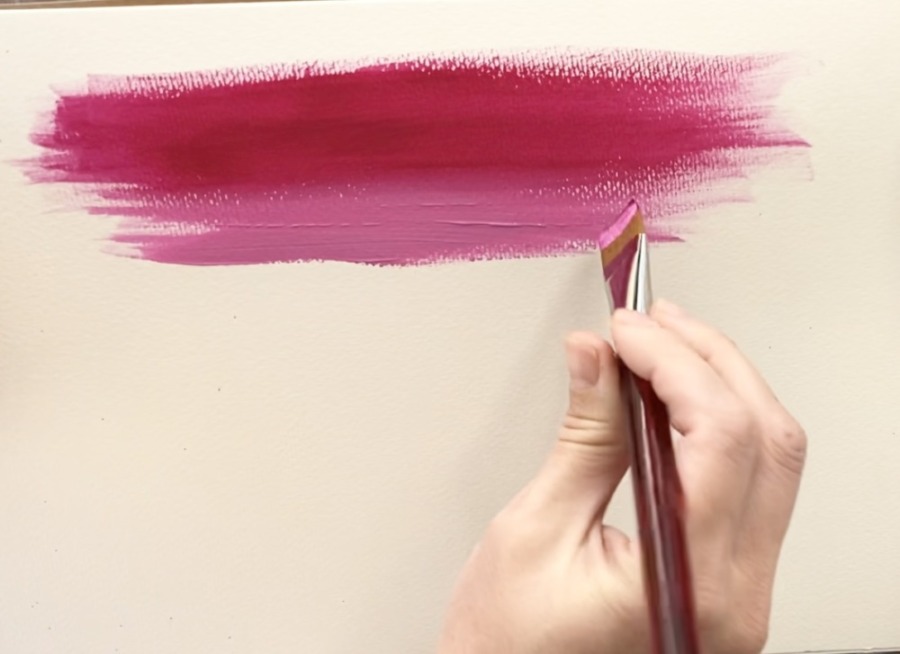
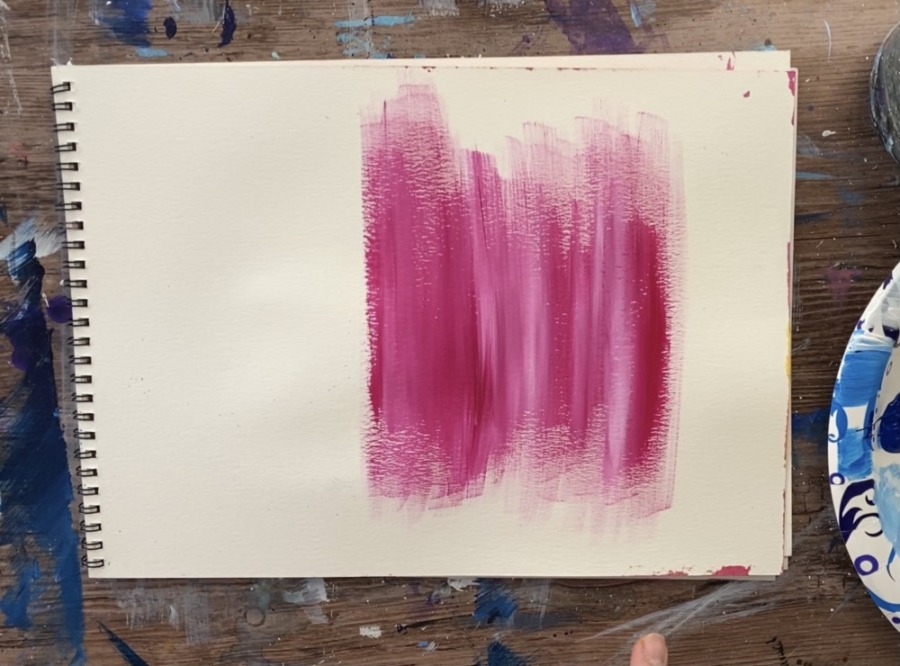
First load your brush with quinacridone and paint left and right strokes. Try to apply an even amount of paint on your surface (not too thick but not too thin).
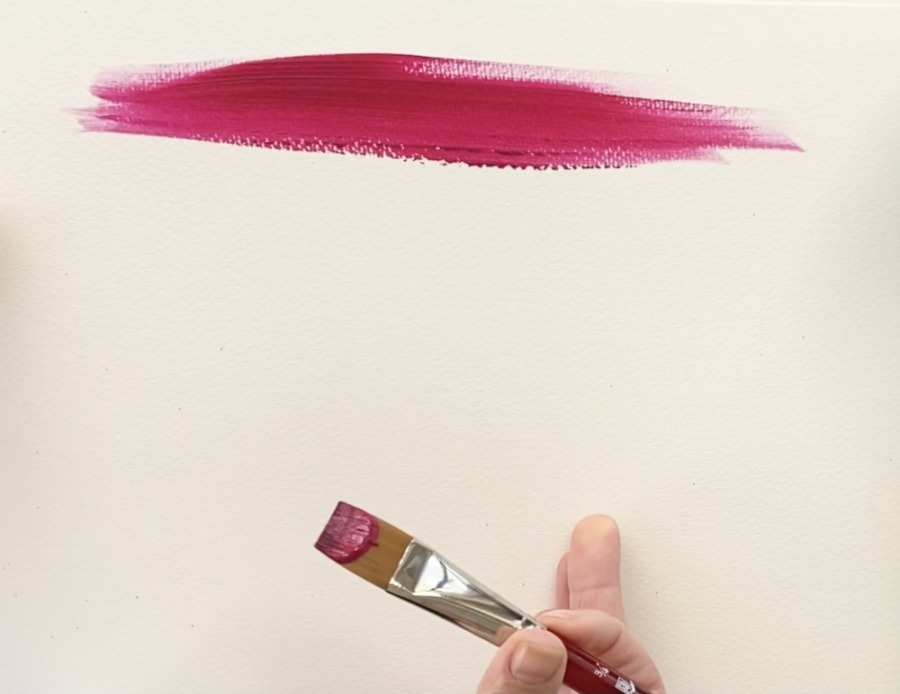
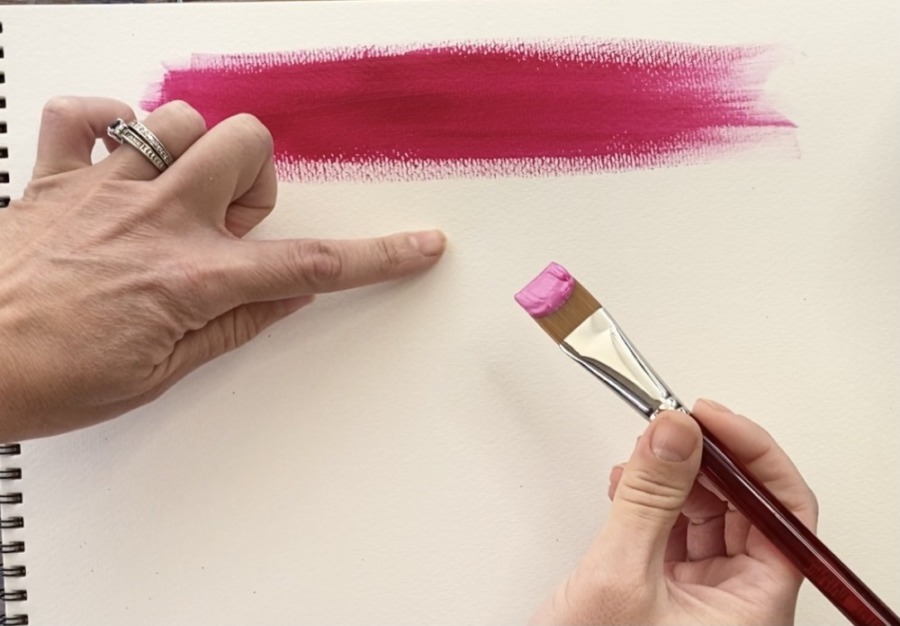
Then, without rinsing your brush, load it in medium magenta.

Apply the horizontal strokes below the darker magenta.
Then paint up and gently blend that lighter pink into the darker pink. You will have to stroke over it multiple times until it blends together.

To get from the magenta to the yellow, it may be best to mix the pink and yellow on your palette to get an orange color first. I did not rinse my brush, I just grabbed some yellow and mixed it together.
Then apply it below the pink and blend up into the pink.
Tip: it’s okay to load a tiny bit of water into your brush to increase the flow and if your paint seems to be drying fast.

Then wipe off your brush. Load it in just the yellow and add the yellow below your orange. Gently work the yellow up painting over the transition multiple times so it will blend.

If you wanted to continue on with white, rinse your brush then apply the titanium white below the yellow. Gently blend it up into the yellow and paint over the transition area multiple times until it blends.

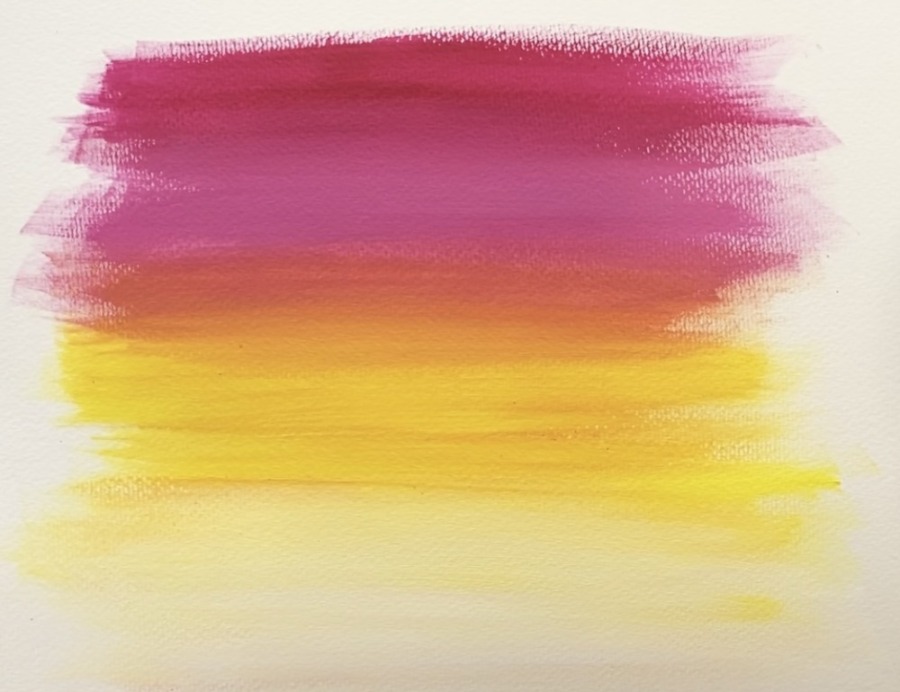
This is a technique you can use to paint an entire sky for a painting that has a sunset!
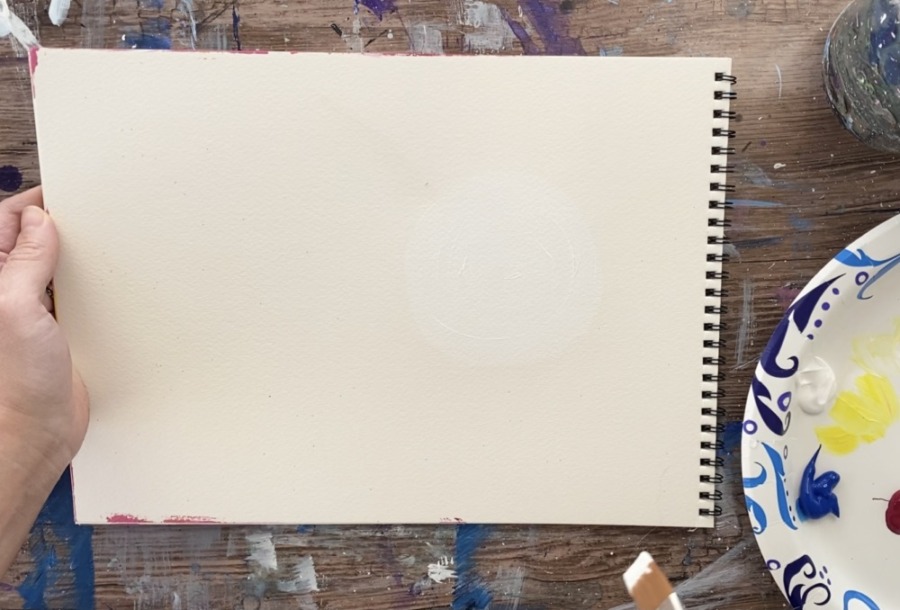
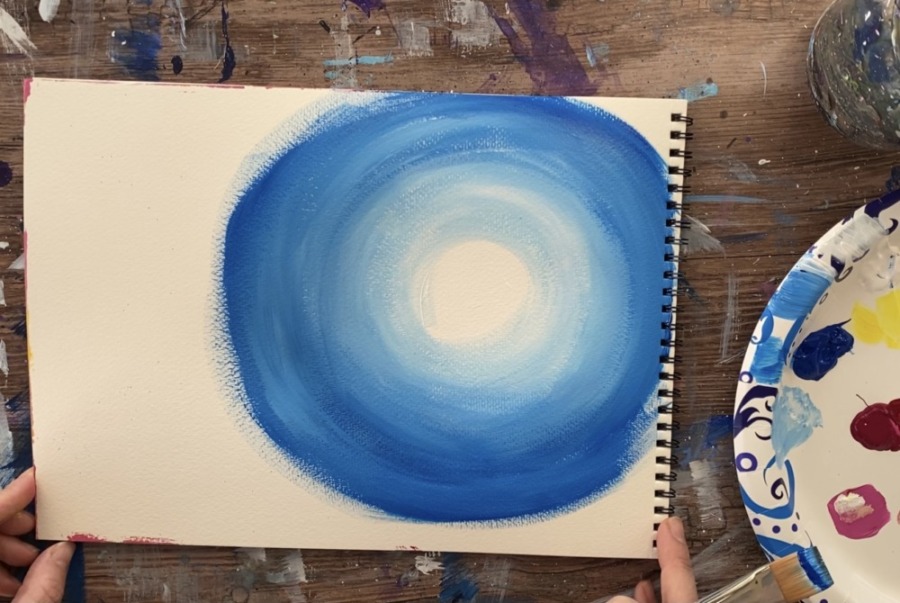
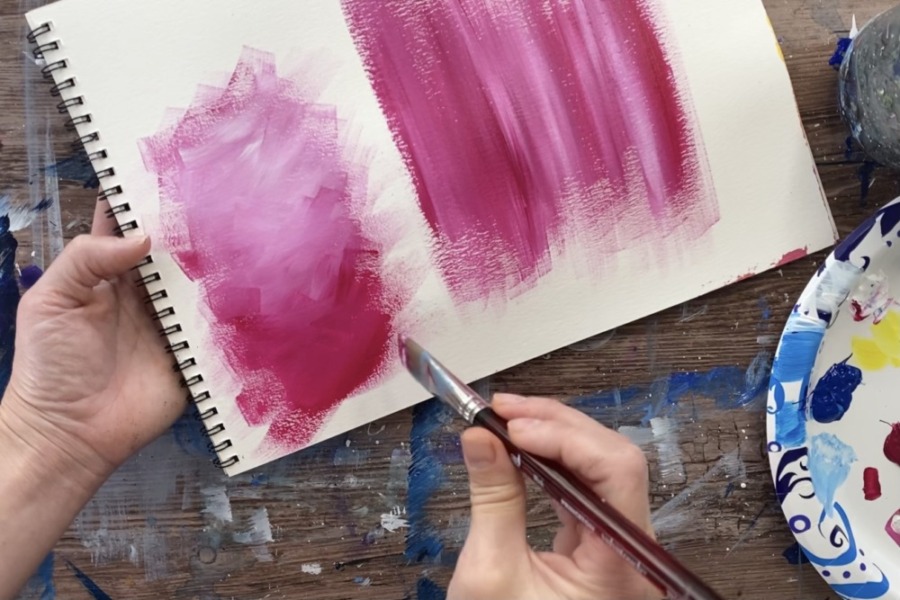
Technique 2 : Circular Wet-On-Wet Blending
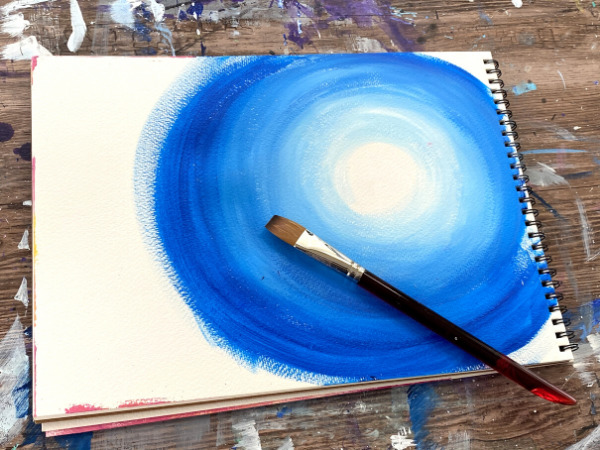
I use this technique a lot for backgrounds of paintings! Basically you are doing blending but going in a circular motion so the colors are lightest at the circle and blend out darker.
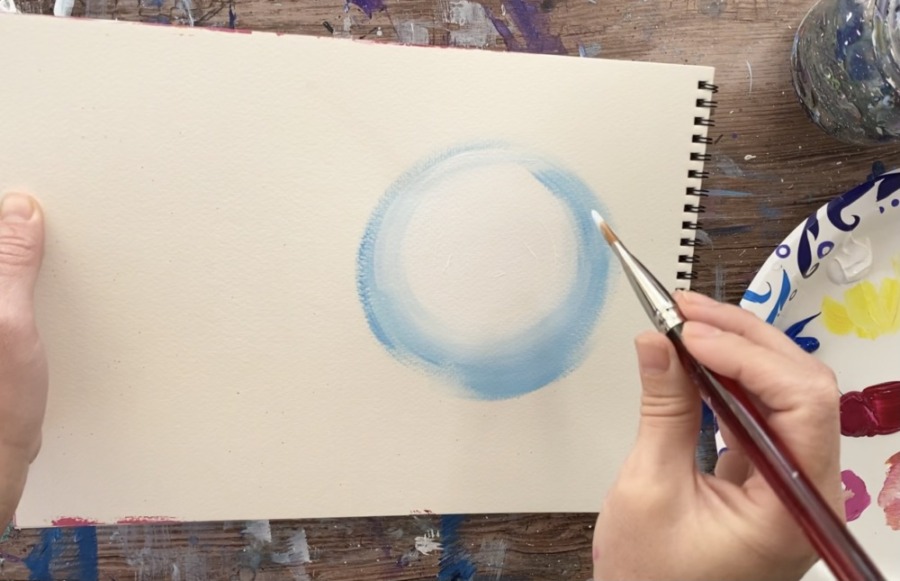
Use your 3/4″ wash brush. Start by painting a medium size white circle anywhere on your surface.
Then on your palette, mix a light blue color. Simply grab a small amount of blue on your brush that already has the white on it. Mix it together to make a light blue.

Apply the light blue in a circular direction around the white circle.
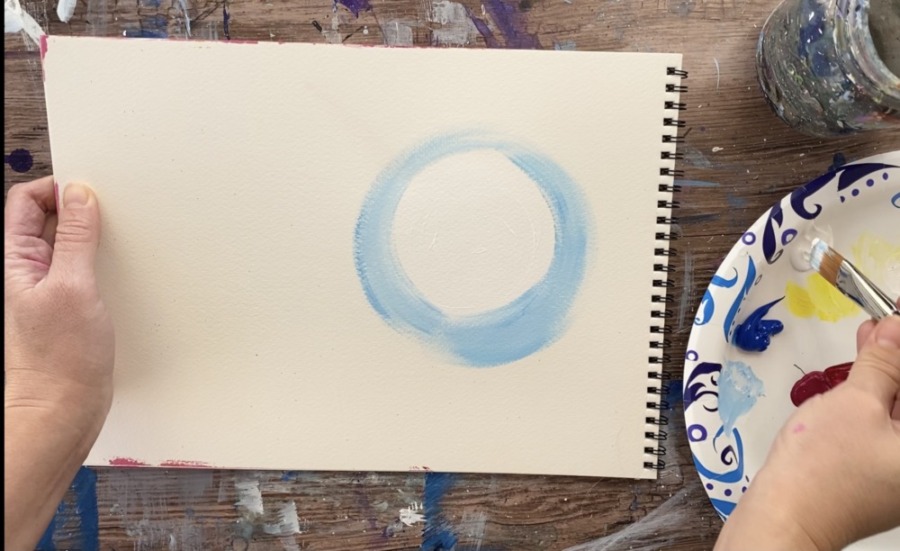
Then grab some more white (not too much) on your brush and paint over the area where the light blue and white transition. Gently brush over the “transition” multiple times to blend it.
Then apply more primary blue in circular strokes on the outer part of the light blue circle. Gently blend it into the light blue.
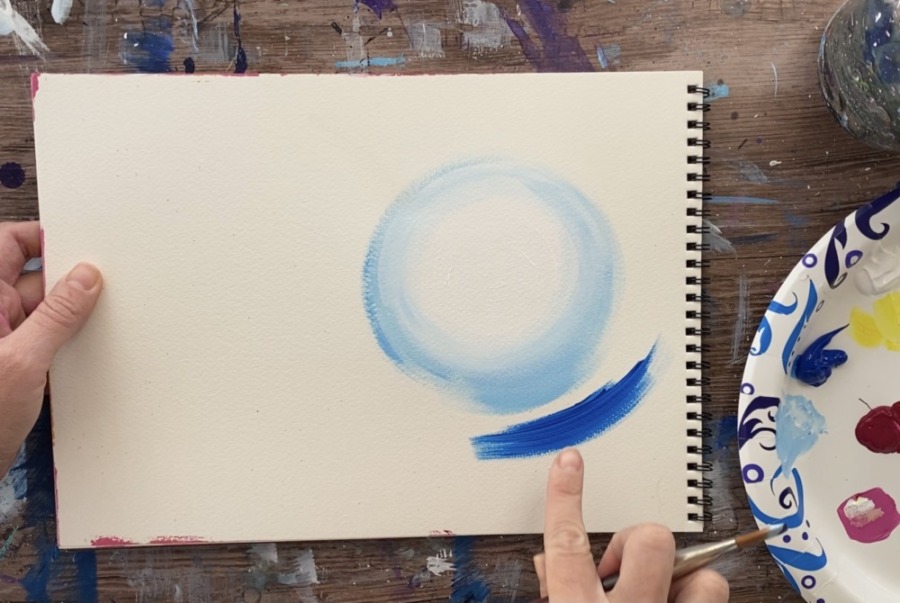

Work in fast circular motions to blend the blue. Add more primary blue to your brush as you work your way out.
Tip: If you brush seems to be overloaded, have a rag handy to wipe the excess paint off your brush.
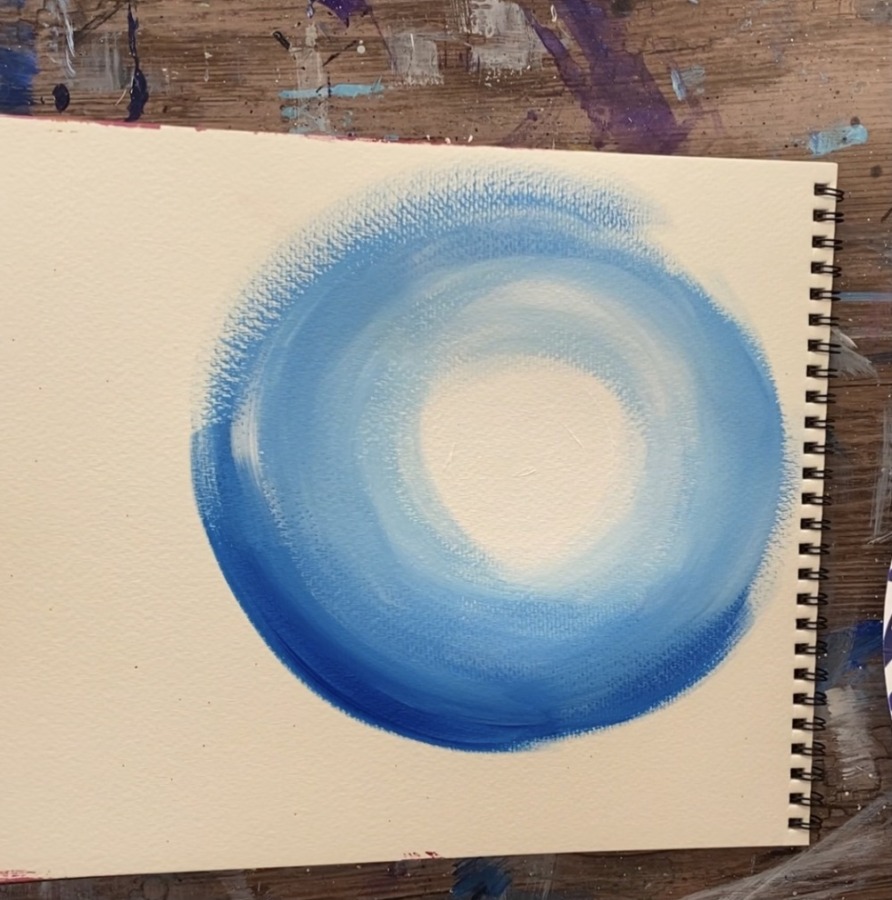
If you need to, you can add more light blue and blend that into the dark blue to light blue transition area.
I had streaks of white show up in my dark blue area and that is okay! In fact, your blending does not have to be a perfect transition from one to the next. Sometimes it looks great when it is “un blended”.
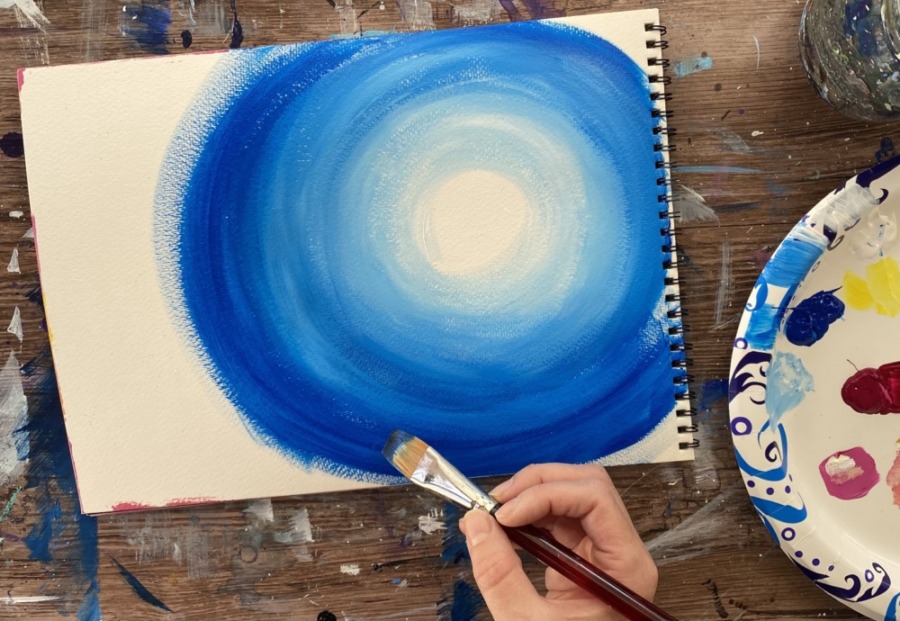
Wipe your brush or completely rinse it when doing the darker areas. Continue doing just the primary blue on the outer parts.
You can even go darker and transition this color to black and a really dark blue such as Prussian Blue.
I did this technique in my “Penguin Mommy & Me” painting!
Technique 3: Double Load Wet-On-Wet

The double load is pretty much what it is titled as. You will be loading your brush with two colors and using those two colors to blend. You’re not creating a gradient, rather you are creating an abstract two-toned area.
I do this a lot to fill up a painting with an abstract background or when I am doing a faux wood grain background. It is such a SIMPLE technique but it makes for pretty backgrounds.
In this demonstration, I loaded my 3/4″ wash brush with quinacridone magenta and dipped the corner in white.
Use the full width of the brush to paint up and down strokes. Blend the white with the magenta but do not blend it in all the way.

When you go to reload, basically double load your brush with the two colors again. You can also add a tiny bit of water to your brush as you paint to increase the flow or thin the paint down a bit.
It’s so simple! I did this background in my Spring Bicycle Painting with “Payne’s Grey” and “White”.
When you are doing a double load blending technique, you do not have to always paint up and down (or left and right for that matter). You can get creative and do “cross-hatching” or “x strokes”.
To do the “x strokes” simply double load your brush with the two colors and paint in criss-crossing directions.

You can blend the white and magenta by varying the amounts of white and magenta you have on your brush.
Another super simple and pretty technique! I did this “criss-cross” blending technique in the background of my “Love Birds Tutorial”.
That’s it for these techniques!
Practice, practice, practice! It’s always a great idea to have a mixed media pad or a simple sketchbook on hand to practice techniques such as blending.

Thank you!!!! I am brand new to painting but have wanted to try for many years.
Thank you so much for this WRITTEN tutorial with pictures!!! Video tutorials are not as good as well written tutorials.
Thank you so much for these very detailed tutorials! I was struggling with blending for more reasons than I realized until I watched the video! I also really like that you have the video plus written instructions with photos, that combination was extremely helpful. You are a great artist and teacher! Jodi
Thanks Jodi!!
Thanks the painting made me do it easier
THANKS
Zaiba
I was wondering if you could do a tutorial on foilage,grass? I’m having trouble with it. Please and thank you. This tutorial was so helpful.
Thanks:):)