
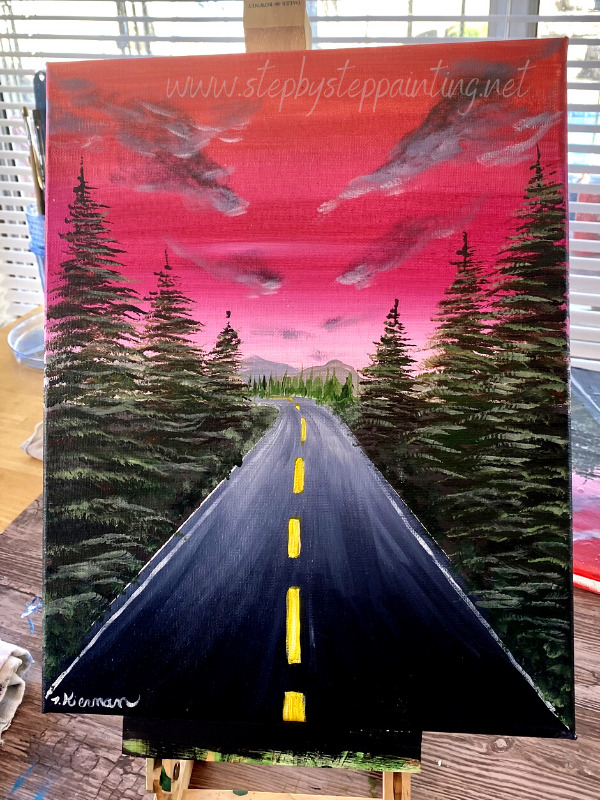
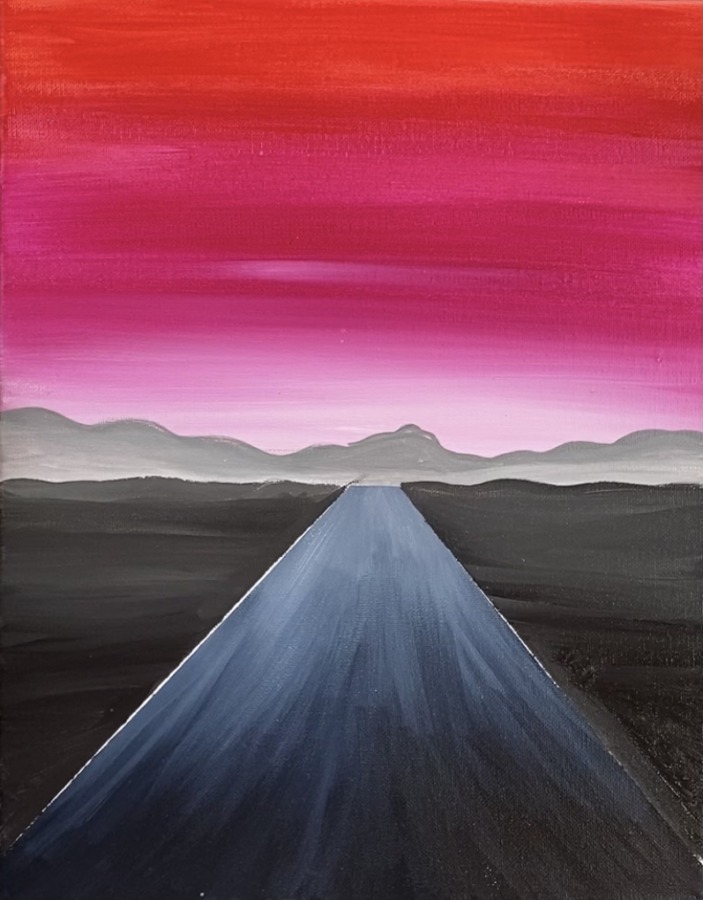
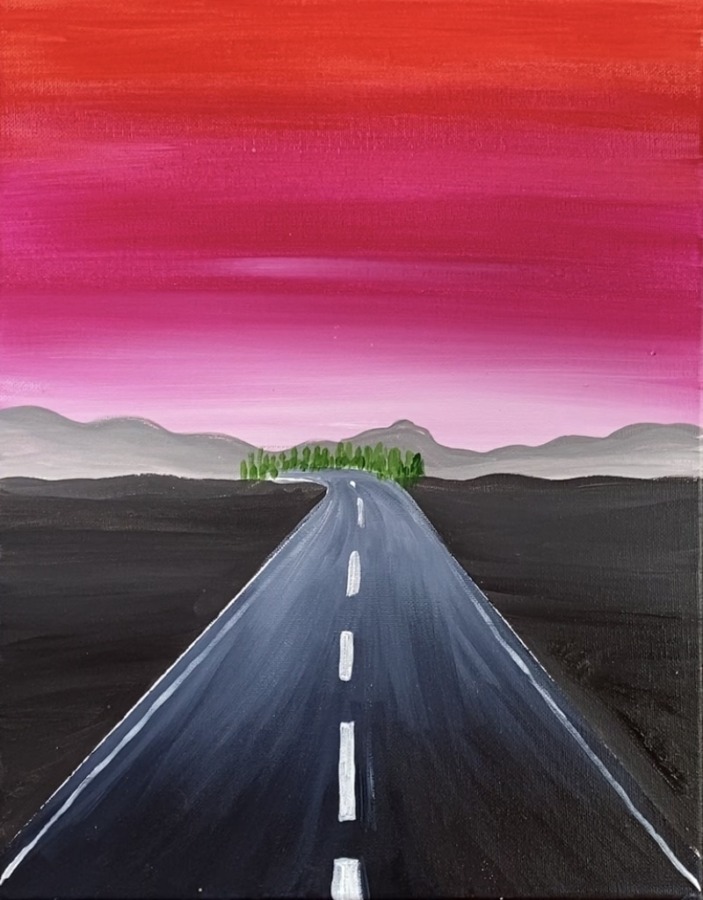
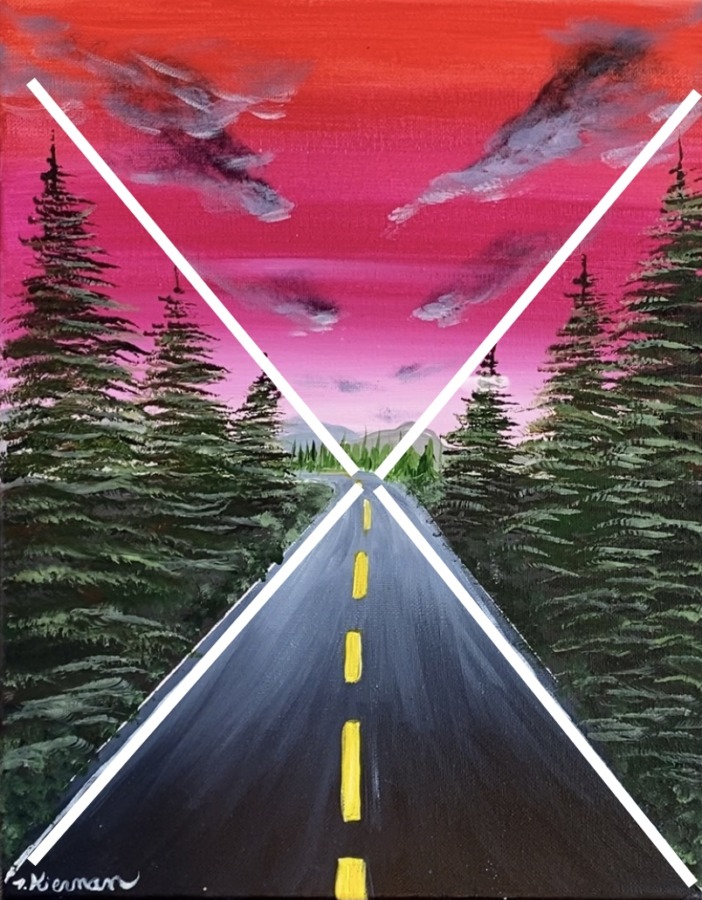
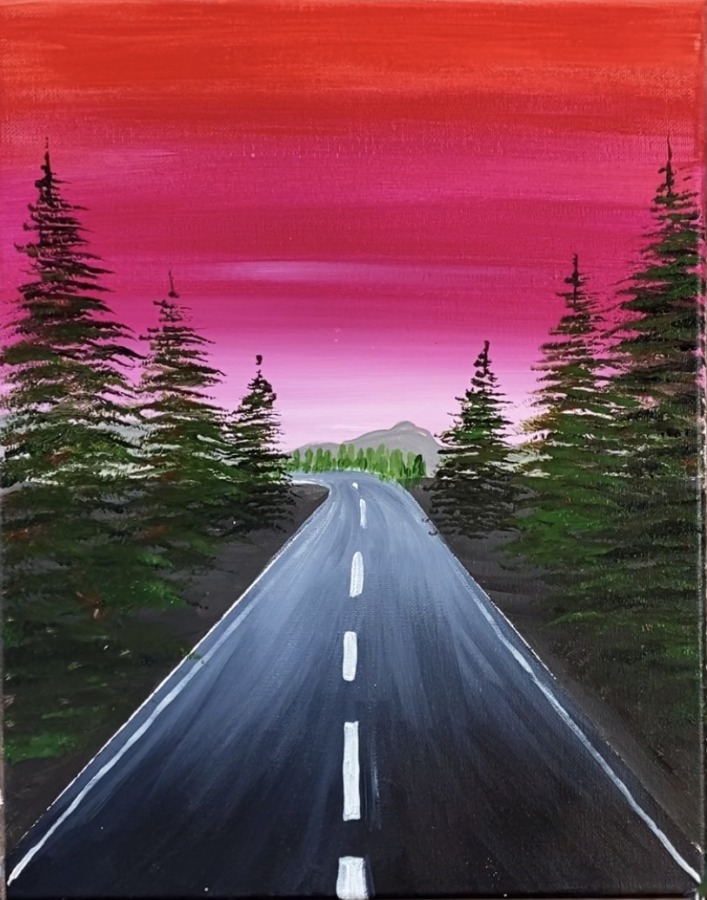
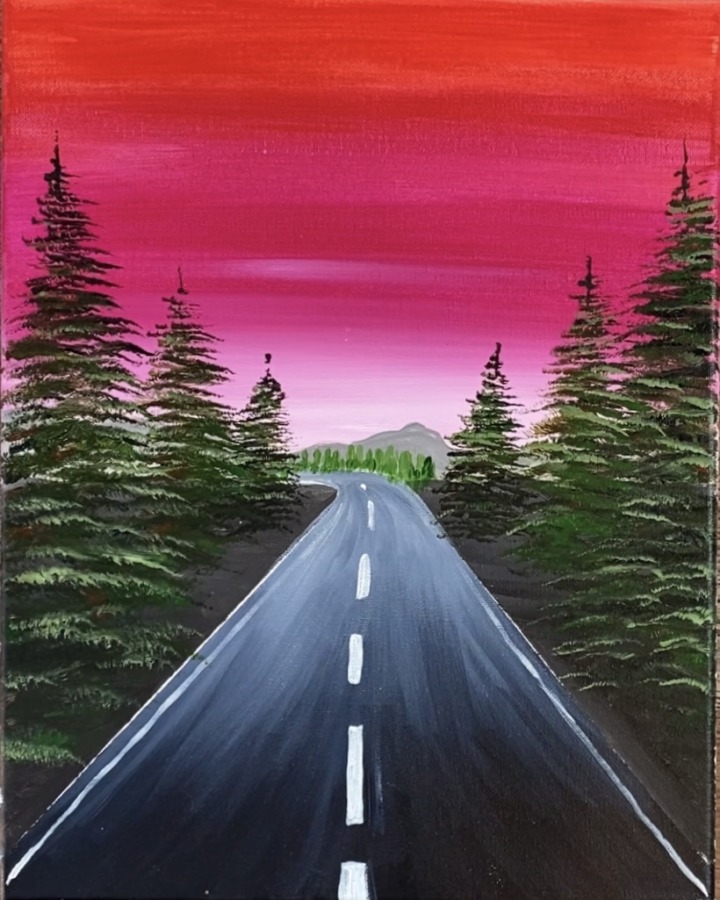
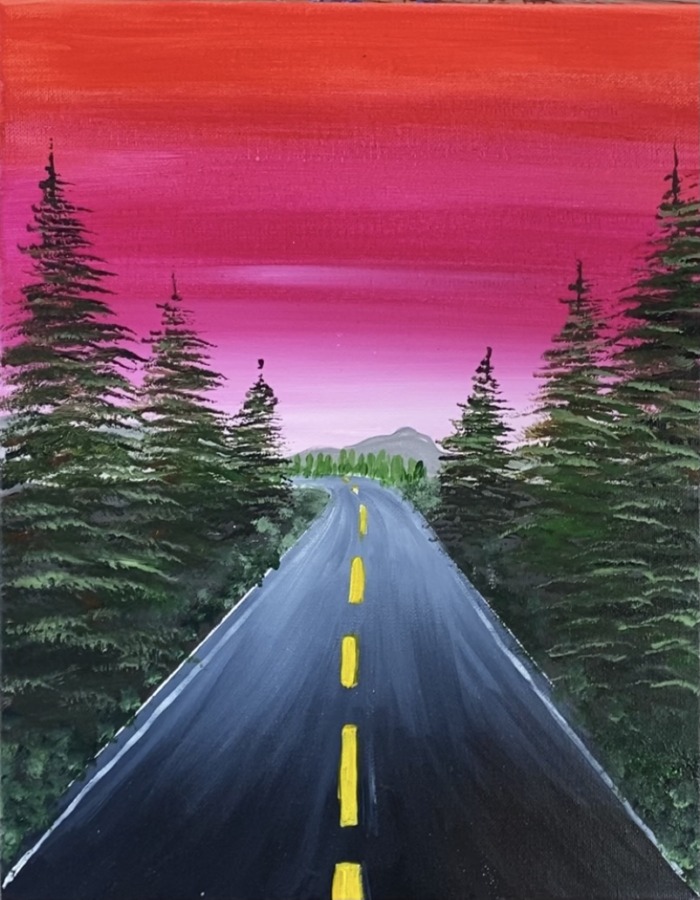
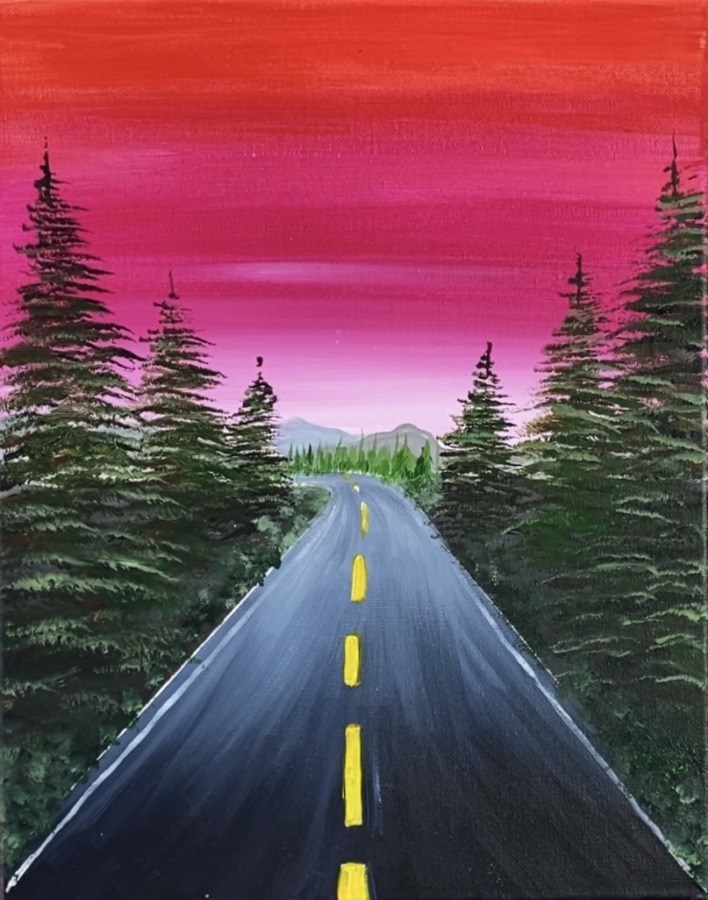
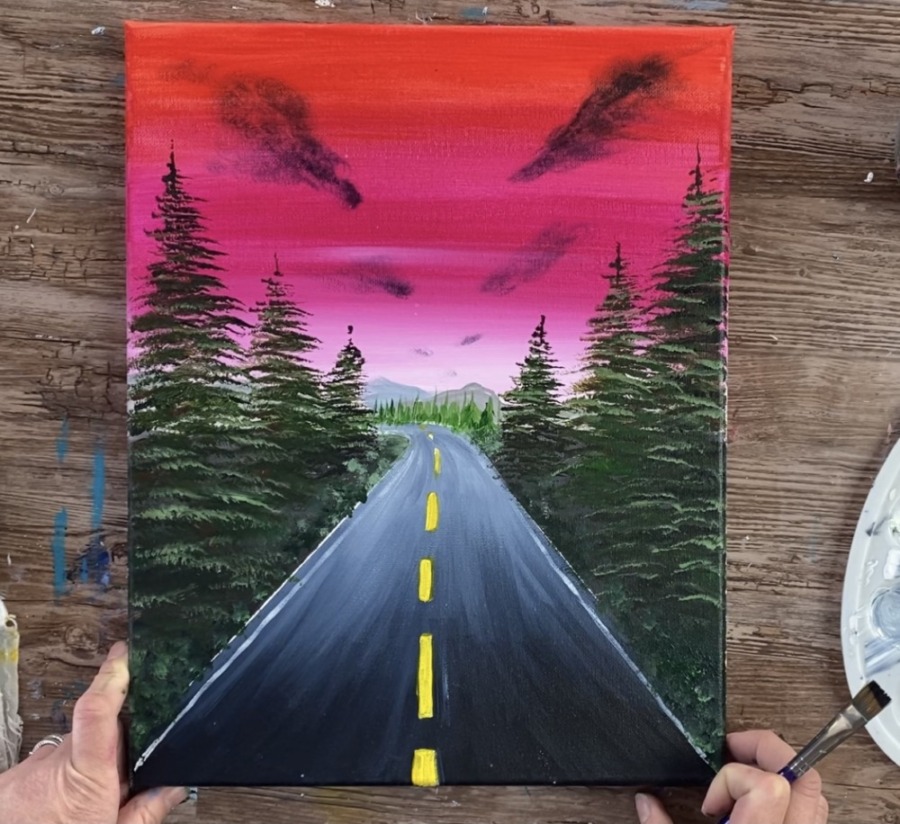
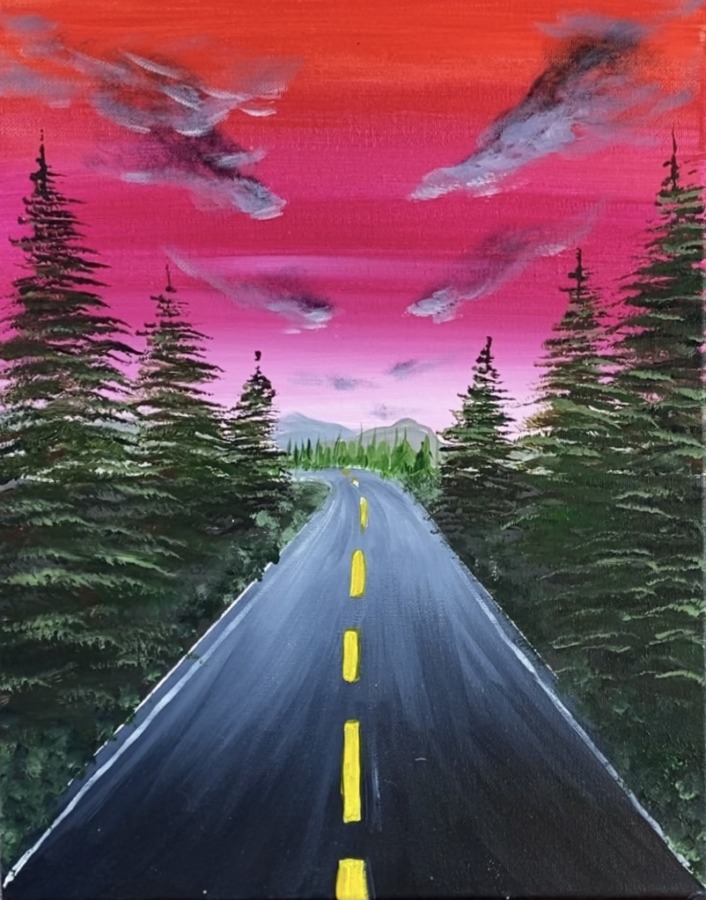
Learn to paint a beautiful cotton candy sunset sky with a road between a forest of trees! I absolutely love the symbolism of road paintings. They represent life’s journey.
Would you like to save this?
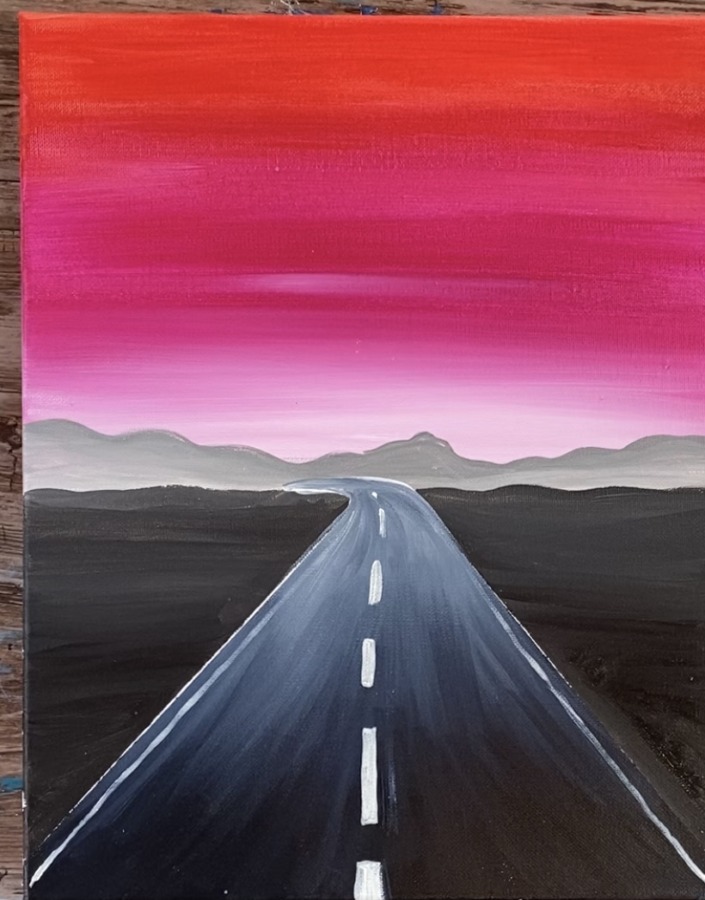
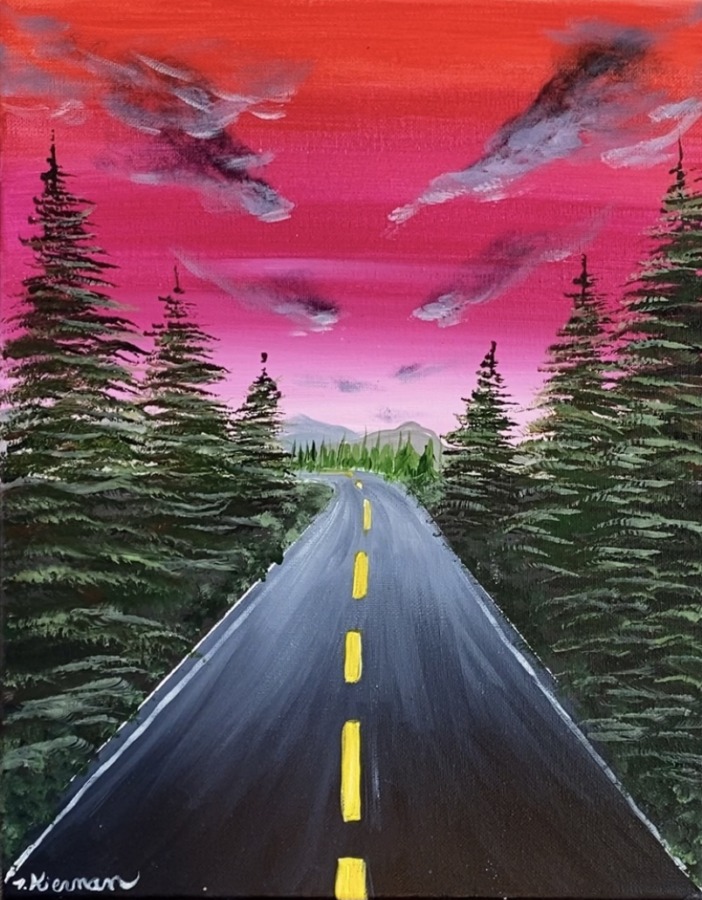
In this painting, I purposefully wanted the foreground to be kind of dark and the distance to turn sharply to the left and turn bright into the sunset. As we approach a new year (this is the last painting I did in 2020), it is a sign of hope.
This is a painting tutorial that is at an intermediate level. I placed this at that level because of the trees and clouds. Those two techniques tend to be tricky.
If you want to practice your fan brush trees, you can check out my tutorial for how to paint trees with a fan brush. I do have a cloud tutorial, however, the technique of the clouds in this painting is different in that these are sunset clouds.
Of course if this painting is calling out to you and you are a beginner, I say go for it! You will be surprised at what you can achieve! It’s all about the process and having fun and this is a really therapeutic painting!
Enjoy and happy painting!
Materials
Sunset Road
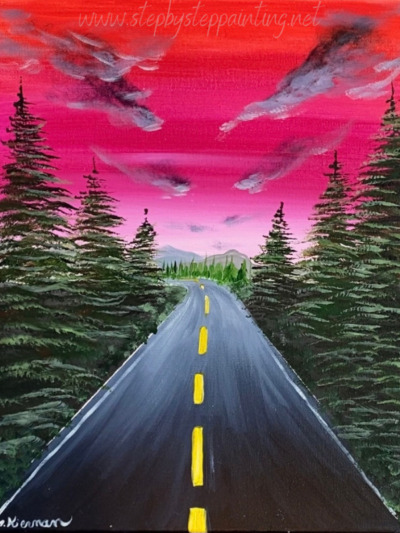
Learn to paint a road composition painting with acrylics on canvas.
Materials
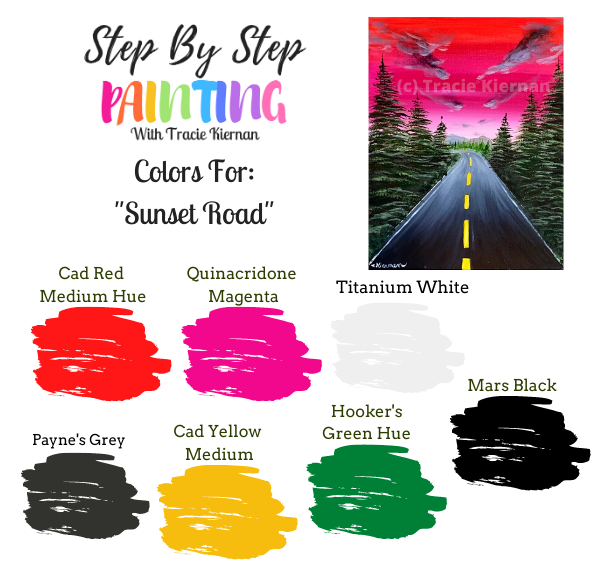
Colors
- Titanium White
- Payne's Grey
- Mars Black
- Cadmium Red Medium Hue
- Cadmium Yellow Medium Hue
- Hooker's Green Hue Permanent
- Quinacridone Magenta
Brushes
- 3/4" Flat Wash
- #4 Round
- #8 Round
- #4 Fan Brush
- Round Bristle Brush (optional, used for ground shrub texture)
- 12 Bright Brush (used for clouds)
Instructions
- See full tutorial on www.stepbysteppainting.net for detailed step by step instructions!
Colors
Directions At A Glance
Video
Step By Step Directions
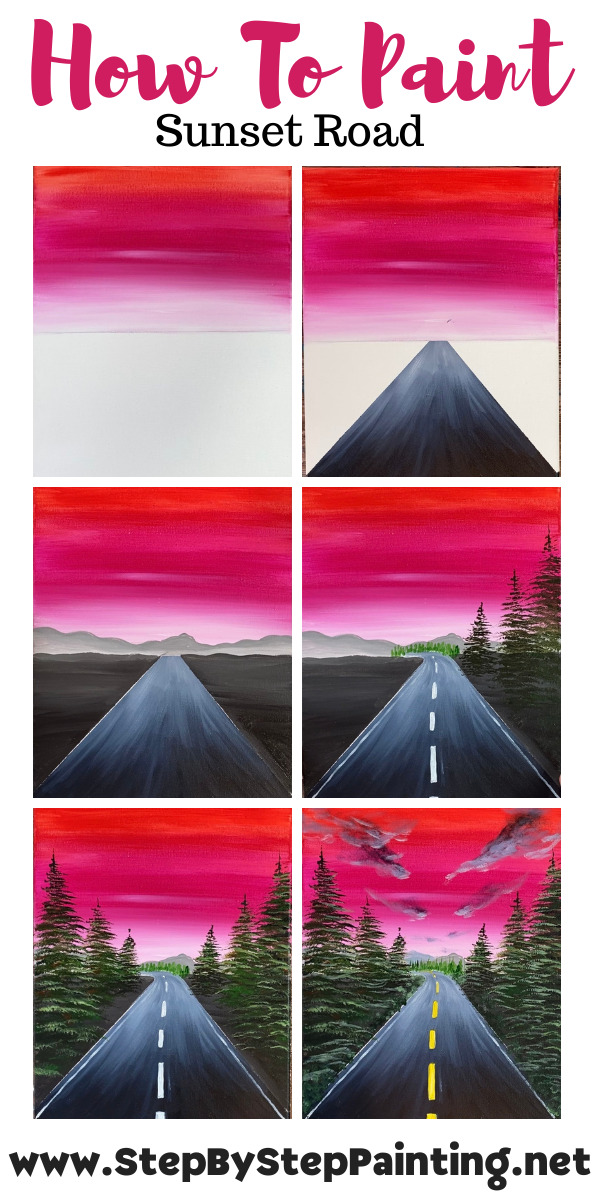
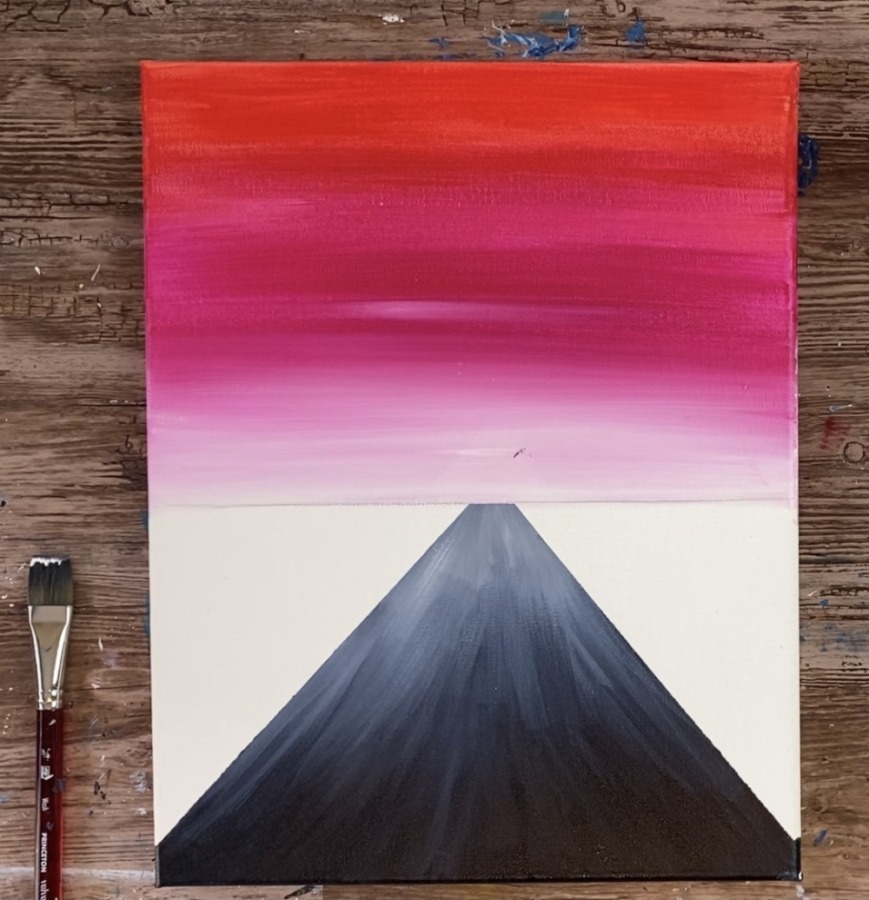
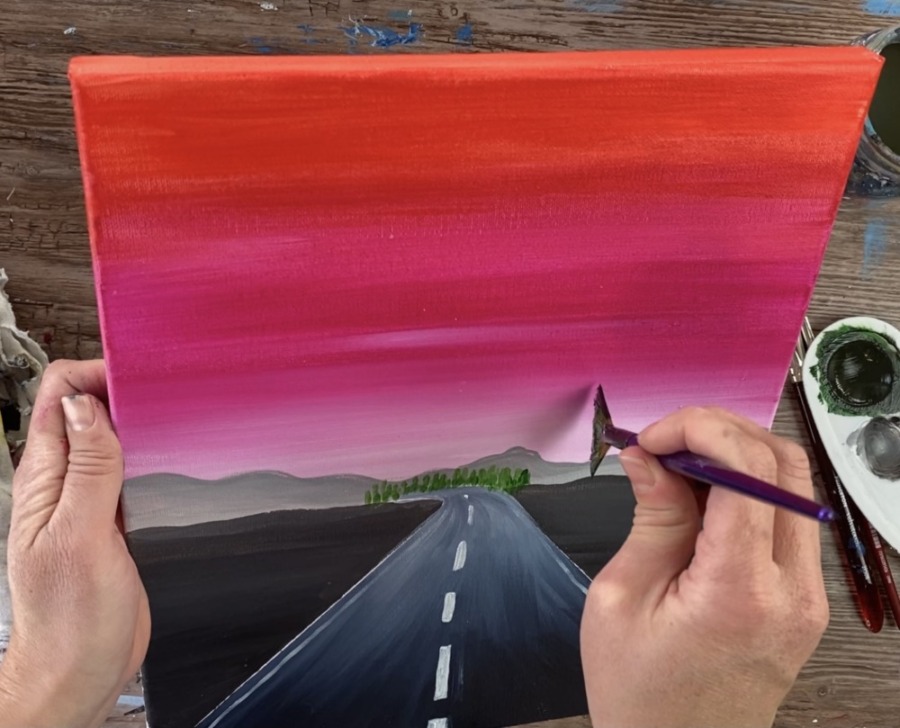
1. Paint the sky
Position your 11 x 14 canvas in vertical portrait mod. Draw a horizontal line in the center of the canvas using a ruler or a straight edge.
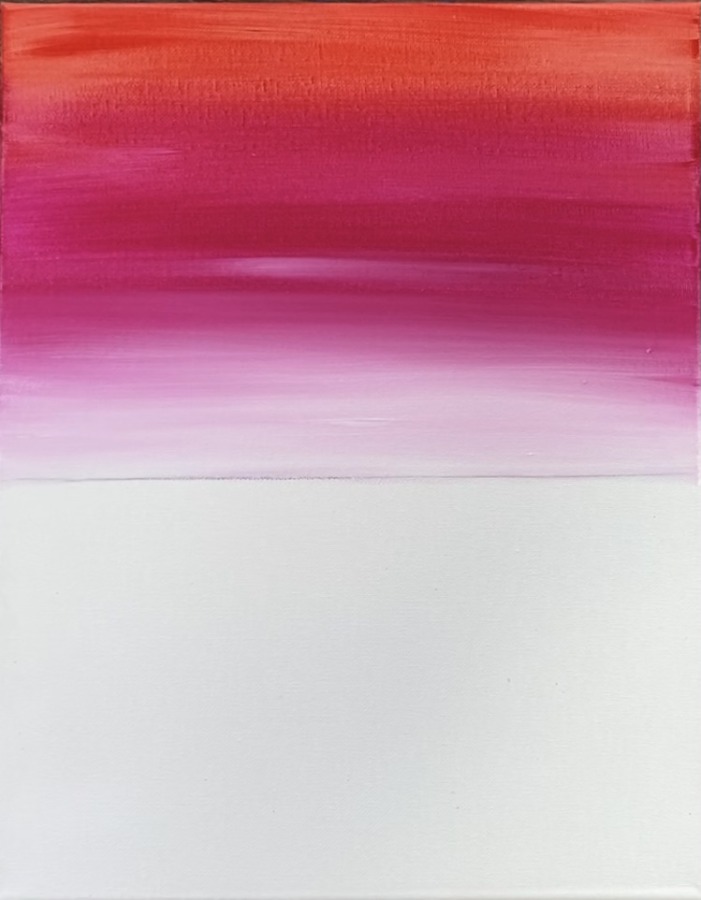
Then use a 3/4″ flat wash brush to paint a very thin layer of water in the sky area. This should be very thin and not dripping.

Then load your palette with cadmium red medium hue (you only need a little bit). Load the tip of your 3/4″ flat wash brush with the red and paint horizontal strokes at the top.
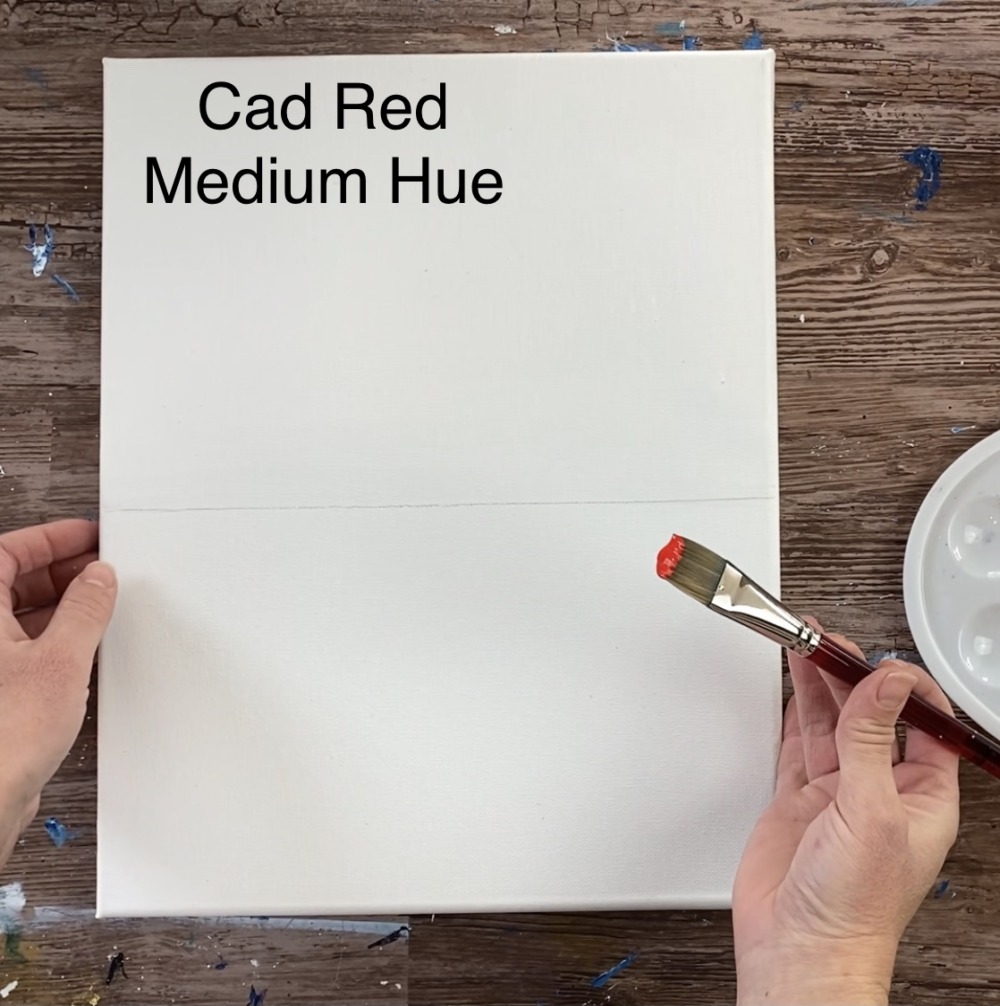
Go about 3-4″ down with the red. Then wipe off your brush with a rag or paper towel.
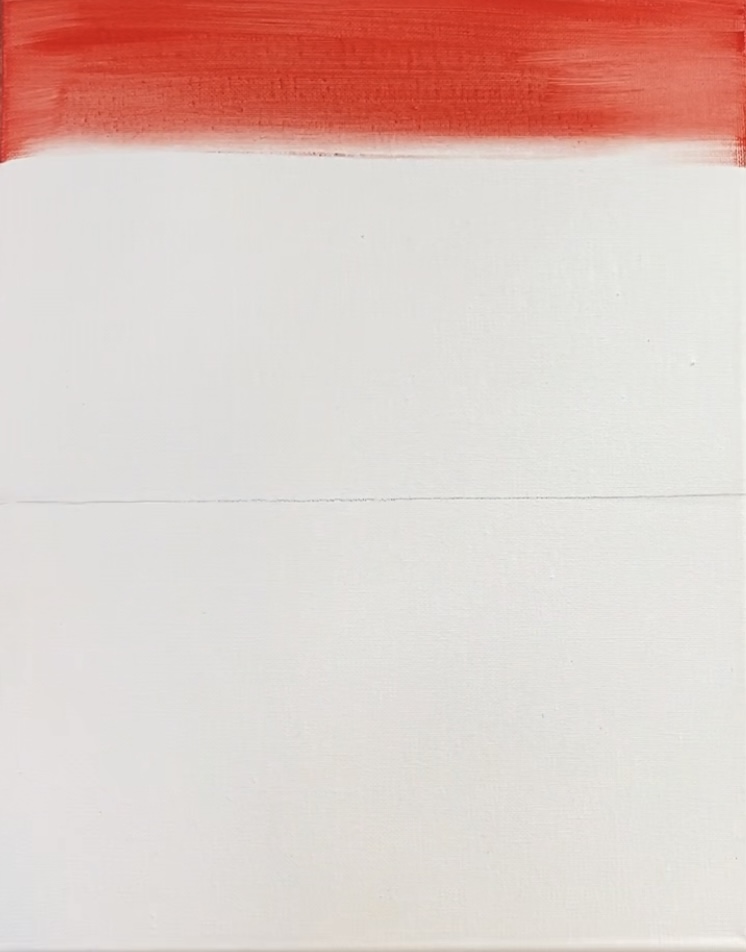
Load your brush in quinacridone magenta.
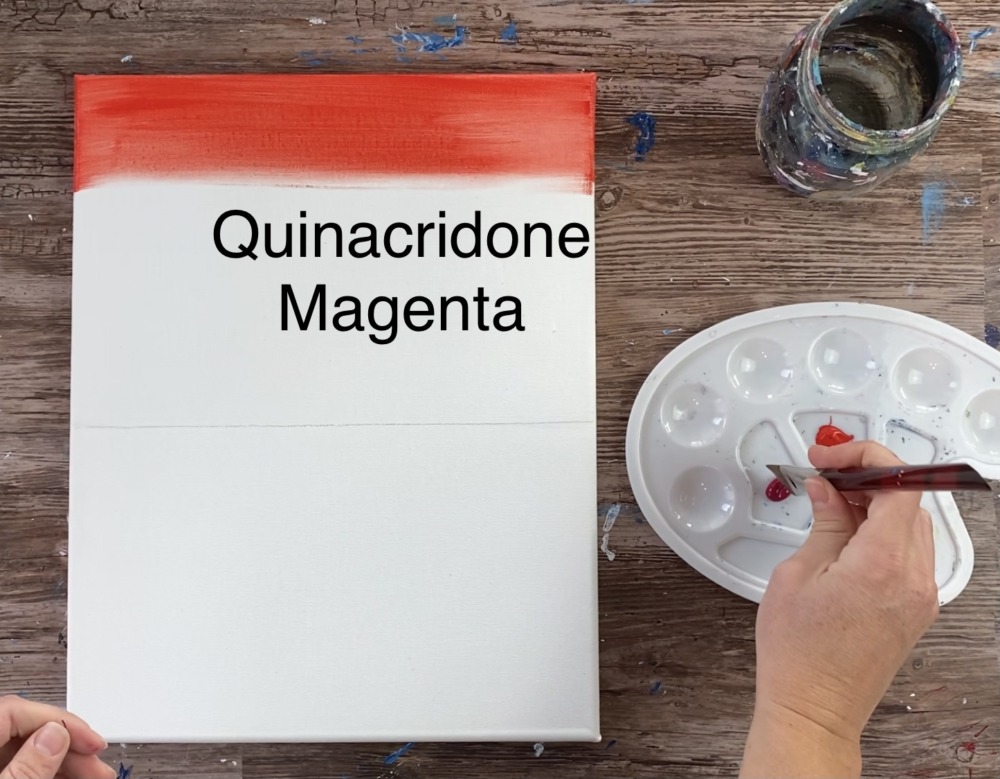
Blend the quinacridone magenta into the red. Then paint almost all the way down the sky but leave a 3-4″ gap of white space above the “horizon line”.
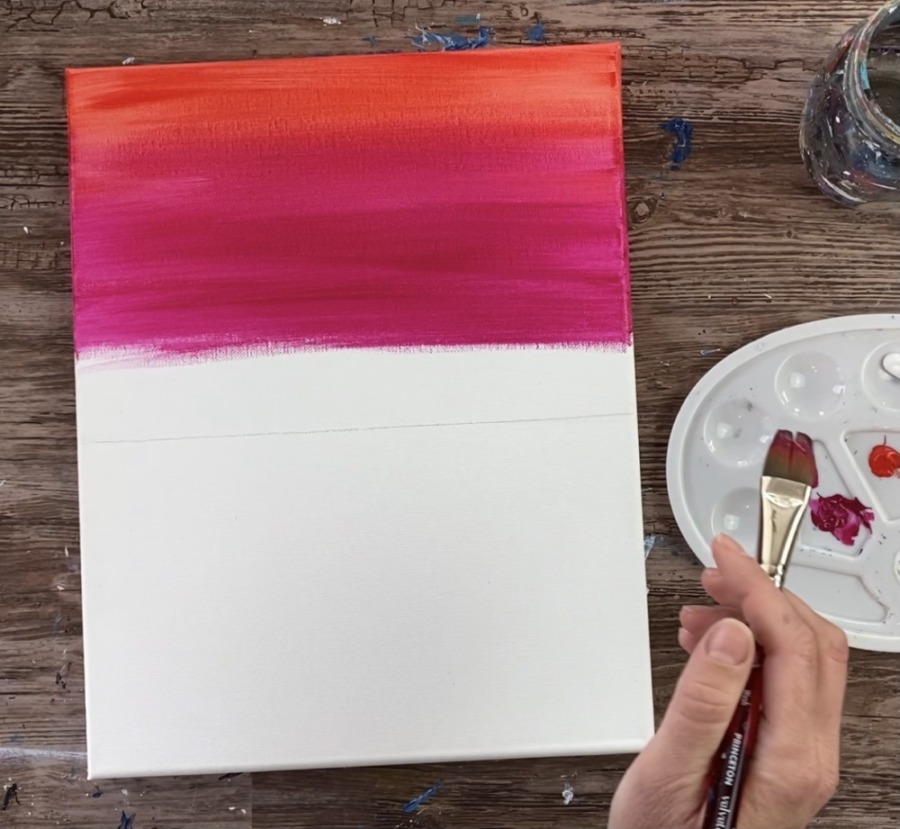
Then wipe your brush off with a rag or paper towel. Load your palette with titanium white and blend in titanium white the rest of the way down the sky area.
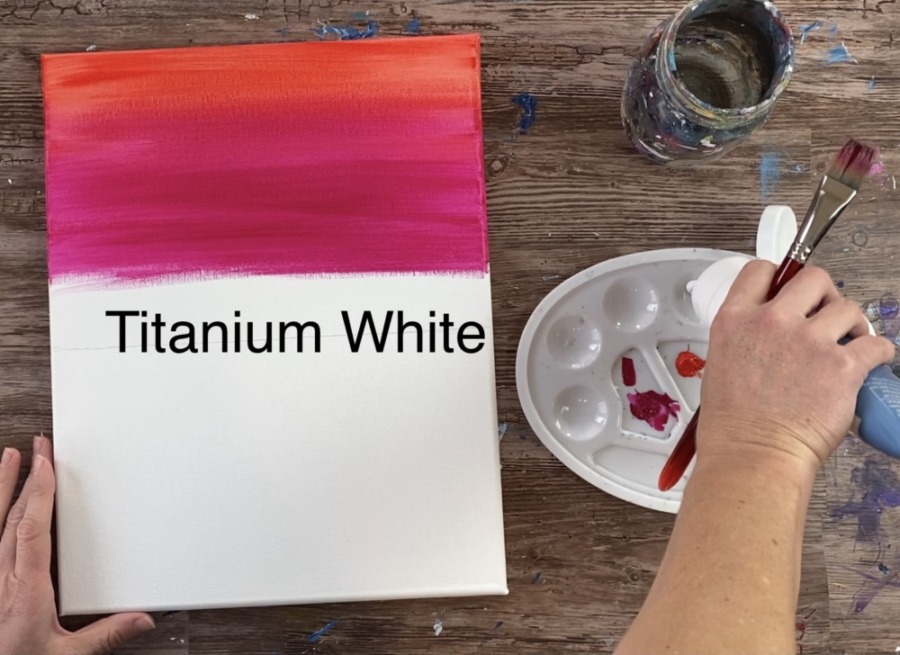
Do not paint below the horizontal line.
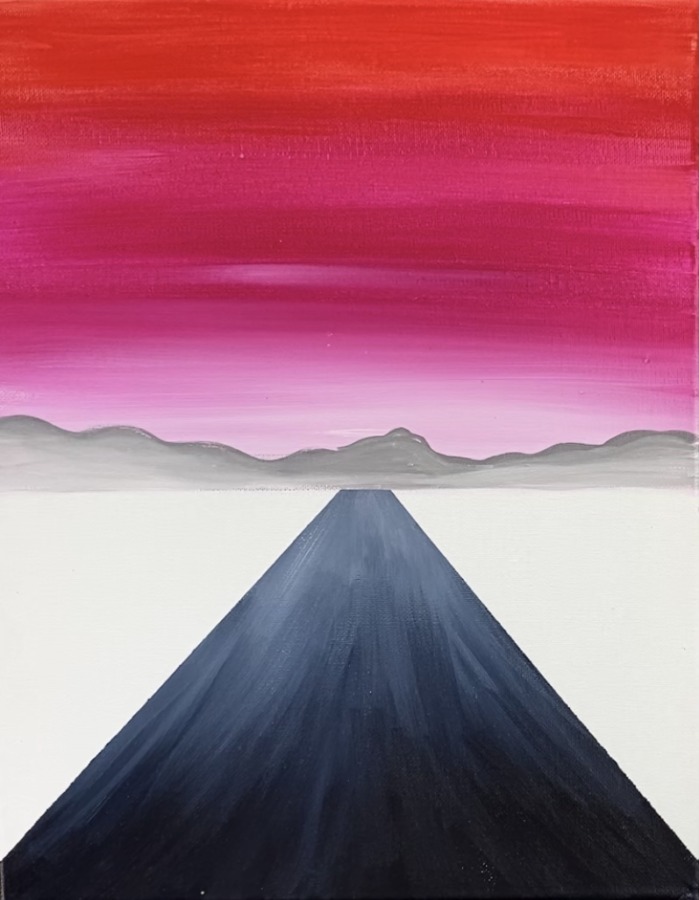
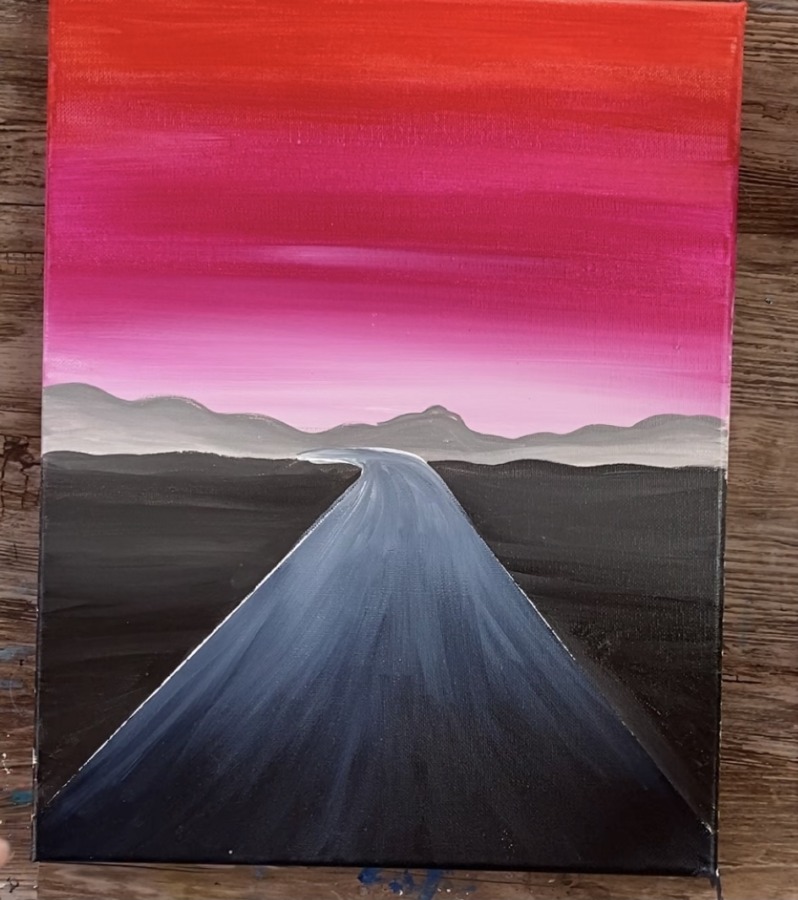
2. Tape & Paint The Road
Next use painters tape or masking tape to define your road area. This road does not go to a point, it goes flat when it hits the horizon line.
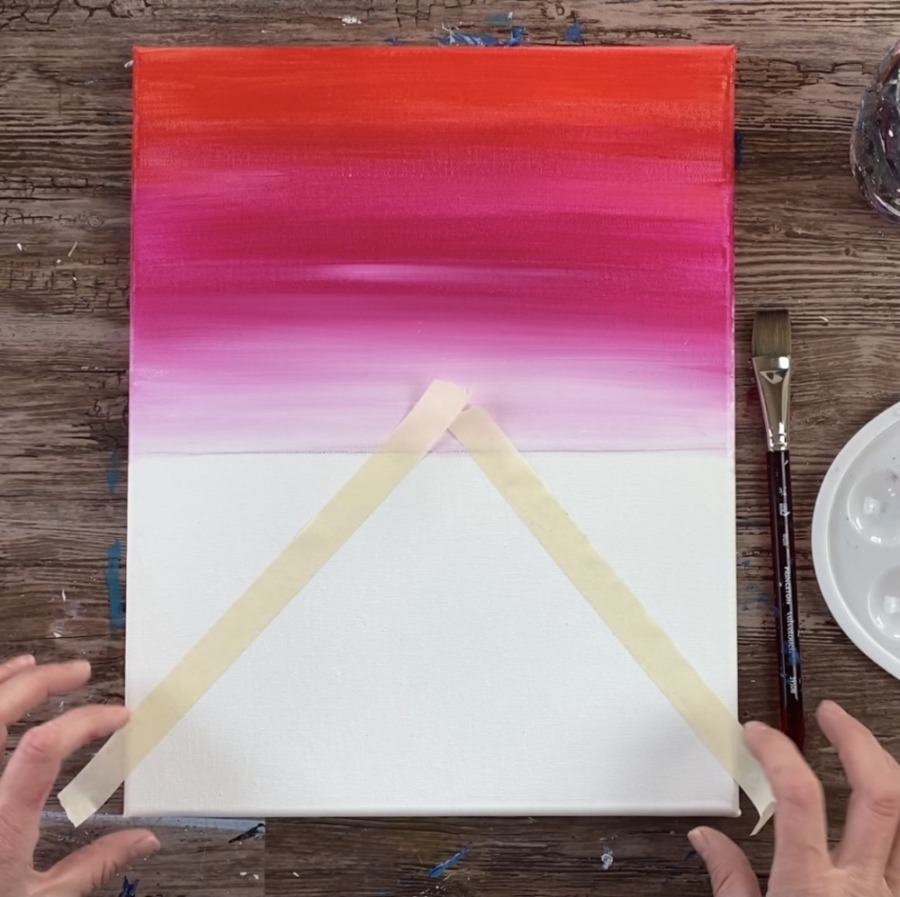
Also the bottom parts of the road do not go to the corner, they go slightly above the bottom and left corners of the canvas.
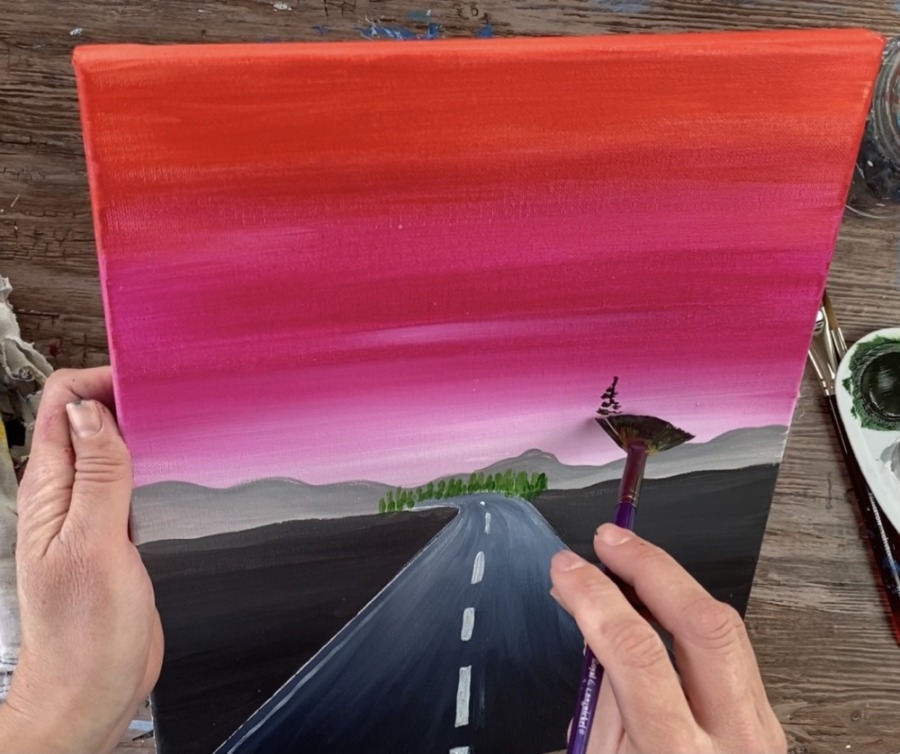
Then load your 3/4″ flat wash brush in the color “Payne’s Grey”. Paint the bottom of the road with this color and paint in diagonal strokes going in the direction of the road.
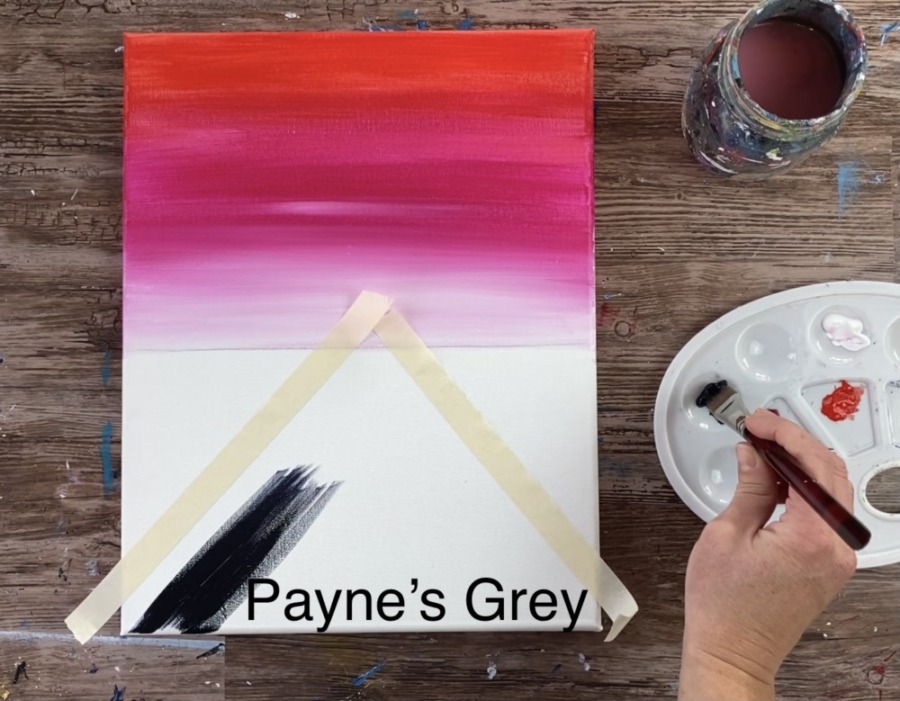
Do not paint all the road, just the bottom half.
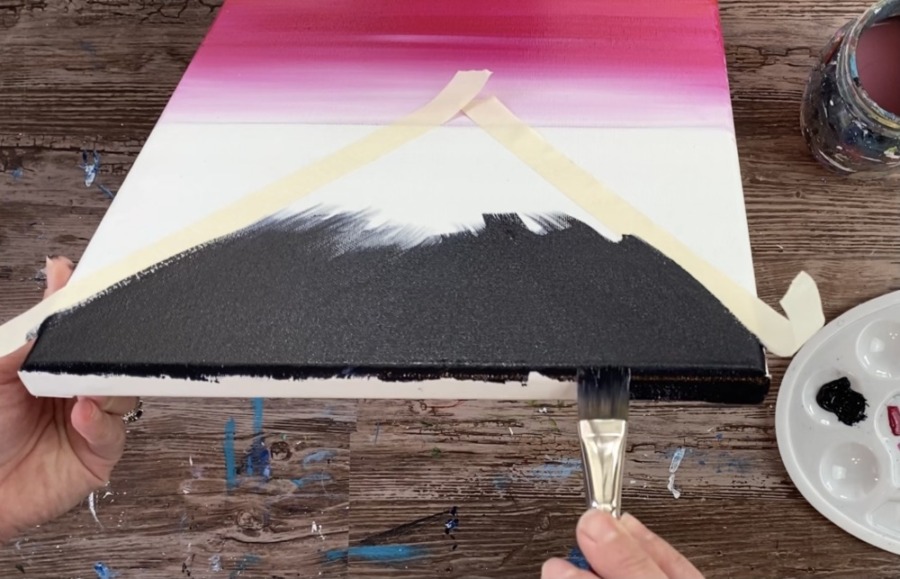
Then wipe off your brush with a rag or paper towel. Load it into titanium white. Blend the white into the Payne’s Grey so that the road gets lighter in the distance.
Gentle blend that white into the gray and continue to make your strokes go in a diagonal direction. Try to get the road to be lightest way in the distance (but not completely white) and darkest at the very bottom.
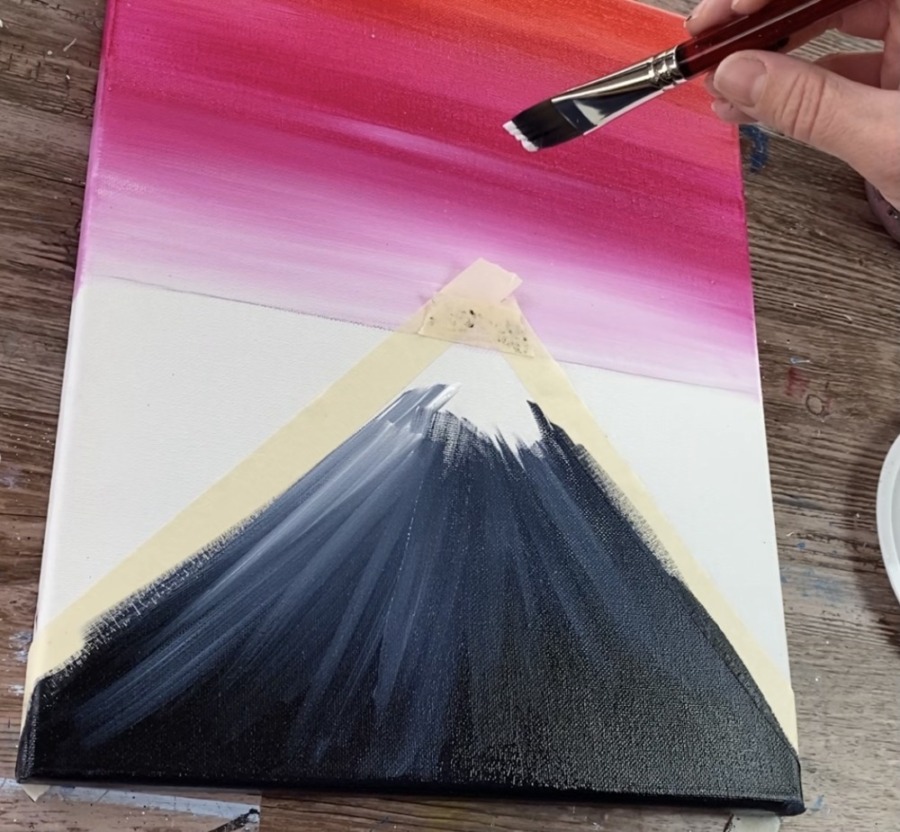
3. Paint The Mountains
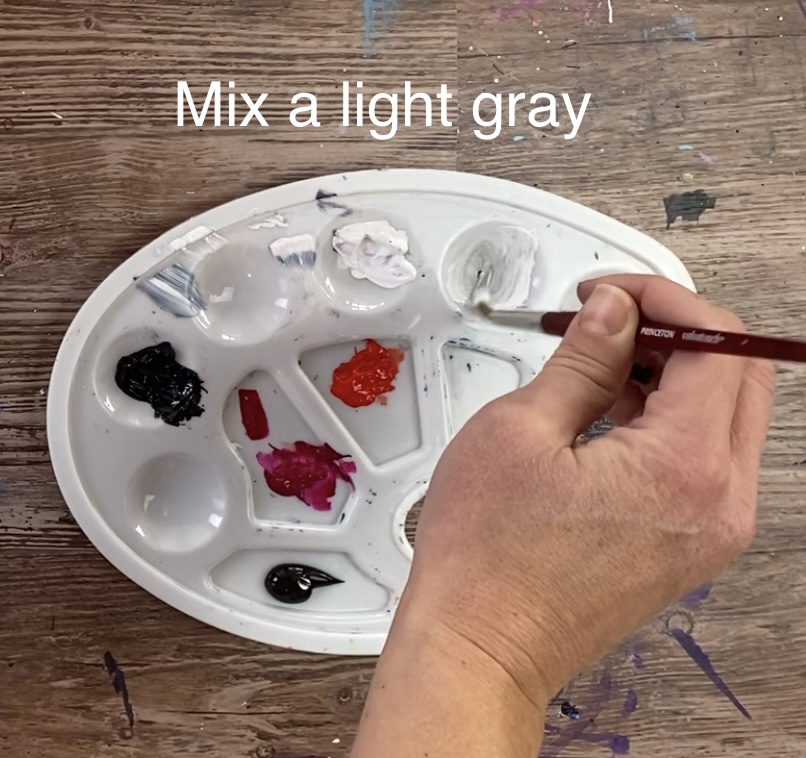
Use a #8 round brush (or any round brush) to paint a light gray mountain range above the horizon line.
Mix on your palette a light gray by mixing 1 part mars black to 4-5 parts titanium white.
Define your mountain rage by painting a wavy line representing the top of the mountain. Then paint the rest of the mountain area in all the way to the horizon line.
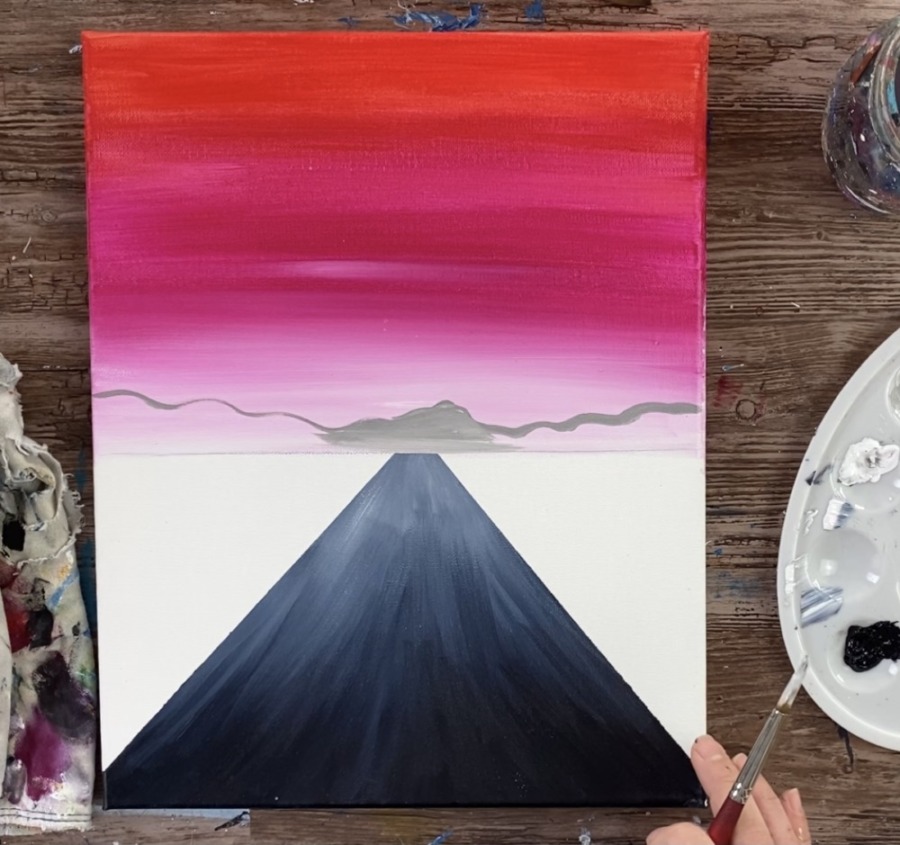
Optional: you can add more white to your gray at the very bottom of the mountain. This gives your mountain some depth.
4. Paint the land
For the land on the left and right, paint it mars black. You can also use your tape to mask off the road. Use any brush to paint that area mars black.
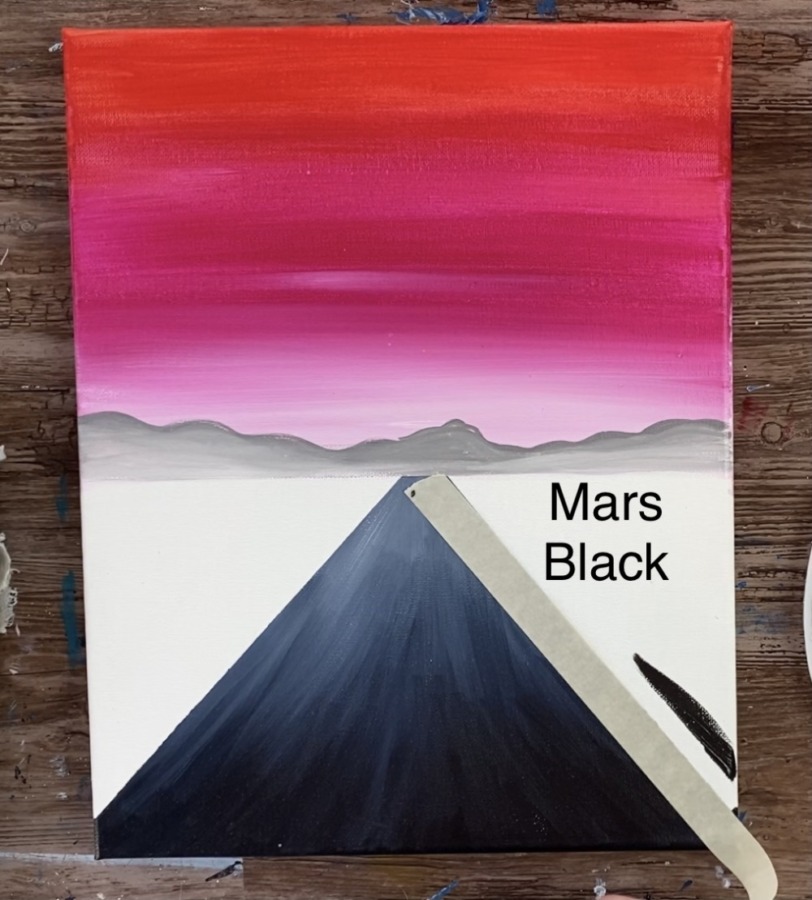
Paint left and right strokes. You can add a pop of white in to the black way in the back to make it look like it’s in the distance. However, much of this will be covered by trees so it’s not completely necessary.
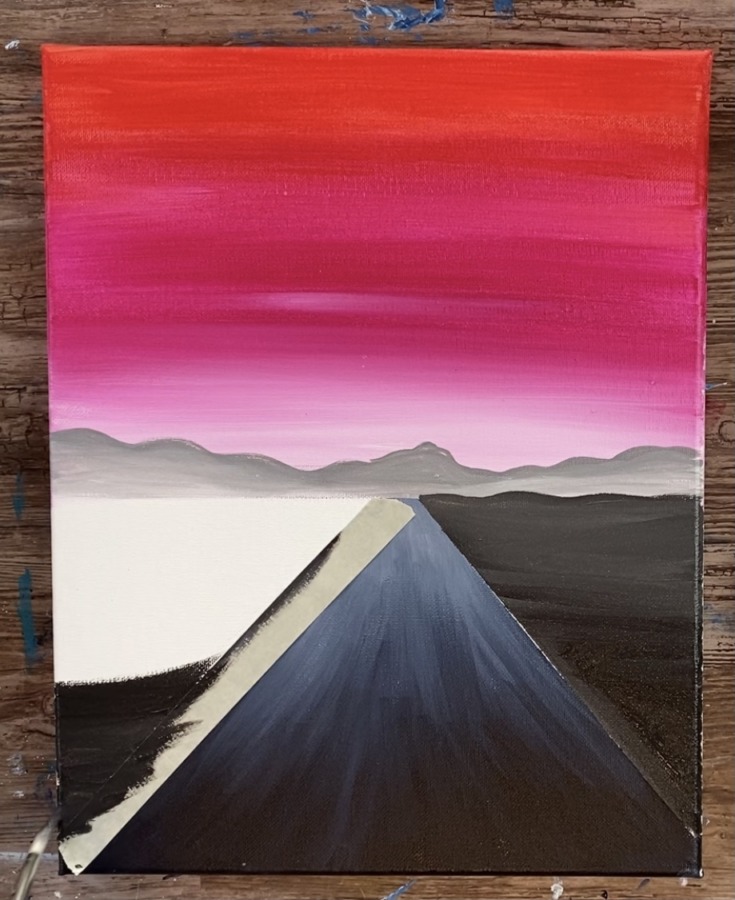
Make the land slightly bumpy or uneven just above the horizon line.
5. Make the road turn
To make the road turn, mix the same shade of gray on your palette as that light gray in the distance (Payne’s grey and white).
Use a round brush and paint your road so it curves to the left (it goes above the horizon line a bit).
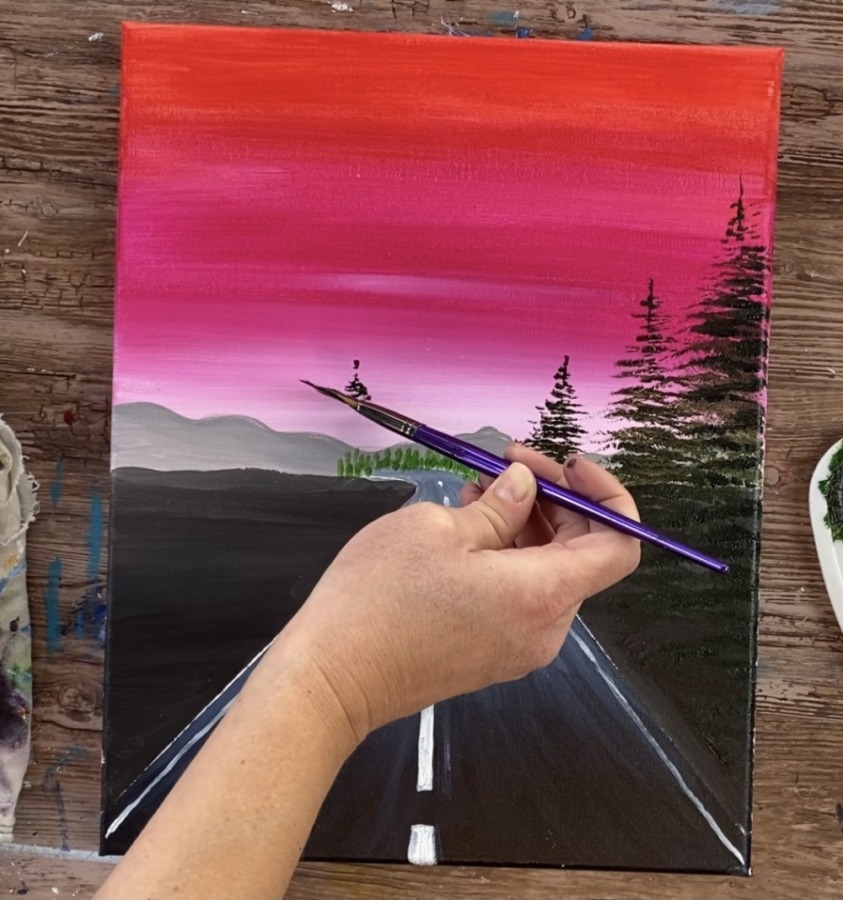
6. Paint the road marks
Use a #4 round brush or any small round brush to paint the white dashed lines on the road. These lines are very tiny way in the distance and get gradually larger and wider as it goes down to the bottom edge of the canvas.
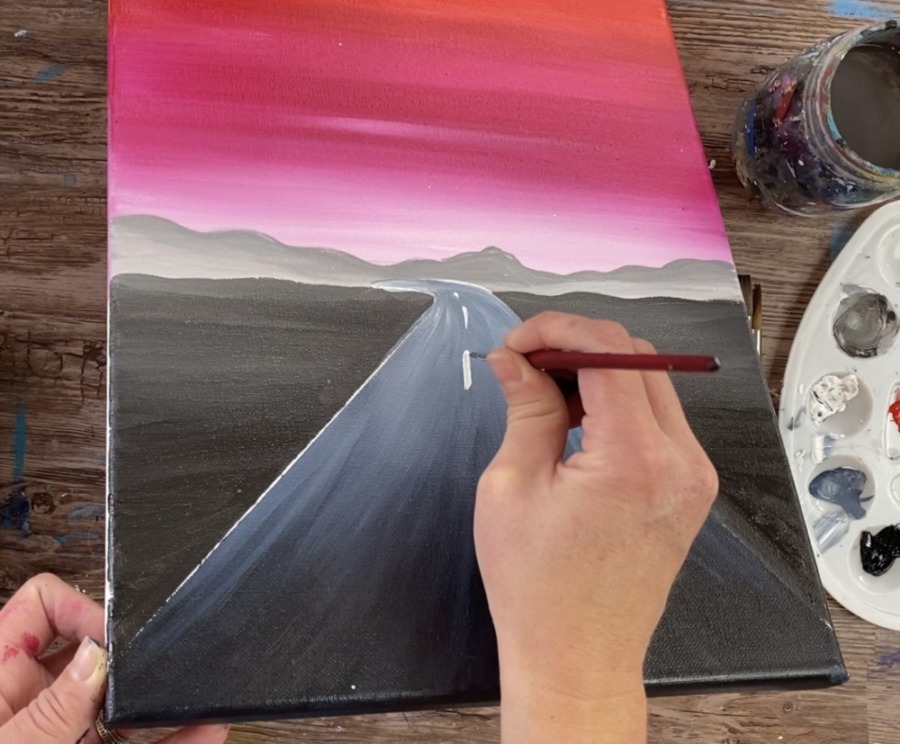

Then paint two diagonal lines on both sides of the road close to the edges. Use a #4 round brush and titanium white. Alternatively you can use a paint pen because these lines are so thin!
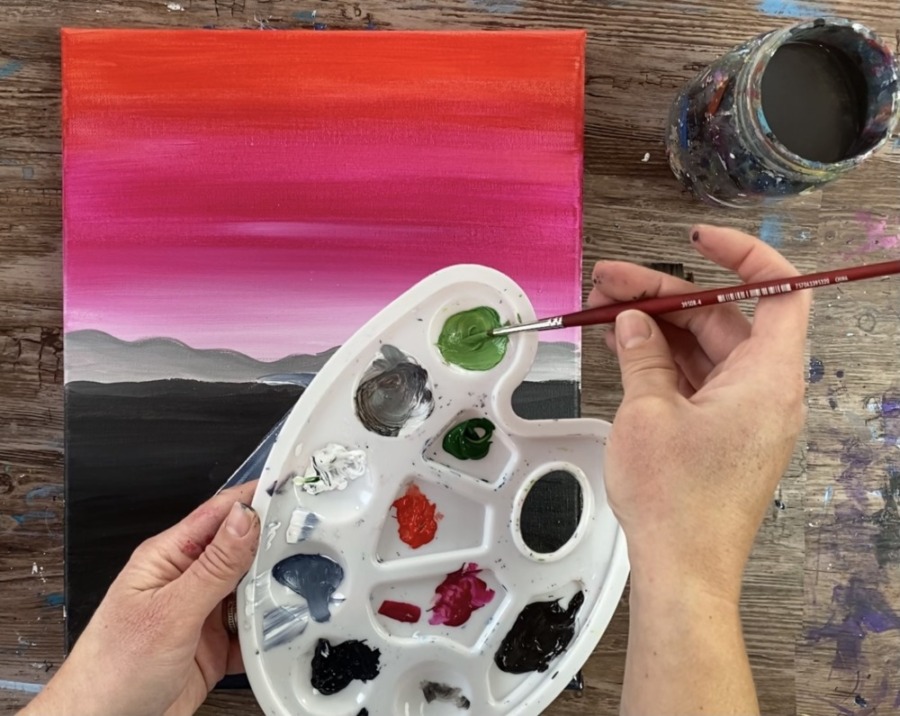
7. Paint the small trees
Use a #4 round brush for this step. Mix on your palette a combination of hookers green hue permanent, a tiny dot of cadmium red medium hue and a bit of white. It should be a light, natural green color.
The trees in the back are so tiny we do not see the branches! Paint vertical line “blobs” above the road where it turns.
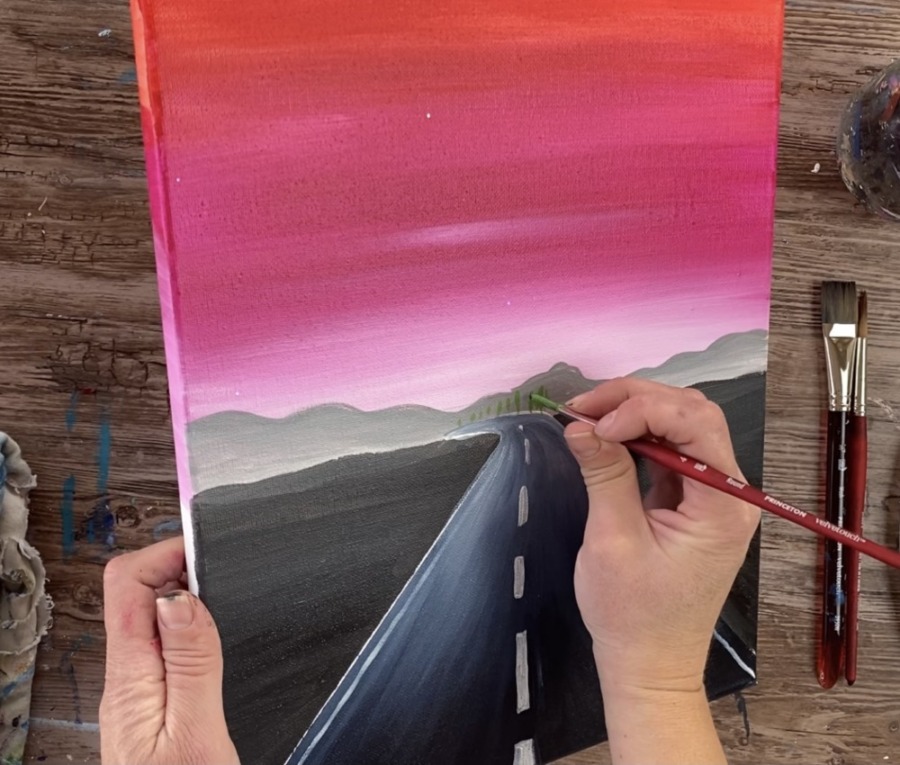
These are very abstract because the trees are so far away. You can vary your green by adding more dark or light green in there.
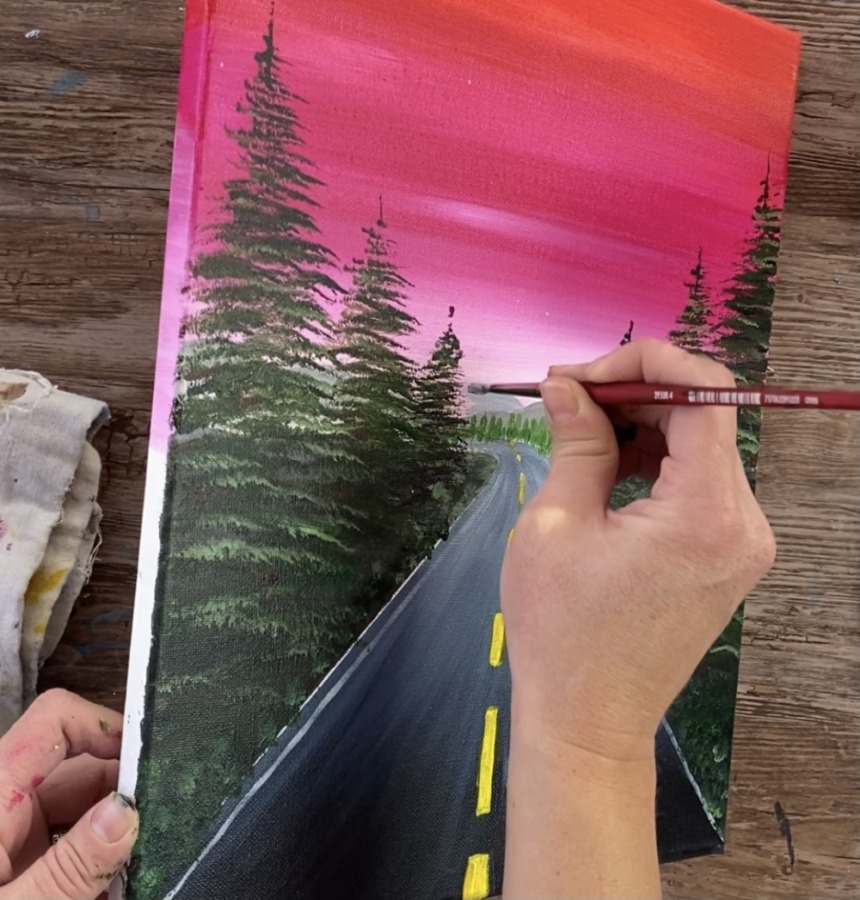
8. Paint the larger trees
I used a #4 fan brush for this step! Mix on your palette a very dark green by adding mars black (or payne’s grey) into that lighter green you already have on your palette.
Tip: for a more in depth tutorial on fan brush trees see my tutorial here.
There are three pine trees each on both sides of the road. Each one gets gradually larger. And because this is a “one point perspective” painting, the clouds and even the road go in the diagonal fashion as shown below.
If it helps, you can draw those lines with a piece of chalk. Start with the smallest tree and make a mark with your fan brush for the top point of the tree.
Hold your fan brush at an angle to get the smaller branches and tap your brush.
Tap just the tip of your fan brush going in a zig-zag direction forming the conical shape of the tree. The branches should be wide on the bottom.
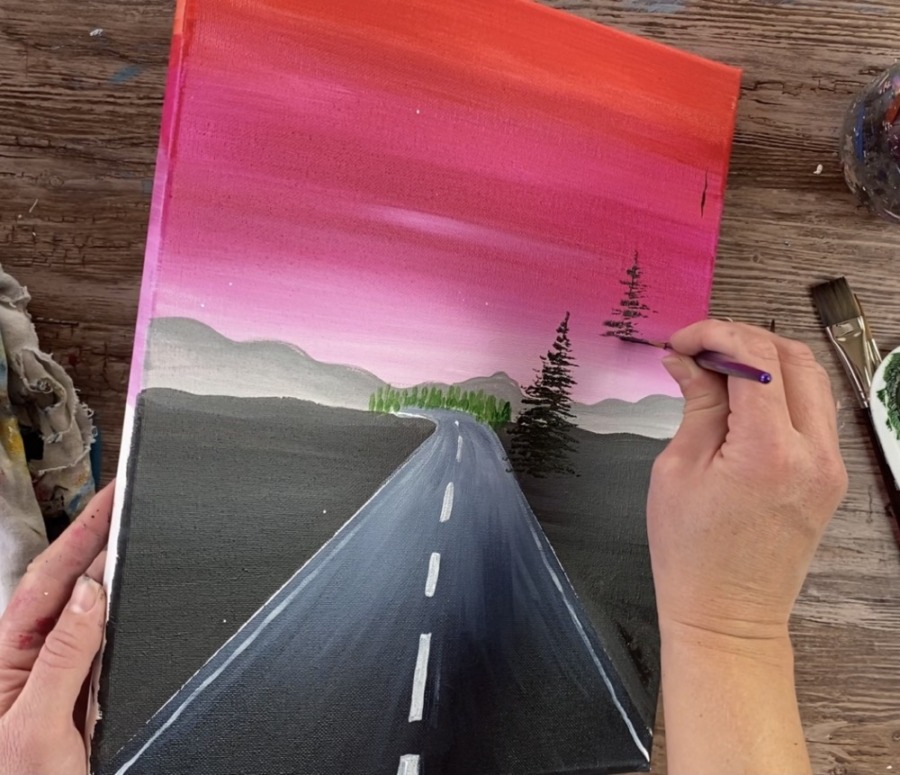
Repeat three times so each tree gets larger along that invisible diagonal line.
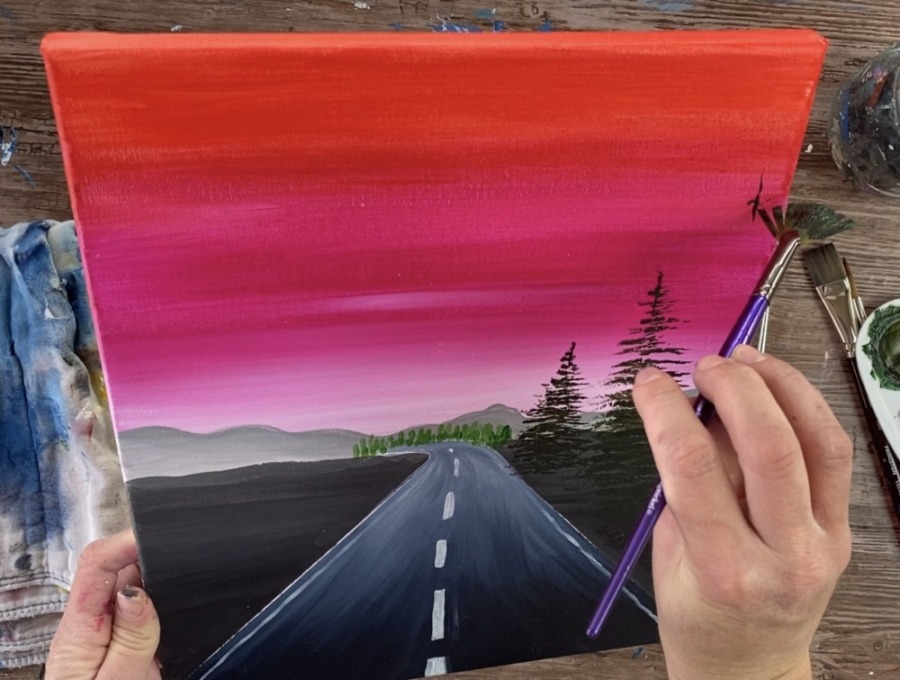
Then do three trees on the left side of the road each at the same heights.

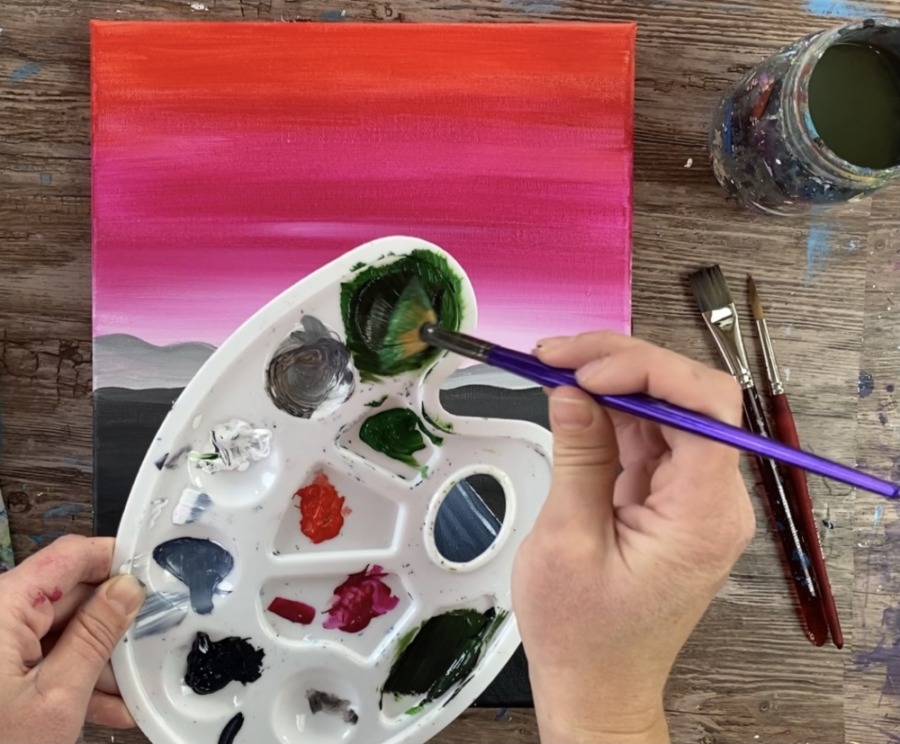
Then to make the trees look more “green” and less like a “silhouette”, go back over each of them with just “hookers green hue permanent”.
Then paint a third layer on your trees with an even lighter green. Add a bit of white into the hookers green hue permanent to make the green lighter. When you do these layers, try not to cover all the branches. You still want your darker layers to show.
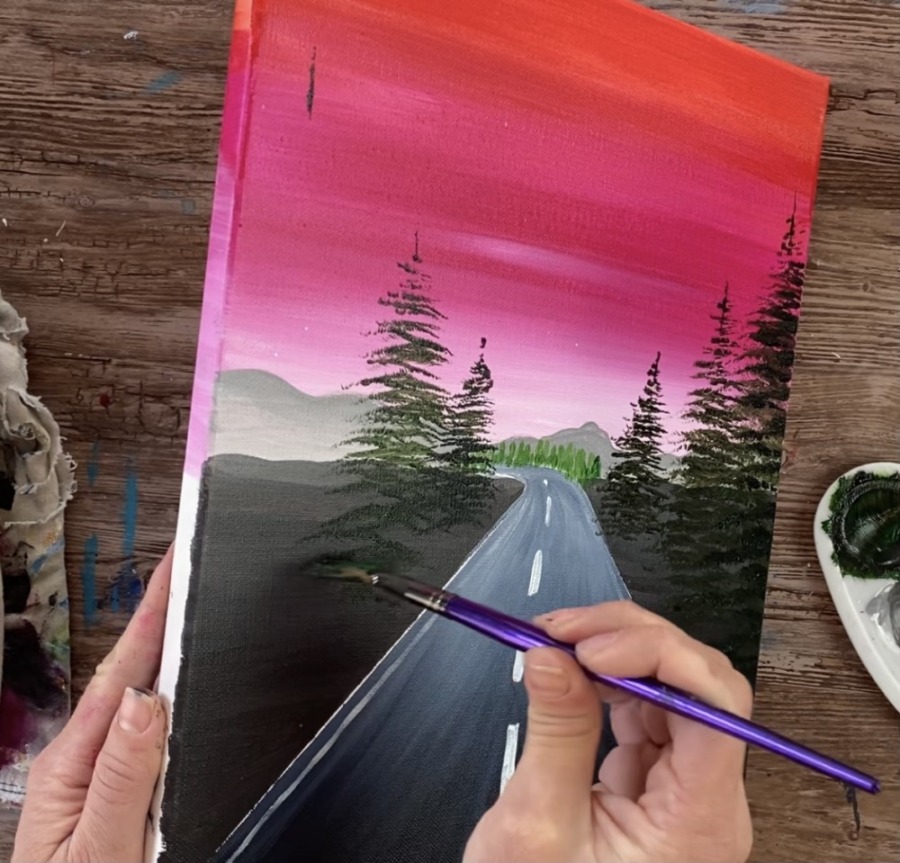
9. Paint the land foliage (optional)
I used a “bristle brush” for this step! It is a round brush with natural hair. This is the same brush I used in my “Jacaranda Tree” tutorial. Alternatively you can use Q-Tips for this technique.
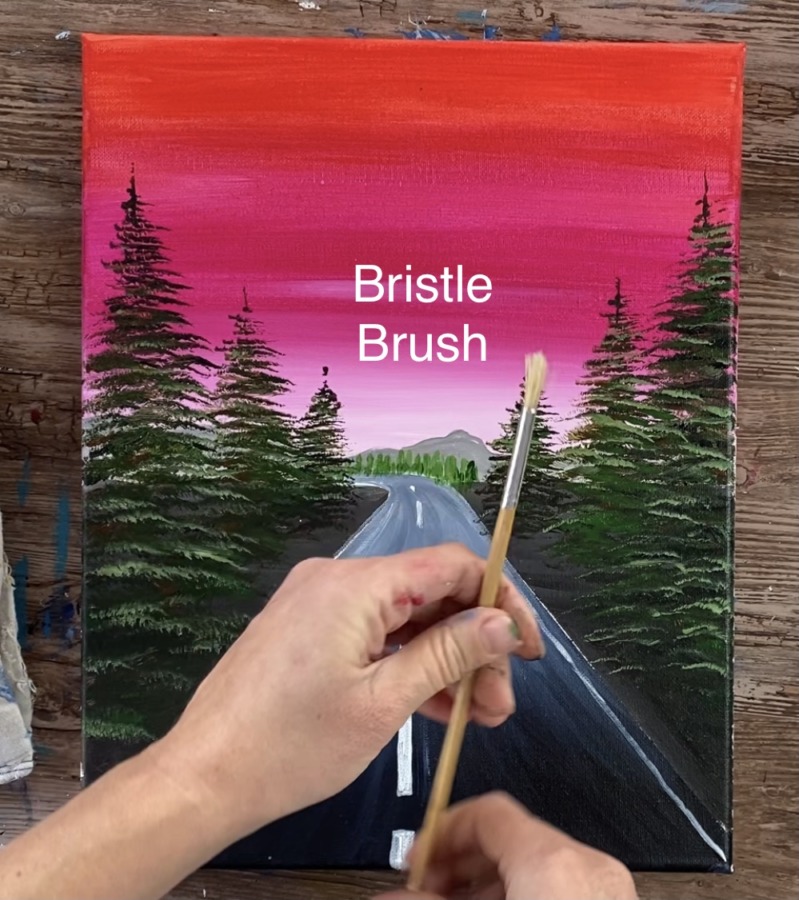
Load the tip of your bristle brush in hookers green hue permanent and “tap” foliage on the side of the road under the trees.
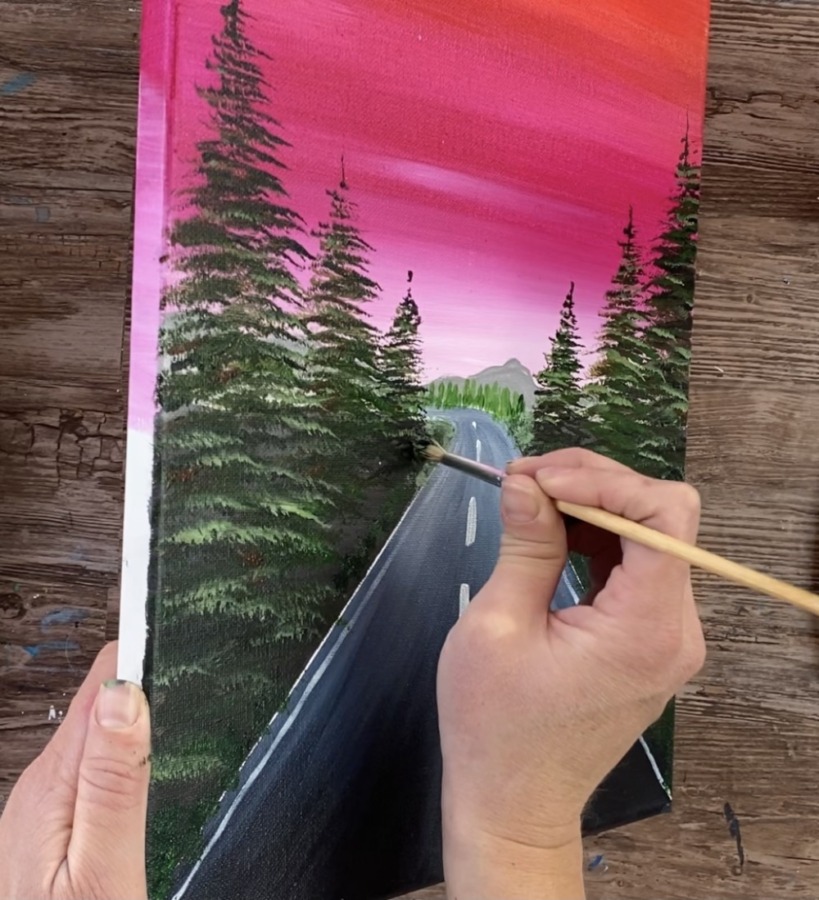
It can overlap the road slightly. Also, add a bit of lighter green in there for color variation.
10. Optional: paint another mountain range
I decided to put a more further mountain range peaking above the first one! This one was done by mixing a tiny bit of payne’s grey with titanium white. I also used my #4 round brush. Because this mountain is much further, it should be a lighter shade of gray than the first one.
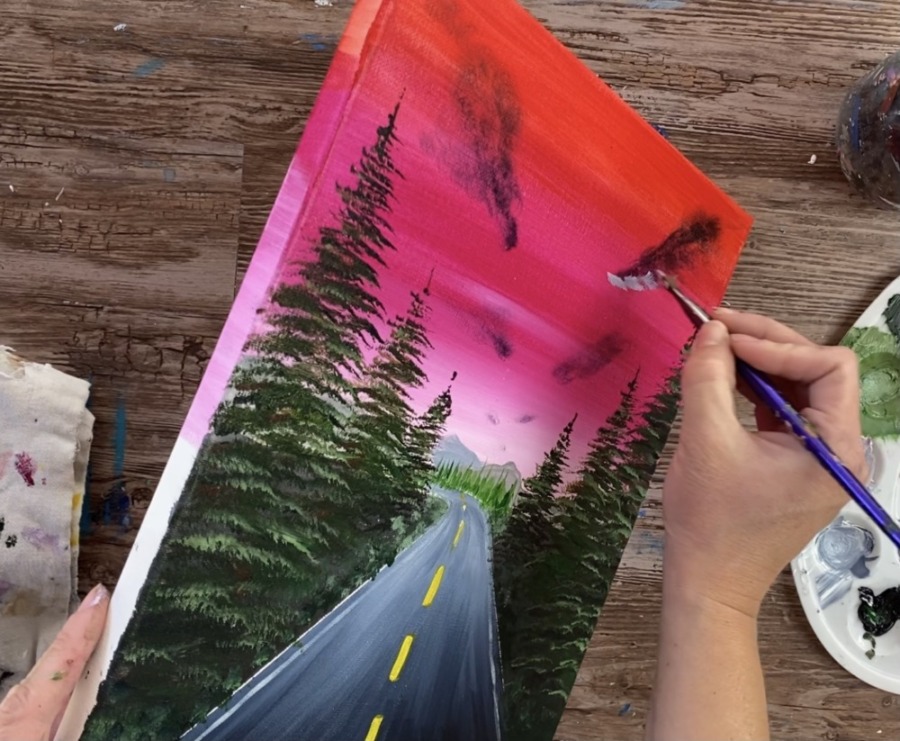
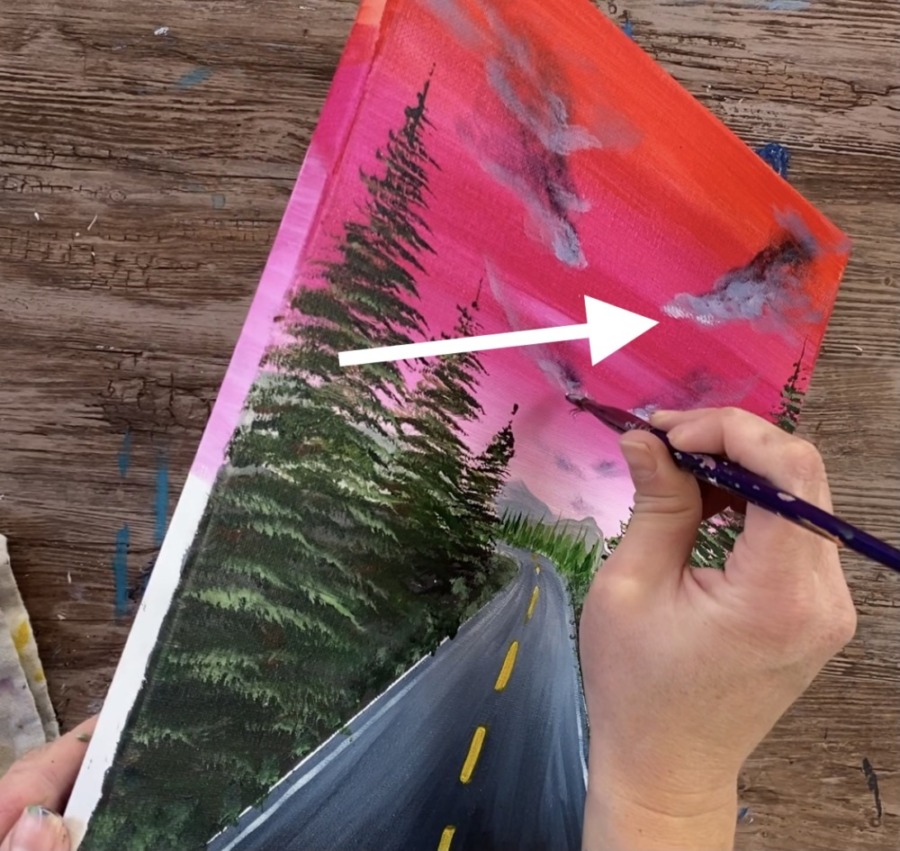
11. Paint the clouds
I used a #12 bright brush for the clouds. You can use any brush you feel comfortable using when you paint clouds.
The first layer of cloud was dark. I mixed on my palette quinacridone magenta with a bit of payne’s grey. This makes it look like a very dark grey-purple color.
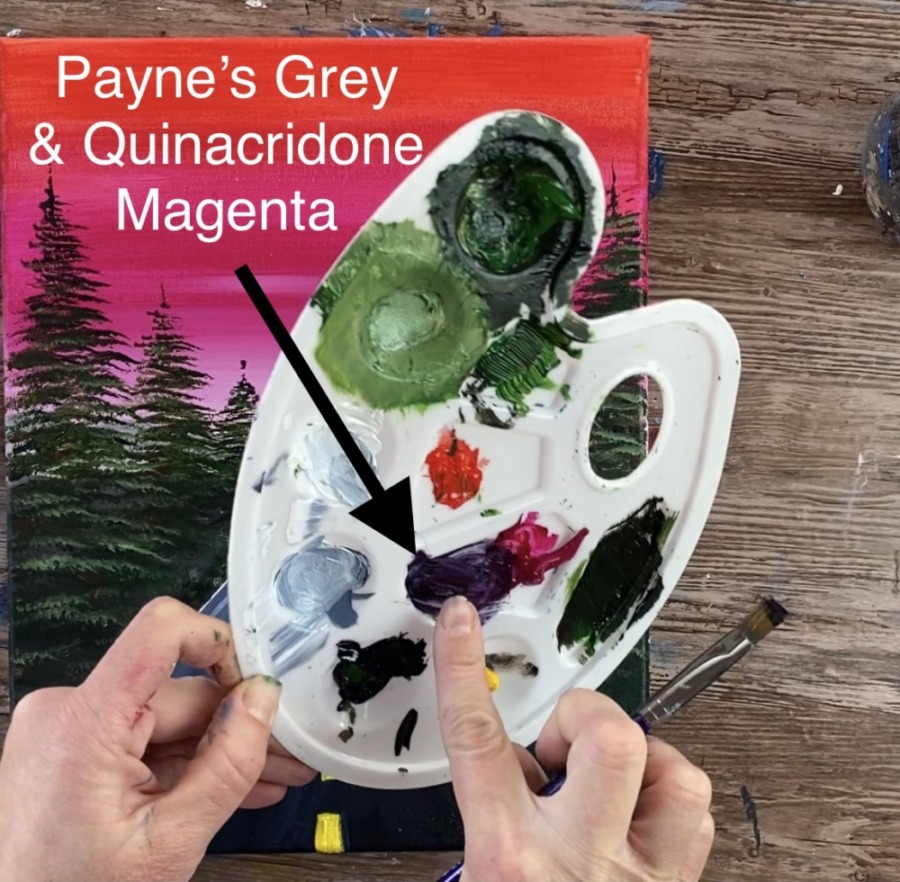
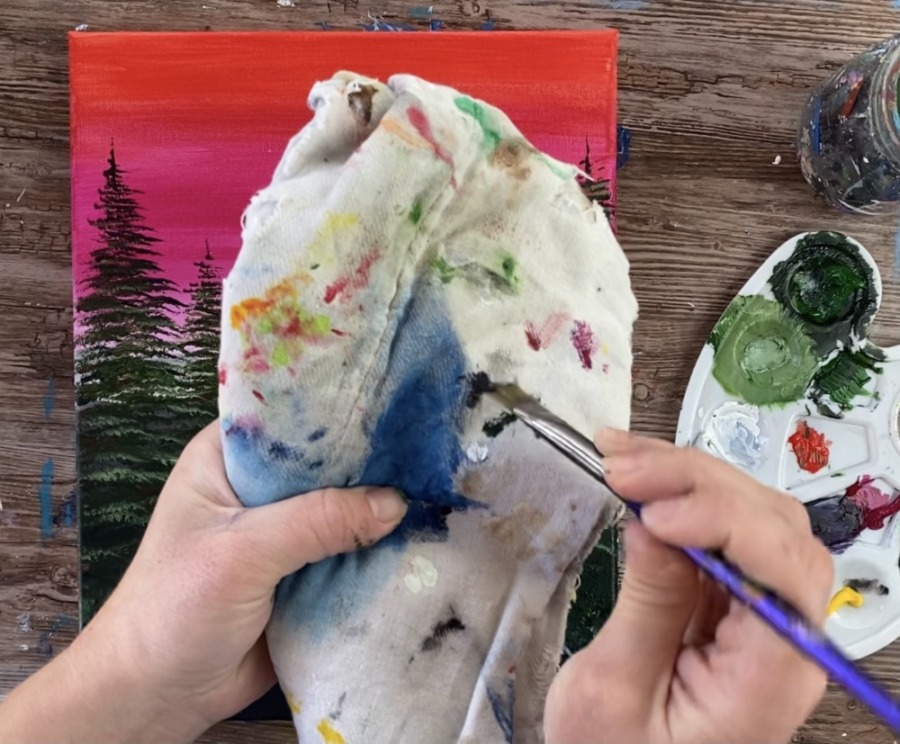
Load the tip of your brush into the dark grey-purple and then wipe it off with a towel. This is because you only want a tiny bit of paint on your brush.
Remember the diagonal line rule with one point perspective.
Start with the largest cloud and tap your brush to form a diagonal shaped clouds. Your brush should only have a small amount of paint on it and it should be translucent through the sky.

Form two large diagonal clouds on the top. Then two smaller diagonal clouds and then two very very tiny clouds just above the mountain ranges.
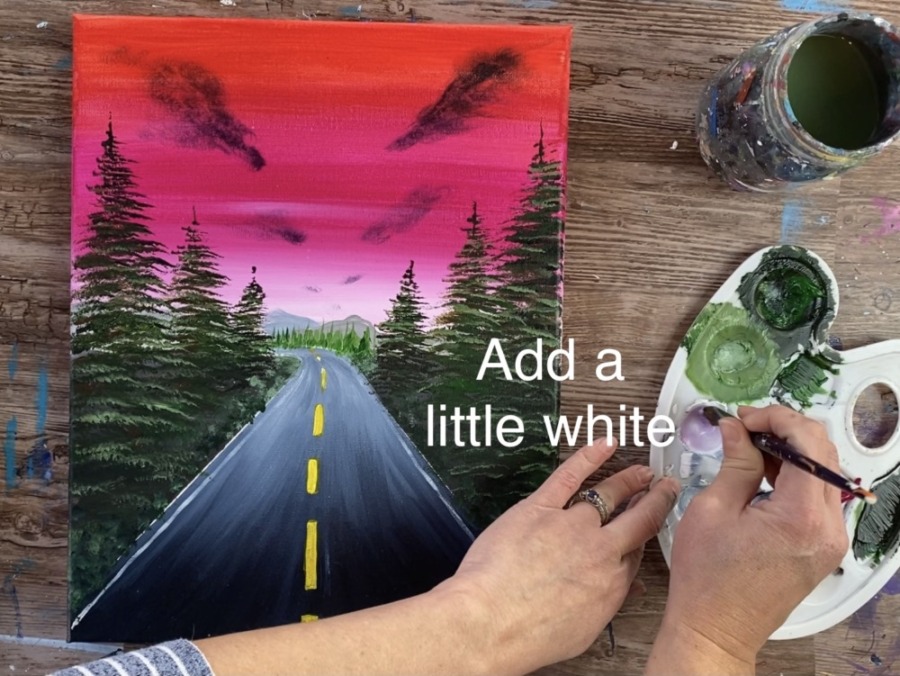
Next you will want to add highlights to the clouds. Wipe off your brush again. Then add a little bit of white to it, blend it on the palette with that dark purple-gray color.
Wipe the brush off with a towel. Gently tap just the bottom areas of the clouds. Again, this should be “dry brush style”. If it is showing too bright, wipe off more paint with your towel.
Tap just the bottom areas of the clouds. This gives them more form.
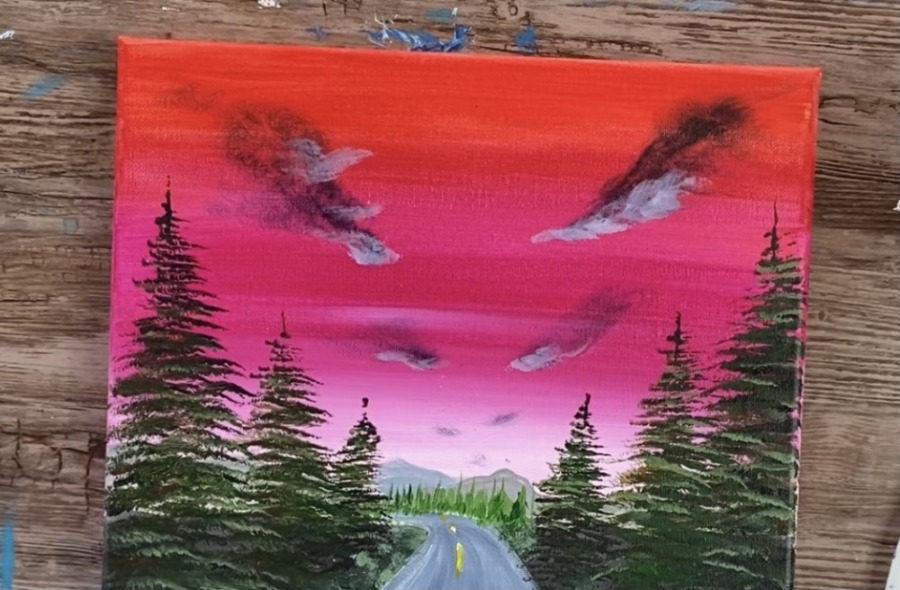
Then add just a pop of brighter white on the very bottom edges of the clouds. This makes the clouds have a bit of bright highlight to them.

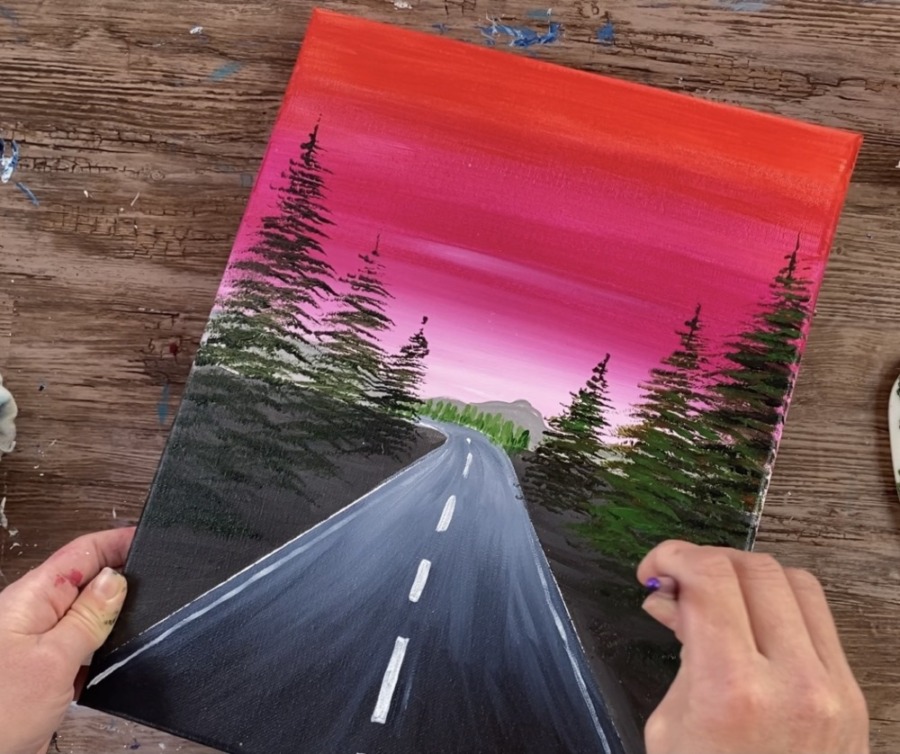
12. Add touch ups on trees if necessary
The final thing I did with this painting was paint lighter green on the branches of the trees. I mixed some white into hookers green hue permanent to make it light.
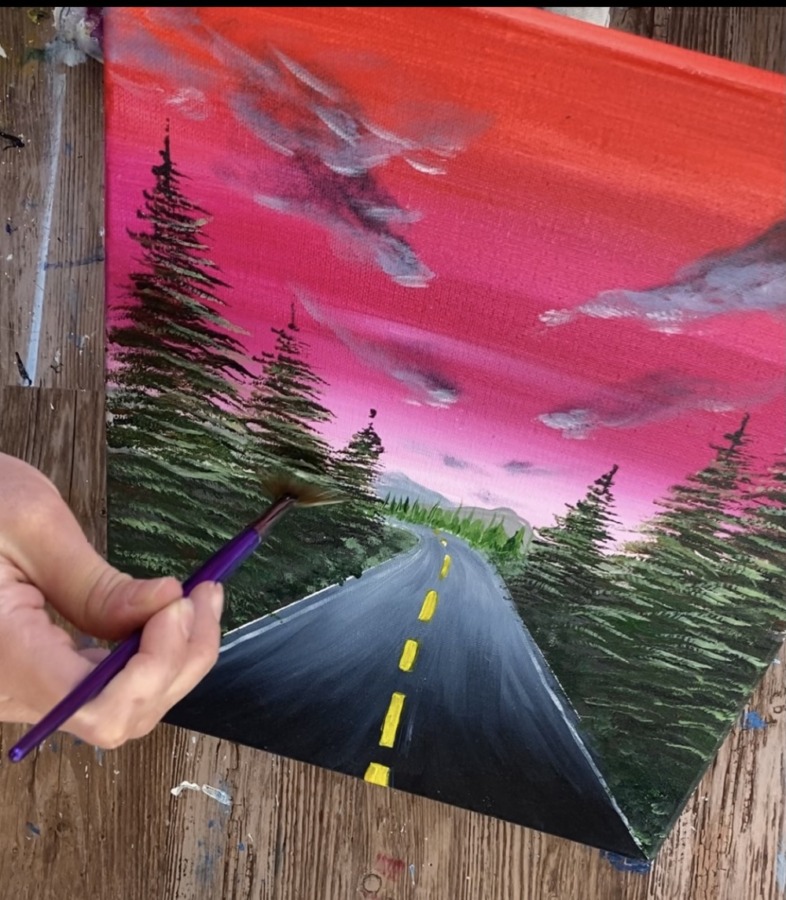
Then stamped some lighter branches on all my trees.
Finished!
Sign your name and show it off!
Share Your Art Here!


Thank you so much for the step by step. It is so much better than trying to follow a video. Where can I find more!