

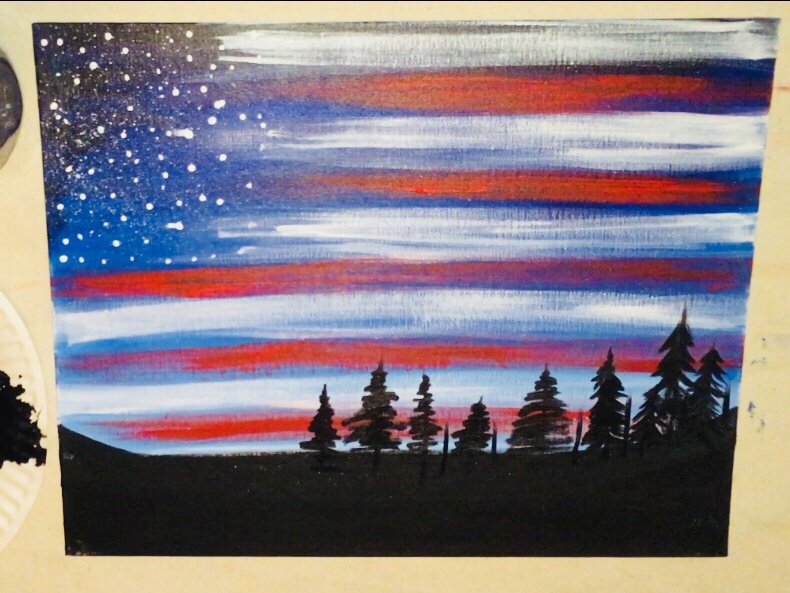
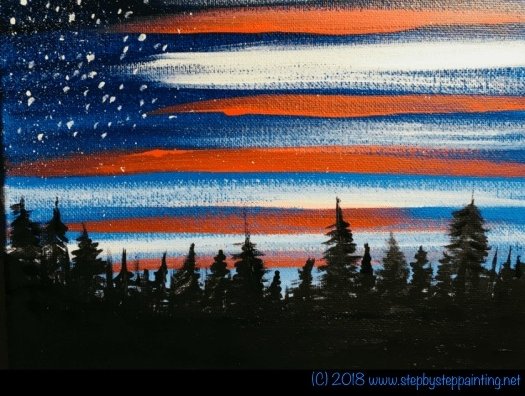
How To Paint “American Flag Sky” – American Flag Painting
Learn how to do this very simple yet stunning American Flag Painting with acrylic paint on canvas. You’ll learn how to do a forest skyline silhouette backed by a twilight or dawn sky and a dry brushed US flag illusion!
Would you like to save this?
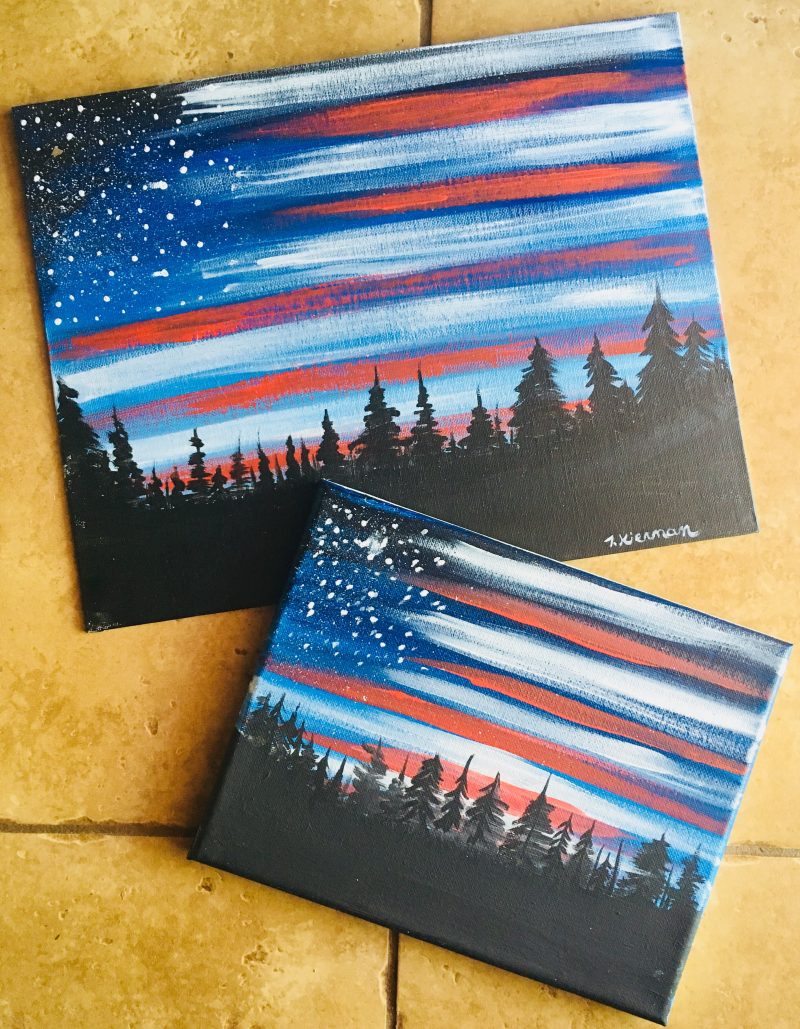
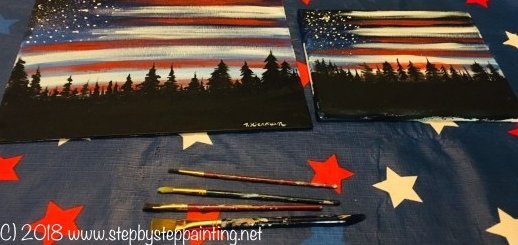
This painting tutorial is for the absolute beginner and even kids. I did one painting on an 8 x 10 canvas and the other on an 11 x 14 size.
The design itself can work on any size canvas or any object! I’ve had users do this on wood boards, T-Shirts with Fabric Paint, murals, rocks…you name it!
See Also:

A little background…
I originally did this painting on Memorial day 2018 as a tribute to that day! My husband is a US Navy Veteran and we have multiple extended family members serving in the armed forces.
All the patriotic holidays are very meaningful for us! This painting is great for all US Patriotic Holidays and year round.
There’s a lot of “skill building” with this painting. You will learn how to do simple blending techniques, dry brush technique, splatter and tree silhouettes. I think it’s a great painting if you wanted to learn how to do those skill or incorporate them into a painting somehow!
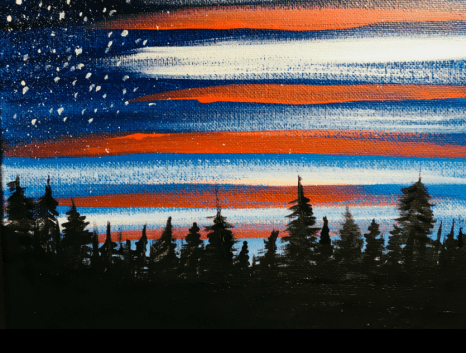
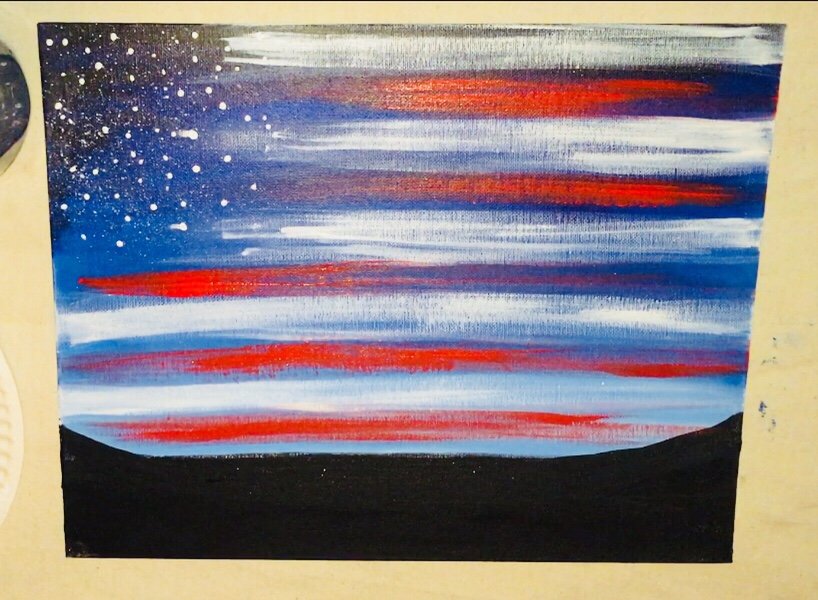
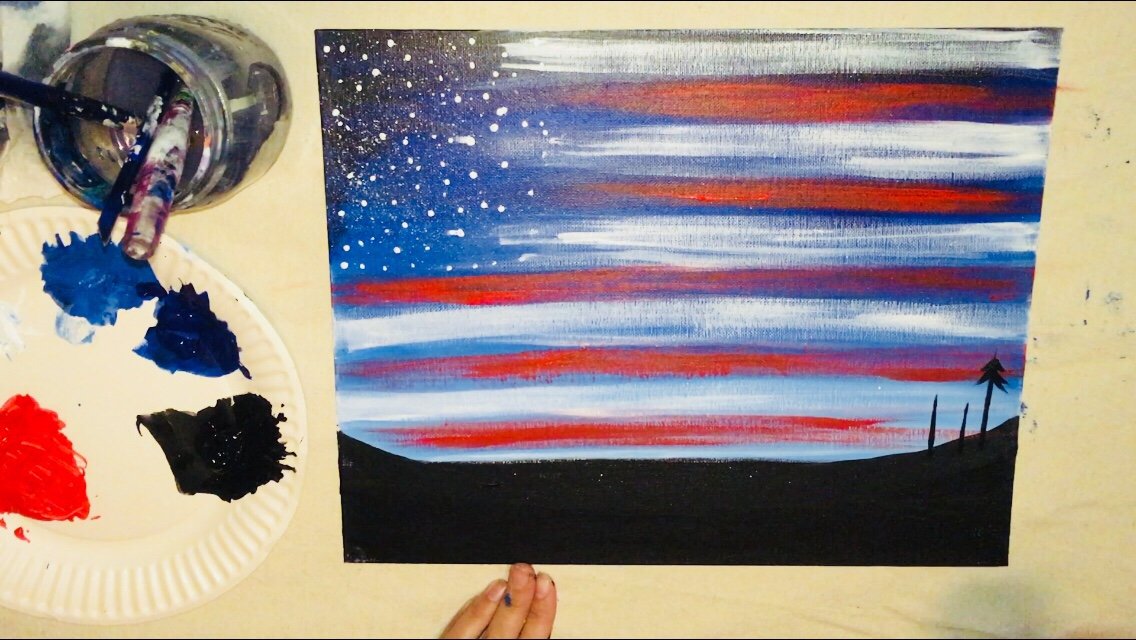
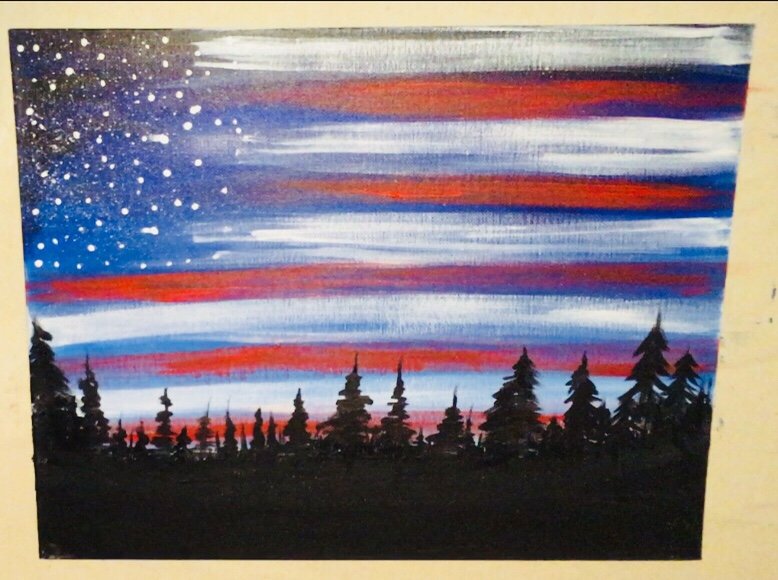
*Oh and one more thing…an important correction: yes, the first stripe on the top is supposed to be red! Some of the photos in this post show “white” but it should be red. You can also do the exact number of stripes (7 red & 6 white).
This post contains affiliate links.
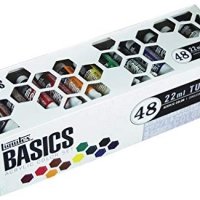
Materials
How To Paint American Flag Sky

This VERY easy canvas painting tutorial will guide you through all the steps of how to paint an American Flag in a sky with silhouette trees.
Materials
Basic Supplies Needed
Colors
Brushes
Recommended Products
As an Amazon Associate, Michaels Affiliate and a member of other affiliate programs, I earn from qualifying purchases.
![]()
![]()
Color Palette: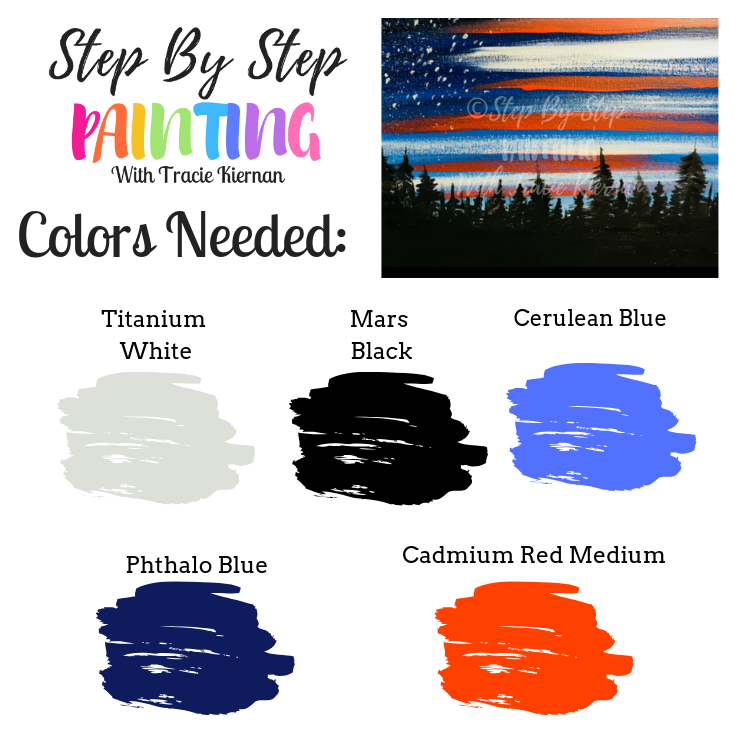

Directions At A Glance:

Video:
Step By Step Pictures:
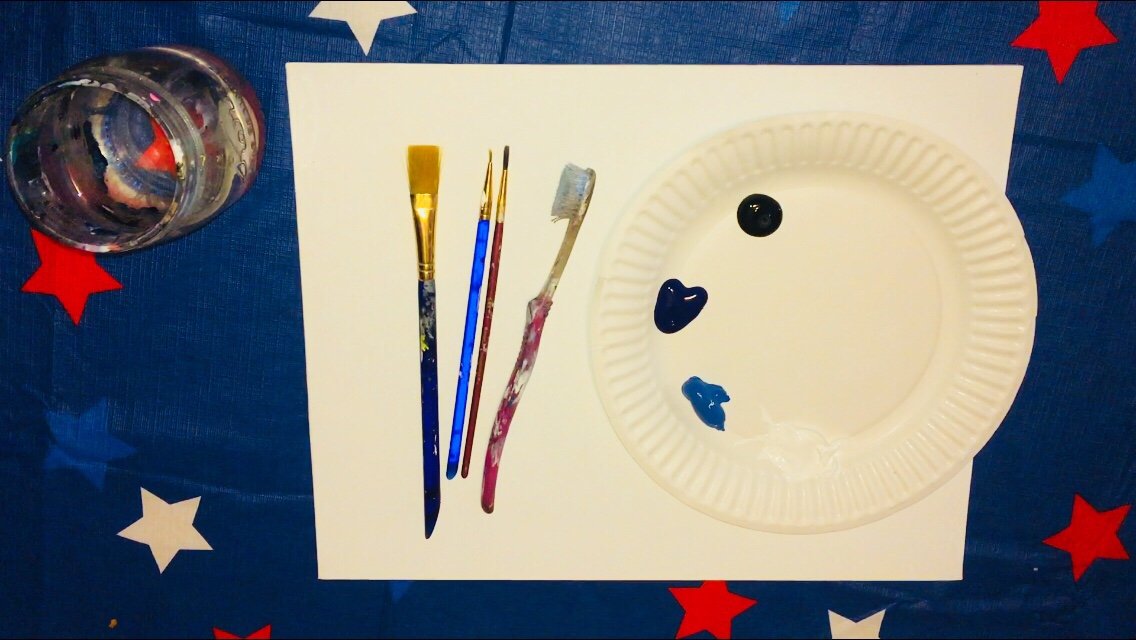
1. Get your supplies ready!
You’ll need a palette with: mars black. phthalo blue, cerulean blue and titanium white. You’ll also need a 3/4″ flat (or similar size), a toothbrush, and two very small round brushes (I’m using a #1 & #0). The size canvas I’m using for this demo is an 11″ x 14″, however, this design can work on any size.
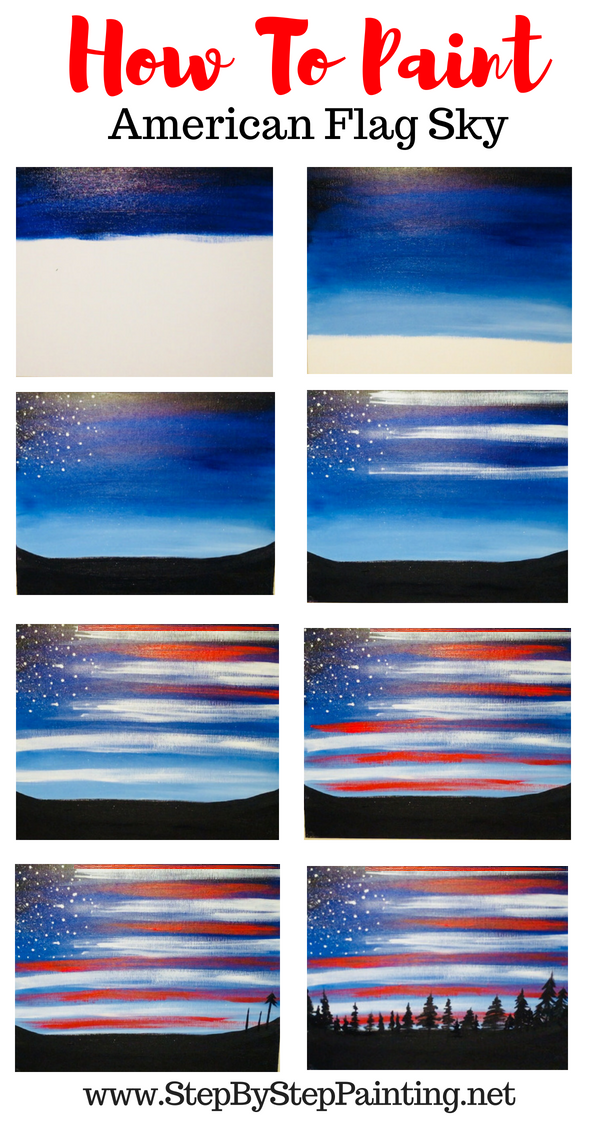
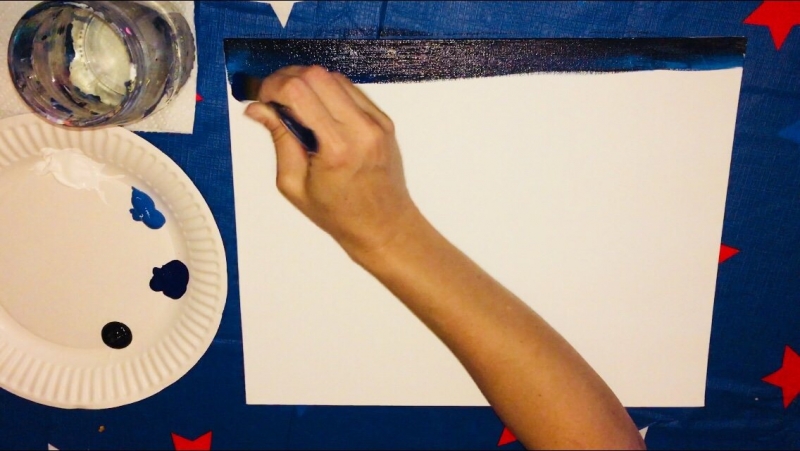
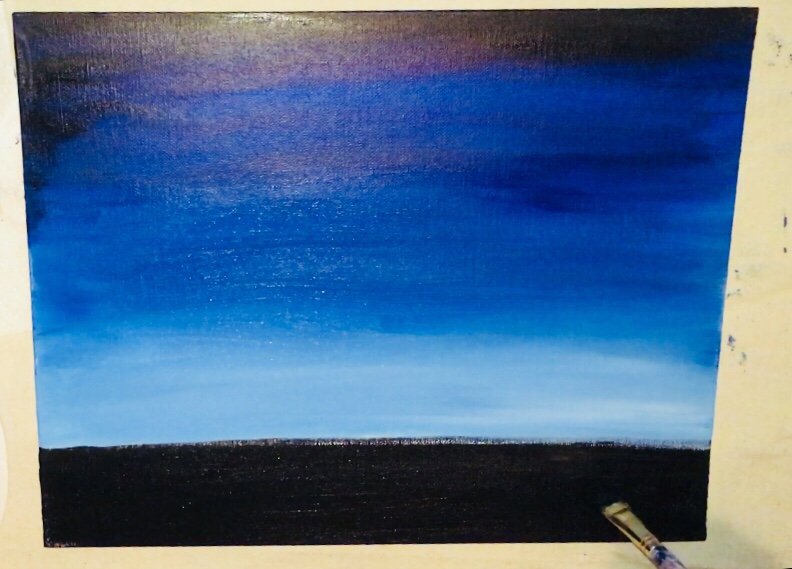
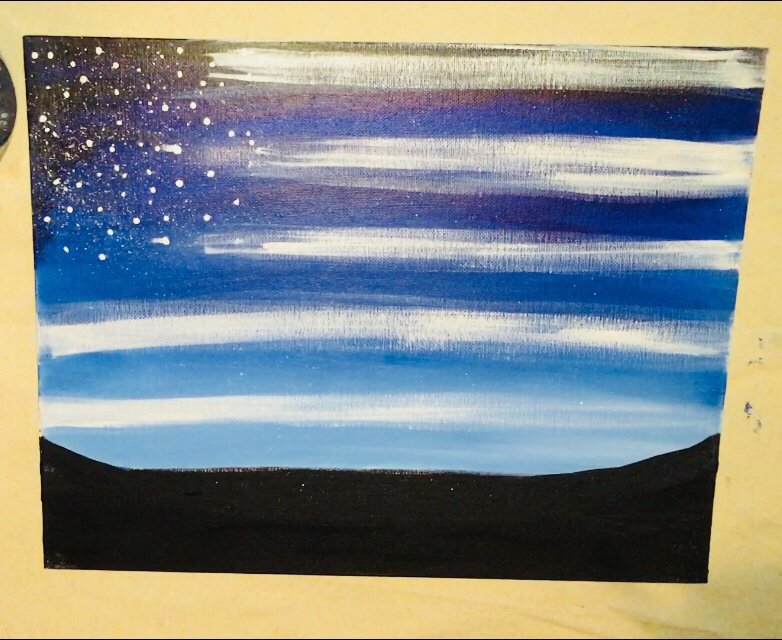
2. Paint a little black at the very top.
We will be painting a sky that starts out very dark on top and then eventually gets very light on the bottom. First paint a black line about a quarter of an inch down the canvas. All these strokes must be going left and right. Oh and I’m using that 3/4″ large flat brush for the entire sky!

3. Don’t rinse brush. Add phthalo blue.
Paint phthalo blue about 4 inches down. Let it blend in with the black. The blue will gradually get lighter as we go down, kind of like an ombre sky. If you find that the black is not blending out, you can always rinse your brush to get that black off.

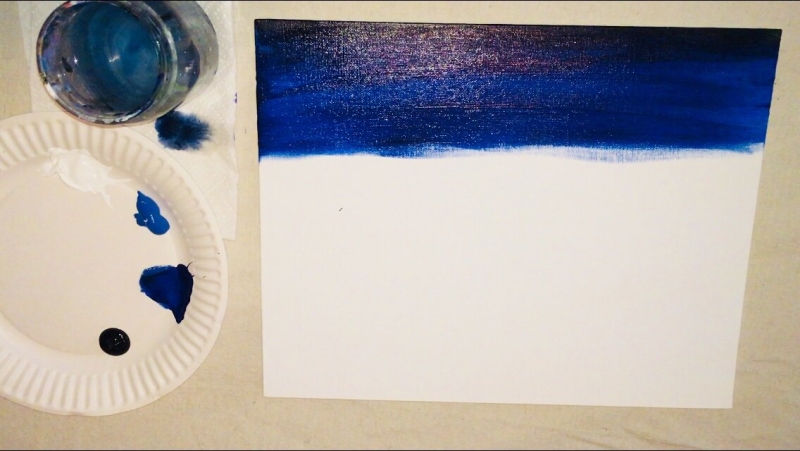
4. Don’t Rinse Brush. Add Cerulean Blue.
Now add cerulean blue to the brush and continue to paint left and right strokes down the canvas. Stop when you get a little more than half way down. We will need to define where this horizon line will be next!
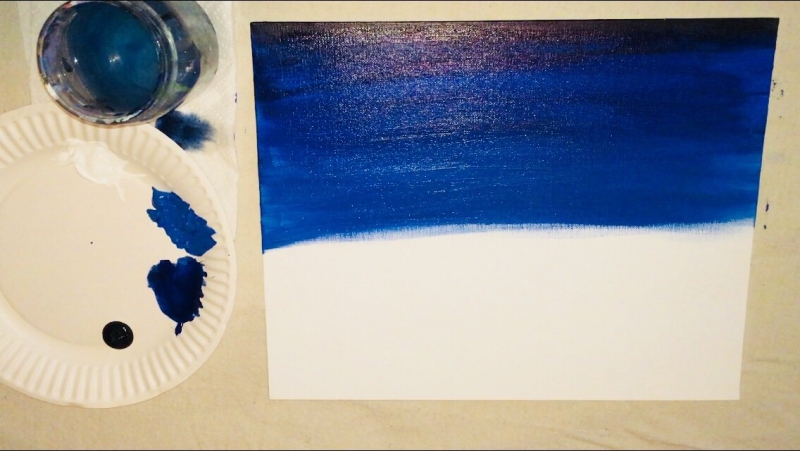
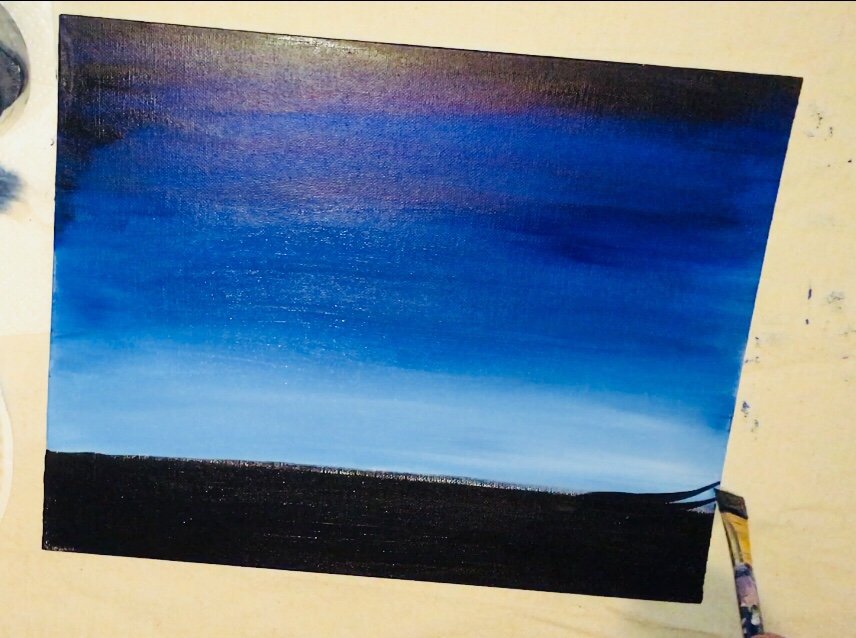
5. Define the horizon line.
Use a ruler and a pencil to draw 2-3″ from the bottom, a horizon line. Mine is approximately 2″. This line will be where the sky will end. If you’re using a larger canvas, do it at 3″ but if you’re using a smaller canvas, then place it less than 2″.
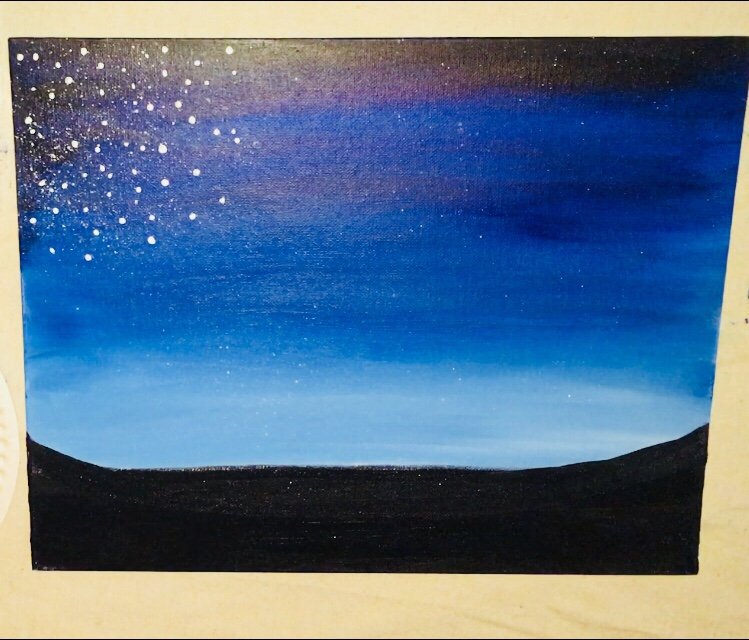
6. Add white in the cerulean blue and paint all the way down to the horizon line.
Next add white and cerulean to the brush. Paint the rest of the way down. The lightest part of the sky should be along the horizon line. Don’t worry about having a crisp horizon line because the trees will be placed on top.

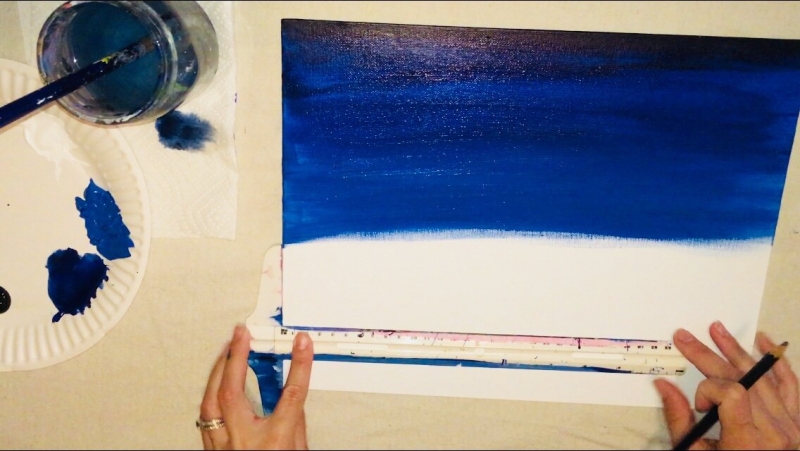
7. Paint the bottom portion black.
Basically fill in the entire bottom black. Keep your strokes left and right.
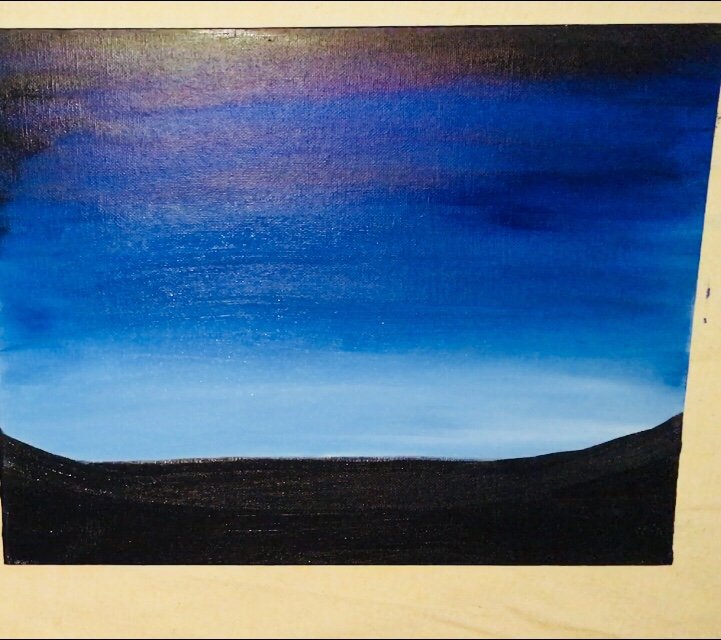
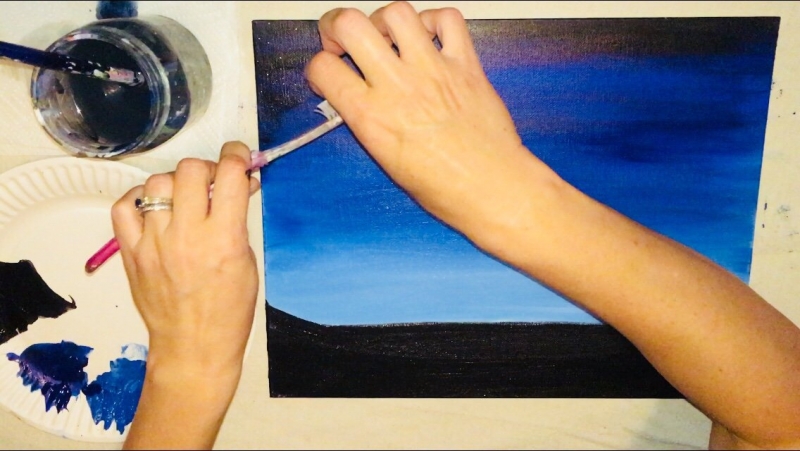
8. On the left and right sides, curve the black up a little.
Use your flat brush to curve the sides up a bit. This step is optional! I did it to help with the varying heights of the trees.
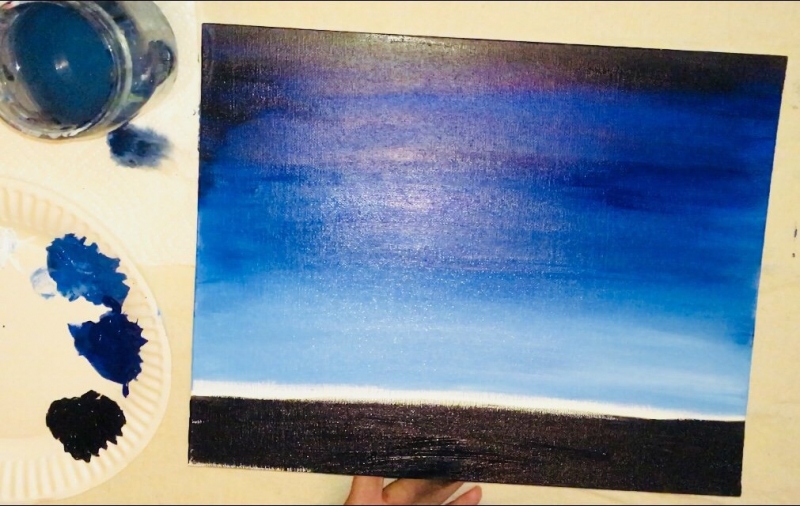
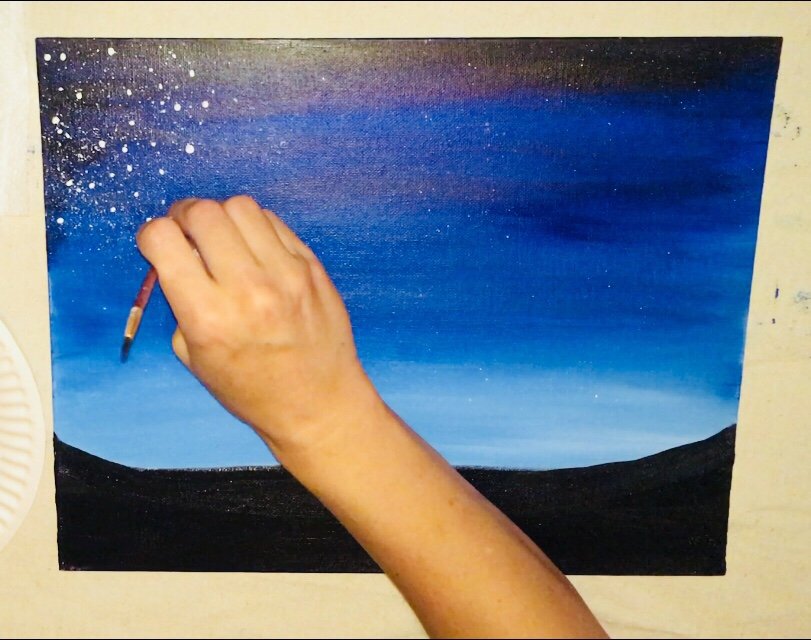
9. Flick stars on the upper left corner and a few here and there throughout.
Use a toothbrush, dip it in white paint and flick stars in the upper left corner. Really saturate the stars in this area. Then add a few star flicks throughout the canvas.

10. Use a tiny #0 brush to paint little white dots in the upper left corner.
Next I added some more very evident stars in this area (and only in this area). I spaced them out kind of clustered like real stars. You can also use the back of the handle of the brush to stamp on these dots.

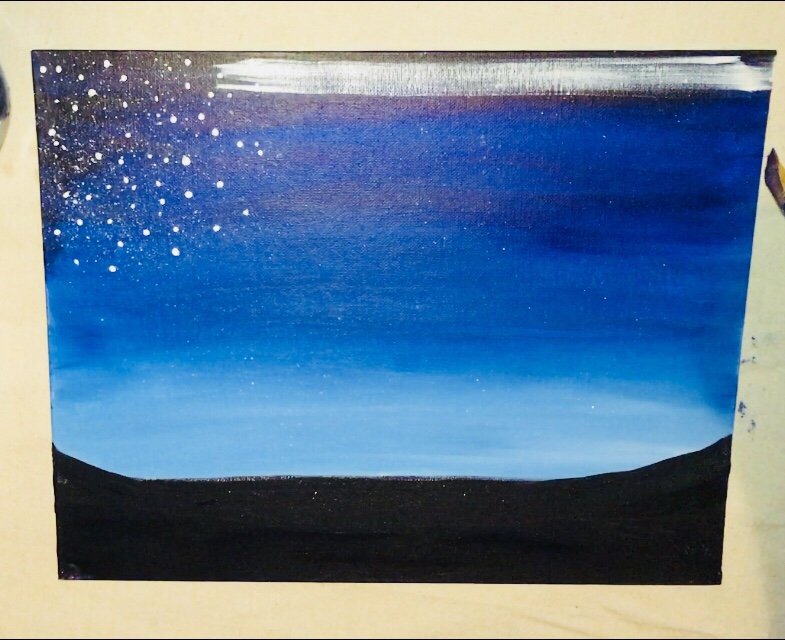
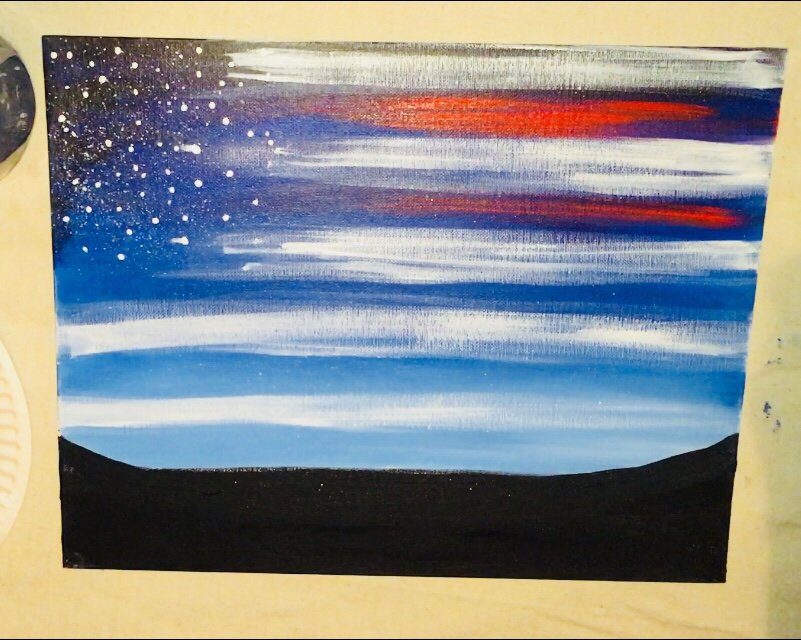
11. Use a 3/4″ Flat Dry Brush to paint white stripes across the sky.
This next step requires using the dry brush technique. Dry brushing is super easy but if you don’t feel confident about it yet, test it out on a separate paper first. Basically get a very clean and very dry brush. Wipe the brush on a paper towel to ensure it is dry. Dip it in white and paint one stroke across the sky (but leave a gap at the top for a red stripe). You can go over the stroke if necessary but the blue below must still be showing through. I did three lines down and then did two lines all the way across.
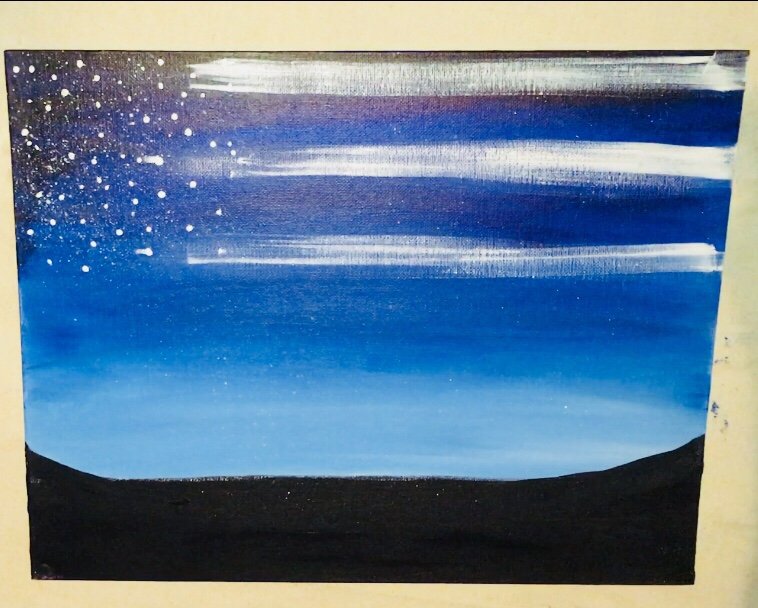
12. Repeat the dry brush with cadmium red medium and paint red stripes.
I did NOT rinse the white off my brush. Why? Because I wanted that white to be bright against the dark blue and so the red mixed with the white a bit. If you find there is too much white on the brush, you can wipe it off with a paper towel. Do another dry brush technique with the red. I painted two stripes down and then three more stripes all the way across as pictured below. ALSO don’t forget the red stripe at the top like I forgot!
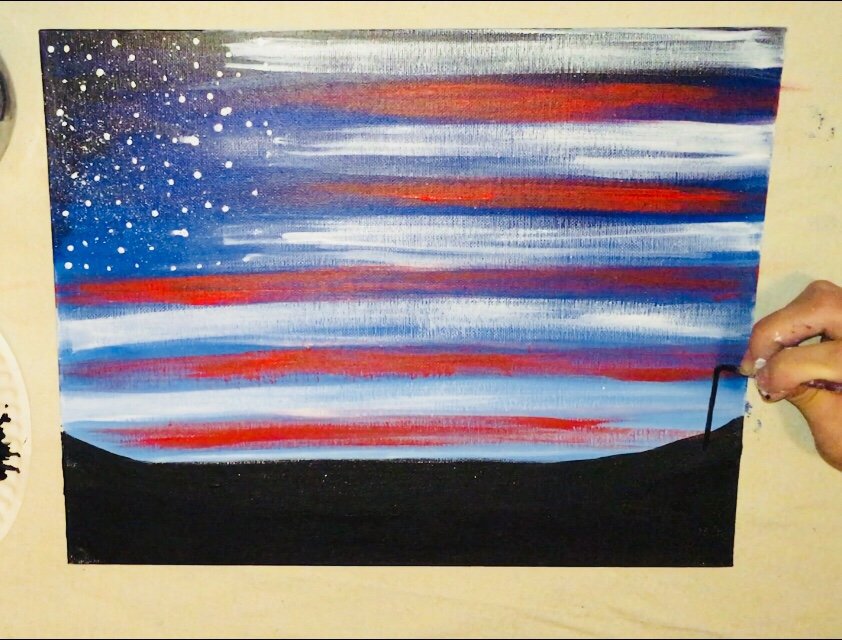
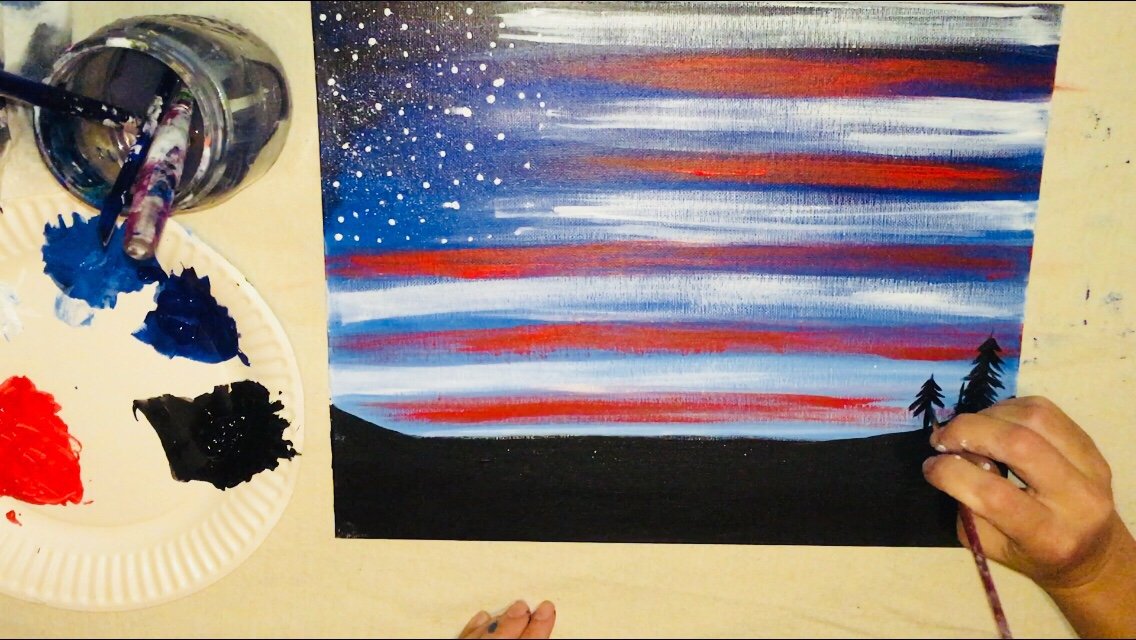
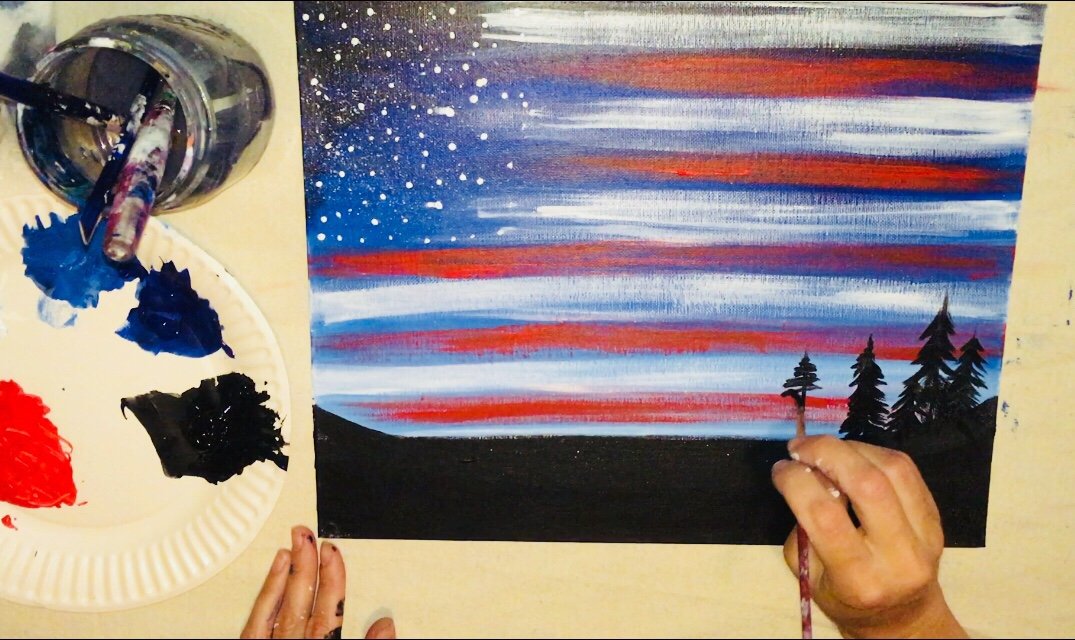
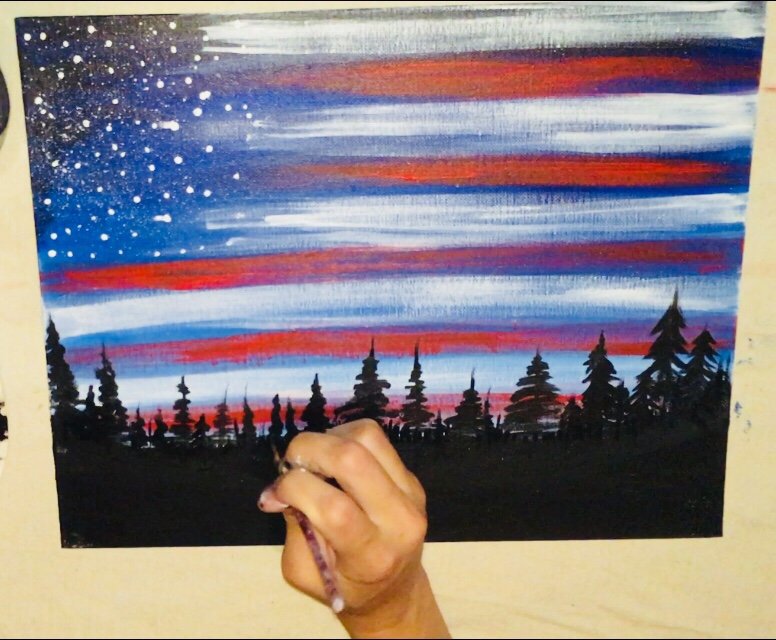
13. Paint the tree line silhouette.
I used a very small round brush (#0) that had kind of a longer tip. To paint the trees, I painted a vertical line first. And then I painted sort of downward strokes to form the shape of a pine tree. You can also do left and right zig-zags to form the pine tree branches. I actually wrote a post about how to paint these kinds of trees with a fan brush and you can check it out here. To make it look more natural, vary the heights of the trees. Also overlap some trees.
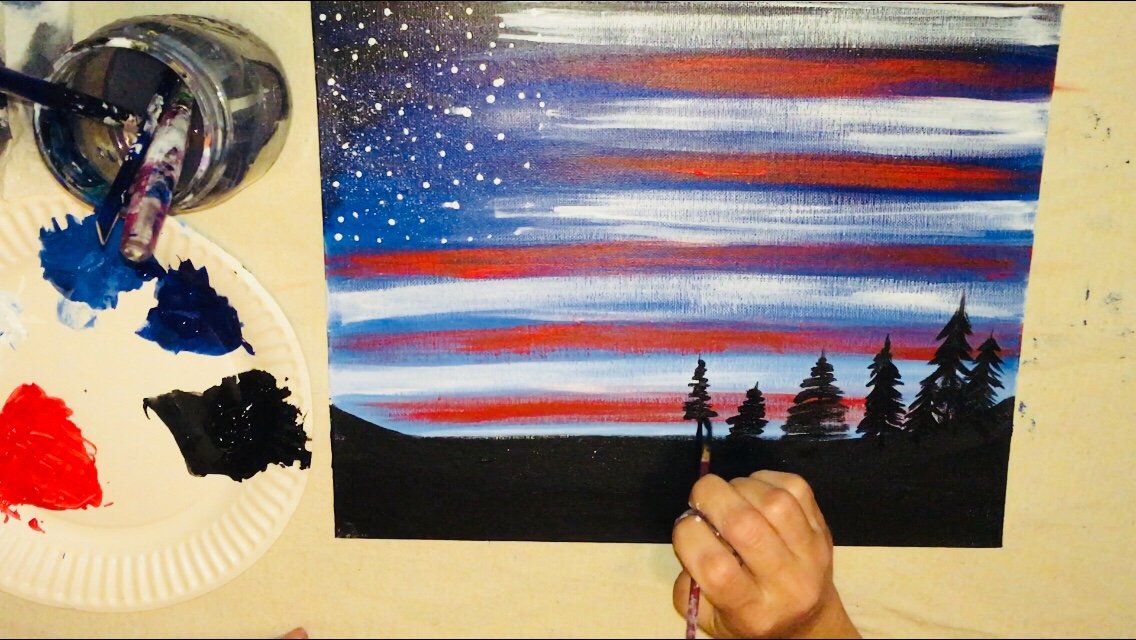
And that’s it! Simple and easy! What a fun Patriotic Painting!
I hope you enjoyed this tutorial! I am so delighted to see all of your paintings shared on the SBSP Facebook page and on Pinterest pins!
You can share yours too by uploading a picture next to the Pinterst pin or….if you want me to see it faster, head on over to the FB page!
You can also tag me on IG @tracie_kiernan_art
Share Your Art With Us!


See Also:

Hi I am going to a park to do this do I need a toothbrush or can it be a small paint brush
You can splatter paint with a small paint brush! ? Just add the paint and flick it with your finger or tap it against another paint brush handle.
Thank you it is a bit tug day present for my dad his birthday day is in 4th of July
You’re welcome! What a great idea for a birthday gift!
Thank you
I love this! I have a small square canvas I may make it on. I was wondering if u could add a silhouette of a tent along the trees since we camp, and maybe a campfire. What do you think?
Hi Kerry! Yes, definitely! You can add any silhouette you would like to this ?
I have been using utube painting videos for about 4 years. I usually watercolor but my granddaughter wanted to do acrylics.
These are the very best, clearest painting videos I have seern.
No frustration wondering what the presenter was doing. Thanks for sharing your great skills!
Celeeste
Wow Celeste! Thank you for that! I’m glad you enjoy my painting tutorial videos!
I just tried this and I am happy with it as a first try. My sky ended up a bit dark but I will definitly try again. Is there any sealer you spray on when dry?
Awesome glad you like how your painting turned out! Yes there is a spray sealer for acrylic painting you can use after your painting dries.
I love this paint idea and I am going to try to do it for my husband for our 8 year anniversary. What do you think about palm trees instead of the current trees? We have painted palm trees before but I wanted to ask before I do the whole painting and try the palm trees and it doesn’t work well. Any suggestion?
Hi Jennifer! I have seen someone else do this done with palm trees and it looked very nice! You can always sketch the idea out first to try it out before doing the whole painting. Also try googling “palm tree silhouette skyline” to help generate inspiration for that idea. Good luck!
What size and brand did you get in the paints? Is it the “liquitex” brand? If so, what sizes of each color? 4 oz or 8.45 oz? I’m wanting to paint this for my grandmother because my grandfather was in the army and passed away a little over 2 years ago. I know she will love it and I just want to make sure I do it right! 🙂
What colors would you use if using Apple Barrel?
I would use: white, black, too blue, bright blue, flag red
I would like to do this with a church group do you care if I share the instructions with a group
Absolutely you can share the instructions with your church group!
Oh wow! I’ll be giving this amazing patriotic scenic painting to my Mom for her Memorial Wall. My Dad was in Vietnam and my brother gave his life in the Persian Gulf. She has a ranch overlooking the Texas Hill Country (cedars instead of pine trees – but she’ll love it)!
This is a painting that I can actually do as a beginner. I’ll practice a bit first, but I see success. Thank you for your time and sharing tutorials that build skills so we can grow our love and desire to learn to paint!