

Would you like to save this?
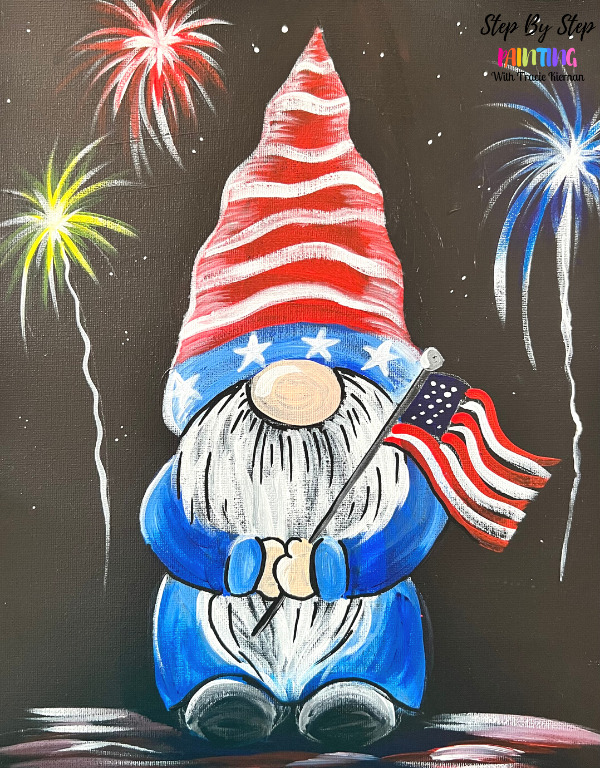
This acrylic painting tutorial will demonstrate how to paint a patriotic theme gnome!
I will be demonstrating how to do this painting on an 11 x 14 canvas that I painted with a layer of “Payne’s Grey”. If you don’t have that particular grey, you can paint your canvas any color of black. This is a great painting you can do to recycle a mess up painting because the dark colored paint easily can cover an old unwanted painting.

Enjoy and happy painting!
Materials Needed:
Patriotic Gnome
Learn how to paint a patriotic theme gnome with acrylcs on an 11 x 14 canvas.
Materials
Colors
- Payne's Grey
- Mars Black
- Pyrrole Red
- Primary Yellow
- Cobalt Blue
- Phthalo Blue
- Titanium White
Brushes
Color Palette
I used Liquitex BASICS acrylic paints for this painting! If you are using a different brand, you can use the color chart below to try to match your colors:

Using Craft Paints?
If you are using craft paints such as Apple Barrel Craft Paints, I would recommend substituting to these colors:
- Black
- White
- Too Blue
- Bright Blue
- Yellow Flame
- Flag Red
- Black (add a little white & blue to it to sub for Payne’s Grey)
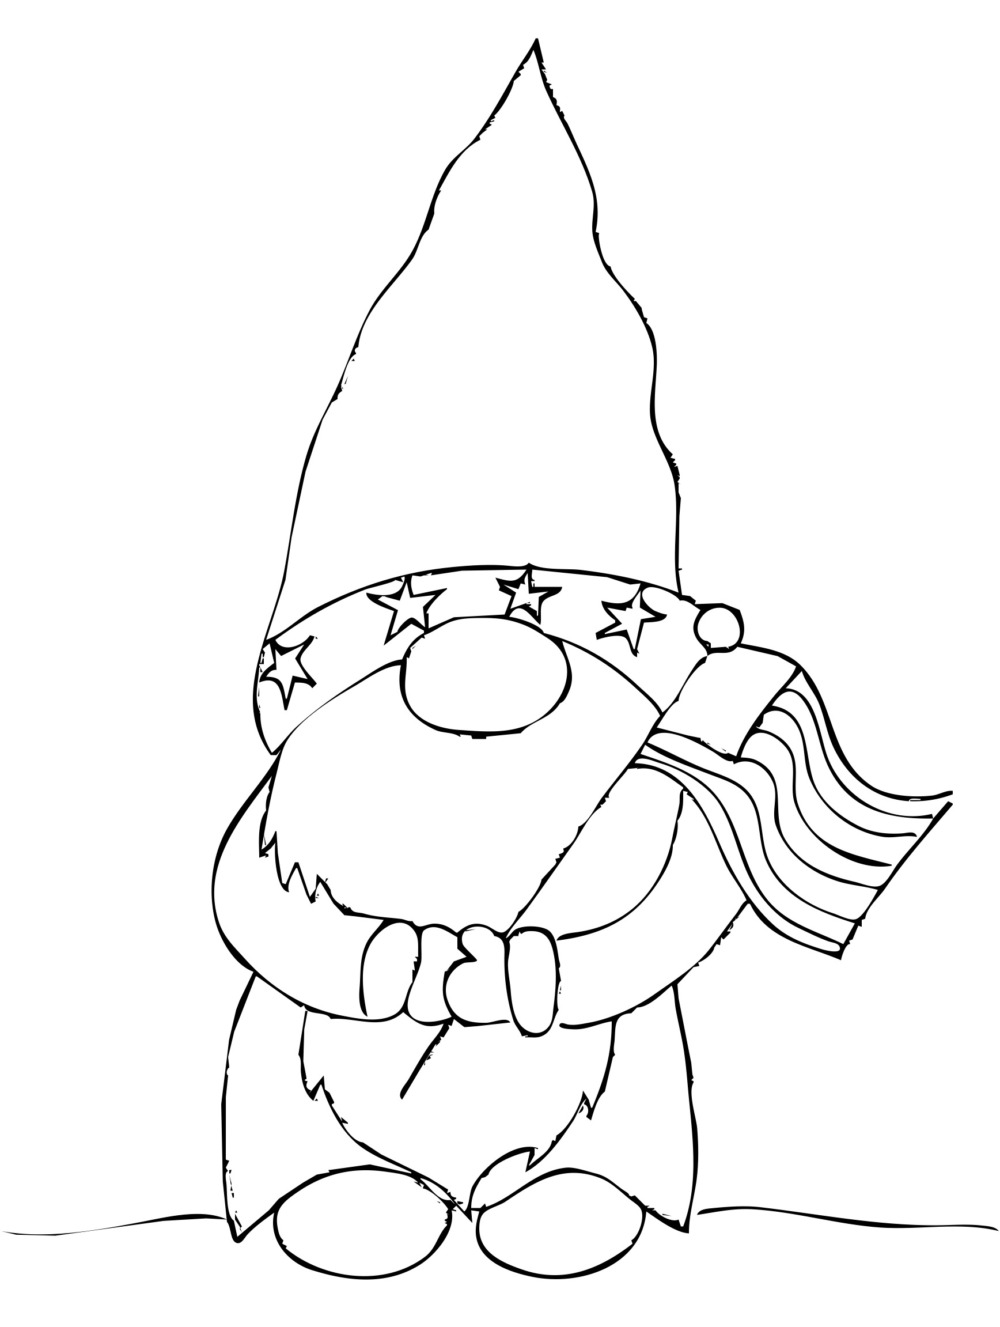
Traceable
I recommend using a sheet of white graphite paper to transfer this design to the dark background.
Directions At A Glance

Video
Step By Step Directions
1. Draw Gnome
I recommend using a chalk pencil to draw the gnome. If you don’t have a white chalk pencil, you can use a regular writing pencil or chalk.
Start in the middle of the canvas and draw an oval.

Then draw a curved line for the bottom of the hat. This is about 5″ wide.

Extend the hat up about 3/4 of an inch.

Then draw the second curved line.
Draw the beard under the hat by drawing two wavy lines that gather to the bottom tip of the beard.

Then draw the hat by drawing two diagonal wavy lines that meet to a point at the top of the canvas.

Then draw his two arm sleeves folded over the beard and meeting in the middle.

Draw his hands so they are simple mitten hands. The one on the right is overlapping the one on the left.

Draw the robe by drawing two curved lines under the sleeves.

Draw a wavy line on the bottom just under the tip of his beard. Leave two opened “bumps” for the shoes.

Draw two ovals for the shoes.


Then draw a diagonal line for the flag pole. Draw a small circle on the tip of the line. Then draw a wavy line for the top of the flag.

Draw a second wavy line and the rectangular shape in the upper left of the flag.

2. Paint Gnome Nose & Hat
For the nose, I mixed equal parts light pink and unbleached titanium. Use a #4 round brush to paint the oval.

Then load your palette with cobalt blue and titanium white. Rinse your #4 round brush. Use that brush to paint the bottom part of the hat with the cobalt blended with a small amount of white. Gently mix the white with the blue for “color variation” in the blue.

Next, use a #12 bright brush and pyrrole red to paint the hat. Use the tip of the brush to outline the shape of the hat. Then paint curved strokes in the middle going up the hat.

Add a small amount of white on the left and the right of the hat and gently blend it in.

3. Paint Beard
Use a #4 round brush and titanium white to paint the beard. Paint short strokes that curve in the direction of the beard hair.

Layer on more hair going around the nose and around the arms and hands. The beard goes to a curvy point on the bottom.

Leave the black from the background showing through to help with the dark parts of the beard texture.

Try not to cover all the black from the background and leave a generous amount still showing through for the beard texture.
4. Paint Robe
Load your palette with phthalo blue and add more cobalt blue if needed. Mix equal parts cobalt and phthalo blue together to create a darker blue. Use that blue to paint the sleeves.

Blend white into the sleeve cuffs so that they are lighter and stand out.

Then paint the rest of the robe using the phthalo and cobalt blue.


5. Paint Stripes On Hat
Use your #4 round brush and titanium white to paint stripes on the hat. Paint loose wavy lines that go in a horizontal direction up to the top of the hat.


Optional: add a small amount of highlighting on the far left of the hat using titanium white. Do this “dry brush style” by adding only a small amount of white to the tip of your brush and wiping some of the paint off. Then loosely paint white over the red to highlight the edge of the hat (where the fireworks would be glowing from the background).

Do this on the right side as well.

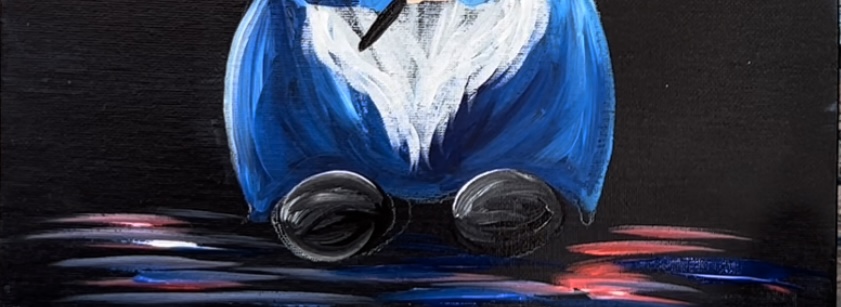
6. Paint Hands & Shoes
Use the same color that you painted the nose to paint the hands. Do this with a #4 round brush.

7. Paint Stars
Use a #4 round brush and titanium white to paint stars on the bottom portion of the hat.


8. Paint Flag & Ground
Use mars black to paint the diagonal pole from the gnome’s hands to the bottom portion of the hat.

Mix a little titanium white into the black to make it more of a gray but make sure the pole has enough contrast to stand out from the beard. Paint the circle onto of the pole.

Then paint the upper left rectangle on the flag with phthalo blue.


Use your #4 round brush to paint the stripes on the flag. Start at the top with phthalo blue. Paint a curvy line going in the direction of the wavy flag.

Leave a gap for the white stripes. Paint the red stripes all the way down.

After the blue dries, paint little white dots for the stars.

Paint the bottom ground area while your stripes are drying. Use a #12 bright brush. double load it into pyrrole red and titanium white. Paint loose left and right strokes to create an “abstract reflection” on the ground around the gnome’s feet. Then load your brush in a small amount of the blues on your palette and loosely blend it with the color. Try not to over blend this area and leave a lot of the dark background still showing through. This is supposed to represent reflection from the fireworks.
Next, paint the stripes white using a #4 round brush and titanium white.


9. Do Detail Work With Black Paint Pen
This is an optional step! If you would like to do detail work with the black pen, I recommend the black POSCA paint pen. This is an acrylic paint marker that works on canvas.

To do the detail work, outline the hands.


Then add a little bit of outlining around the nose. Add lines on the beard for beard texture (also optional!).
Tip: When you use the pen, treat it like a paintbrush! Hold it loosely to create fine, loose and thin lines. You don’t want to press too hard with these pens.


10. Paint Fireworks
To ensure the colors show up nice and bright, these fireworks are done in layers!The first layer is white, the second layer is the color of the firework and there is a third layer of white in the middle.
Use a #4 round brush and titanium white to paint the first layer of the fireworks. Paint a “starburst” style stroke with the round brush.

Create your firework shape by starting in the middle of the firework and stroke outwards. Release the pressure of the brush so the stroke goes to a thinner point. The base of each stroke (the middle) should be slightly thicker.

Form your firework “starburst” shape by adding more white curved lines going in a circular “radial” direction. Then paint a wavy line for the trail of the firework.


Repeat this technique for each of your fireworks. I made two large fireworks with a trail and one large firework without a trail.

Next, use cobalt blue and/or phthalo blue and add a layer over the white layer. The trick is to try not to cover all the white. You can make new strokes with the blue as well. The blue should show up nice and bright with the white as a base.

Repeat this technique for the red and yellow fireworks. For the yellow, I used primary yellow.
Then add a layer of white in the center of each of the fireworks. Create “starburst” smaller strokes just in the center. This will make the fireworks appear bright.

As a final “touchup” you can add little stars all throughout the sky. I did this with titanium white and using the tip of my round brush.

Finished!

Share Your Art Here


