
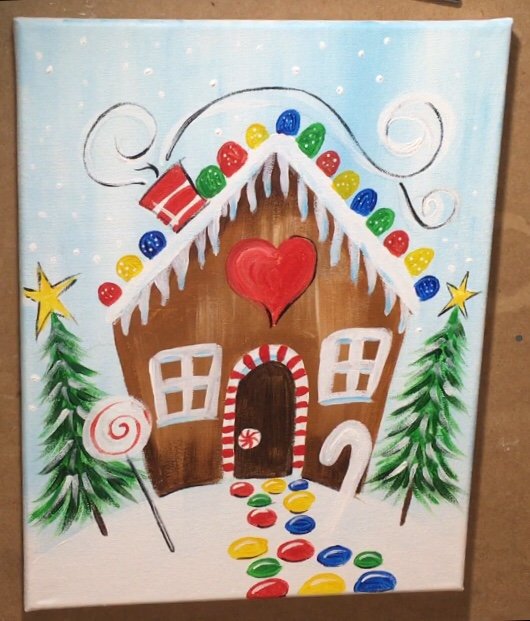
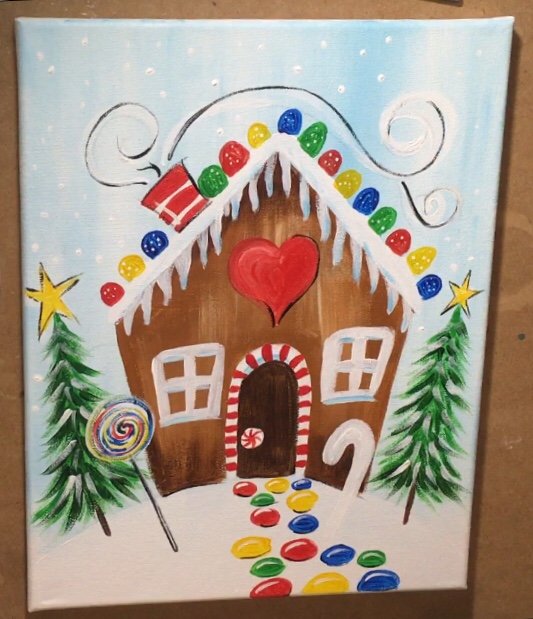
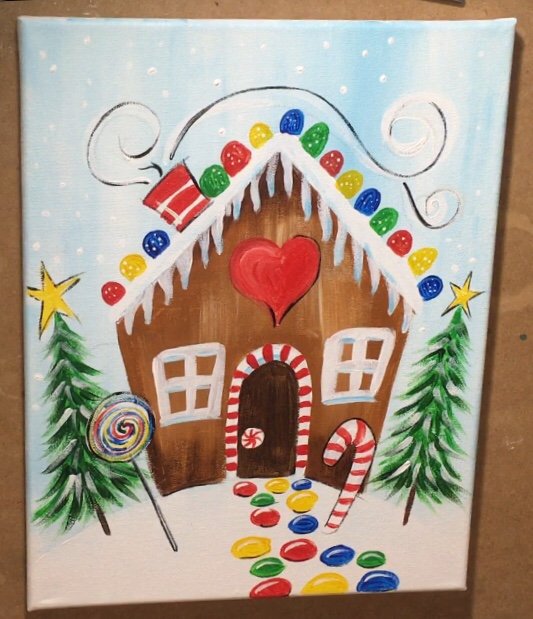
How To Paint A Gingerbread House
Would you like to save this?
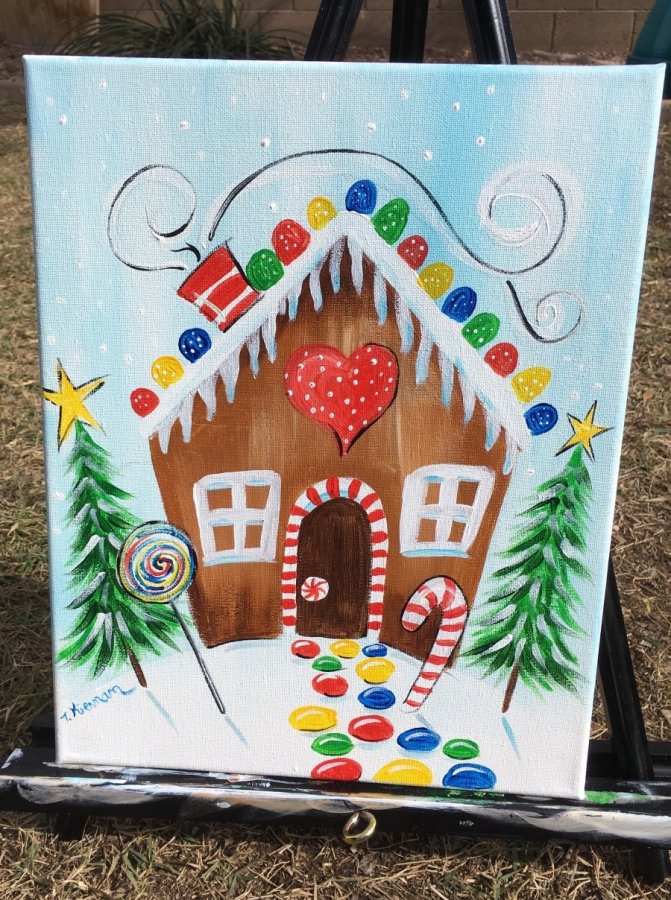
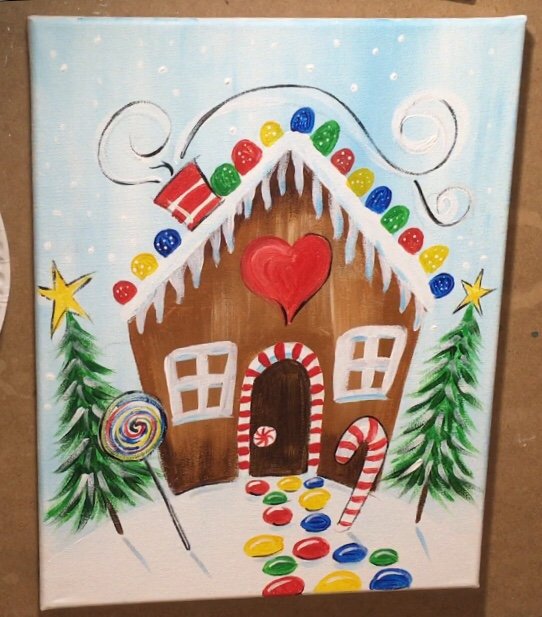
Learn how to paint a Gingerbread House with acrylic paints on canvas. This was so much fun to paint! I’ve been wanting to do a gingerbread house painting for awhile now and finally put a tutorial together for it. This tutorial will guide you through the steps of how I did this painting but it’s certainly open for a lot of customization!
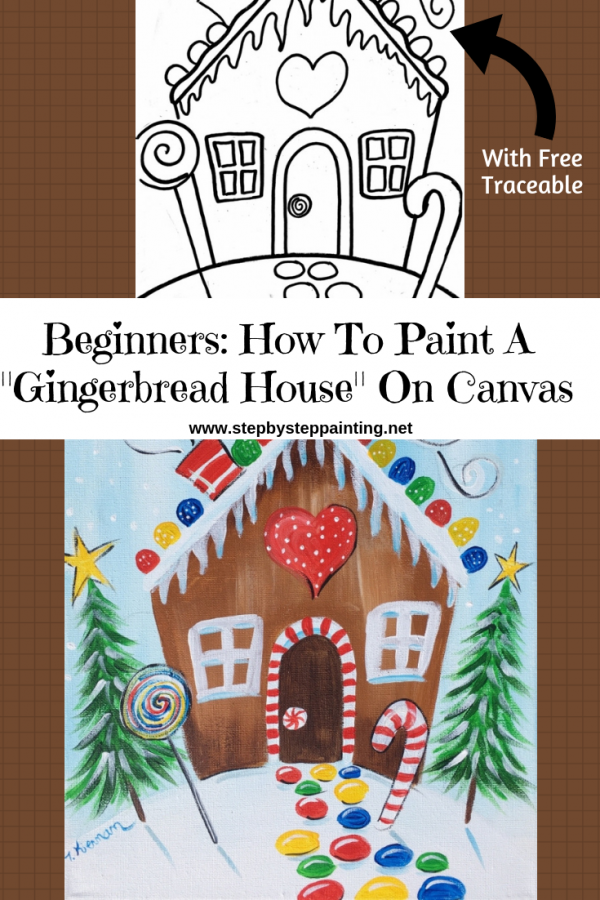
This is a fun Christmas Canvas Painting you can do with your kids as well. I provide a traceable so you don’t have to worry about drawing the house. Think of all the creative possibilities and types of candies you can add to this design!
 Enjoy and happy painting!
This post contains affiliate links.
Materials:
- Canvas 11″ x 14″
- Acrylic Paint
- Cadmium Red Medium
- Cadmium Yellow Medium
- Light Green Permanent
- Hooker’s Green
- Primary Blue
- Light Blue Permanent
- Mars Black
- Titanium White
- Raw Sienna
- Burnt Umber
- Brushes (I am using the Royal & Langnickel Zen Brushes)
- 3/4″ Flat (or any large size wash brush)
- #4 Bright
- #5 Round (or 4 or 6 if you can’t find 5)
- #10/0 Liner
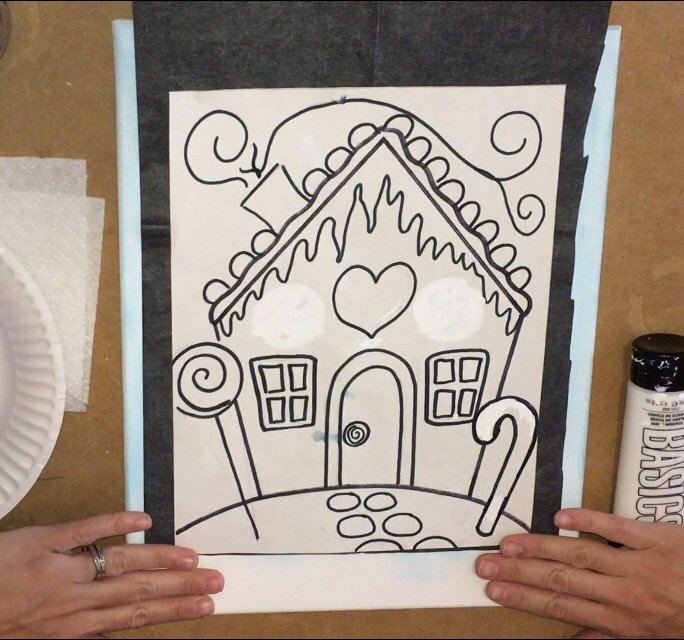
- Traceable
- Graphite Paper


Traceable:

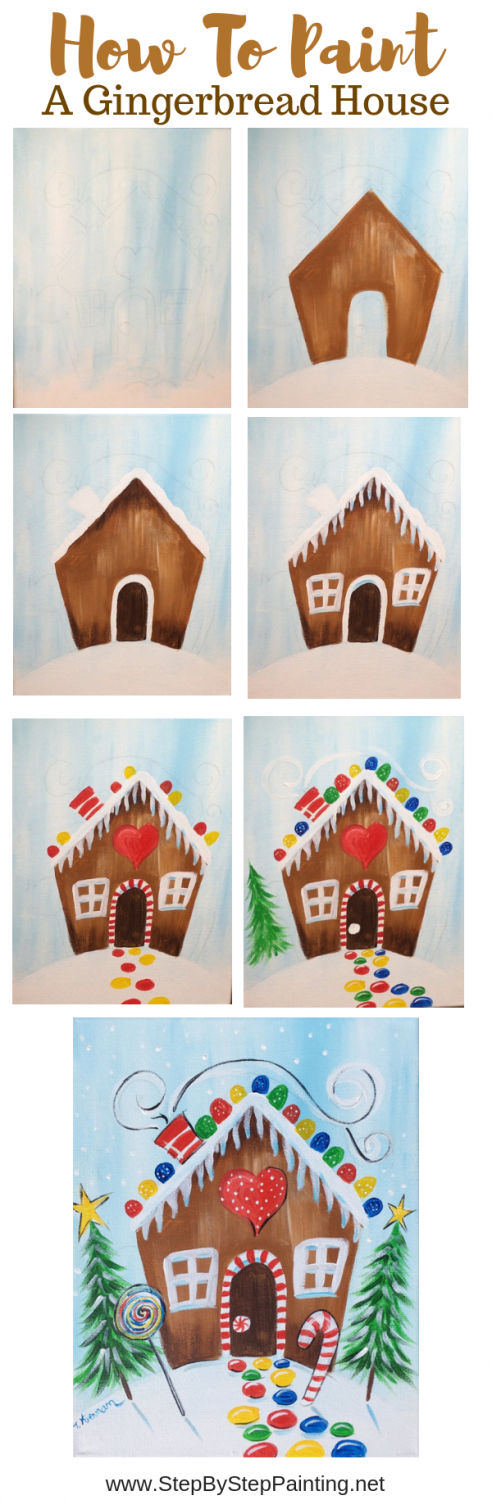
Directions At A Glance:

Video:
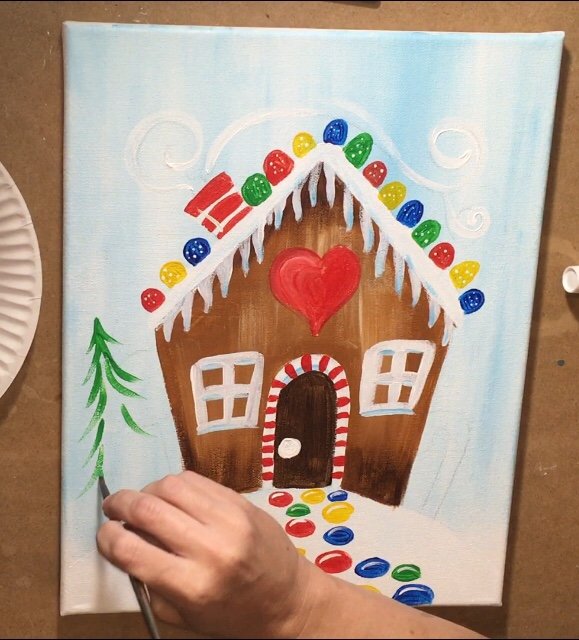
Directions:
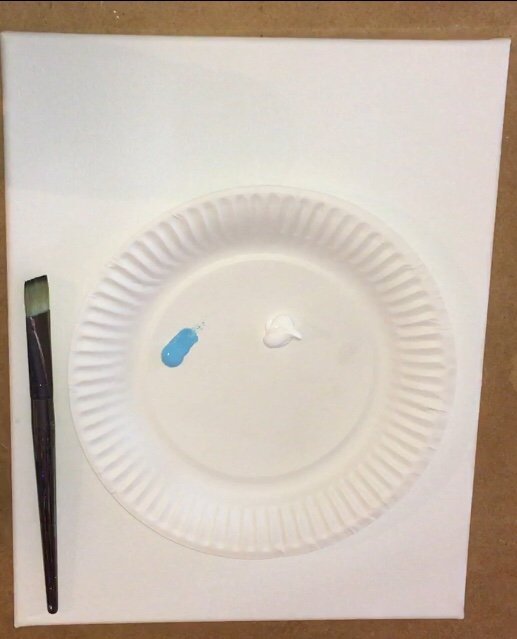
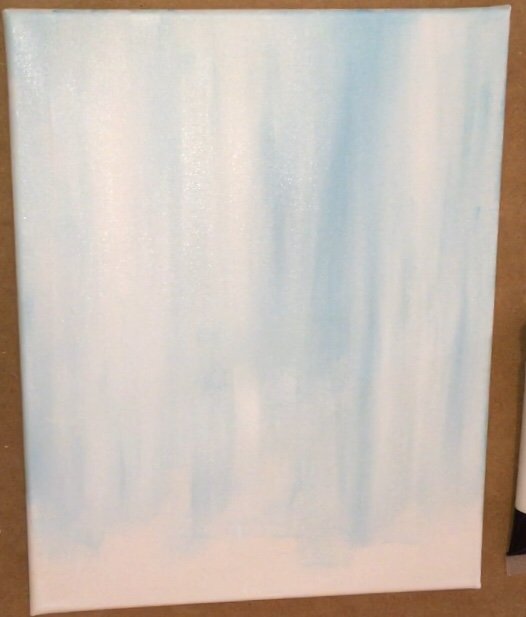
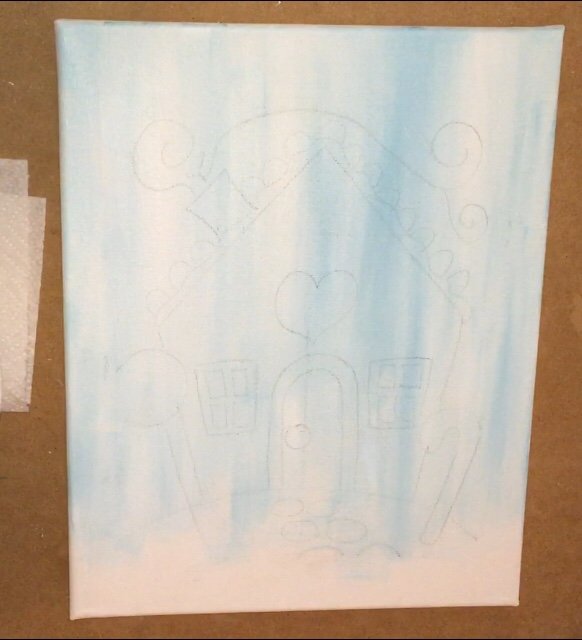
1. Paint the background light blue permanent and titanium white.
You’ll need a large wash brush (I used a 3/4″) and the colors light blue permanent and titanium white. Double load the brush and paint long up and down strokes. Let the colors blend on the canvas without blending all the way together so that it looks “icy” in the sky.


2. Transfer the gingerbread house to the canvas.
If you’re using the printable, get it ready and printed on a standard size computer paper. Place it over the graphite paper and trace with a pencil. The design will transfer to the canvas. Note: the placement of the traceable is about three fingers up from the bottom of the canvas.
3. Paint the white snow hill.
Use your 3/4″ flat brush and titanium white to “cut in” on that hill line and fill the entire area solid white.


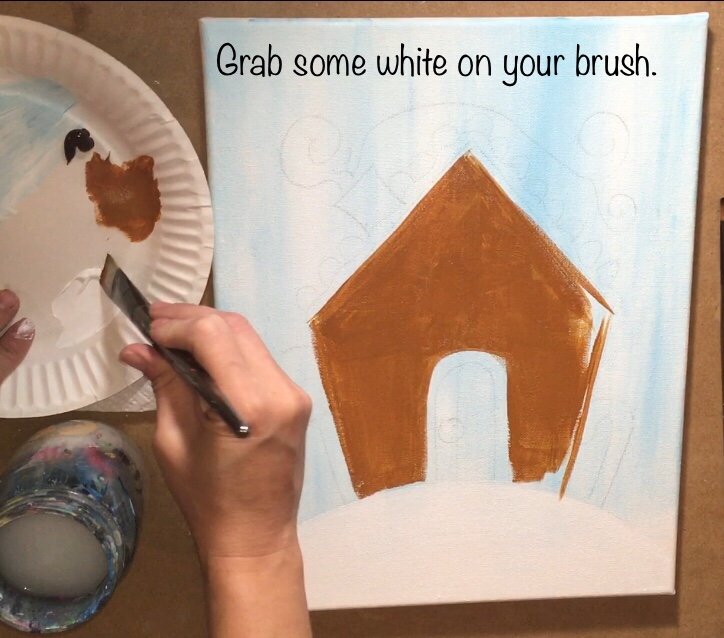
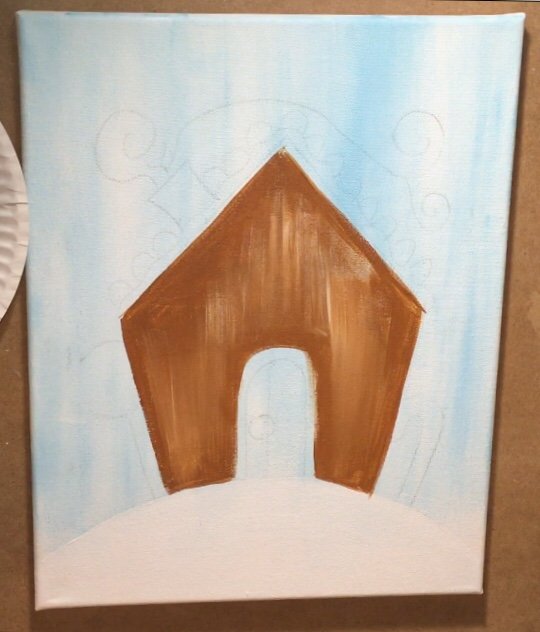
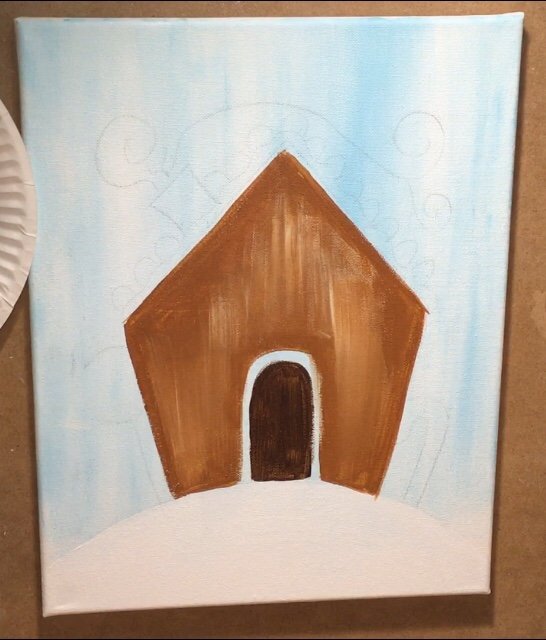
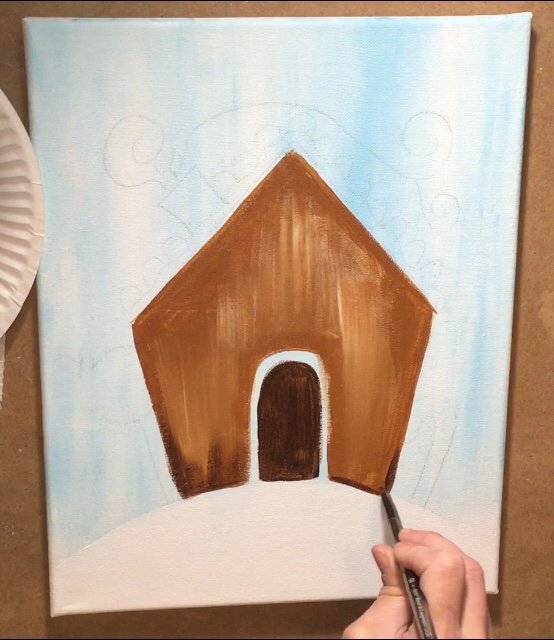
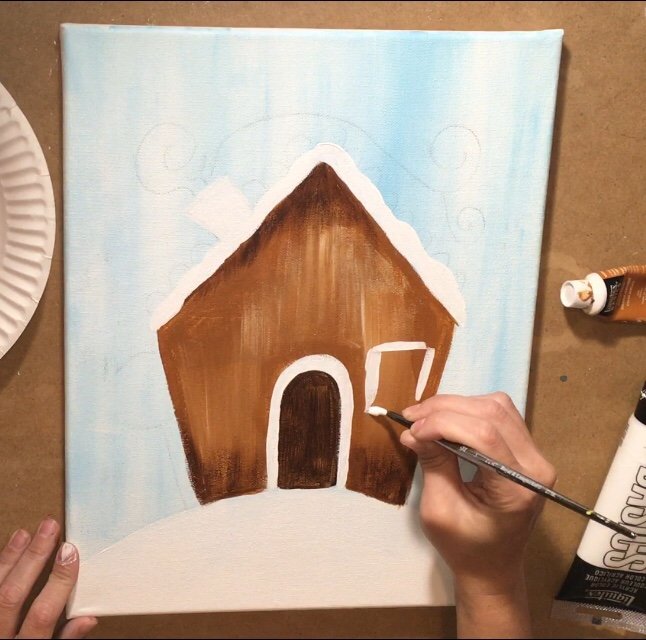
4. Paint the brown base of the house with raw sienna.
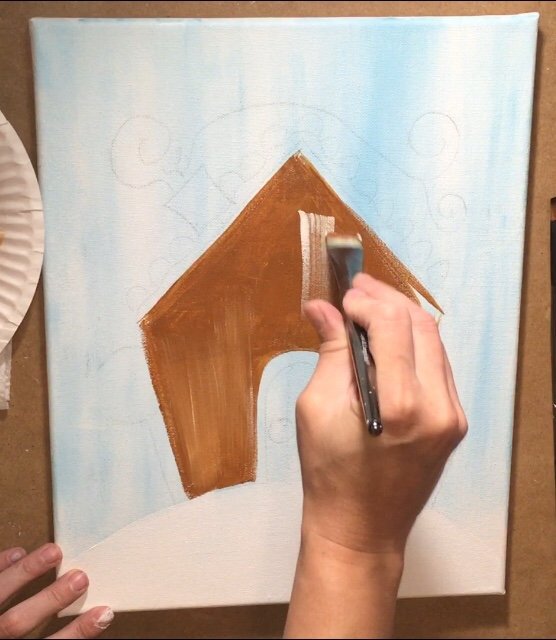
Use raw sienna and your 3/4″ flat brush. Paint up and down strokes except for the area where you need to “cut in” on the roof and paint diagonally. Note: you can switch to a smaller #4 bright brush to get into the tighter areas.
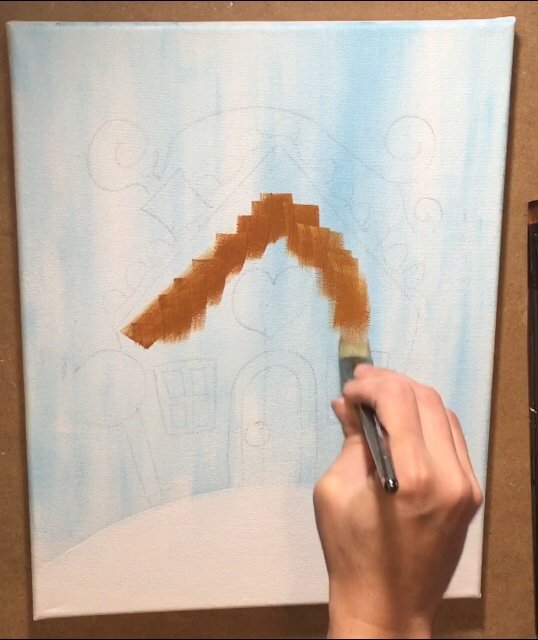
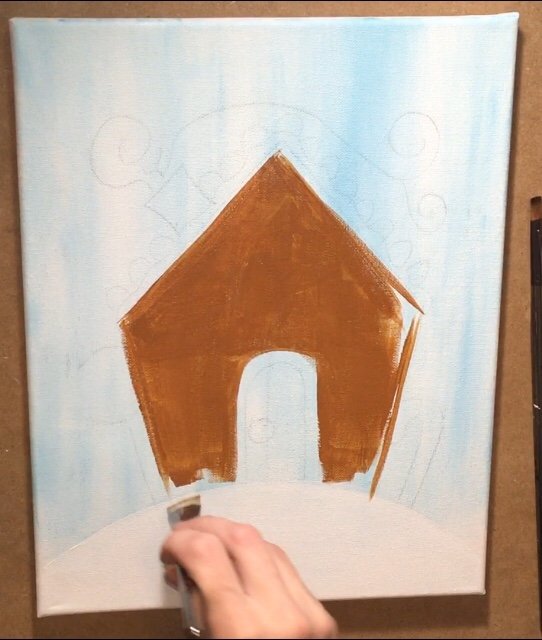
Grab some white on your brush and lightly blend it in with the raw sienna “dry brush style”. This gives the brown in the gingerbread house some color variation.
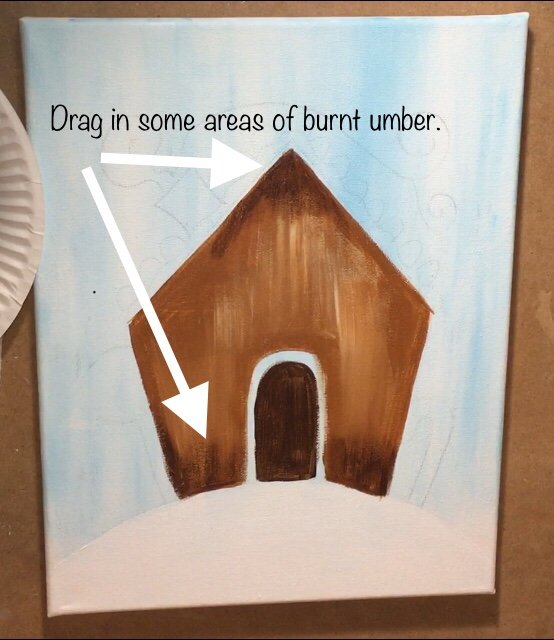
5. Paint the door raw umber.
Use a #4 bright brush to paint the door raw umber. Leave some gaps around the door but don’t worry about getting the edging perfect because that will be painted over with white later.
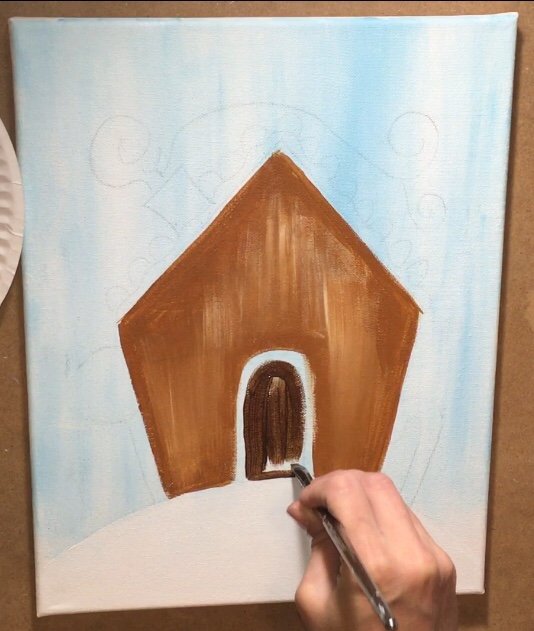
Then “dry brush” some of that burnt umber on the bottom and the top areas of the house.
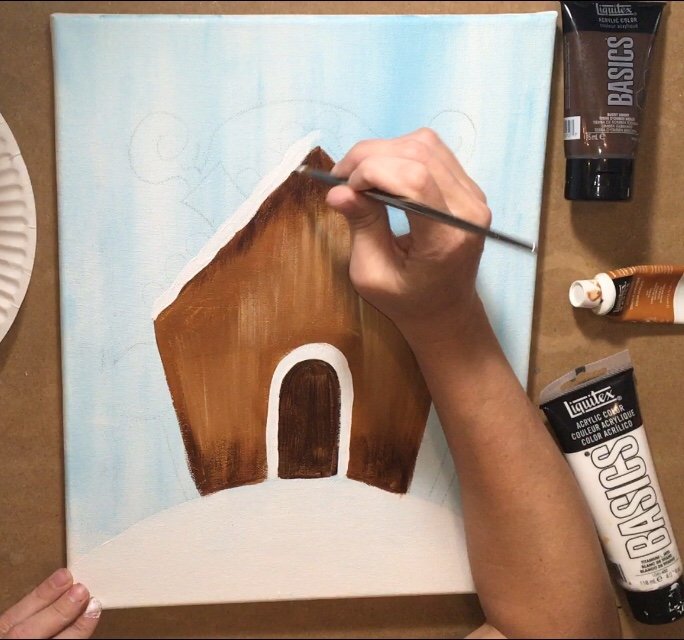
6. Paint the white trim on the door, snow on roof, windows and chimney.
Use a #5 or similar size round brush for this. Paint the trim around the door titanium white.

Then paint the snow on top of the roof.
Next paint the windows. Since the windows from my traceable were gone, I just estimated them at this point!

7. Paint the icicles and heart.
Then I painted the icicles in titanium white and still used that #5 round brush.
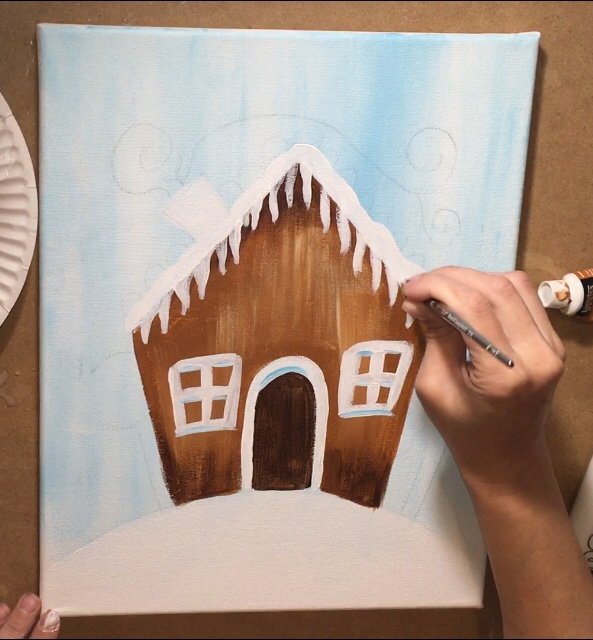
Optional: you can dip your brush in a tiny bit of blue and blend it into the white a bit for some color variation and shadow in the snow.


I also painted the heart with Titanium White as a way to “white out” the area for it to be red.

8. Paint red stripes on the door trim and chimney.
Next use any brush to paint the red stripes on the door trim and the chimney (I used my #5). The exact color of red I used was cadmium red medium.

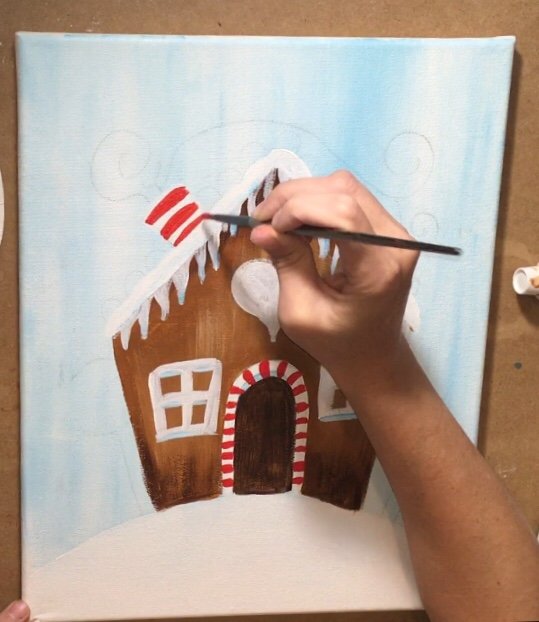
At this point I also painted the heart in. 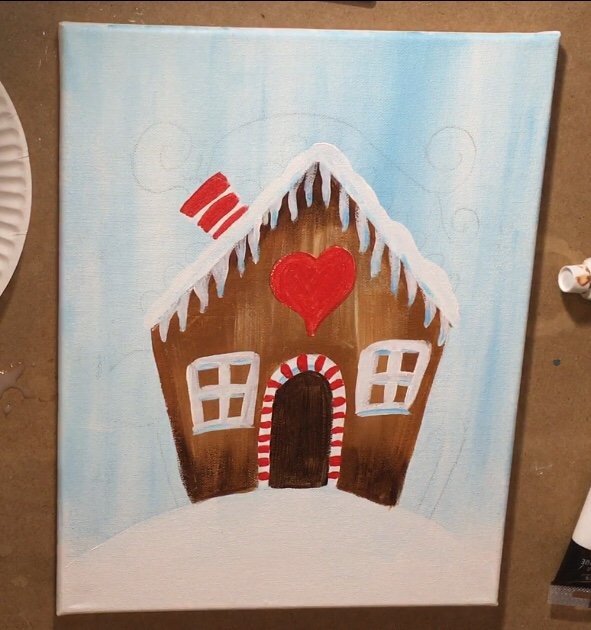
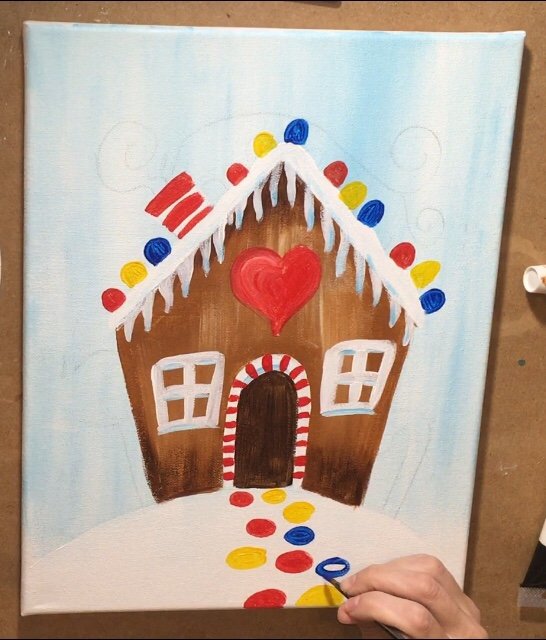
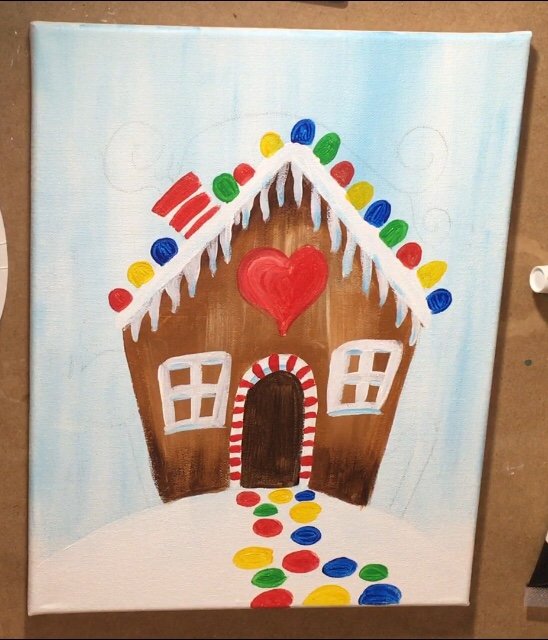
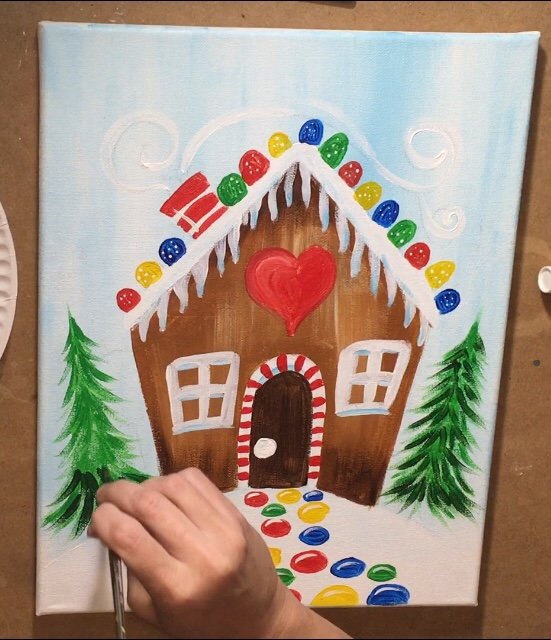
9. Paint the gumdrops on roof and ground path. Use one color at a time.
The colors on my palette for the gumdrops are: cadmium red medium, cadmium yellow medium, light green permanent and primary blue. Because it’s no fun to constantly switch colors, I painted all the red gum drops first and then continued onto the next colors.
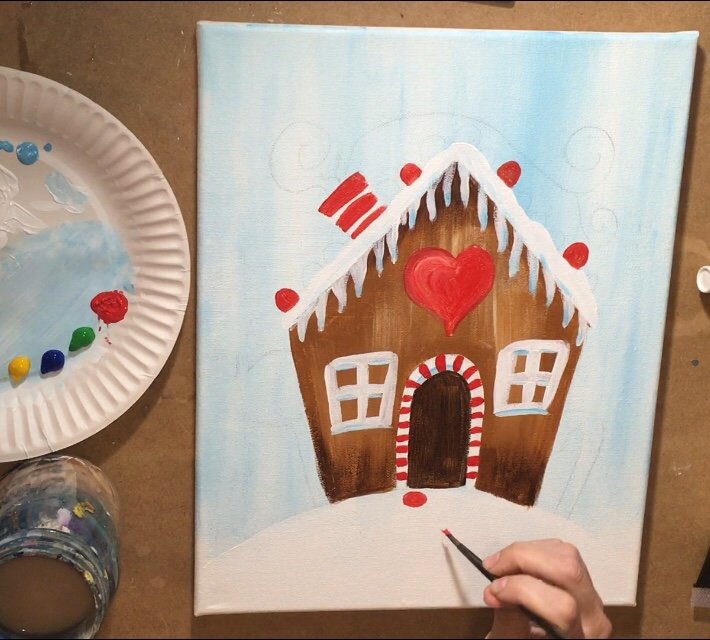
Optional: When painting the path, try to make the gum drops get slightly larger towards the bottom to create a sense of “depth”. I also angled my path a bit. The shape of these ground gum drops is a basic oval shape.
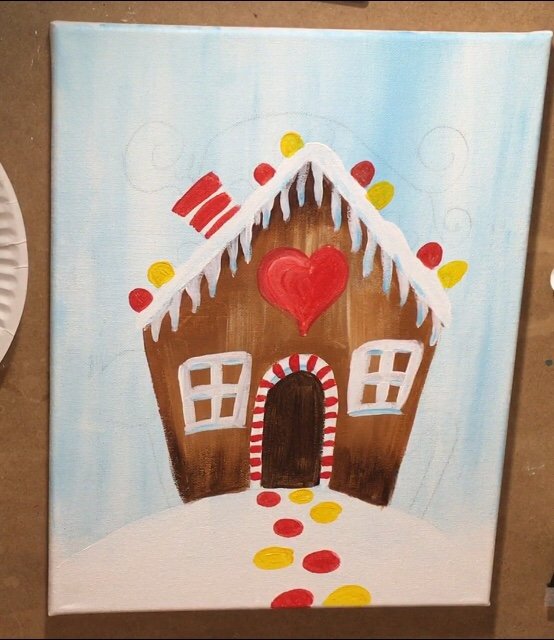
10. Paint the white smoke and add details to the gumdrops.
Next I painted the swirls coming out of the chimney with titanium white and that same #5 round brush. Also I switched to a 10/0 liner to paint tiny dots on the roof gum drops and a reflection line on the ground gum drops. Oh and also – that door knob!

11. Paint the trees.
To paint the trees, I used my #5 round brush and the colors: light green permanent, hooker’s green and titanium white.
When I paint trees, I start out with a basic outline of the tree. Drag each stroke down with the round brush so that it starts out thick but gets thin as the paint runs out.
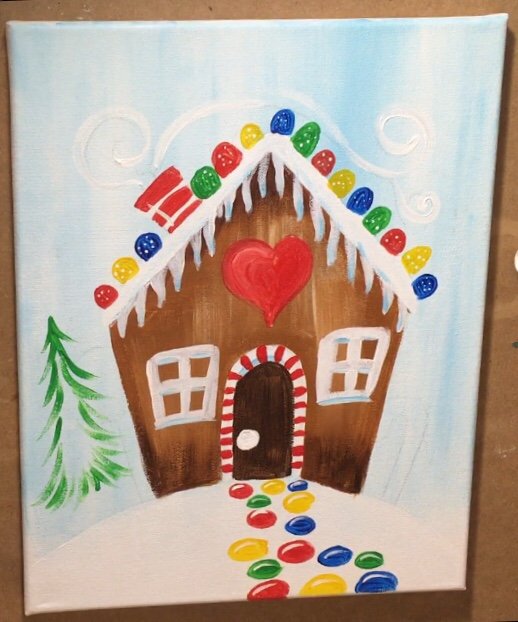
Then I fill in the inside of the tree using that same technique of dragging each round brush stroke from top to bottom.
Repeat those steps for the tree on the right.
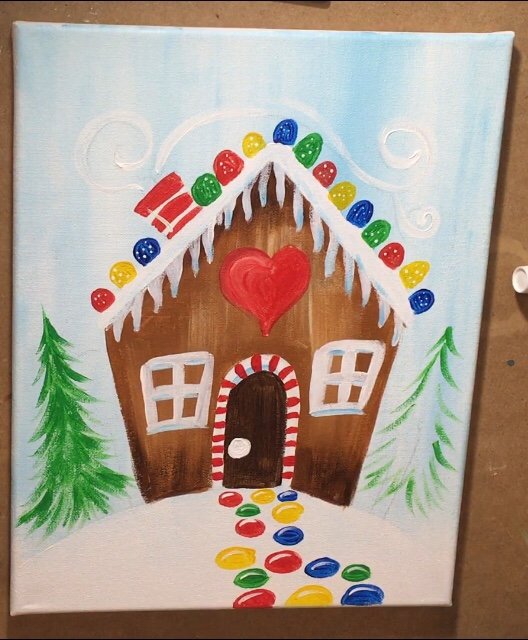
To get the “texture” and darker areas on the trees, I used hooker’s green. Rinse your brush off and grab hooker’s green. This time start from the bottom of the tree. Drag each stroke down one at a time (paint short curved lines).

Then work your way up the tree painting more short curved lines so that the lines overlap each other as you go from bottom of the tree to top of the tree.

To paint the trunks, use burnt umber and paint a line. To add a bit of snow, use a clean round brush (#5) and paint more strokes starting from bottom of the tree to the top of the tree.
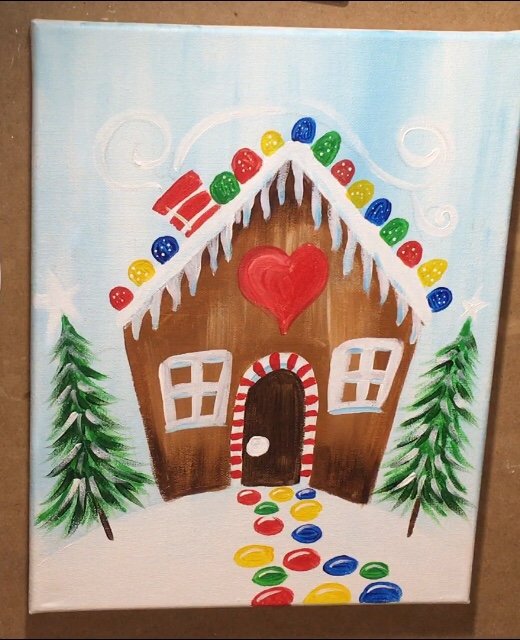
12. Outlines some black smoke and a few other areas with mars black.
Next I wanted that smoke from the chimney to stand out better so I used my 10/0 liner and the color mars black to outline the line again. I did not completely cover the white. Oh and also I painted the stars on the trees too with cadmium yellow medium.

I also picked some areas to slightly outline with the black. Be careful with this step! It may be tempting to outline everything but that’s not the point. The point is to add just a bit of black outline to “some” areas. I added black on the bottom of the ground gum drops.

And I outlined the right side of that heart.
Part of the chimney and the stars on the trees were outlined as well. Remember, any outlining I do is optional and you don’t have to copy it if you don’t like that style!

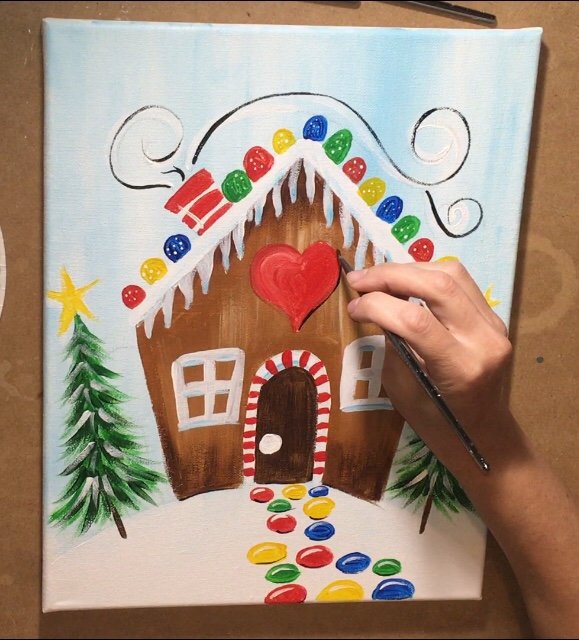
13. Paint the lollipop and candy cane.
To do the lollipop and candy cane, you’ll need to white out some areas first. Start by painting a titanium white circle in the general area you’d like to see the lollipop. Note: I did paint the candy cane stripes on the doorknob in too with cadmium red medium.
Then paint the stick from the circle to the ground. Also, paint a white candy cane shape where you’d like your candy cane to be.

Wait for that white to dry a bit. Then proceed with cadmium red medium and your 10/0 liner. Paint a spiral starting from the center of the circle and swirling out.
Paint a yellow spiral on the circle. 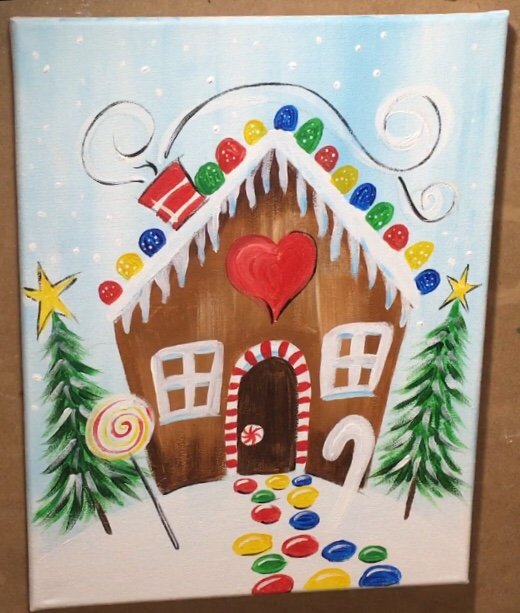
Then paint a blue spiral on the circle.
Finally, paint the stripes on the candy cane in with cadmium red medium. Also, I outlined the circle of the lollipop and the candy cane with mars black.
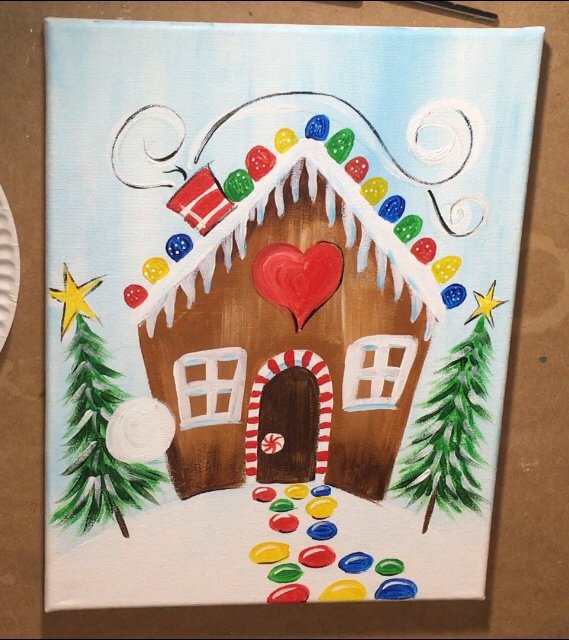
13. Paint shadows on the ground.
To do the shadows, I used watered down primary blue mixed with white (about equal parts). Use a #4 round brush to paint some shadow lines just under the trees, lollipop and candy cane. And if you look closely, the ground gum drops have a tiny bit of shadow underneath too.
Finished!
Sign your name and show it off! 
Share Your Art!


Our family of 10 will be painting this after our Thanksgiving dinner!! So excited!!
Oh how fun! Enjoy!!
How long will this take for elementary aged children to complete?
That’s a great question! Kids tend to go fast through their paintings depending on the age. Older students spend longer on details than younger. But it also depends on the child. I would say about 1-1.5 hours for this painting.
How much paint if each color should we buy? 2 oz., 4 oz.? I’m ordering paint and supplies for my grown kids to put in a basket for Christmas. Date night activity for them and their significant other. ?
2oz should be a good amount for each of the colors ? You may want to get a 4oz of the white because that one is used more.