
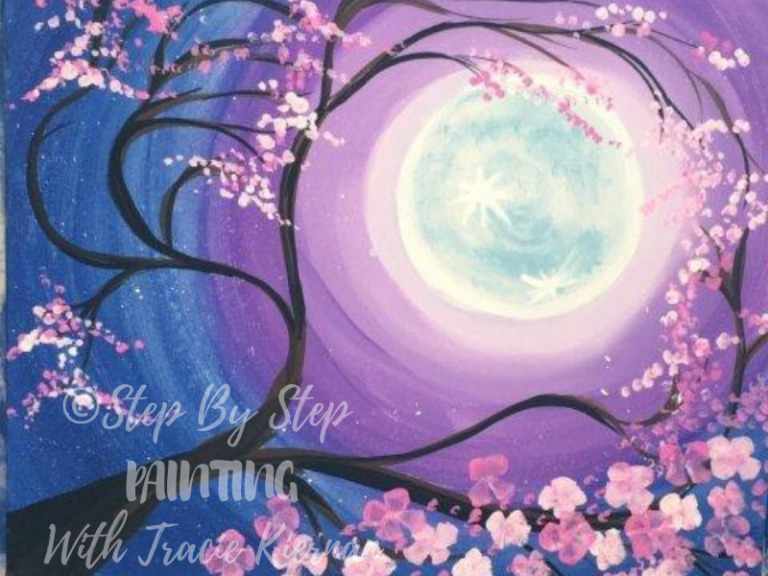
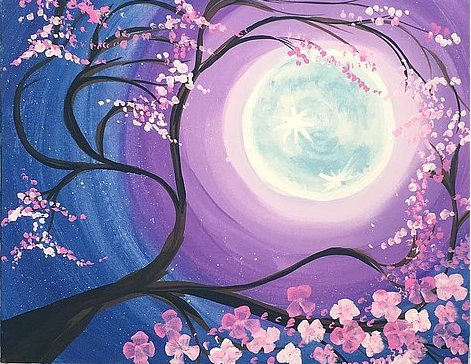
Cherry Blossom Tree Painting
Paint your own cherry blossom tree painting with acrylics on canvas.
This step by step acrylic painting tutorial will guide you through the techniques so you can render your own cherry blossom painting that you will be proud of!

Would you like to save this?
Sakura means cherry blossom in Japanese. The tree symbolizes life, death and rebirth because the flowers are only fully bloomed for a short amount of time.
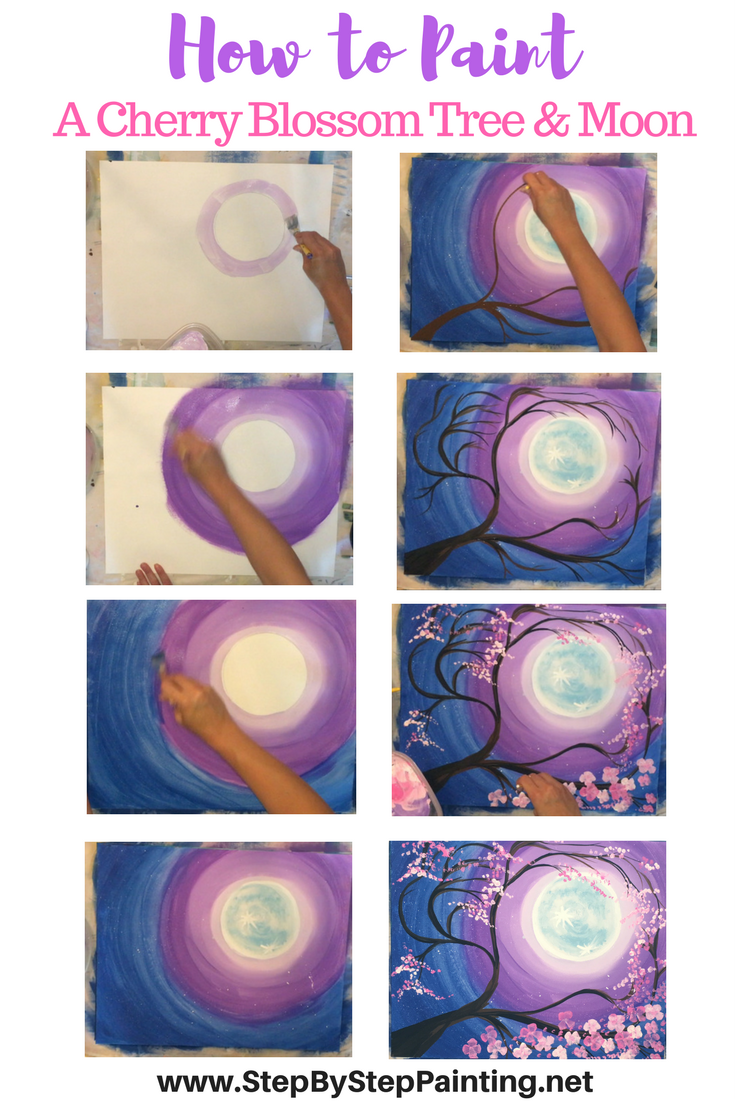
In this tutorial you will be tracing a circle for the moon and then blending colors outward from the moon to create a glowing sky.
Then you will learn how to paint the actual Cherry Blossom tree. The flowers themselves are extremely simple and require you only to dot the tip of your paintbrush!
As always, I love to see your work! Please share it in the wonderful collection that is growing on the Pinterest “I Tried It” section of the pin!
If you don’t want to share on Pinterest, you can always message me the painting or post it on the Facebook Page!
Enjoy and Happy Painting Artists!
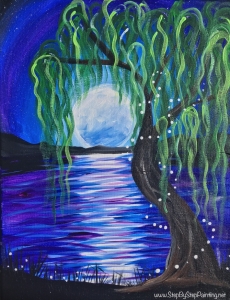
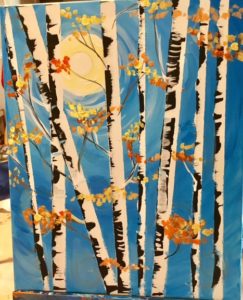
More Tree Paintings
This Post Contains Affiliate Links from Amazon.com
Materials:
Cherry Blossom Tree Painting
Paint your own cherry blossom tree painting. This beginner tutorial will guide you through each step and teach you the painting techniques.
Materials
- Acrylic Paint
- 16 x 20 Canvas
- Sponge or baby wipe for moon texture
- 7” Circle To Trace Moon (I used a plate)
Colors (Listed in BASICS and Apple Barrel Terms)
- Phthalo Blue (Or Too Blue)
- Light Blue Permanent (Or Blue Cotton)
- Dioxazine Purple (Or Purple Iris)
- Burnt Sienna (Or Nutmeg)
- Mars Black (Or Black)
- Titanium White (Or White)
- Portrait Pink (Or Medium Magenta)
Brush Sizes
- 1” Flat Or 3/4” Flat
- #4 Bright
- 1/2” Angle
- #4 Round
Instructions
- Trace a circle for the moon.
- Paint and blend the moon beams starting with purple mixed with white and then blending it to solid purple.
- Paint the dark blue in the sky on the outside part of the light purple moon beams.
- Splatter some stars in the dark areas of the sky.
- Add some texture to the moon using a baby wipe and light blue.
- Paint some more white on the moon, outline the moon and paint some texture asterisks on the moon.
- Paint the branches with black and then add some brown.
- Paint some lighter brown to add more highlights and texture on the tree branches.
- Paint the cherry blossoms by dipping a round brush in pink and white and painting little dots on the tips of all the branches.
- Paint some larger flowers by painting petal shapes with the same pink mixture.
Directions At A Glance 


Video For Cherry Blossom Tree Painting
See more videos in my painting video library!
Directions For Cherry Blossom Tree Painting
1. Trace A Circle For The Moon
Trace a circle for the moon. This was a 7″ ceramic plate. Use a pencil and draw lightly.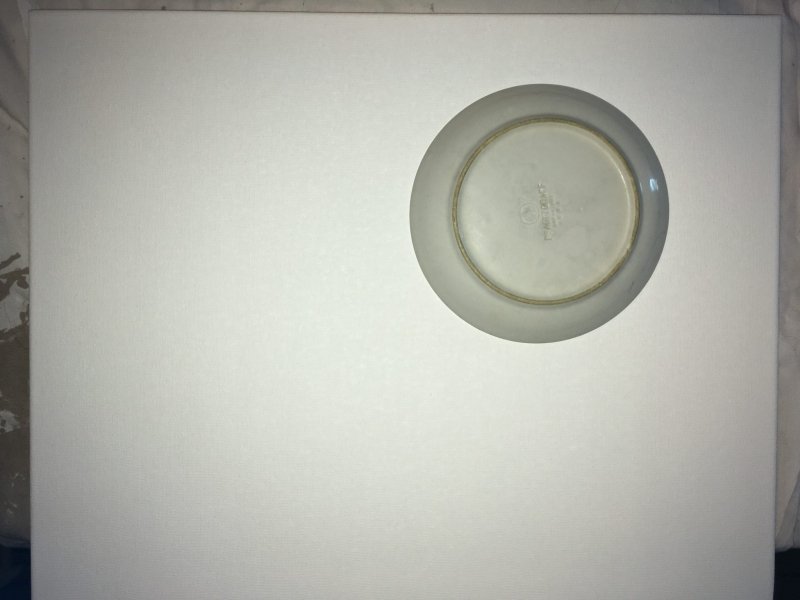
The moon is traced on my canvas in the upper right hand corner.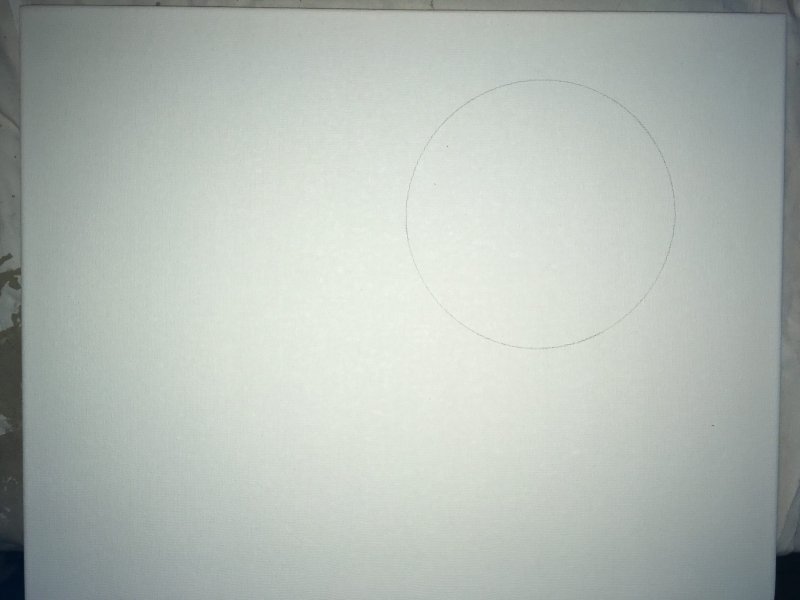
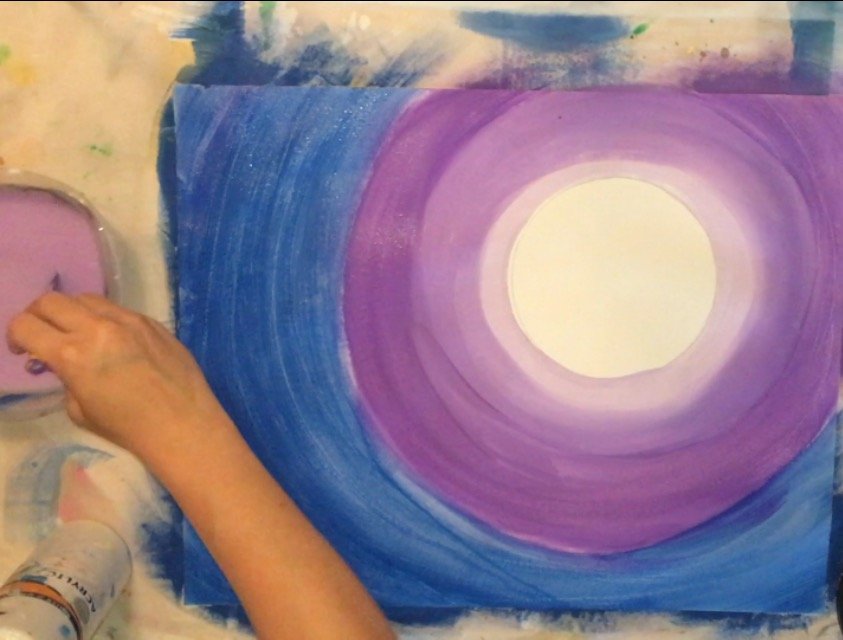
2. Paint And Blend Moon Rings
You’ll need: a 1″ flat brush (or similar size), purple & white paint. Put about 5 parts white and 1 part purple onto the palette. For demonstration, I am using the Apple Barrel Paint in the photos. 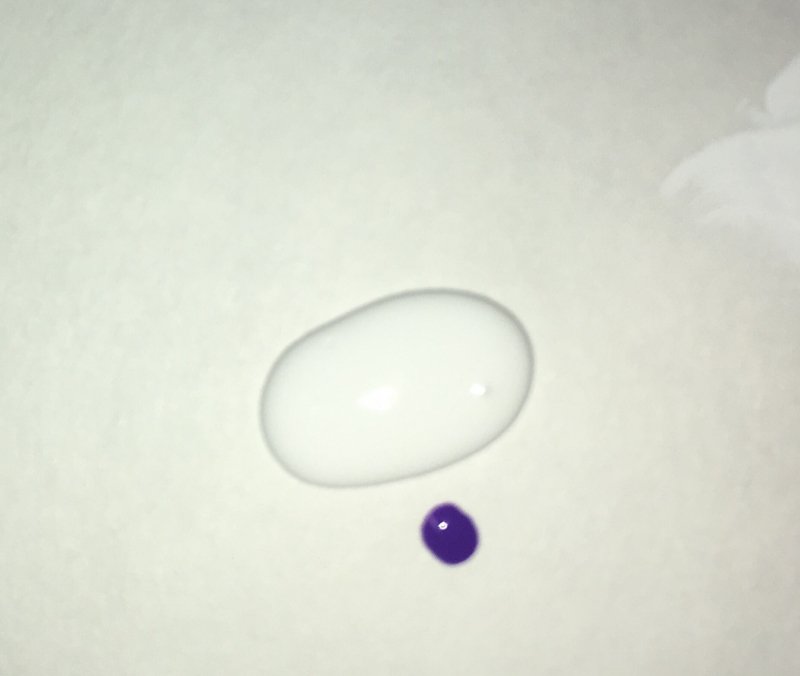
Mix that white with the tiny bit of purple to create a light purple tint. This purple should be VERY light. If it’s not light, add some more white into the paint. 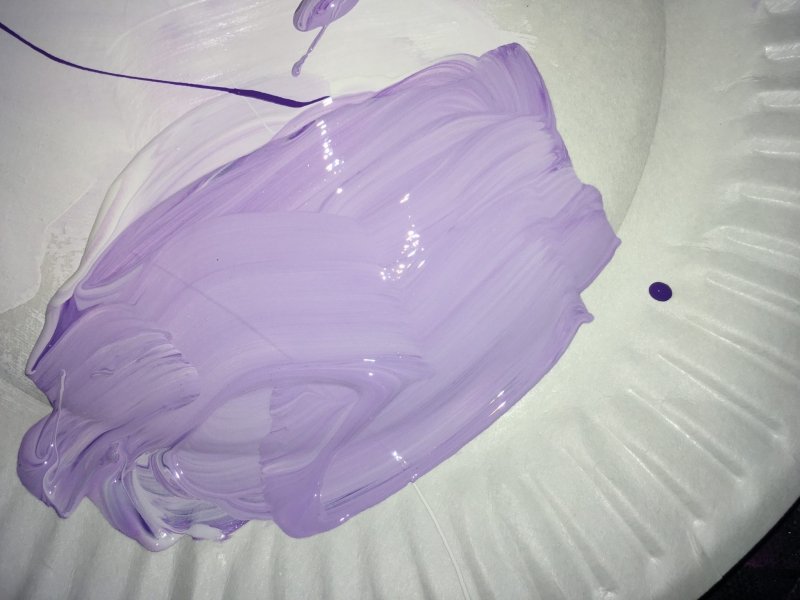
Use a 1″ flat brush to paint a ring around the moon. The ring was about the width of my brush.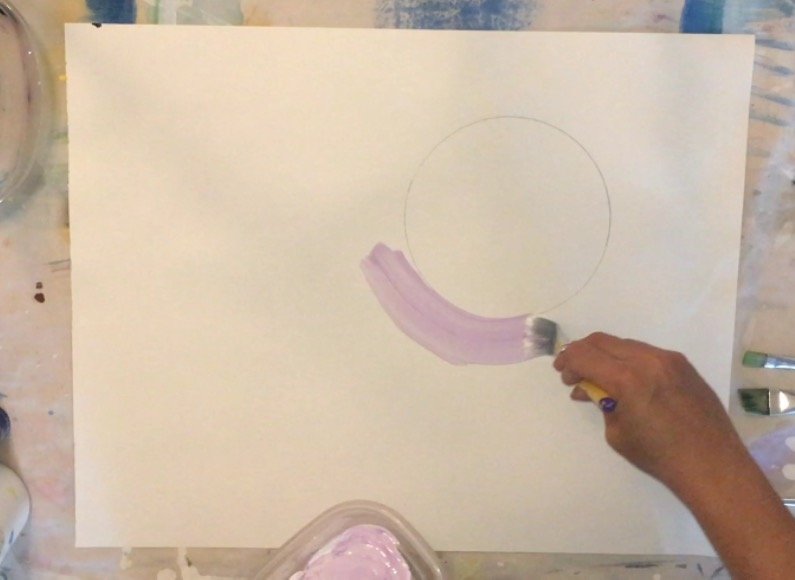
I then mixed another tint of purple, this time it was darker. About 4 parts white and 3 parts purple (or just make a tint of purple that is slightly darker than your first purple ring).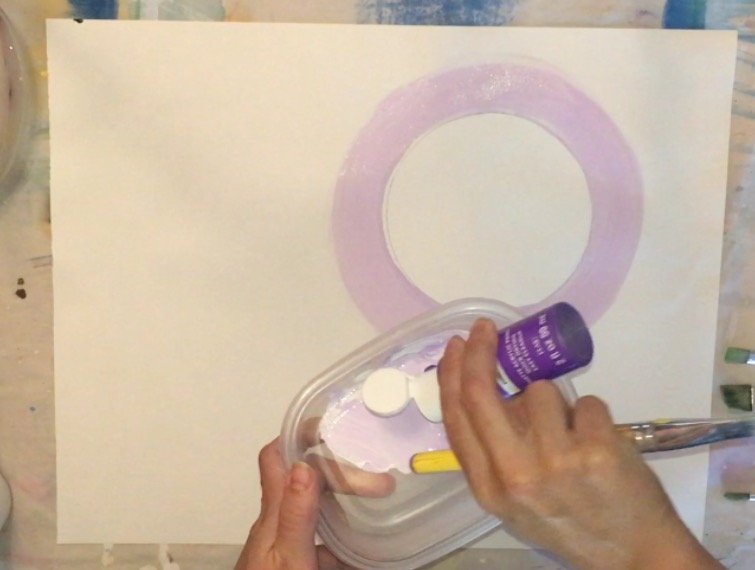
Paint that ring around the moon. You can try to blend the colors together now by painting over the lighter ring and letting them blend on the canvas or blend them together in the next step.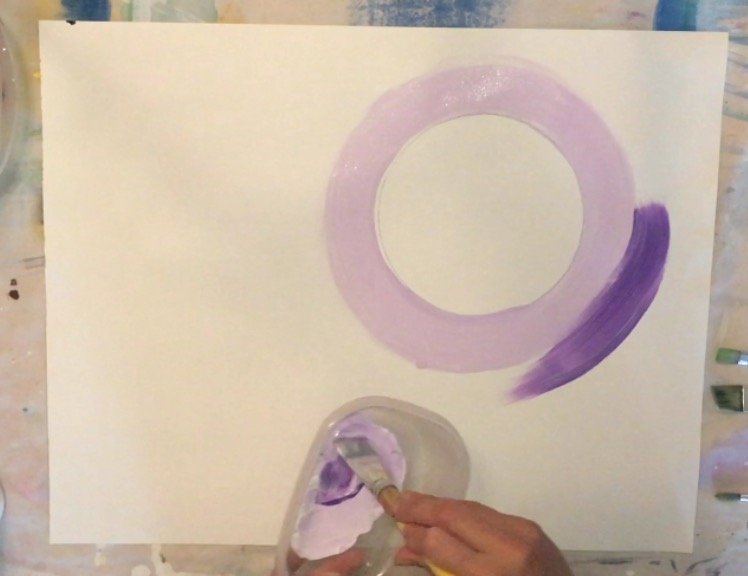
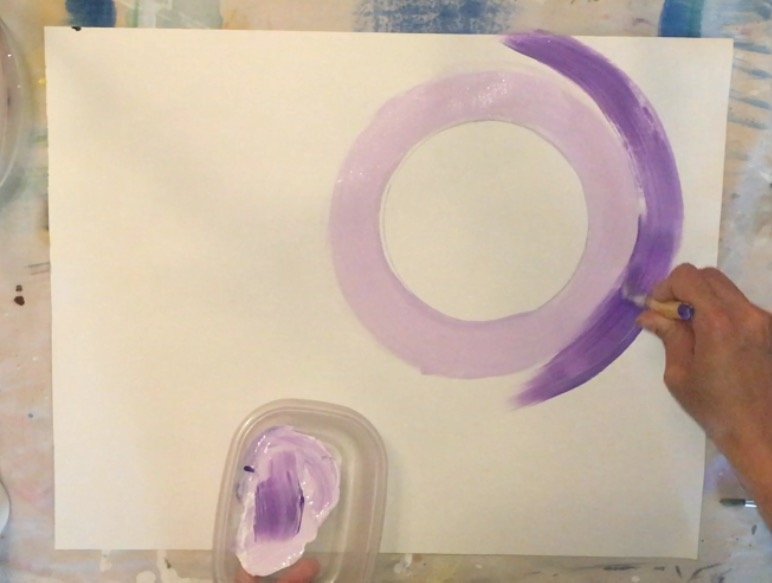
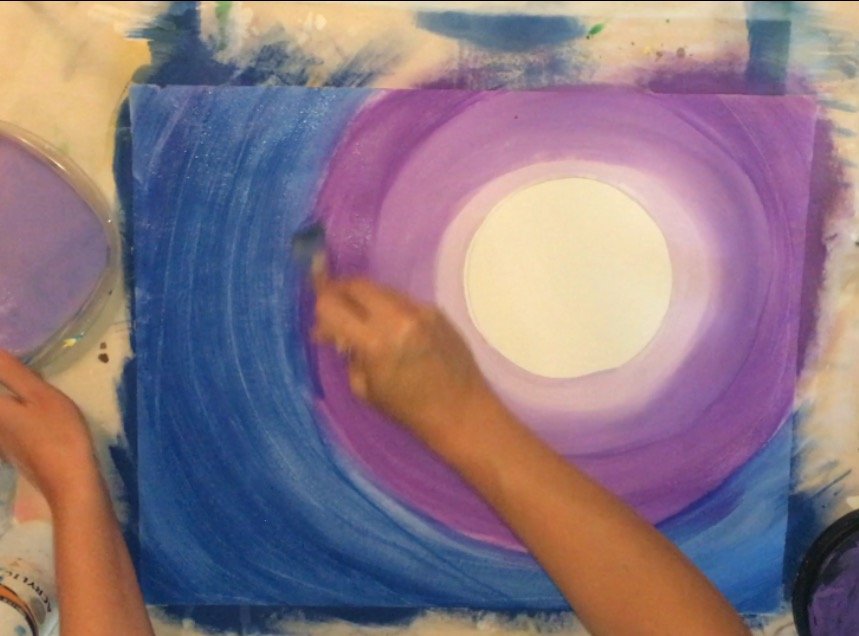
To blend, I used a wet on wet technique. I cleaned my brush and just added water to the brush. I painted the area where the two rings met. This lets the colors blend IF your paint isn’t dry yet. You can also try using a soft dry brush to blend or blend the colors as you paint. OR you can mix and in between purple shade and blend that into the colors. 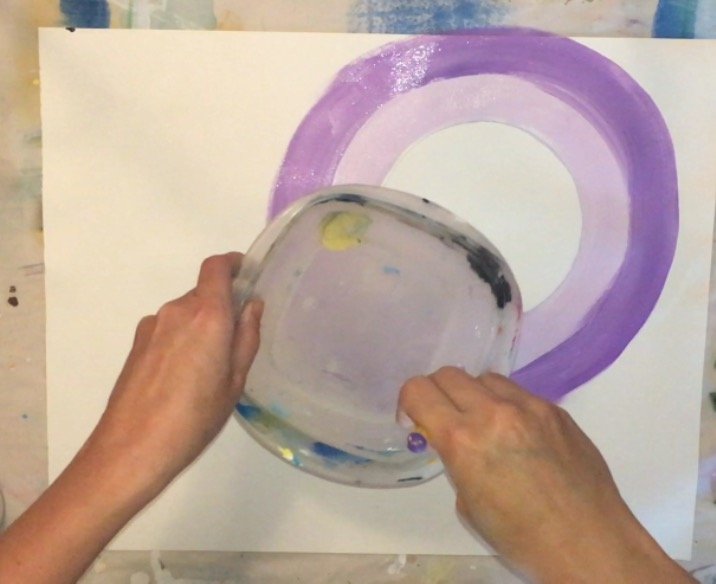

If your paint is dry, you can also mix another tint of purple with a color that is in between the two and paint over the area where the rings meet. The video helps with this step!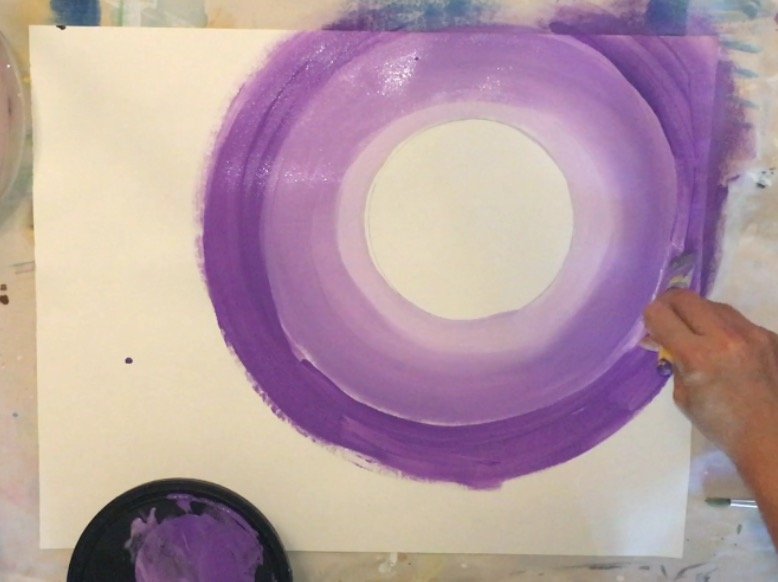
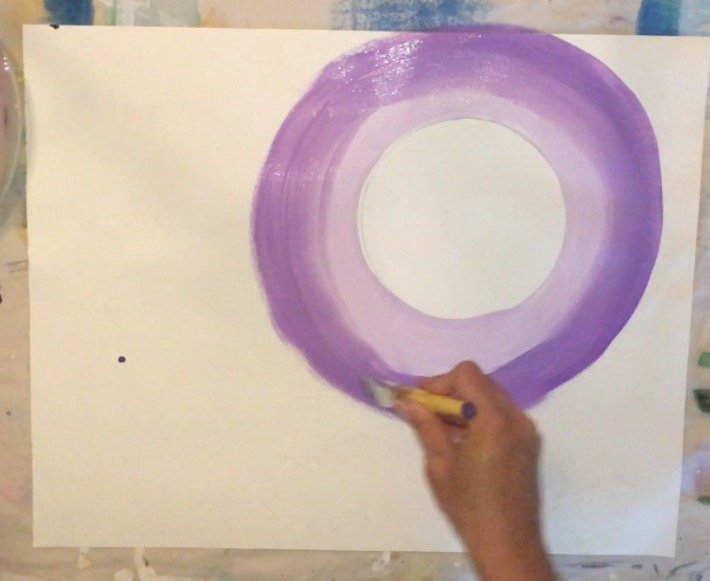
The third ring was solid purple with no white mixed in it. Rinse off your brush all the way and paint just purple not mixed with white. 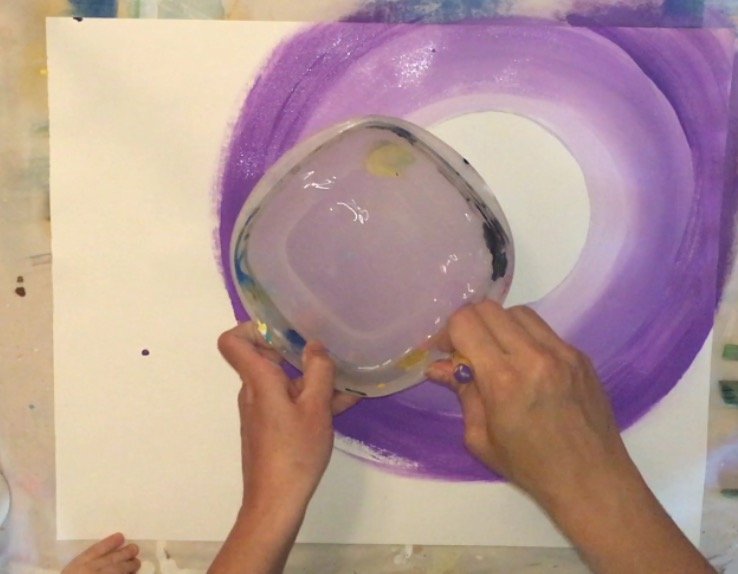
I then blended that purple ring.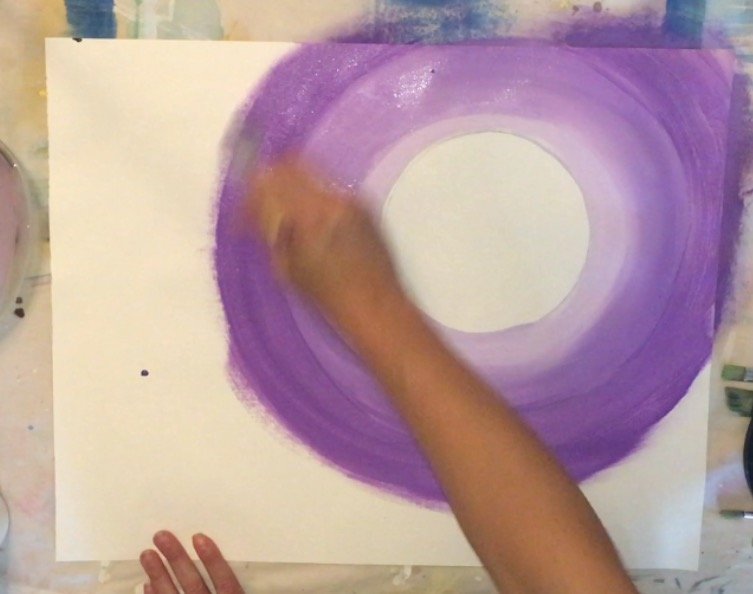
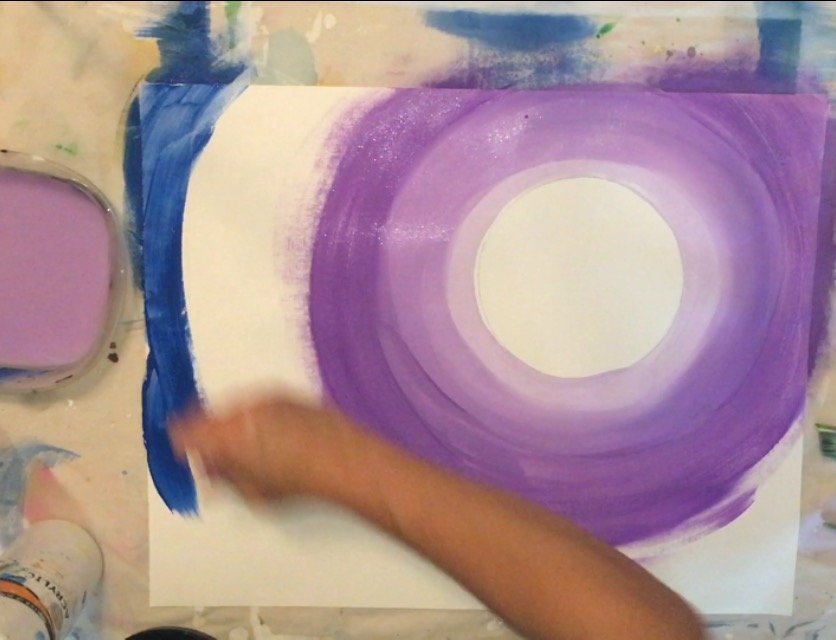
3. Paint The Dark Blue Sky
You’ll need a 1″ flat brush and dark blue! I used “Too Blue” from Apple Barrel or Phthalo Blue from Liquitex BASICS. Basically paint the rest of the area in with the Phthalo Blue making sure you are still going in a circle form around the moon. Blend that dark blue in with the purple. 
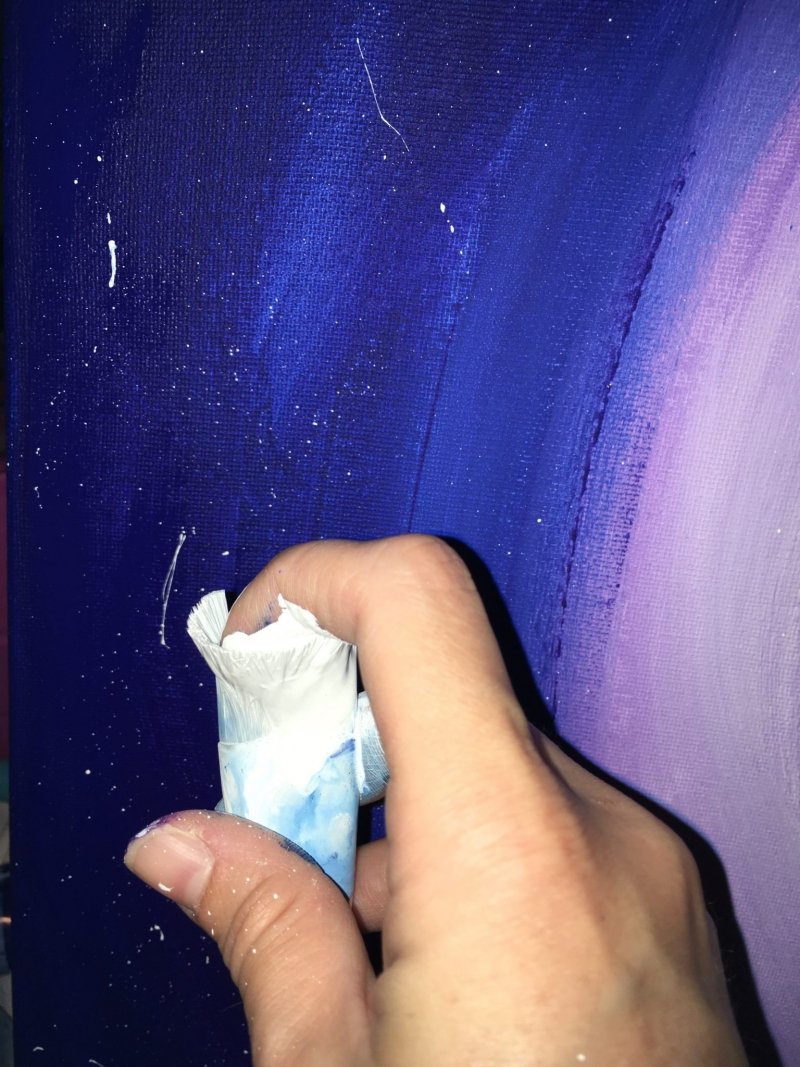
4. Splatter Some Stars
You will need a 1″ flat brush or tooth brush and white paint! Splatter the white paint onto the canvas to create stars.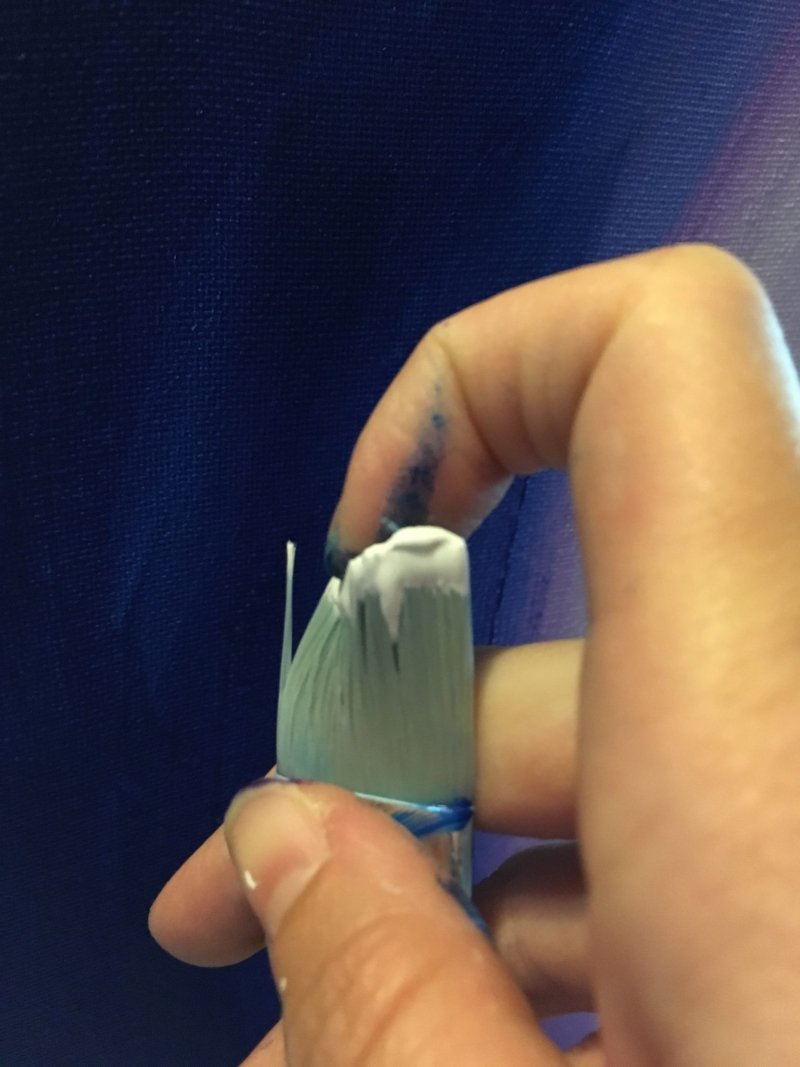
5. Add Some Texture To The Moon with a Sponge or Baby Wipe
You will need white + blue paint and a sponge or baby wipe. Mix a very light blue tint. This is about 5 parts white and 1-2 parts blue.
I used a baby wipe to sponge on moon texture. You can use a sponge for this step too but I didn’t have one at the time. Dab on the texture inconsistently around the moon. Some areas are darker some are lighter. It helps to look at an image of a real moon to observe how the texture looks. 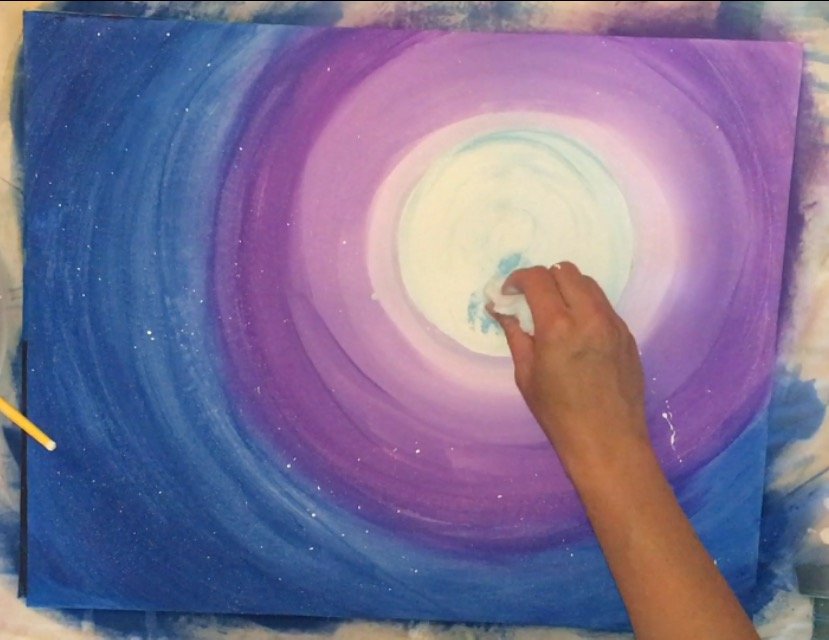
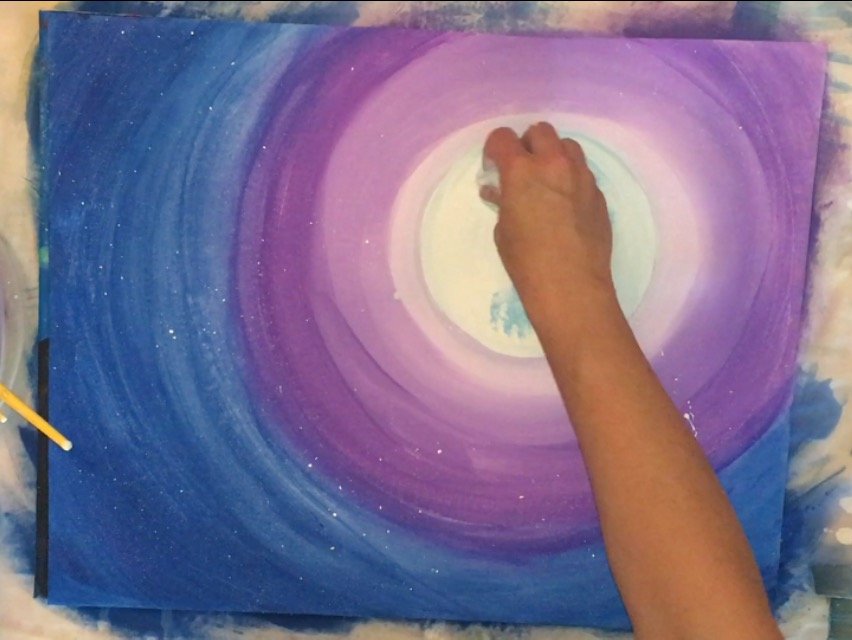
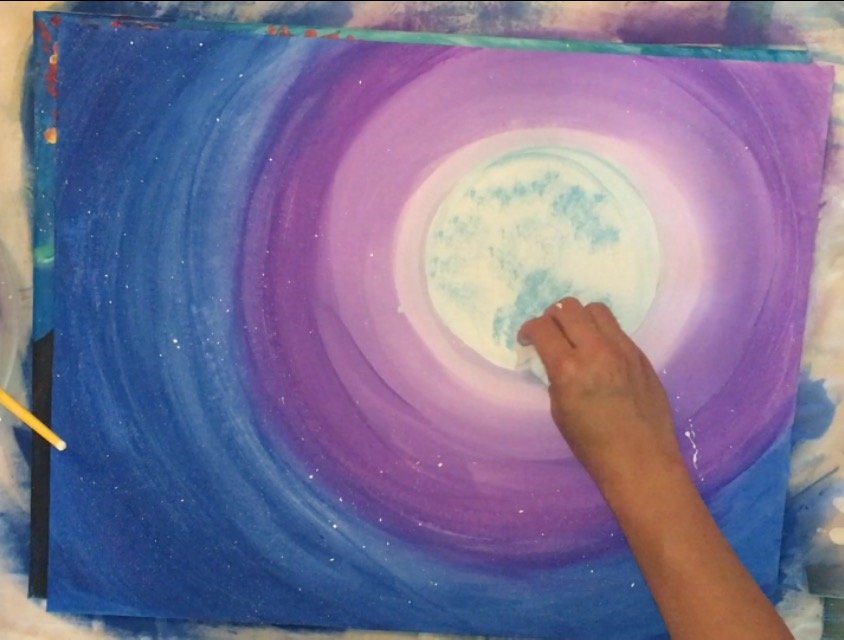
Make sure you leave a lot of white space! If your blue takes over, go back over it and add pure white sponge prints. 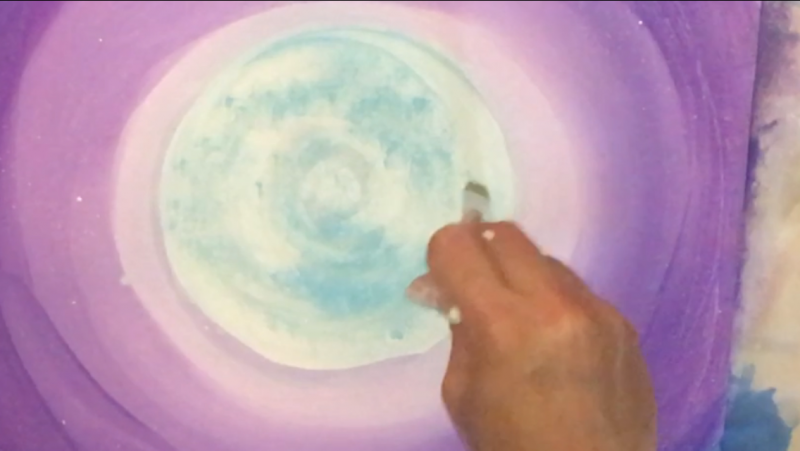
To soften some of the sponge prints, I went over LIGHTLY with a wet brush. I painted in kind of circular strokes to get that blue to soften. You can also soften with a soft mop brush or soft round brush that is not wet. 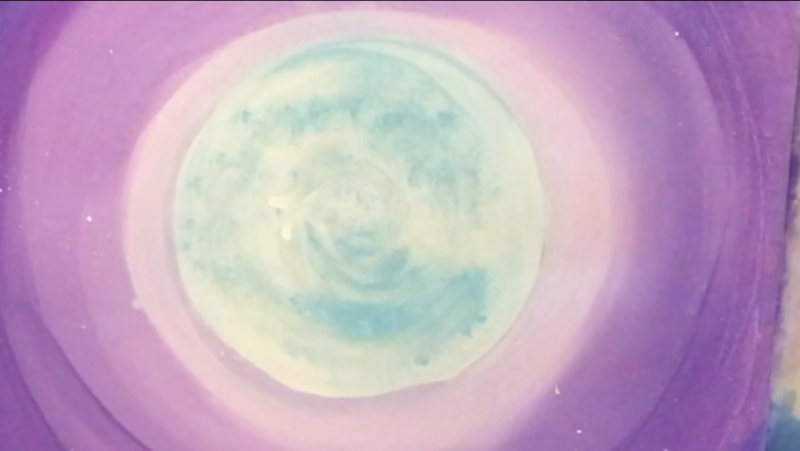
6. Paint some “asterisks”
You will need white paint and a small round brush. I know the photography is not great hear! But with a small round brush, I painted little asterisks or “X’s” on the moon.
There is one in the middle and one on the lower right. I also outlined the entire moon with white and that same small round brush. 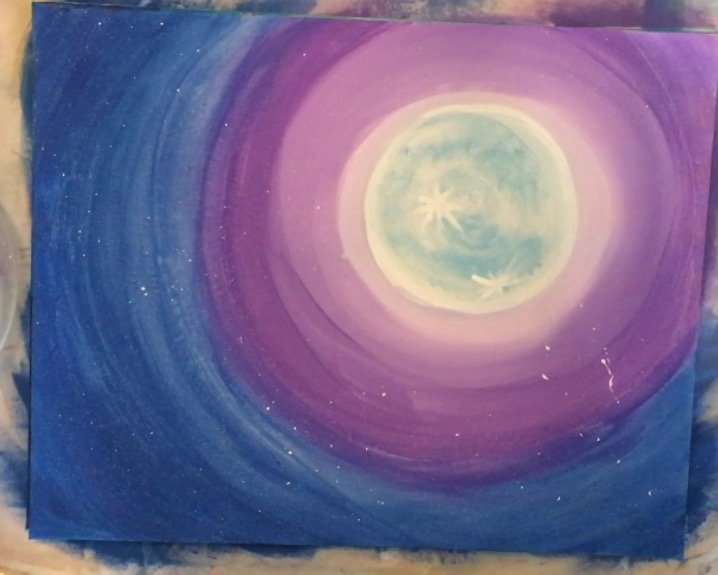
7. Paint The Tree Branches
These photos in this step are from the painting I did with the Liquitex Basics paint. See how the color varies!! You will need a 1/4″ angle brush or any size flat rush or even a large round brush. You will also need black paint.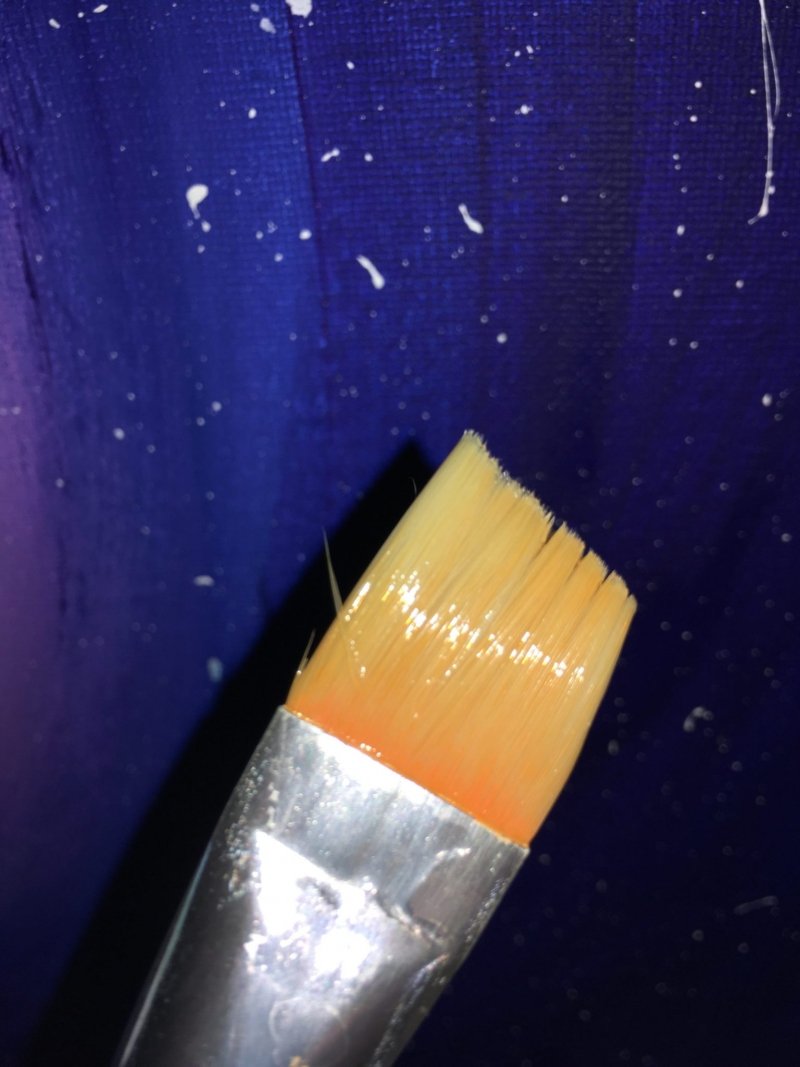
Using black, paint a sort of triangular trunk shape in the lower left corner.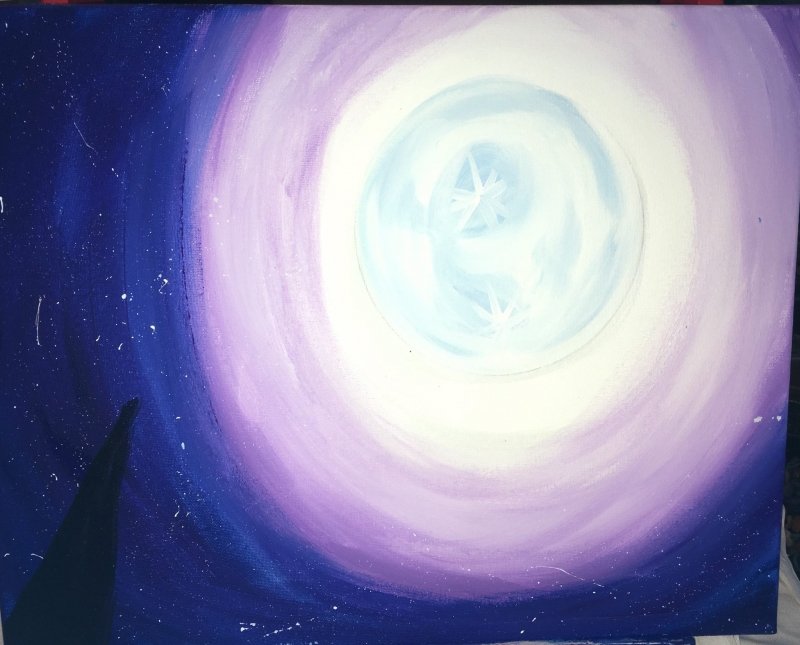
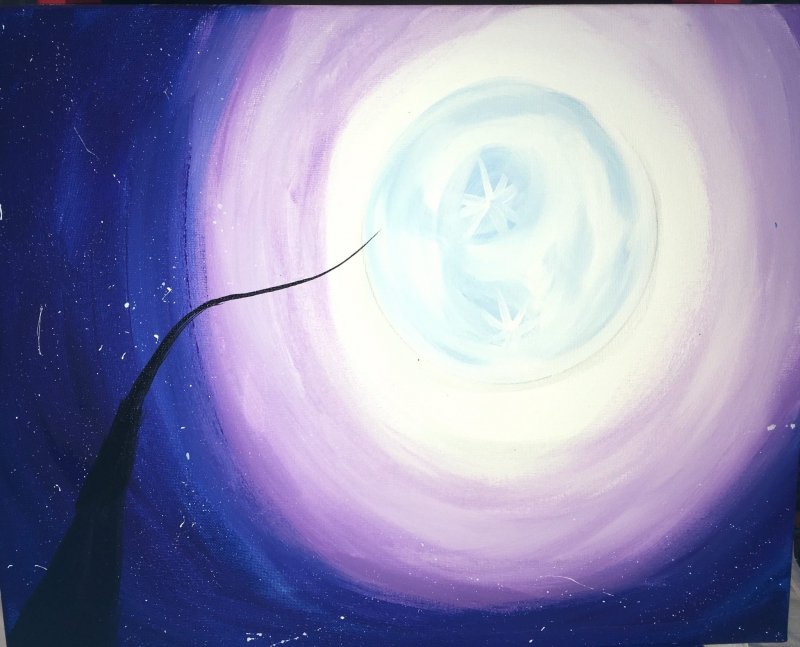
Continue that line until it gets thinner.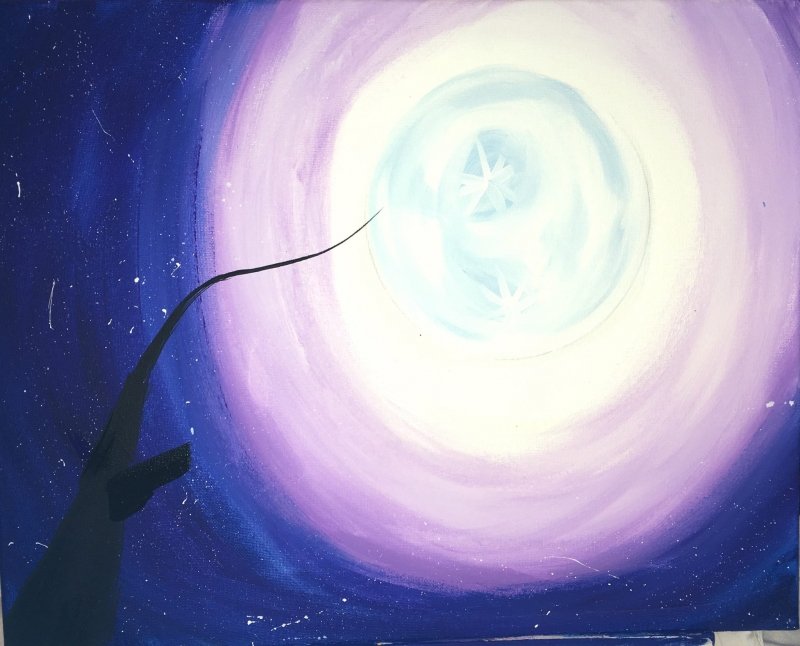
Paint more branches stemming from the main large branch.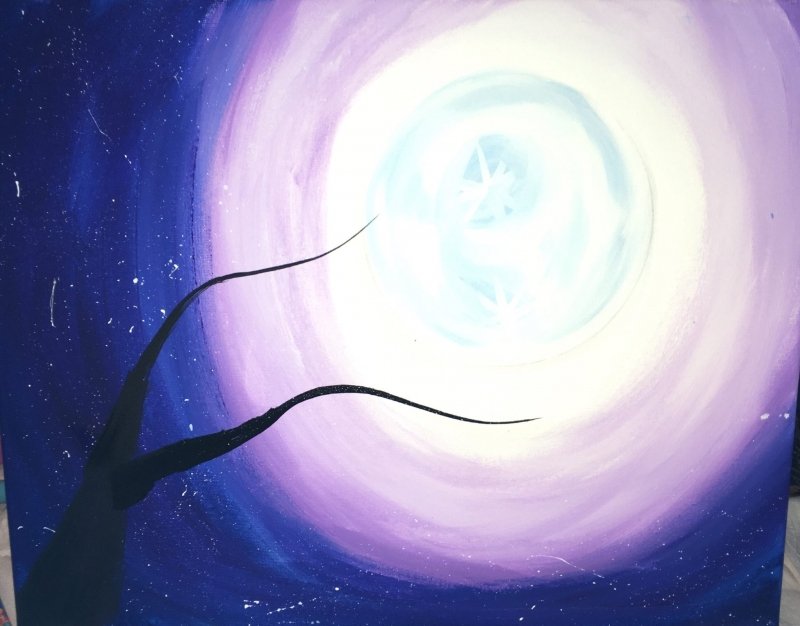
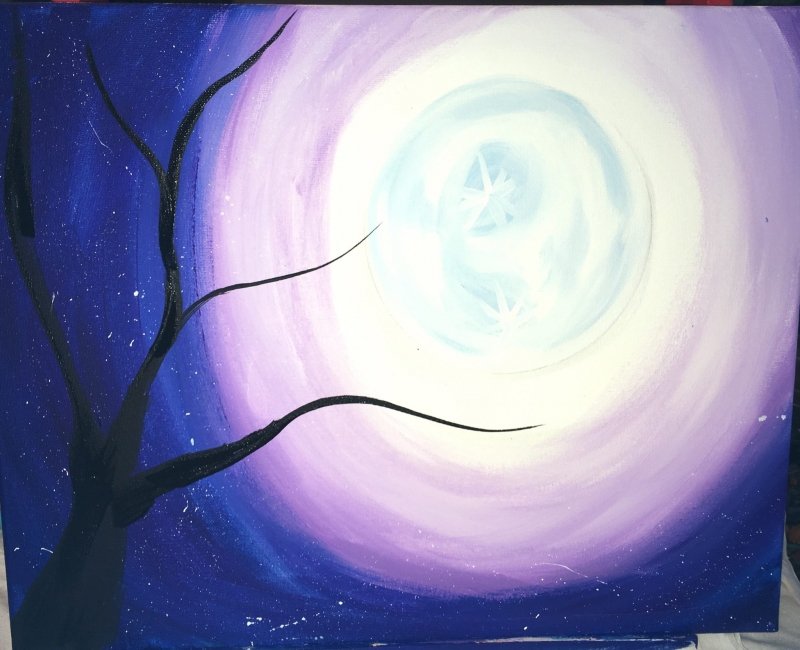
When I paint branches, I like to think that I am painting letter “Y’s” in some areas. Notice that to top is forming the letter Y.
When you use that angle brush, release the pressure on the highest bristle to make the line get thinner.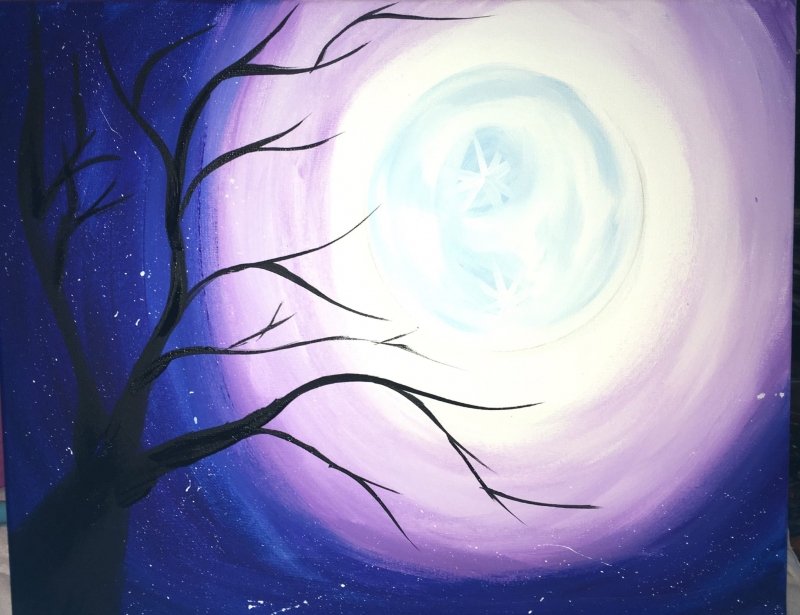 Take note at the direction of the branches. I’m not covering my moon up. It’s almost as if they are going around the moon or hugging the moon. Keep repeating your branches. Some are starting to get really small!
8. Paint Some Highlight & Texture On The Tree
You will need a 1/4″ flat and dark brown paint. Add brown highlight to the right side of the tree. I used burnt sienna here. Or if you’re using craft, and dark brown will be fine. I used a 1/4″ flat brush to do this step.
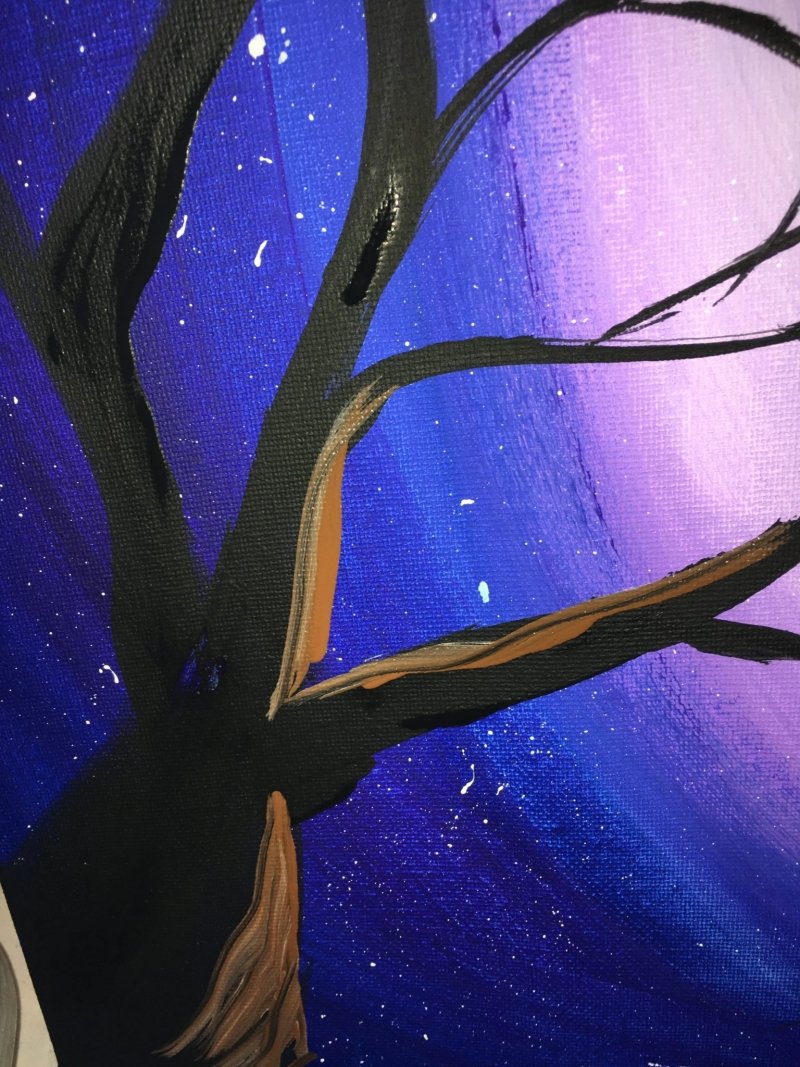
Here is a closeup of the highlight. I only painted on some areas of the branches on the far right side or the very top.
I also added some texture strokes on the branches and main tree trunk so that it faded to the darker color. Again, totally optional!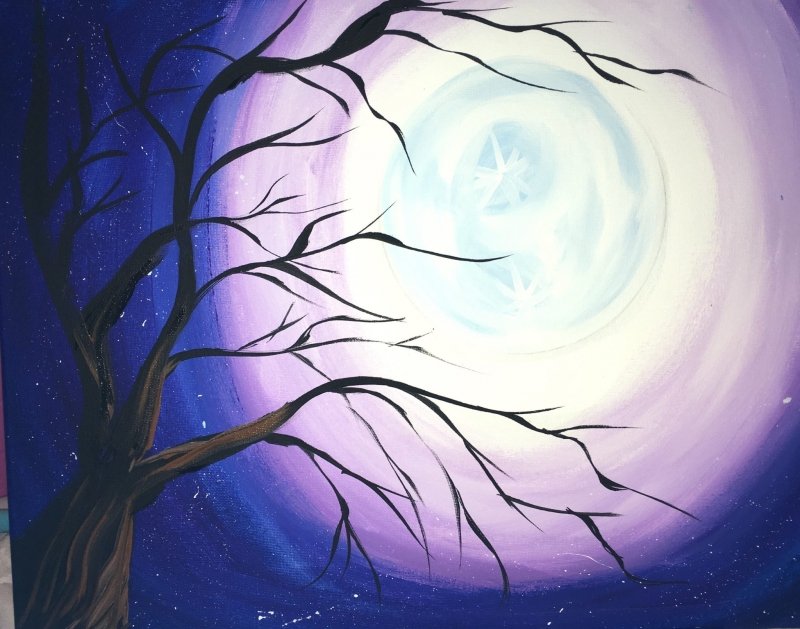
9. Paint The Cherry Blossoms
You will need a small round brush and pink + white paint. This is the best part! Pour some pink and white on your palette. Don’t mix it all together! Your brush will be double dipping. Use a small round brush to paint dots on the branch tips.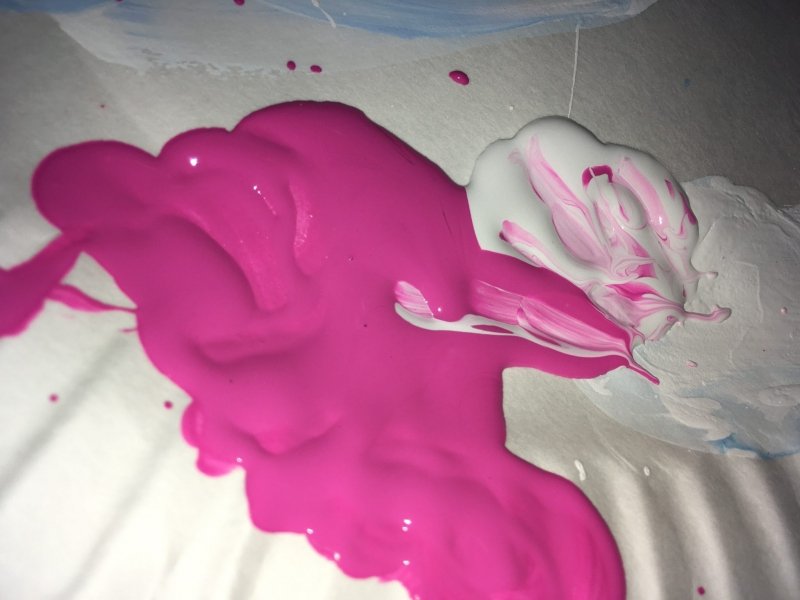
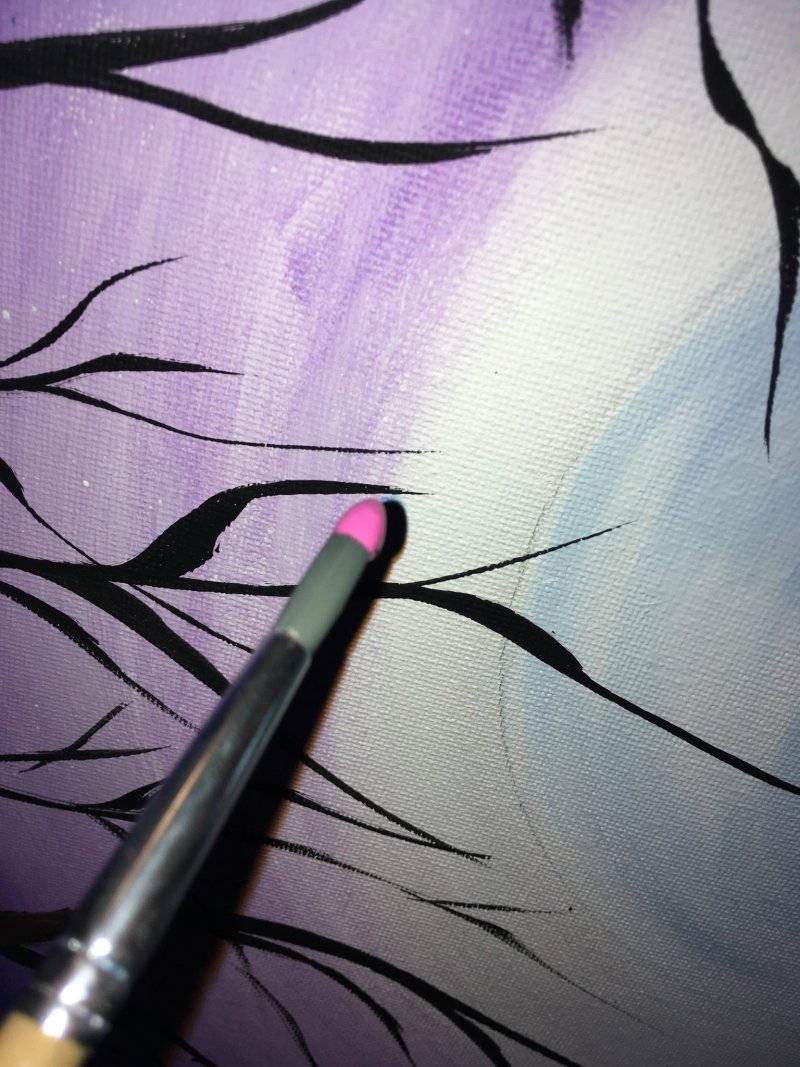
Dip your brush in the pink first and paint some pink dots.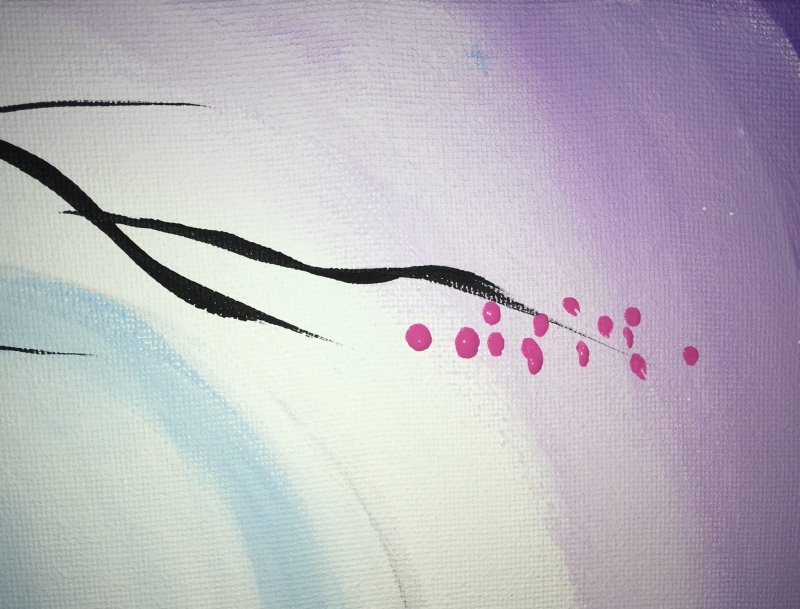
Then dip it in the white without rinsing off. This double dipping will make the colors look varied on the canvas!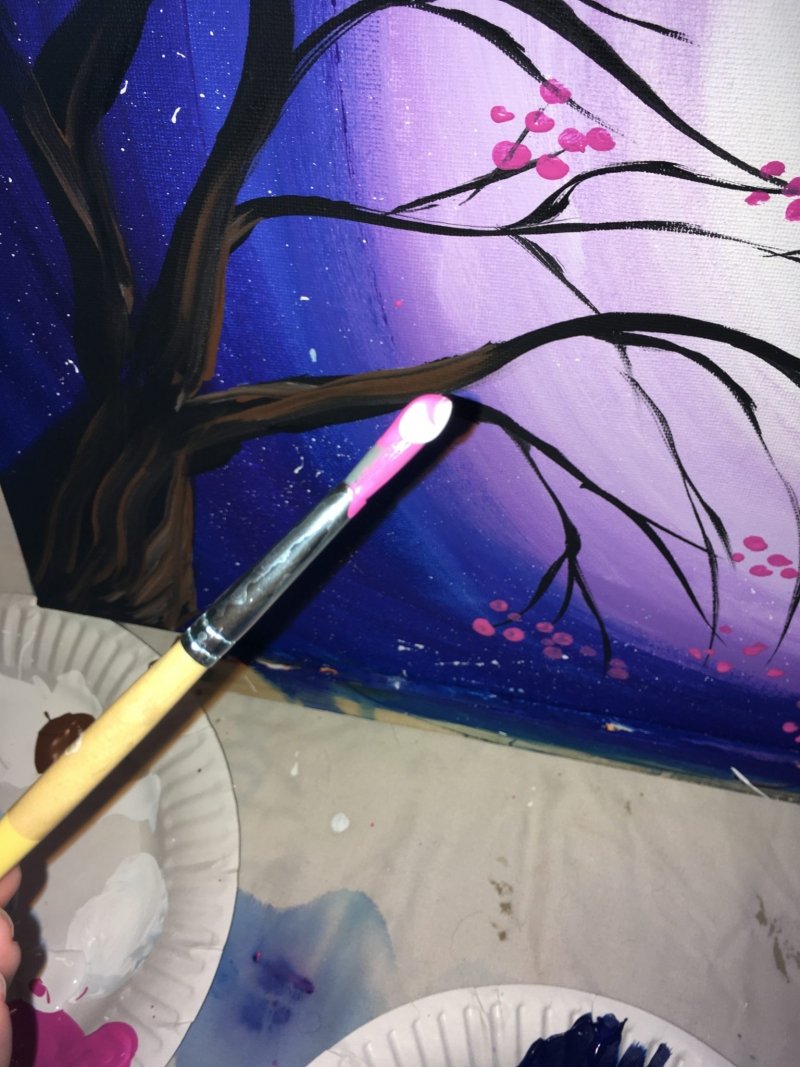
Not all the dots have to be touching a branch! Also see how the are in clusters. Some of these clusters are going vertical and some are going horizontal.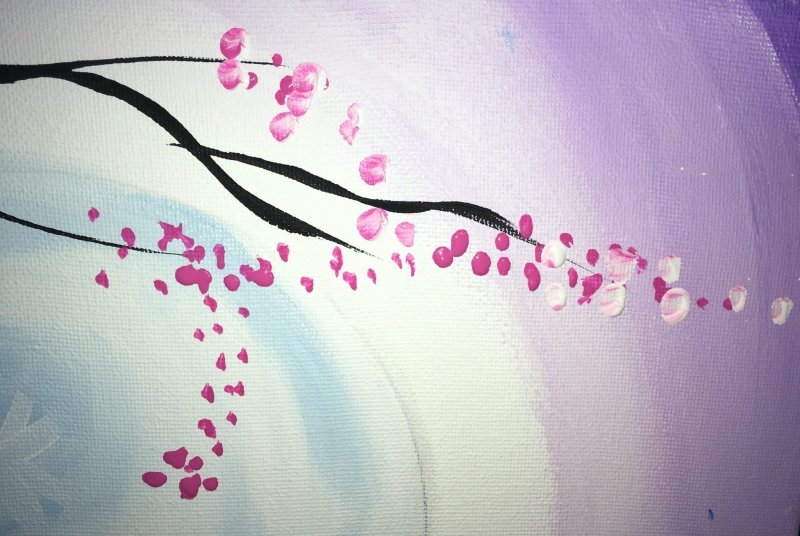
Remember not to completely cover your moon! Keep going with the blossoms. It’s up to you how many you’d like on your tree! Maybe there are no blossoms at all…up to you!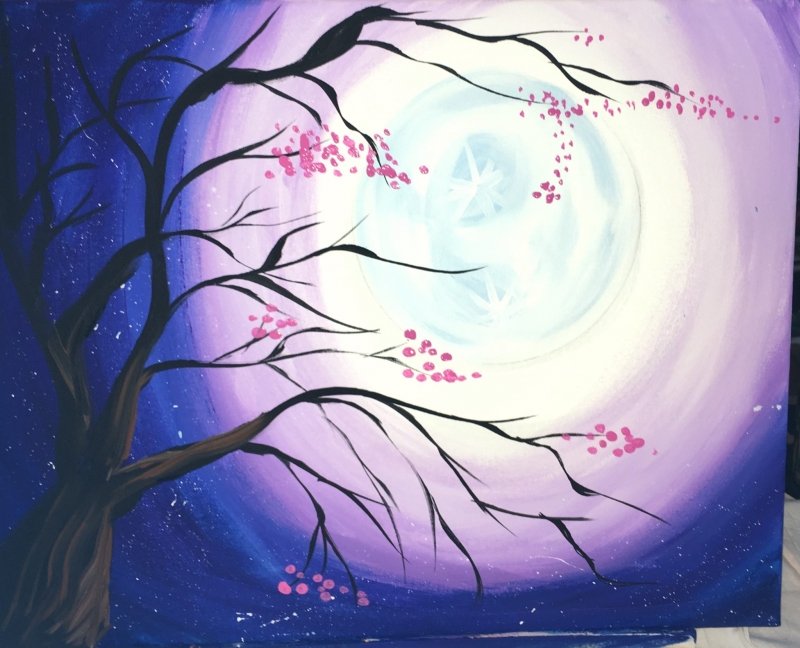
To make the bigger blossoms, I used the side of my round brush to make a stamp. Four stamps for four petals.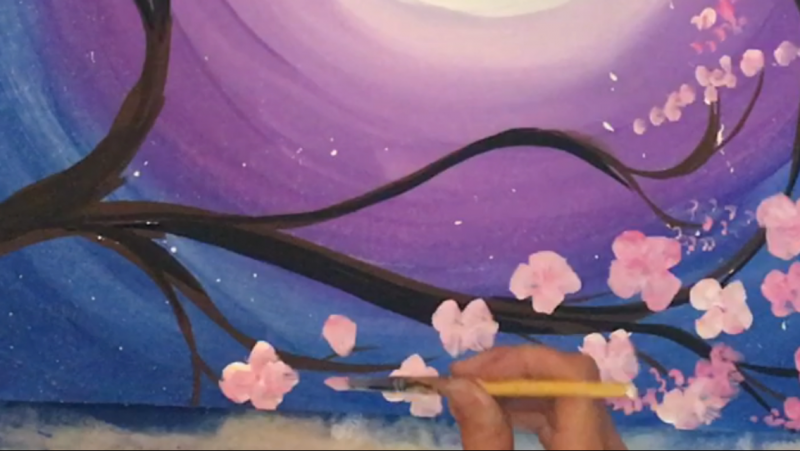 I am double dipping the brush here when I’m making the stamps. I like when my colors mix on the canvas.
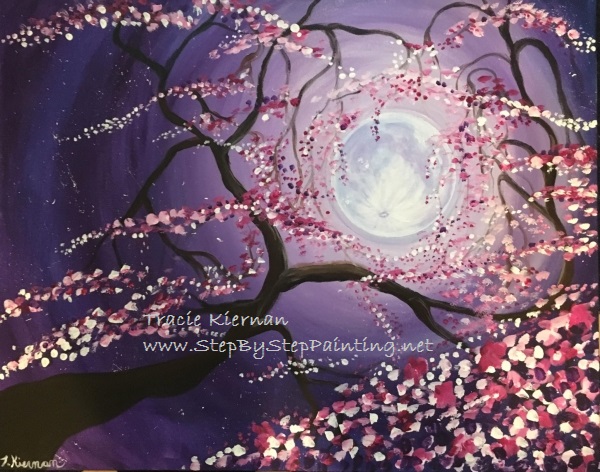
Finished!
The top painting was done with Liquitex Basics and the bottom was done with Apple Barrel Craft. You can see the difference in colors and how well the colors blend together.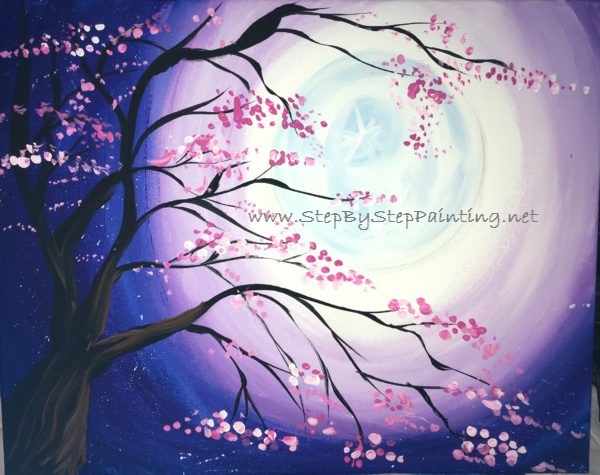
Share Your Art!


I just got into painting.. I am going to try this one for sure!!!
Yay! Welcome to the wonderful world of painting! Have fun!
My daughter wants to have a painting birthday party but we just can’t afrord to do it at a studio with the amount of kids she wants. This will be perfect. I tried it during nap time today. Your directions are so easy to follow and I’m pleased with my final result. Thank you for putting this out there, and especially for making it free. Such a blessing.
Thank you Sarah! I’m so glad you found this website! Good luck with your daughter’s birthday party! I’m sure it will be so much fun painting with all her friends ?
This was an amazing blog. You havr explai ed the paiting so well that i could paint it easily.
Thank you Vinita!
Thanx alot for your post, it looks soo cool. I’m new in painting and looking for easy but nice tutorials. Definitely going to try this, love your galaxy painting too!
Thanks! So glad you like the tutorials! Happy painting!!
hello, I stumbled across your site in searching for something to paint with my mentoring group of young ladies ages 10-13 without having to get an instructor. I absolutely love this piece. Do you think this would be something we can do, do you have any other pictures that we can do that is fairly easy.
Hi Edna! Yes this is something you can do with that age range! Ive taught 10-13 year olds in the past and I’d say it’s very skill level appropriate. You can always click around this website to see all the other paintings but if you really like this one then go for it!
this is so perfect …Thank you for sharing…And yes, I do paint and take other peoples ideas to bring to canvas and make it special …You have a awesome and very wide ranging side that keeps me busy for some time. The ladies from church will thank you as well ( for enriching their lives and rooms )
Thank you Silvia!
Thank you for the tutorial! It definitely makes it easier for me to paint. I’m new at painting. I already tried painting it. Thanks once again!
What an awesome video and detailed instructions! Thank you for sharing your love of art and helping! My 9 year-old son is going to try this today 🙂
You’re welcome! I hope your son enjoys painting this!!
Wow !! this is really awesome! Thanks a ton for sharing the very minute detailed instructions.
It makes so easy to paint such a beautiful picture, which would not be possible for me without your tutorial 🙂
I am really really thankful to you, I loved my cherryblossom painting !
So lucky that I found this website, god bless you for sharing and spreading happiness !! 🙂