
How To Paint A Christmas Tree Saguaro Cactus
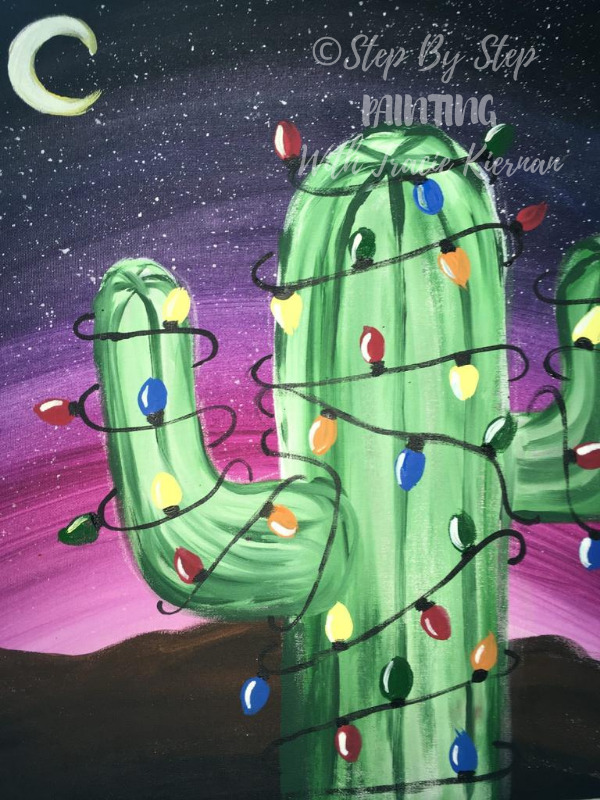
This tutorial will teach you how to paint a majestic cacti that can only be found in the Sonoran Desert. Yup, I am an Arizona resident! I’ve grown to appreciate the beauty of our state, particularly the desert, over the years that I’ve grown up here.
There is something truly awe inspiring about our desert when you see it for the first time. And yes, some of us “Zonians” do really decorate the saguaros with Christmas lights (with heavy duty gloves of course)!
Any how, you are going to be guided step by step how to do this painting. The beautiful starry twilight sky will be painted first, then you will draw the cactus with a piece of chalk, paint it in and add those fun Christmas lights!
Materials
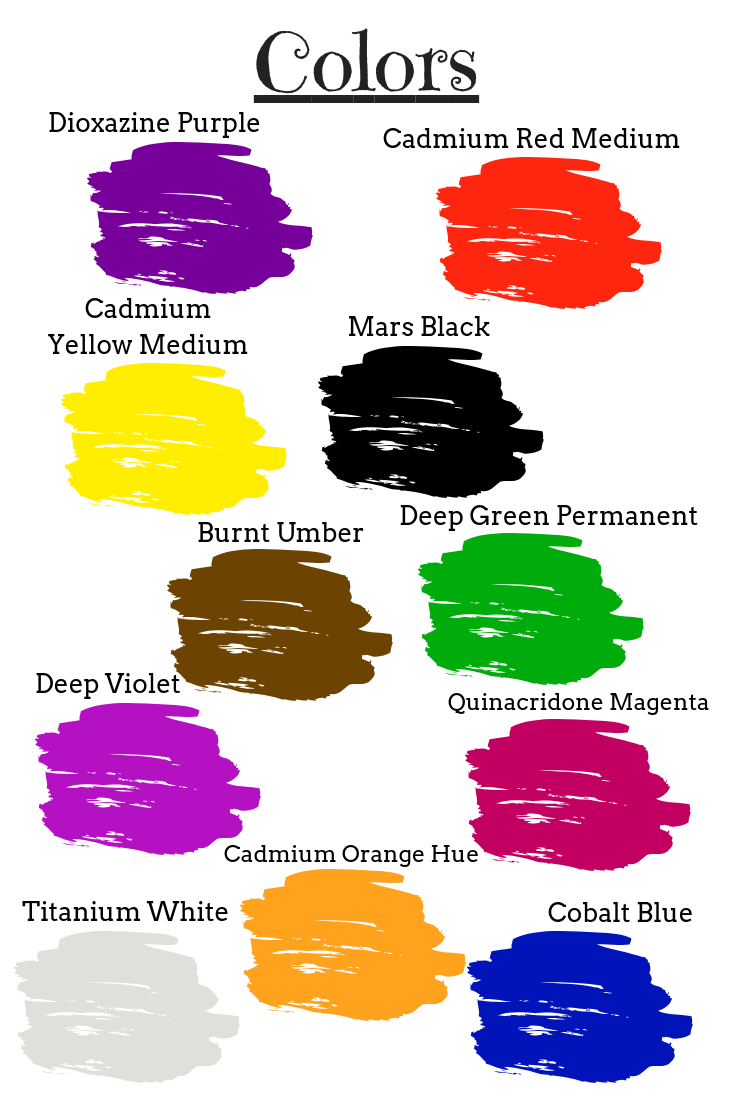
- Acrylic Paint (I recommend the Liquitex Basics brand)
- Paint Colors:
- Mars Black
- Dioxazine Purple
- Deep Violet
- Quinacridone Magenta
- Titanium White
- Deep Green Permanent
- Cadmium Red Medium
- Cadmium Orange Hue
- Cadmium Yellow Medium
- Cobalt Blue
- Burnt Umber
- 16″ x 20″ Canvas or and desired size
- Brushes:
- 3/4″ Wash
- #0 Round
- Chalk for drawing the cactus
Directions At A Glance:


Video:
Step By Step Instructions:
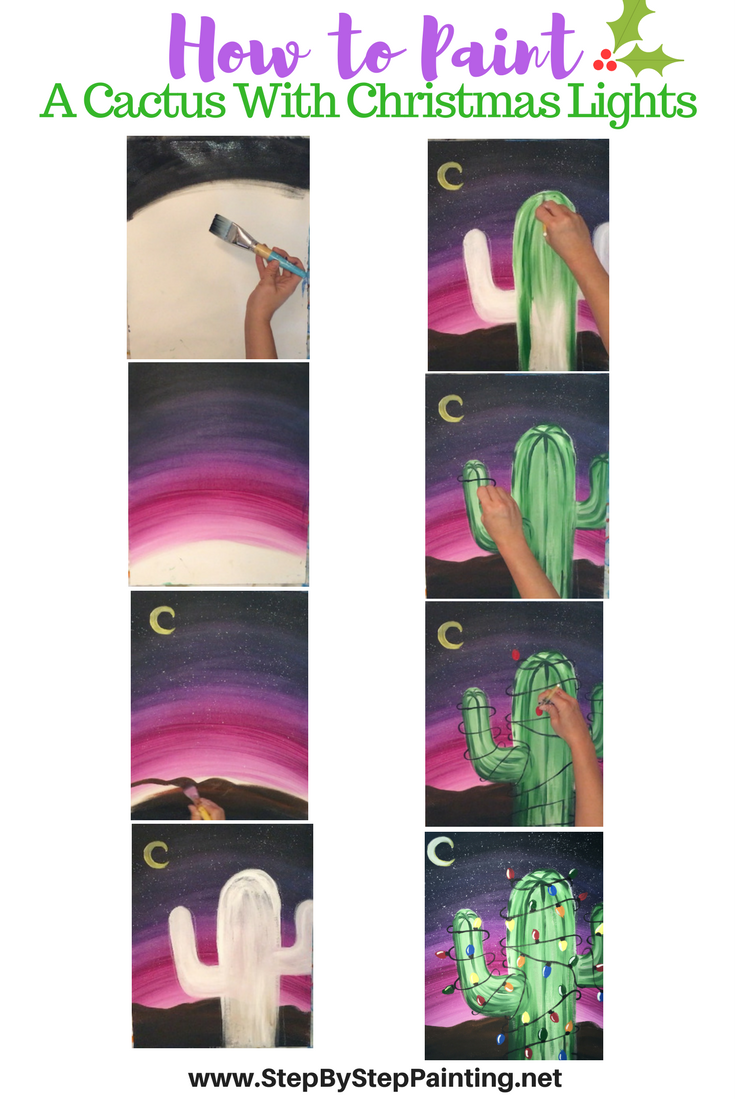
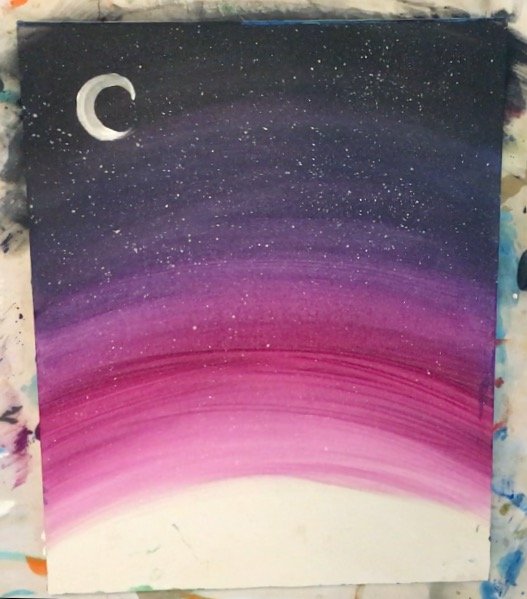
1. Paint the sky first starting from the top of the canvas.
Turn your blank 16″ x 20″ canvas to vertical position. 
I used a 3/4″ wash brush for these steps. Paint “Mars Black” at the top (about 2-3″). I painted in an arc line, however, you may wish to paint in a horizontal line to make it easier.
Next blend in the color Dioxazine Purple without rinsing the brush. It will look very dark but should gradually turn into a lighter color as you work your way down the canvas. 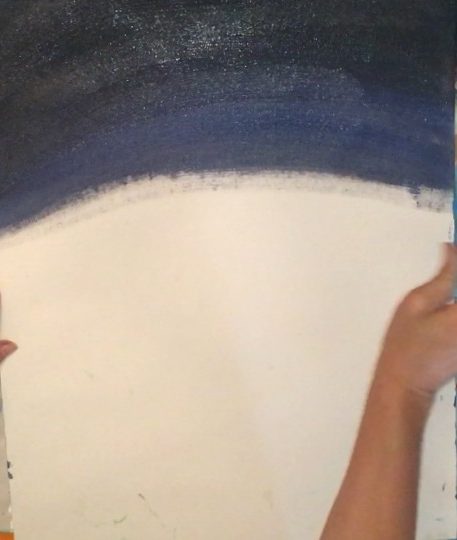
Then I rinsed my brush to make sure any black was off the brush. I added “deep violet”. I blended that violet into the dioxazine purple by brushing over the color and letting the colors blend “wet on wet”. 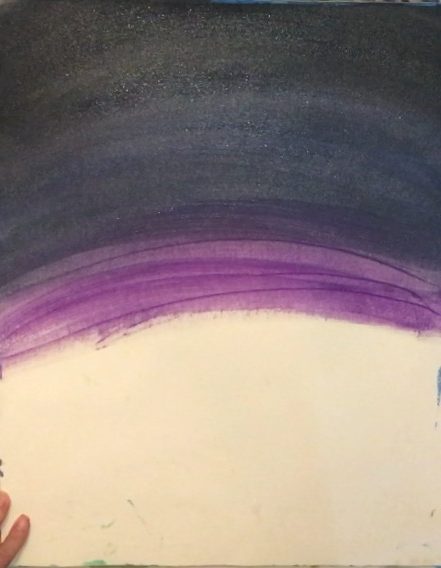
Then I added ” Quinacridone Magenta”. This is such a pretty color! Probably my favorite Liquitex paint color. I blended the magenta into the violet as well. Note: you can choose to rinse the brush in between the deep violet and quinacridone or not rinse the brush. Both methods will provide similar results. 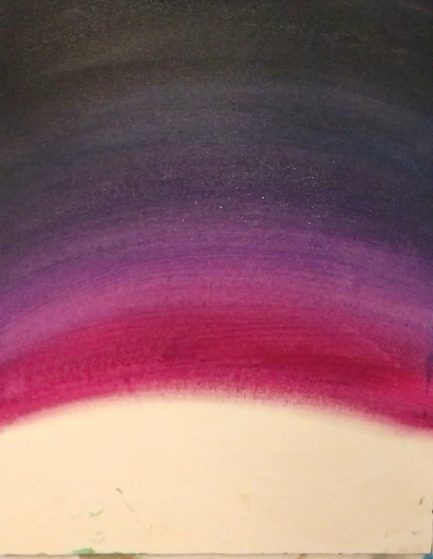
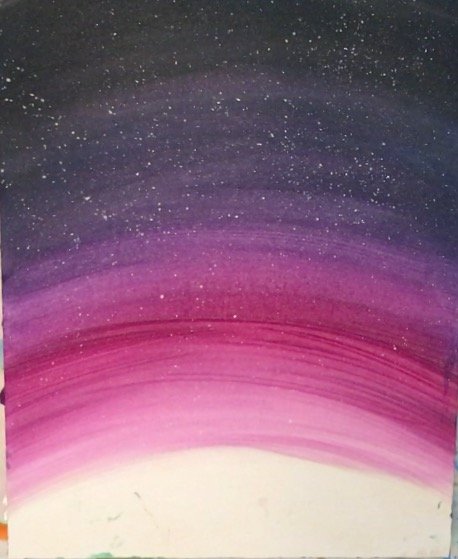
The final color on the horizon line is ” Titanium White”. That horizon line should be nice and bright as it gives the “glowing touch” to the painting. I also blended this into the magenta by painting over the colors. As you see in the video, I ended up brushing up into all the colors for this step. This helps give one last blending touch to the sky. 
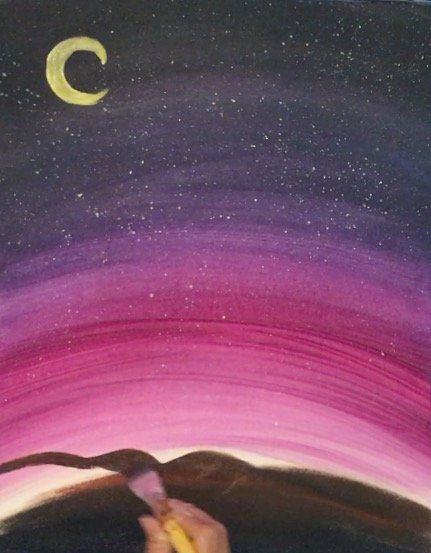
2. Paint stars in the sky
Next I took a wet brush, applied titanium white and flicked and splattered stars in the sky. You can also do this with a toothbrush. 
3. Paint a crescent moon
Then I got a small brush (#0 Round) and painted the outline of the moon in with titanium white. When the white was dry, I painted yellow on top of the white (which is optional). 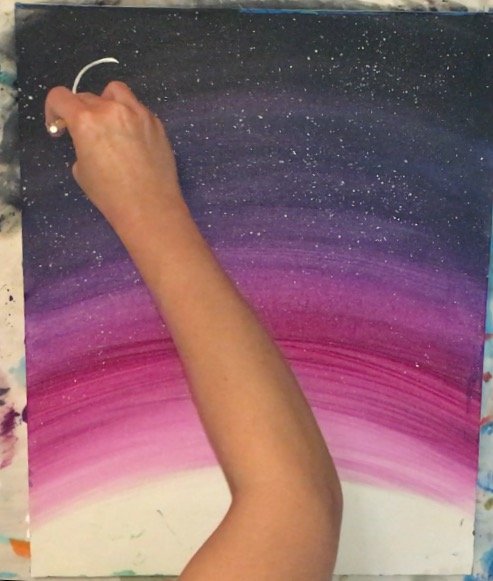

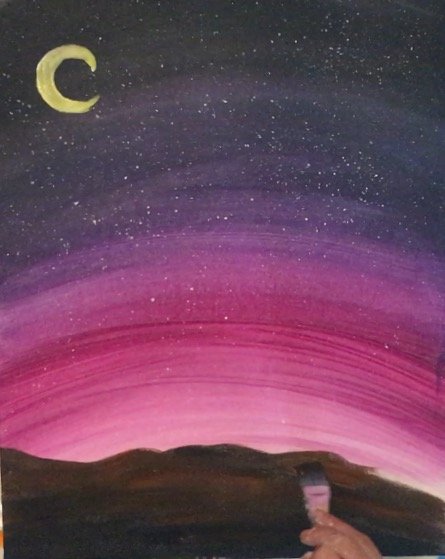
4. Paint the landscape
For the landscape I started with mars black on the bottom and then applied burnt umber towards the top where the horizon line is. Basically, the mars black blends to burnt umber using wet on wet blending. You can also “double load” both colors onto your brush and paint. I used a 3/4″ wash brush.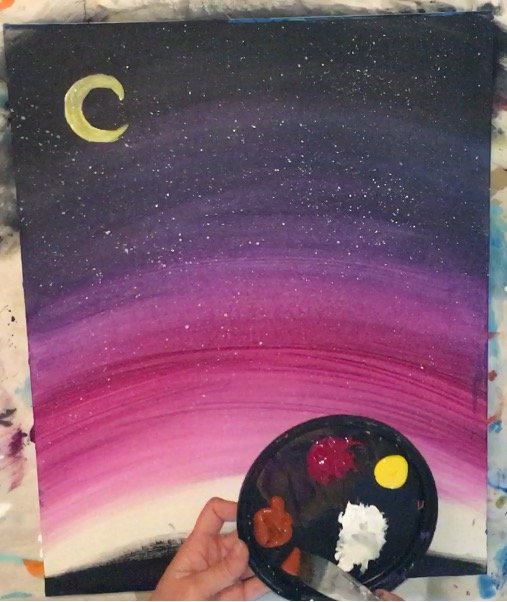
Keep applying that burnt umber and mars black as you work your way up to the horizon line (where the bottom of that sky is).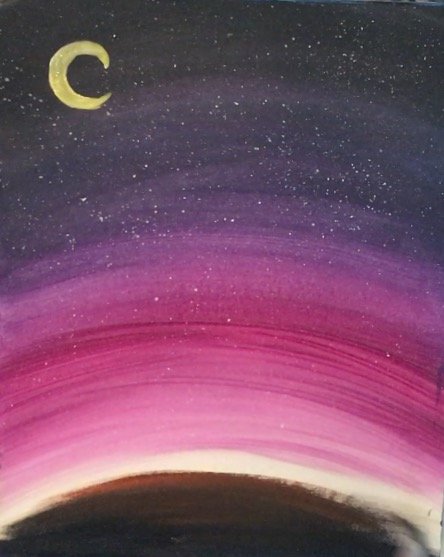
Then define your mountain line with burnt umber by painting a “squiggly line”. 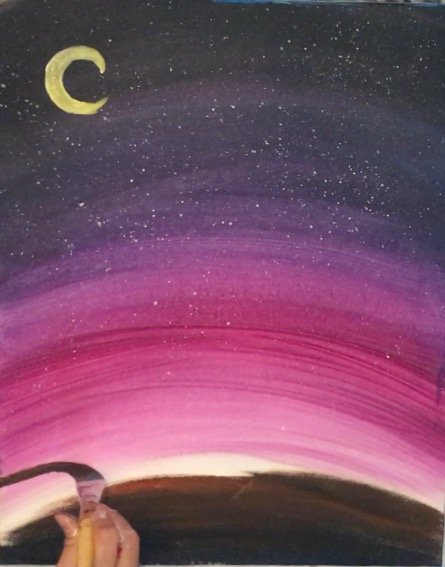
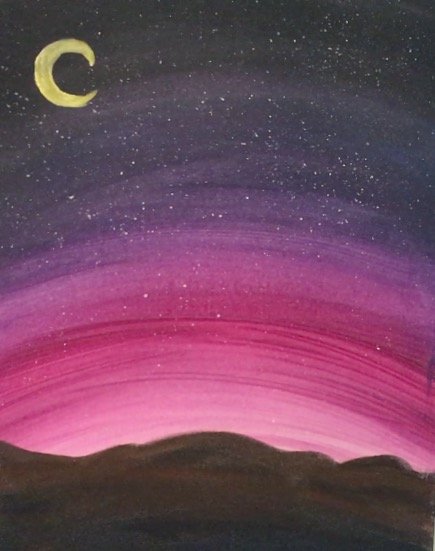
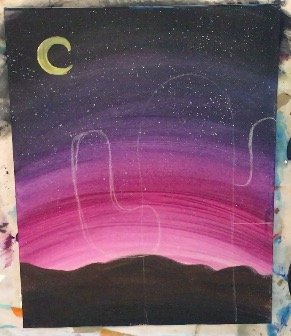
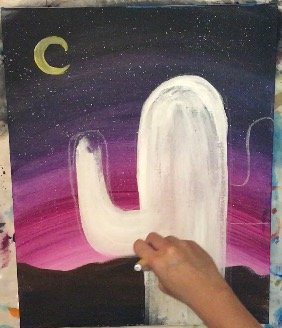
5. Draw the cactus with chalk.
Then I drew the entire cactus in with white chalk. White chalk works beautifully on (dried) canvas because it can erase! Go ahead and copy my cactus. If you do come up with your own cactus shape, just make sure it is large and take up most of the foreground! 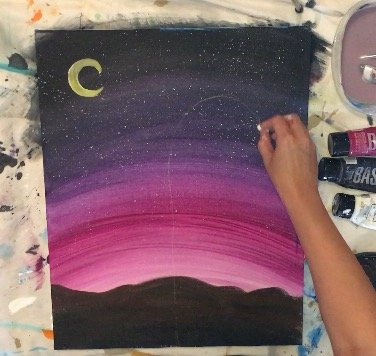
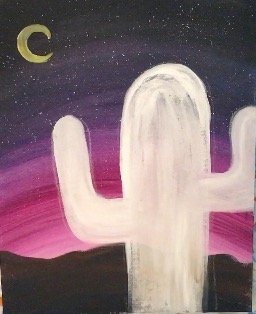
6. Paint the cactus titanium white.
Then I painted the cactus in a solid coat of titanium white. I also used my 3/4″ wash for this. If there are parts that are translucent, that is fine! The point of the white is to make a primed base to paint the green on. In other words, you can leave some of the sky showing through. 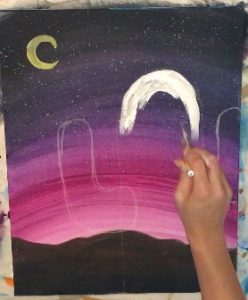
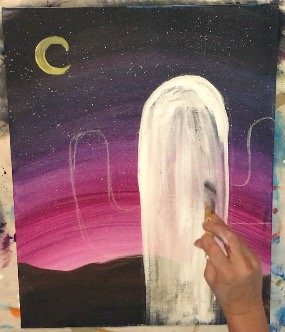
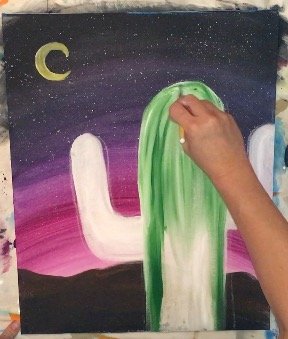
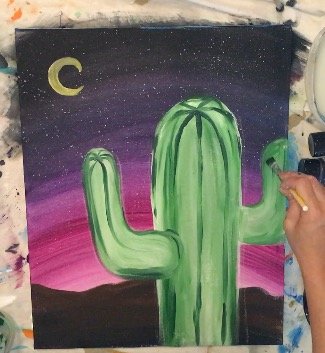
7. Paint the cactus “deep green permanent”.
Then I took “deep green permanent” and painted the cactus in. If you have ever painted a pumpkin (like my pumpkin tutorial), this is kind of a similar concept. Paint in a curved stroke on the outsides. In the middle, paint in an oval stroke. I got different variations of green by varying the firmness of how I held the brush. I pressed hard in some areas so I could see “cactus lines”. Also important: that titanium white is not dry yet so YES that green is supposed to blend with the white a bit to provide various color darkness and lightness.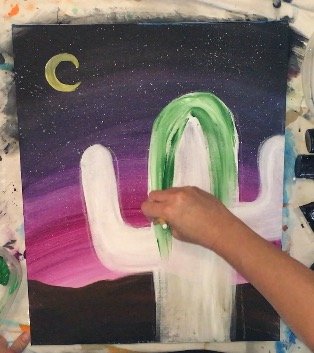

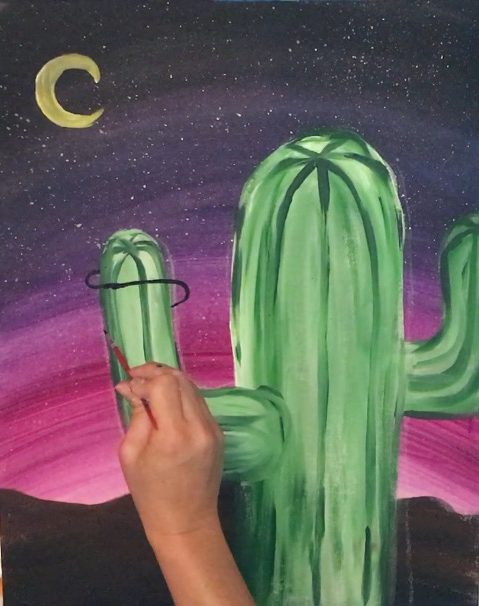
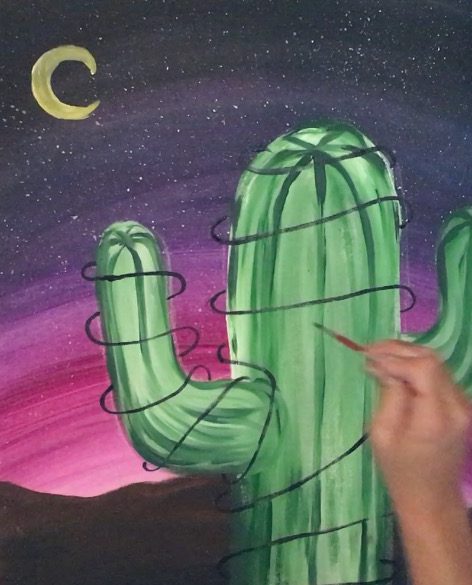
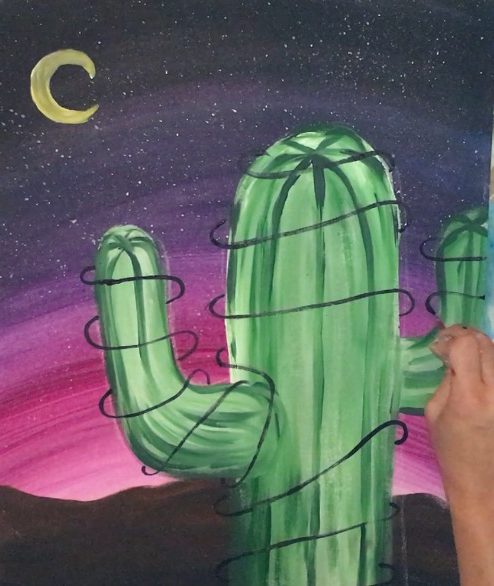
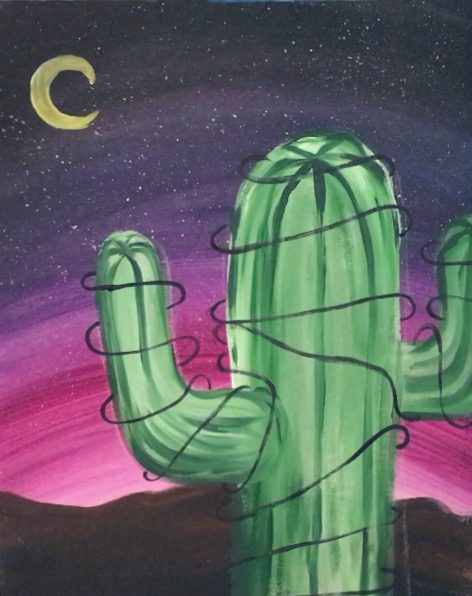
8. Paint lines on the cactus.
On the top of the cactus I painted some curved “criss-cross” lines to force it to look a little 3D. In the video, you will see a close up. Or you can click on the image below to see. Do this with any brush, a #0 brush might be easier but you can also use your flat brush. Use “Deep Green Permanent” or a tiny bit of black mixed with Deep green permanent to make these lines look darker. 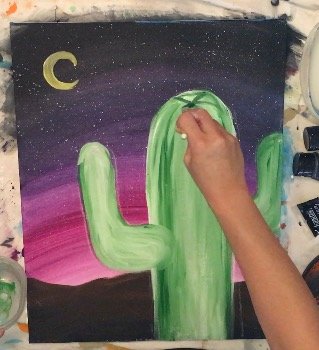
It almost looks like a watermelon!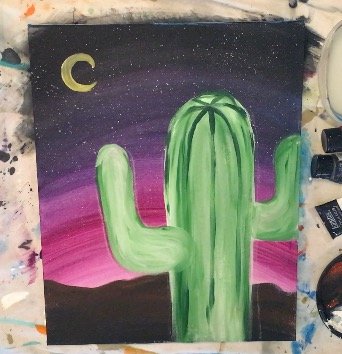
I did the same thing with the arms. 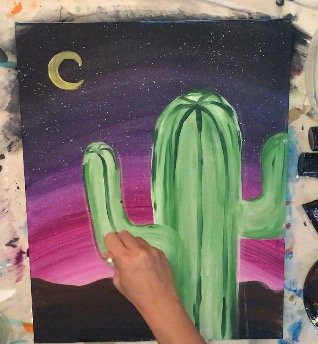

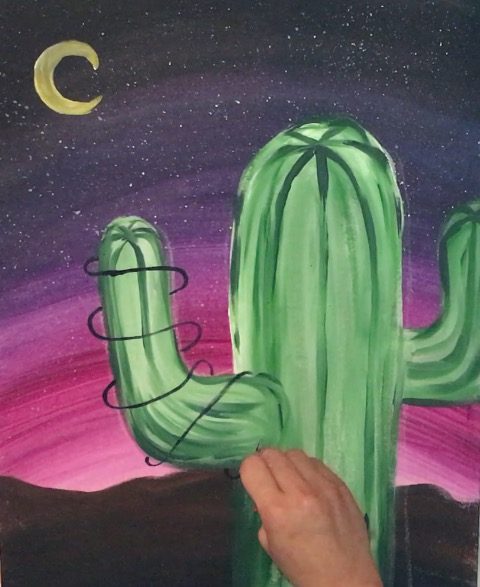
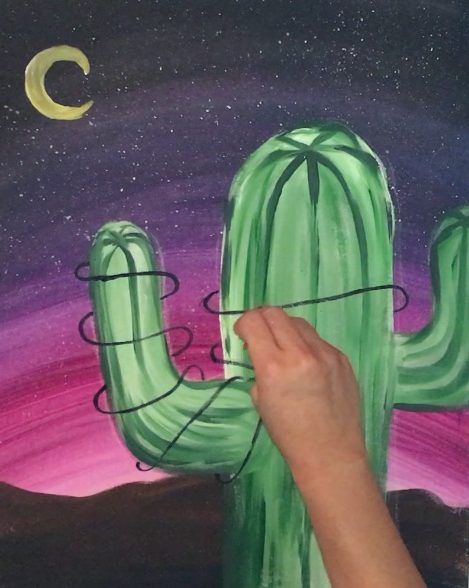
9. Paint the Christmas Light String
Then I used a small round brush (#0 Round) to paint in the strings of the lights. I used “mars black” for this. I started on the far left cactus arm and wrapped the string around the entire cactus.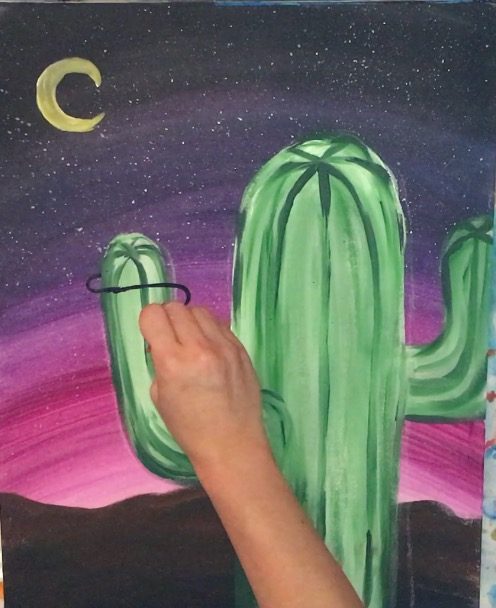
It’s almost like painting “s” lines. Leave a blank space where the lights go behind the cactus. Then repeat. 
10. Paint Christmas Light Bulbs
Then I painted the lights. I used a small round brush (#0) for this. Basically I did each light in two strokes to make an oval shape. I did one color at a time and painted in random spots. Note that the light socket will come after painting the lights. Also note: if your colors aren’t showing up you may need to “white” the bulbs out first and then go over them with color. 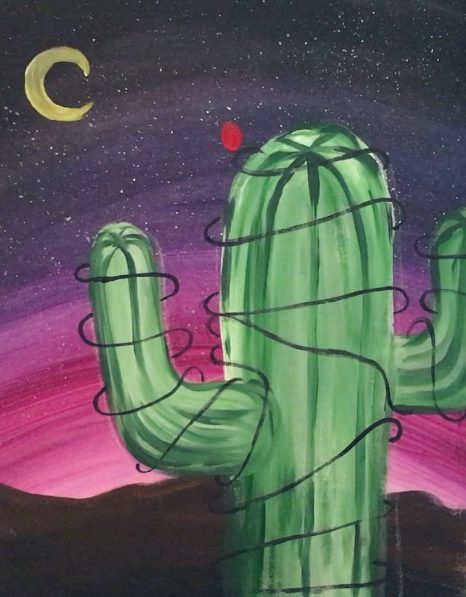
Do one color at a time so you don’t have to keep rinsing your brush and switching the colors. 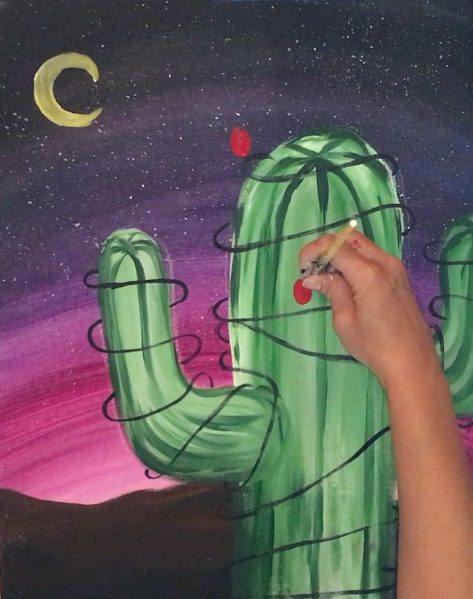
Leave a small gap where the bulb light socket will go. Just a LITTLE gap!
Then I did all the blue lights. 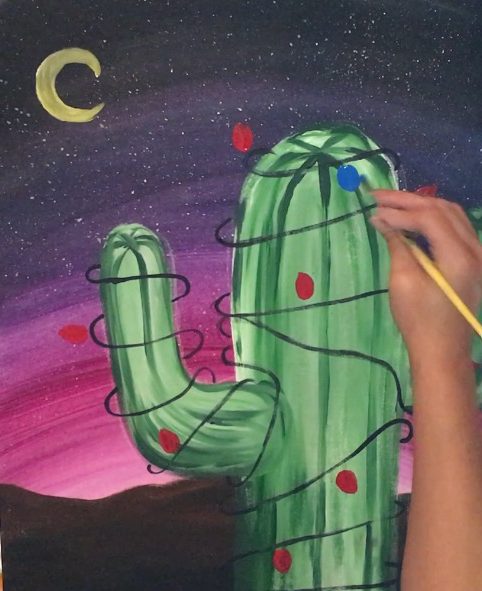
11. Paint the light socket
Then I did the yellow, the orange and the green. For the light sockets, I went in with a tiny brush and painted a small rectangle that overlapped just the bottom of each light.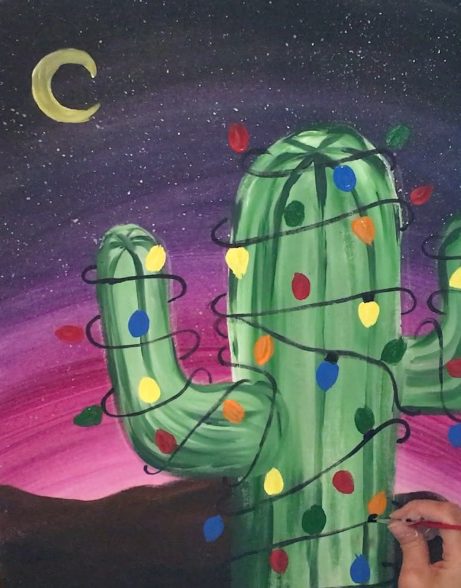
12. Paint a white highlight on all the lights.
For the highlights in the lights, I did one small stroke of titanium white just on one side of each light.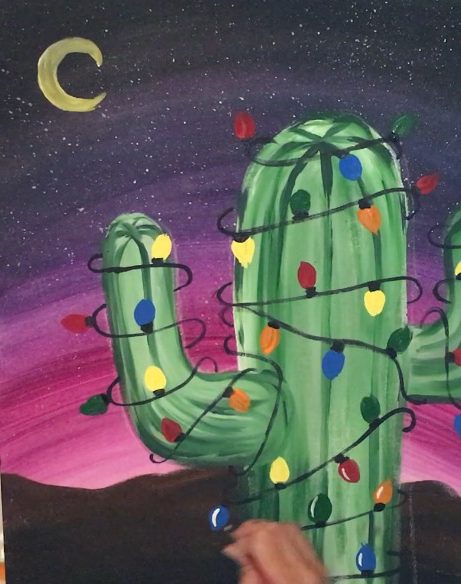
Finished!
And there you have it! Your very own Christmas Tree Cactus!
Would you like to save this?
Don’t forget to share your art on the Step by Step Painting Facebook Page or on Pinterest!


Hi Tracie.
So glad to find your site. My daughter and I are just learning to paint on canvas. The ideas and pics are great. Is there a way to print out the instructions so we can do different pics at the same time?
Thanks so much..
Denise
So glad you found this site too Denise! A lot of people work on two different paintings at a time! Have you tried printing from your internet browser? Doing so should print the instructions and pictures along with it! Hope this helps!
I’m from Arizona too! Love this great tutorial, and plan on trying this weekend after Thanksgiving. Thank you for the easy to follow instructions, I am eager to try this!!
Thanks Debbie! Glad to have a fellow Arizonan! I love our saguaros 🙂 Enjoy your painting time!