

How To Paint A Shamrock With Faux Wood Background
Beginning acrylic painters will learn how to paint a dark faux wood background, a shamrock with Celtic swirls on the inside and a cute ladybug sitting on the leaf!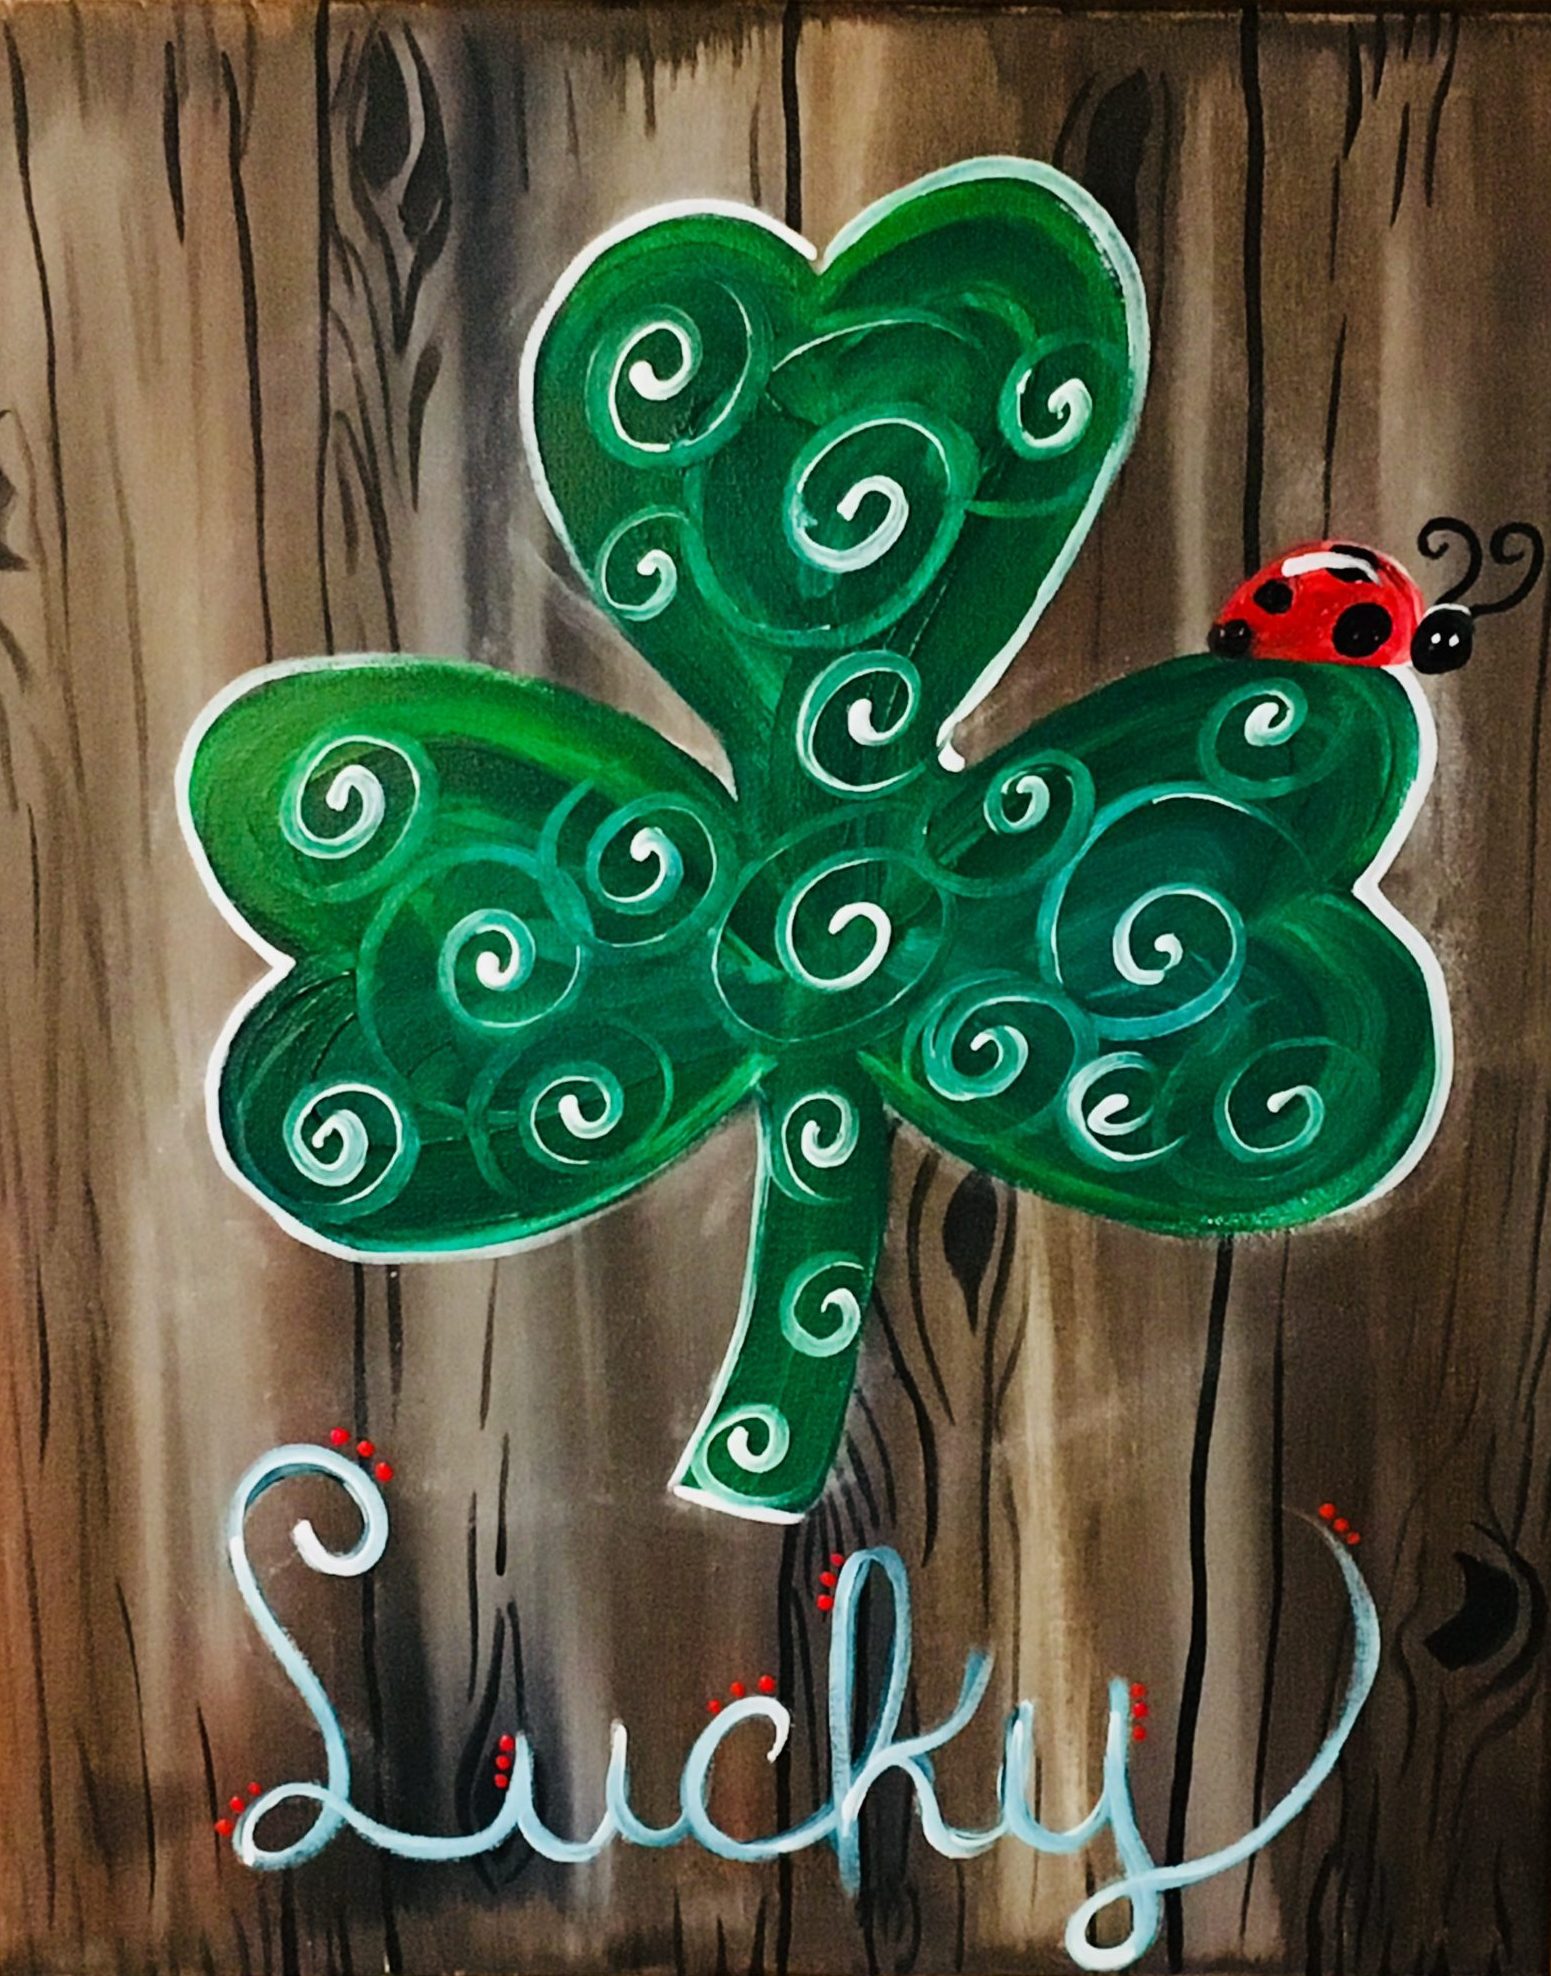
Would you like to save this?
Description:
Hello artists! I have decided to create one more St. Patrick’s day themed painting this year! This one actually can work as a year round design given its symbolism or if you love Irish decor!
The background/ under painting technique seems to be a recurring theme in my last few paintings with the “triple load technique”. Triple load means to apply three different colors to the paint brush and allow them to loosely mix on the canvas. That’s how you create a faux wood effect.
I think this painting is special in the sense that you really can personalize it with symbols of meaning to your life, values or simply to represent Irish Heritage! The ladybug is a symbol of good luck. But for me, every time I see a ladybug I am reminded of my grandmother.
The word can be personalized too. I painted out the word “lucky”. You can do this too, leave it without a word or change the word to something else like “Blessed”, “Erin go Bragh”, “Happy St. Patrick’s Day”… I always say this but it’s your painting, your rules!
Thank you for viewing this tutorial! As always, upload your painting on the Facebook page or on Pinterest or, if you prefer, you can always privately message me! Ask questions if needed too!
Happy Painting Artists!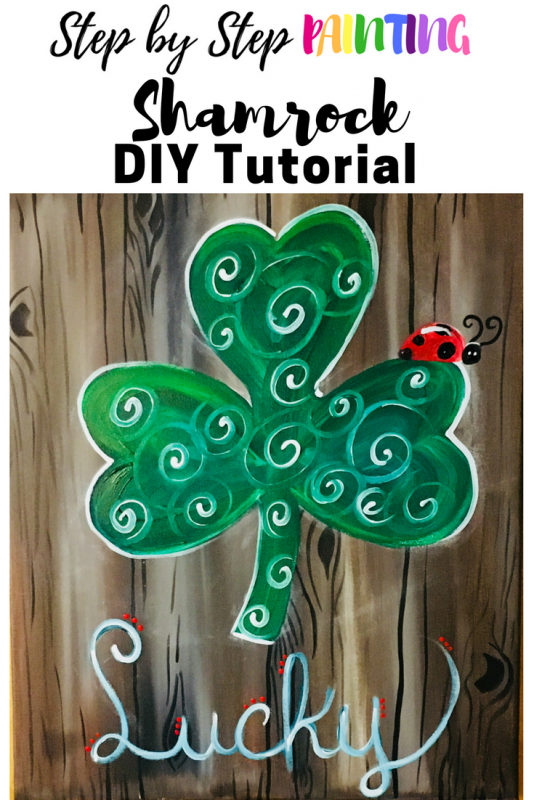
Materials:
- 16″ x 20″ Canvas
- Acrylic Paints
- Cadmium Red Medium
- Phthalo Green
- Deep Green Permanent
- Raw Umber
- Burnt Sienna
- Titanium White
- Mars Black
- Brushes
- 2″ Flat Brush (
- 1/4″ Angle Brush (
- 3/4″ Flat Brush
- Small/Medium round brush
- Chalk for drawing shamrock and letters
Directions At A Glance:
Video:
Note: this is an older video & an older tutorial before I got more advanced with my painting tutorials 🙂 There is no voice over instruction but it does demonstrate how I did the painting as explained in the directions below.
Step By Step Pictures:
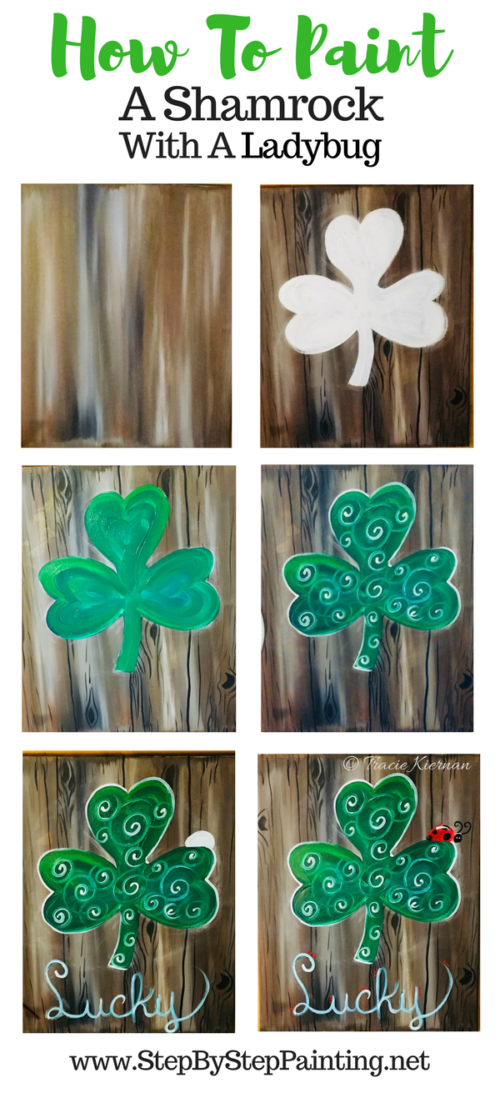
1. Paint The Wood Background
I used a 2″ flat brush for this. If you don’t have a 2″ flat, you can use a 1″ or the largest flat you have. I found that using a larger brush really helps get the colors on the canvas faster. Triple dip the brush in Raw Umber first then dip the corners in white and burnt sienna.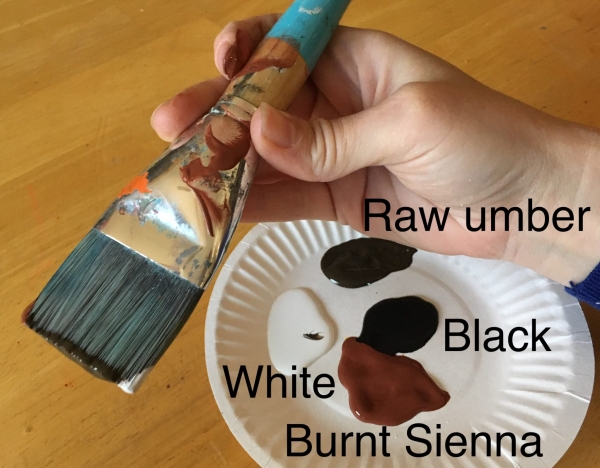
Paint up and down strokes with that triple loaded brush. Allow the colors to mix themselves on the canvas.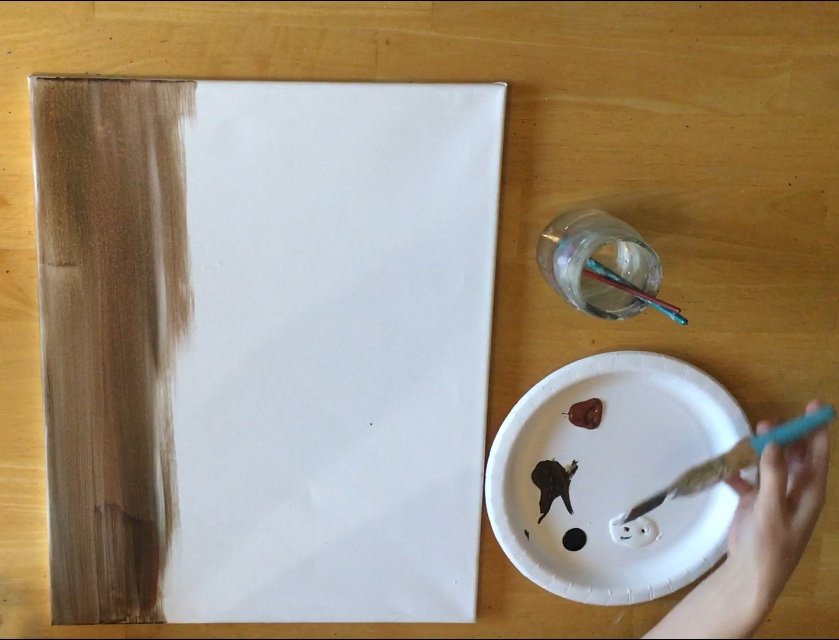
Don’t worry about the details of the wood texture just yet. Just relax and let the paint do its magic! As you reload, make sure the raw umber is the main color the brush is being dipped in.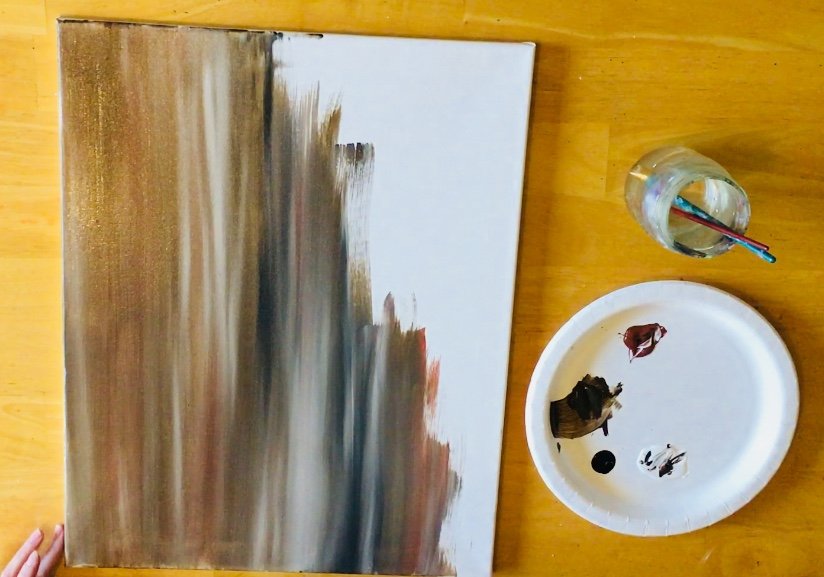
Occasionally dip the corner of the brush in black. Don’t use too much black! It tends to take over.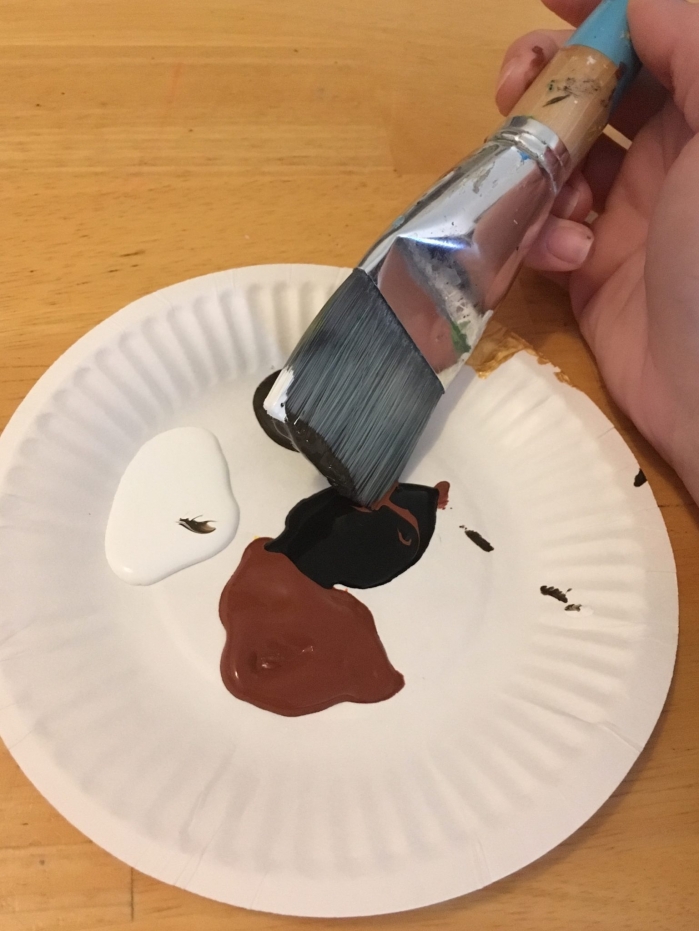
Everyone’s painting will look different because of color variations with loading the brush! If you like one color, you can emphasize it a bit more by adding more of it to the brush. Try to smooth out any visible brush marks too.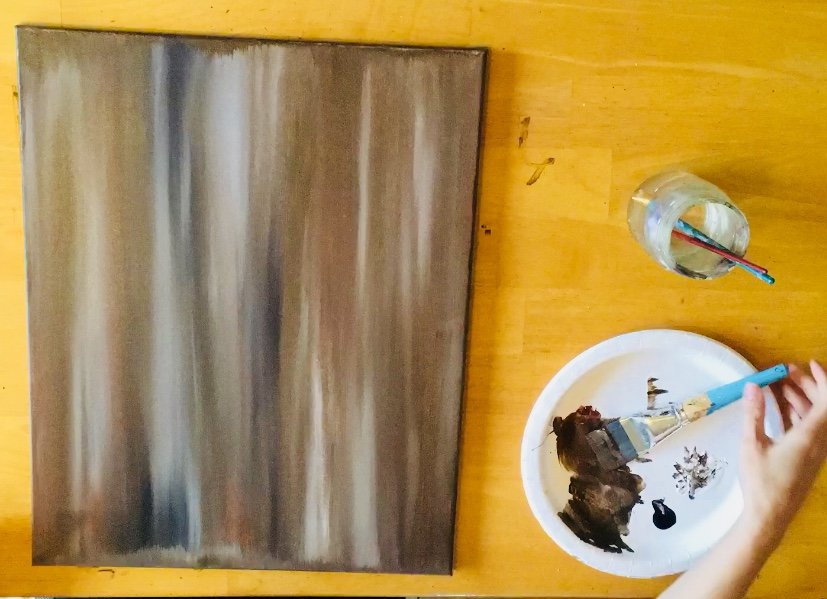
2. Paint The Wood Texture Details (optional)
This next step is optional. I think it looks fine if you leave your canvas as is, but if you want to add more detailed texture, I’ll demonstrate how I did it! I divided my canvas in half and then in quarters. You can estimate this or use a ruler. Then I used a 1/4″ angle brush to paint three black lines. Actually I double loaded that brush in both burnt umber and black. If you don’t have an angle brush, a round brush works too.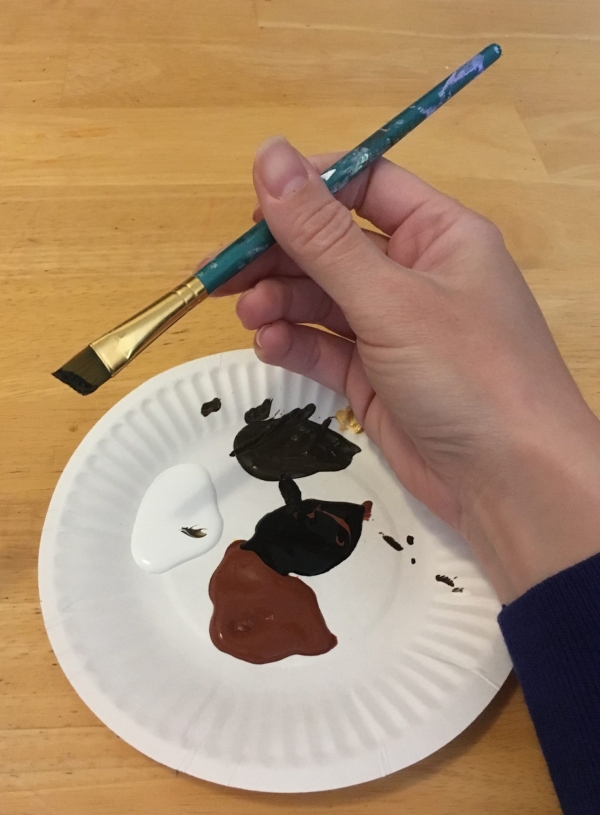
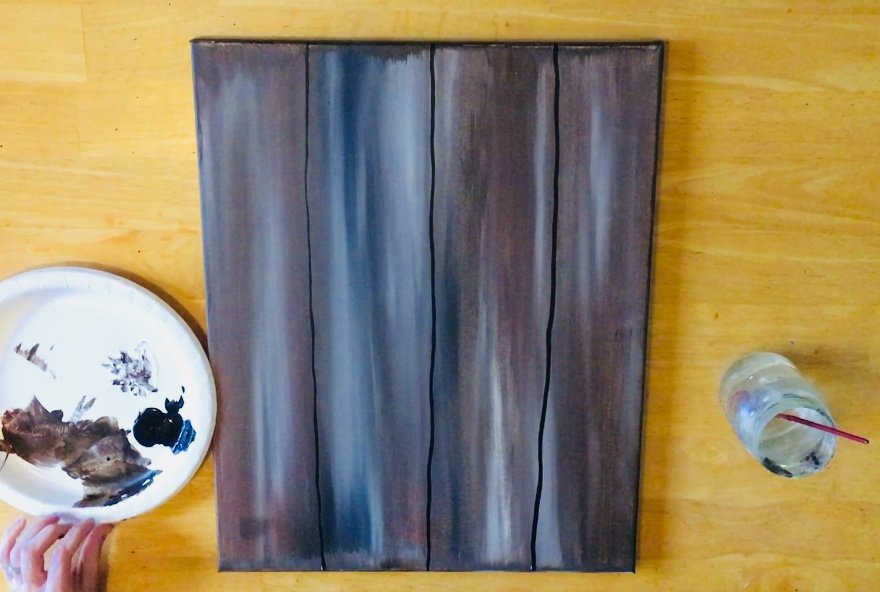
Then I painted wood grain designs on the canvas. I used that same angle brush for this step but you can use any other small brush you feel comfortable with. Paint little cat eye shapes or crescent shapes and then paint the lines radiating out from the shape. Paint some vertical lines here and there. Try not to add too much detail in the middle because the shamrock will be covering up most of it.
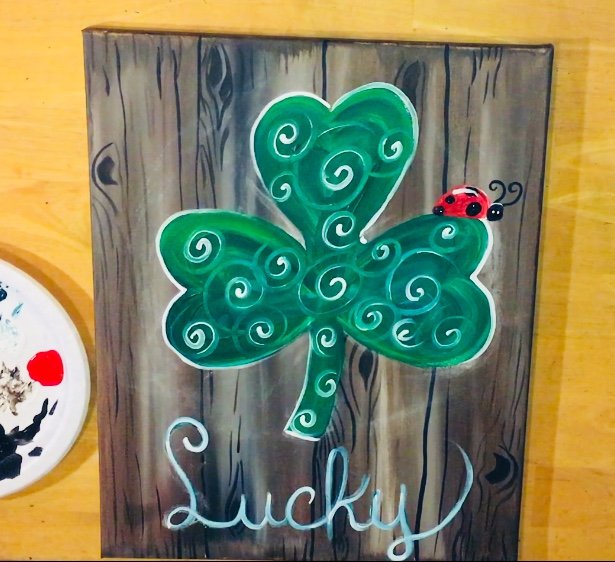
3. Draw The Shamrock With Chalk
Next I used chalk to draw this shamrock! I mentioned this in my other “Clover Painting” but I always have issues with drawing shamrocks for some reason… This time I tried drawing a circle first and this helped a lot! So, with the chalk, I drew a large circle. You can find a large circle to trace if that helps!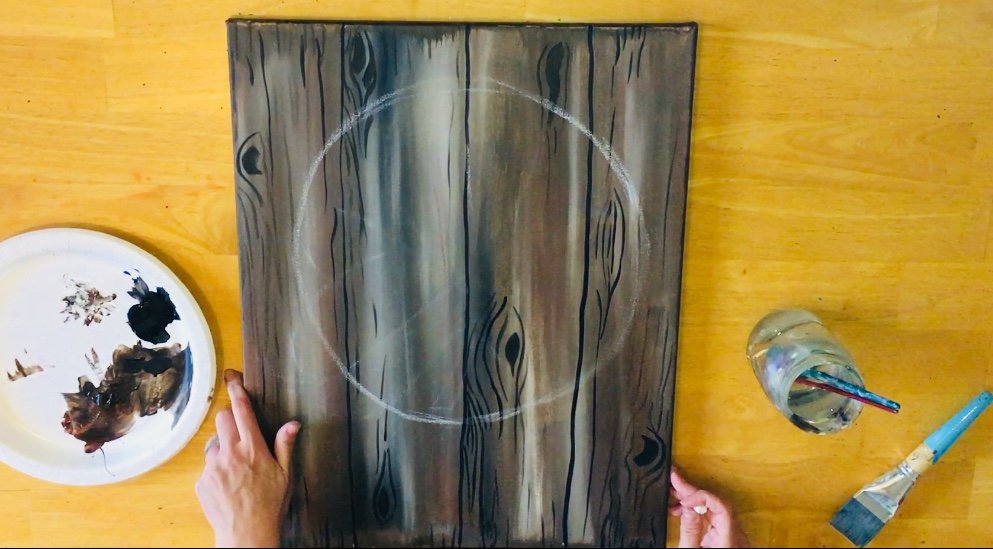
Then I drew the shamrock inside of the circle. Each leaf is like drawing a heart.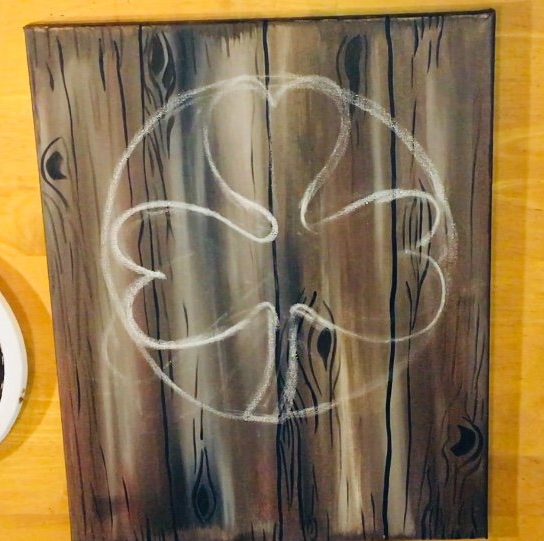
4. Paint The Shamrock White
The shamrock must be painted in white to “block out” that dark color. Otherwise, the green won’t stand out on the canvas.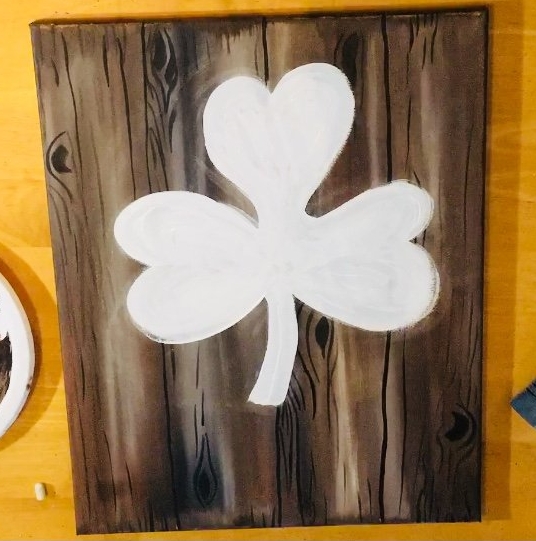
5. Paint The Shamrock Green
Next I painted in the shamrock green. I wasn’t sure where I wanted to go with this step. So I decided to just use two different shades of green and double load my brush. I allowed the two green shades to kind of mix themselves on the canvas. Make sure your strokes go with the “groove” of the heart shapes.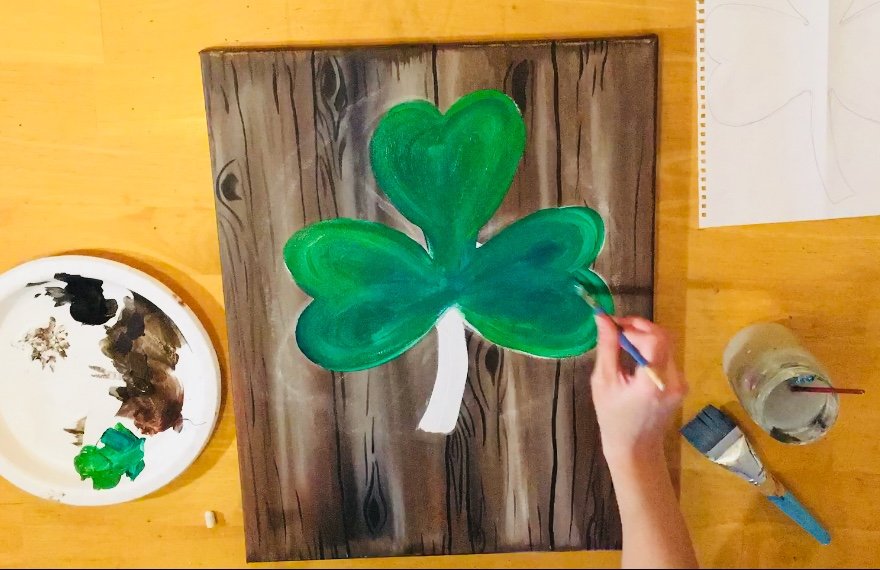
6. Loosely Outline The Shamrock
I used a small round brush and titanium white to loosely outline the shamrock. I didn’t want to outline it all the way. If you look closely, it’s only outlined in some areas. Of course if you want to outline the whole think you may choose to do so!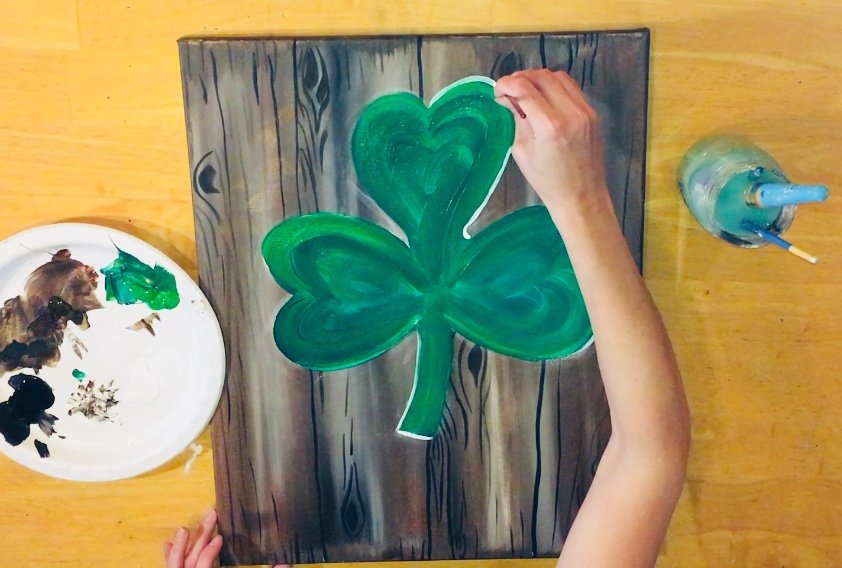
7. Paint some spirals inside the shamrock
Using that same small round brush, I painted white spirals inside the shamrock. Now, it helps if the green isn’t completely dry yet! That way your spirals will mix with the green a bit.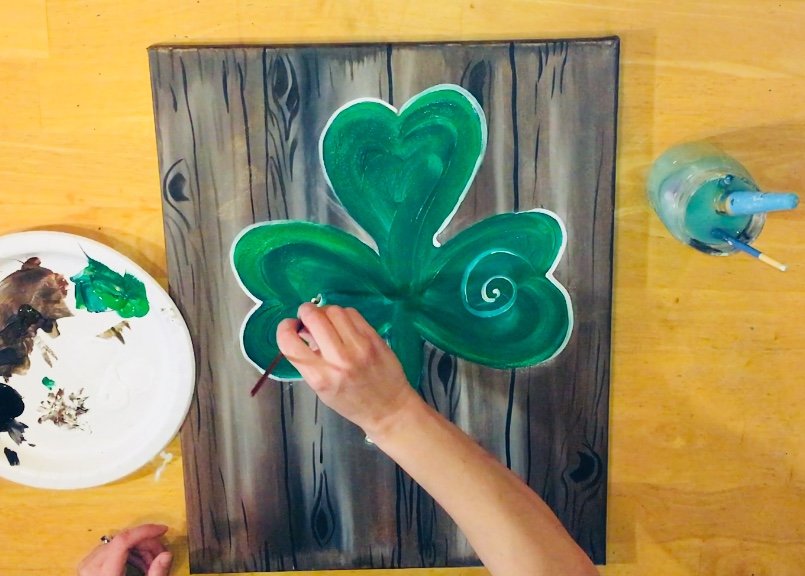
The spirals varied in sizes, larger and kind of medium.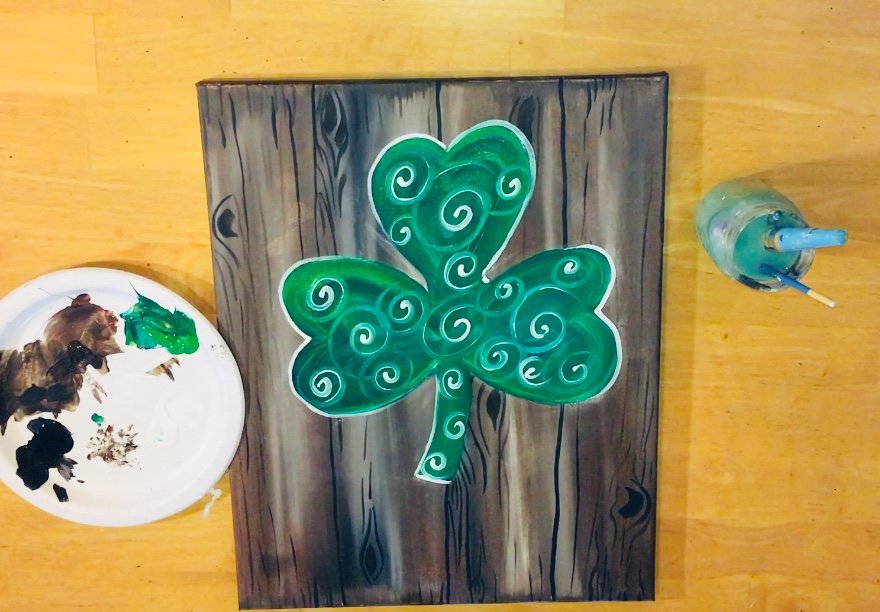
8. Block out a white area for the ladybug & draw letters with chalk
Next I blocked out an area for the ladybug with titanium white. Again, that red won’t show unless it is painted white first. While that was drying, I started my lettering. A ruler helps keep the letters straight. Also…use chalk to draw the letters first.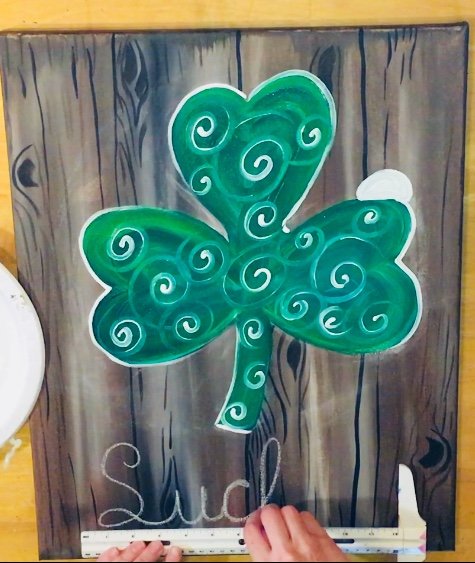
9. Paint the ladybug and letters
When the ladybug white area was dry, I used cadmium red and mars black to paint the ladybug. I also painted the letters in with phthalo green and white (double loaded).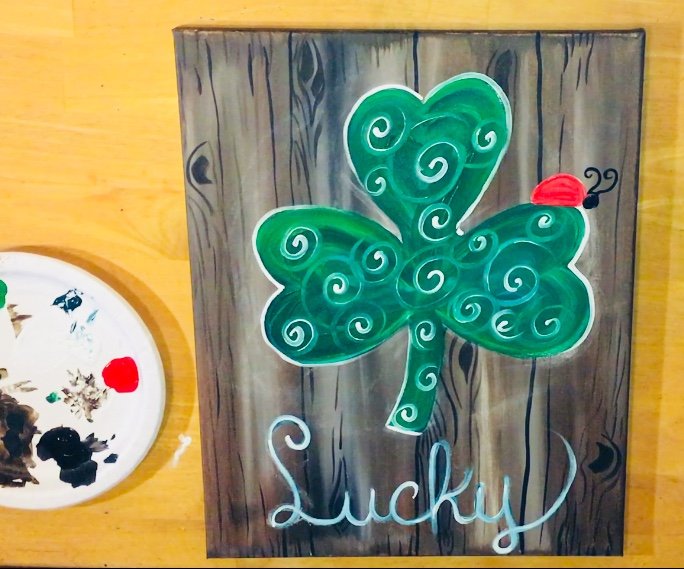
10. Paint some more details on ladybug
Paint the spots, two little eyes and a highlight line on the ladybug. It helps to make sure the colors dry in between adding these details!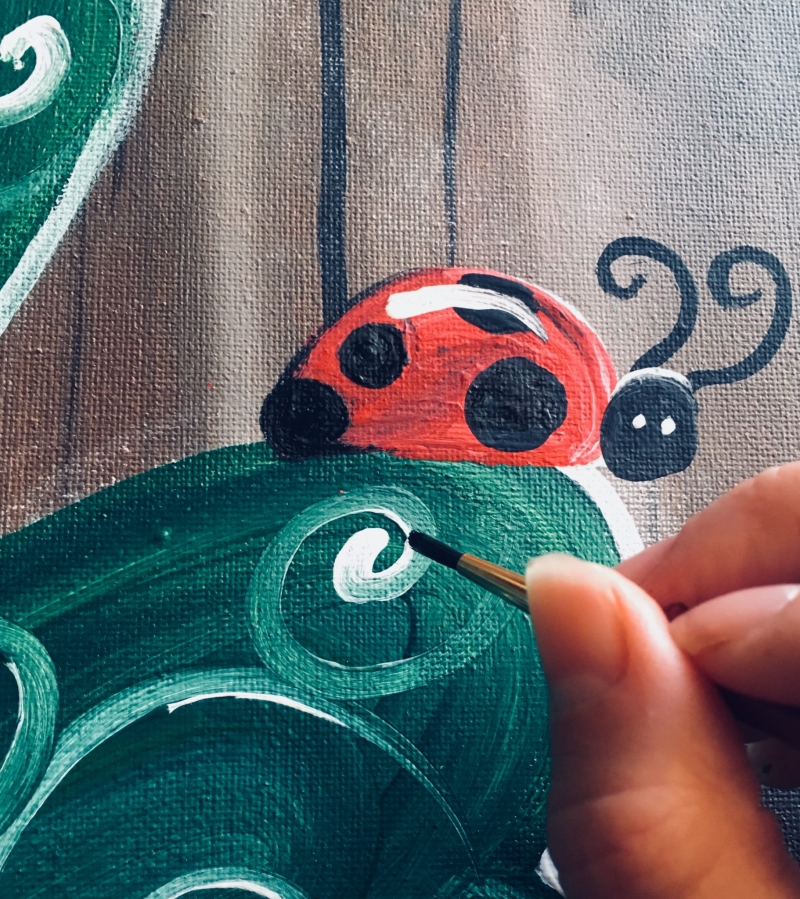
11. A Final Touch & Finished!

I added a Celtic knot in the upper left corner with two Celtic style vines. To do this, I drew it out with chalk first and then painted over the chalk. I first painted it with gold, decided I didn’t like the gold, and then painted it over with white! Use a small round brush if you are doing this step.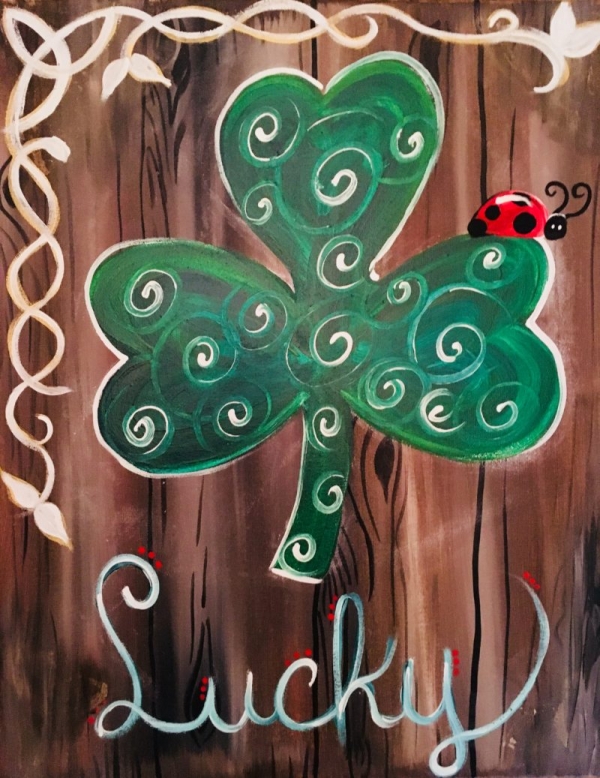
And there you have it! A simple painting you can display with your St. Patty’s Day decor or year round!
Share your art on social media!


So cool. My nephew goes by Lucky. He’s mostly Irish so this is a perfect painting to give him. He recently lost a lot of things from flooding.
I know he’ll love it.
Thank you
Anita
Hello Anita. I’m glad that you are able to give him such a beautiful gift to represent his name and Irish Heritage! I’m sorry to hear about his loss from flooding. ?
It looks like you might have had a video of this tutorial at one point, but that it is not longer on there. Do you have a video tutorial of this picture?
Hi Terri! Yes there’s a video. I checked and you’re right it’s missing. I will fix that!
Thank you so much, Tracie! My daughters and I have so much fun together-time doing your tutorials. You are GREAT!
You’re welcome Terri!!!