

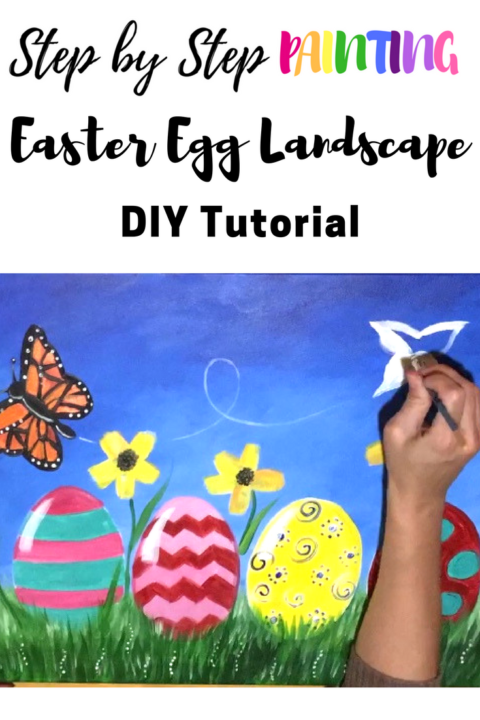
Easter Painting Step By Step Tutorial
Beginners and kids can learn how to paint this easy Easter painting!
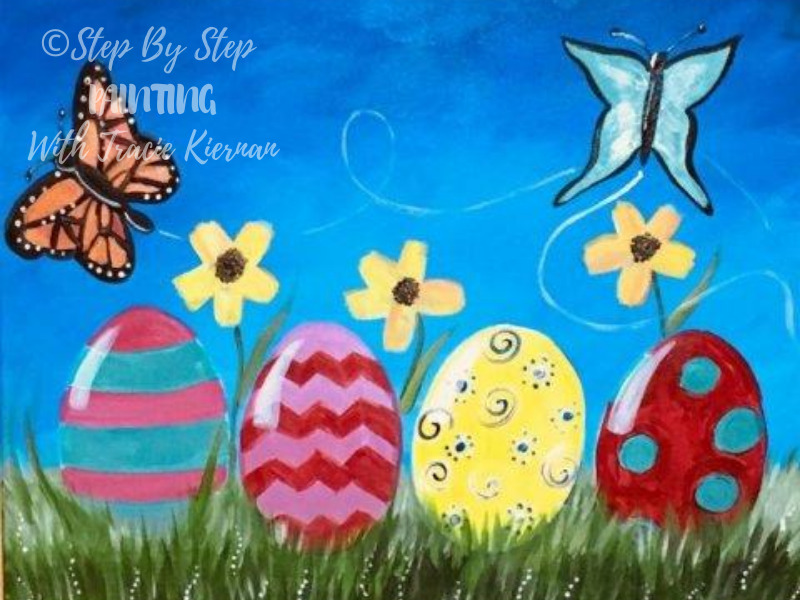
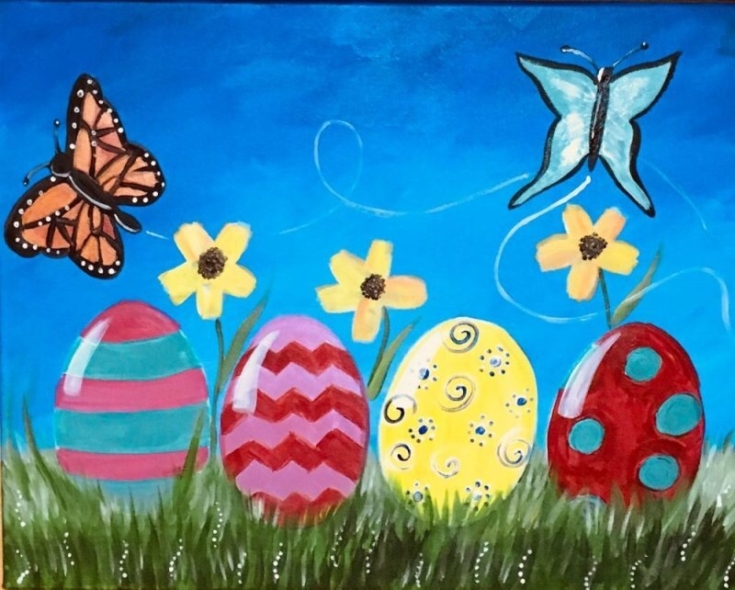
This Easter egg landscape painting was done on a 16″ x 20″ canvas (or whatever size you want to do it on) with acrylic paints.
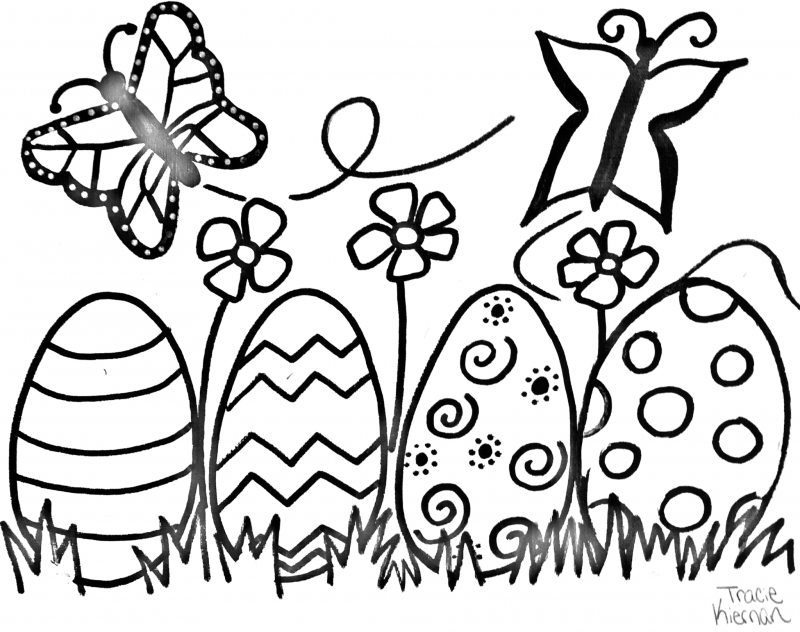
The bright and cheery painting has two butterflies, yellow flowers and patterned Easter eggs sitting on green grass with a bright blue sky.
You will be guided step by step with detailed pictures, instructions, a material list and a video!
Enjoy and happy painting artists!
This post contains affiliate links to Amazon.com.
Materials
Easter Painting
Learn to paint a colorful, bright and cheerful Easter landscape painting. This acrylic painting tutorial for beginners will show you how to do the steps.
Materials
- 16 x 20 Canvas
- Acrylic Paints
- Brushes
- White Chalk
- Pencil, Paper and Scissors For Egg Template
- Ruler
- Traceable (optional)
Colors
- Cadmium Red Deep
- Cadmium Orange Medium
- Cadmium Yellow Medium
- Deep Green Permanent
- Light Green Permanent
- Phthalo Blue
- Bright Aqua Green
- Primary Red
- Titanium White
- Mars Black
- Burnt Umber
Brushes
- 1” Flat
- 1/4” Flat (12 Bright)
- 4 Round
- 10/0 Round
Instructions
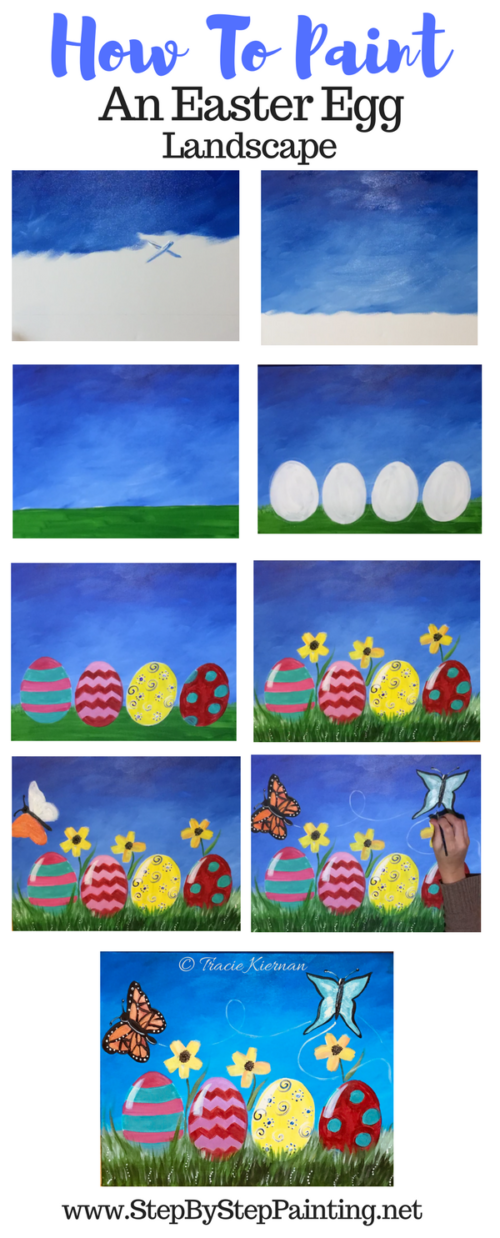
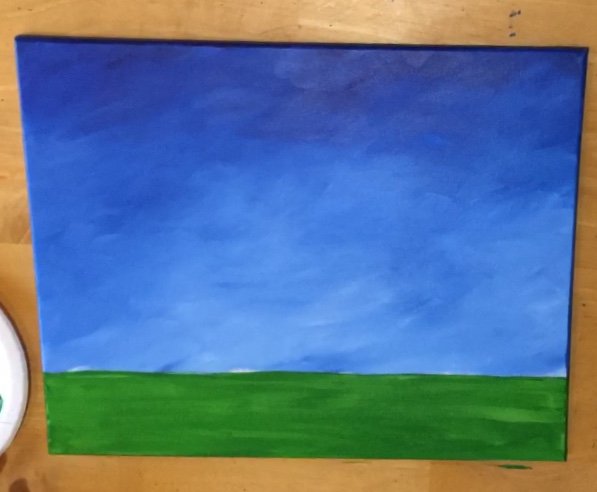
- Draw the horizon line with a ruler about 1/3 the way up the canvas.
- Paint the sky with phthalo blue starting at the top and gradually adding white as you work your way down to the horizon line.
- Paint the area below the horizon line with light green permanent.
- Create a template for the eggs. Cut the template out and trace onto the canvas.
- Trace the eggs four times along the green area with chalk.
- Paint the eggs titanium white.
- Decorate the eggs with a round brush and your choice of colors and designs.
- Paint a highlight on each egg after the designs have dried.
- Paint flowers between the eggs.
- Paint the grass blades starting at the horizon line and work your way down to the bottom of the canvas.
- Paint two different butterflies.
Doing this with Apple Barrel Paints?
Use the listed colors below for this painting.
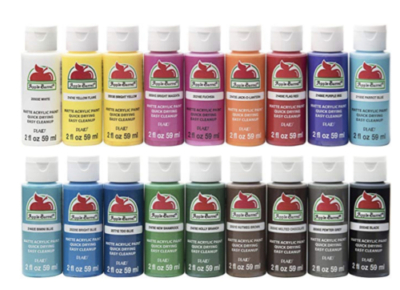
- Flag Red
- Jack O Lantern
- Bright Yellow
- Holly Branch
- Shamrock
- Bright Blue
- Bimini Blue
- Fuchsia
- White
- Black
- Melted Chocolate
Printable:
OPTIONAL! This printable is not necessary because you can create your own egg template and trace them onto the canvas. Click here to download the PDF for this!
Directions At A Glance:
Video For Easter Painting
Step By Step Directions For Easter Painting:
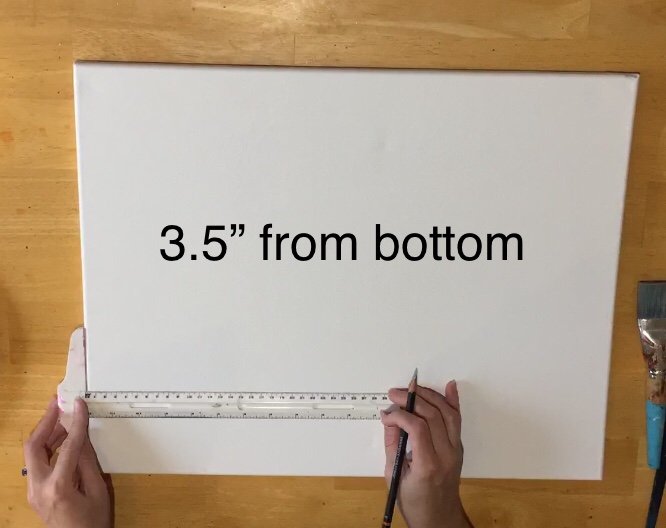
1. Draw The Horizon Line
Use a ruler to measure 3.5″ from the bottom of the canvas.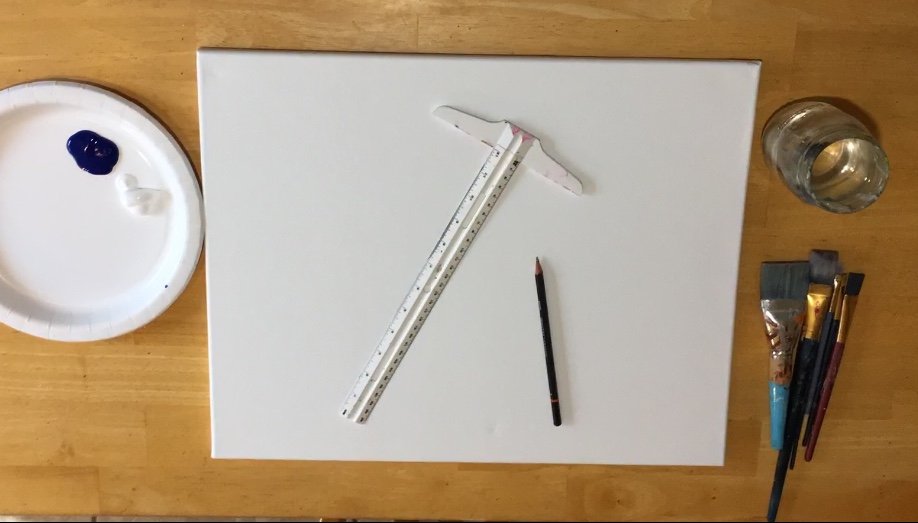
Lightly draw the horizon line with a pencil.
If you’re using a smaller canvas, the measurement is a little less than 1/3 of the way up so you can adjust accordingly.
2. Paint The Sky
To paint the sky, I used cross hatching brush strokes with a 1” flat brush.
This is a technique that is great for blending blue and white to paint a sky in landscape paintings.
Basically, instead of brushing left and right, I brushed in “X’s”.
Start with Phthalo blue.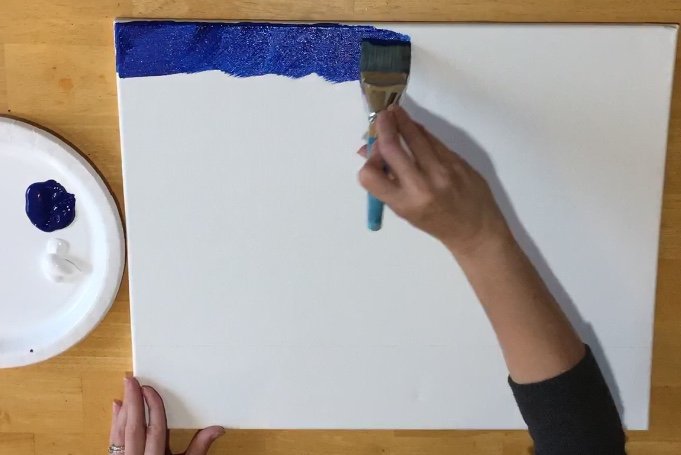
Then gradually add more white as you reach the horizon line so that the blue gets lighter. 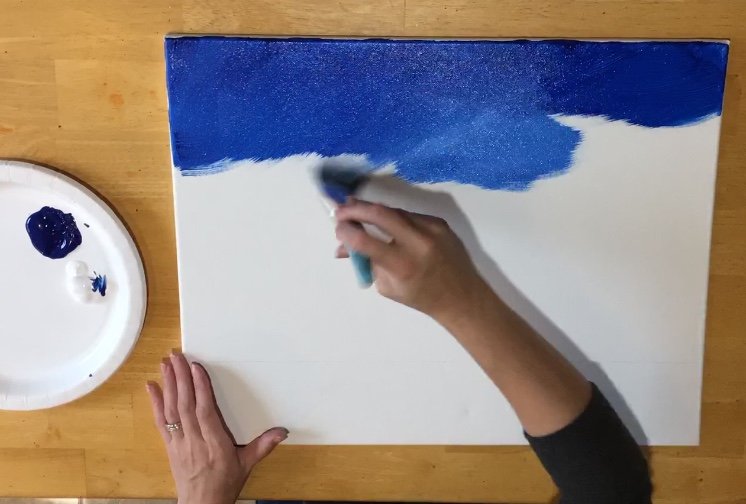
Brush in X strokes all along the canvas starting at the top and working your way down to the horizon line.
As you get closer to the horizon line, add white to your brush without rinsing the blue off. 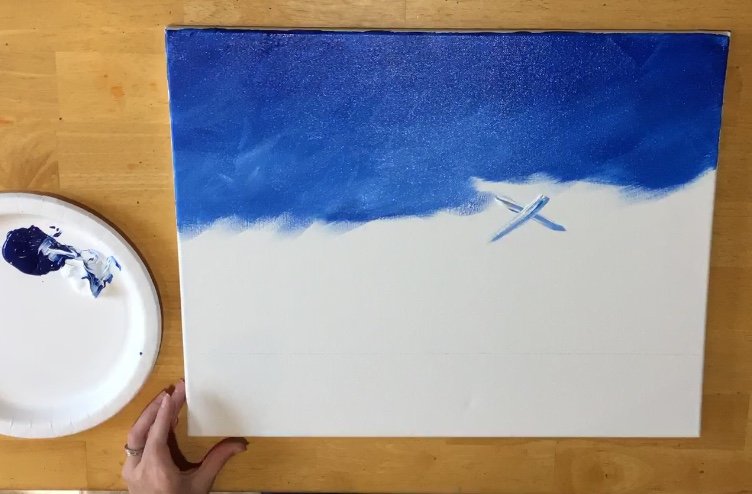
Also note, I am not dipping my brush in water at all! Just keep adding white as you work your way down.
Keep adding more and more white as you work your way down to the horizon line.
Those X strokes will blend the blue and the white nicely.
Try to soften any hard visible brush strokes as well.
This sky has the darker shade of blue at the top and the lighter shade of blue along the horizon line.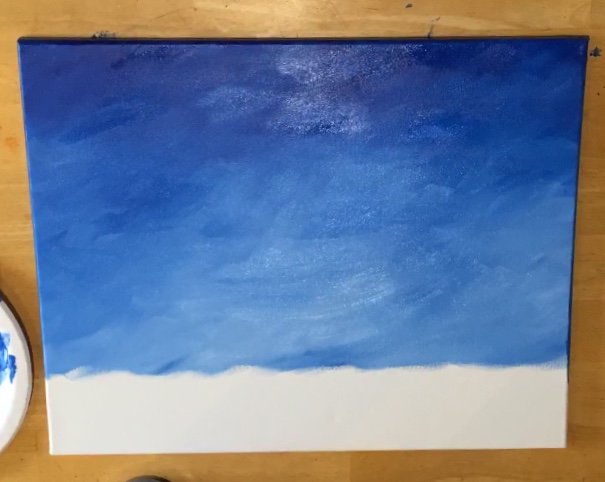
3. Paint Green Layer For Grass
For this next step, I used light green permanent to paint the grass.
I used left and right strokes this time! If you lost your horizon line, you can use the ruler to help guide you again!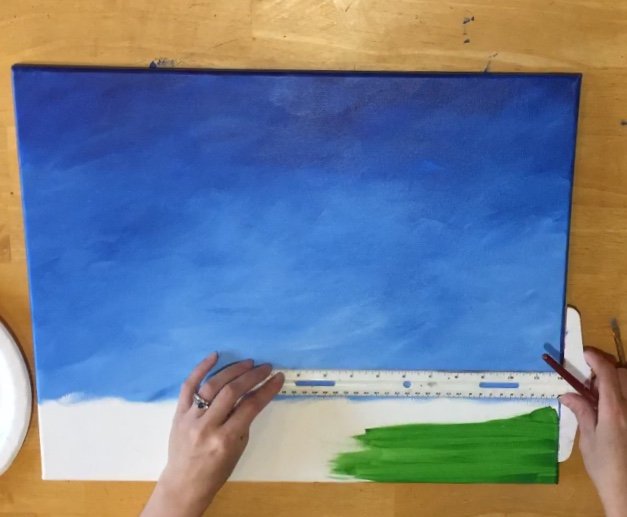
Don’t worry about grass texture yet, we will add grass details layer.
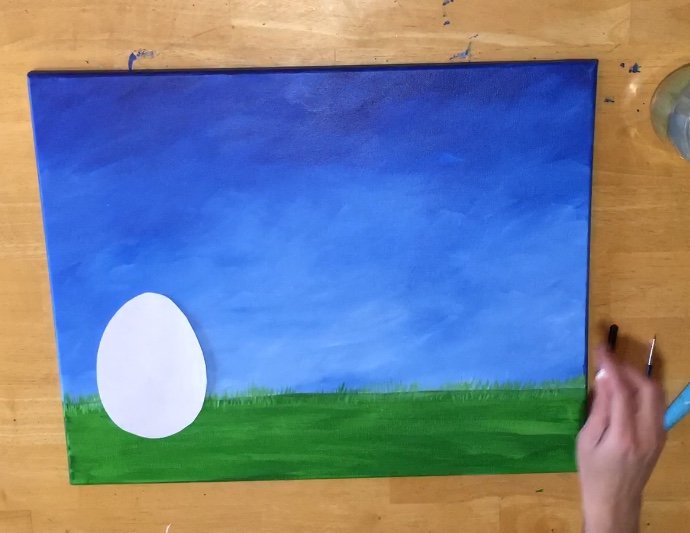
4. Create a template to trace eggs with
I suppose you can draw the eggs with chalk without a traceable, but I was going for a more uniform look!
I decided to draw an egg on a blank piece of paper.
This egg is approximately 6″ high.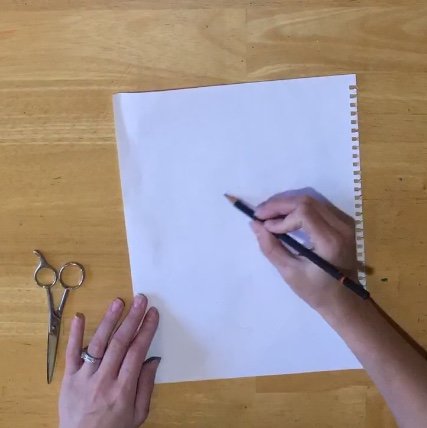
Then I cut the egg out and used it to trace.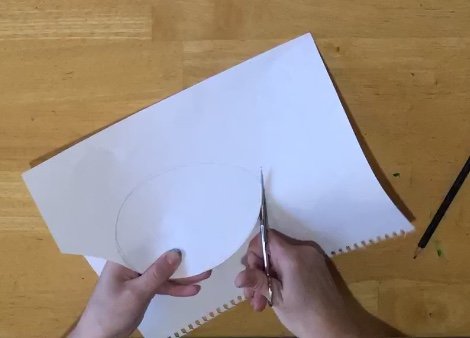
5. Trace the eggs on the canvas & paint white
Trace the egg four times with a piece of chalk. 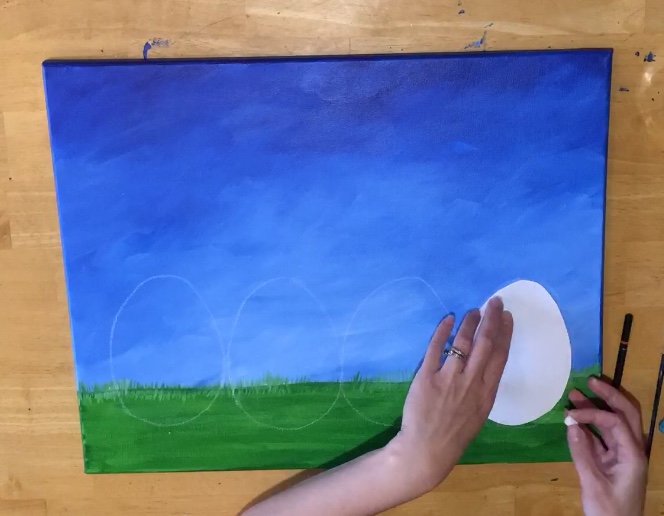
Then paint the eggs with titanium white. 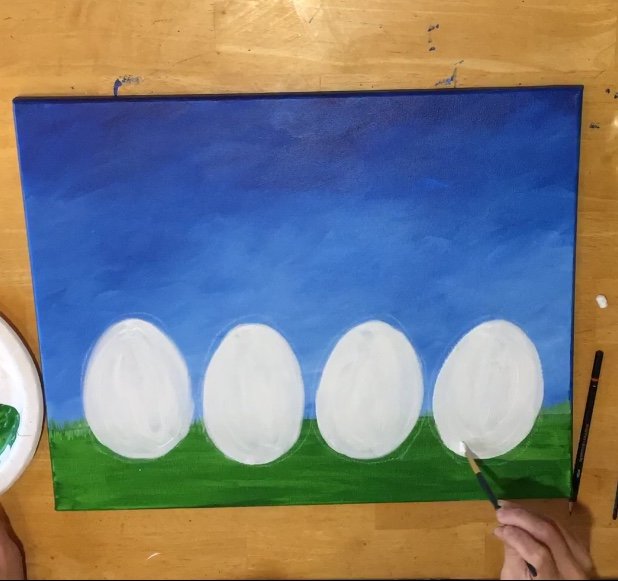
6. Decorate the eggs
Next, decorate the eggs with your own custom patterns and designs!
The colors I am using here are bright aqua green and primary red mixed with white to create two different tints of pink.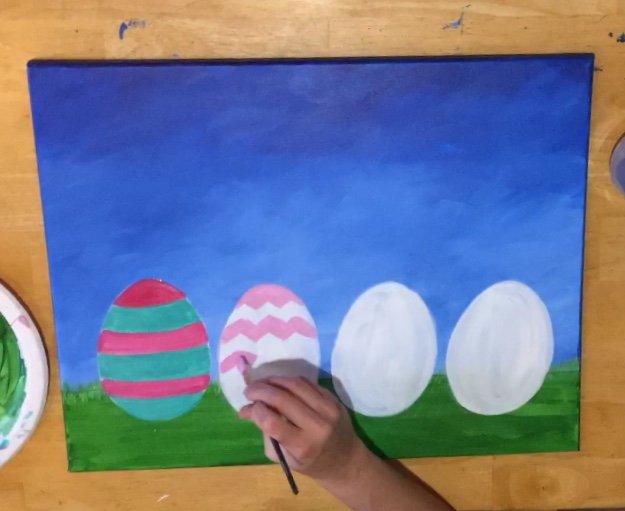
These colors are cadmium red dark and cadmium yellow medium.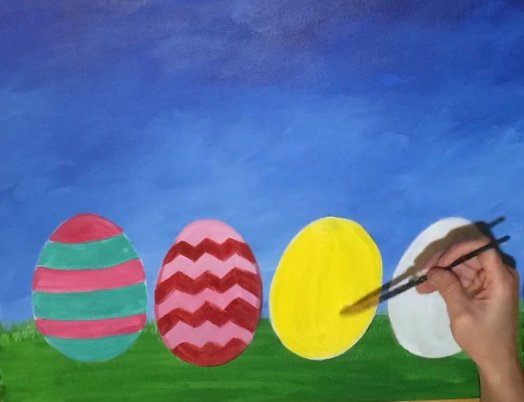
I did white and blue designs on the yellow egg and cadmium red dark plus bright aqua green dots.
Then wait until the eggs dry then paint a white highlight line on each of the eggs.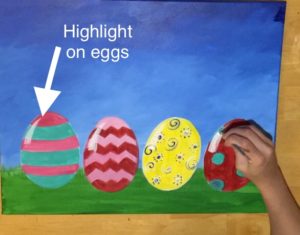
7. Paint Flowers
For the flowers, I blocked out the white for the petals with a 1/4″ flat brush.
Then I painted a thin green stem using a tiny round brush.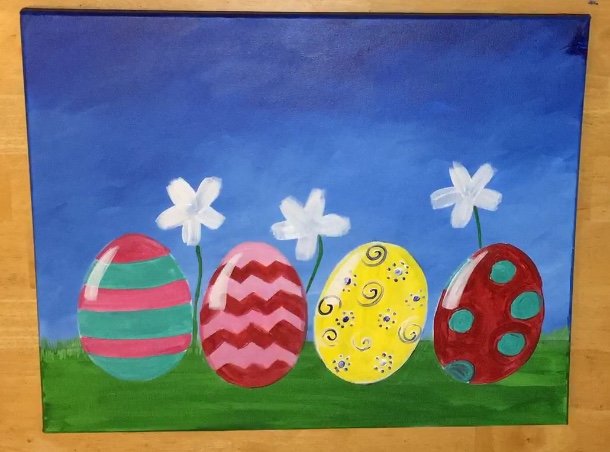
With the 1/4″ flat brush I painted leaves with green double dipped in some yellow.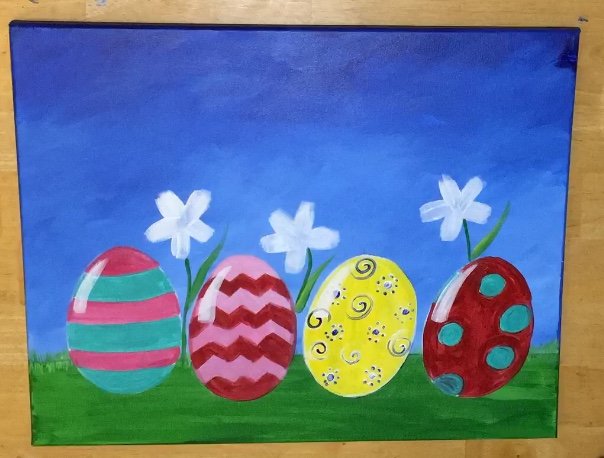
Then I painted the petals with a 1/4″ flat brush double dipped in yellow and orange.
If you aren’t familiar with double dipping, you can refer to my acrylic painting brush stroke techniques page.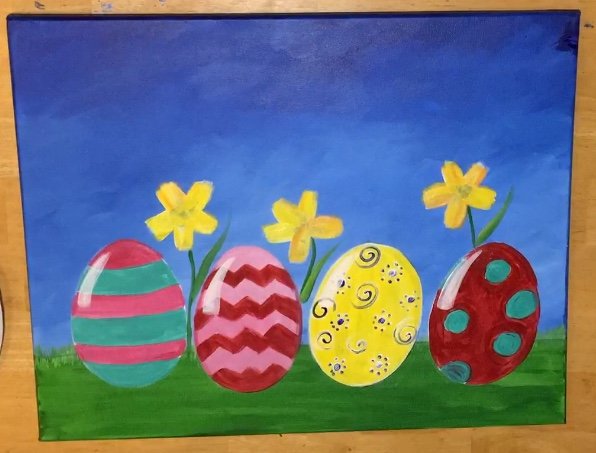
The center of the flowers were painted with black and burnt umber (dark brown).
I used a tiny round brush and painted little dots. This is a stippling technique!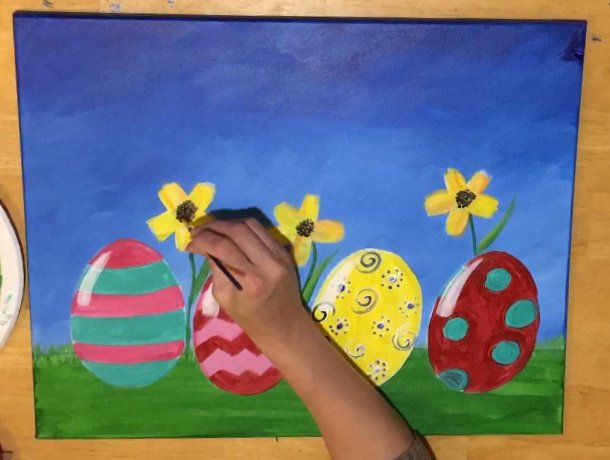
8. Paint The Grass
The trick with painting the grass in this painting is to start at the horizon line and paint lighter color grass strokes.
Then as you work your way to the bottom of the canvas, the grass strokes get darker.
If you don’t have multiple shades of green, you can mix it on your palette.
Mix white and green for the lighter color grass.
Then mix black and green for the darker color grass.
When mixing that darker green, you will only need a tiny bit of black.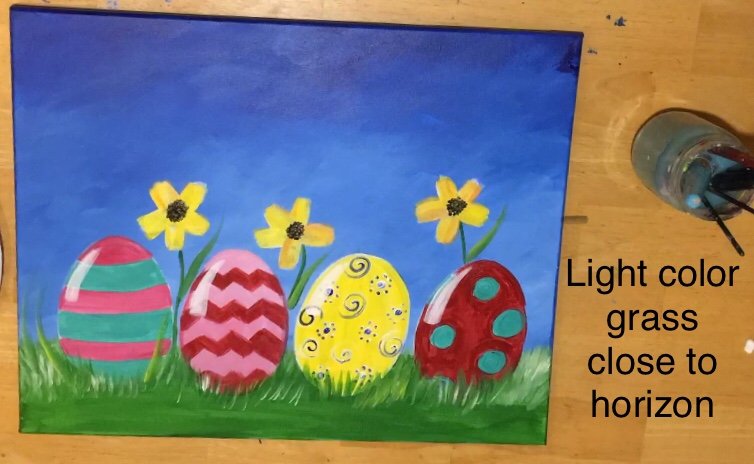
Mix white and green on the palette to make a lighter shade of green.
Use a 1/4″ flat brush and the tip to paint each individual grass stroke. (bottom up, bottom up).
The lighter grass is close to the horizon line.
Then just under the eggs is a pure green color.
Overlap the eggs with some brush strokes as well to make it look like the eggs are sitting in the grass.
As you work your way down, make a darker shade of green by mixing green with a tiny bit of black. 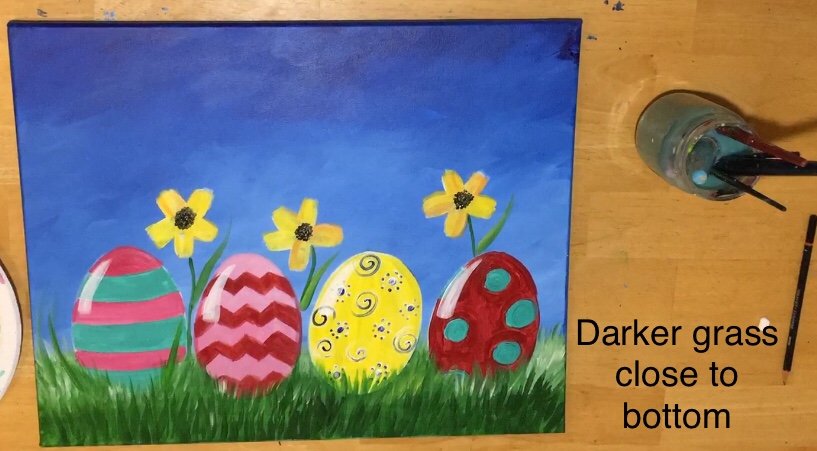
To give it a whimsical effect, you can paint tiny white dots in the grass.
This just reminded me too much of my Whimsical Clover Painting so I had to repeat it!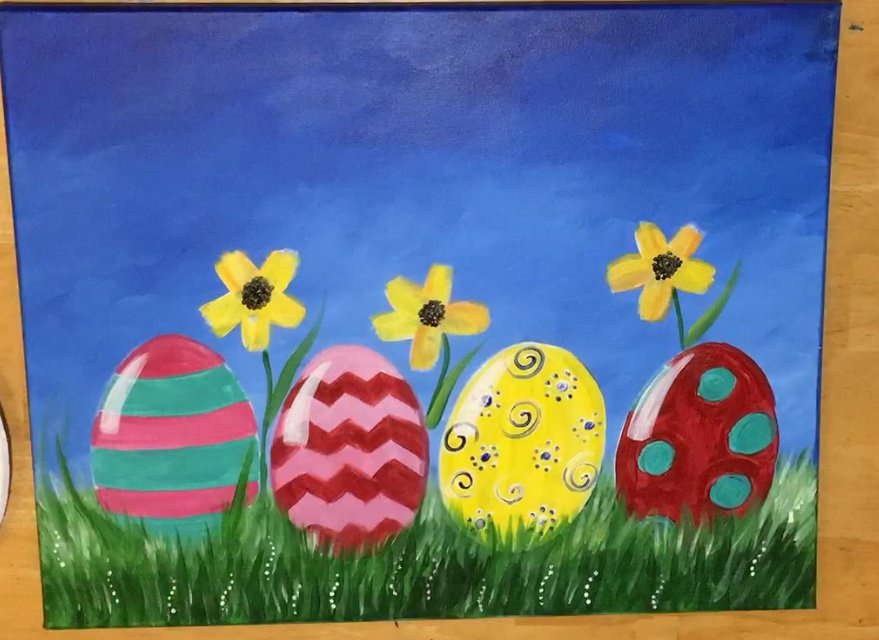
9. Paint Butterflies
I chose to paint a monarch butterfly and a blue butterfly.
You can simplify this step if you’d like!
I find painting monarch butterflies tricky. The designs on the wings are very intricate!
Try not to fret on this step and simplify it if necessary!
Draw the butterfly with chalk.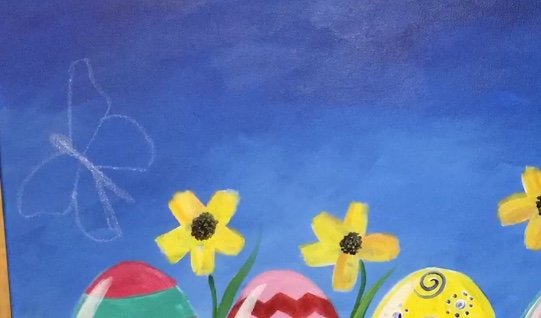
Paint the wings in white and the body black.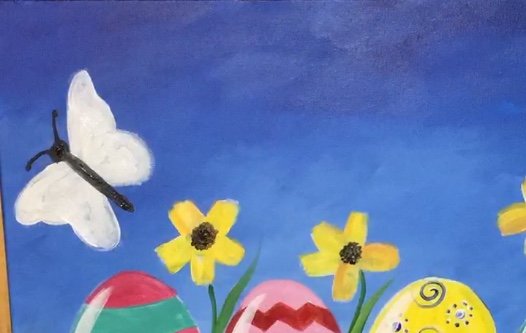
Paint the wings orange and red.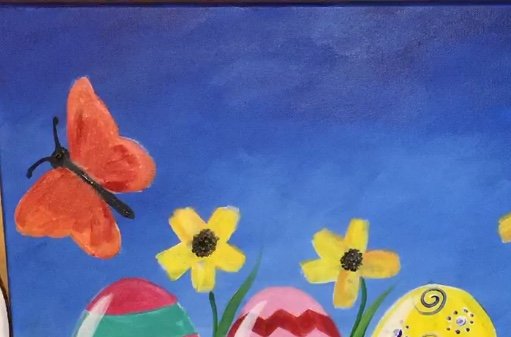
Outline the edges of the wings with black. I used a small round brush for this.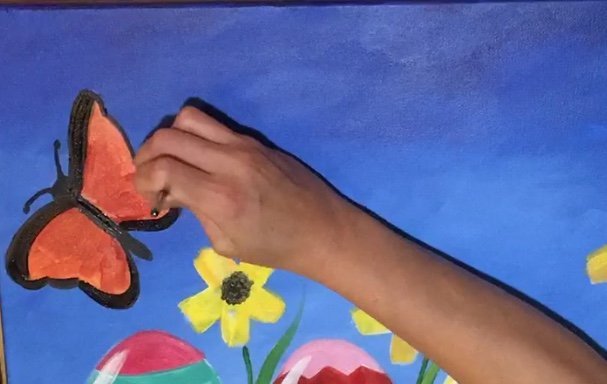
Paint a line dividing the wings in quarters.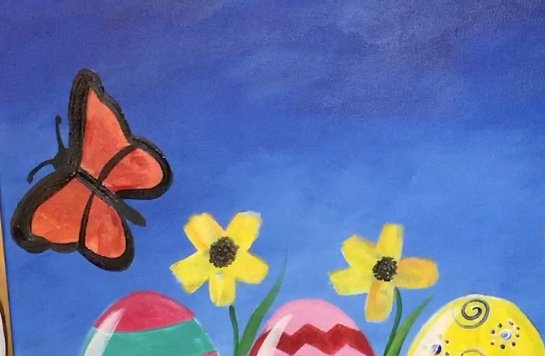
Add diagonals inside each of the wing quarters.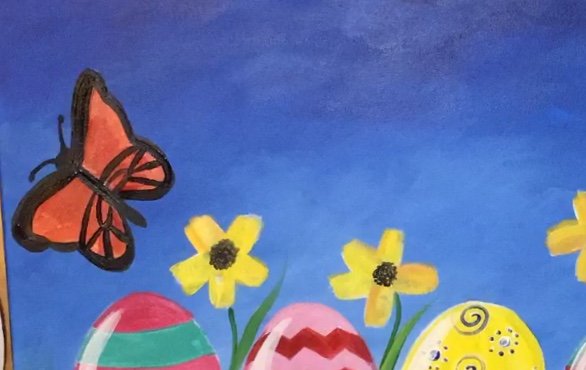
Each of the wing quarters have black diagonal lines.
I found looking at a photograph of a monarch butterfly helpful to getting the pattern right.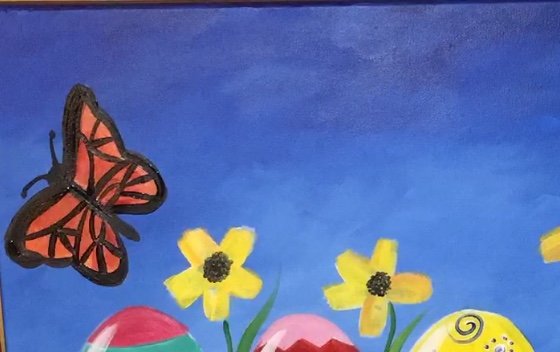
Use a tiny brush and titanium white to paint small white dots on the edging of the wings.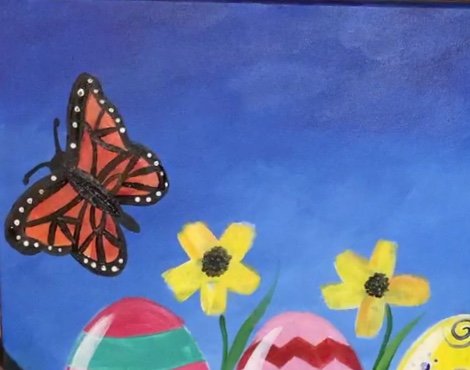
Then I painted a “loop” in the sky to represent the butterfly’s path. You’ll see it zoomed out in another picture!
Also, I painted a white highlight on the body of the butterfly.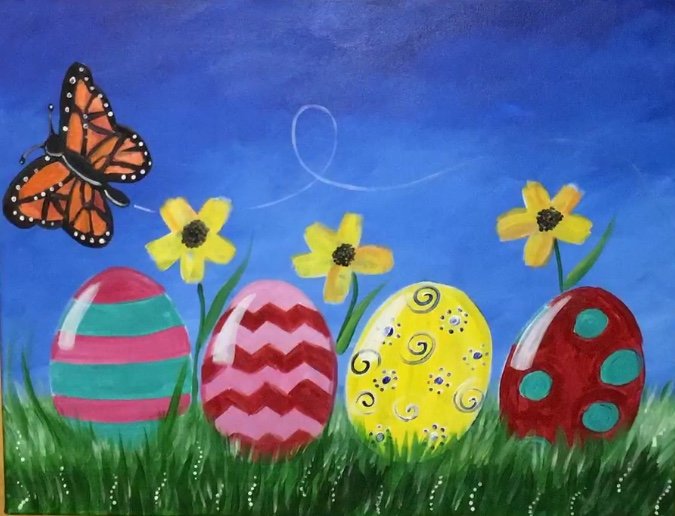
The blue butterfly was more simple! I repeated the steps but instead of orange, I used bright aqua green with a little white blended in.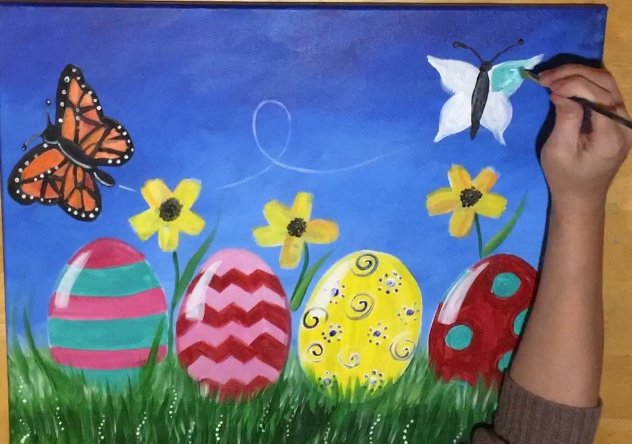
And of course another loop to represent this butterfly path!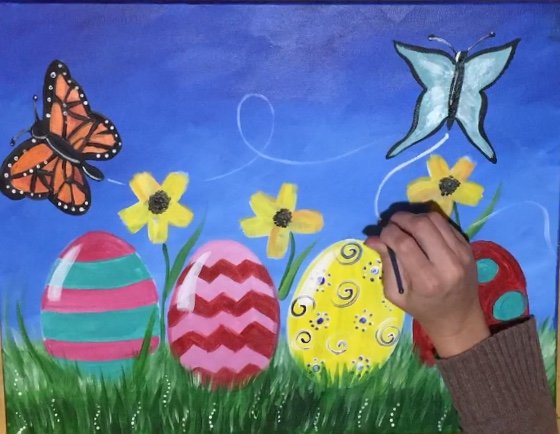
Finished!
Your very own Easter painting that you can display!
Would you like to save this?
Share Your Art!


Looking to do more Easter paintings?


1 thought on “Easter Egg Landscape Painting”
Comments are closed.