
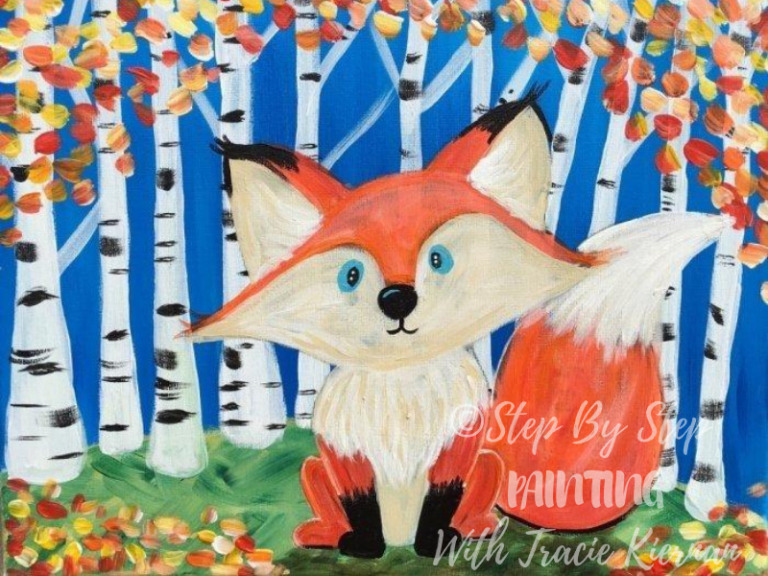
Fall Fox Birch Trees
Learn how to paint an easy Fall Birch Tree Landscape with a cute fox in the foreground. This step by step acrylic painting tutorial will guide you through each step. 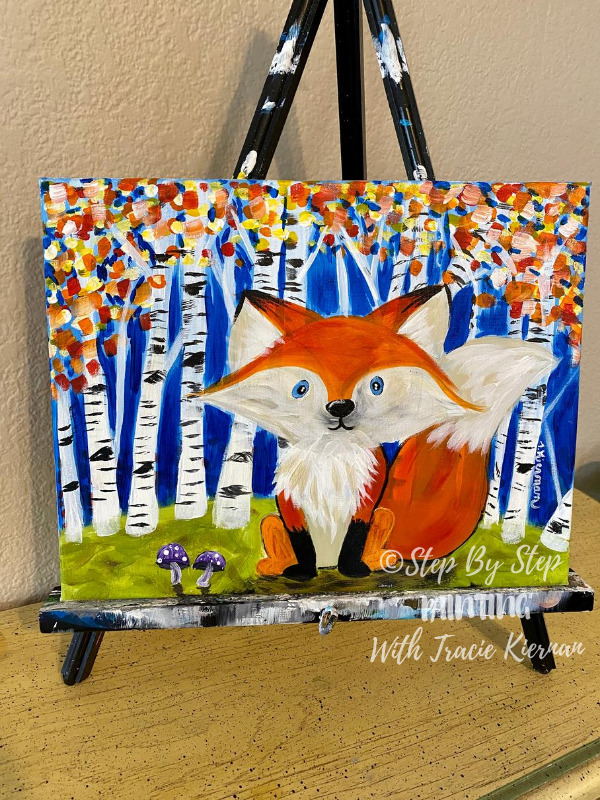
Would you like to save this?
The painting was done an an 11″ x 14″ canvas with acrylic paints. The tutorial also includes a Fox Traceable so you don’t have to worry about drawing.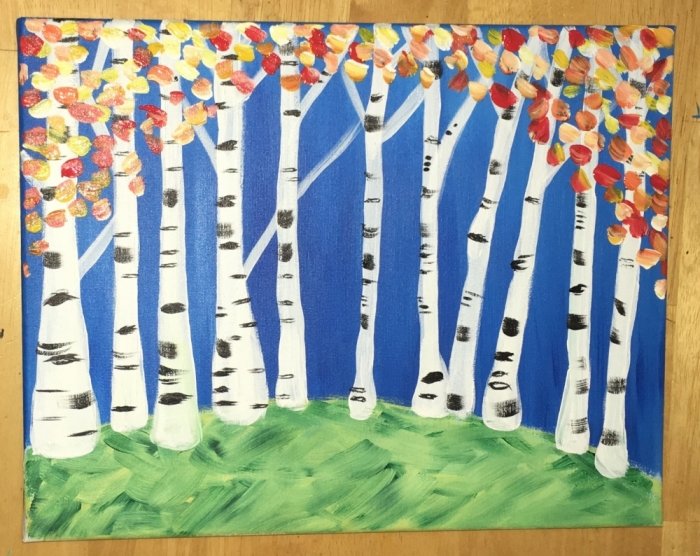
If you’ve been itching to paint a Fall birch scene and not a fox, you can leave the painting as is! This design makes a simple yet gorgeous Fall Birch tree scene!

Enjoy and happy painting!
This post contains affiliate links.
Materials:
- 11″ x 14″ Stretched Canvas
- Acrylic Paint (I used Liquitex BASICS for this design. There’s quite a few colors in this! I like using my 48 Piece BASICS set for paintings that call for a lot of colors because they are all ready to go!)
- Cadmium Red Medium
- Cadmium Orange Hue
- Cadmium Yellow Medium
- Brilliant Yellow Green
- Deep Green Permanent
- Burnt Umber
- Phthalo Blue
- Light Blue Permanent
- Titanium White
- Mars Black
- Unbleached Titanium
- Paint Brushes (*I used Royal & Langnickel Brushes)
- 3/4″ Flat
- 1/4″ Flat (#4 Bright)
- #8 Round
- #5/0 Round (or the tiniest round brush you have!)
- Traceable
- Graphite Paper
- Pencil
Color Palette: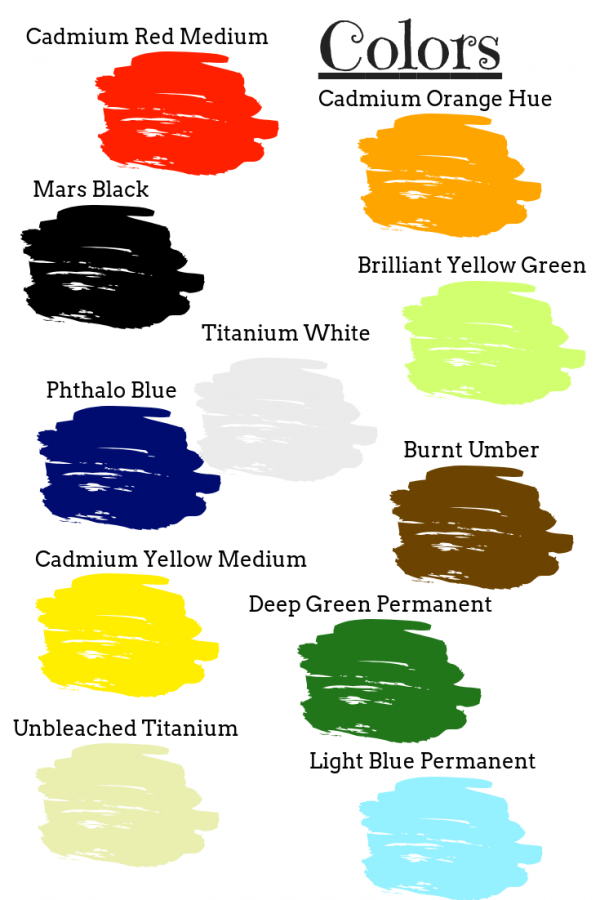

Traceable:
Directions: print on a standard 8.5″ x 11″ computer paper. Trace the fox in the lower right corner aligned on the canvas (or anywhere else if you’d like!). You can find a PDF version of this printable here. 
Directions At A Glance: 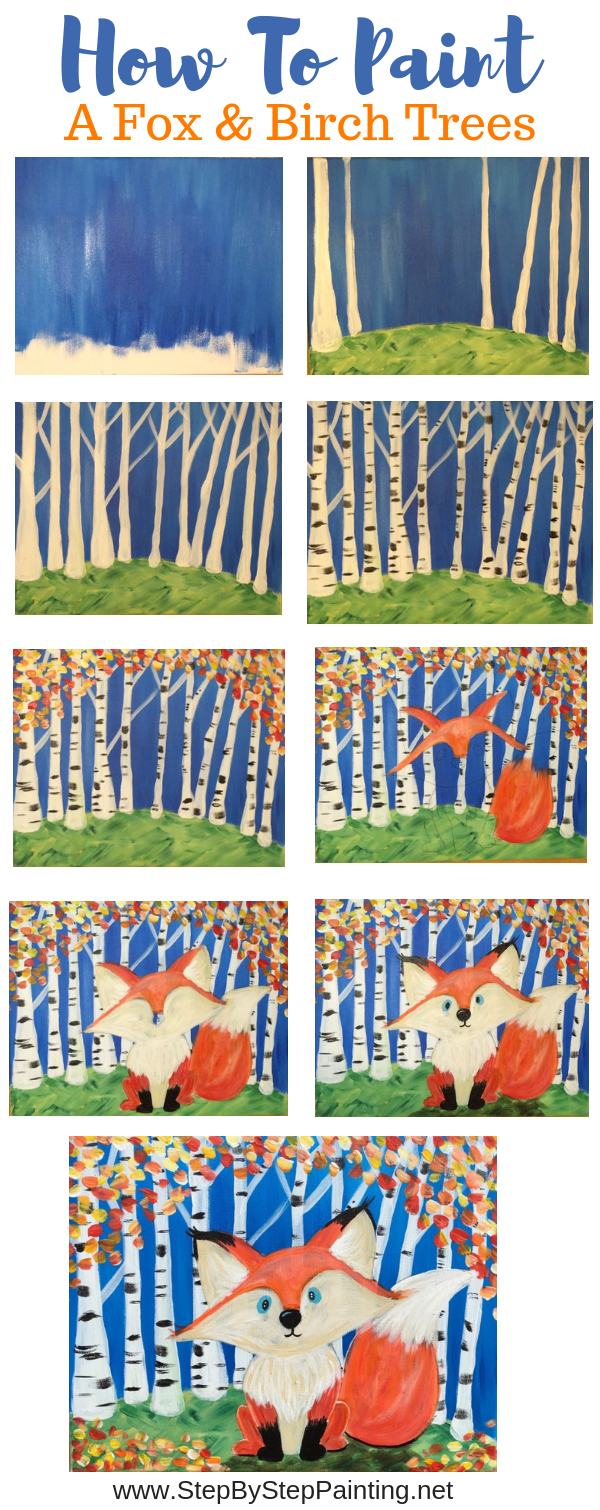

Video:
Step By Step Directions:
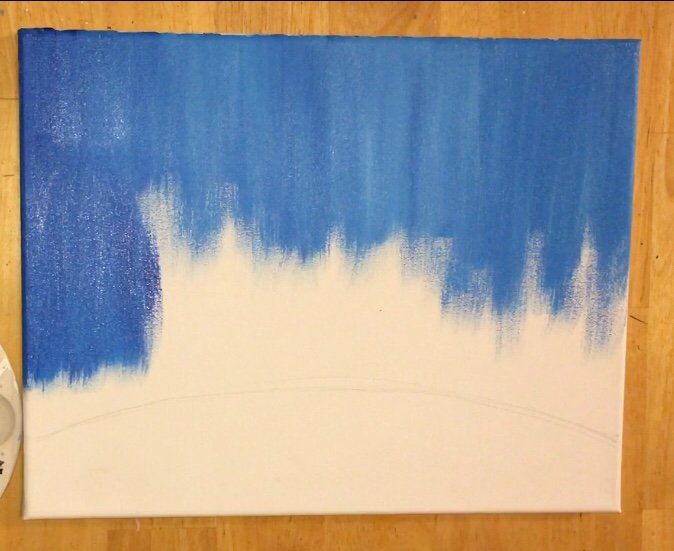
1. Draw a hill with a pencil.
The placement of this hill was about three finger widths high on the sides. Lightly draw this with a pencil. 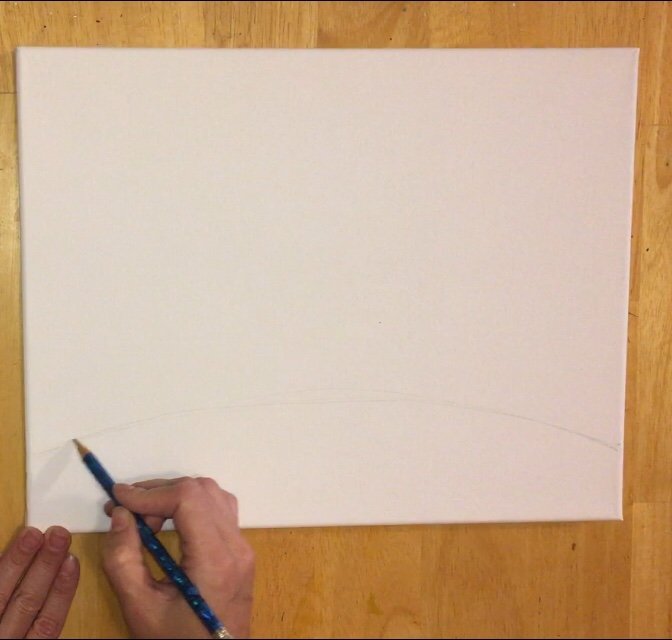
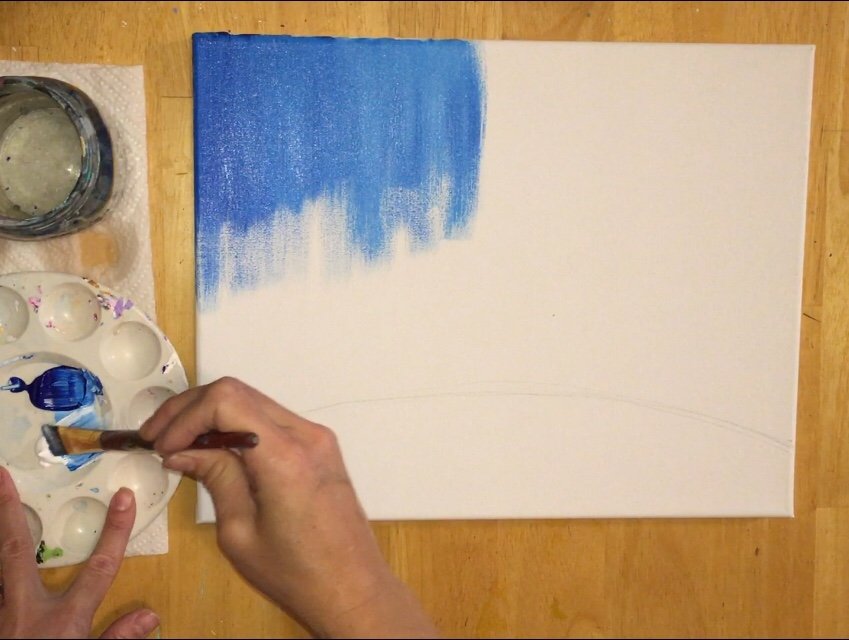
2. Use the colors phthalo blue & titanium white an a 3/4″ flat brush to paint the entire sky above the hill.
Paint in all up and down strokes. Double load the brush in both the phthalo blue and the white but use mostly phthalo blue. The up and down strokes will blend on the canvas. If you see white streaks that is okay! 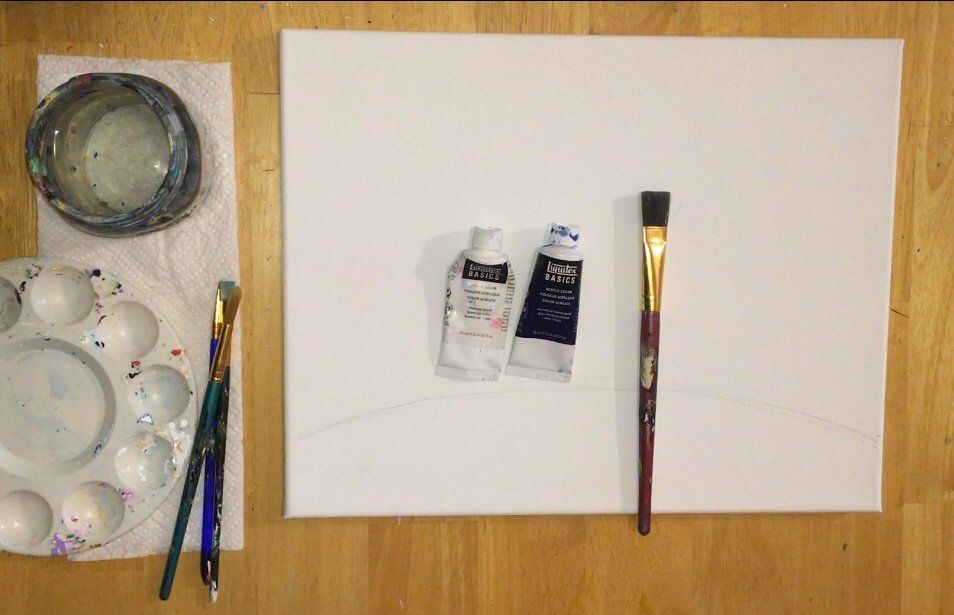

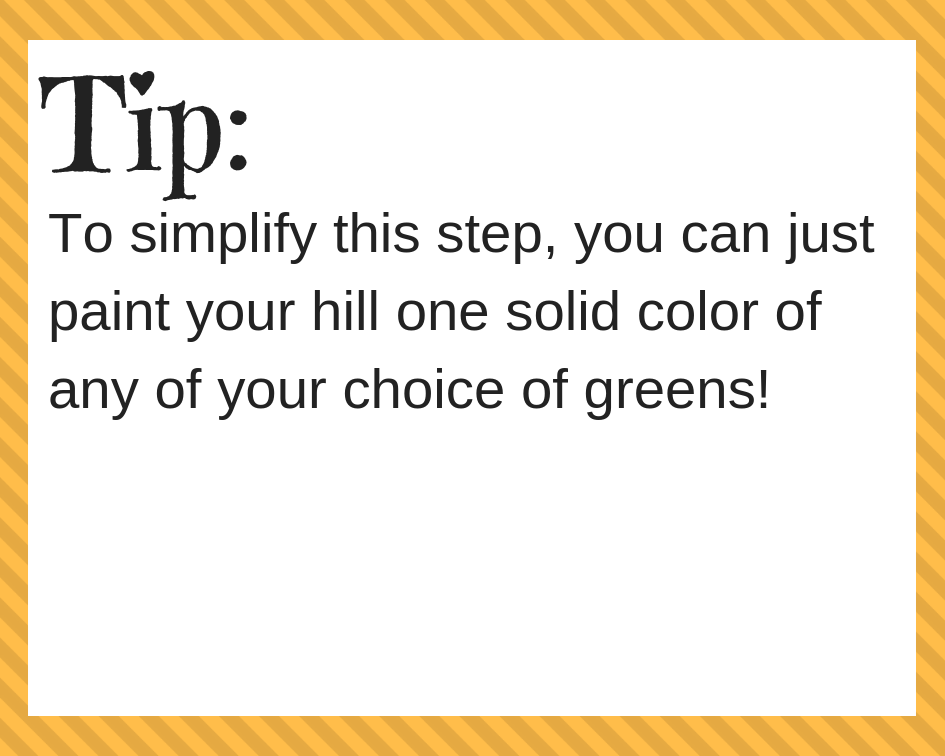
3. Paint the hill.
If you were like me and covered your hill, you’ll need to paint over the hill with white first to cover up the blue. 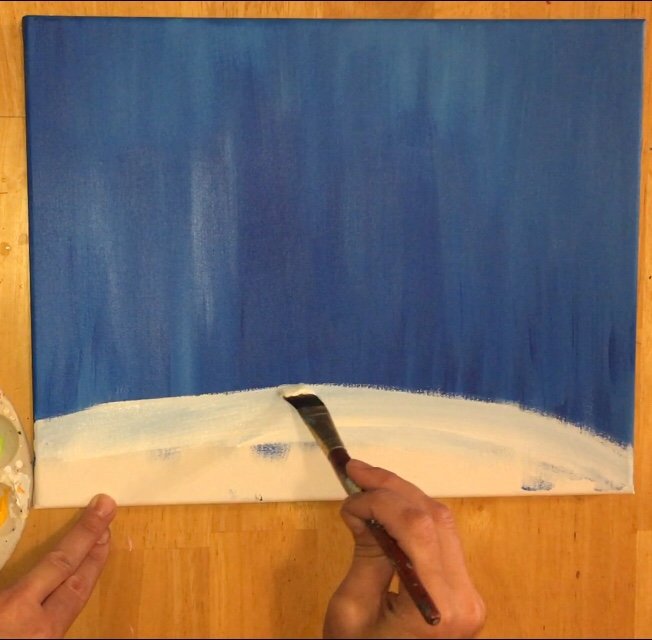
Then mix a “golden green color” by mixing: brilliant yellow green, cadmium yellow medium and burnt umber onto the palette. 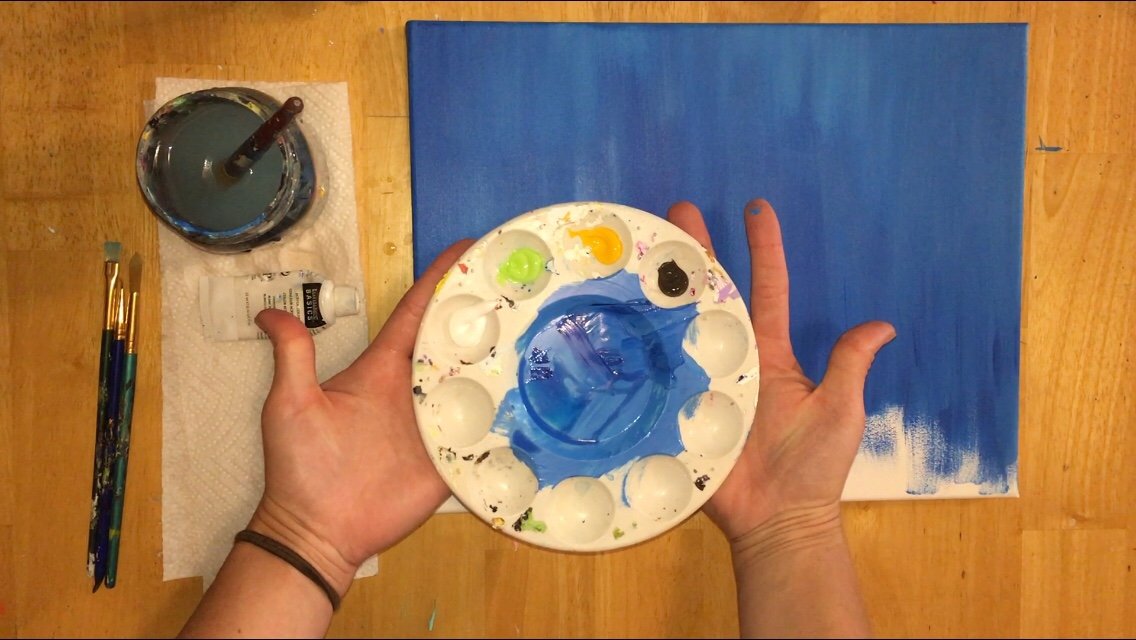
Dip your 3/4″ flat brush in all three of those colors! Those colors mixed together create a “golden green”. 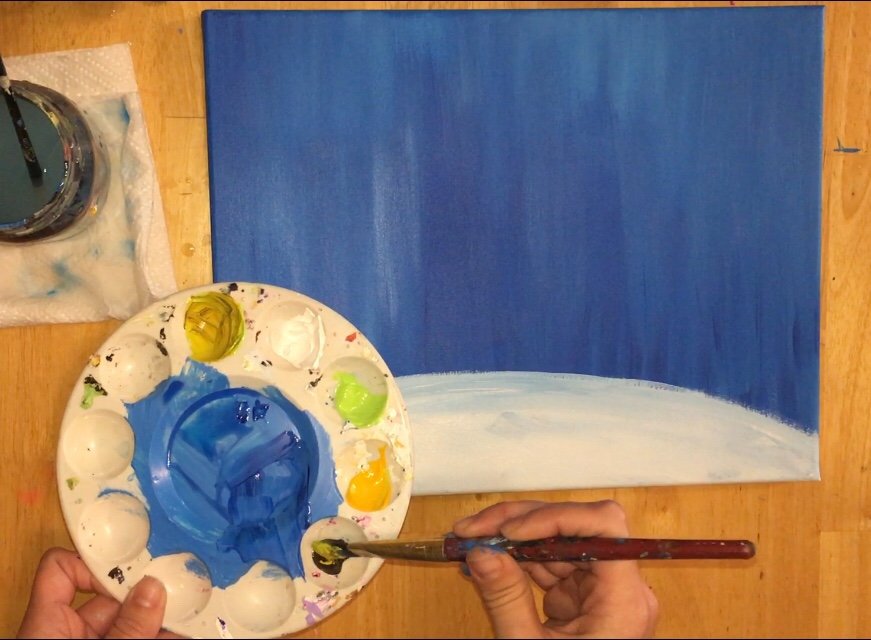
Paint the hill by doing all “X” style strokes. Let those colors blend together. It should create a “golden green” color. If it looks too dark, try using less burnt umber. 
Fill the entire hill with this gold green color and “X” strokes. The goal is to get this “expressive” style on the hill and the texture here almost resembles grass.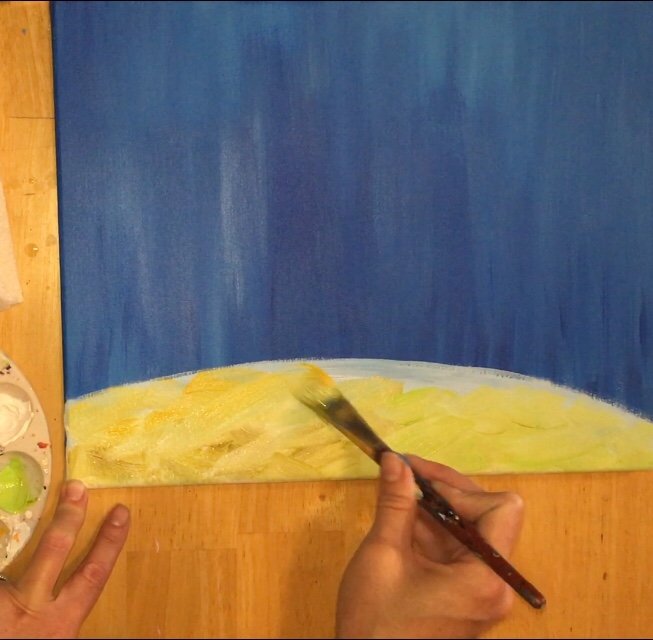
Next load your brush with deep green permanent. This dark green will stand out against the gold green. Paint in more “X” strokes but don’t completely cover the gold green. 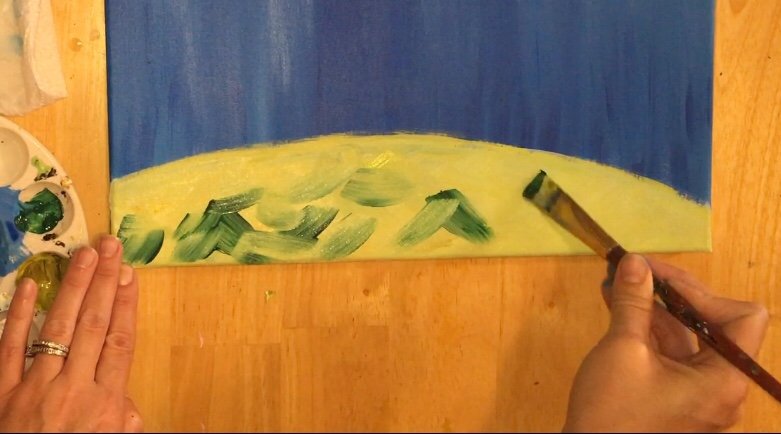
The deep green permanent is not mixed all the way with that gold green and the texture resembles grass. 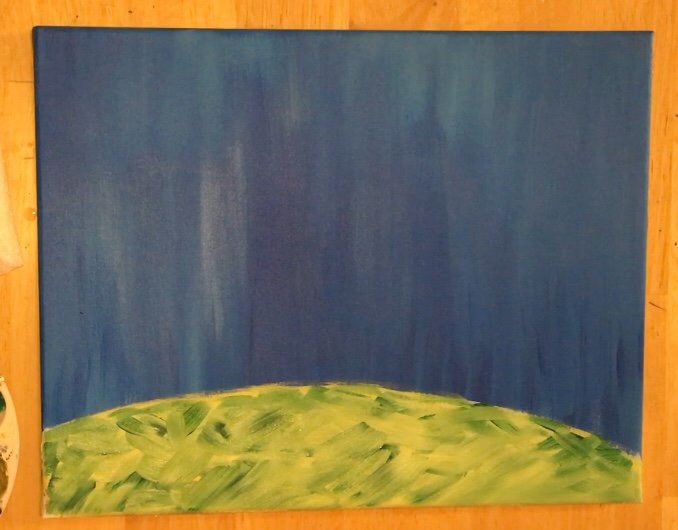
4. Paint the birch trees with Titanium White & 1/4″ Flat Brush.
Ideally, that blue & green should be dry! If it’s not, you may want to take a break and come back. To paint the trees, use a 1/4″ flat brush. Paint each white line starting on the bottom and painting up.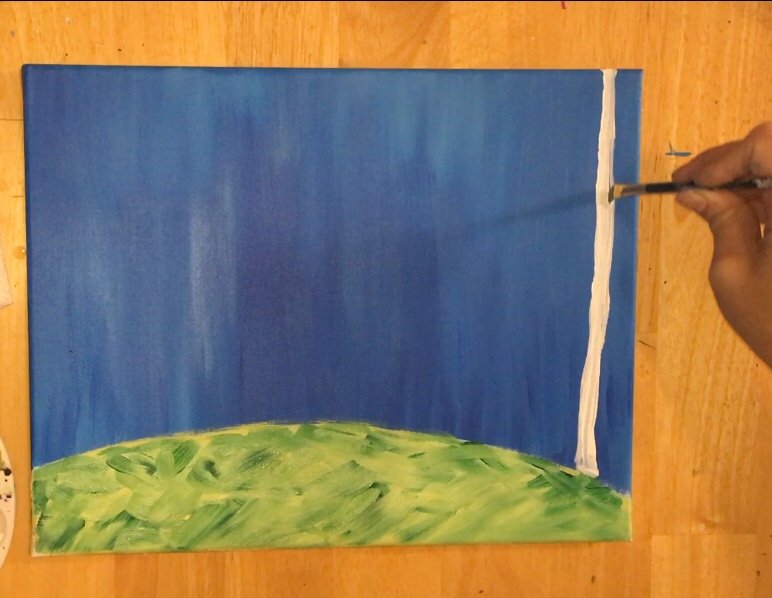
The bottoms of each of the trees starts out a little thicker and then the line gets thinner towards the top. The line itself is also kind of “wobbly”.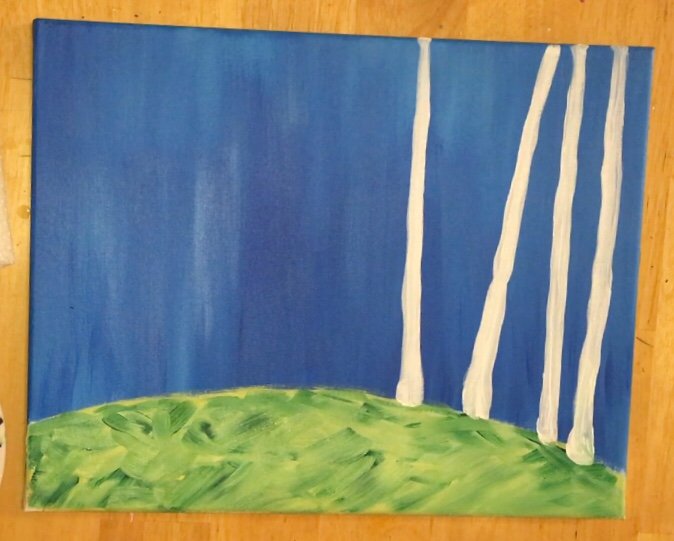
Paint some trees thinner and some trees thicker. Some of the trees are more vertical and some are slightly slanted. 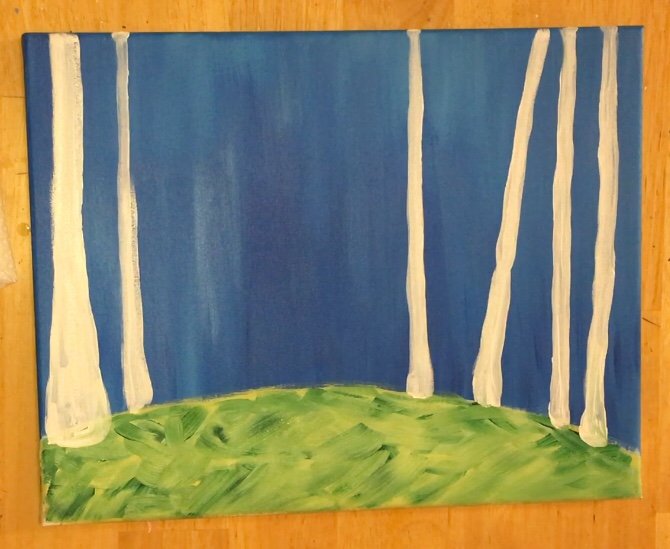
The bottoms of the trees do overlap that hill! Also the bottoms are kind of rounded. 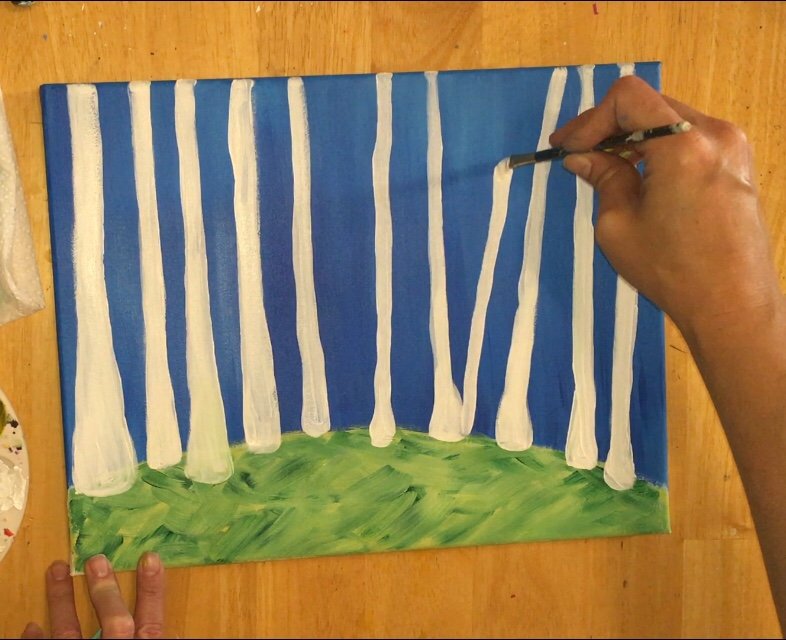
You may need to add a few coats of this titanium white to make sure it’s nice and opaque! 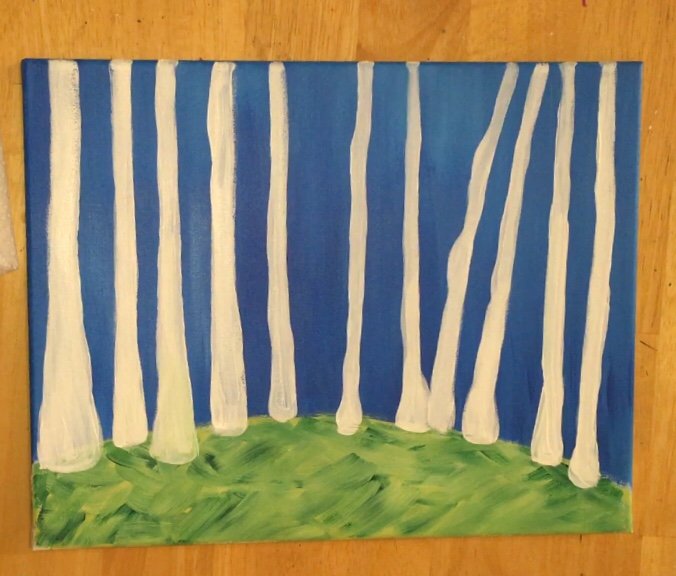
5. Paint Branches on the Birch Trees.
To do the branches, use the tip of the 1/4″ flat brush on its side. Paint different diagonal lines going outwards. Only do this on the top area of the trunks. 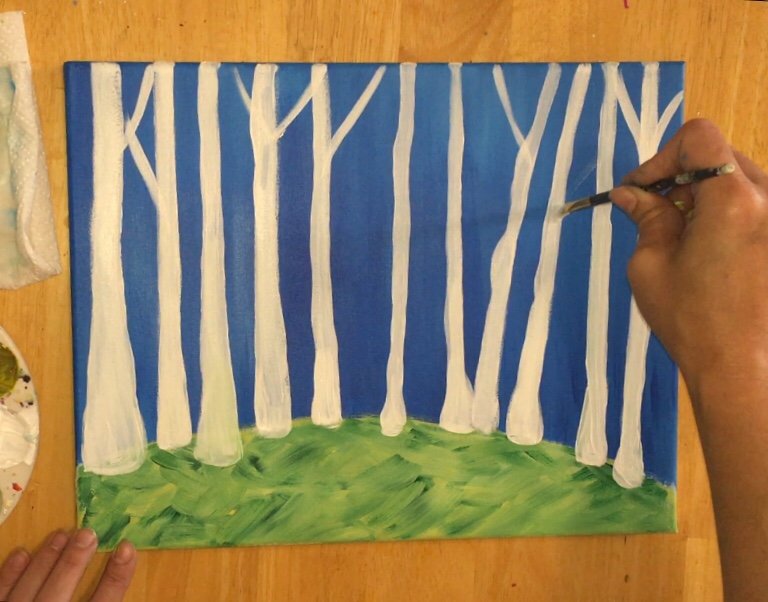
Some diagonals are thicker and some thinner.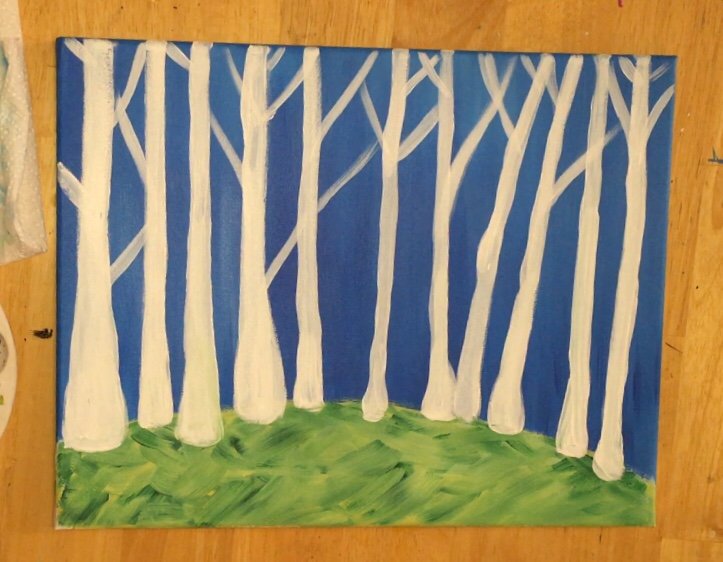
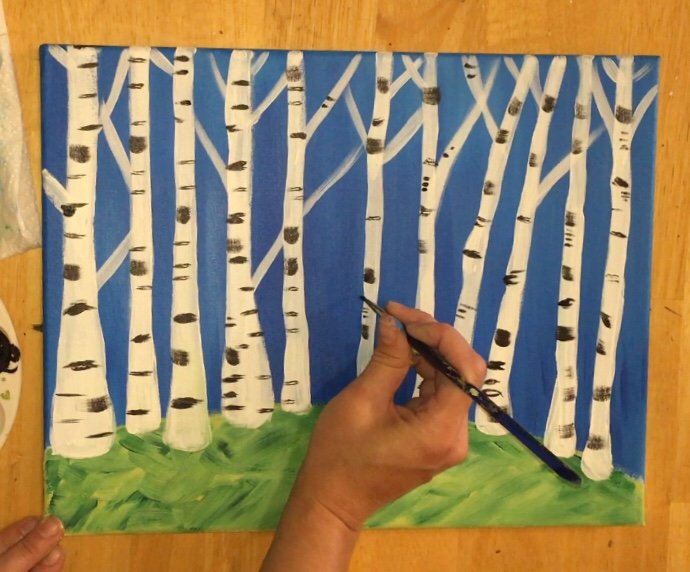
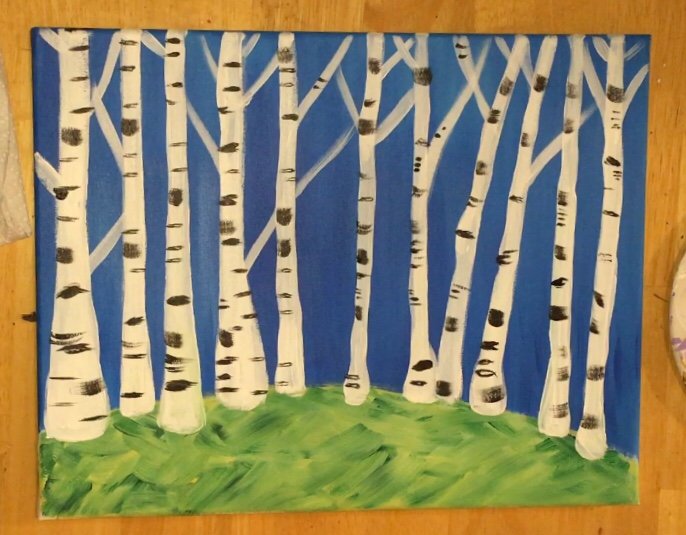
6. Paint black marks on the trees.
Use that 1/4″ flat brush (clean and dried) and the color mars black. Use the tip of the brush to paint thin uneven horizontal lines on the trees. You can even give some indication of “knots” on the trees by painting cat eye shapes. 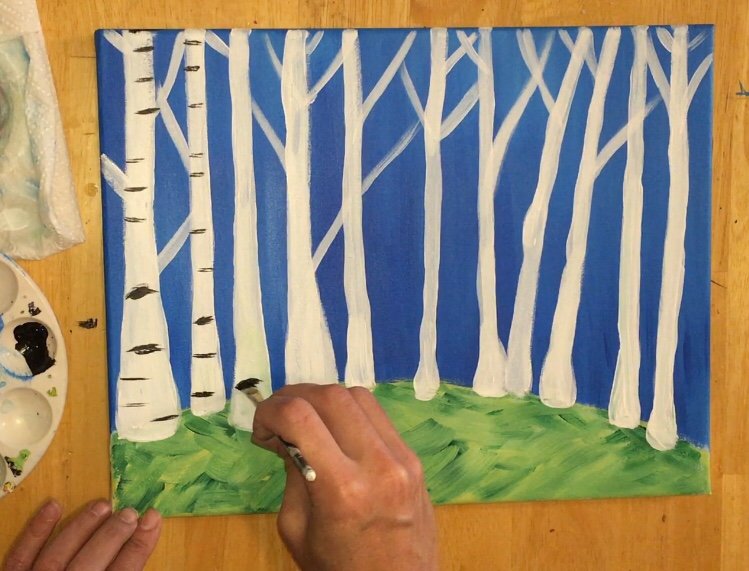
Don’t worry about uniformity! Each tree is completely different! You can also use the full width of the brush and drag to create a different kind of black mark. 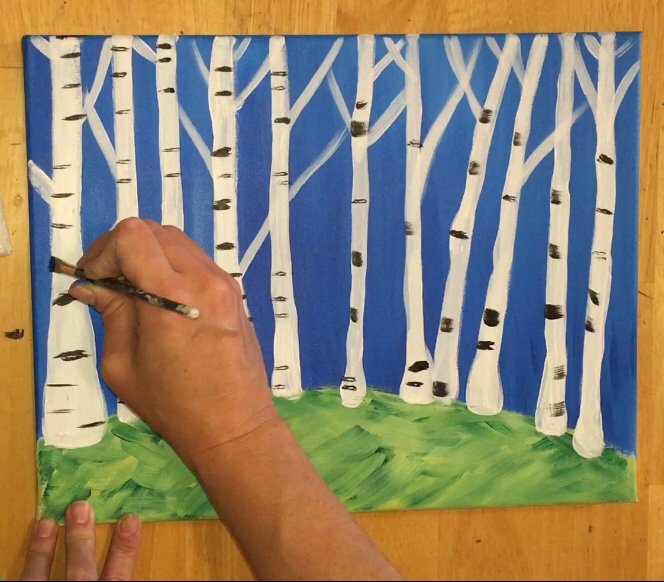
To get even more detailed, I switched to a 5/0 round brush and painted thinner black lines on the trunks and some of the branches. 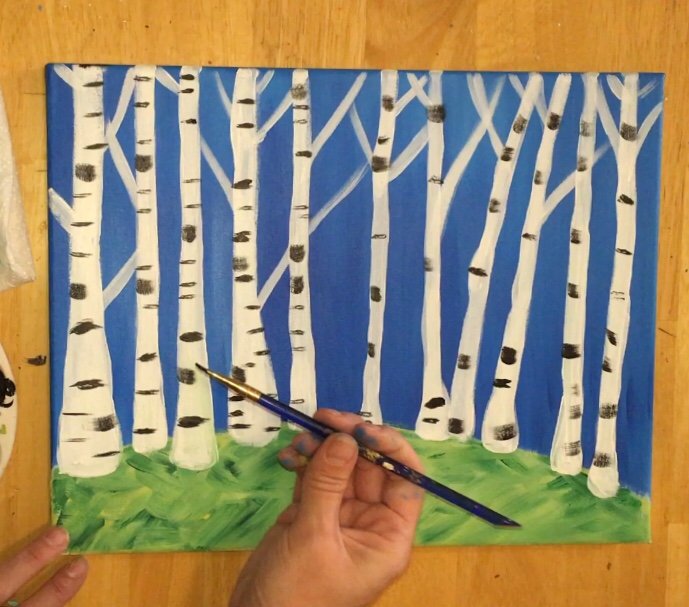
7. Paint the fall leaves.
Load your palette with the colors: cadmium orange hue, cadmium yellow medium, cadmium red medium and titanium white.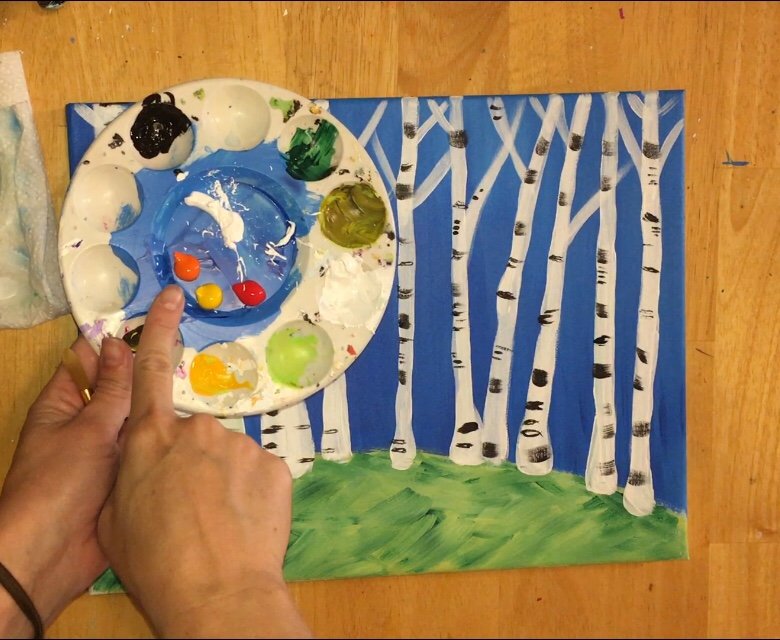
Use a #8 round brush for this but keep it dry!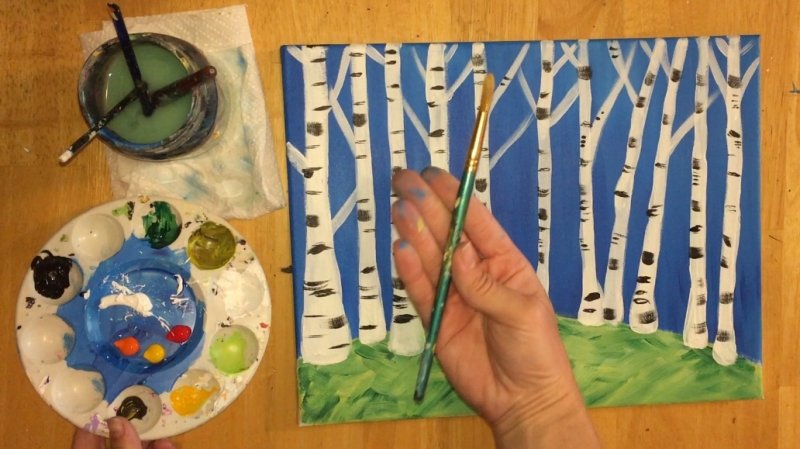
Double load the brush in titanium white and cadmium yellow medium. Since cadmium yellow medium is translucent, dipping it in the white will make it stand out. 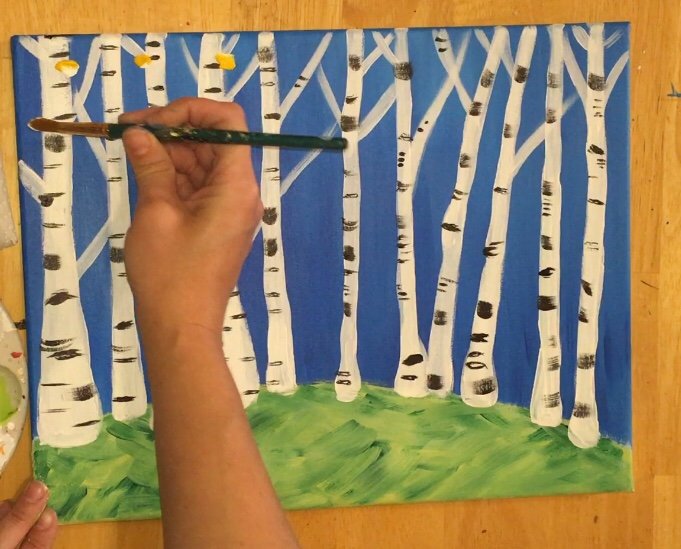
Stamp each leaf with the #8 round brush by using the side and not necessarily the tip of the brush. 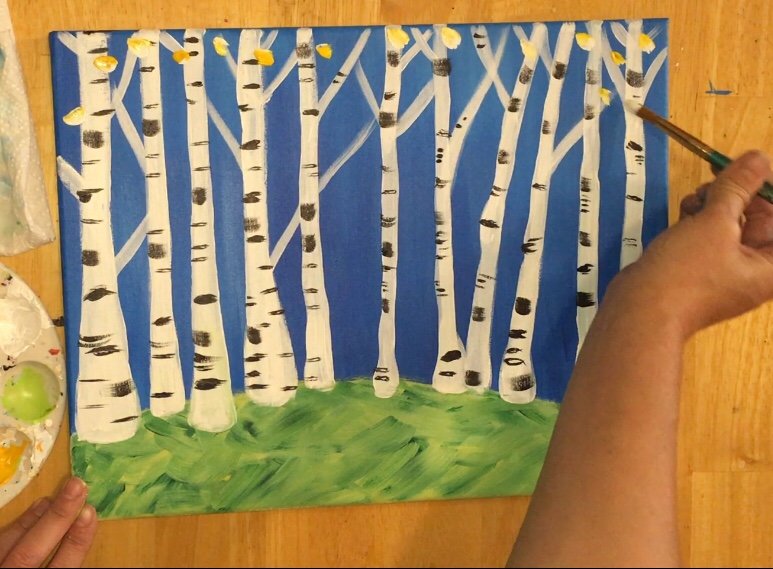
You don’t need to rinse the brush when switching to the next color. Simply grab the next color on your brush and continue to paint the leaves.
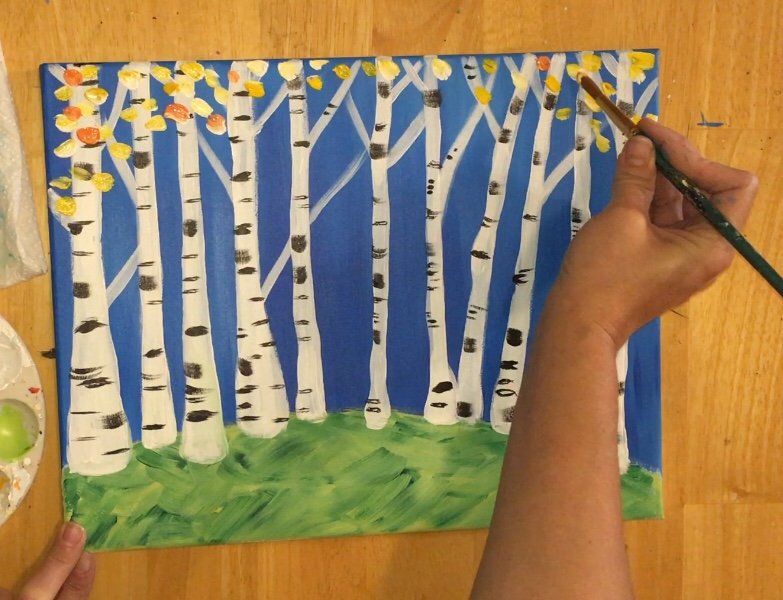
Continue on to load the brush with the cadmium orange hue and then the cadmium red medium. Notice how the shape of this “leaf line” forms an arc. That was done on purpose.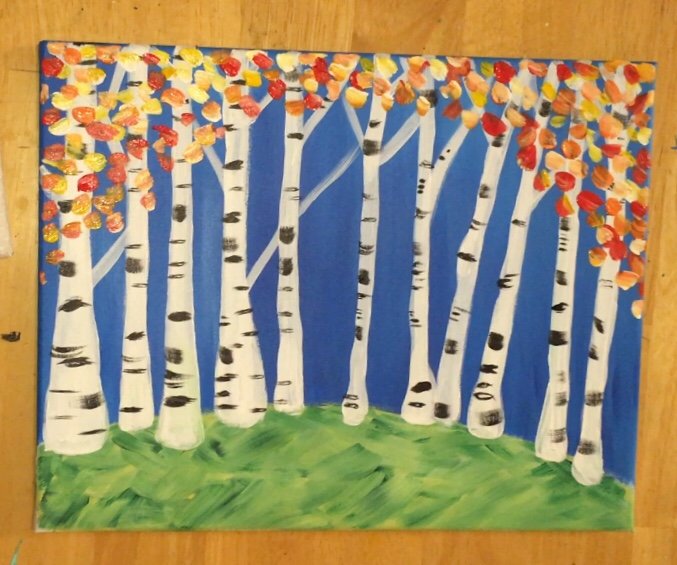
This is where you can stop if you’d like! This design makes for a beautiful fall birch landscape scene. You can paint some leaves on the bottom too! Continue on if you are doing the fox…
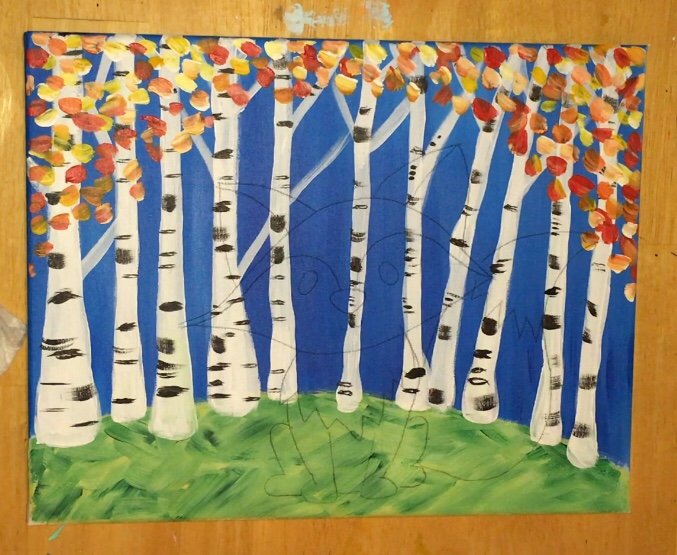
8. Trace the fox onto the canvas.
The printable is aligned on the lower right corner.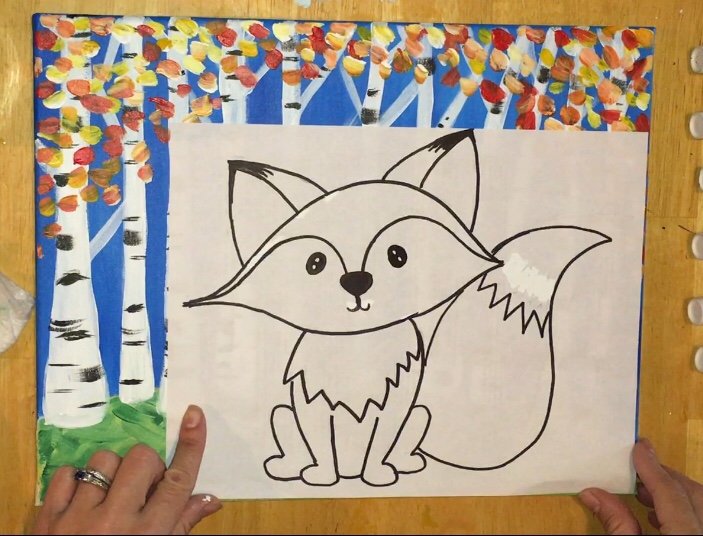
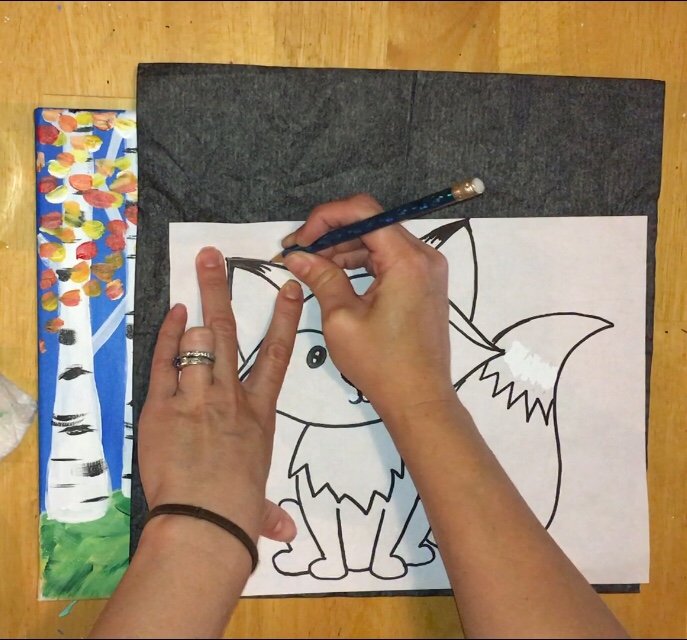
Place your graphite paper underneath the traceable and use a dull pencil to trace the design onto the canvas. 
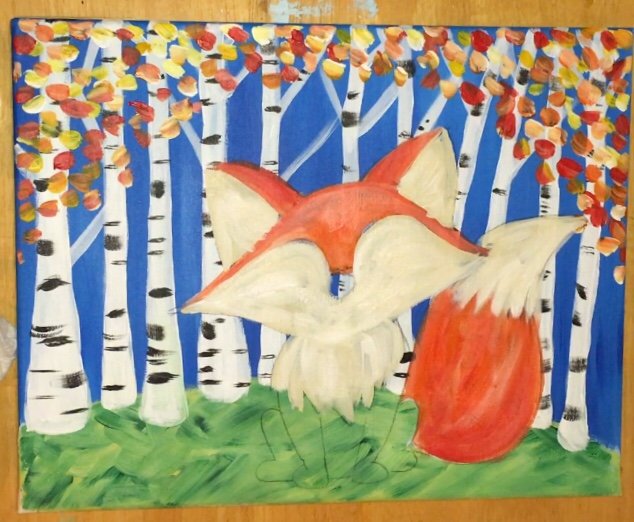
9. White out the top area of the fox’s head and tail.
I used a 1/4″ flat brush and the color titanium white. Fill in areas shown below with white first (doesn’t have to be solid). This helps cover anything in the background since orange is usually translucent.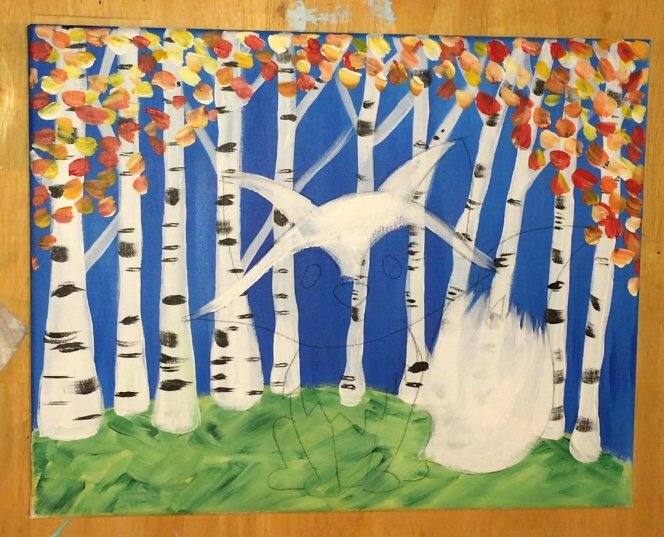
Ideally, you want to wait for that white to dry (but I wasn’t patient and my orange turned white-orange at first). Paint over the white out area with the color cadmium orange hue. Use the 1/4″ flat brush for this step! 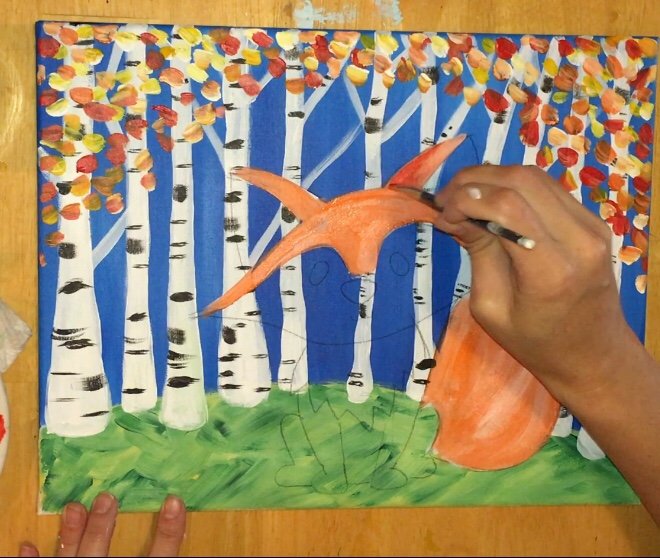
Try to get your strokes to contour with the shape of whatever you are painting in. For the tight areas, use your brush on it’s side. 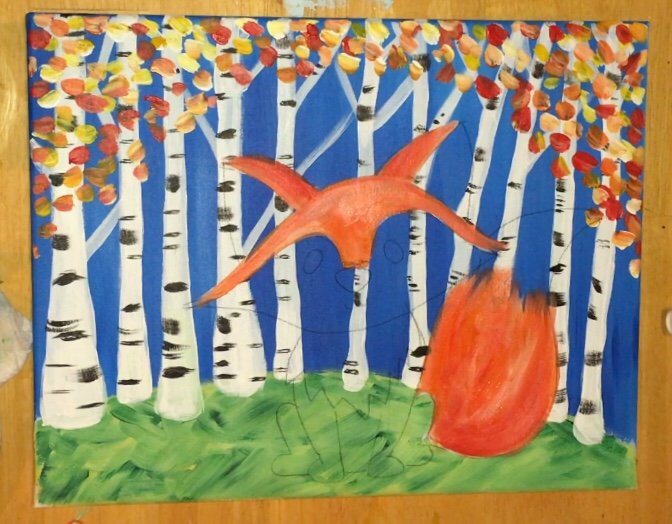
Then add the color “cadmium red medium” to the canvas. Let it blend with the cadmium orange hue.
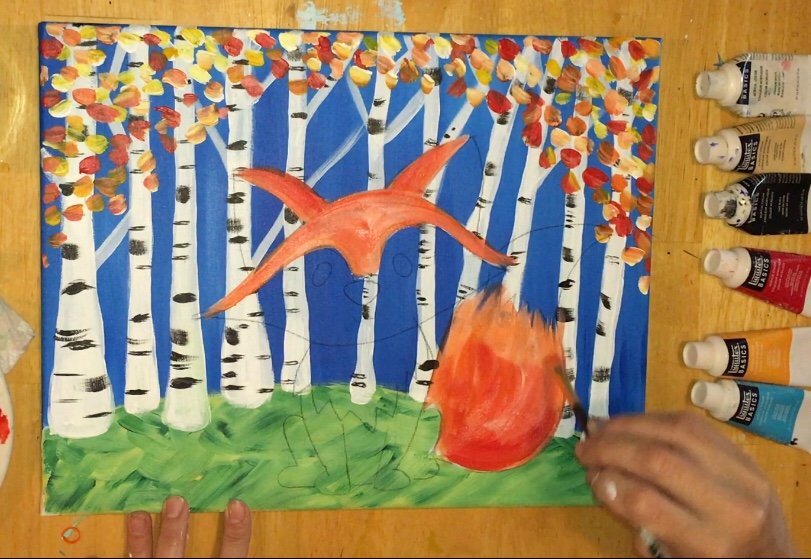
The point of this red is to make the orange look like a red-orange and not so much pure orange. If you don’t like this look, you can always do just orange!
10. Use the color unbleached titanium to paint inside of the ears, the rest of the face, the chest and tail tip.
Unbleached titanium was used in this area so that it would stand out against the white in the birch trees. 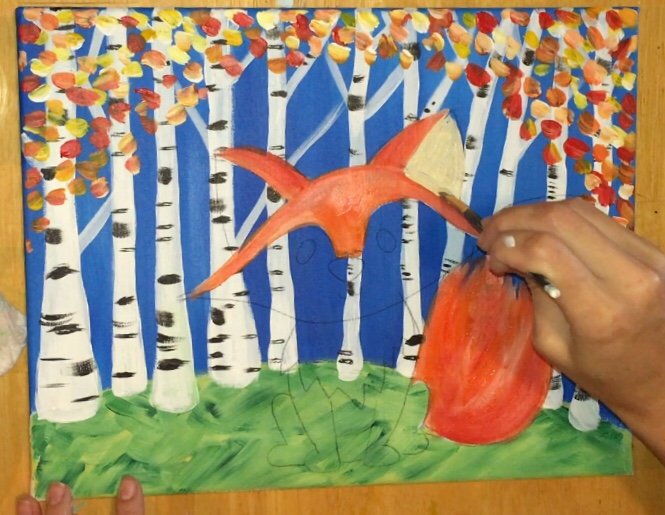
Since unbleached titanium is an opaque paint color, there is no need to “white out” these areas. With one or two coats, you should be able to cover the background.
For the tip of the tail, just estimate the zig-zags. You don’t have to fill them in like the traceable. 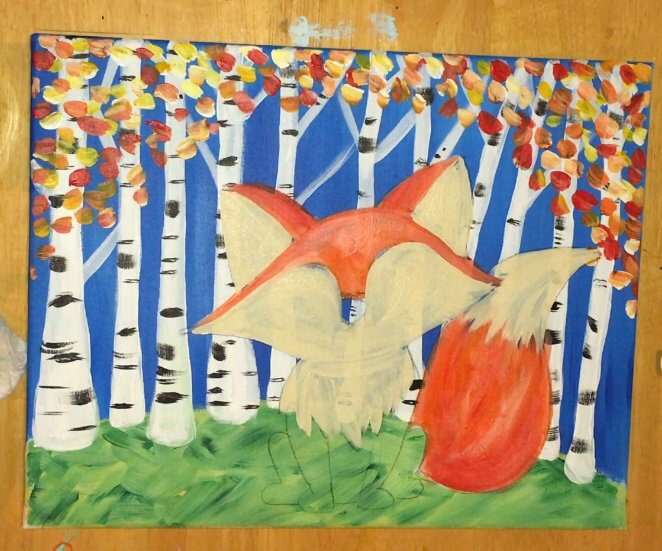
Next add titanium white to your brush before the unbleached titanium dries. You don’t need to mix it all the way with the unbleached titanium. Just lightly paint over some of the areas to give a little indication of fur. 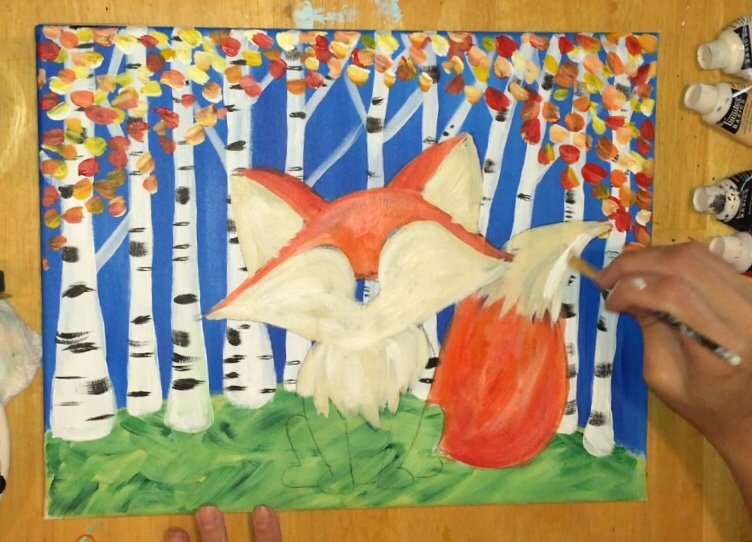
Adding the white gives a little fir texture.
Next I whited out the areas of the fox’s legs. When you white out an area, it doesn’t need to be 100% solid. 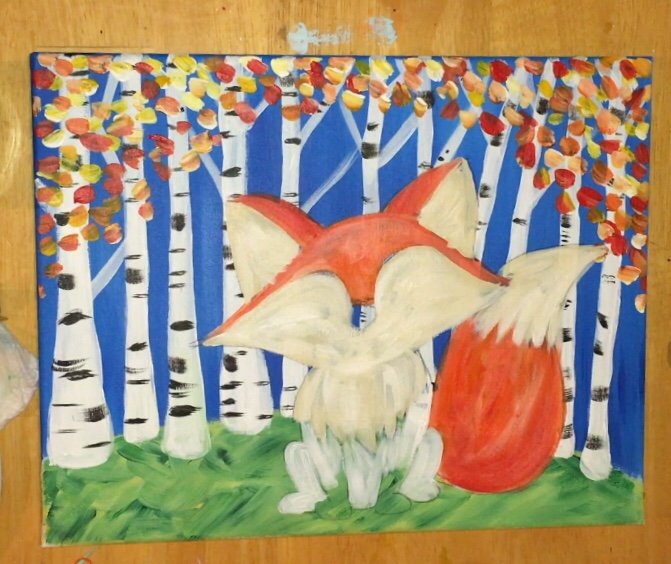
While waiting for that to dry, I painted the fox’s “socks” mars black. 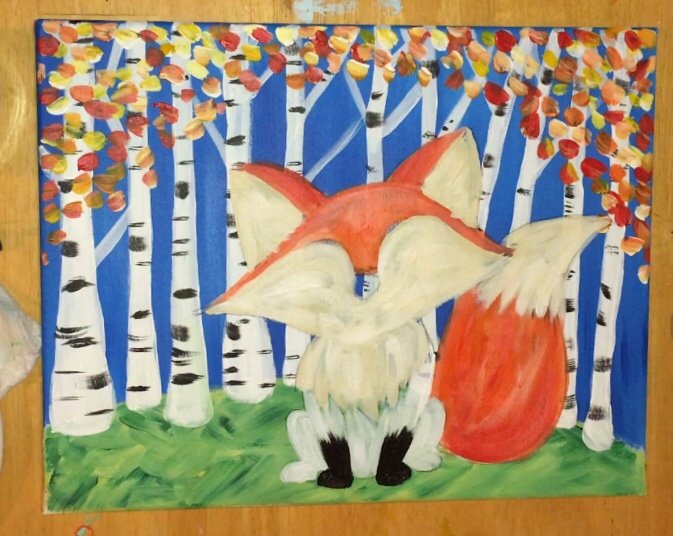
Then I painted the legs in. This time I double loaded my brush with both cadmium orange hue and cadmium red medium. 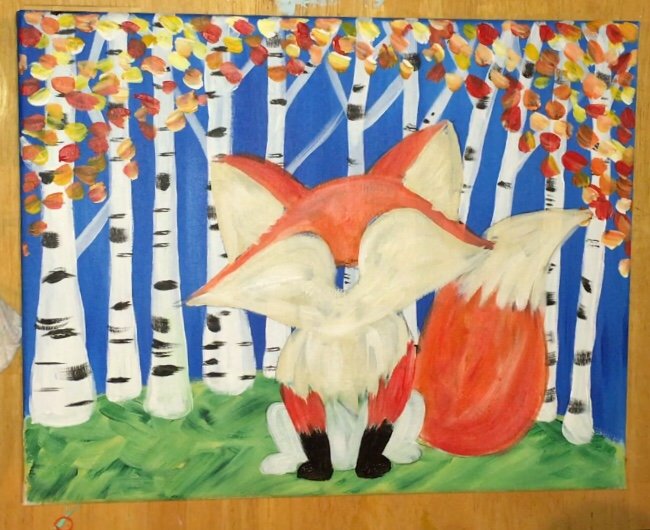
Also the very bottom between his legs was painted with unbleached titanium.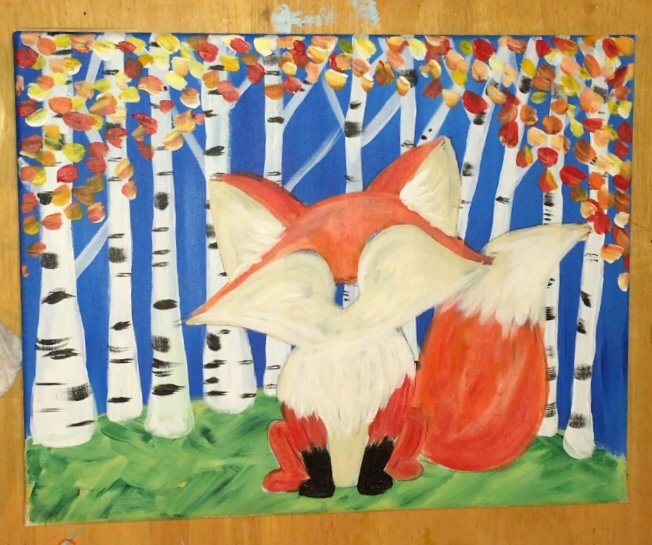
11. Paint the nose, mouth, tips of ears and eyes.
Use your tiny 5/0 brush for this. Paint the tips of the ears black. Also paint the nose and mouth. 
Next paint the eyes with light blue permanent. (The only time this color shows up!)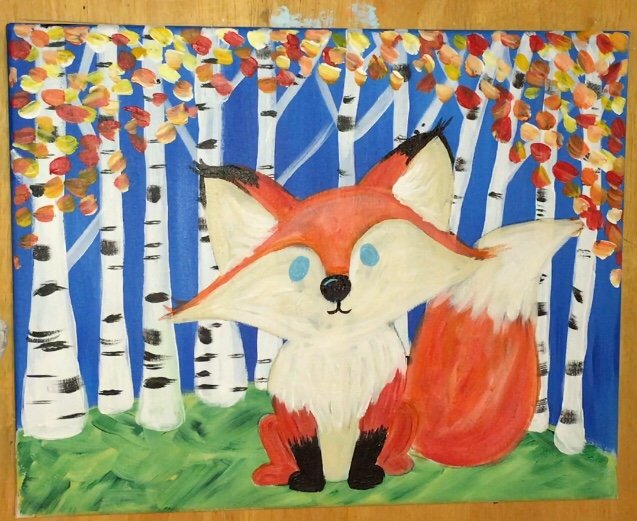
12. Paint a shadow under the fox.
While waiting for that light blue in the eyes to dry, paint some dark shadow area under the fox. Use the color deep green permanent mixed with a little burnt umber. Paint the same style of strokes just under the fox. 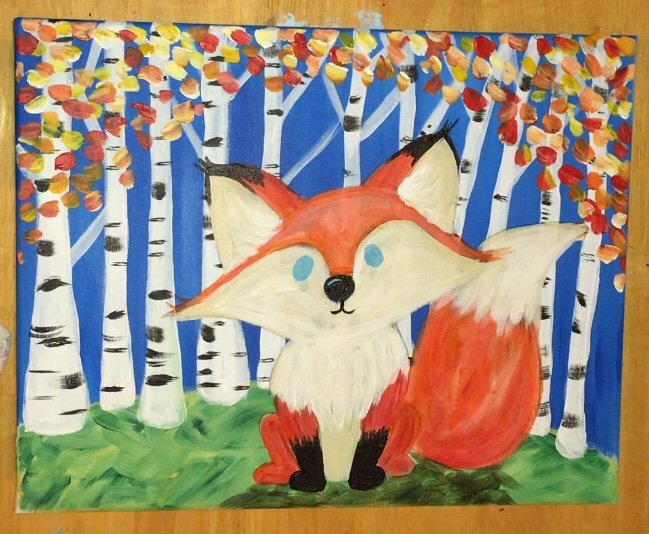
13. Paint the inside of the eyes.
Make sure that blue is dry! Use the color mars black to paint a small oval in the inside of each eye. Then wait for that mars black to dry and paint two tiny white dots on each of the black ovals. 
After doing the little white dots on the eyes, I decided to outline the bottom parts of the legs a bit to make them stand out. This is totally optional! And actually ended up muting that white a bit with some more orange because it was too bright!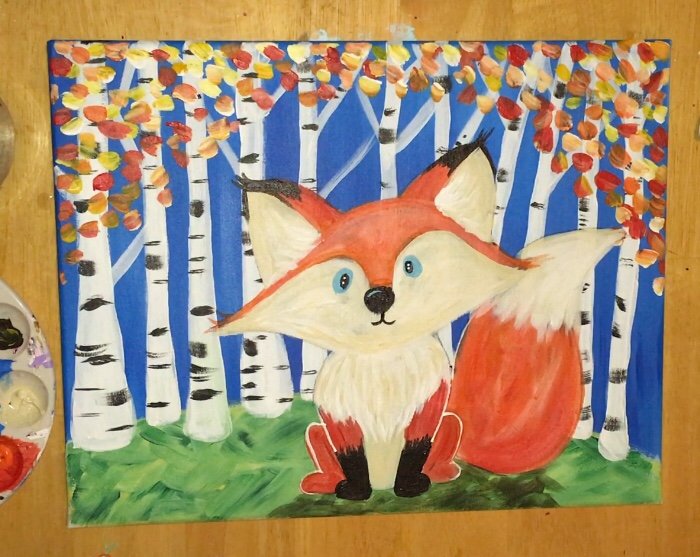
14. Paint leaves on the ground.
Do this the same way you painted the top leaves! I painted leaves on the left and right of the fox and made them slightly curve the opposite way from the leaves at the top.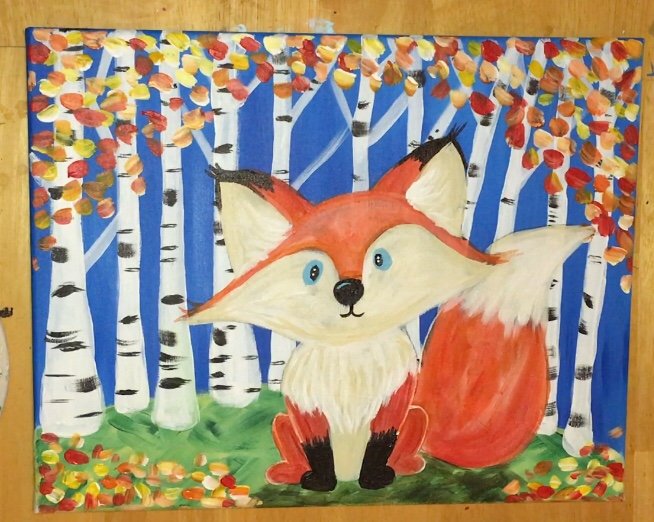
One final step – I added a tiny bit of black outline just under the fox’s tail and feet.


I happened to see your site on Pinterest. Thank you so much for your tutorials. I volunteer at a small school and this will help me tremendously!
Hi Betty! I’m so glad you found me on Pinterest! And wonderful, glad I can help! ?