
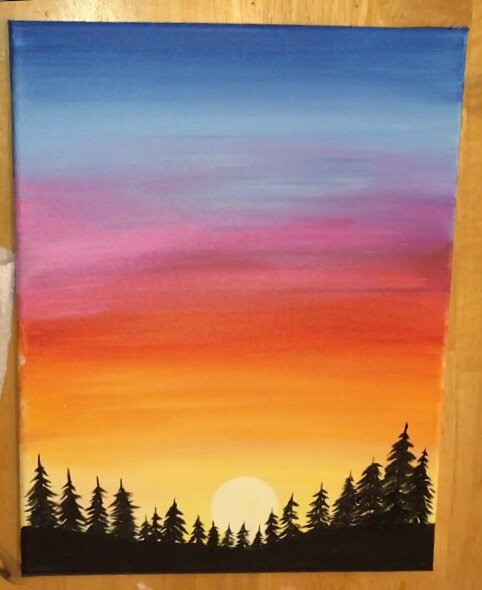
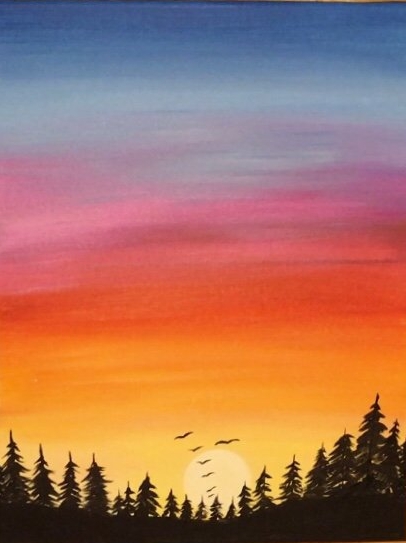
Sunset Painting – Learn How To Paint A Sunset
Create your very own sunset painting with acrylics on canvas!
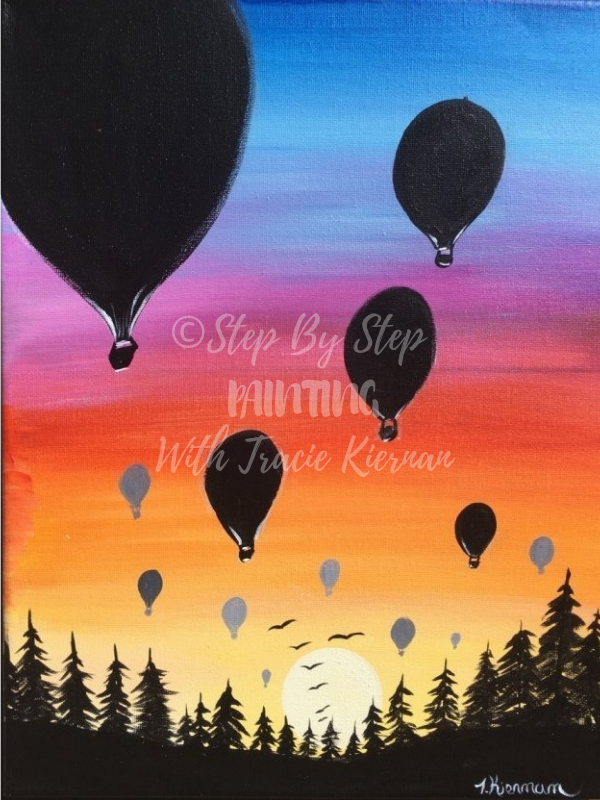
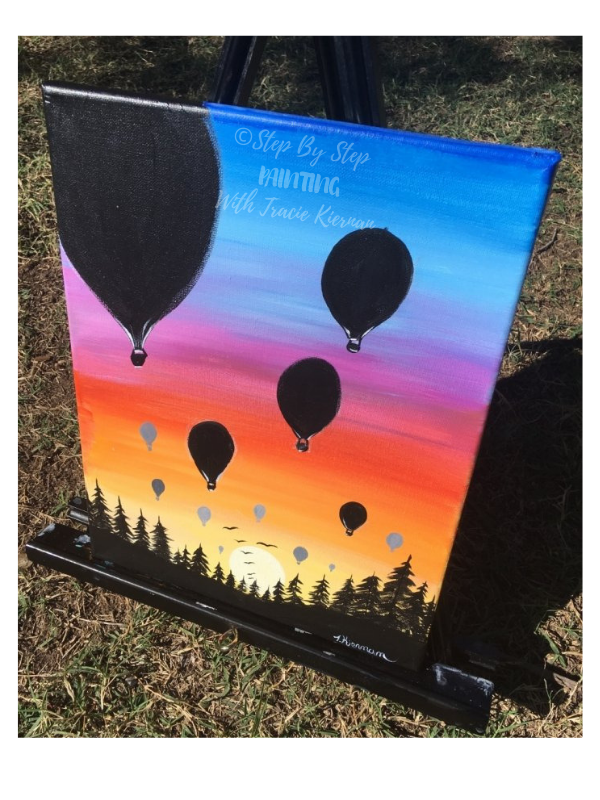
Learn how to paint a sunset with hot air balloon silhouettes afloat in the sky over a tree line.
This is a very easy acrylic painting for an absolute beginner. 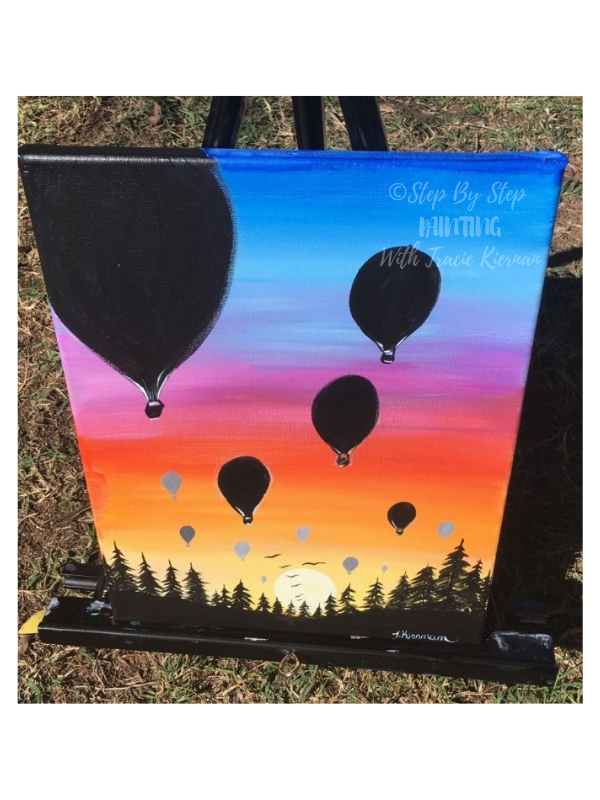
Would you like to save this?
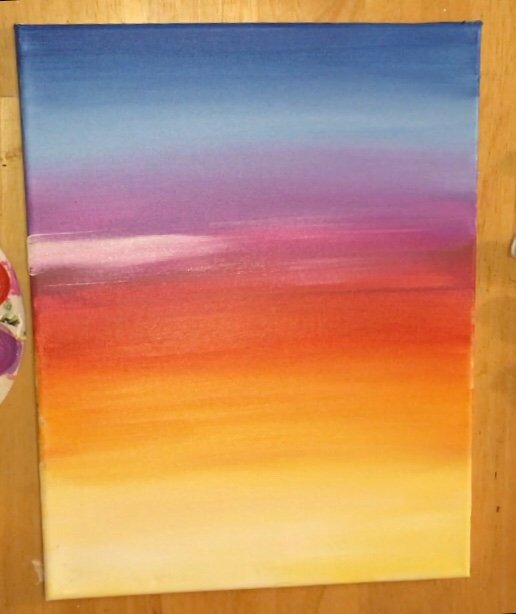
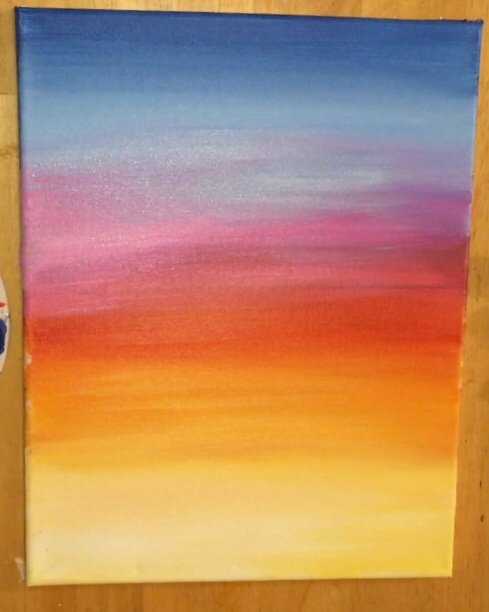
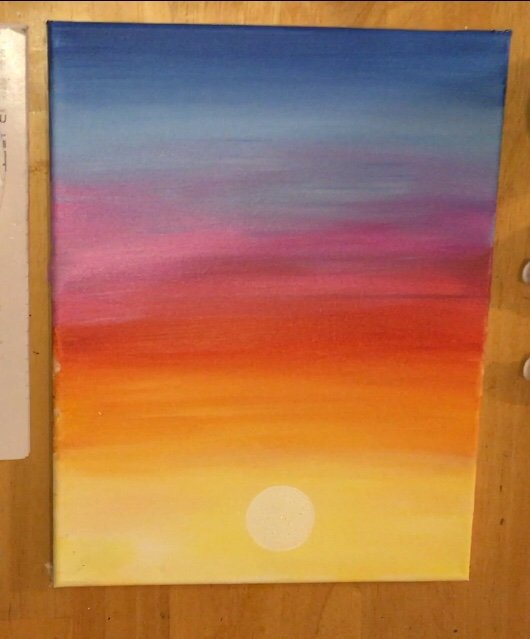
The sunset painting was done on both an 11″ x 14″ stretched canvas and an 8″ x 10″ canvas.
This design can work on any size or any surface!
I get a lot of requests for sunsets!
While I do have a few tutorials with sunsets, I think this one will be the most versatile because you can take the concepts and apply it to other paintings that you may want to have a sunset in.
 You also don’t have to paint the hot air balloon silhouettes if you just want to focus on the sunset painting.
Keep scrolling for free tutorial!
When I do sunsets, I select a few “analogous colors” and blend them horizontally down the canvas.
I always like to start with blue (in this case “cerulean blue”) for my top color.
The trick is getting the blue to fade into orange without it turning “brown”. The color “medium magenta” in between the blue and the orange hues helps with this transition.
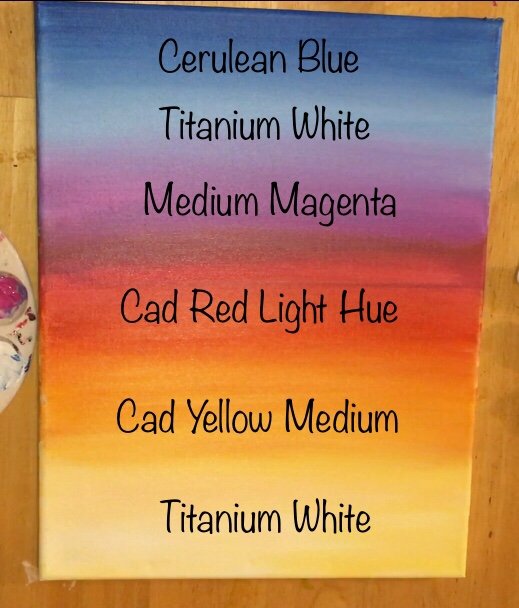
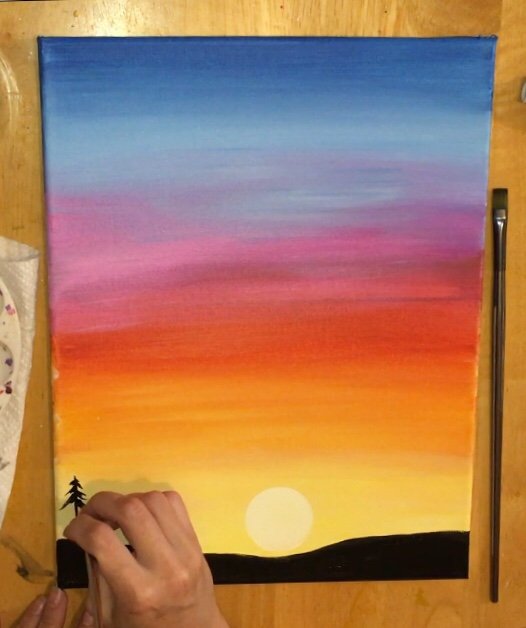
Then the bottom of the sunset along the horizon line is the brightest. That is where I used titanium white and cadmium yellow.
Finally, the sun was done using the sponge foam pouncer! I absolutely love those things and use them any time I need to paint a circle.
The largest pouncer in this set made the perfect sun!
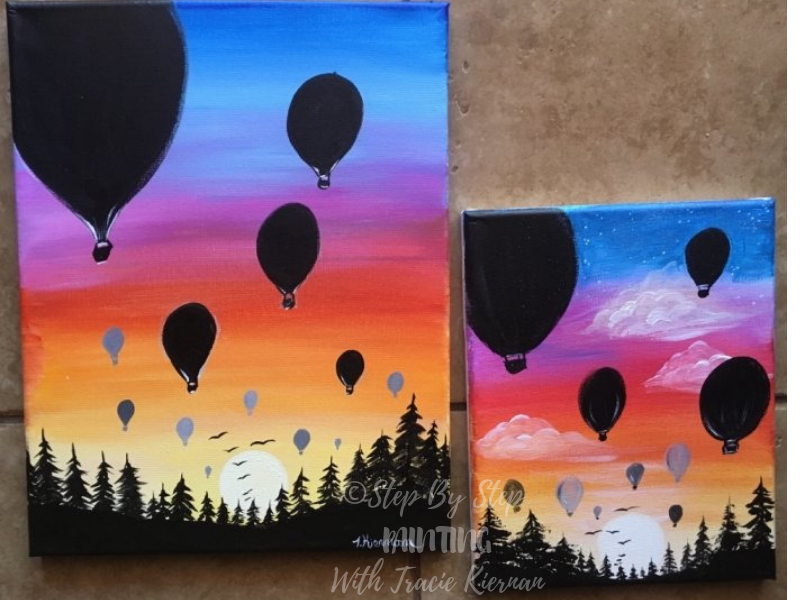
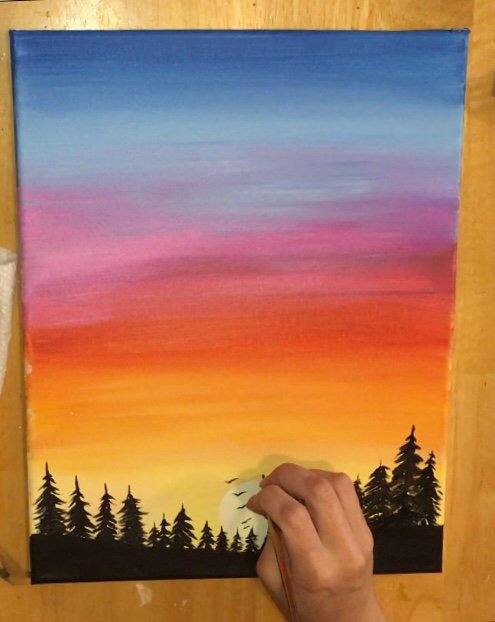
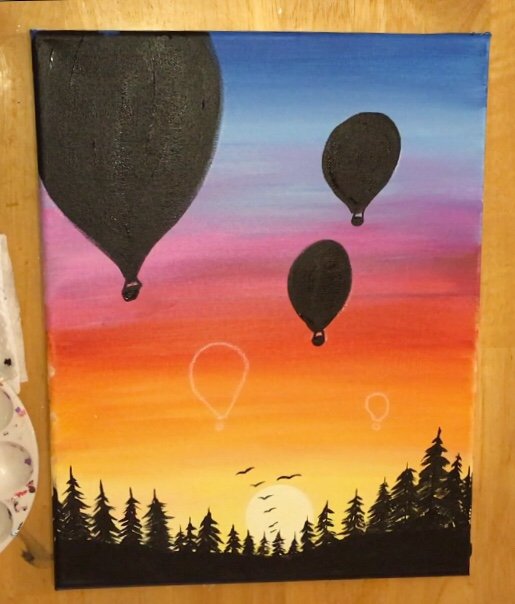
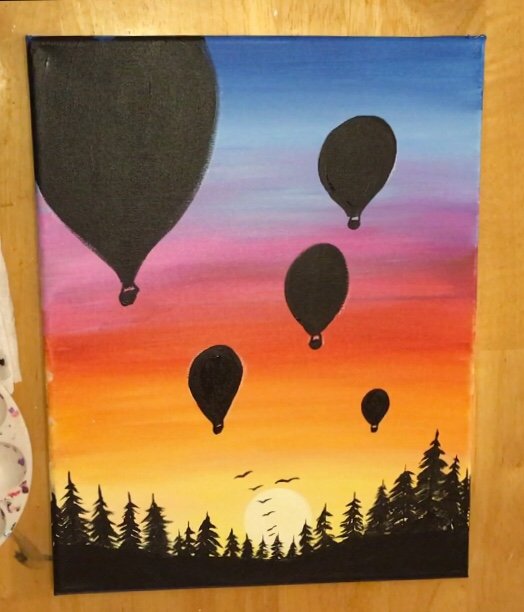
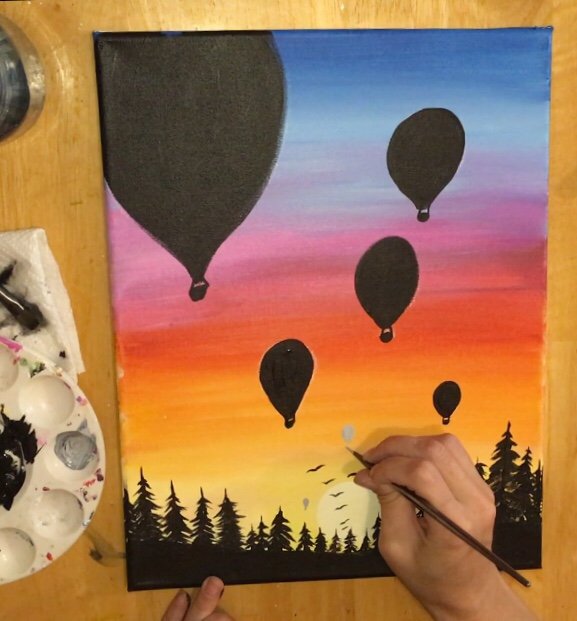
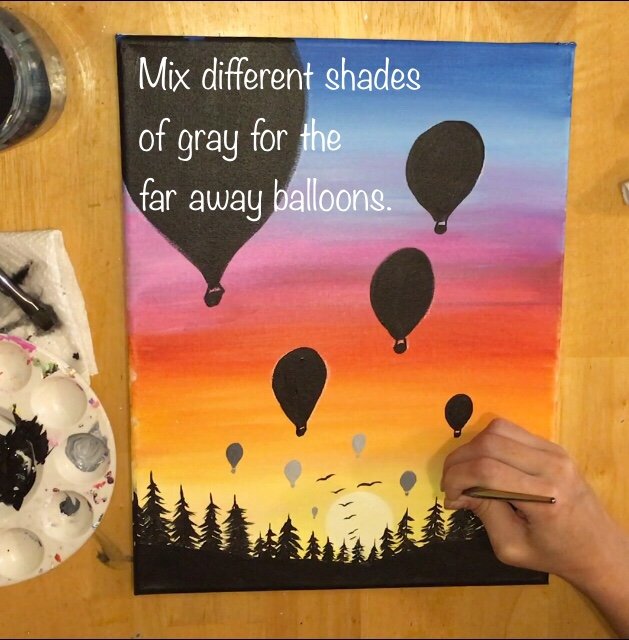
After painting the sunset, then you do all the silhouettes! You may notice that some of the balloons in the distance look lighter.
That is to create the illusion of depth! All I did was paint the smaller balloons with different shades of gray. Easy peasy!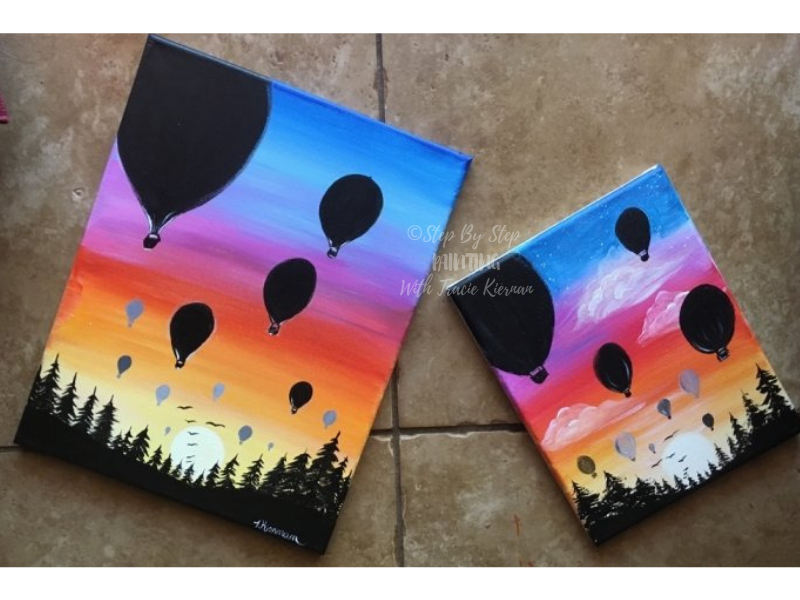
Anyhow, I know you will enjoy painting this beautiful hot air balloon painting! I can’t wait to see your painting.
Enjoy and Happy Painting!!!
This post contains affiliate links.
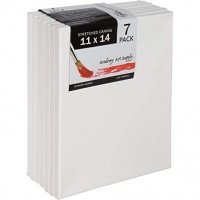
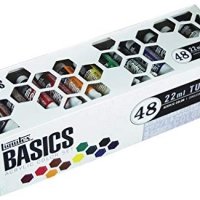
Materials:
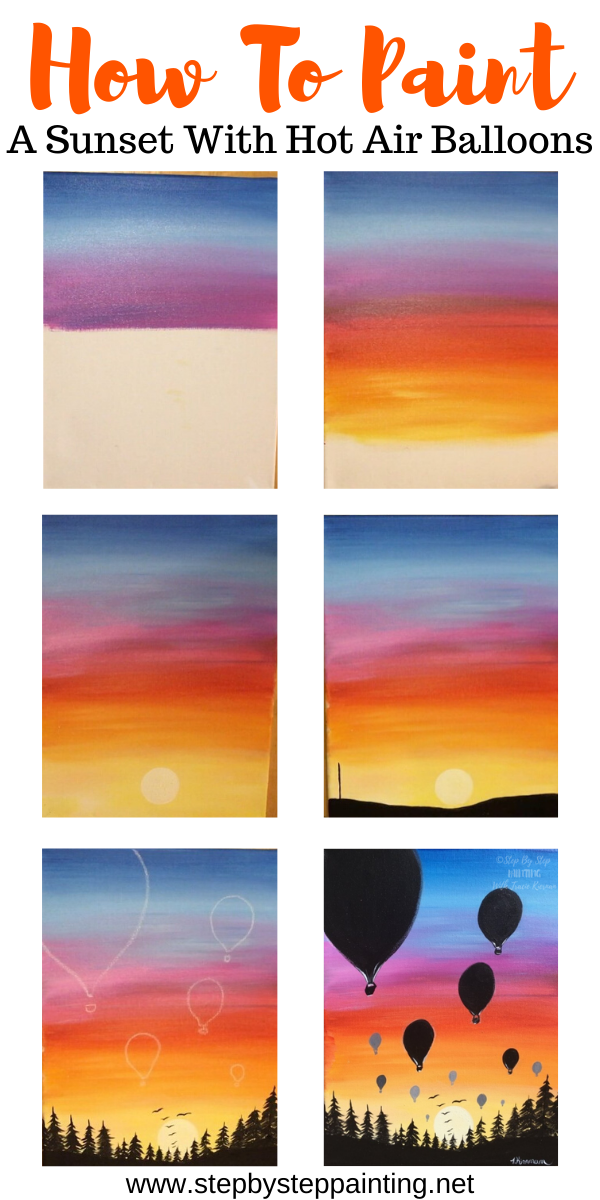
How To Paint A Sunset - Hot Air Balloon Silhouettes
This super simple acrylic painting is of a sunset over a treeline and several hot air balloon silhouettes.
Materials
Canvas
Paint
- Cadmium Red Light Hue
- Medium Magenta
- Cadmium Yellow Medium Hue
- Cerulean Blue Hue
- Mars Black
- Titanium White
Brushes
Other
Instructions
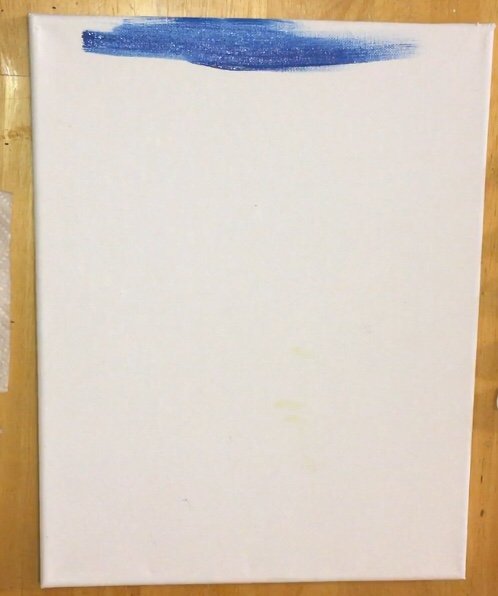
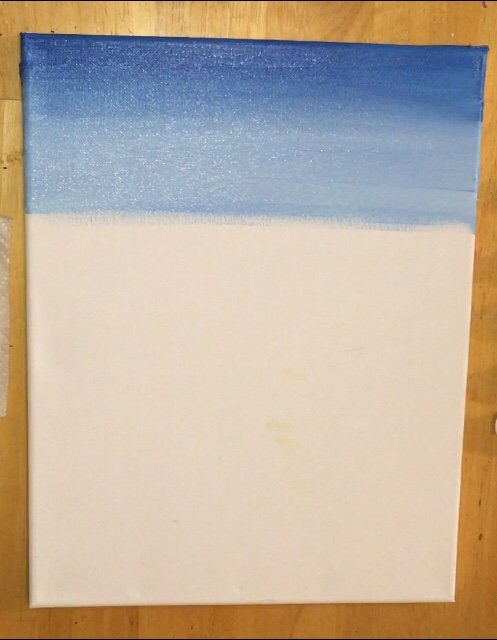
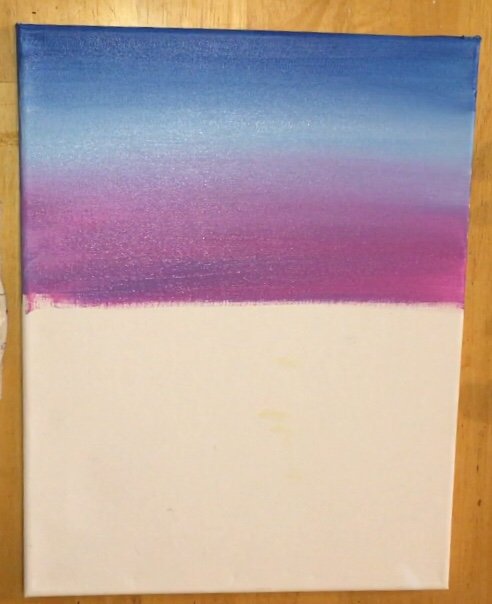
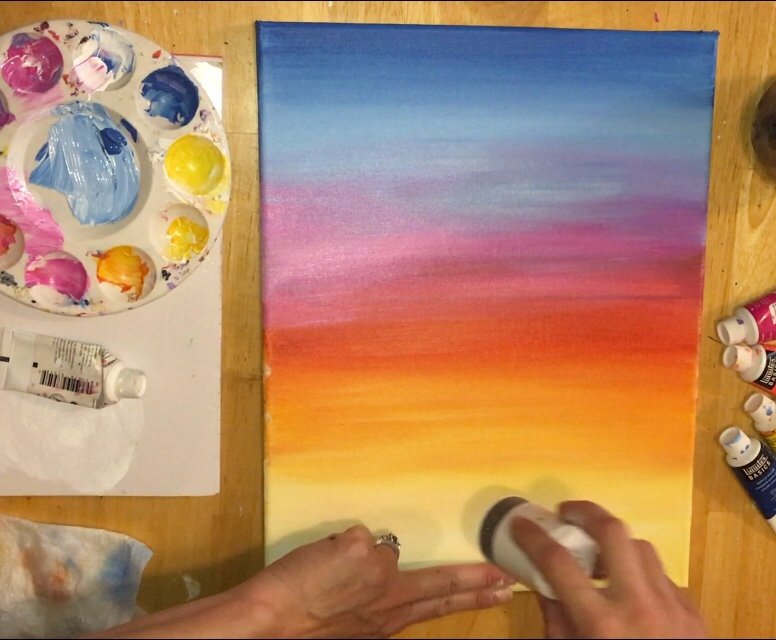
- Paint the top of your canvas cerulean blue mixed with titanium white. Paint this entire sky in horizontal strokes with your 3/4” flat brush. Note that the canvas is in portrait mode.
- Blend the blue and white down the canvas to a very light blue.
- Then load your brush in medium magenta and blend the light blue to medium magenta.
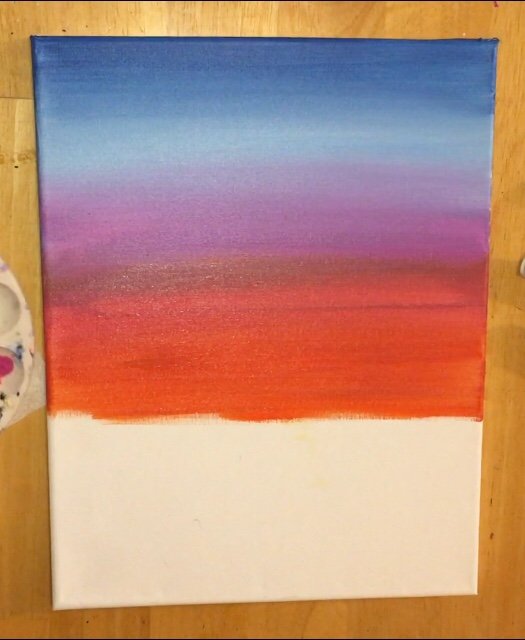
- Rinse your brush and add cadmium light hue down the canvas.
- Next add cadmium yellow medium that blends down the canvas.
- Then add titanium white mixed with cadmium yellow medium down to the bottom portion of the canvas.
- Paint the sun using a round foam Pouncer or any size paint brush.
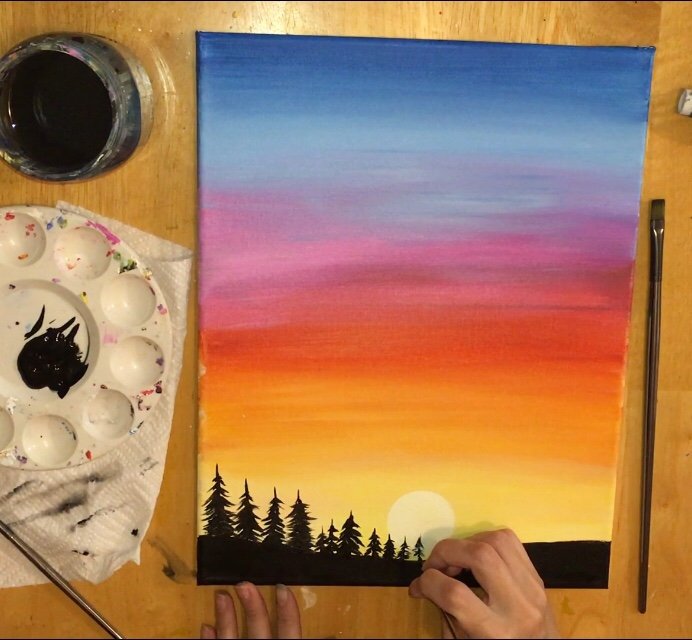
- Paint the silhouette of the land mars black using a round brush.
- Paint the silhouette trees using a small round brush and mars black.
- Paint tiny birds in the distance using mars black and a tiny round brush.
- Draw the hot air balloons with chalk.
- Paint the hot air balloon silhouettes in with mars black and the smallest ones in the distance in with gray.
Recommended Products
As an Amazon Associate, Michaels Affiliate and a member of other affiliate programs, I earn from qualifying purchases.
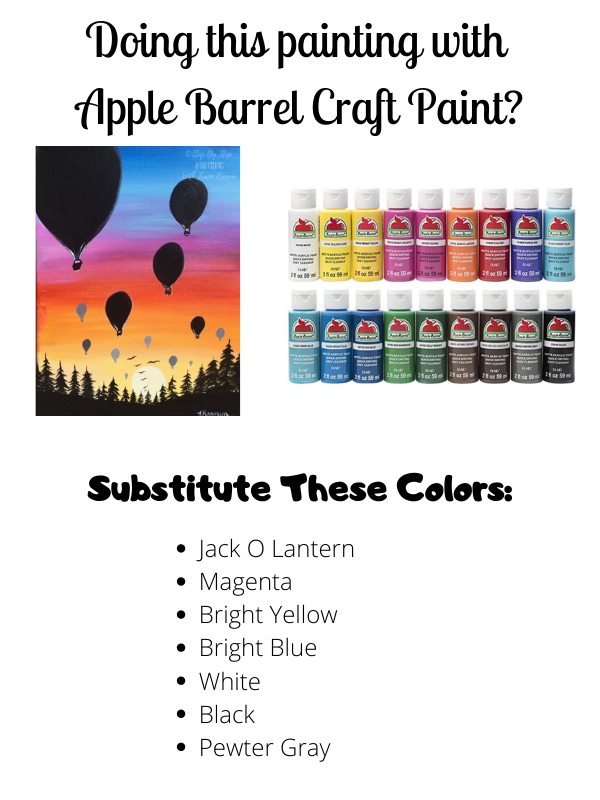
Color Palette/For Sunset Painting:

Sunset Painting Video:
Step By Step Directions For Painting A Sunset:
1. Start with the color cerulean blue & titanium white.
Dip your 3/4″ flat brush in the water and pat dry.
Load with the cerulean blue.
Paint the top 2-3 inches of the canvas with a nice, smooth long horizontal stroke layer.
As you work your way down with the cerulean blue, about 2-3 inches, add titanium white to the brush (without rinsing).
Now your brush is double loaded with cerulean blue and titanium white.
Continue painting the same horizontal strokes as you work your way down the canvas. That blue will turn lighter and blend to a light blue.
2. Load the brush with medium magenta and continue to blend down the canvas.
Next add medium magenta to the brush (unrinsed).
Blend the medium magenta into the blue-white.
You will get a light purple from this.
Continue painting horizontal strokes. At this point, I reached about the half way point down the canvas.
3. Rinse brush completely. Next add cadmium red light hue and blend into the purple and then down the canvas.
You might get an area where the color looks kind of “muddy”.
This is because the cadmium red light hue is an “orange tone” and the medium magenta is a “blue tone”.
The blue and orange don’t mesh well so it might look kind of brown. You may not mind! But I offer a solution to fix this later…
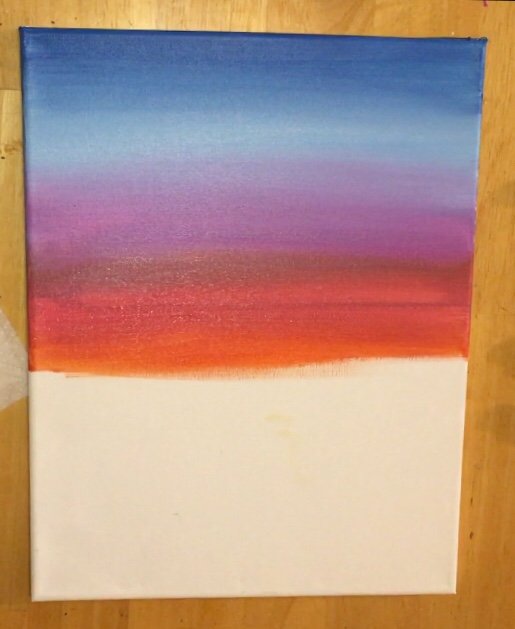
Continue painting the cadmium red light hue until you’re about 2/3 a way down the canvas.
4. Add cadmium yellow medium to the not rinsed brush.
The cadmium yellow medium will easily blend with the cadmium red light hue.
Continue down the canvas. The color should be getting nice and solid yellow with little orange left in it.
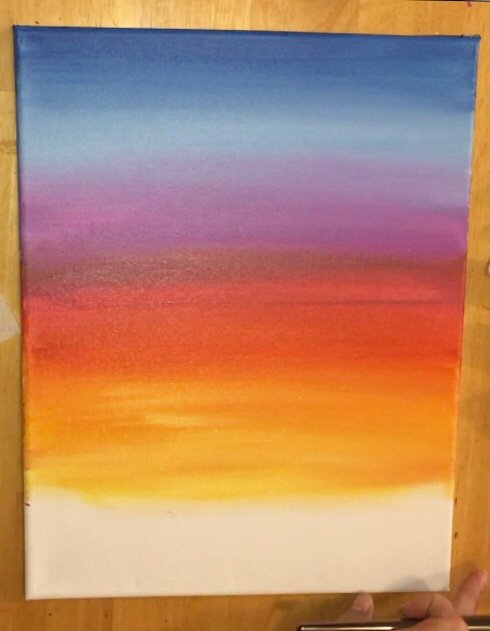
5. Finish the rest of the sky with cadmium yellow medium + titanium white.
Load the brush with both cadmium yellow medium and titanium white (about equal parts).
This combo should create a very light yellow that will blend nicely with the cadmium yellow medium.
Fill the rest of the canvas all the way down.
6. Optional: blend the magenta/cad red light hue transistion.
To do this, I used titanium white and medium magenta and slightly painted over that “muddy” area where the orange and blue hue meet.
Blend it in the sky and it turns into a brighter pink color (or a trace of a cloud).
7. Paint the sun.
The sun was painted using the largest circle in this pouncer set. (Note: this set seems to be unavailable at Amazon. You can find other round sponges that would work, like this set!)
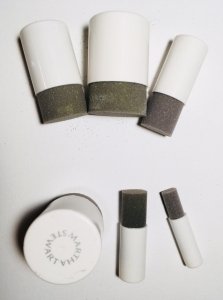
Dip it completely in pure titanium white.
Then firmly press and turn to form a solid circle.
The position of the sun was approximately two fingers from the bottom edge of the canvas.
If your yellow-white in the sky isn’t dry all the way, that is fine!
The pure titanium white circle might blend slightly and look yellow. That is what happened with my sun and it turned out nice!
8. Use a #6 round brush to paint the bottom ground line mars black.
Sketch the ground line lightly with the brush and then fill it in with solid mars black.

My ground line was higher on the left and right sides and dipped lower under the sun.
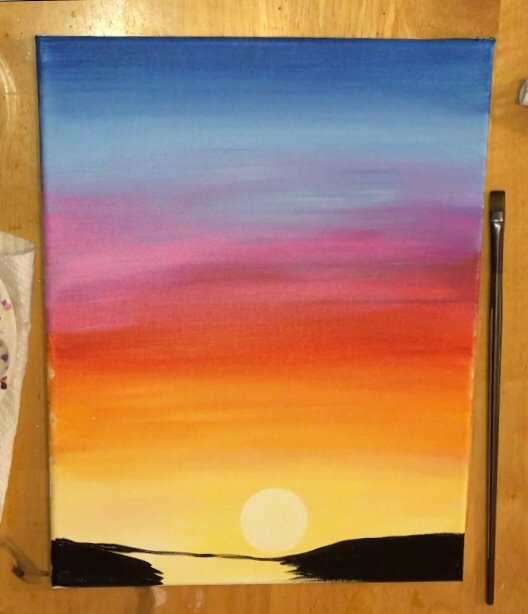
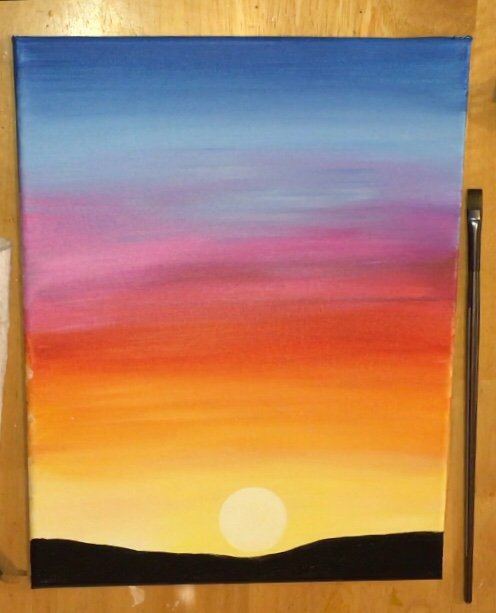
9. Paint the trees.
There are a few ways you can paint silhouette trees. I even have a post about How To Paint Silhouette Trees With A Fan Brush.
I did not choose to use a fan brush for this painting because this area was too small for that technique.
So I opted for using the #10/0 round liner and the #6 round brush.
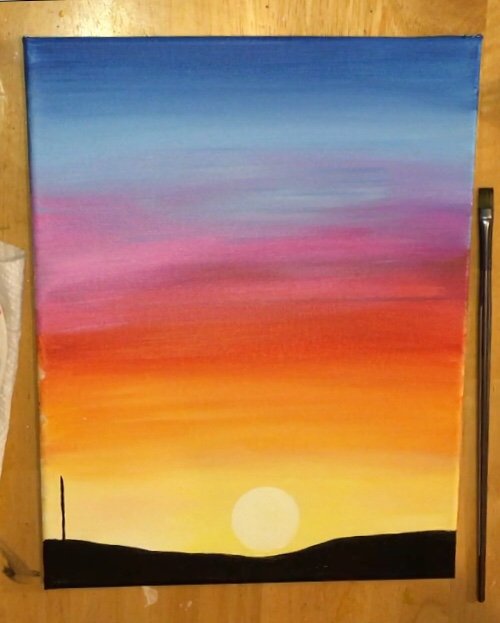
First paint a vertical line with the 10/0 liner.
Then use the #6 round brush to paint the branches stemming out on the left and right sides.
Start from the top and then go to the bottom for the branches.
Continue painting the trees.
I purposely made the trees taller on the left and right sides. Then as they got closer to the middle, the trees were shorter.

Some trees were shorter on the left and right as well.
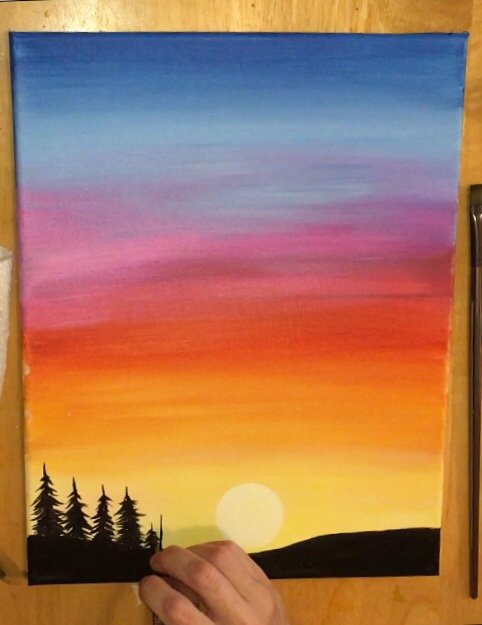
The trees under the sun were the shortest trees and they did overlap the sun.
Then the trees on the right gradually got larger.
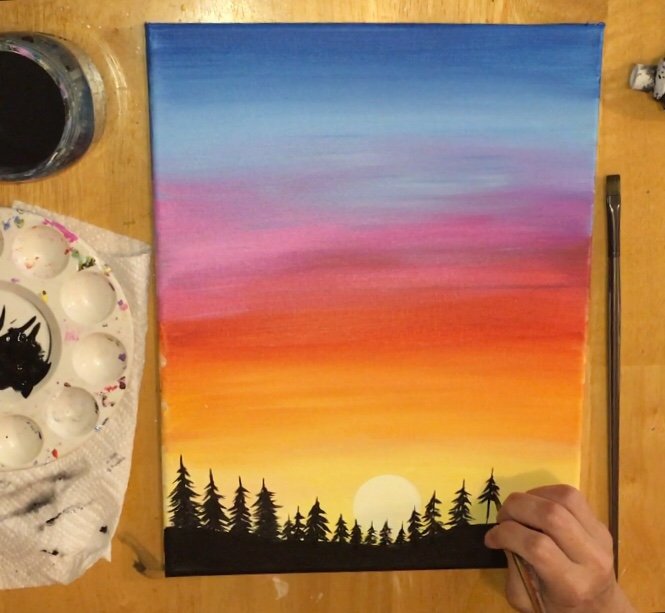
The trees on the right were the tallest!
10. Paint birds.
Use a 10/0 liner round brush to paint the birds.
They are smallest towards the bottom of the sun and gradually get larger as they go up. I only put birds in this area of the painting.
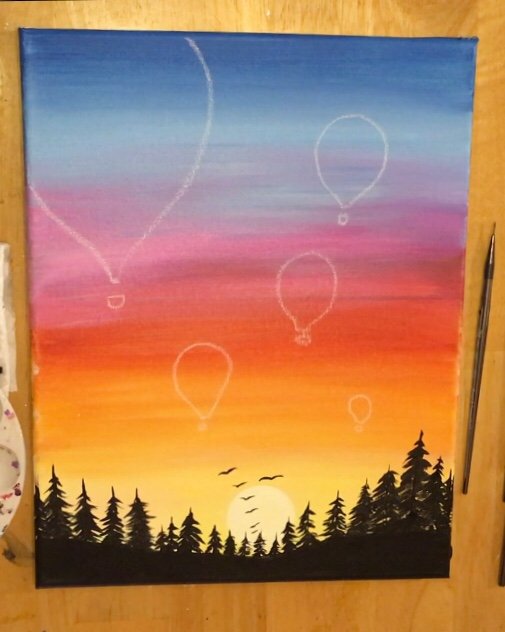
11. Draw the hot air balloons with chalk.
You can technically just start painting the balloons, if you feel confident!
But I recommend drawing the balloons out with chalk first so you can figure out the placements.

Drawing a hot air balloon is almost like drawing a “heart” but the top doesn’t have the “bumps”.
Then the little basket is like an upside down semi-circle.
I only drew the large balloons. All the tiny balloons in the painting were painted without drawing them first.
12. Paint the balloons black.
I used a combo of the #6 round brush and the #4 bright to fill in the balloons.
You can use any brush you feel comfortable with to fill these balloons in.
Just paint them solid mars black!
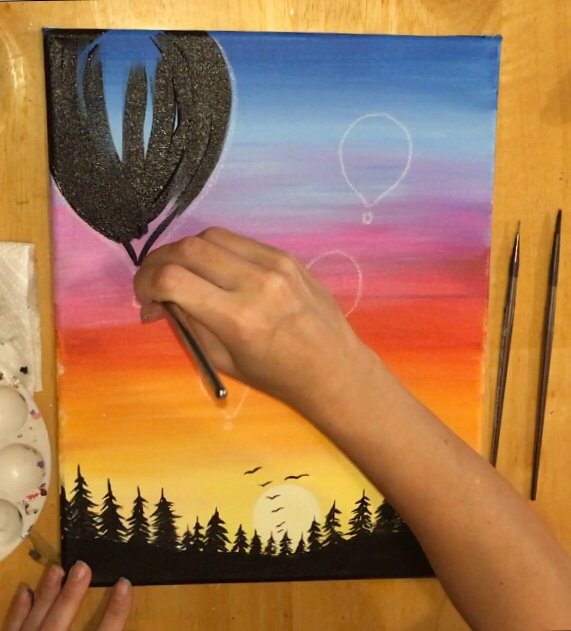
For the smaller areas, like the strings and the baskets, use that 10/0 liner brush.
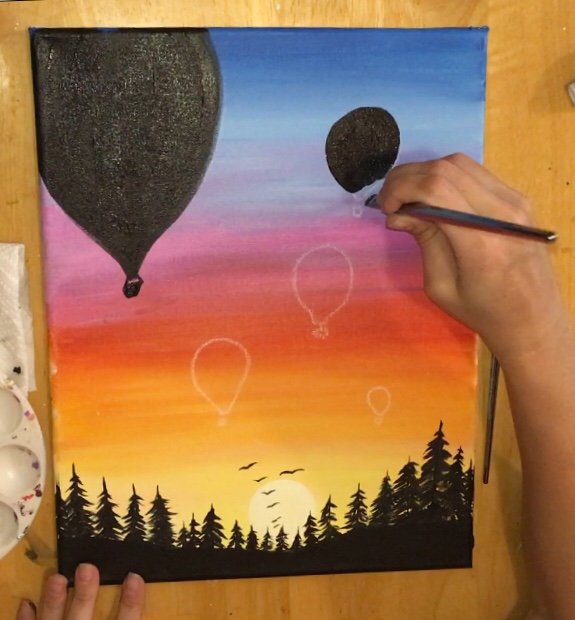
13. Paint the tiny balloons with different shades of gray.
You can mix different shades of gray on your palette by mixing titanium white and mars black or use gray paint if you have it handy.
To get a lighter gray, use more titanium white and a tiny bit of black.
Each balloon is actually a different shade of gray. The tiny balloons were only painted closer to the sun.

14. Optional: Paint subtle white highlight on the bottom area of all the larger balloons.
Use a 10/0 liner to paint some slight highlight on the bottom of the baskets and a little bit on the bottom left and right sides of the balloons.
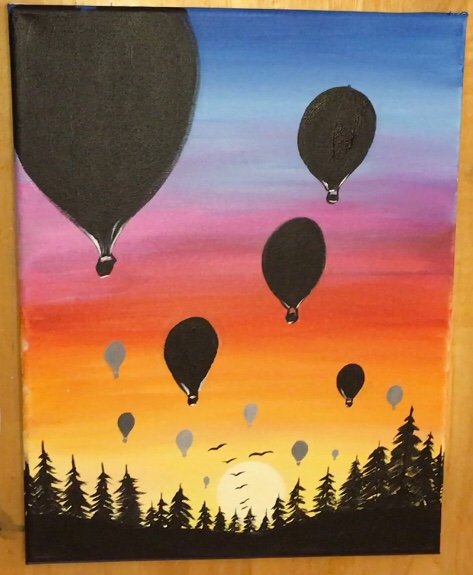
Finished!
Don’t forget to sign your name and then show it off!

Share Your Art!


More Sunset Paintings:
How much paint do you use? We are doing a family paint party with 20 and trying to figure out much paint to buy.
Hey Stefani! Great question… I always go by .25 oz per color per painter for a 16×20 canvas or half that for a 11×14 canvas. So an 8oz tube or bottle can get you enough for 20 people. However if there is a lot of one color, I would get an extra bottle or tube just in case. I’m going to link you to my diy party planner that might help too: https://gallery.mailchimp.com/b2852f9c503eeb78763964003/files/408ddda7-58b5-4c67-89b5-ae8d7ef5754a/PaintPartyPlannerStepByStepPainting.pdf
I tried this and it was amazing, ur instructions were too good. I have never painted before it’s my new interest, this is my first painting and I loved it 🙂
You made my day, actually my entire year 🙂
Awwww thank you so much!!! ?? I’m so glad you did this painting and loved it and feel amazing about it! Enjoy your painting journey!
thank you so much
this was so helpfull.
mine came out really good
You’re welcome!
very nice
Hi Tracie, I am planning on doing this painting with my middle school Girl Scout Troop, remotely on zoom meeting. Any ideas of the best way to keep costs down? Ideas on affordable paint? Each girl will need to have her own supplies (paint, brushes, etc). I can’t find an affordable brush set with all of these brushes. Can we substitute? We have 14 girls, and a very limited budget. Thanks for sharing these tutorials! This will be a fun painting meeting!
Yes I can definitely help you with that Heather! During this time, Michaels has been very reliable (and affordable) with canvases, brushes and paints. They have a craft paint called “crafters choice” which is a very inexpensive craft paint. For canvases, look for the Artist’s Loft brand at Michaels, also inexpensive and in stock! For brushes, I would also look for either Artist Loft or Craftsmart brand. There is one in particular I just looked up and I will link it below but this brush set can be used for this painting!
https://www.michaels.com/craft-smart-all-purpose-brush-set/10317285.html