
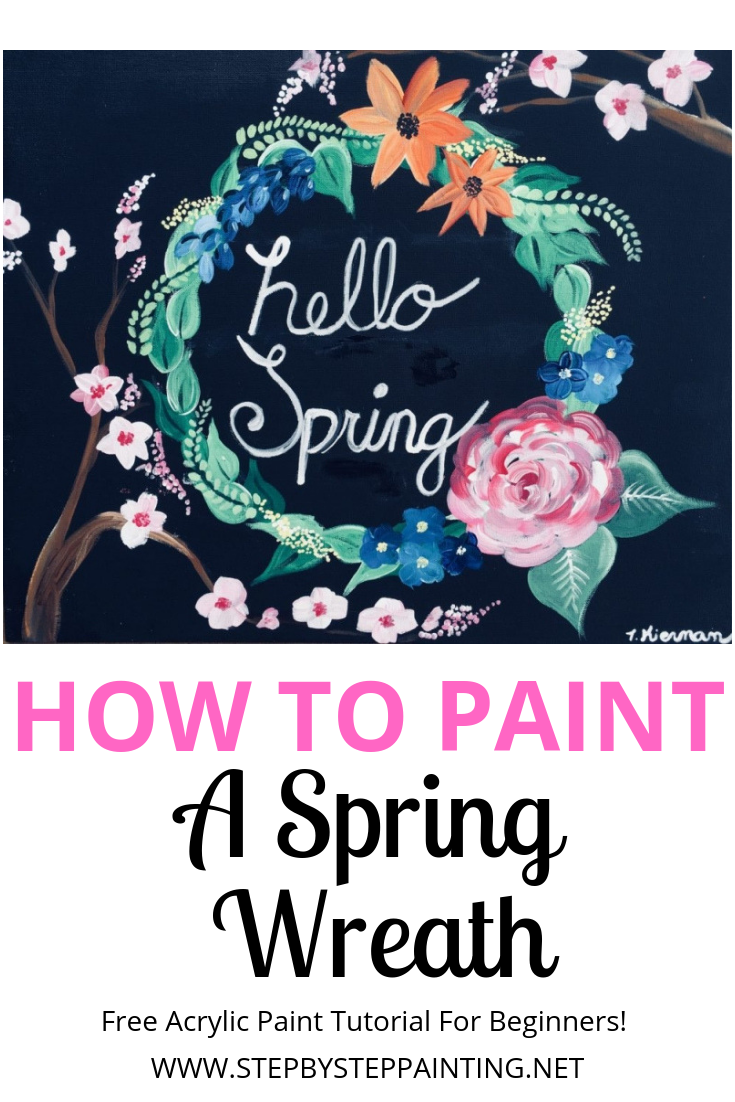
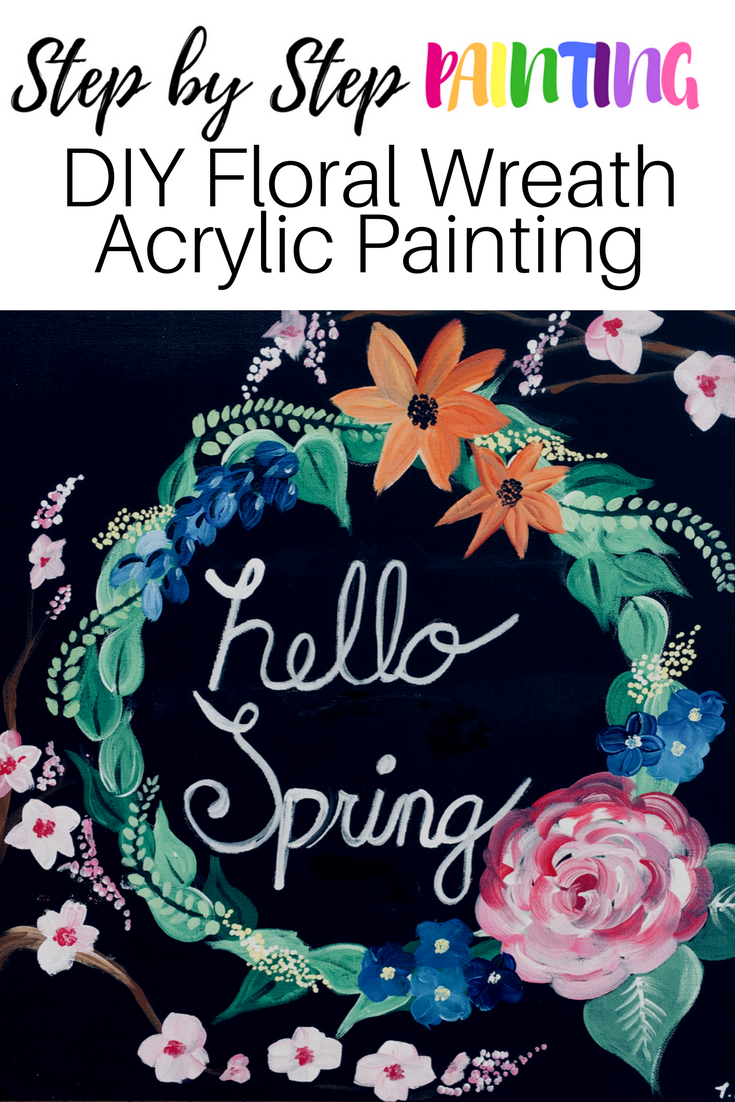
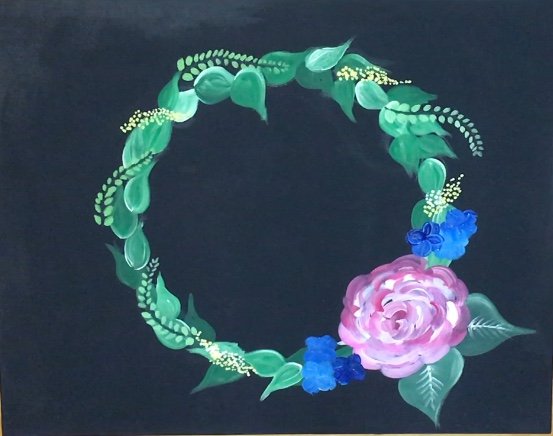
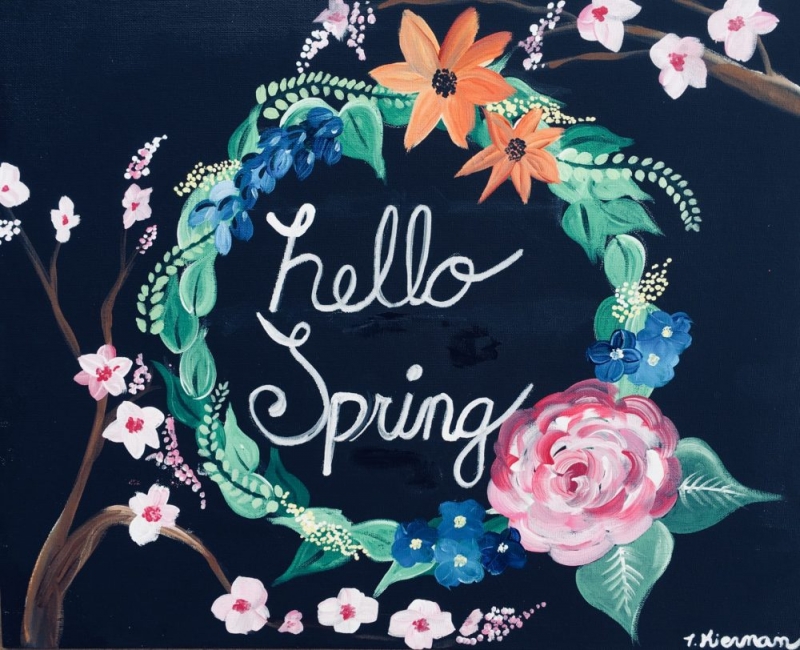
Description
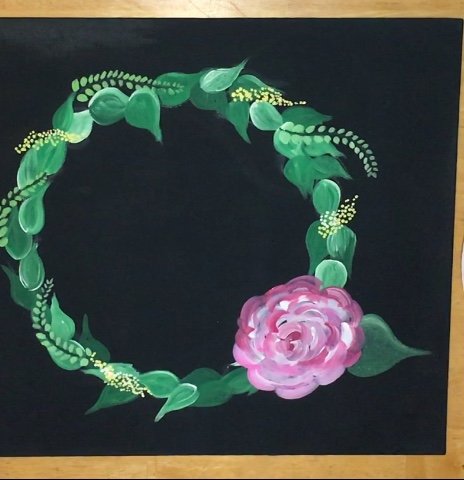
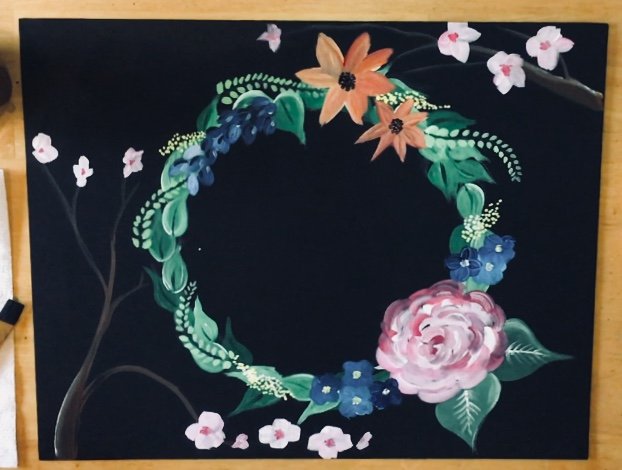
Beginners can learn how to paint a Spring wreath with acrylic paint on a black canvas background! This tutorial will guide you step by step with pictures, video and a material list.
Do you have a painting that you’ve messed up on and you want to paint it over? Painting the entire thing black is a solution because it will cover easily in one coat! You could also paint a plain white canvas black or purchase a black canvas.
Painting on a black canvas is a little different from painting on a white canvas.
The trick is using paints that are “opaque” and not “translucent”. I find that some of the Liquitex Basics are opaque (but not all of them) and almost all of the Apple Barrel Craft paints that I like to use are opaque.
I think most craft paints will show up opaque. Try testing out the paints you have on the black canvas first to see how they show up. If they look too “see through”, you can always add white underneath the color or double load your brush in white.
Any how, I have been itching to paint a wreath of some sort but I always thought it would be too difficult!! It was surprisingly very easy and absolutely addicting!!
I ended up painting two and now all I can think about are different floral arrangements I could paint on a wreath.
I think it looks hard because of all the details but if you take each step slowly and think in therms of layers (like you’re actually building a wreath), it’s actually easy peasy!
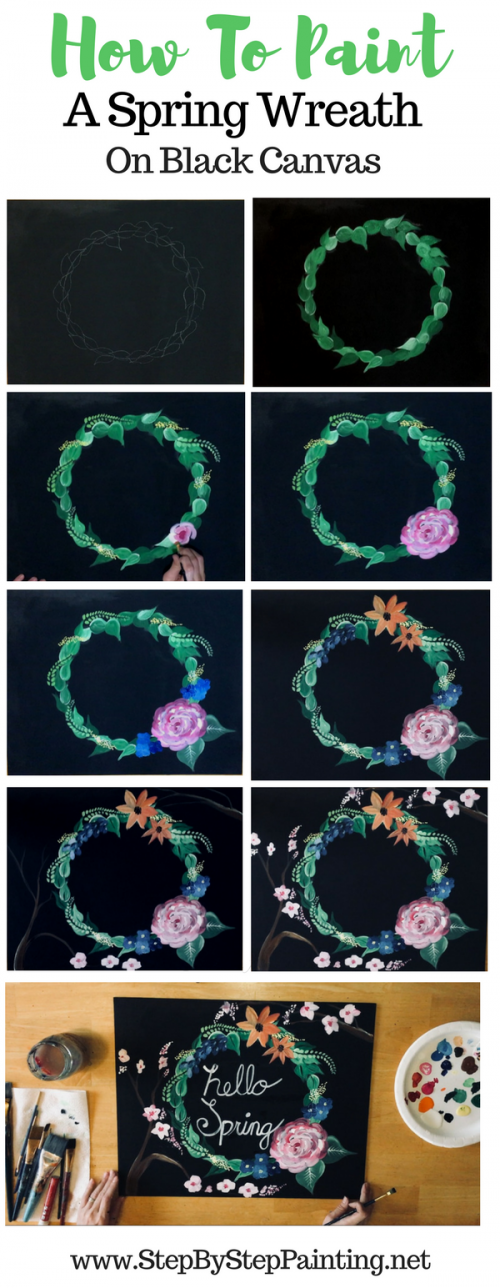
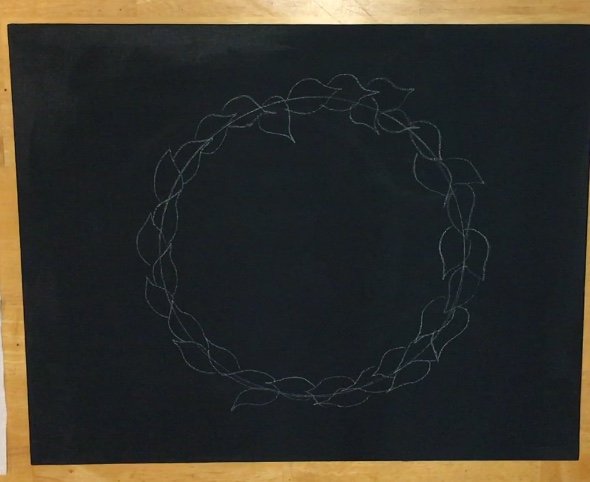
The first step I did was trace a large circle with chalk and draw out my leaves. This helped set the groundwork of confidence for the rest of the painting.
It also helps to practice painting flowers in a sketchbook (a lot) before applying them to the wreath.
I think my flower painting skills are getting better too! I’ve been commenting in my last few tutorials how I need to work on my flowers and that has come along with practice!
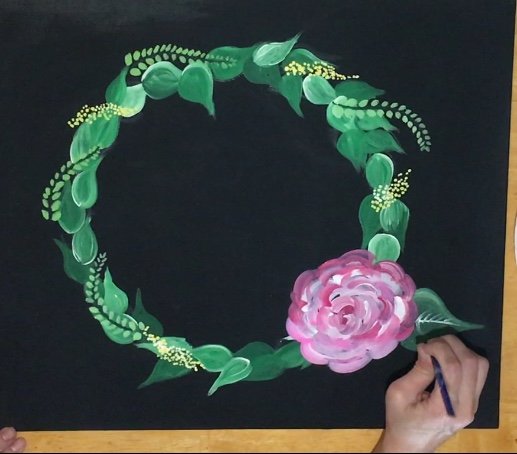
Andddd now I present to you, How To Paint A Spring Wreath On Black Canvas! I hope you find this painting enjoyable and as addicting as I found it! Happy painting artists!
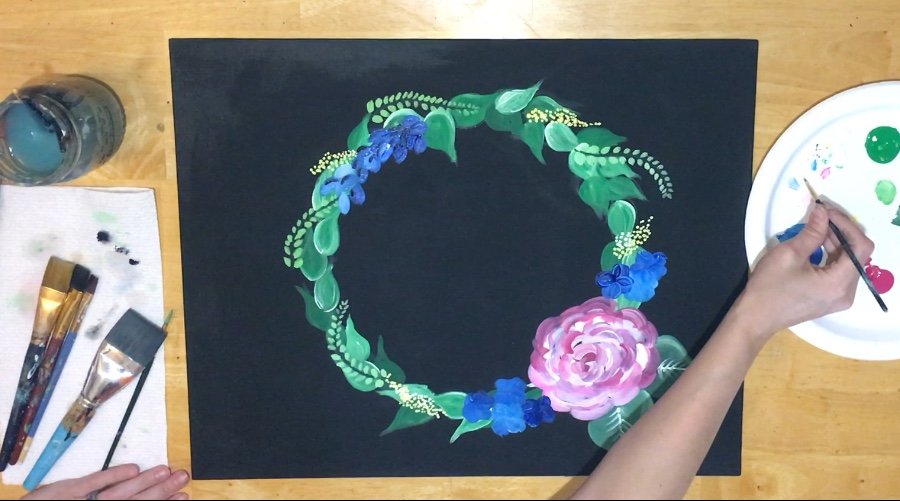
Materials:
- 16″ x 20″ Canvas (I used a white canvas painted black. You can purchase a black one but they are usually more expensive.)
- Acrylic Paints (I used both Liquitex Basics and Apple Barrel Craft paint for this painting)
- “Primary Red” Liquitex
- “Fuchsia” Apple Barrel
- “Jack O Lantern Orange” Apple Barrel (Opaque Orange)
- “Flame Yellow” Apple Barrel
- “Shamrock Green” Apple Barrel (Bright Green)
- “Holly Green” Apple Barrel (Dark Green)
- “Phthalo Blue” Liquitex (A dark primary blue)
- “Bright Blue” Apple Barrel (light primary blue)
- “Titanium White” Liquitex (White)
- “Mars Black” Liquitex (Black)
- “Nutmeg” Apple Barrel (Lighter Brown)
- Brushes
- #3 Round (medium round)
- #0 Round (tiny round)
- 1/2″ flat
- 1/4″ flat
- 3/8″ flat (#10)
- Chalk
- Large 11″ Plate To Trace
- Ruler (I like using a T-square ruler)
- White Marker (both water based and oil based markers work find on canvas! You can also paint the word with a small round brush)
Directions At A Glance:
Printable
Feel free to use this for your own creative purposes!
If you want to transfer it on the canvas to help with your painting, great! You can also use different art mediums to color it in.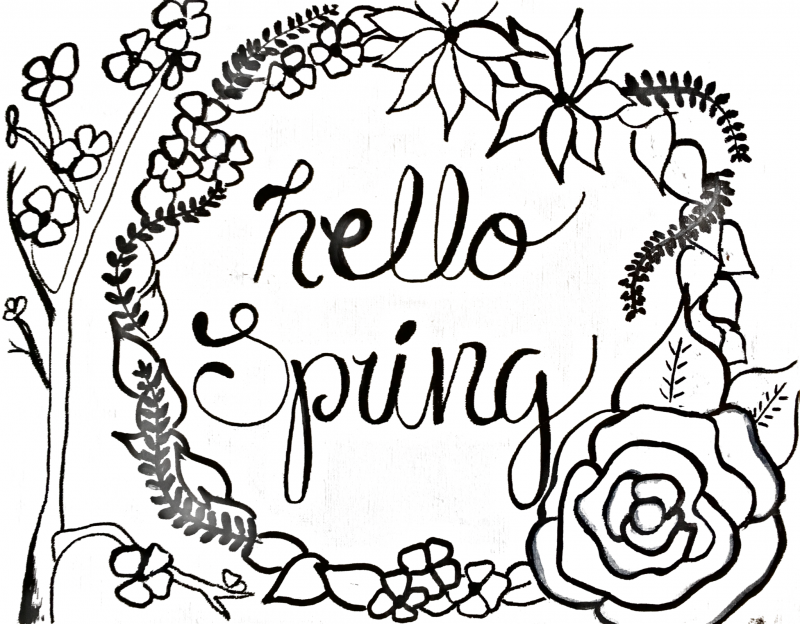
Video:
Step By Step Picture Directions
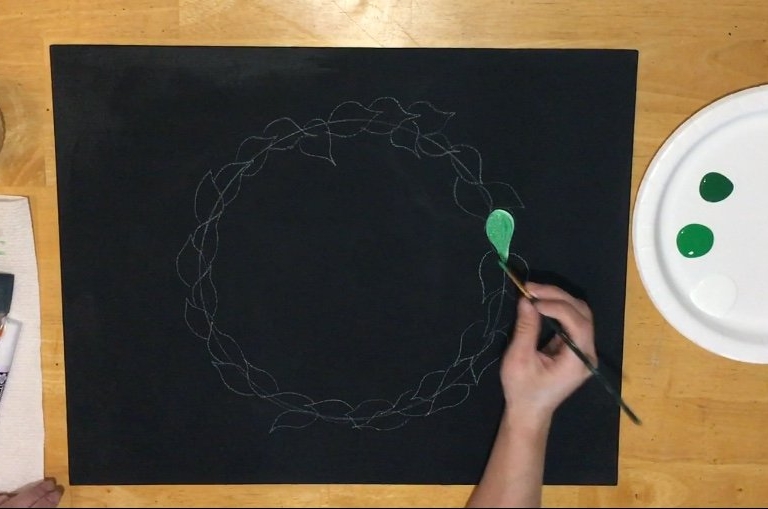
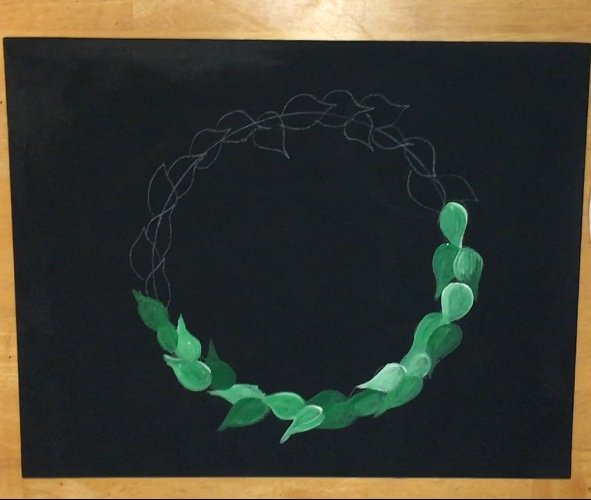
1. Trace A Large Plate With Chalk
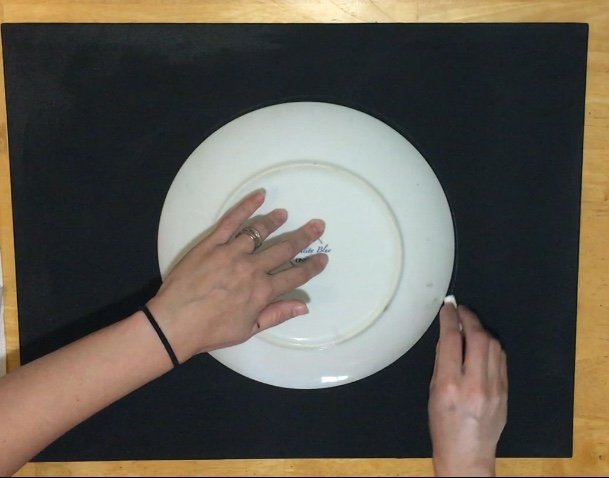 This plate is 11″ in diameter. You can use any size circle! I used a piece of chalk to trace the circle on the black canvas. As mentioned in the materials section, this canvas was white and I painted it over black.
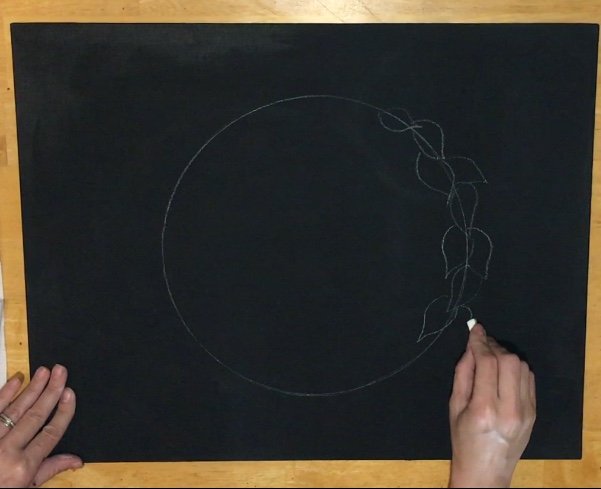
 With the chalk, I started drawing leaves on the circle. Notice that all the leaves are going in the same direction. Many of them are overlapping. I started by drawing one leaf and adding more going in a clockwise direction.
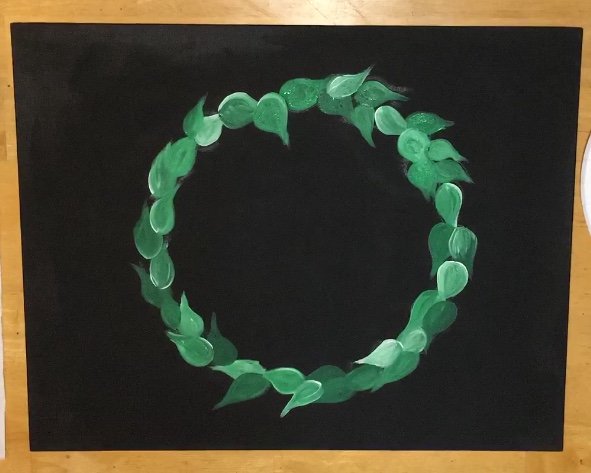
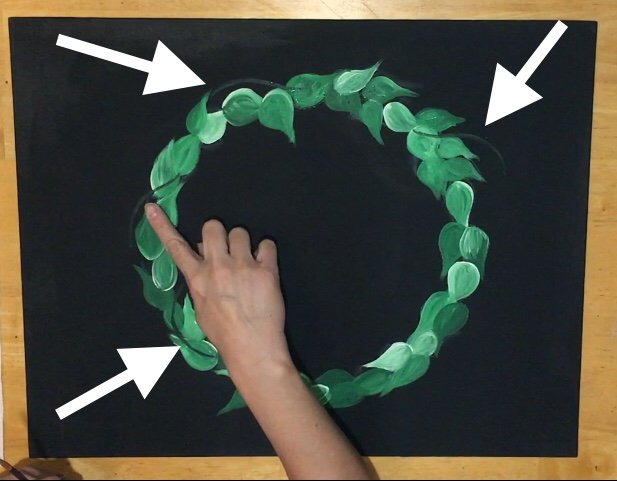
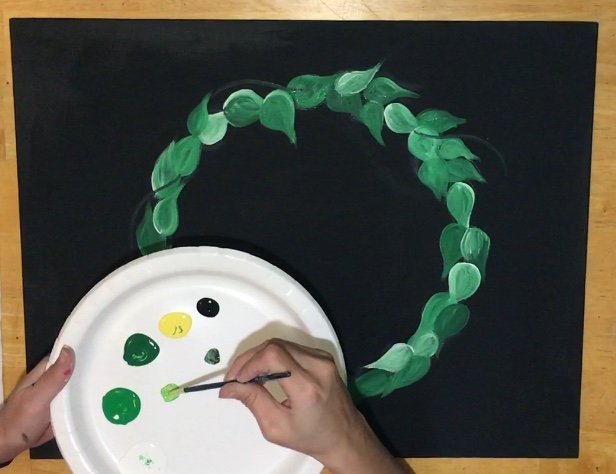
2. Paint The Leaves
- White
- Light Green
- Dark Green
- #3 Round Brush
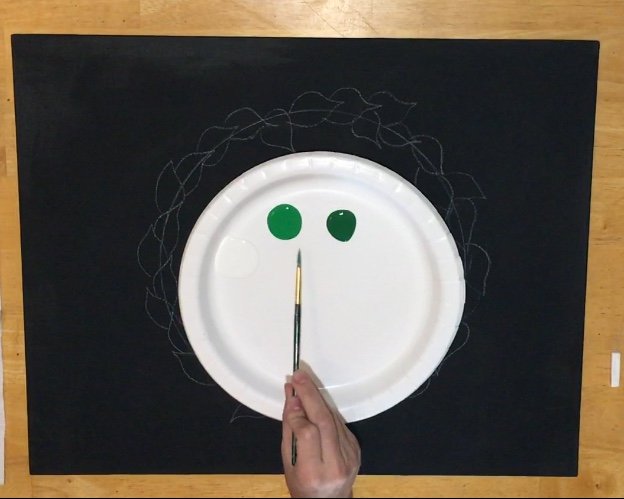 On my palette I have white, light green and a dark green. These two are Apple Barrel colors: Shamrock and Holly. It’s hard to tell, but there is white on the palette too! I am also using a #3 round brush.
 Paint each leaf in one at a time.
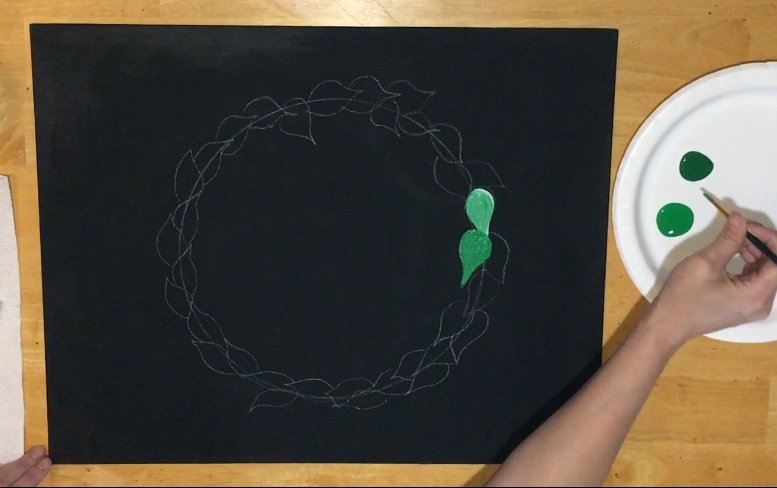 Each leaf is a different green. I started with the light green, then the darker green and then I added different amounts of white to the greens.
 This pattern was repeated all around the wreath. You don’t need to rinse your brush between colors, just apply the green and allow the leaves to be all variations of the three colors.
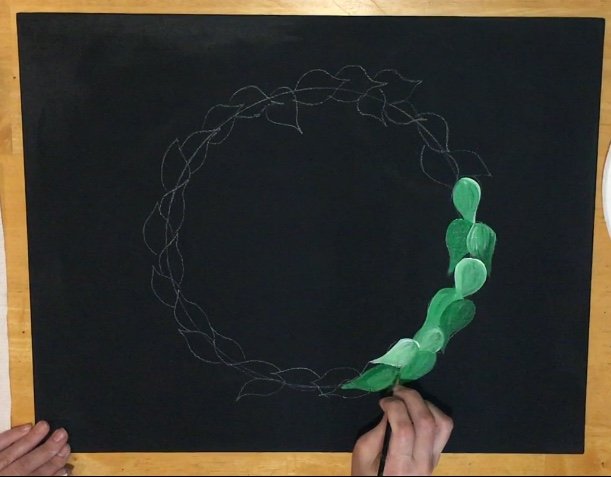 You don’t technically have to paint inside all the lines. You can improvise as you go around! Also, for a more natural look, the pattern of colors can be mixed up.
 Notice that the leaves overlap each other as you paint clockwise.
3. Paint a different kind of leaf
- Black
- Yellow
- Light Green
- #0 Tiny Round Brush
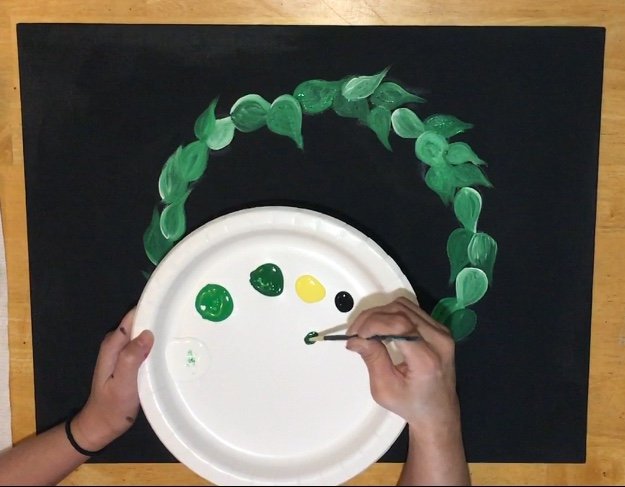 Next, I mixed on my palette black with green to make a dark green.
 I used that color to paint 4 stem lines on the wreath. These are the middle parts of the next leaf I am about to paint. It’s hard to see but the arrows are pointing to where I painted them!
 Then I mixed yellow with green to make a kind of light yellow-green.
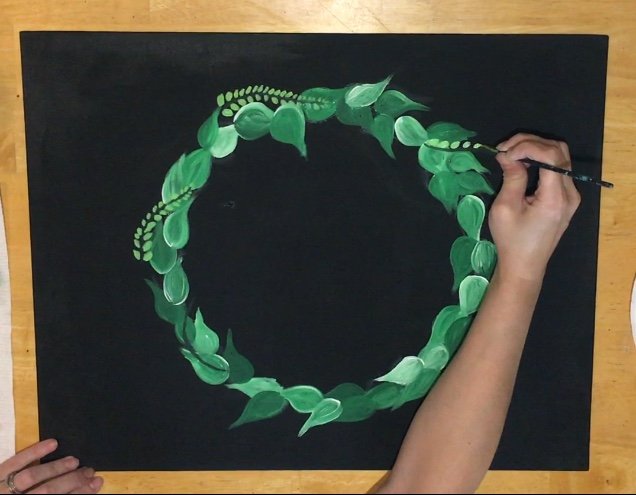 I used a #0 tiny brush to paint tiny little leaves on each of those dark stems. These tiny leaves get smaller as they get higher on the stem.
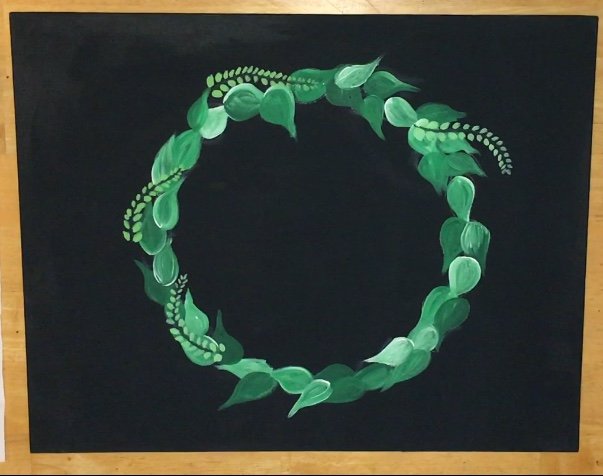
4. Paint Little Yellow Dots
- White
- Yellow
- #3 Round
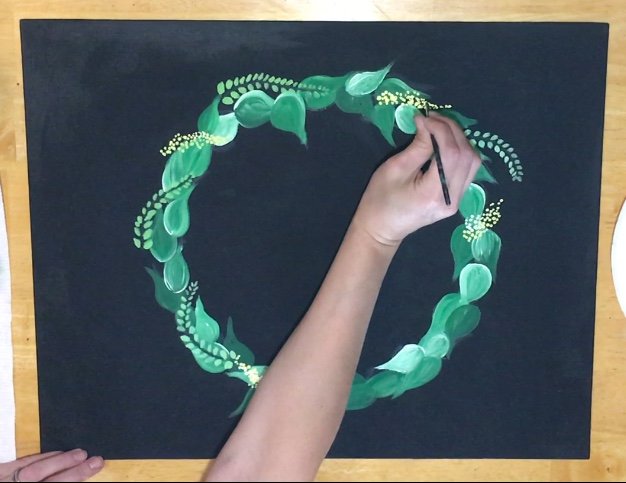 Next, I used that tiny brush to paint little bunches of yellow and white dots along the wreath. I am using that #3 round brush here.
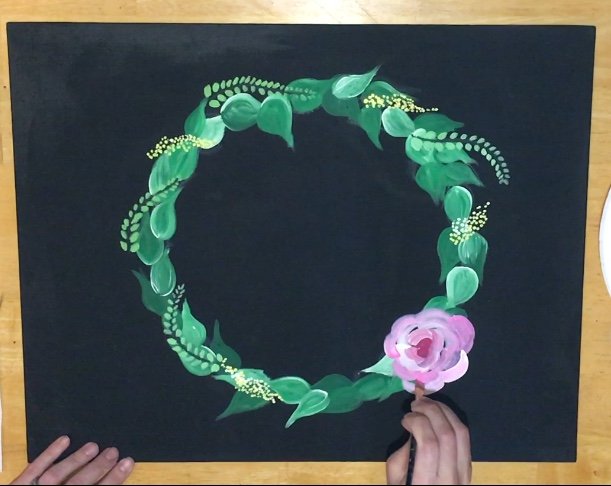
5. Paint The Rose
- Primary Red
- White
- Fuchsia
- 3/8″ Flat
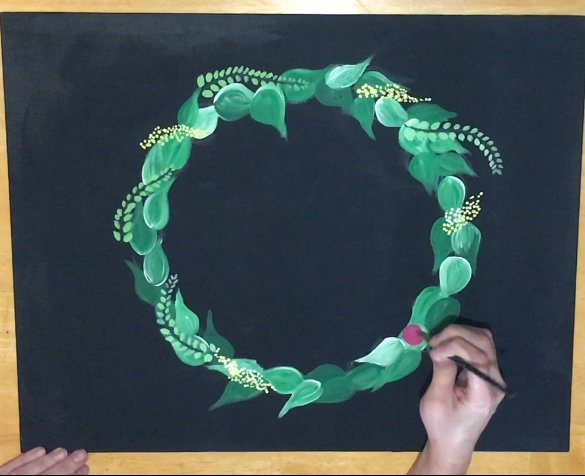 Okay, I admit I was really nervous during this part! I definitely practiced this many times in my sketchbook before doing this. Use a 3/8″ flat brush (#10) to paint a small primary red circle. If you don’t have primary red, use dark pink. Also, if you don’t have that exact size brush, you can use a 1/2″ or 1/4″ flat.
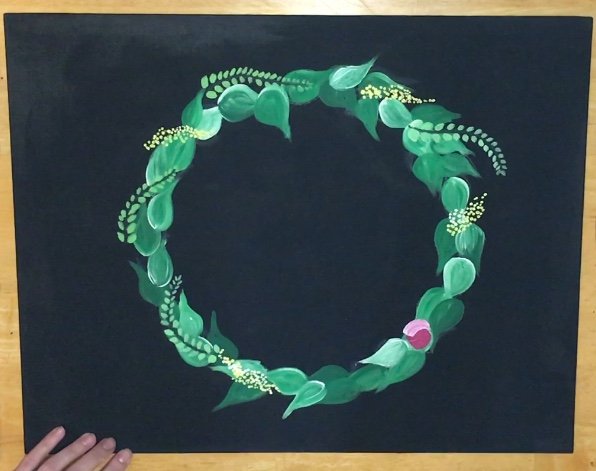 Do not rinse the brush off but wipe off any excess paint so it doesn’t get too clumpy. Then dip the brush in white and paint a little arc stroke hugging that circle. That arc will turn into a white-pink color.
 Continue painting little arc lines around that circle. Try not to think too much here! Paint each arc with one stroke without painting them over again. If you over paint too much (like I tend to do), the colors will all mesh together.
 Then paint more arcs, forming the shape of the rose. The brush was dipped in white each time I reloaded. The petals got more white-ish as they evolved out.
 Some of my arc lines are overlapping the previous arc lines.
 I started adding some “Apple Barrel Fuchsia” to the corner of my white paint brush. This made my petals have a little more color variation.
 Paint more arc lines until you get the desired rose size and shape. I suppose you can also call this a Peony! I did go back in and add some more arc lines of pink on top of some of the white.
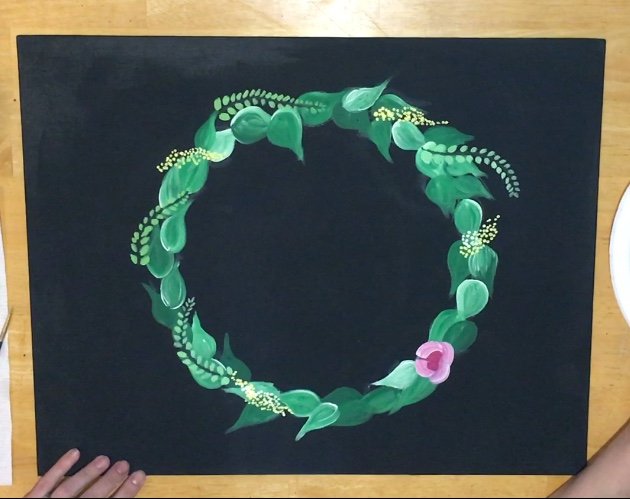
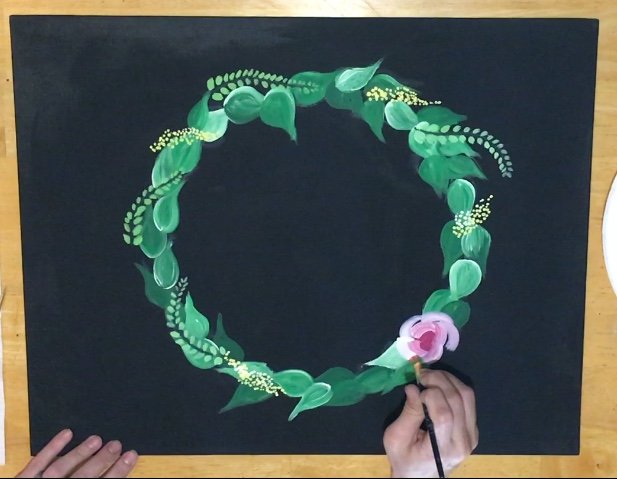
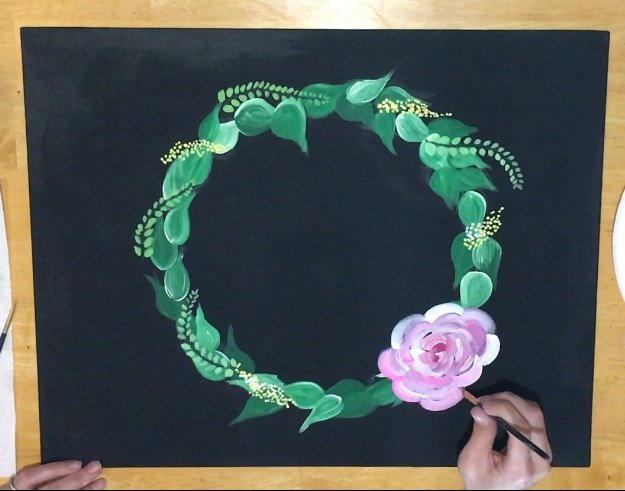
6. Paint the rose leaf
- Dark Green
- White
- #3 Round
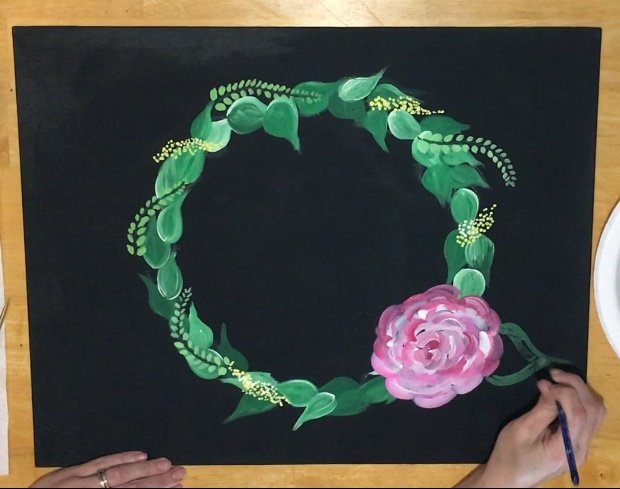 Next I used that dark green paint and a #3 round brush to paint the leaf. Paint the shape of the leaf first and then fill it in.
 Add a little highlight with white and blend it into the green.
 Then I painted the lines on the leaf using titanium white. These lines are very fine, hold that brush lightly! I’m still using that #3 round brush.
 Next I painted a second leaf with a white highlight on the right.
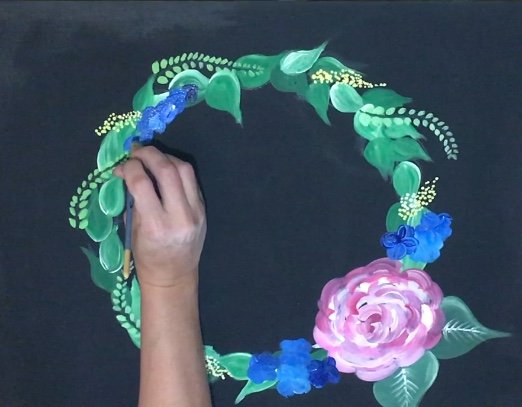
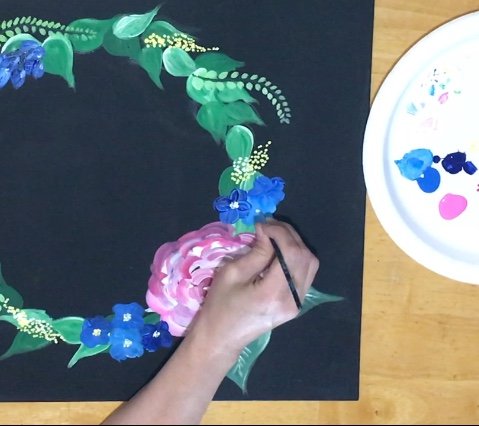
7. Paint Blue Flowers
- Light Blue
- Dark Blue
- White
- 1/4″ Flat
 On my palette, I have three different kinds of blue: Pthalo blue in Liquitex, Bright Blue in Apple Barrel and White mixed with Pthalo blue to make a light blue. I used a 1/4″ flat brush to paint little blue flowers.
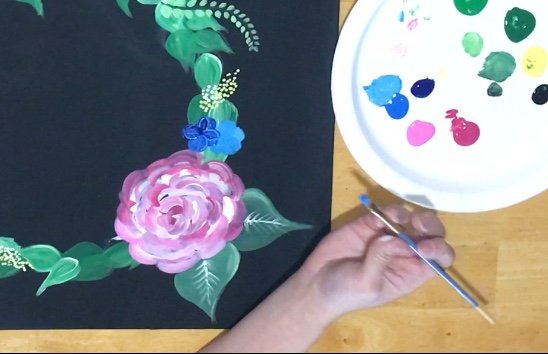 Each flower is a different blue. This helps some of the flowers stand out next to each other.
 I painted bundles of little blue flowers on both sides of the rose.
 Then I painted a bundle of flowers on the upper left part of the wreath.
 I also added some black shadow lines in the blue flowers in the upper left corner.
 Finally I painted the centers of the flowers with little tiny yellow dots. This was done with a small round brush.
8. Paint orange flowers
- Orange
- White
- Black
- 3/8″ Flat
- #3 Round
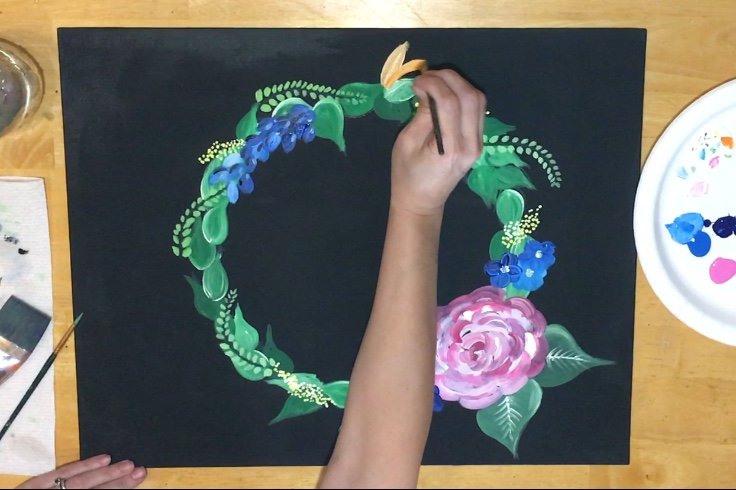 I used jack o lantern orange (apple barrel) and titanium white. I double loaded a 3/8″ flat brush in both colors. These petals went to a point.
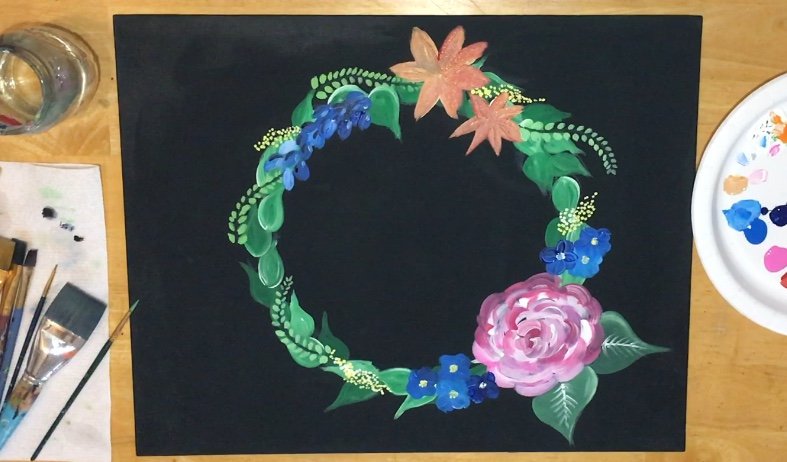 I painted a smaller flower next to the larger orange flower.
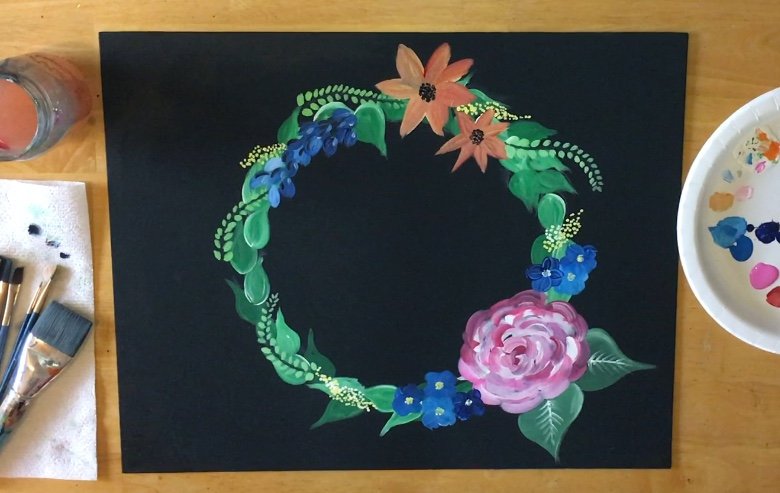 Then I painted the center of the flowers with little small black dots.
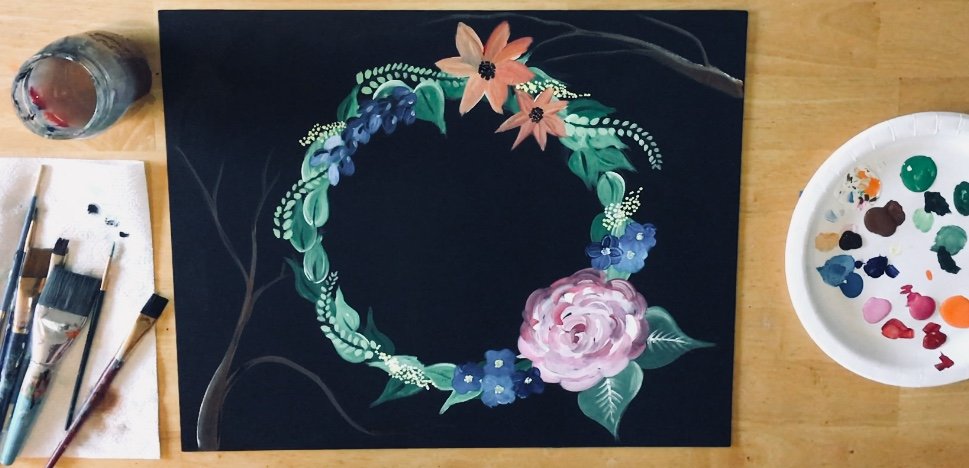
9. Paint Cherry Blossom Branches
- Light Brown
- White
- 1″ Flat
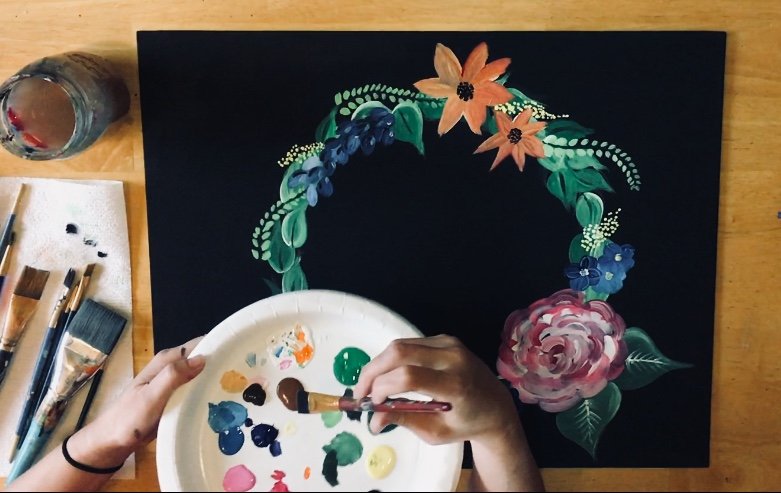 I used a 1″ flat brush and nutmeg brown with white on the corner of the brush.
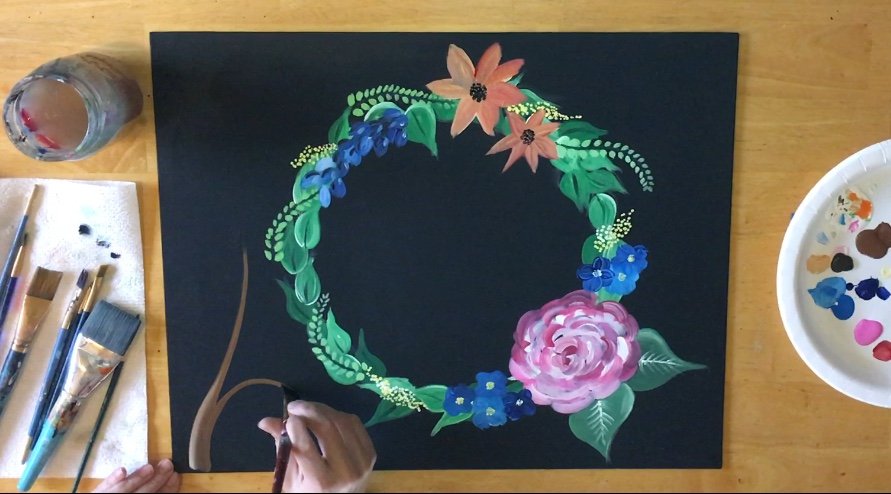 Paint branches. Start out thick and then twist the brush to make the branch thinner.
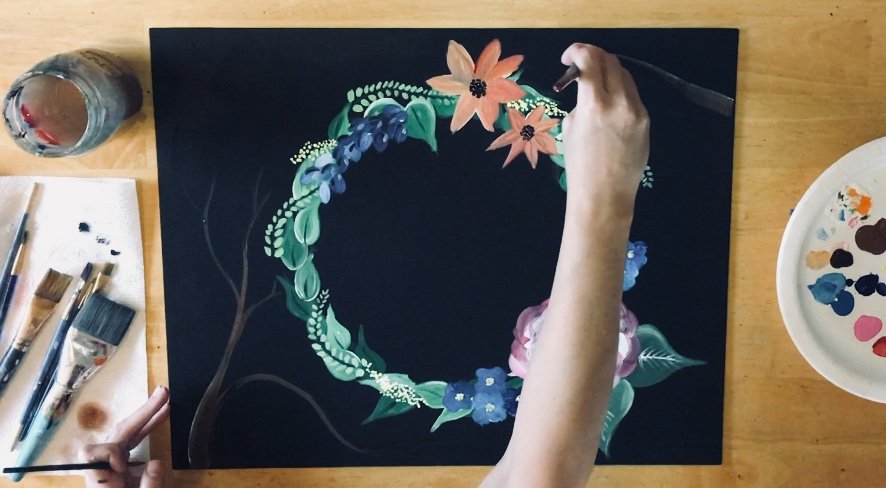 I painted another branch in the upper right corner.
 Try not to think too hard about the branches! It might help to take a look at the Cherry Blossom Tree tutorial because I go into depth with how to paint branches over there!
10. Paint Cherry Blossoms
- White
- Fuchsia
- Primary Red
- #3 Round
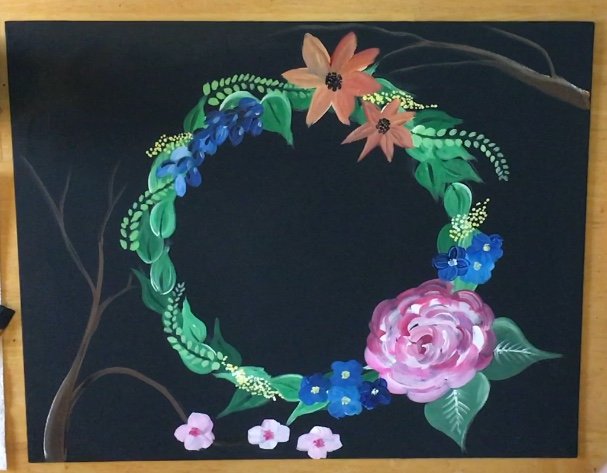 I used a large round brush to paint the blossoms. These were done with white mixed with a tiny bit of pink. The petals were painted by stamping the side of my #3 round brush. Paint the petals first and then dot in little primary red (dark pink) dots in the center.
 I also painted little bunches of dots on the tips of the branches. This is so similar to my Cherry Blossom Tree painting!
11. Draw Out the Words with Chalk
- Ruler
- Chalk
- White Paint Pen
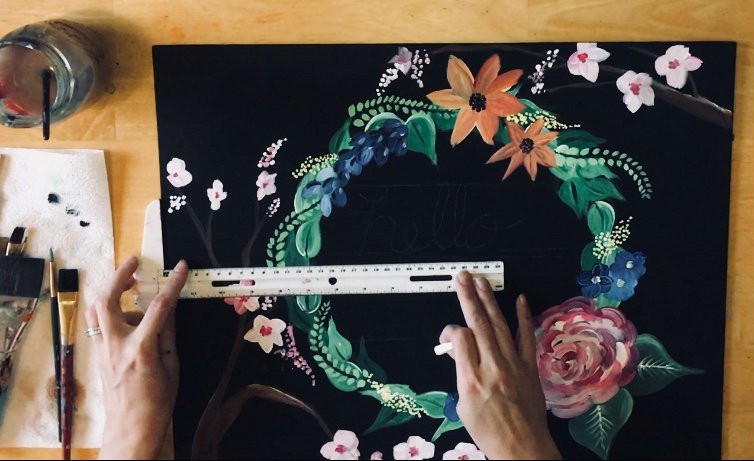 I used a ruler and chalk to draw out my letters. The ruler helps keep the lettering straight.
Finished!
 At last! Now it’s time to write the words! I used a white paint marker to draw out the letters. This can also be done with a tiny round brush.
Share What You Did!


I like this and its cute and I was wondering will there be a summer wreath that would be nice too.
Great idea about the summer one! Maybe!! ?
Love your website
Use it all the time
Can’t print Spring wreath traceabile
Hi Nancy! Thanks! I’ll take a look to see what’s going on with that traceable ?