
Would you like to save this?
Mermaid Painting
Learn how to create your very own mermaid painting with acrylic paint!
This step by step acrylic painting tutorial will guide you through the process and techniques of how to paint a mermaid!
This painting was done on a 16″ x 20″ stretched canvas with acrylic paint.
There is a video, a FREE traceable, very detailed pictures and instructions!
Looking for the how to draw a mermaid tutorial?

See Also…
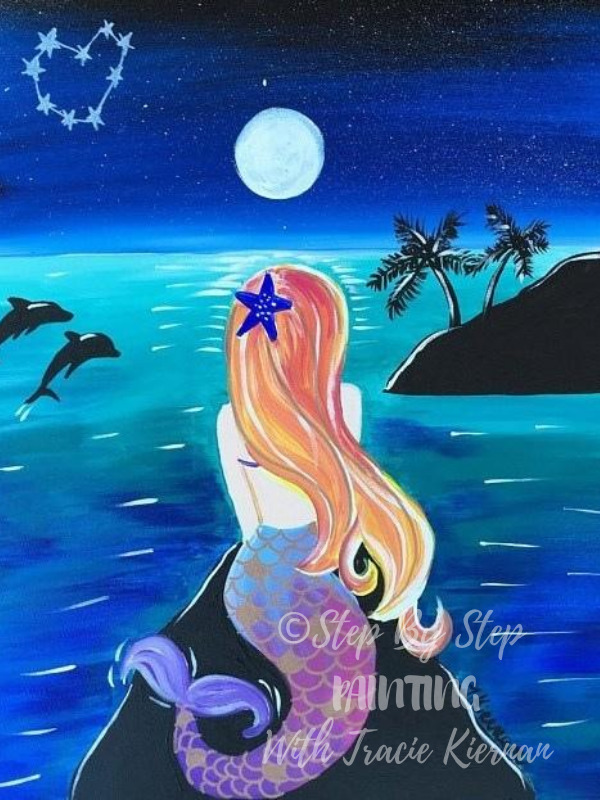
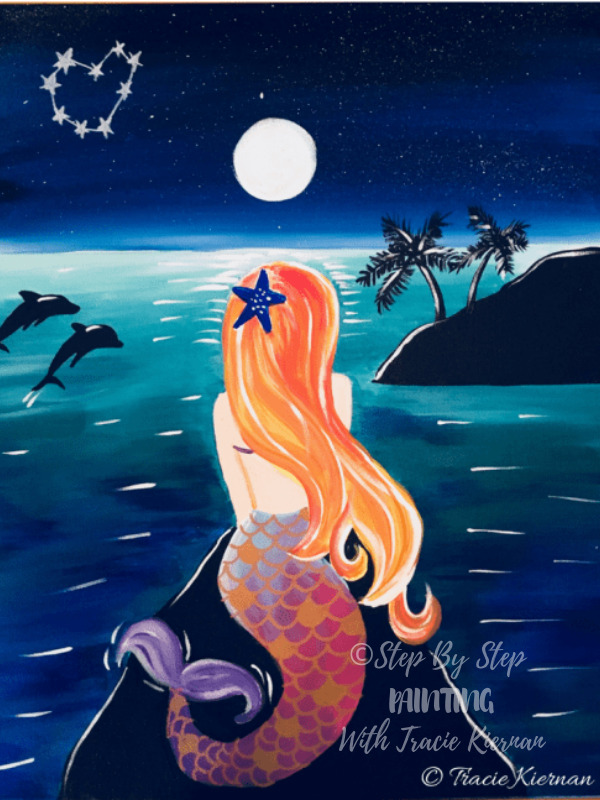
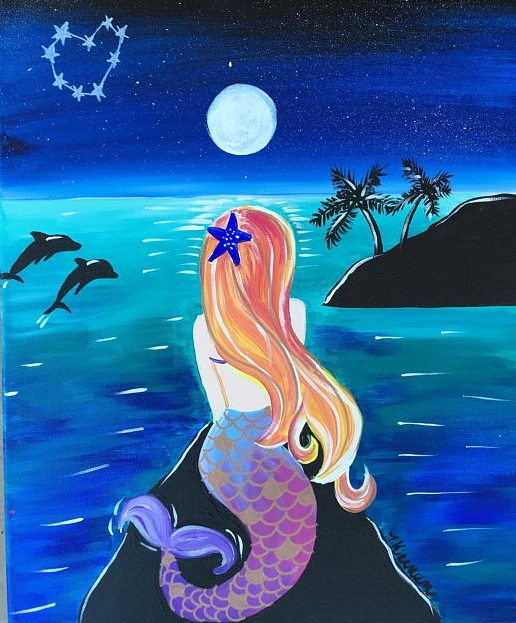
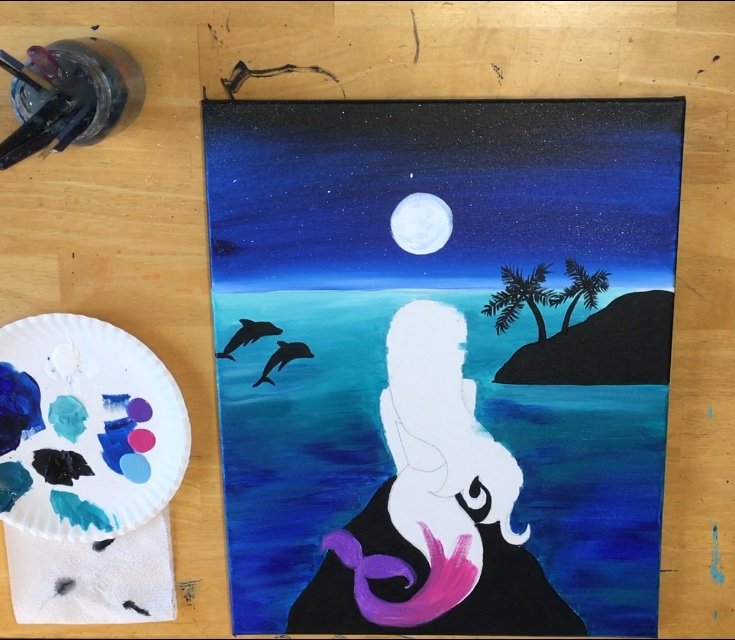
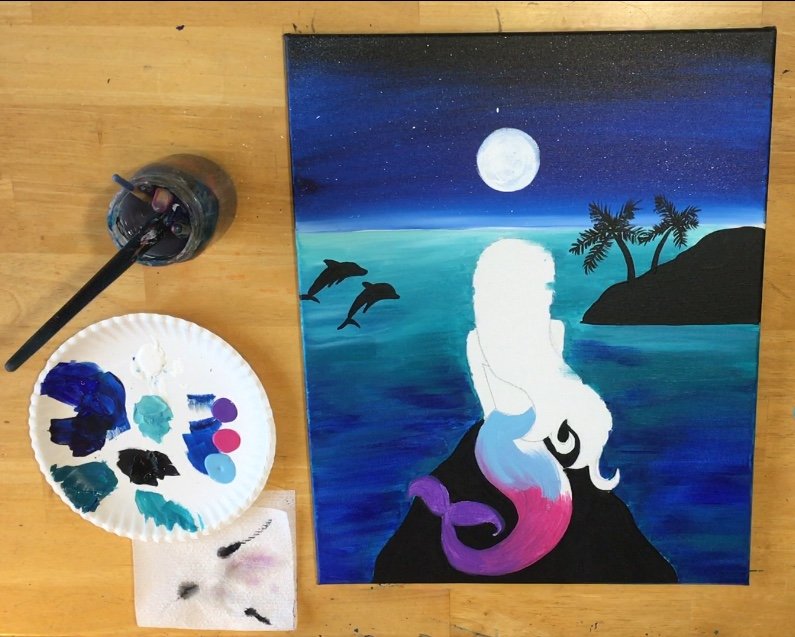
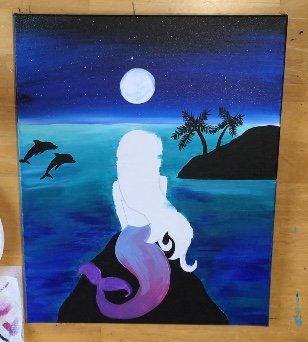
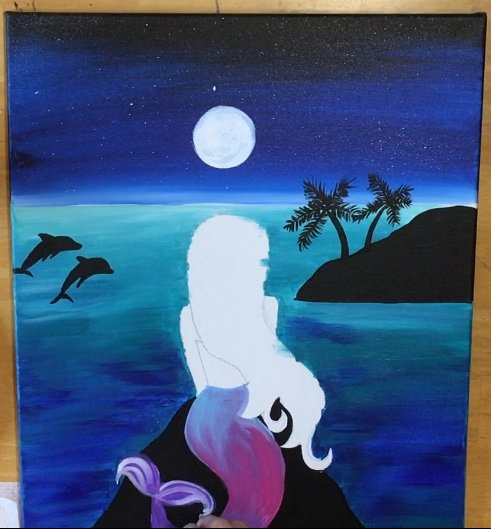
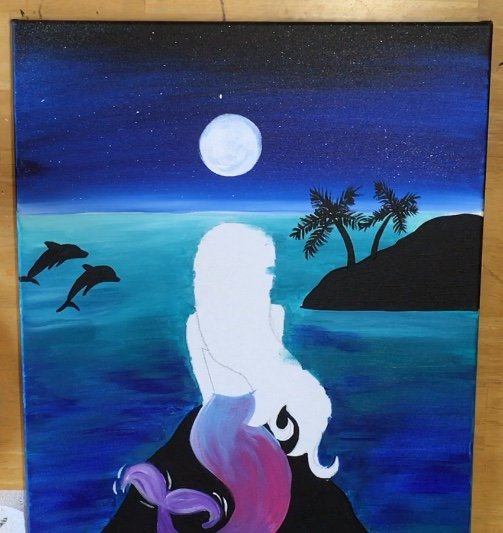
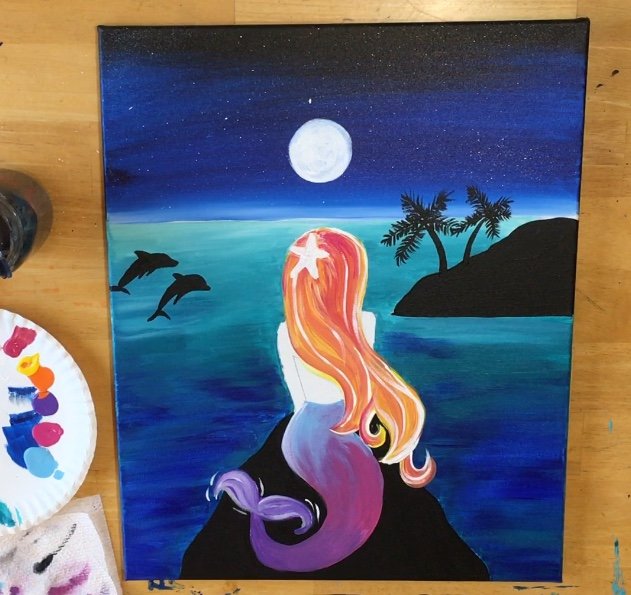
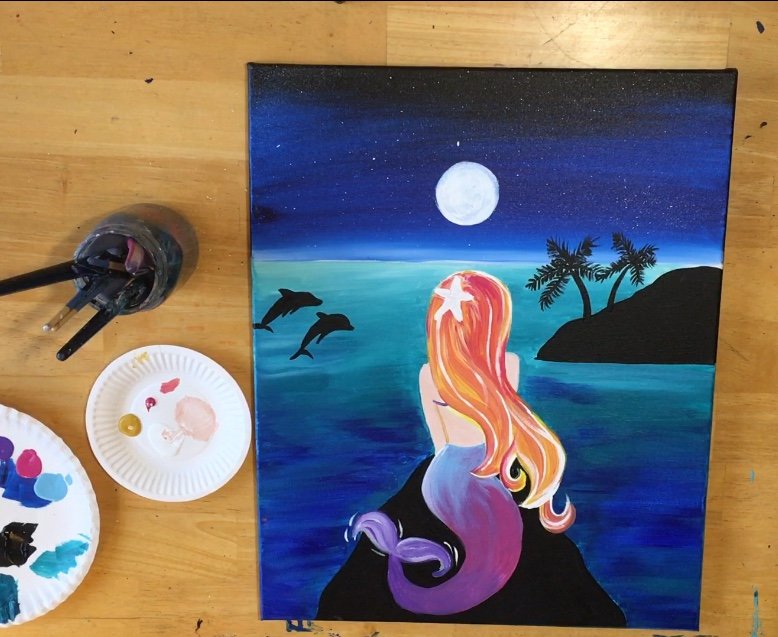
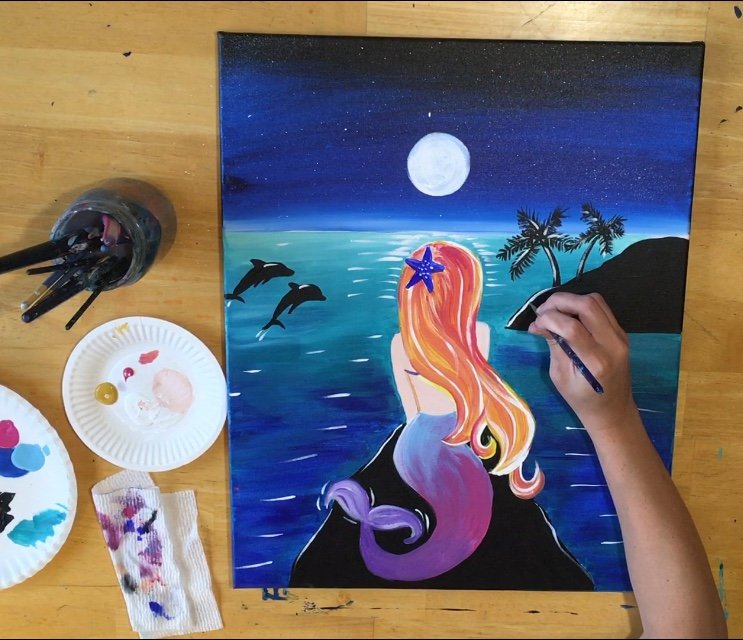
I love mermaids and all things nautical and I think this painting is just “magical”! Sparking water, heart constellation, jumping dolphins, oh my! I present to you “How To Paint A Mermaid”!
Happy Painting Artists!!!!
Materials Needed For Mermaid Painting:
How To Paint A Mermaid
Create your own mermaid painting with acrylics on a 16 x 20 canvas.
Materials
- Acrylic Paints
- 16 x 20 Canvas
- Paint Brushes
- Graphite Paper If Using the Traceable
- Traceable
- Bronze or Gold Sharpie for scales on mermaid tail
- White Paint Pen for Stars in Sky
- T-Square or Straight Edge
- Drawing Pencil
- Toothbrush for splattering stars in sky
Colors
- Primary Red
- Cad Orange Hue
- Cad Yellow Medium
- Phthalo Blue
- Ultramarine Blue
- Turquoise
- Bright Aqua Green
- Purple Iris (Apple Barrel)
- Parrot Blue (Apple Barrel)
- Fuchsia (Apple Barrel)
- Titanium White
- Light Portrait Pink
- Yellow Oxide
Brushes
- 1” Flat
- 1/4” Flat (12 Bright)
- #3 or #4 Round
- #0 Round (or the smallest round brush you have)
Instructions
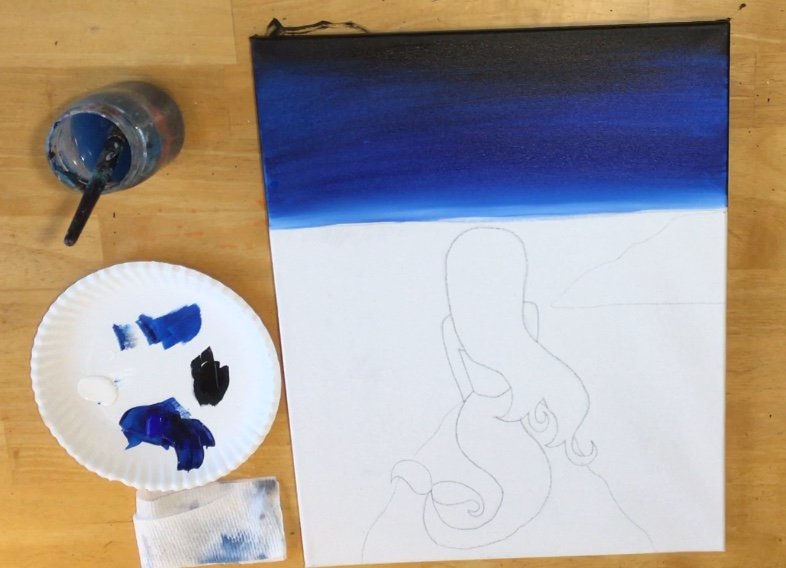
- Draw the horizon line with a straight edge and then transfer the mermaid drawing onto the canvas.
- Draw the rock and island formation.
- Use a 1” brush to paint the sky starting with mars black and blending to phthalo blue and then white.
- Paint the stars by flicking some white specks of titanium white paint then use a round brush to paint a white moon above the horizon.
- Paint the water starting just under the horizon line with bright aqua green and then blending it to turquoise in the middle. Continue down to the bottom of the canvas and blend in ultramarine blue for the water in the bottom area.
- Paint the island, palm trees, dolphin and rock all with mars black.
- Use the apple barrel craft paint colors (fuchsia, parrot blue and purple iris) to paint the mermaid fin.
- Use a round brush to paint the mermaid hair a combo of yellow, orange and primary red.
- Paint a starfish in the mermaids hair and a few strand lines for texture.
- Paint the skin color of the mermaid - her shoulders and arms.
- Paint white highlights in the water.
- Use a sharpie to draw the mermaid scale designs.
- Use a white paint pen to draw the constellation in the sky.
Craft Paint Conversion: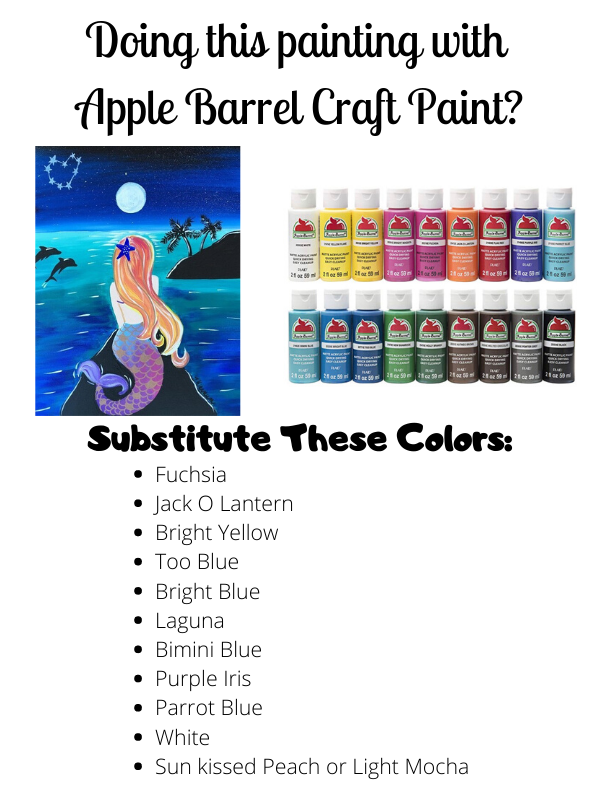

Directions At A Glance:
Printable For Mermaid Painting: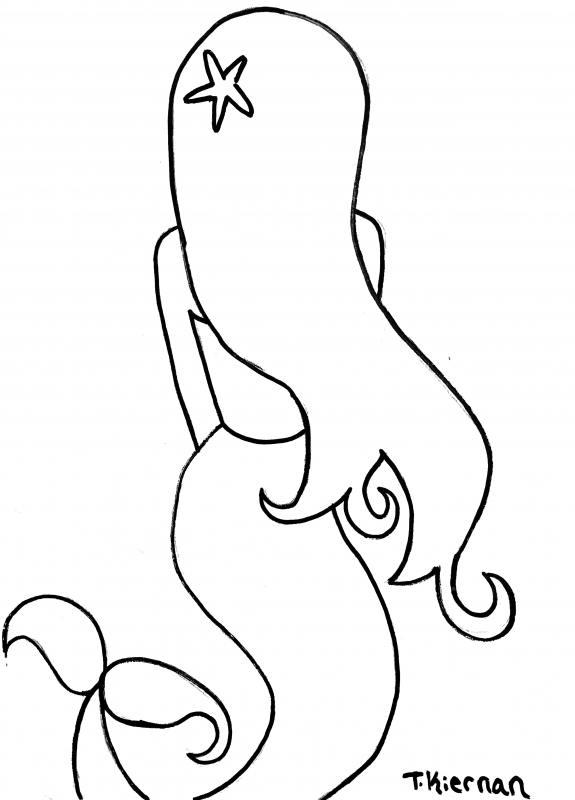

How To Draw A Mermaid:
This is a step by step drawing of how I drew the mermaid!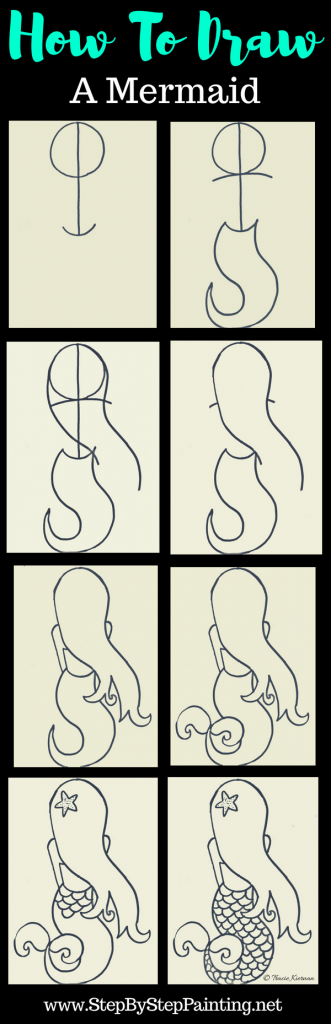
Video For Mermaid Painting:
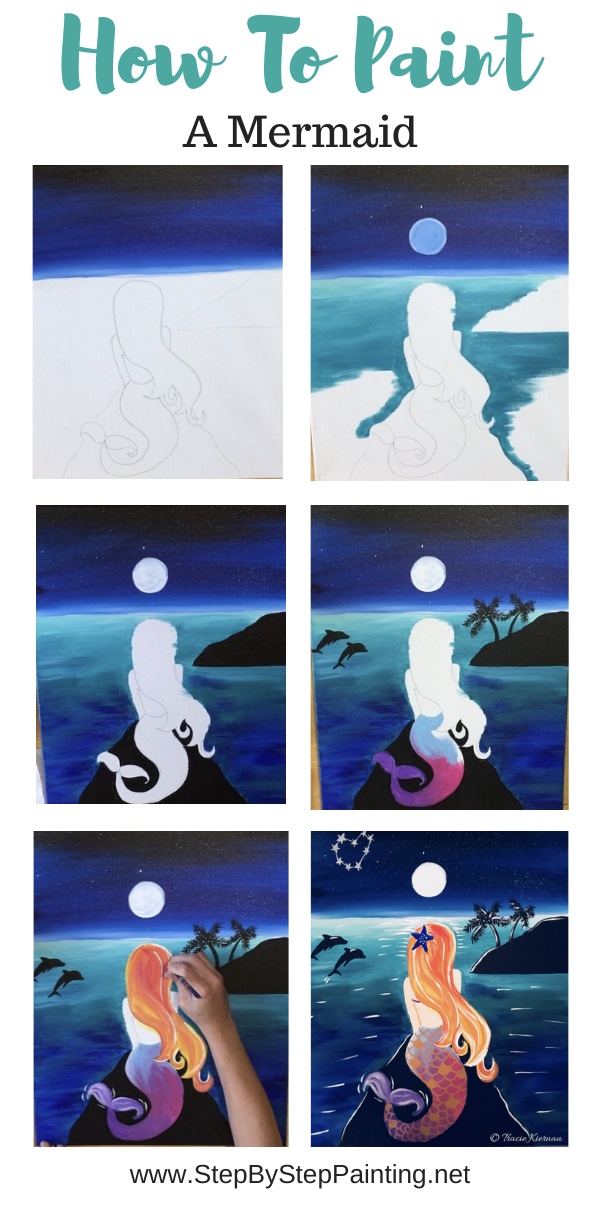
Step By Step Picture Directions:
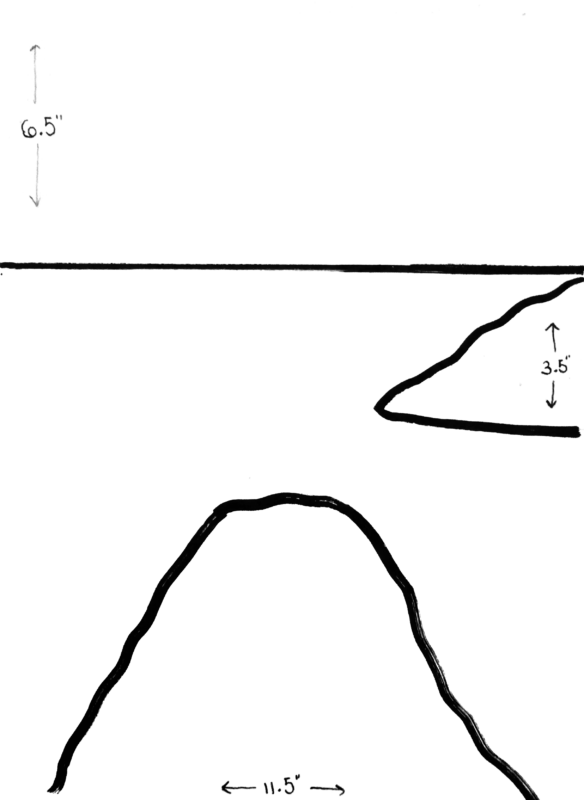
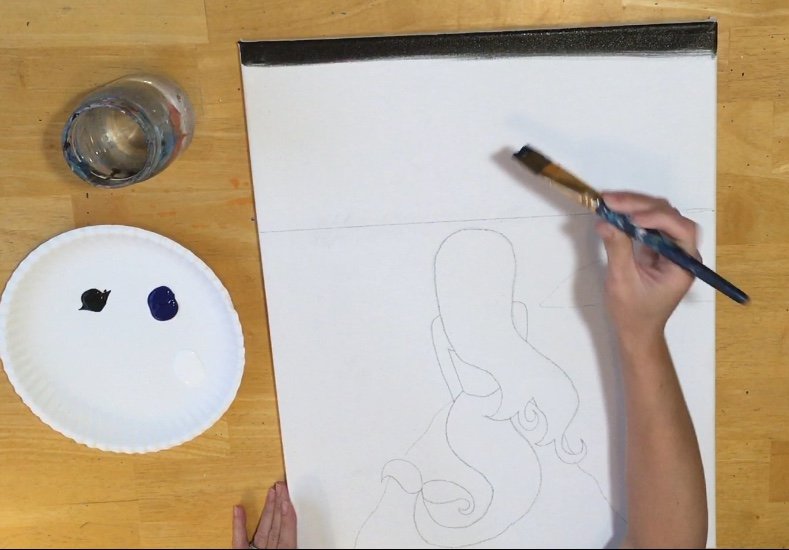
1. Draw Horizon Line

With a pencil and a ruler, draw a line across the canvas. This is a 16″ x 20″ canvas and the line is approximately 6.5″ from the top.
2. Draw The Mermaid
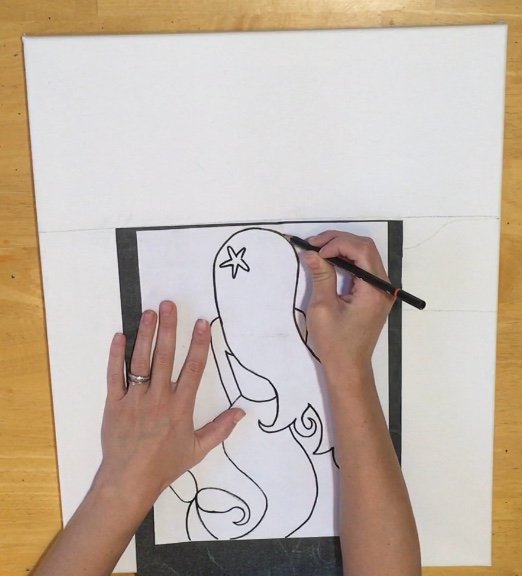
I used a piece of graphite transfer paper and set it underneath my print out of the mermaid.
Align her head just a little bit underneath the horizon line. And, since her tail was cut off, I just filled it in.
3. Draw the rock under the mermaid and the rock in the background.
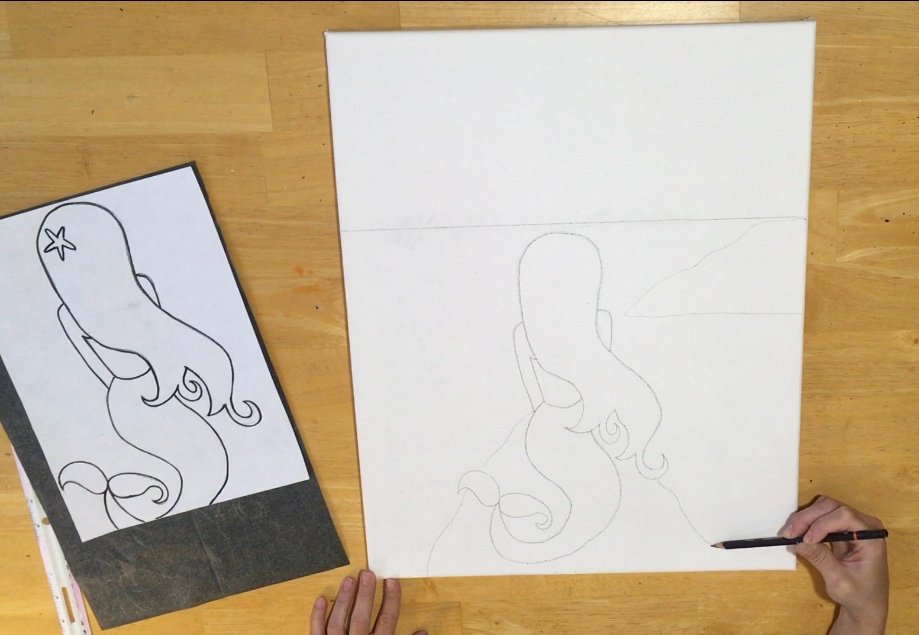
Then lightly draw the rock with a pencil.
The mermaid is sort of perched on this rock so the lines extend just to where her hands would be.
The rock in the background is about 3.5″ high and extends almost to her right shoulder.
4. Paint the sky
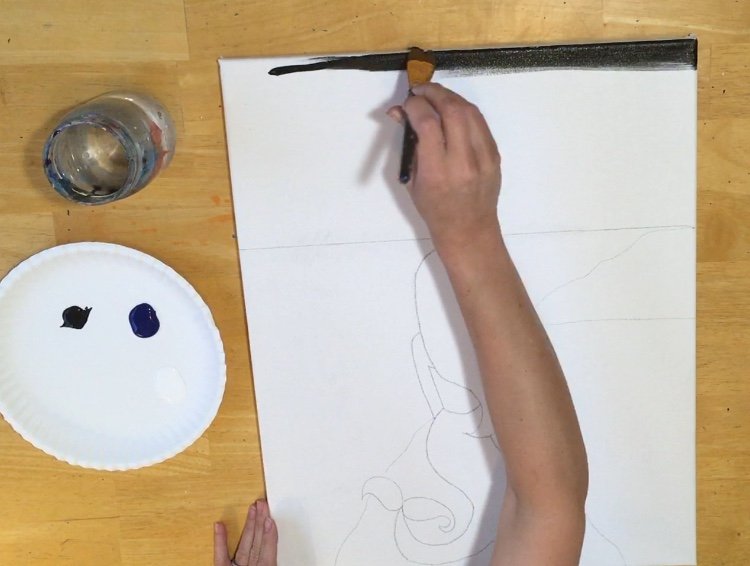
Using a 1″ flat brush and “Mars Black” paint about an inch of horizontal strokes across the sky.
This sky strokes are going completely horizontal.
After your 1″ of black, don’t rinse the brush off.
Add “Phthalo Blue” to the brush and paint slightly over the black so it will blend.
If your black has already dried, you might need to add a tiny bit more black to the blue to get it to blend.
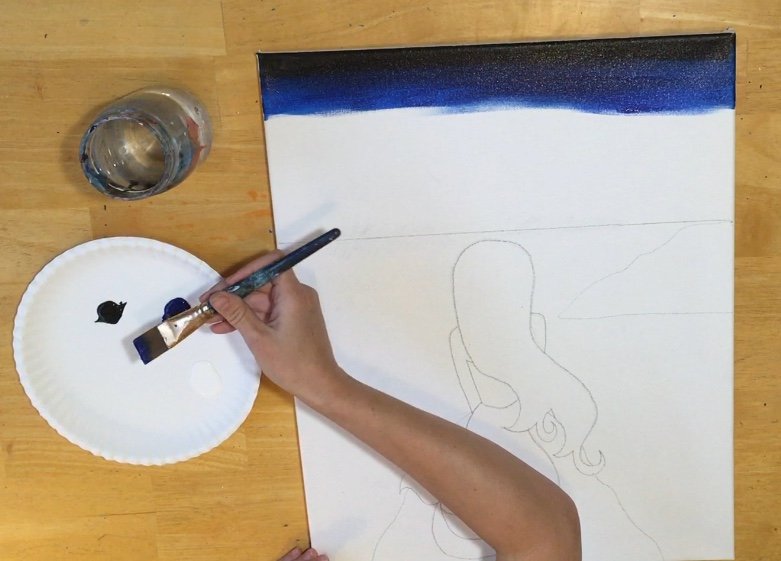
Keep painting that phthalo blue almost all the way down. Smooth out any visible brush strokes along the way.
Leave about an inch of space on the bottom above the horizon line.
Then CLEAN off your brush (you don’t want any black on the brush because you’ll make gray).
Paint that bottom inch above the horizon line “Titanium White”.
Let that white mix with the blue to make a light blue.
If it doesn’t seem to be mixing, then add some blue to the brush.
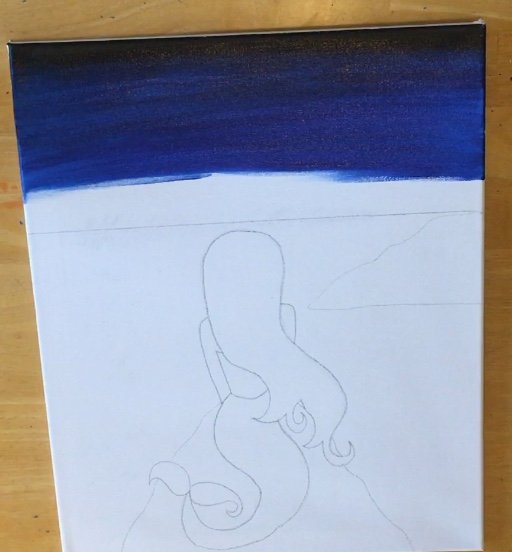
Blend that bottom portion. The whole sky should be an ombre of light blue closest to the horizon line and black at the very top.
5. Paint The Stars
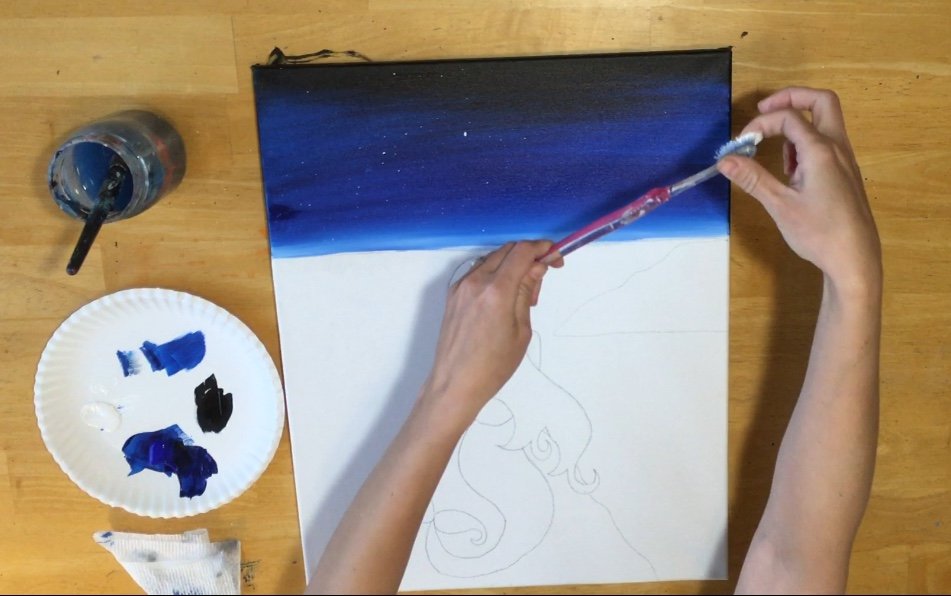
I used an old toothbrush for this.
Don’t dip the toothbrush in water or you’ll get too many drips. Just dip it in the white paint.
Test it out on a separate piece of paper first so you can get a feel for how the splatters behave.
Then splatter as many stars as you’d like.
6. Paint The Moon
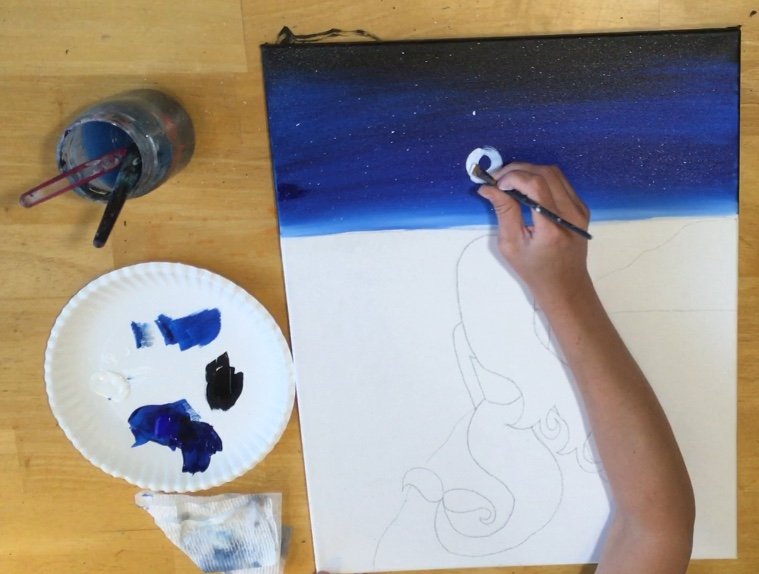
I used a 1/4″ flat brush for this but you can use a round brush.
Paint your circle.
That white might mix with the blue if it’s not dry all the way. If it does, you can go back and paint another coat of white on top to make it a brighter white.
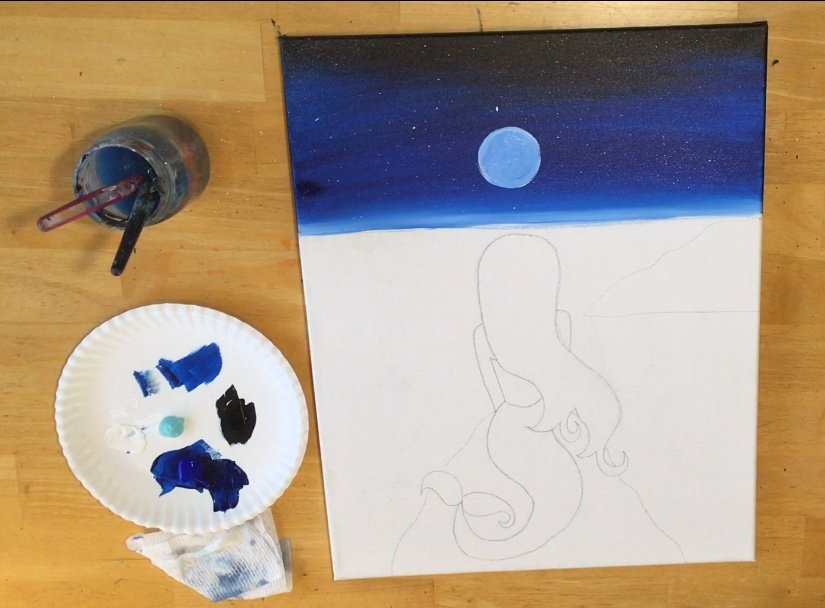
As you see, my moon was light blue for awhile. Wait until that dries to add another coat of white.
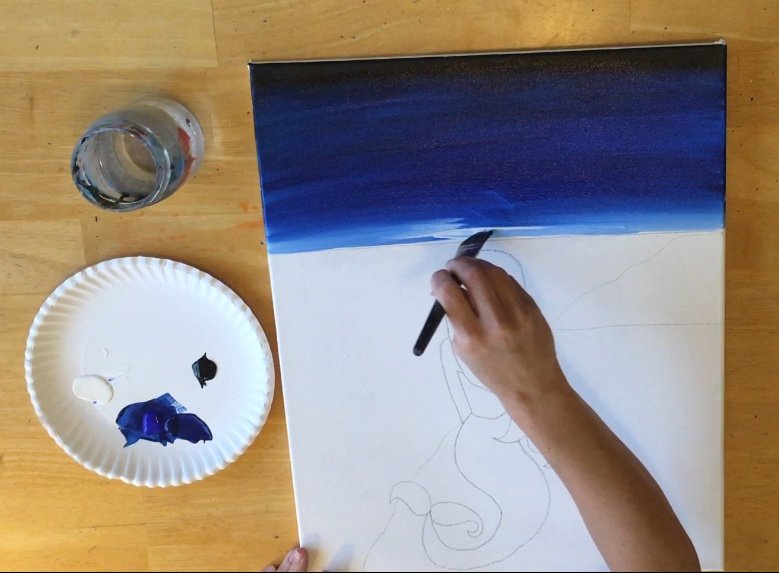
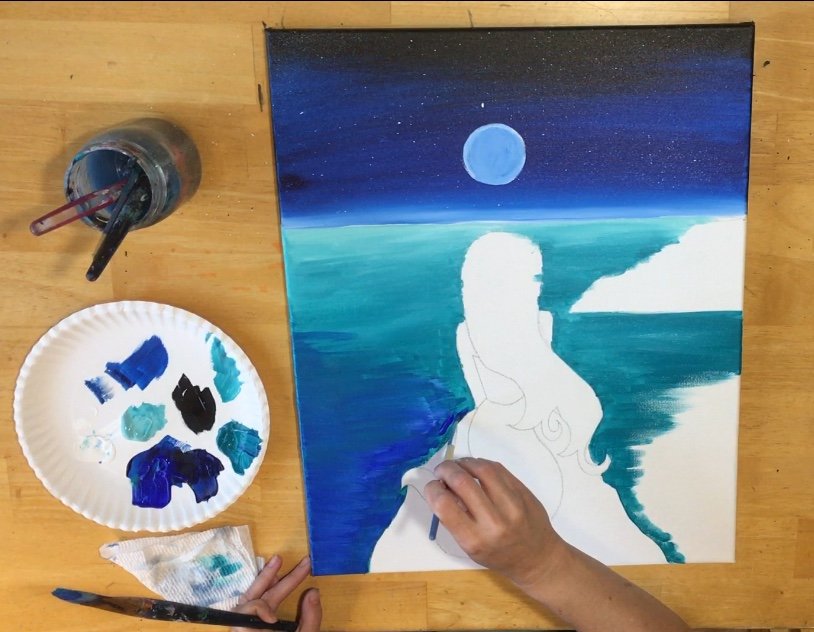
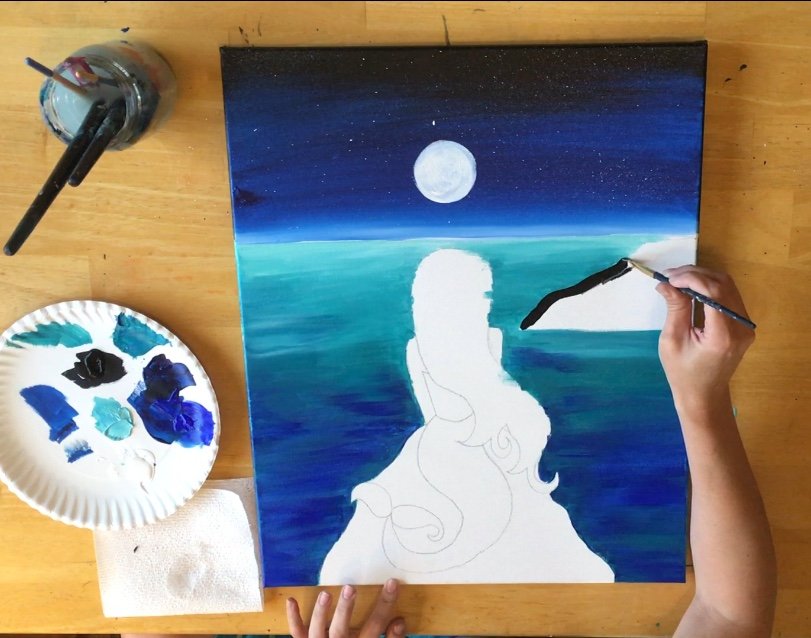
7. Paint The Water
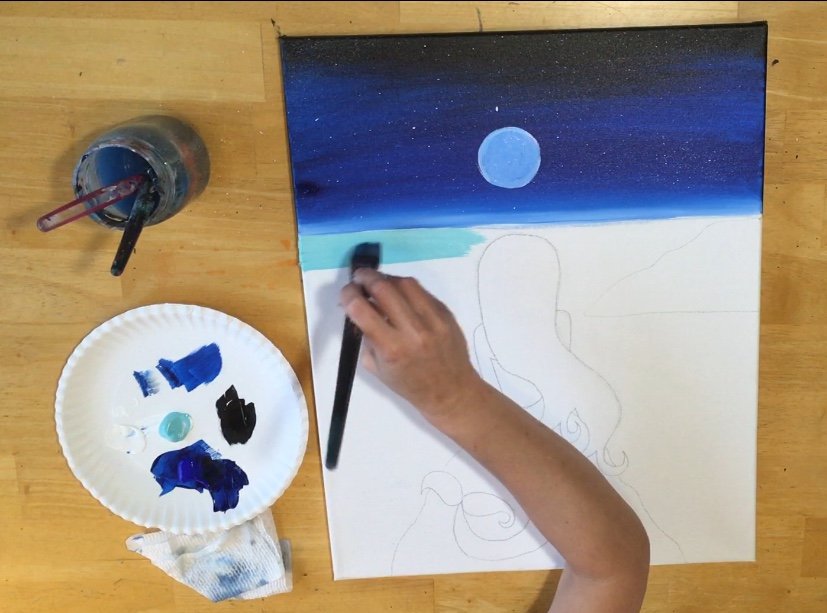
I used a 1″ flat brush for the large areas and a 1/4″ flat when I needed to “cut in” around the mermaid and around the rocks.
Start with your lighter turquoise (bright aqua green).
Note: in the video I am using “Ocean Blue” in Hobby Lobby Brand. This is equivalent to Bright Aqua Green in Liquitex BASICS.
 I painted that lighter turquoise about an inch and a half down before switching to a darker turquoise.
The goal here is to create another “ombre” of light to dark turquoise.
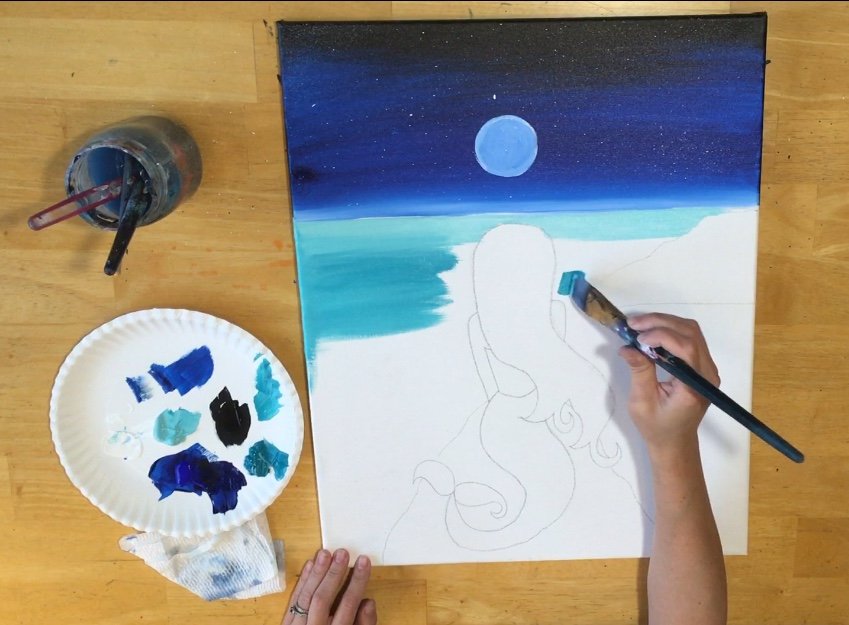
Without rinsing the brush, I added “turquoise” and blended it with the lighter turquoise.
Keep these strokes going left and right.
Try to smooth them out as much as possible. It will be a challenge to “cut in” around the mermaid but painting it this way will be rewarding in the end!
Don’t worry too much about blending the two turquoises perfectly together.
Think about how Caribbean water looks and how it changes from light to dark in some areas. Just try to keep your strokes as consistent, horizontal and smooth as possible.
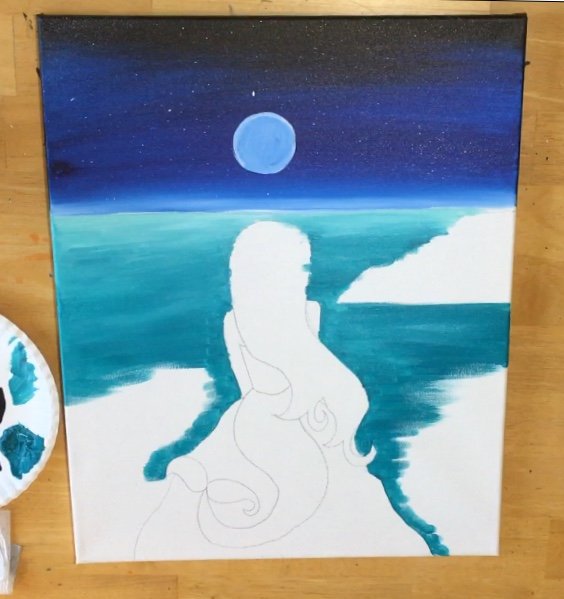
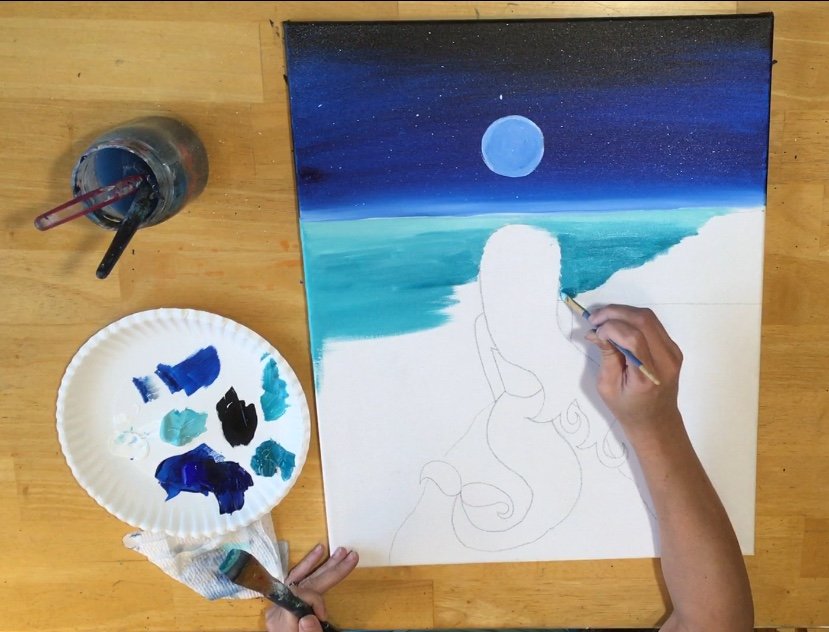
I painted this phthalo turquoise almost all the way down.
Those white areas shown above are where I started blending in my next shade of blue.
Also, if you end up painting slightly over the mermaid, that can be fixed later! Just don’t loose her shape!
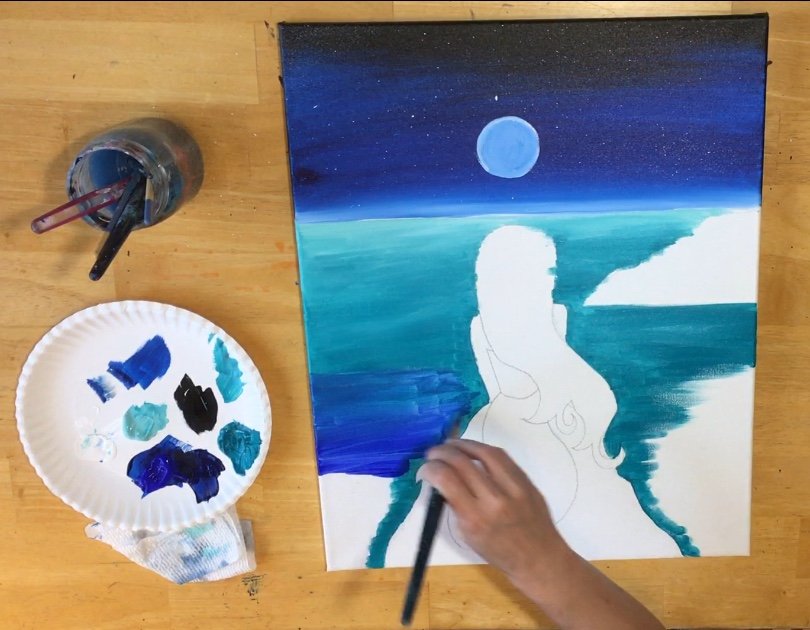
Next I added “ultramarine blue”.
This is always a lovely blue to use in the water!
Basically I filled in the rest of the areas with ultramarine blue and did the best I could to blend it with the rest of the turquoise.
Be sure to use that small brush to cut in where you need to blend.
That ultramarine blue was painted over and blended with a lot of the turquoise area up to about the mermaid’s shoulders.
This is up to you how much ultramarine blue you want to show up. If you like the all turquoise look, you can limit the ultramarine blue.
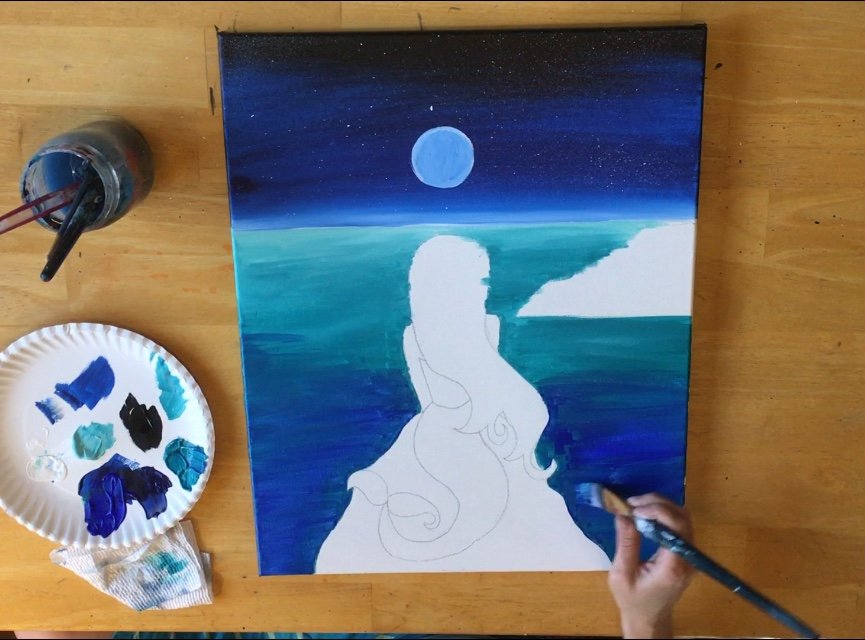
Take your time, make sure those strokes are smooth and cut in as close as possible to the mermaid drawing.
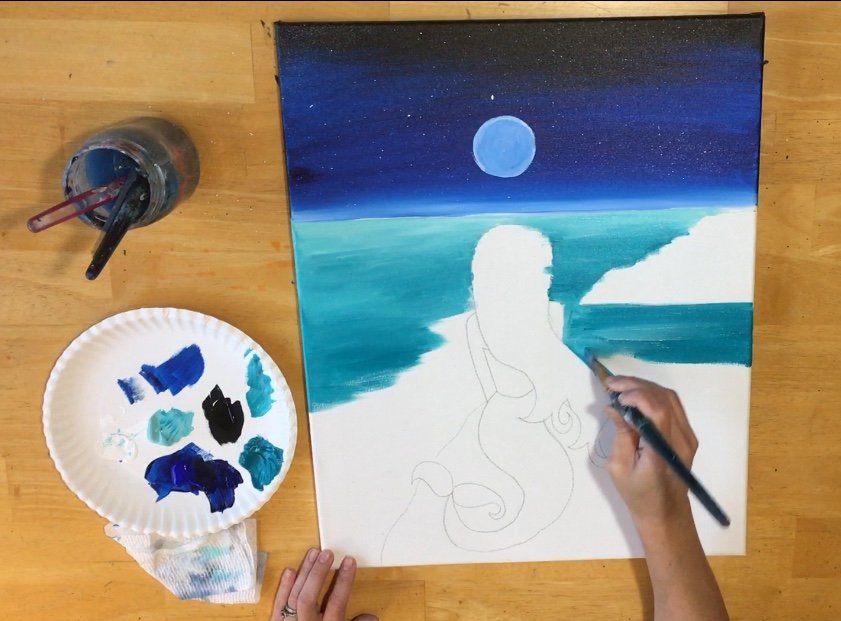
8. Paint the rocks
Use a small flat brush to paint both of the rocks “Mars Black”.
I’m using a 1/4″ flat here. ALSO NOTICE that I painted another coat of white paint over the moon!
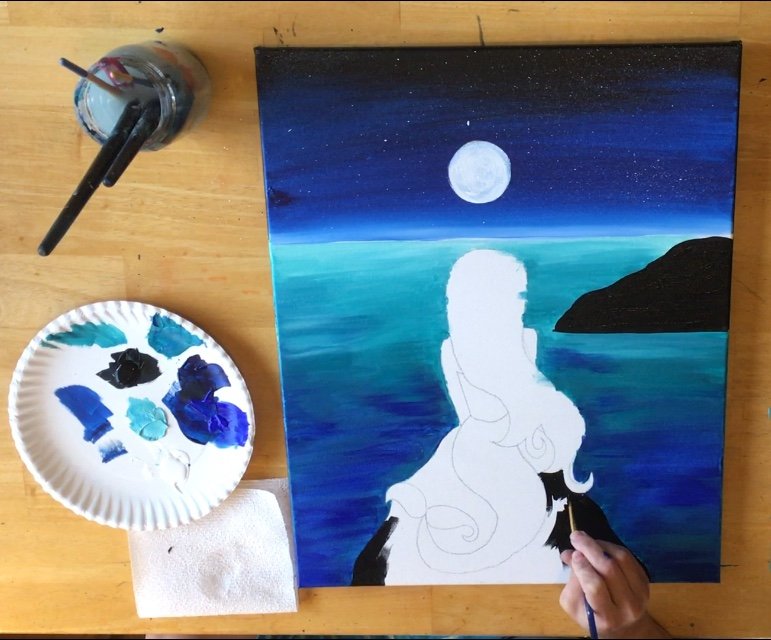
Then I switched to a small round brush to cut in even closer to the curves of the hair and the mermaid tail.
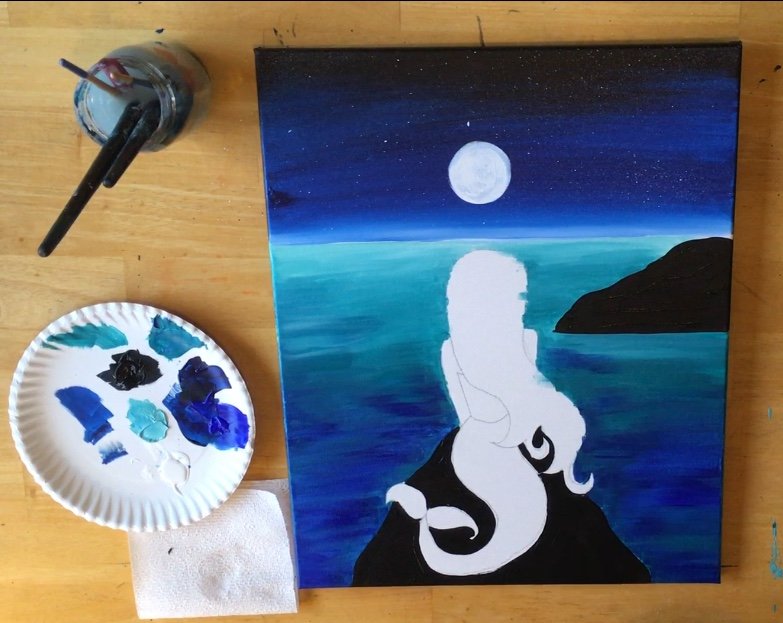
9. Paint The Palm Trees
I used a small round brush (I believe a #3 round) to paint the trees trunks.
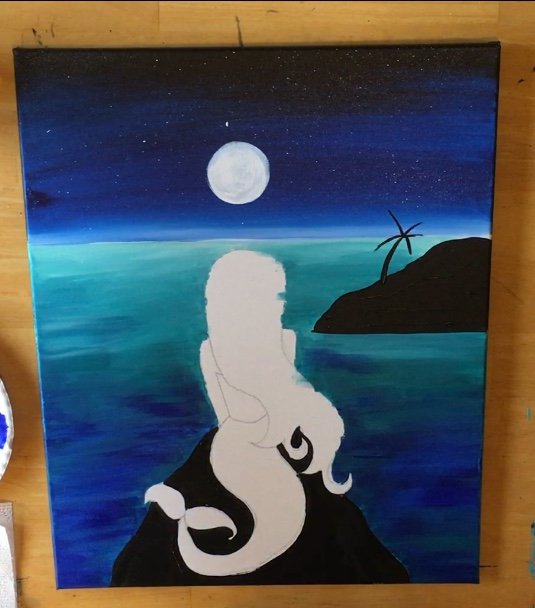
Then paint the lines stemming out from the trunk.
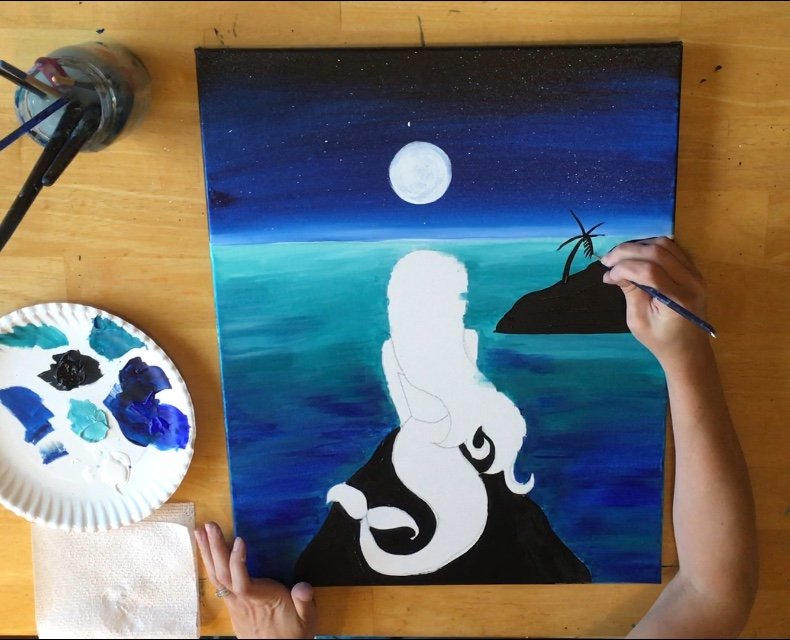
Use the tiniest round brush you own to paint the little palms stemming out from each of the lines.
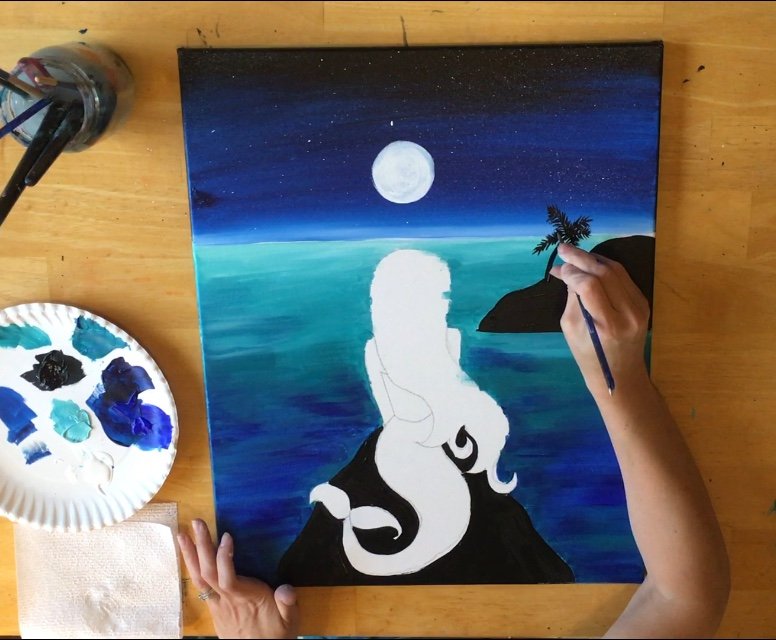
Start from the center of each line and pull each little line outwards.

Repeat to make a second palm tree! If you’re on a “palm tree fix” you can paint more!
10. Paint The Dolphins
Using a small round brush, start off by painting a banana shape body.
Form the nose of the dolphin almost like you’re painting a dog’s snout.
Add the features of the tail, dorsal fin and front fins.
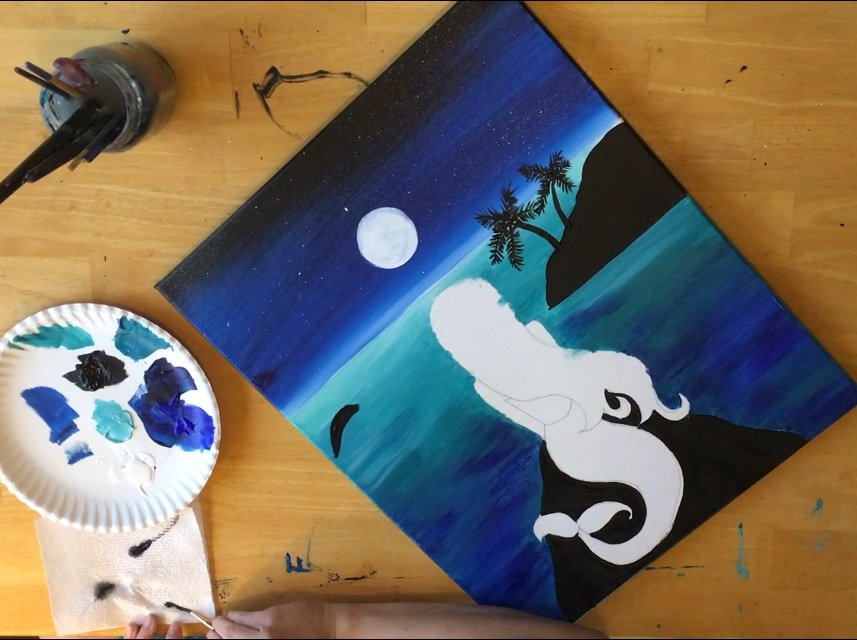
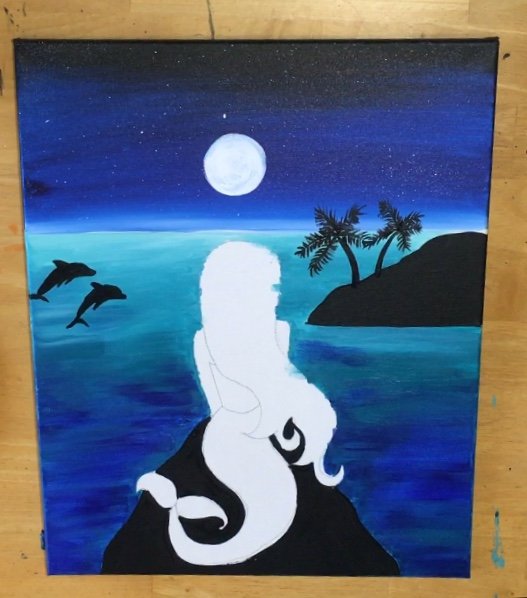
11. Paint The Mermaid Tail
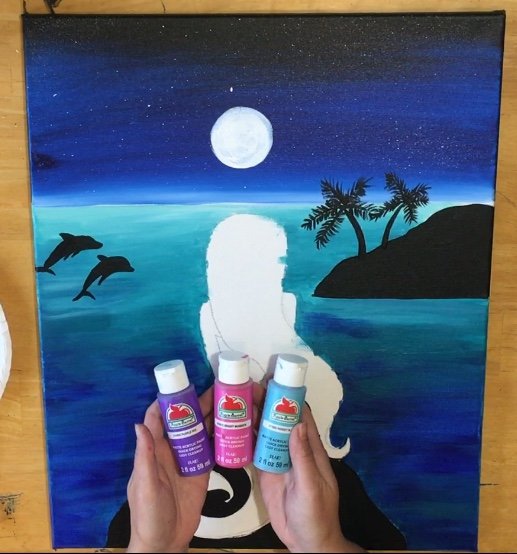
Here is where I switched to Apple Barrel Craft paint because I didn’t have these colors in Liquitex.
I wanted this tail to be “Mermaid Colors”. So “purple iris”, “fuchsia” and “parrot blue” fit the description.
You can use any shade of pink or purple or even light green for this step!
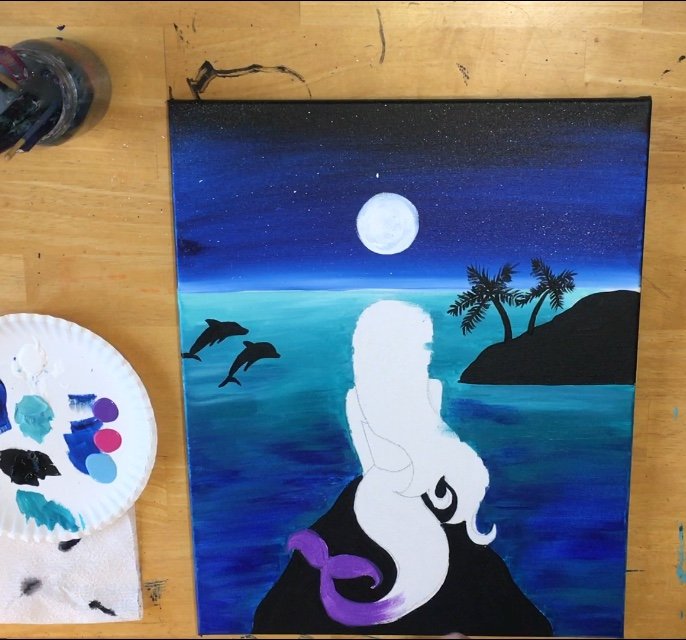
First I painted the tip purple.
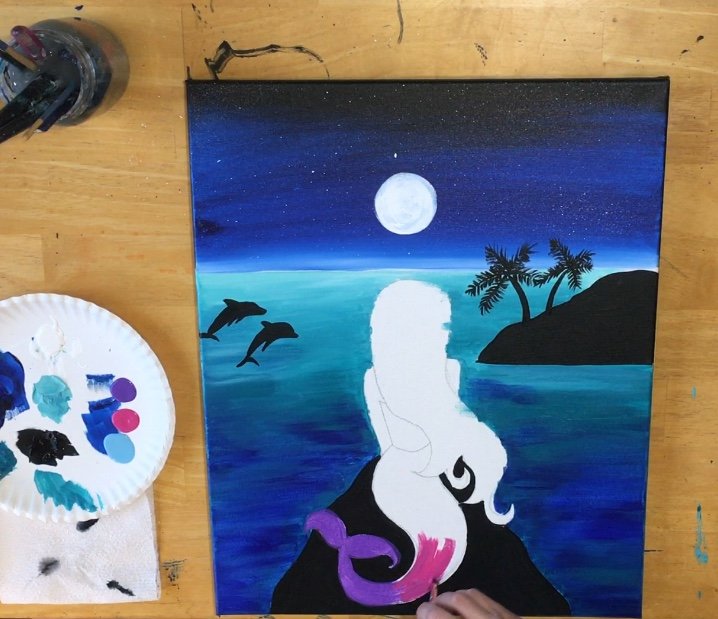
Then I added in the fuchsia. Craft paint is harder to blend so I had to work the color in harder but it ended up looking great!
To help it blend, I did have to add more purple into the fuchsia. Here it is all blended.
Next I painted the upper portion with parrot blue.
The blue was tricky to blend and it ended up being a bit too purple. Don’t fret too much about the tail color!
Remember that bronze scales will be drawn over the tail!
Next I went in and added some white on the end of the mermaid tail.
Then I made some splash lines. This was all done with a small round brush.
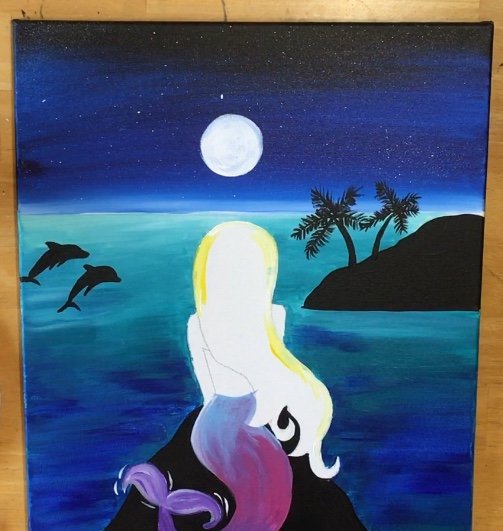
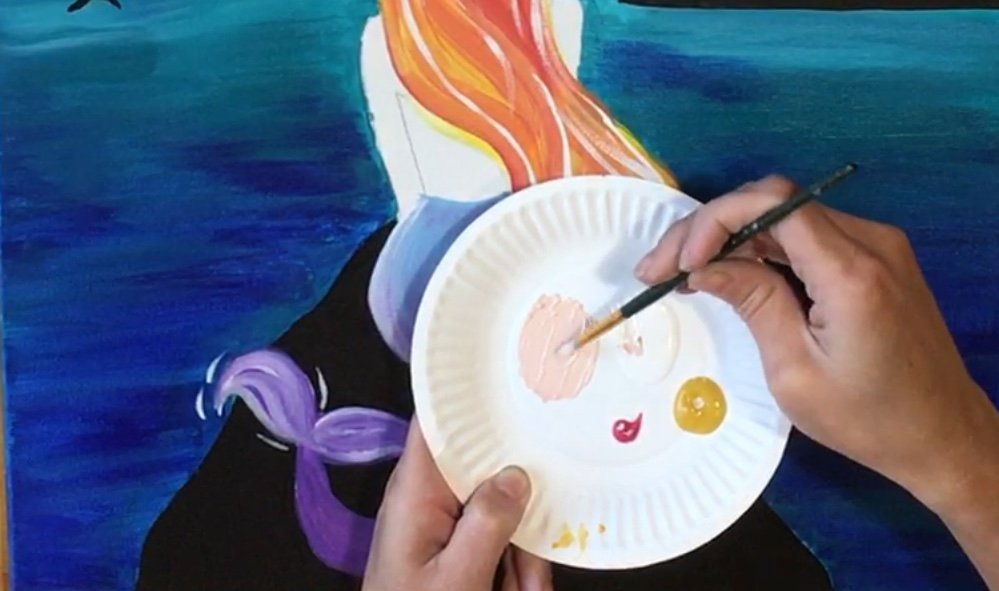
12. Paint The Hair
There were areas that I needed to “block out” again because I got blue paint on the hair.
If this is the case, just use some white mixed with yellow or just white to block it out.
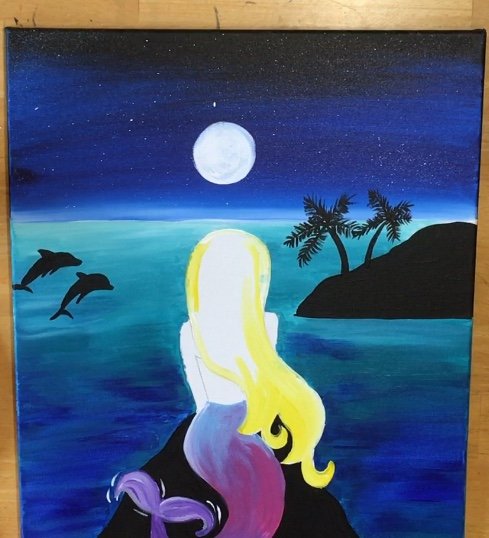
I used a number 3 round brush to paint the hair. When you paint hair, each stroke goes with the flow of the hair. So follow each curve around as you are painting.
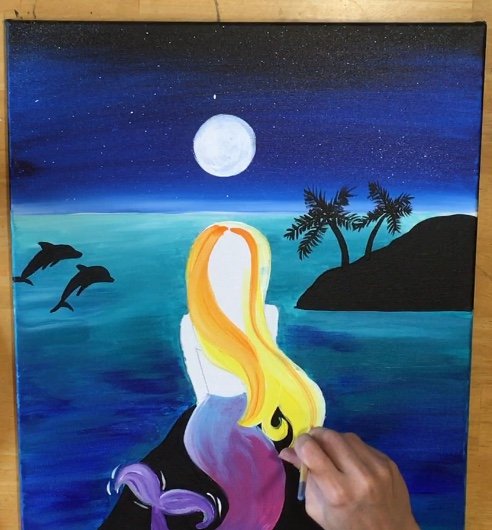
After starting with yellow, I added cadmium orange to my brush.
Again, follow each stroke like it is a strand of hair.
I allowed the orange to mix with the yellow as well.
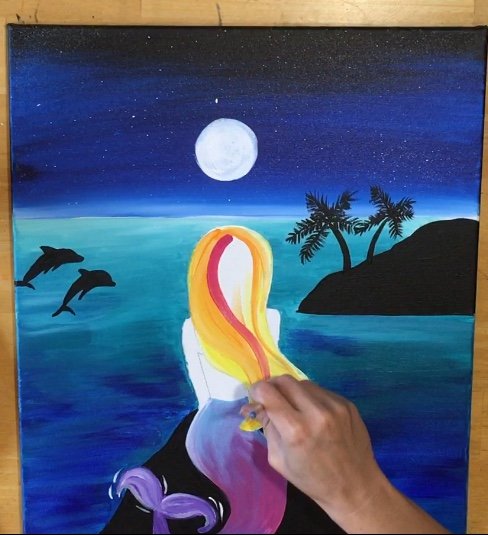 Then I added primary red (dark pink).
Again, follow each stroke like it is a strand of hair and allow the colors to blend on the canvas.
A good chunk of her hair ended up being primary red.
Then I added some more layers of orange and yellow.
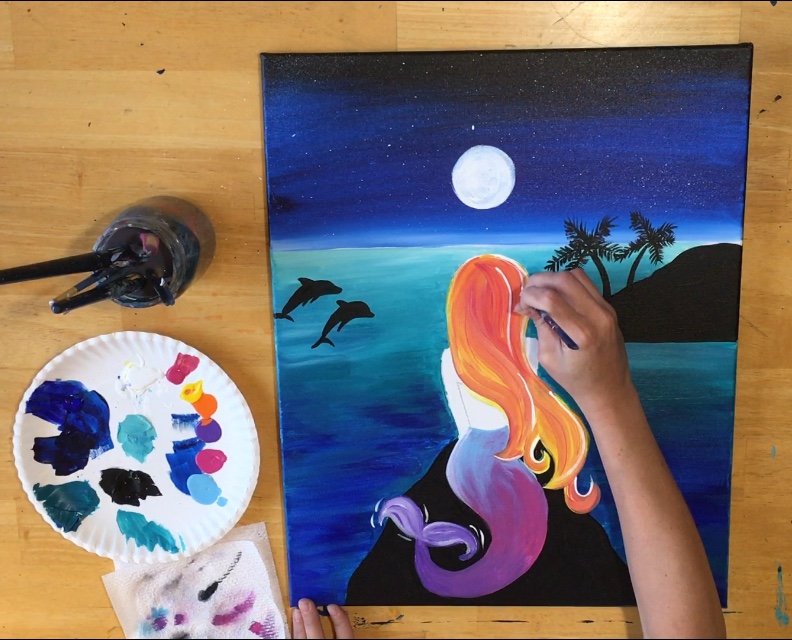
To add some more “pizzazz” I outlined some of the strands with titanium white.
13. Paint The Starfish In Her Hair
With a small round brush and titanium white, block out an area where the starfish will be painted in.
Note that if the hair is still wet you may not be able to paint the white starfish until it dries.
Wait until the white dries and then paint it in with ultramarine blue.
14. Paint The Shoulders and Back
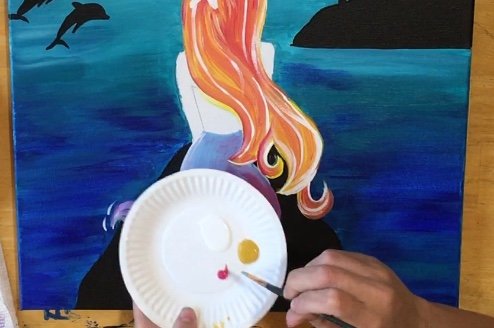
To make this flesh color, I mixed 4 parts white, 3 parts yellow ochre and 1 part primary red (dark pink). Play around with the proportions if necessary.
You can also just use light portrait pink for this step or your own choice of skin color.
After you are done mixing paint the mermaid’s back and shoulders with a small round brush.
To paint the arm line you see on the left, I used solid “yellow ochre”.
You can also use your bronze sharpie to draw it in after the flesh color dries.
Then I added her strap with purple paint. The line starts just under the armpit and extends to her hair.
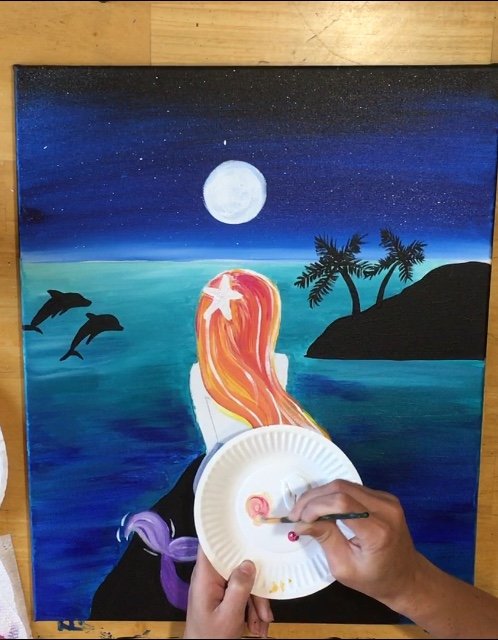
15. Paint The Starfish Blue
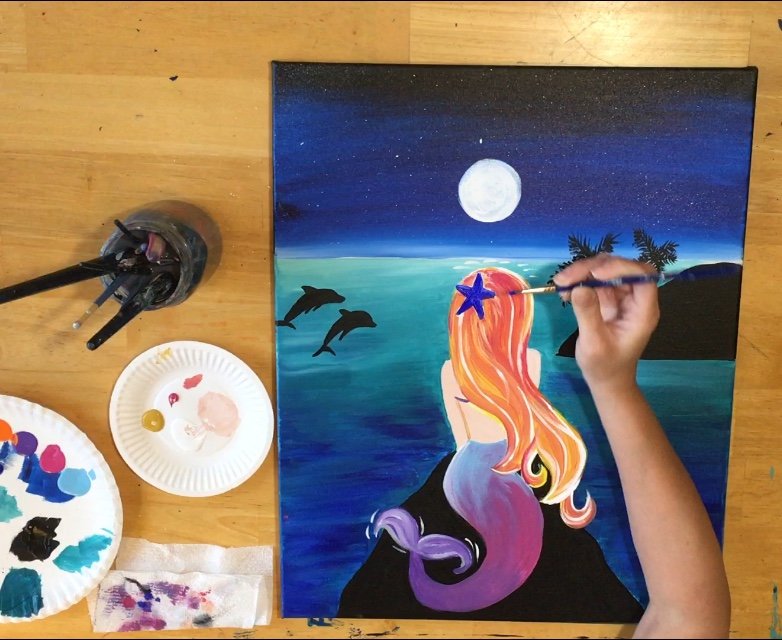
Now that the starfish is dry, I painted it in with ultramarine blue, or whatever you’d like!
I chose blue so it will contrast against the red-orange hair.
16. Paint white lines in the water

I used a #0 brush and titanium white to lightly paint horizontal reflection lines in the water.
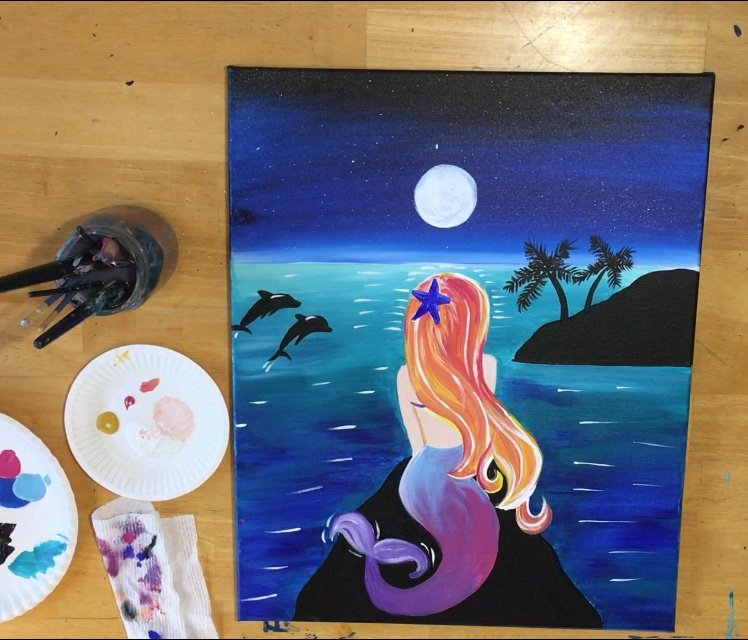
Don’t go too crazy with this step.
Also I did more lines closer to the horizon line just under the moon. Just enough to make the water look like it is sparkling.
17. Outline some of the silhouettes
I always like to slightly outline my black silhouettes because it makes them “pop” a bit.
I did this with the dolphins, trees and rocks.
Just lightly, use a tiny detail brush! If you don’t like the look, you can always skip this step.
18. Draw Mermaid Scales

I think this part really brings “magic” to that mermaid tail!
The end result makes the tail look metallic and “color shifting”.
I used a bronze sharpie to do this. I think the bronze looked the best as I tested it out with the gold first and it didn’t quite have the same effect.
Basically draw the scales like you are writing a bunch of letter “U”s.
Then fill in some of the scales solid color.
And, because I couldn’t resist that bronze sharpie, I gave her some highlights. Just a few!
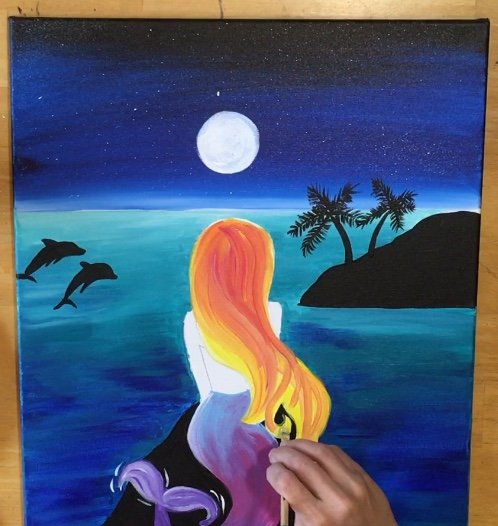
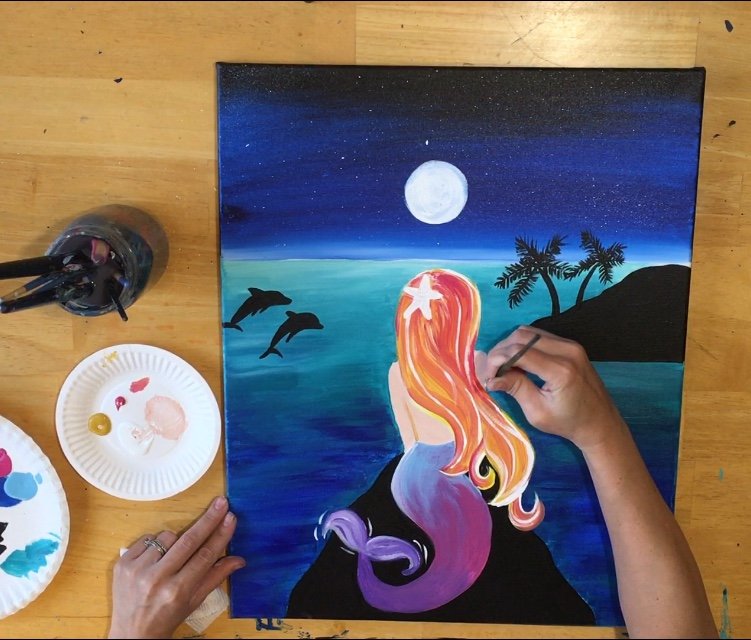
19. Draw The Constellation
 I used a white paint pen for this.
You can also use a tiny round brush to do this but I liked having more control with my pen!
Draw out stars to form the shape of a heart. You can also try it in chalk first and then draw over the chalk.
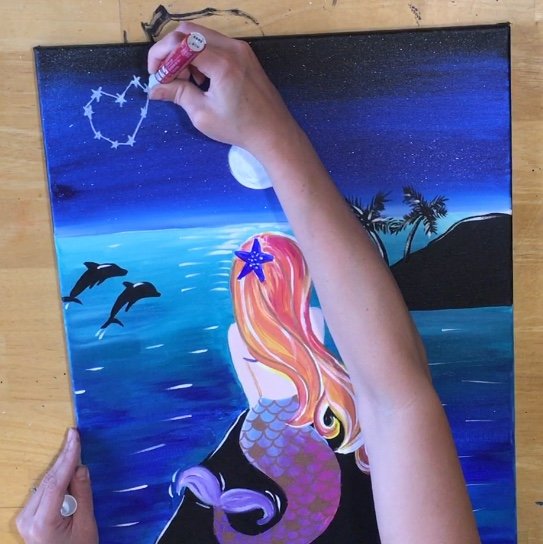
Then connect the stars like a constellation. Out of all the little details, this is my FAVORITE part of the painting!
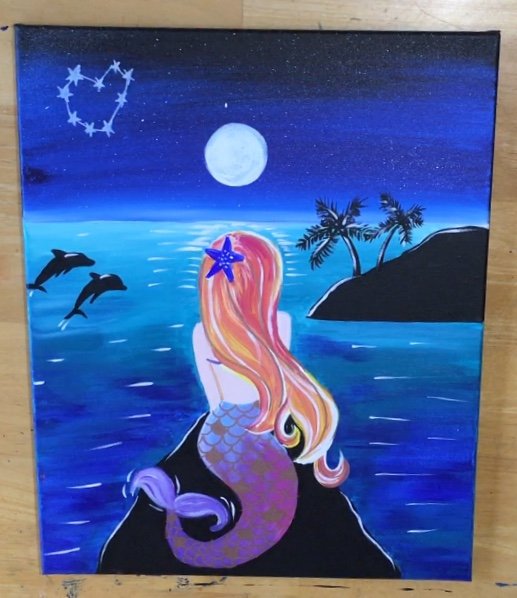
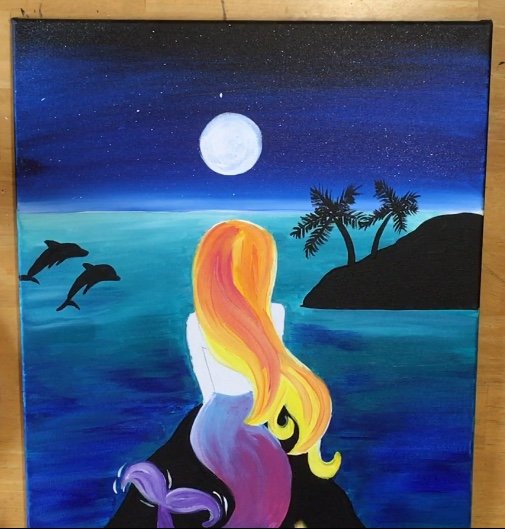
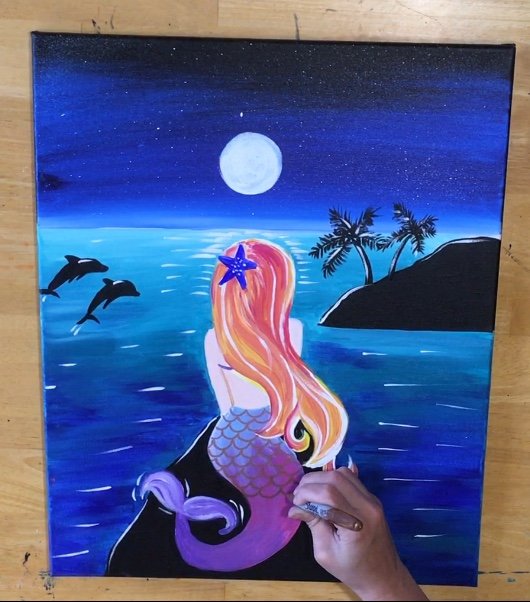
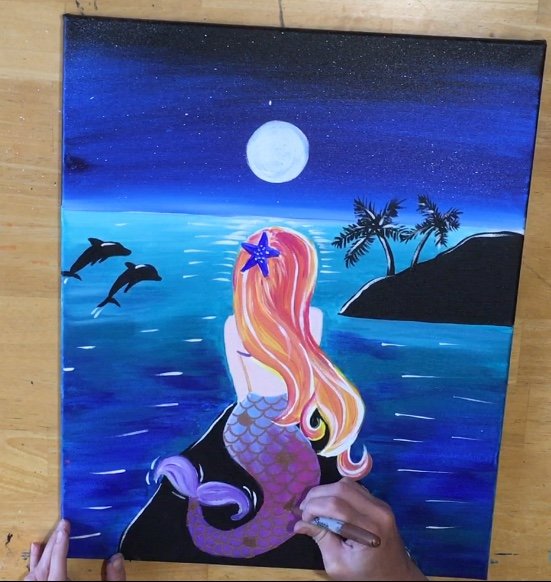
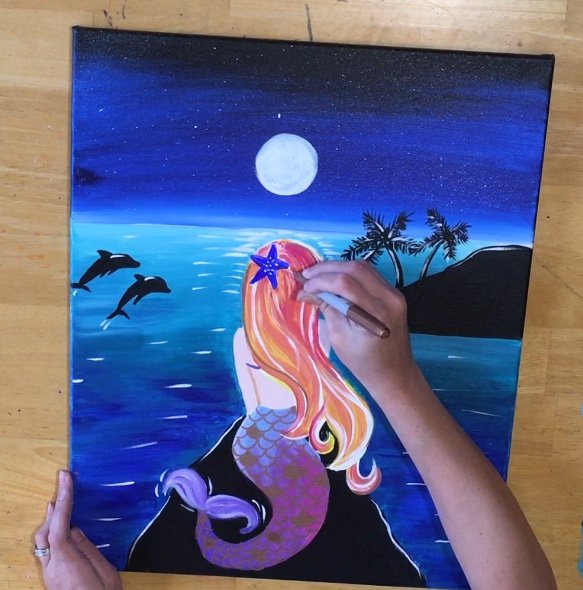
There it is! A beautiful, magical, moonlit mermaid painting!
I hope you had fun with this one and I can’t wait to see your paintings!
Don’t forget to sign your name and show it off!!
Finished!!
Would you like to save this?
THANKS FOR VIEWING THIS TUTORIAL!
See Also:


I love your paintings and the step by step instructions. It gives me so much happiness and peace. Thank you for sharing your talent.