
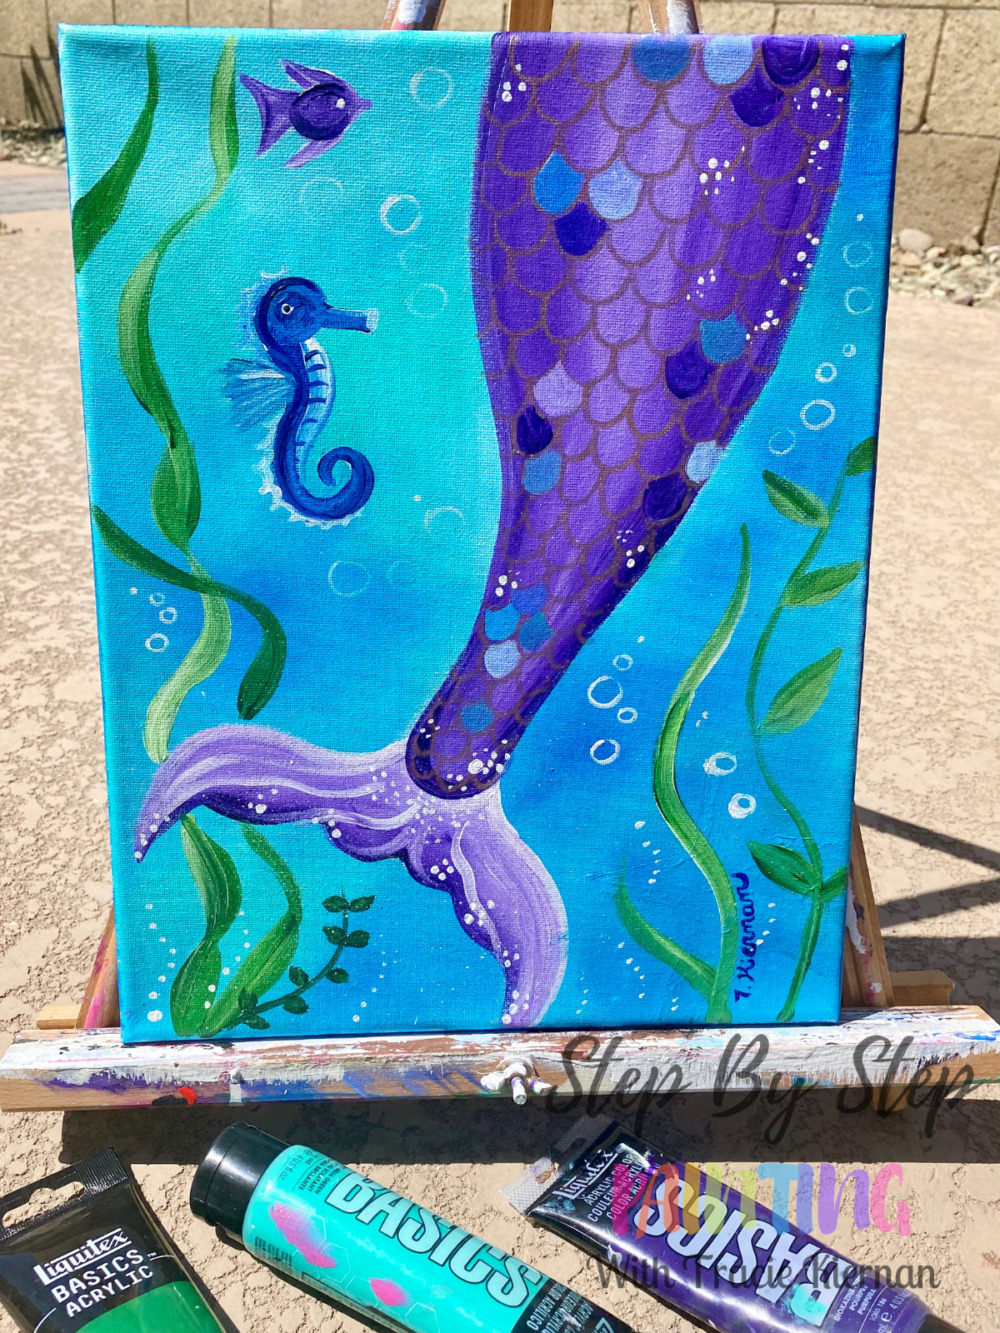
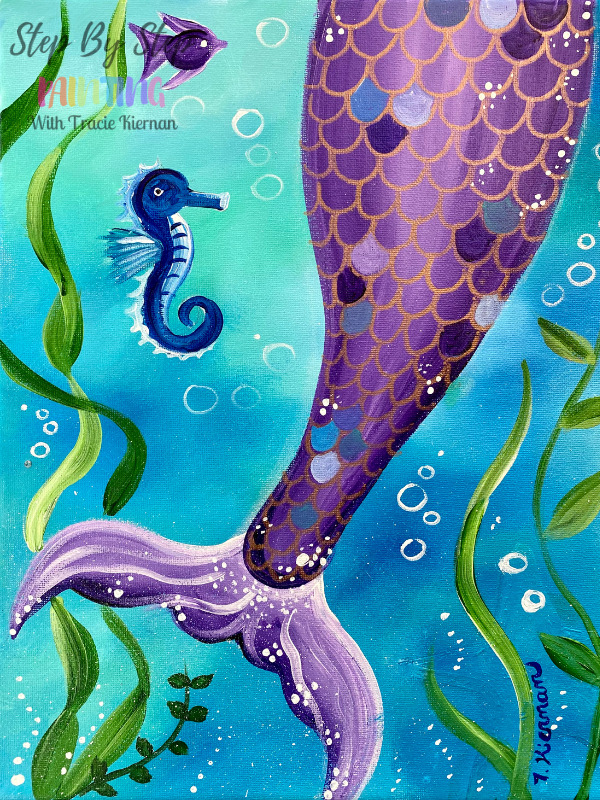
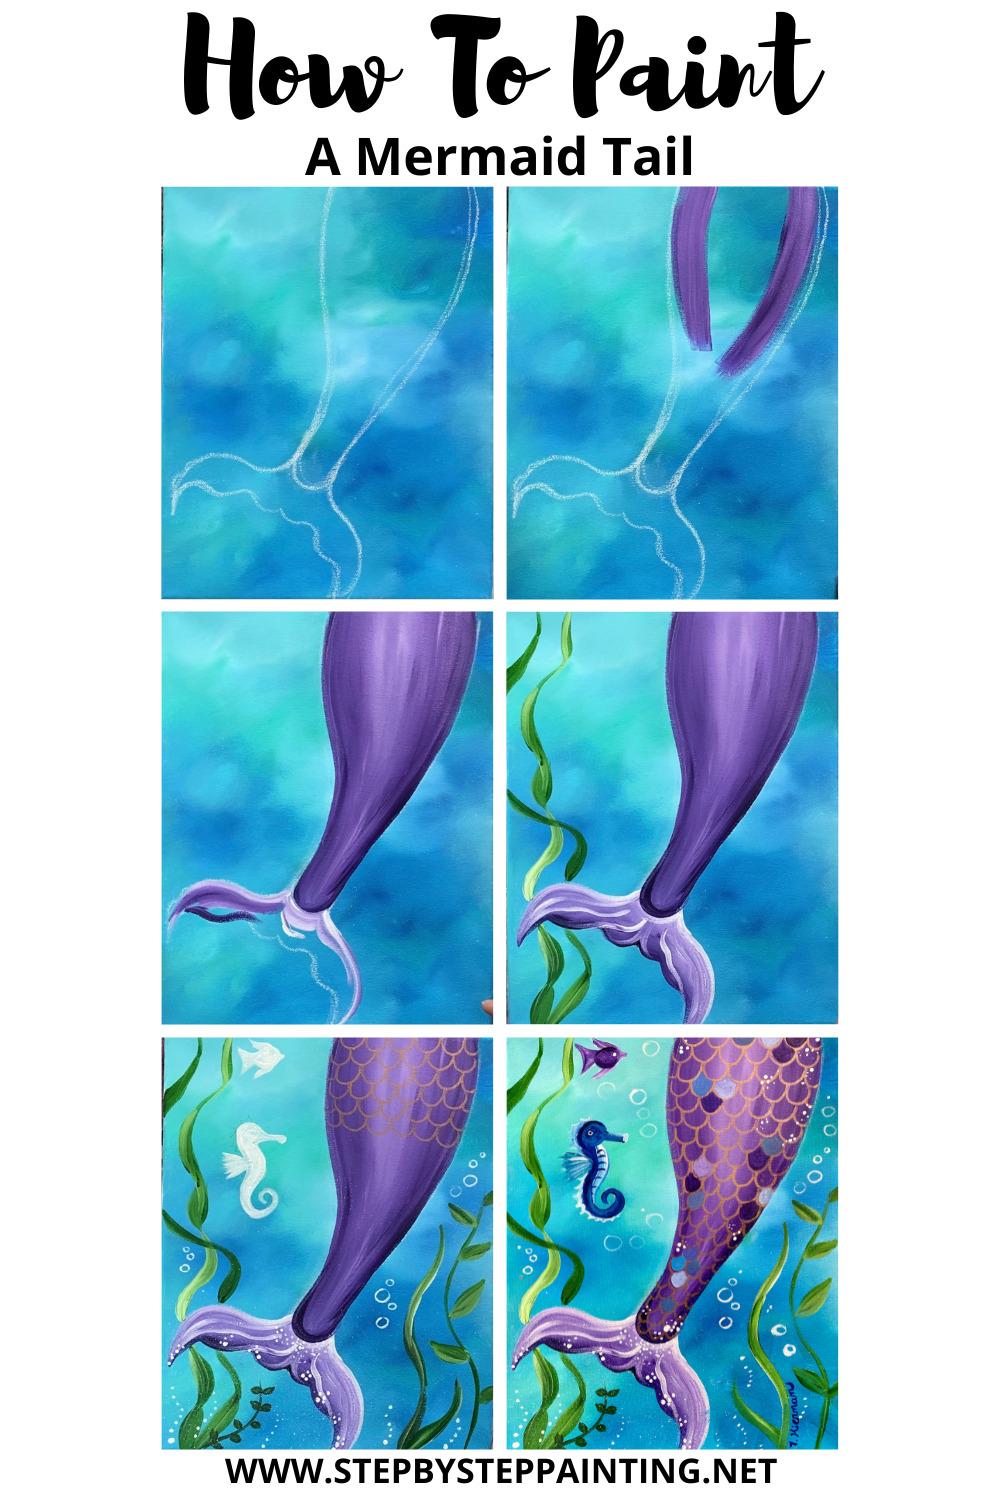
Learn how to create a mermaid tail painting! This acrylic painting tutorial has a pretty palette of cool purples, blues and greens!
It is also a perfect painting to compliment the “Under The Sea Painting“!
Would you like to save this?
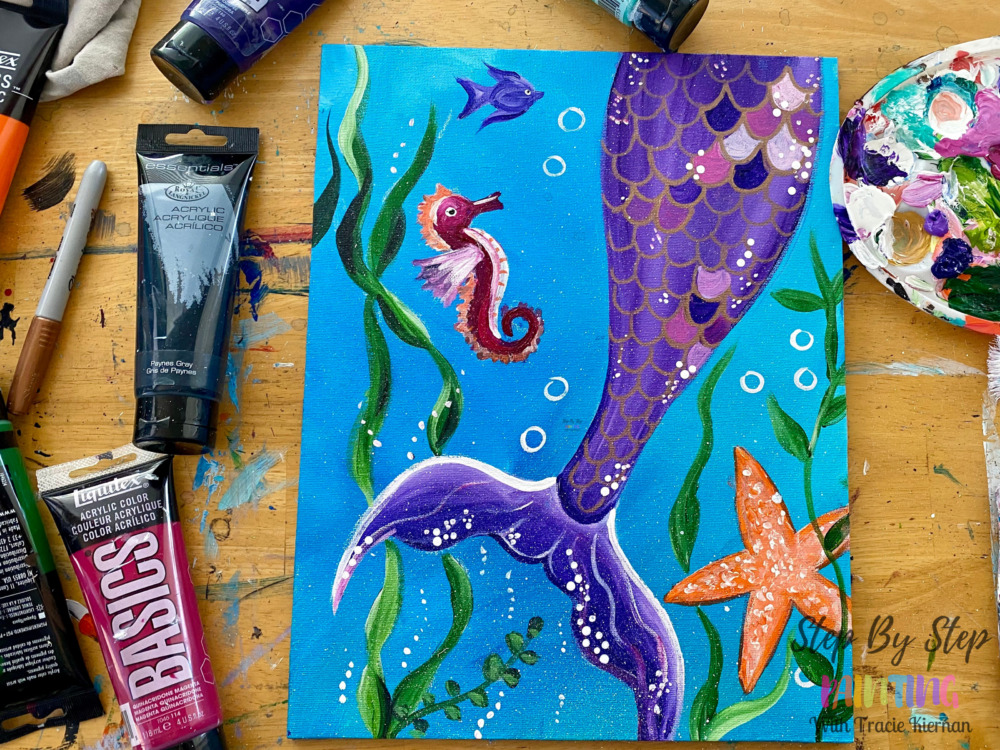
Customize the colors in this painting and add some custom sea creatures! You can do the sea horse in a brighter, warm color and add a starfish for a more bright, cheery color palette!
Enjoy and happy painting!
Materials
Mermaid Tail Acrylic Painting Tutorial
Learn how to paint a mermaid tail with acrylcis on canvas. easy step by step painting for beginners.
Materials
- Acrylic Paint
- Brushes
- Canvas
- Chalk
- Optional Template & Graphite Paper
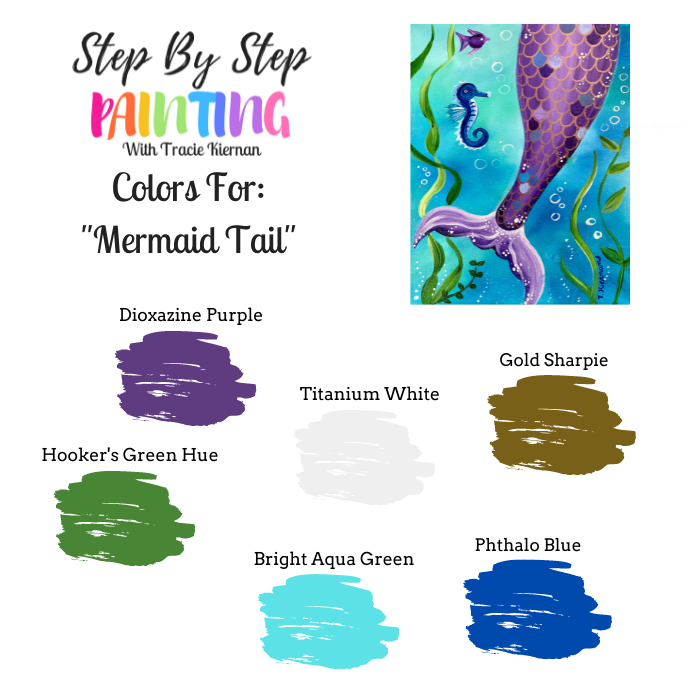
- Gold or Silver Sharpie
Colors
- Titanium White
- Hooker's Green Hue Permanent
- Phthalo Blue
- Bright Aqua Green
- Dioxazine Purple
Brushes
- 3/4 Flat Wash
- Makeup Blending Brush
- Toothbrush
- #4 Round
- 5/0 Round
- #8 Round
Instructions
- See tutorial on www.stepbysteppainting.net for full instructions!
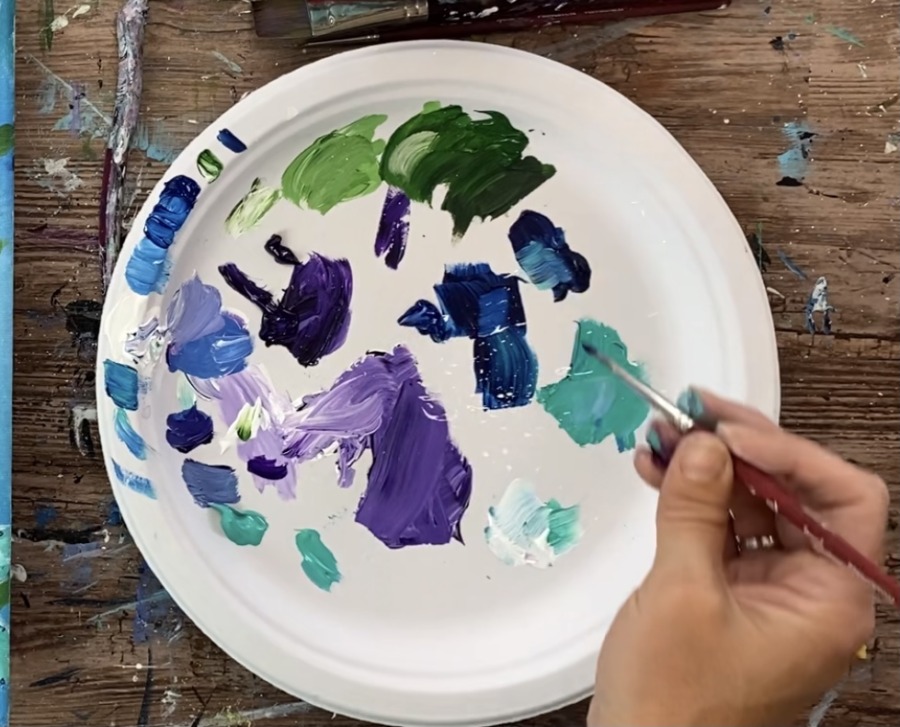
Color Palette
Using Craft Paints?
Try substituting these Apple Barrel Craft Paint Colors:
- White
- New Shamrock
- Bimini Blue
- Purple Iris
- Too Blue
Directions At A Glance:
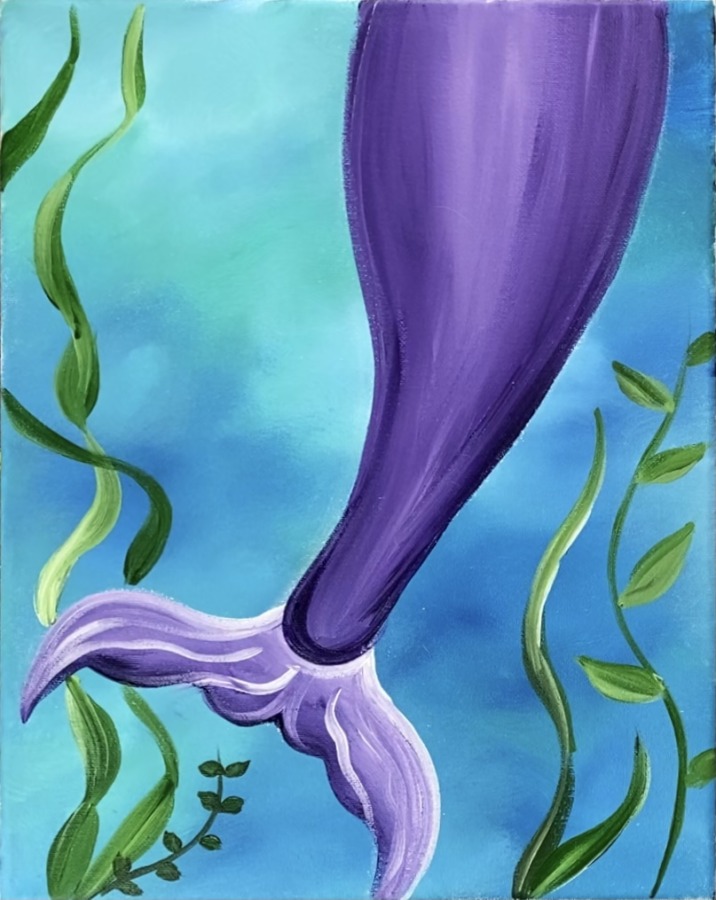
Traceable

Video
Step By Step Directions
1. Paint The Background
Use a 3/4″ flat wash brush and a mop blending brush for this technique. Load your palette with three colors: bright aqua green, phthalo blue and titanium white.
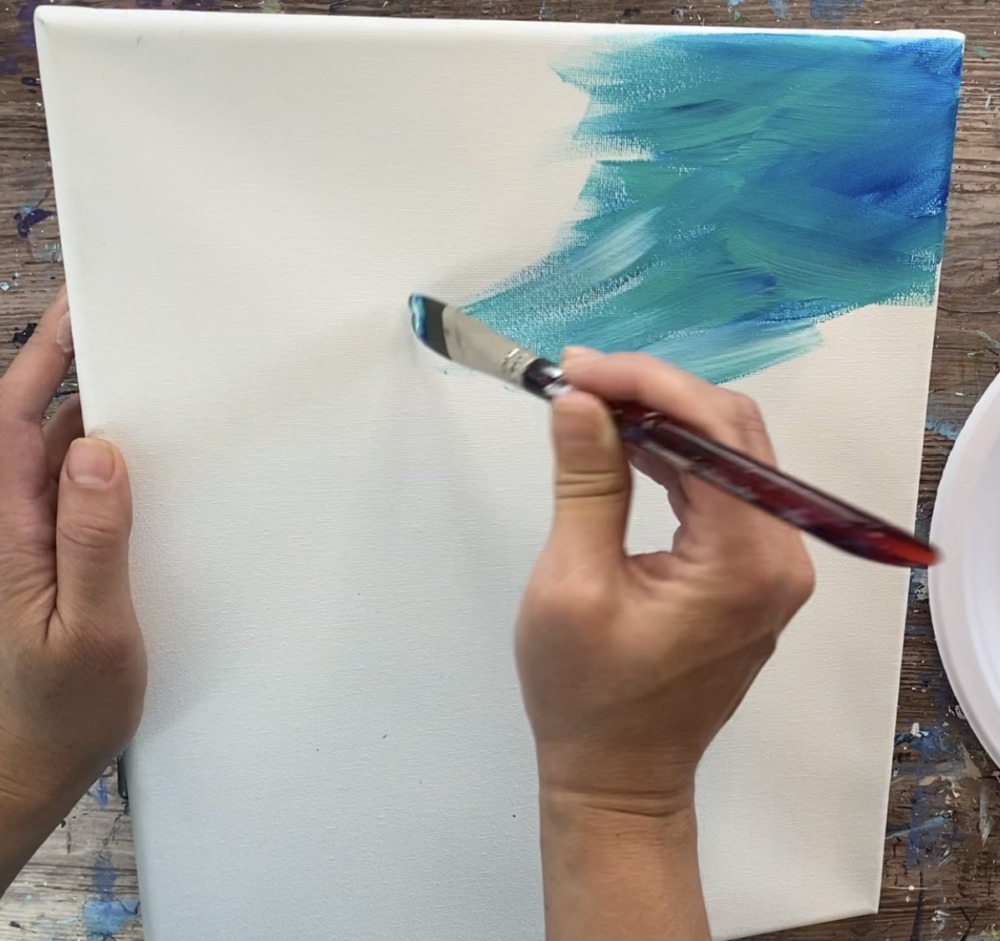
Triple load our 3/4″ flat wash brush in the three colors (aqua, blue and white). Paint in textured angle strokes blending the three colors on the canvas.
Then before that dries, take your mop blending brush and blend the colors so the strokes on the canvas become very soft. Try not to over blend the colors to the point where they all turn the same solid color.
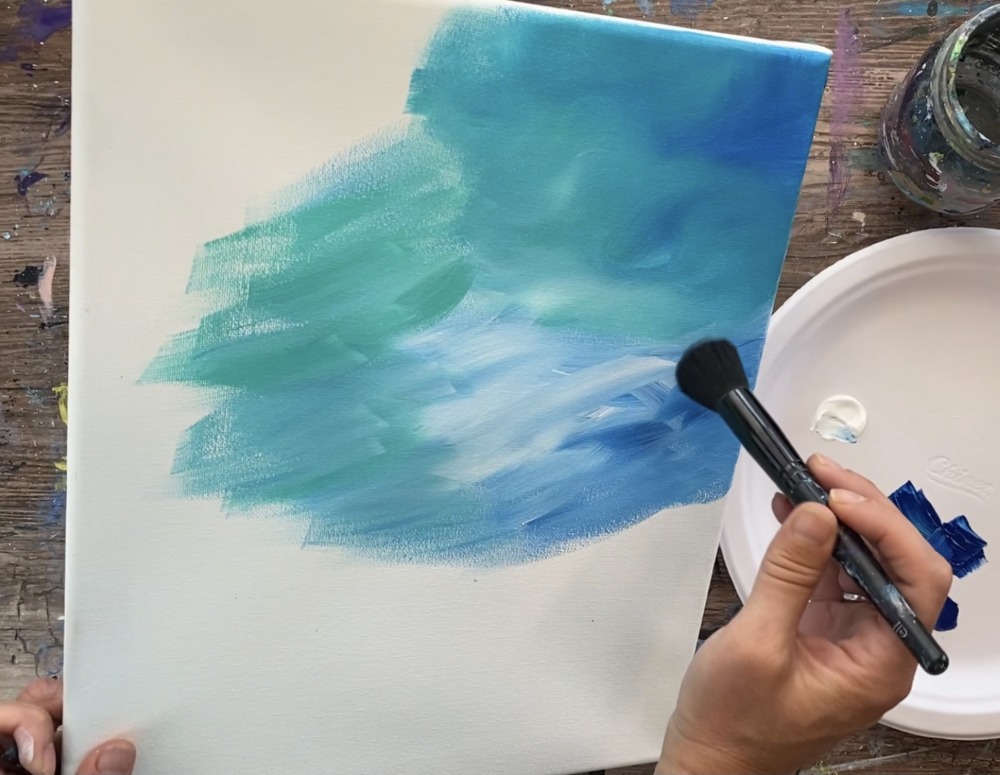
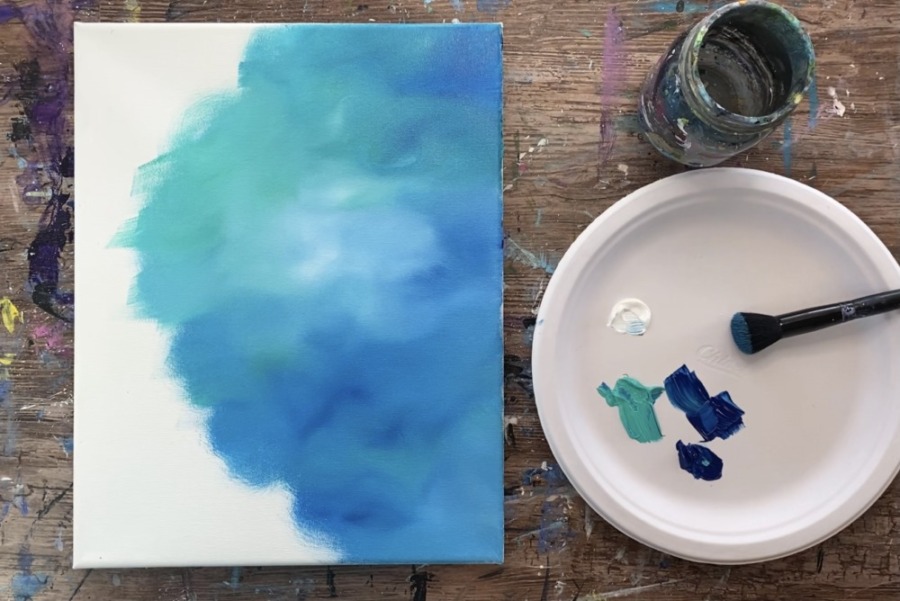
Continue to switch between the 3/4″ flat wash brush and the mop blending brush so the colors blend on the canvas and look soft. Try to create some variations in the background where some areas are lighter, some darker. Some areas have more of the darker blue and some have the aqua.
Those two brushes pictured below were used to create this very soft blended background.

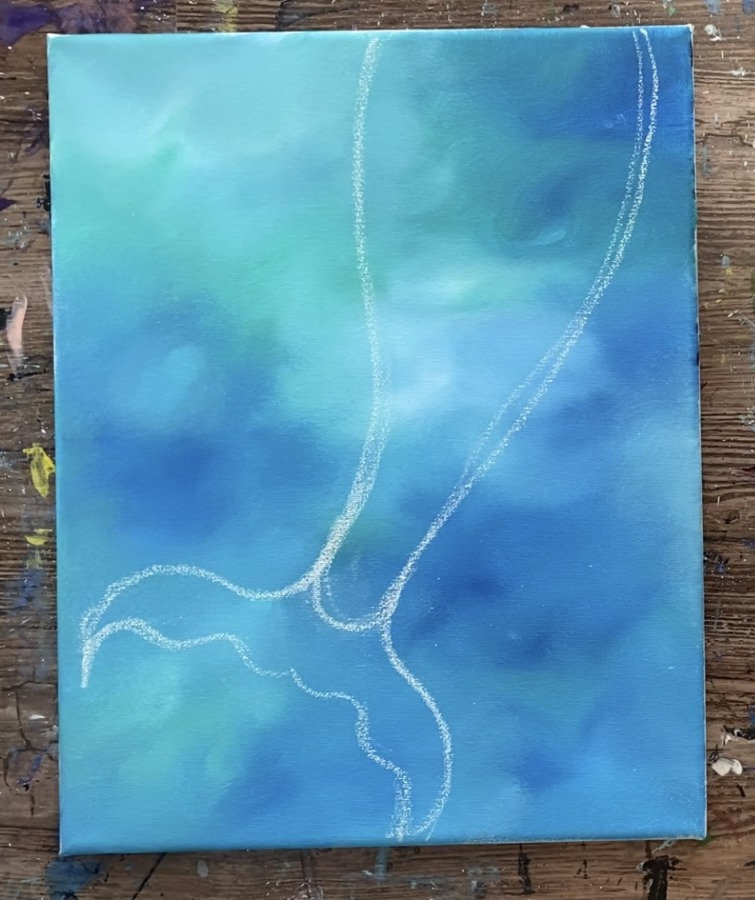
2. Draw The Mermaid Tail With Chalk
You are welcome to download the template and use a traceable for this! You can also use a piece of chalk to draw the mermaid tail. Start at the top with your chalk so the top piece is wide and goes down narrow but not to a point.
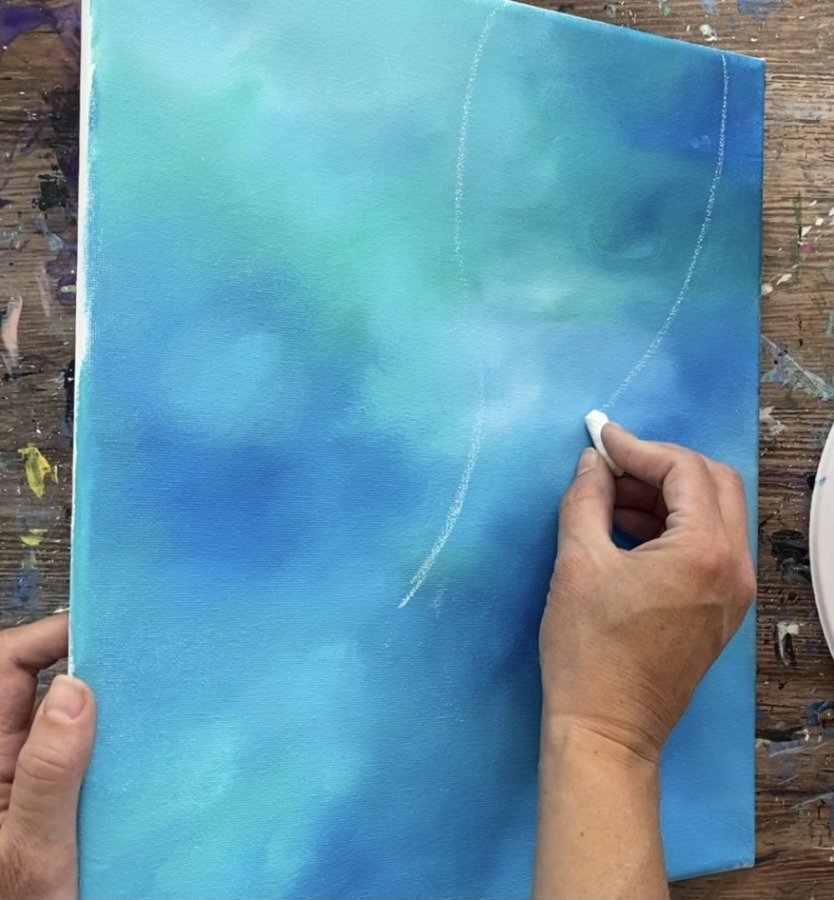
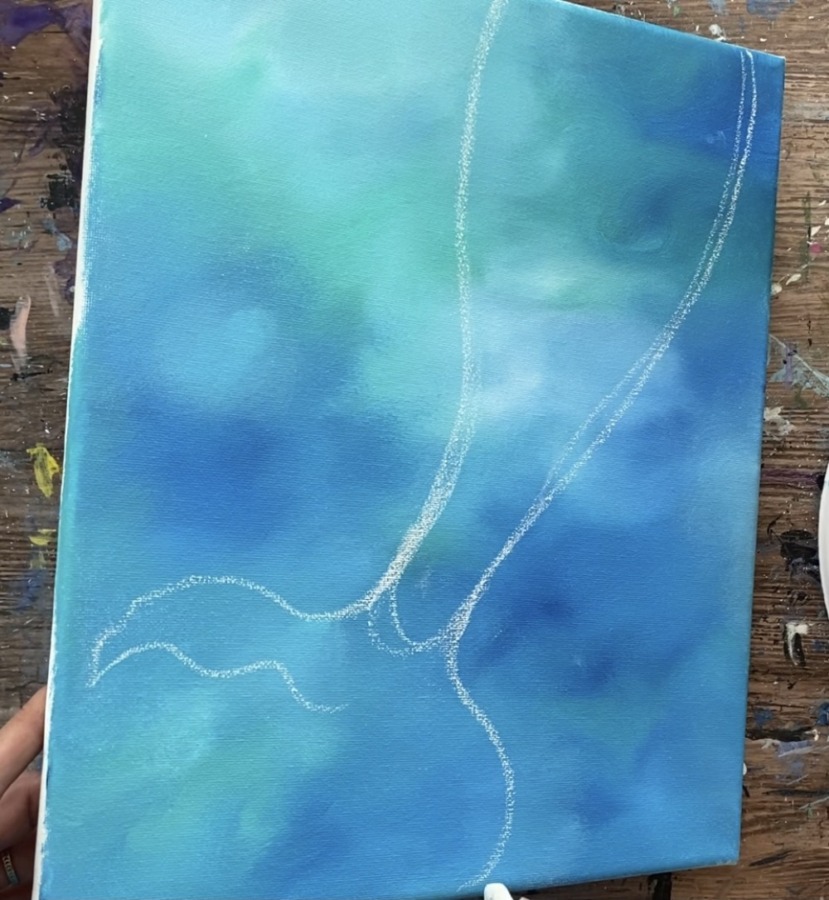
The bottom part of the mermaid is curved.
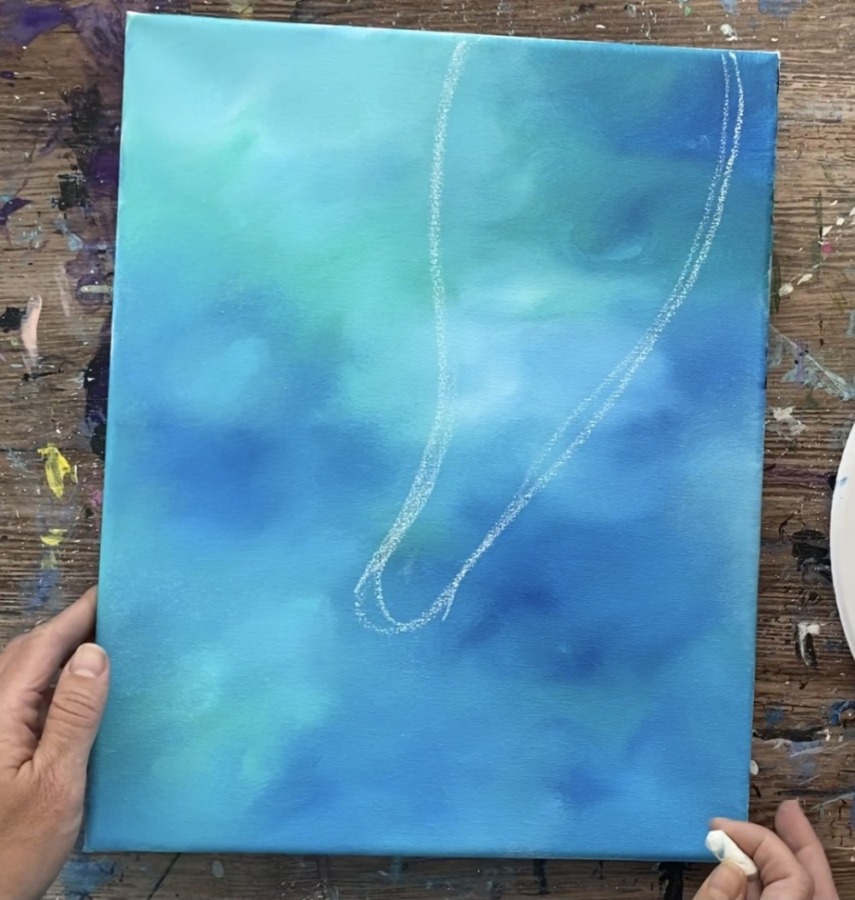
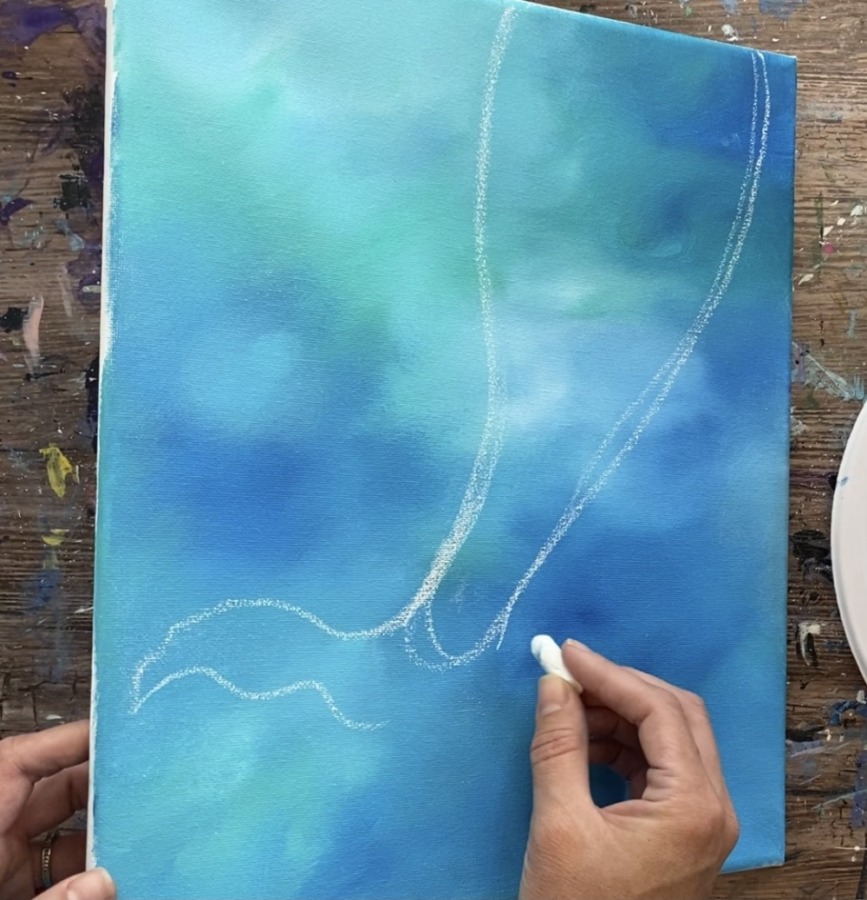
Then draw the mermaid tail. Draw an arc and then wavy lines below it.
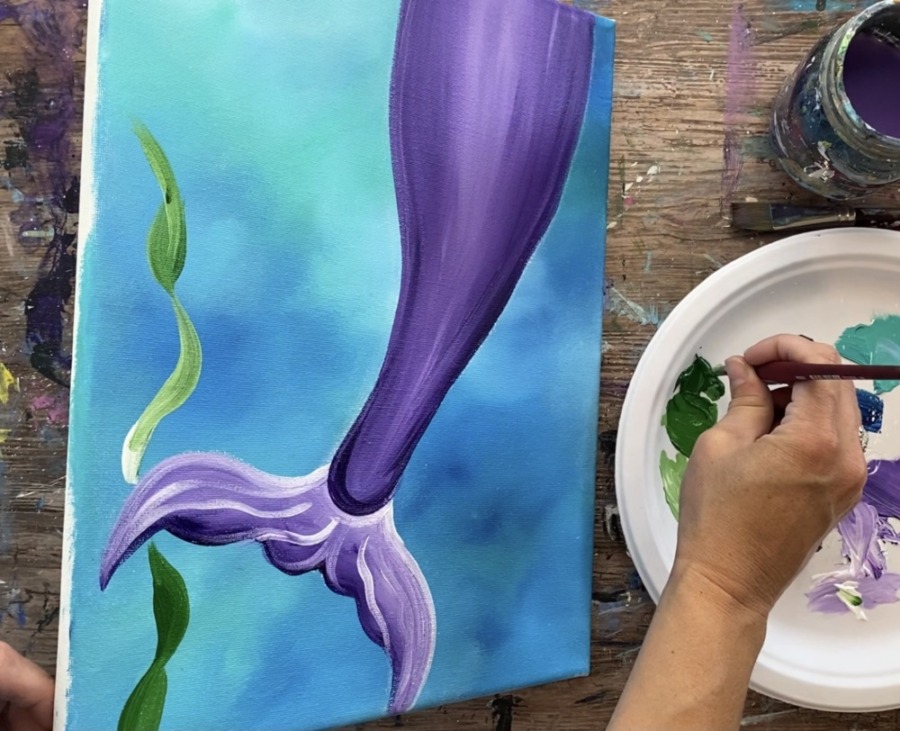
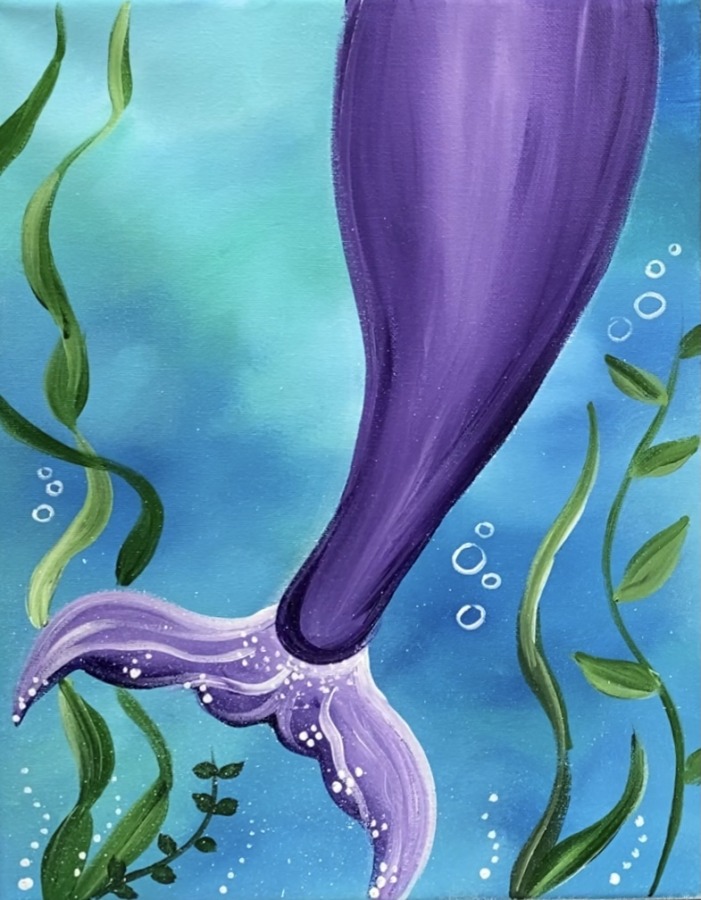
3. Paint The Tail
Next paint the mermaid tail. Load your palette with dioxazine purple and titanium white. Load your 3/4″ flat wash brush with the purple and a little bit of white. Paint the tail stroking downwards blending that purple with the white.
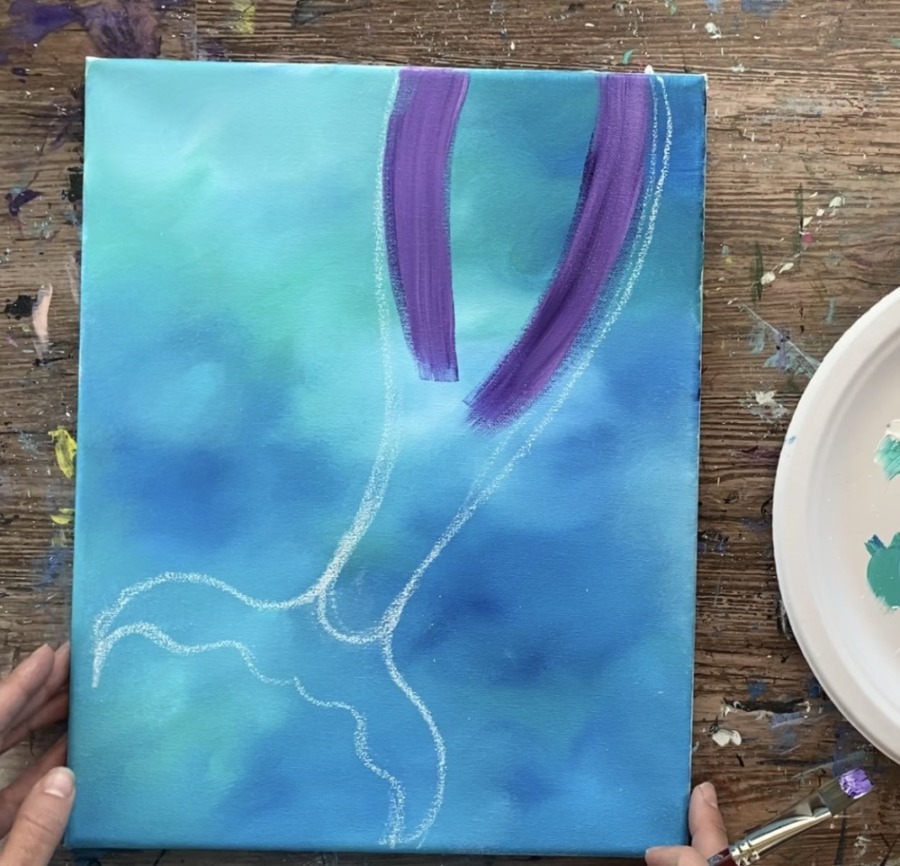
Blend in more white in the center so there is more white in the center of the tail. Add more of the dioxazine purple on the left and right of the tail so it is slightly darker on those sides.
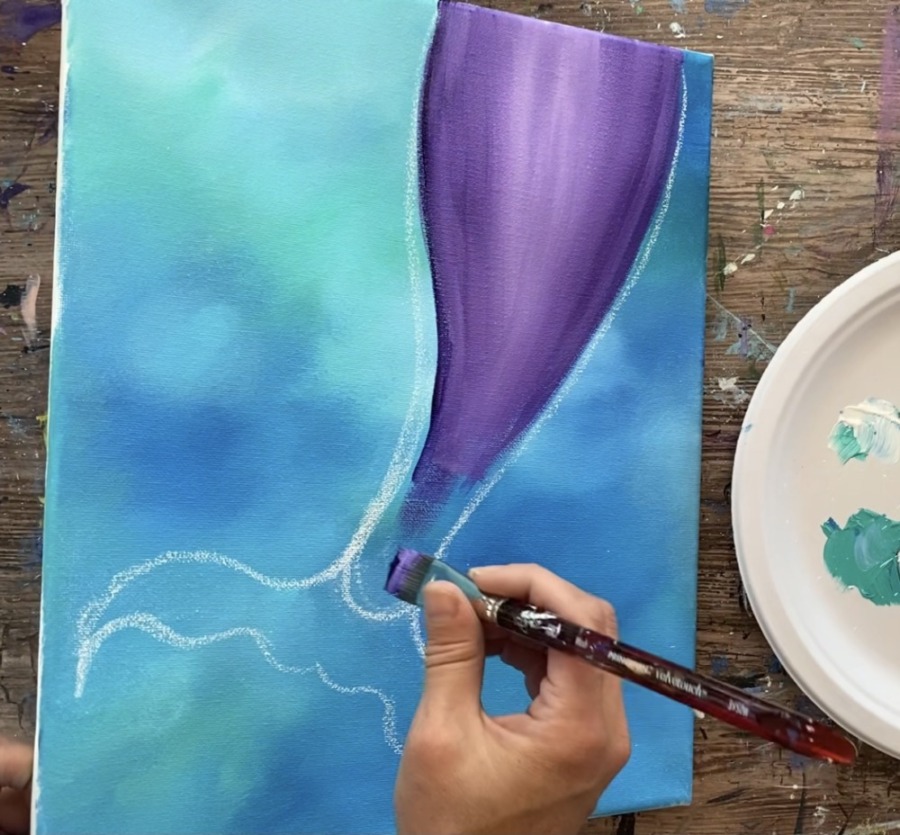
Then use your #8 round brush to paint the fin. Start with more white and a little bit of purple so that the top part of the fin is lighter.

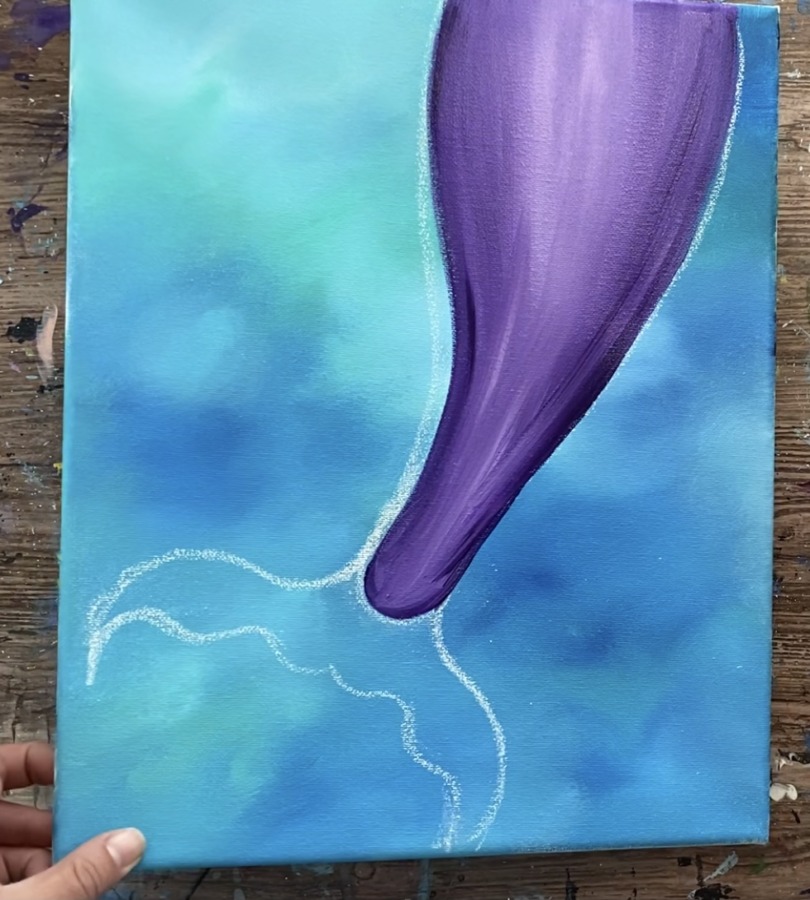
Then blend more of the darker purple into the middle part of the fin. Paint in curved, contouring strokes. This is a very “flowing” part of the tail so make sure your strokes are “curved”.
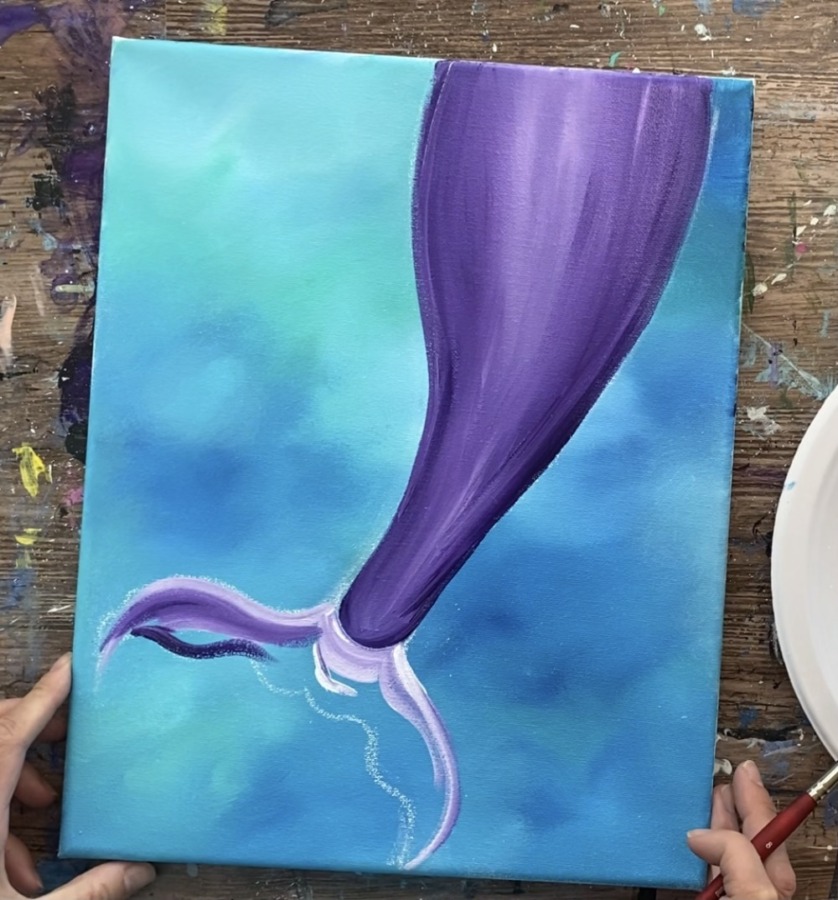
Try to get the top part of the fin to be lighter and have it blend to a darker purple on the bottom part of the tail. Make sure you also define the shape of the fin.
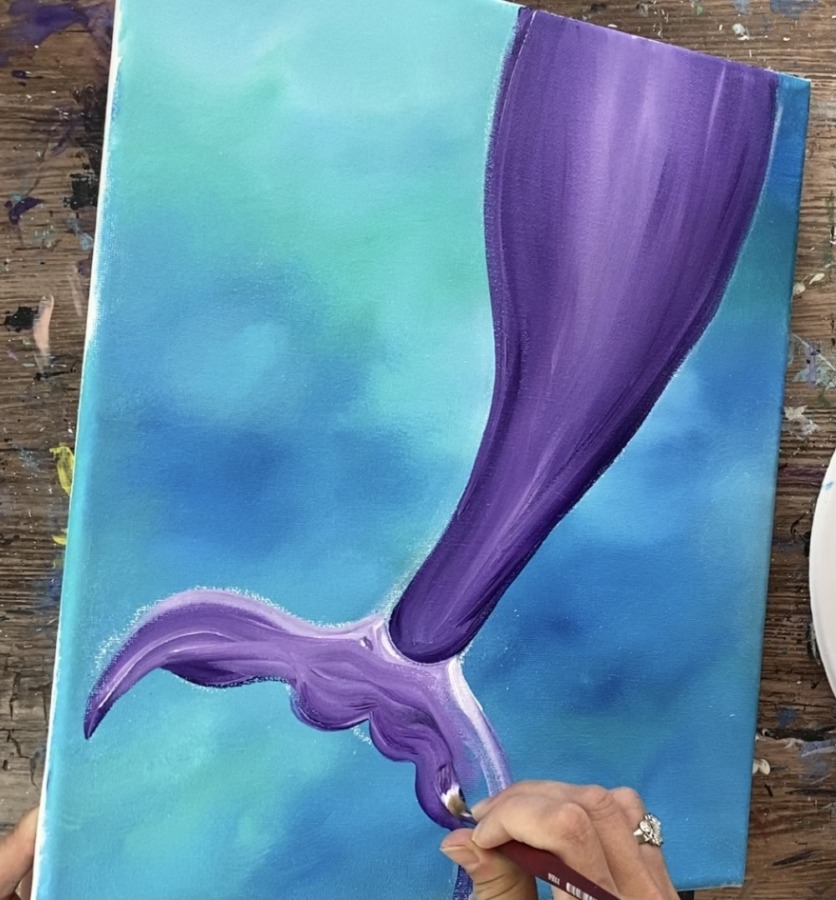
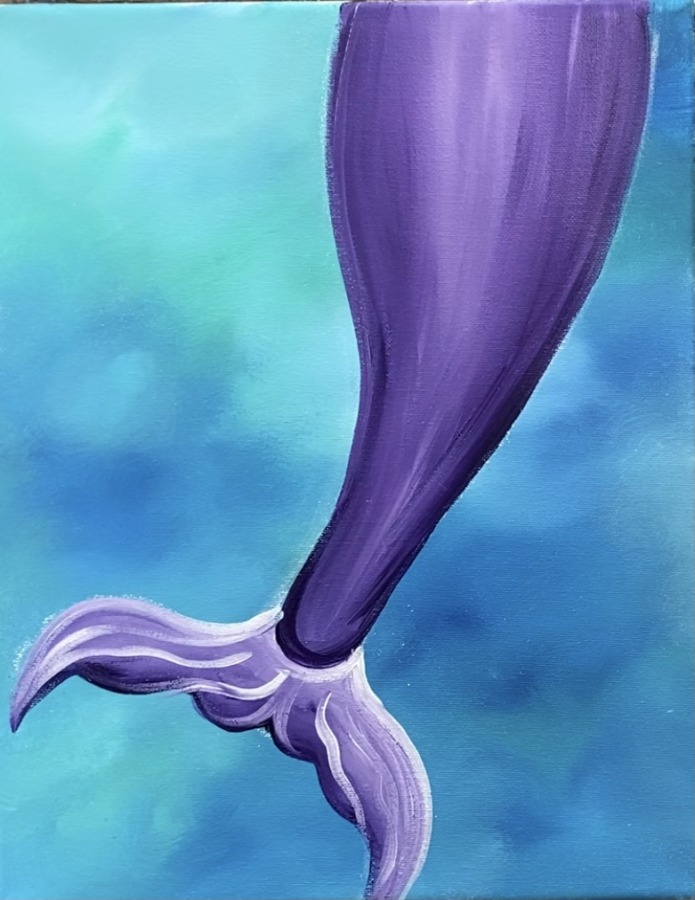
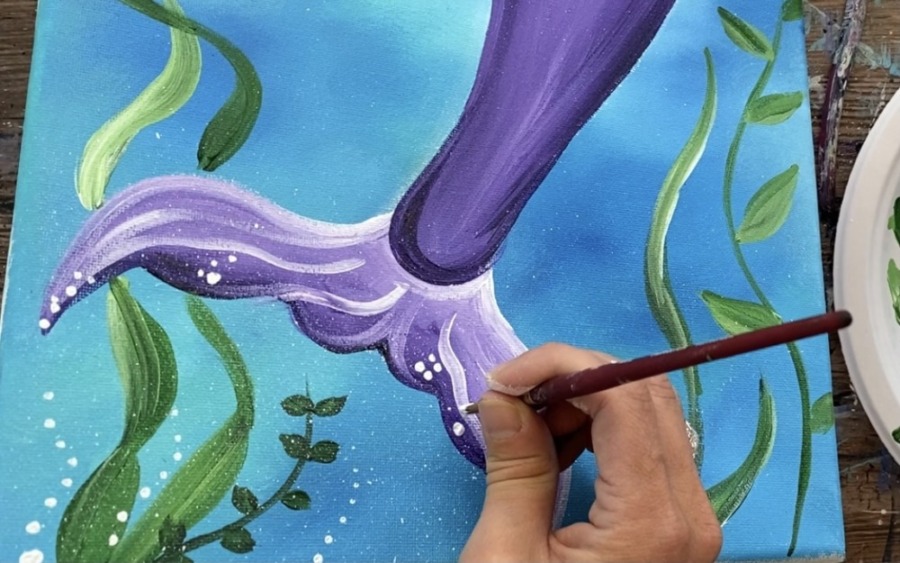
Then rinse brush and load it into just titanium white. Paint white curved lines on the tail to create some of the fin texture.
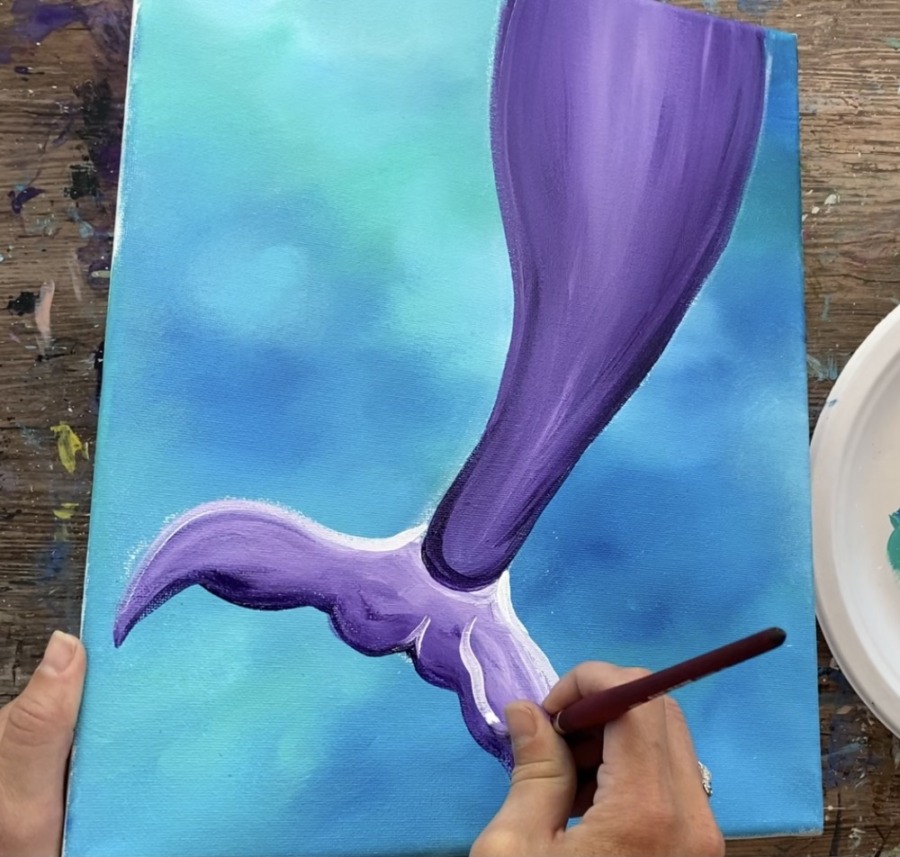
Start in the center under the curved top of the fin and paint a flowing white line to the bottom edge of the fin. Do several of these fin lines on each side.
4. Paint Seaweed
Load your palette with hookers green hue permanent and titanium white. Use a #8 round brush and load it into both the white and the green.
Use the #8 round brush to paint the seaweed. Alter the thickness of the stroke of the seaweed so it gets wider and then thinner. Change the amount of green and white you load on the brush so it varies.
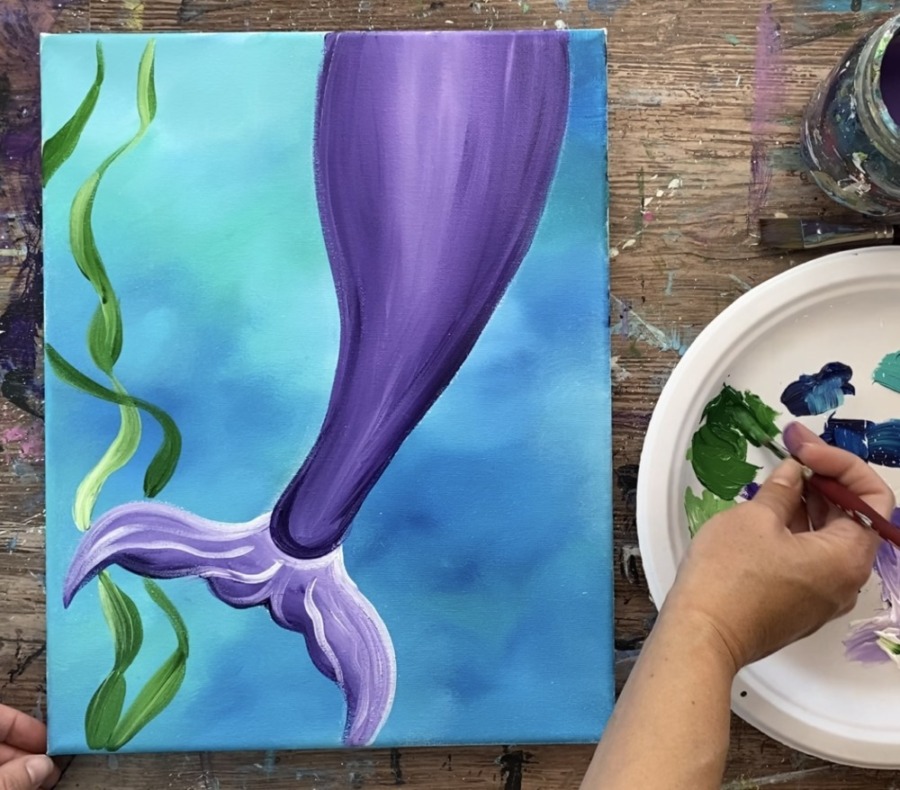
Paint several types of seaweed. Some can be vertical and wavy. Some can have leaves on the sides of the lines. Some can have small rounded leaves.
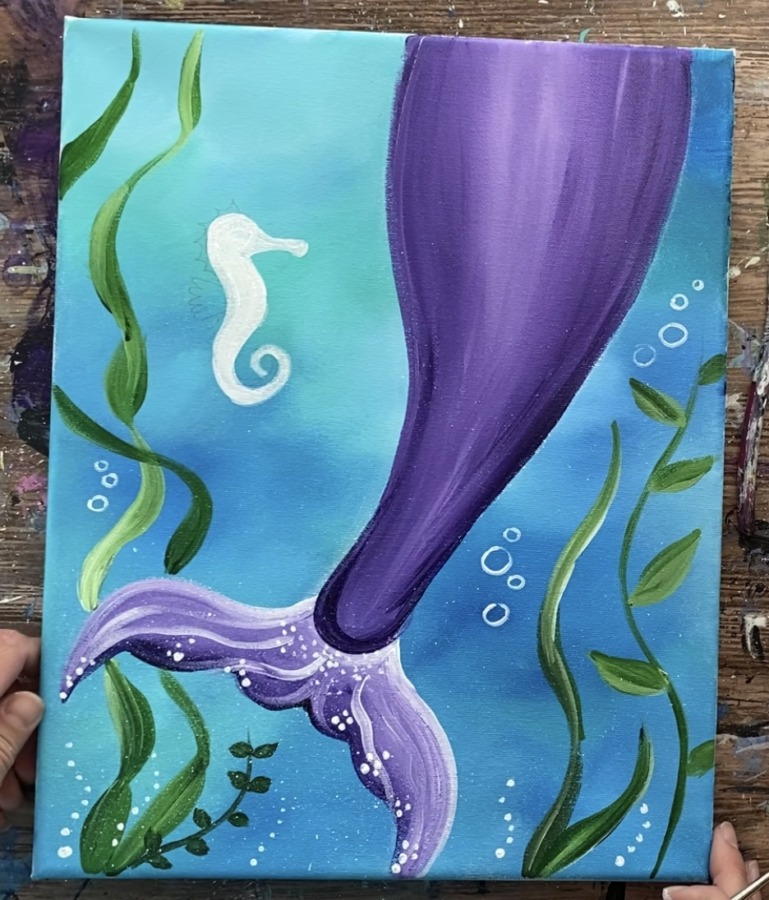
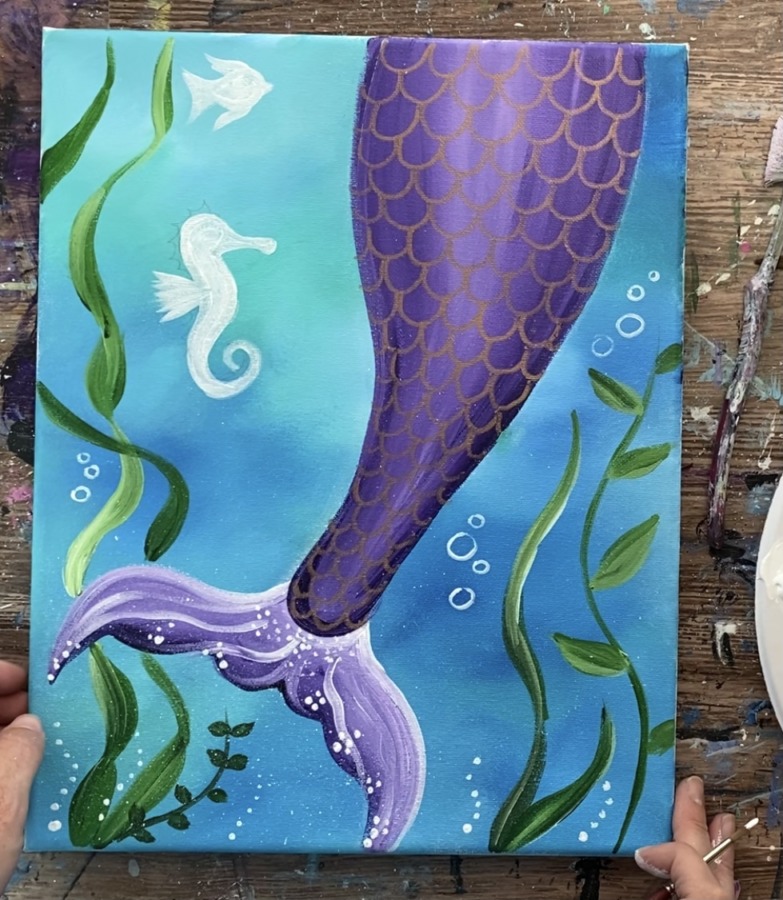
5. Paint Splashes/ Tail Sparkles
Use a toothbrush to splatter some small dots under the tail. Load a small amount of slightly watered down titanium white on the brush and flick it with your finger to create the splatters.
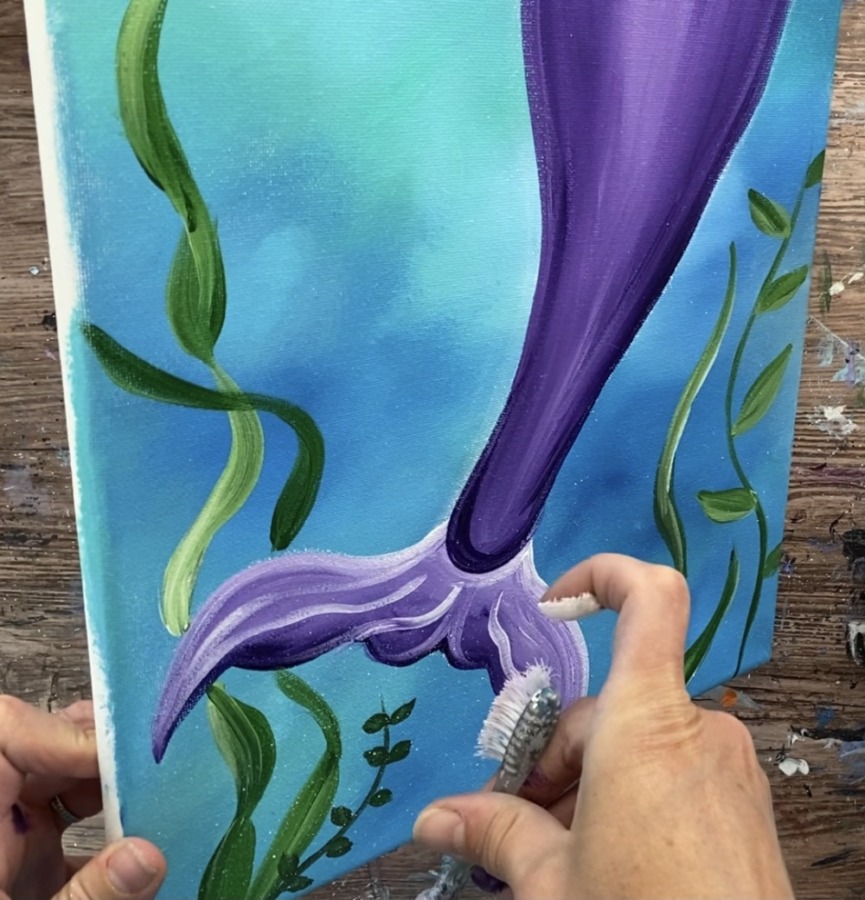
You can do this all throughout the canvas but I did it mostly on the bottom under the mermaid fin.
Then paint various sized dots on the tail. Use a #4 round brush and titanium white. Paint these dots in clusters and make some that are tiny and some that are slightly bigger. This adds to the “sparkle effect” on the tail.
6. Paint Bubbles
Then use a smaller 5/0 round brush to paint small white circles all throughout the painting. You can also do strings of small white dots on the bottom around the seaweed.
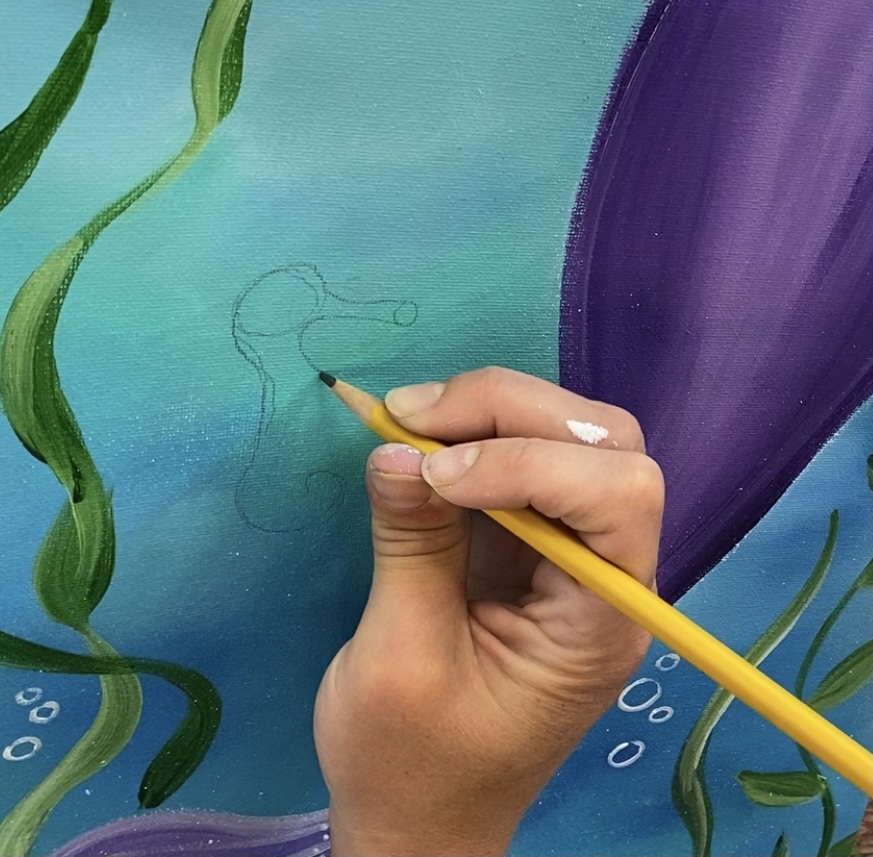
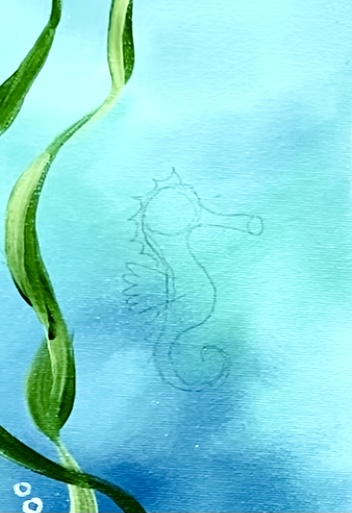
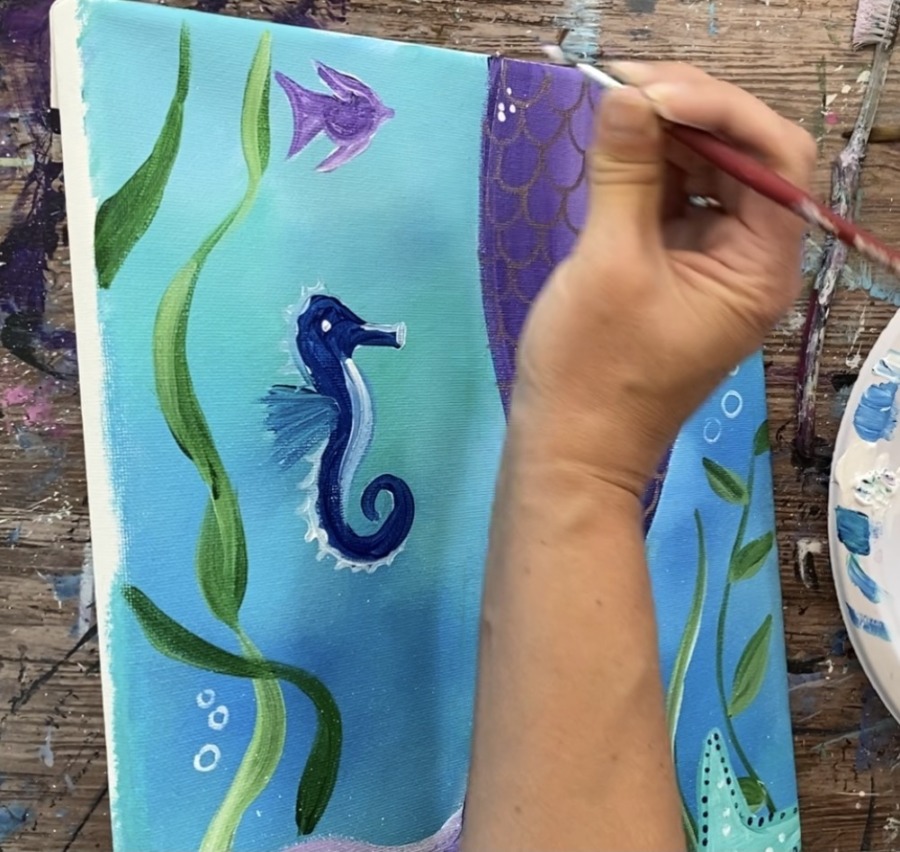
7. Draw/ Paint Seahorse & Fish
Next draw the seahorse with a pencil (or use the traceable template that has the seahorse on it). You can see a great tutorial for how to draw this kind of seahorse here.
Then I highly recommend you paint the seahorse titanium white so the color of the seahorse will stand out better against the dark background (it gives it better coverage).
Then paint a fish white (or draw it in and paint it).
7. Draw The Scales With Gold or Silver Sharpie
I used a gold sharpie to draw the mermaid scales. This can also look great with a silver sharpie or even a black one!
Draw the upside down half circle shapes in a row. And then stagger them in the next row like bricks.
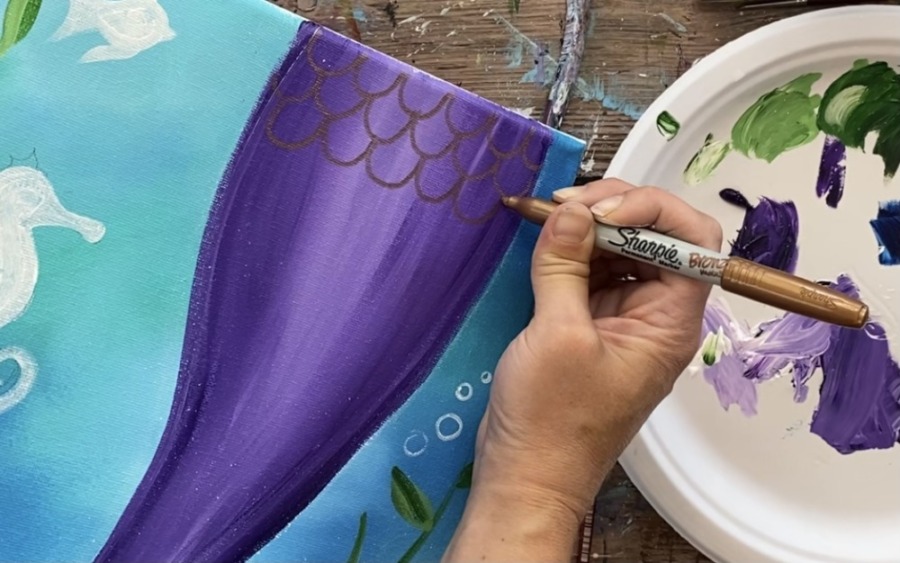
Continue to draw the scales working your way down to the bottom of the mermaid fin.
8. Paint Sparkles on Mermaid Tail
Then do more clusters of white dots all throughout the tail the same way you did them on the bottom fin piece.
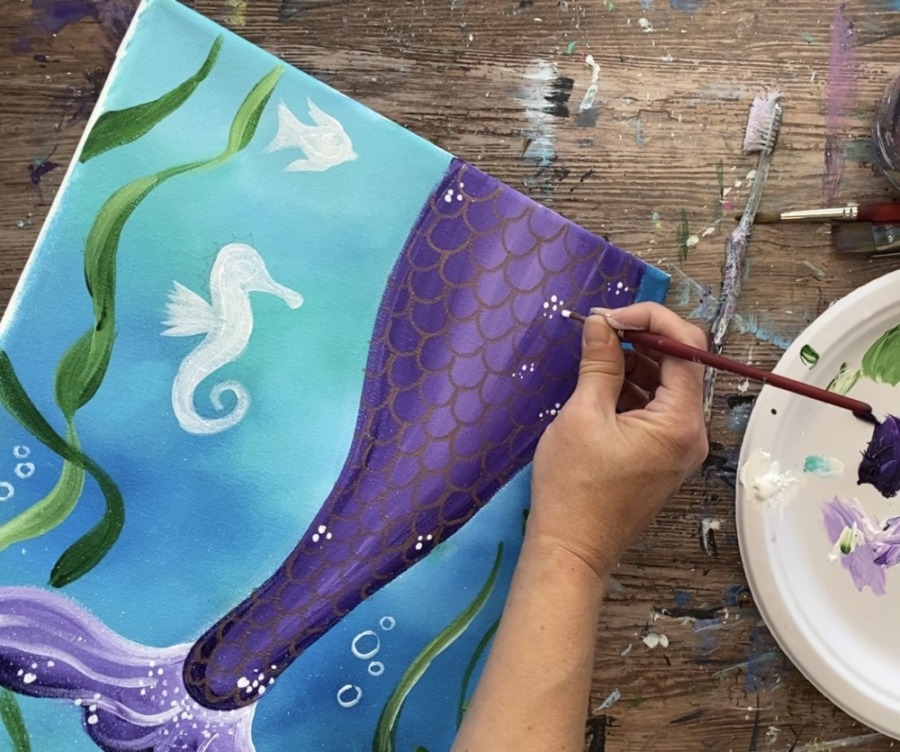
Vary the dots so some appear larger, some smaller.
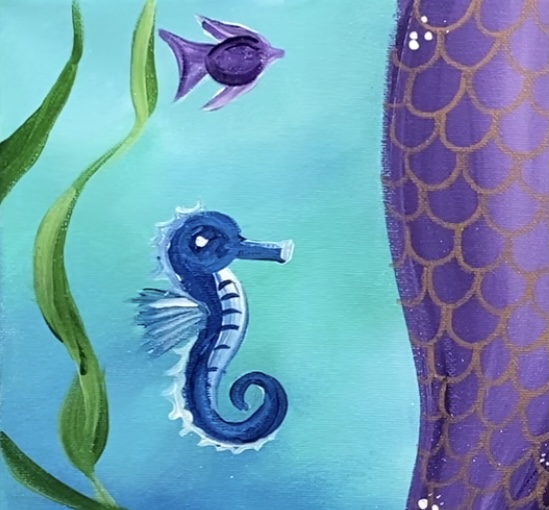
9. Paint Seahorse & Fish
If the seahorse base coat is dry, paint it with phthalo blue (or another color choice if you wish).
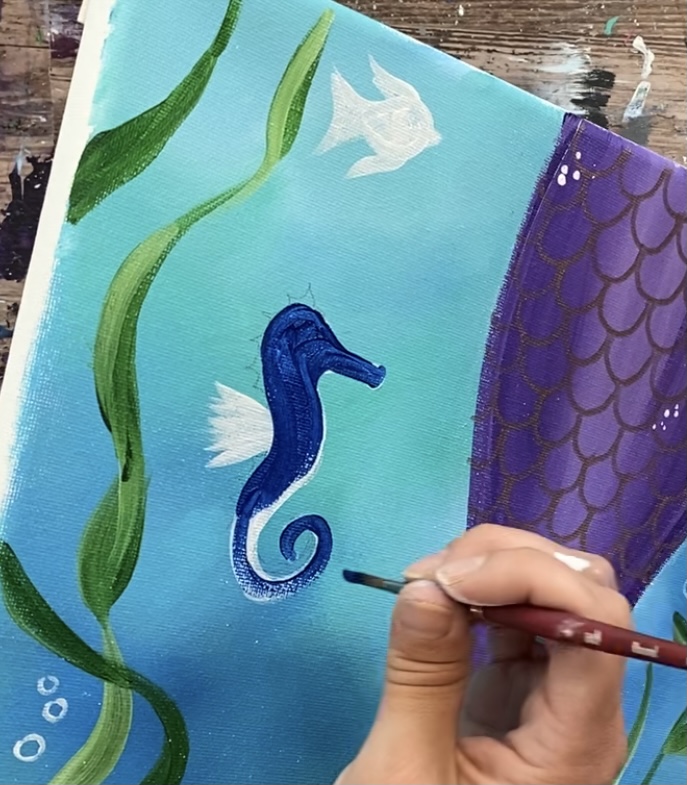
Paint the left part of the seahorse, the head, tail and mouth with the phthalo blue. Then mix a little white into the phthalo blue so it becomes lighter. Paint the side fin and the belly with that lighter blue.
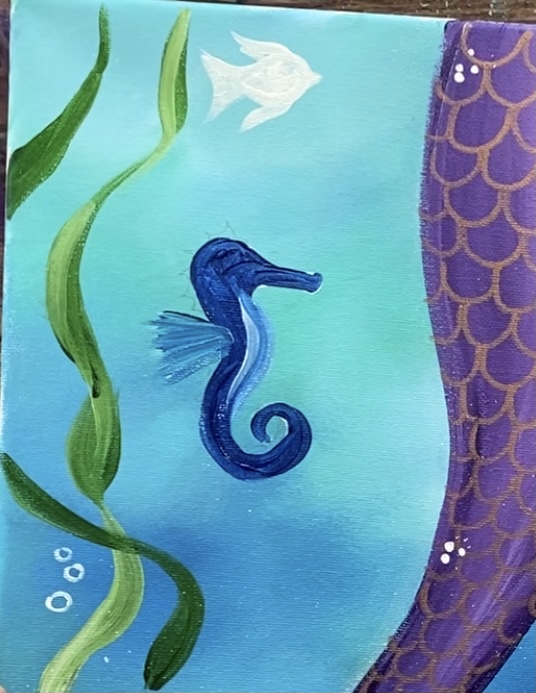
Then paint the points on the back with that lighter blue.

Paint the eye white.
Then paint blue lines on the bellow of the seahorse. Paint the fish with a combination of dioxazine purple and a little bit of white so some areas of the fins are lighter purple.
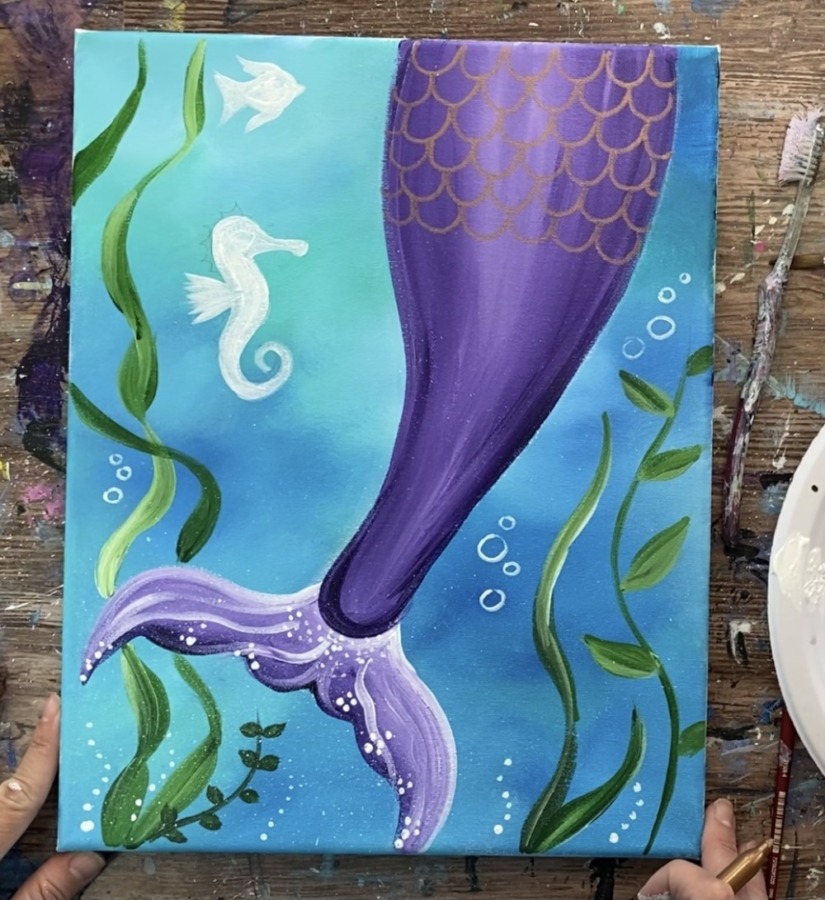
10. Paint Some Scales On Mermaid Tail
Next paint some of the scales on the mermaid tail. I wouldn’t recommend painting all the scales but it does give it a pretty effect when various shades of blues and purple used on your palette are used to paint some of the tails in clusters.
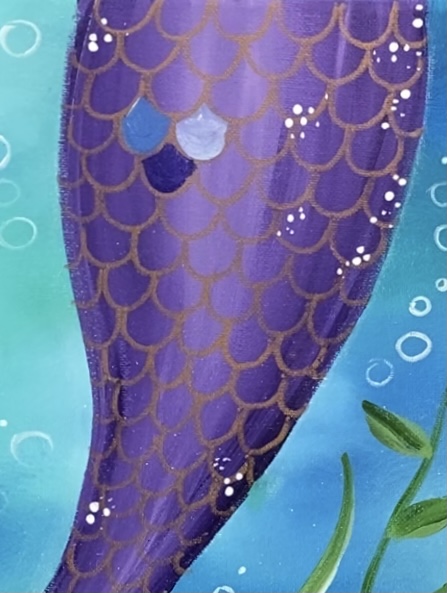
On your palette mix variations of blue with white and purple and aqua. Have fun making and mixing different unique colors. Then use the #4 round brush to paint those unique colors on the shape of the scales.
Paint them in clusters. Some areas have three scales painted together, some two and some four.


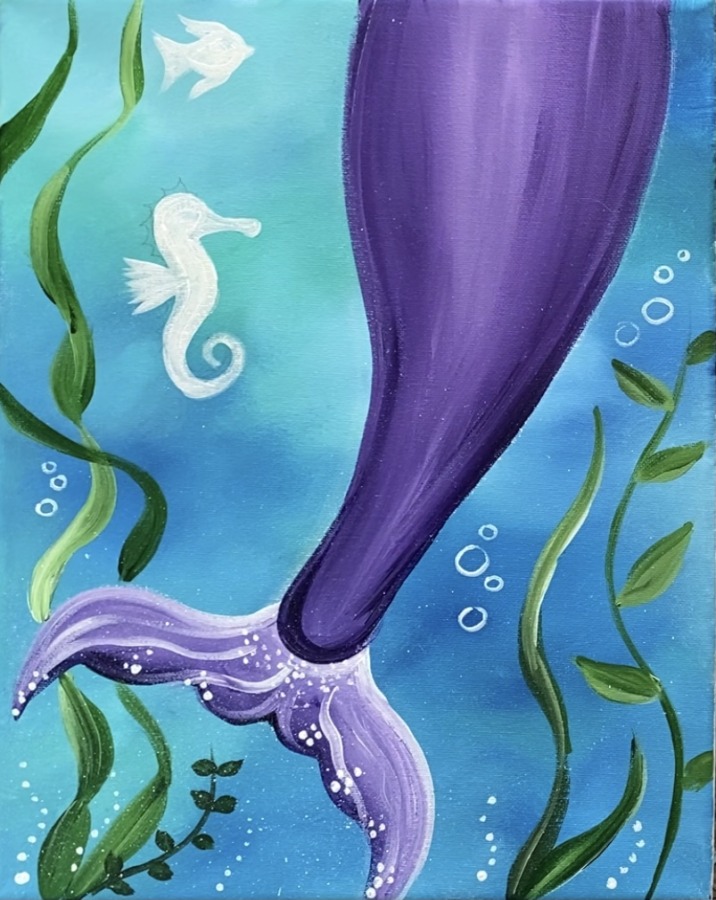
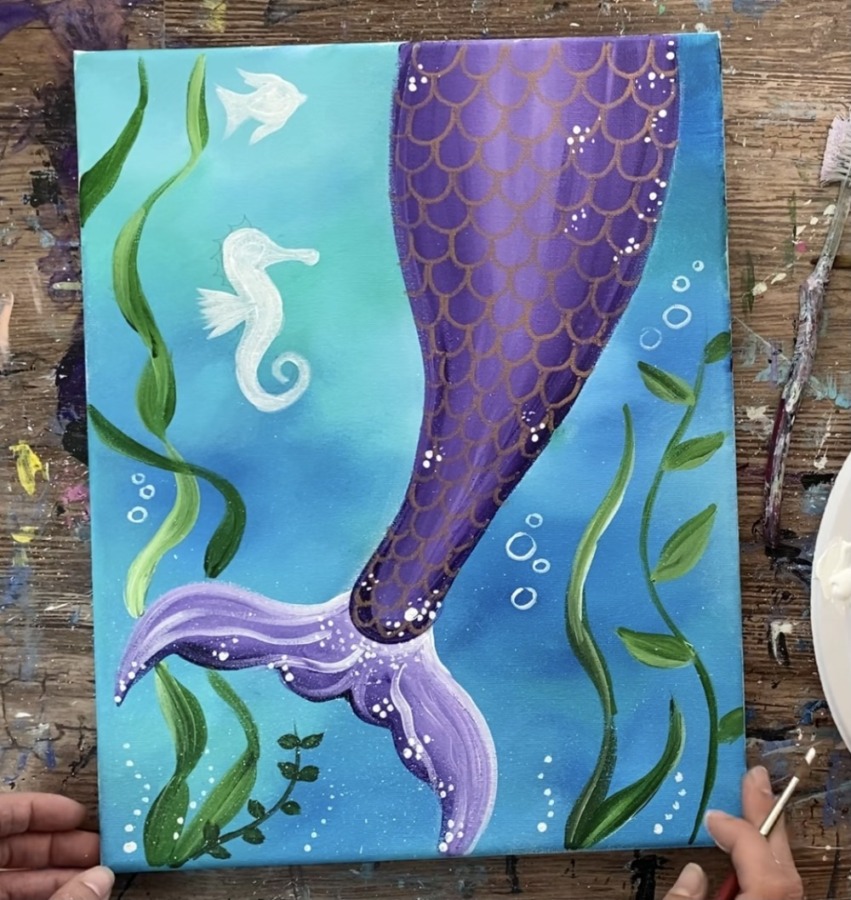
Finished
That’s it! Sign your name and show it off!

Share Your Art Here!


How do you get the different colors to show up in the background? My colors are are blending together into one color even when I try not to overblend it