

Would you like to save this?
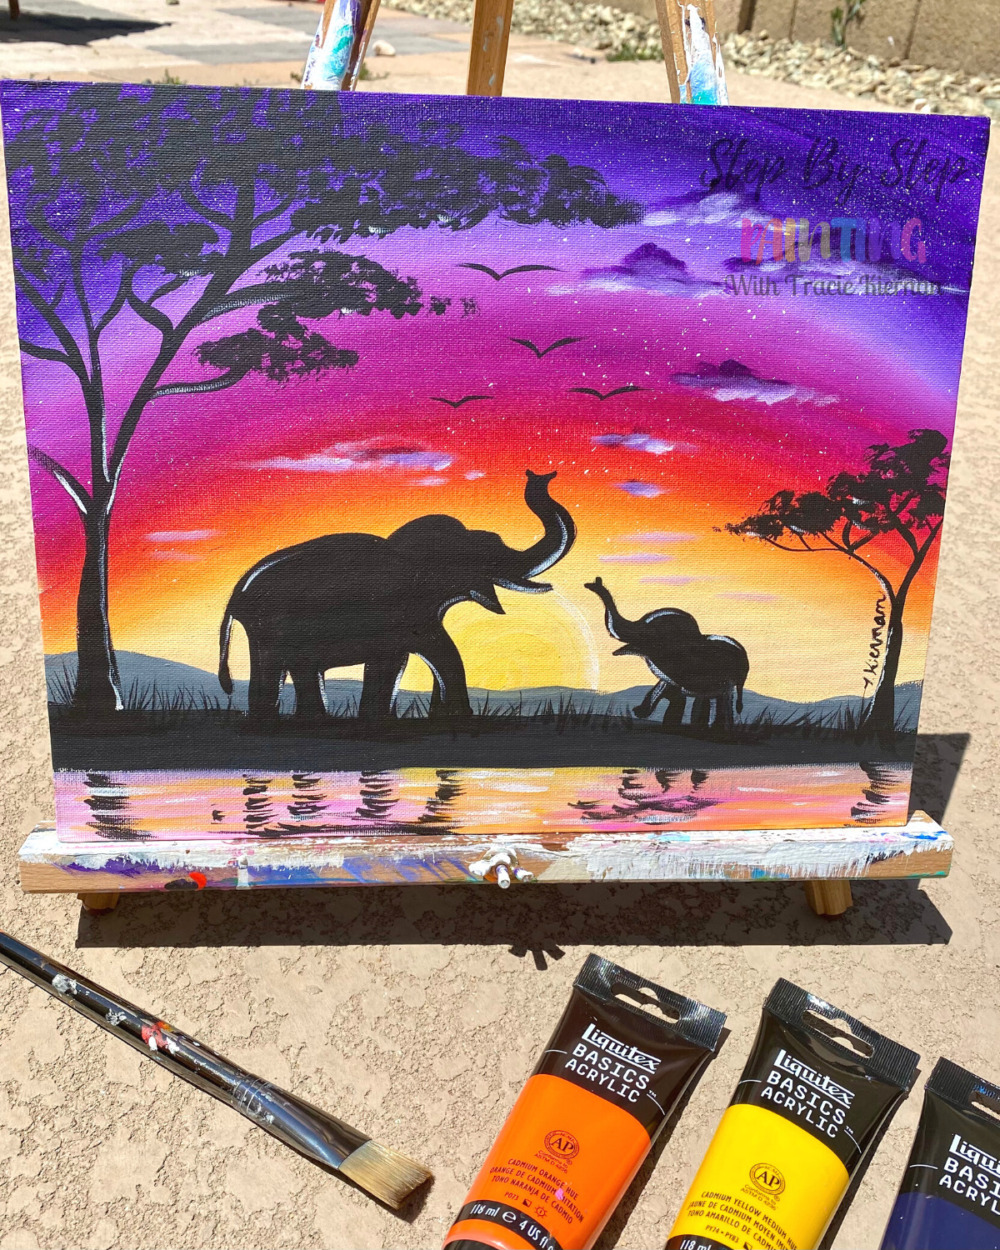
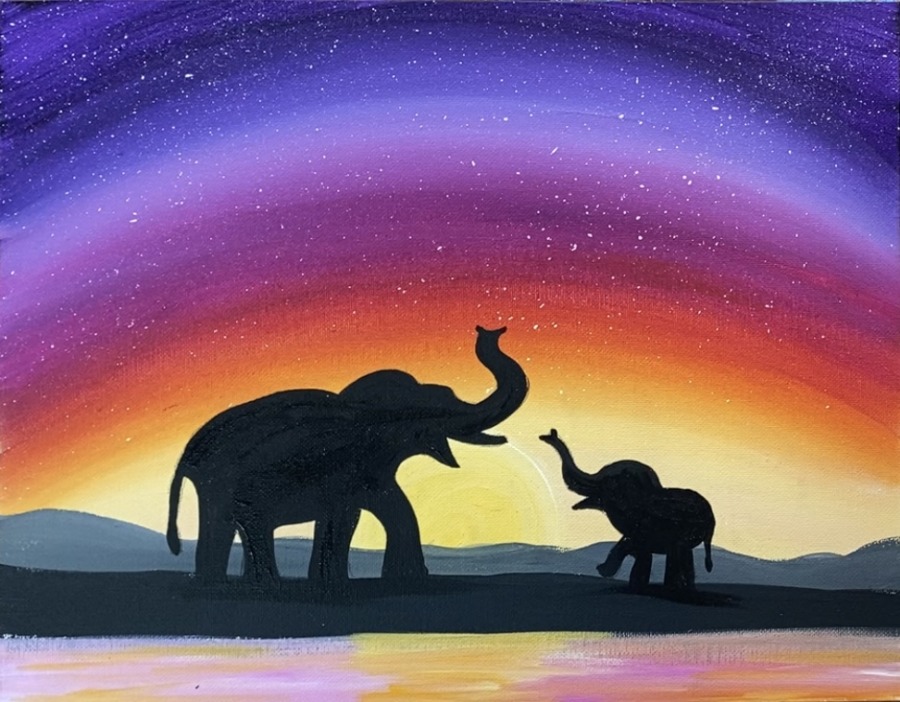
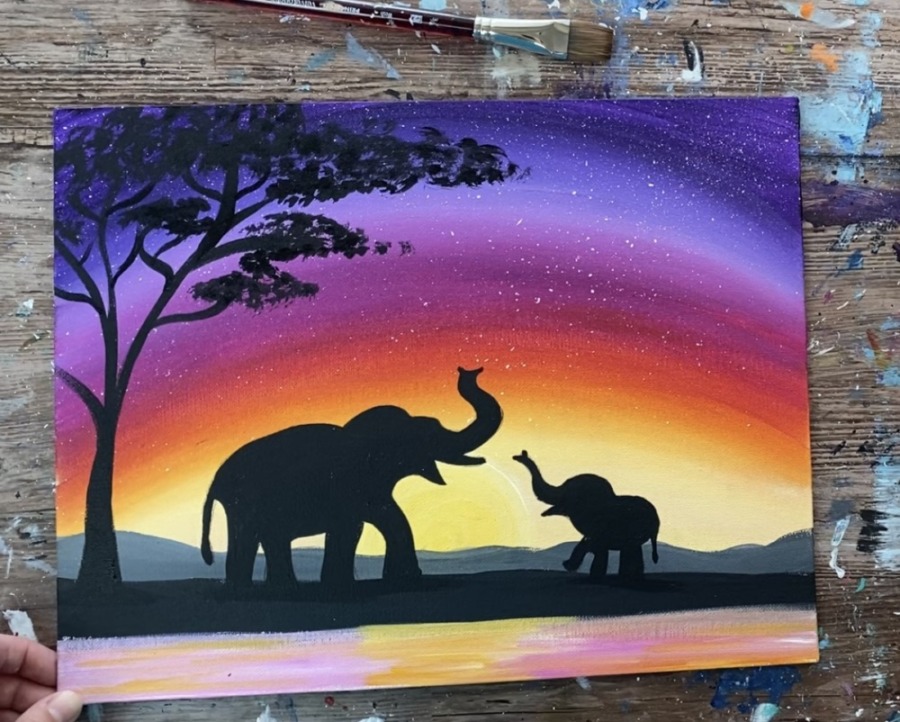
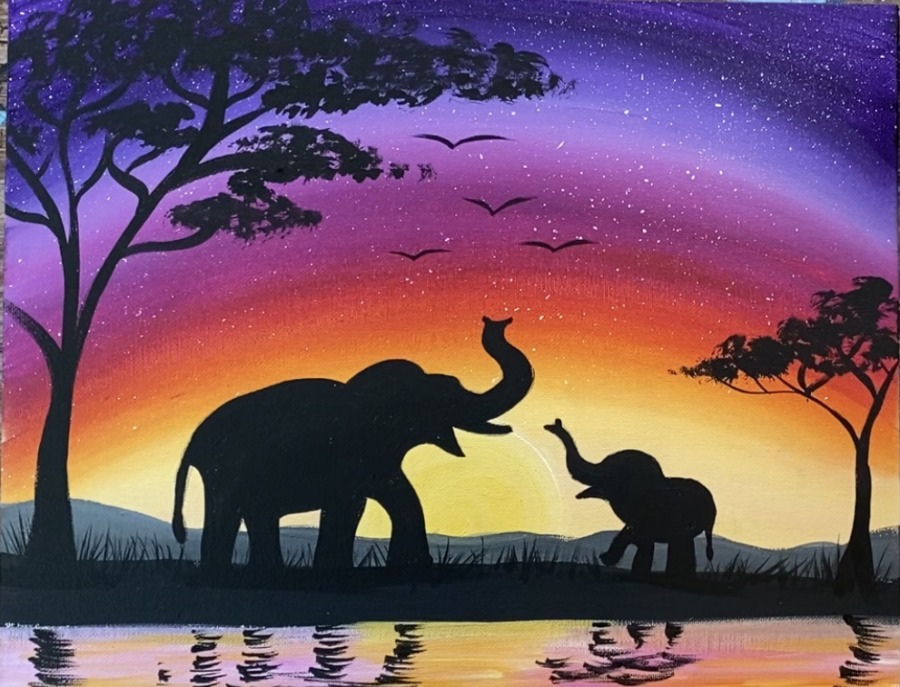
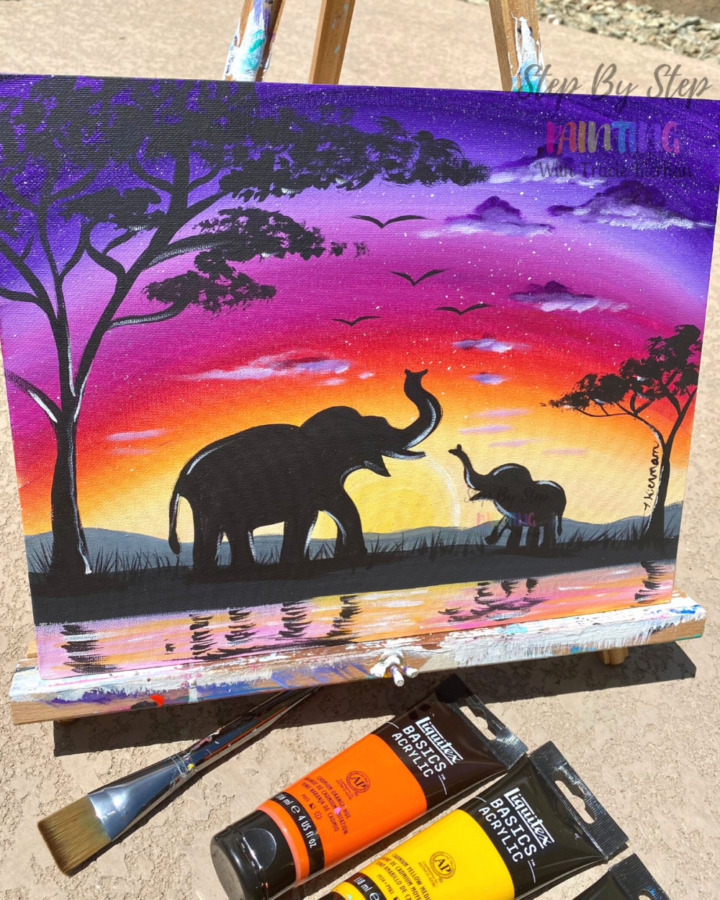
Learn how to paint an African Elephant Sunset with acrylics on an 11 x 14 canvas.
This painting has you rendering a beautiful purple and orange glowing sunset. A perfect backdrop for the elephant silhouettes!
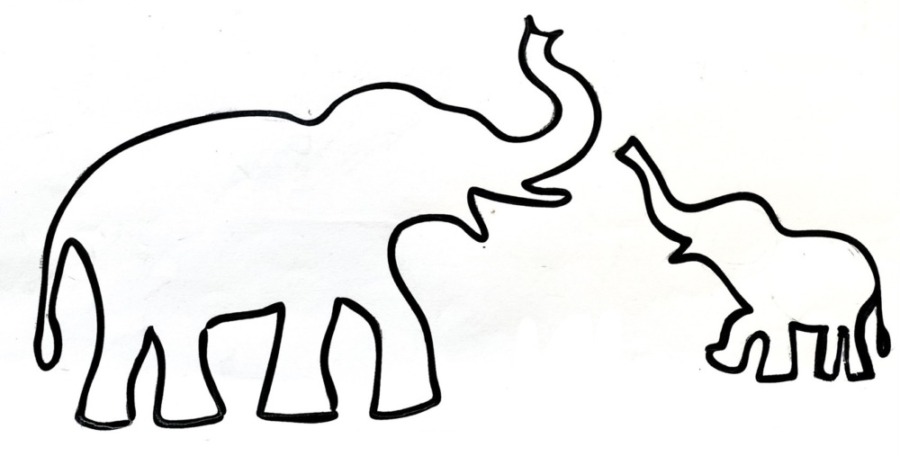
The tutorial comes with a printable that you can download and use to transfer the elephant designs to your canvas.
Enjoy and happy painting!
Materials
African Elephant Sunset Painting
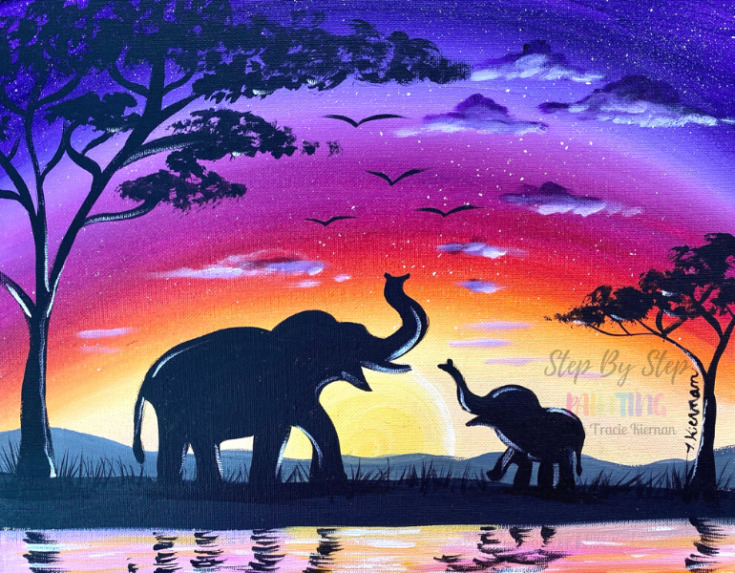
Learn how to paint an African Elephant Silhouette sunset painting for beginners!
Materials
- 11 x 14 Canvas
- Acrylic Paints
- Brushes
- Traceable
- Graphite Paper
- Pencil
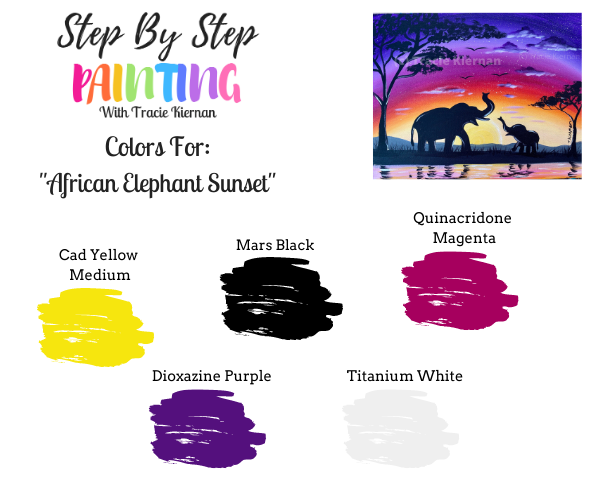
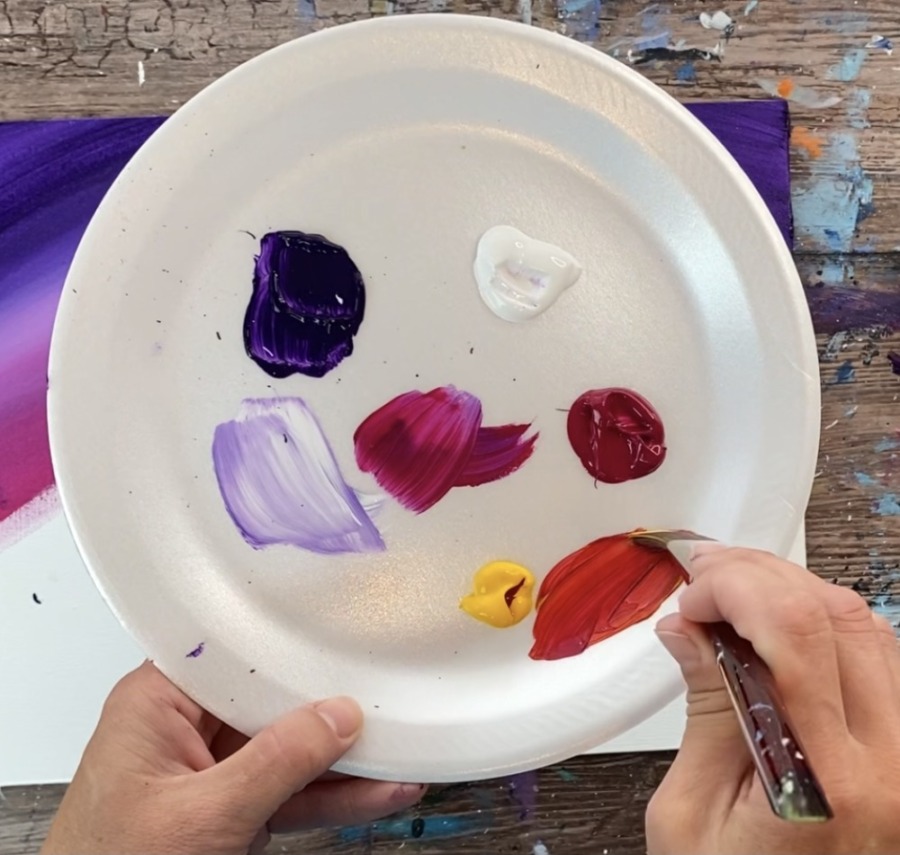
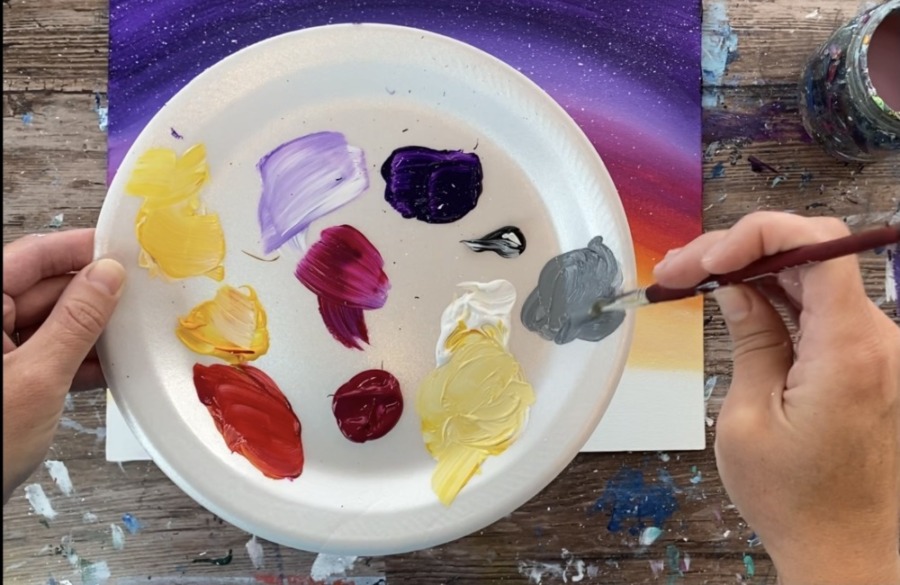
Colors
- Mars Black
- Titanium White
- Dioxazine Purple
- Quinacridone Magenta
- Cadmium Yellow Medium Hue
Brushes
- 3/4" Flat Wash
- #8 Round
- Small Round (optional if your #8 round doesn't have a good point to it for small details)
- #4 Bright Brush (optional if you are doing the clouds)
Instructions
- See tutorial on www.stepbysteppainting.net for full instructions!
Colors
Using Craft Paints?
Try substituting with these Apple Barrel Paint color suggestions:
- Black
- White
- Purple Iris
- Bright Yellow
- Bright Magenta
Directions At A Glance:
Traceable:
Video:
Step By Step Instructions:
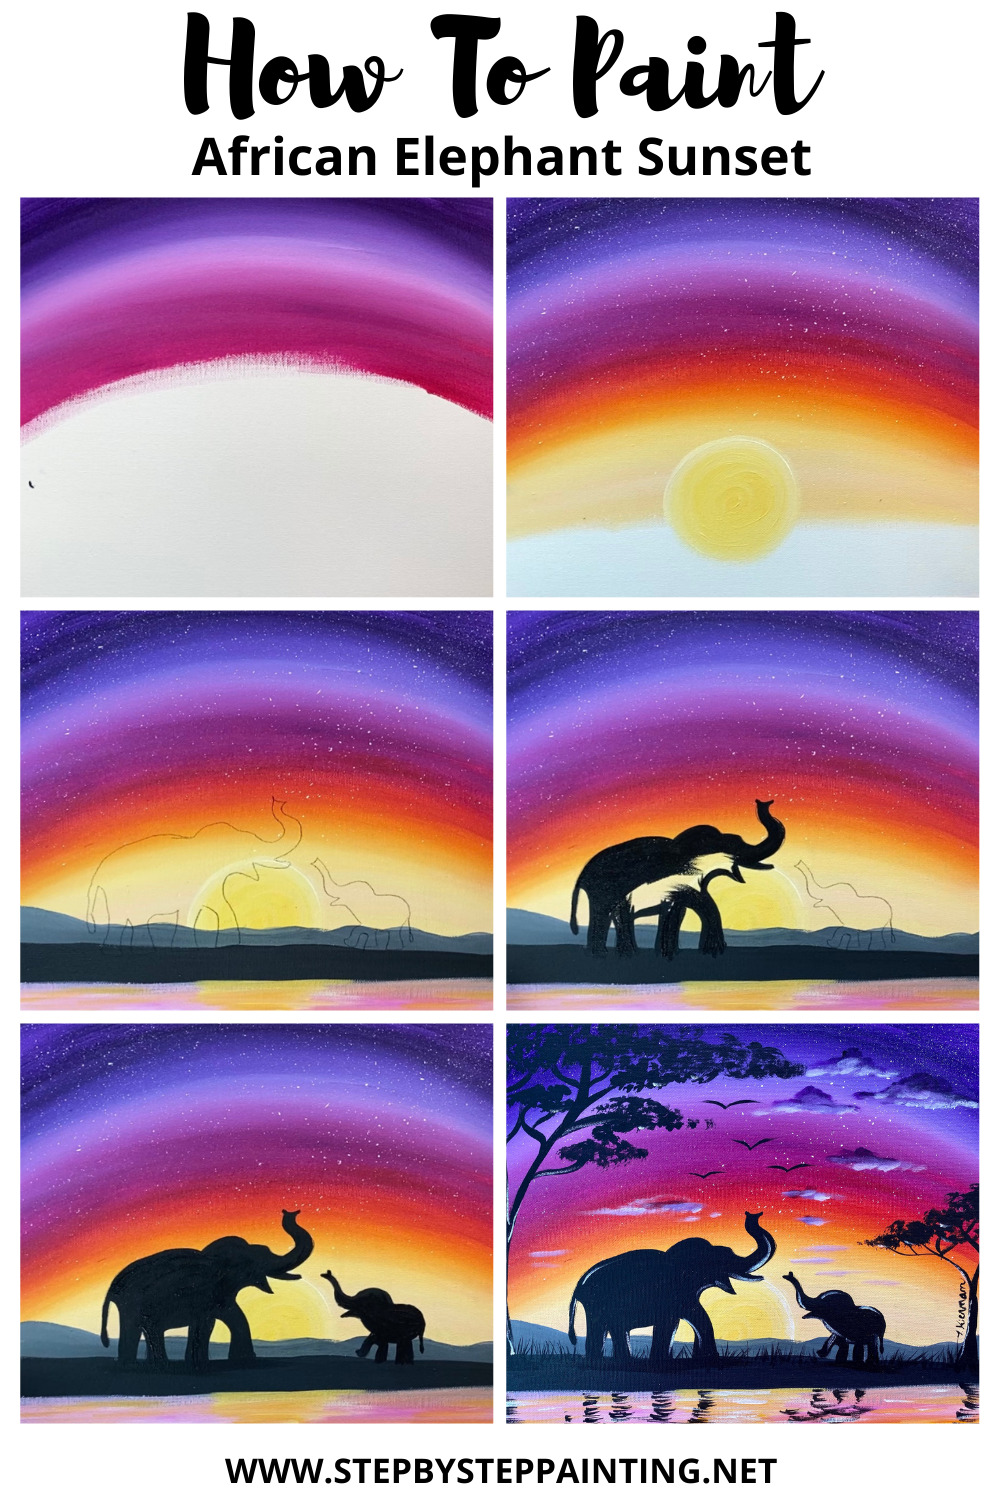
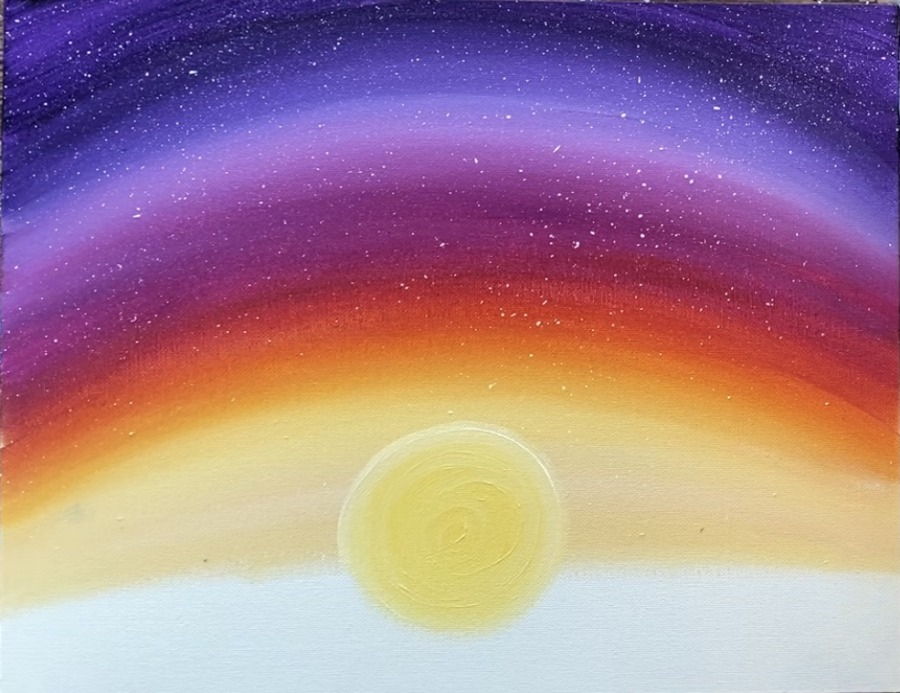
1. Paint The Sunset Sky
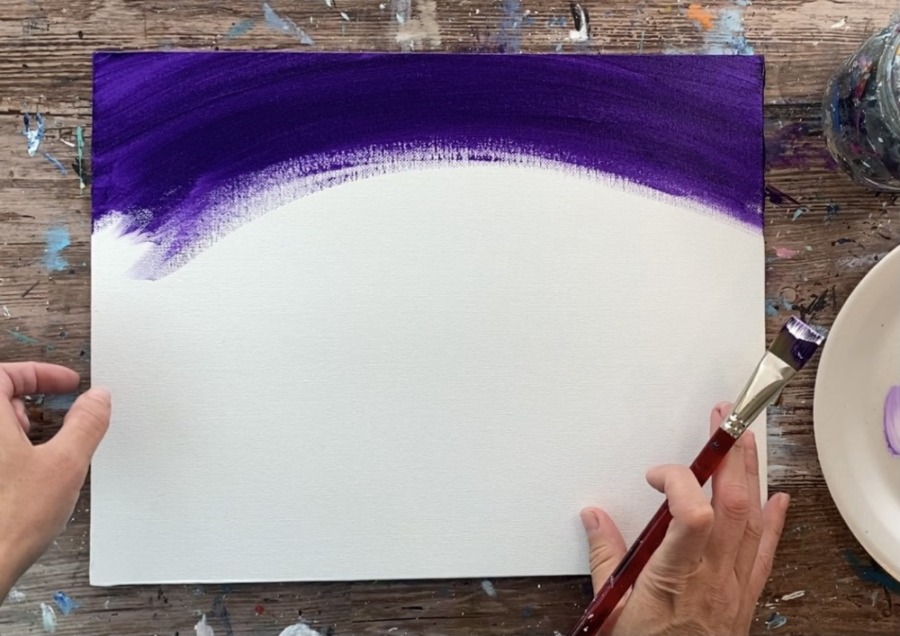
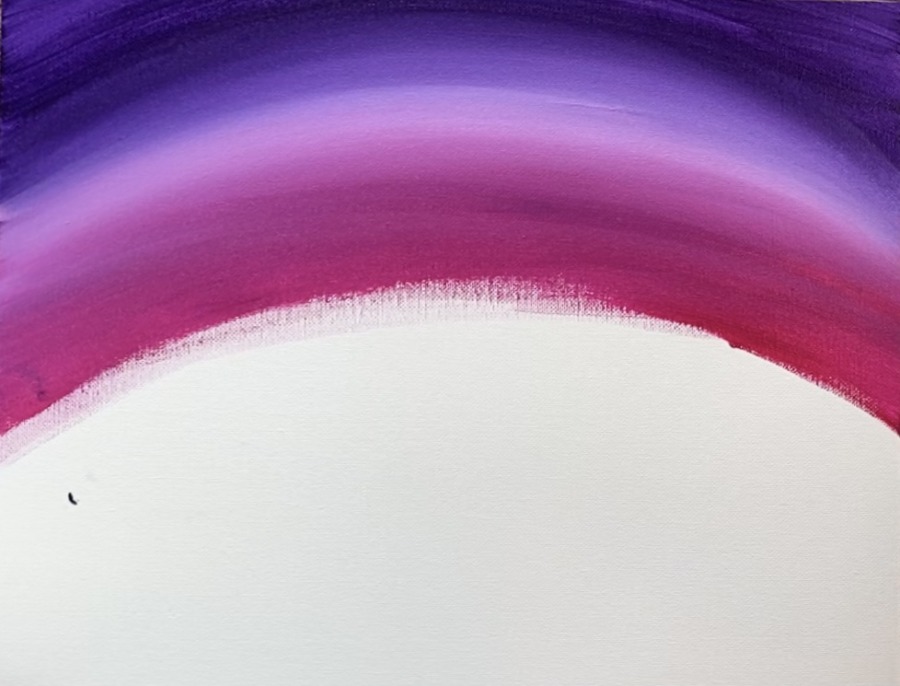
Use your 3/4″ Flat Wash Brush loaded in the color Dioxazine Purple. Paint the top three inches of your canvas with this purple. Do curved strokes going the full width of the canvas.
Tip: it may be helpful to draw your horizon line at 2.5″ from the bottom of the canvas so you know how far your sky will go down.
Next load the tip of your brush in titanium white. Blend the white under the dioxazine purple so that it becomes a lighter purple.
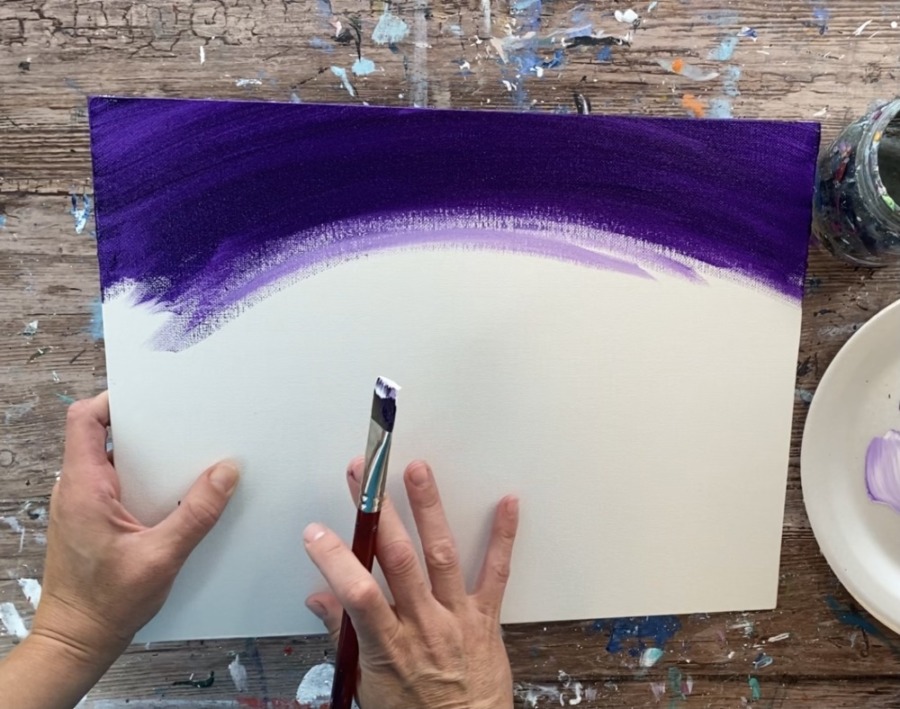
Work your way down the canvas with this lighter purple. Work the paint so that the dark purple blends to that lighter purple but keep the very top of the sky very dark.

Next wipe off your brush but do not rinse. Load the tip of your brush with quinacridone magenta. Blend that magenta into that lighter purple so the sky transitions to a magenta color.
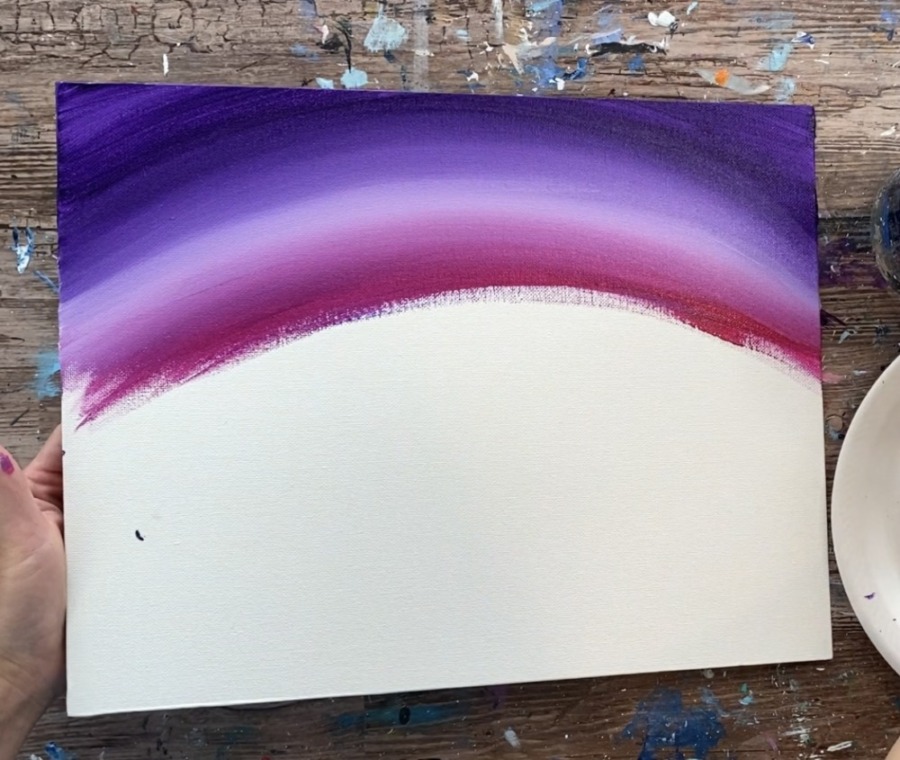
Go to almost the halfway point of the canvas with this magenta.
Rinse your brush off and dry. Then mix yellow with quinacridone magenta so that it becomes an orange. To do this, mix about 3 parts yellow to 1 part magenta.
Then blend the orange down so the magenta transitions to orange.
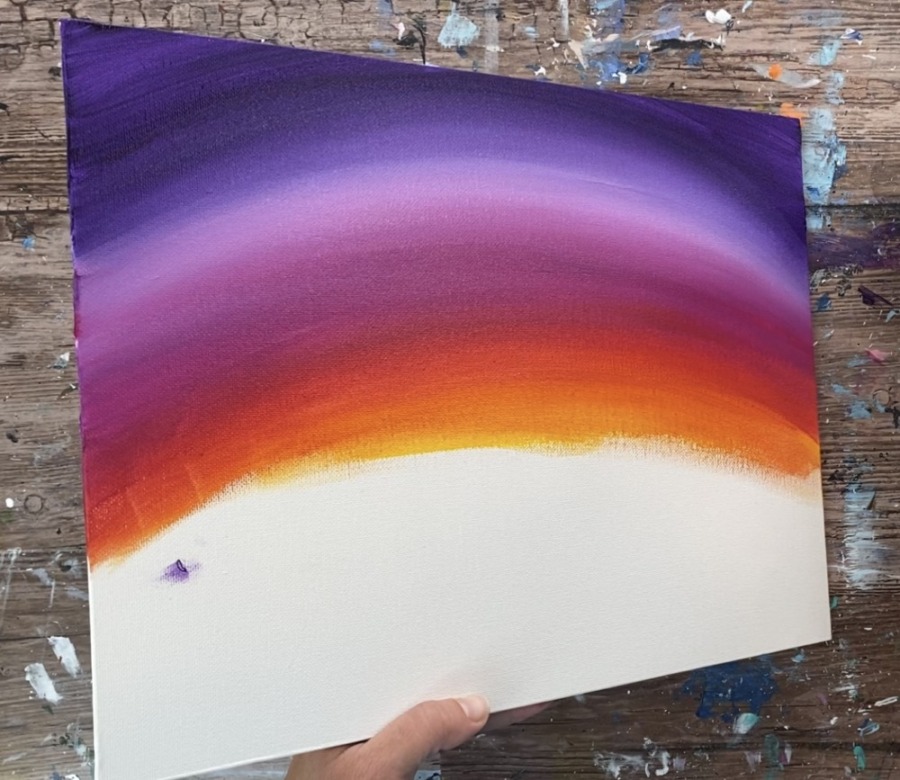
Wipe off your brush and load it into yellow. Blend the yellow in the sky under the orange.
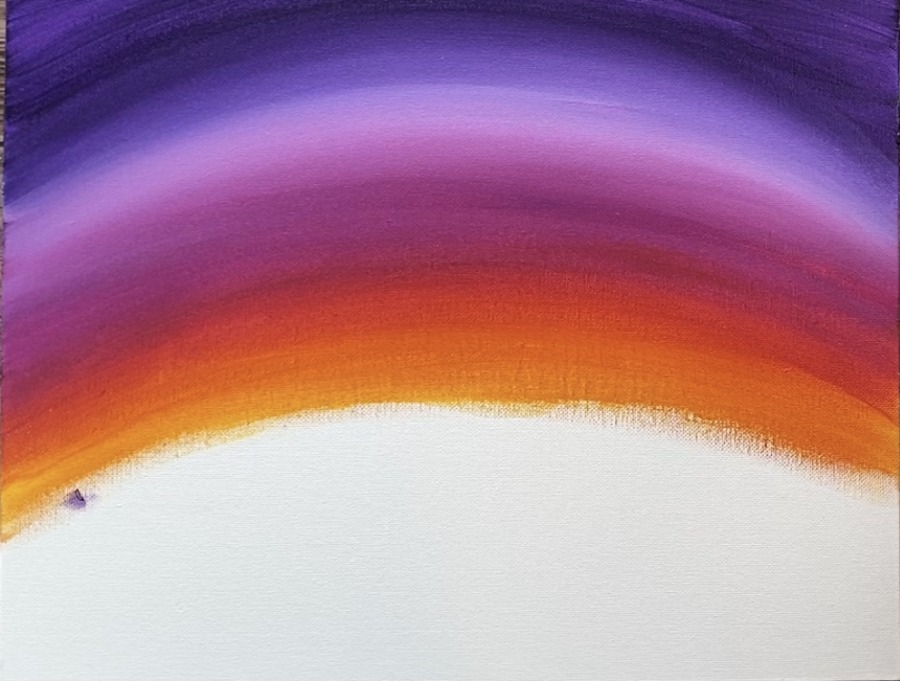
Then mix white into your yellow so that the yellow becomes very bright. Paint this bright yellow to the horizon line. The horizon line is about 2.5 inches from the bottom of the canvas.
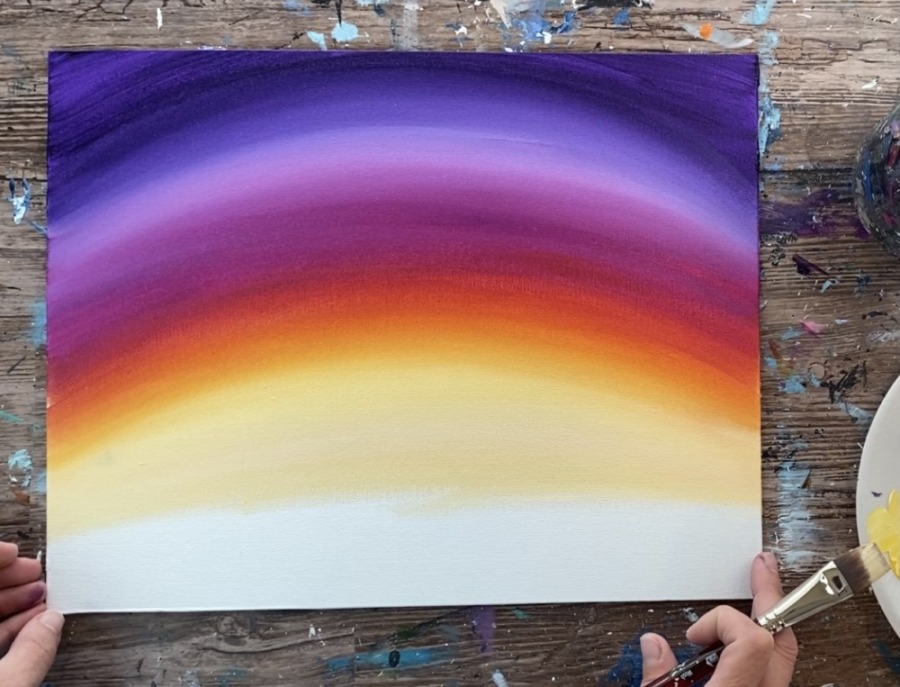
The brightest part of the sky is along the “horizon line”. Paint this area so that it goes flat instead of curved.
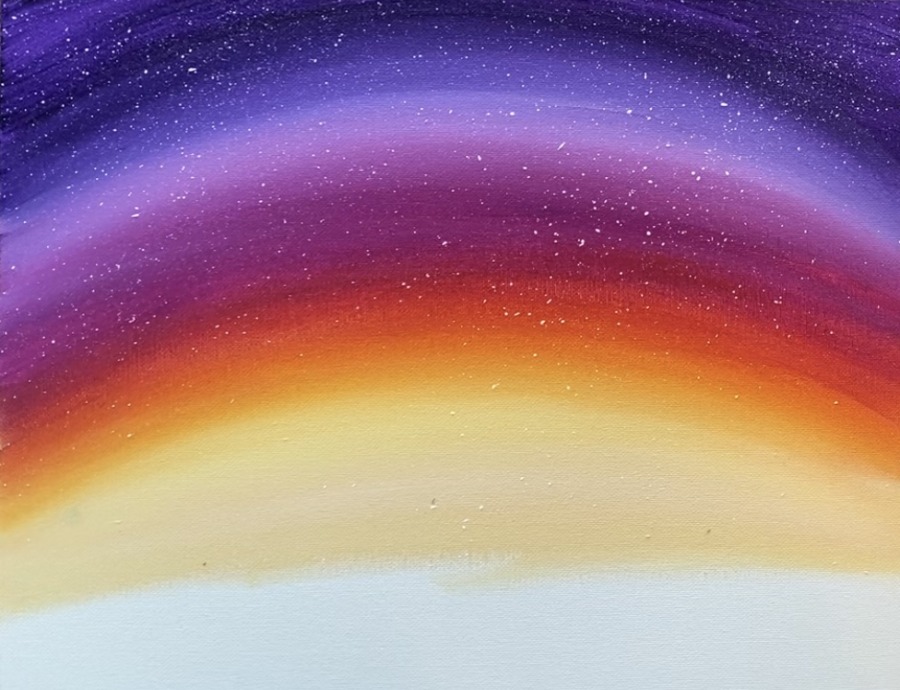
2. Splatter The Stars
I used a toothbrush for this step! You can also use any brush to “flick” your stars. To achieve this effect, you will need to slightly water down the white so that it is a smooth consistency.
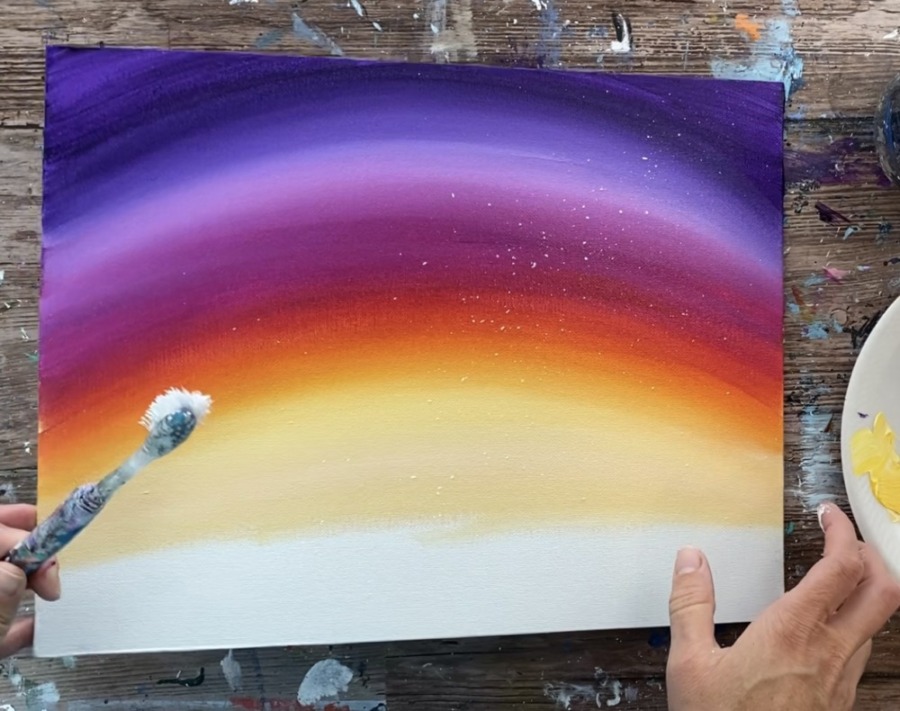
Splatter your stars all over the sky area.
3. Paint The Sun
Mix white and yellow on your palette to make a very light yellow color. Paint a circle that dips below the horizon line. My circle is about 3″ in diameter.
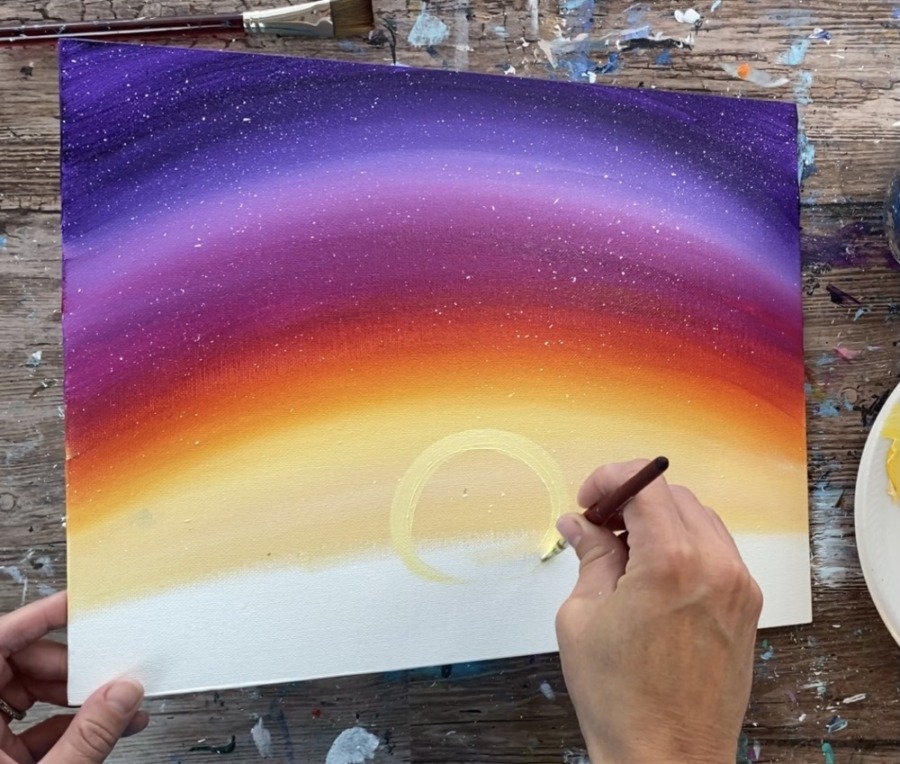
Then add some more cadmium yellow medium (without white) in the middle of the sun and blend outwards so the outer edge of the sun is slightly lighter.
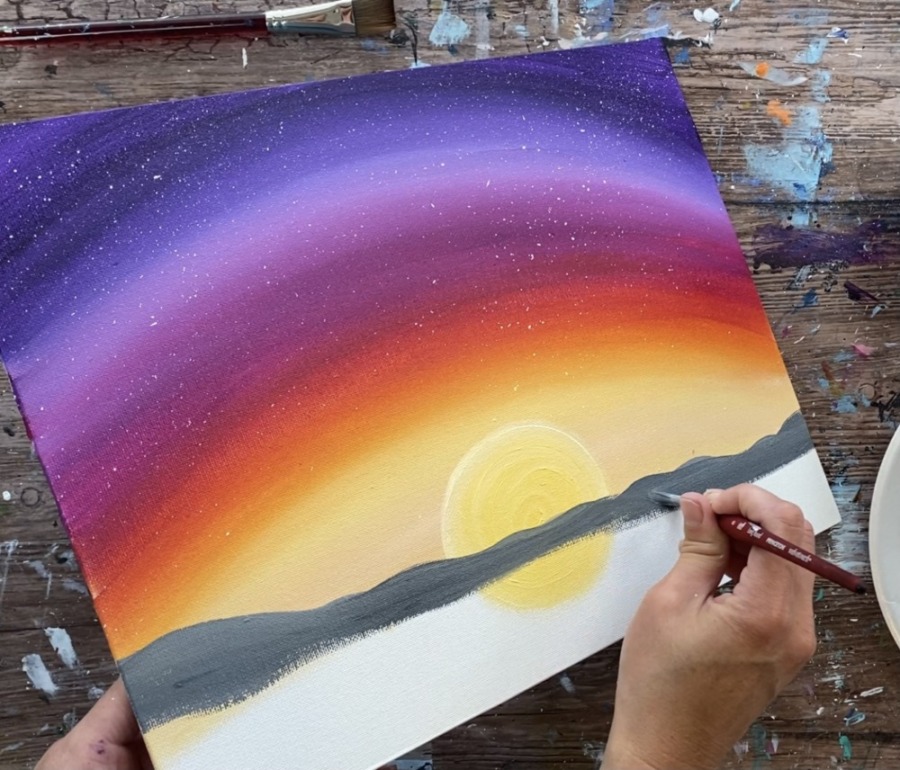
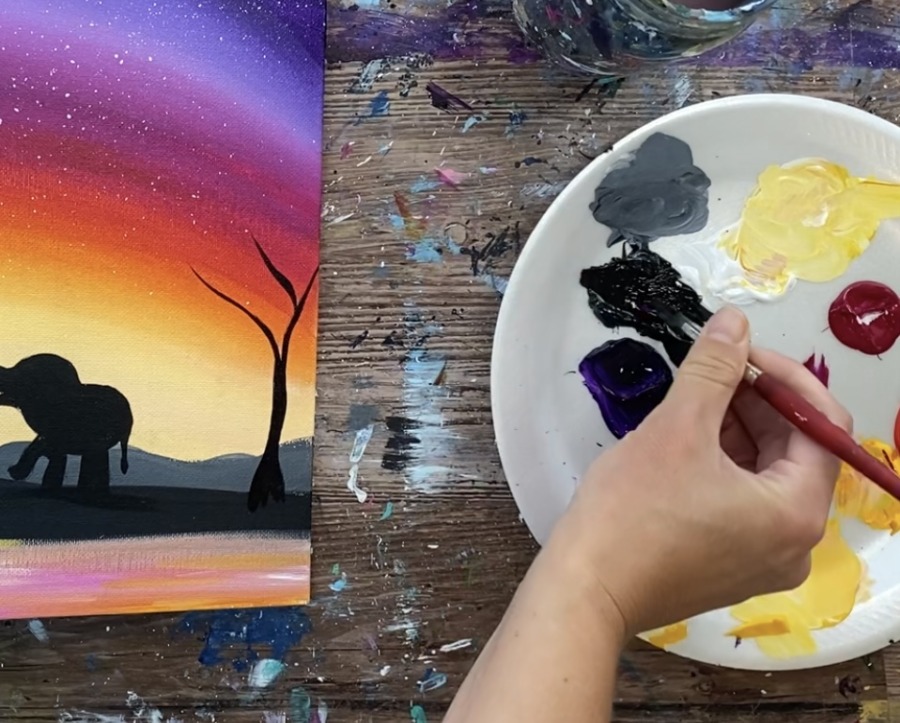
4. Paint The Gray Mountain/ Hilly Area
On your palette mix a medium gray color. Do this by mixing about 4 parts white to 1 part black. Gradually add the black into your white until you get the gray shade you want.
Use the #8 round brush to paint the hilly area along the horizon line.
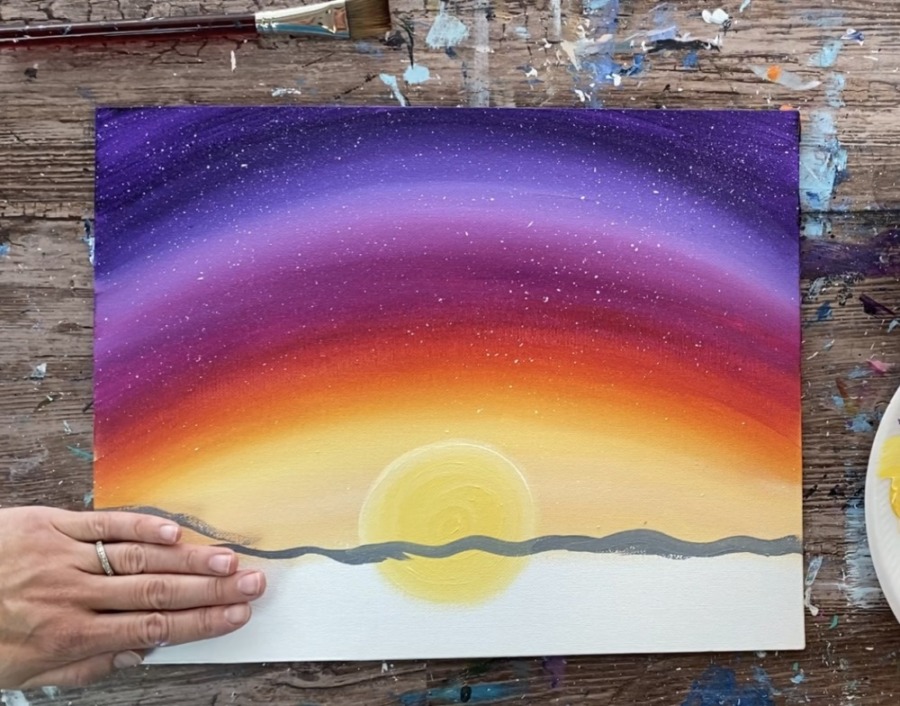
This area is about five fingers from the bottom of the canvas.
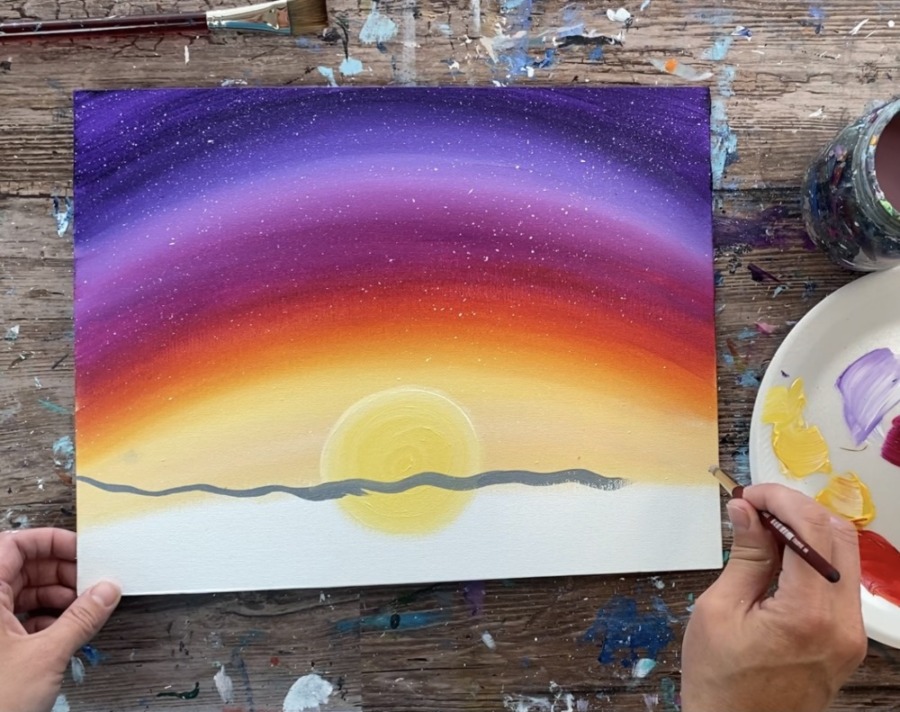
Paint your wavy line all the way across, cutting the sun in half. Go down about an inch and fill it in solid with the gray. The middle part of the gray mountain under the sun dips down lower.
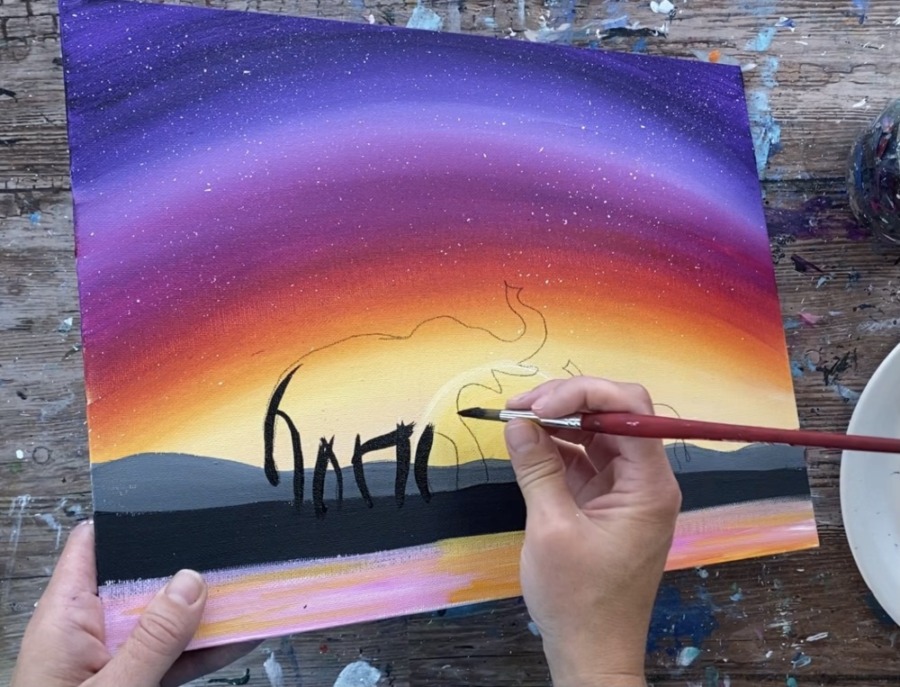
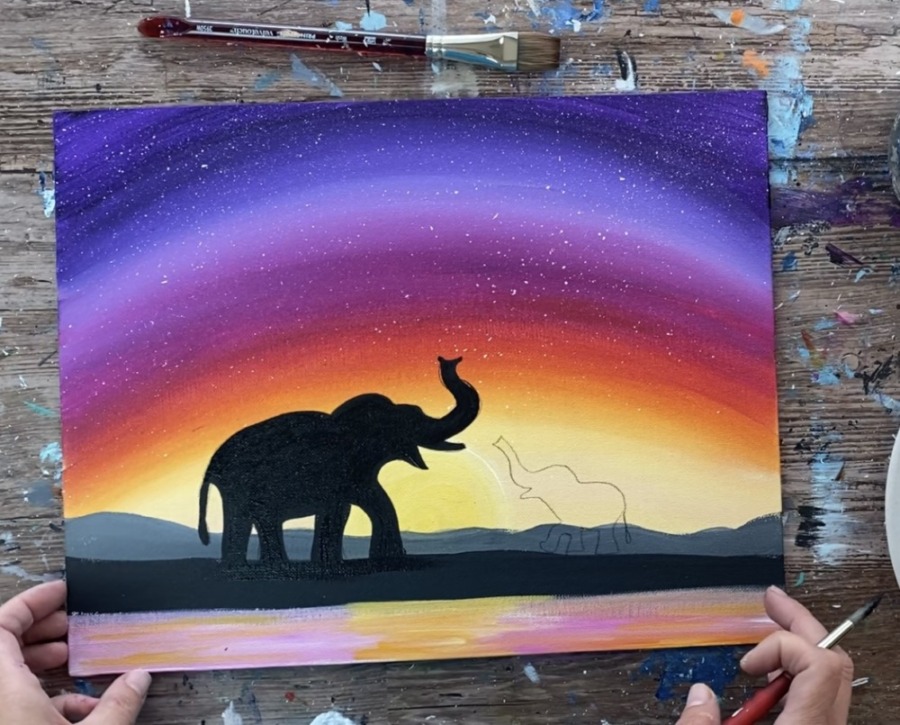
5. Paint The Black Land
Next load your brush in just mars black. Paint black downwards about an inch and leave a gap below for the water area. Note: your black land area may need to go over your gray mountain area so you have room for water.
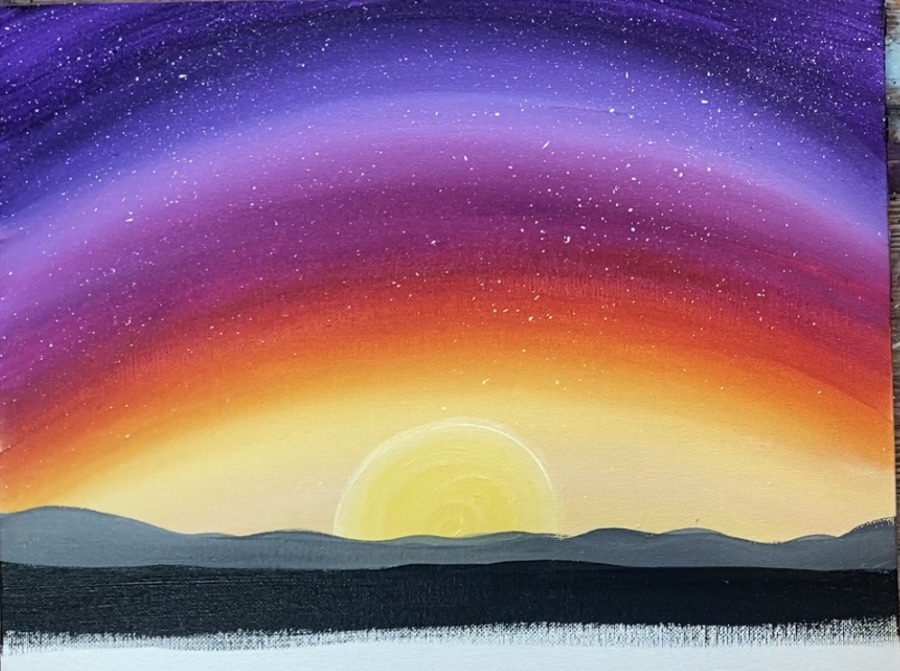
6. Paint The Water
Double load your 3/4″ flat wash brush in both titanium white and quinacridone magenta. Paint the water area so the white and pink blend together but not all the way.
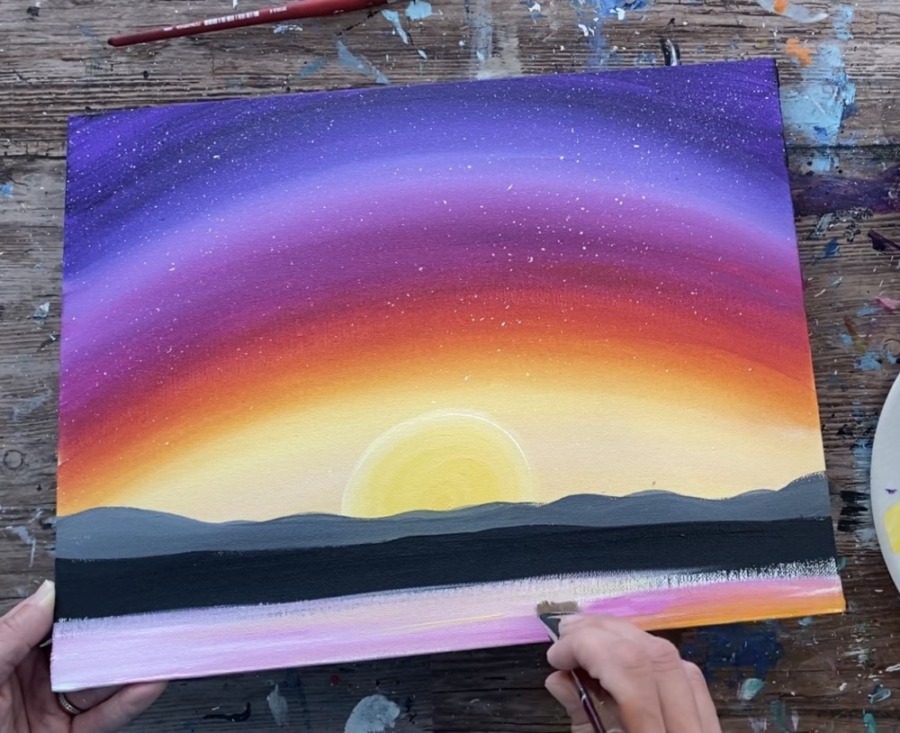
Add a little orange and yellow in your water area because the sunset would be reflecting its colors into the water.
Paint yellow lines in the water just under the sun.
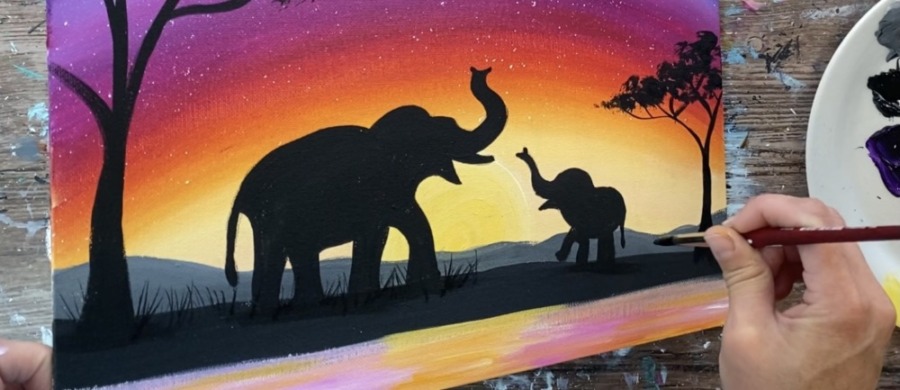
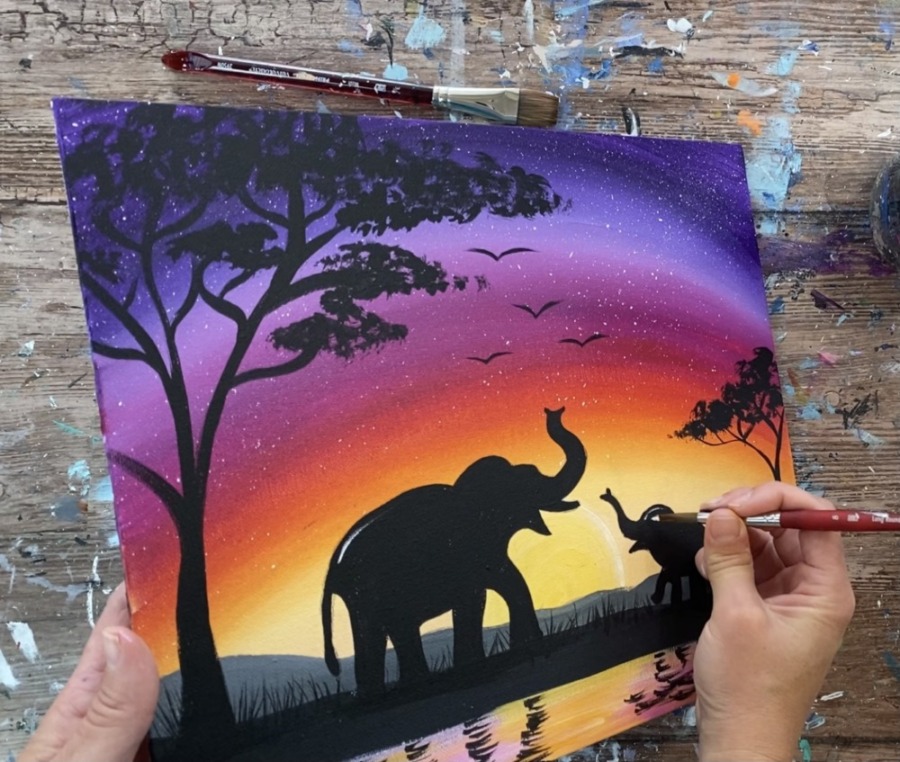
7. Draw/ Transfer The Elephant Silhouette Outlines
You can use and download the traceable I provide for your for this tutorial! Simply print it on an 8.5″ x 11″ printer paper and cut the elephants out so you can easily position them on the land.
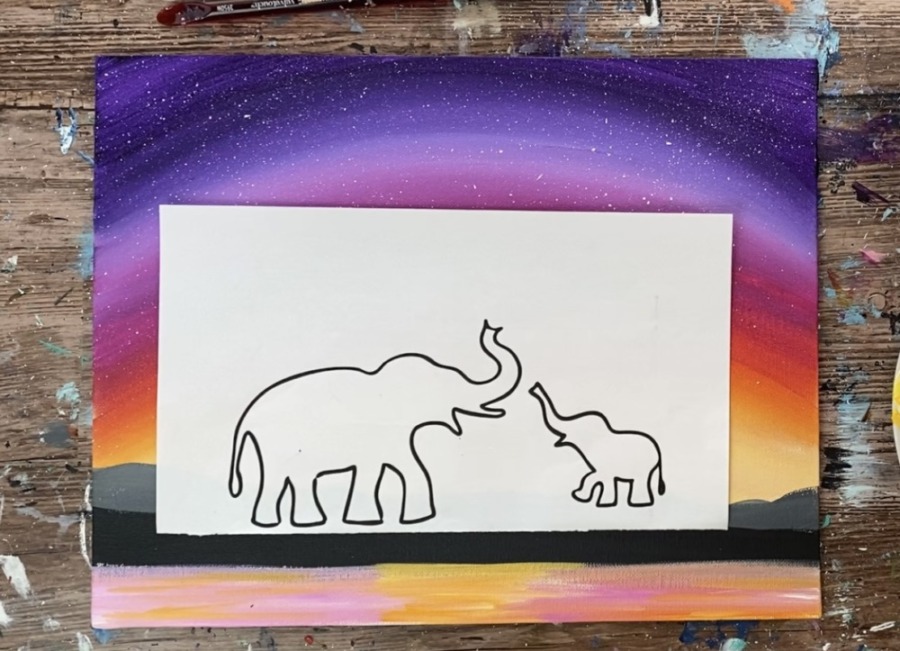
Place a sheet of graphite paper under the elephants and trace.
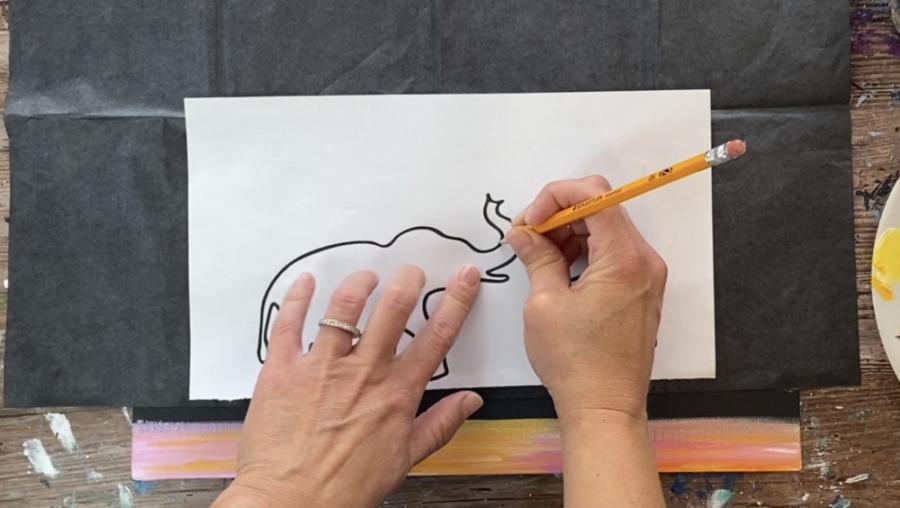
8. Paint The Silhouettes
Then use a #8 round brush and mars black to paint the elephant silhouettes in. I recommend slightly watering down the black paint so it flows easily.
Tip: if your round brush doesn’t have a fine tip to it, you may want to switch to a smaller detail brush.
9. Paint The Trees
Use the #8 round brush to paint the acacia trees. Start at the bottom where the trunk is and have the trunk be wider at first and then get narrow as it goes up.
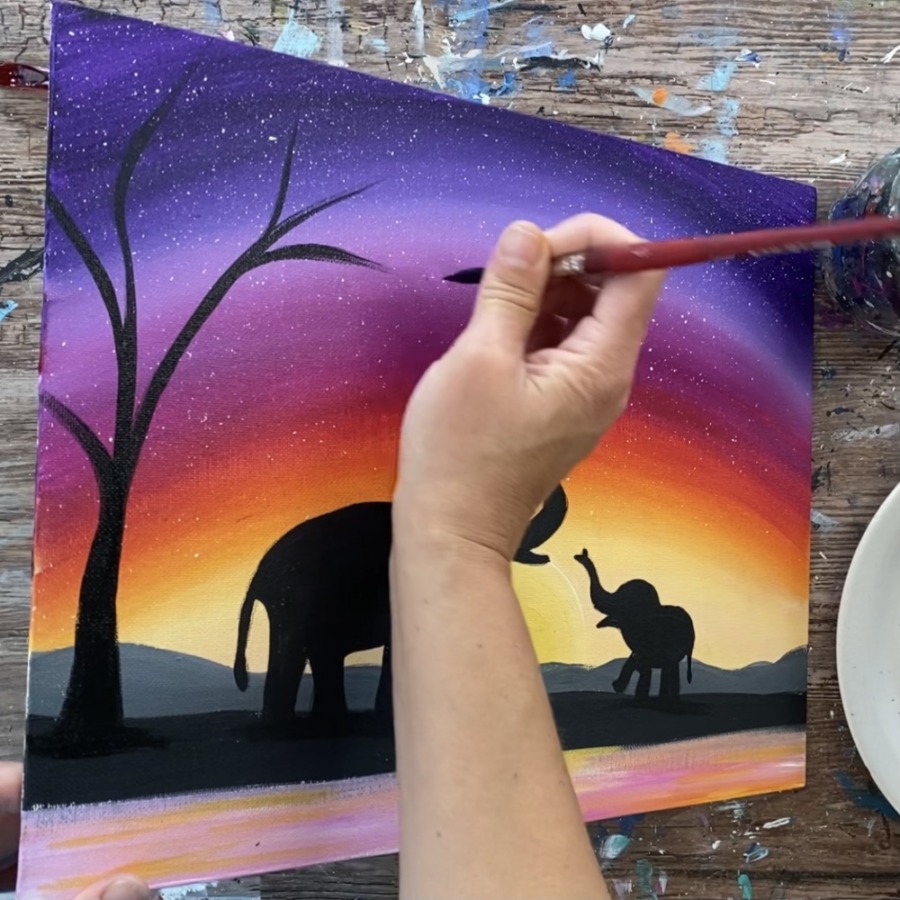
Branch your tree outwards to two or three main branches. Then paint smaller sub-branches branching out from those main branches.
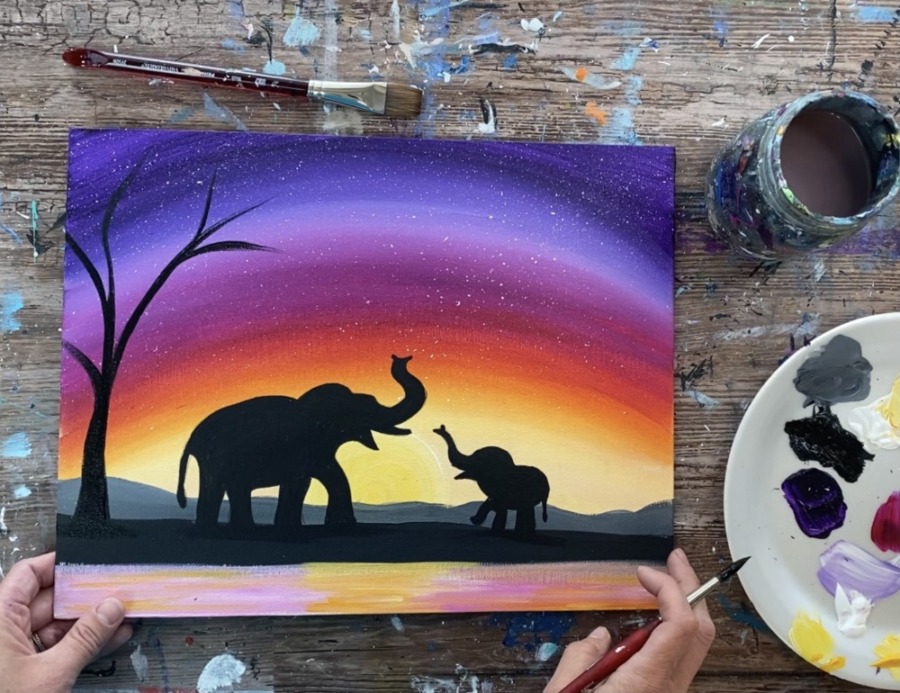
Then paint the leaves of the tree by dabbing the tip of your round brush to create the canopy of the tree. This “canopy” should be wide and thin and doesn’t really tower upwards.
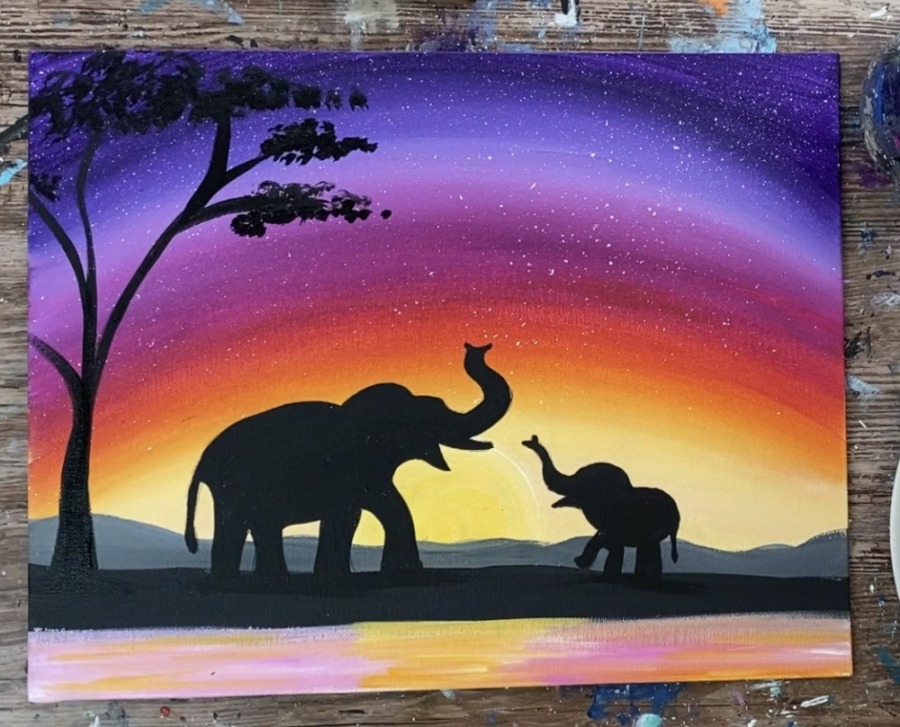
Paint clusters of these leaves on the tips of all the branches. Then paint curved branches in between some of the other branches. Acacia trees have quite a few branches up at the top and they are very twisty and curvy.
Example of an acacia tree:

Repeat this by painting another smaller tree on the right side of the baby elephant.

10. Paint The Grass
Use the tip of your round brush to paint very thin grass lines along the silhouette.
Paint the grass lines so they are angling in different directions. It helps if the black is slightly watered down so your line appears very thin.
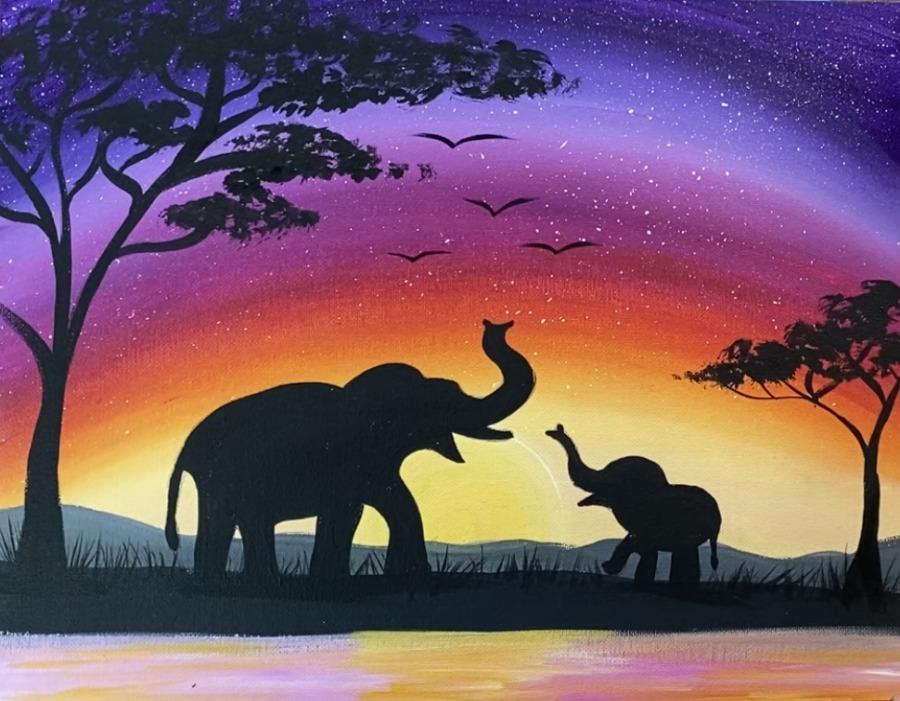
11. Paint The Birds
Use the tip of your brush to paint very thin birds in the sky.
12. Paint The Reflections In Water
Then paint the reflections in the water under the tree and elephants. Use your round brush to paint very thin horizontal lines going vertically under the trees and elephants. Do this very loosely.
13. Highlight The Silhouettes
Use the tip of your round brush & titanium white to highlight the elephants. Loosely outline some of the inner edges.
Doing these highlights gives your silhouette more contrast and depth.
Add highlights to some of the edges of the trees.
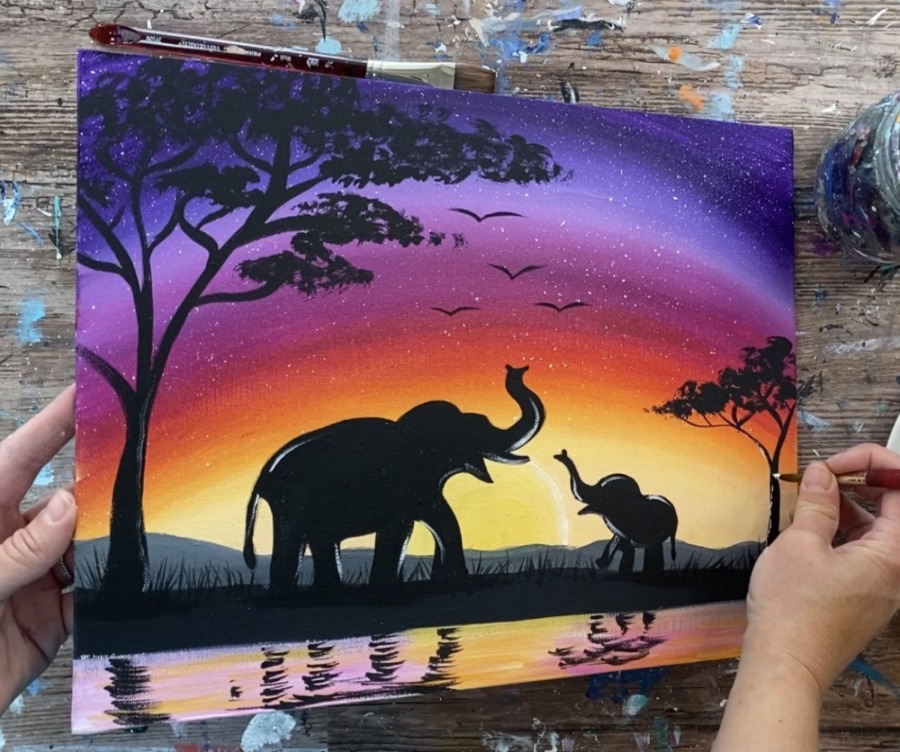
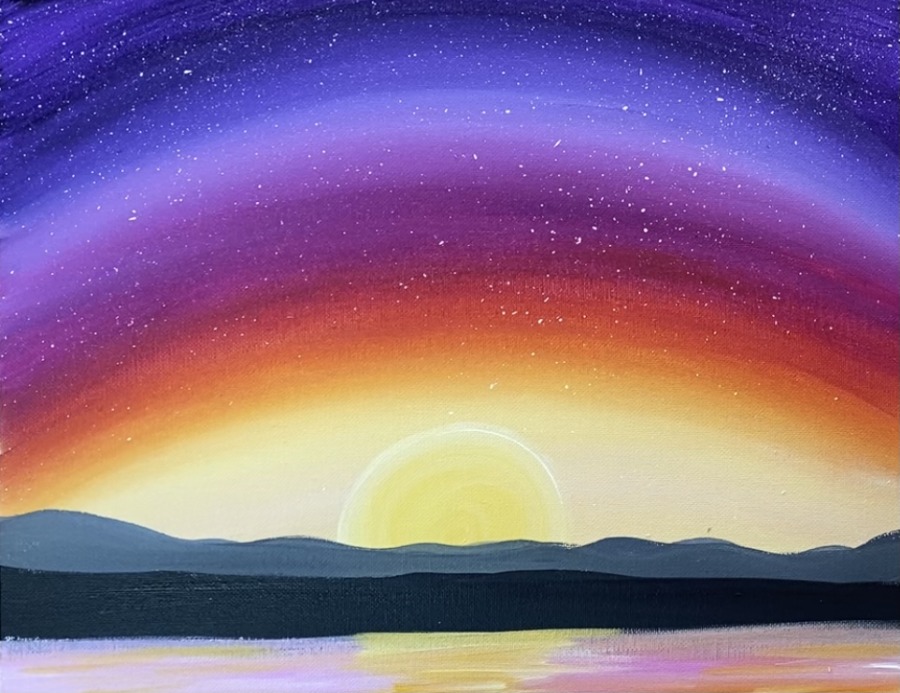
14. Paint White Reflection Lines In Water
Next loosely paint horizontal lines in the water area with white.
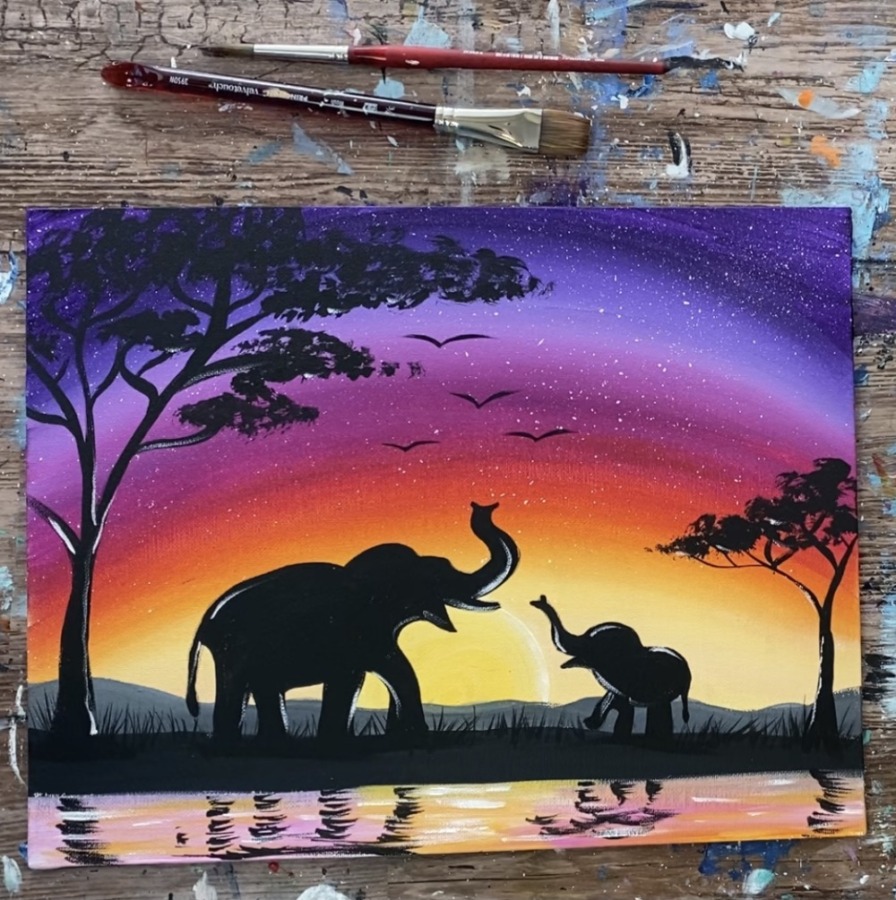
15. Optional: Paint The Clouds
If you are doing the clouds, use a small flat brush (or a round brush). Start by painting the darker cloud with dioxazine purple mixed with a little bit of quinacridone magenta.
Add a small amount of that purple/magenta to the tip of your round brush. Paint small circular strokes forming the shape of the clouds.
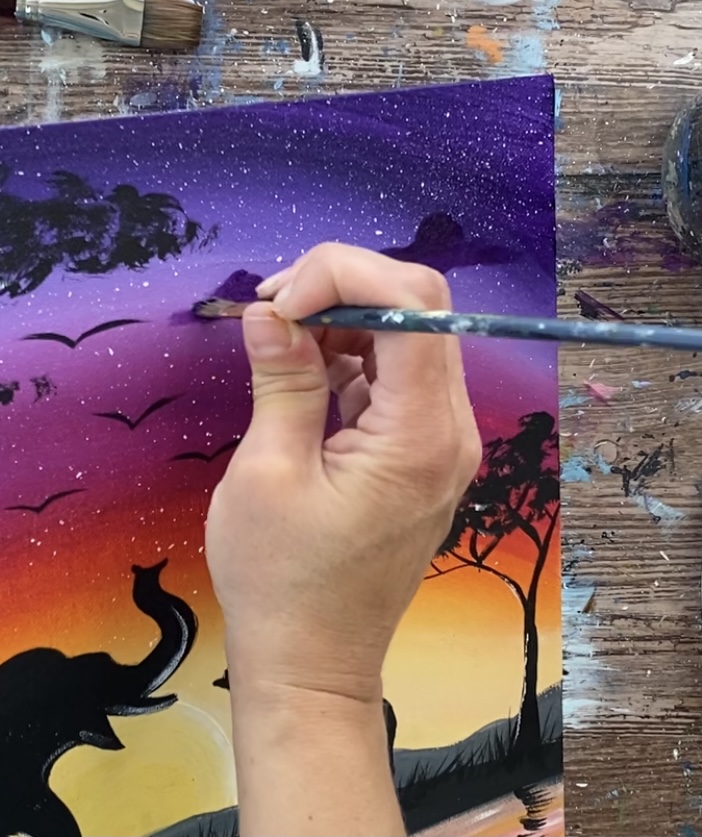
These clouds are flat, long and somewhat bumpy at the top. The ones that are closer to the top of the canvas are larger and the ones closer to the sun are smaller.
Then mix a little white into the dioxazine purple so that it becomes a lighter version of that purple. Continue to paint small rounded strokes blending that lighter purple upwards.
Keep the top part of the cloud dark and the bottom part of the cloud lighter. Make sure you are only loading a small amount of paint on your brush and sometimes it helps to wipe off the paint after you load it to ensure only a small amount is on the brush.
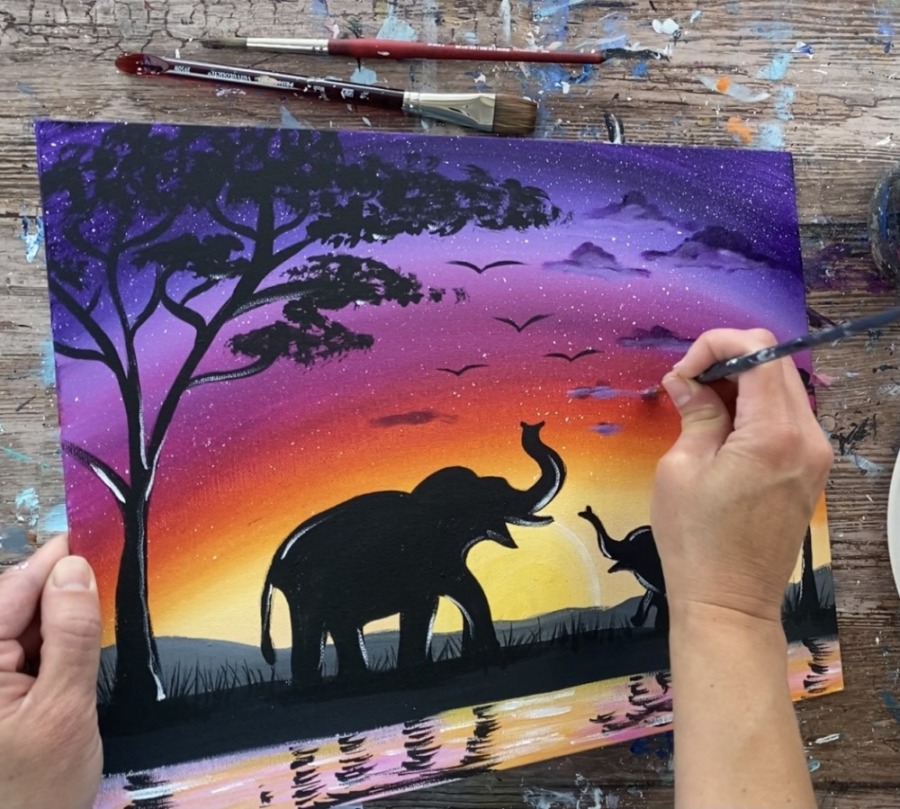
Add a small amount of white (or very light purple) just on the very bottom edges of the clouds. The brightest parts of the clouds should be at the bottom where the sun would be reflecting on them.
I added some smaller long clouds next to the sun. And that is it!
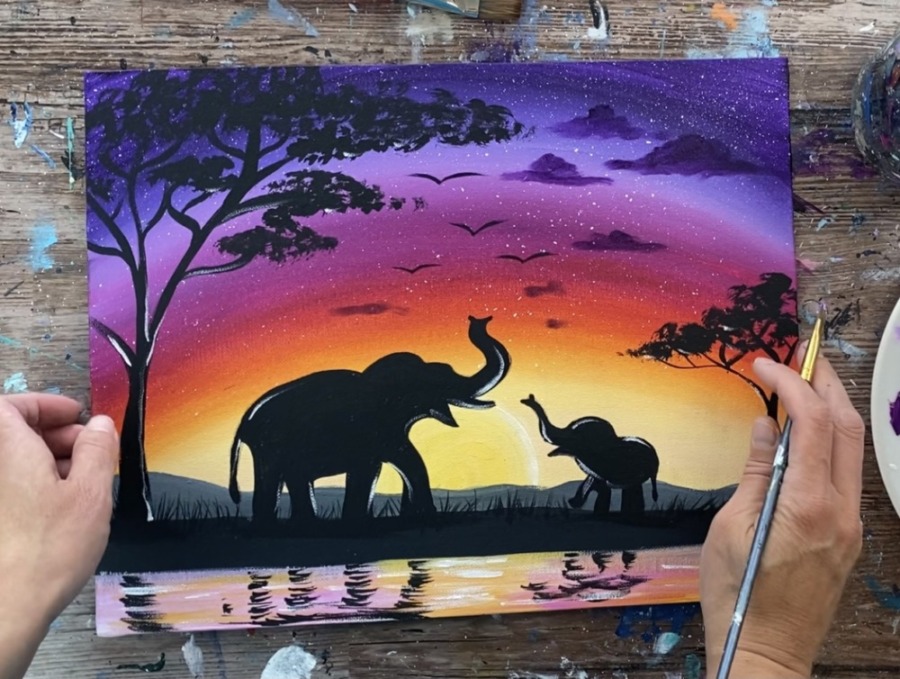
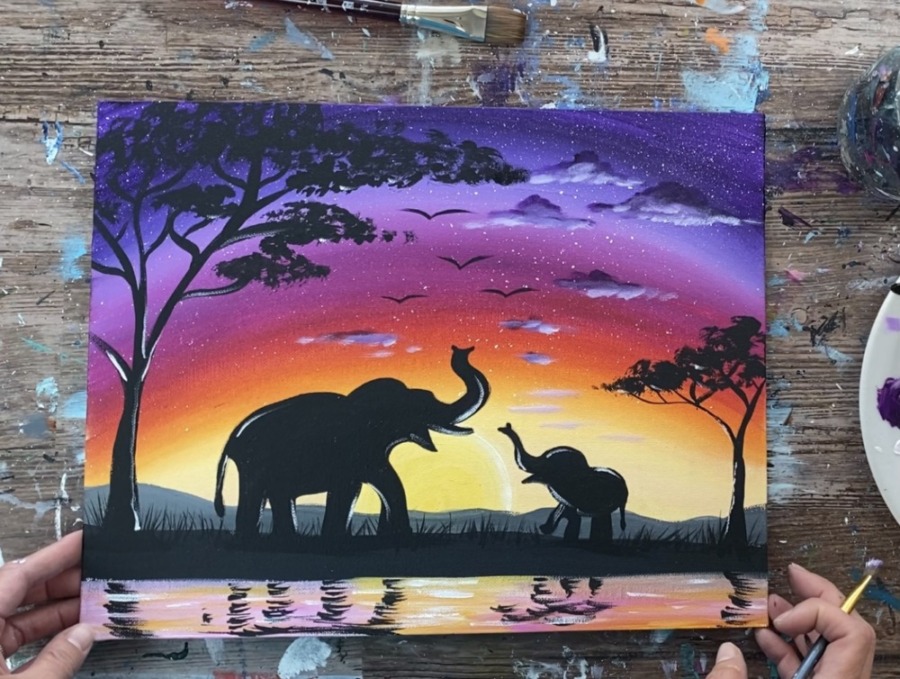
Finished!
Share Your Art Here:


I just wanted to thank you for posting these tutorials. I’ve never painted before but am just getting into it. I find your tutorials extremely helpful and easy to follow. I’ve been getting good feedback (even though I only see my mistakes haha). I have painted this African sunset and the cactus sunset so far. Thank you and I can’t wait to paint along more with you!
You’re welcome!!
I’m making this painting for my mom’s birthday and it’s an awesome idea! Thank you so much for making painting fun and easy!