

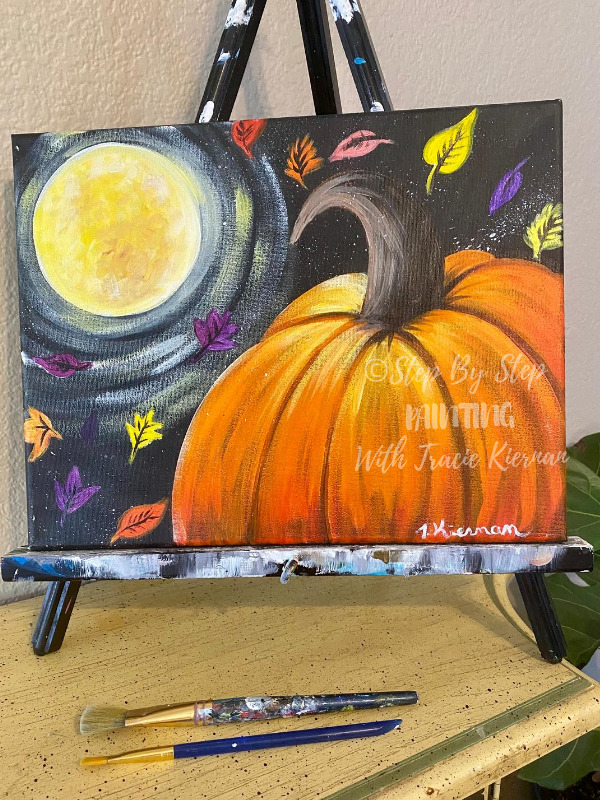
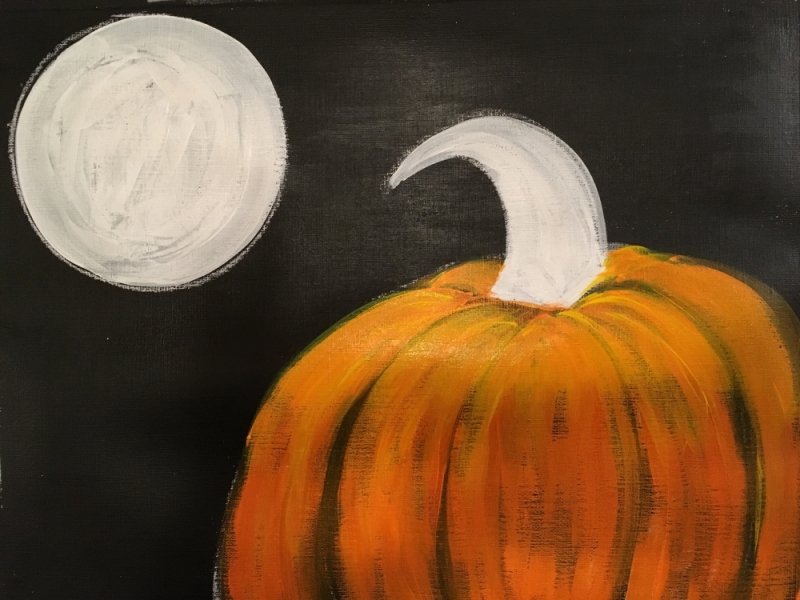
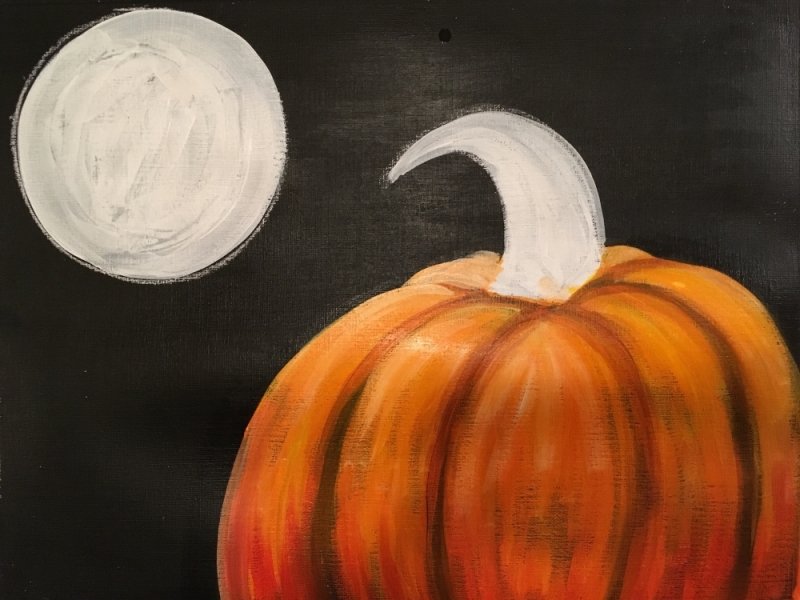
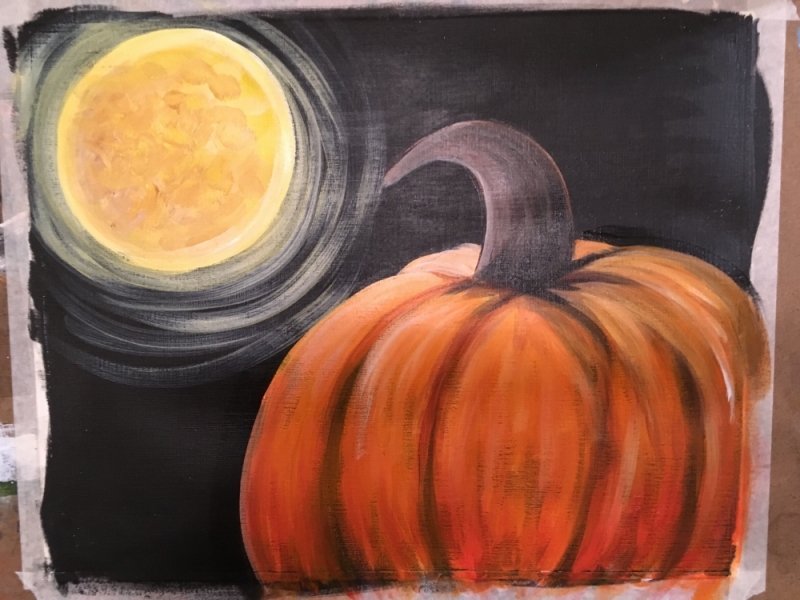
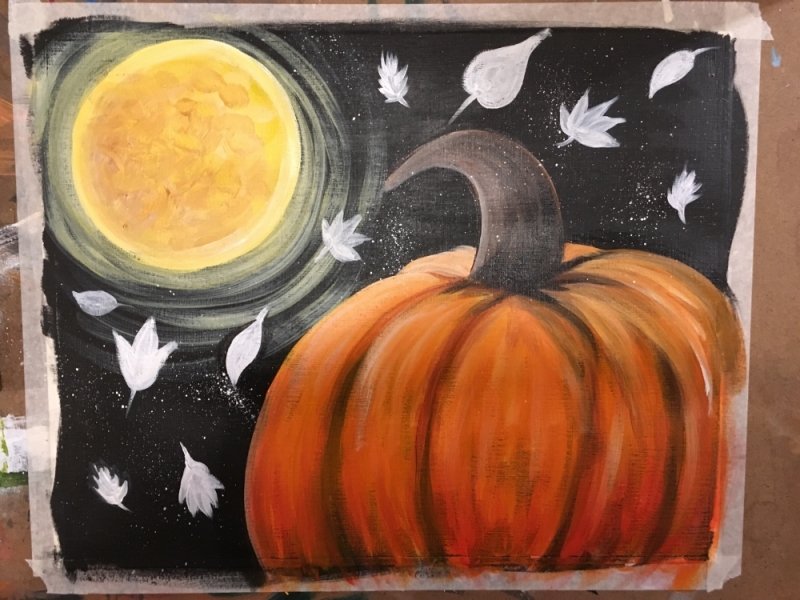
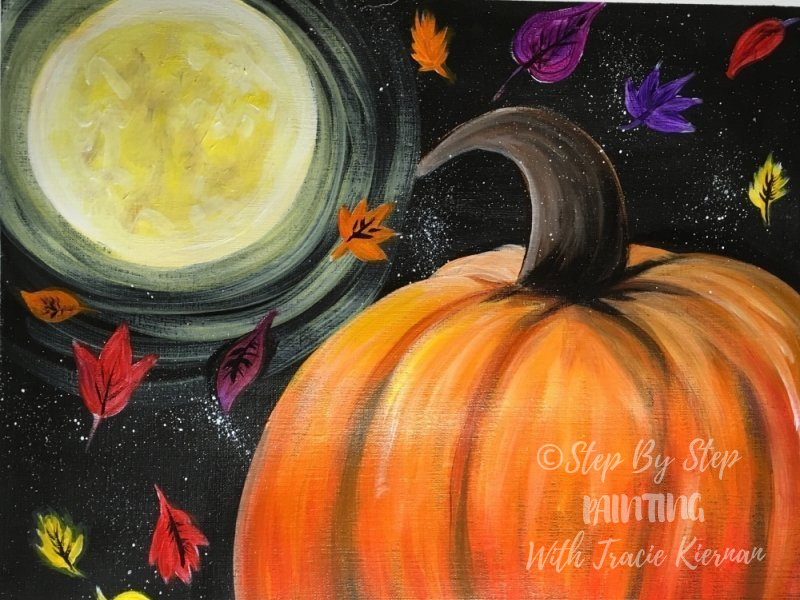
Beginners can learn to paint a pumpkin on canvas. This beautiful night fall pumpkin painting features a harvest moon and falling leaves! The following post is a step by step beginner acrylic painting tutorial.
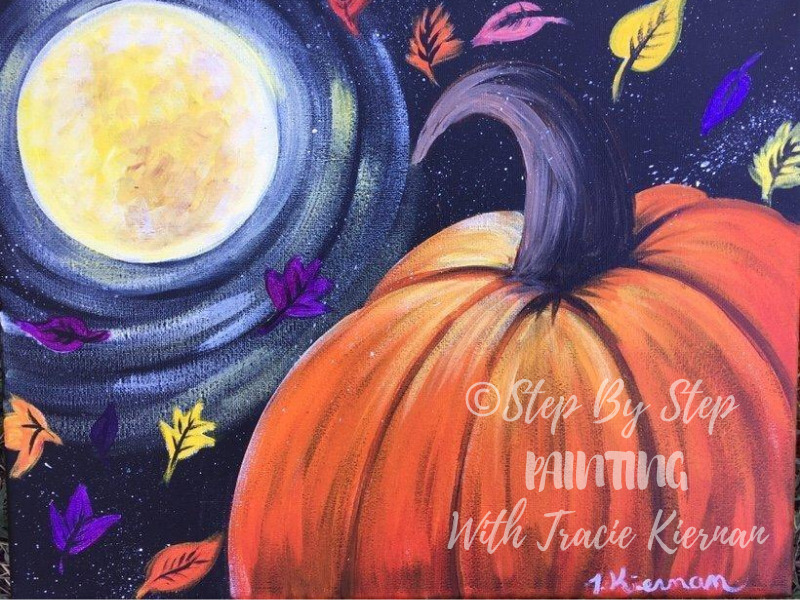
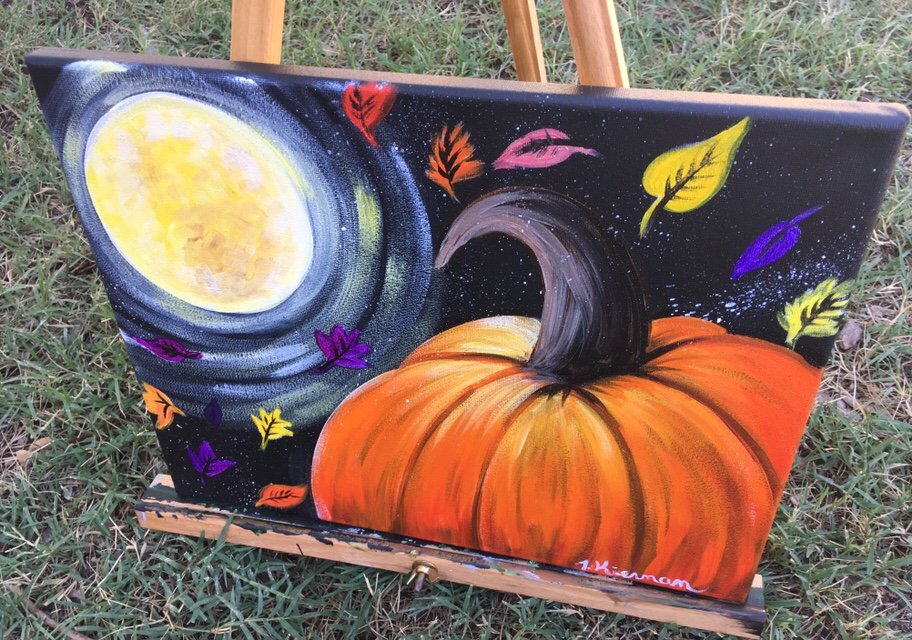
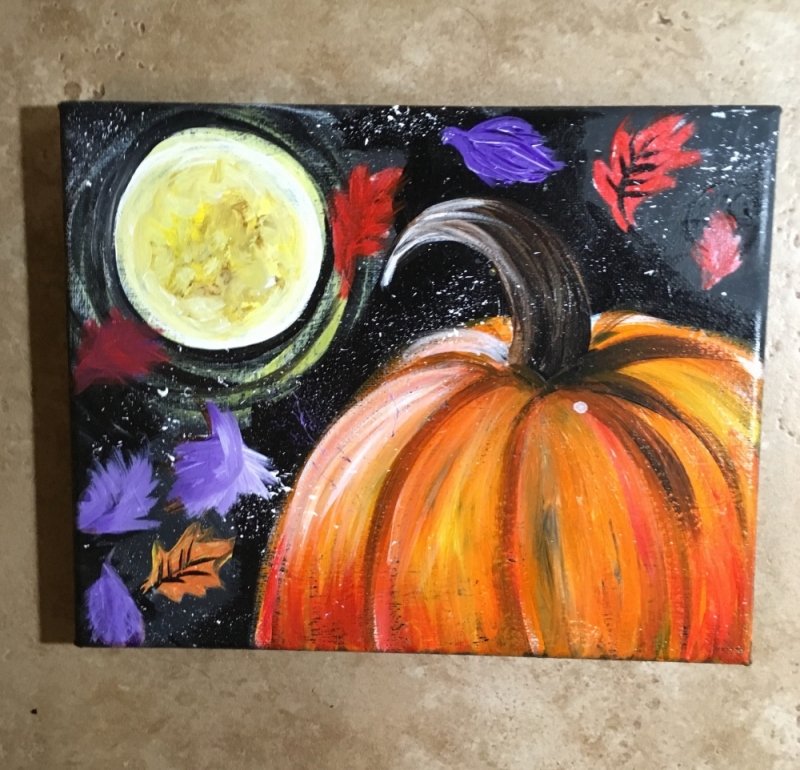
The painting was done on an 11″ x 14″ canvas with acrylic paints. You can also enlarge the painting and do it on a 16″ x 20″ canvas. Or you can do it on a smaller 8″ x 10″ canvas like the one pictured below.
There is no traceable for this! The pumpkin is super easy to draw. We will draw it with chalk so you don’t have to worry about messing up.
Enjoy and happy harvest painting artists!
For personal use only.
This post contains affiliate links. Clicking on one of the links and purchasing a product may result in myself receiving a small commission but at no extra cost to you.
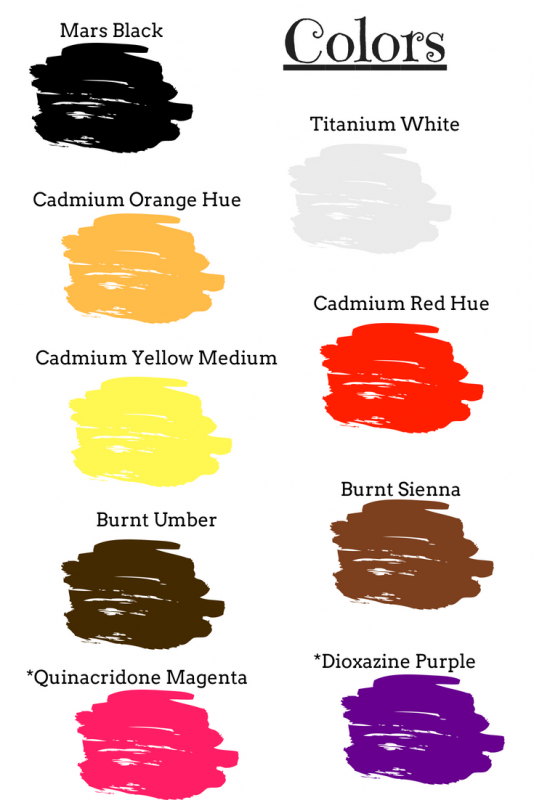
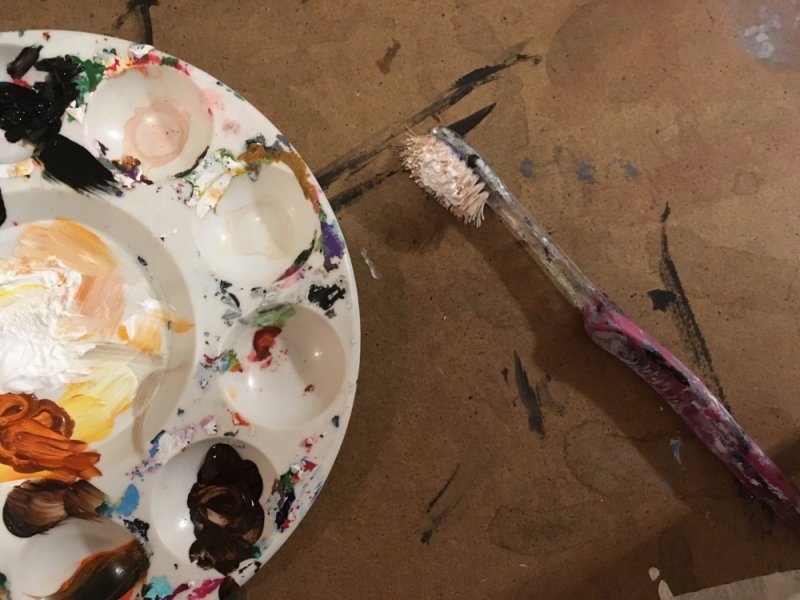
Materials
- Canvas 11″ x 14″ or any size you’d like
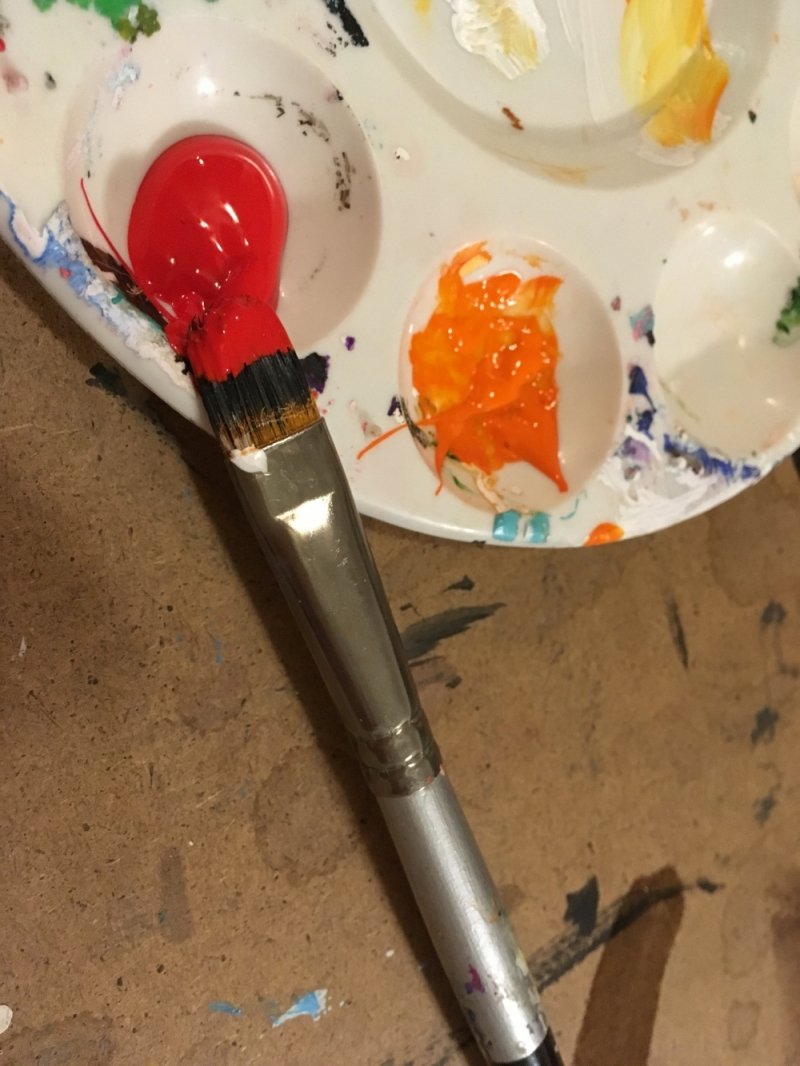
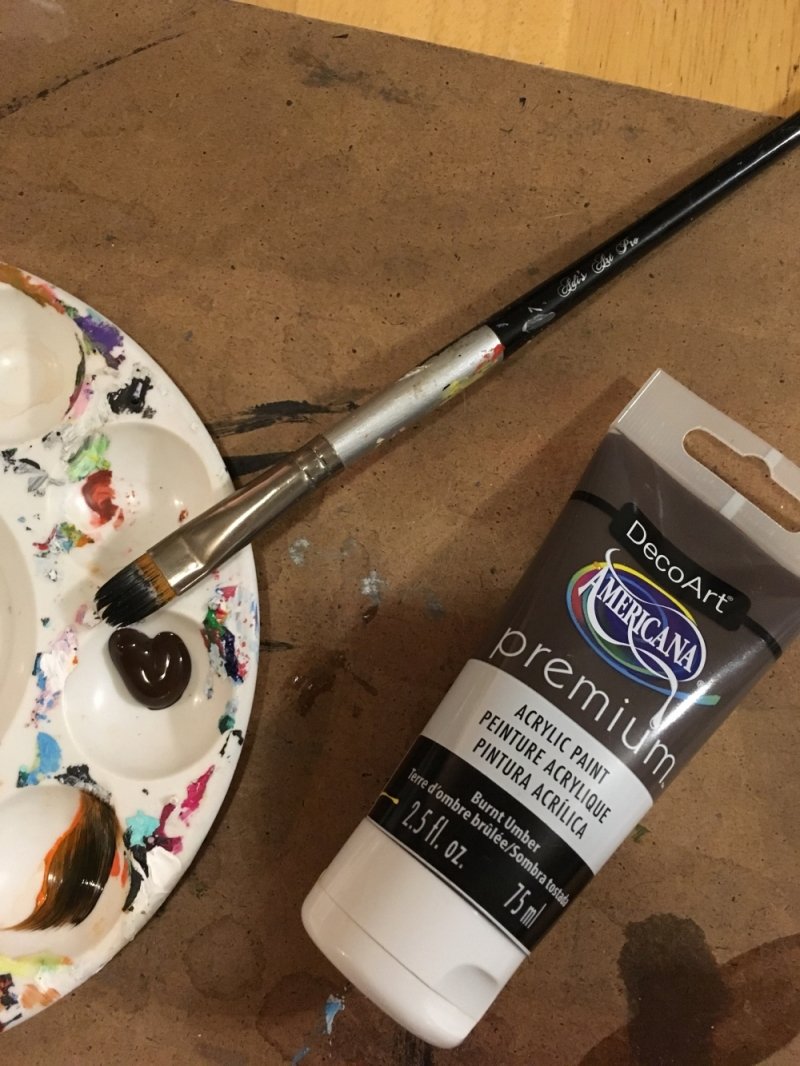
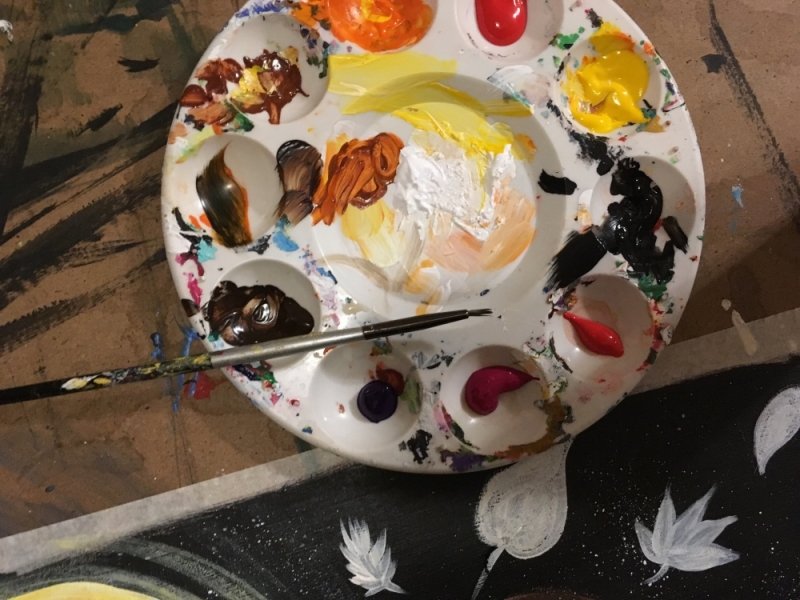
- Acrylic Paint (I used DecoArt Americana, except for the titanium white and mars black I used Liquitex BASICS)
- Mars Black
- Titanium White
- Cadmium Orange Hue
- Burnt Umber
- Cadmium Red Hue
- Raw Sienna
- Cadmium Yellow Medium (Or Primary Yellow if you want your moon to be brighter)
- *Quinacridone Magenta
- *Dioxazine Purple
- *Optional colors. These only showed up in the leaves.
- Paint Brushes
- *3/4″ Filbert (This is like a flat but has curved edges)
- Medium Round Brush
- Tiny Round Brush (only used this to paint the lines on the leaves)
- Large 1″ flat brush (only used this to paint the canvas black)
- Toothbrush (for splatter painting)
- Chalk
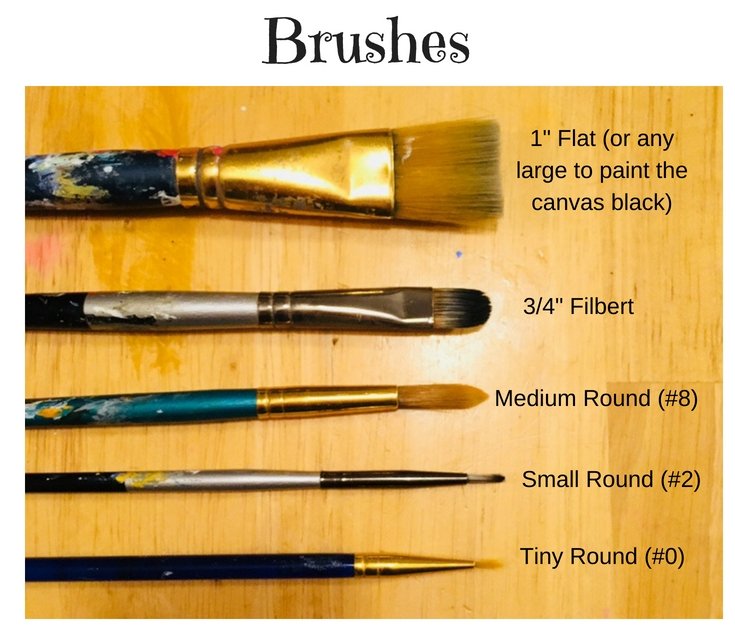 I also used an old toothbrush for the stars. Not pictured.
Directions At A Glance:

Video:
Step By Step Pictures
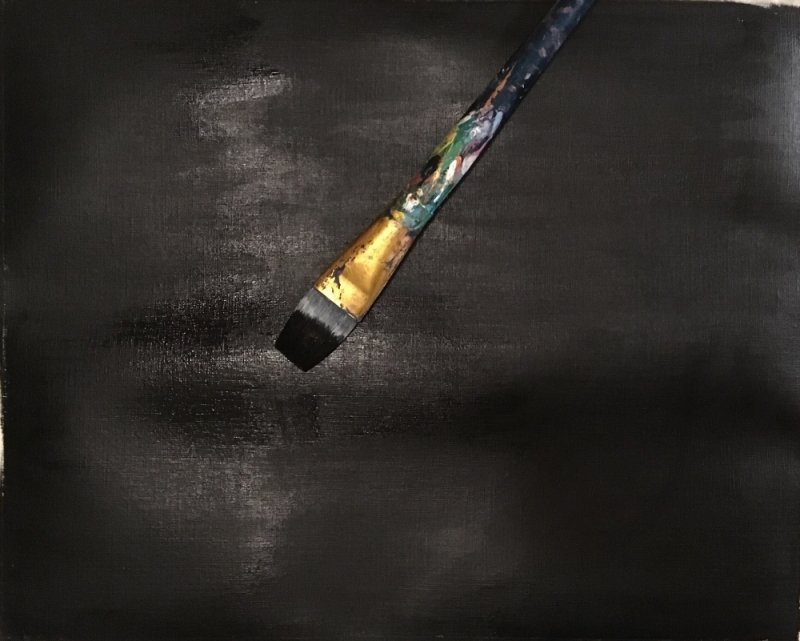
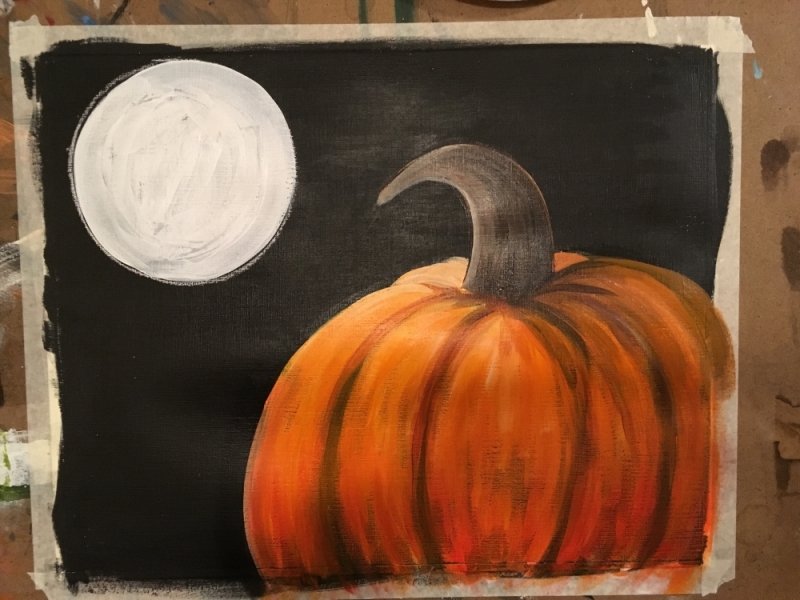
1. Paint the entire canvas black.
I used “Mars Black” to paint the entire canvas 1 solid coat. Let it dry completely before going on to the next step. I used a 1″ flat brush to do this.
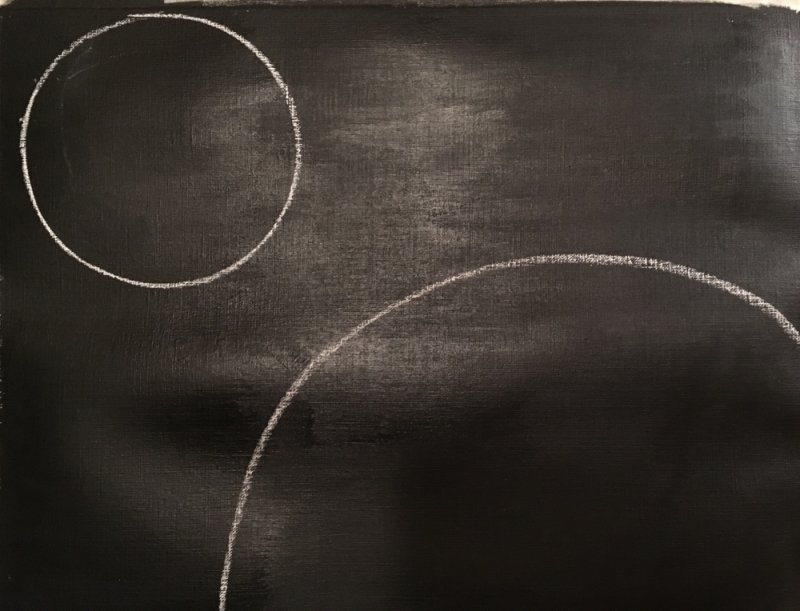
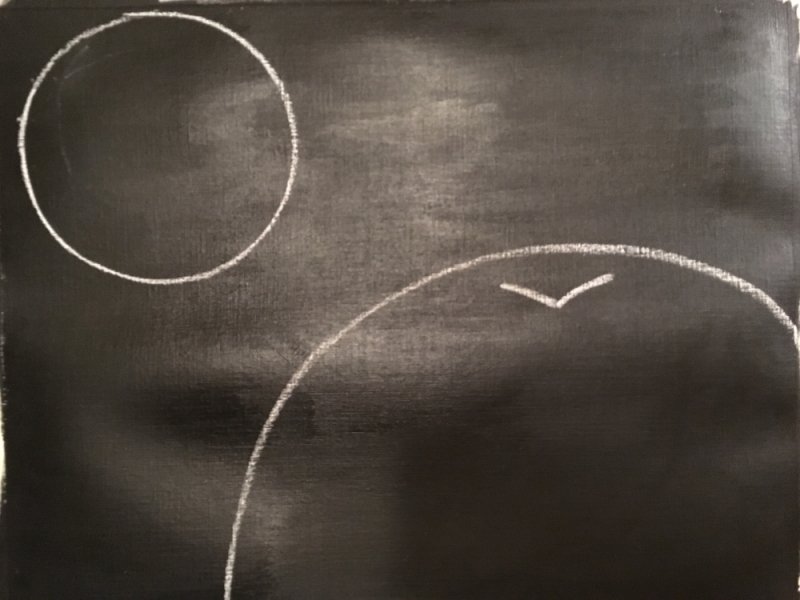
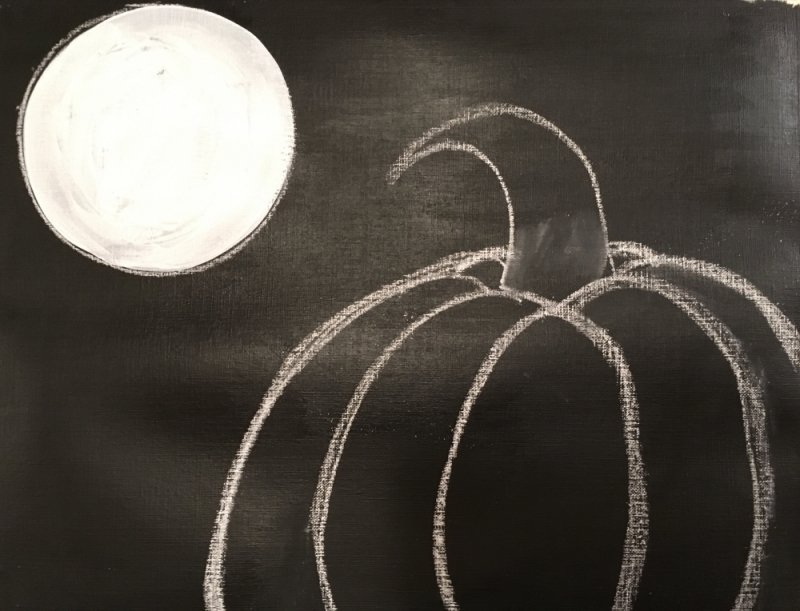
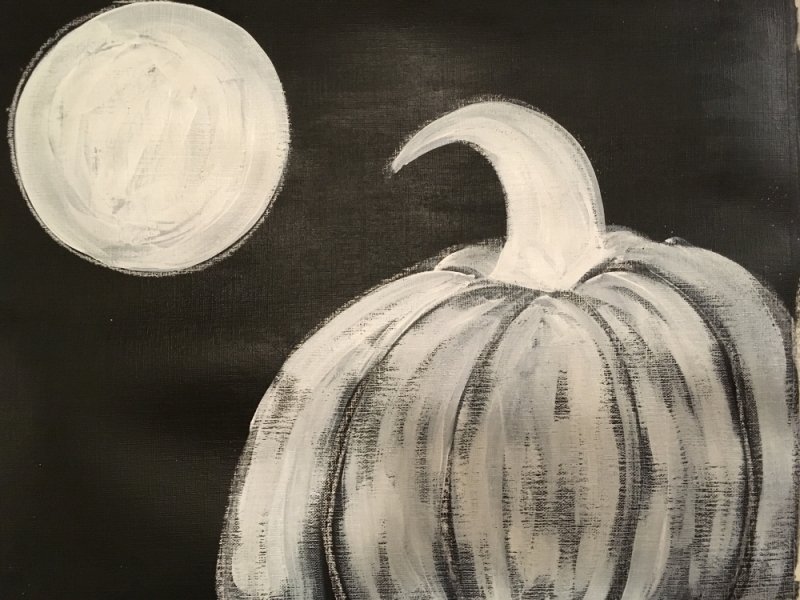
2. Draw the pumpkin and the moon with chalk.
Use a piece of white chalk to draw out the main parts of this painting. For the moon, I actually traced a roll of masking tape to get a perfect circle. For the pumpkin, just estimate the shape. Pumpkins come in all odd shapes and sizes so this circle does not need to be perfect.
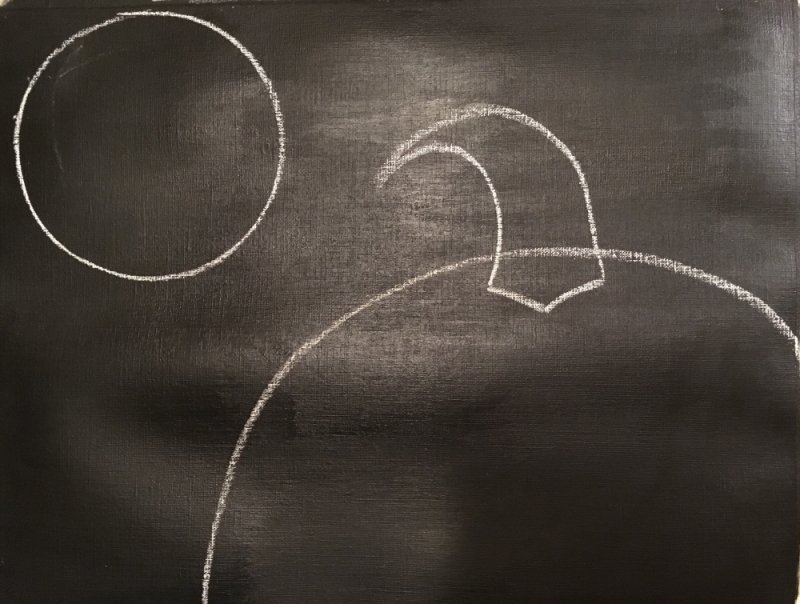
3. Draw the pumpkin stem.
Start at the top but a little bellow the top. Draw the bottom angle lines first then the stem.
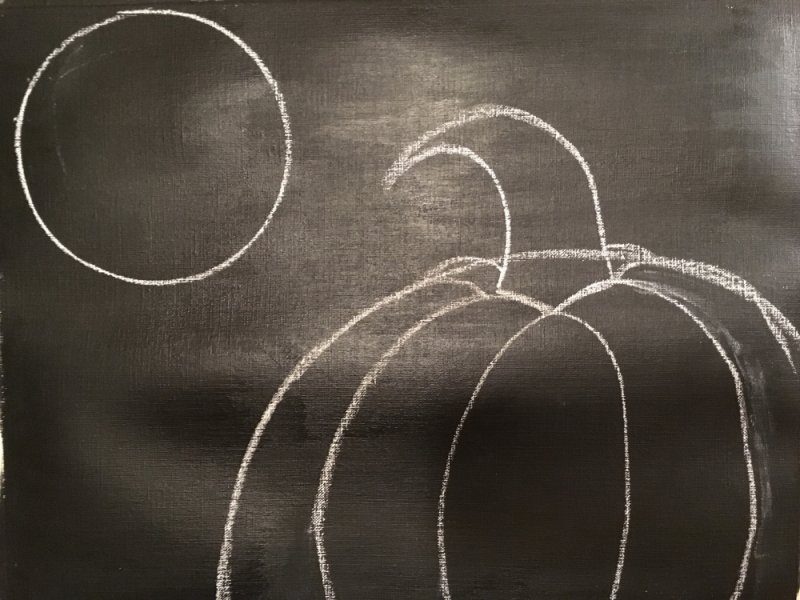
4. Draw the pumpkin lines.
Use the bottom of the pumpkin stem as a guide. Draw all the curved lines. I started in the middle of the pumpkin and then worked my way to the left and right. Also note that there are bumps that show behind the stem on the top of the pumpkin.
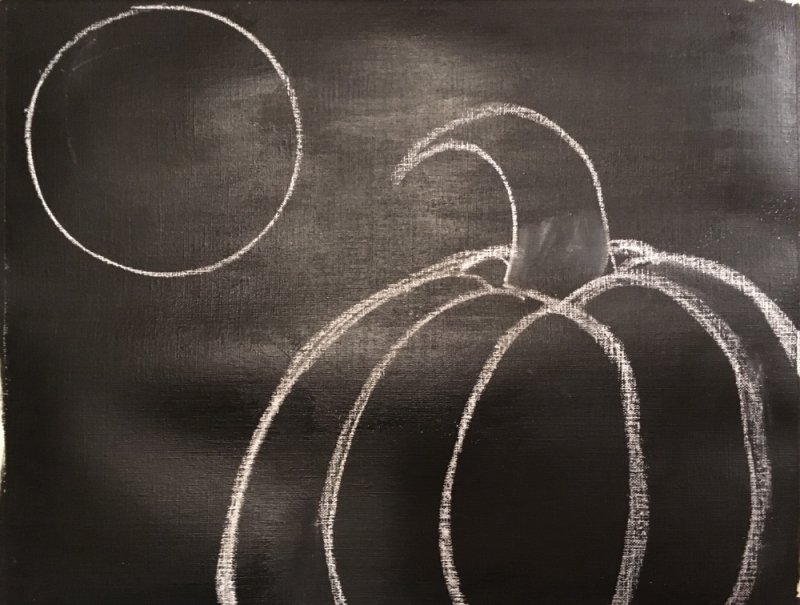
Then erase the lines that do not need to show.
5. Paint the moon white.
This step is easy! Just a solid coat of titanium white for now! I used my 3/4″ filbert brush for this. We will be using this brush for most of the painting!
6. Paint the pumpkin “bumps” in with white.
Use your 3/4″ filbert for this. Each pumpkin bump will be painted separately. Make your strokes go with the groove direction of the pumpkin. Also, allow a lot of the black to still show through, this helps develop the texture of the pumpkin surface. Leave the lines of the pumpkin that were drawn with the chalk as dark as possible for now.
The direction of your strokes will form the shape of this pumpkin.
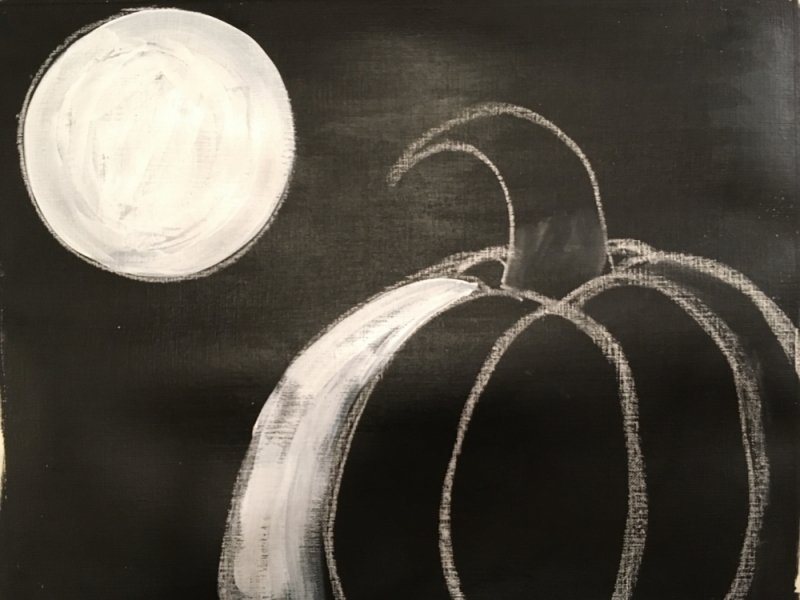
The middle bump of the pumpkin has strokes that start out curving to the left and then curve to the right.
Fill the top bump areas of the pumpkin white too. Don’t worry about having to paint over the stem part. Your white base here should really define the shape of this pumpkin.
7. Paint the stem in solid white.
This is a solid coat of titanium white.
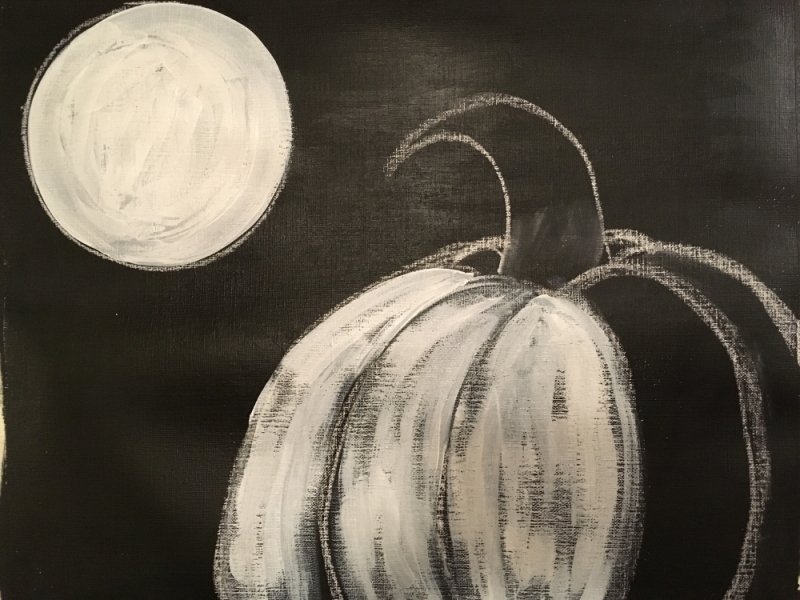
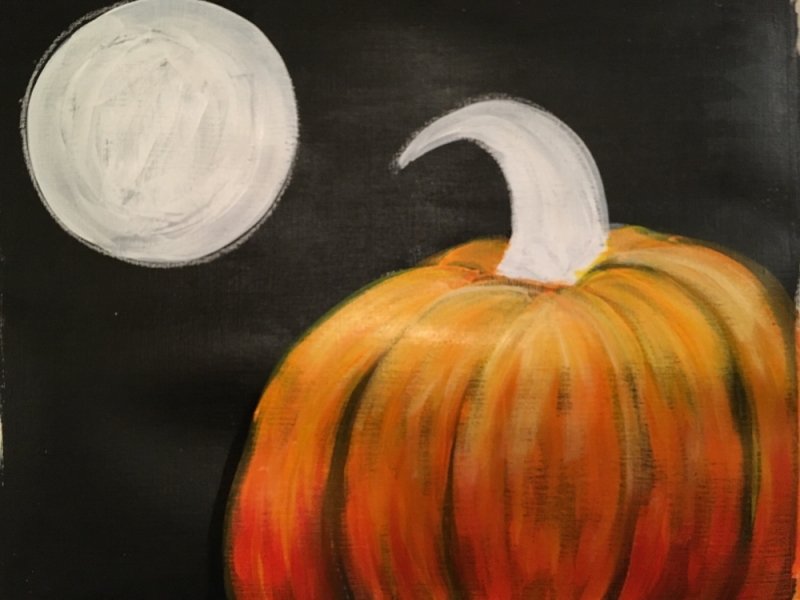
8. Paint over the bumps with “Cadmium Orange”.
In the same way you painted the white, paint over it with cadmium orange. Leave some of that black, especially where the lines are, showing through. Note: I’m still using that 3/4″ filbert!
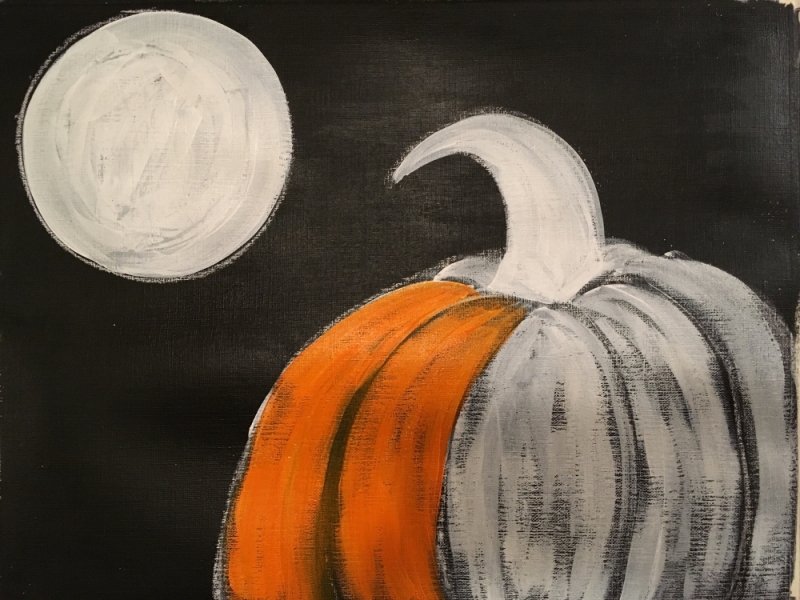
9. Wet on wet yellow on the top part of the pumpkin.
Dip your brush into the yellow, don’t rinse the orange off. Blend yellow onto the pumpkin on the top parts. This is wet on wet blending because the orange is still wet and we are adding yellow on top. Still make sure your strokes are going in the same direction.
10. Wet on wet cadmium red on the bottom part of the pumpkin.
Then, in the same way you added yellow on the top of the pumpkin, add red on the bottom of the pumpkin. This time, do rinse the brush off to get the orange and yellow off. Blend the red into the still wet orange on the pumpkin.
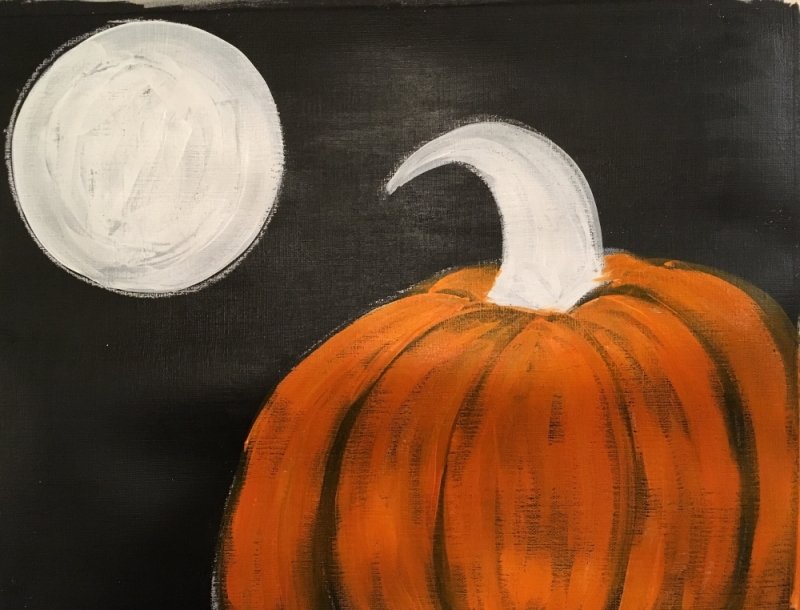
11. Go back over the outside of the pumpkin with black to define the shape.
If your pumpkin got all out of shape like mine did while painting, go back over with black and define the outline of the pumpkin. I used my 3/4″ filbert for this step.

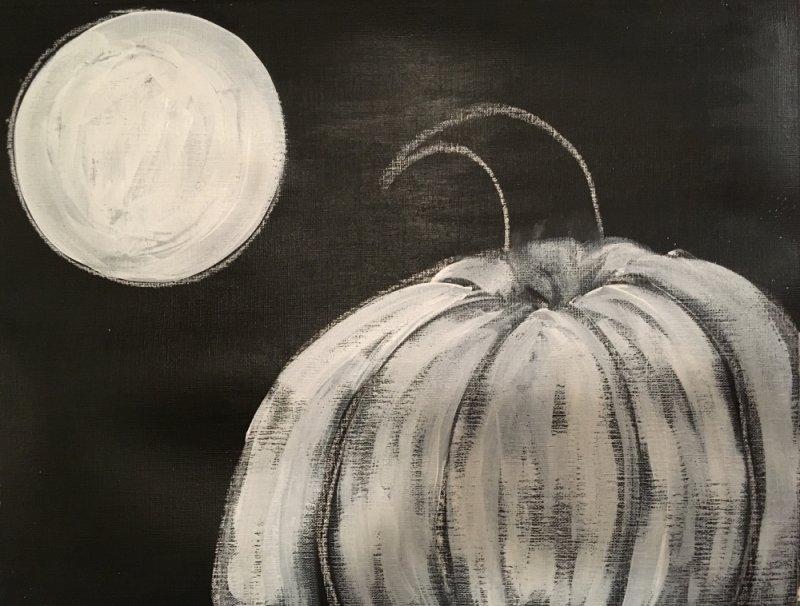
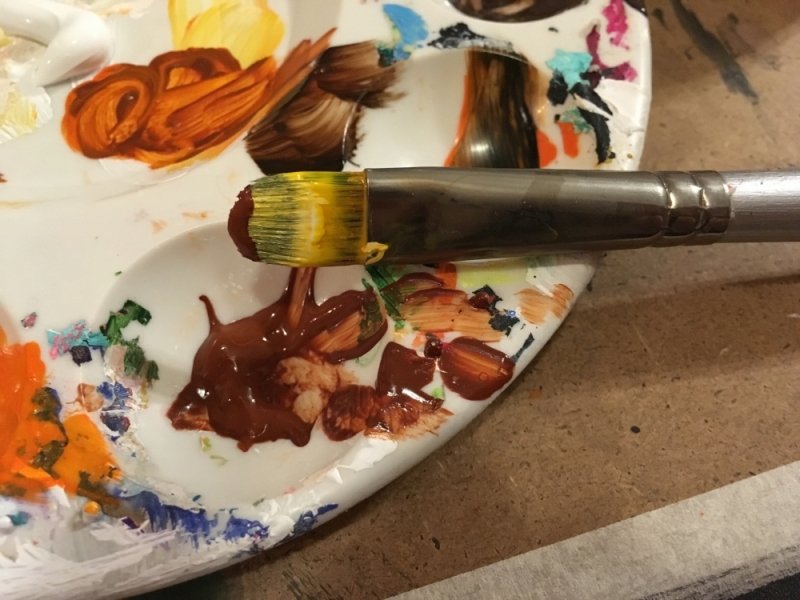
12. Mix cadmium orange medium with burnt sienna (brown and orange). Use that color to paint the lines of the pumpkin.
I used a medium #8 round brush for this step. Basically, where the lines were left dark, paint them in with burnt sienna mixed with cadmium orange (equal parts). You might want to add a little more brown if it’s not showing up dark enough.
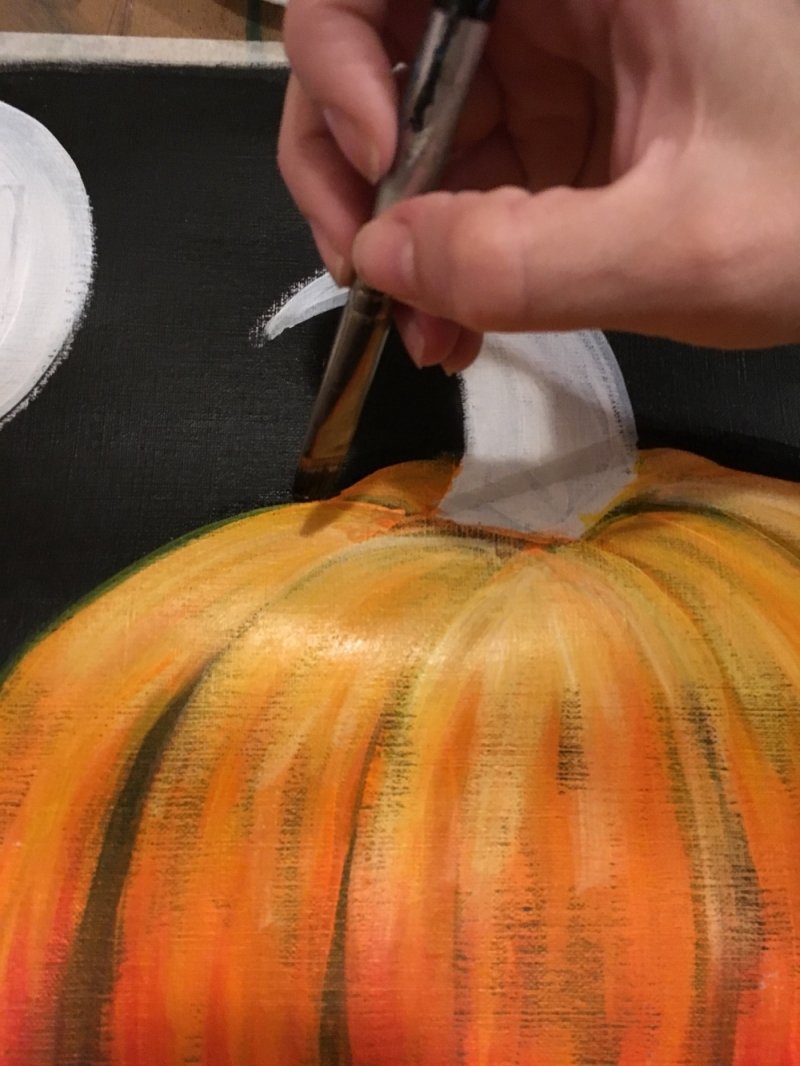
13. Paint The Stem.
Use burnt umber to paint the stem a solid coat. I used a 3/4″ filbert!
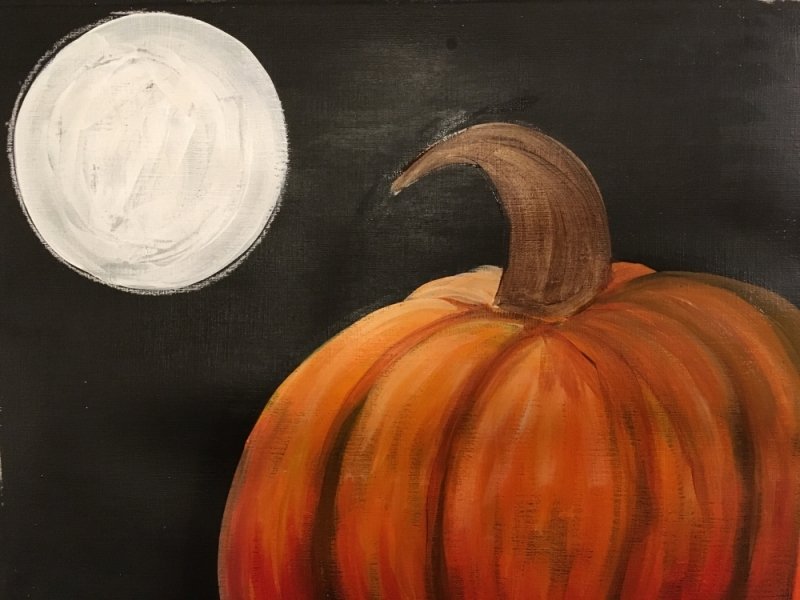
14. Add Highlight and Shadow on the Stem.
Use black to paint the right side of the stem’s shadow. Then extend the black a little on the lines of the right side of the pumpkin (optional but it gives the pumpkin some shadow).
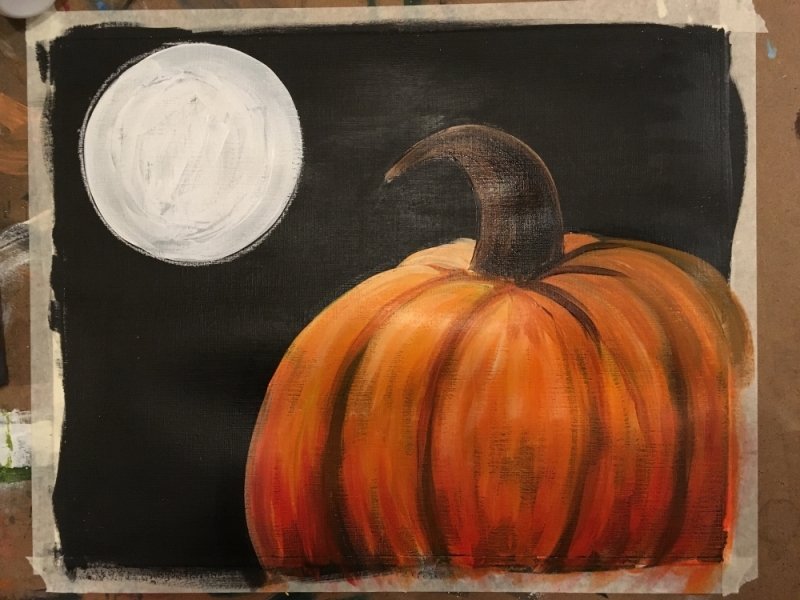
Add white to the left part of the stem as a highlight. Blend it all in with the brown.
15. Paint the moon.
For the pictures in this tutorial, I used cadmium yellow medium. In the video, I will use “primary yellow” because the moon will look brighter! Your choice… Any how, start off by painting the moon a solid coat of yellow.

Then dip your not-rinsed yellow brush into a tiny bit of burnt sienna.
Paint brown moon texture into the yellow of the moon. Don’t think too hard about this step, just blend little “blobs” everywhere.
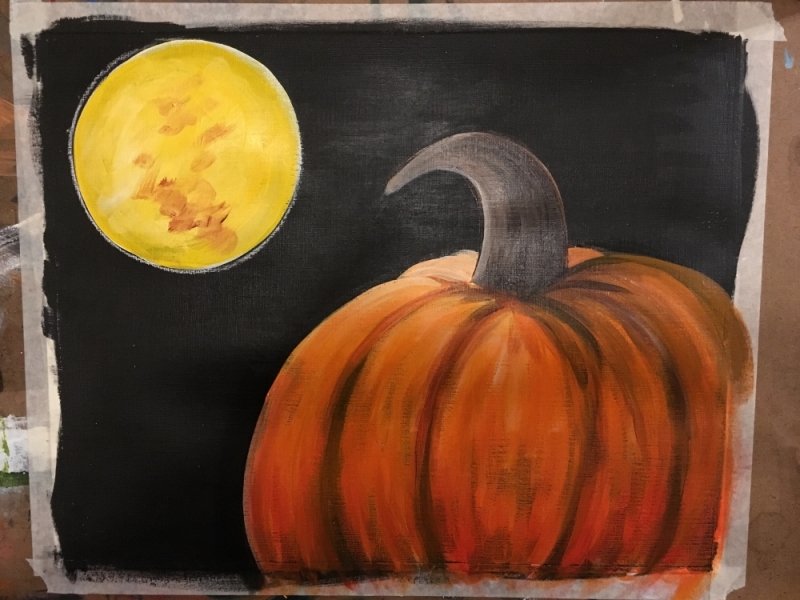
If needed, go back over the moon with white and more yellow to blend your moon texture in.
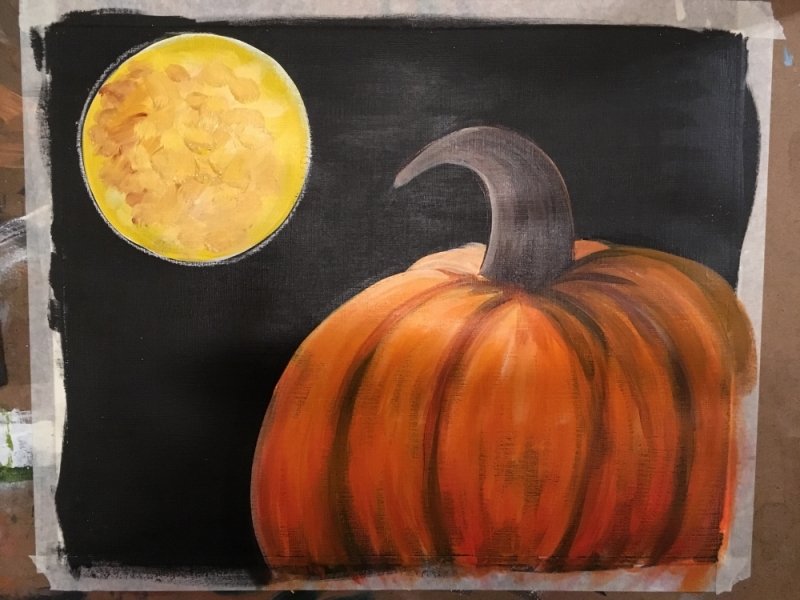
16. Dry brush moon beams around the moon.
Add very little titanium white to the filbert brush. Start on the very edge of the moon circle. Lightly paint moon beams so the strokes look dry. Let the moon beams fade out into the black sky.
17. Paint the fall leaves white.
I used a small #2 round brush to paint the leaves. It really helped to look at leaves on my phone and study the shapes before actually painting them in. I suggest practicing first. Paint a nice variety of shapes and sizes!
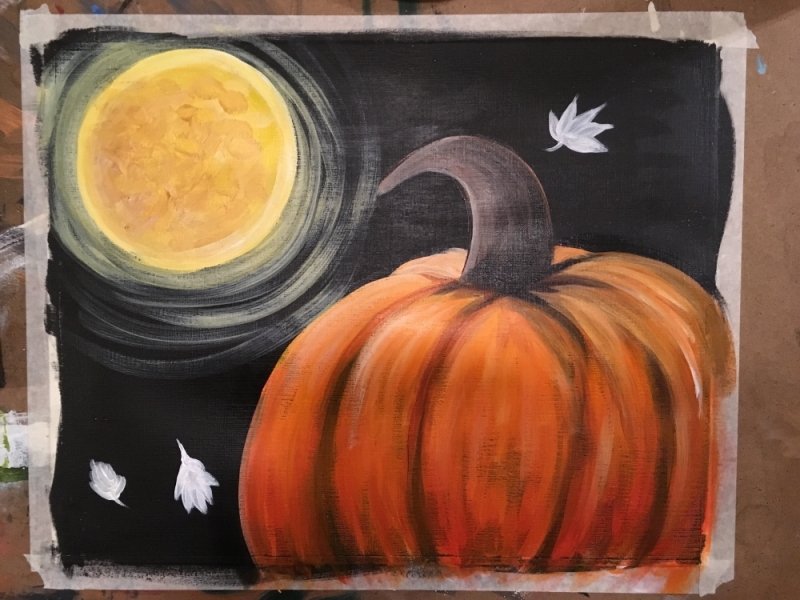
18. Splatter paint some stars in the sky (optional but it looks cool).
Next I used an old toothbrush to splatter stars in the sky. You will overlap the pumpkin slightly but I left it because it looked kind of cool and magical. Use slightly watered down titanium white and flick the toothbrush.
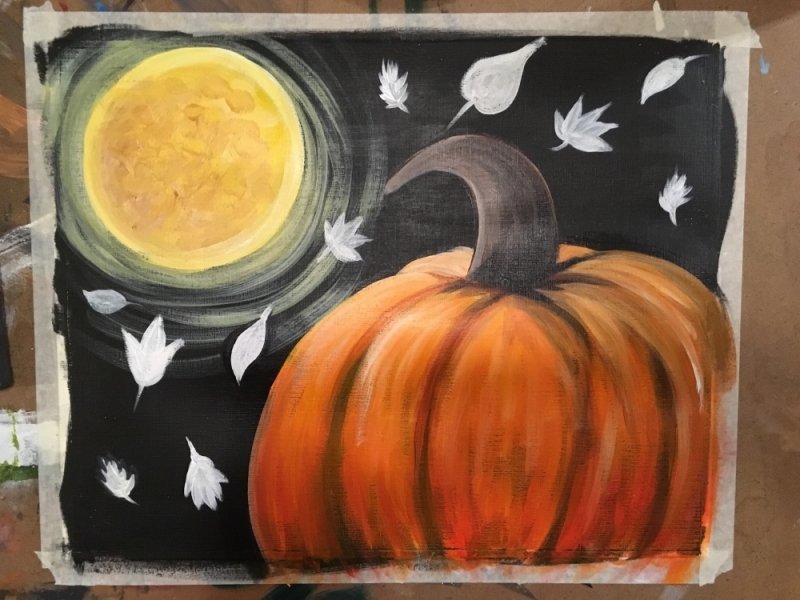
19. Paint the leaves in using a variety of fall colors: red, orange, yellow and even purple! Then lightly paint in some lines with a very tiny round brush.
Go back to your #2 round brush and paint the leaves in. Use a variety of different colors. I used dioxazine purple and quinacridone magenta for some of the leaves. I also used cadmium orange, yellow and red.

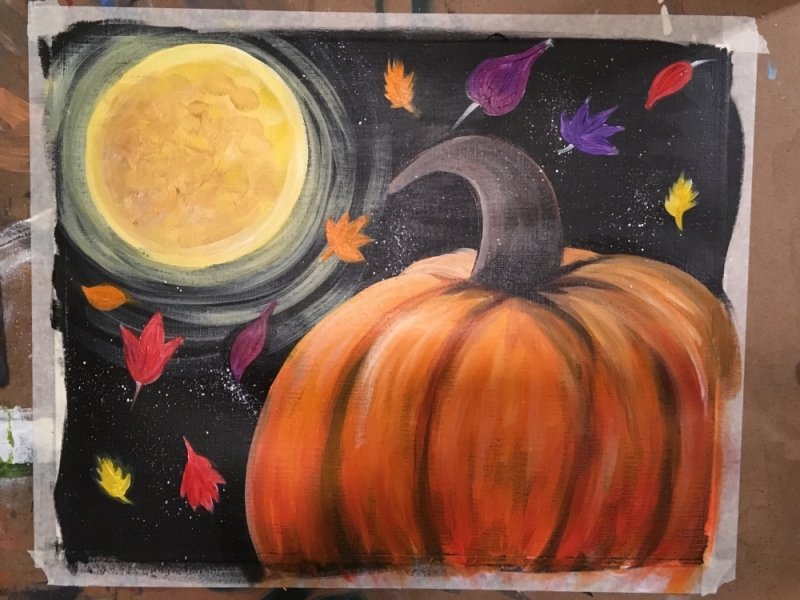
Then use a very tiny round brush to paint the lines on the leaves with mars black.
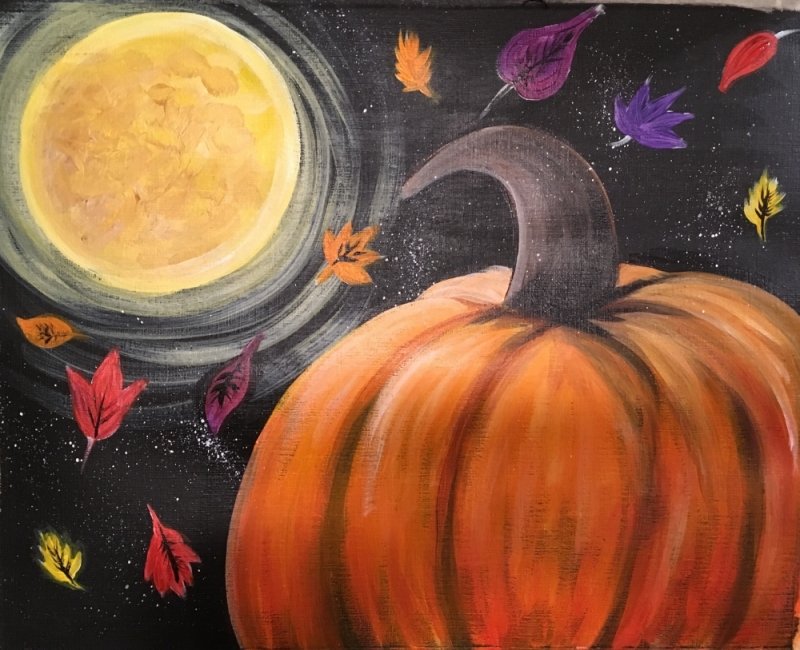
20. Some Final Touches
To get the moon to be brighter, I painted it over with primary yellow, which is a brighter yellow than cadmium yellow. Then I added some more highlights onto the pumpkin on the left with both white and primary yellow. This added the “pop” that the painting needed.
Share Your Art


Love your work, I must try this on my own.
Thank you so much
Thanks Pauline! Do try it, this one is a fun one!
Very easy to follow you. Thank you!
You’re welcome Dottie!
We did this for a paint and sip for our Mother’s 93 Birthday. The instructions were very easy to follow. She has always like to paint and enjoyed doing this picture.
That is so wonderful to hear! Happy 93rd Birthday to your mother!!! I’m so glad you chose to use this tutorial for her paint and sip! My grandmother just had her big 90! ? o
Thanks so much for your detailed instructions and video! I did the Fall pumpkin harvest moon last night solo and it was so easy to follow. My painting turned out great and just wanted to say thanks!
You’re welcome Karen! I’m so glad you enjoyed the Pumpkin Harvest Moon and love your results!