

“How To Paint Apples With Acrylics”
Would you like to save this?
Beginners can learn to paint a basket full of red delicious apples! This painting also has a super pretty faux wood background and I will show you how I did that using only three colors loaded on the same brush!
Painting apples is also a great painting exercise to learn about highlights and shadows.
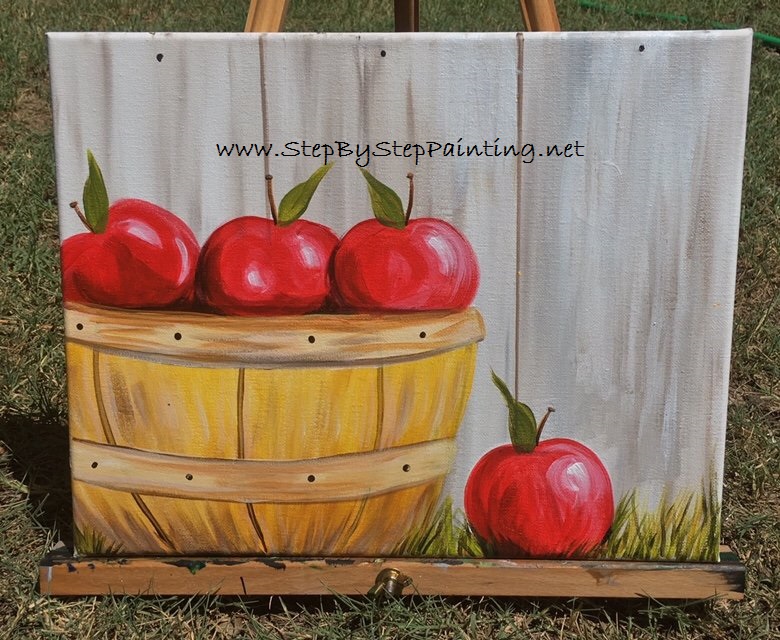
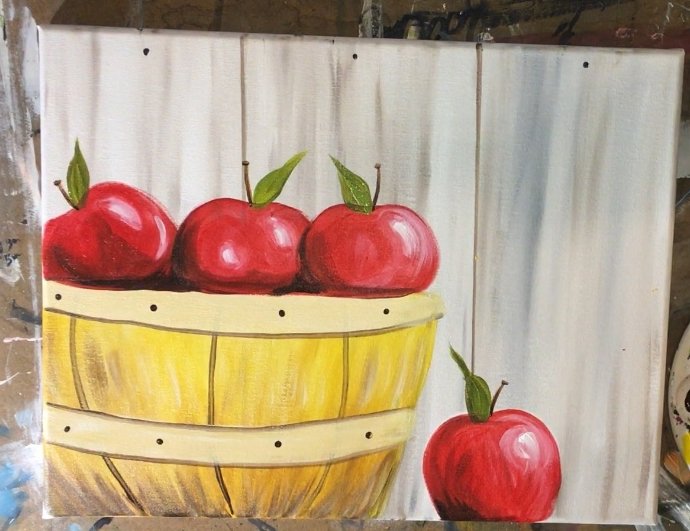
“Apple Picking Basket” was done on an 11″ x 14″ canvas with acrylic paints. As with any of the paintings on this site, you can do it on any size and any surface.
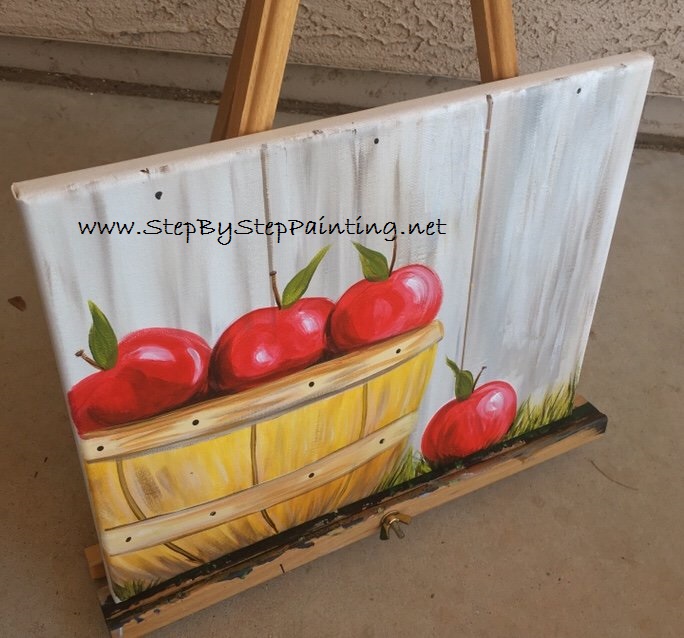
This painting looks a bit more challenging because you have to do the highlights and shadows on the apple. Actually it’s not too difficult and only three different colors (red, black and white) were used in the apples.

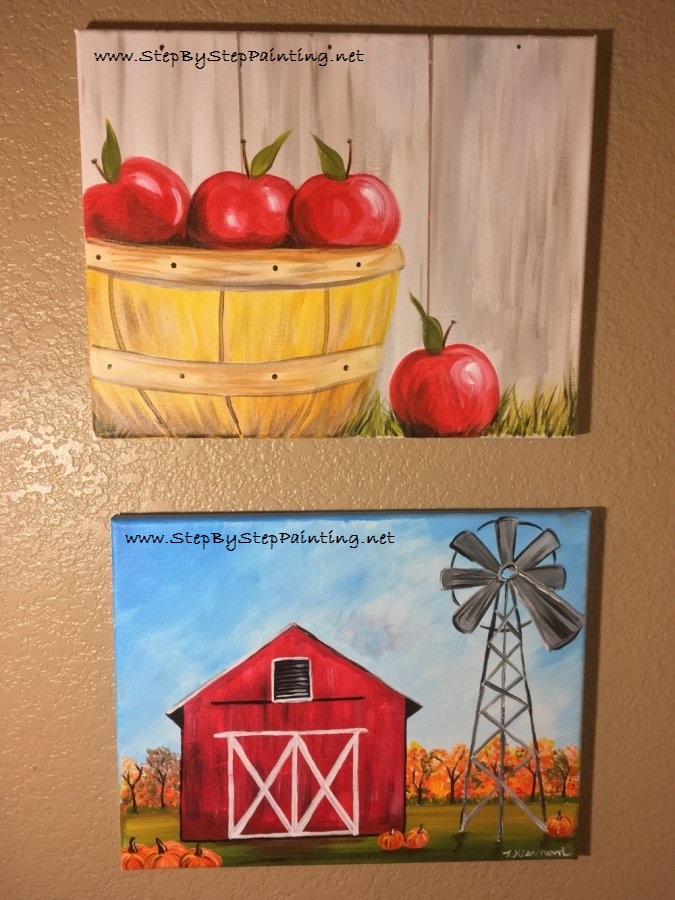
Although intended for Fall, this painting makes a great year round display. And if you did the Fall Barn painting, this one actually compliments it very well! Those reds look so lovely next to each other!
Enjoy this painting and don’t forget to share!
This post contains affiliate links.
Level/ Duration:
Level: Easy-Medium, Duration 1-2 Hours
Materials
- Canvas 11″ x 14″ or any size you’d like
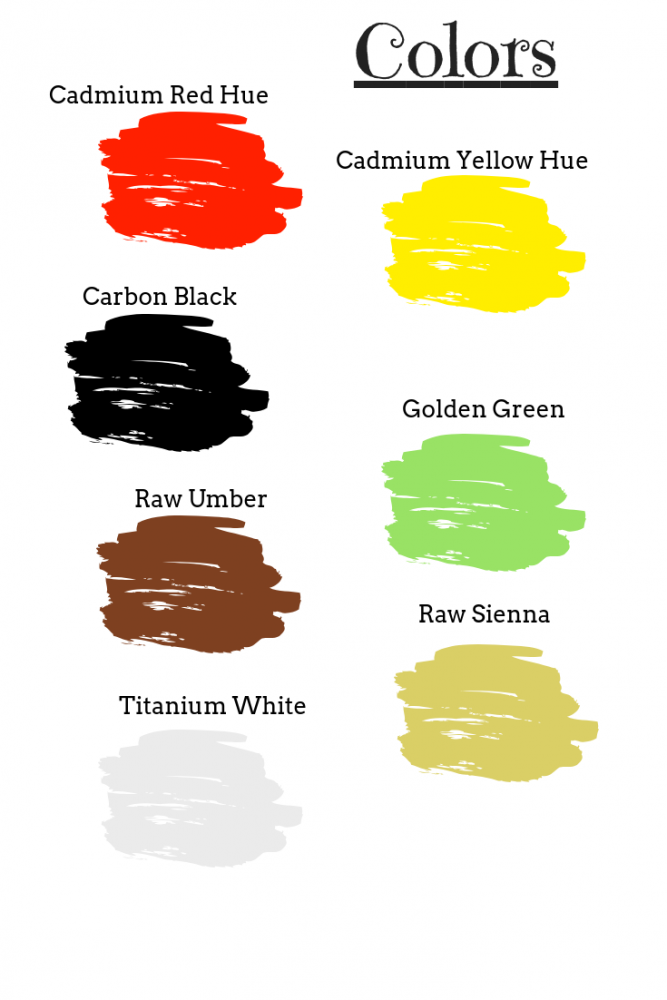
- Acrylic Paint (I used DecoArt Americana, except for the titanium white I used Liquitex BASICS. Use what paint you have on hand!)
- Carbon Black (Mars black is fine too!)
- Titanium White
- Cadmium Red Hue (A bright warm red for those apples)
- Cadmium Yellow Hue
- Golden Green (A light, warm green but any green would work)
- Raw Sienna
- Raw Umber
- Paint Brushes (Royal & Langnickel or this Adi’s brush set)
- 3/4″ Flat
- 1/4″ Flat
- #0 Round
- #3 Round
- T-Square Ruler
![]()
![]()
Reference Photo:
This is the reference photo I used to help with the composition and proportion of the basket and apples. It also helps to look at it when doing the lights and darks on the apples. Source: Pixabay Royalty Free Creative Commons Library. You can also use a real apple to help for reference. 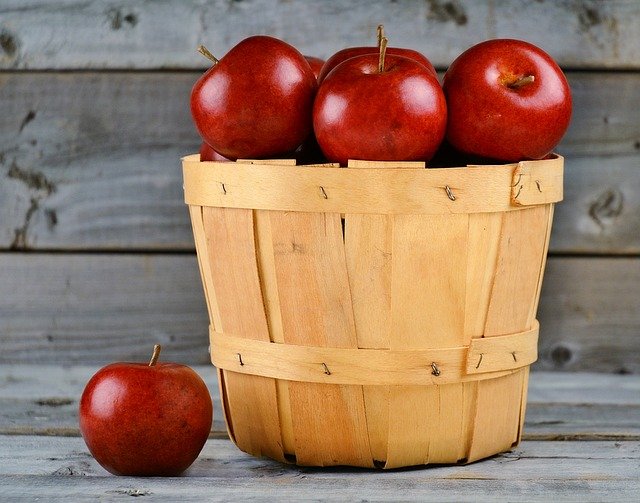
Directions At A Glance: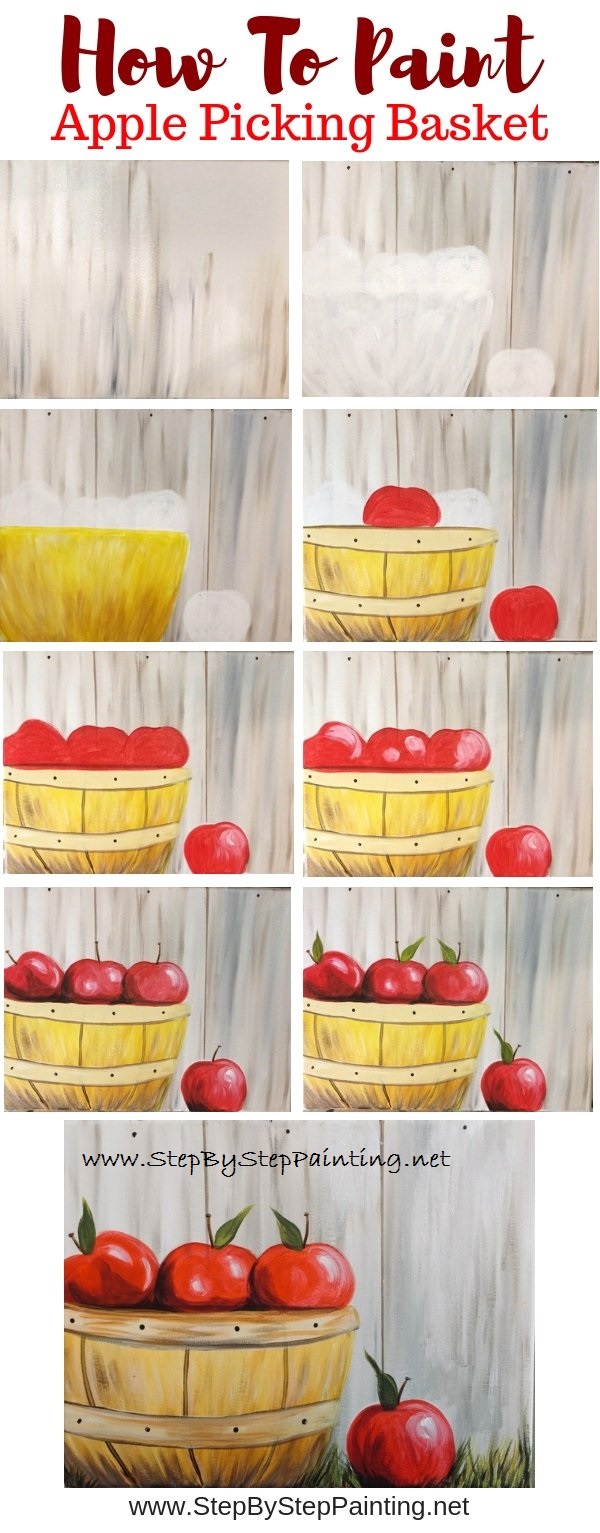

Video:
Step By Step Pictures
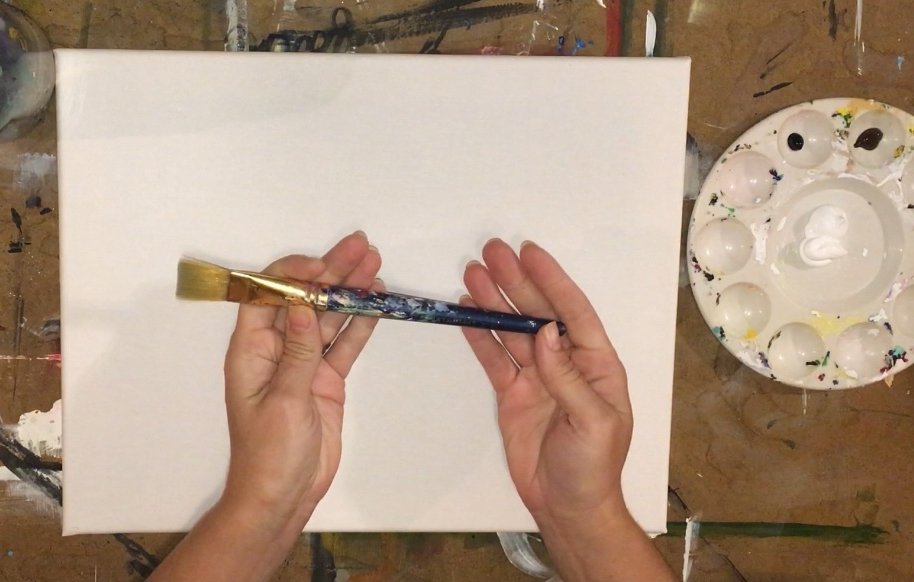
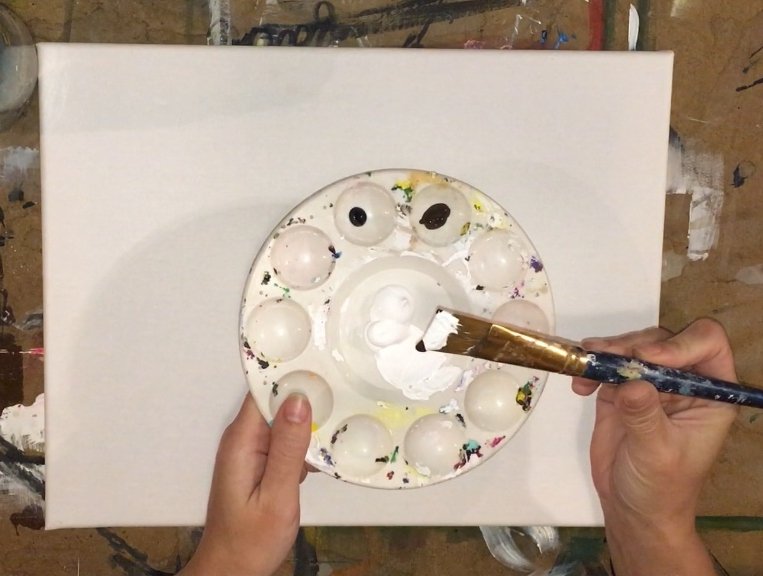
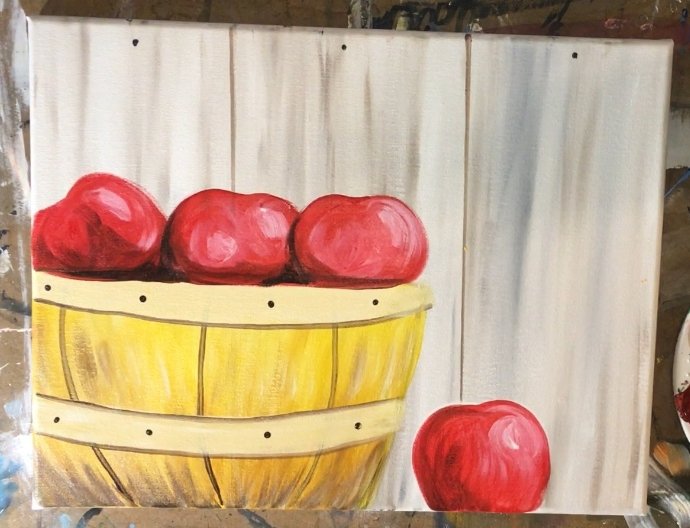
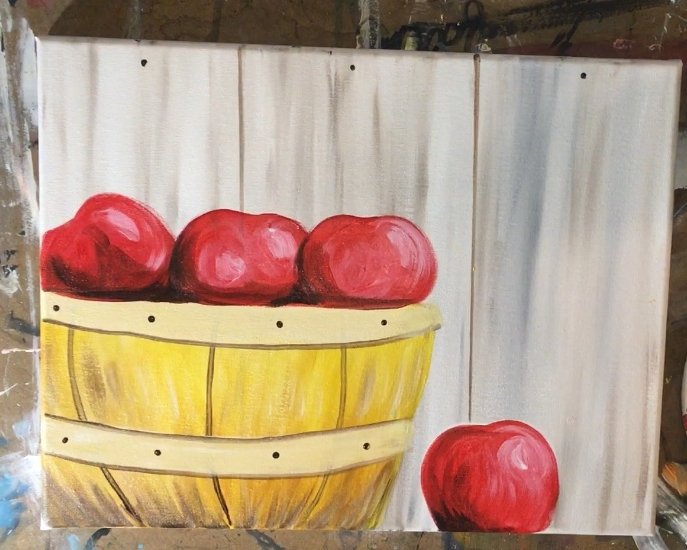
1. Paint the faux wood background using the 3/4″ flat and titanium white, raw umber and carbon black.
Dip the brush in your water first and then pat dry. Load your brush with titanium white. Then dip the corners in raw umber and carbon black (one color on each side).
 Be very careful to only put a TINY it of black. Black will take over so you only want like a drop on that corner. You can put a bit more raw umber on the other corner if you like the brown look in the wood.
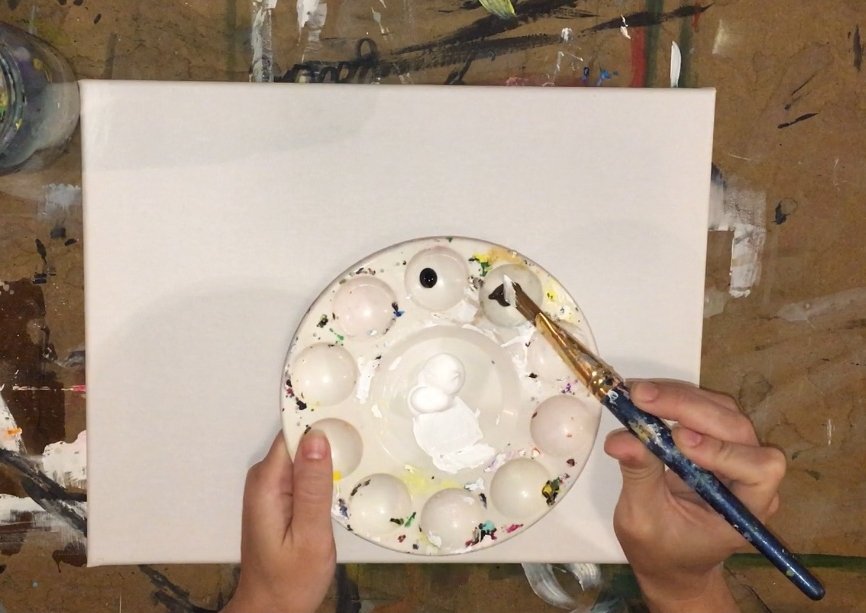
Paint up and down strokes letting the colors blend beautifully on the canvas.
You may notice that you want more brown on the corners, less black or even more black. You decide how much you would like to reload your brush with! Just make sure that you are applying mostly white so the colors will look like a “washed wood”. 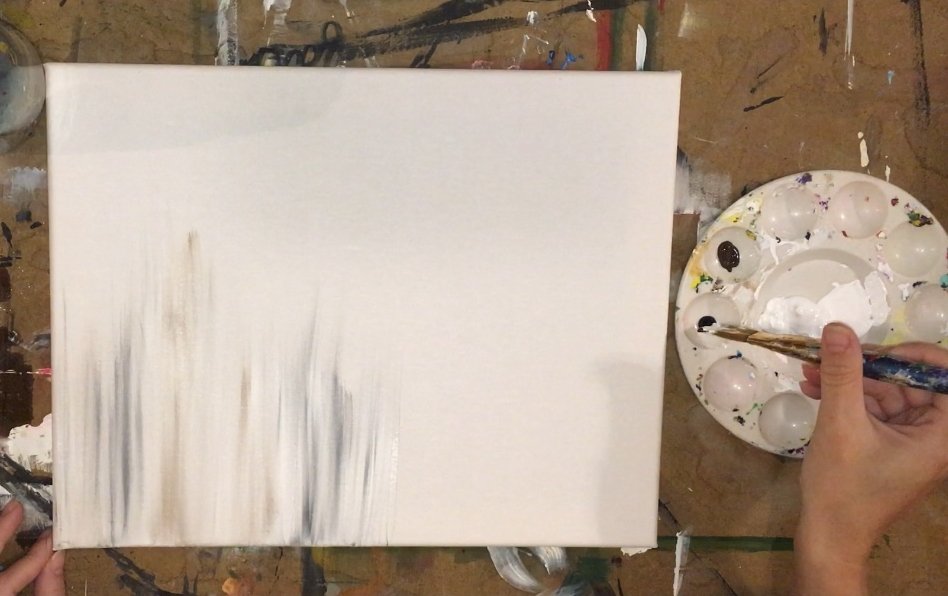
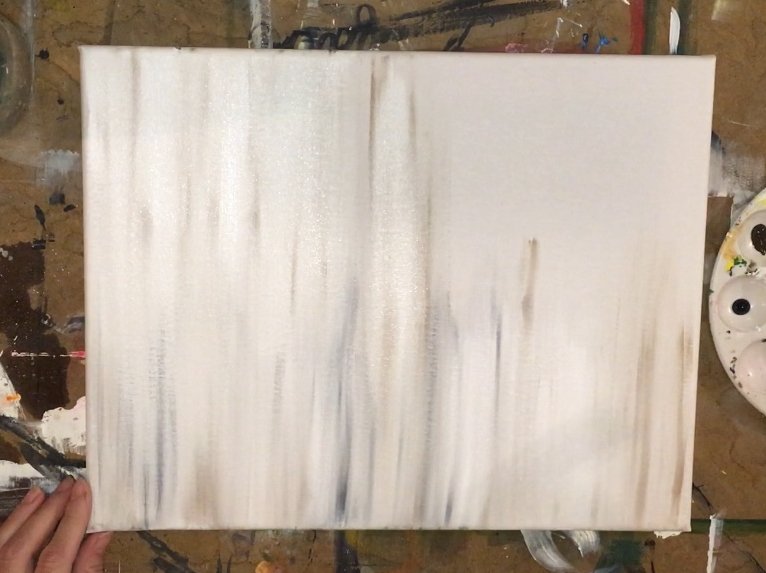
Keep all the strokes going as vertical as possible and all the way across the canvas. You can also apply multiple coats to adjust how your wood looks.
Just make sure that you don’t blend all the colors into one solid color. The more you paint over this, the more it will blend to one color and we don’t want that. 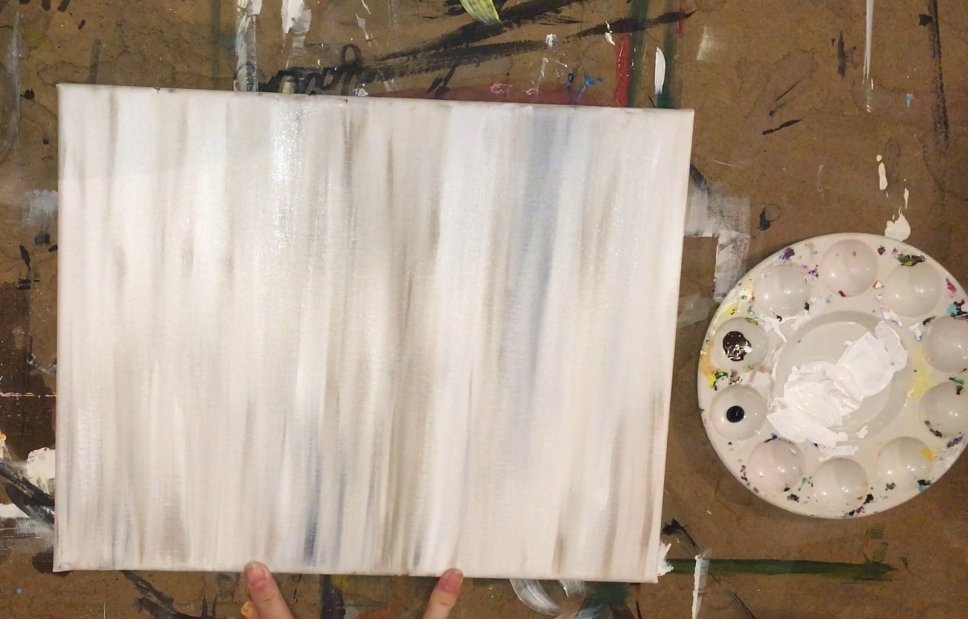
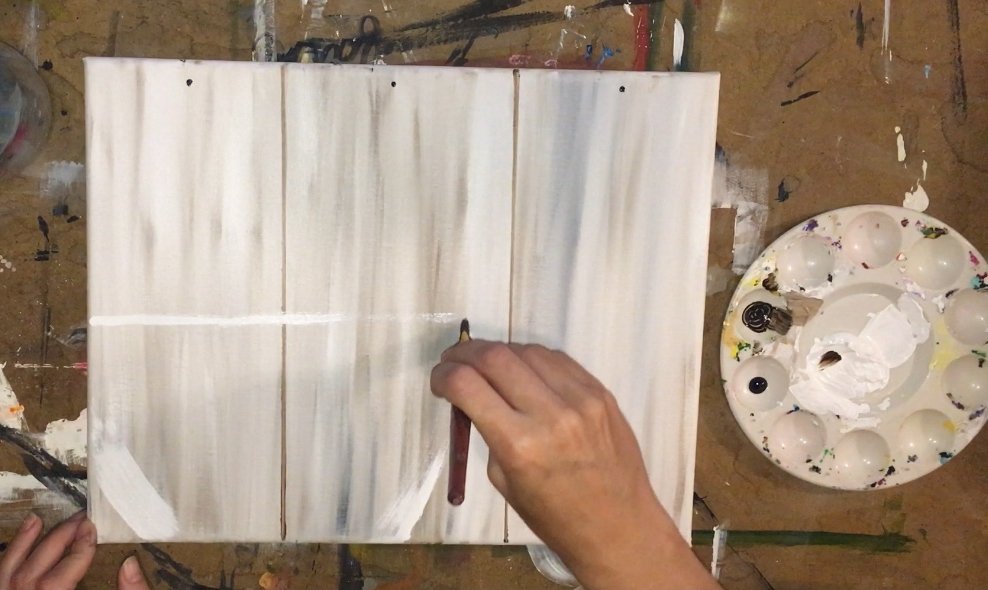
2. Paint the vertical spaces between the wood pieces and little dots on the top for the nails.
Switch to a 1/4″ flat brush and use the side of the brush to paint two straight vertical lines.
I used a T-Square ruler for this to make sure my lines were perpendicular on the canvas. I also estimated where the “thirds” were on the canvas. If you want you can measure for exact spacing.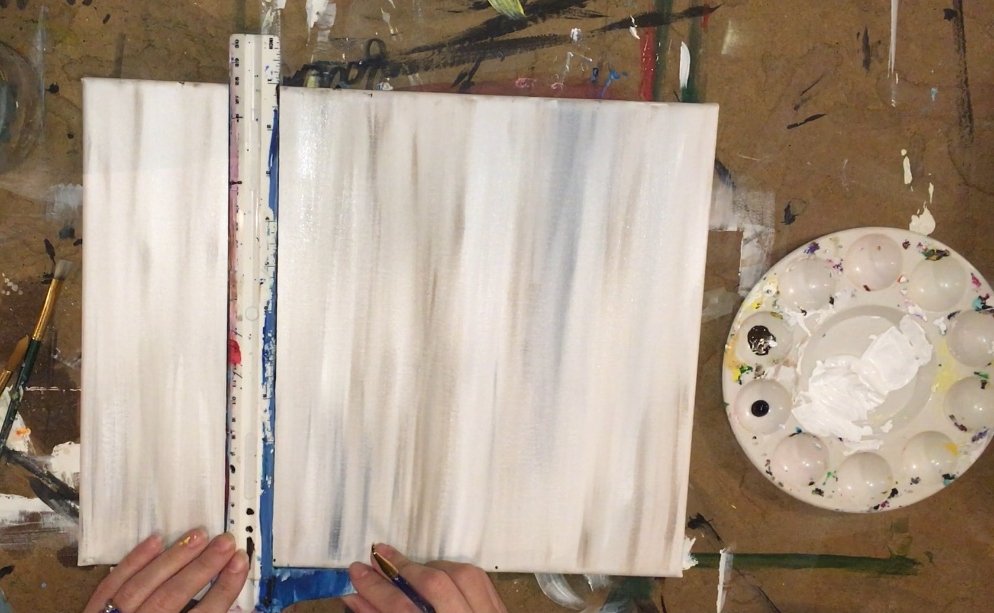
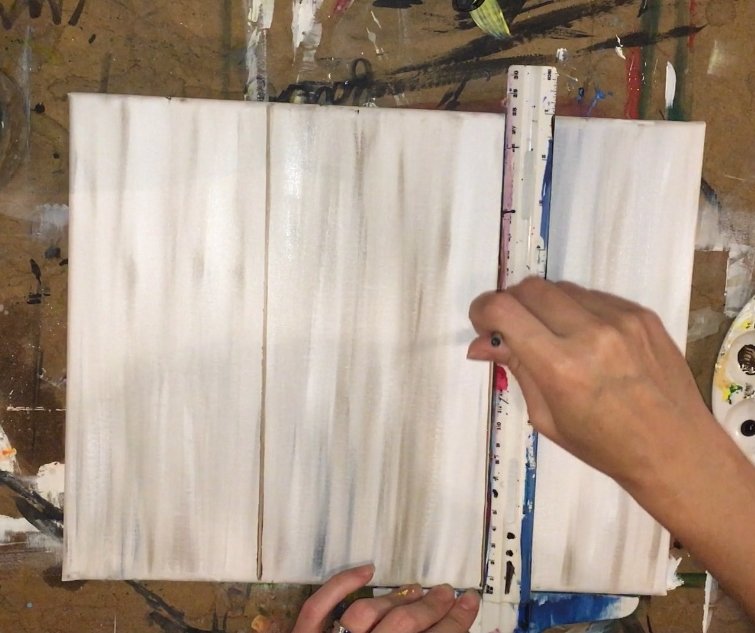
To paint the nails on the faux wood, I used the back of my brush to stamp on one little dot of “raw umber” just at the top of the canvas. 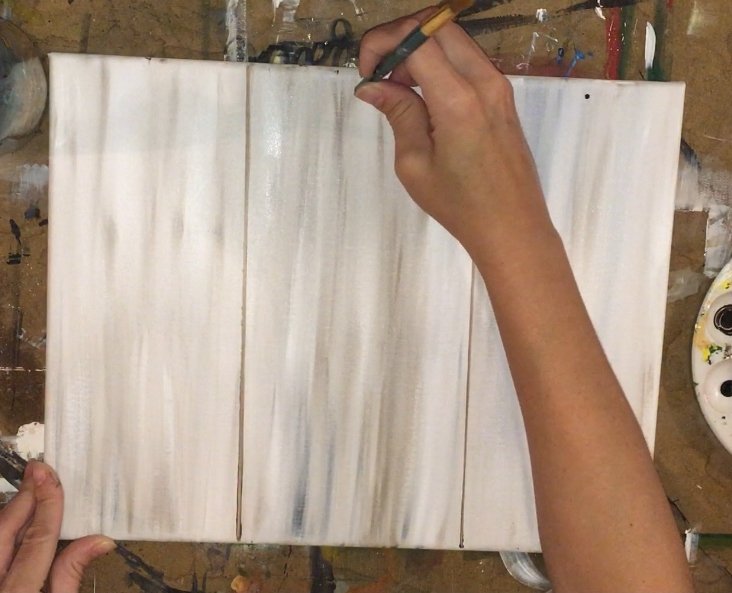
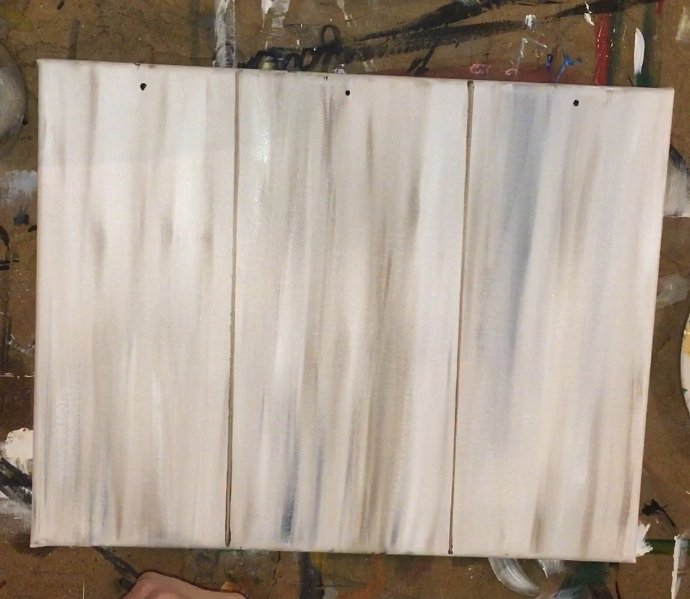
Beautiful faux wood! This was super easy to do!
3. Use titanium white and 1/4″ flat to form the basket shape.
Determine the size of your basket. Mine was on the far lower left and the size of my hand with fingers spread. Paint a bowl shape that is almost as high as half the canvas. 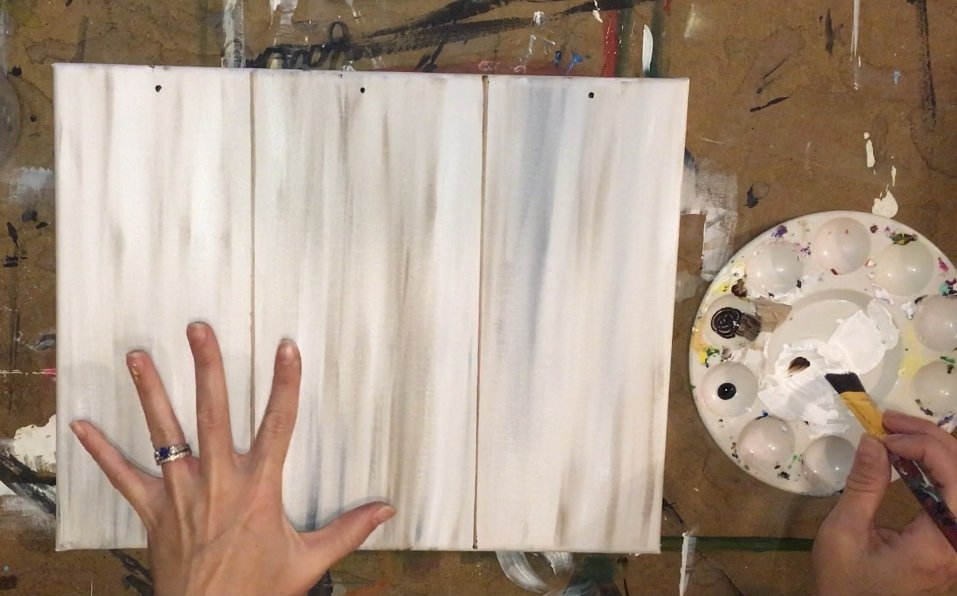
Use your ruler as well to get a nice flat top. Don’t worry too much about details yet. 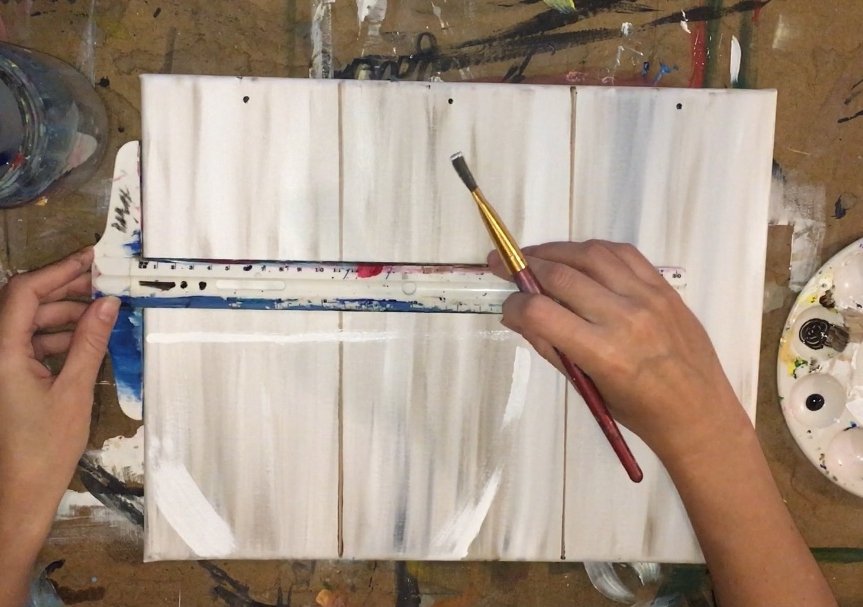
Paint the basket in white but don’t worry about it being solid white. If some of the faux wood is still showing through then that is okay. Just try to get your strokes to go in the direction of the shape of the basket. 
4. White out the shapes of the apples.
Using the same brush and titanium white, form the shapes of apples. It helps to look at a real apple for this and observe how the apple is just a circle with a dip on the top where the stem.
(Don’t paint the stem at this point) You can also look at this photo from Pixabay.com. 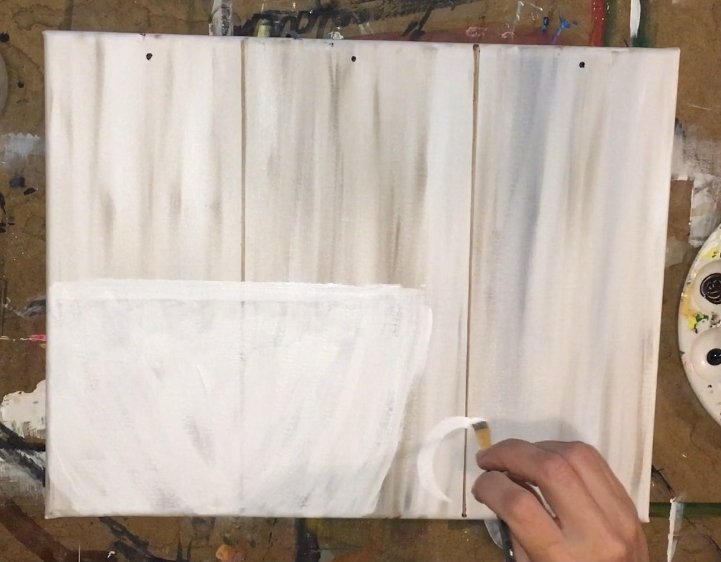
Use your fingers to estimate the size and heights of the apples. To make sure the apple was the same size as the one on the ground, I just spaced my fingers and moved them to the basket.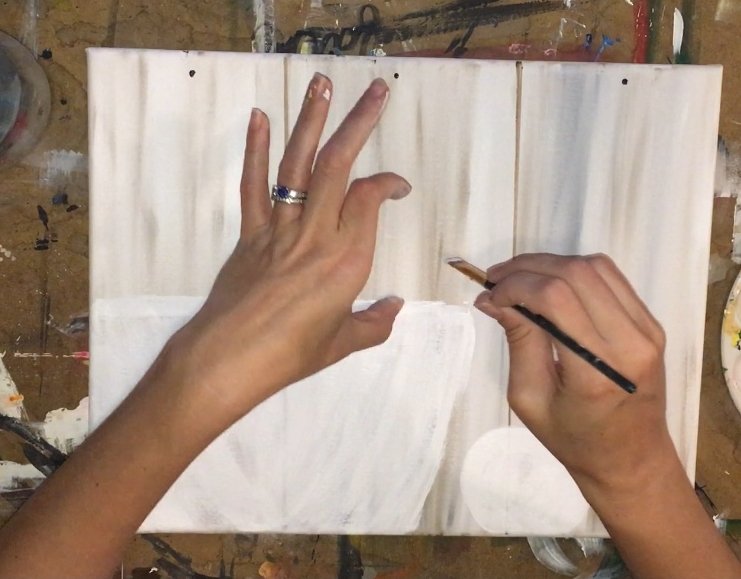
As shown in the reference photo, there are three apples on the top inside of the basket. You don’t have to worry about who is overlapping who yet and you don’t need to make your “white out” completely solid. 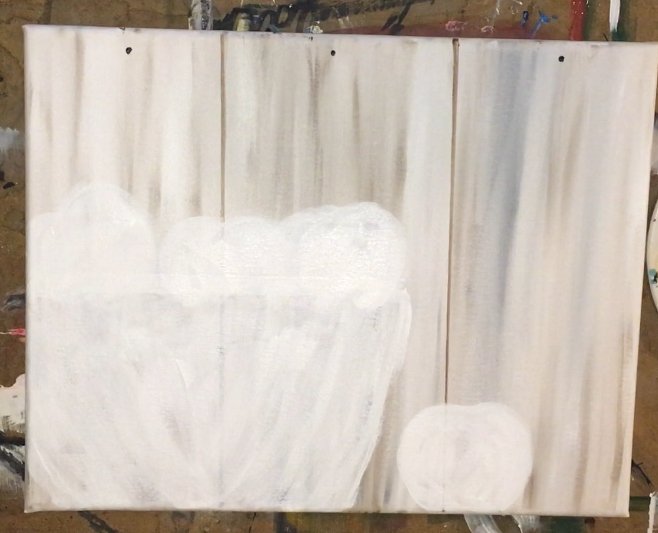
5. Paint The Basket: Cad Yellow Hue, Raw Sienna and Raw Umber.
Use a 1/4″ flat brush and start with only cadmium yellow. Paint strokes starting at the bottom of the basket and curving up slightly. Your strokes will define the shape of this basket to make it look like it has some depth.
On the right, the strokes are angling one way, in the middle they are going vertical and on the left they are angling the other way. 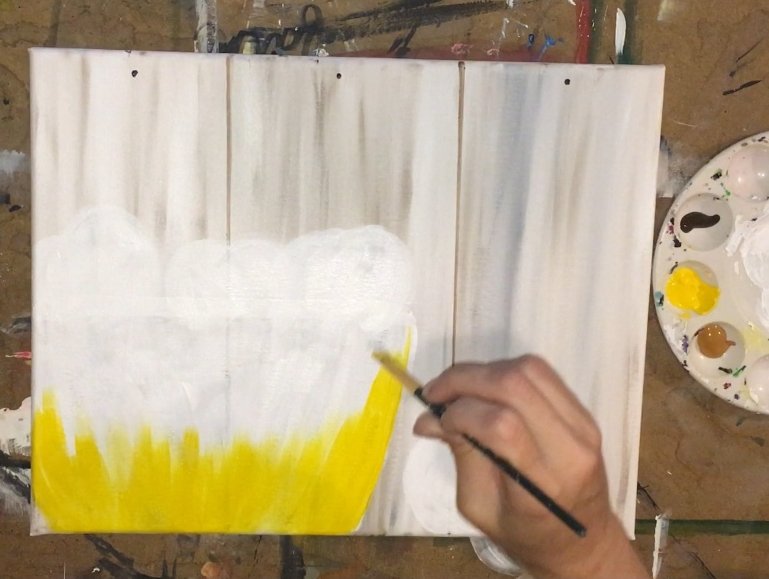
Fill the whole shape in with cadmium yellow. Then add raw sienna to your “dirty brush”. Paint raw sienna just on the bottom half of the basket, blending it in with the yellow. Your raw sienna should slowly fade to yellow at the top.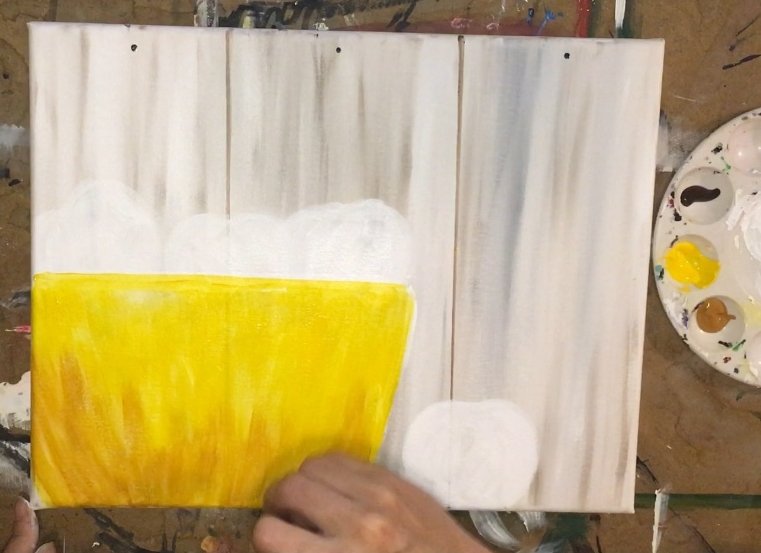
To establish “texture” my strokes were not smooth, rather rough. The two colors do not blend perfectly together either.
When I painted, my brush sort of “flip flopped” back and forth in angled strokes. I also used the side of the brush tip to paint thinner strokes. 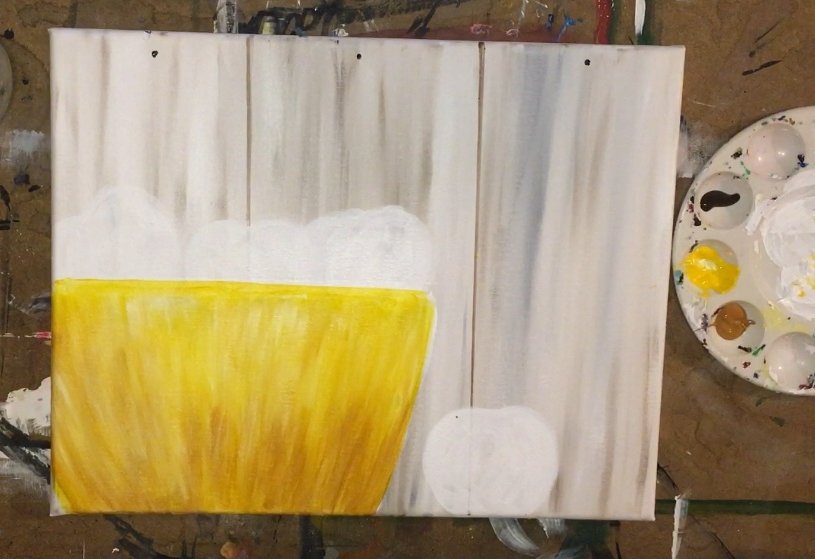
Paint three lines on the basket.
Next use just the tip of that 1/4″ flat brush, turned to the side to paint three lines on your basket. I used “raw umber” for these lines. They are also kind of curved. Don’t worry about perfection or realism! Also, I added some raw umber to the bottom of the basket. 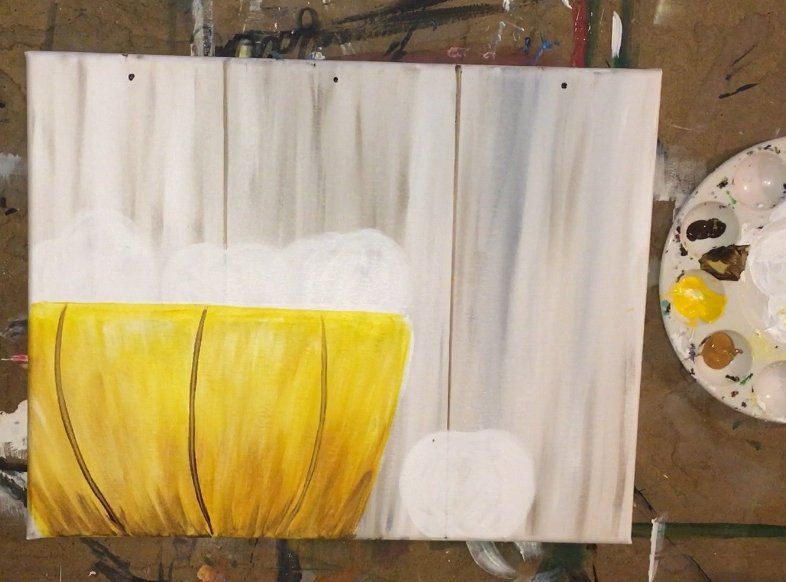
Then paint two lighter horizontal straps going horizontal but curved across the basket. The color I used for this was raw sienna mixed with white (about equal parts but doesn’t have to be exact. Just so the color you are using is lighter than the color of the basket)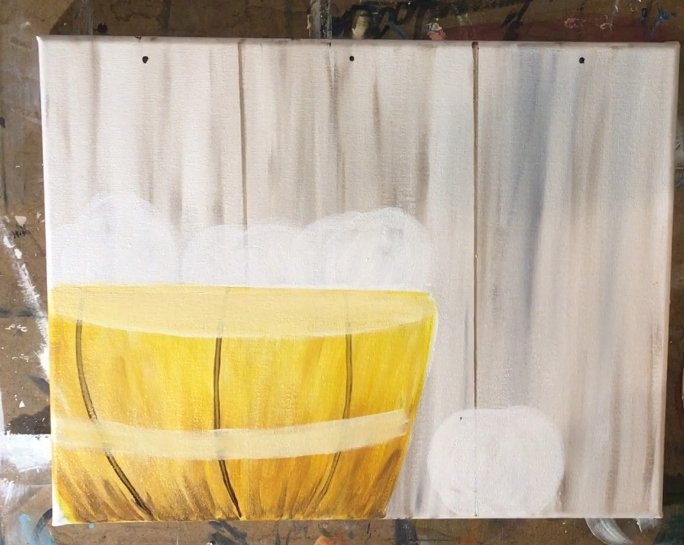
You may need to do a few coats of that lighter color so it overlaps the dark line it underneath. Then I outlined the top and bottom edges of that light colored line with raw umber. 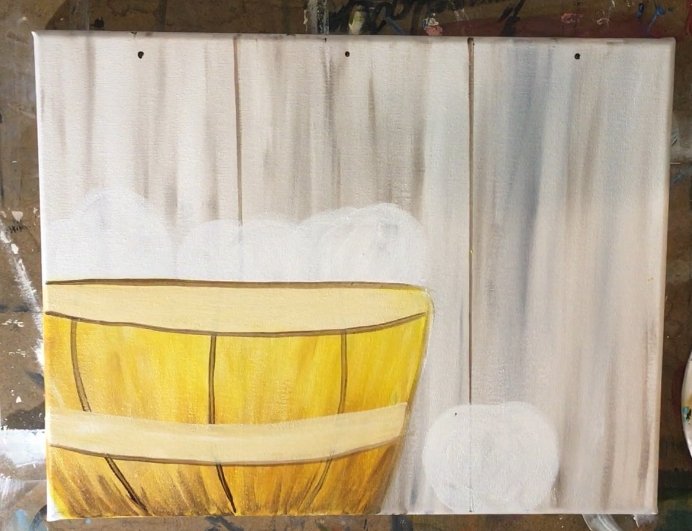
I also added some “tacks” onto the basket using the back of my paint brush. I used raw umber mixed with black to make them look dark. Then I painted some strokes of that raw umber in some of upper areas of the basket. Just a few strokes to give it some “texture” and “rustic look”. 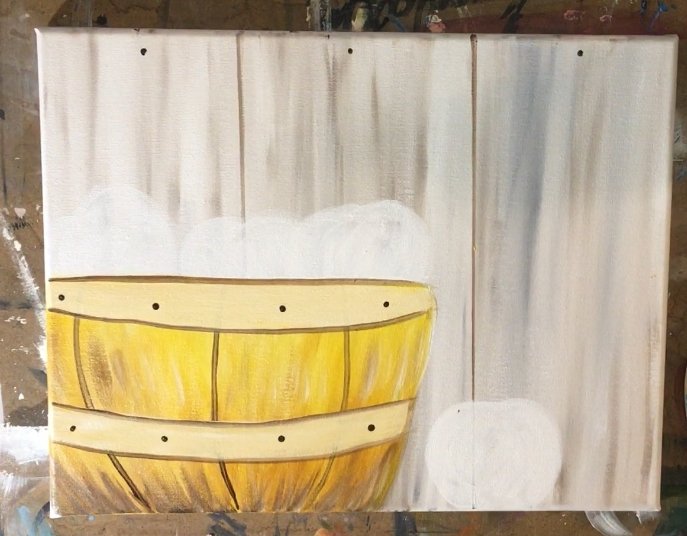
6. Paint the apples with cadmium red hue
Use your 1/4″ flat brush and cadmium red hue to paint a solid coat over the entire shape of all the apples. Make sure your stroke is going in the direction of the apple shape.
This is very similar to how we do pumpkins (with the strokes going in the direction of the curves). If you leave a little white showing through, that’s okay!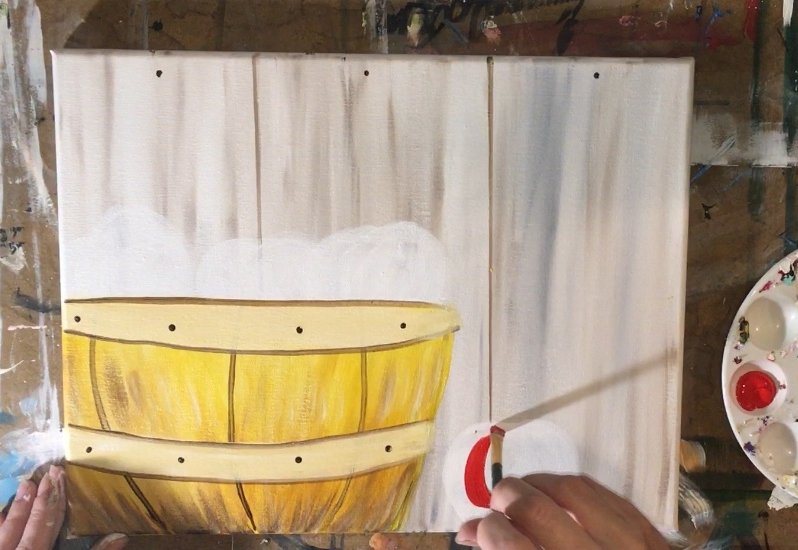
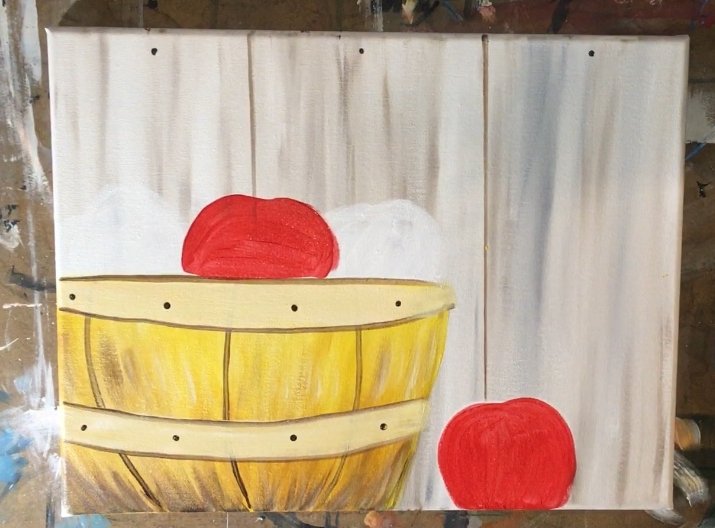
You can also determine the overlapping of the apples in the basket. I made the one on the far right be in front of the middle apple and the middle apple be in front of the far left apple.
Make sure your apples stay wet at this point as we are doing some wet on wet blending for the highlights next!
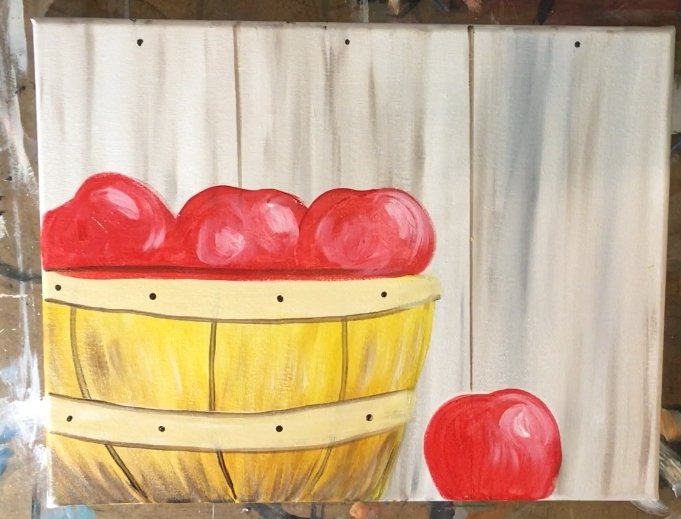
7. Paint the apple “highlight” with titanium white. 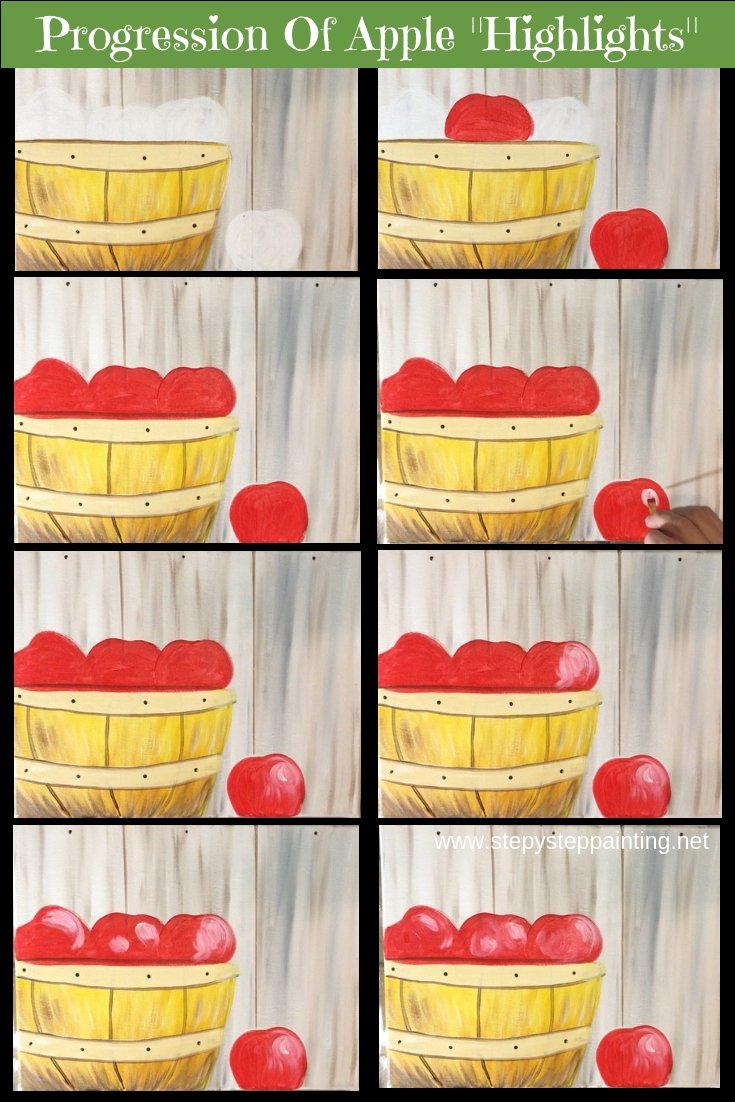

I did the highlights on the apples next. I dipped my 1/4″ flat brush in titanium white (still had red on it, I didn’t rinse it off). Then I painted a mark on the right side of the apple on the bottom. It will blend with the red below a bit because that red is not dry yet. 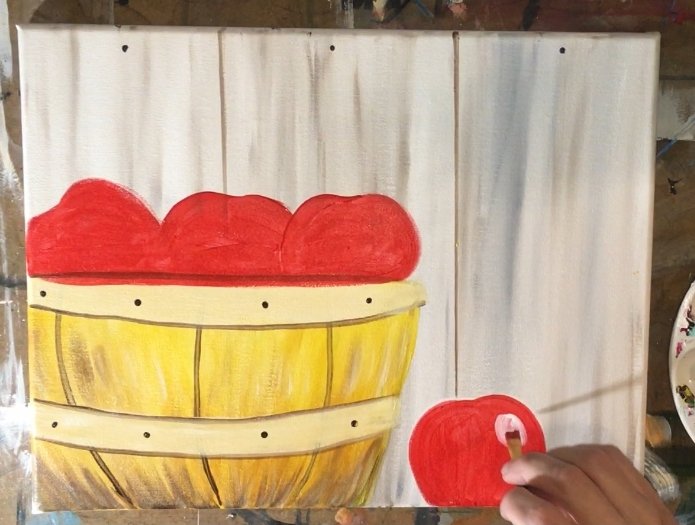
I blended the white back out into the red a bit by painting circular strokes. Look at the reference photo if necessary. Also, we really aren’t going for realism here, just an “impression” of the apple. 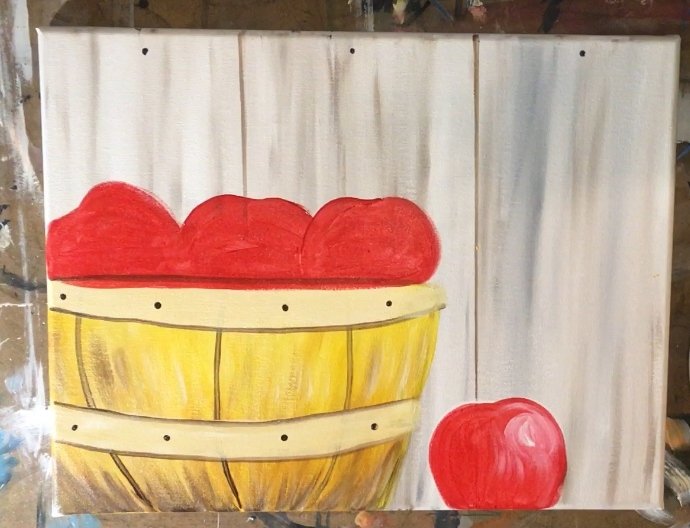
Make more white highlight marks on the other apples. The direction of the strokes go in a curved motion to give the apple depth and blend with the red below. 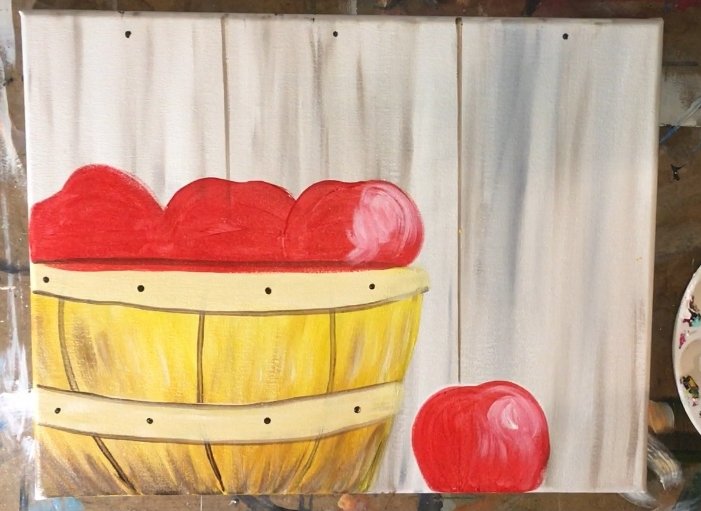
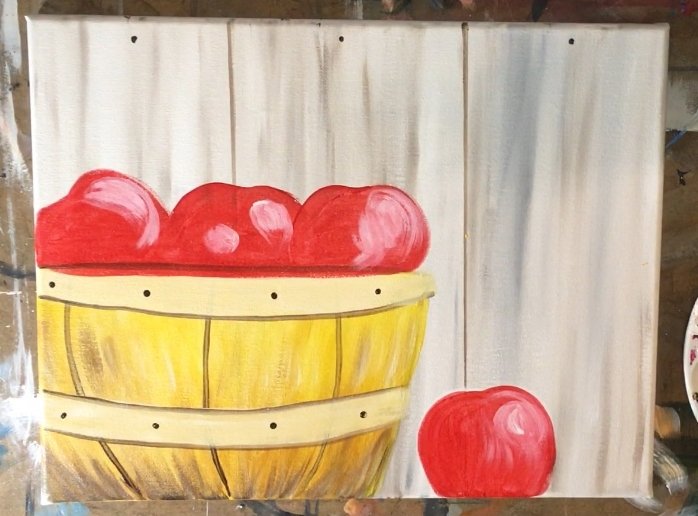
Then I added more cadmium red to my brush and blended the white areas. I did not paint over the white areas with red, just around them to help give a smother transition. Again, looking at a reference photo really helps but don’t get too caught up in making it look exactly like the reference. 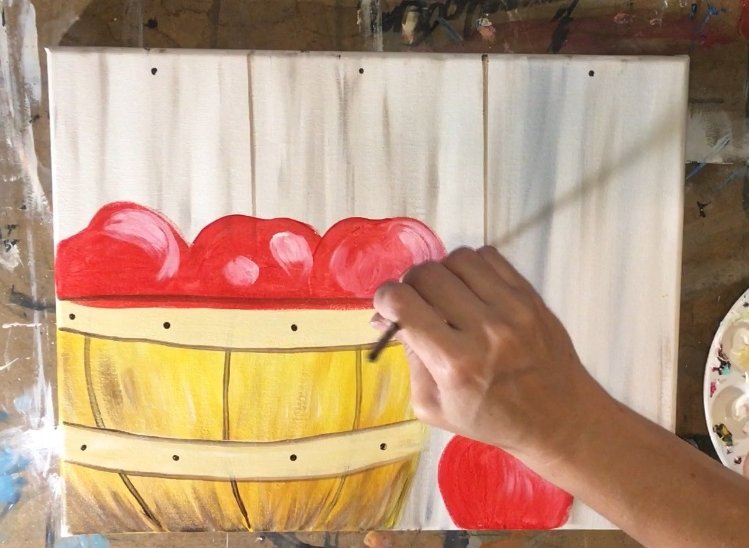
8. Paint the apple “dark areas” with cadmium red medium mixed with a drop of black. 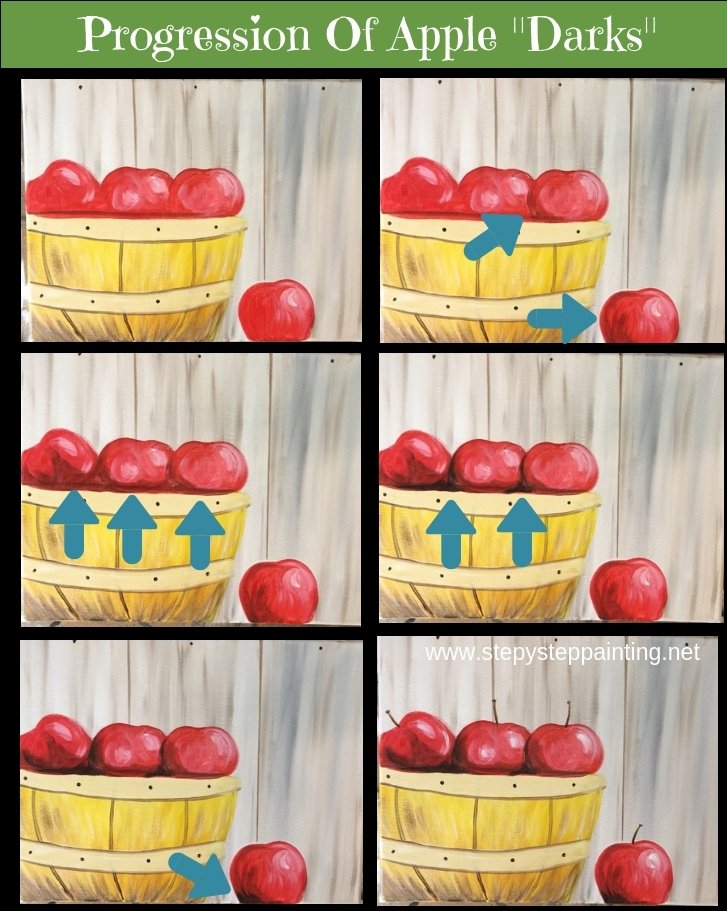

Next I painted the dark shadow areas of the apples. To do this, I mixed a dark red by adding a tiny bit of black to cadmium red hue. Black is strong so you really only need a drop of paint in that red! Mix it together until you get a nice dark, rich brick red color. 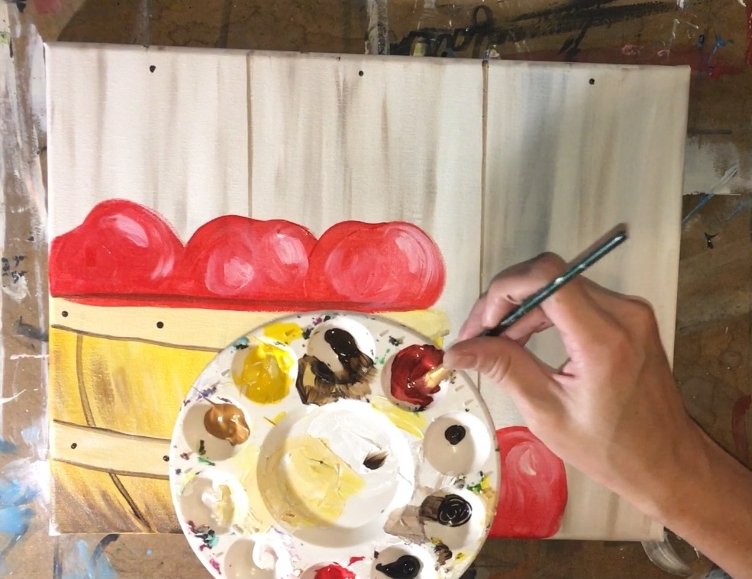
The left side of all my apples are dark in color. I painted curved strokes on the left side of the apple on the bottom. Then I painted curved strokes on the far right apple in the basket. 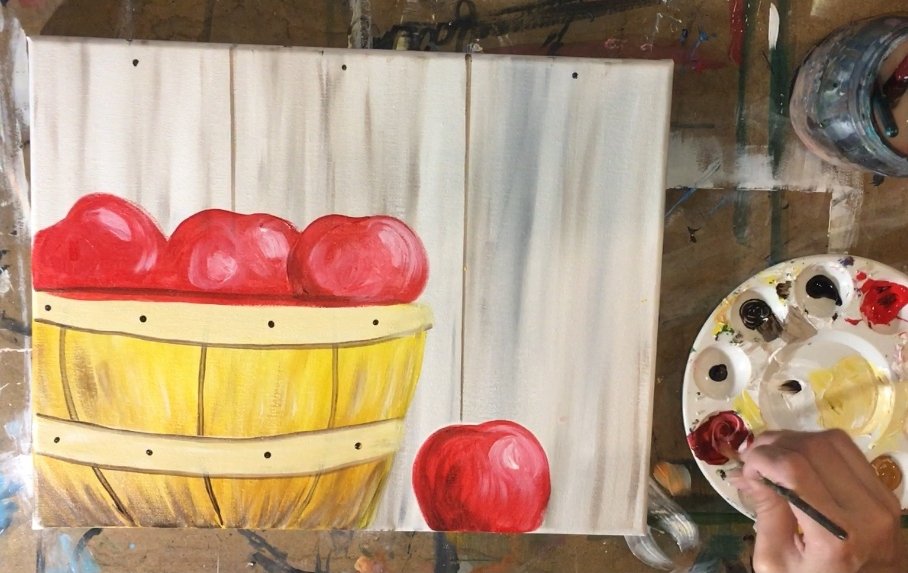
The bottom of all the apples in the basket is a dark red. Don’t worry about painting over the basket as we can fix this later. Also the far left apple has some dark areas in the middle. 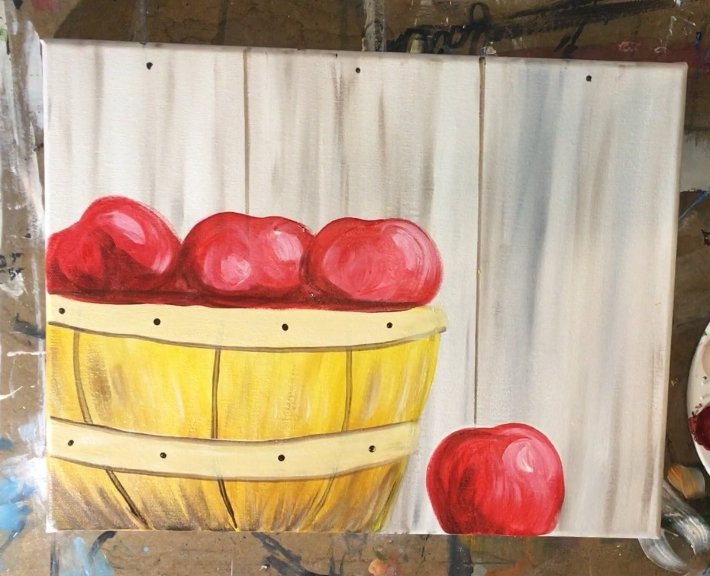
Next I added even darker areas to my apple by adding more black to that dark red. The darkest areas are on the far left and in the cracks where the apples rest in the basket (bottom of the apples).
Then I added that darkest color on the apple on the ground.
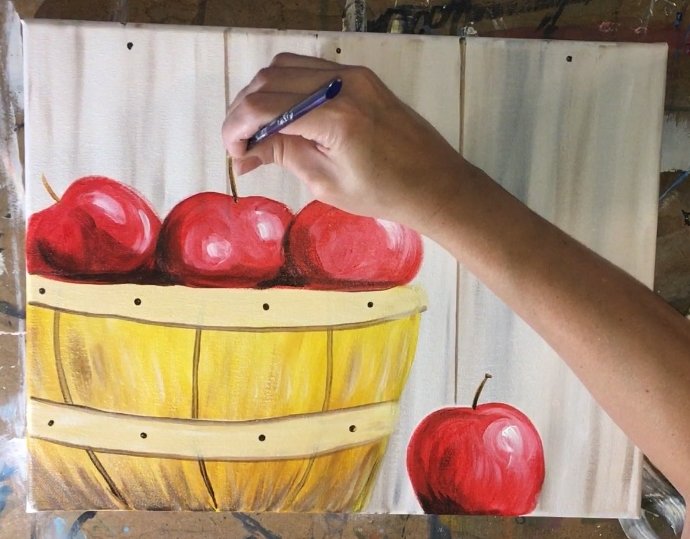
9. Paint the apple stems with raw umber and black and a #0 round brush.
Basically I dipped my tiny #0 brush in both the raw umber and the black then painted the stems. At the top of each apple stem there is a little dot/ bump. To make it simple, I just did my stem at the very top of each apple.
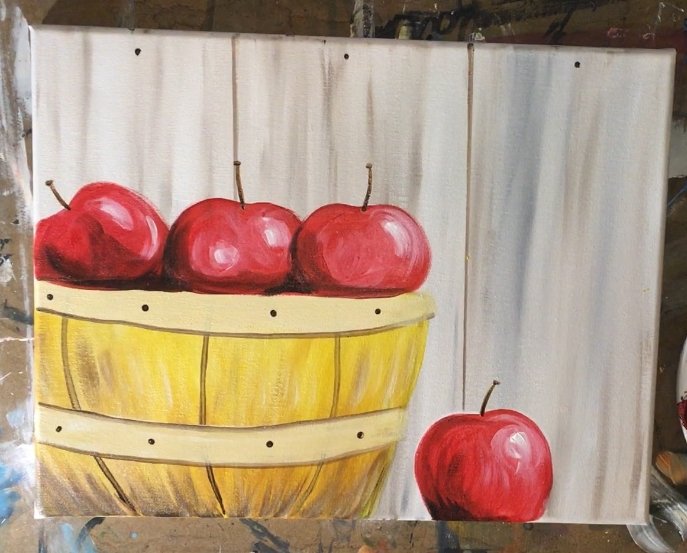
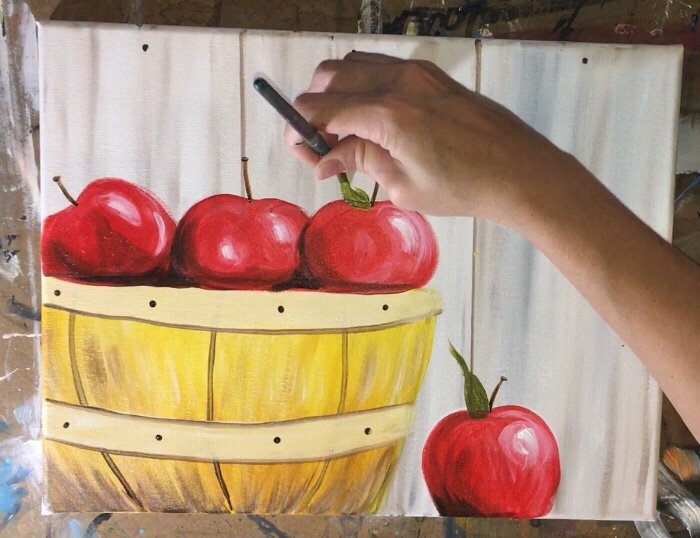
10. Paint the leaves of the apples with golden green mixed with a “drop” of black.
I used a #8 round brush for this. Then on my palette, I mixed a dark green color by mixing golden green with a tiny drop of black.
Press firm to start the leaf at the bottom of the stem then lightly let the leaf go to a point. Each of my leaves went in a different direction.
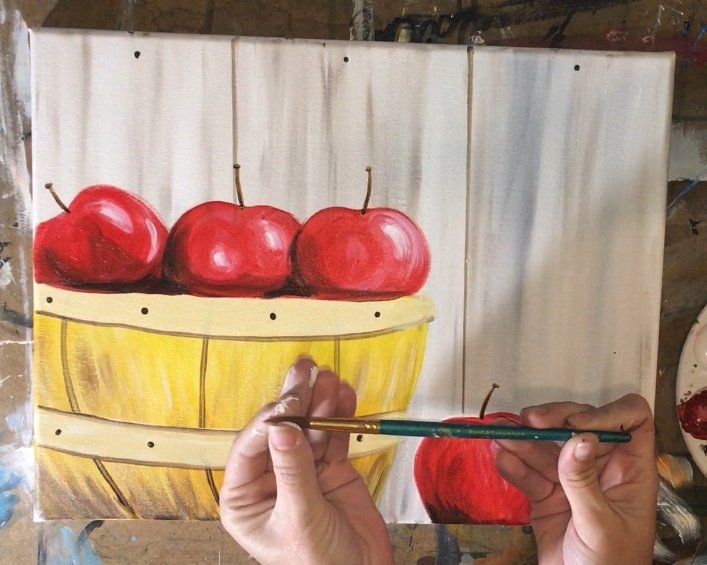
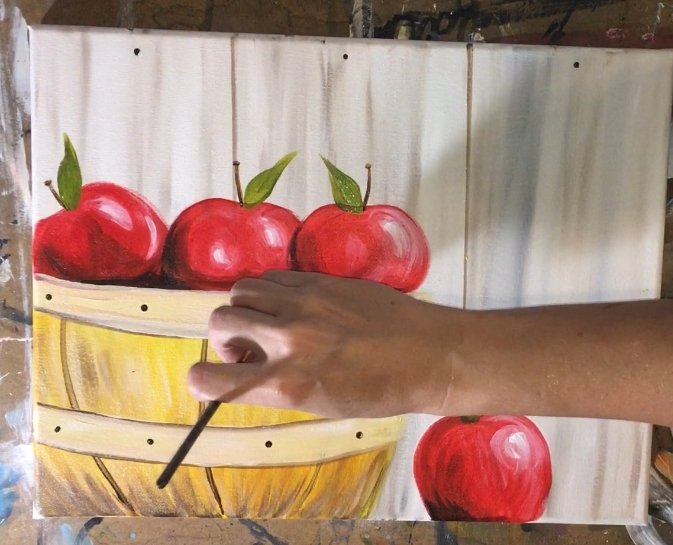
11. Go back and fix the top part of the basket if necessary and then paint grass on the ground.
To fix the basket and make it look like it’s overlapping the bottom of the apples, I just went back in and mixed the same color (raw sienna and white) with the 1/4″ flat brush. I painted over the area where the apples should be behind the rim of the basket.
To paint the grass, I used a #0 round brush and started with the color “gold green”. Paint each blade one at a time starting from the bottom and then “whisping up”. Make the angle of the grass go to the left and right on the outside edges of the apple on the ground. Also, make the grass goe to the right a little on the bottom edge of the basket.
Add in the color “raw sienna” into the grass. Paint grass blades over the green grass blades going in different directions. Basically the raw sienna gives the grass a different color variation. 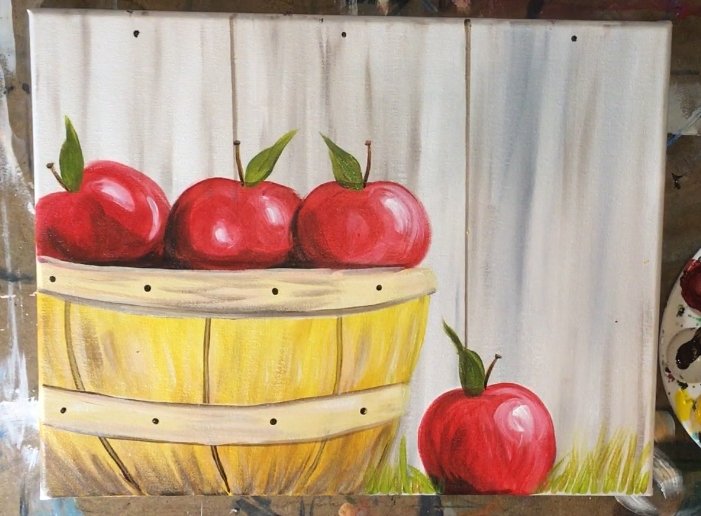
Add in some darker greens into the blades using the same color as the apple leaves (gold green mixed with a drop of black). Paint more strokes going in different directions and different heights. 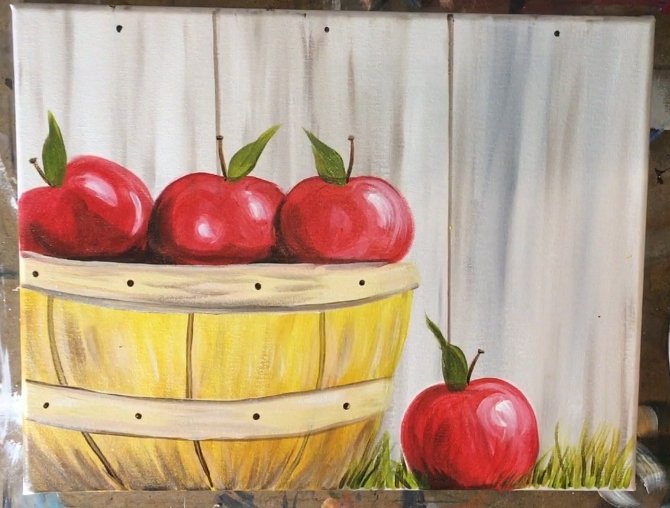
Finished!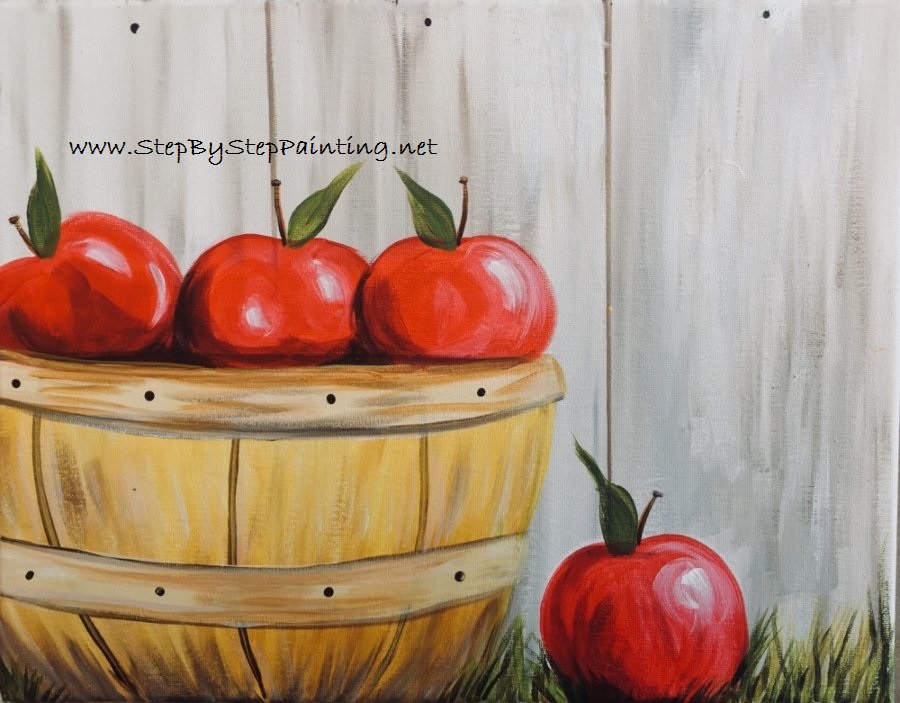

I love this! I wish you had a tracer for it.