
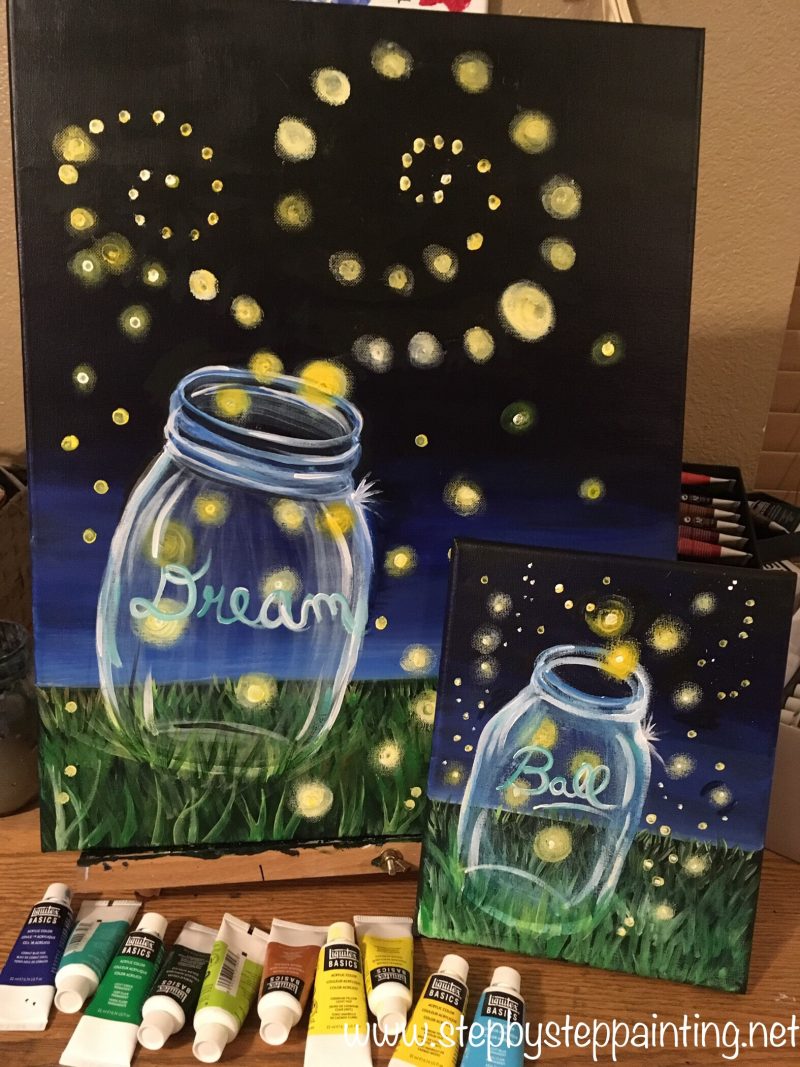
How To Paint Lightning Bugs (Fireflies) & Mason Jar
Have you ever wanted to learn how to paint a clear mason jar with lightning bugs? This beginner acrylic canvas painting tutorial will show you how.
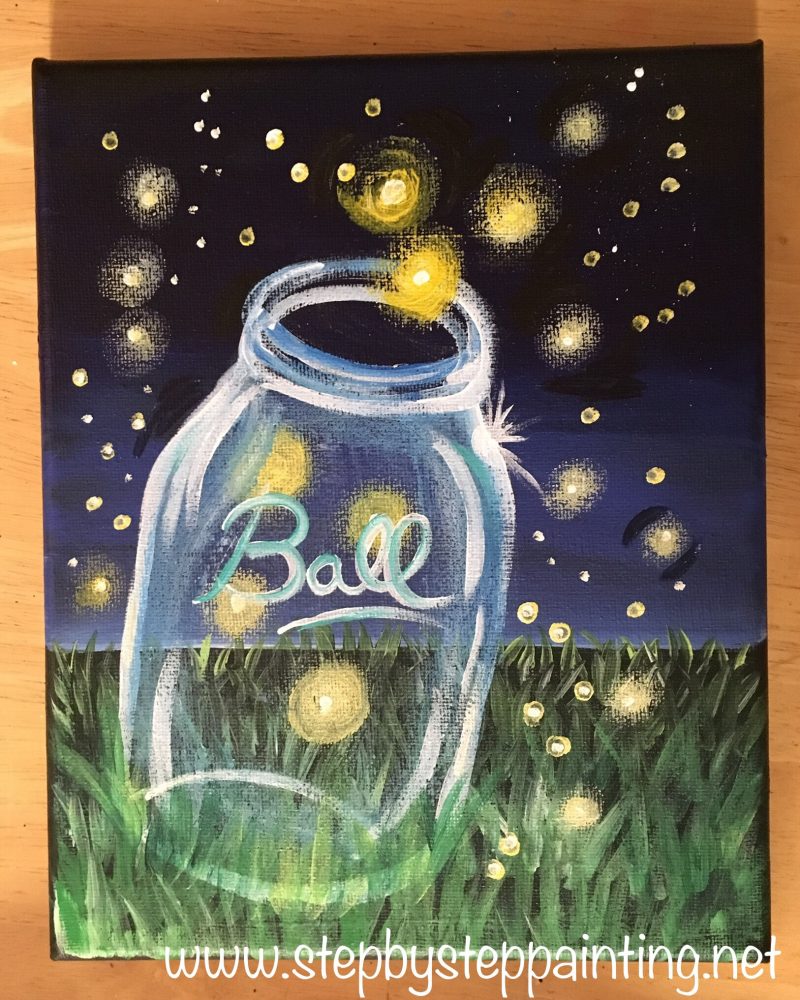
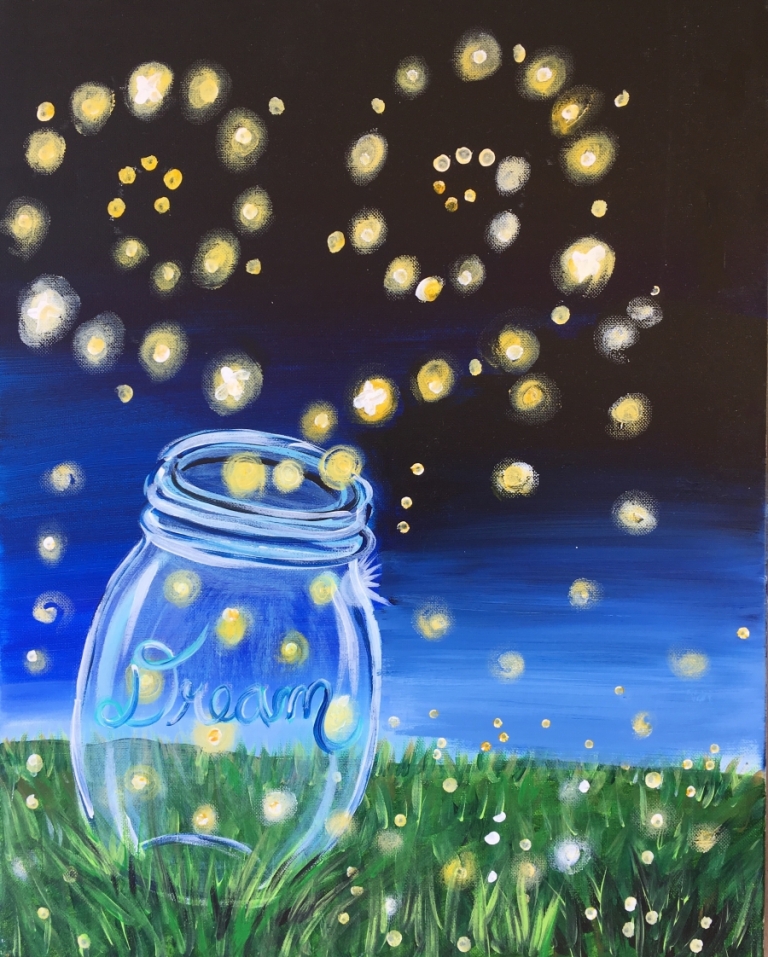
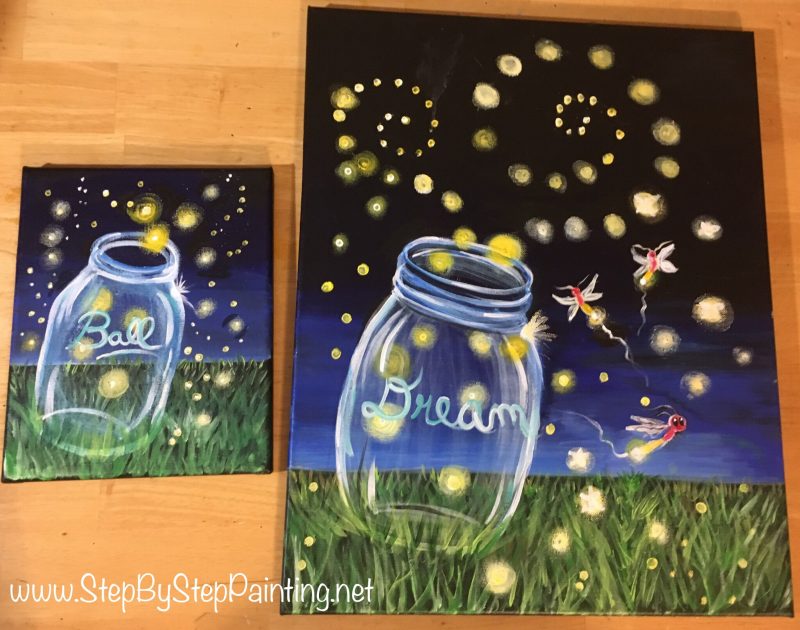
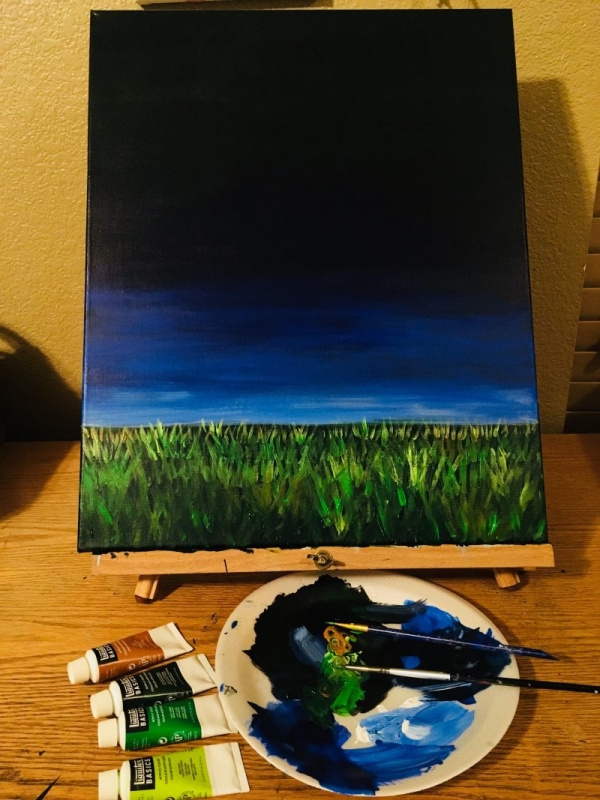
This painting was done on a 16″ x 20″ stretched canvas. I also did the painting on an 8″ x 10″ canvas. The design itself is very versatile and can be modified to fit any size canvas.
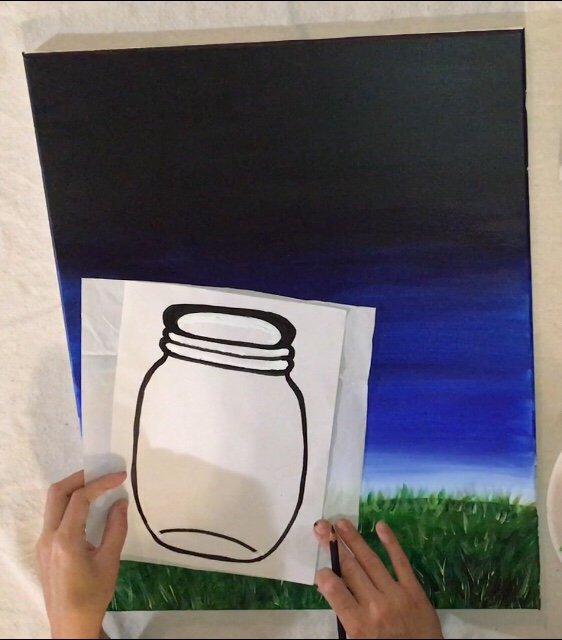
I also provide you with a template of the mason jar.
Enjoy this painting!
Materials:
- 16″ x 20″ Stretched Canvas
- Acrylic Paint (I used Liquitex BASICS for this)
- Mars Black
- Phthalo Blue
- Cobalt Blue
- Titanium White
- Hooker’s Green
- Bright Yellow Green
- Light Green Permanent
- Raw Sienna
- Cadmium Yellow Deep
- Cadmium Yellow Medium
- Light Blue Permanent
- Bright Aqua Green
- Brushes (I used Royal & Langnickle Brushes)
- 3/4″ Flat
- #6 Round
- #3 Round
- #1 Round
- White Graphite Paper (Or regular transfer paper)
- Baby Wipe (Or damp paper towel)
- Q-tips (you can use your fingers too)
- Chalk
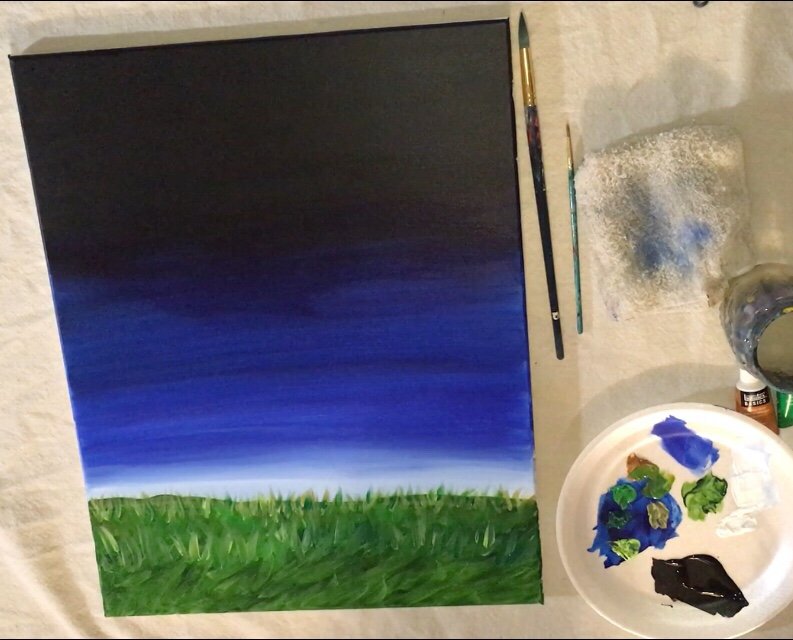
Color Palette
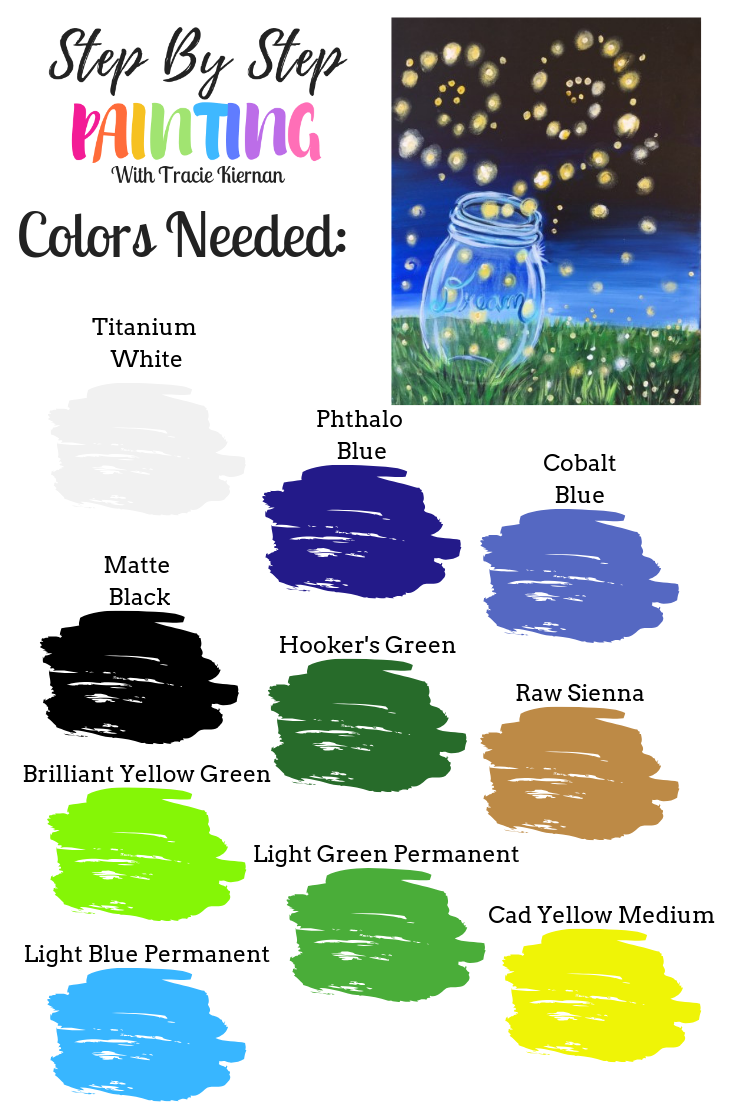
You can simplify this color palette by using only one of the greens and one of the blues (I would choose “Phthalo Blue”).
Traceable Of Jar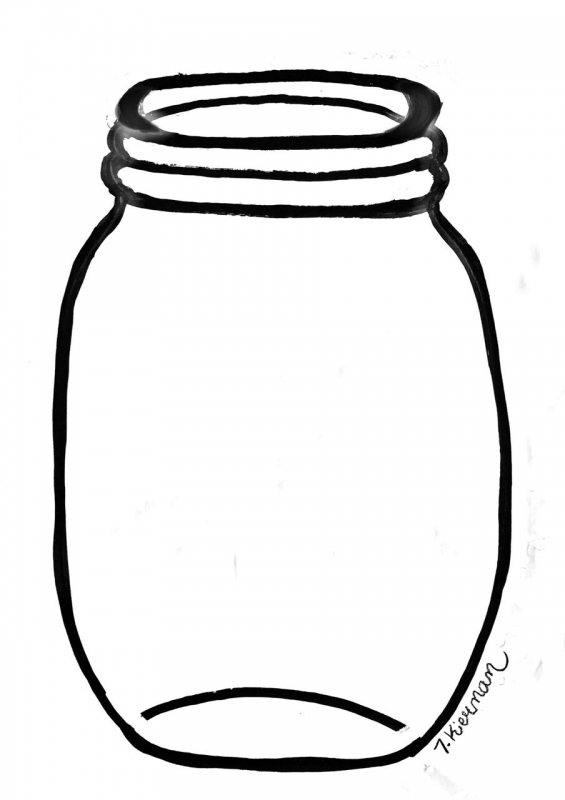

Directions At A Glance:
Video (this is the long version):
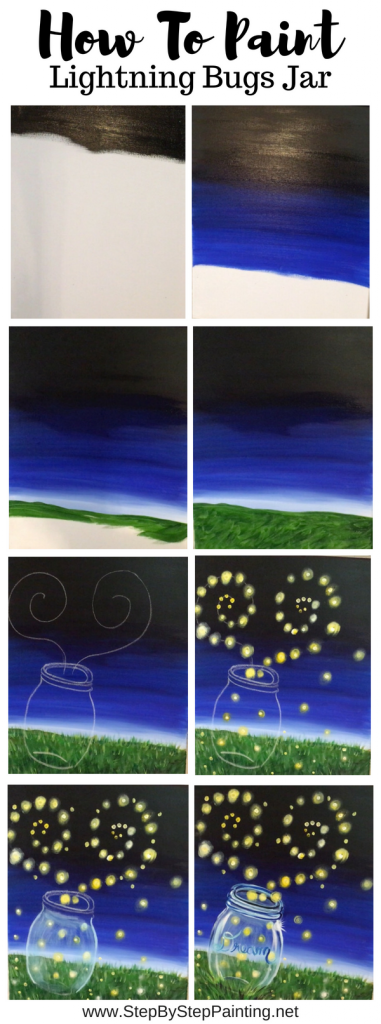
Step By Step Pictures:
1. Paint mars black at the top and go down about 1/3 of the way.
Use a 3/4″ Flat brush or any large flat. Paint left and right smooth strokes. I went down with the black almost a third of the canvas. 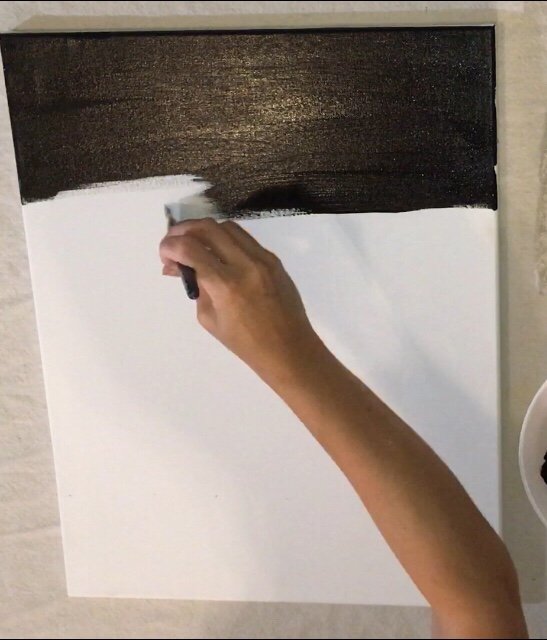
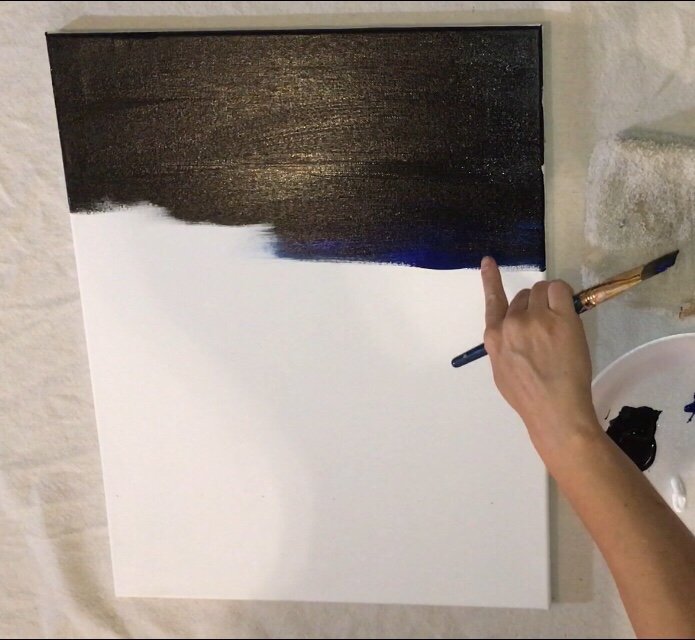
2. Don’t rinse brush. Add in phthalo blue and blend with the mars black.
Continue down with the Phthalo blue and blend it up with the black. Then gradually add in more phthalo blue until no black is left. You might need to rinse the brush if the black is still blending too dark to get a more pure phthalo blue.
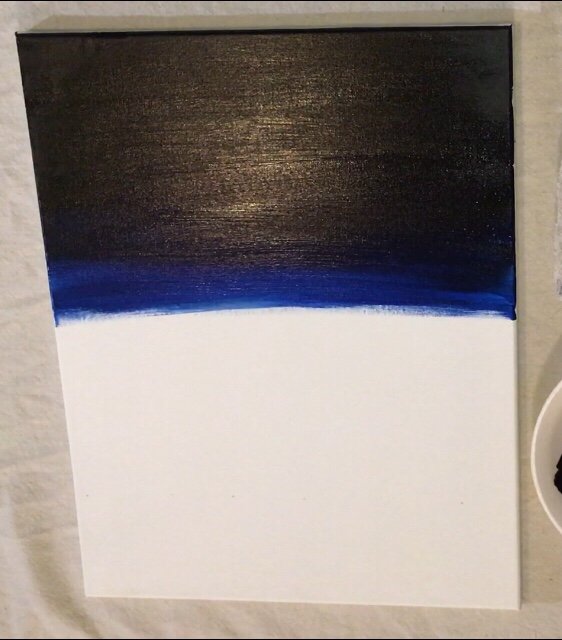
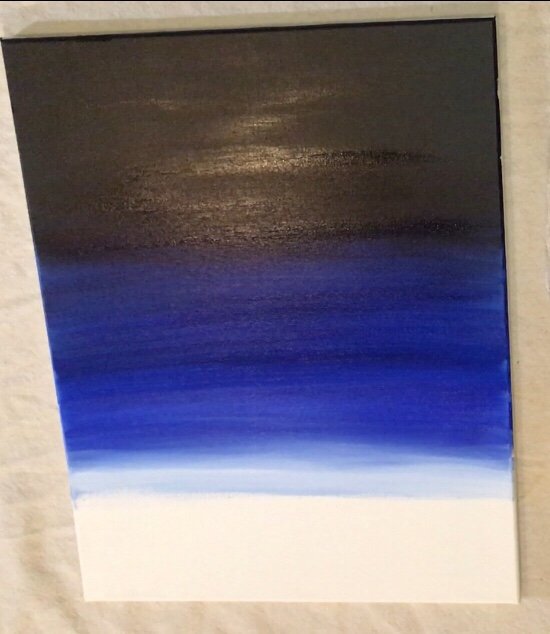
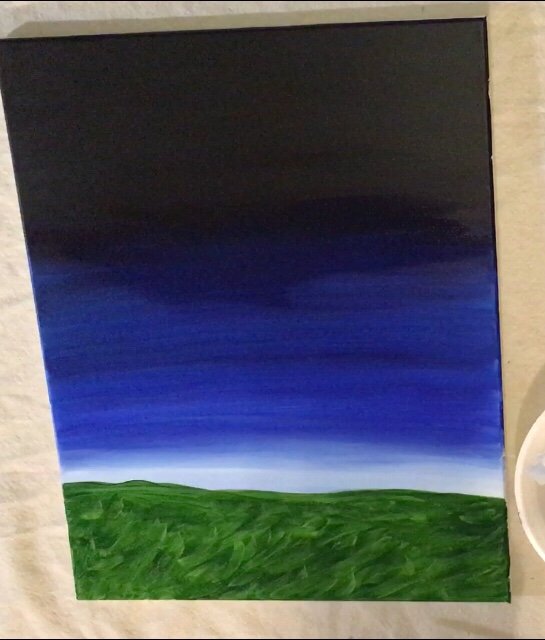
3. Paint cobalt blue all the way down to the horizon.
My horizon line is about four inches up from the bottom. I painted the cobalt to about that point. Blend the cobalt into the phthalo. 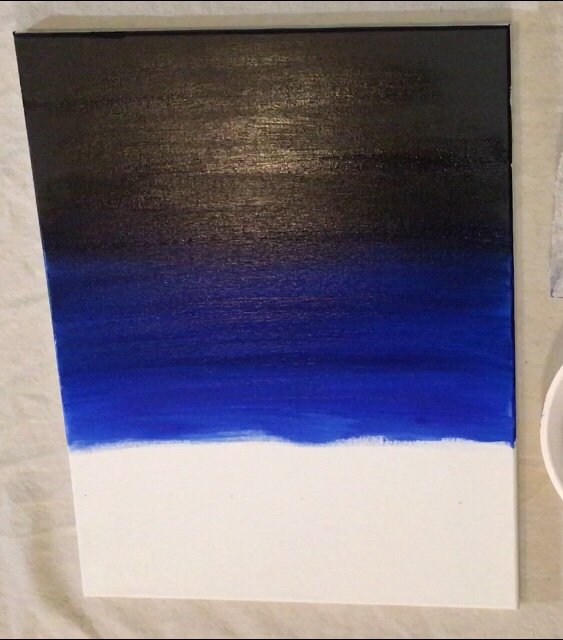
4. Paint white along the horizon.
To get that glowing horizon, I added white to my brush and blended it just along the edge. I did not rinse my brush so there is cobalt and white on the brush. Blend the white up into the cobalt. 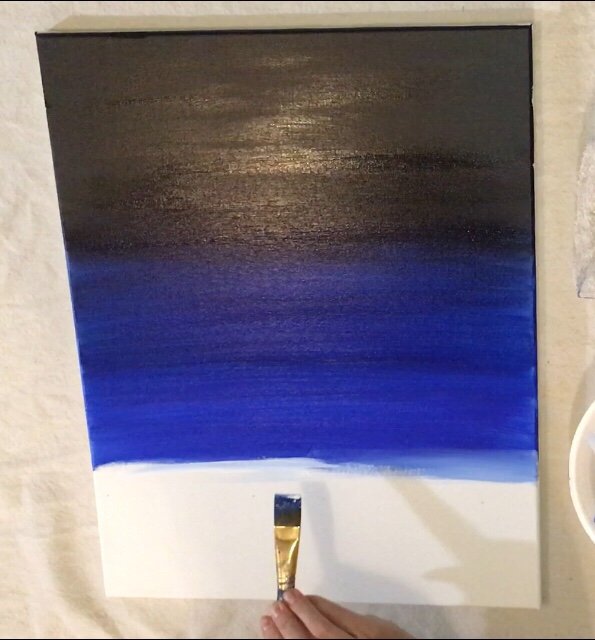
5. Paint “Hooker’s Green” along the horizon.
My horizon line was purposely not straight. With a large #6 round brush, I painted an uneven line to define the horizon. This was done with a very dark green called “hooker’s green”. 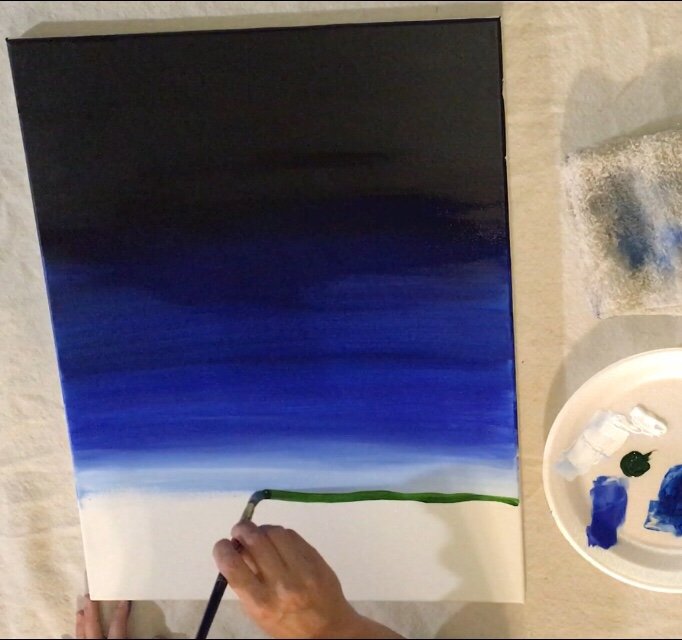
6. Fill in the rest of the “field” with “hooker’s green”.
To get a grassy texture in this area, I did “X” strokes and scribble strokes. They went in every direction! Have fun and be expressive in this step!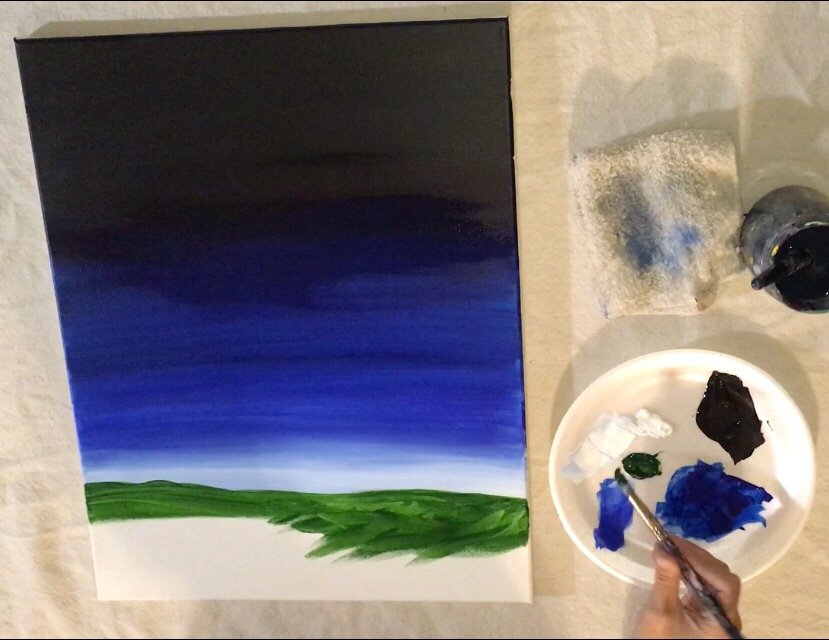
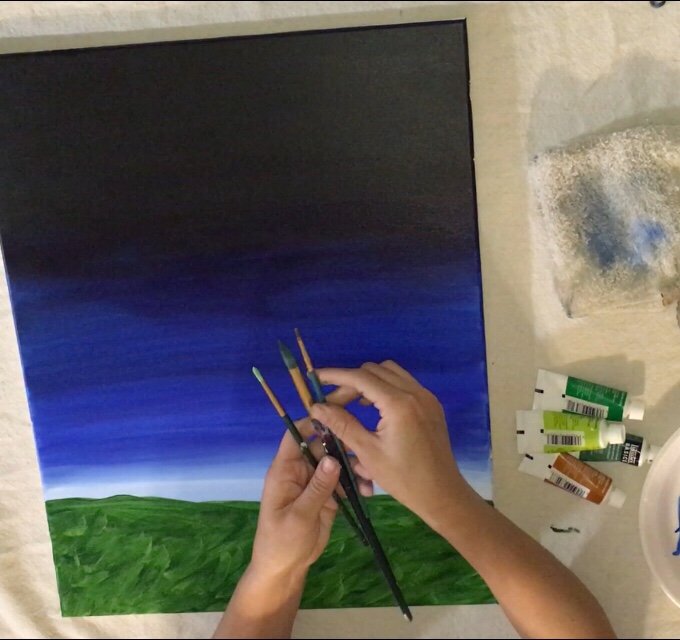
7. Paint the details in the grass.
I used a #6 round brush, a #3 round brush and a number #1 round brush to paint the grass. I also used the colors: raw sienna, brilliant yellow green and light green permanent. Start in the back closest to the horizon line and paint small grass strokes. Then as you work your way down, paint larger grass strokes with the larger brush. You’ll see in the video how I blended the colors in the grass! But really, I just alternated the colors and mixed to make all different shades of green! I also used a little bit of mars black. 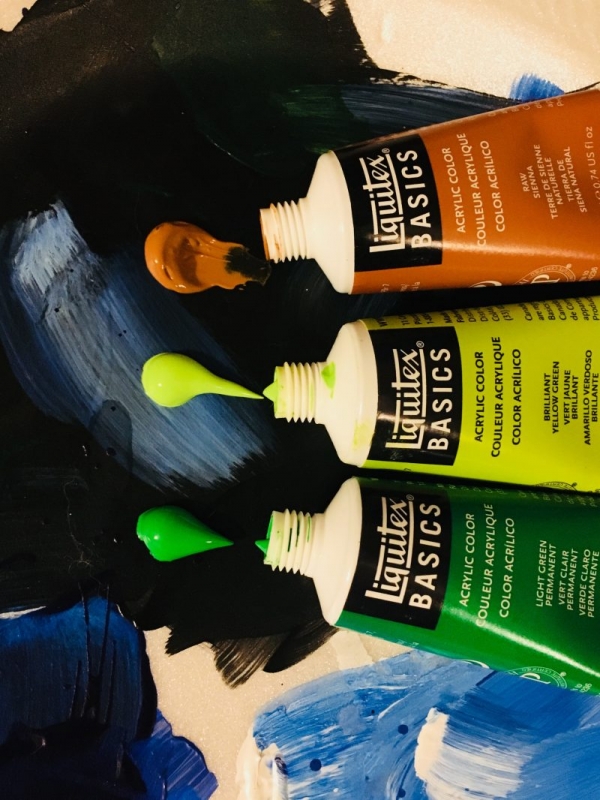
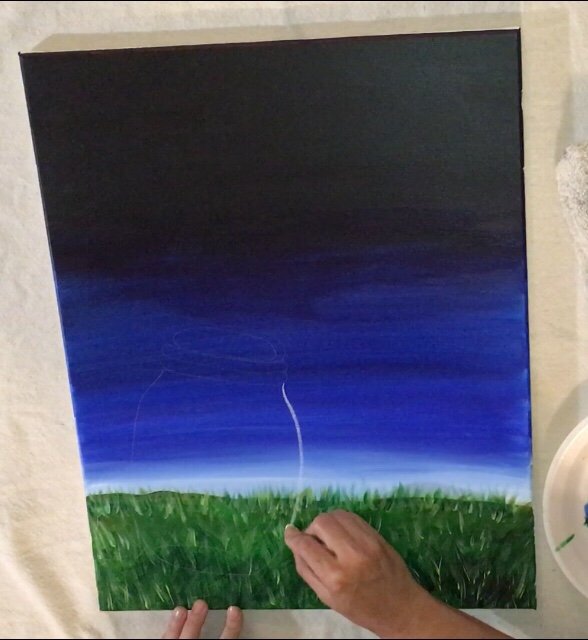
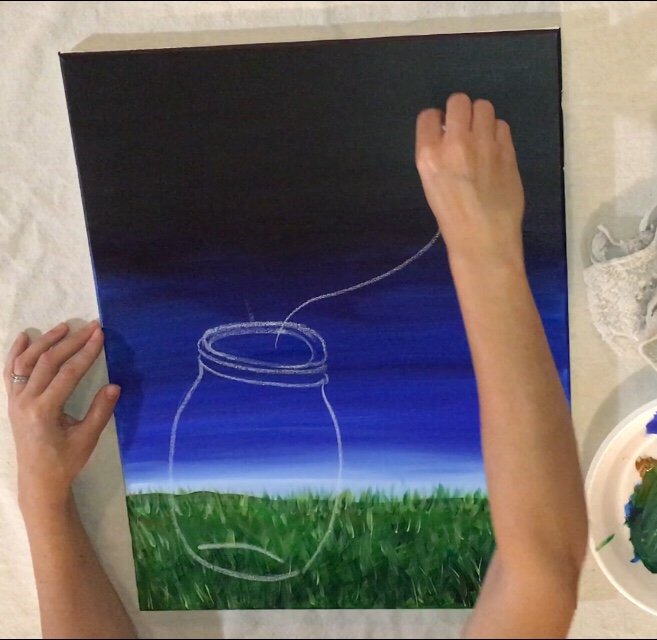
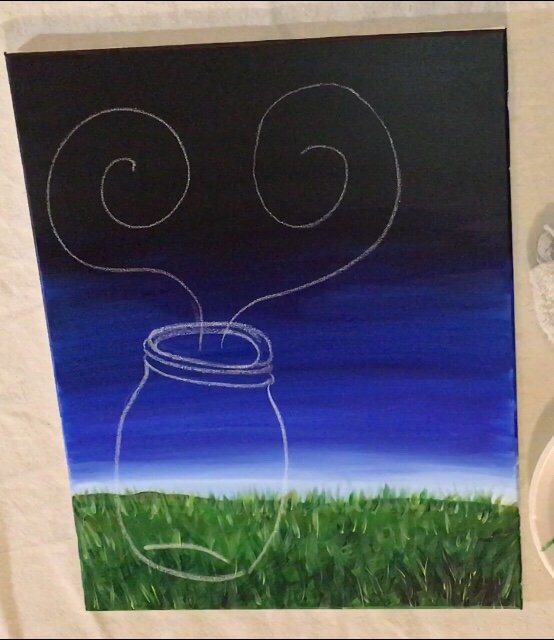
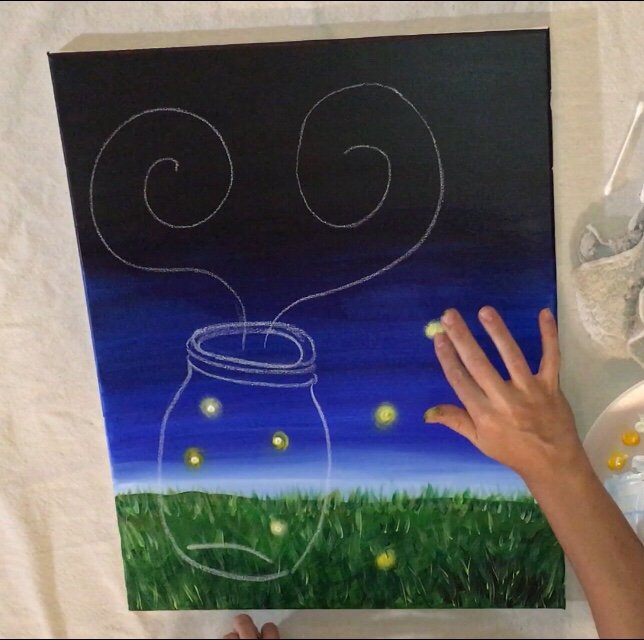
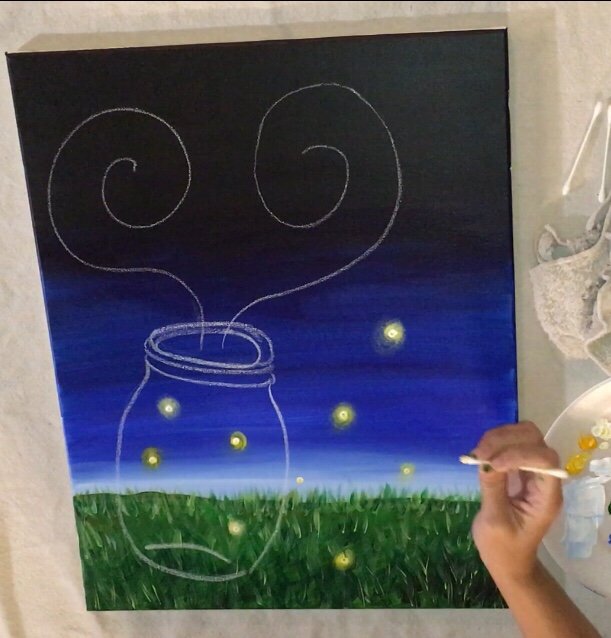
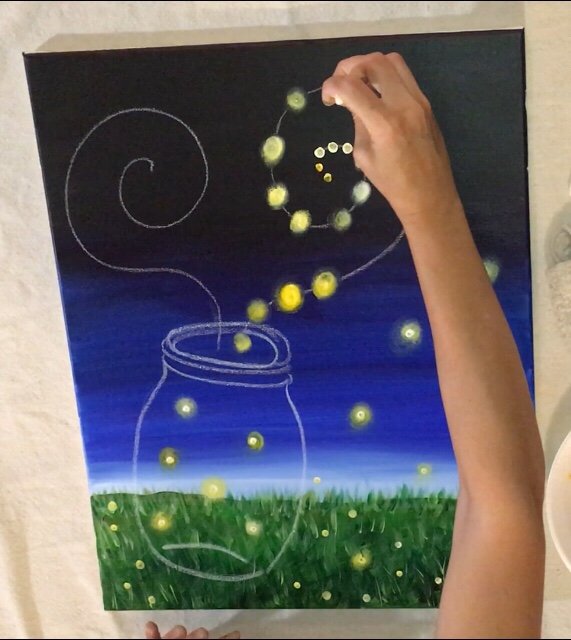
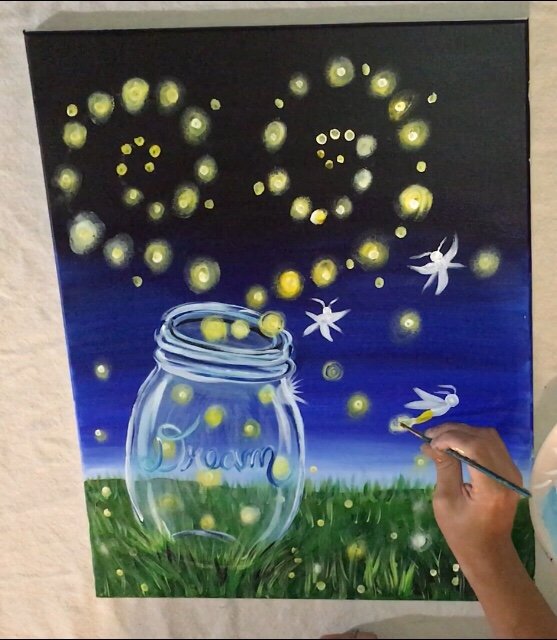
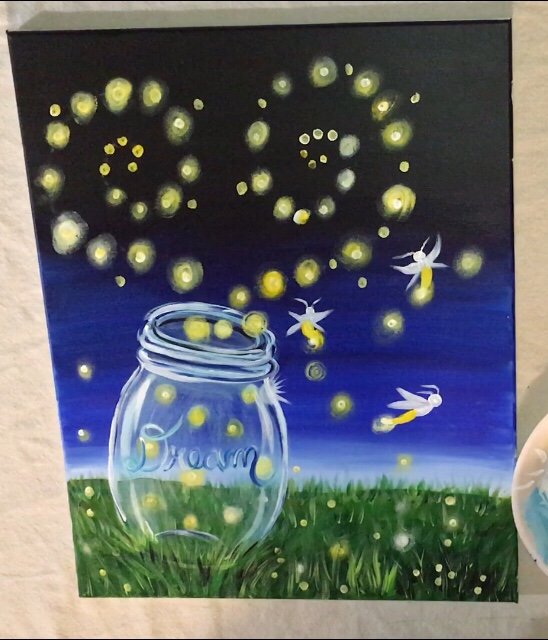
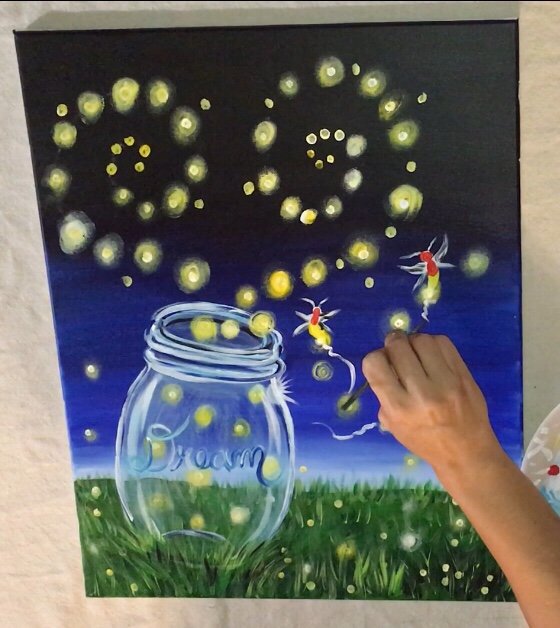
8. Draw the mason jar.
I used a white sheet of graphite paper to transfer the template of the mason jar. This can be printed out on a standard size computer paper. Then I used a piece of chalk to draw over the jar so it showed up better. I also drew spiral lines for the lightning bugs.
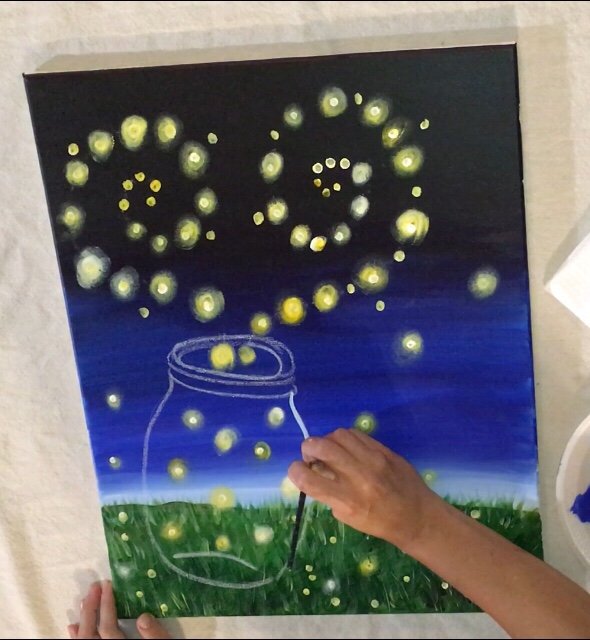
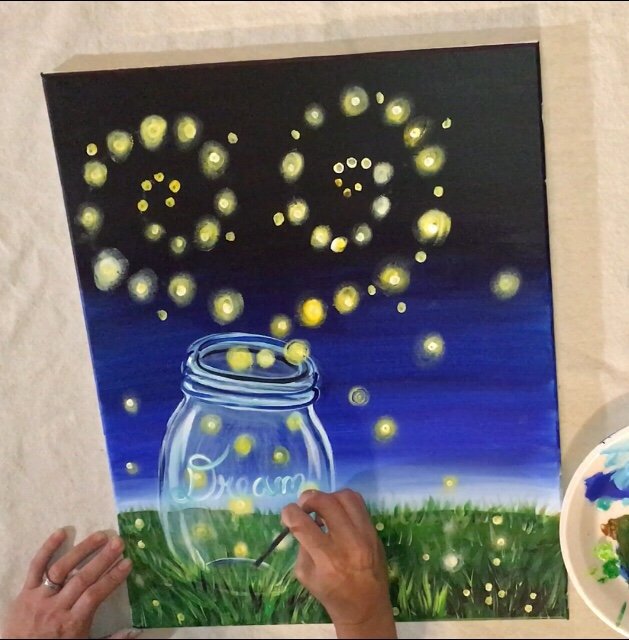
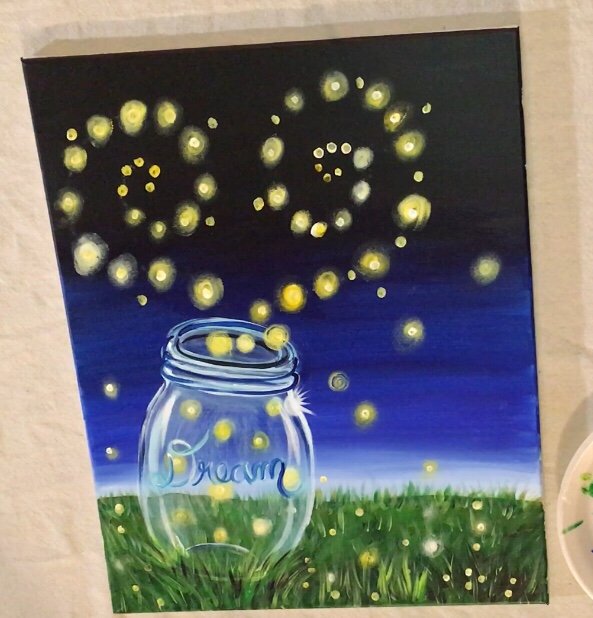
9. Paint the lightning bugs with a Q-tip and your finger!
I used the colors cadmium yellow medium, cadmium yellow deep and titanium white to paint the fireflies. Dip the Q-tip in those colors. Then dot the Q-tip onto the canvas. Then use your index finger to blur the circle to give it that glow effect! Do this all along the spiral lines and all throughout the canvas. Vary the amounts of yellow and white to give the glows different shades of yellow. Also vary the sizes of the dots! 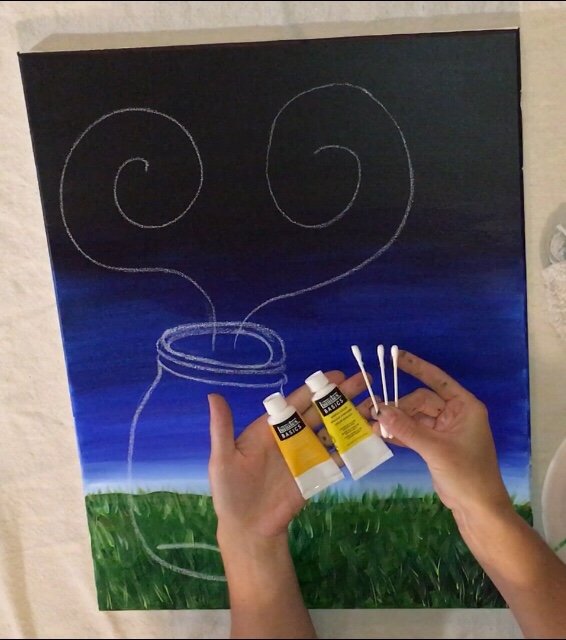
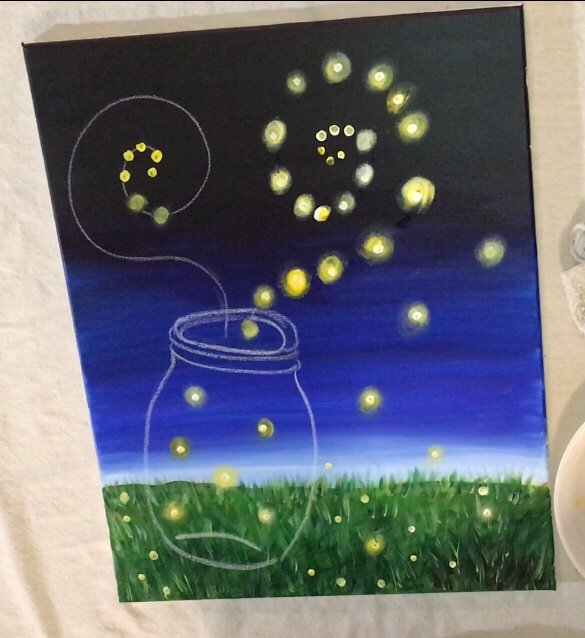
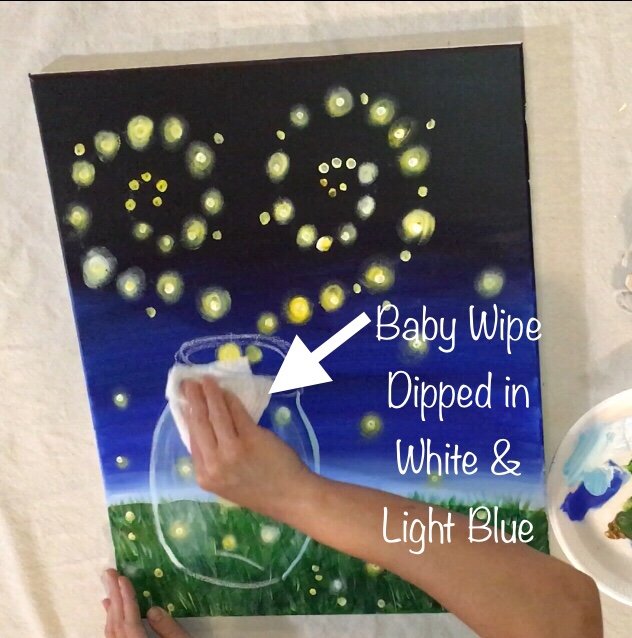
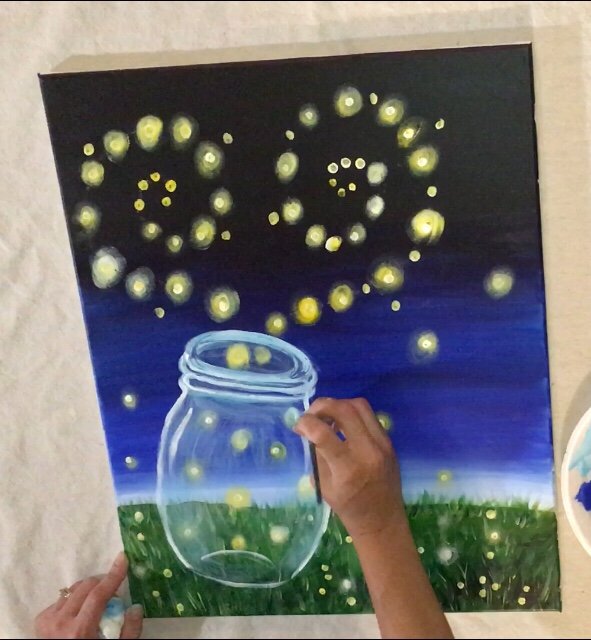
10. Paint the mason jar with titanium white, light blue permanent, a small round brush and a baby wipe.
First I outlined the entire jar with both white and light blue permanent on my #2 round brush (small round brush). Then I used a baby wipe and dipped it in white and light blue. LIGHTLY smear the paint all around the jar to create a sheer effect. Try to curve the paint to form the shape of the jar. Then after creating the sheer layer on the jar, go back and add highlights with the titanium white. 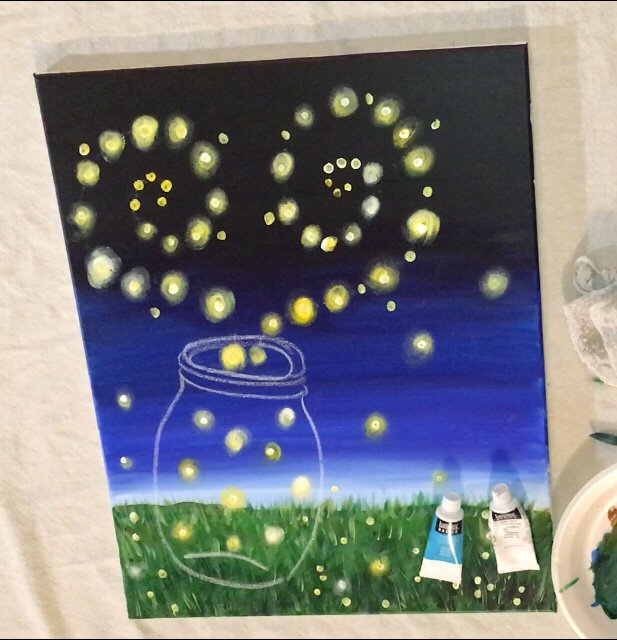
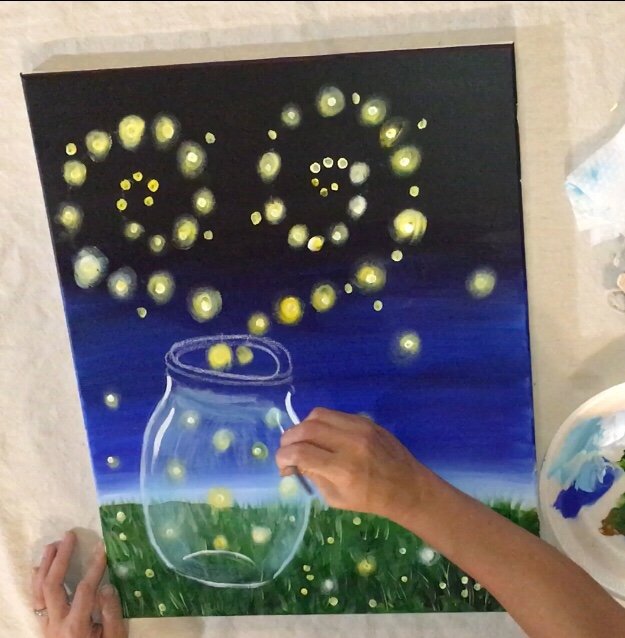
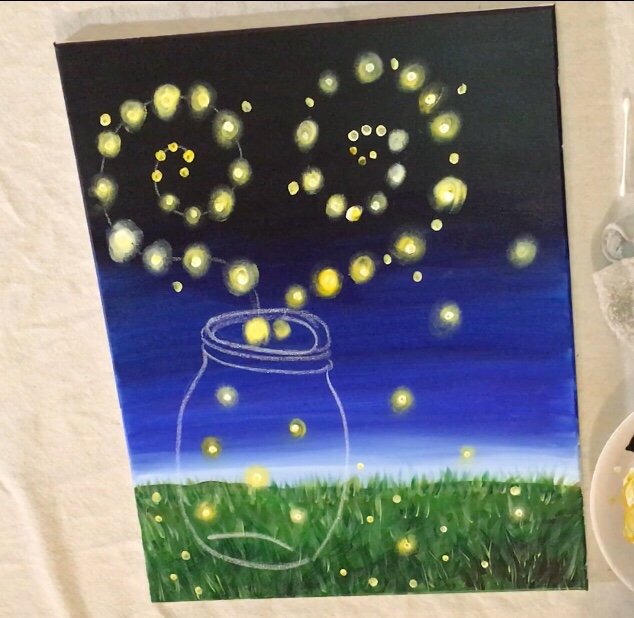
11. Paint some overlapping grass just on the bottom of the jar.
To do this I used a small round brush (#1) and the same colors I used to paint the grass. Paint some grass blades overlapping the jar to make it look like it is resting on the grass. 
12. Optional: paint some dark areas on the jar with phthalo blue and black. Also paint a word such as “dream”.
To get the darker areas you see in the rim and the sides of the jar, I just outlined slightly with phthalo blue and mars black (equal parts). To paint the word, I used “bright aqua green” and “titanium white”. Basically I dipped my brush in both colors and painted the word. It might also help to draw the word with chalk first and then outline it with the paint. Finally I added a glow sparkle in the upper right hand corner of the jar. I did this with pure titanium white so it was nice and bright!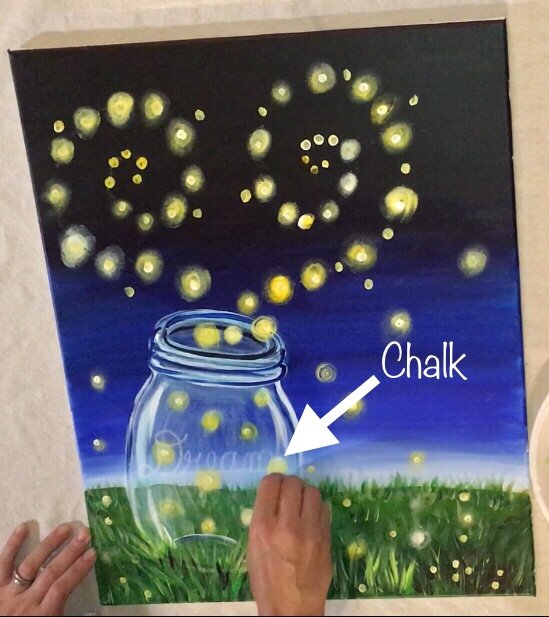
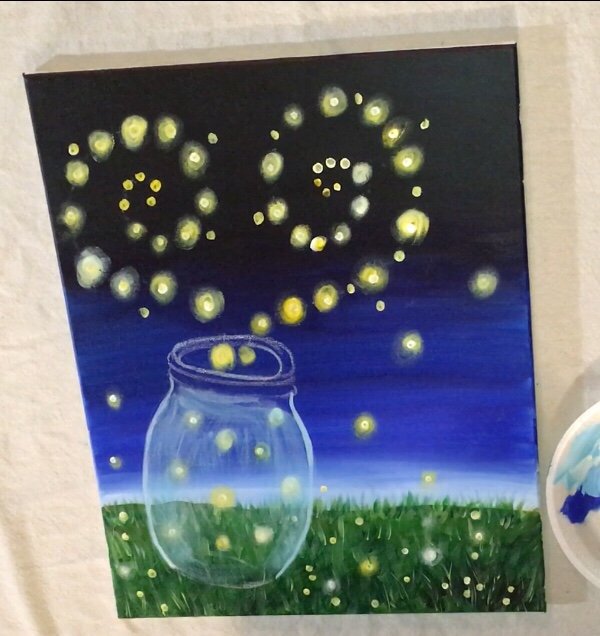
13. Paint detailed lightning bugs (optional).
I can’t decide if I liked the lightning bugs that I painted below or not! If you like that option, I’ll show you how I did it. To do this, I painted the shape with titanium white first. I used cadmium yellow medium for the light and blurred it out with my finger to create the glow. I also used cadmium red medium for the abdomen and head. Then I painted a thin white line representing the light trail! 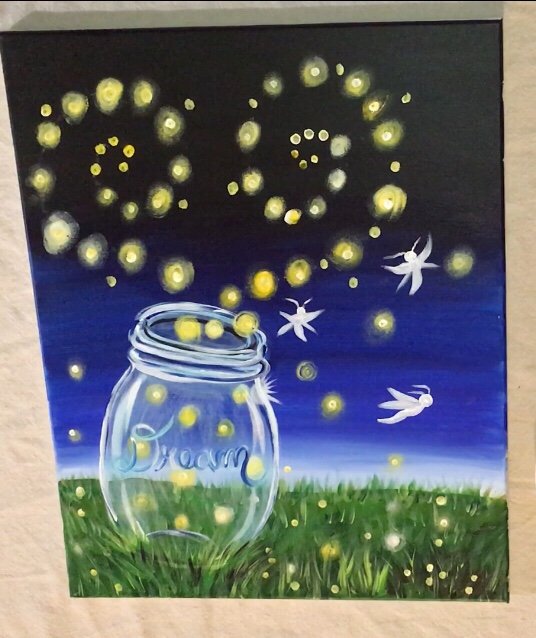
Hi, Tracie, my mom and I love your Fireflies and Mason Jar painting, and we were wanted to ask if we could use it for a painting party. We plan to use the proceeds from our paint party as a fundraiser to raise money for school supplies for an orphanage we support in Kenya, Africa. If you could let us know if it would be okay, that would be wonderful. Thank you and have a wonderful day!
Hi Breeze! That should be fine ? Be sure to tag me on FB or IG and credit the work with this website. Enjoy!
Thise is an awesome painting you created .Pluse the tutorial was very easy to understand \to paint .te hank you for thise.
Thank you so much for your detailed tutorial. My friend and I painted this tonight and we were very happy with how clearly you taught and how well they turned out. We added clear embossing powder on the fireflies.
That sounds like fun Rita! You’re welcome!
Hi Tracie, my niece and nephews are starting a foundation in memory of their mother. It is for pancreatic cancer patients. Would we be able to modify your firefly design for our logo?