
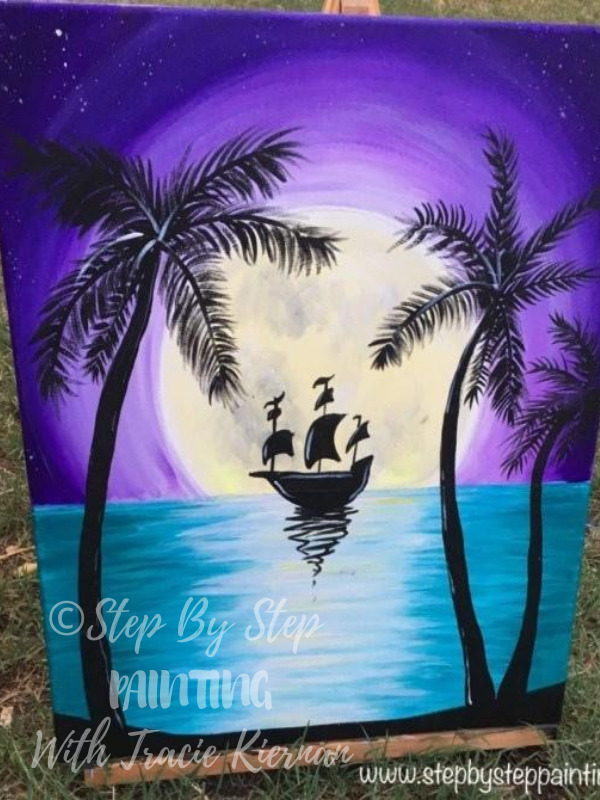
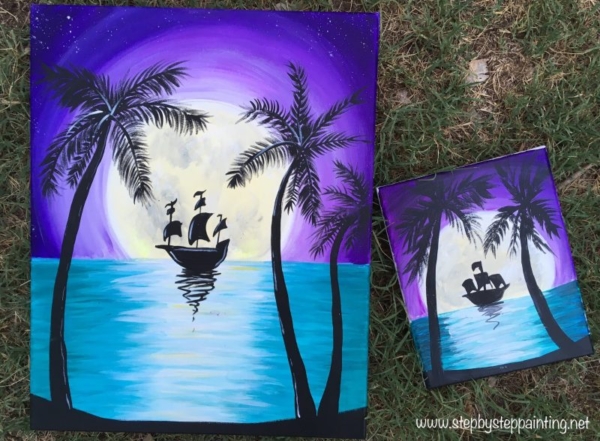
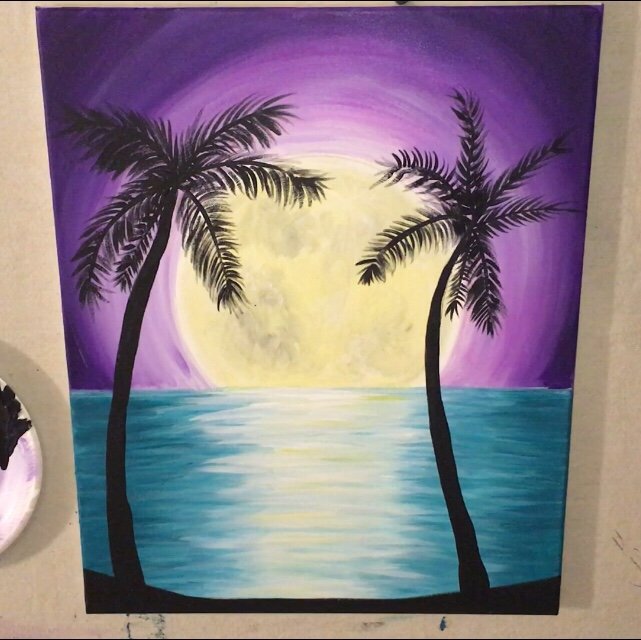
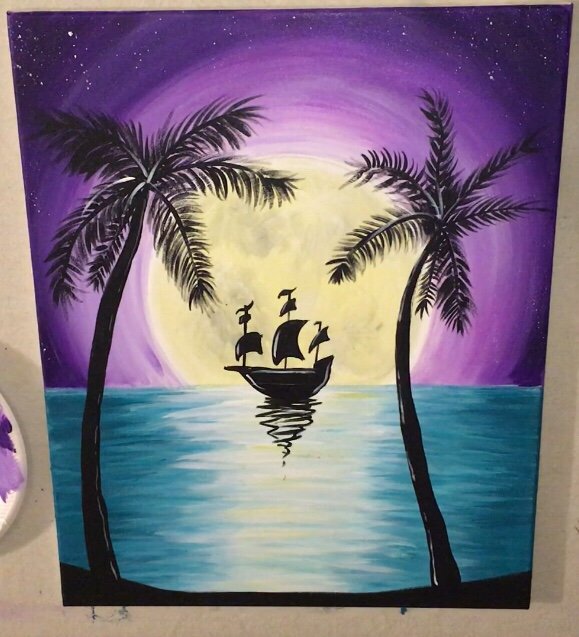
How To Paint Tropical Moon Rise With Ship
Learn how to paint a full moon rising over a turquoise sparkling ocean with palm tree silhouettes and a pirate ship.
Would you like to save this?
This is the last in my series of “July Summer Nights”! And it’s an easy one with a limited color palette!
When planning a painting, it’s hard to force myself to use a limited color palette because I want to use ALL THE COLORS (insert meme here)!
But sometimes the simplicity of a limited color palette packs a punch visually. I chose purple and turquoise because I LOVE those two colors together. I also made yellow accents in the moon because I love how yellow pops next to purple.
Enjoy this painting and share with us on Facebook or Pinterest!
Duration/ Level:
2 hours, Level Very Easy
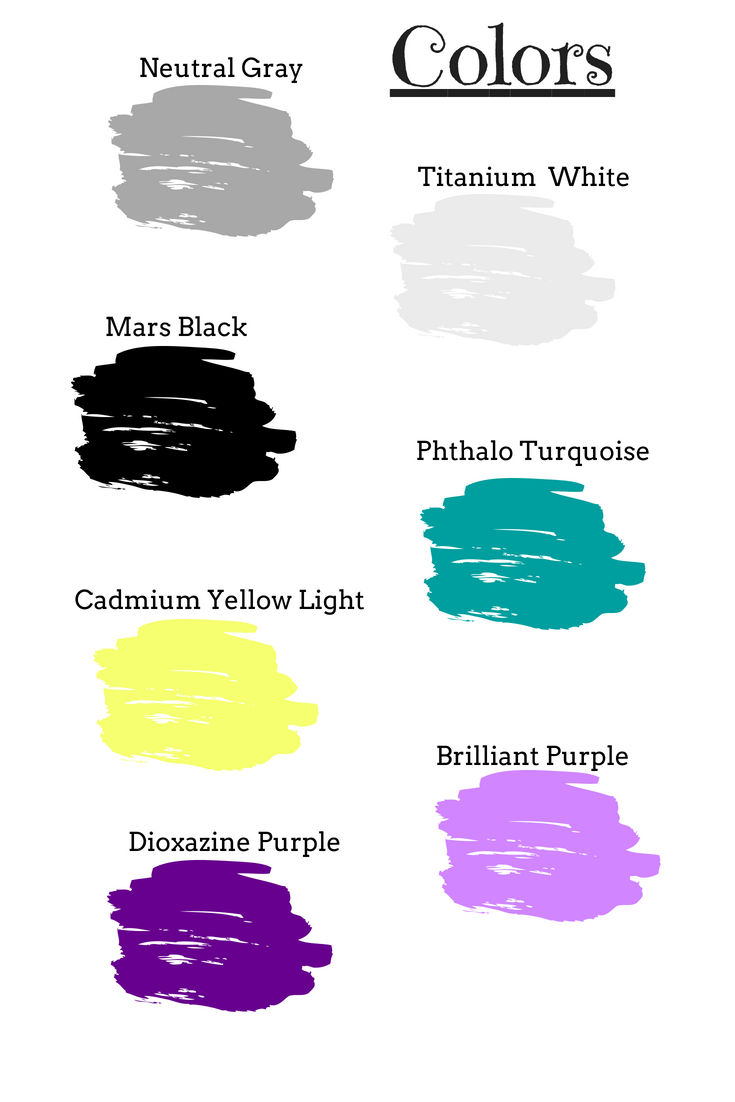
Materials:
- 16″ x 20″ Canvas (This design can work on any size!)
- Acrylic Paint (Liquitex BASICS *except one of the colors listed below)
- Titanium White
- Neutral Gray
- Cadmium Yellow Light
- Mars Black
- *Phthalo Turquoise
- Dioxazine Purple
- Brilliant Purple
- Brushes
- #6 Round
- 1″ Flat
- 1/4″ Flat (#4 bright)
- #1 Round
- 9″ Paper Plate to trace moon
- Ruler & Pencil to draw horizon
*Liquitex BASICS doesn’t have a “phthalo turquoise” but they now have “turquoise” in their new line of colors. This is a dark teal/dark turquoise color. DecoArt Americana is also a great brand that makes this color.
Directions At A Glance: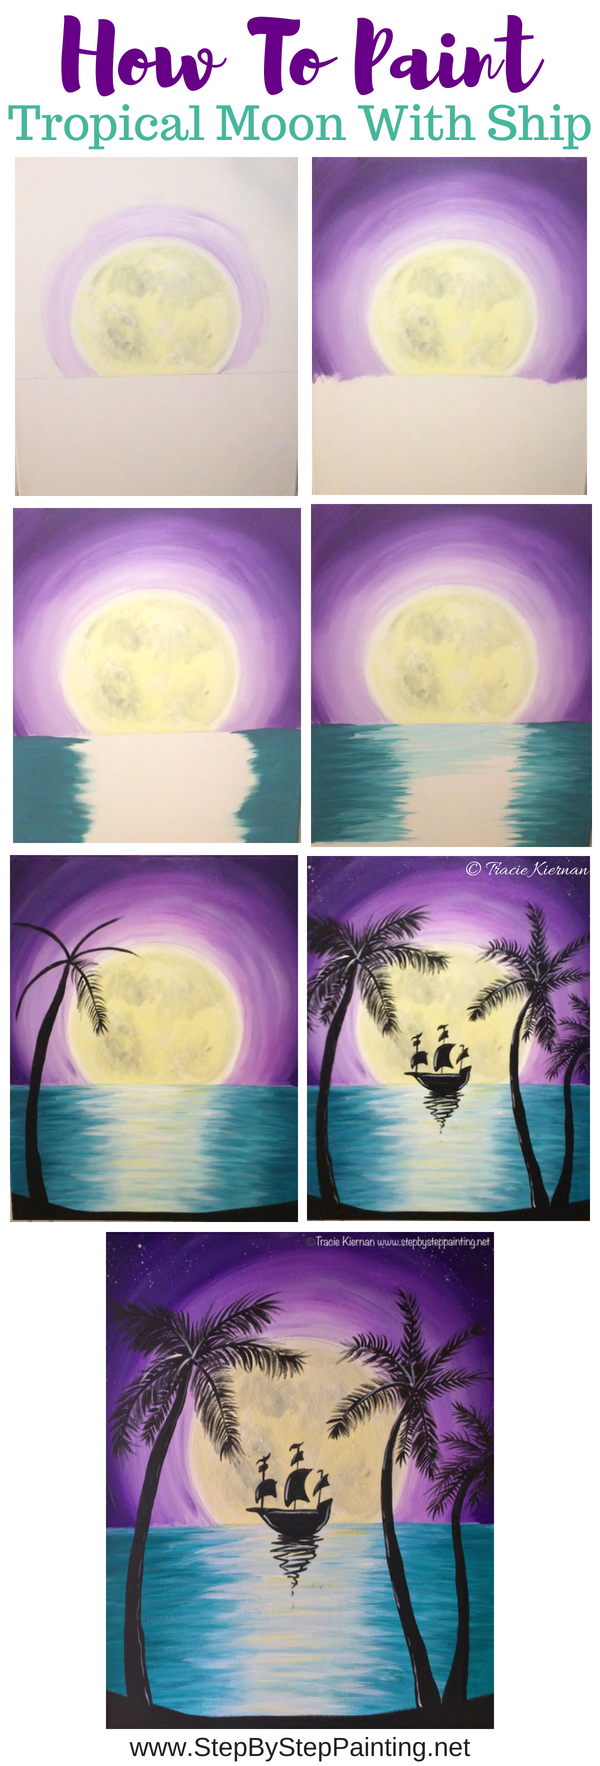

Video:
Step By Step Directions:
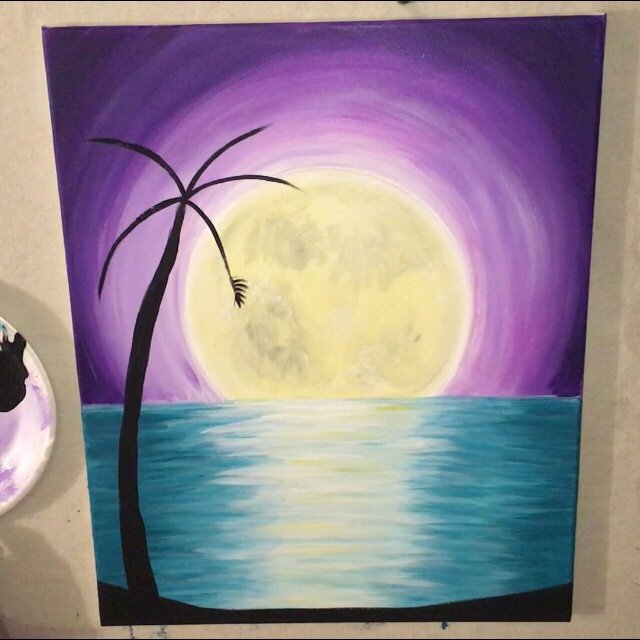
1. Draw your horizon line with a pencil.
I used a ruler and measured 8 inches up from my 20″ high canvas. You may have to adjust the proportions down depending on the size you are using. 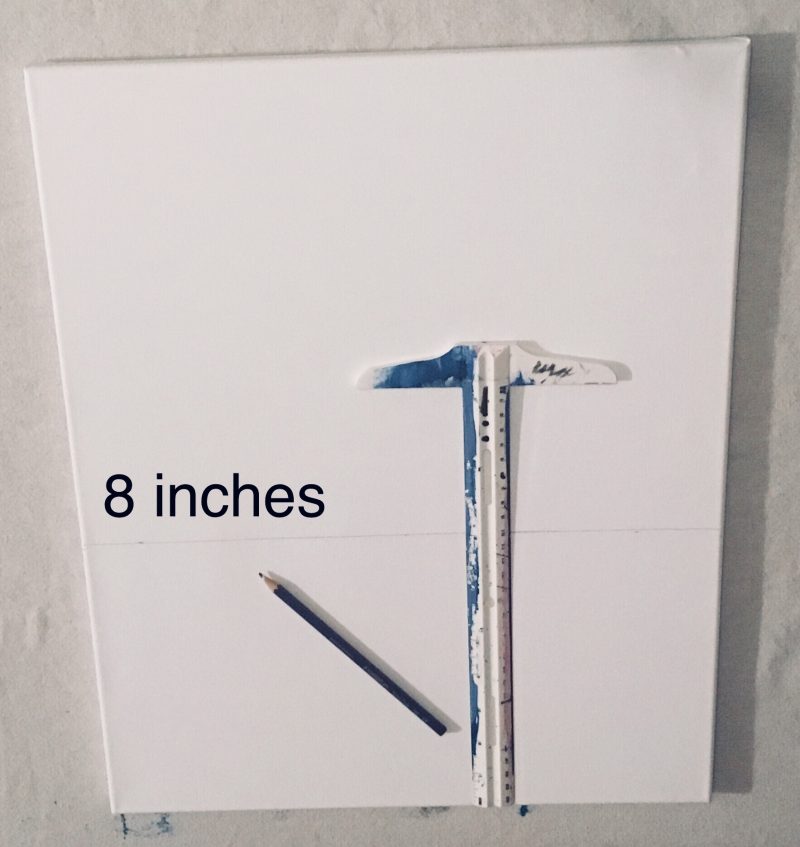

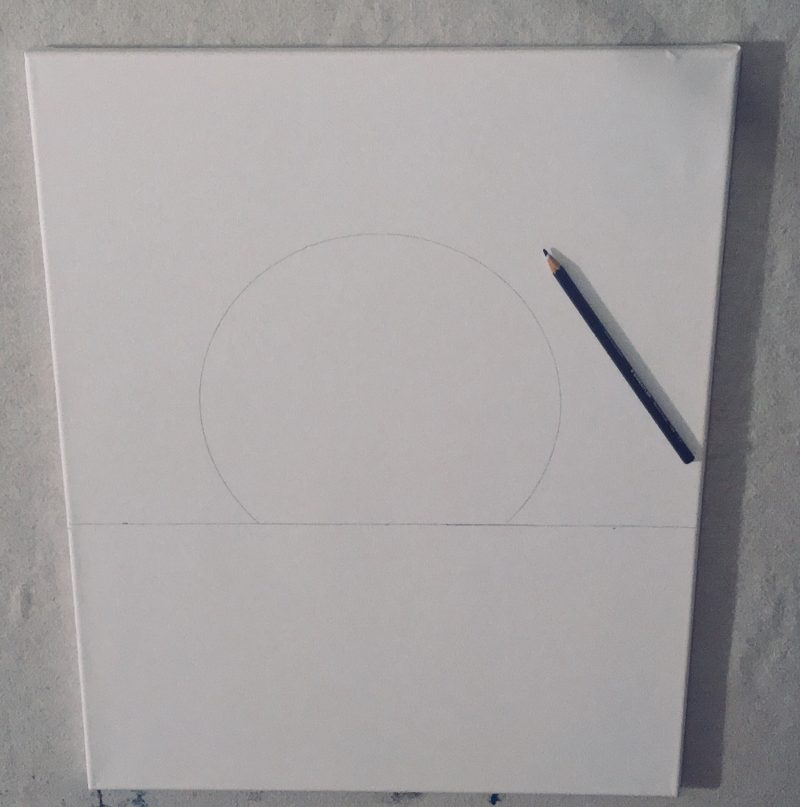
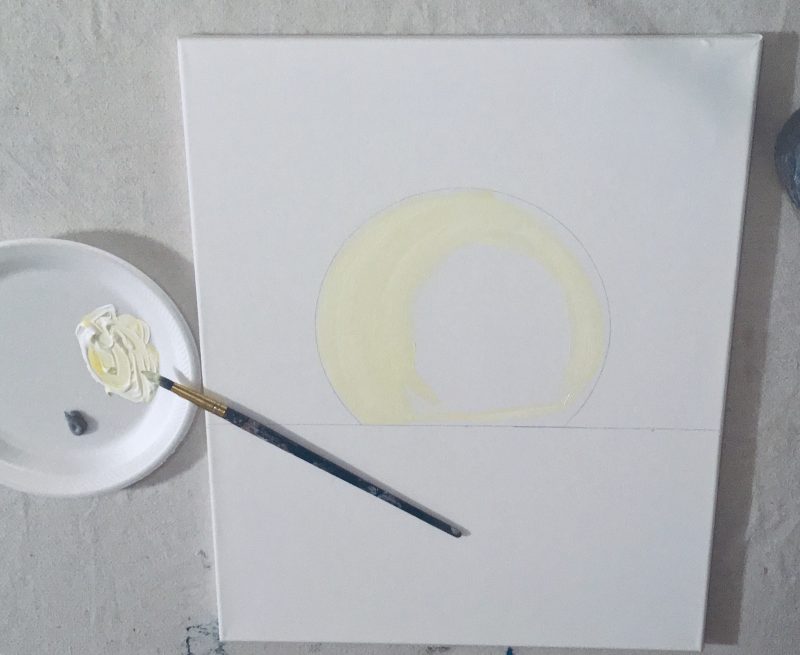
2. Trace a circle for the moon.
My plate happened to be 9 inches. This circle was dipped just a little bit below the horizon line. 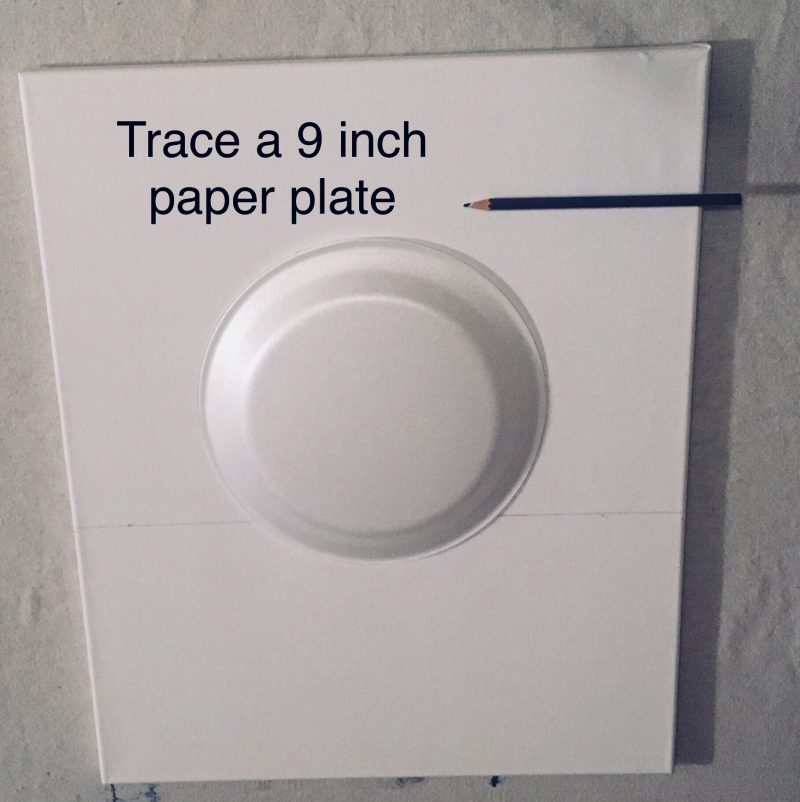

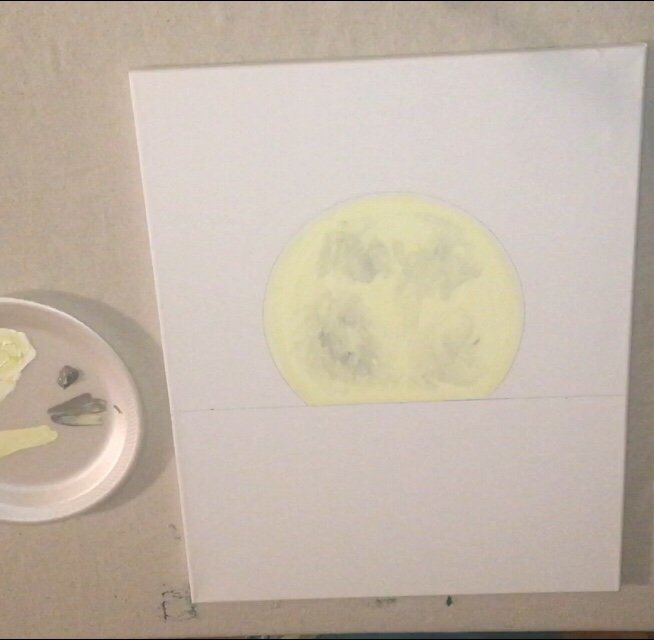
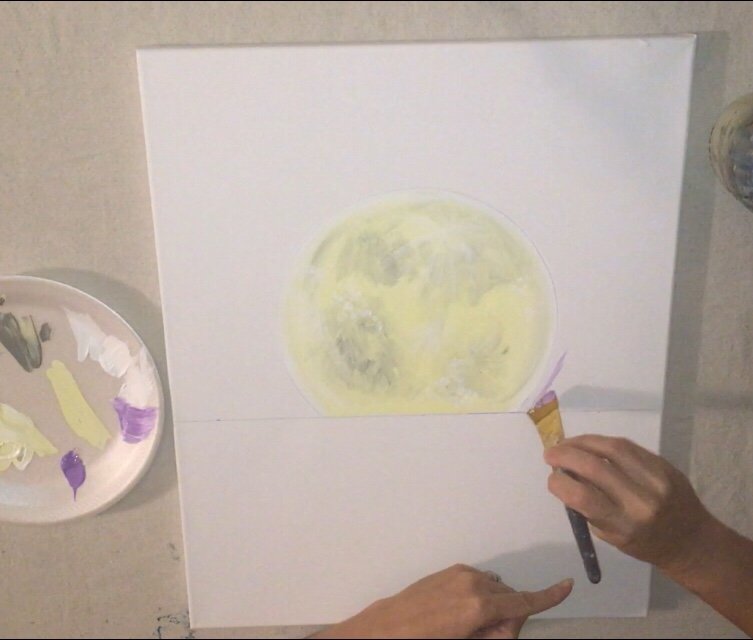
3. Paint the moon titanium white + cadmium yellow light.
Add titanium white, cadmium yellow light and neutral gray to your palette. You will need a lot more white (about 6 parts) than yellow (about 2 parts). With a #6 brush, mix the white and yellow together. Paint the entire circle. It should look like a very pale yellow. Make sure your strokes are going rounded in the shape of the circle.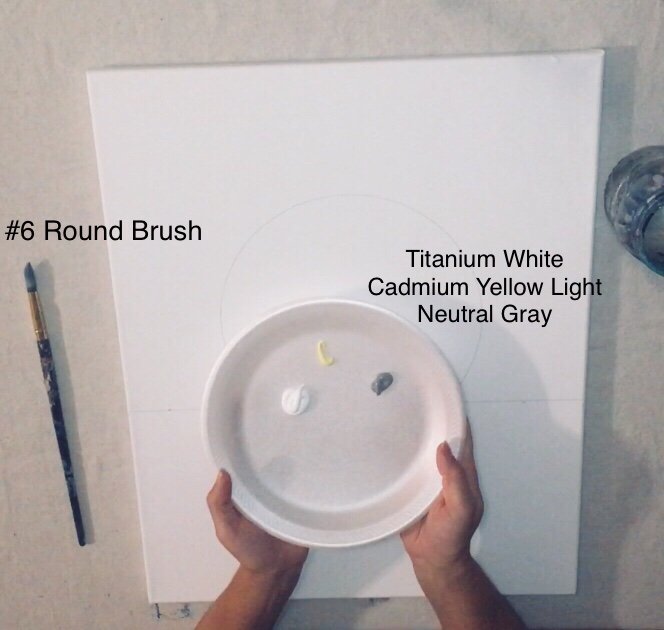

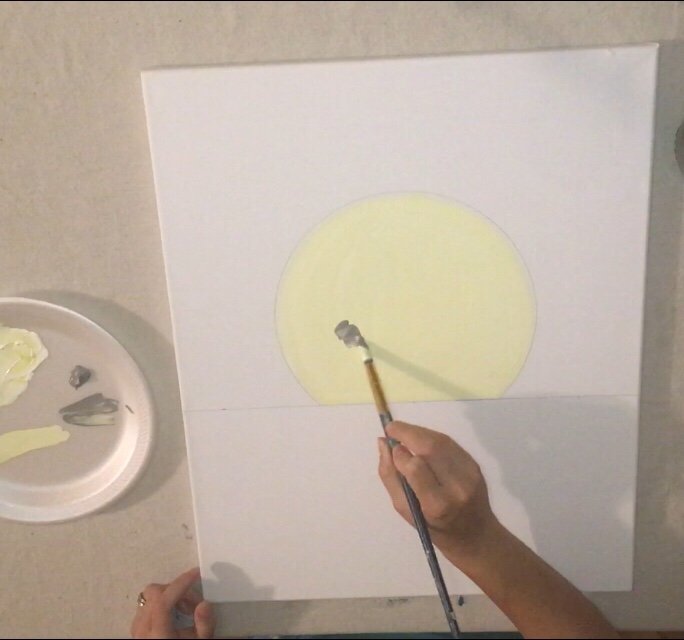
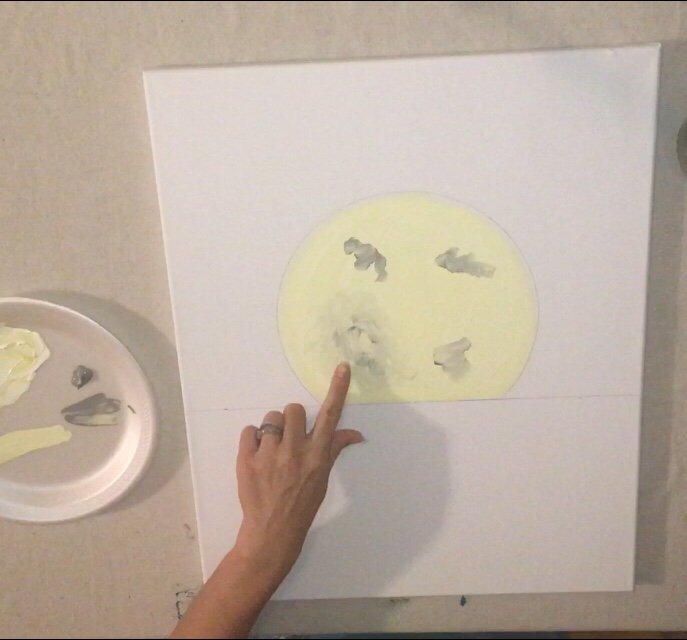
4. Paint neutral gray shadowing on the moon.
Do not rinse the #6 brush off. Add a little bit of neutral gray to the tip. We are going to paint some shadows into the moon and it needs to be done while the yellow is still wet. This is a “wet on wet” blending technique.

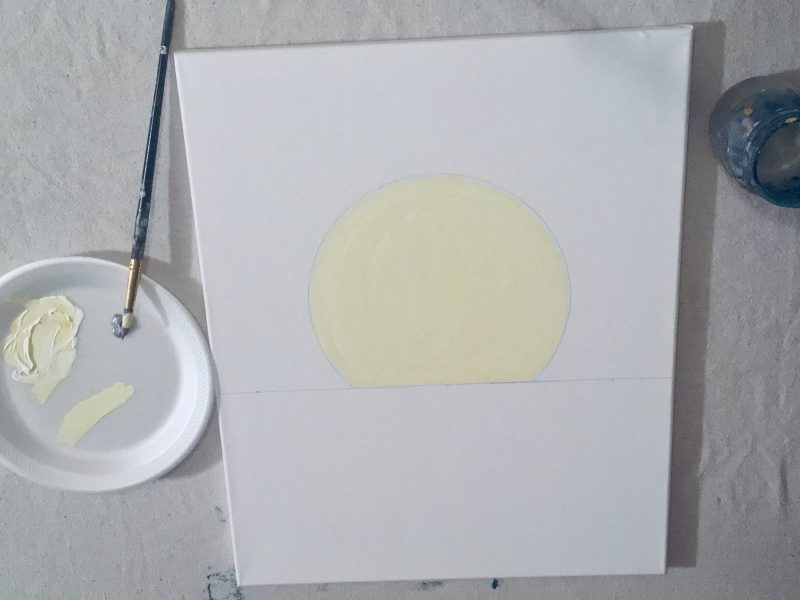
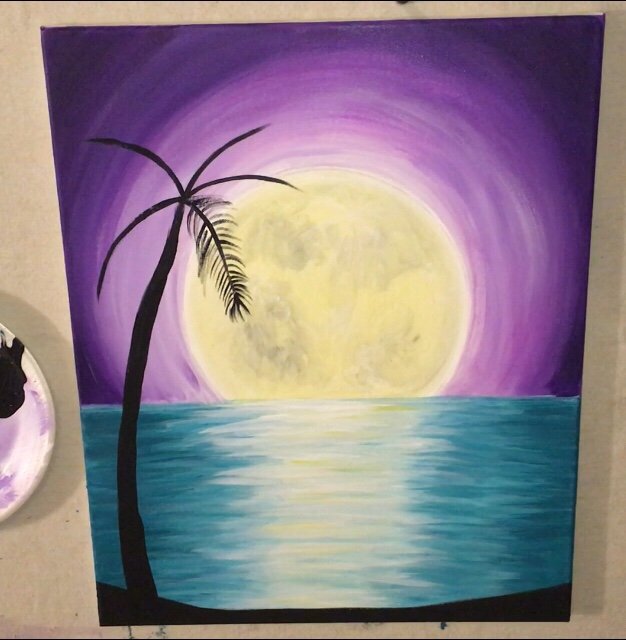
5. Outline the moon with pure titanium white then paint an “asterisk”.
Clean off your #6 round brush and pat dry. Outline the edge of the moon with titanium white. Let that white blend in with the yellow of the moon. Then paint an “asterisk” in the top right area of the moon with titanium white. Then paint some small “dotted” areas of titanium white. 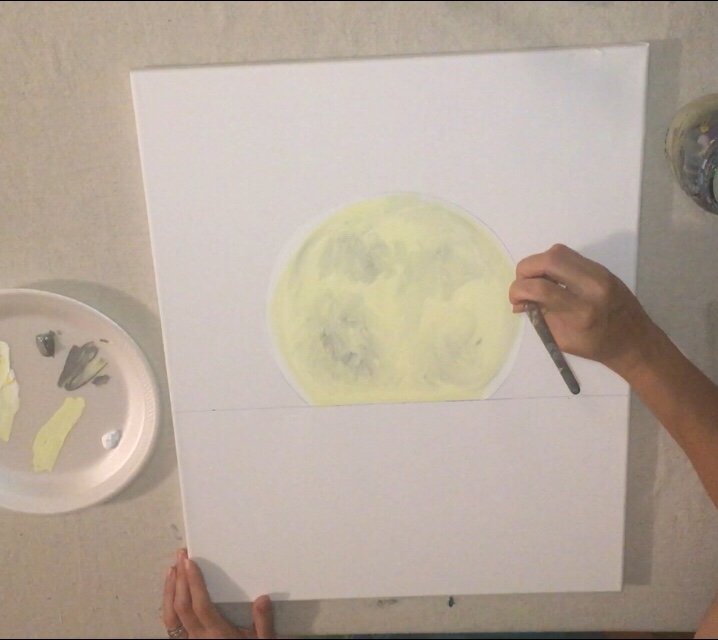

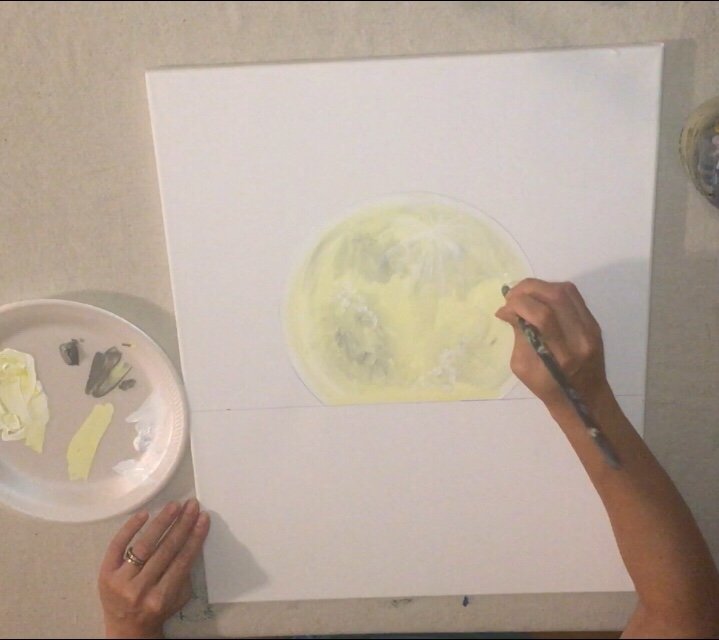
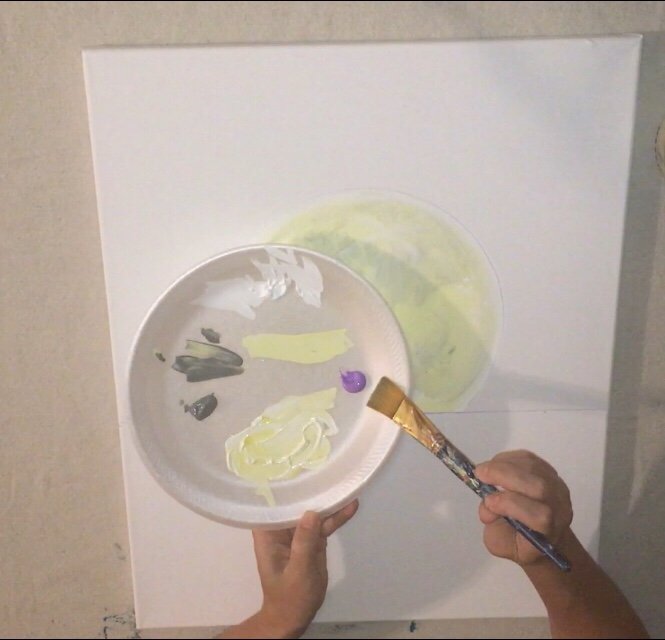
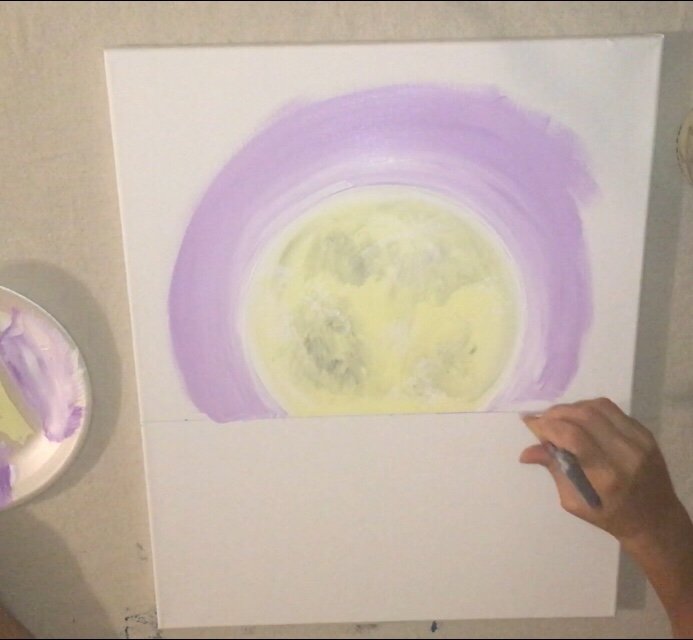
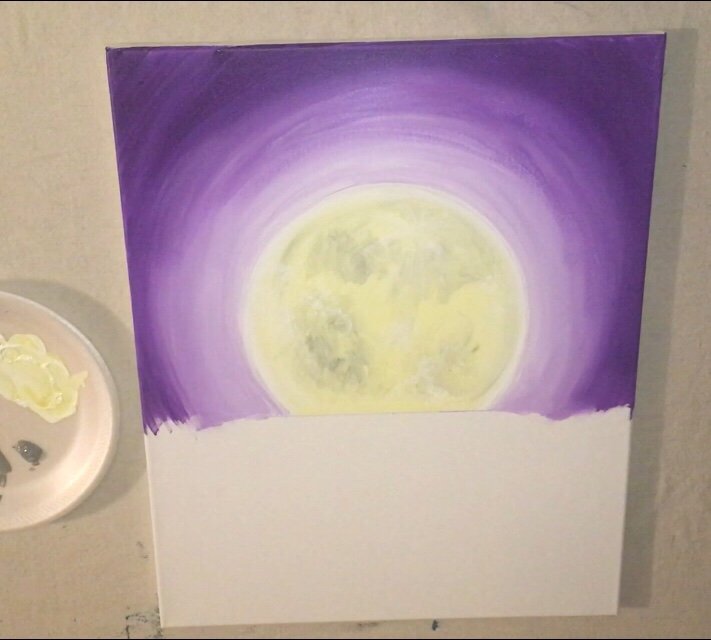
6. Paint the sky titanium white, brilliant purple and dioxazine purple with a 1″ flat brush.

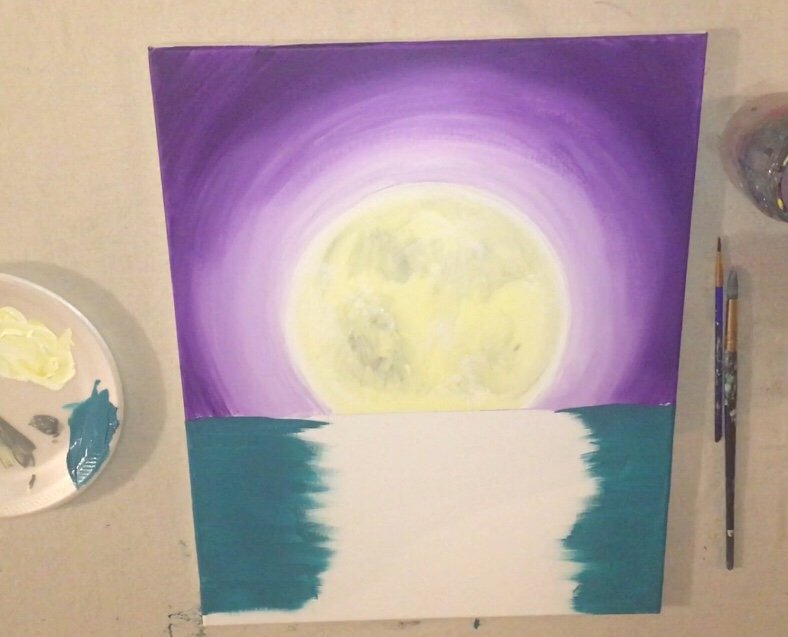
7. Paint phthalo turquoise water with a 1″ Flat Brush.
Using a 1″ flat brush, paint horizontal strokes of phthalo turquoise. Alternate using the full width of the brush and the side of the brush. Make sure to “cut in” on the horizon line. Leave the entire center under the moon blank canvas. 

*8. Use “Wet on Wet” blending to blend titanium white onto the phthalo turquoise.
Do not rinse the brush. Dip it in titanium white. Use the side of the brush to paint thin horizontal strokes of white mixed with phthalo turquoise. This will blend on the canvas. Do this over half of the phthalo turquoise. Essentially, the water is darkest on the far left and right sides and gets lighter in the middle. 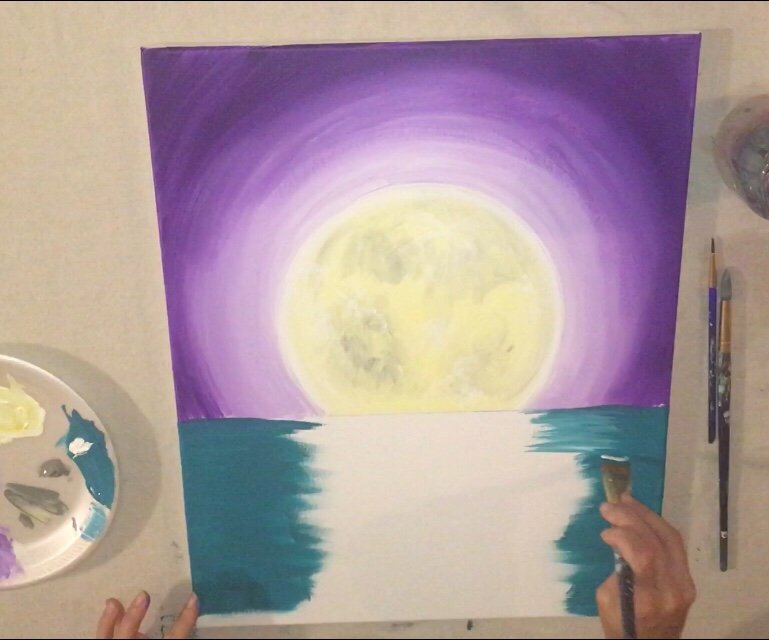

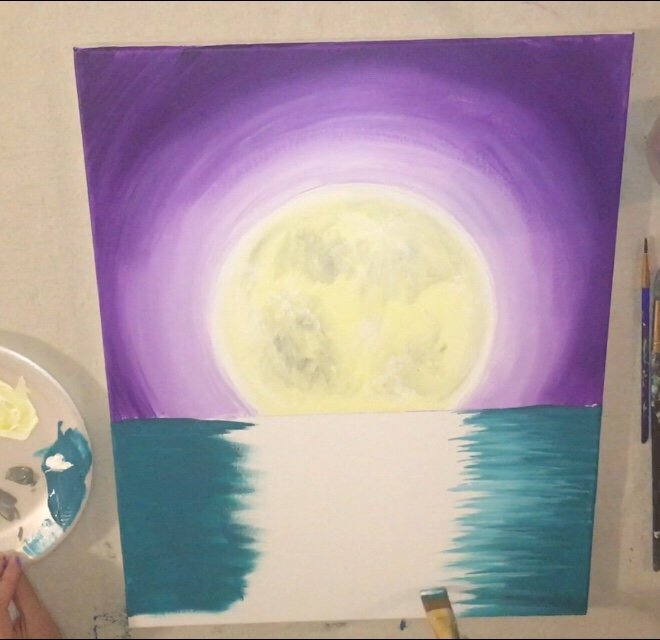
*In the video you will see me switch to a 1/4″ flat brush. This helps to get a smaller, varied type of stroke in the water.
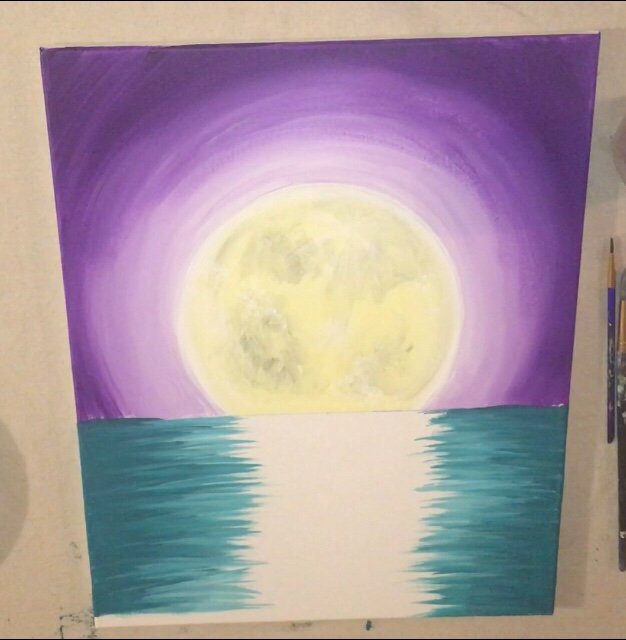
9. Paint titanium white horizontal lines in the middle to get the “reflection”.
Rinse your brush off all the way. Add pure titanium white. Paint the same horizontal strokes in the middle but drag some of the phthalo turquoise in with it. You should get a very light phthalo turquoise out of this. If it’s not “dragging in” because it’s too dry, you can add a TINY bit of phthalo turquoise into the white. Then go back over some of this light area with a TINY bit of phthalo turquoise and paint a few horizontal lines. 

10. Add some slight cadmium yellow light onto the reflection.
To do this, I used a #6 round brush. I dipped it in pure cadmium yellow light and painted very lightly some horizontal yellow lines. This was only done on the white area of the reflection. Careful with this because you don’t want that yellow to mix with the turquoise to create green!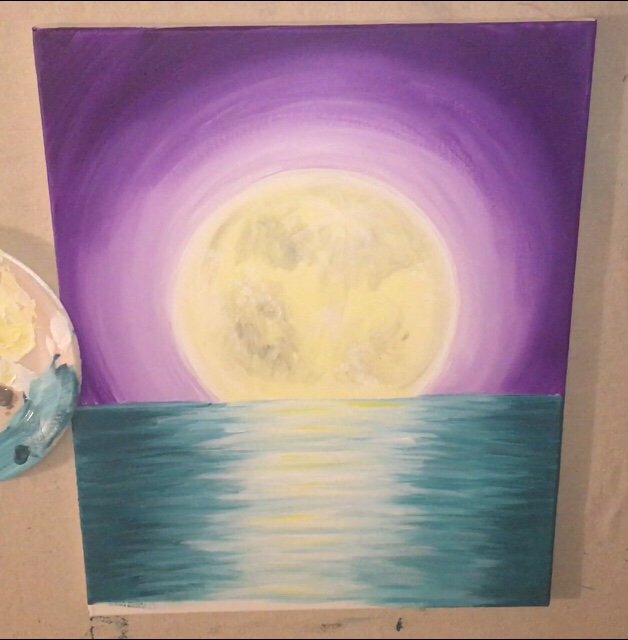

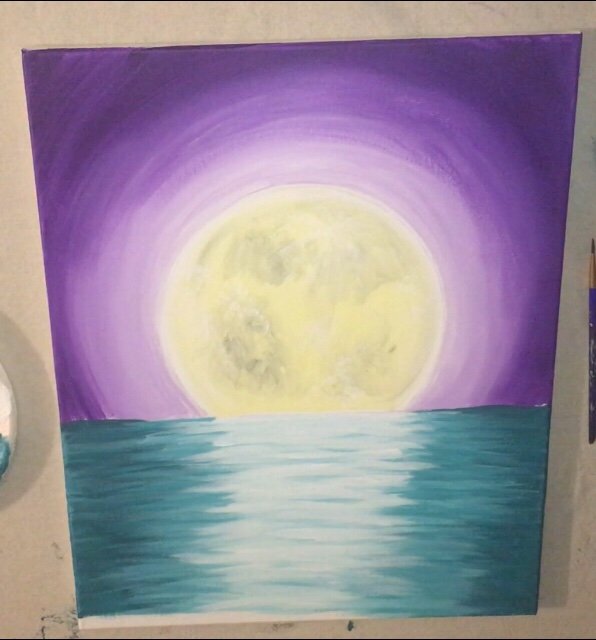
11. Wait for your painting to dry! Paint the bottom “sand” with mars black and a #6 round brush. 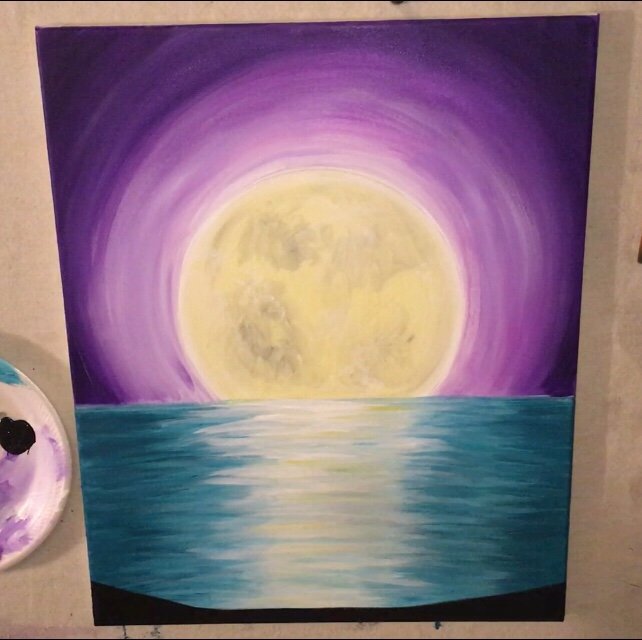

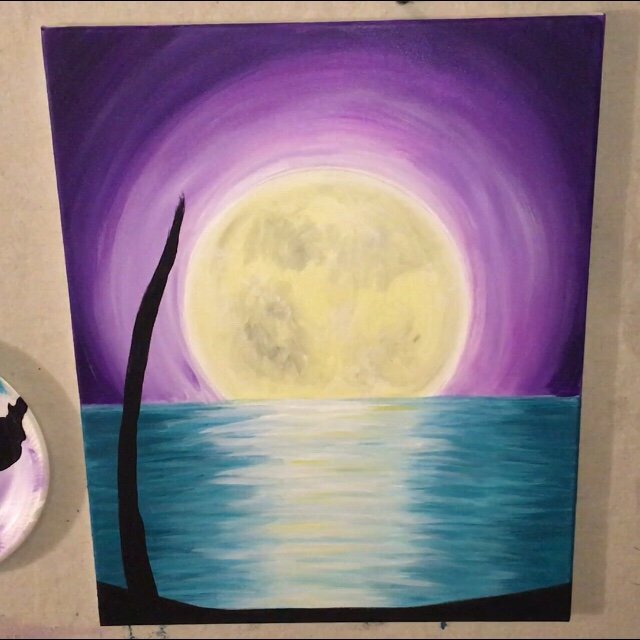
12. Paint the palm trees mars black and a #6 round brush and a #1 round brush.
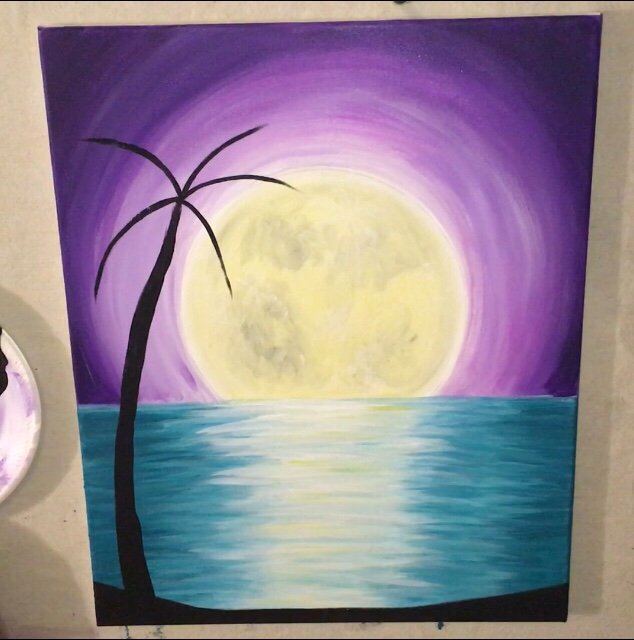
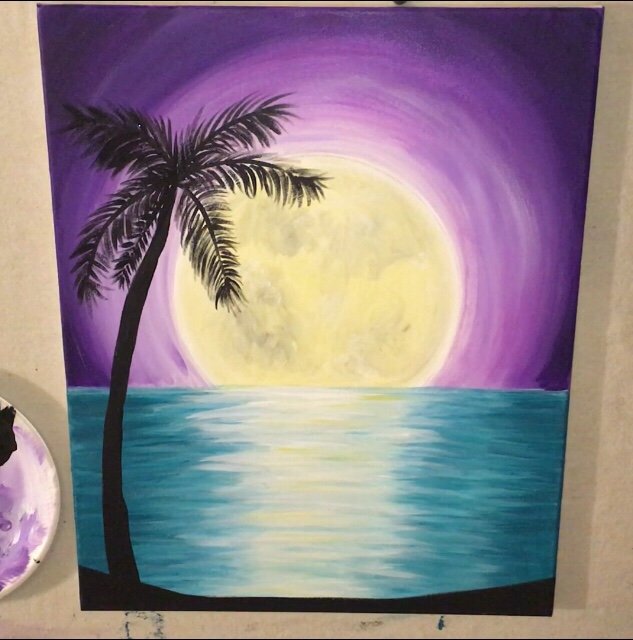
Use the #6 large round brush. Paint a tall curved palm tree trunk. It starts out thick on the bottom and thins out at the top. Then use a smaller brush, the #1 round, to paint the middle stems of all the palms. Then paint each of the palm leaves. I still used a #1 to paint the thin lines on the branches. It helps to “twist the brush to make a point” on your palette to get a finer line.

13. Paint a pirate ship silhouette with mars black and a #1 round brush!
This ship was painted right on the horizon line in front of that moon! I found it helpful to find a silhouette of a pirate ship to look at as a reference. I went to www.pixabay.com, a royalty free database, and typed in “pirate ship silhouette”. There’s a lot of different designs you can choose from! It might help to practice first on a piece of paper. Use a small round brush and start with the bottom portion of the ship. Paint its shape. Then paint the lines for the sails and then the sails themselves! You’ll want to use at least a #1 or smaller round brush to get those fine details in. 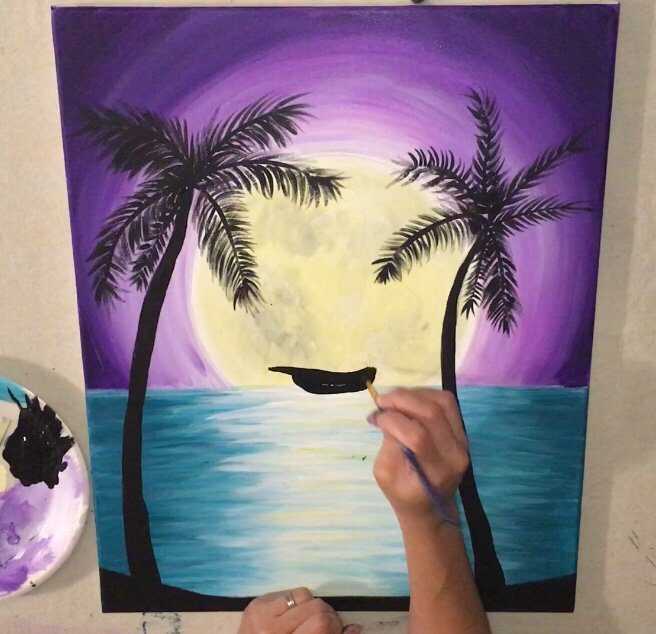

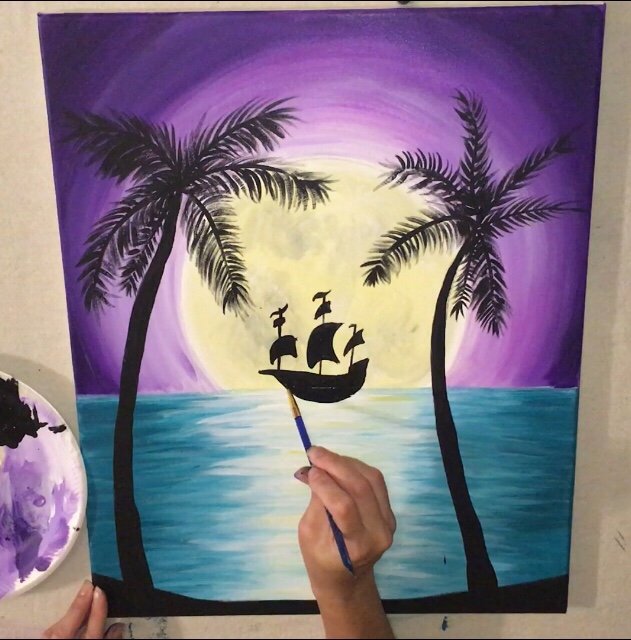
14. Paint the reflection of the ship with a #1 round and mars black.
Paint very loose horizontal strokes just under the ship to represent its reflection in the water. 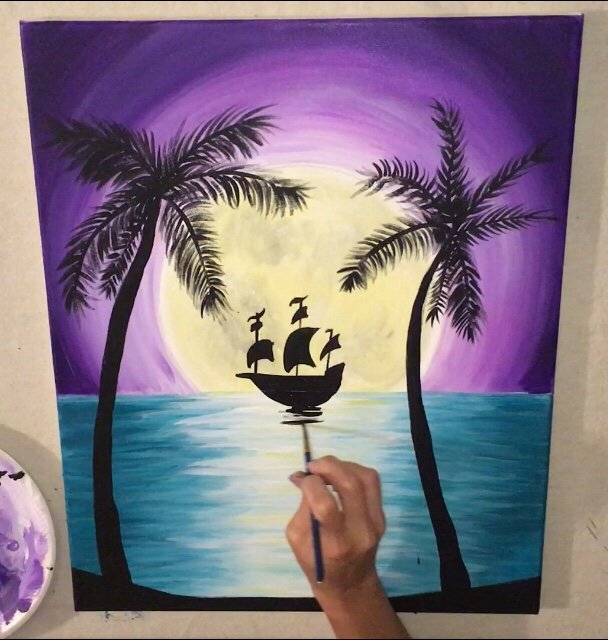

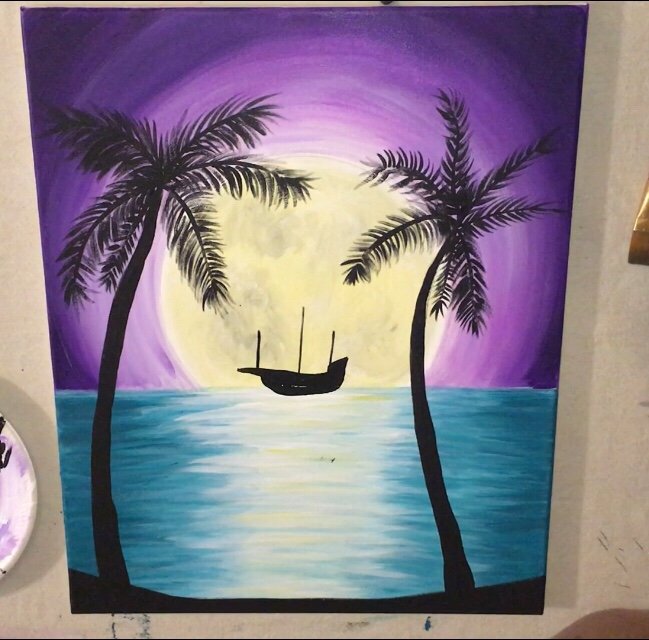
15. Add some titanium white highlight and some stars in the sky.
I used a #1 round for this. Paint very lightly some white highlight on the ship and the trunks of the trees. Paint also slightly on the middle part of the palms. This step is optional but it does give the pirate ship a cool effect! I also splattered some stars in the sky in the dark purple area. You can splatter with a toothbrush or a flick a flat brush.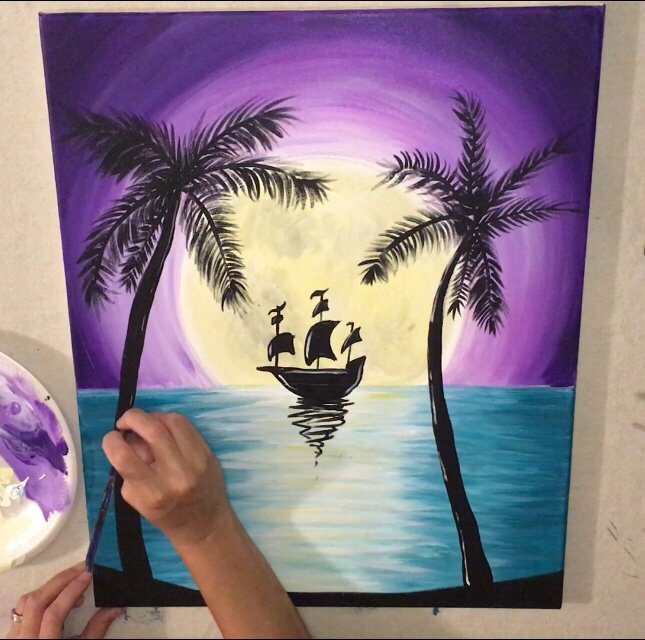

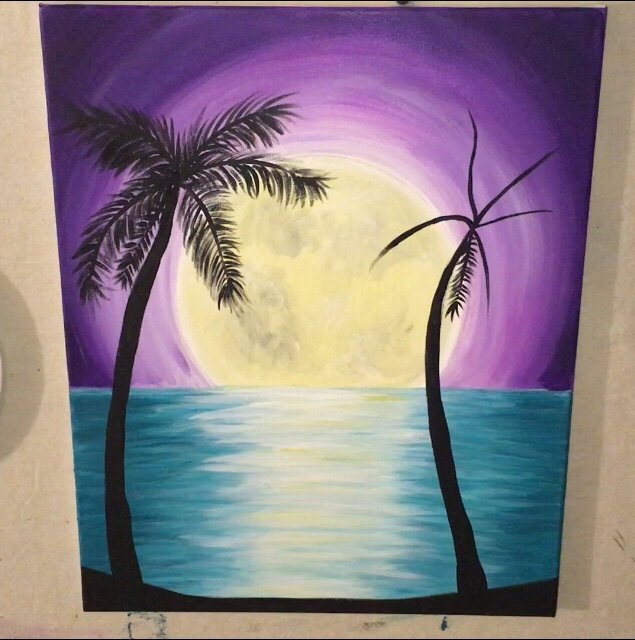
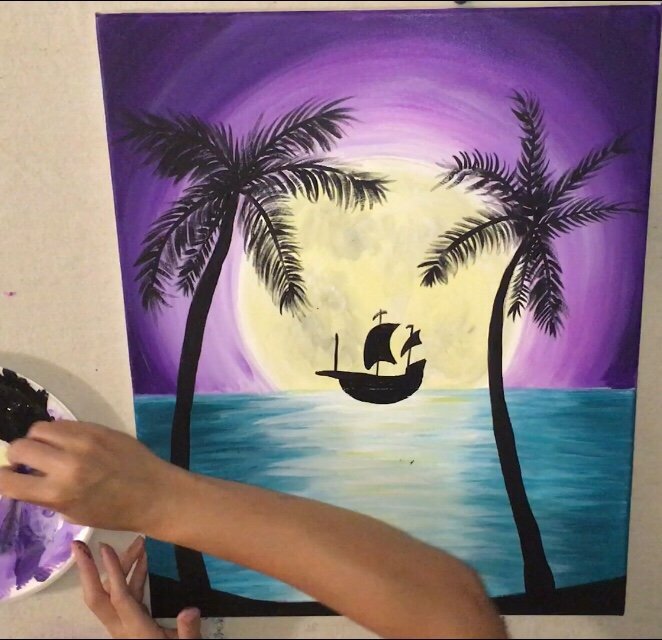
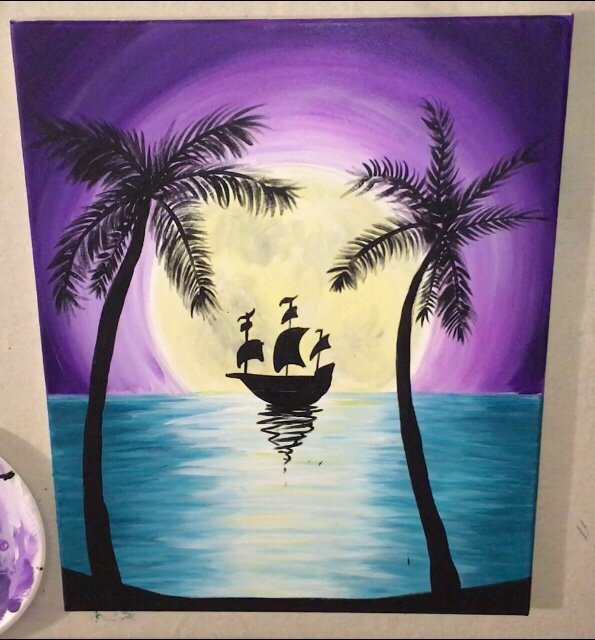
16. Optional: paint another palm tree.
I painted one more smaller palm tree on the right and then I was done! 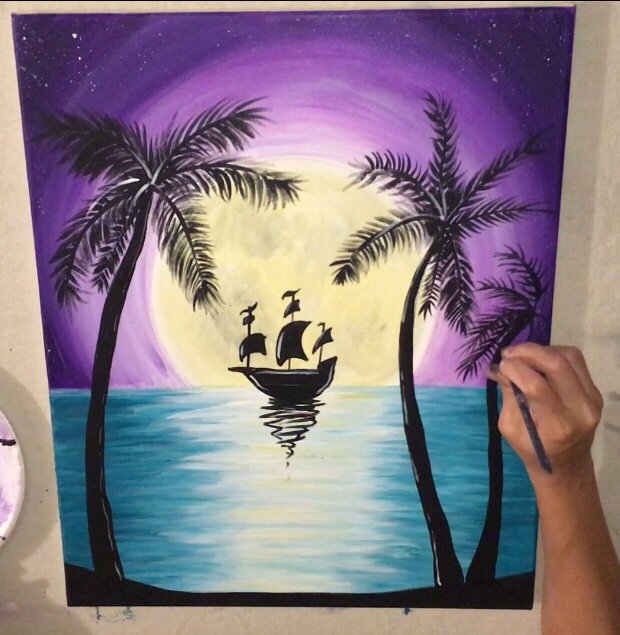

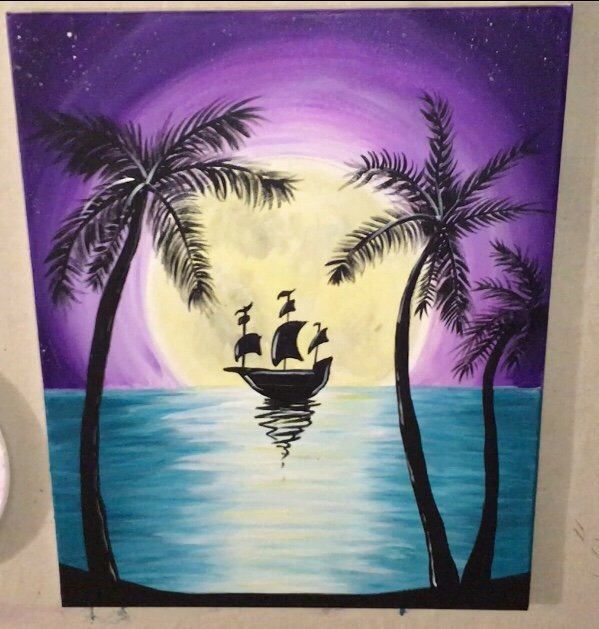
Finished!
What a fun simple painting! If you did this one, please share your painting over on the Facebook page!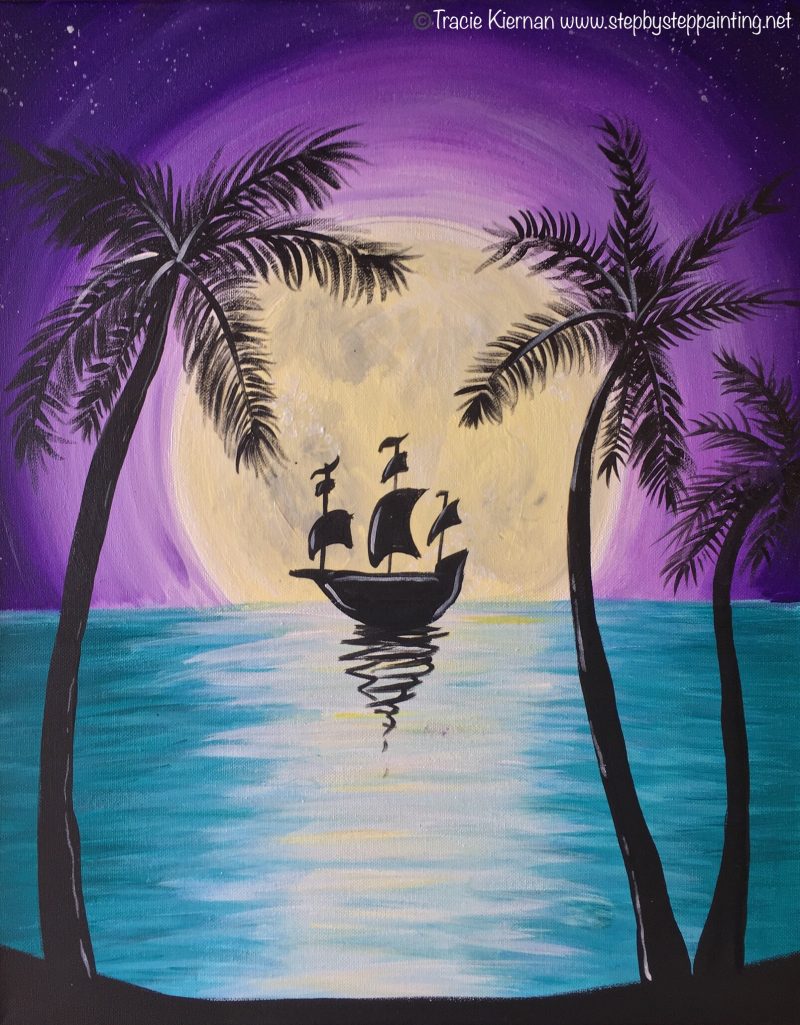


Thank you for sharing this video. It is useful for me. I will try paint this today. Wish me luck.
Thanks! Creative vibes being sent your way – good luck and enjoy!!
very nice palm leaf plates
nice information you have shared
Hi! This is incredible and the steps are so helpful! I’m part of a pirate performance group and was going to host a pirate paint night on twitch, would I be able to use your painting for inspiration/for the paint night? I would credit you of course and provide the link to your tutorial/blogpost here. If not, it’s okay, just thought I would ask.
Hi Megan! Absolutely that would be okay! Have fun!
I really love your tutorials, very helpful !! Detailed instructions makes it very easy to paint for beginner like me 🙂
Followed your some tutorials mentioned below, you taught so nicely that those turned out great !!
tropical moon rise, Summer Swing, Moon, Winter Barn, Harvest Moon path, Galaxy Falls, Rustic Jar of Daisies, Lightning Bugs Jar, Cherry Blossom Tree
and Mommy & Me Penguins with my little daughter 🙂
I am so happy and thankful !
Thank you Tracie for sharing picture by picture tutorials !! really appreciate your efforts !!