

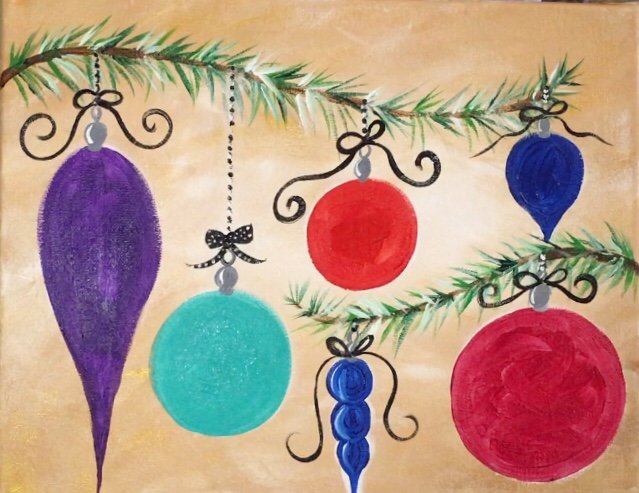
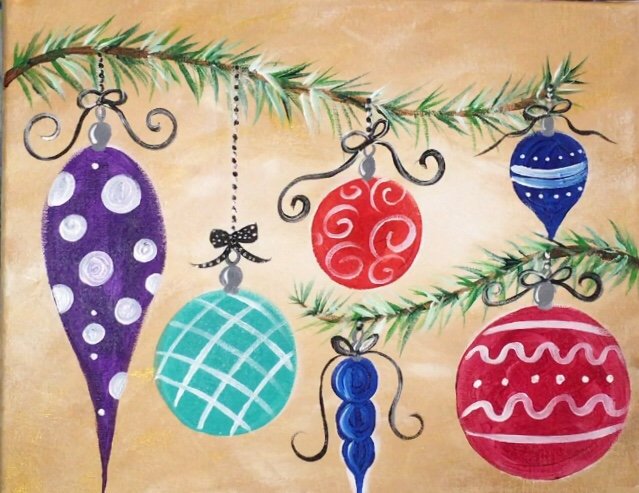
How To Paint Whimsical Ornaments
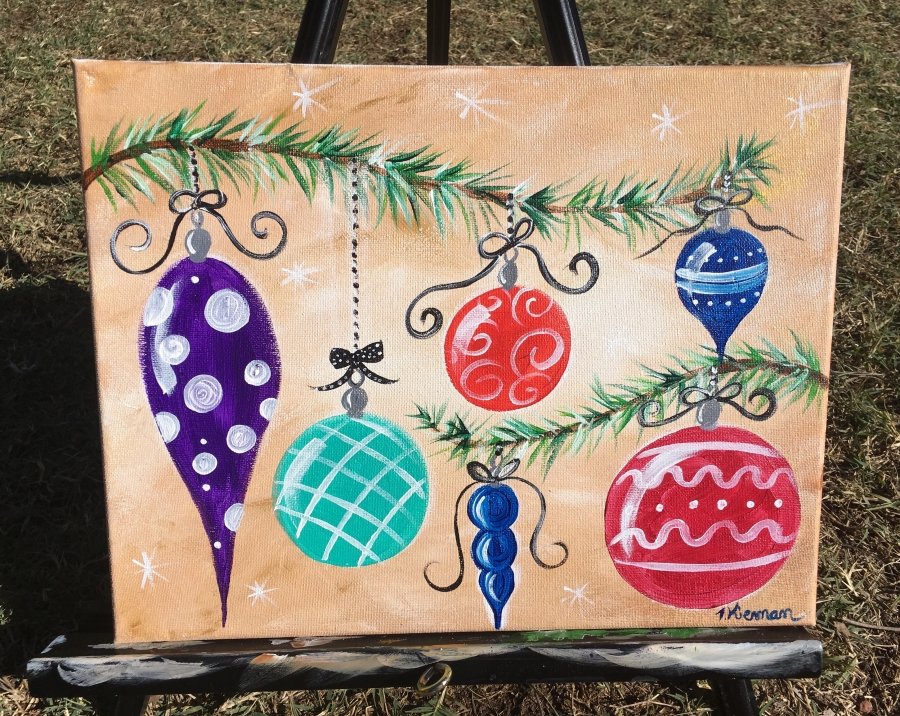 Sit back, relax, turn on the holiday music and paint this easy whimsical ornament acrylic canvas painting! I will guide you through the steps on how to set this type of painting up and it’s very simple!
You can customize this painting very easily! Write names on the ornaments, do solid colors, change the colors, etc.
Enjoy and happy painting!
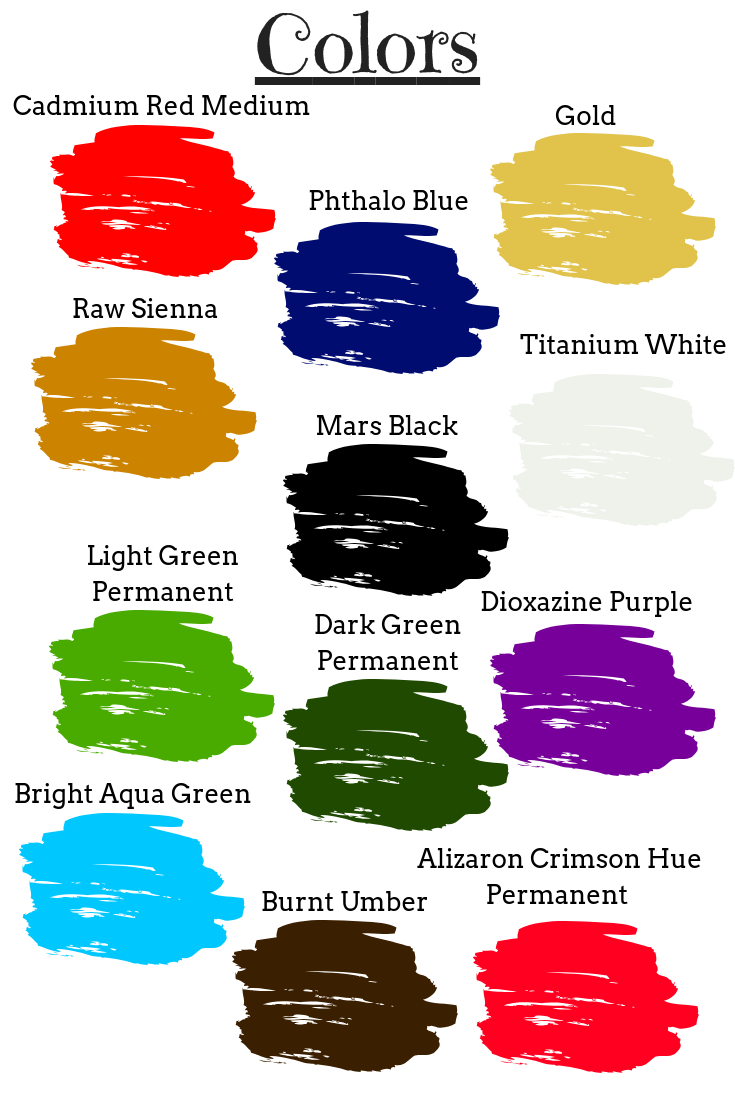
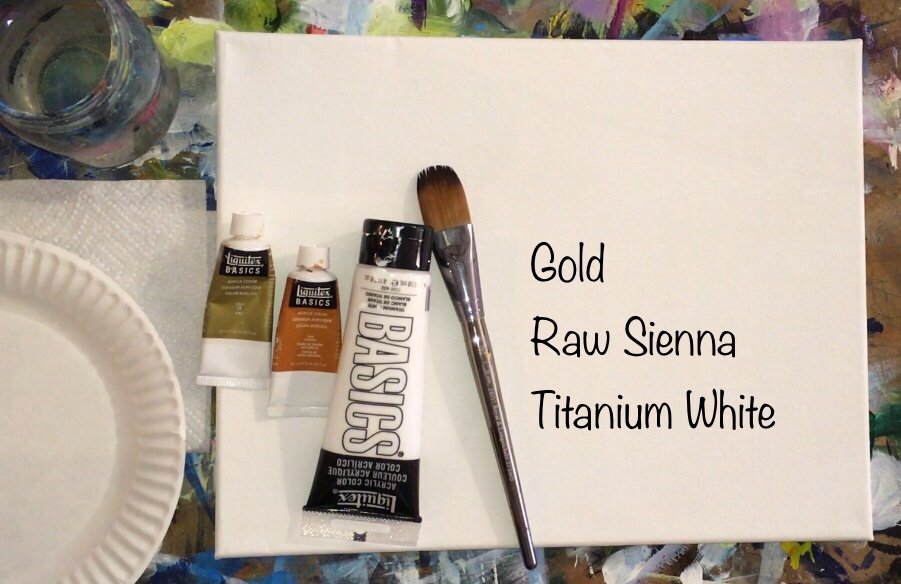
Materials:
- 11″ x 14″ Canvas
- Acrylic Paint (Liquitex BASICS – Need to convert colors because you are using a different brand? You can see my color conversion chart here)
- Titanium White
- Mars Black
- Burnt Umber
- Raw Sienna
- Gold
- Cadmium Red Medium
- Alizaron Crimson Hue Permanent
- Dark Green Permanent
- Light Green Permanent
- Bright Aqua Green
- Dioxazine Purple
- Phthalo Blue
- Brushes
- 1″ Oval Wash (Or any large wash brush will work. I just happened to use the one in this pack)
- 1/4″ Angle
- #4 Round
- #10/0 Liner
- #4 Bright
- Misc. Supplies
- T-Square Ruler
- Chalk
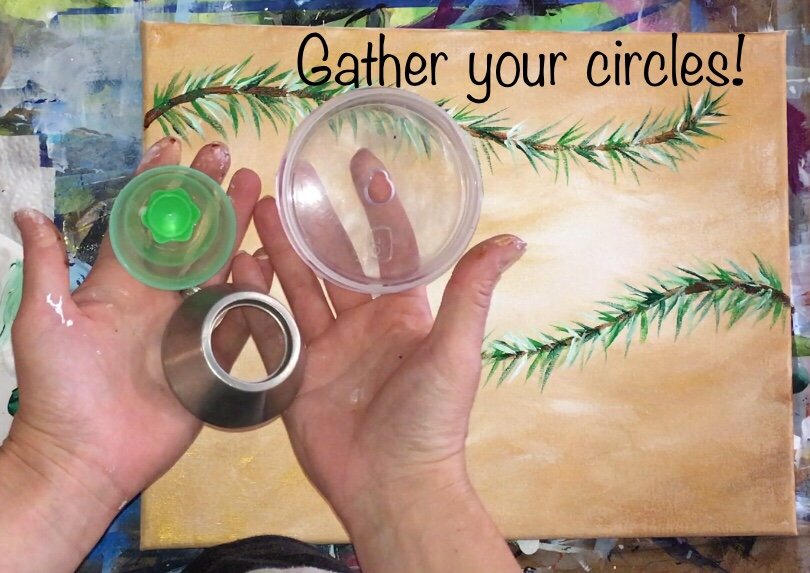
- Random Small Size Circles To Trace

Directions At A Glance:

Video:
Step By Step Directions
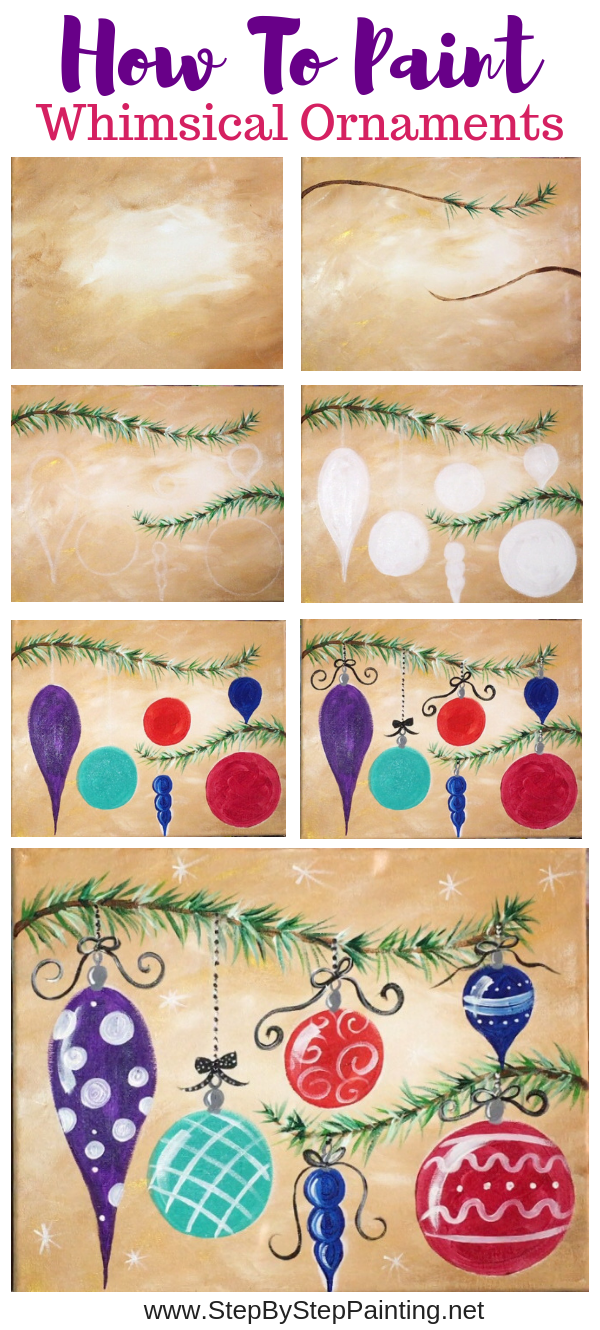
1. Paint the Background With An Oval Wash Brush
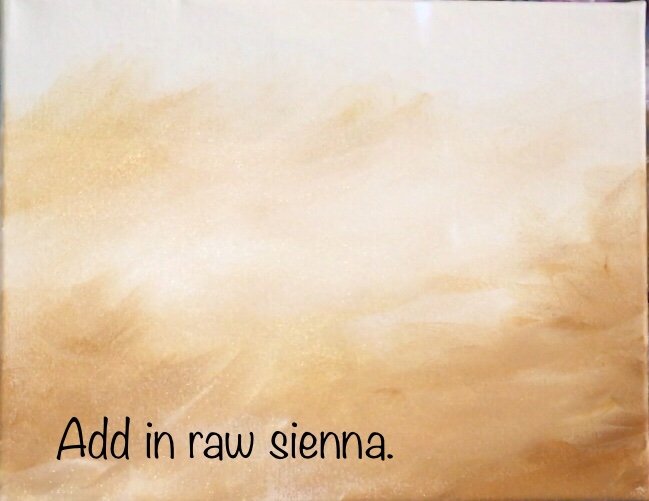
Use the colors: Gold, Raw Sienna and White. Use a 1″ Oval Wash Brush (or similar size large wash brush). To do the background, I used these colors to make a lighter area in the middle and have it subtly get darker on the edges.
To do this, I used “X” style strokes to blend the colors together. That basically means I “flip-flopped” the brush from side to side to blend all the colors together on the canvas. Start with Titanium White. Paint those “X” style strokes starting in the middle.
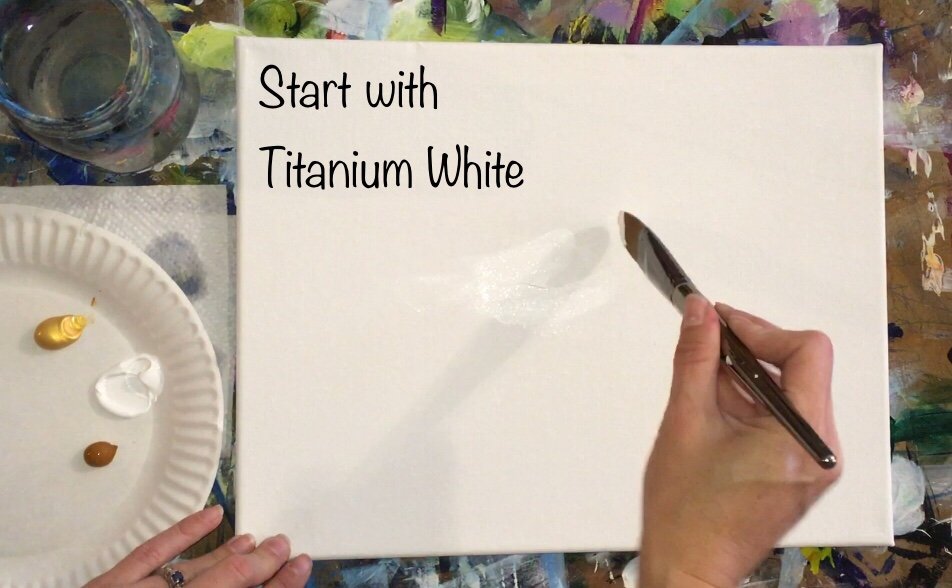
Add gold as you work your way outwards from the middle and allow the gold to blend with the titanium white. I did not rinse my brush. In fact, at no point will I be rinsing my brush as I add more colors to the canvas.
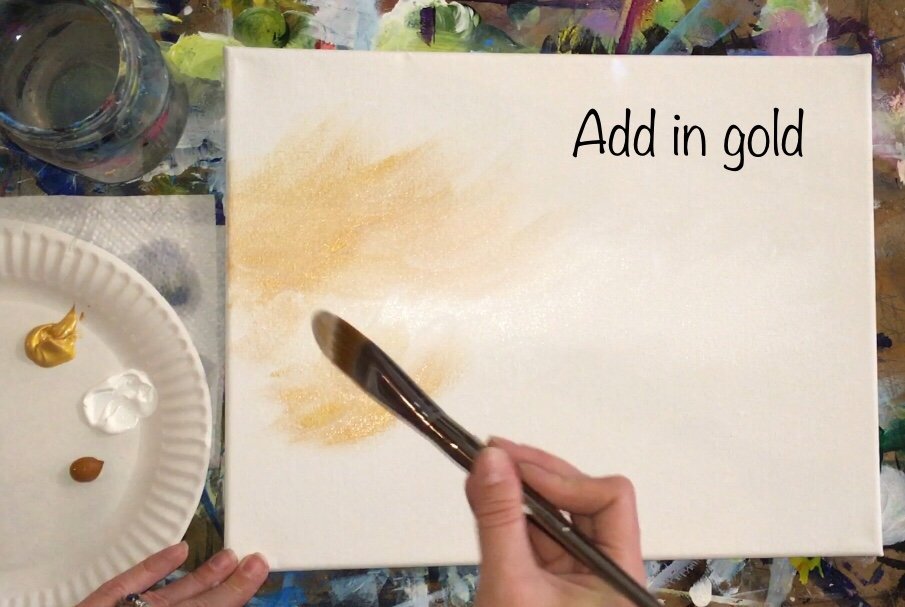
Keep painting “X” strokes letting the colors blend but not all the way. Try not to stress about copying the image exactly. This background is expressive and, while I can explain the technique, yours might look different and that is okay!
Add in Raw Sienna as you work your way to the edges. Let the Raw Sienna blend in with the gold and white. The raw sienna is kind of dark at this point so you may need to add a bit of white to get it to blend more smoothly.
.
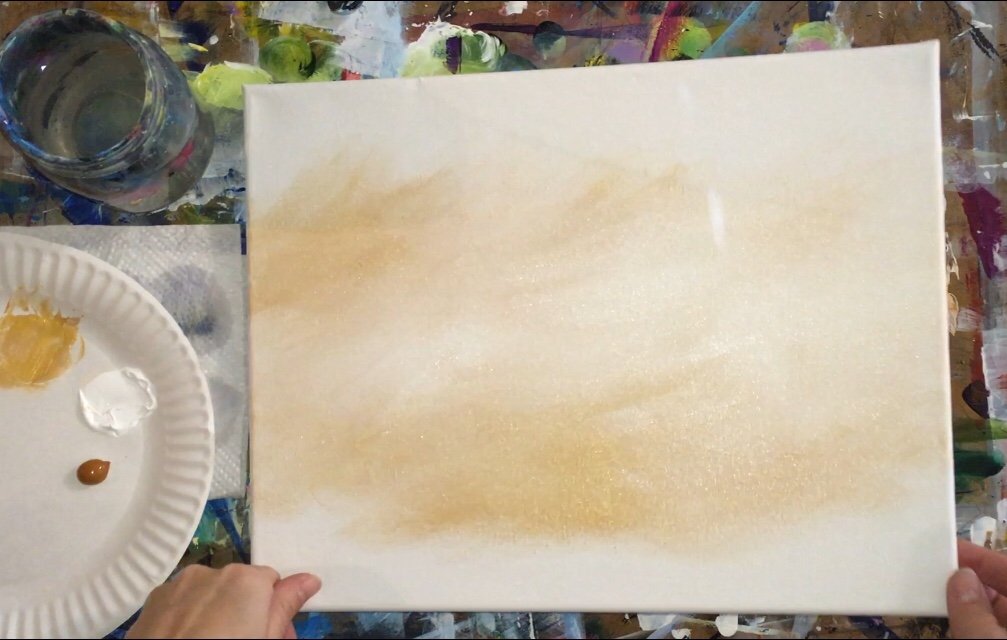
Essentially the middle is the brightest and it gets slightly darker on the outside edges but it’s supposed to be a very subtle blend.
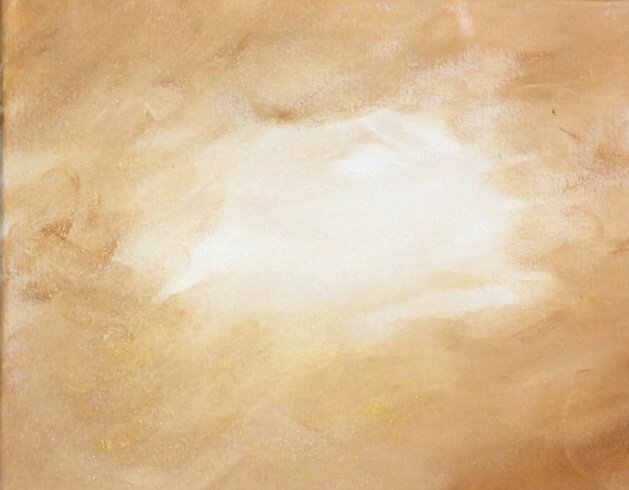
I added more titanium white and continued to blend.
Then I added some streaks of gold so it would show up. Add more colors as needed but it’s important not to keep “working it” because it will eventually turn one solid color.

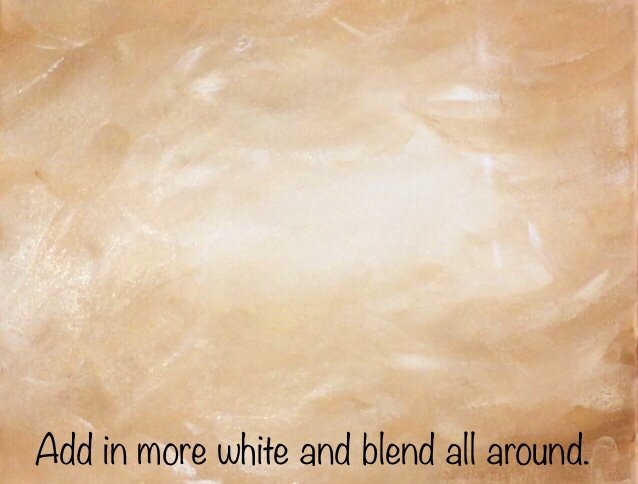
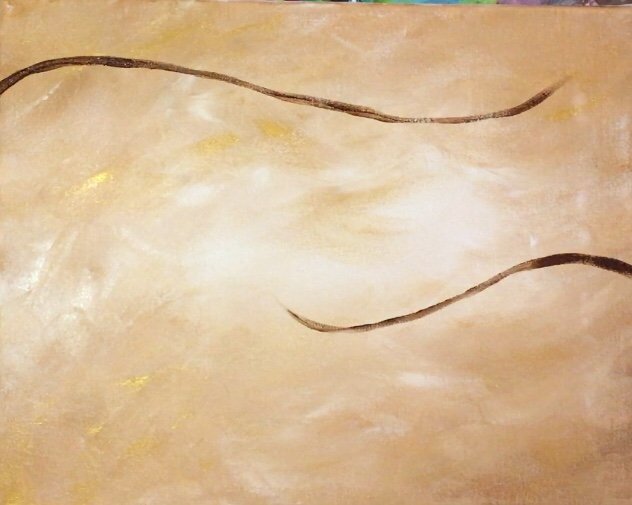
The background is complete! Let this dry completely before moving on to the next step.

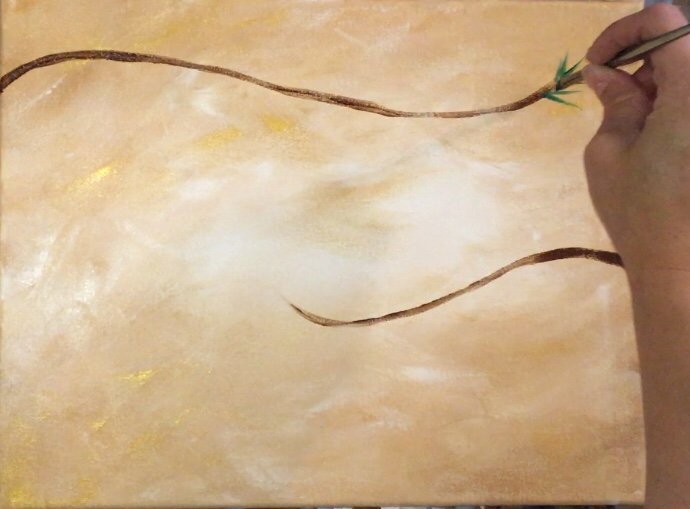
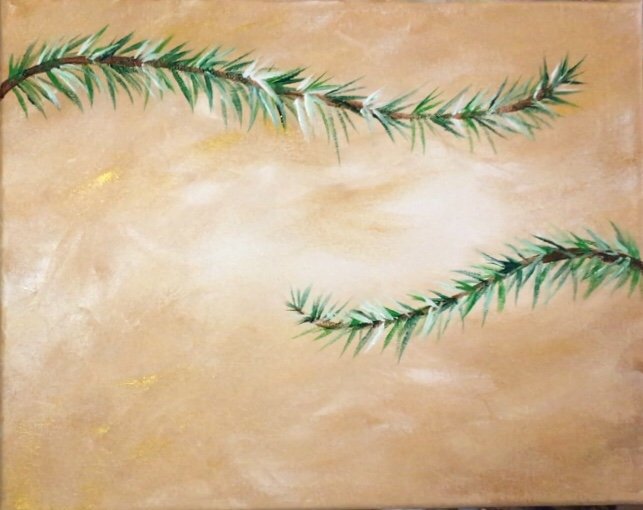
2. Paint The Branches
To paint the branches, I used a #4 round brush and the color burnt umber. Paint two branch lines
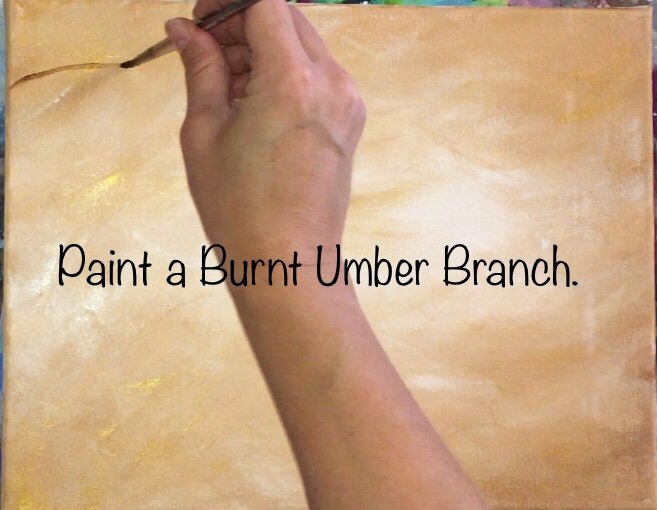
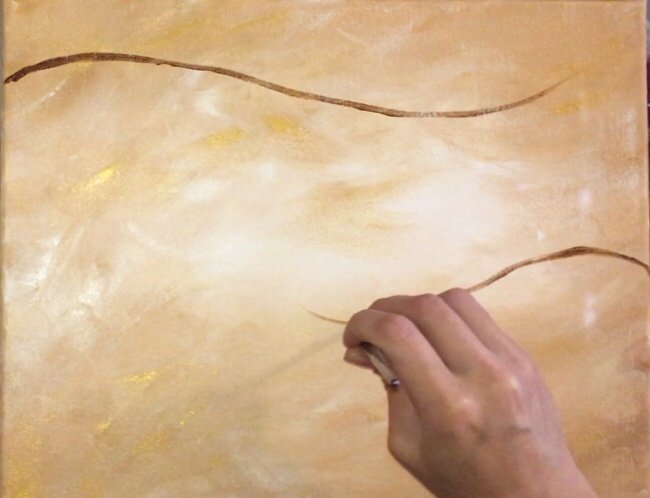
My branch lines were kind of “sloppy” BUT the pine needles will be covering a lot of these lines any way.
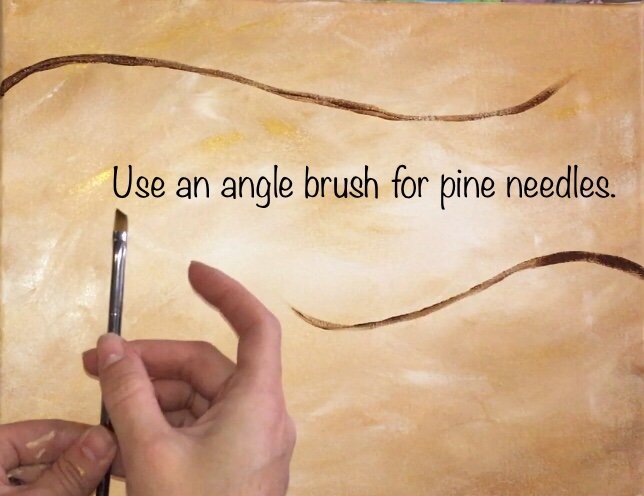
3. Paint the Pine Needles
Use an angle brush for the pine needles. When I use an angle brush I always have the highest point opposite of the direction I am painting in (like when you use an angle brush to paint a wall and “cut in”). In other words, if I am painting left to right, the highest tip is on the left.
I started with the color dark green permanent.
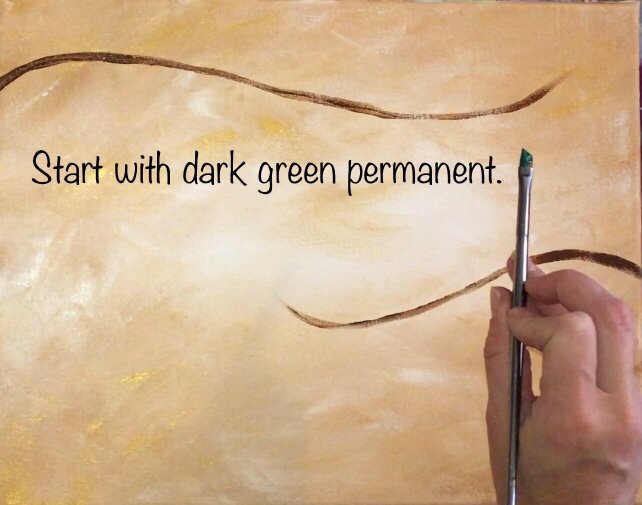
Then paint each pine needle stroke starting from the brown line and drag the green line to form a tip. When you drag the angle brush, start with a little bit of pressure then lighten the pressure to let the highest point of the bristles form the tip of the pine.
Continue painting pine needles along the branch.
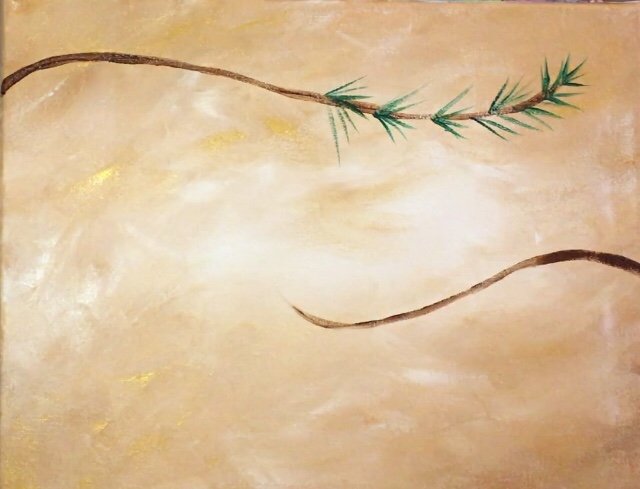
Then repeat with the branch on the bottom.
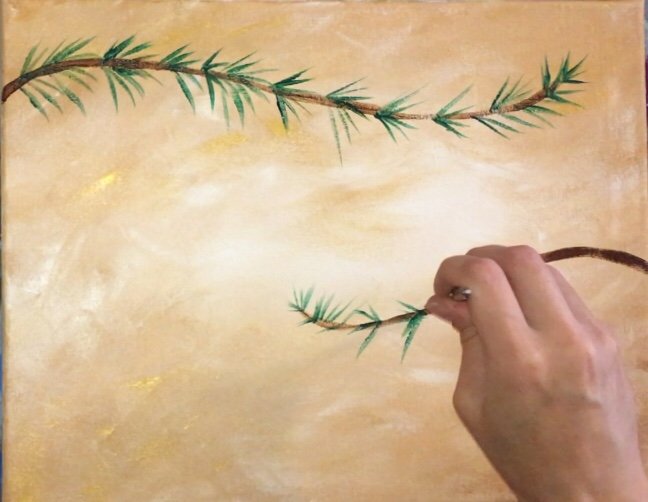
All of these pine needles were done with dark green permanent. Notice how I left plenty of gaps so that I can paint some more needles with a different shade of green.
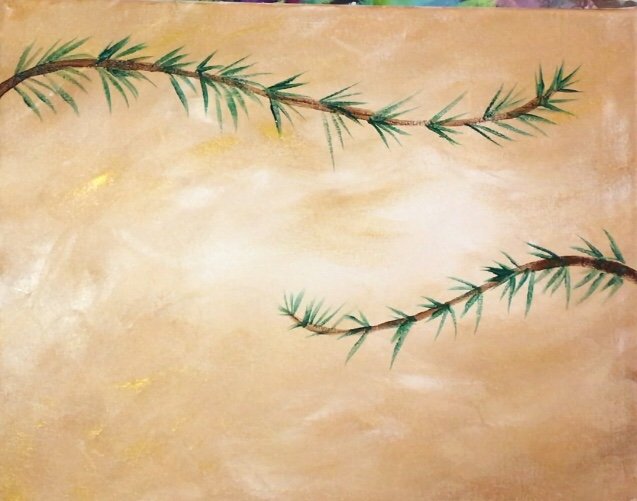
Next paint some more pine needles with “light green permanent”. You don’t need to rinse your brush when switching to this color. Also, it’s okay if you overlap the light green permanent pine needles with the dark green permanent pine needles.
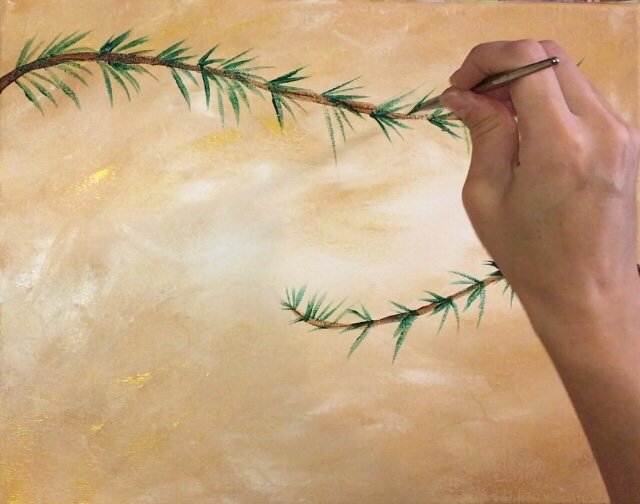
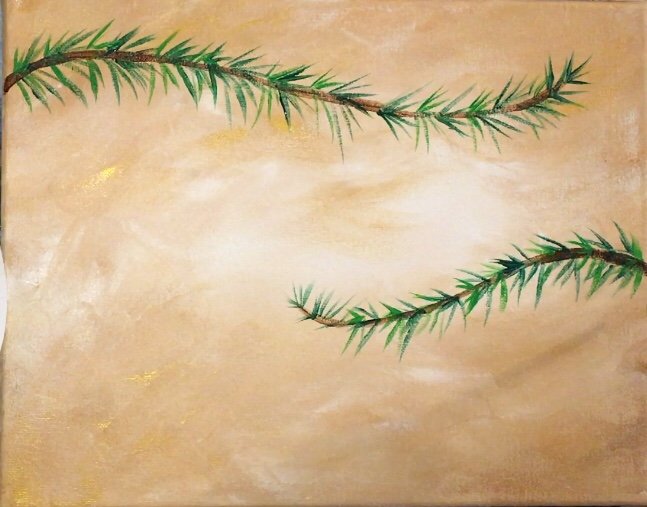
Load your angle brush with titanium white without rinsing it. Paint some white pine needles. The white will blend to make a lighter green and white color.
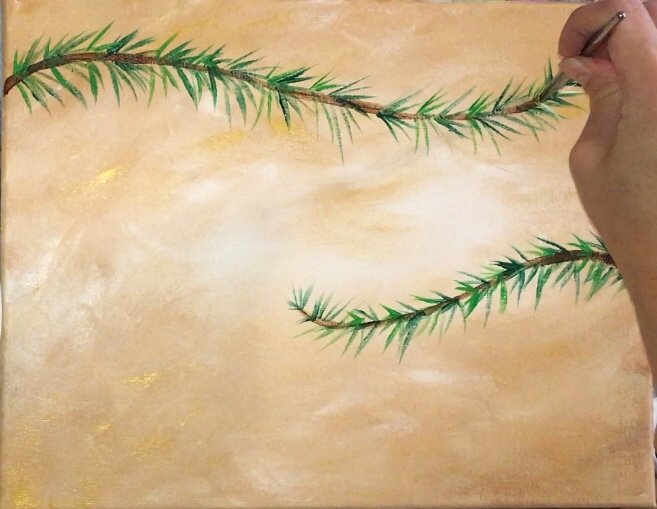
Now the branches are complete!
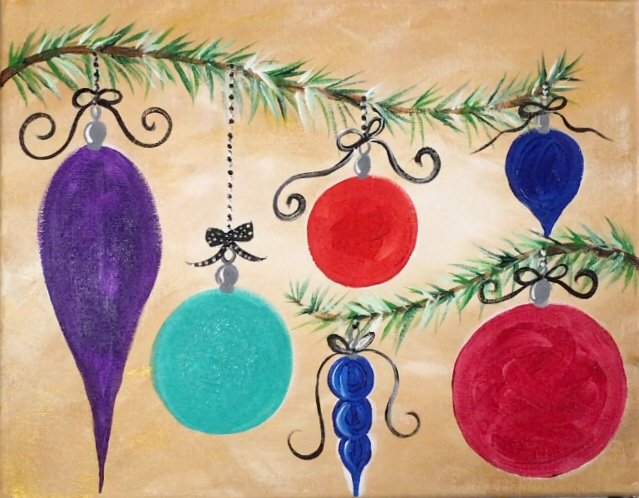
4. Draw The Ornaments With Chalk & Trace Circles
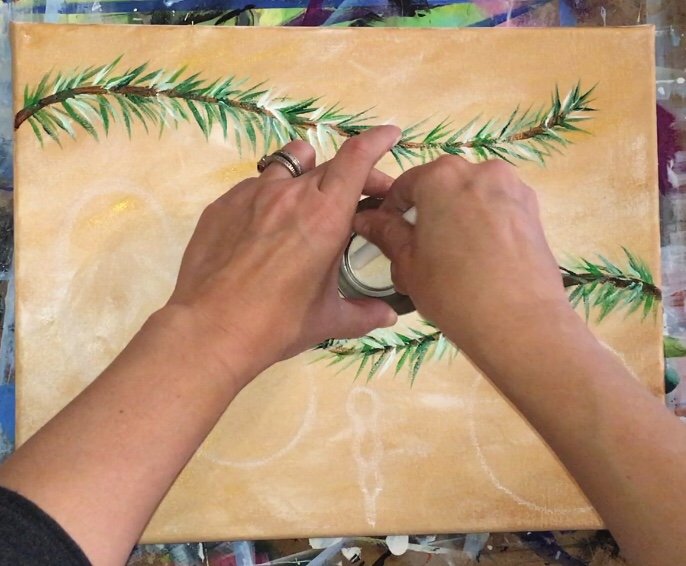
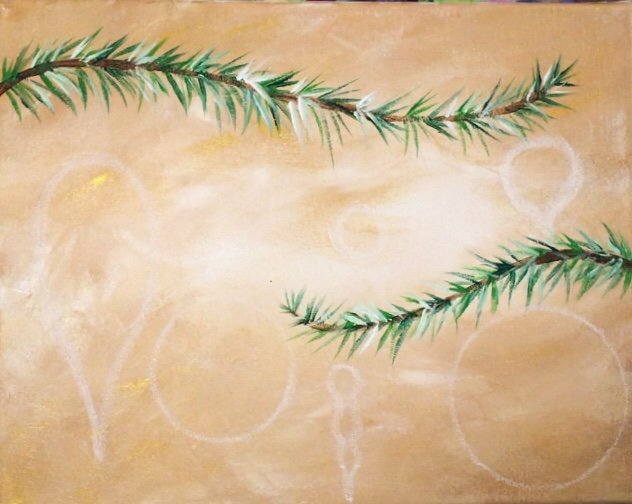
Unless you’re feeling super confident, I recommend drawing the ornaments out with chalk first. I found three different circles that I used for tracing perfect circles.
The odd shaped ornaments were drawn freely with the chalk. The circle ornaments were drawn by tracing the circles. You may have to play around with the positions of the ornaments. Perhaps you found different size circles than I did so you may have to figure out different spacing.
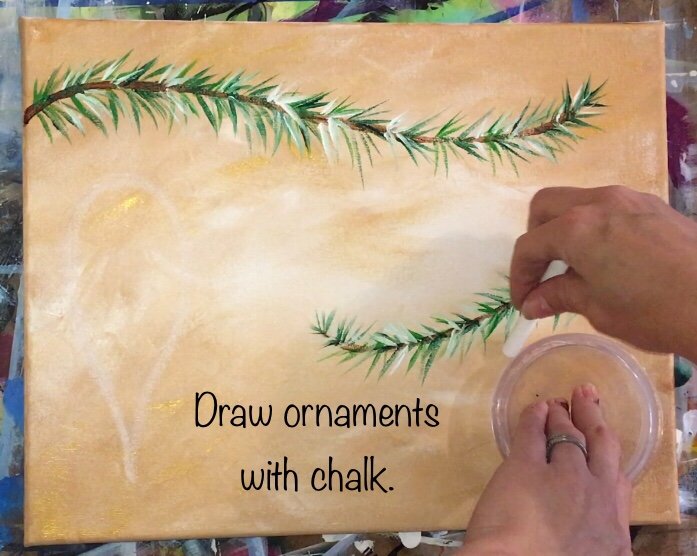
The nice thing about chalk is that it erases! If you don’t like the placement of the circles or if they don’t seem to fit where you thought they would, simply dip your finger in the water and erase.
After drawing all your ornaments, take a step back and ask yourself if it feels “balanced” enough. Are there a variety of sizes and shapes?
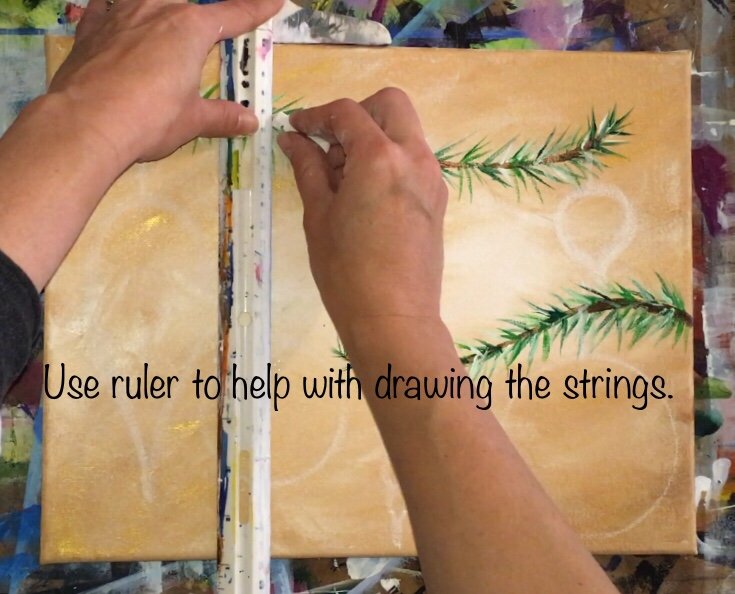
Then, optional, use a ruler to draw the strings with the chalk. I used my T-Square to make sure my strings were perpendicular.
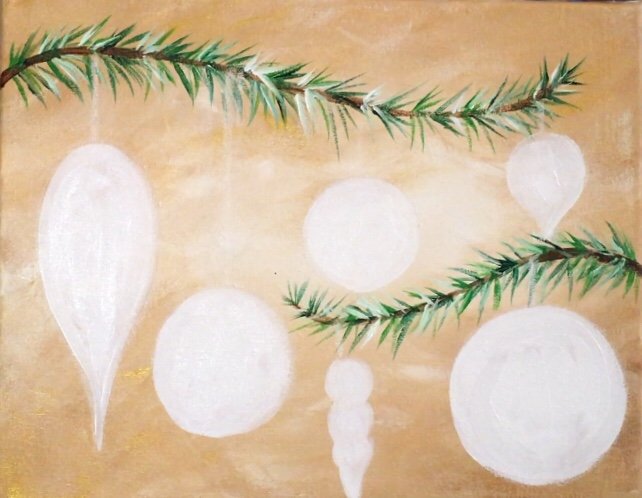
5. Paint the ornaments in with Titanium White
Although it may be tempting to paint the ornaments in, you’ll need to “white them out” first. Basically I used a #4 bright brush to paint all the ornaments solid white. You may need a smaller brush for the smaller ornaments.

Do not paint the lines white! Those are still chalk lines.
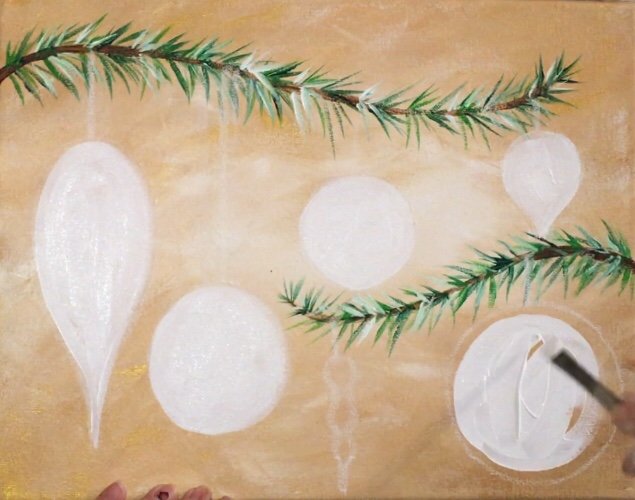
The ornaments are all painted in! You’ll need to wait until that white is completely dry before moving on to the next step.
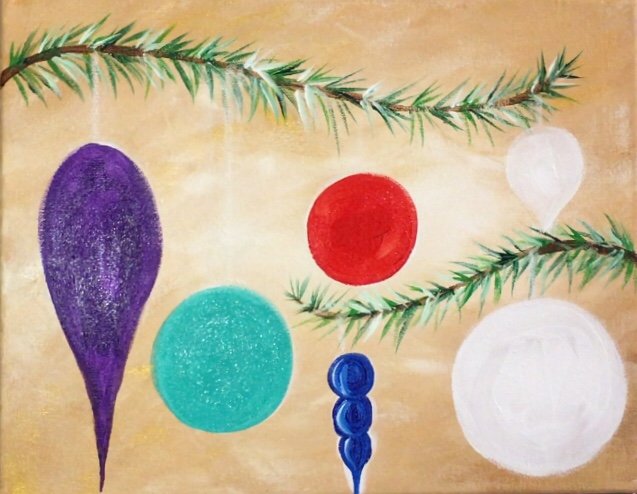
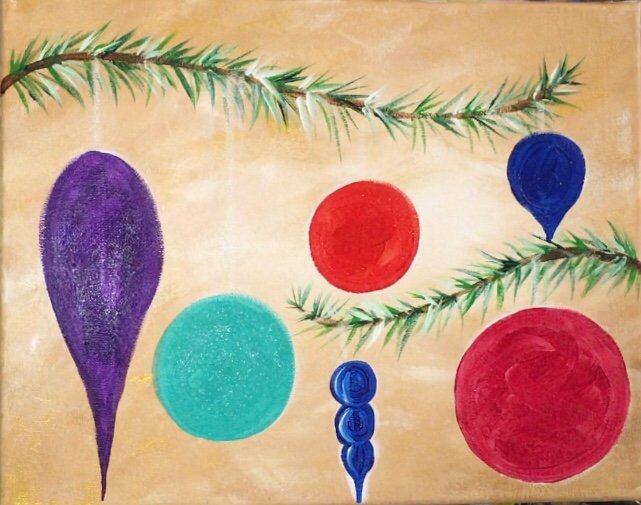
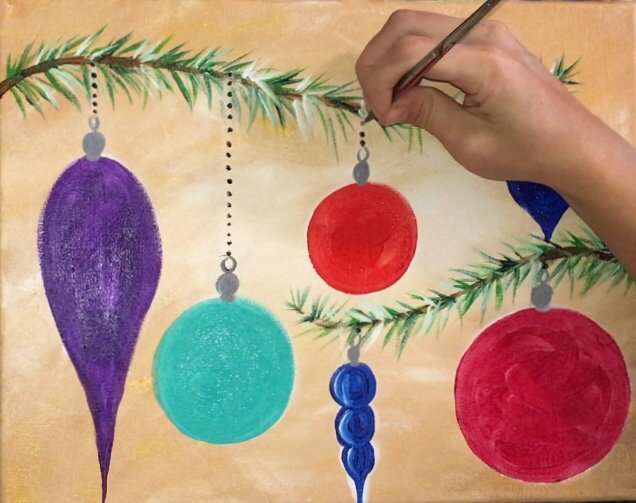
6. Paint the ornaments in with jewel tone colors.
Paint the ornaments with bold, jewel tone colors. I used the colors: dioxazine purple, bright aqua green, cadmium red medium, alizaron crimson hue and phthalo blue. Use any brush to fill the ornaments in. I used my #4 bright brush and a #4 round brush to fill in smaller areas.
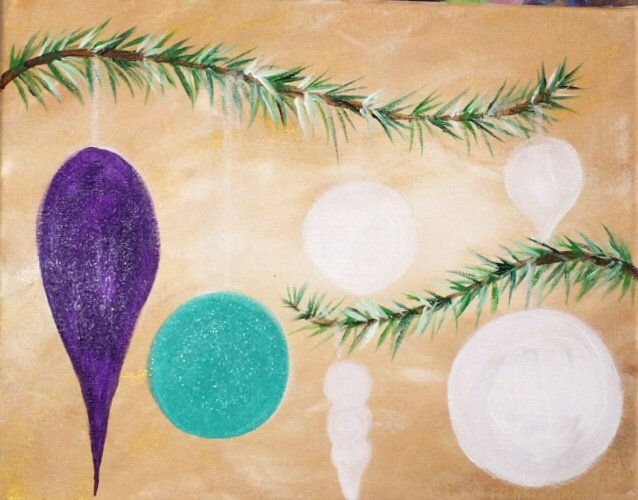
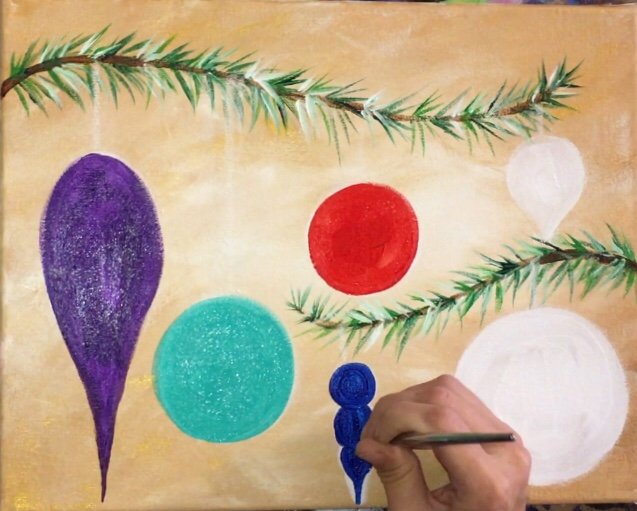
Since the small blue ornament on the bottom didn’t have any designs, I painted a highlight with titanium white before the blue dried. That white blended with the blue a bit to make it look “3Dish”.
7. Use a round brush to paint the ornament tops and hooks
I mixed mars black and titanium white together to make gray. Then I used a #4 round brush to paint all the little gray tops on the ornaments.

I also painted a hook above the tops.
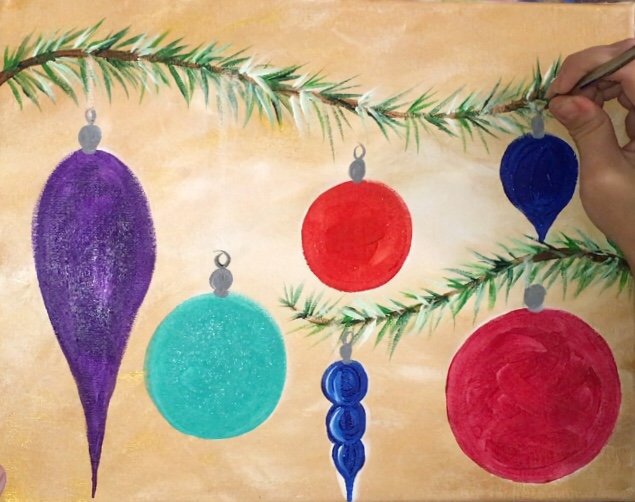
8. Paint little dots for the strings and add bows
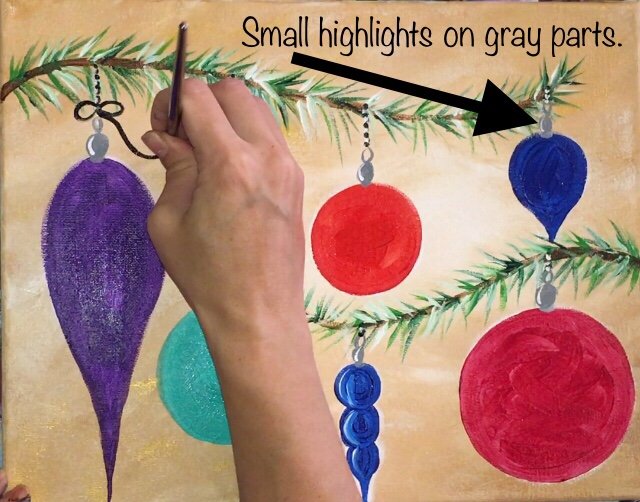
Use a very small round brush (I used a 10/0 liner) to paint little black dots all along the chalk line. Leave a little bit of space for the white dots.
Then paint white dots in between the black dots. Continue on and paint a black bow on the strings. There is also a small white highlight on all the gray areas on tops of the ornaments.
There were a few different types of bows I painted. These add to the whimsical look of the painting. I used mars black and a #4 round brush for the bows.
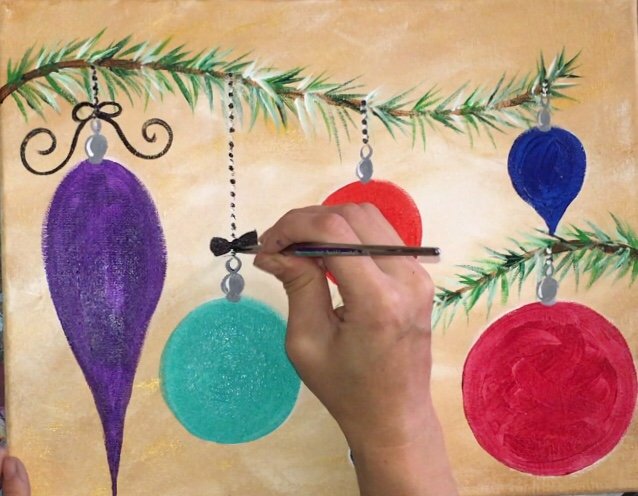

Optional: Then I added some white along the black to give it a little “highlight”.

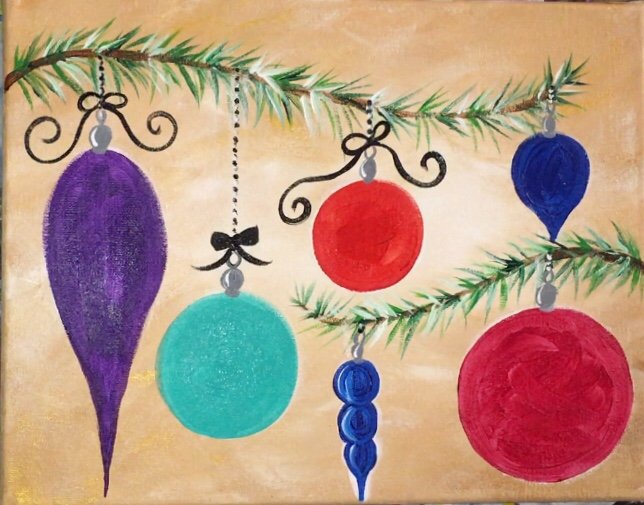
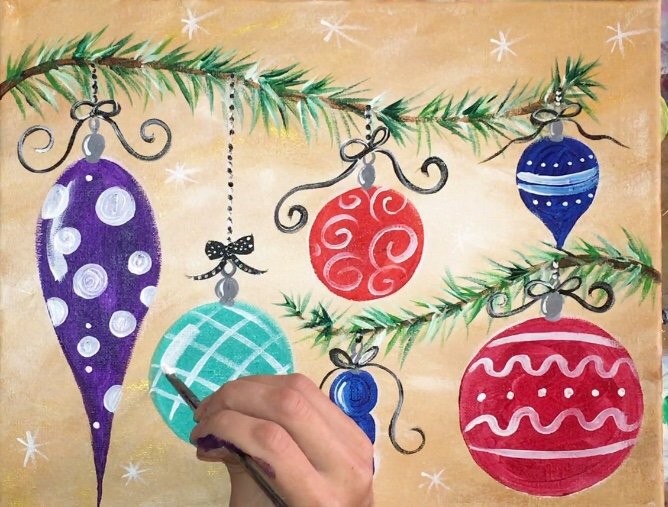
9. Paint patterns on the ornaments
Make sure your ornaments are completely dry before painting them in. Use Titanium White and a round brush (or any brush you feel comfortable with). Paint in different designs.
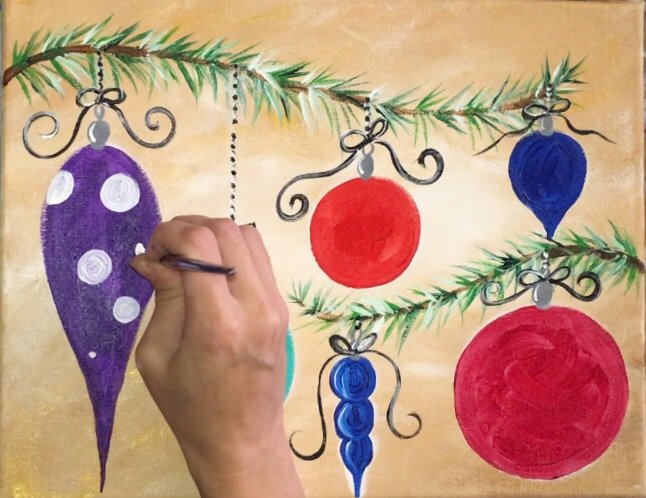
I did polka dots on the purple ornament then criss-cross lines on the aqua ornament.
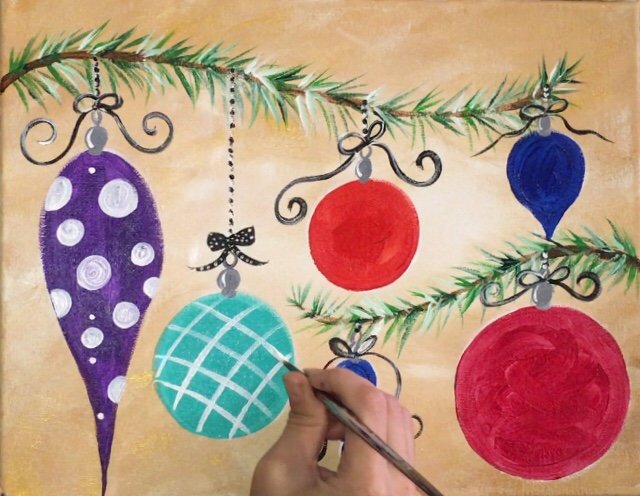
Then a different design on the far right ornament.
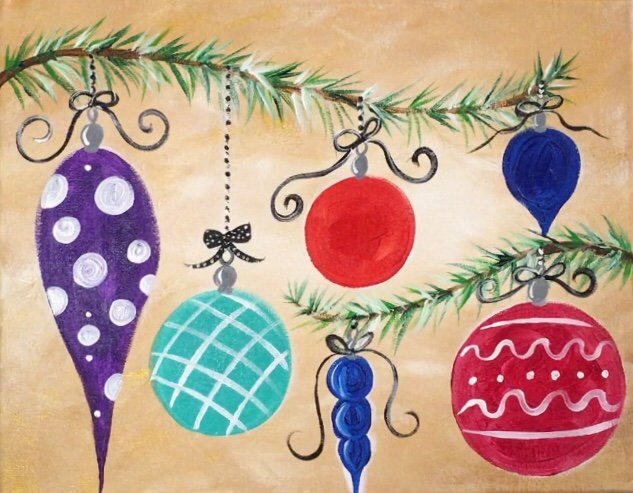
Then I continued to fill in different designs on the other two ornaments. The small blue ornament on the bottom did not have any designs.
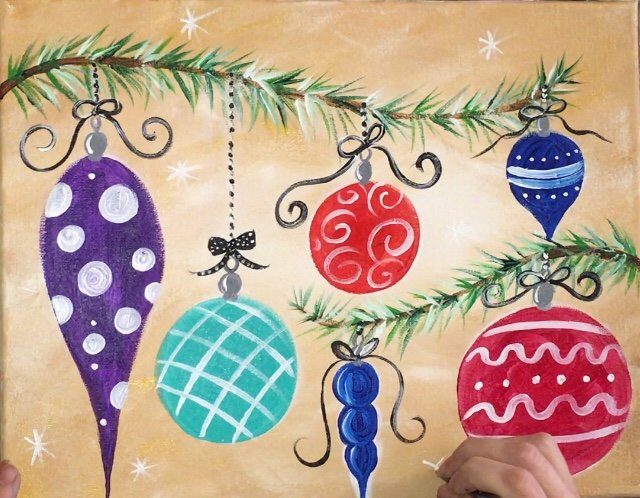
10. Paint little stars in the background
To get a little “sparkle” in the background, paint some asterisk stars using a 10/0 liner and titanium white.
11. Use an angle brush to paint a highlight on all the ornaments
For the last final touch, I used my angle brush and titanium white to paint a highlight mark on the left areas of all the ornaments. Important: make sure your designs are completely dry before doing this! Use a dry brush, add titanium white and, with one stroke, paint a highlight that overlaps everything on the ornament.
The goal is to get this stroke to look “dry” and translucent.
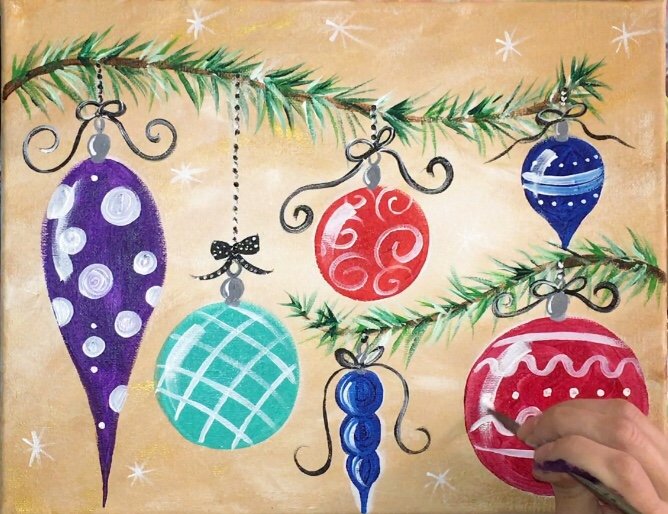
Finished!
That’s it! Such an easy painting you can sit back and relax to. Think of all the possibilities you can do with different colors, shapes and designs.
Share Your Art!


Are you on Instagram? I’d love to tag you and give you credit when I post my painting!
Hi Kelly! I’m not active in Insta ☹️ but that’s my #goal to get my Instagram rolling in 2019! You can still tag me ? If you’re on FB you can send me a pic there or email me: contact@stepbysteppainting.net
Hi,
I can’t find the video link for this painting. Would you mind posting the link in the comments so my daughter and I can paint it later today?
Thanks!
Jennifer
Here you go! ? https://youtu.be/RAHIWY7CzkU
Hello! I wasn’t able to access the color conversion chart :-/ I think the link may not be working. Would you mind reposting? Thanks!!
That page moved. You can find information about color conversions here: https://stepbysteppainting.net/2021/02/12/paint-color-conversion-for-different-brands/ ?