
How To Paint An Owl On A Christmas Tree
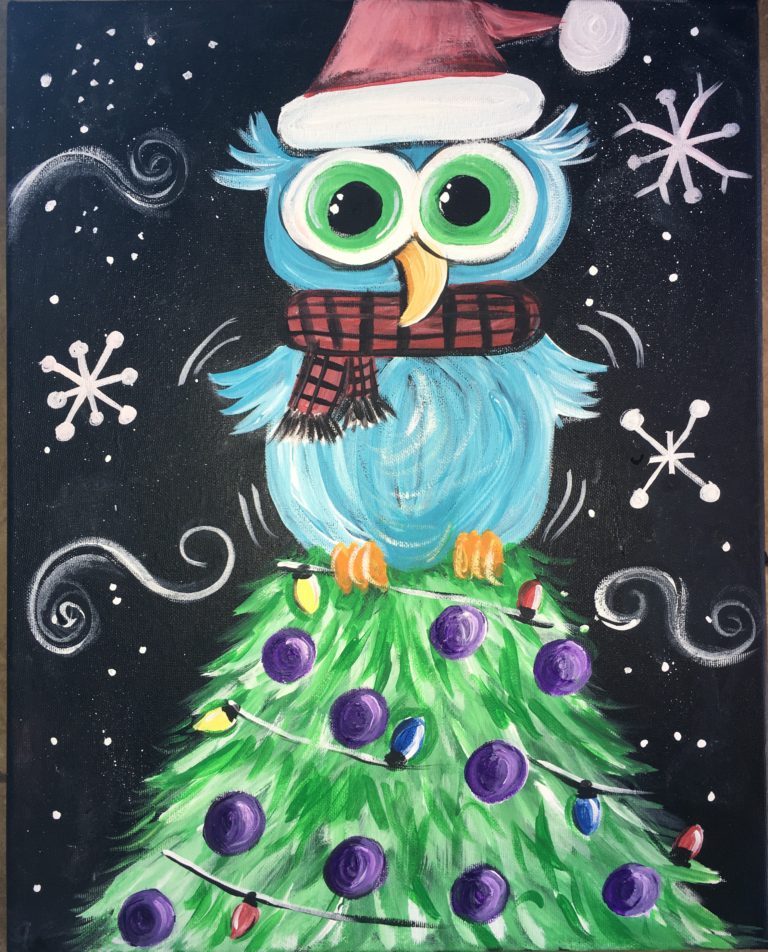
 Learn to paint this cute owl on top of a Christmas tree! I used a black canvas for this acrylic painting (actually I painted a white canvas black and you can too!) Do you have a painting you messed up on and want to reuse the canvas? Just paint it over with one or two coats of black paint! I love how the colors show on the black background almost like chalkboard art. For the owl, I provide a pre-drawn template that can easily be traced onto the canvas. You’re welcome to come up with your own owl design as well. Enjoy! I can’t wait to see how yours turns out!
This Post Contains Affiliate Links
Materials:
- Canvas (I used 16″ x 20″)
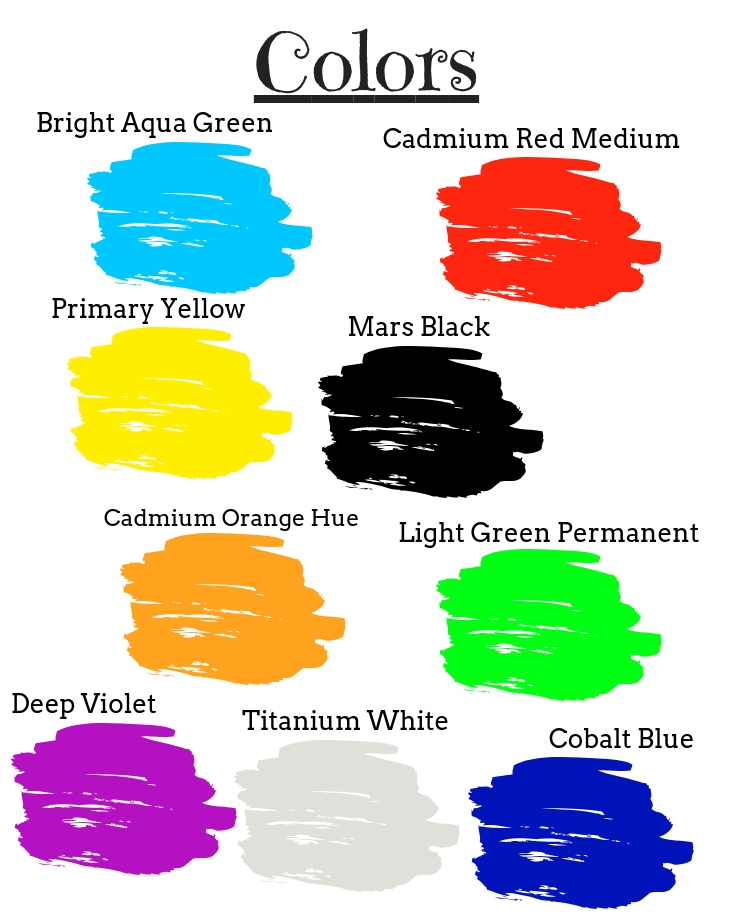
- Acrylic Paint (I used Liquitex Basics) Check out my color conversion paint brand chart here.
- Paint colors:
- Cadmium Red Medium
- Cadmium Orange Hue
- Primary Yellow
- Light Green Permanent
- Bright Aqua Green
- Deep Violet
- Mars Black
- Titanium White
- Cobalt Blue
- Black Canvas (Or paint a white canvas black)
- Brushes
- 3/4″ Wash
- #4 Bright
- #0 Round
- #4 Bright
- Owl Template
- White Graphite Paper or Chalk for Tracing Owl Template onto canvas

Traceable: 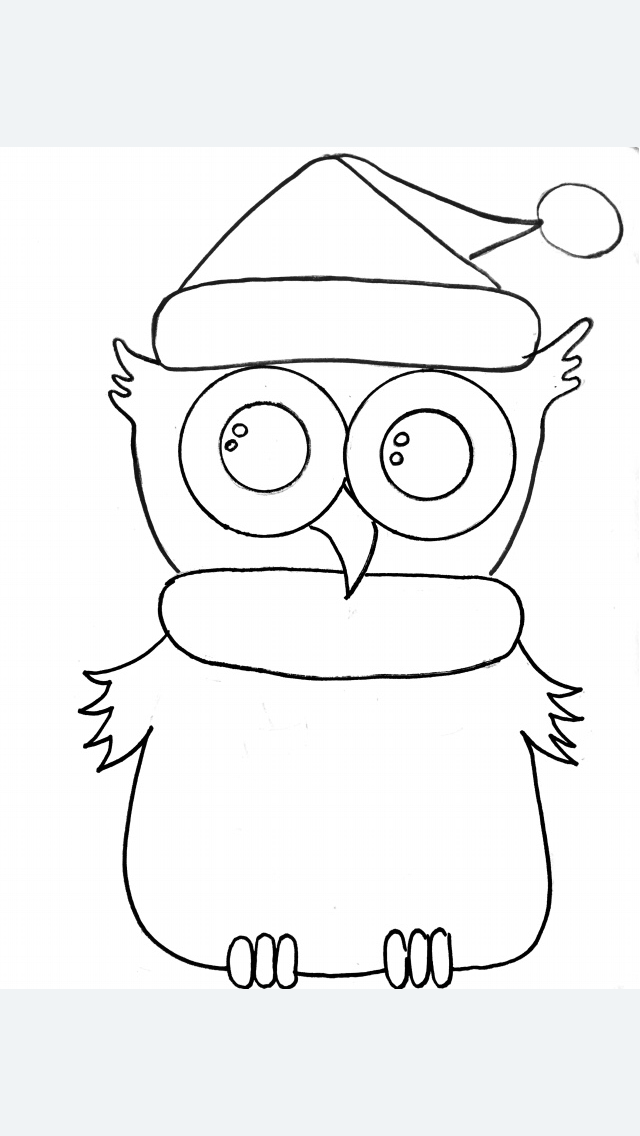
 PDF Print Owl Template
Directions At A Glance:


Video:
Step By Step Directions:
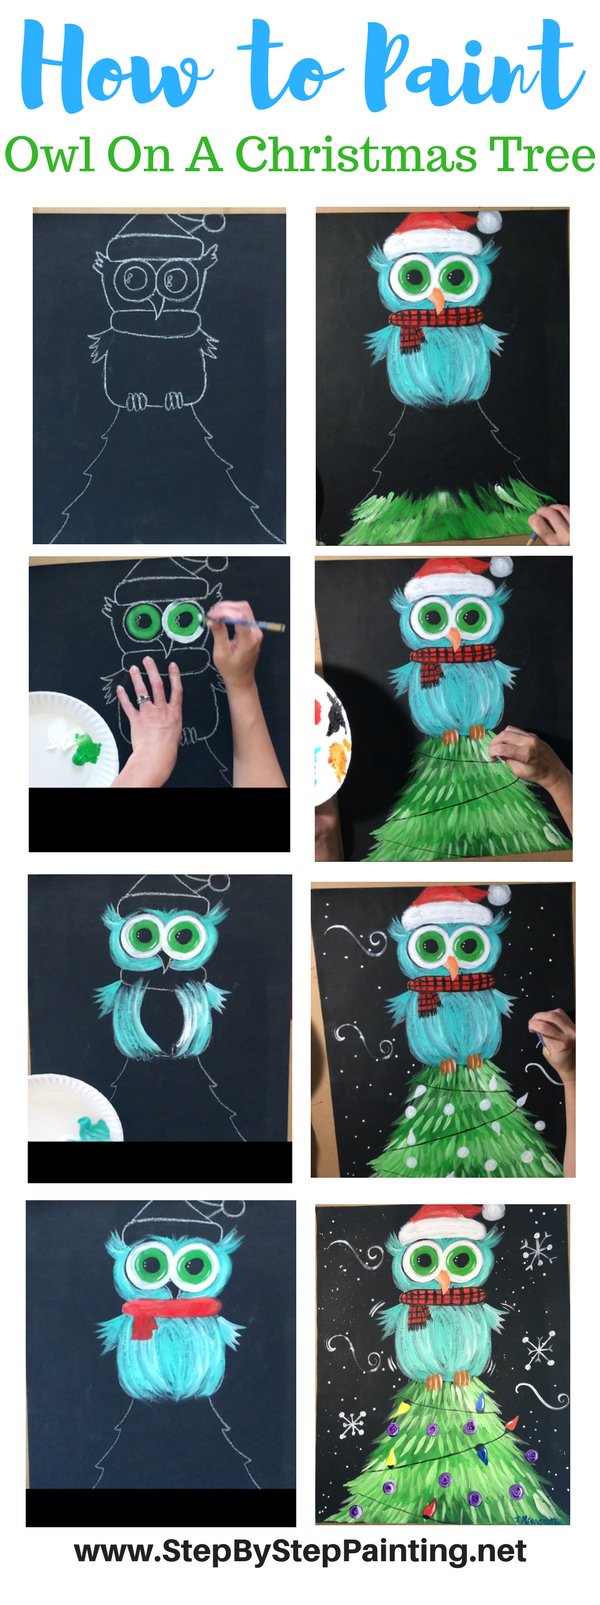
1. Transfer the Owl onto the black canvas towards the top middle.
I began with a black canvas. You can get a black canvas or paint a white canvas black! Then I transferred my owl template onto the canvas. To do this, I simply rubbed white chalk on the back of the owl. Then I traced the owl with a pencil. You can ALSO use white graphite paper for the transfer. 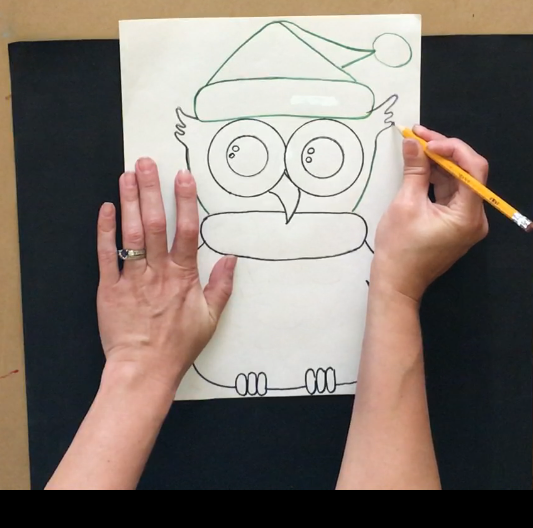
2. Trace over the owl drawing with chalk and draw a Christmas Tree underneath.
Your transfer won’t be this dark! I traced over the transfer again so the owl will show up for demo purposes! I also drew the Christmas Tree. 
3. Paint the Eyes
Next I used a #4 bright flat brush to paint the eyes. I double loaded the brush with light green permanent and a tiny bit of titanium white. The white will help the green to be more opaque on the canvas and give the eyes some color variation! Don’t mix the white, just dip it into the white and let the color do it’s “thing” on the canvas. 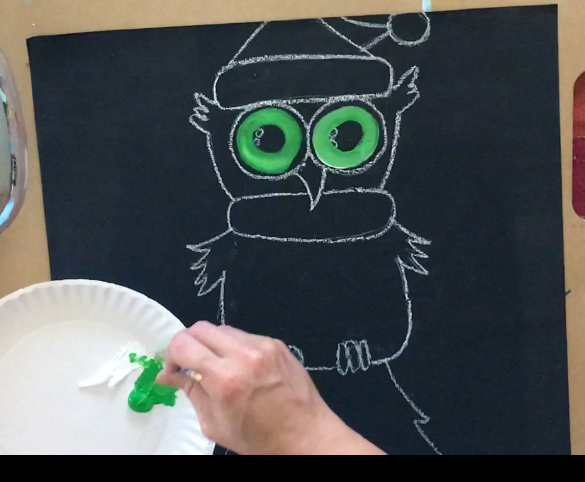
Then I painted white circles around the green circle with pure titanium white. Don’t worry if you need to go outside the circle lines on the chalk drawing! I also added a bit of white highlight on the green and then two little dots on the black area of the eyes as shown below. 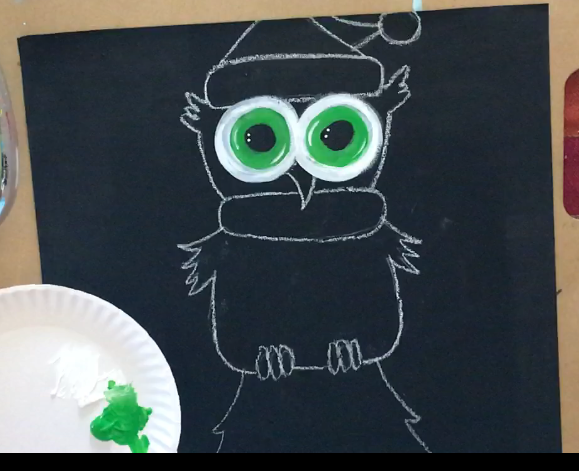
4. Paint the head, wings and body
Next I painted the head and body with bright aqua green and a tiny bit of titanium white. Load your brush with the aqua first and then dip in the white without mixing the colors together. I used the same #4 flat brush. To get this “feathery” texture, I made sure my brush was dry (no dipping in water). If you absolutely need to dip in the water a few times to get the paint to flow, you may do so! 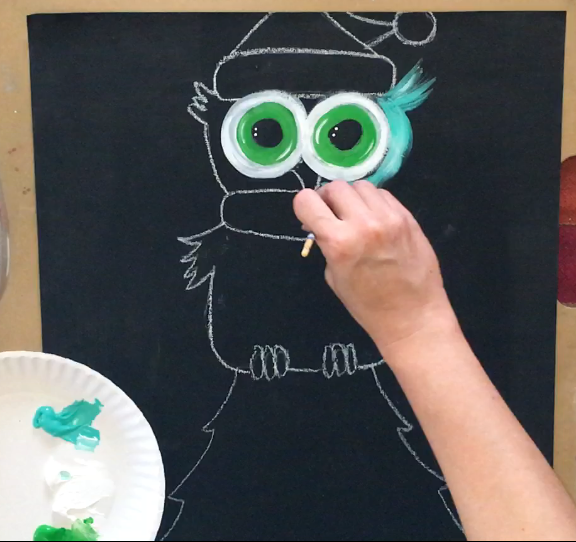
Pay attention to the direction of the paint on each side of the face… The direction of the strokes go in the same direction of the shape/ contours the shape you are filling in. 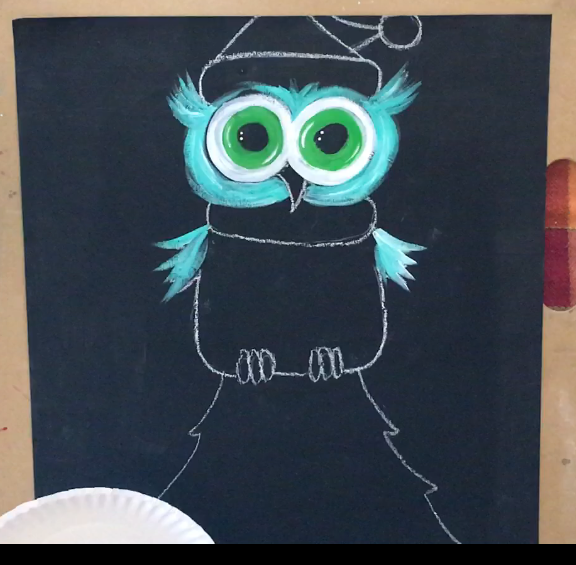
And the belly – the paint strokes are long curves going opposite directions.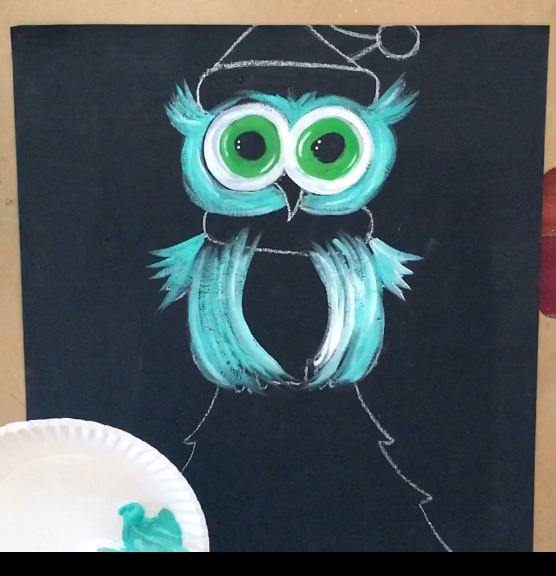
The strokes that meet in the middle of the belly go in an oval shape. Note that you will still see black canvas through the owl. That’s what I wanted! It gives this cool “chalkboard” style to the painting.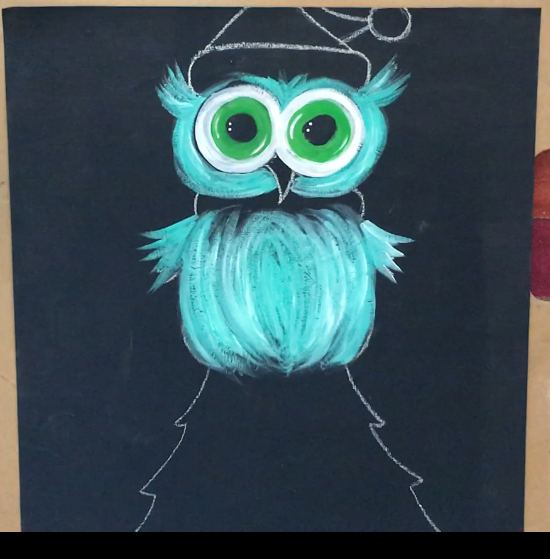
5. Paint the scarf
For the scarf and hat, I painted titanium white on first and then the color cadmium red medium. The red would have a hard time showing up on the black if you did not apply a layer of white first. 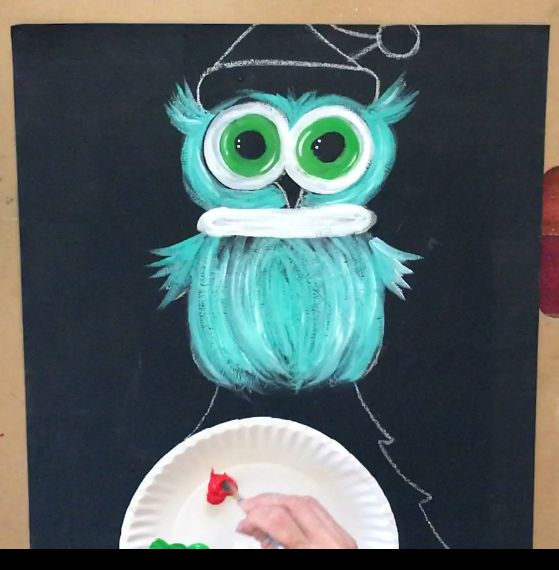
You can definitely customize this! A Harry Potter scarf would be super adorable!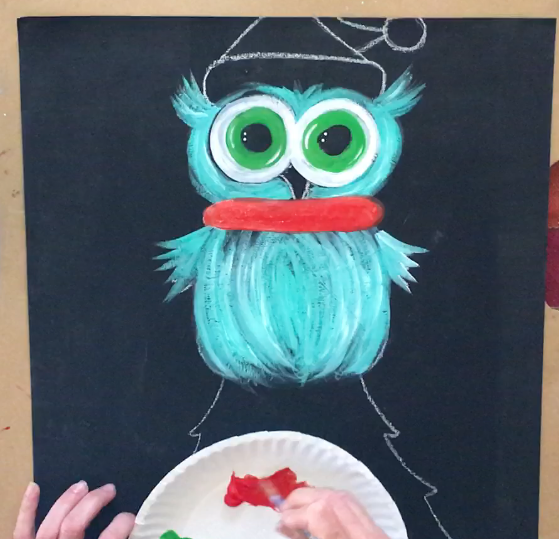
Wait for that red to dry a bit and then add the pattern on top of the scarf. I painted mars black for the pattern and used a #0 round brush to create the “Buffalo Check”. 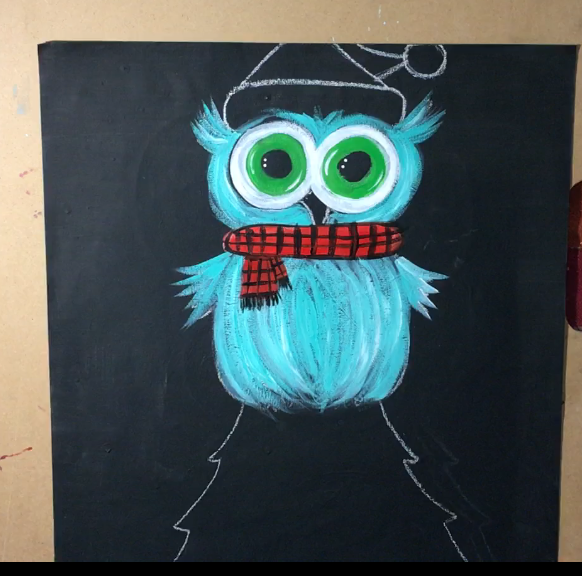
6. Paint the Santa Hat & Beak
Then I painted the Santa Hat. I first “whited” the area out with a #4 bright brush and titanium white. 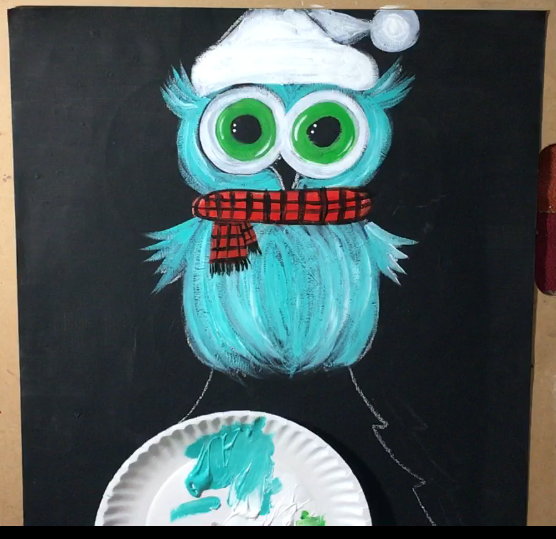
While waiting for that to dry, I pained the beak white too. 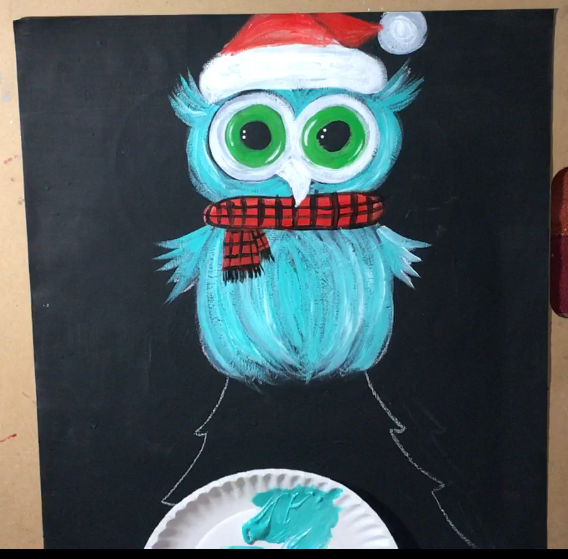
Then I painted the red part of the Santa Hat in with cadmium red medium and I painted the beak cadmium orange hue. There is a bit of highlight on the beak with titanium white on the left and a little bit of whit on the front part of the hat that provides contrast against the back side of the hat towards to tip. 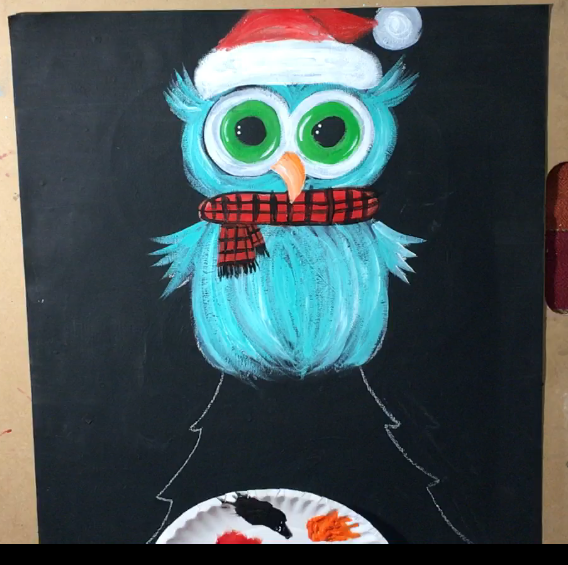
7. Paint The Christmas Tree
The Christmas tree was painted using the dry brush method (not adding water to the brush). I used light green permanent and titanium white. I loaded the brush with light green and a tiny bit of white (double load). I started from the bottom of the tree and painted one row at a time. Also, I used the #4 Bright Brush for this. 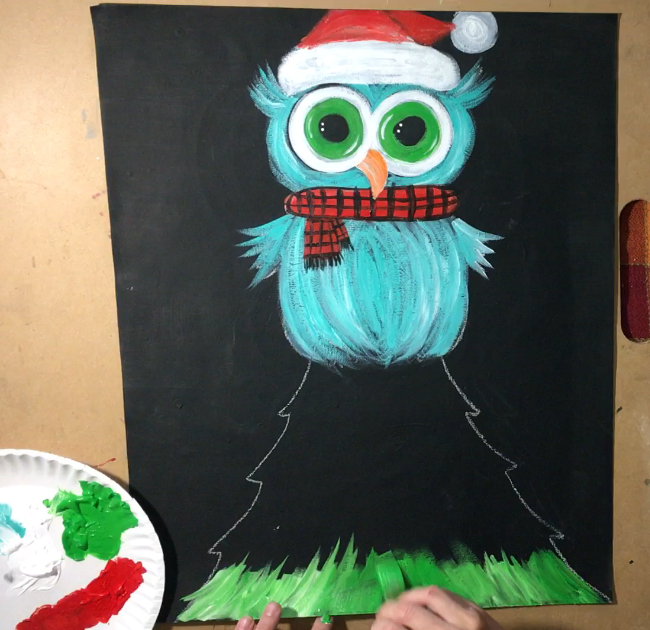
Basically drag each stroke bottom up on the bottom row of the Christmas Tree. Let the color do it’s own mixing on the canvas. Continue painting the next row up and overlap the strokes slightly as you paint each row. 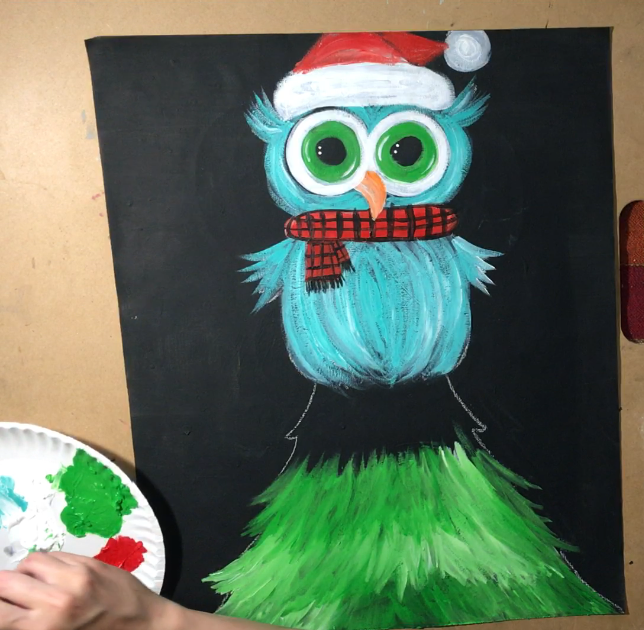
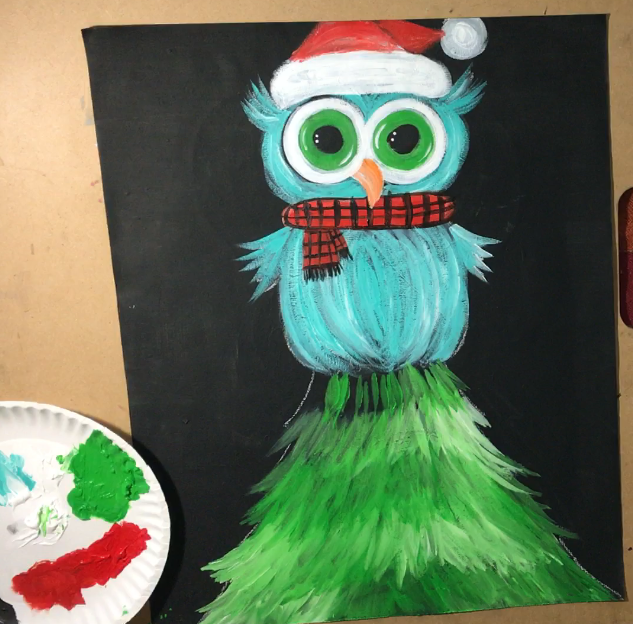
Then I added some more strokes of white/green on the tree. You will see in the video how I did this! They are all just one stroke of my brush tip dipped in equal amounts of white and green and painted from top down instead of bottom up. 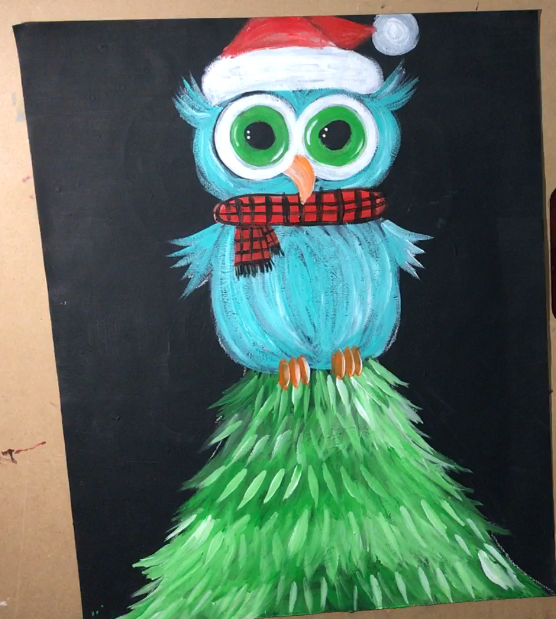
8. Paint the Christmas Lights & Snowflakes in the Background
I painted the Christmas light strings with mars black and used a #0 Round Brush. Then the lights and ornaments were painted with a layer of titanium white. 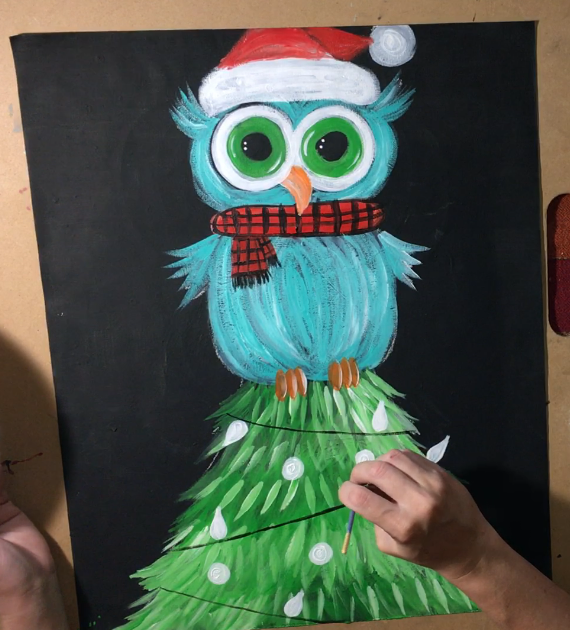
While the lights and ornaments dried, I painted the snowflakes and swirls in the background. Again, use that #0 round brush. 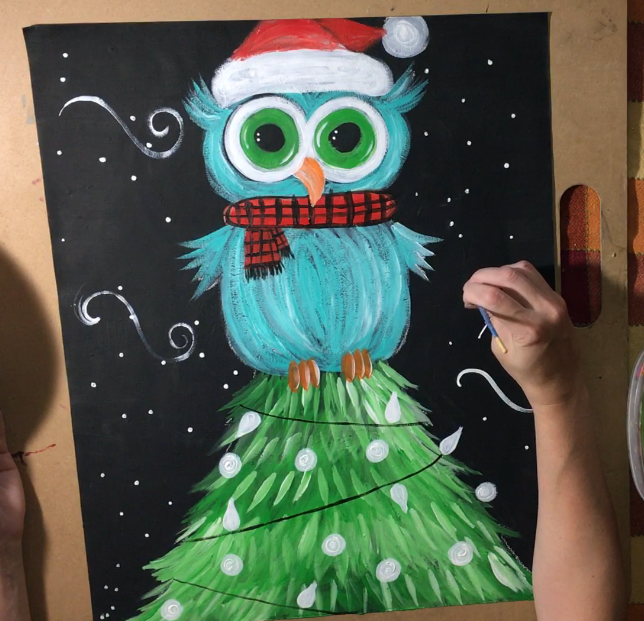
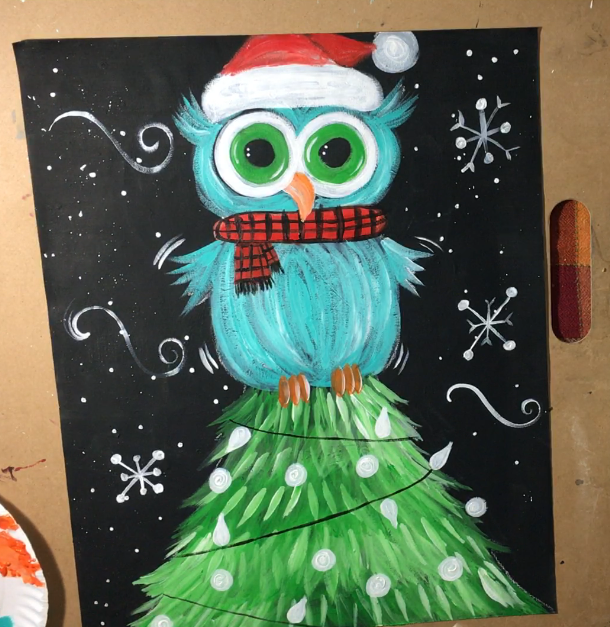
Finally I painted in the lights and ornaments with my chosen colors! I used cadmium red medium, cobalt blue, primary yellow and the ornaments were deep violet. 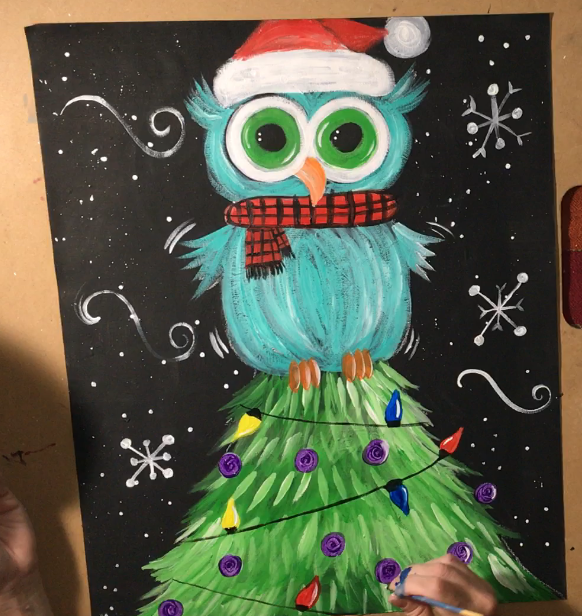
Finished!
 Sign your masterpiece and show it off!
Share Your Art!


I love your step by step paintings. Thank you for sharing. I would love to get more information.
Thank you Marlena! Is there something you’d like to get more information on?
This is a very interesting art piece. Bravo. It seems to be easy based on your step by step instructions.
I’m going to be painting this on a rock. Do I do this the same way as on canvass?
Sincerely,
Sandy
Hi Sandy, yes you can paint it the exact same way on a rock! I know a lot of rock painters that use this website for that purpose. Thanks!