
Easter Bunny Canvas Painting Tutorial
Would you like to save this?
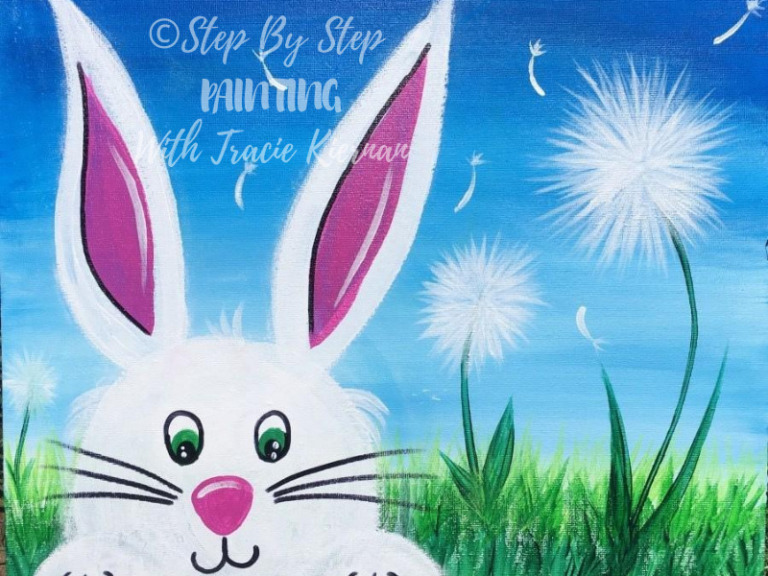
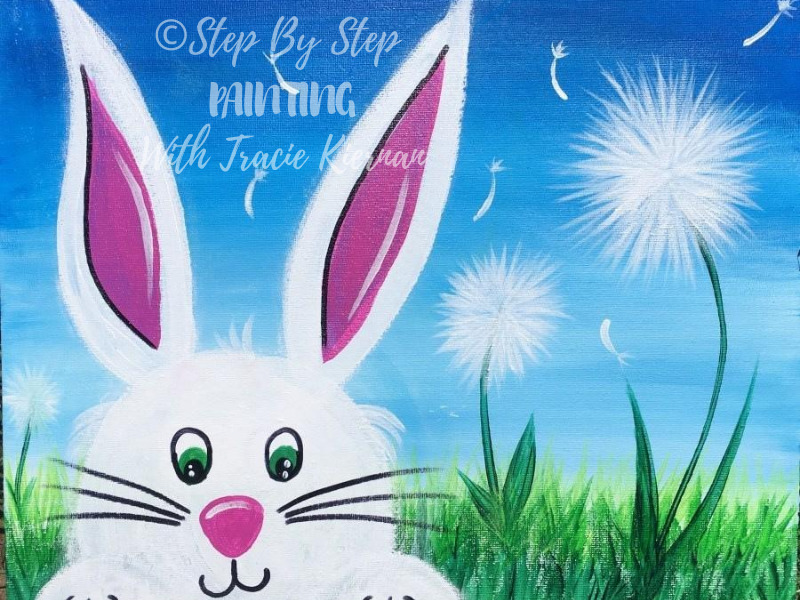
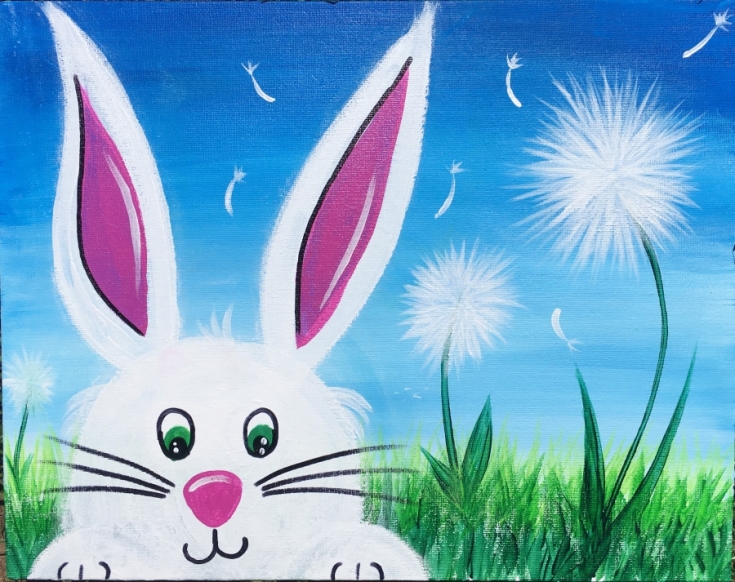
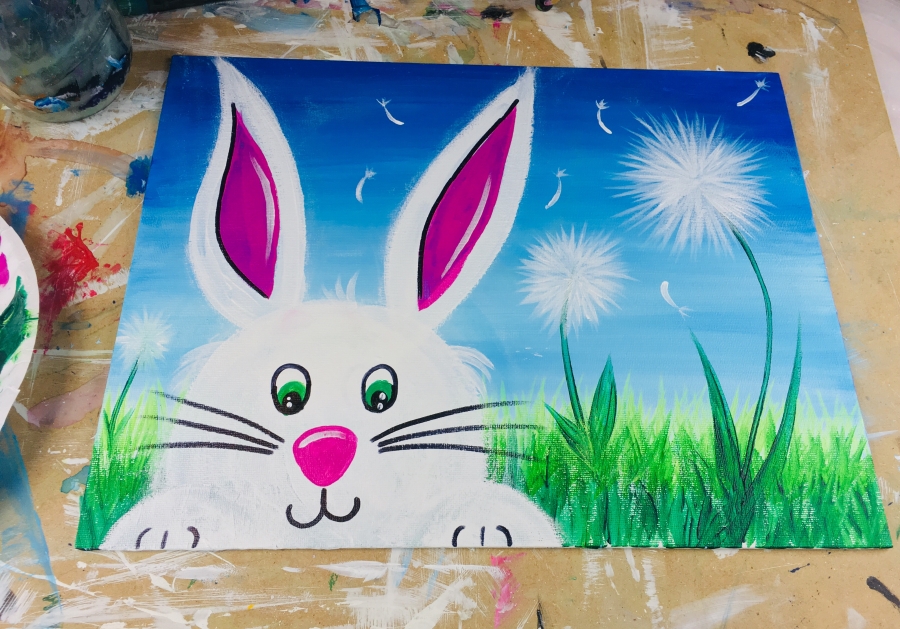
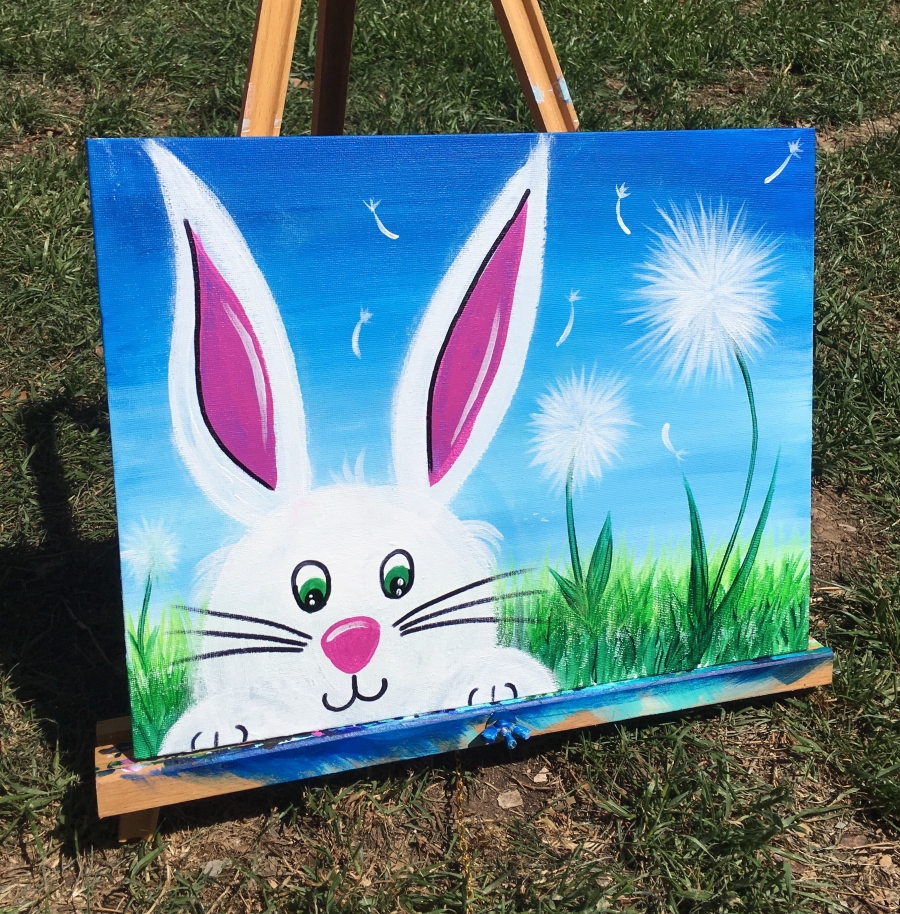
This acrylic painting tutorial is a GREAT one to do with your kids! It is a super simple Easter canvas painting, absolutely adorable and fun! You will learn how to paint the head of The Easter Bunny crouched down in a field of grass and dandelions. There is a clear beautiful blue sky and dandelion seeds floating with the breeze.
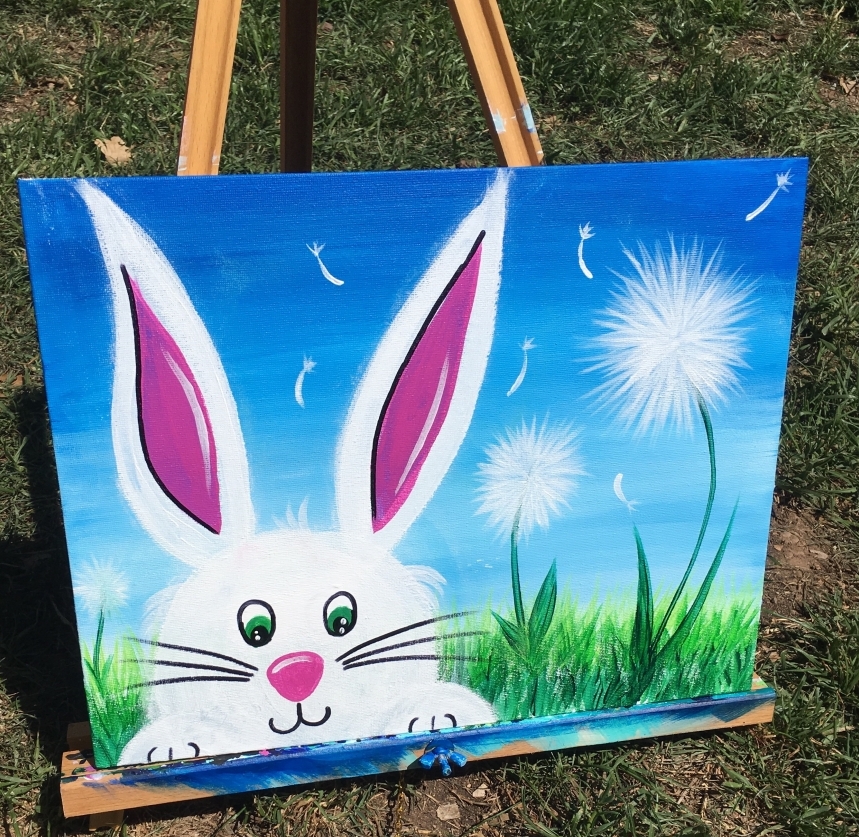
This painting was done on an 11″ x 14″ canvas panel but the design can be done on any size canvas. I used acrylic paints Liquitex Basics and a black sharpie for some of the face details.
Enjoy and happy painting artists!
Materials:
How To Paint An Easter Bunny
Learn how to paint an adorable and super simple Easter Bunny with acrylics on canvas.
Materials
Basic Supplies
- Acrylic Paint
- Paint Brushes
- White Chalk
- Black Sharpie
Colors
- Titanium White
- Carulean Blue
- Brilliant Yellow Green
- Light Green Permanent
- Dark Green Permanent
- Medium Magenta
Brushes
- #12 Flat
- 3/4" Flat
- #4 Round
Color Palette: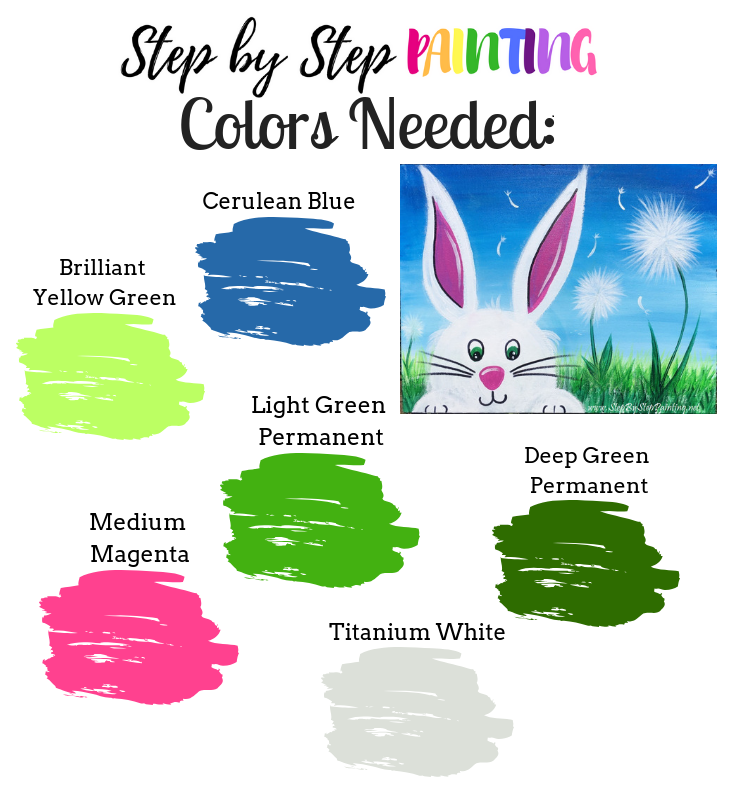

Doing this with Apple Barrel Craft Paint?
A popular craft paint is the Apple Barrel. If you would like to do this painting, I would recommend these colors:
- Bright Blue
- White
- Black
- Bright Magenta
- New Shamrock
- Holly Branch

![]()
See Also:
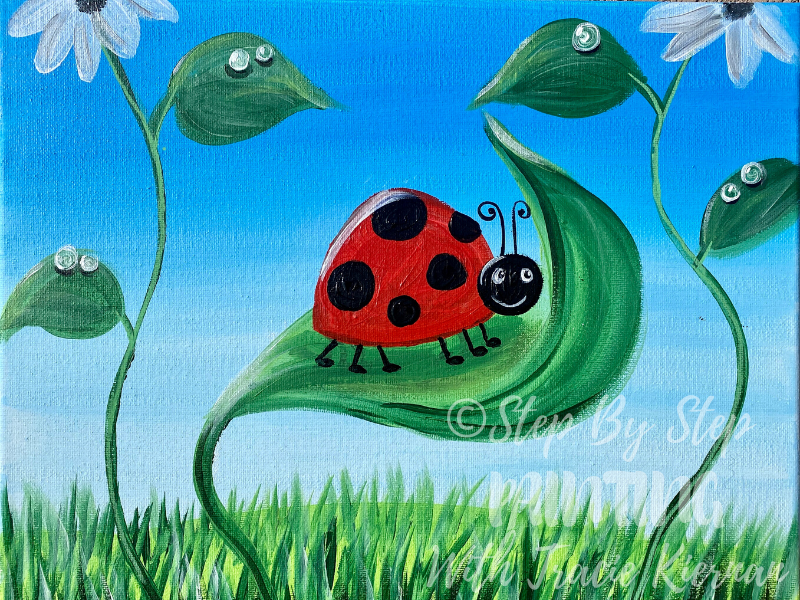
Paint a cute ladybug to match this similar painting!
Directions At A Glance:

Video:
Step By Step Directions:
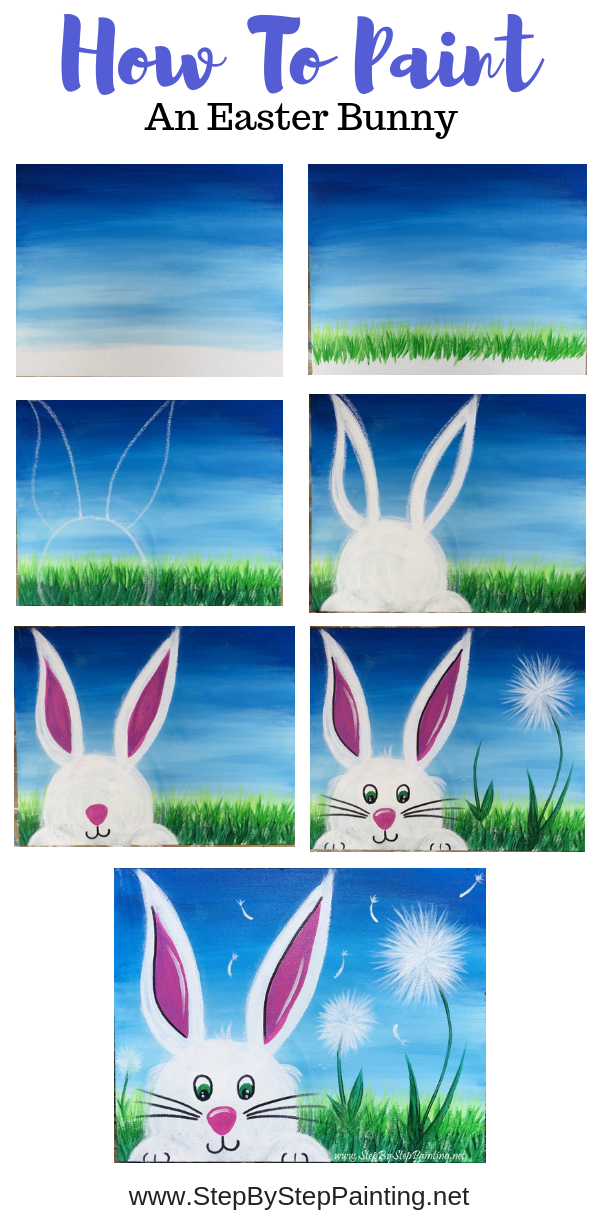
1. Paint the sky background
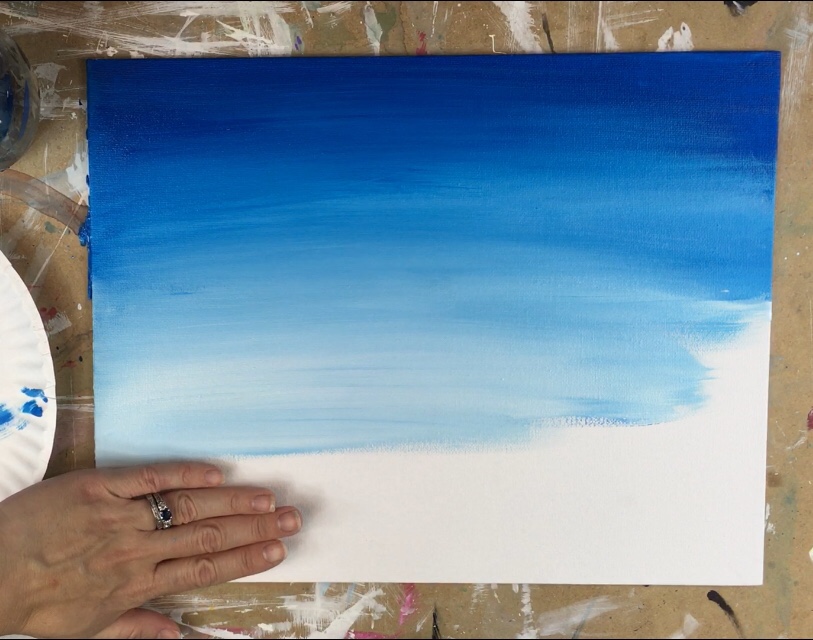
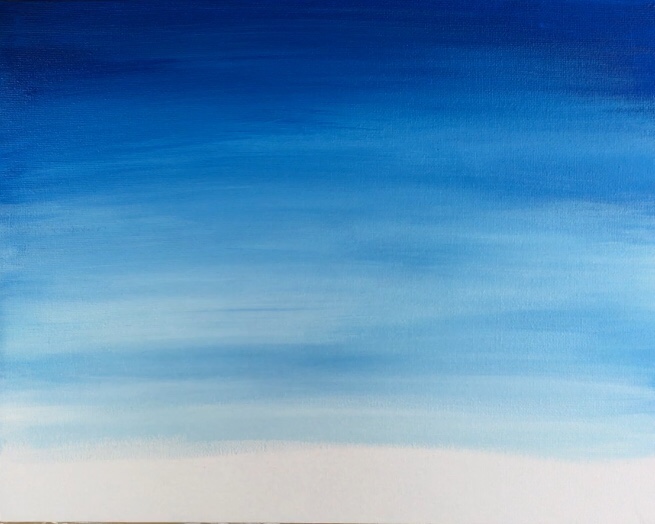
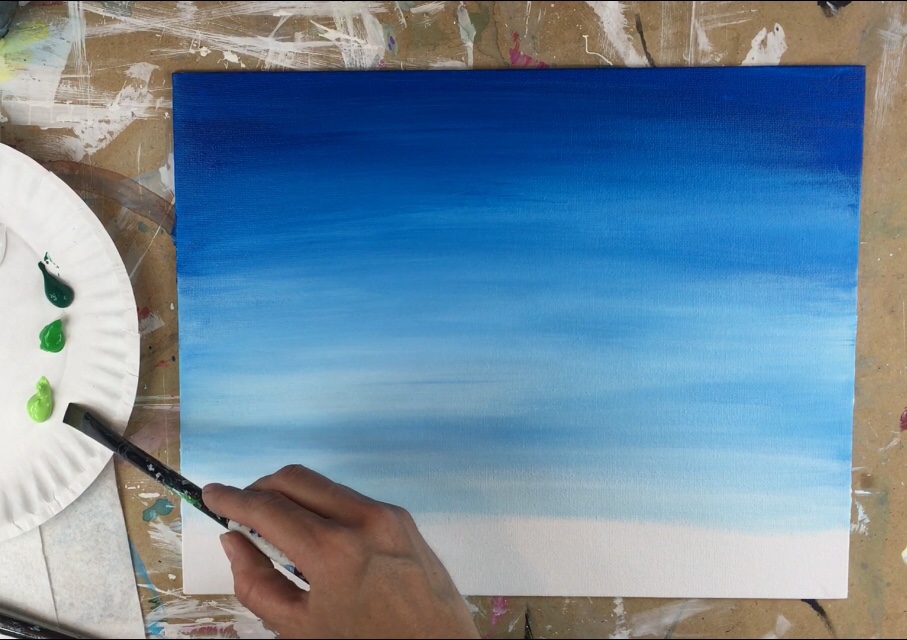
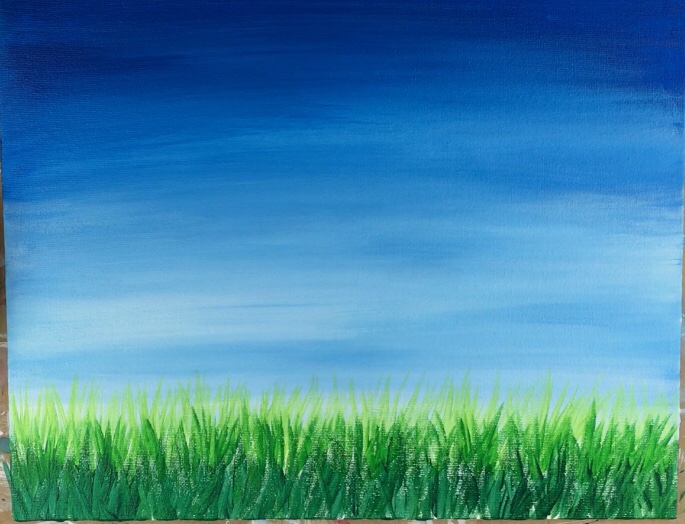
Position the canvas horizontally. To paint the sky, you will need the two colors titanium white and cerulean blue. You will also need a 3/4″ flat brush. This sky is a gradient of blue and white. That means that the blue will start out dark and pure at the top and then slowly fade to a light blue and almost white on the bottom.
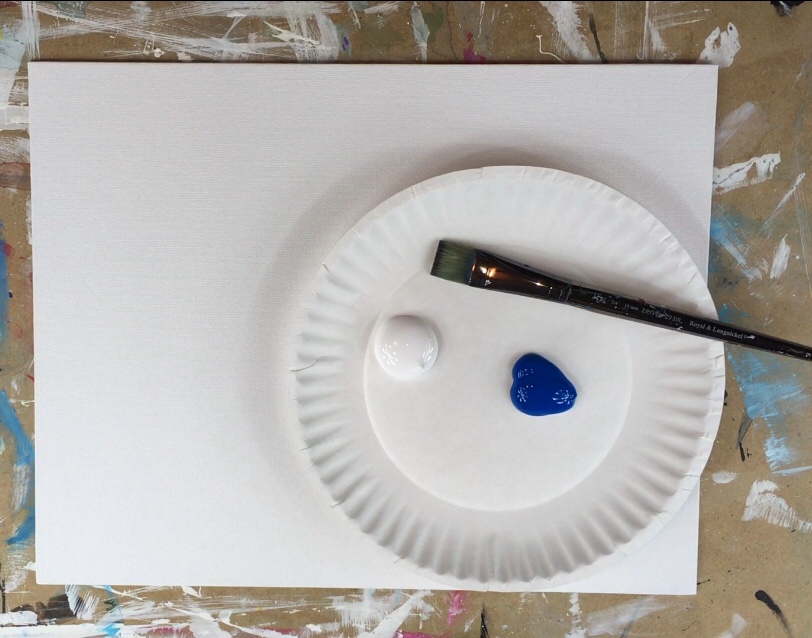
Dip your brush in a jar of water and pat it dry. Start with just cerulean blue and paint left and right long horizontal strokes starting at the top of the canvas.
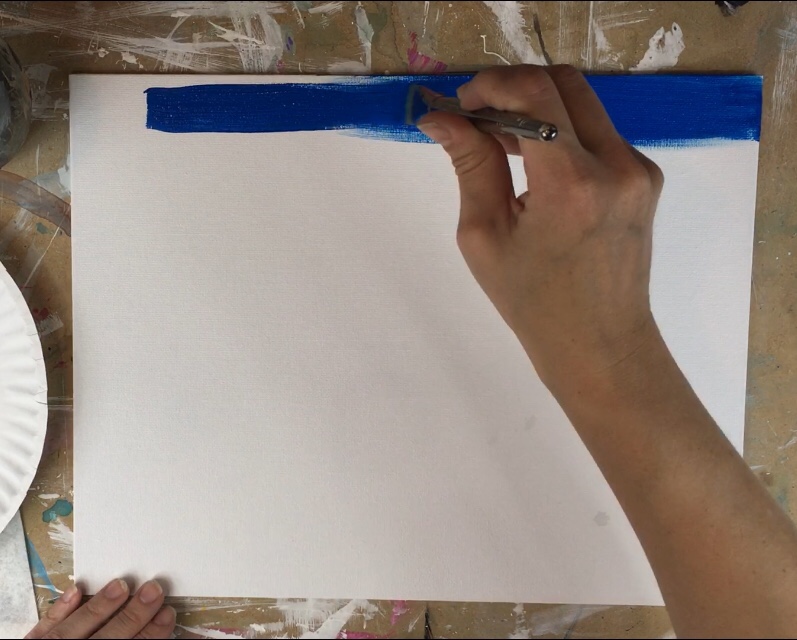
Go about 5 inches down with that cerulean blue.
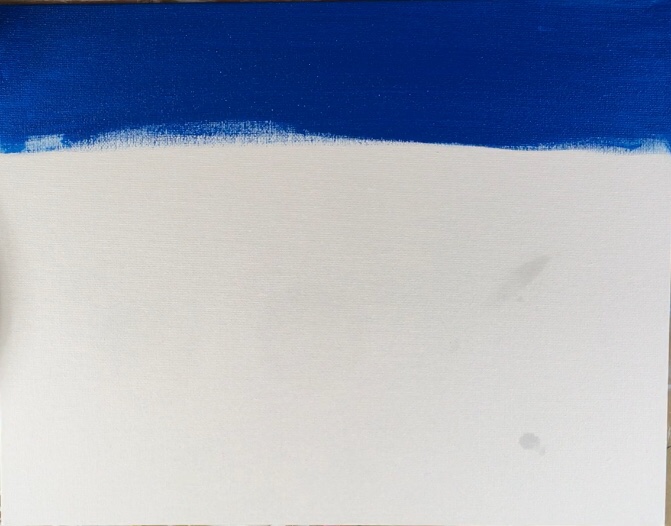
Then, without rinsing your brush, apply white to it. Your brush should now be double loaded with the blue and the white.
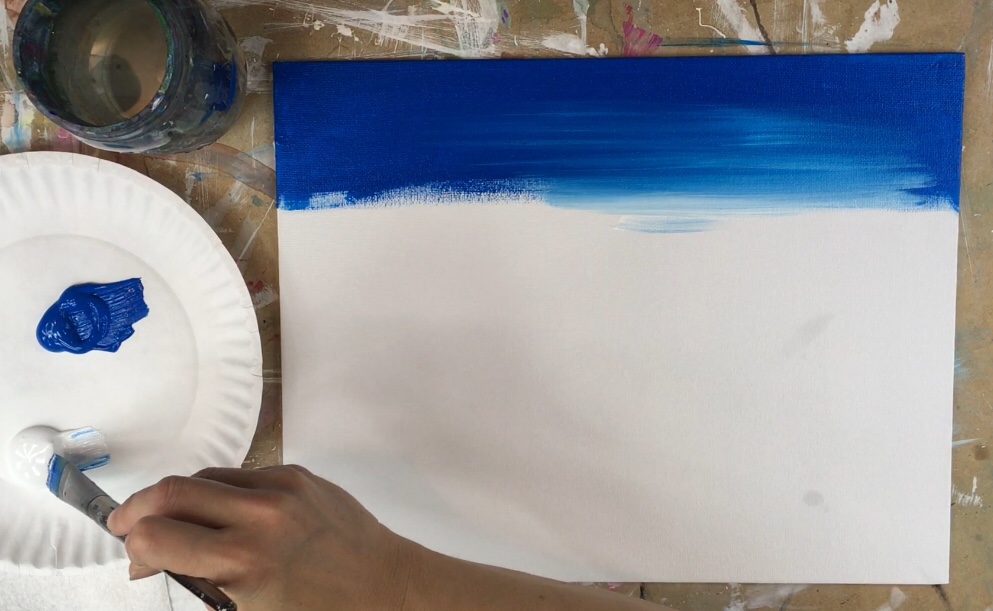
Blend that white into the blue and work your way down the canvas. To blend, simply use wet-on-wet blending (meaning the colors blend on the canvas because the blue is still wet). At this point you should have a medium blue.
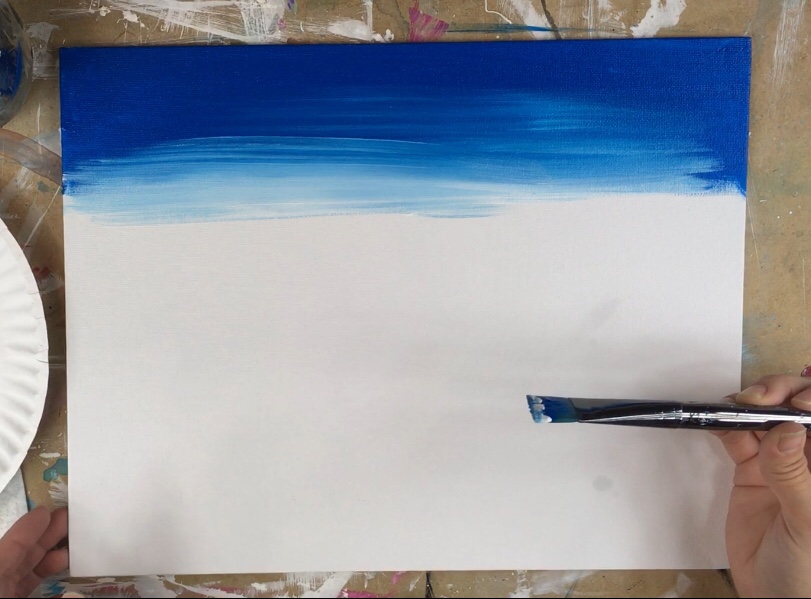
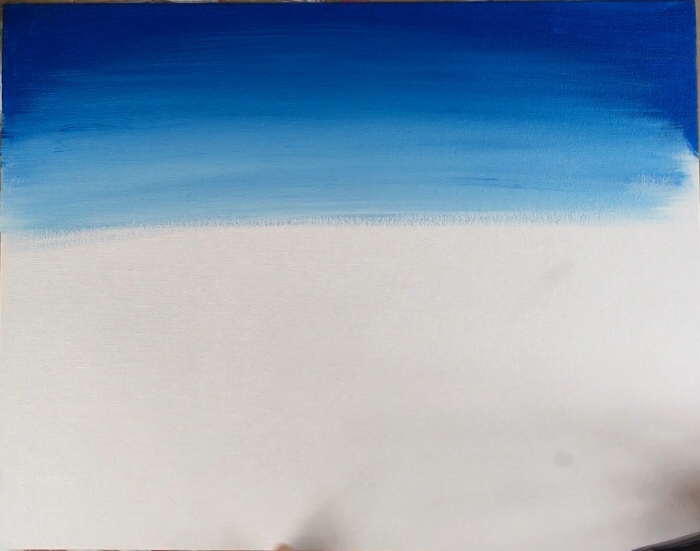
Keep working your way down the canvas. As you reload the brush, reload it with more white. Allow your blue to get lighter and lighter with that white as you work your way to the bottom of the canvas. Your blue should be turning into a light blue.
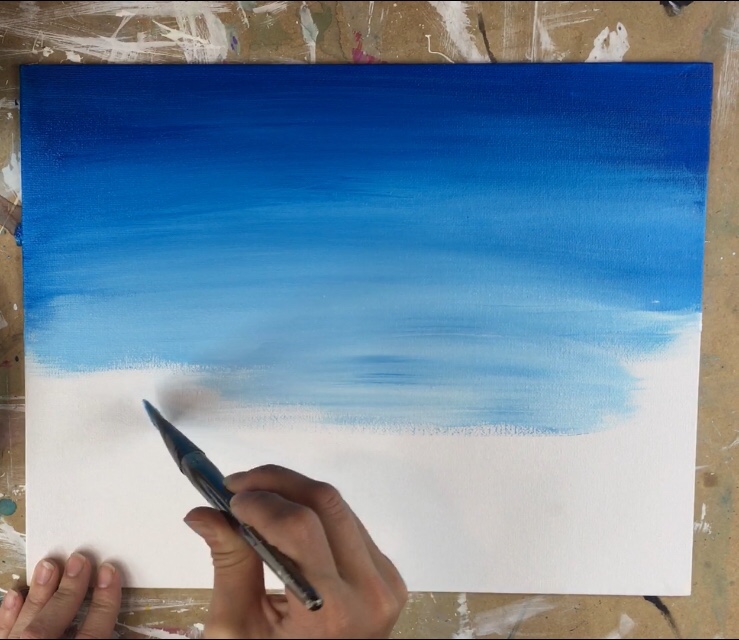
I left about four fingers of space at the bottom of the canvas and that is where I stopped painting the blue. The bottom portion is where the grass will be painted.
2. Paint the grass
You will need three different greens for this grass: brilliant yellow green, light green permanent and deep green permanent. You will also need your #12 flat brush. You will be painting three rows of grass blades starting with the lighter green at the top and then the darker green on the bottom.
Start with brilliant yellow green. Use your brush tip on it’s side so the bristles are vertical. Paint little vertical lines to represent grass blades. This lighter green should overlap some sky a bit. It is also the further grass in this painting so it is, essentially, only painted along the horizon line and not all the down to the bottom of the canvas.
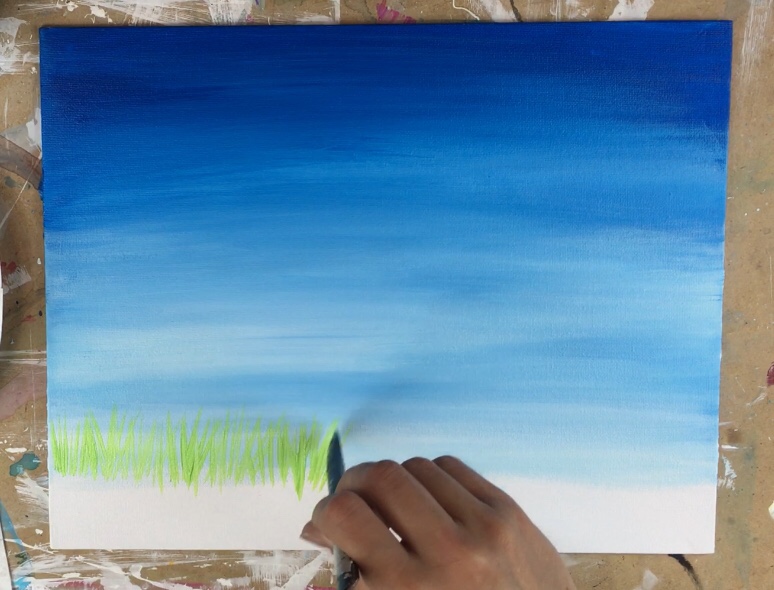
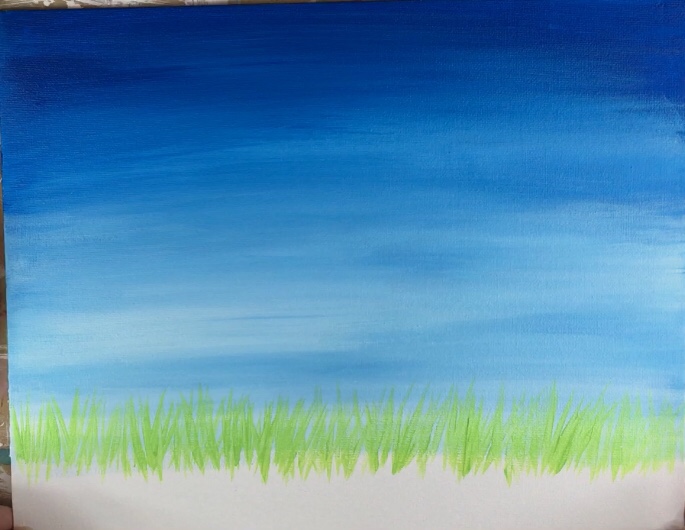
Next load your brush with light green permanent. You do not need to rinse the brilliant yellow green off. Paint a second row of these same types of grass blades. This row starts lower than the lighter green grass but still overlaps the top row.
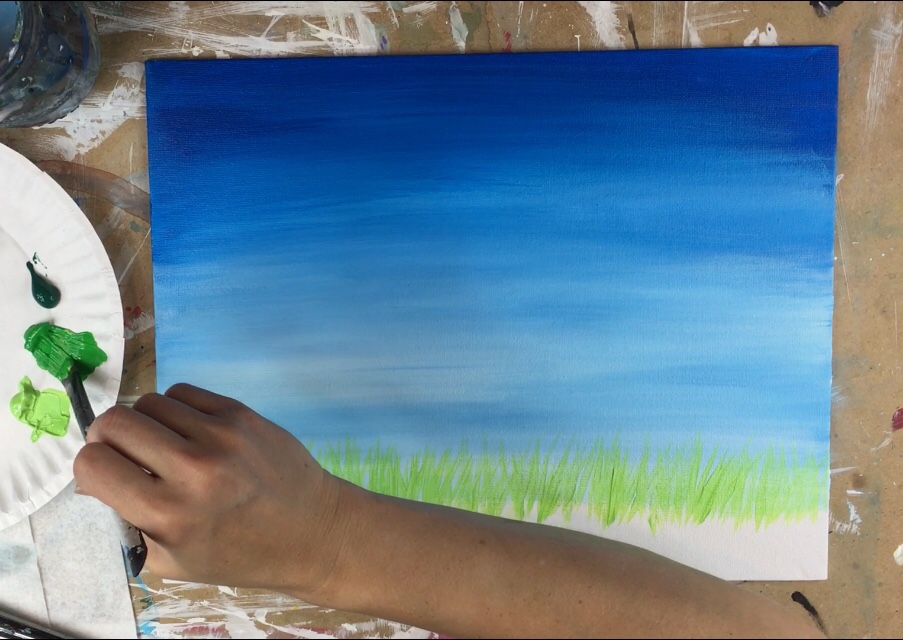
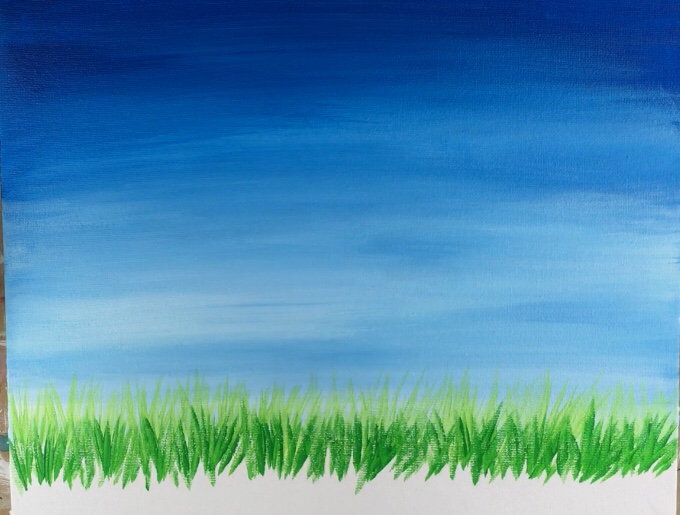
The third row of grass blades was done with deep green permanent. Again, you do not need to rinse your brush off when loading the next color. This third row should cover the whole bottom area. Most of the white canvas should be covered by now although there may be a few specks of blank space showing through the grass.

3. Dry your painting or wait for it to dry completely
You can use a hair dryer or just wait for the entire painting to dry. This is important because we will be drawing the bunny with chalk next and the sky/grass should not be wet at all for this.
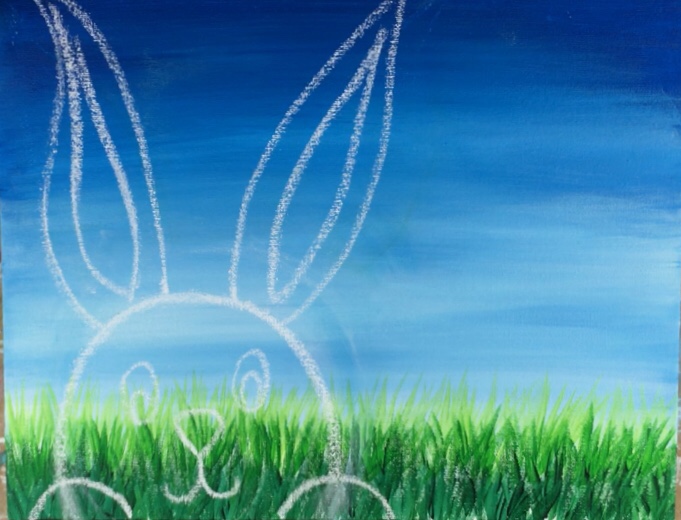
4. Draw the bunny with chalk
The bunny is simple to draw and entails basic shapes and lines. Chalk can easily be erased on the canvas using a wet paintbrush or damp towel. This rabbit is large and takes up half the canvas. The ears go all the way to the top edge of the canvas and the half circle head shape is almost as large as a hand. Start by drawing a half circle for the head.
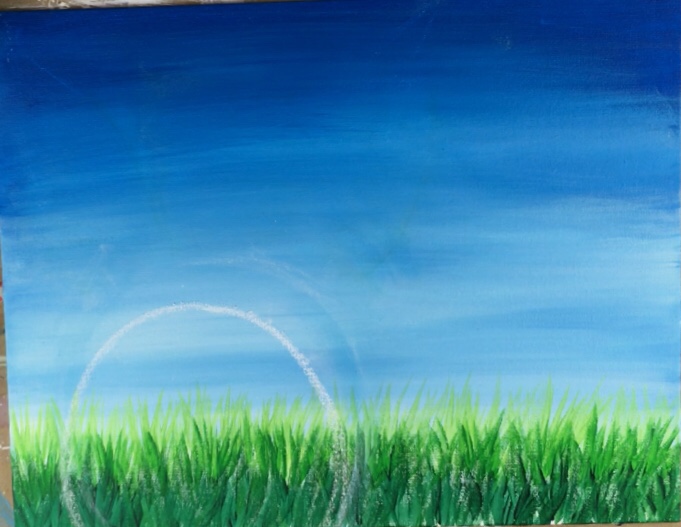
Make two marks on the top of the head about two finger widths spaced apart.
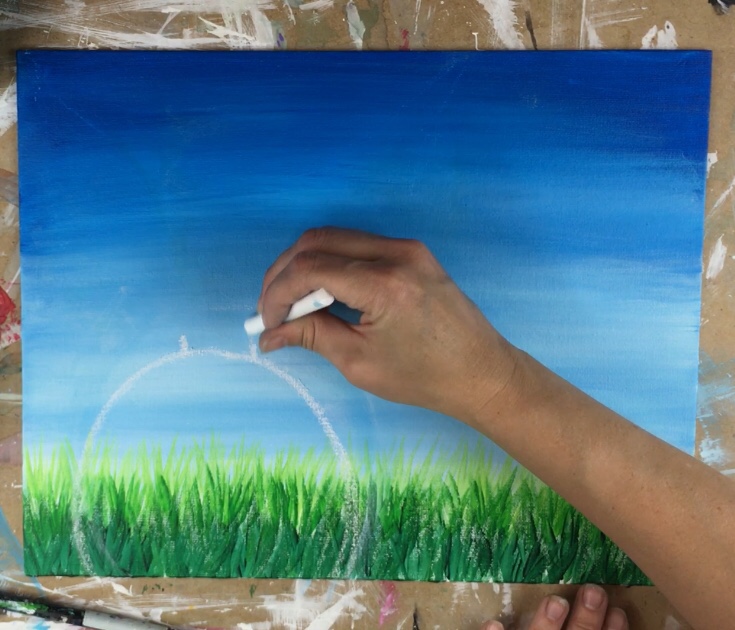
Using those two marks as a guide, draw two curved lines to represent the inner parts of the bunny ears. These go all the way to the top of the canvas.
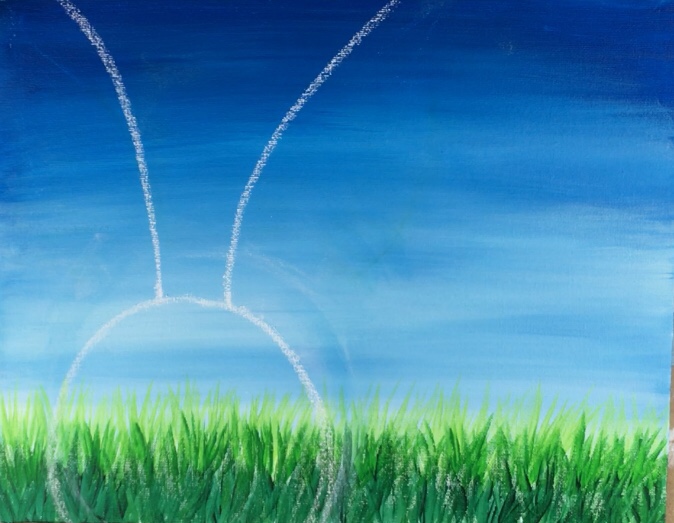
Then draw the outer parts of the bunny ears.
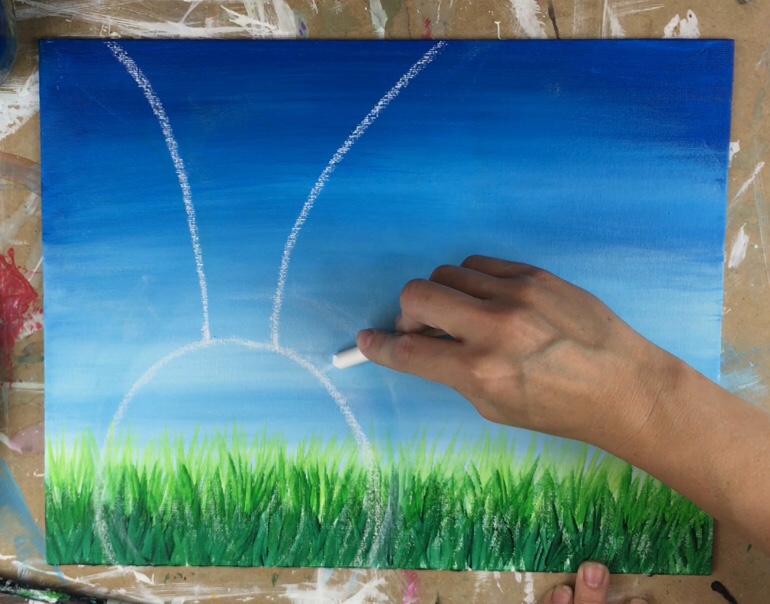
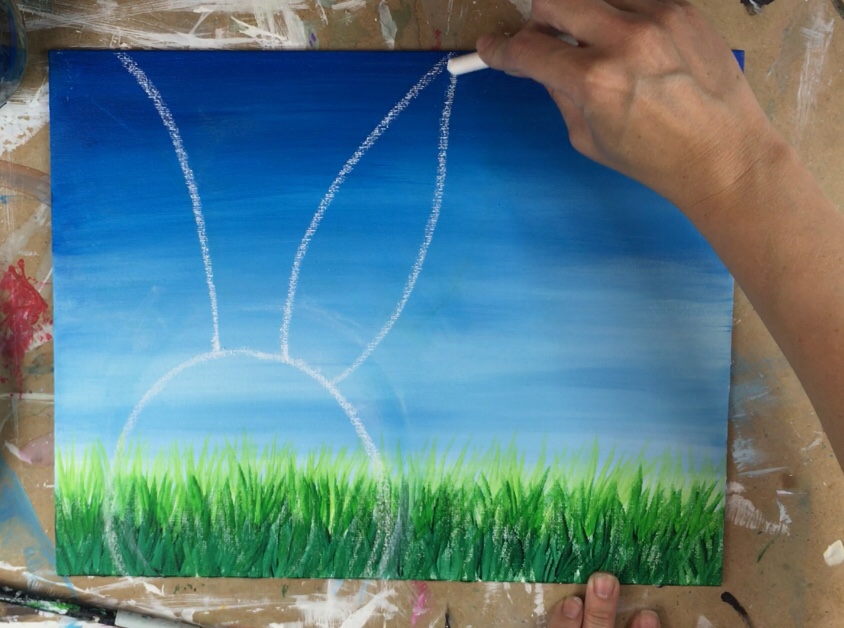
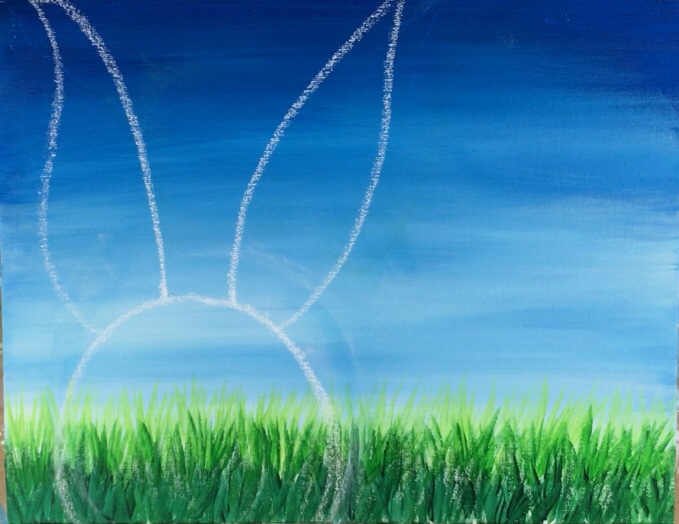
Then draw two half circle shapes on the bottom for the feet.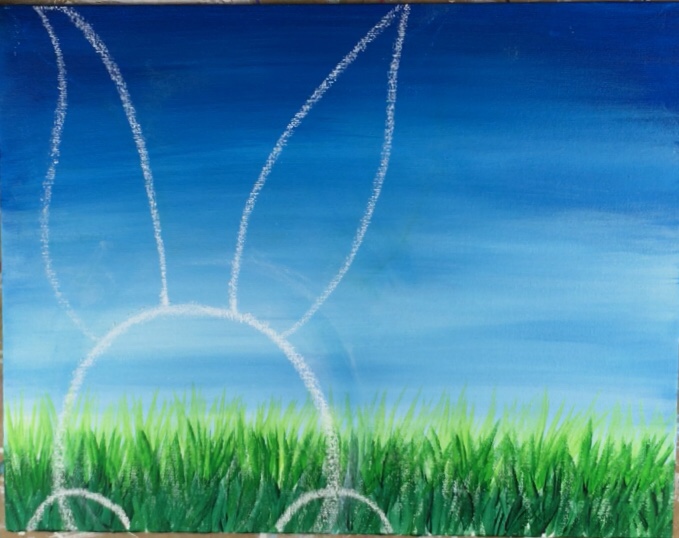
Optional: draw the facial features. This is optional because we will be painting over this part any way but it is helpful to kind of get an idea about what the face will look like/ is good practice. 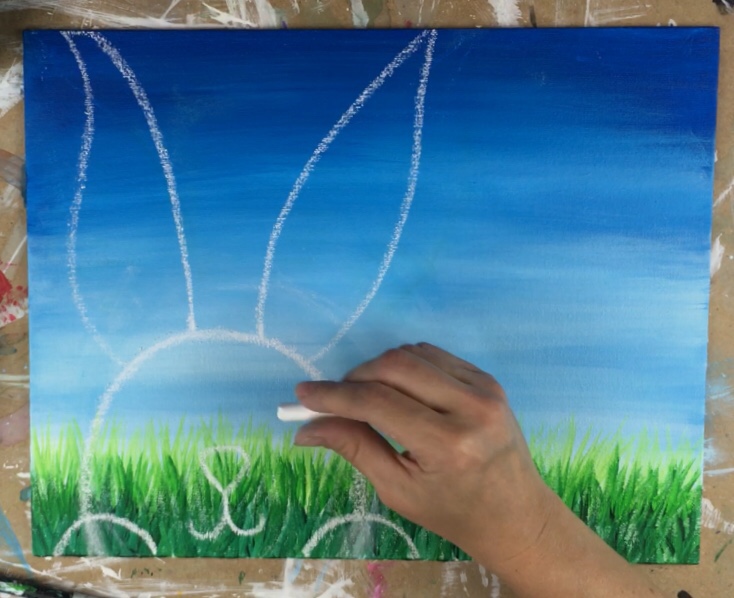
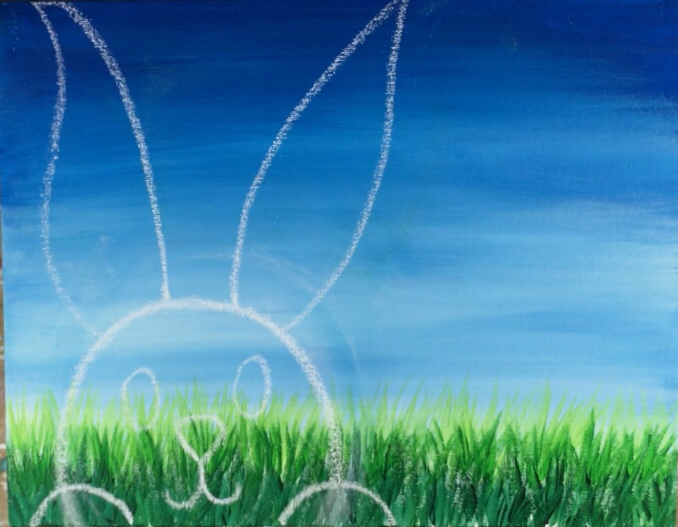
Draw the inner parts of the ears.
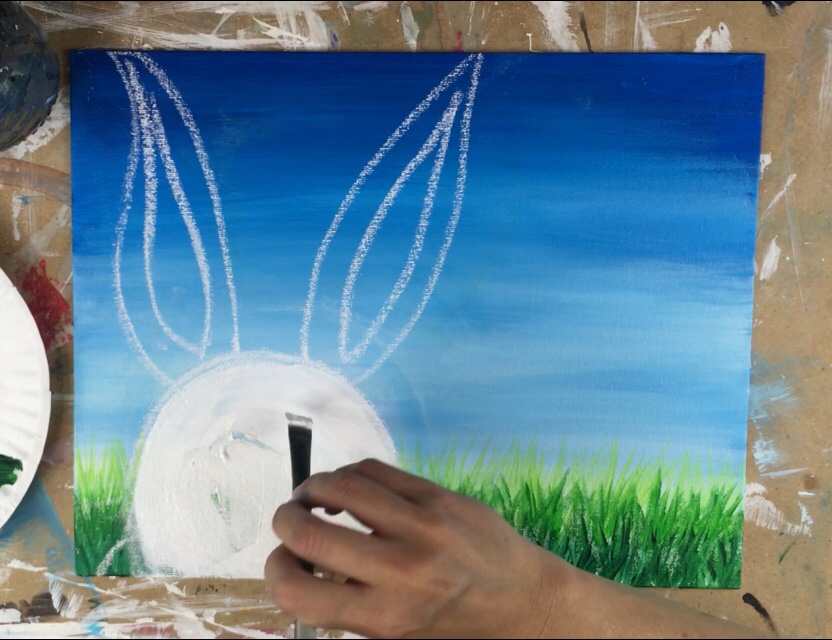
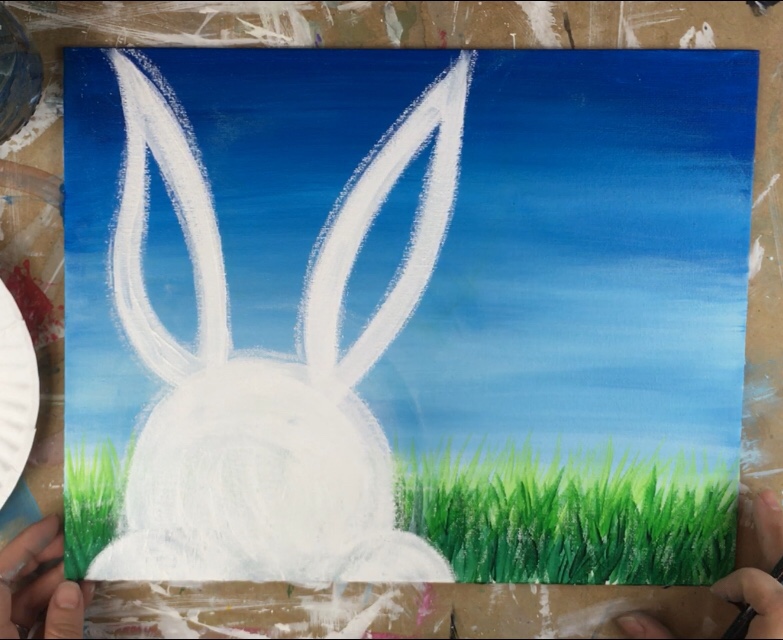
5. Paint the bunny with titanium white
I used the #12 flat brush and titanium white to paint the entire area of the bunny (minus the inner parts of the ears). This should be a nice solid coat of white! Then, if you need to erase any leftover chalk showing through, you may do so with a wet paint brush or a damp towel. 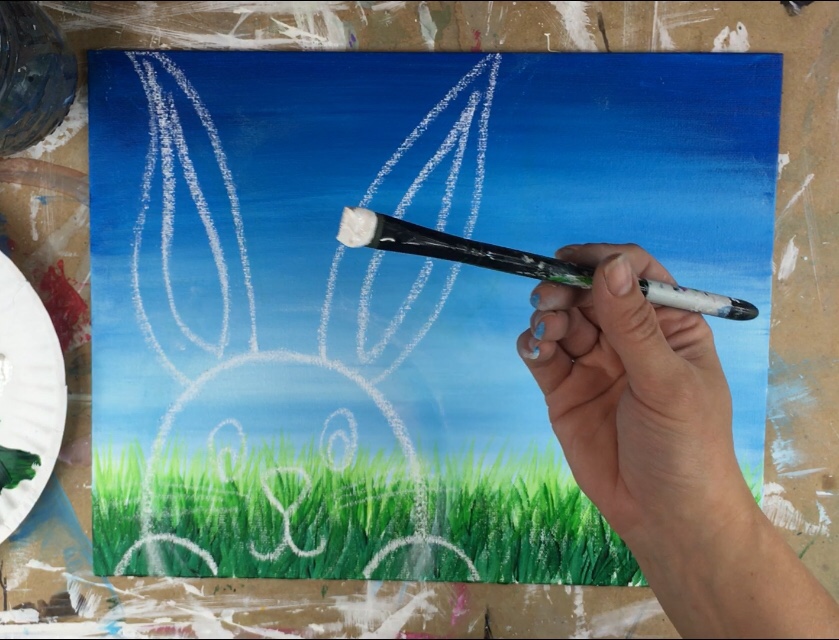
6. Paint the inner parts of the ears & a nose
I used the #4 round brush and the color medium magenta. Using a smaller brush is helpful here because it is a smaller area. Basically paint the inner parts of the ears with this medium magenta. 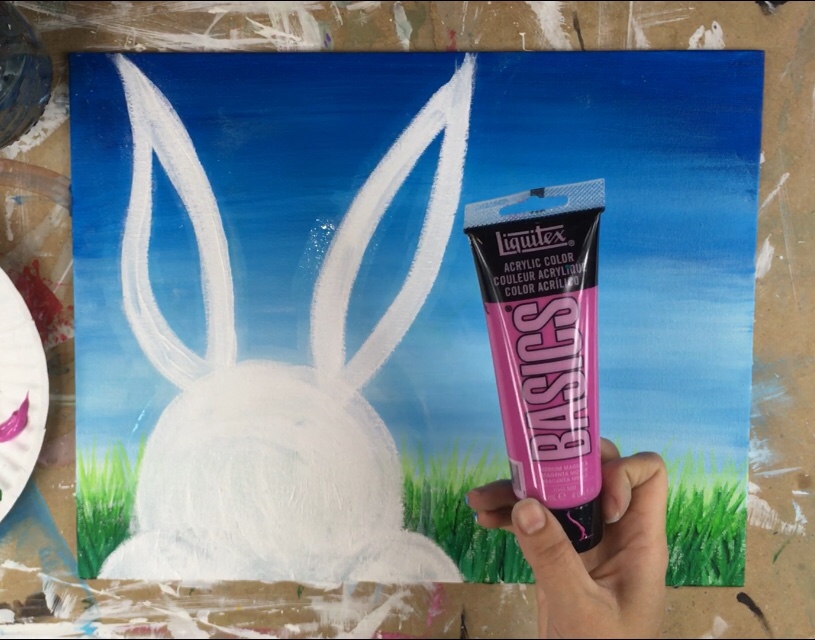
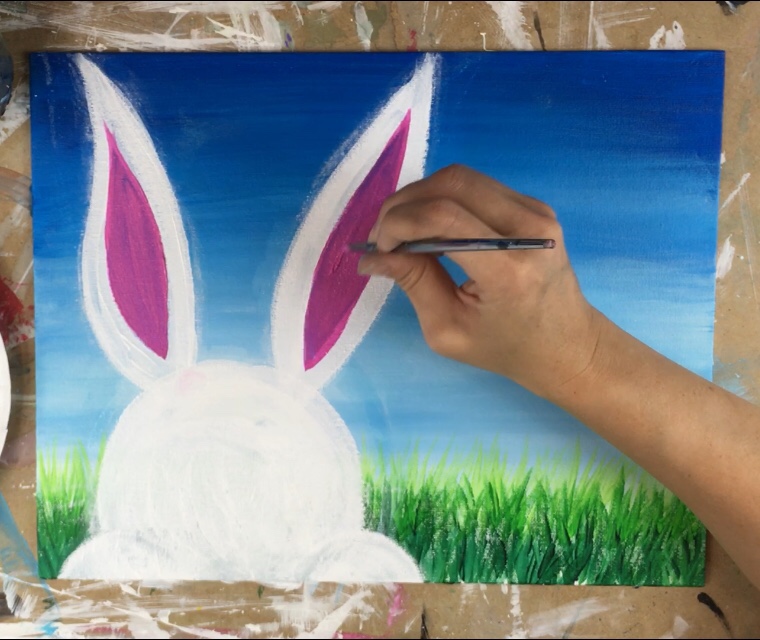
Then use the same brush and color to paint a nose. My nose is an upside down rounded triangle shape located not exactly in the middle but a little lower than the middle of the bunny’s face. Note: if your white is not completely dry all the way, you may want to wait a bit or use the hair dryer real quick to dry the white. 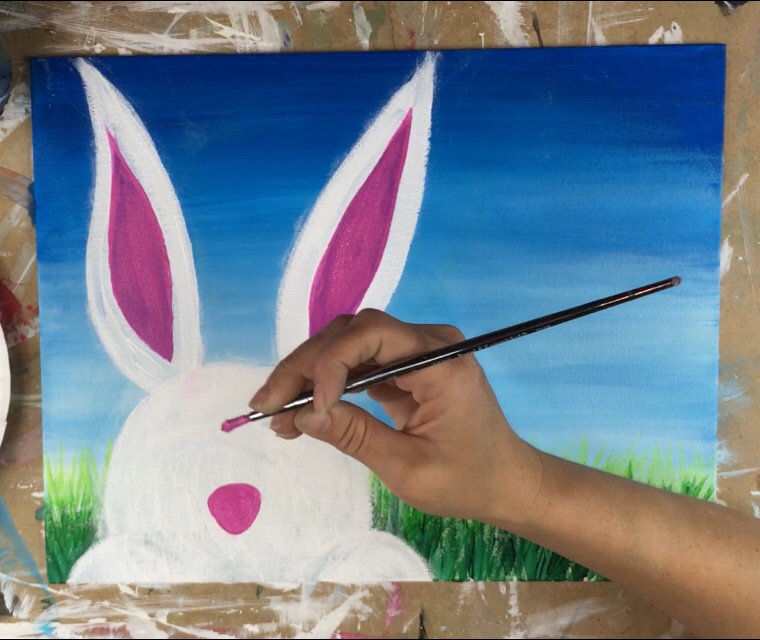
7. Use a sharpie to draw facial features: mouth, whiskers, eyes.
The sharpie is helpful in this step because it gives you more control versus if you were to use a very tiny liner brush and mars black. (However, you most certainly are welcome to do that if you prefer the brush/paint). 
Draw on a mouth… 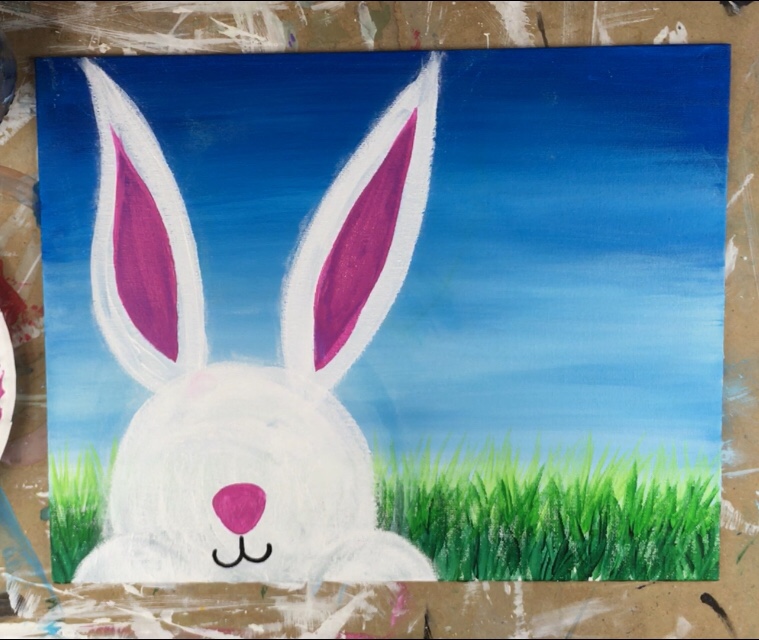
Then draw whiskers and the lines on the front paws… 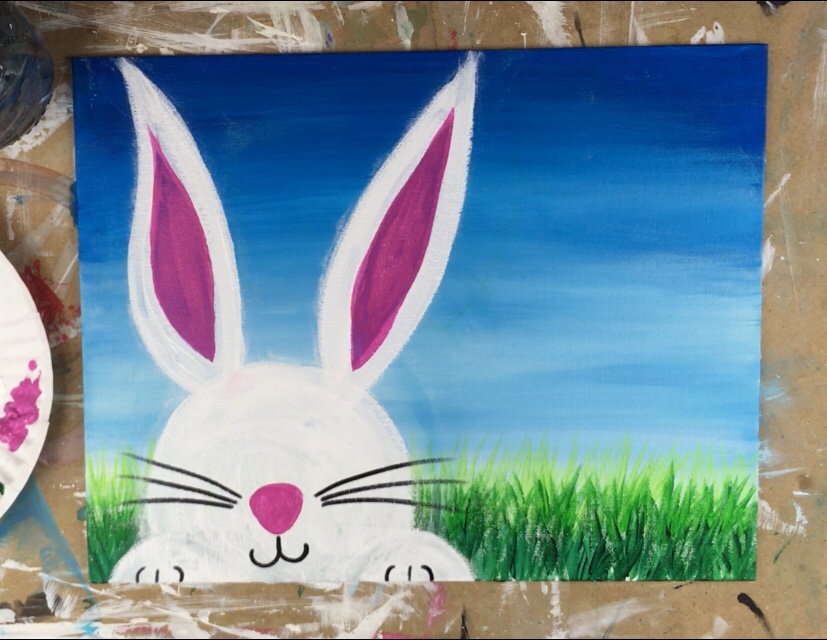
Then draw the eyes. Mine are about two finger widths apart. 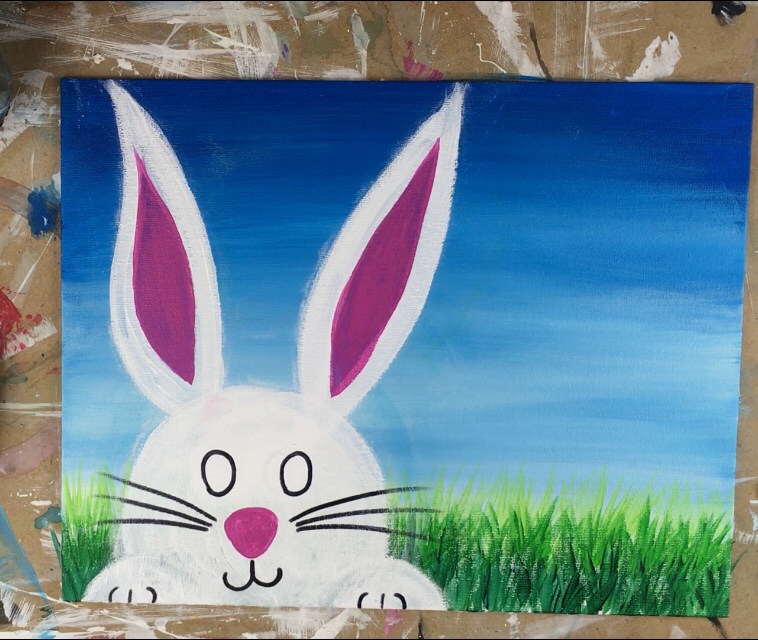
8. Add more details in the bunny
For the iris of the eyes, I used the darker green on my palette and a #4 round brush.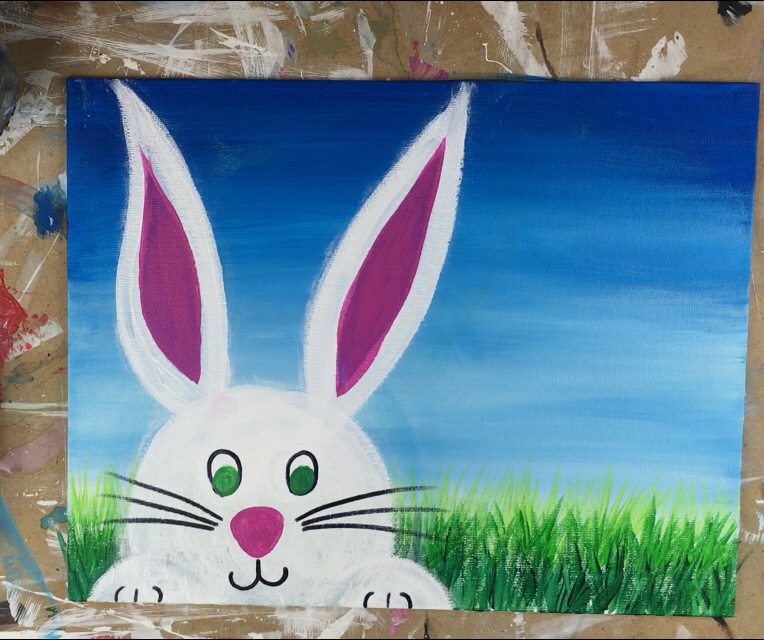
Then I painted a white highlight line on the right side of the inner parts of the ears (over the medium magenta). I also made a highlight line on the nose.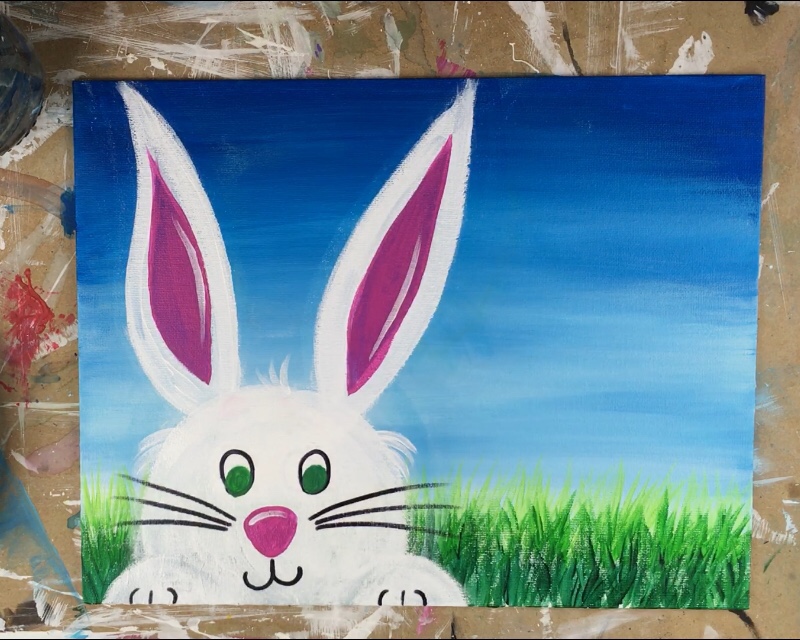
Then I used my sharpie to make a black line only on the left side of the inner parts of the ears.
Then (if your eye color is dry) draw the pupils in with the sharpie. 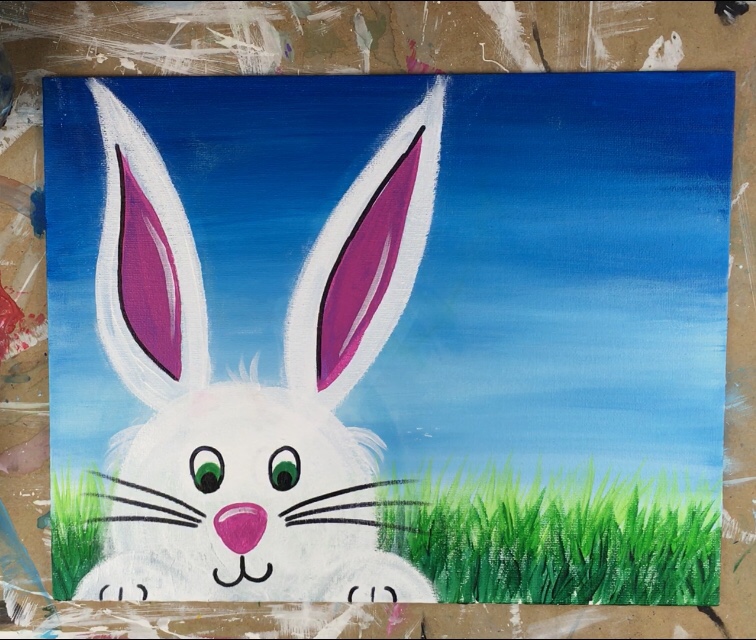
Then I used my round brush to make two white dots on the black pupils of the eyes.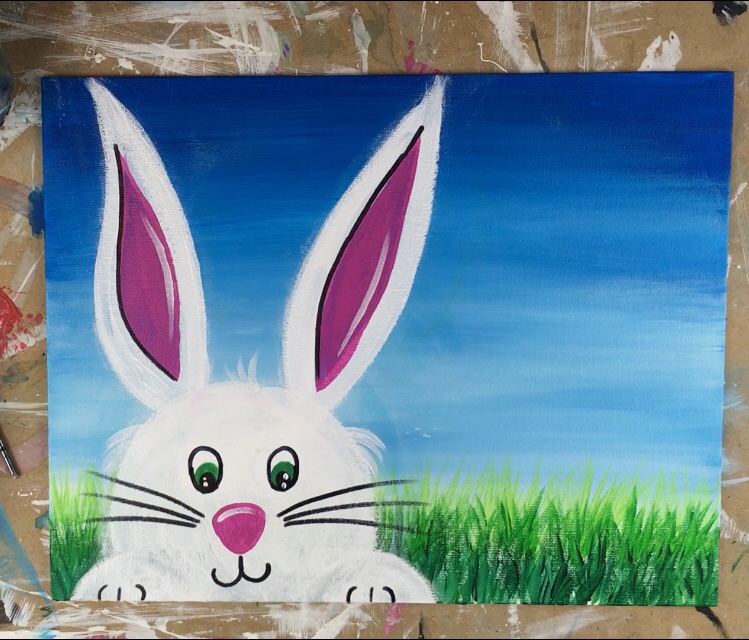
9. Paint the dandelions
Use your #12 flat brush and deep green permanent. Use the tip of the brush on its side (vertically) to paint the stems of the dandelions. Then paint some leaves next to the stems. I did one tall stem closer to the bottom of the canvas and one smaller stem that seems further away. 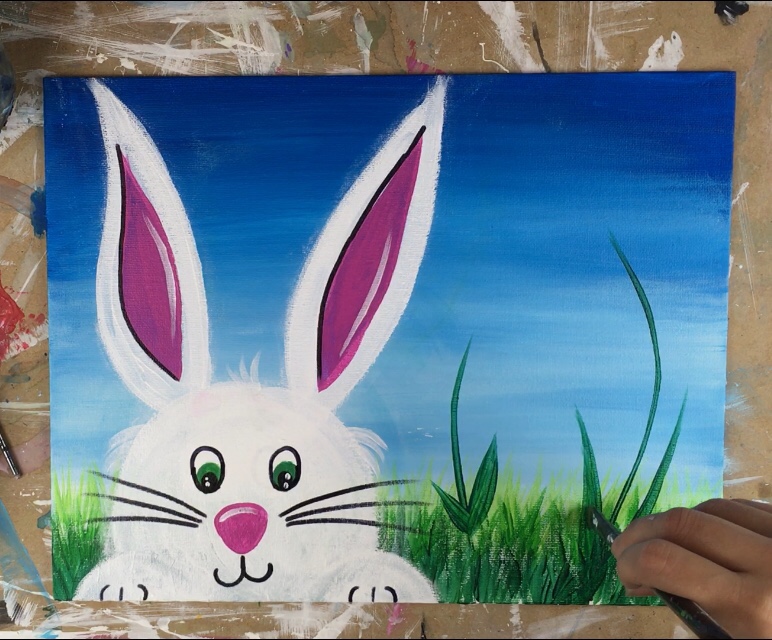
To paint the “white fluff” of the dandelion, I used the #12 flat and titanium white. Again, use the tip of the bristles to paint thin lines. The lines start in the middle and ray out in a circle all around the center top point of that stem. 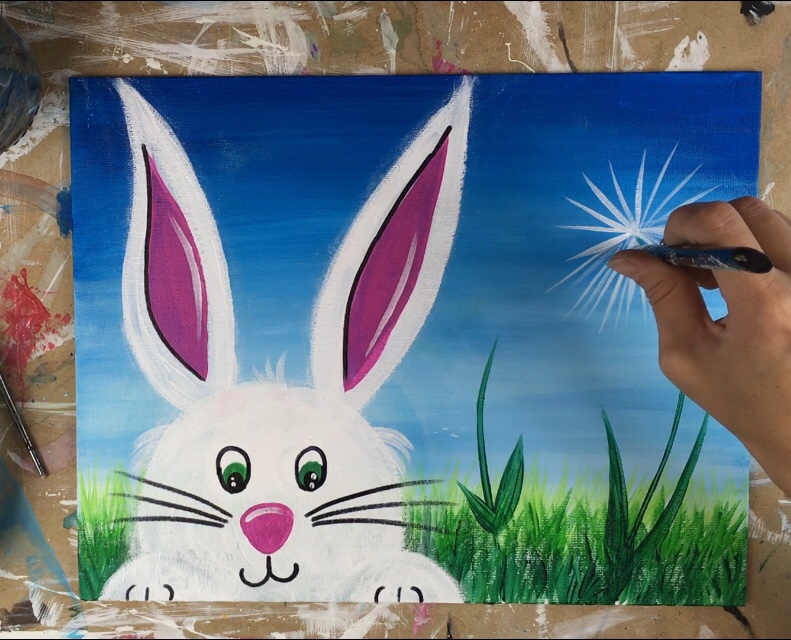
Do the same for the smaller dandelion in the back. 
Then use your round brush to paint a few dandelion seeds floating in the air.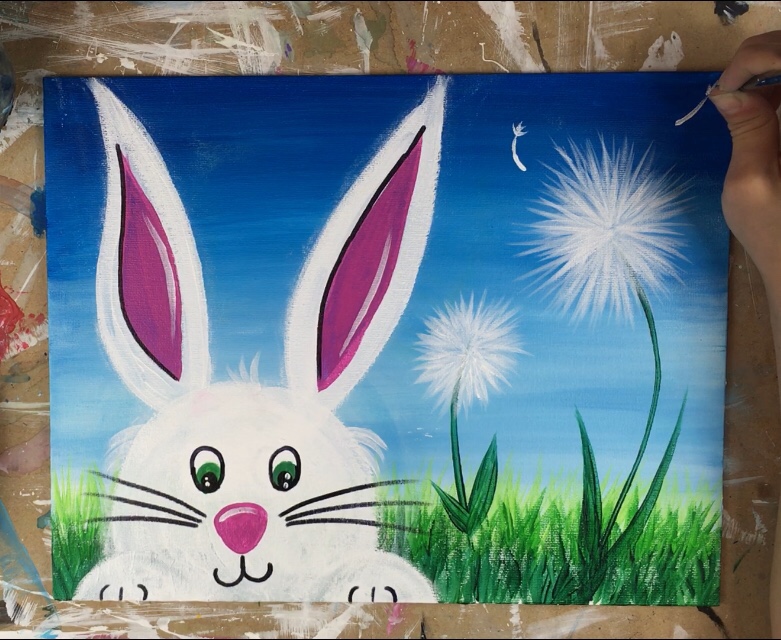
I did one more smaller dandelion on the left of the bunny and a few more seeds floating in the air.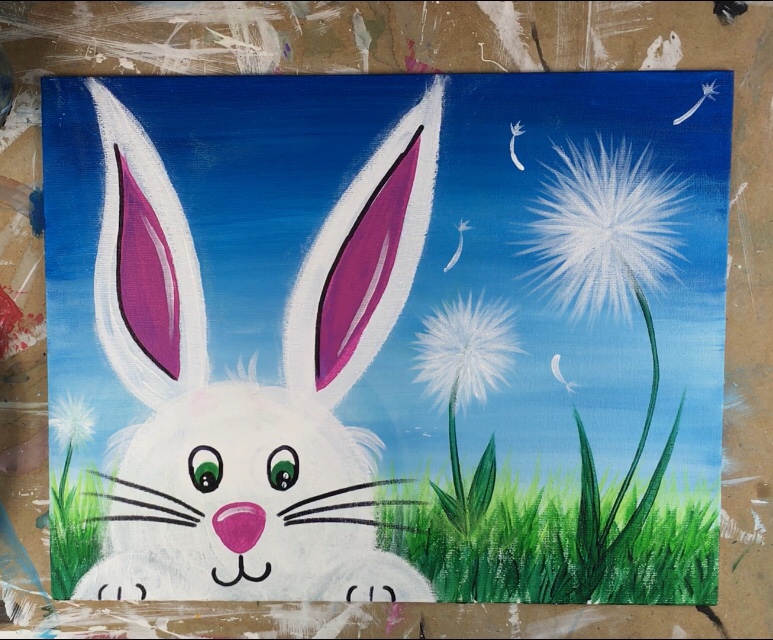
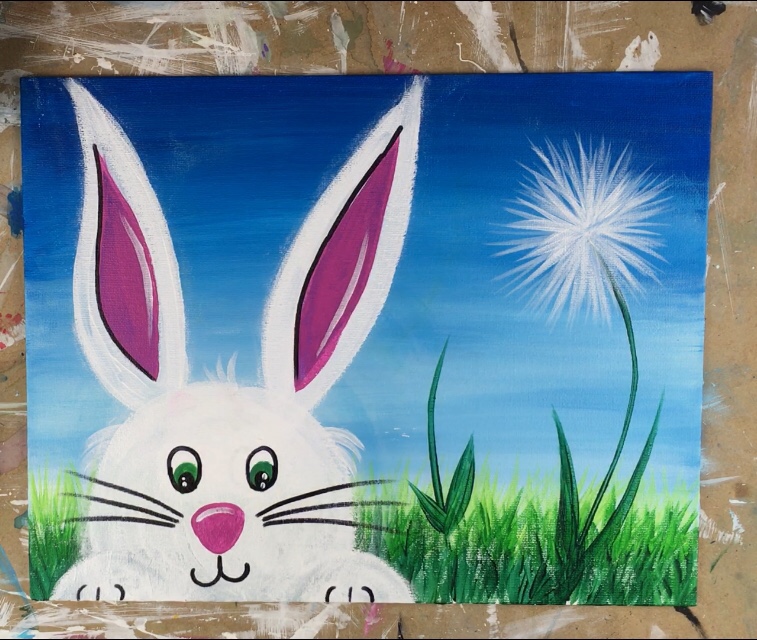
Finished!
Would you like to save this?
Hi Tracie,
Thank you for your wonderful step by step tutorial on painting an Easter Bunny. Our GS troop volunteered today and we brought this activity to a children’s home.
Everyone loved it….. even the adults!?
Thank you again!
You are very welcome! What a wonderful event to volunteer at a children’s home!
Thanks
were is the video for the how to paint the easter bunney
Yes there is a video on this blog post. Look for it right above all the step by step directions.