
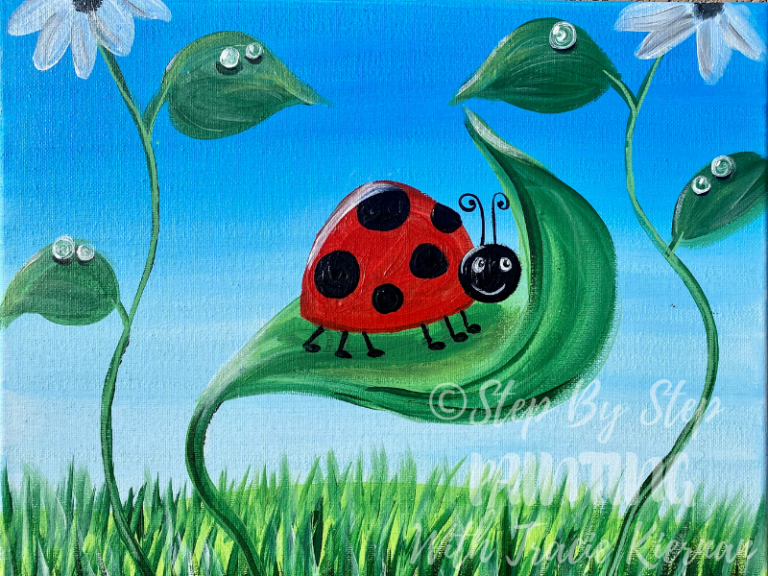
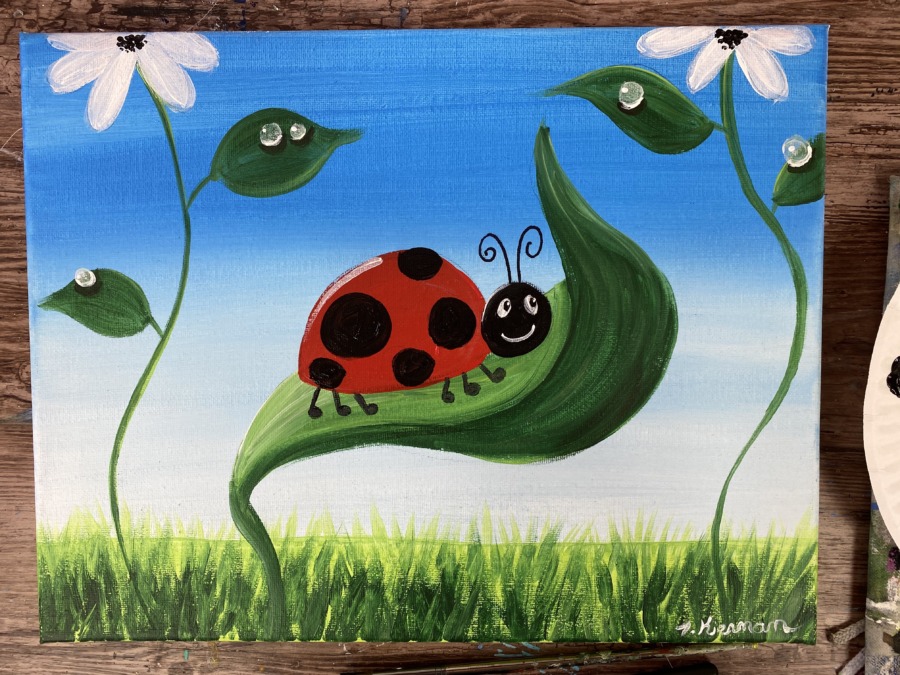
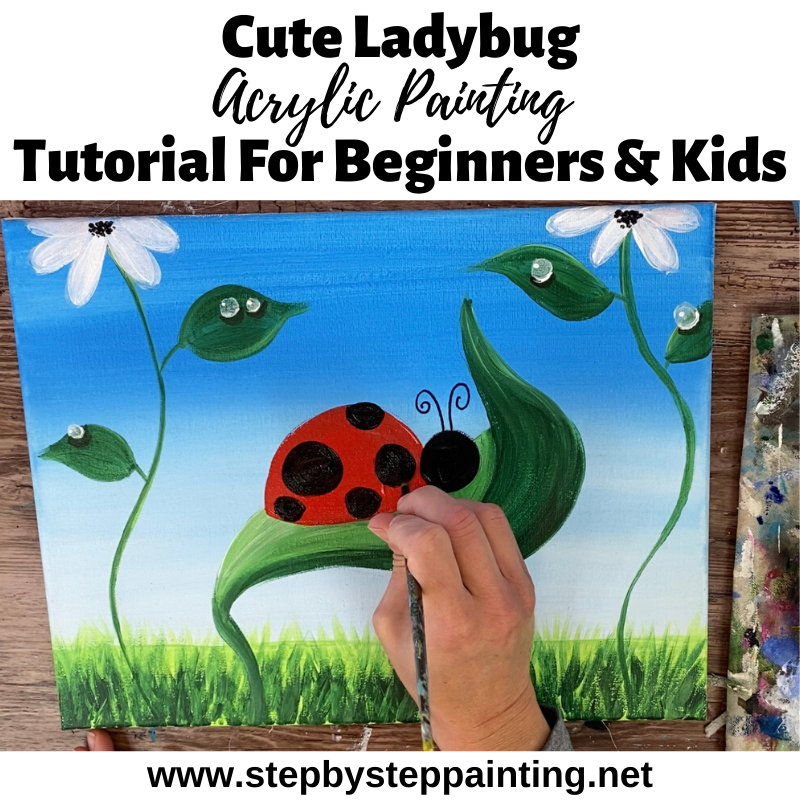
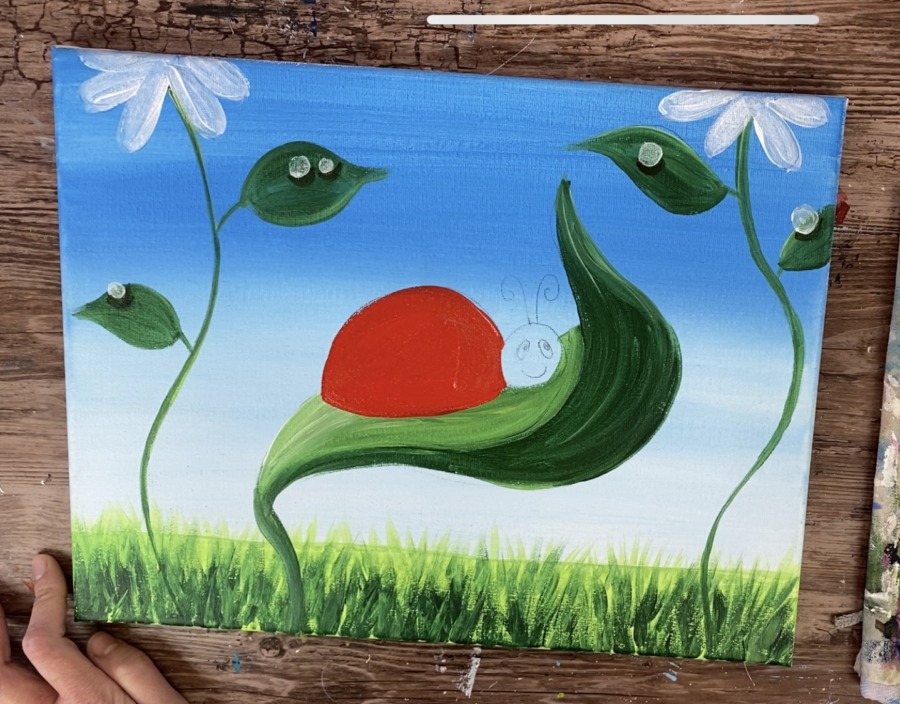
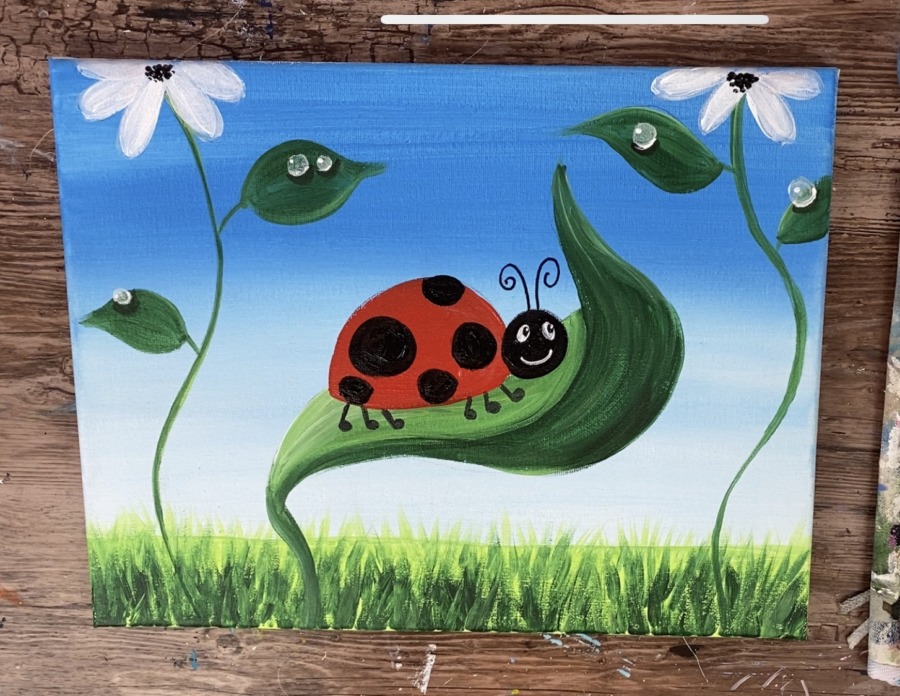
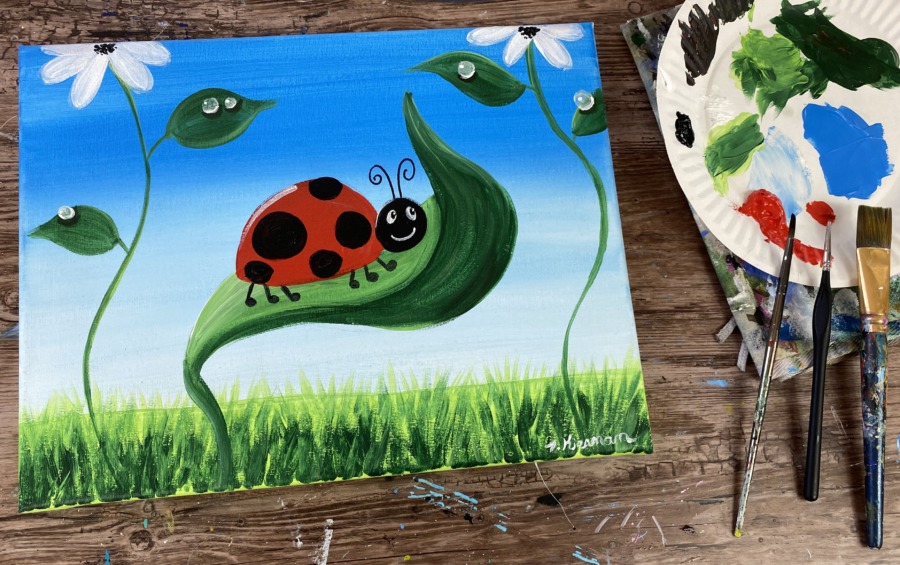
Ladybug Painting Step By Step
Would you like to save this?
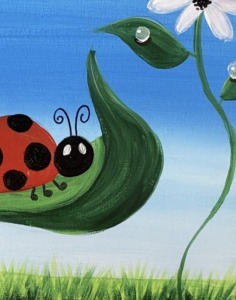
Learn to paint this cute ladybug! This is a great painting you can do with the kids or as a relaxing & easy painting for yourself!
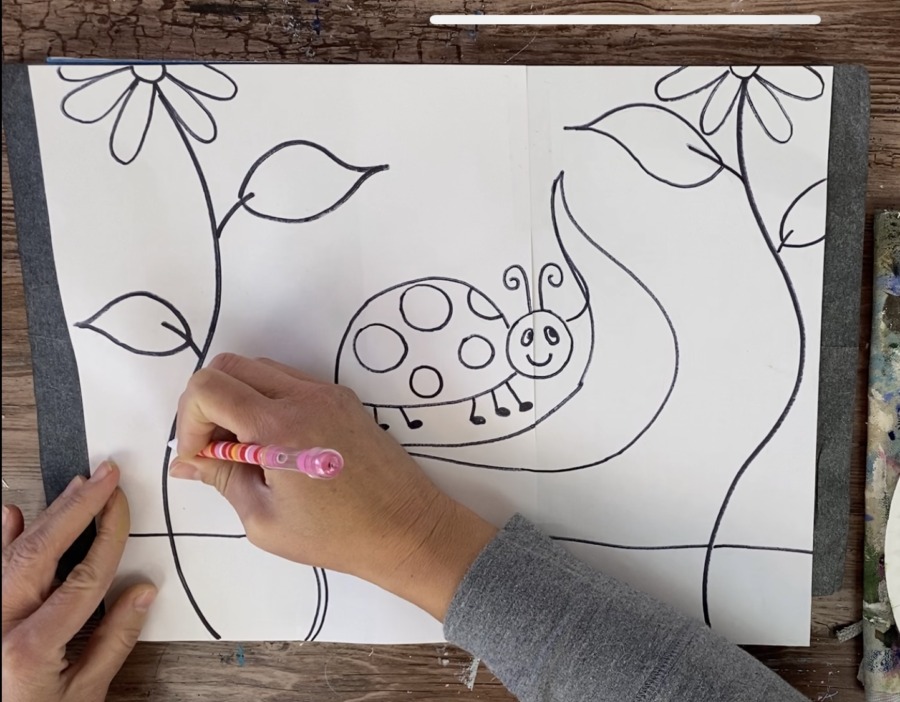
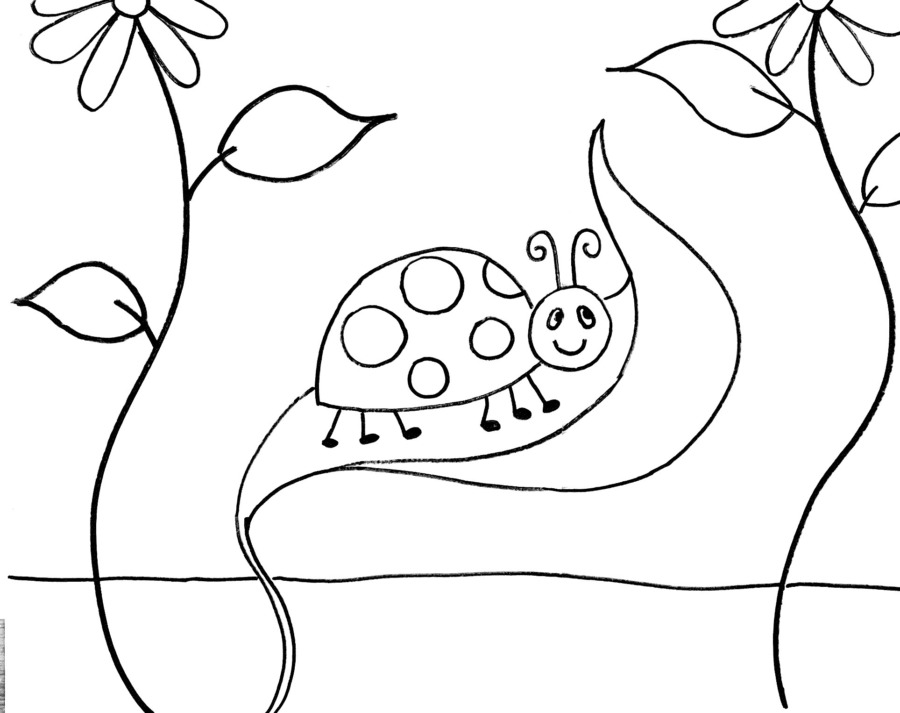
This tutorial comes with a traceable so you do not have to worry about drawing the ladybug. Or you can draw this simple composition on your canvas.
Enjoy and happy painting!
Materials Needed:
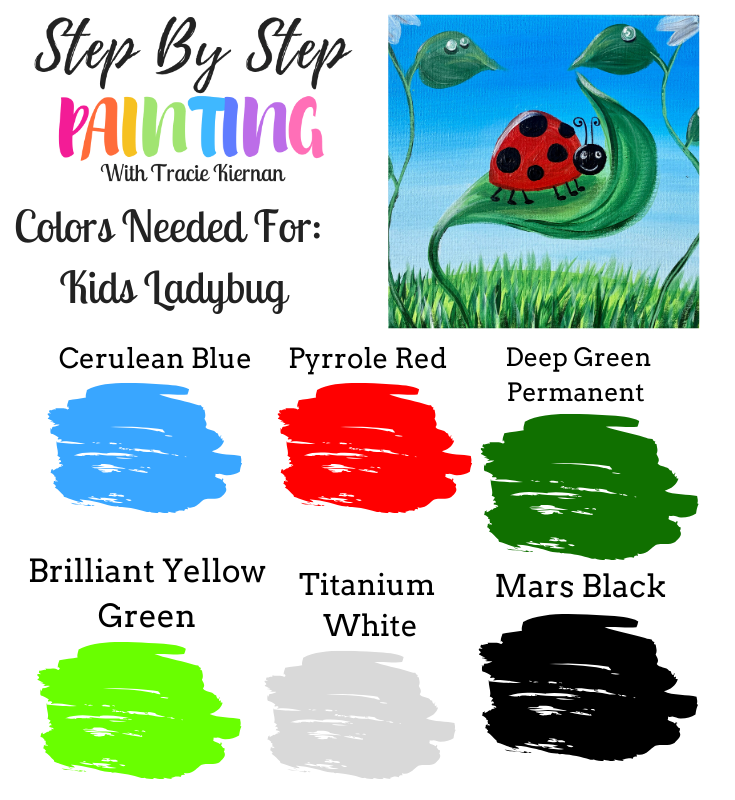
Kids Ladybug Painting

Learn to paint with acrylics a cute ladybug on a leaf. This is a great painting you can do with your kids!
Materials
- Acrylic Paint
- Paint Brushes
- 11 x 14 Canvas
- Traceable (optional)
- Graphite Paper
- Pencil
- Sharpie Or Black Paint Pen (optional)
Colors
- Pyrrole Red
- Deep Green Permanent
- Brilliant Yellow Green
- Mars Black
- Titanium White
- Cerulean Blue
Brushes
Color Palette:
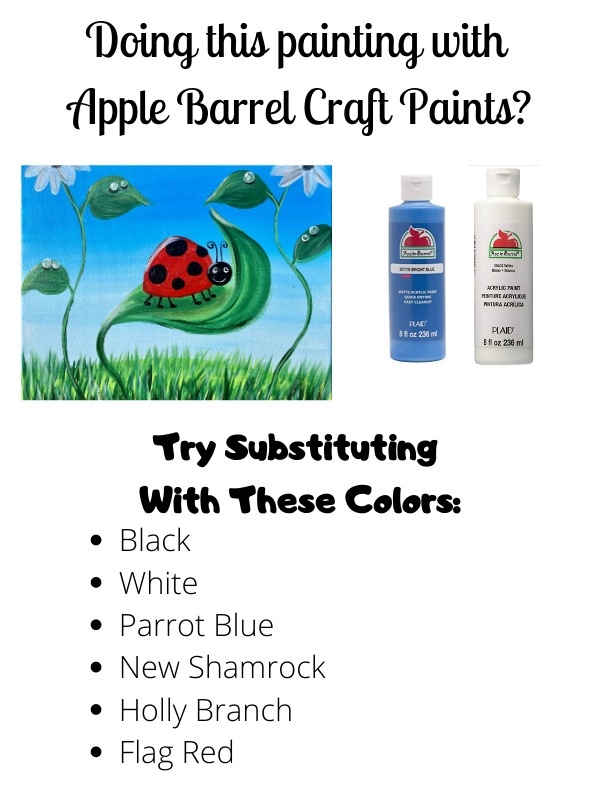
These colors are listed in Liquitex BASICS. Many brands use the same names for their colors. You can also look at the colors in the palette below and match what is closest to the colors you have on hand!
Craft Paints!
I am providing you a conversion suggestion to the popular Apple Barrel Craft Paints!
Traceable:
Directions At A Glance:

Video:
Step By Step Directions:
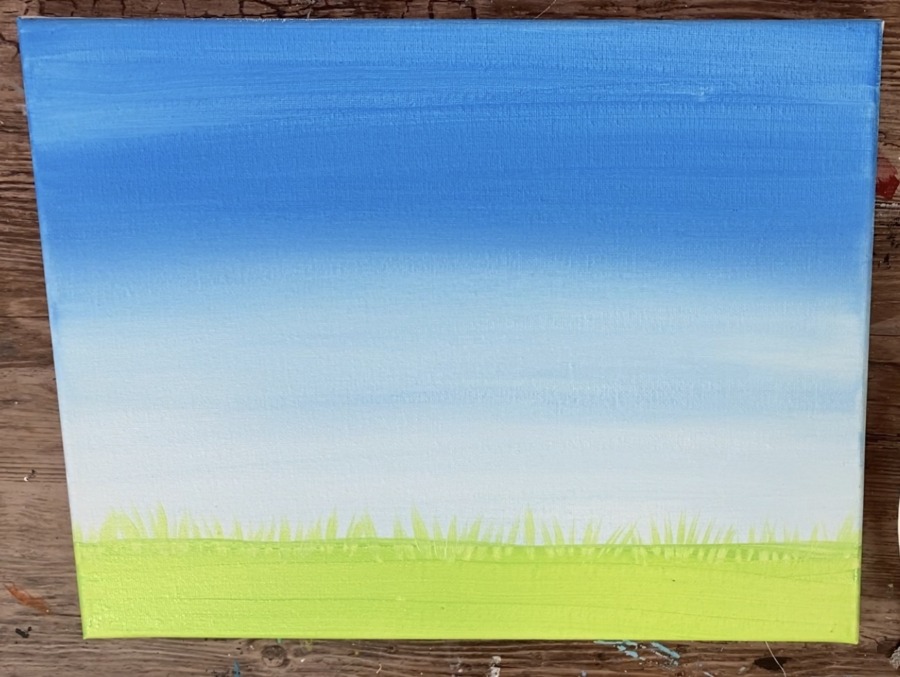
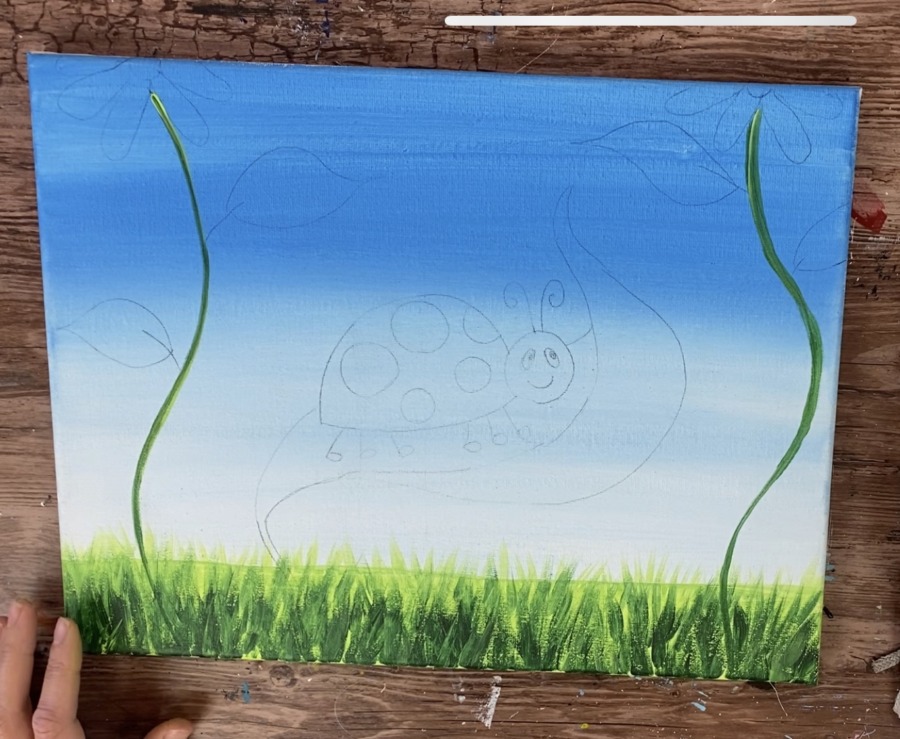
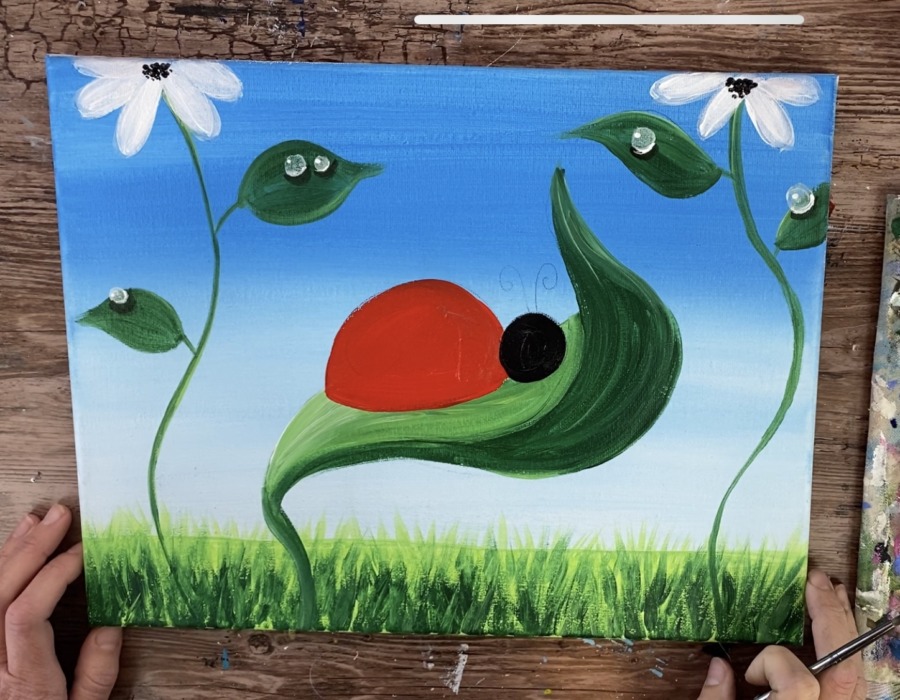
1. Paint The Background (Sky)
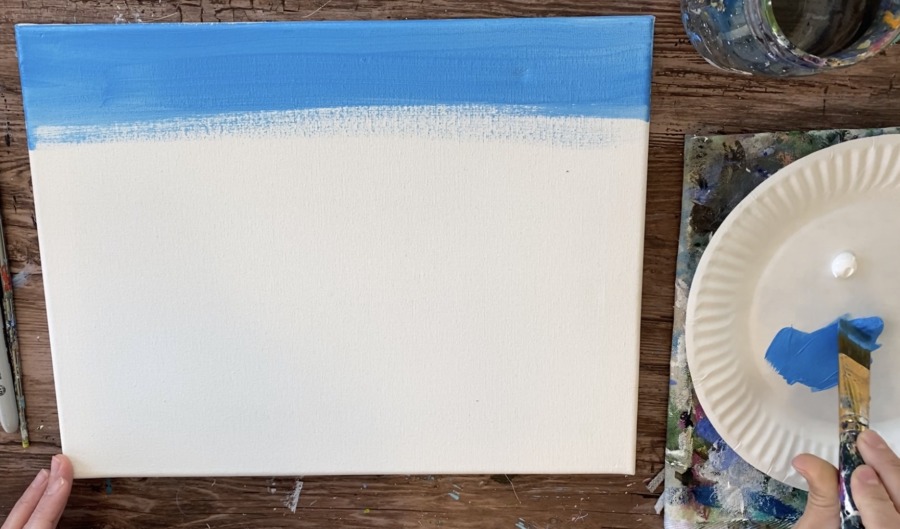
Load your palette with cerulean blue and titanium white and get your 3/4 Wash Brush ready (a big flat brush).
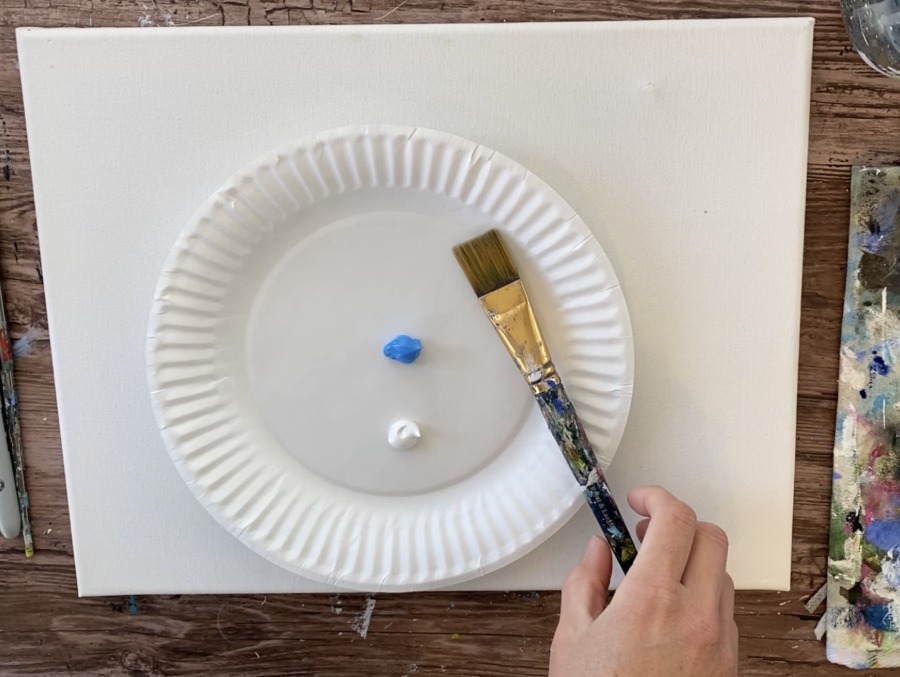
Load your brush in water and gently pat it dry. Then load it in cerulean blue. Start at the top of the canvas and paint left and right strokes across the canvas.
Go about a third of the way down the canvas then load your brush in some white (without rinsing the brush off).
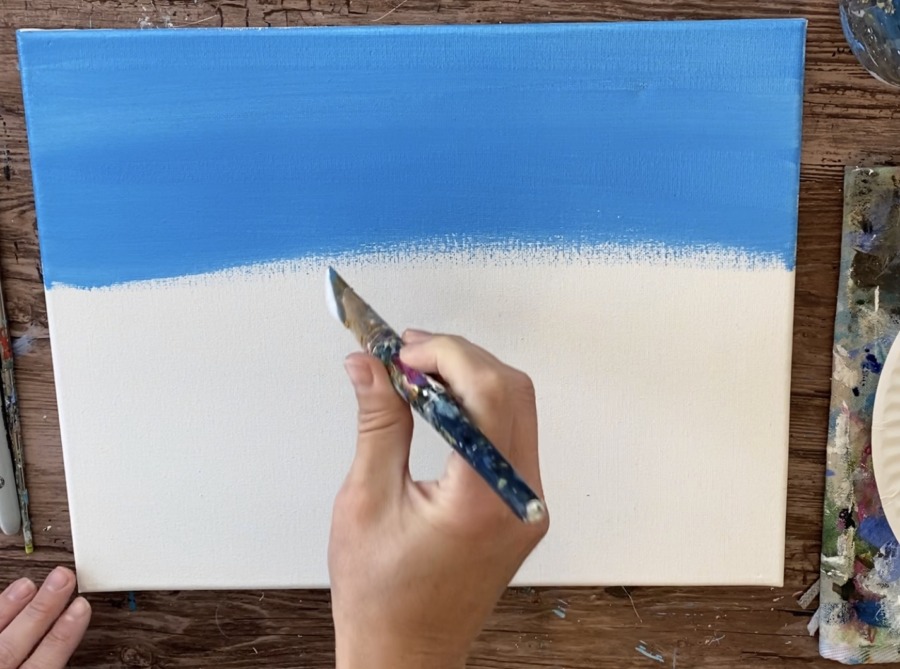
Blend the white with the blue so the blue gradually turns lighter as you work your way to the bottom of the canvas.

Paint almost to the very bottom of the canvas. Reload the brush in more white as you work your way down. Blend the colors so the blue get lighter and lighter.
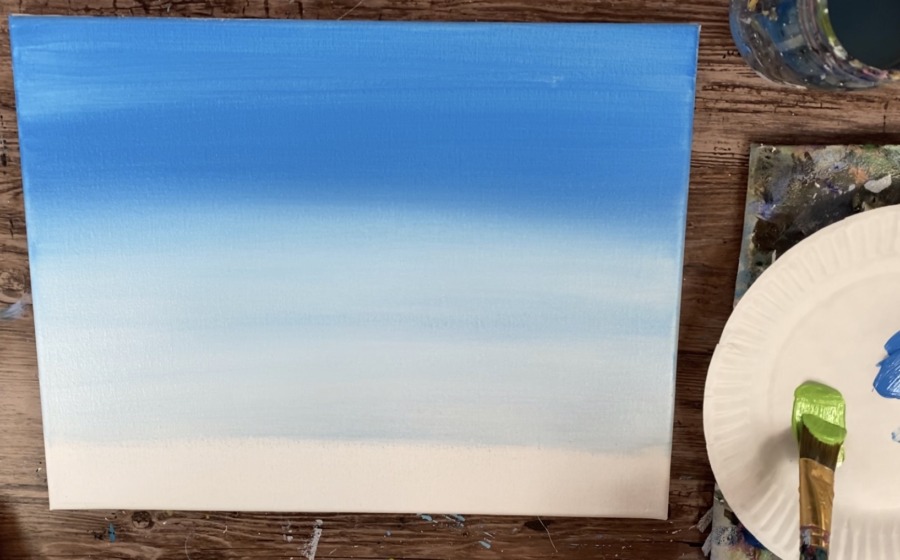
Tips: Blending colors takes some work! Continue to blend “wet on wet” on the canvas. The more you brush over your paint, the more it will blend. Also, try not to overload your brush with too much paint. Just a small amount is fine! If you need help getting the paint to flow, try adding a tiny bit of water to the brush.
2. Paint The Ground & Grass
Next rinse your 3/4 wash brush and pat it dry. Paint the bottom area of the canvas with brilliant yellow green. This will be the base of our grass.
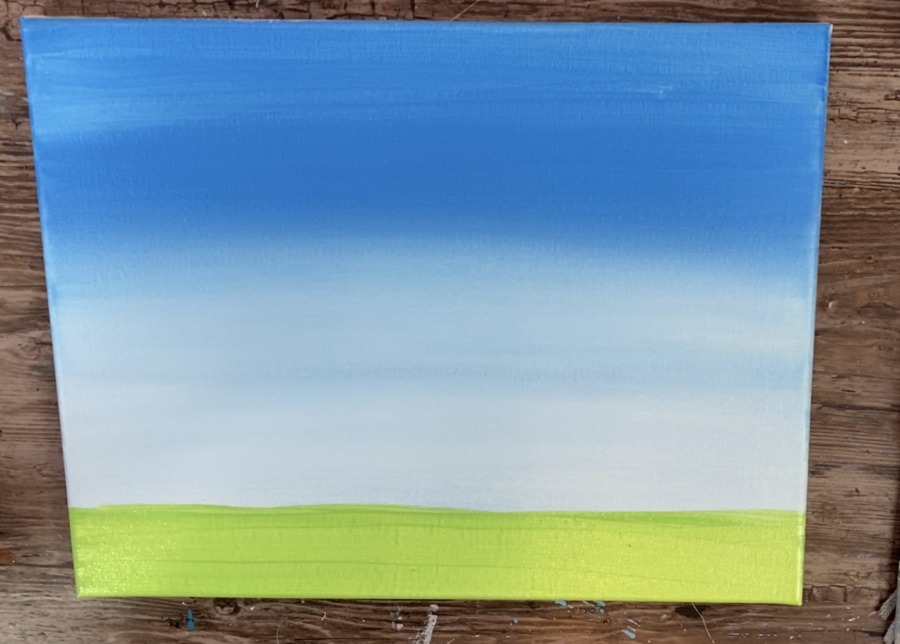
To do the grass blades, load your palette with deep green permanent, titanium white and more brilliant yellow green (if needed).

Use a 4 round brush. Mix white with brilliant yellow green to make a light green. Start at the top (close to the horizon line).
Paint light green grass lines all across the horizon line. Note: this is very similar to the grass in my Easter Bunny Painting if you have done that one!
Basically, we are making lighter grass blades in the back (top) and darker ones on the front (bottom).
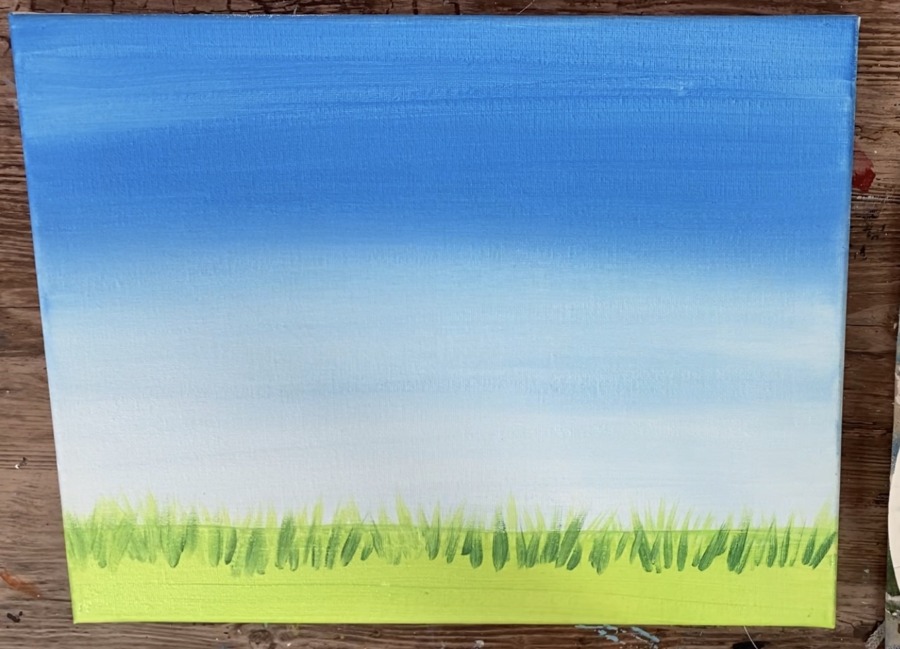
Then load your brush in some deep green permanent and paint another row of grass lines. This should be a medium green color but not as dark as the deep green permanent because it mixes with the lighter green.
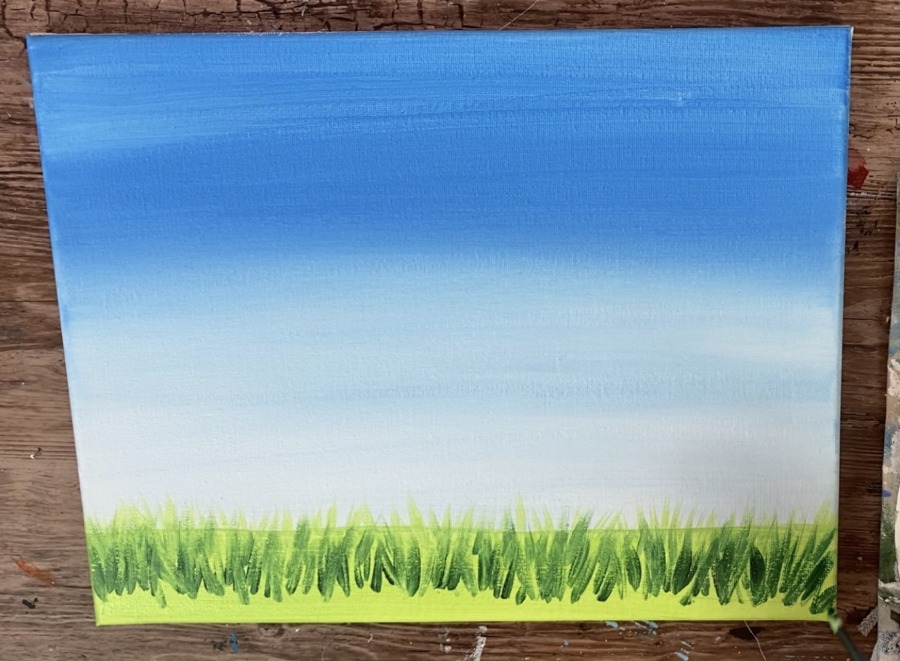
Then do another row but with more deep green permanent on your brush so the grass blades are darker.
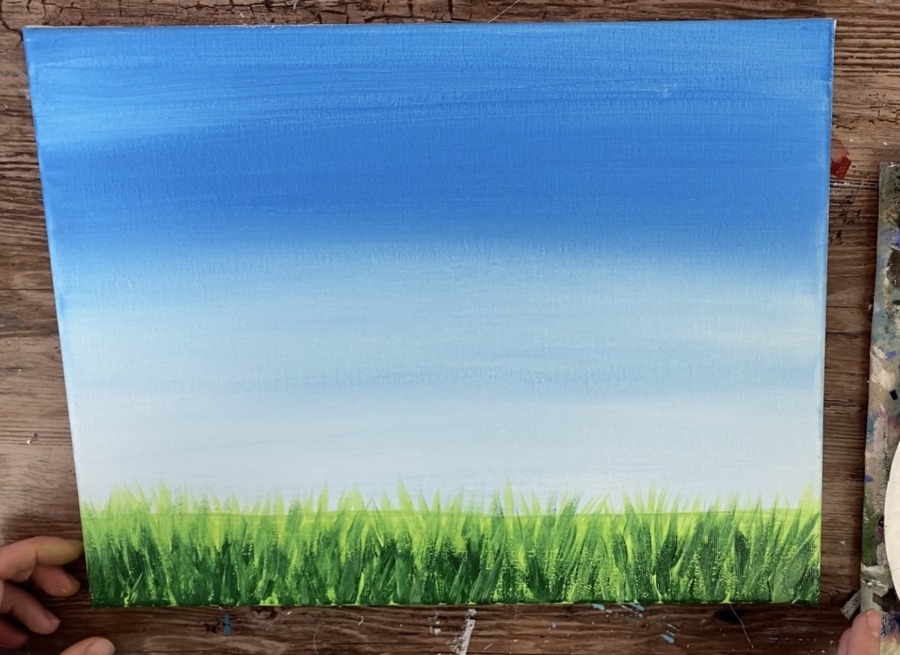
Do one final row of grass blades on the bottom with just the deep green permanent.
3. Trace or draw the composition onto the canvas
You will need to wait for your entire painting to dry before doing any drawing over the sky and grass.

If you are using my traceable, lay a sheet of graphite paper below the traceable. Then trace with any writing utensil.
If you are drawing, you can either draw this on a separate sheet of paper and then transfer it or you can draw directly onto the canvas.

The design will transfer.
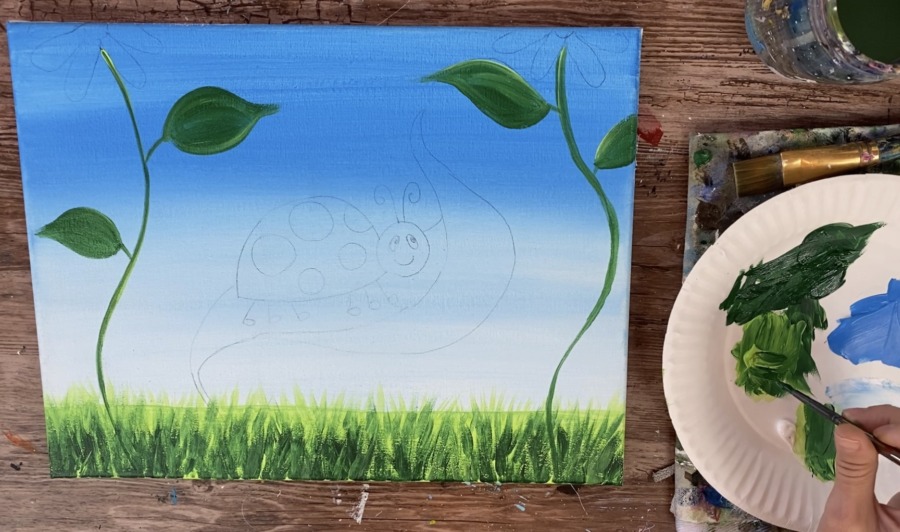
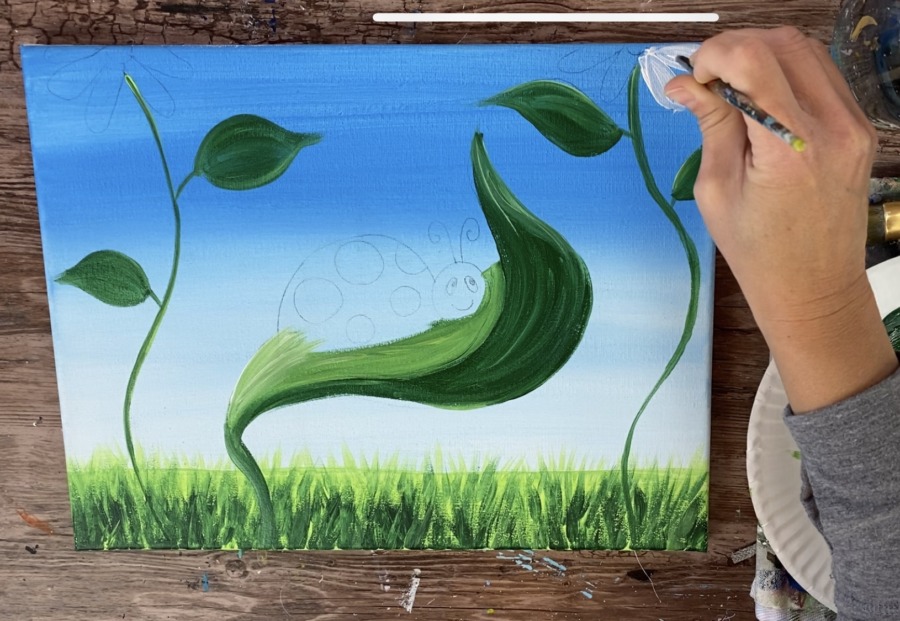
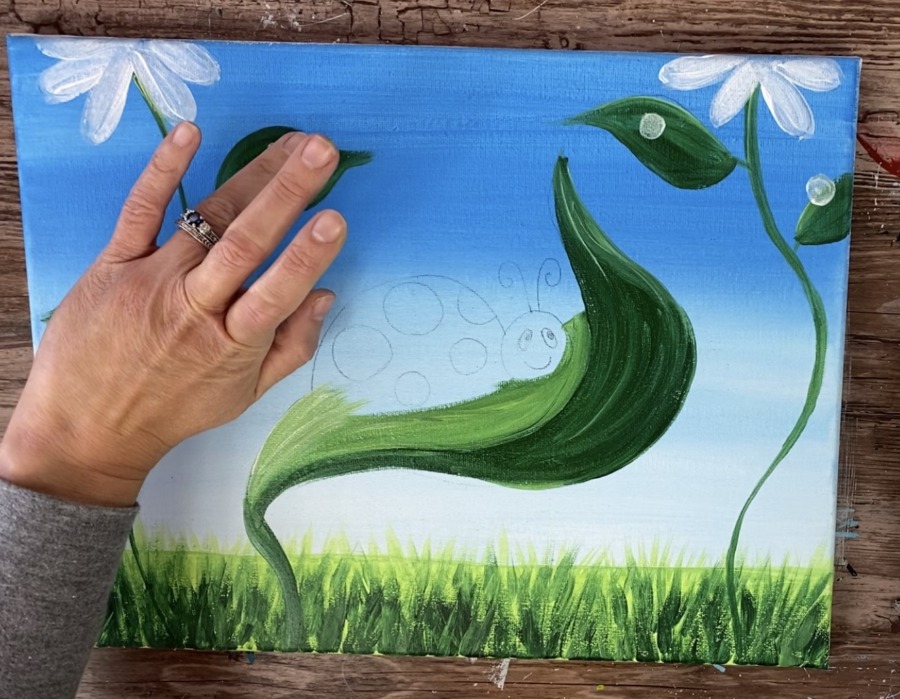
4. Paint the stems and leaves
Using your 4 round brush, double load it in both brilliant yellow green and deep green permanent.
Paint both of the stems of each of the flowers. Use the tip of your round brush to make these thin lines.

Then paint the leaves. To get that color variation in the greens, double load your brush in both the light and dark green and let them blend on the canvas as you are filling in the shape.
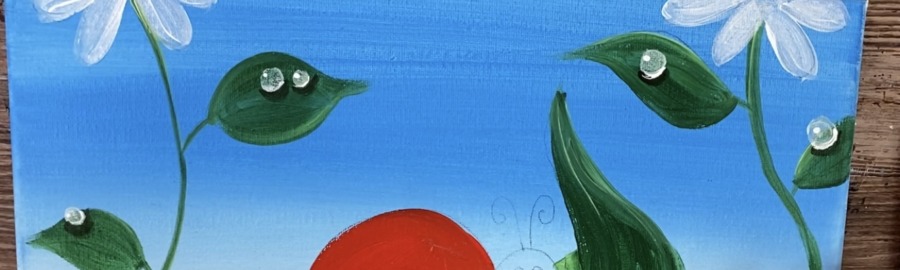
5. Paint the large leaf
Observe how the large leaf is curled. The part that the ladybug is standing on is lighter and the folded under part is darker.
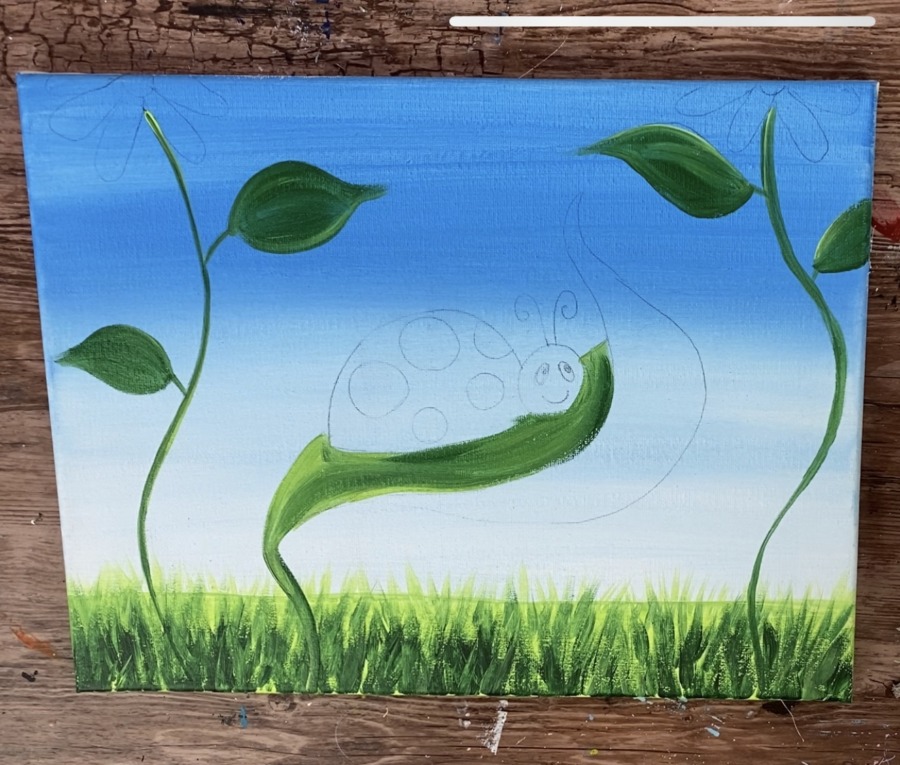
First paint the part of the leaf that the ladybug is standing on. Double load your brush in brilliant yellow green with just a little deep green permanent. This should be the same green shade as the smaller leaves.
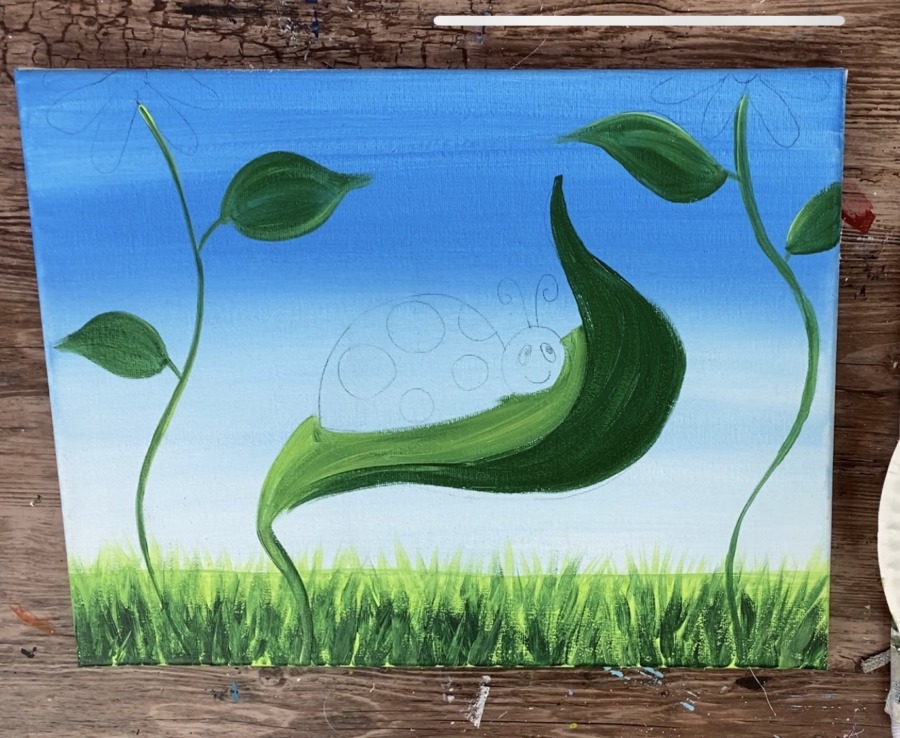
Then paint the other part of the leaf, the part that is curled, with just deep green permanent and only a little brilliant yellow green.
The darker and lighter areas of the leaf divide the curled part. Tip: make the direction of your strokes contour to the direction the leaf is going.
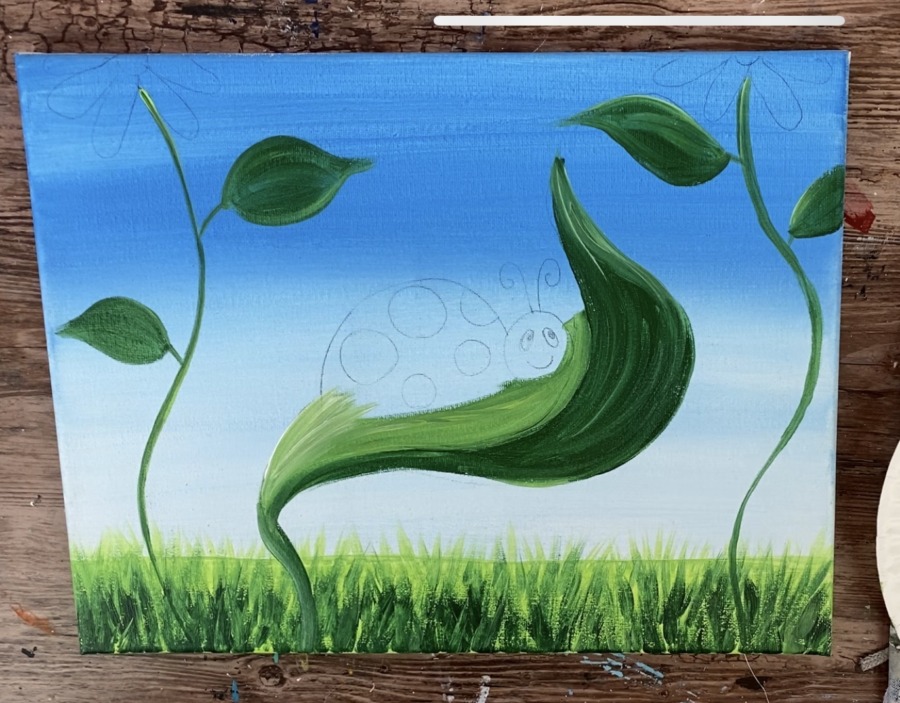
Then, as an added detail, you can add a bit of white into the leaf and blend it in. I did this to the far upper right part of the leaf where it is pointed as well as the far lower left part of the leaf under the ladybug.
Tip: it’s okay to paint over your drawing!
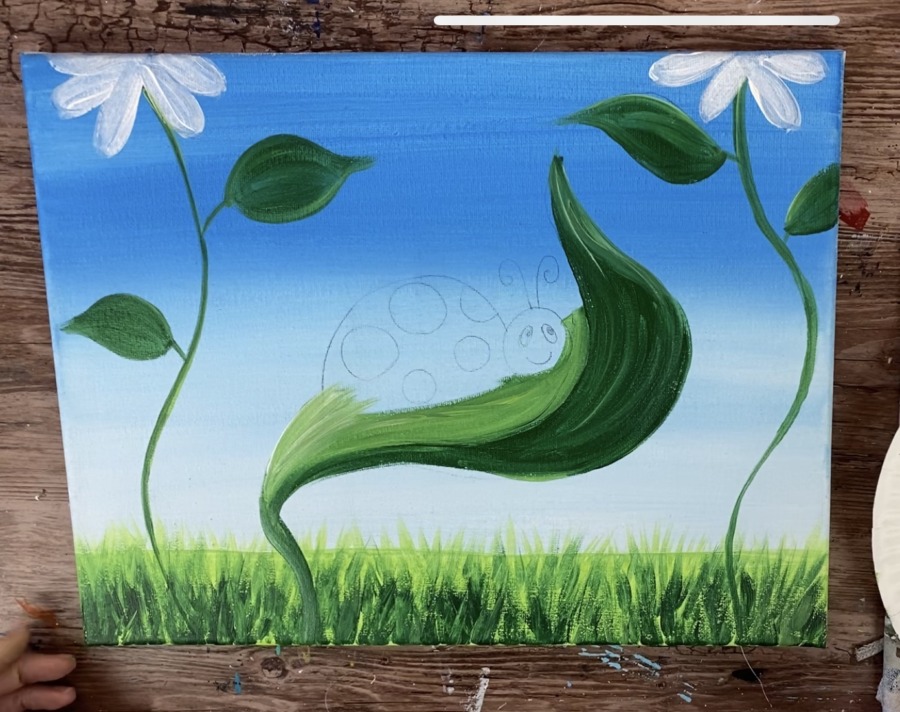
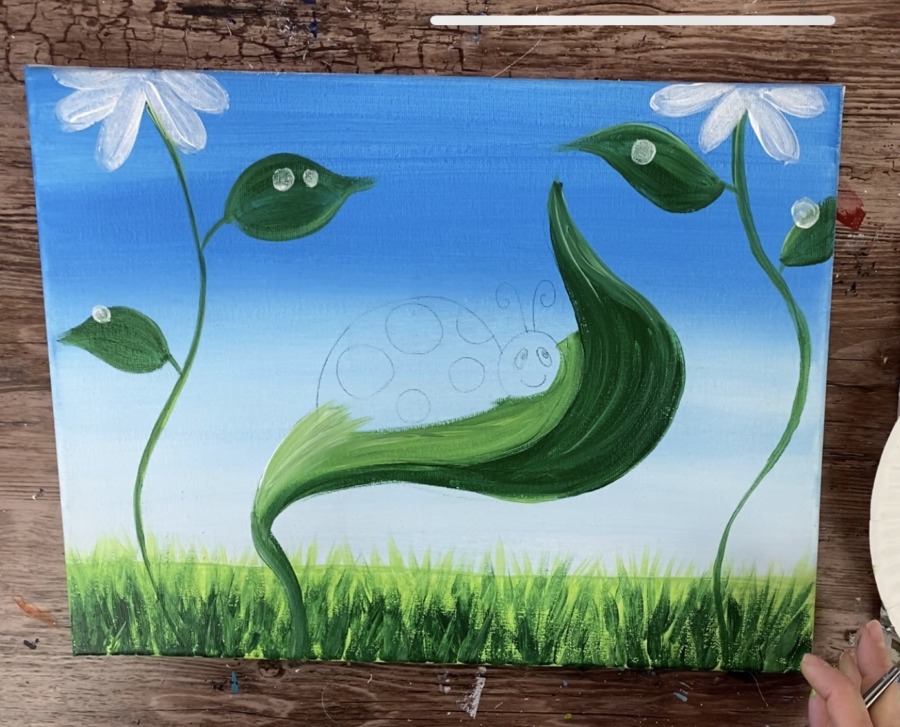
6. Paint the flowers
Then completely rinse the greens off your 4 round brush and dry. Paint the petals of the flowers with titanium white.
Only the bottom half of these two flowers are showing.
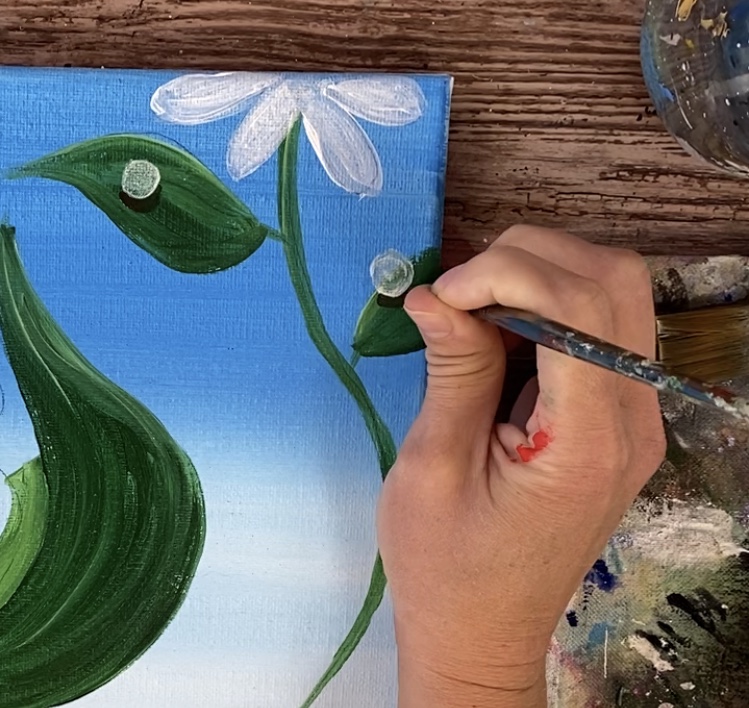
7. Paint the dewdrops
To do the dewdrops, first paint small white circles on all the leaves.
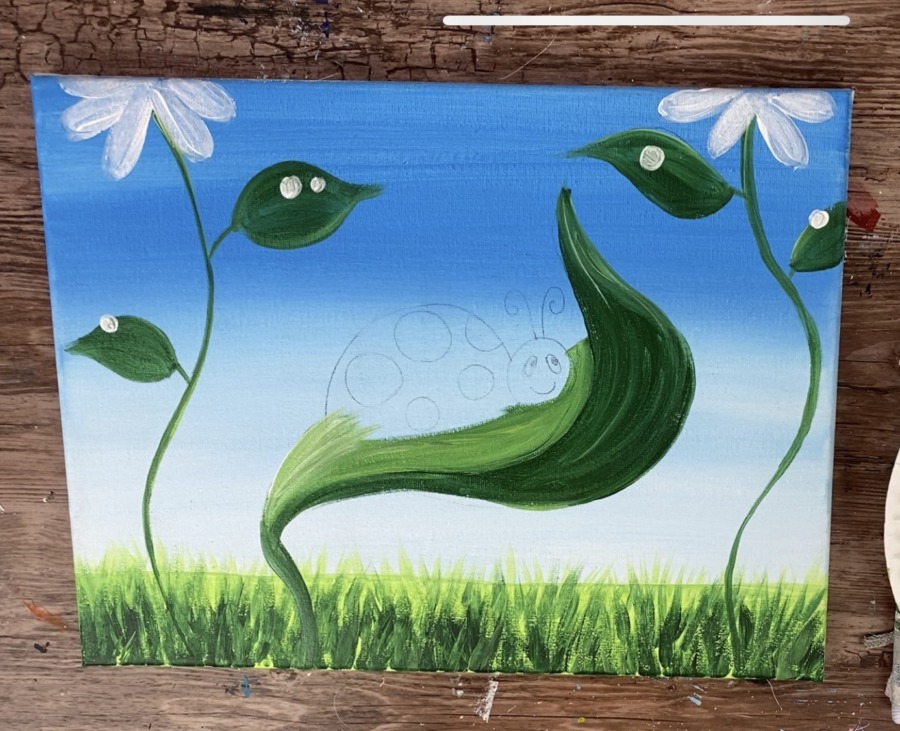
Then, to make them look lighter in color, take your finger tip and press it on each of the circles. This will remove some paint off of the white circles making them look a little see through just like a drop of water!
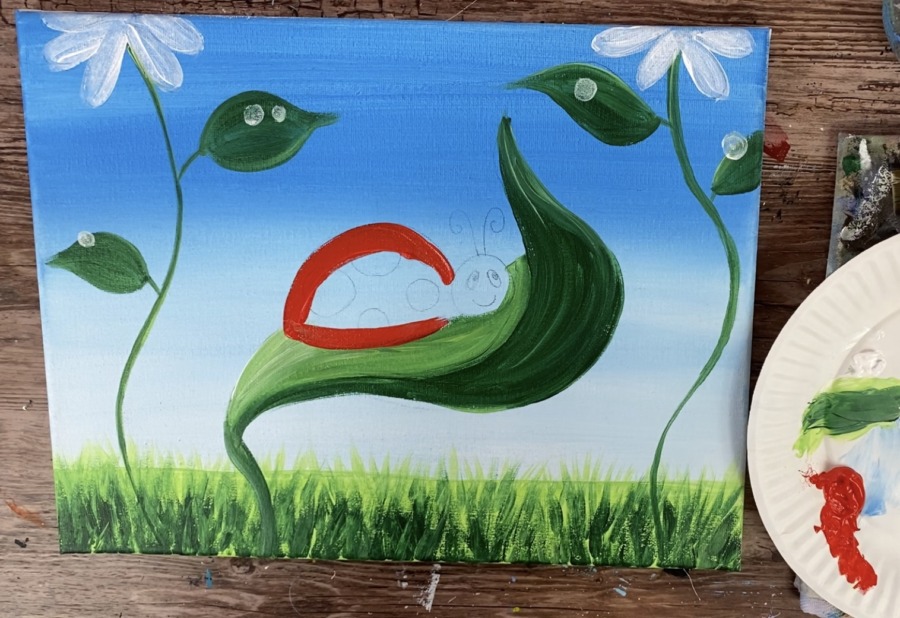
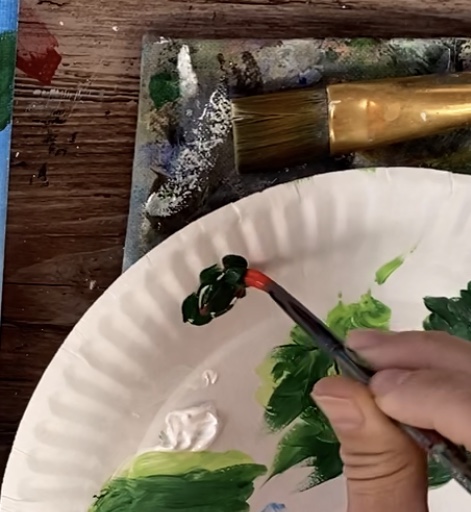
8. Paint the ladybug body
Use your 4 round brush and Pyrrole red to paint the body of the ladybug. You may want to paint around the spots or over them. I chose to paint over the spots.
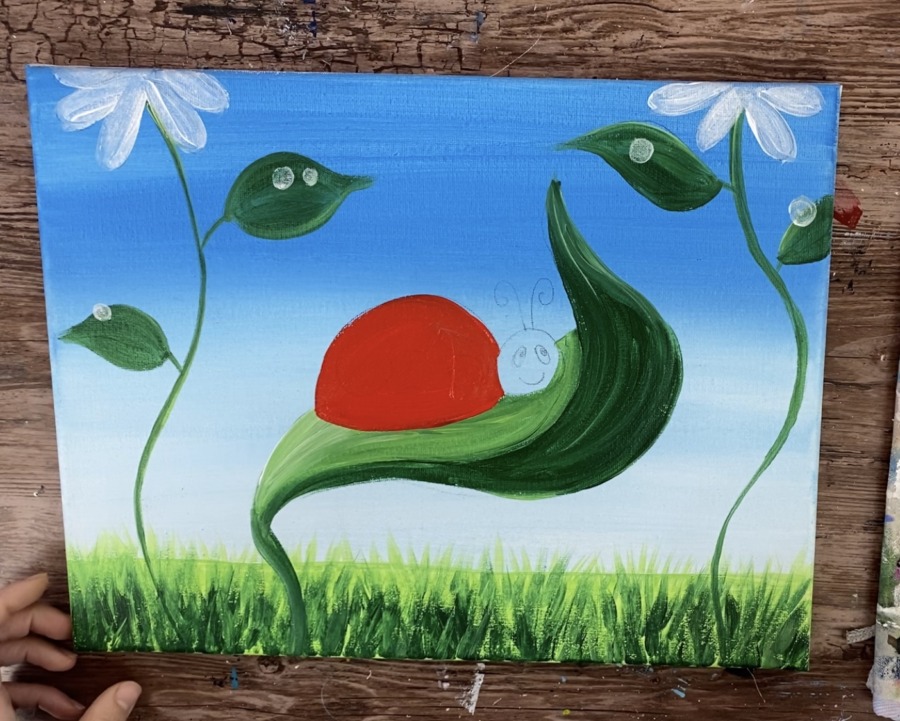
9. Paint the shadows under the dewdrops (Optional)
If you want to make the dewdrops look a little more realistic, paint a dark shadow under each of them. To do this, mix a little red with deep green permanent (about 1 part red, 3 parts green). This will make a very dark green – perfect for a shadow color!
Take your 4 round brush and paint a small curved area just under each of the dewdrops.
Tip: if your 4 round brush seems too thick, try using a 5/0 round or the tiniest round brush you have!
Then clean your brush off and add just white to it. Paint a tiny white dot on the top left of all the dewdrops!
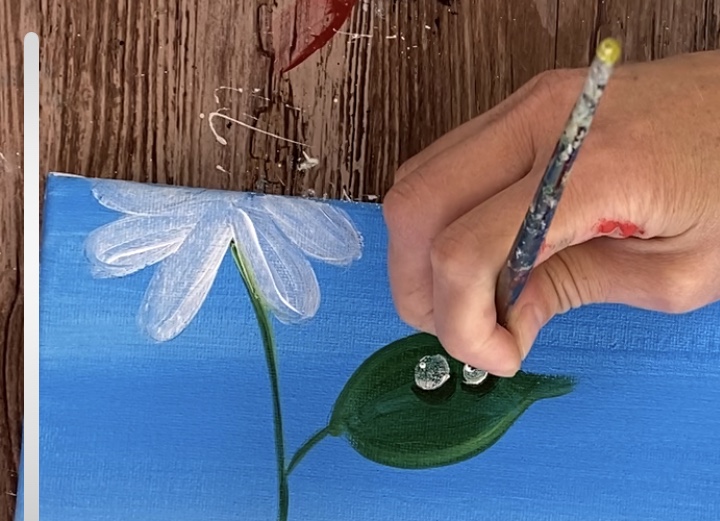
You can also add just a little more white at the very bottom of each of the circles just above the shadows. In other words, outline just the bottom curve of the circle above the shadow.
10. Paint the ladybug head
Use your 4 round brush and mars black to paint the circle of the ladybug head black.
Additionally, paint some small black dots where the centers of the white flowers are at the very top of the painting.
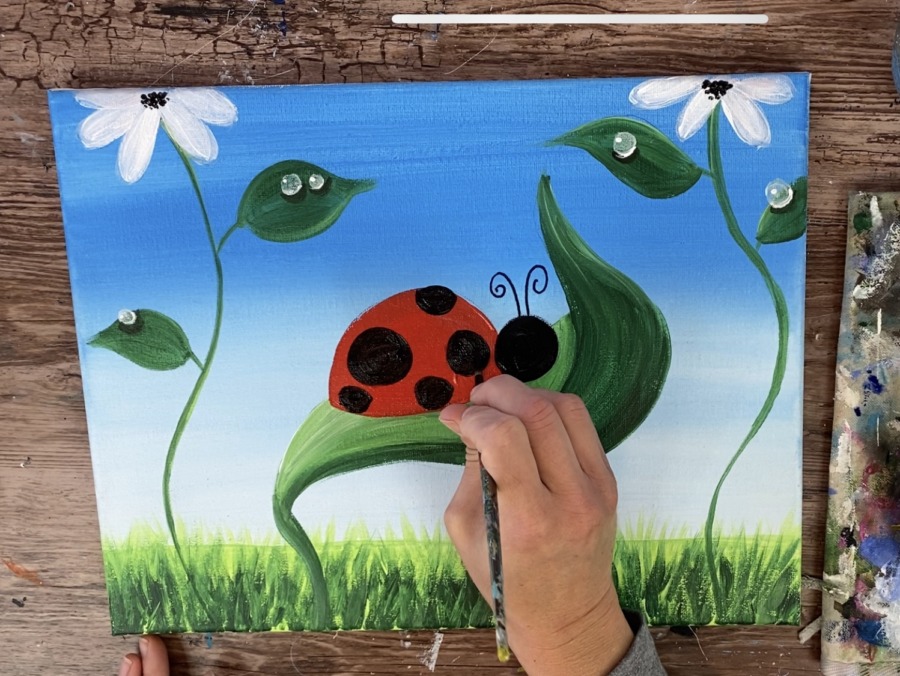
11. Draw or paint the antennae
I used a standard sharpie black marker for the antennae! You can do the same or use a tiny brush to paint the black antennae.


12. Paint the spots
If your red is dry, use a 4 round brush to paint the spots on the ladybug.
13. Draw or paint the legs
Then, if your leaf is dry use a sharpie or a tiny paint brush to paint or draw the legs.
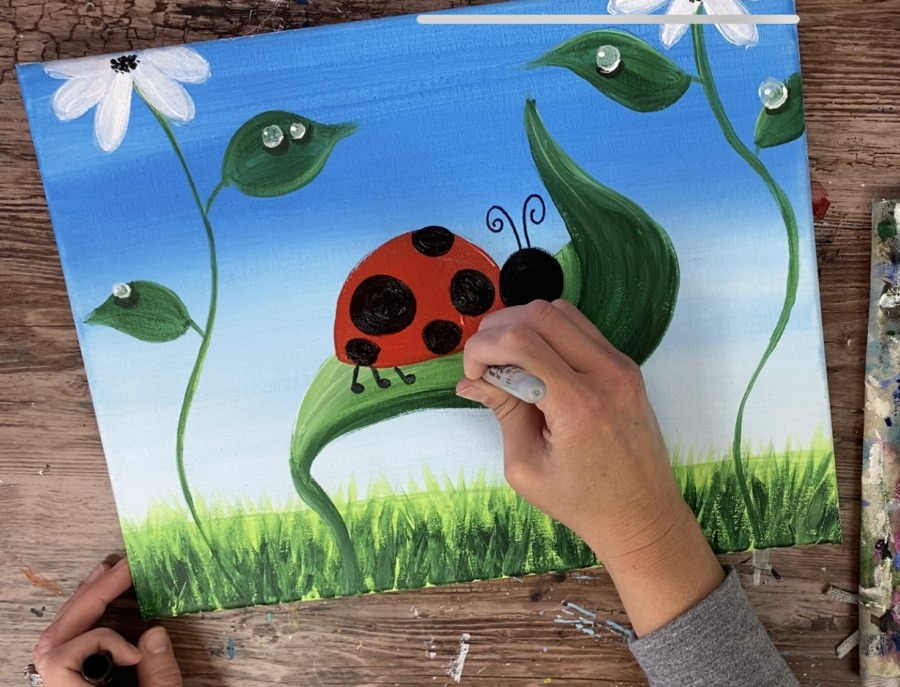

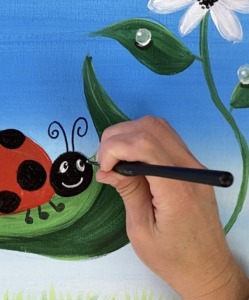
14. Draw or paint the face
If you have a white sharpie or paint pen, you can do it with that. I used a tiny round brush to paint the eyes and mouth.
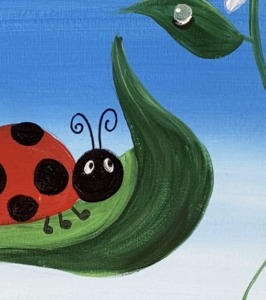
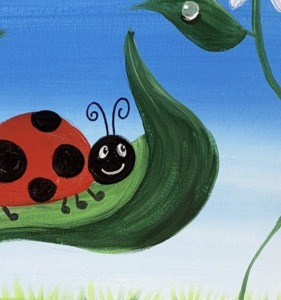
15. Add highlight on the ladybug
Finally, if you look closely, there is a small white line on the top left of the ladybug’s back as well as the left side of the ladybug’s head.
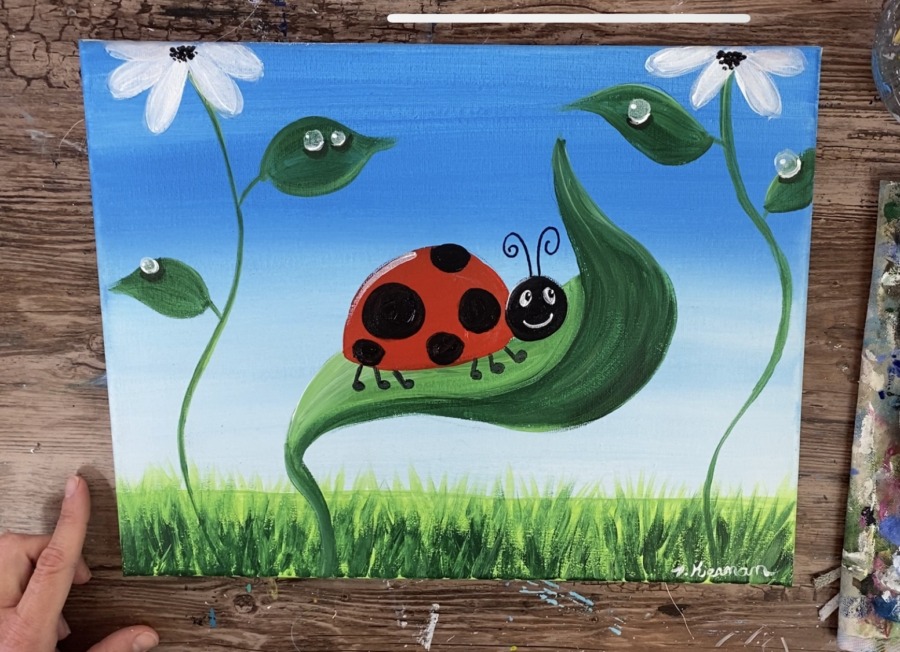
Finished!
Sign your name and show it off!!
1 thought on “Ladybug Painting”
Comments are closed.