
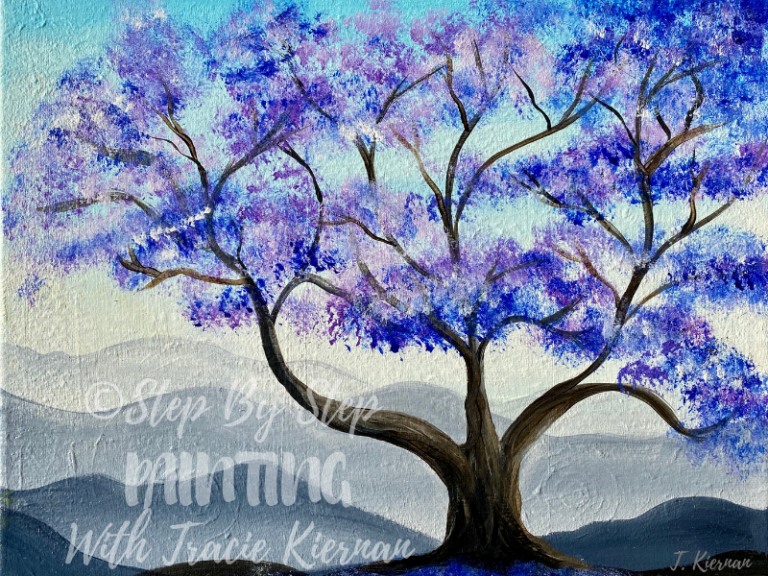
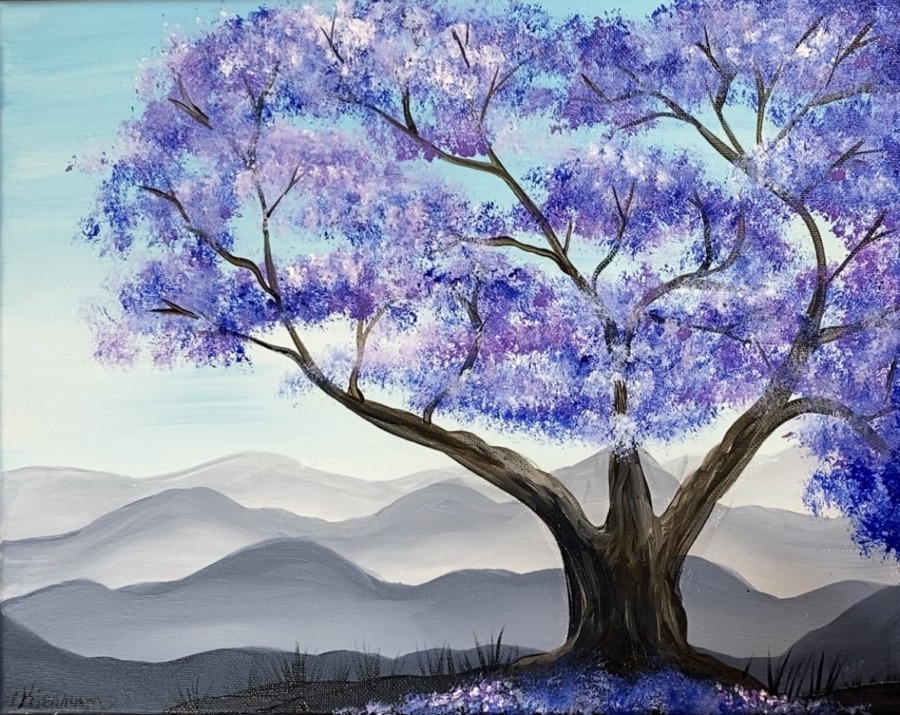
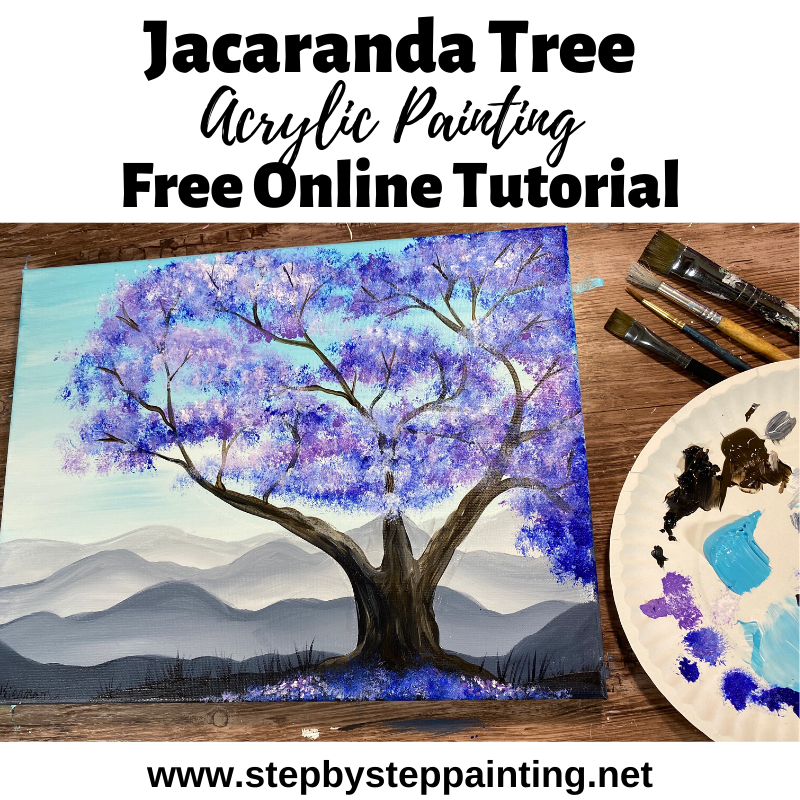
How To Paint A Jacaranda Tree
Would you like to save this?
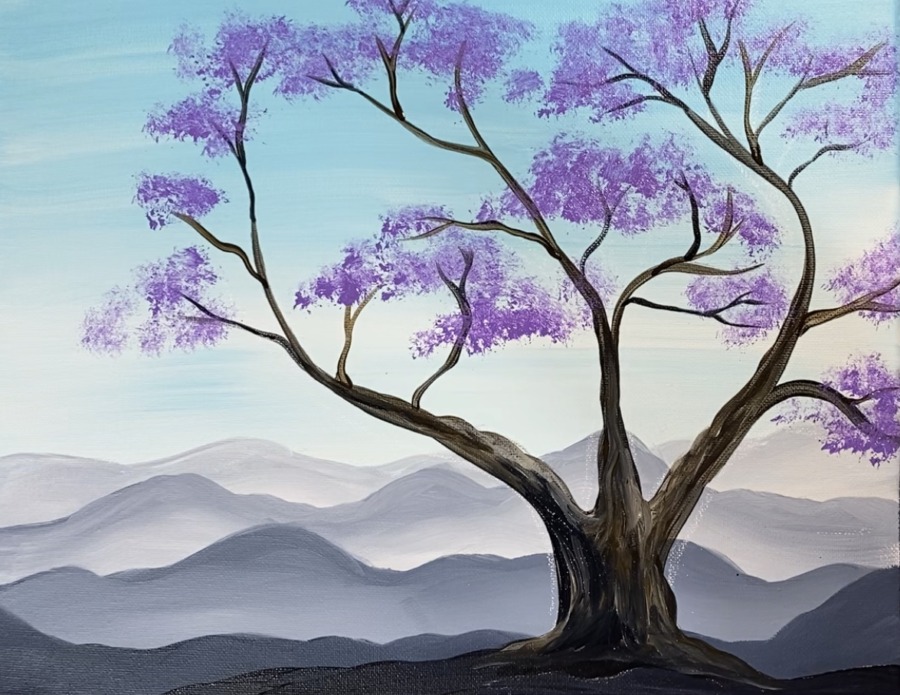
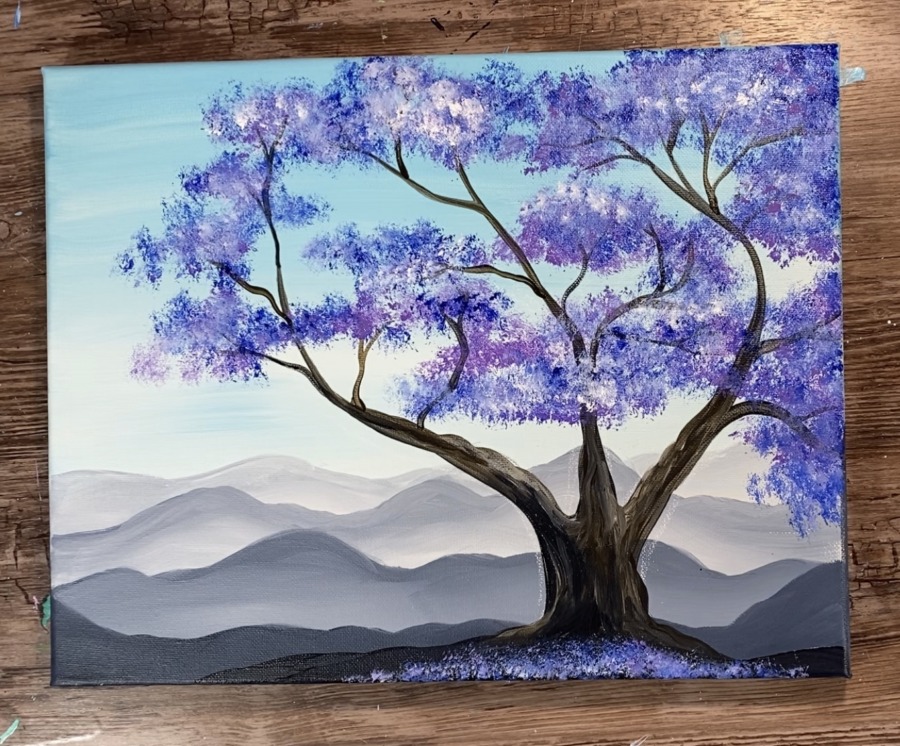
Learn how to paint a Jacaranda tree step by step!
This is a simple painting with a limited color palette. I did this on an 11 x 14 canvas with acrylics.
You can do these pretty purple blossoms with a special brush I like to call a “scruffy brush”. And it’s SO EASY!
I used one of the round brushes in this set. You can use any brush, preferably a round brush, that has the stiff, natural scratchy bristles.

Have an old brush that is crazy out of shape? It may be perfect for this tree!
You can also use what is called a “deer foot brush” for this technique.

![]()
The stiffness of the bristles make for perfect texture brush to “dab” the blossoms.
I LOVE Jacaranda trees! They are one of my favorite trees for their beauty. And the word, Jacaranda, is just a fun word to say! :-p
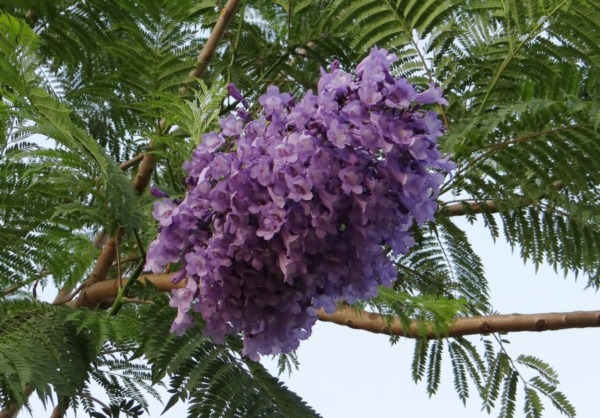
We have them around Arizona and when you see one in bloom around the Spring time, the purple blossoms are so surreal and gorgeous!
I can honestly stare at these trees for hours! I also love how interesting the branches look.
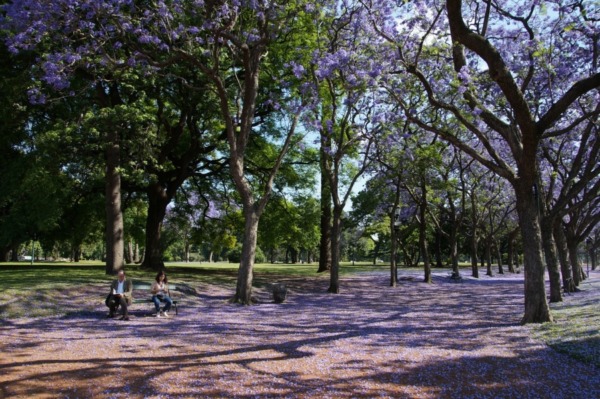
Then when the purple blossoms shed from the tree, you get a blanket of purple all over the ground.
Enjoy and happy painting!
Materials Needed
Jacaranda Tree Painting
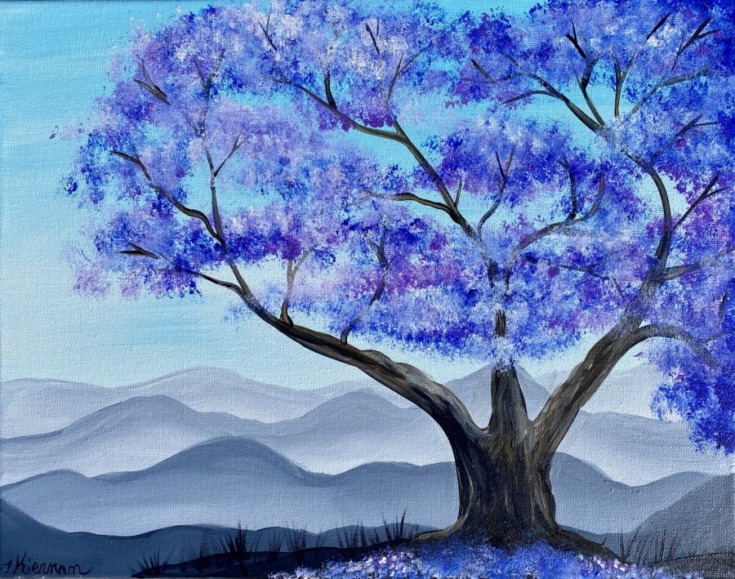
Learn to paint a Jacaranda tree with purple blooms and layers of mountains in the distance.
Materials
- Acrylic Paint
- Brushes
- Canvas 11 x 14
- Chalk (optional if you want to draw the tree first)
Colors
- Titanium White
- Payne’s Grey
- Light Blue Permanent
- Raw Umber
- Brilliant Purple
- Ultramarine Blue
Brushes
Instructions
- See tutorial for full detailed instructions.
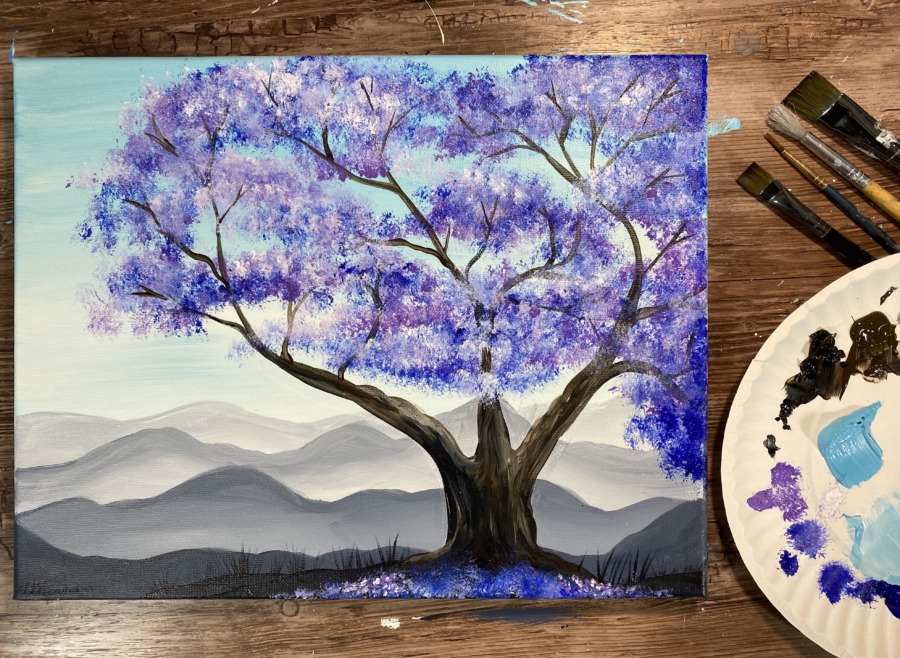
Color Palette
A common question I get is what to substitute “Payne’s Grey” with if you don’t have that color. You can use any black that you have on hand (e.g. Mars Black) and follow the directions as listed. Payne’s grey will give your mountains that bluish undertone while Mars Black will make it more neutral.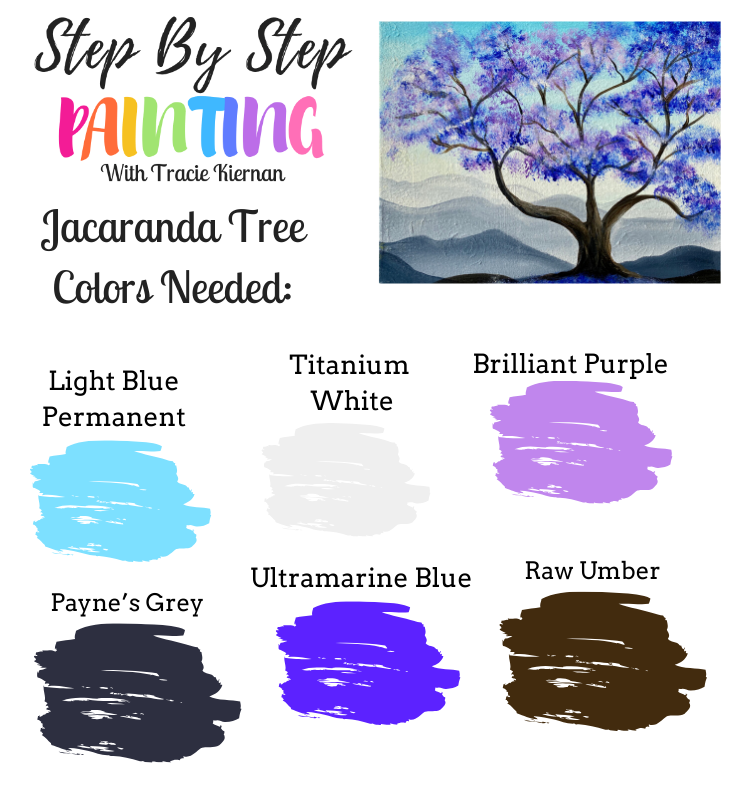
Brushes
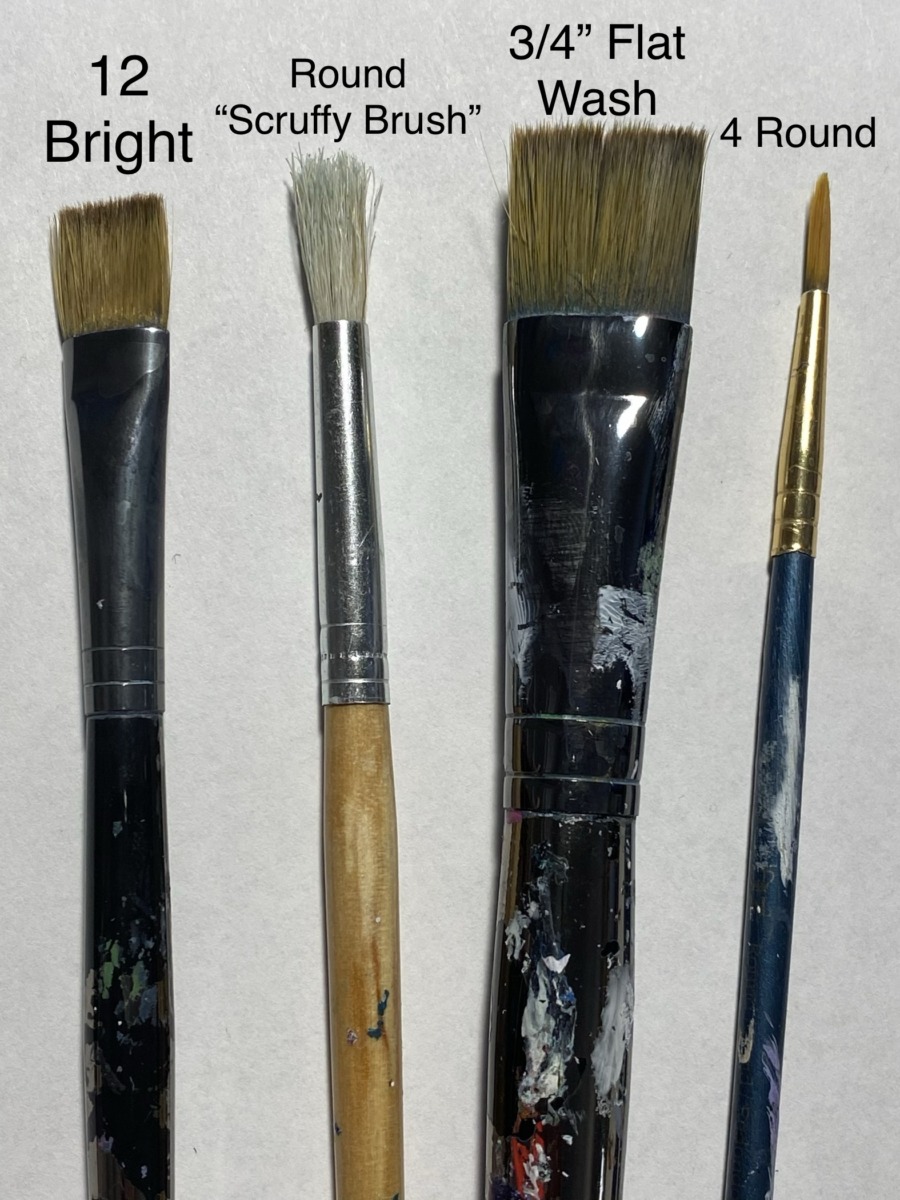
Note: I often get asked about the numbers on the brushes, especially the round brushes. You can use brushes of similar numbers (3 round, 5 round, 10 bright, 1” Flat, etc.) and still do the same techniques!
Directions At A Glance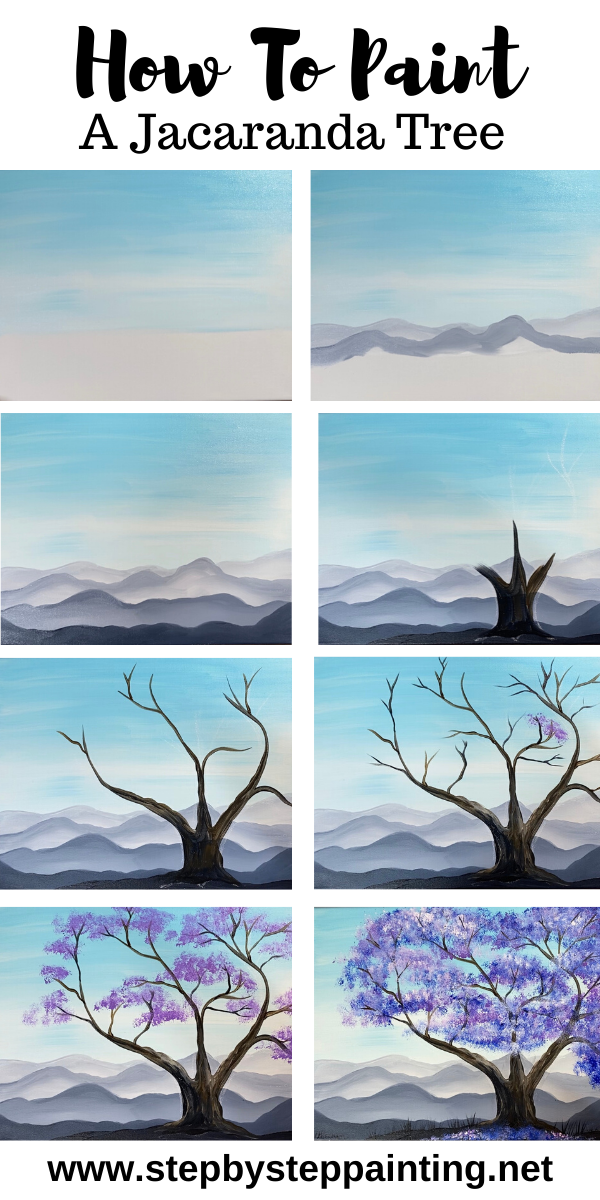

Video
Step By Step Directions
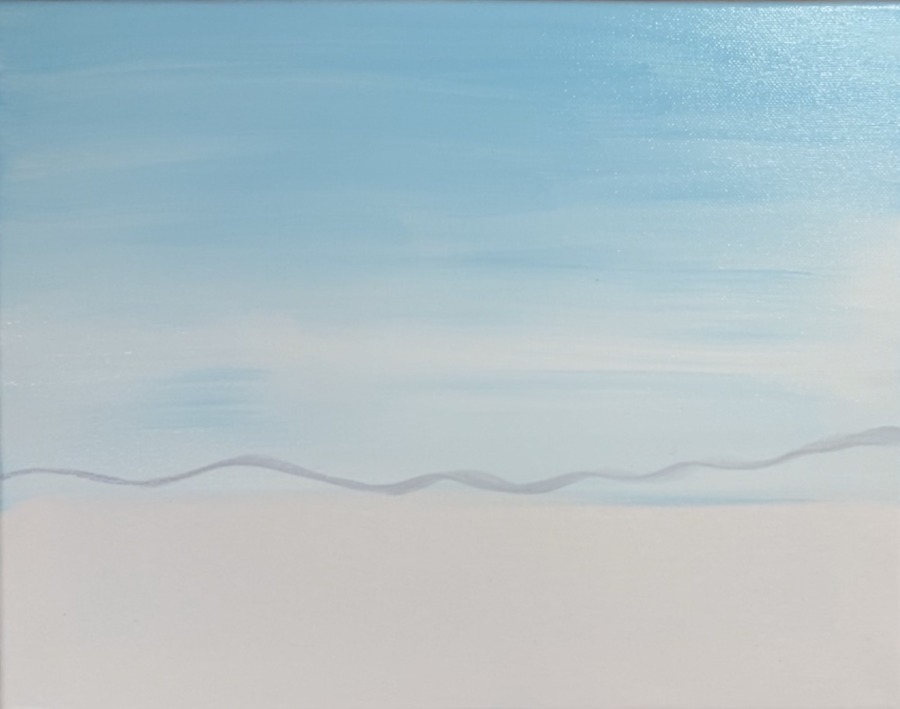
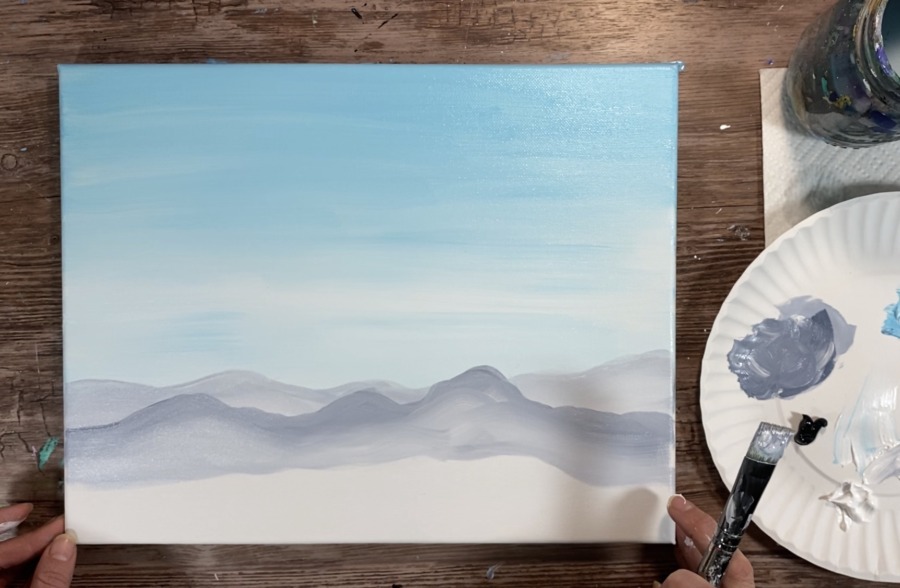
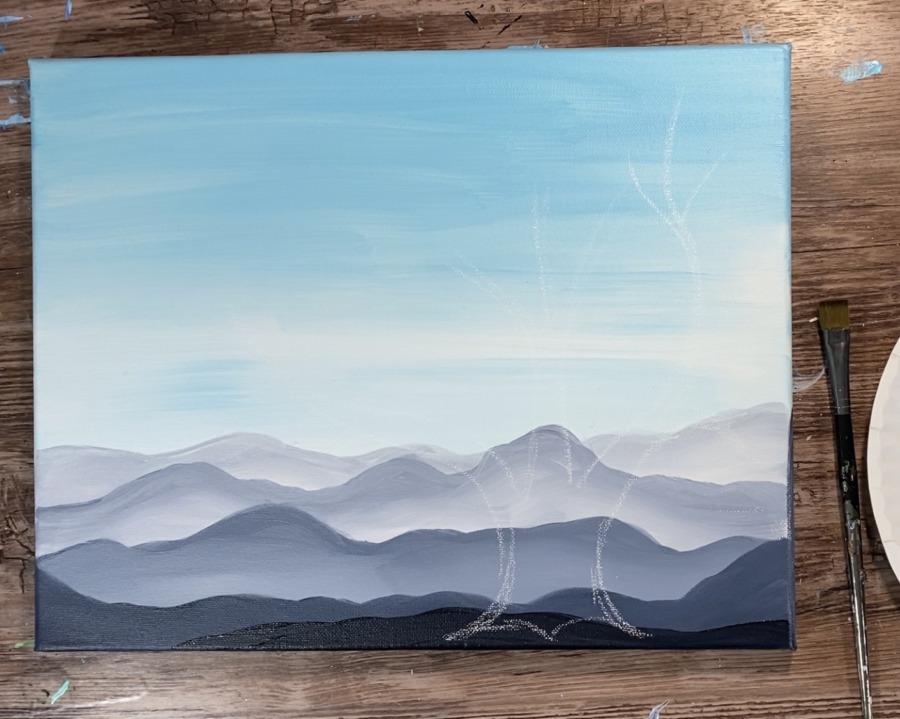
1. Paint the sky
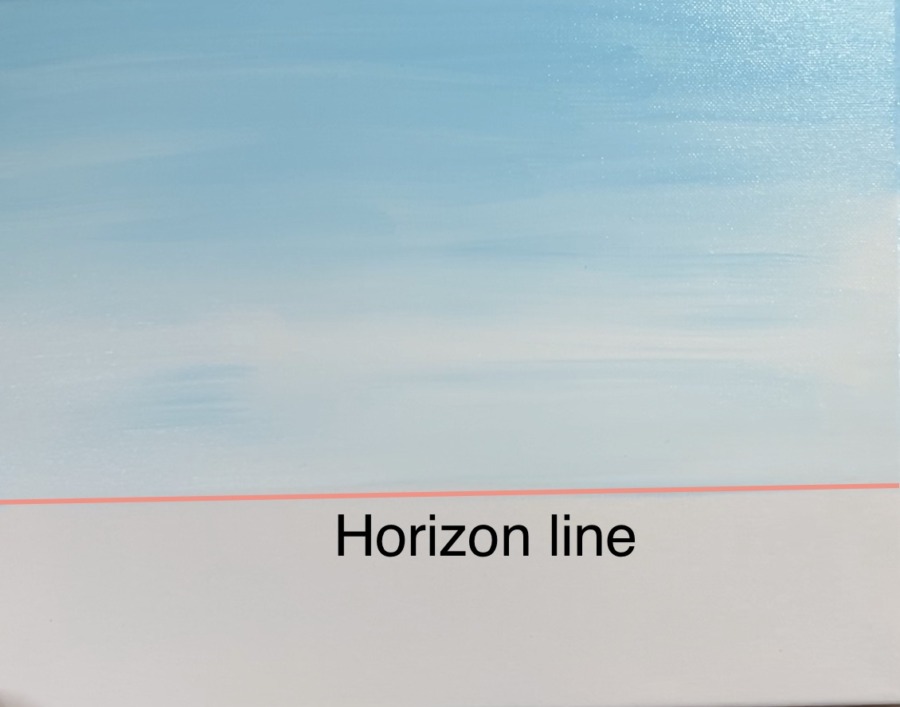
The sky in this painting takes up about 2/3 the canvas. It starts out on top as an almost pure light blue permanent and then gets lighter down towards the horizon line.
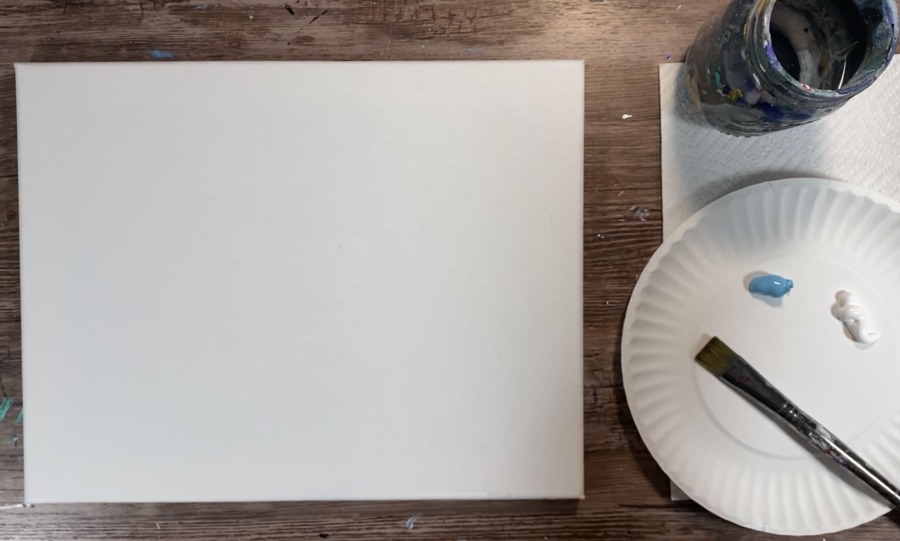
Start at the top. Load your 3/4 flat brush with about 50-50 light blue permanent and titanium white.
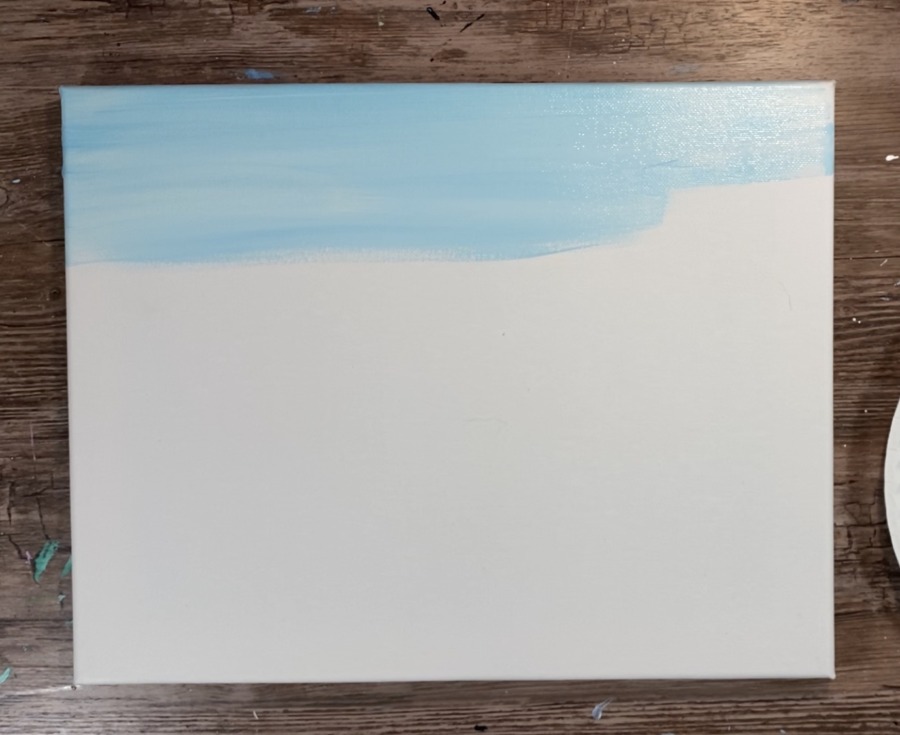
Paint left and right horizontal strokes and work your way down the canvas.
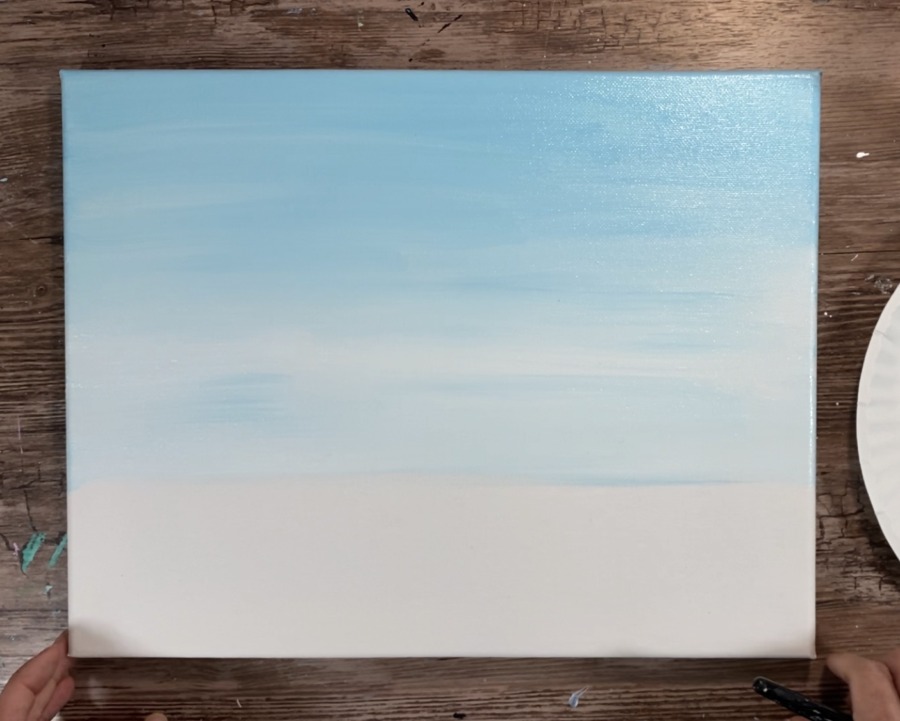
As you work your way down, load your brush in more titanium white so the sky gets lighter as you go down.
You will want your blue to turn very light. Keep adding more white as you work your way down about 2/3 of the canvas.
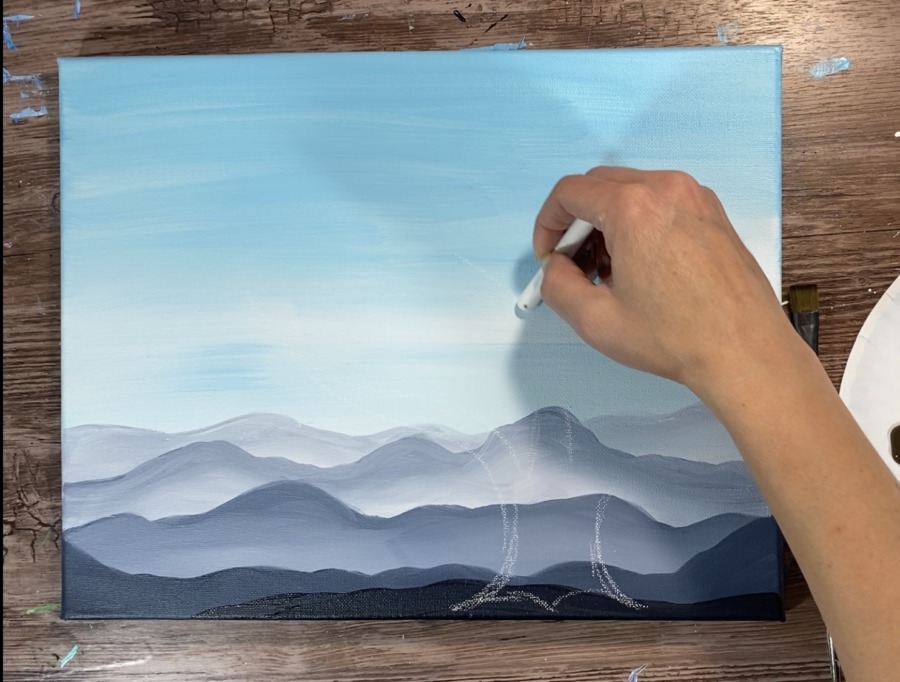
2. Paint the mountains
Note: I did not wait for the blue background to dry, however, if yours seems very wet, try drying it a little with a hair dryer.
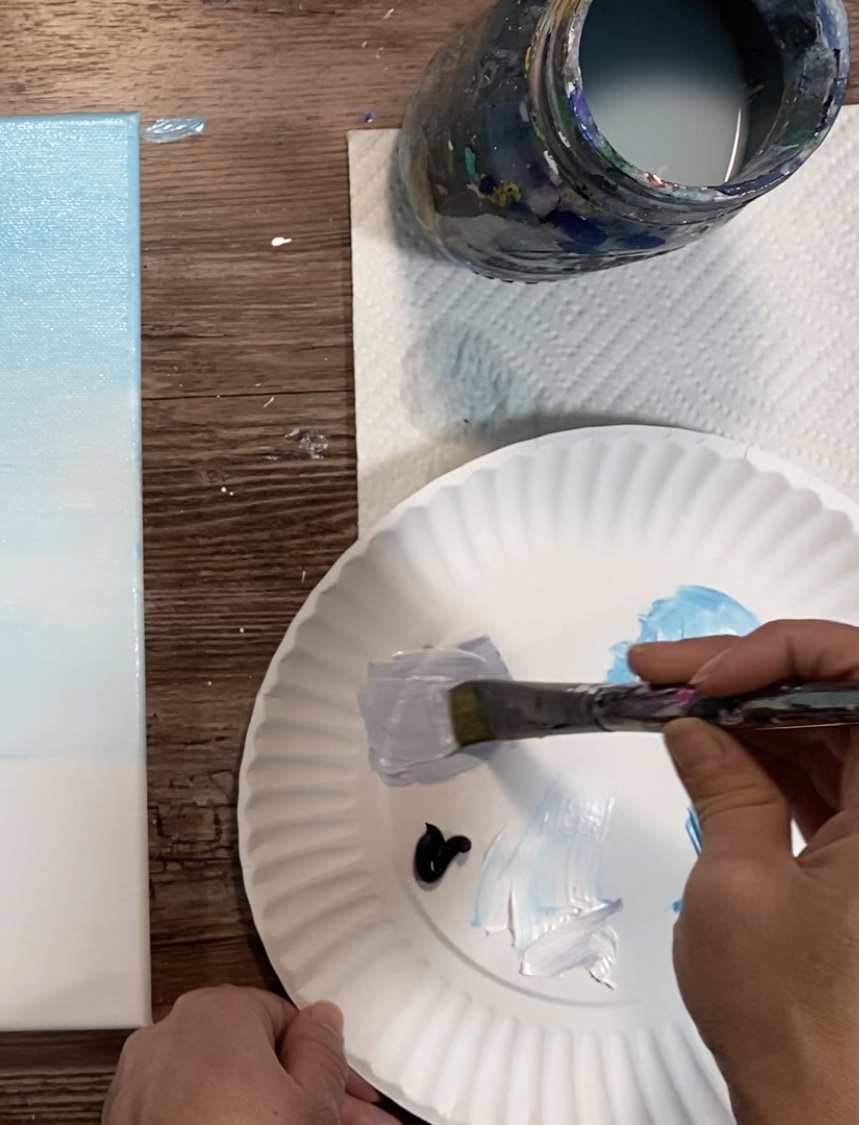
These mountains were done with Payne’s Grey and Titanium White. The mountains way in the distance are the lightest tint and they gradually get darker as you work your way down.
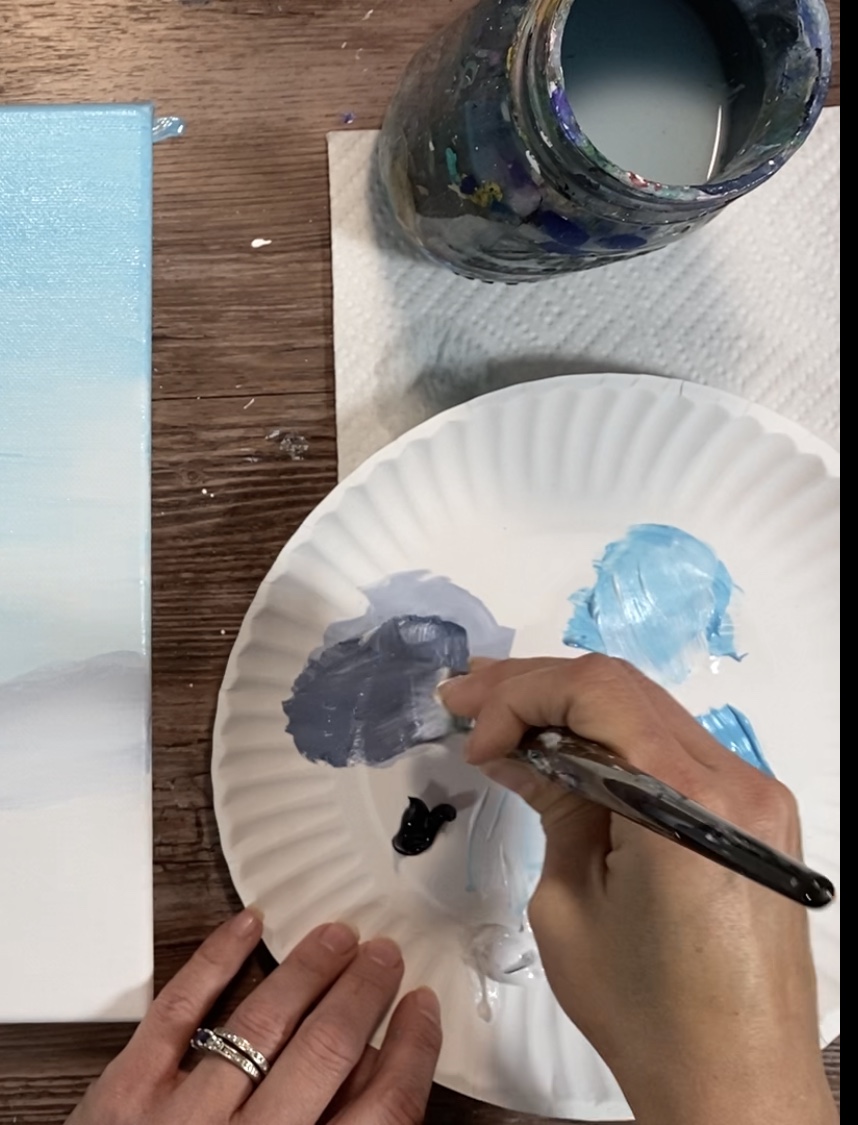
On your palette mix about 6 parts titanium white and 1 part Payne’s Grey so that you get a very light gray.
Use your 3/4 flat brush (the tip) to draw a wavy, uneven mountain line. This line slightly overlaps the sky.
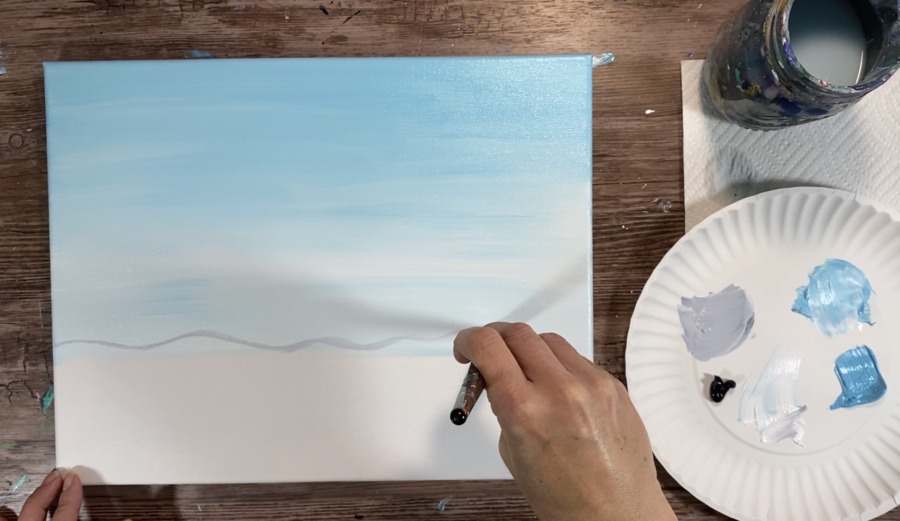
Then fill in your mountains with this same light grey color. I went about 3/4 inches down with this but you don’t have to be precise. 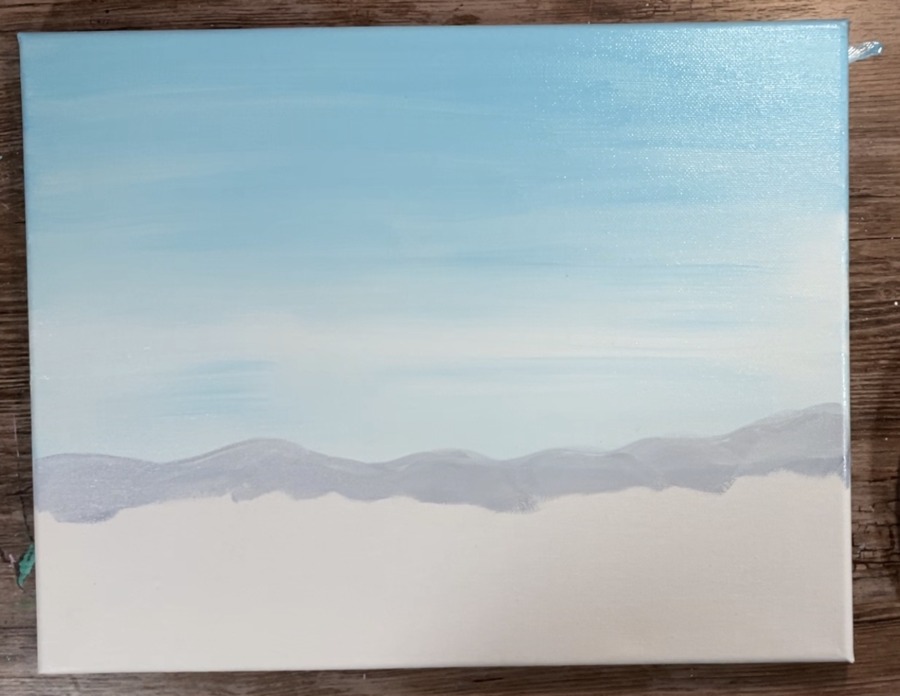
Optional: add more white to the base of that mountain so it looks like it is fading to a very light color on the bottom.
Do this by grabbing more titanium white on your brush, painting the base and blending it back up so it looks like the colors are fading. 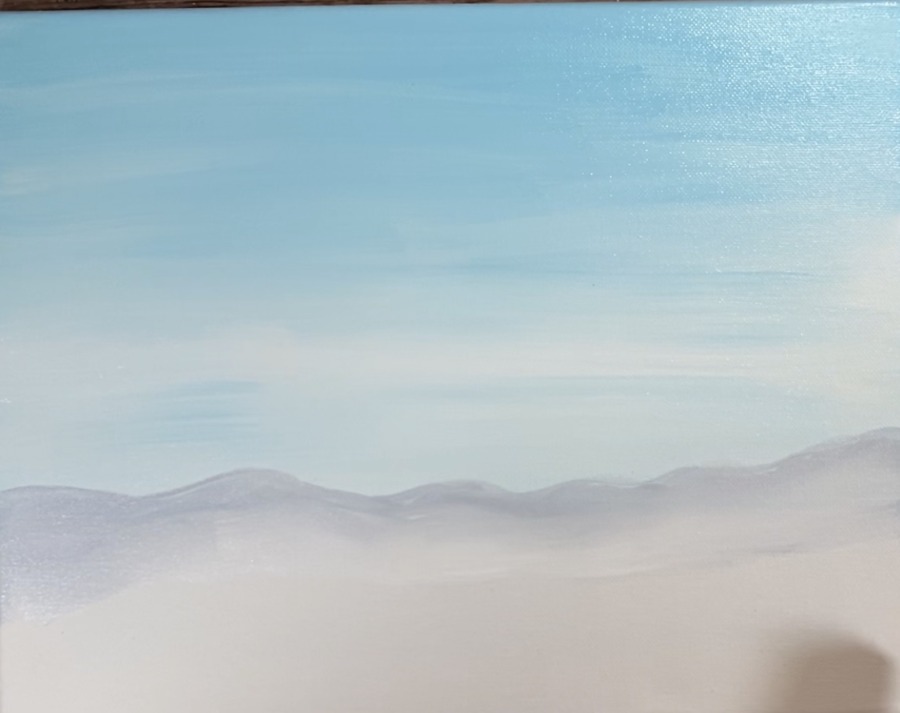
If you are an absolute beginner, you can skip this step of blending more white on the bottom. But doing this gives it more of a “misty mountain” effect.
Next you will want to add a little more Payne’s Grey to your palette so you can get a shade of grey slightly darker than your furthest mountain.
Then draw your next layer of mountain. This mountain line looks more natural if it is different from your first line. You can even make a peak higher than your first line. 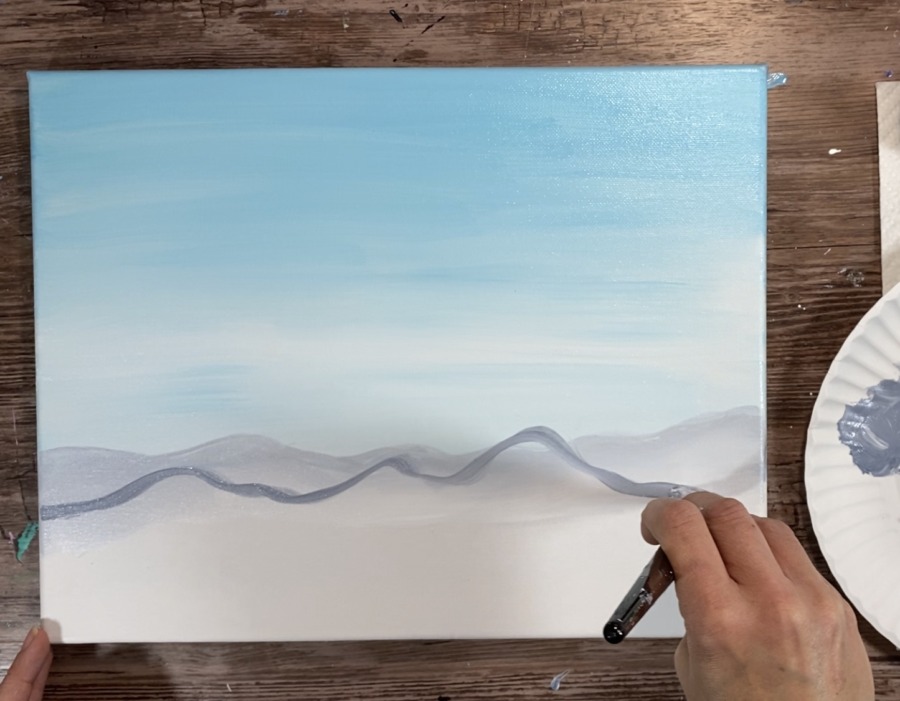
Then do the same thing as you did with your further mountain. Paint it in and add some more white on the bottom so it looks like it is fading down. 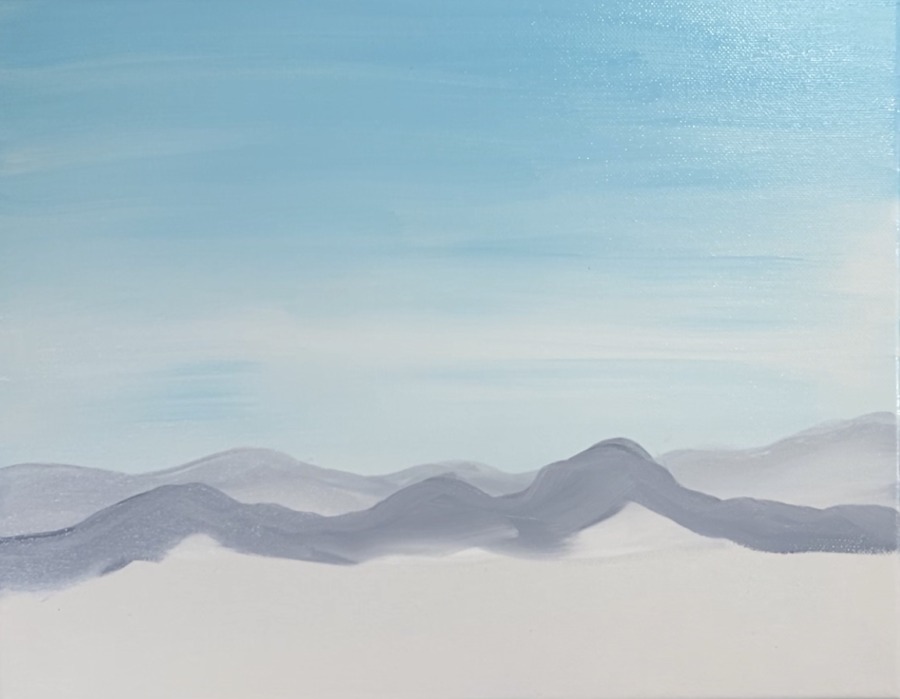
For your third mountain layer, add about two more drops of Payne’s Grey to your previous color so you get a slightly darker grey. Then paint your third mountain line.
I made this mountain line a little more lower so the previous mountain looks like it is larger. 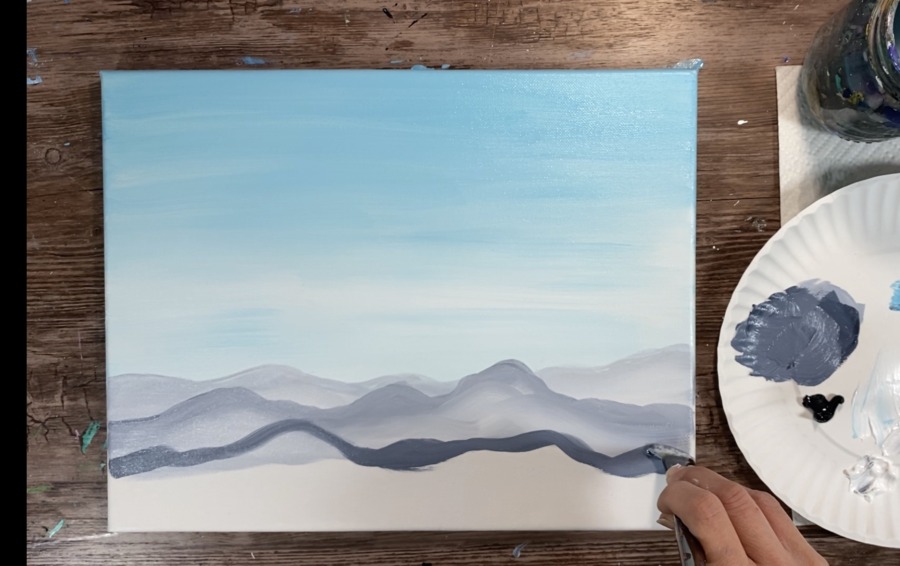
Paint this mountain and add some more white to the base. 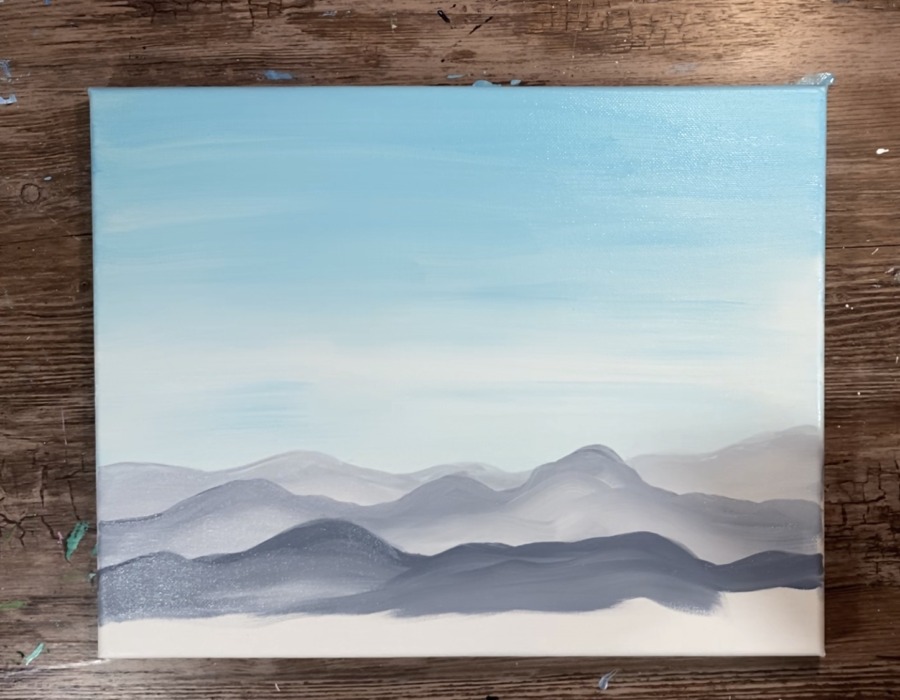
Tip: at no point in painting these mountains did I rinse my brush. If you get excess paint off your brush, you can always wipe it with a paper towel. 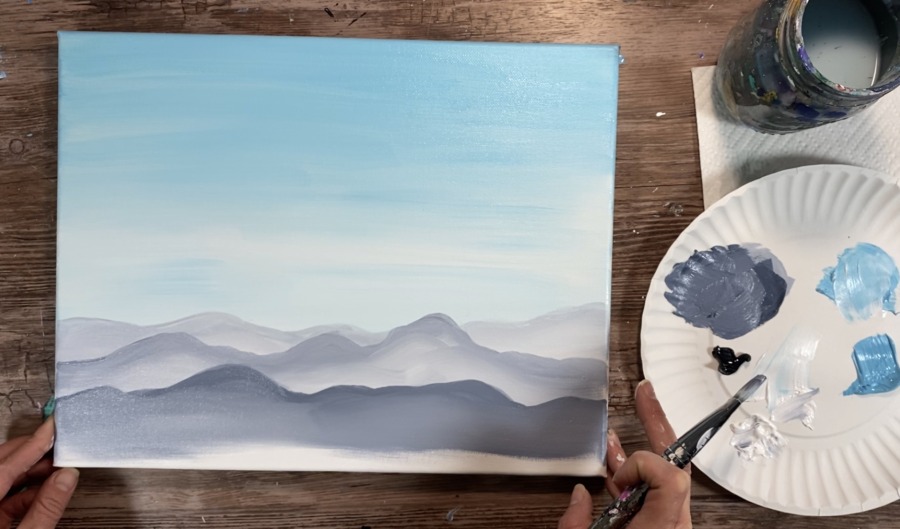
Then I did my 4th mountain line. This one is a little more flat than the previous ones. Also, at this point you should be pretty low on your canvas.
This color was mostly Payne’s Grey with a little titanium white.
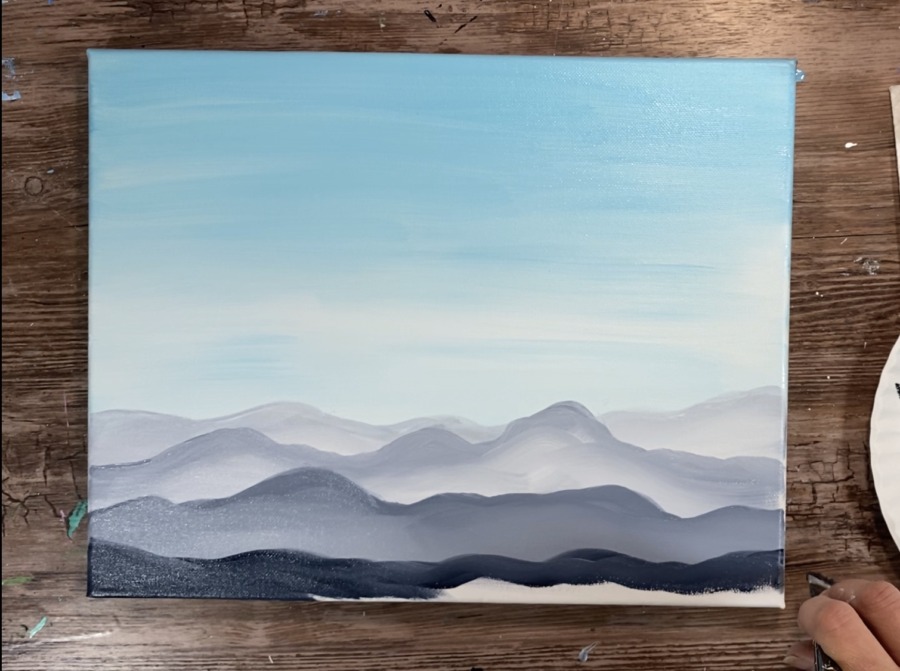
If you want, you can add some white on the base of this layer but I chose not to.
Then I did one more shade darker and one last land line!
Completely rinse and dry your brush and use just Payne’s Grey not mixed with any white. 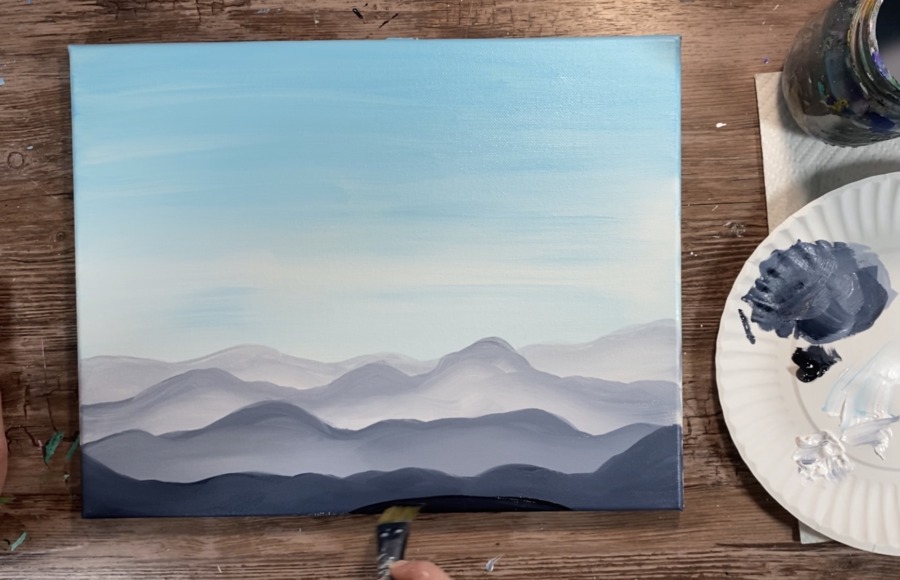
On the bottom of the canvas, make a very low land with that pure Payne’s Grey. This will be the base for our tree.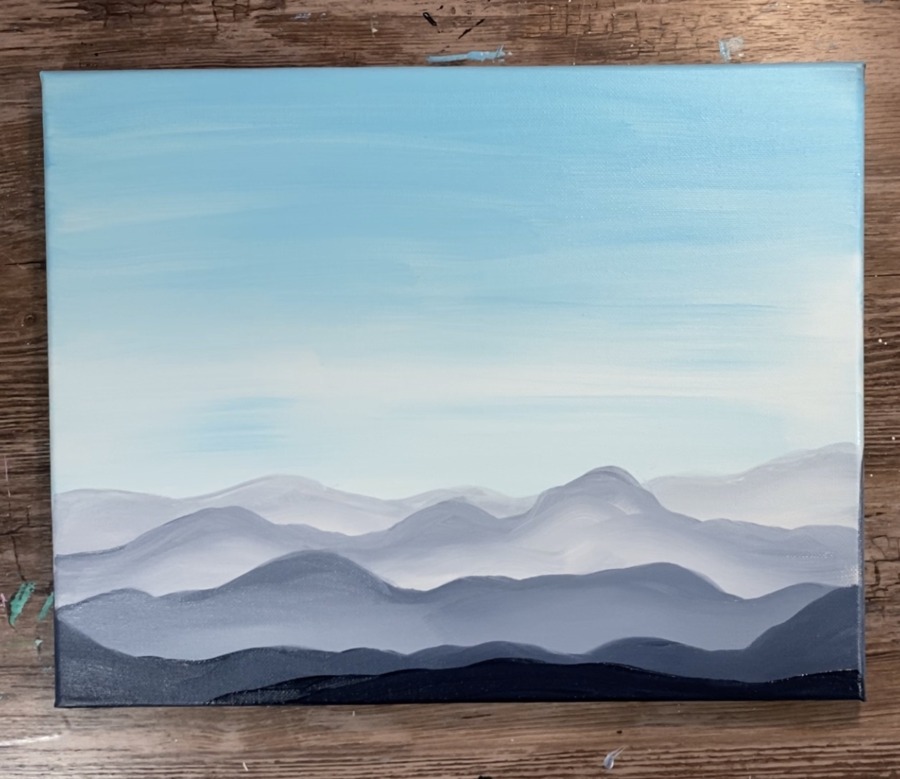
Let your painting dry before moving on to the next step!
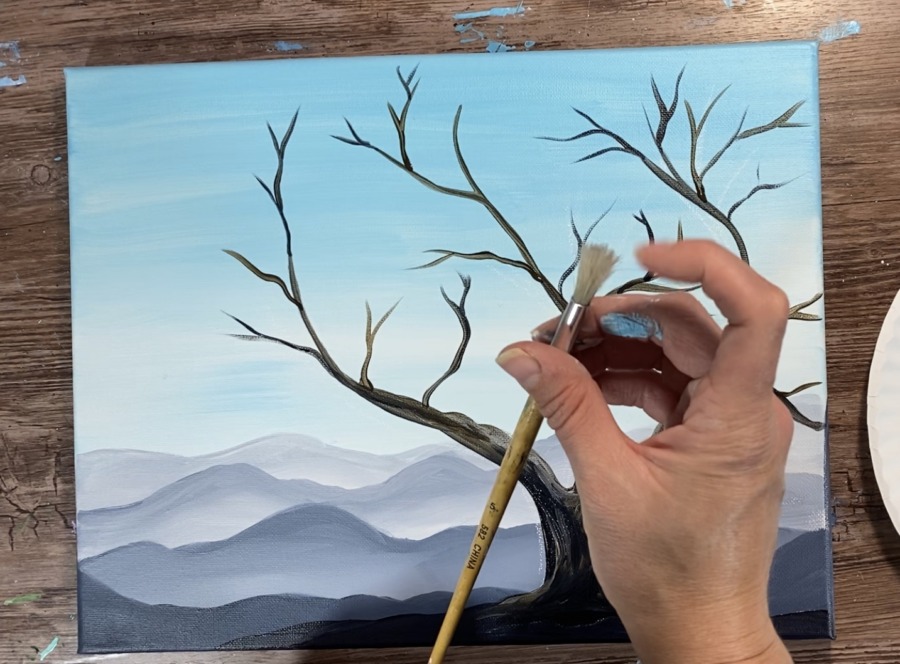
3. Draw the tree with chalk
I suppose you can go ahead and paint the tree if you feel confident with your trees. But I like to kind of sketch with a piece of chalk first, especially when I’m doing a large tree that takes up most of the painting.
Use your chalk to draw the stump. It is rather wide on the bottom and a few of the roots are showing. 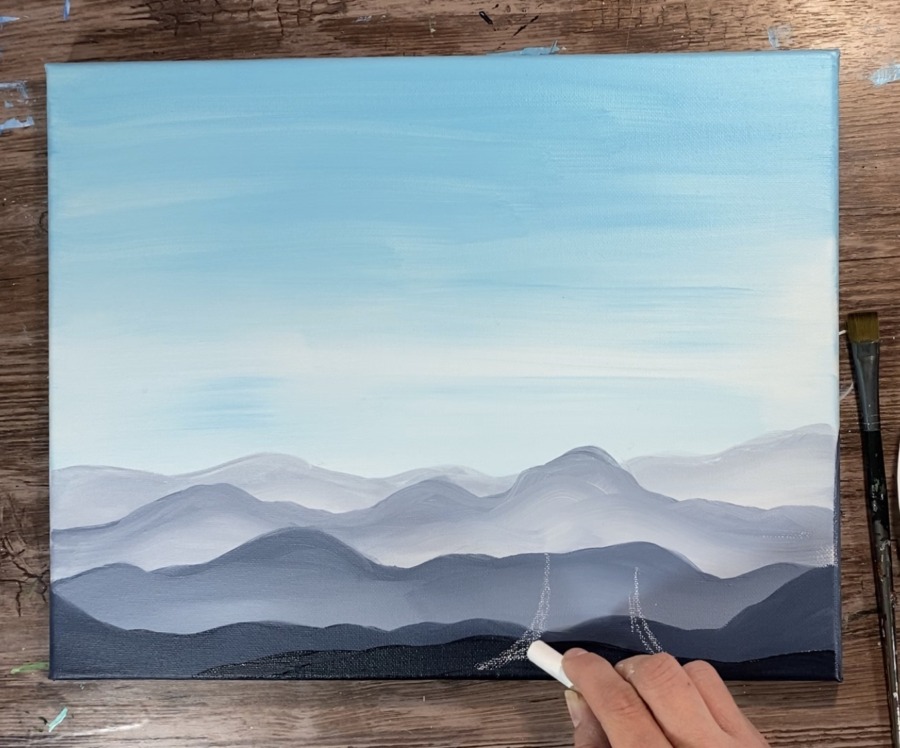
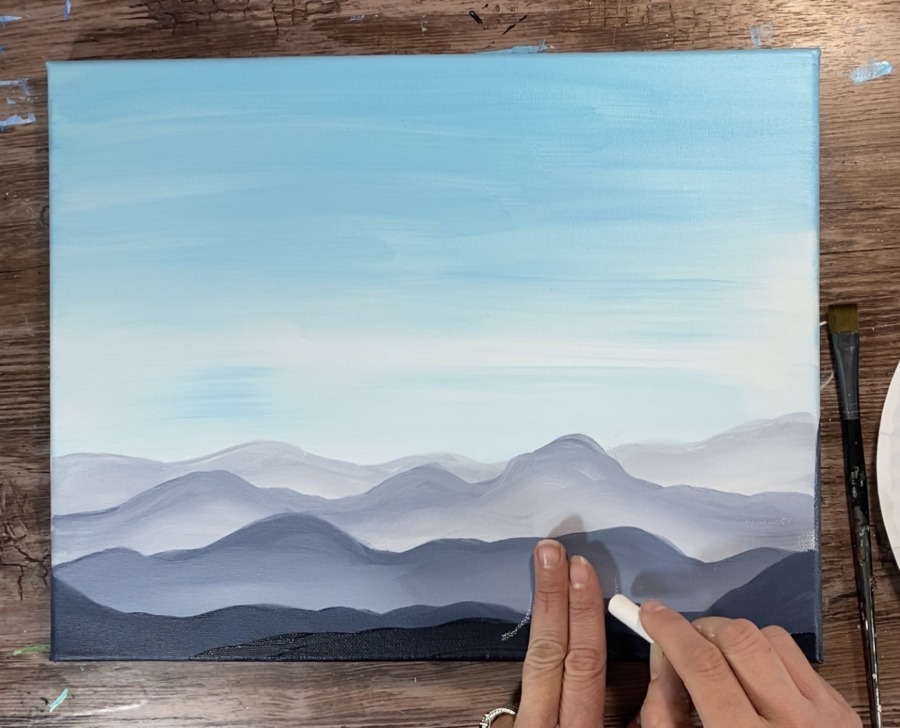
This tree branches out quickly into three large branches. 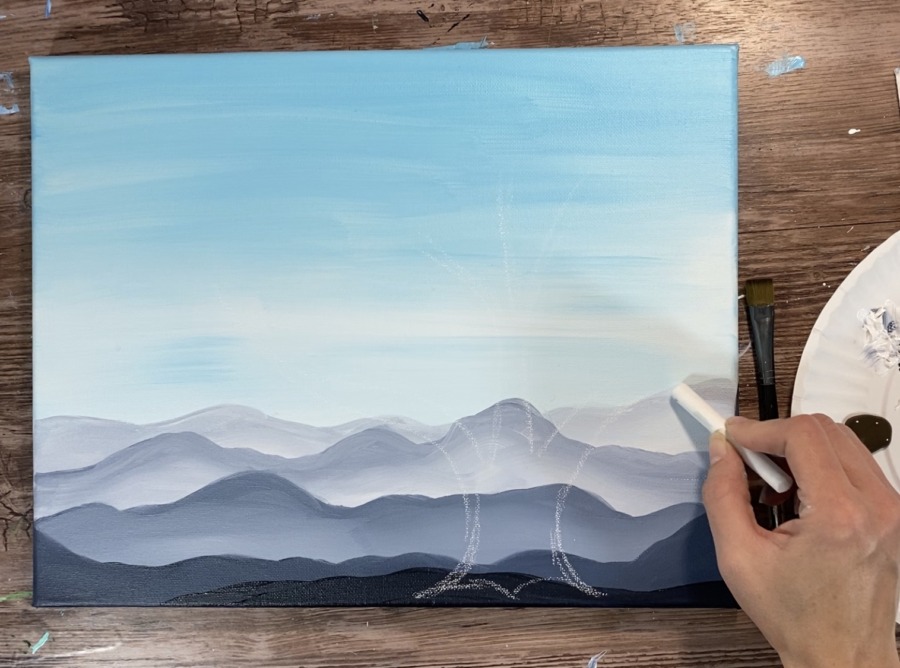
And then smaller branches from there.
I know that chalk is kind of hard to see. Here is a sketch of the shape and branches that I drew with my chalk. You don’t have to draw every small branch on the tree because you will be painting those in. 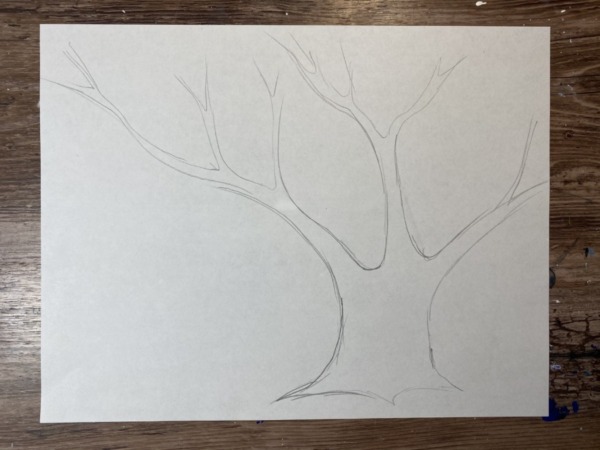
4. Paint Your Tree Trunk & Branches
For the tree stump I used my 12 bright brush double loaded in Raw Umber and Payne’s Grey. 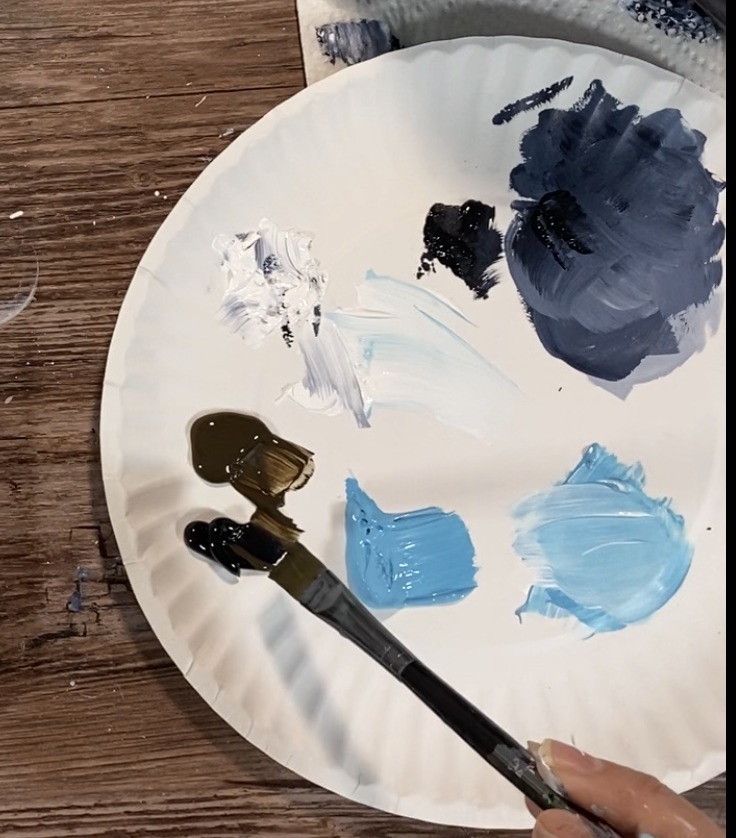
Start at the bottom and paint your stump in. Your brown and grey will blend on the canvas to create a color variation but ultimately this first layer should be nice and dark. 
When you get to the smaller branches, either turn your bright brush on its side to create the thinner strokes or switch to a 4 round brush. 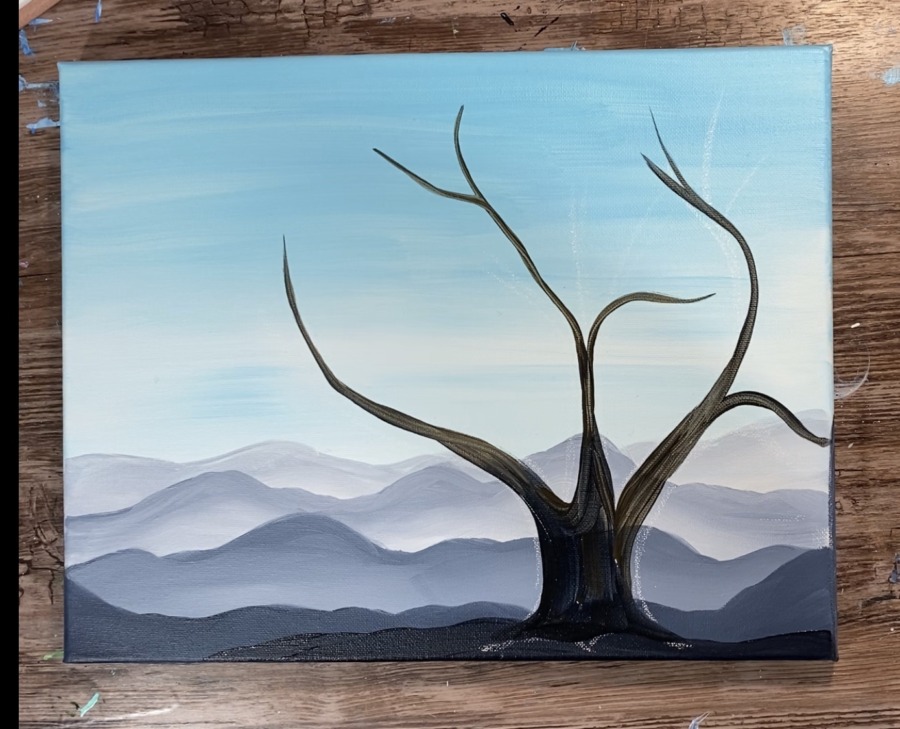
Continue to paint the branches. You can add as many branches as you’d like, having them stem off in pairs and going to a point. 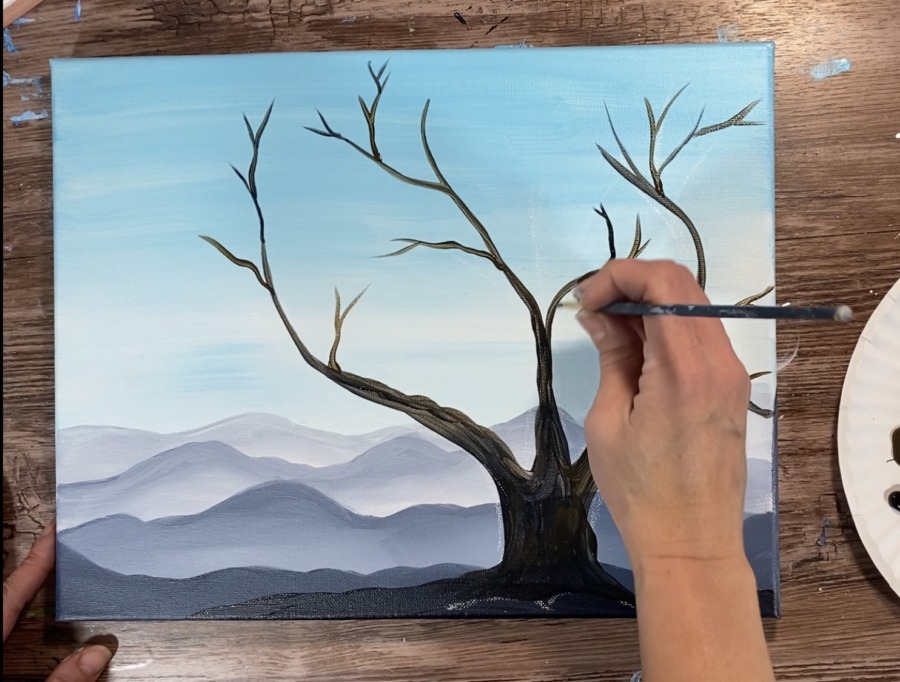
Tip: To really get the branches to go to a point, release the pressure on your brush to holding it very lightly so your line gets thinner.
Also, on the sides of the tree branches, I made them kind of bumpy and uneven. 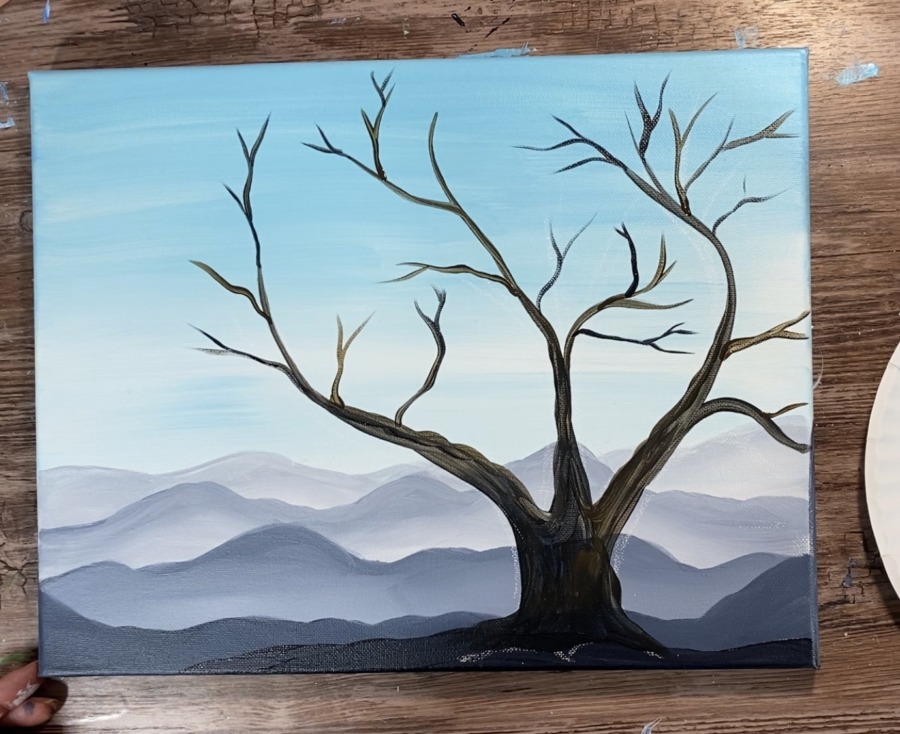
Next I did some lighter colors on the branches and tree stump and to give it some texture.
To do that, I added white to my raw umber.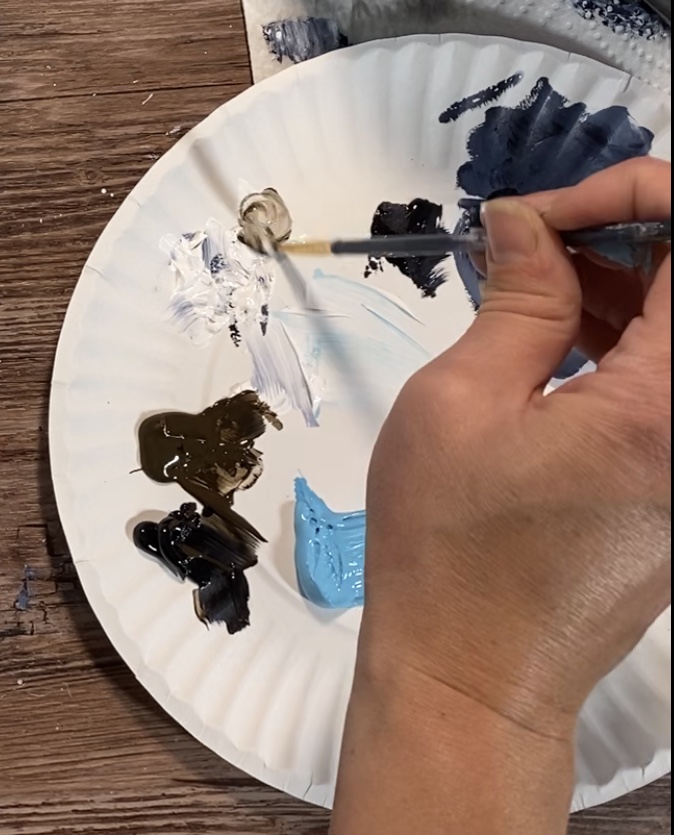
And used that 4 round brush to add lighter areas to the tree on the inside of the larger branches on the left and right. 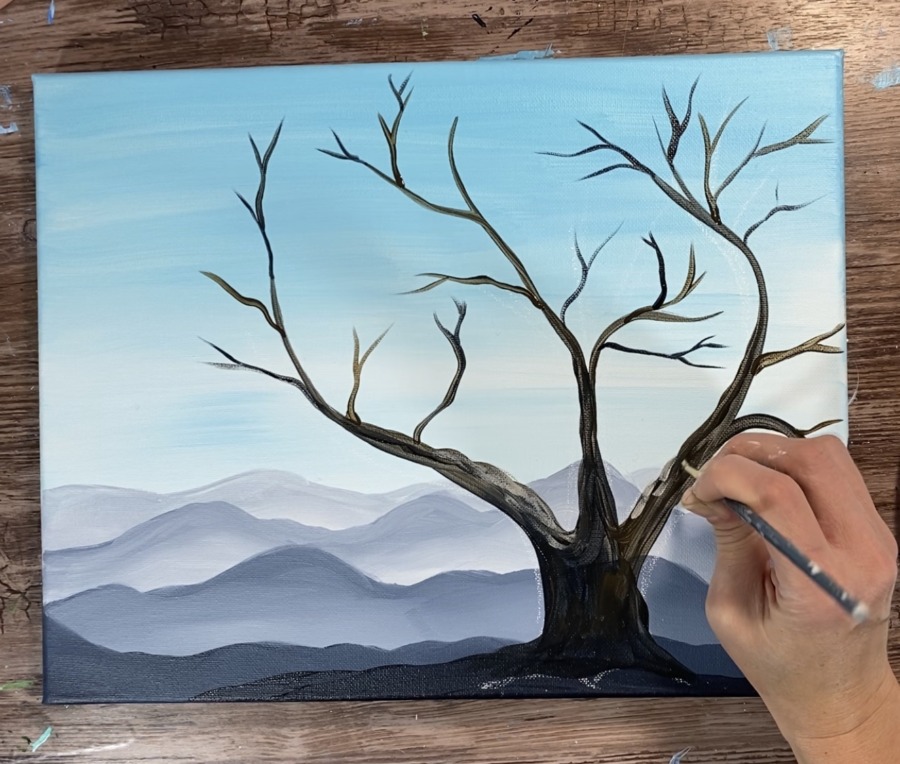
Make short little strokes. Then you can add more raw umber to your brush to blend it back in the to the rest of the branch.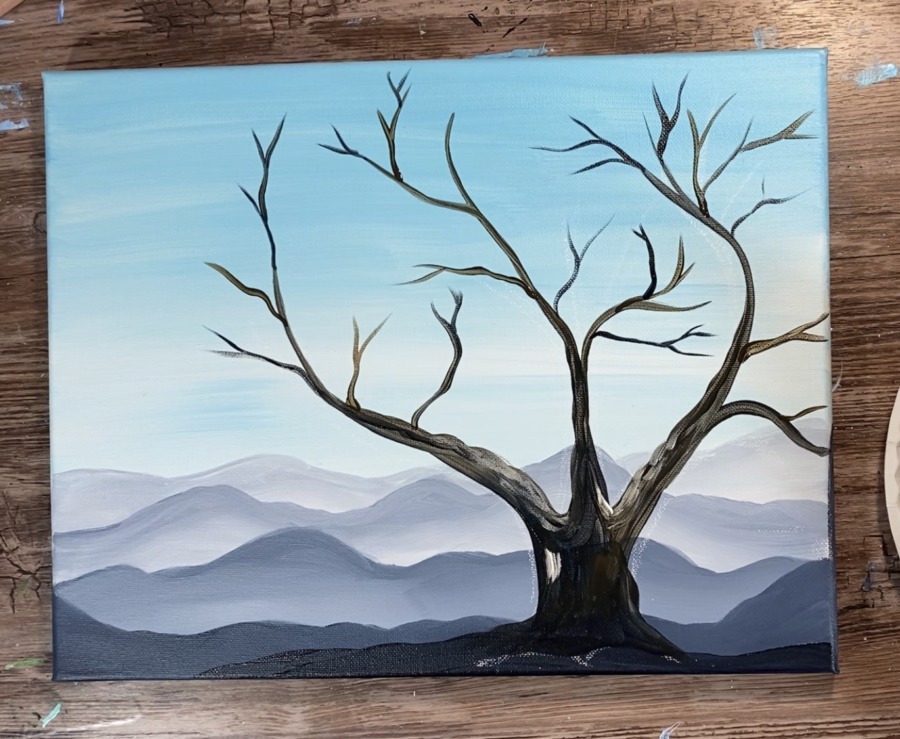
Add more of that light brown and raw umber to the tree. Make short little strokes going vertically on the stump and then diagonally in the direction of the large branches.
Load your brush in varying amounts of the light brown, brown and grey.
5. Paint the blossoms
This is the fun part! Also, you do not need to wait for your branches to dry but if they seem very wet, your can use a hair dryer to dry them real quick.
You will need a round scruffy brush with stiff bristles.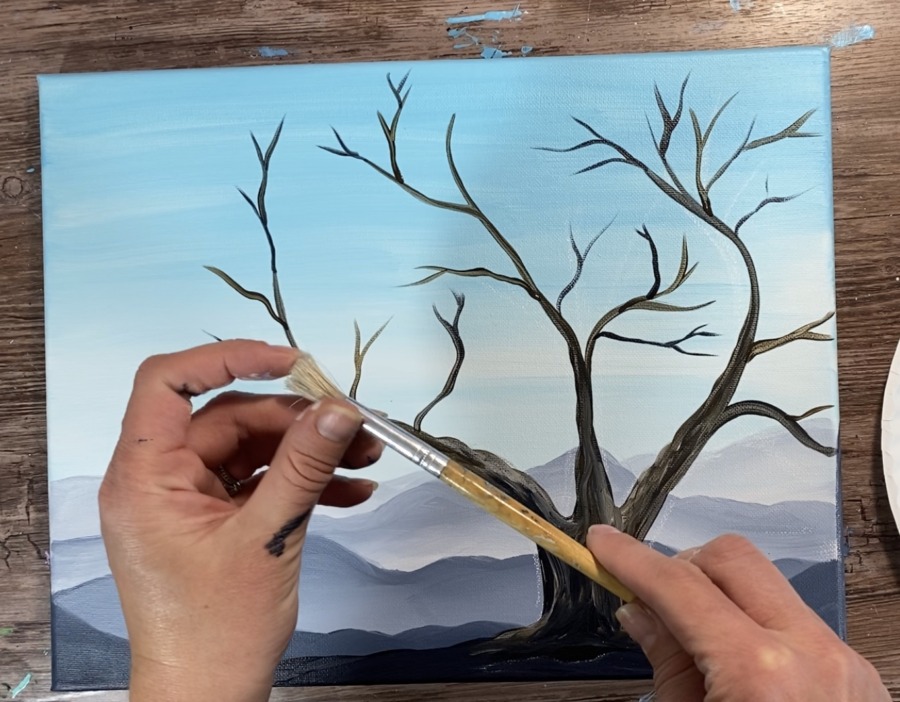
Load your palette with brilliant purple, ultramarine blue and titanium white. 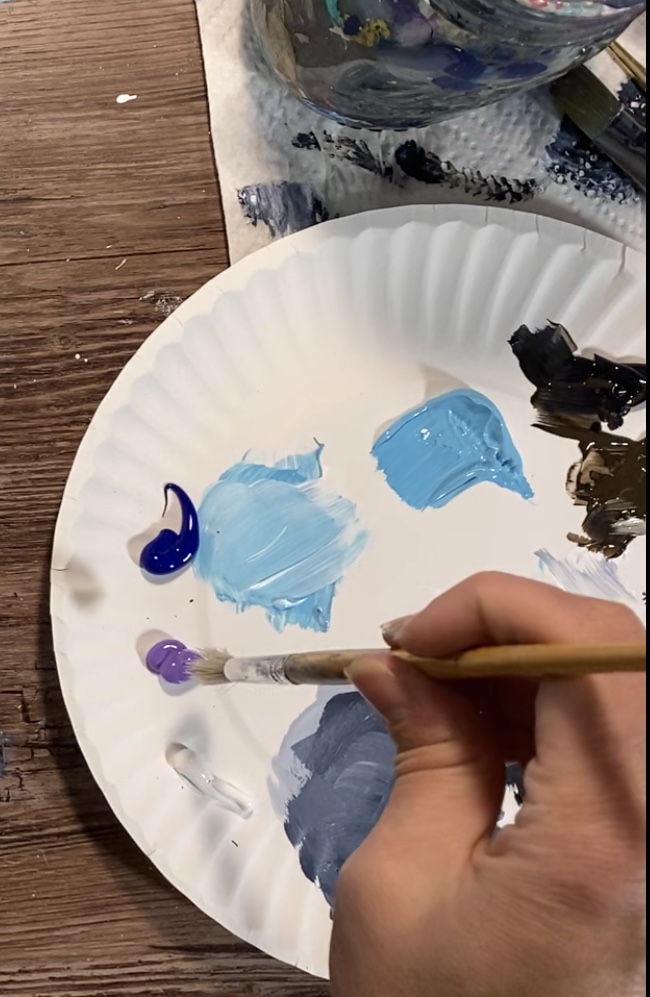
Start with the brilliant purple.
Dip the tip of your “scruffy brush” in the purple (bot not too much!). Dab a little off the brush so not too much is on it.
Tap the brush to make a cluster of blossoms on the tips of the branches. 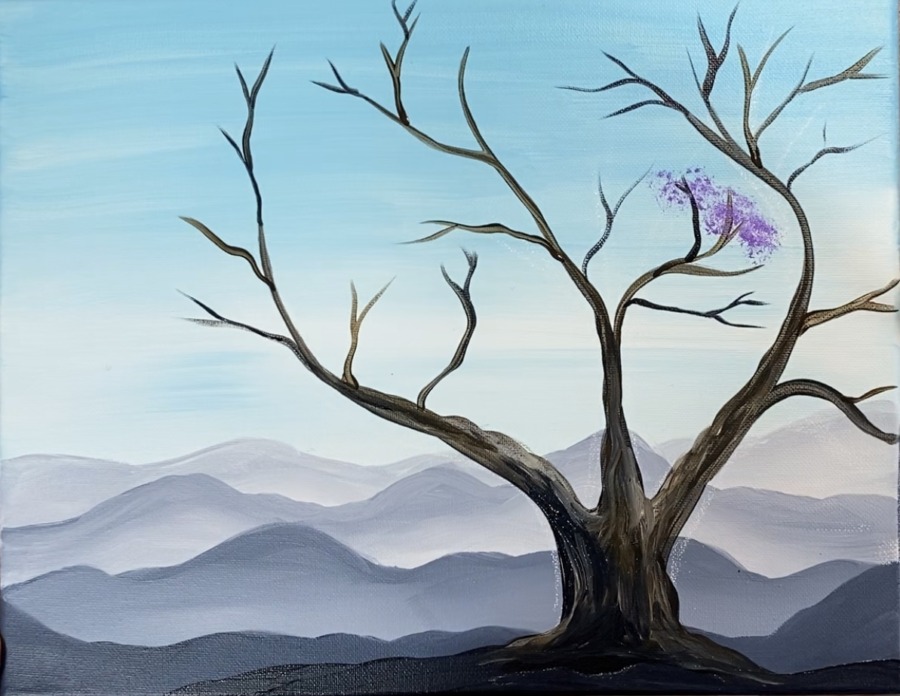
Continue to paint clusters. These blossoms sort of go in bunches of all shapes and sizes. 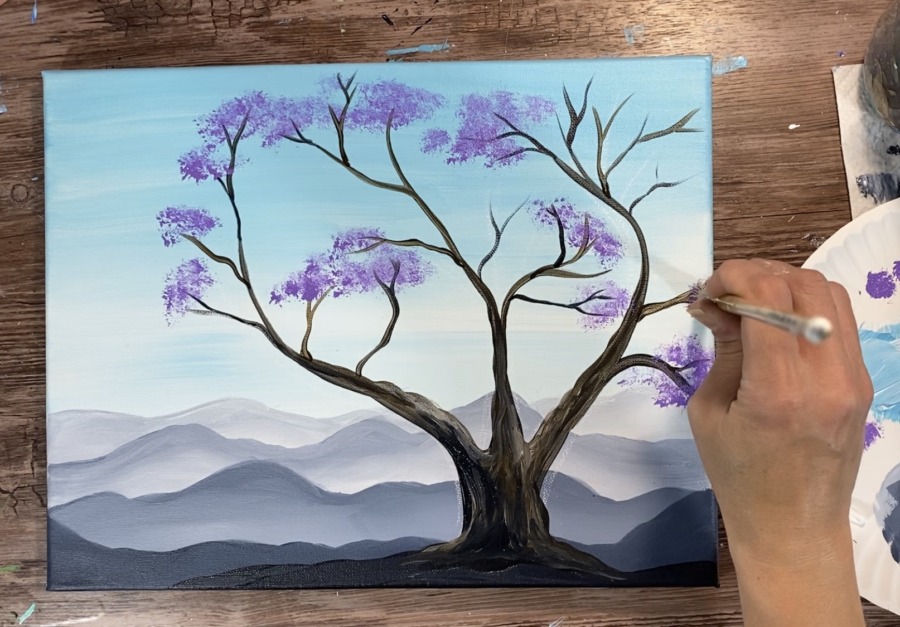
Don’t rinse that purple off the brush! Next load your brush in the ultramarine blue and dab it off to the side so not a lot is on the brush.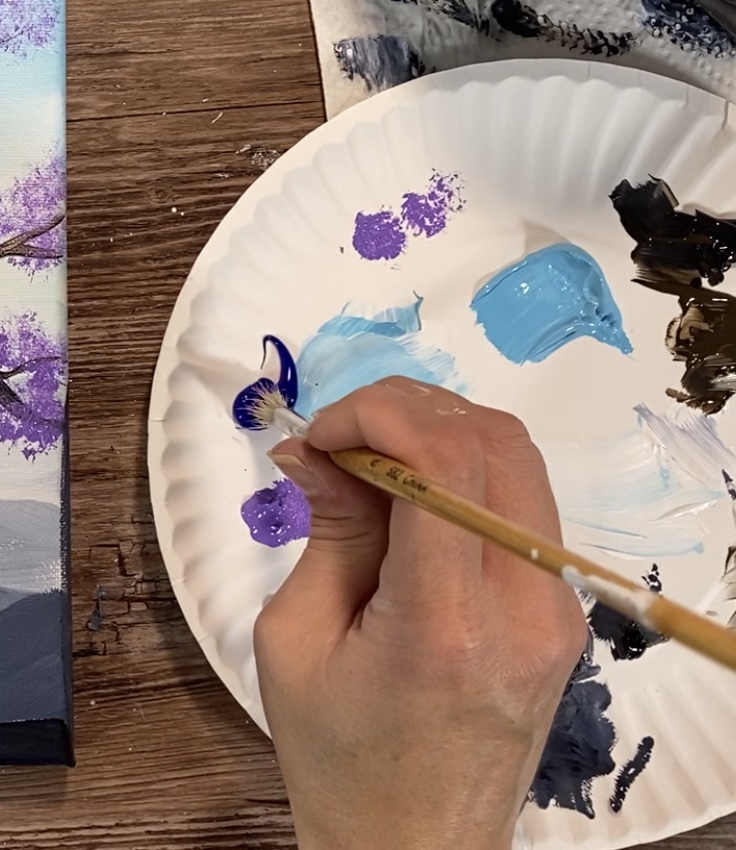
Add clusters of this blue. Since the purple isn’t dry and there still is a little purple on your brush, it should blend in nicely to look like an almost indigo color. 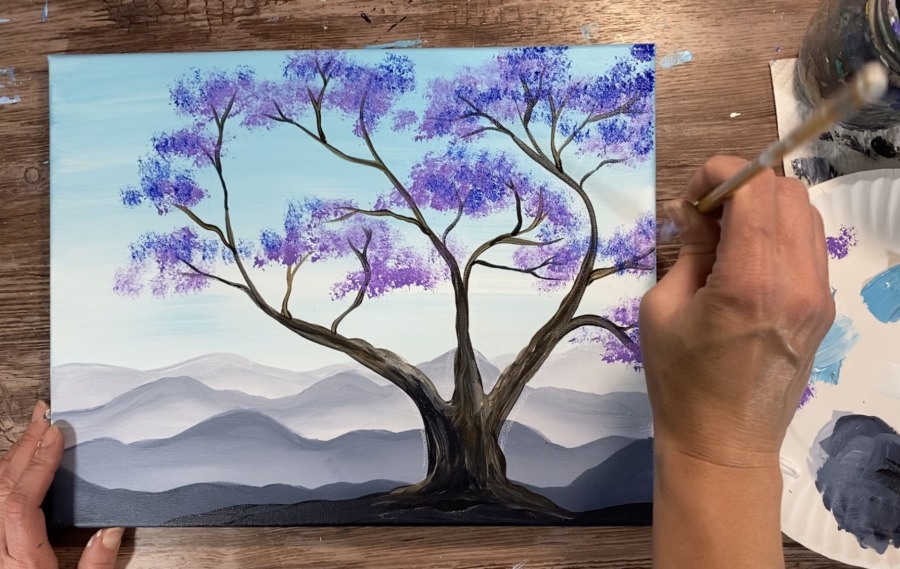
Dab the blue over most of your purple but don’t completely cover your purple. Think of this as another layer of blossom bunches. 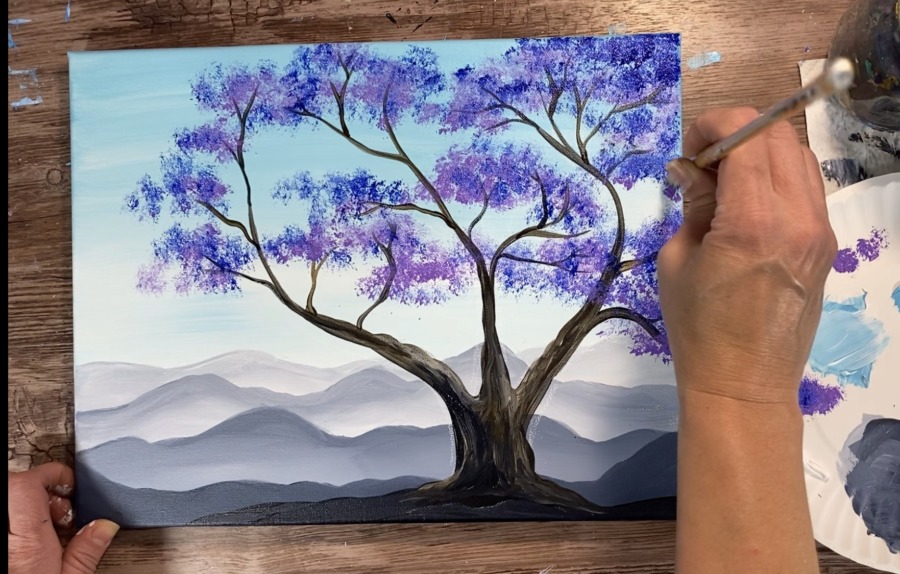
Tip: your clusters of blossoms should not be solid and opaque. We still want sky showing through!
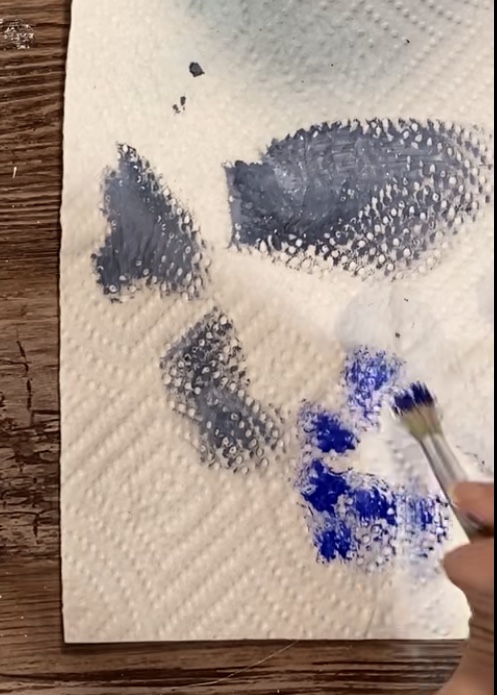
If your brush seems overloaded at this point, you can also use a paper towel to wipe excess paint off.
Next load your brush in some white.
Add some white bunches to your blossoms but don’t go overboard on the white because it can take over fast and look like snow!
I dabbed white in a few areas. 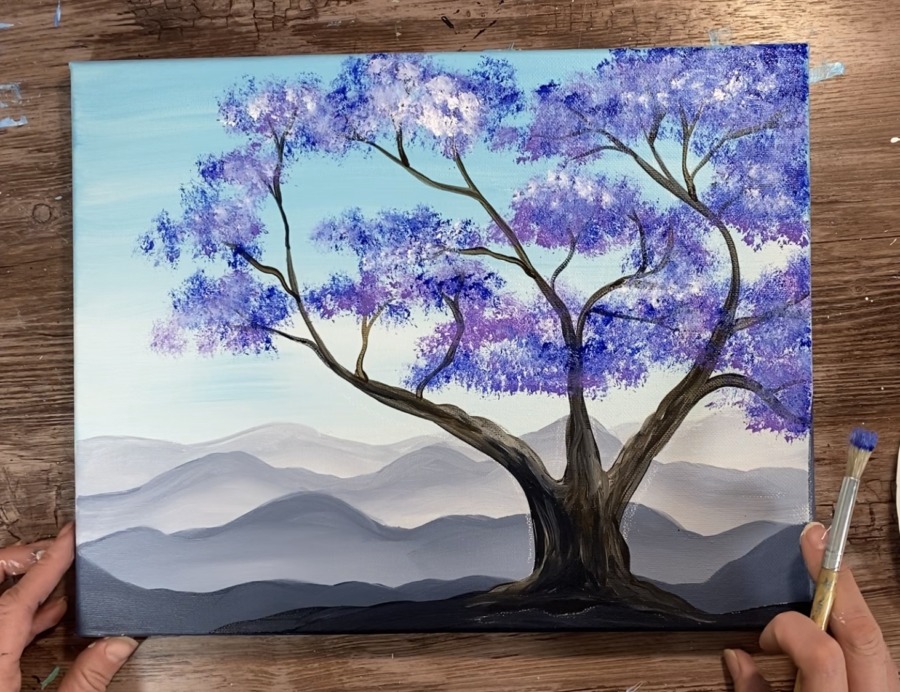
As you go to reload your brush, you can load it in different amounts of the purple, blue and white. Keep adding more bunches of blossoms to your tree until you are satisfied with it.
I purposefully made the blossoms on the far right darker by adding more of the ultramarine blue there. 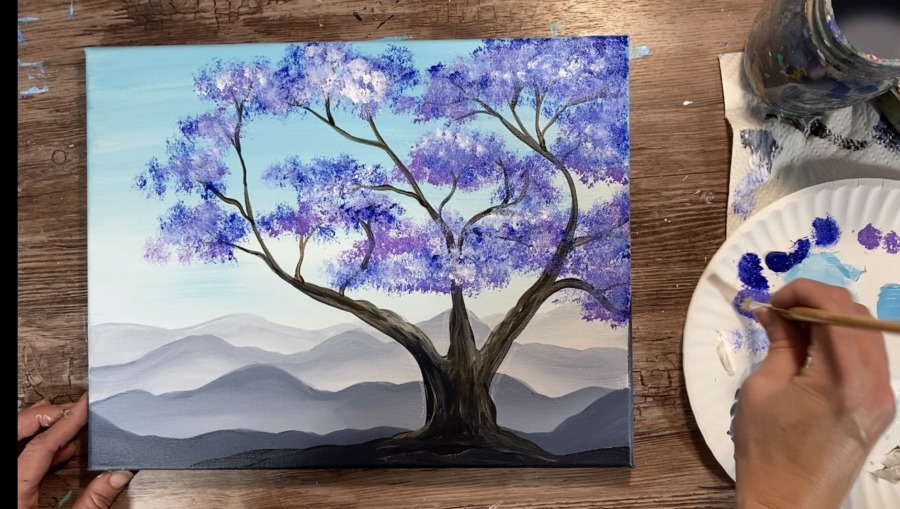
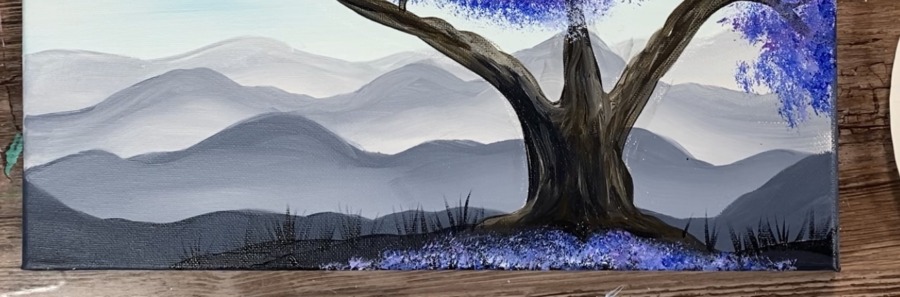
5. Paint blossoms on the ground
It’s not a Jacaranda Tree in full bloom without the blossoms all over the ground!
Next I did the same blotting technique with the purple, blue and white on the ground around the trunk of the tree. 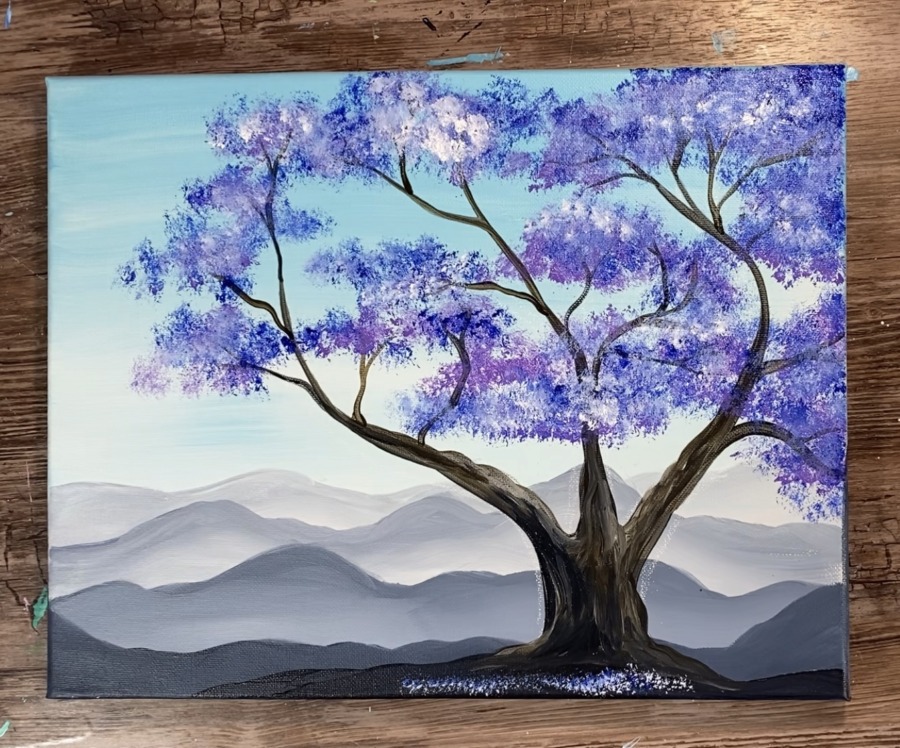
6. Paint some shadowy grass lines
Then I used my 4 round brush to paint little Payne’s Grey grass lines sticking up. This is optional but it added another interesting thing to look at on the ground.

7. Some final touches…
I went in and added more blossom bunches! I don’t think you can do too many for this Jacaranda Tree!
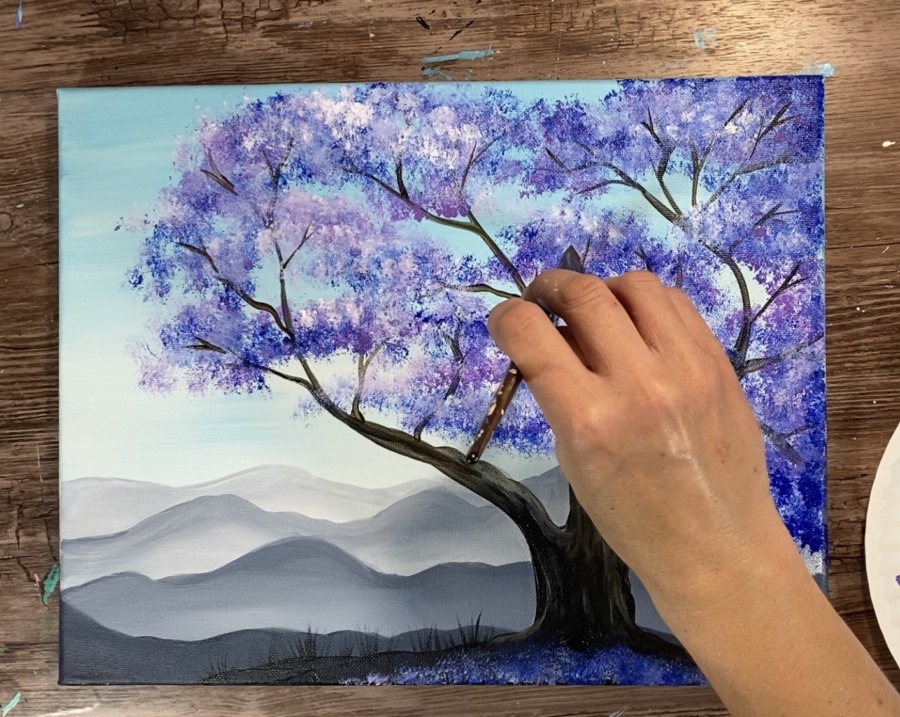
You can also go back and add some more branches in the tree that are showing through the blossoms.
Then I did a few more blossoms on the ground with my round brush.
Finished!
Share Your Art
Did you do this painting and want to share? You can upload a photo on the Facebook Community Tab on SBSP Facebook Page, You can upload a photo on Pinterest on one of the SBSP Pins and you can also Tag me on IG @Tracie_Kiernan_Art.


I love your paintings and teaching. Unfortunately I didn’t receive any email for sign-up.
Hi Edward! Thanks! And sorry you haven’t gotten the emails. Sometimes it goes in your promotions folder or even spam. If you’re still not seeing them, go ahead and email me your email address and I’ll take a look.
Thank you so much for these detailed instructions! It really helped me paint this. I would love to share my painting picture with you for feedback, please tell me how best!
You can email me: hello@stepbysteppainting.net ?