

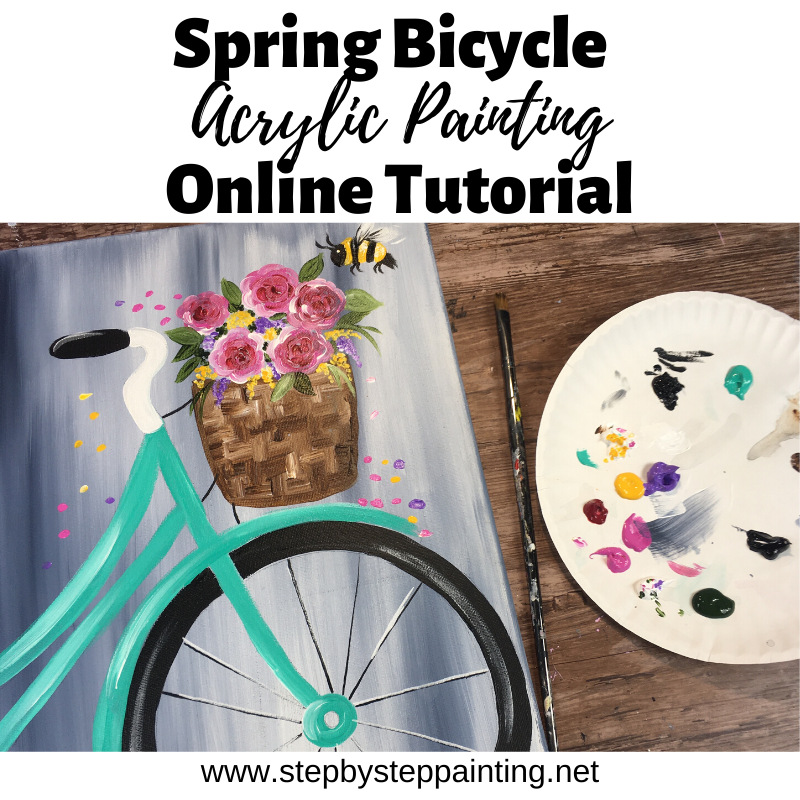
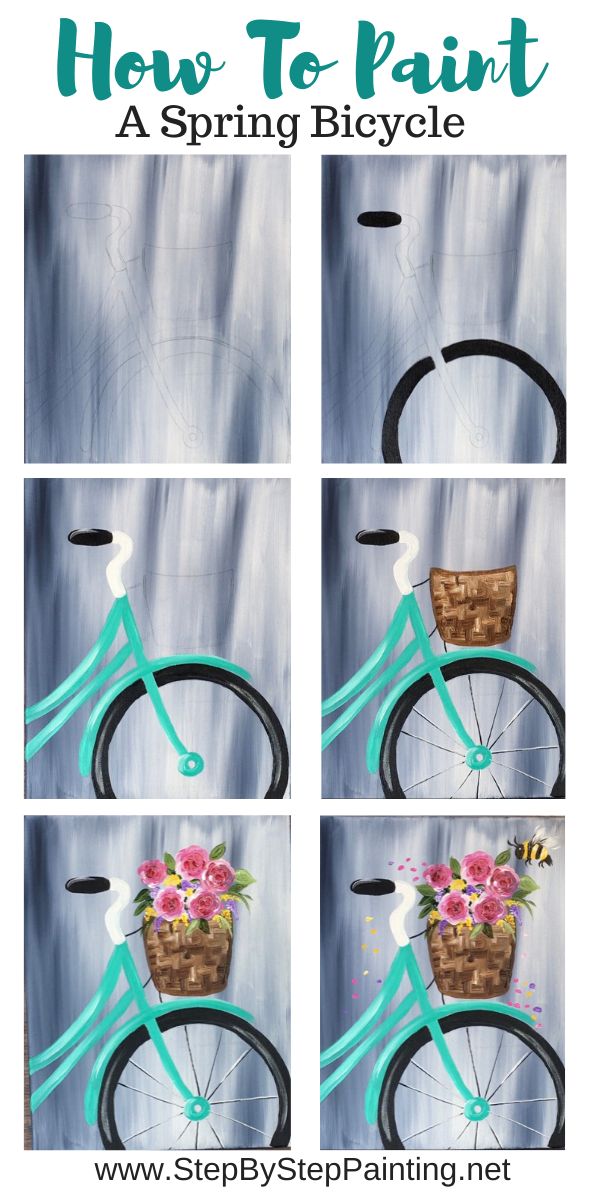
Spring Bicycle Painting
Learn to paint a bicycle with a basket of flowers and a cute bumblebee.
This acrylic painting tutorial includes a free traceable of the bicycle.
Would you like to save this?
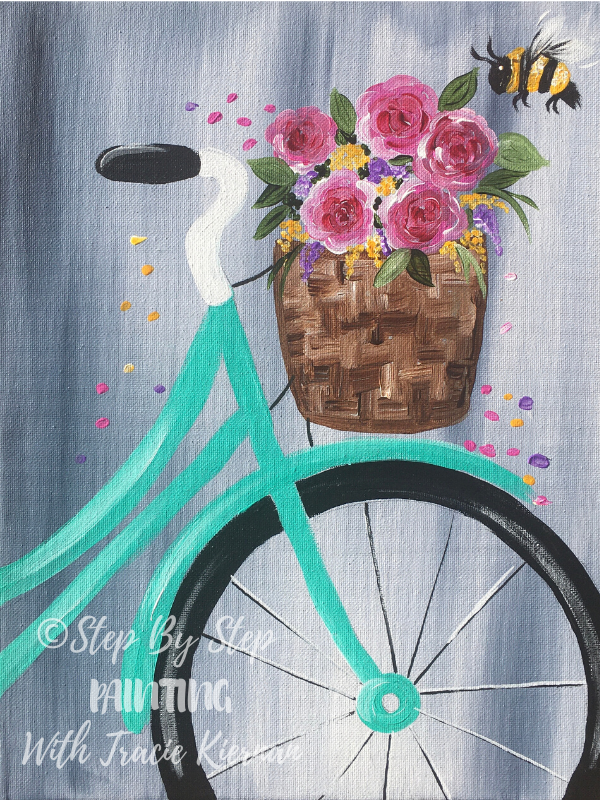
There’s quite a few colors in this painting! I love the simplicity of the teal bike against the gray background.
But the colors are concentrated in the floral basket and that cute bumblebee! It’s a representation of spring arriving in full beautiful colorful blooms.
This painting was done on an 11 x 14 canvas with acrylics. I’d say the level is on the easier side with a little bit of a challenge with the flowers.
Enjoy and happy painting!!!
Materials
Spring Bicycle Painting

Learn to paint a beautiful spring bicycle with a gray wash background, flowers and a cute bumblebee. This tutorial is super EASY and includes a traceable of the bicycle.
Materials
- Acrylic Paint
- Brushes
- Canvas
- Black Paint Pen
- Graphite Paper
- Traceable
- Black Paint Pen
- White Paint Pen
Colors
- Titanium White
- Payne’s Grey (Use mars black if you don’t have payne’s grey)
- Mars Black
- Bright Aqua Green
- Medium Magenta
- Brilliant Purple
- Cad Yellow Deep Hue
- Alizarin Crimson Hue Permanent
- Hookers Green Hue Permanent
- Burnt Umber
Brushes
Instructions
- Paint the gray wash background with Payne’s Grey and Titanium white using a 3/4” flat wash brush.
- Let the painting dry then transfer or draw the bicycle onto the canvas.
- Paint the tire of the bike with black using a 4 bright brush.
- Paint the body of the bike with bright aqua green and a little titanium white.
- Paint the handle of the bike mars black.
- Use a black paint pen to draw the wheel spokes.
- Paint the basket using the basket weave stroke technique and a 4 bright brush. Use burnt umber and titanium white for this step.
- Let the basket dry.
- Paint the roses using a round brush and alizarin crimson hue Permanent, medium magenta and titanium white.
- Paint the other flowers using cad yellow deep hue and brilliant purple. Paint little dots using the tip of your round brush.
- Paint the leaves using hookers green permanent.
- Paint the bee using a round brush, mars black, cad yellow deep hue and titanium white. Use a 5/0 round for the small details of the bee.
Color Palette 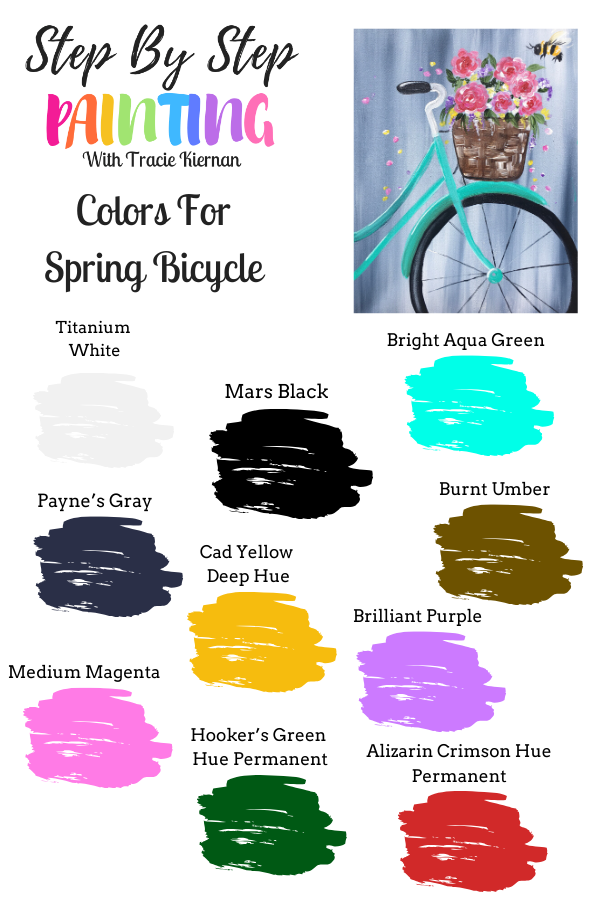

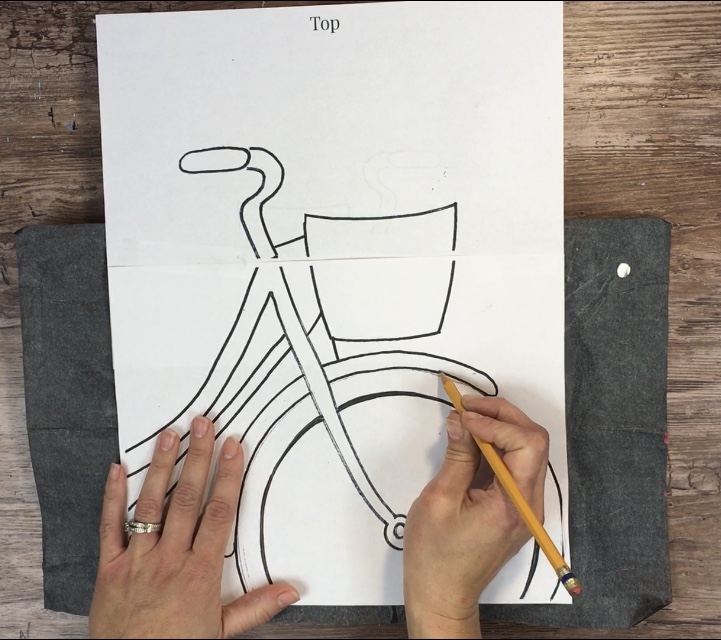
Traceable
If you are doing this on an 11 x 14, I have a PDF download that is optimized for this size. Go to the Traceable Library to find it or scroll up to the materials section of this post.
It will need to be printed on two sheets with “top” representing the top sheet. Tape both of the sheets together.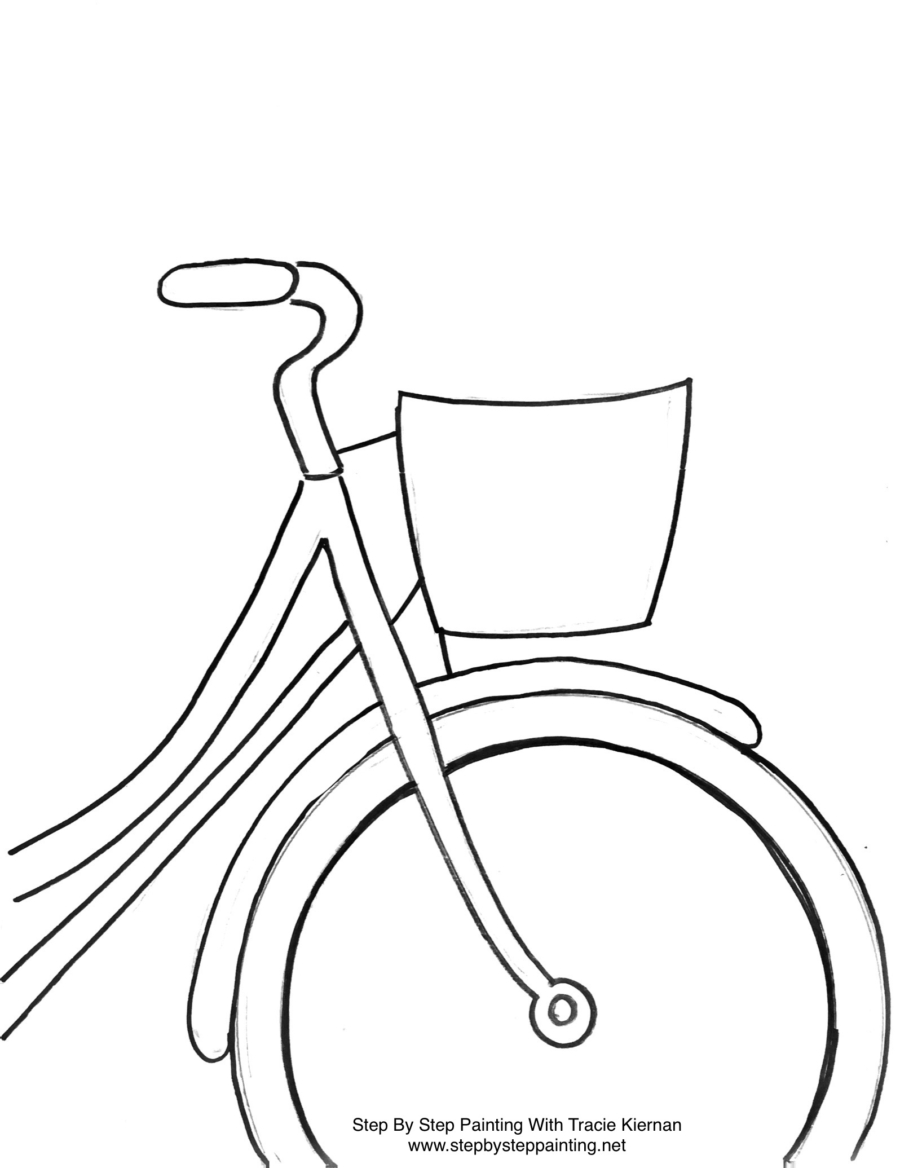
Directions At A Glance
Video
Step By Step Directions
1. Paint A Gray Wash Background
To do this background, I used a 3/4” wash brush and the colors Payne’s Grey & Titanium White.
You really only need a tiny bit of Payne’s Grey. If you want, you can do this with mars black instead. But it is very important that you use only a tiny bit so the background doesn’t get too dark.
Load your brush in mostly titanium white but dip a little bit of Payne’s Grey on the corner. 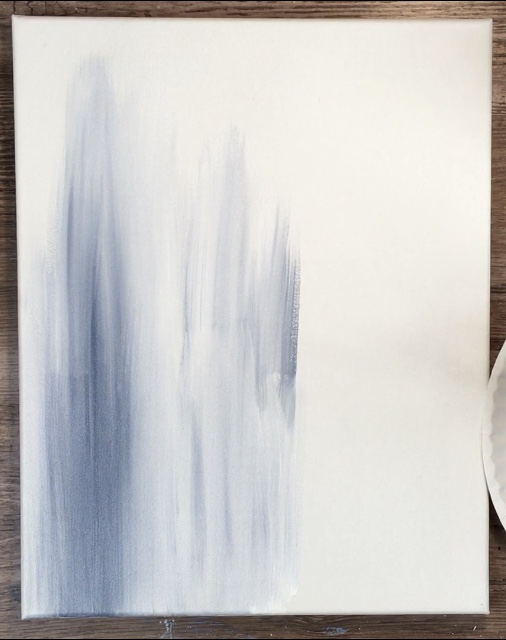
Paint up and down strokes to create a blended look of the Grey with the White.
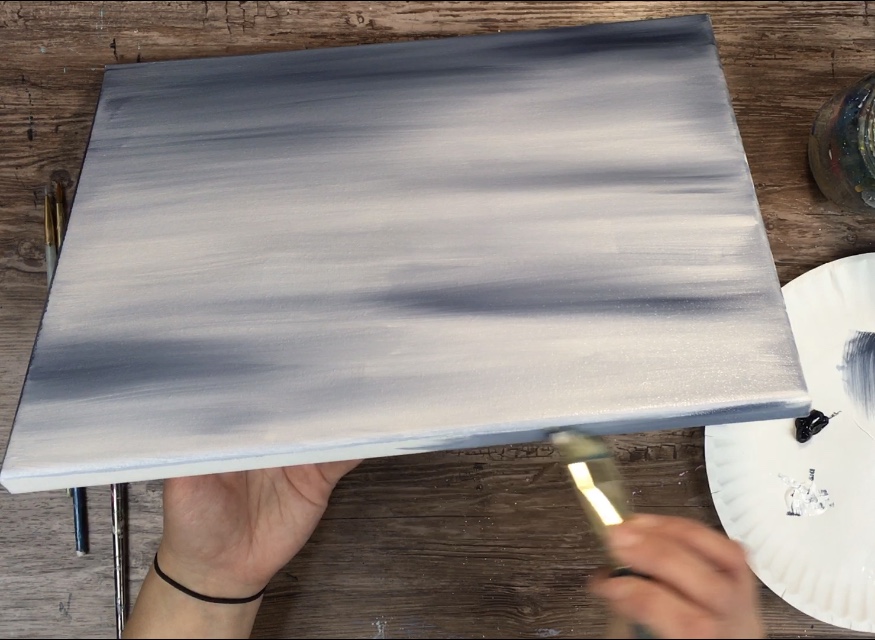
Fill the entire canvas and don’t forget to paint the sides if you are doing this on a stretched canvas.
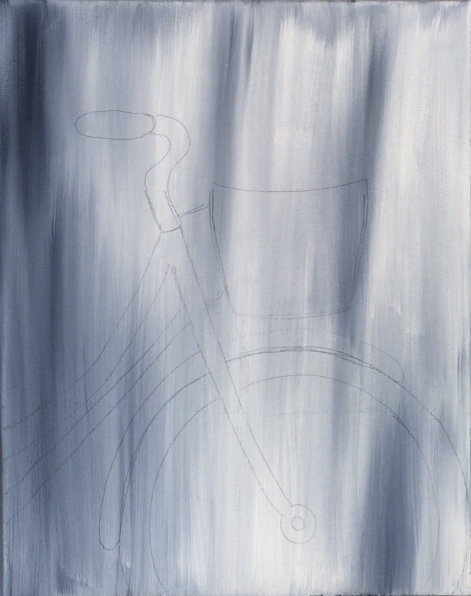
2. Transfer Or Draw The Bike Onto The Canvas
You will need to wait for the background to dry or use a hair dryer to speed up the process.
Draw the bicycle or use the traceable to transfer it to the canvas with graphite paper.
Always place your graphite paper shiny side down, trace on a flat surface and press relatively firm with the pencil.
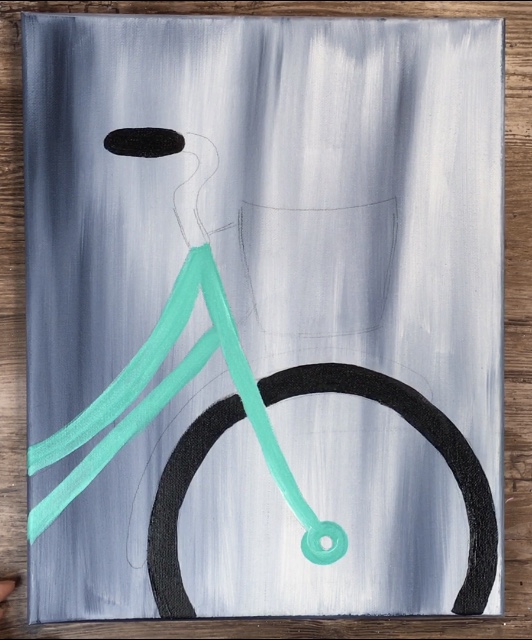
3. Paint The Tire & Handle
The first thing I did was paint the tire. Use a 4 bright brush and mars black. Carefully paint the circle.
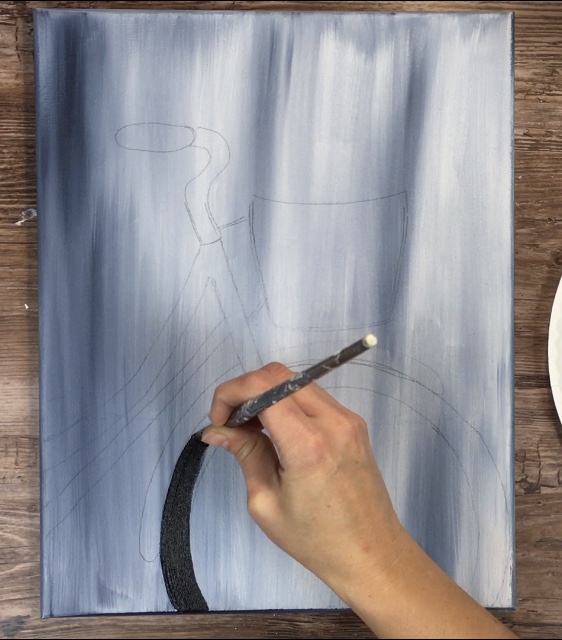
Then use a 4 round brush (or that 4 bright) to paint the handle mars black. 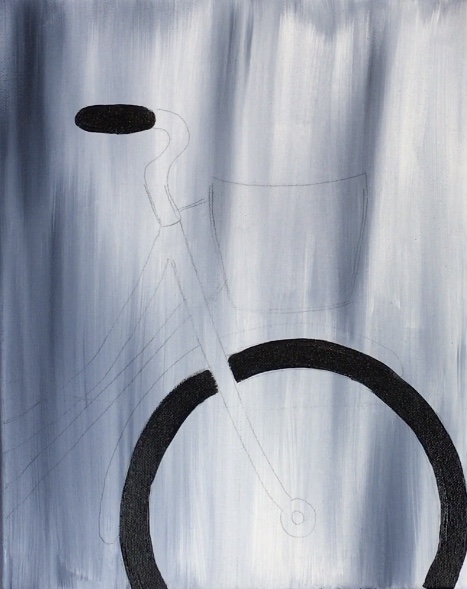
4. Paint The Frame
To do the frame, I used a 4 round brush and the colors bright aqua green dipped in a little bit of titanium white.
Fill in the frame. Load your brush in mostly bright aqua green but you can dip the tip of your brush in a little titanium white.
The aqua and white will create a varied color that looks like it has a little highlight to it. 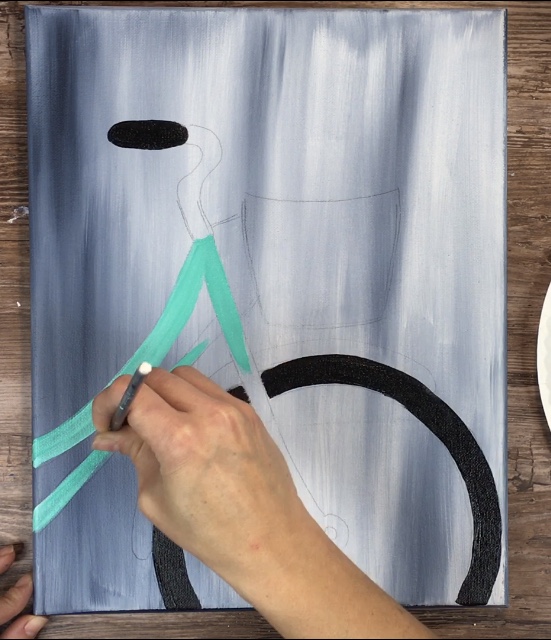
5. Paint the part under the handle bar & do some highlights
The part just under the black handlebar was painted with pure titanium white and a 4 round brush. 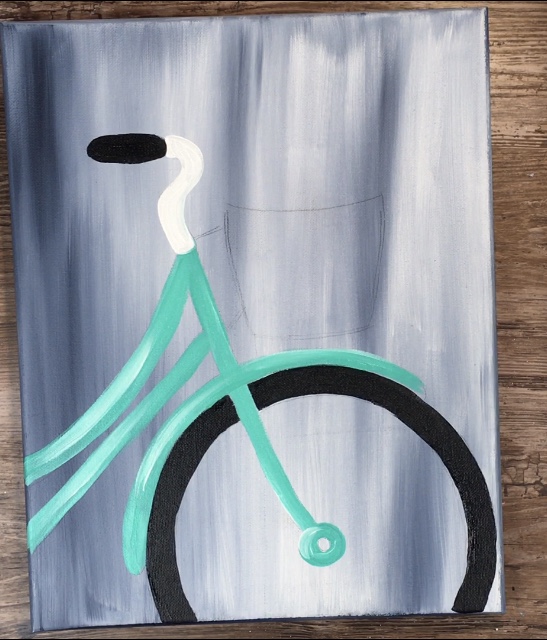
Then I did some purposeful highlighting. I used titanium white and a round brush.
Add highlight to the black handlebar and the wheels. You can also add a bit more highlight to the aqua frame.
Tip: when you’re adding the highlight to the black parts, try to do it dry brush style (no water on brush, wipe off excess paint with a paper towel). This allows it to be a bit more subtle. 
6. Paint The Spokes
For the spokes, I used a black POSCA paint pen and a white POSCA paint pen. This allowed for easier control of the straight lines.
If you prefer, or you don’t have paint pens, you can do this with a tiny round brush and mars black/ titanium white.
Draw the spokes from the center to the wheel with the black first. 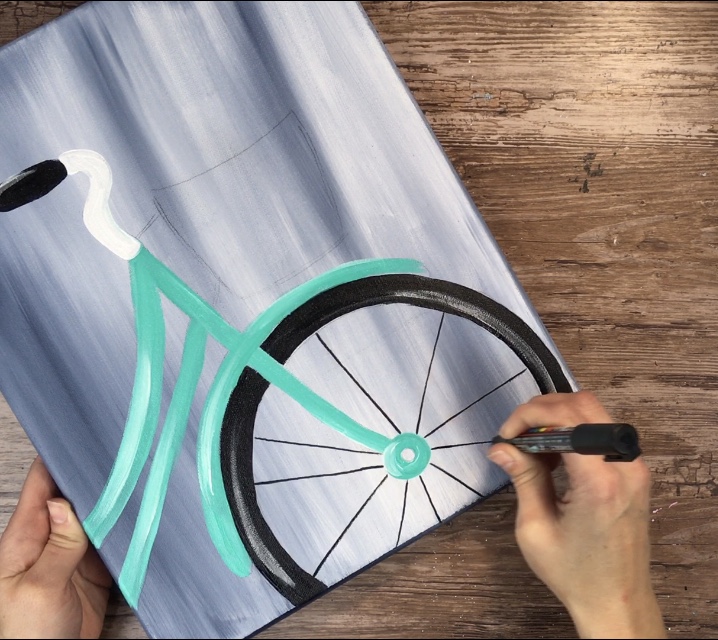
Then do a little bit of white on the spokes. Do the white line just a little bit next to the black lines so it looks like a highlight.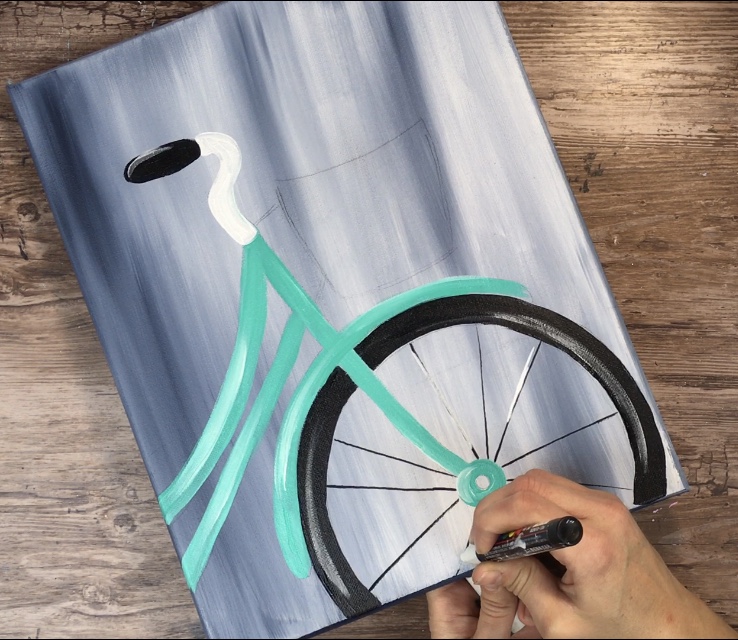
I also did the basket attachments with the black paint pen. 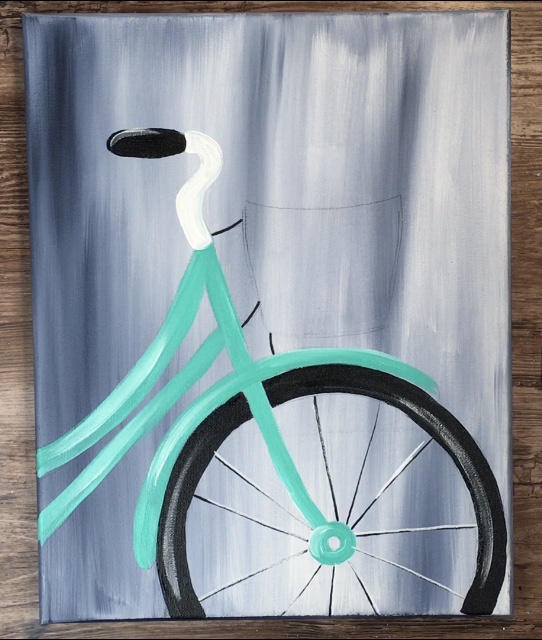
7. Paint The Basket
For the basket, I used a 4 bright brush and the colors burnt umber and titanium white.
To do the basket weave pattern, I double loaded this 4 bright brush in both burnt umber and titanium white (more brown than white).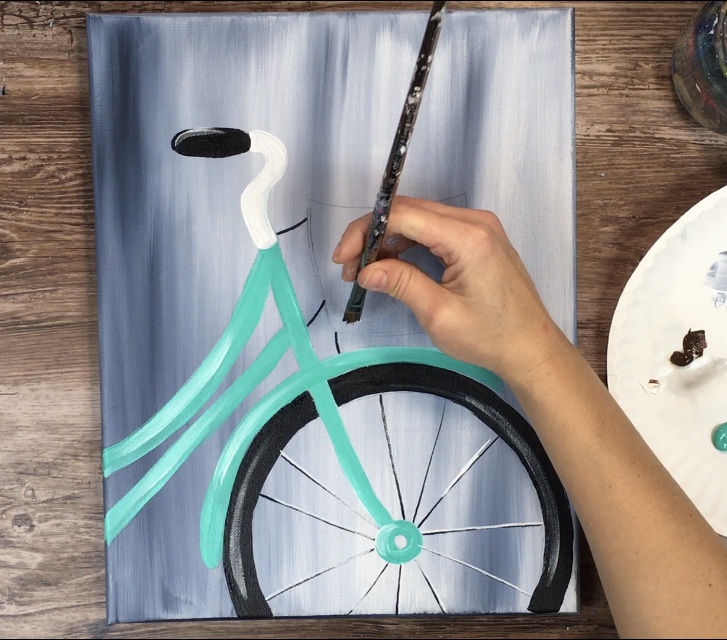
Start at the bottom of the basket. Use the full width of the brush to make a short stroke going vertically. Then next to that stroke, make another short stroke going horizontally (opposite direction).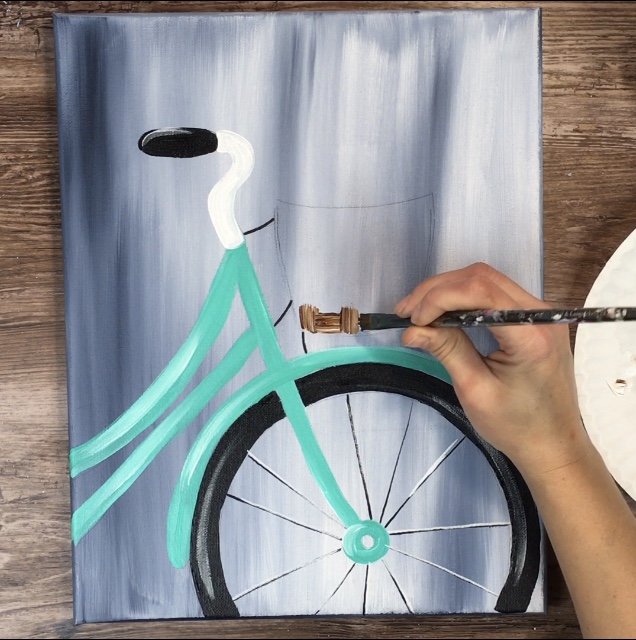
Repeat this pattern going across the basket in rows and work your way up. 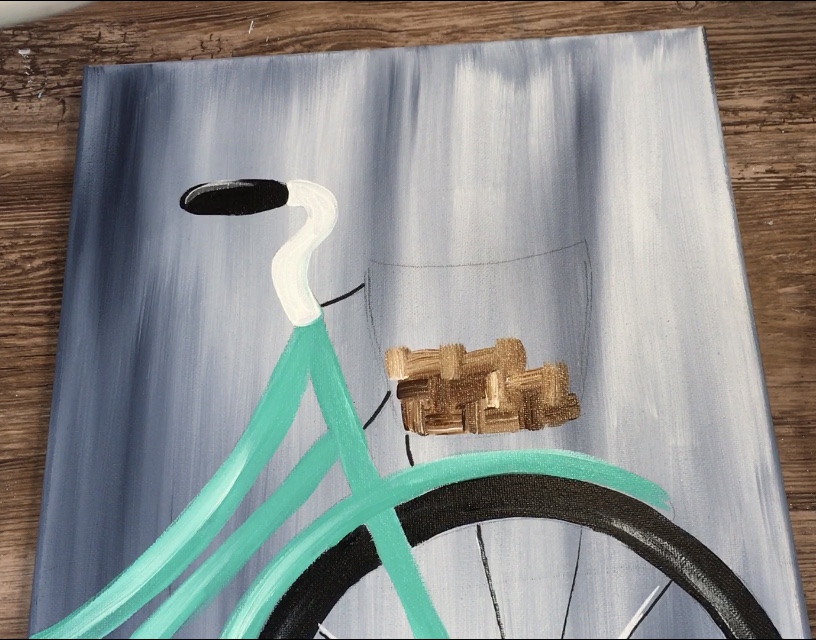
When you reload your brush, load in different amounts of the brown and white so that each stroke looks unique in how the colors mixed on the canvas. 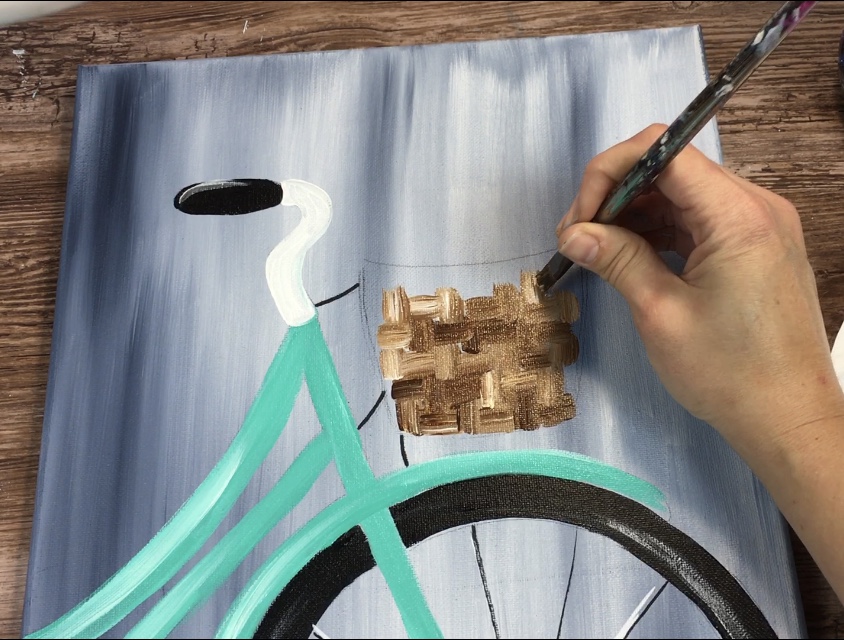
Fill the entire basket with this basket weave technique. The strokes of the brush are what make it look like a basket. 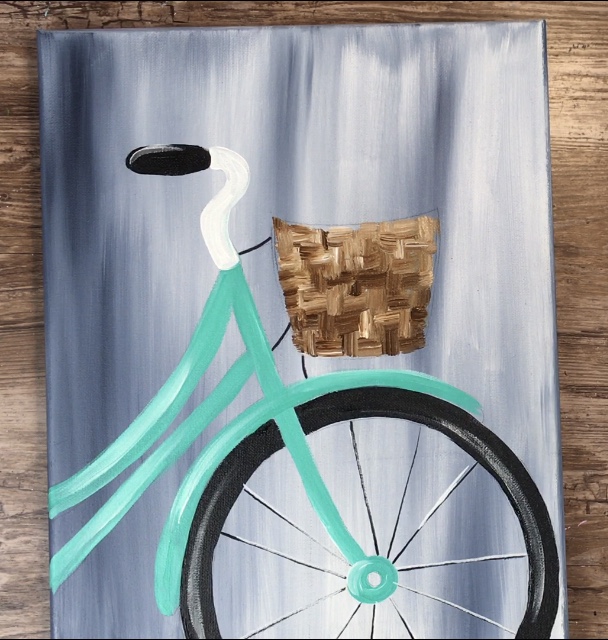
Then, optional, I decided to outline the basket to help define the shape. You can outline with a round brush or the tip of your bright. 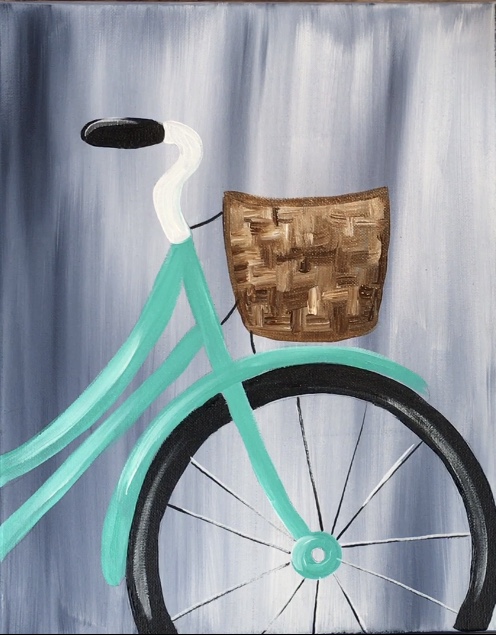
8. Paint The Roses
If you’re unfamiliar at how to paint simple roses, I recommend practicing first. They are easier than what they seem!
The graphic below shows a simple way to paint the roses. I did the roses on this painting a slightly different way but you can decide white way is easier for you.
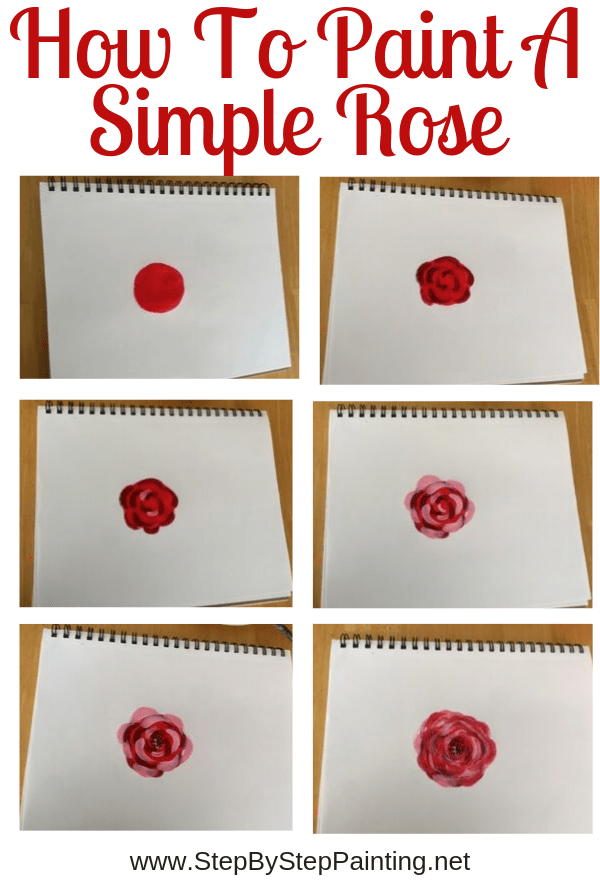
I used the colors alizarin crimson, medium magenta and titanium white for my roses. I also used my 4 round brush.
Start with alizarin crimson (the darker red) and paint a little c or comma stroke. Then paint little c strokes around it forming the shape of the rose. 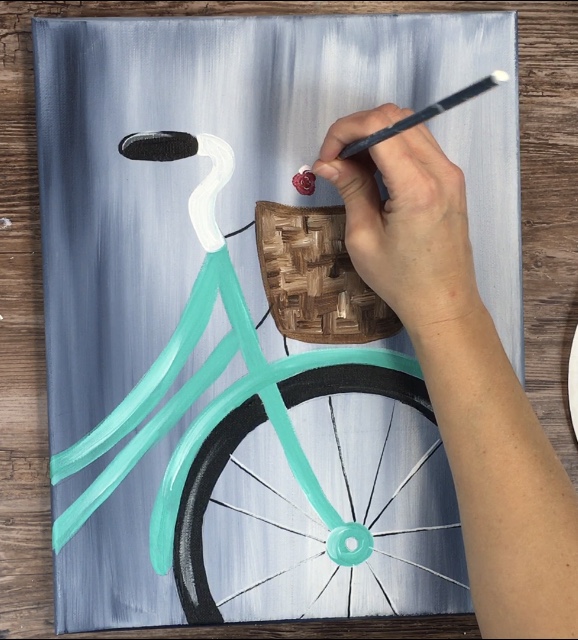
Load your brush in the medium magenta and continue to paint little arc strokes working your way outwards forming the shape. 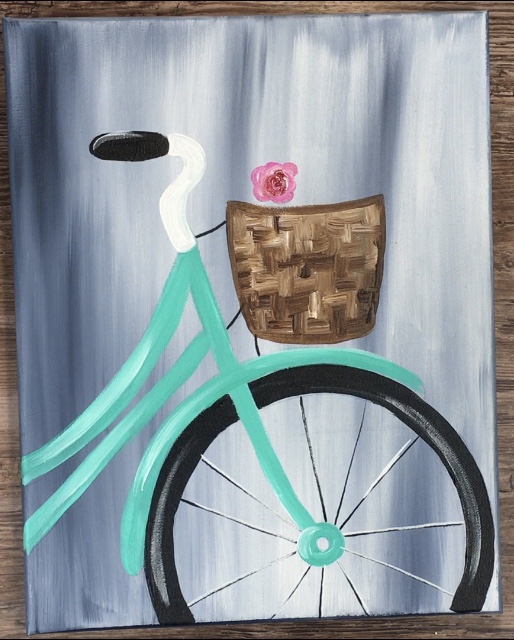
Then load your brush in titanium white and make the outer petals lighter as the white blends with your pinks.
You can go back with red and pink to make more layers of the C strokes but try to make the middle of the rose darker and the outer lighter. 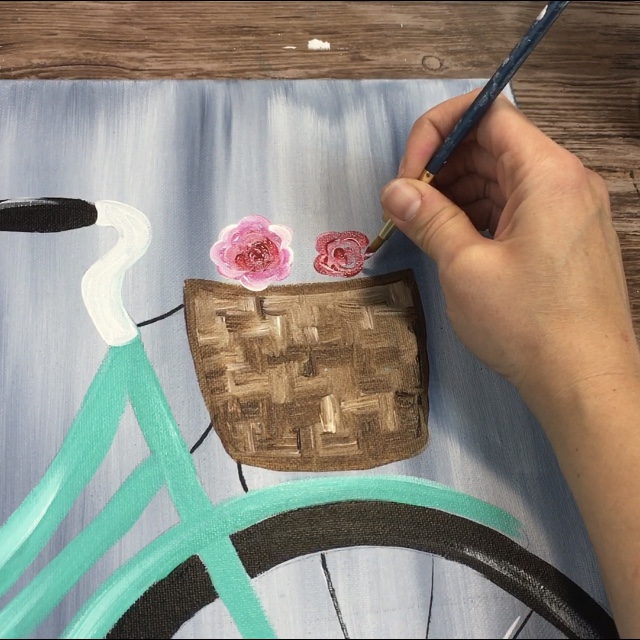
Repeat this technique for the desired amounts of roses.
Don’t worry about where the leaves will go at this point, just paint floating roses above your basket.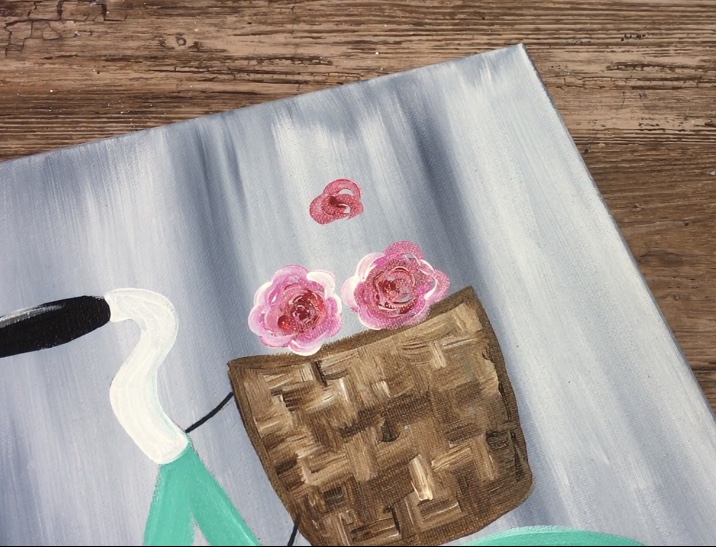
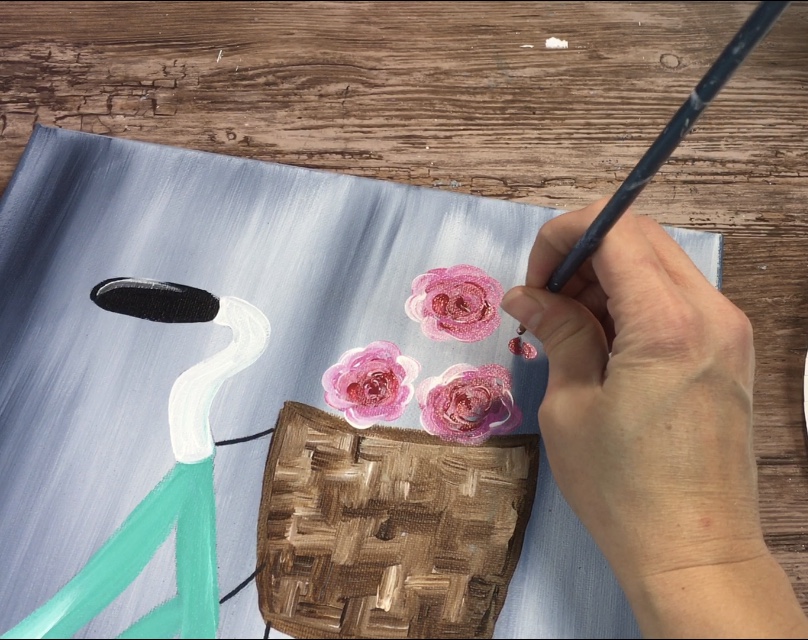
I did a total of 5 roses. 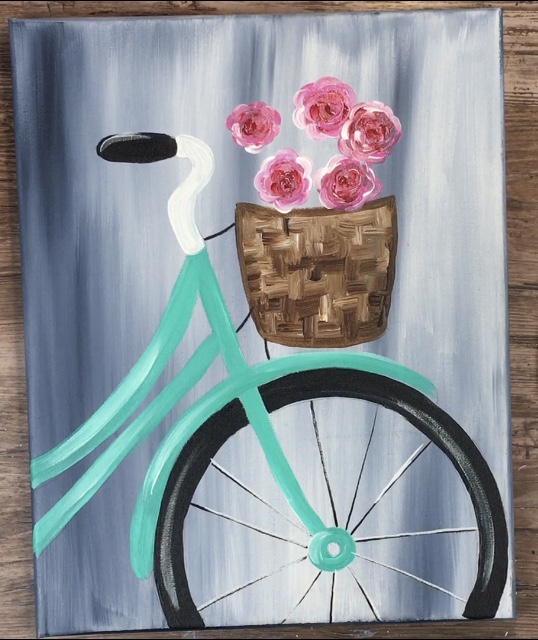
9. Paint The Leaves And Other Florals
The other flowers were done with brilliant purple and cadmium yellow deep hue.
Start with the yellow and use your 4 round brush. Dip the tip of your brush in yellow and white.
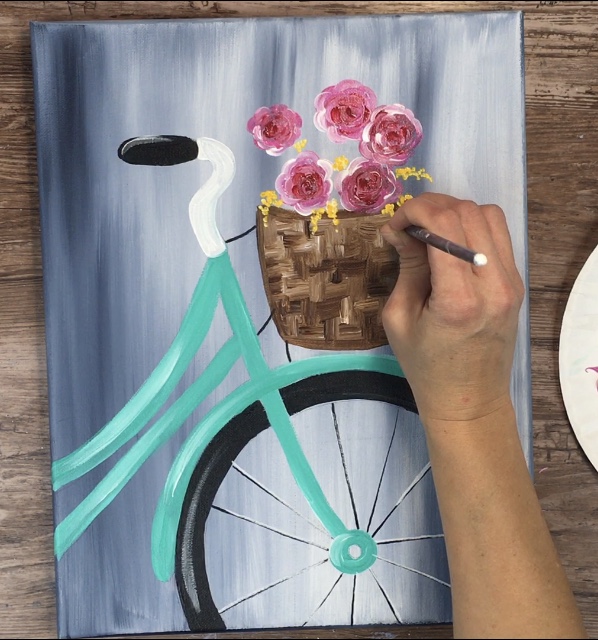
Paint little clusters of dots that seemingly hand down from the basket but also in between the roses. Then repeat for the purple. 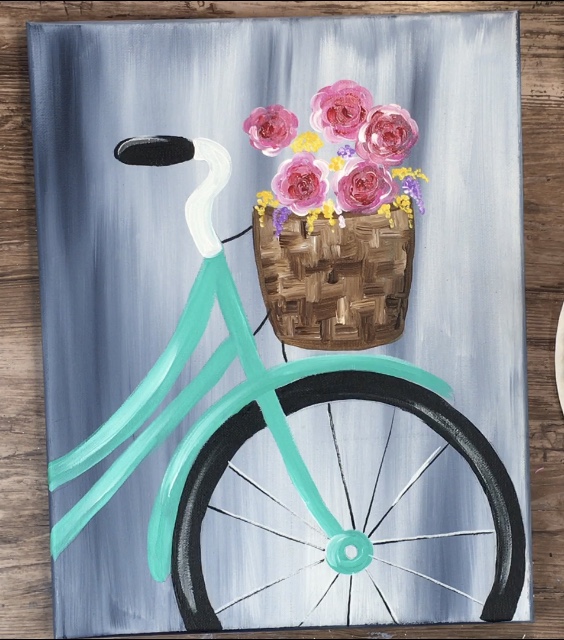
Next do the leaves with hookers green hue permenant and the round brush.
Paint little leaf shapes hanging down from the basket, next to the roses and in between the flower clusters. 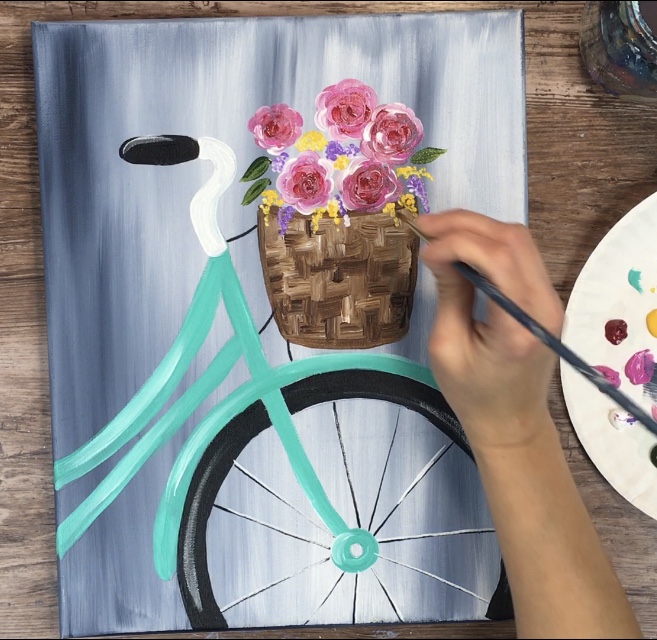
You can add a little color variation to the green by double loading in white and green to create different tints. 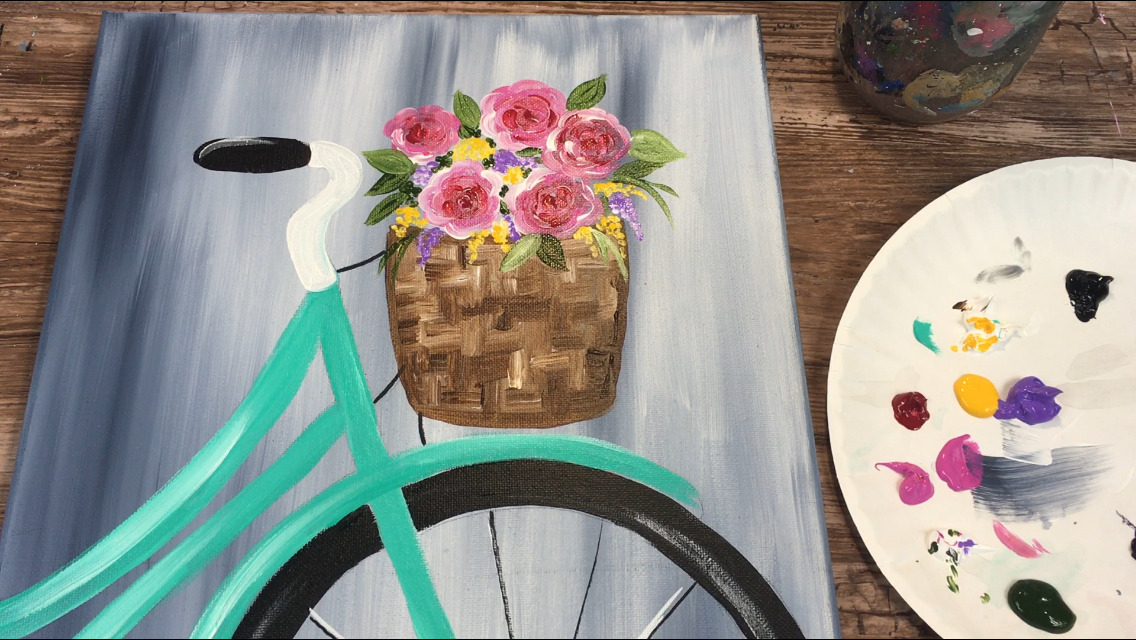
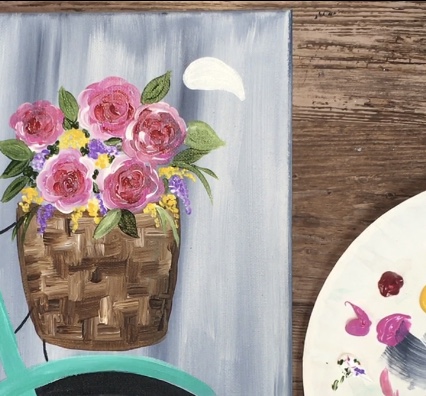
10. Paint The Bee
To do the bee, I used my 4 round brush and the colors titanium white, mars black and cad yellow deep hue.
Start by painting a teardrop shape with titanium white in the upper right area of the canvas above the flowers (you can put your bee somewhere else if you’d like).
Then when that white dries, paint the stinger, stripes and head with mars black. I used a 4 round brush. 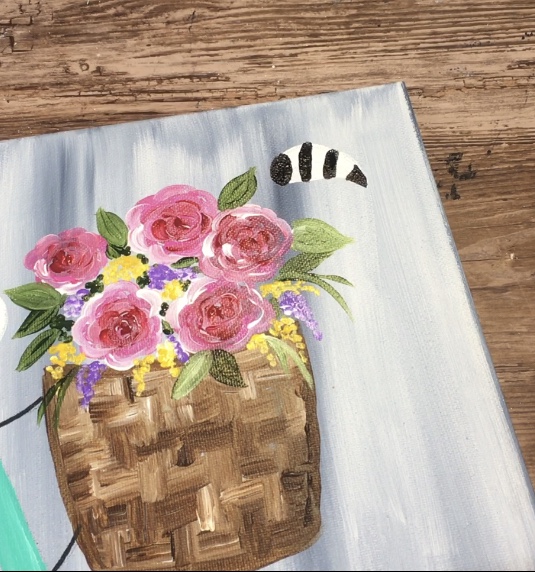
Then paint over the leftover white with cad yellow deep hue permanent. 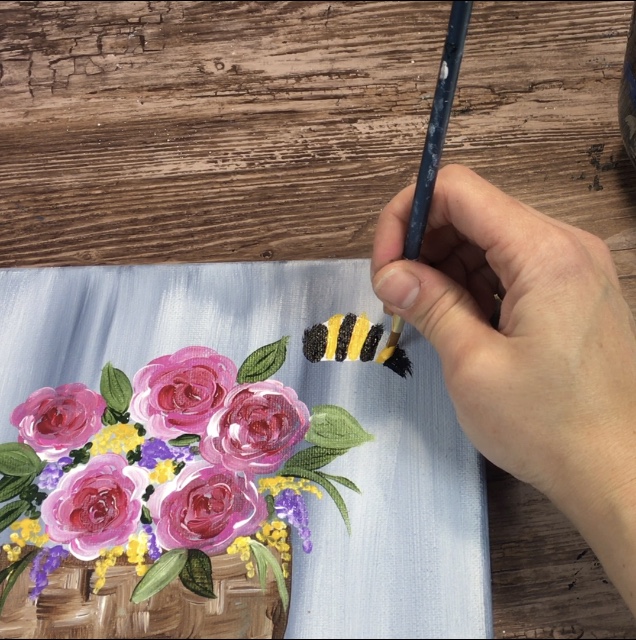
If you want to add a bit of texture to the bee, use your 5/0 round or black paint pen to paint a little bit of fuzz on the edges of the black areas. 
Then paint the legs with your black paint pen or 5/0 round and mars black. Paint the antenna.
Also I painted little white dots on the yellow areas to add to the texture and a white eye. 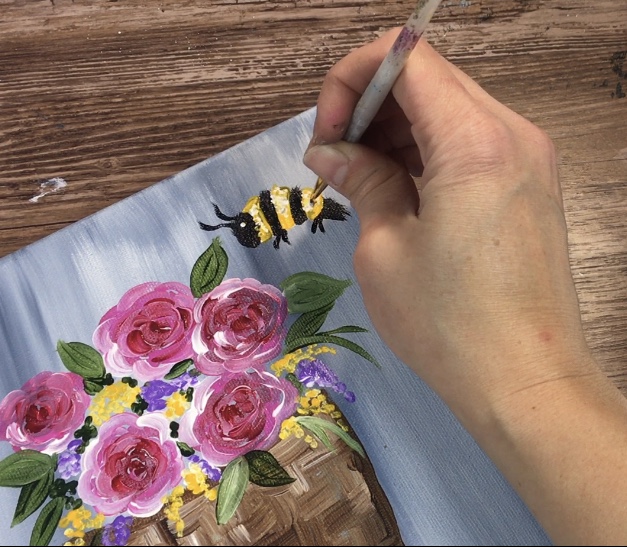
Paint the wings with titanium white. 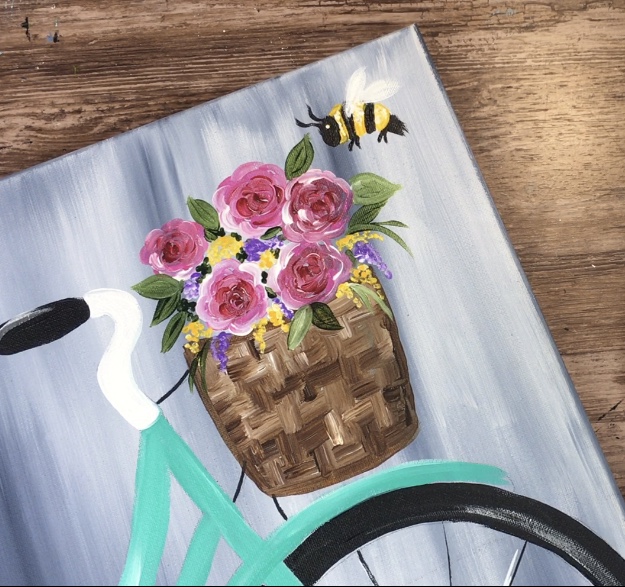
Then add a few very fine black lines on the base of the wings. 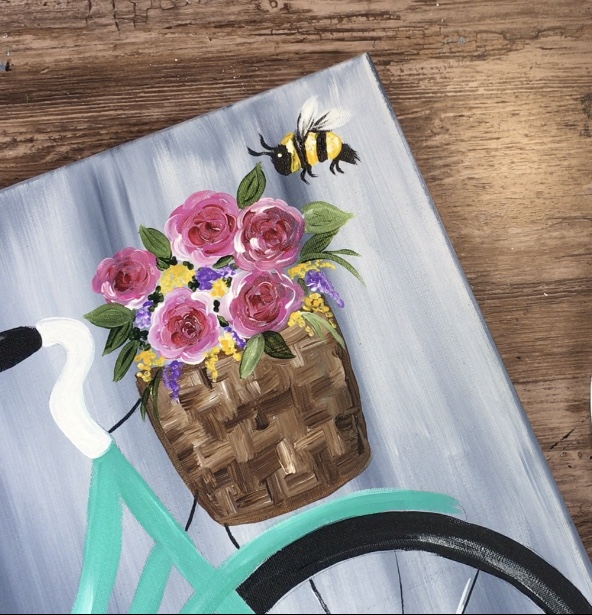
There are also a few white motion lines next to the wings. 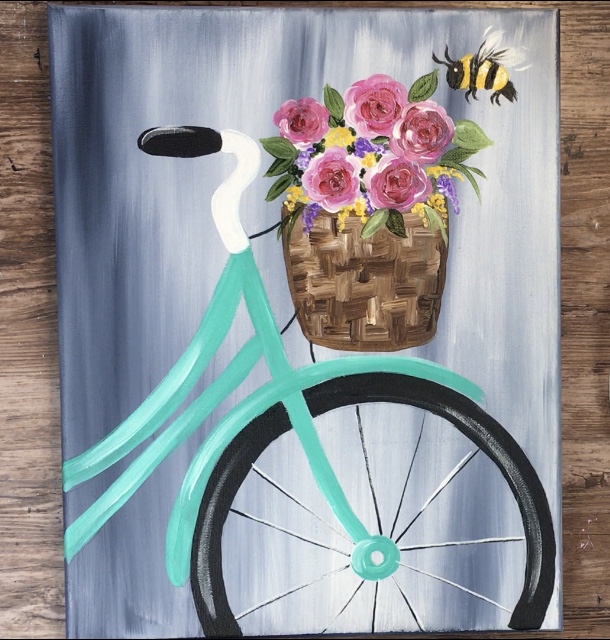
Then as a final touch to this painting, I did a few flower petals falling down and flying away. 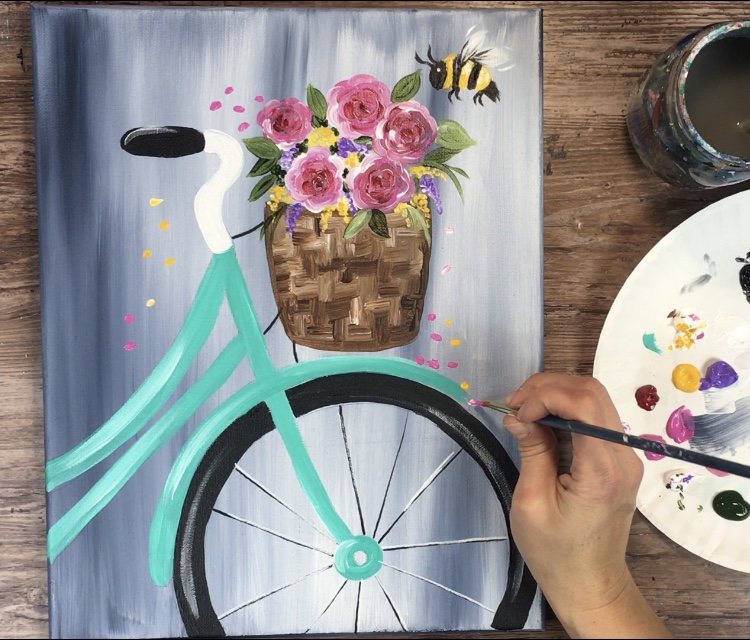
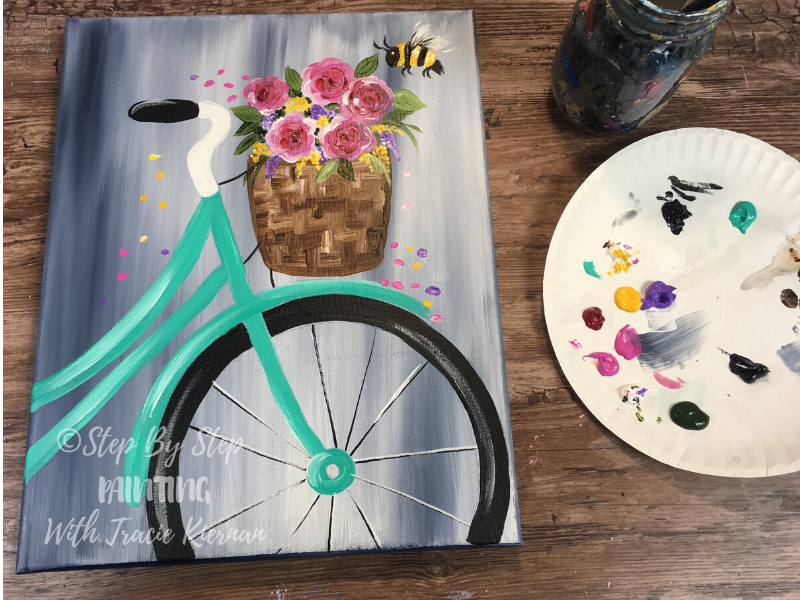
Finished
This was a fun painting and makes for a beautiful piece of art to compliment all your spring decor! Hope you enjoyed.
Share Your Art Here!


I love this design and will try to rug hook it!
Thanks Colleen! I’d love to see a photo when you’re finished with it ?
Which colors u suggest to buy as a set for beginners becoz in apple barrel we need to buy individually i guess?
Thank you very much it was so helpful