Would you like to save this?
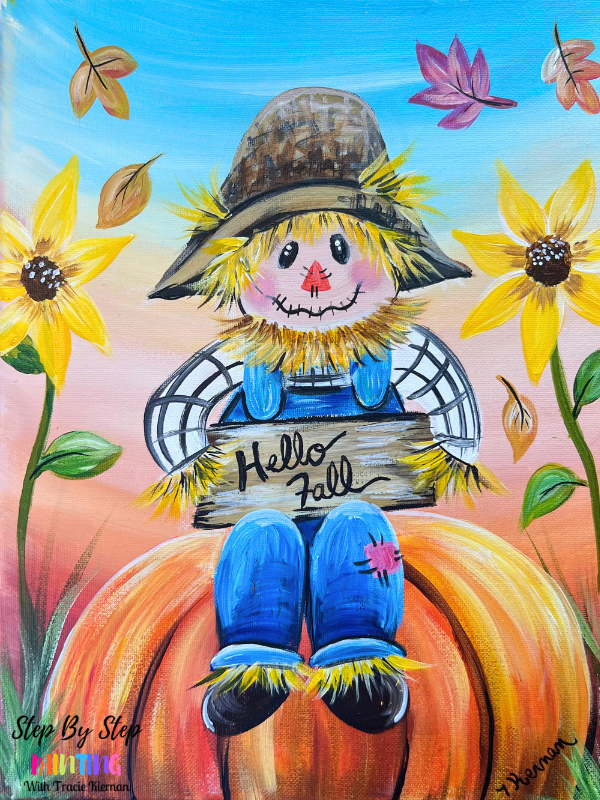
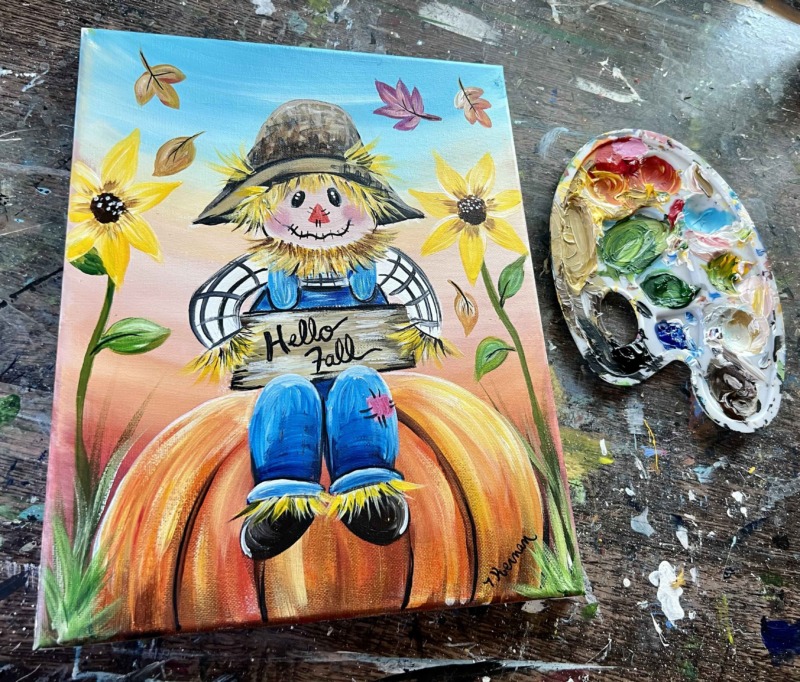
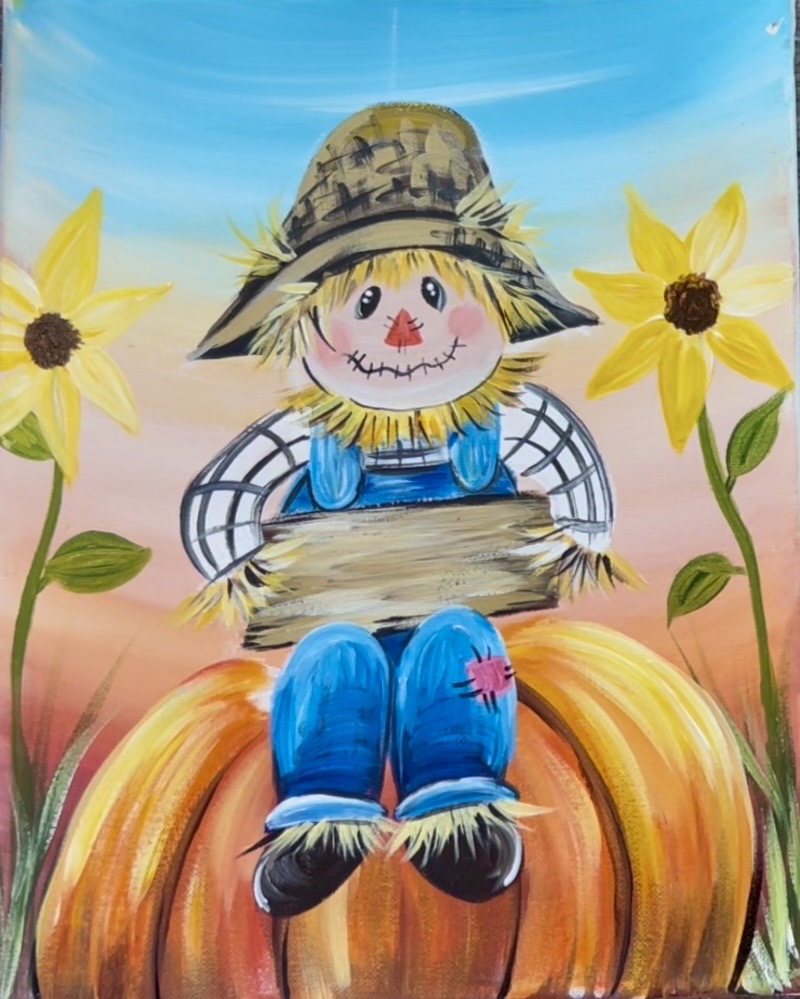
Paint an adorable scarecrow sitting on a pumpkin with a sign. You can customize the wording on the sign!
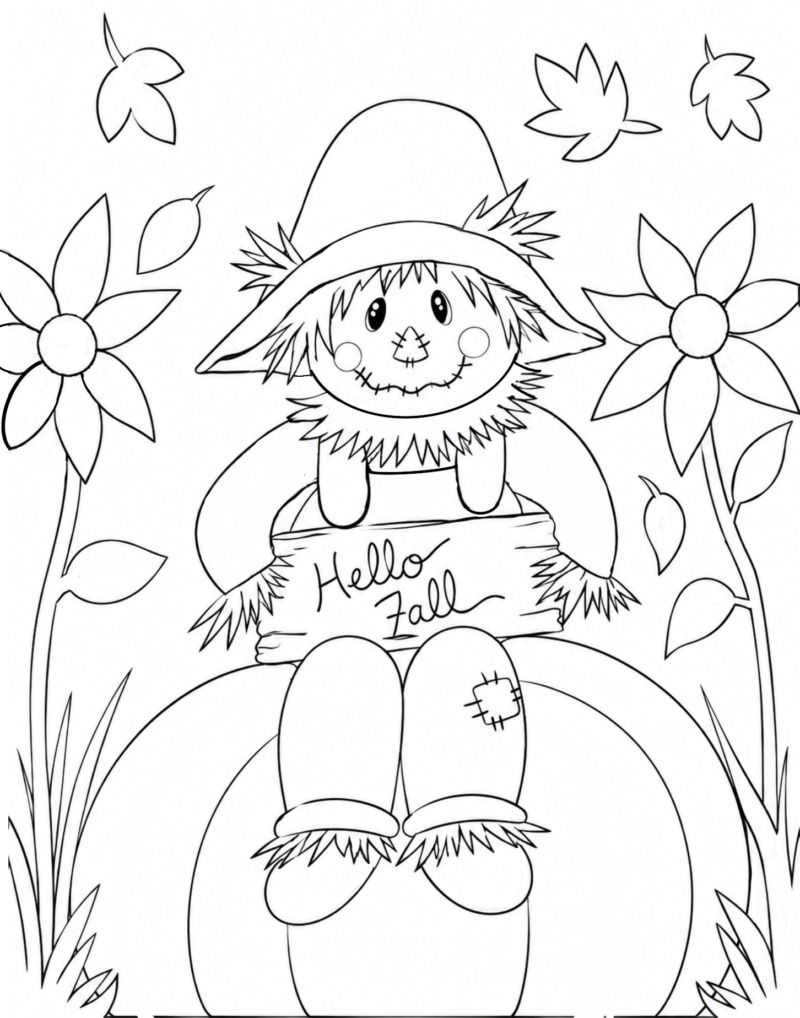
This tutorial includes a template and instructions for drawing the scarecrow and pumpkin.
Enjoy and happy painting!
Materials:
- 11×14 Canvas (or any size)
- Acrylic Paints (I use Liquitex BASICS)
- Brushes (see sizes below)
- Chalk
- Ruler
- Optional Traceable Template
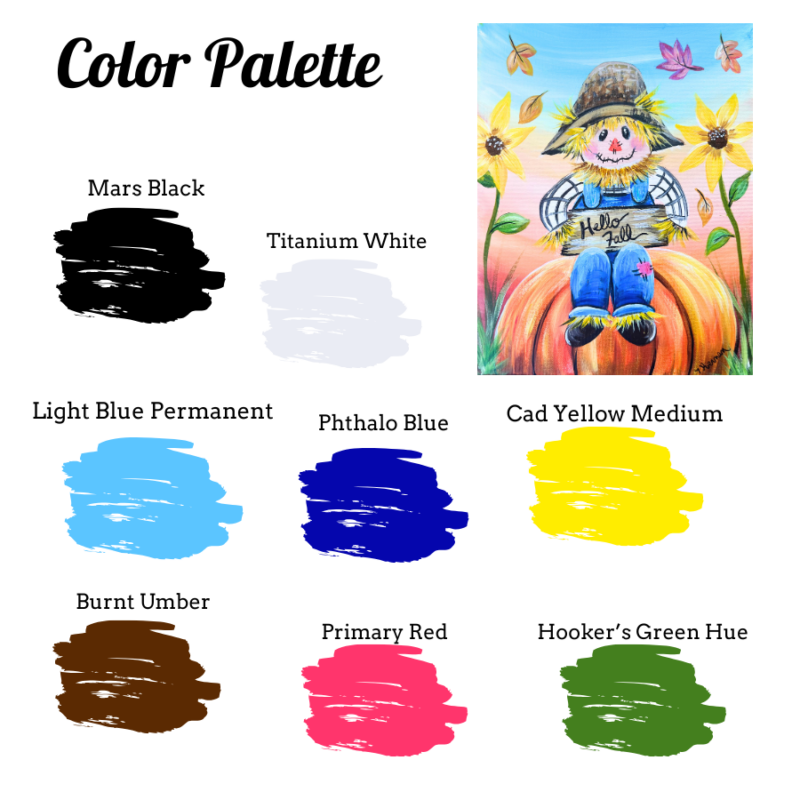
Colors:
- Titanium White
- Mars Black
- Primary Red
- Cadmium Yellow Medium Hue
- Burnt Umber
- Phthalo Blue
- Hooker’s Green Hue
- Light Blue Permanent
Brushes:
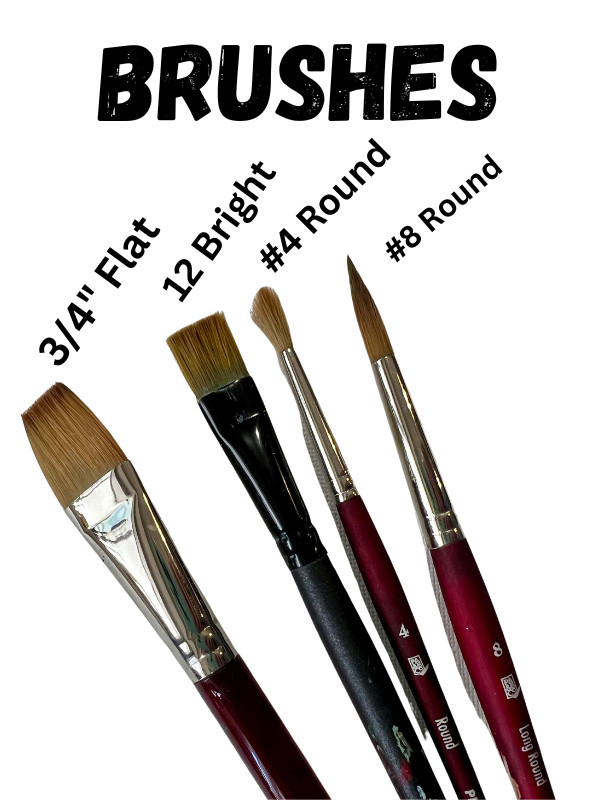
- 1″ Flat Brush (or 3/4″ flat)
- #4 Round Brush
- #8 Long Round Brush (optional)
- #12 Bright Brush (optional)
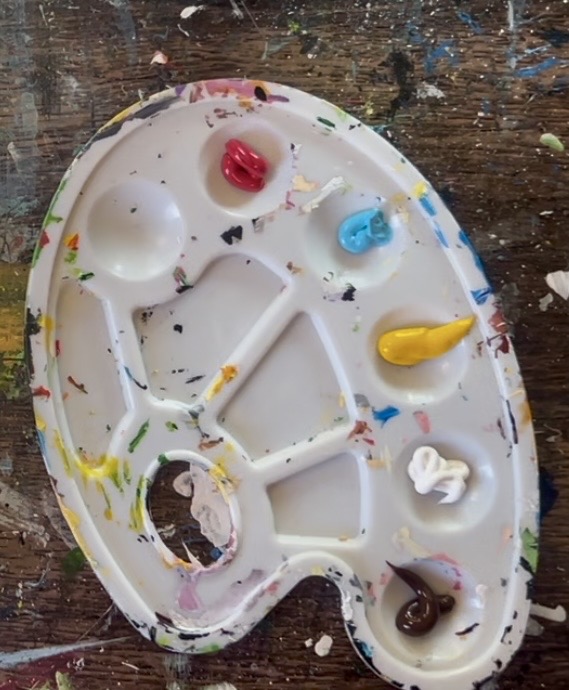
Color Palette:
Traceable (optional):
More sizes available in my PDF shop!
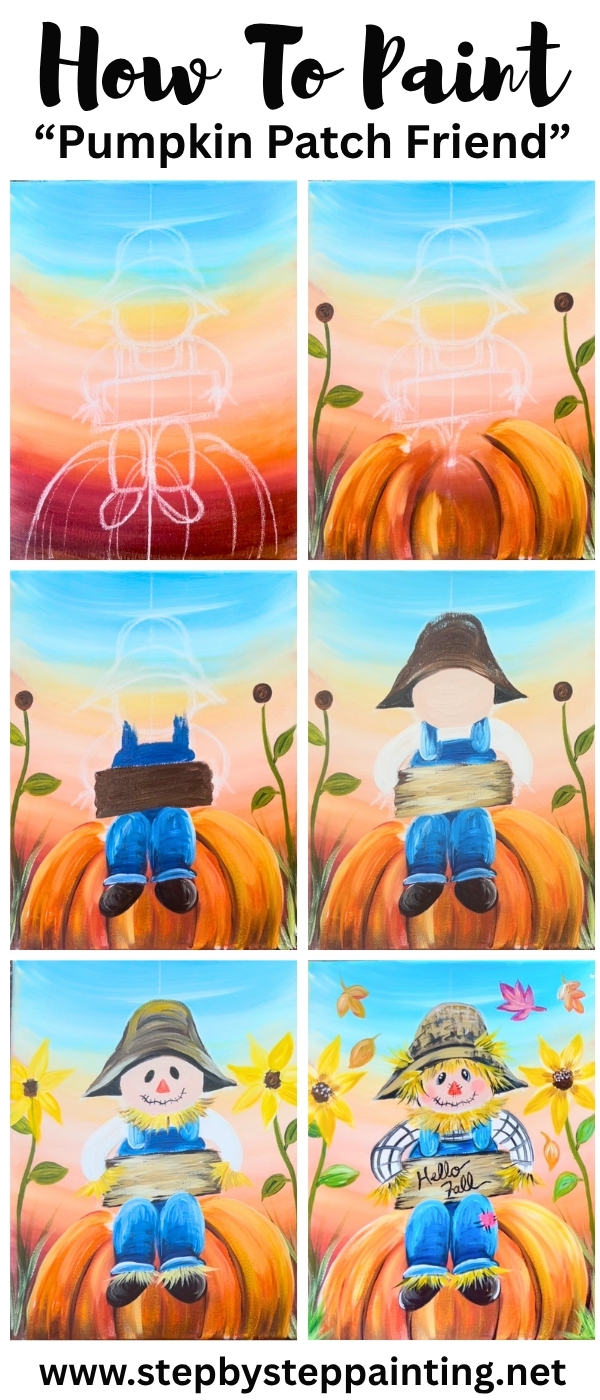
Directions At A Glance:
Video:
Step By Step Instructions:
1. Paint Background
Load your paint palette with the following colors: “Light Blue Permanent”, “Titanium White”, “Burnt Umber”, “Primary Red” and “Cadmium Yellow Medium Hue”. I’m going to call these colors from now on: light blue, white, brown, red and yellow.
Load your 1″ Flat Brush into equal amounts of light blue and white. Start at the top and paint curved paint strokes that are curving downwards. Go down about 3-4 inches and stop.
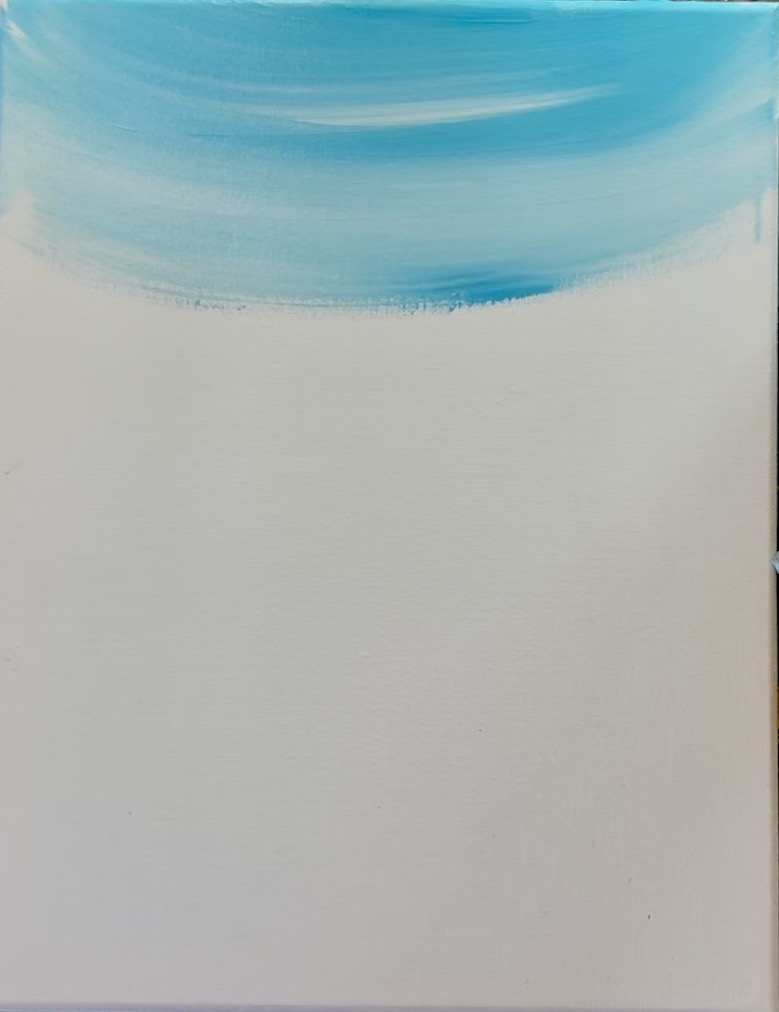
Wipe the brush off. Then load it into just white. Then blend white on the bottom of this curve so the sky becomes very light, almost all the way white. Go down about another inch with this and stop. At this point, the canvas is about 1/3 filled with this light blue color. This will need to dry a bit before we can transition to yellow.
Rinse the brush and load into brown. Paint the brown at the very bottom of the canvas and paint in the same curved direction. Go about an inch and a half up with this brown.
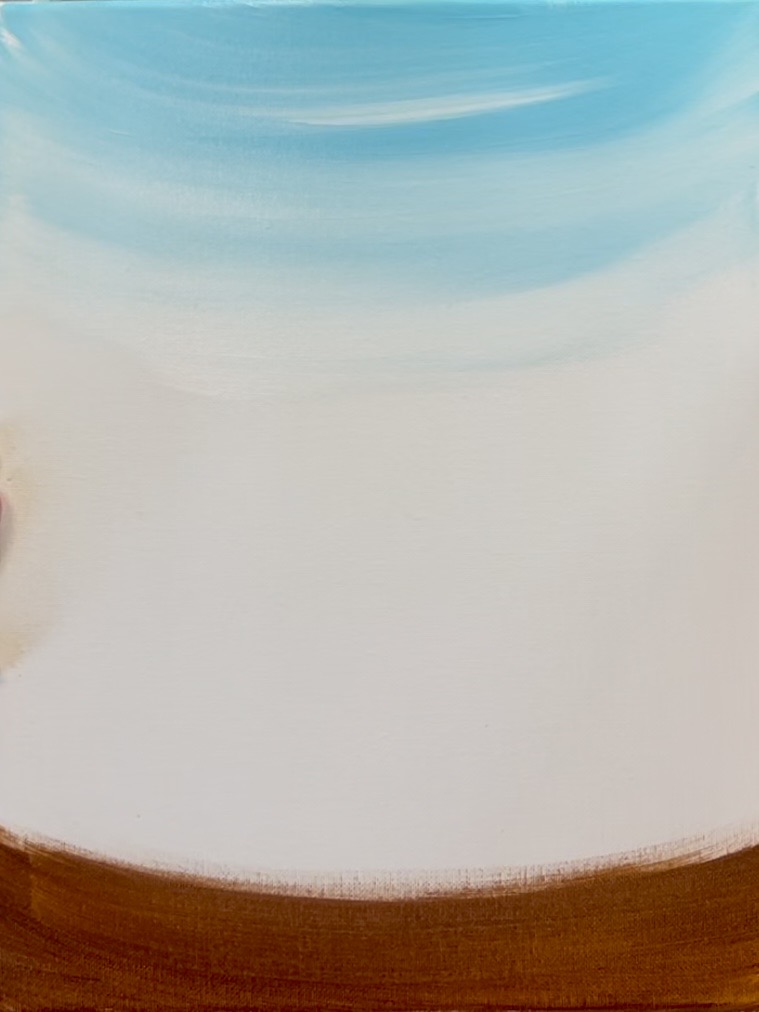
Wipe the brush but do not rinse. Load into the color red and blend the red with the brown so the brown transitions to the red color.
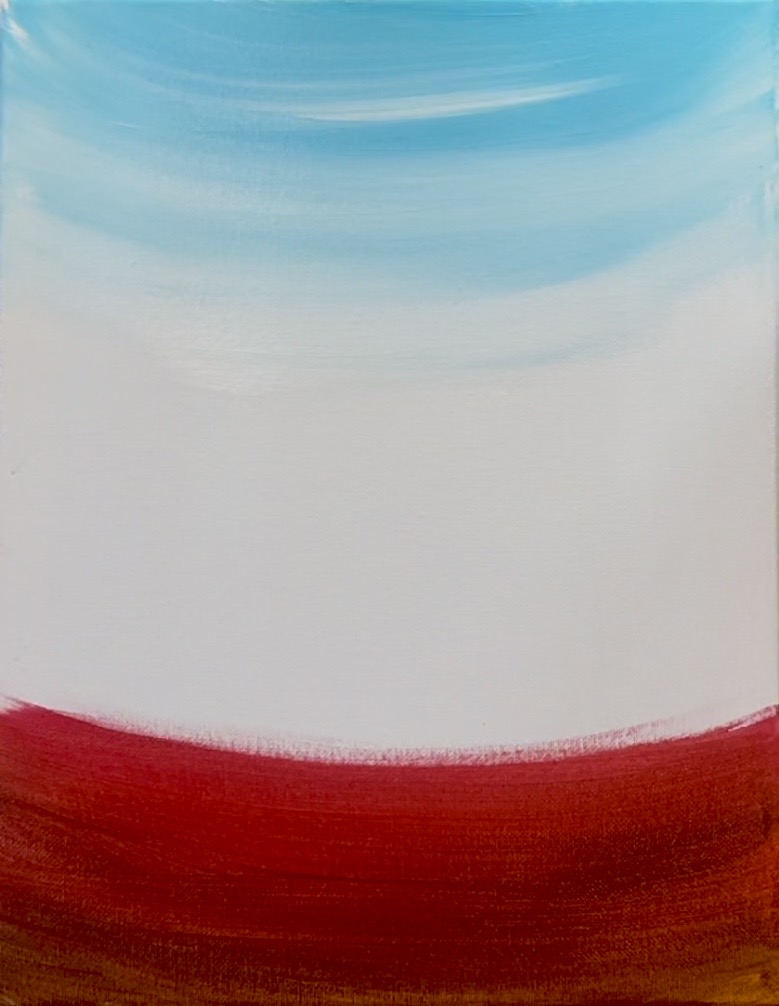
Next, mix orange on your paint palette by mixing 3 parts yellow to 1 part red. Blend your orange with the red color. At this point, you are a little less than halfway up the canvas (although this doesn’t have to be exact).
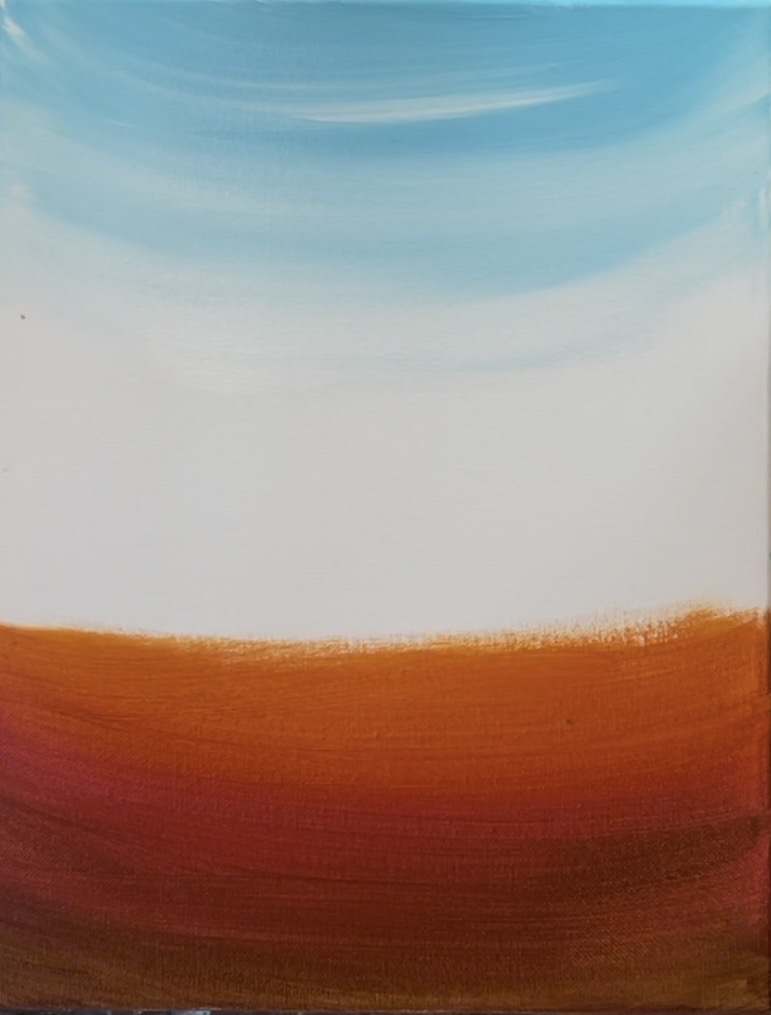
Without rinsing the brush, mix some white into your orange color on your palette (or just load the brush with white and blend on the canvas). This white will make the orange turn more of a light coral color. Blend this above the orange.
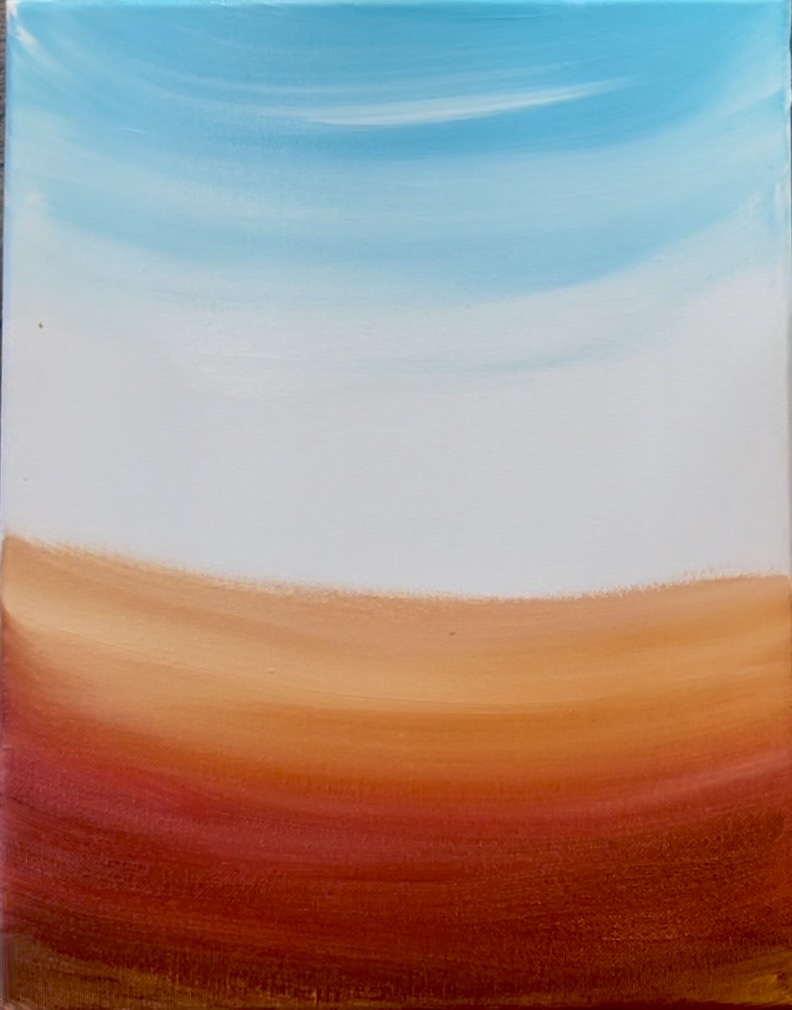
Then wipe the brush and load with just white and add the white above this light orange area. Bring this all the way up to your light blue in the top of the sky. Make sure this is very light! At this point the light blue is dry so it’s not going to blend with the light blue.
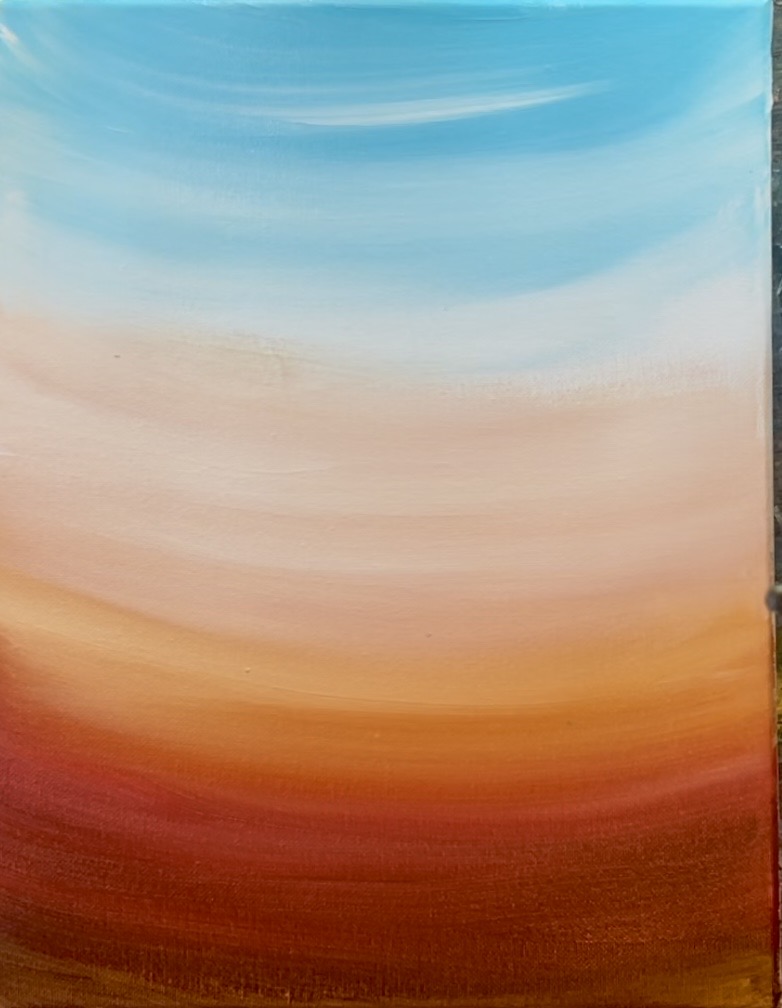
Then load the brush into white and load just a small amount of yellow on the corner of the brush. Blend this up into the light blue of the sky. Since the blue is dry, the yellow won’t blend with the blue to make green (although it might still look a little green in some areas even if it’s being painted over the blue). Gently “glaze” over the light blue so the light yellow transitions into the light blue. Our sky/ background looks something like the picture below! Yours does not need to be exact. Let this dry before going onto the next step.
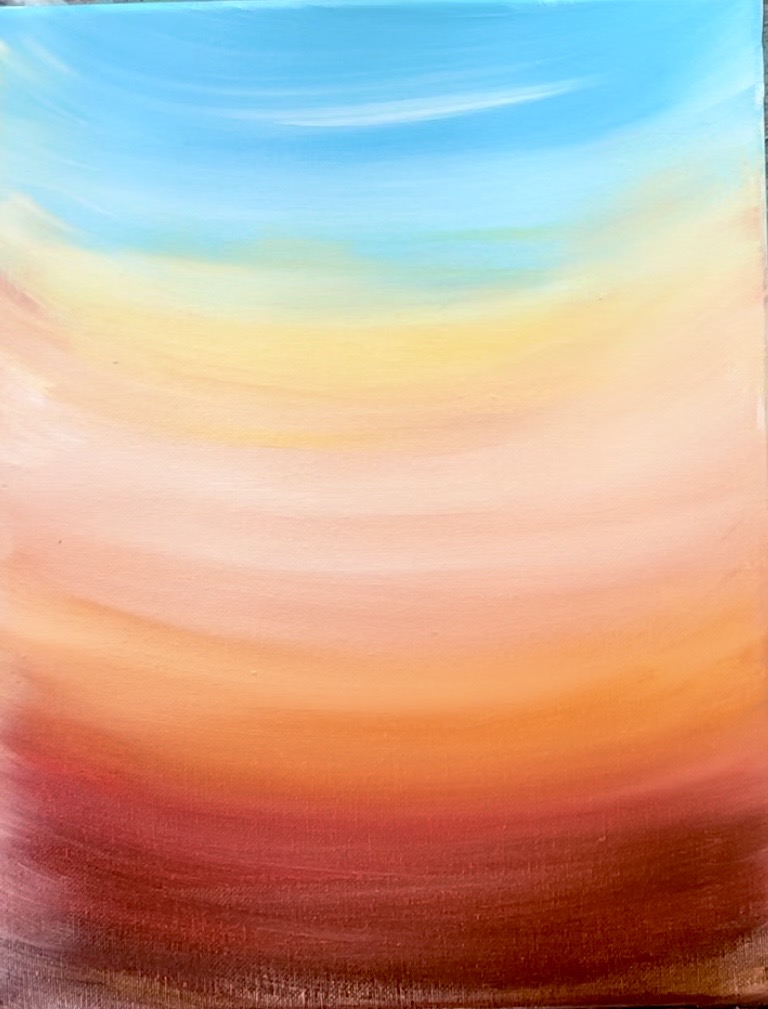
2. Draw Scarecrow & Pumpkin With Chalk
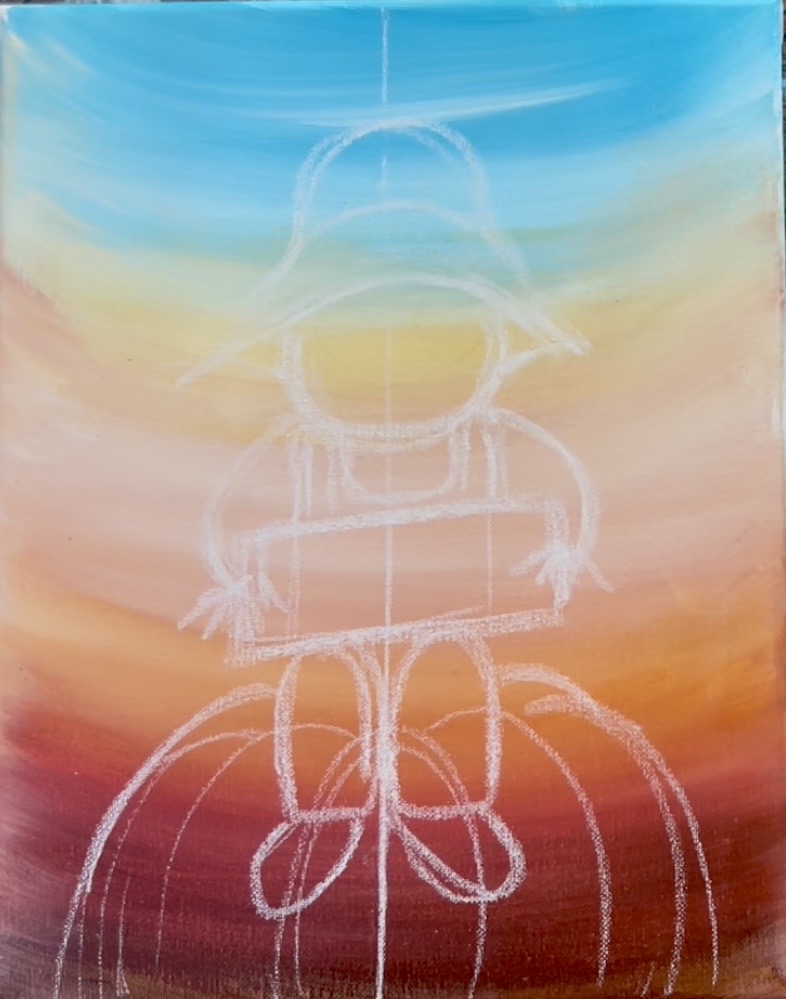
Note: the drawing is going to look different from the template because one will look more sketch-like and with chalk.
Start by measuring the canvas and drawing a vertical line right down the middle of the painting. This will be the “line of symmetry” and will make drawing slightly easier. Then draw the pumpkin. Draw this pumpkin by starting in the middle and drawing an oval-like shape. Then draw a set of 2-3 curved lines that extend from the top to the bottom edge of the canvas. Note: the pumpkin is about 5″ high and about 9″ wide. Make sure to give yourself enough room for the scarecrow.
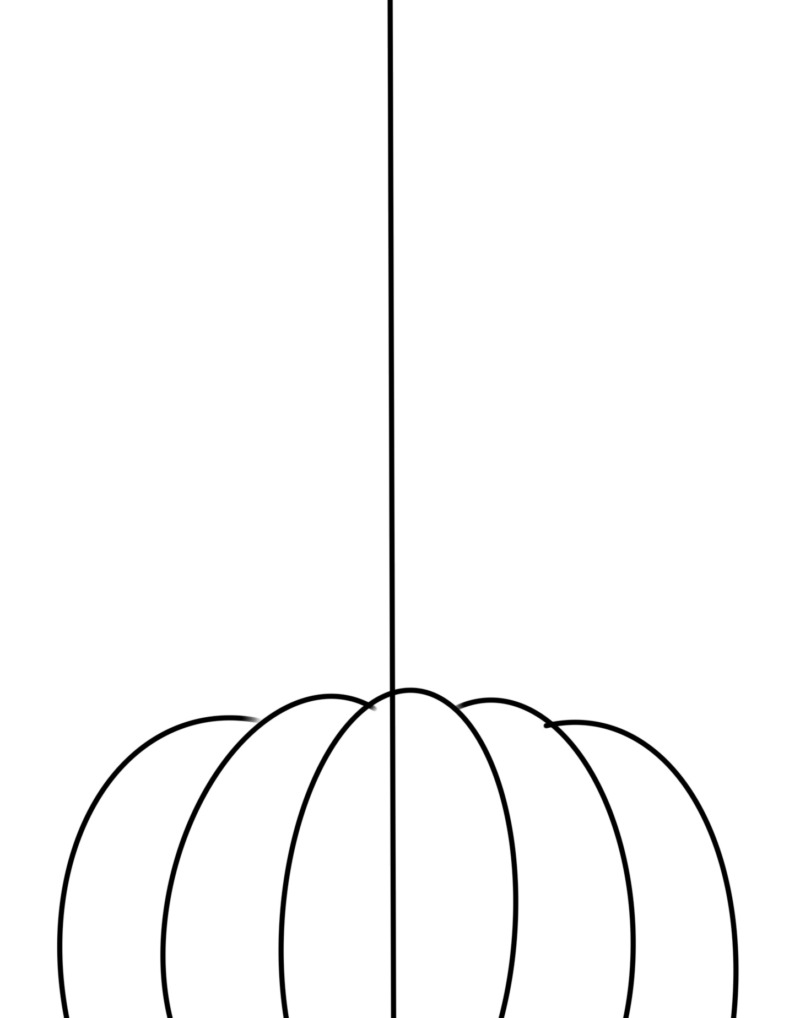
Then draw a U line for the head and draw a scarecrow style hat that overlaps the top of the head.
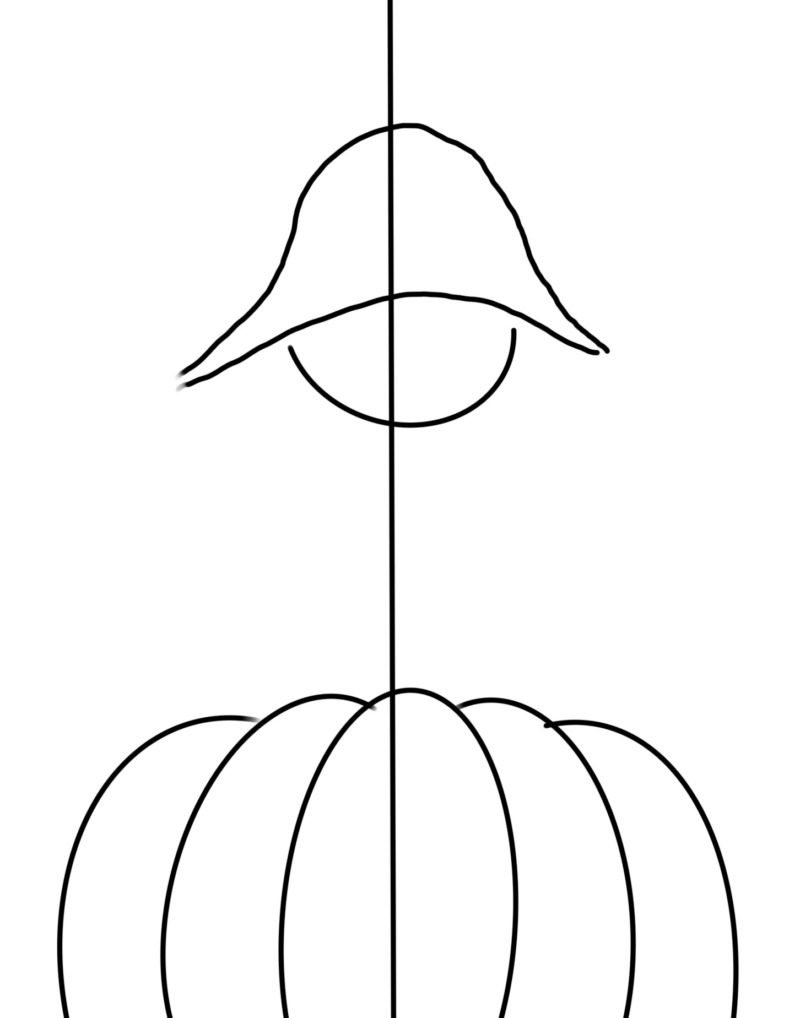
Draw the overalls directly underneath the head. Then draw a slightly angled rectangle shape for the sign. This sits directly above the pumpkin.
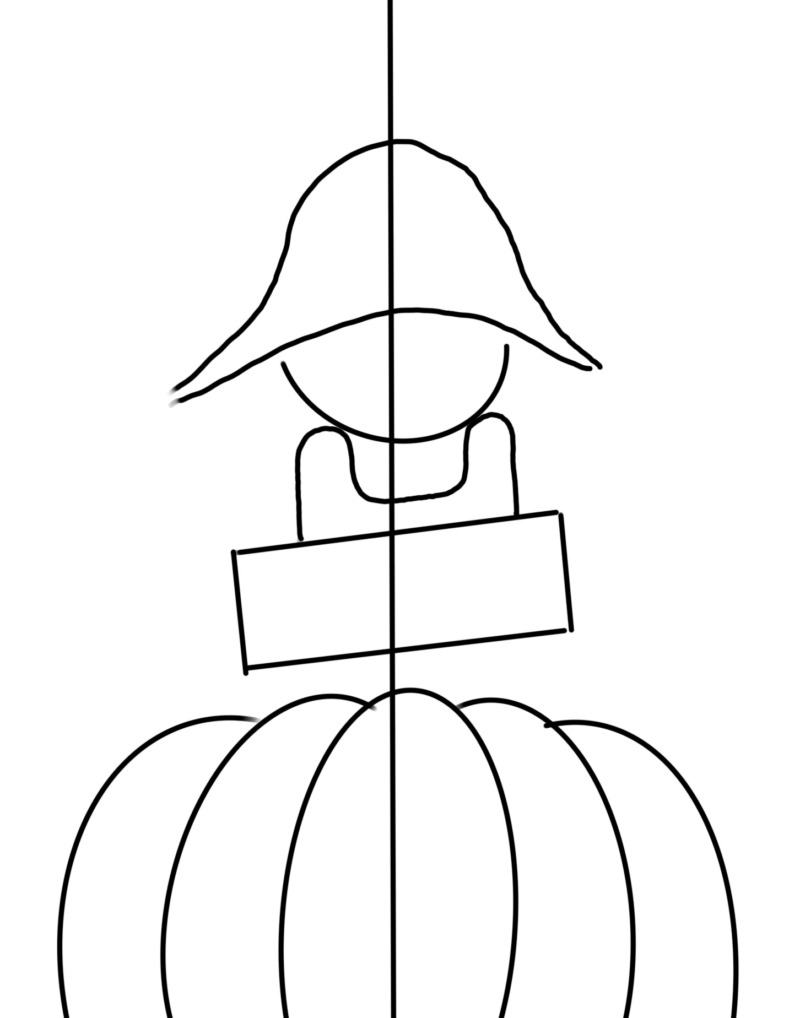
Then draw the set of pant legs and shoes directly under the sign. You may find you need to adjust the height of your pumpkin so the scarecrow is sitting on it and not floating over it. Then draw a set of arms extending out from the sides of the overalls and meeting the sign on each side. You can then draw a few straw lines for the hands that overlap the sides of the sign.
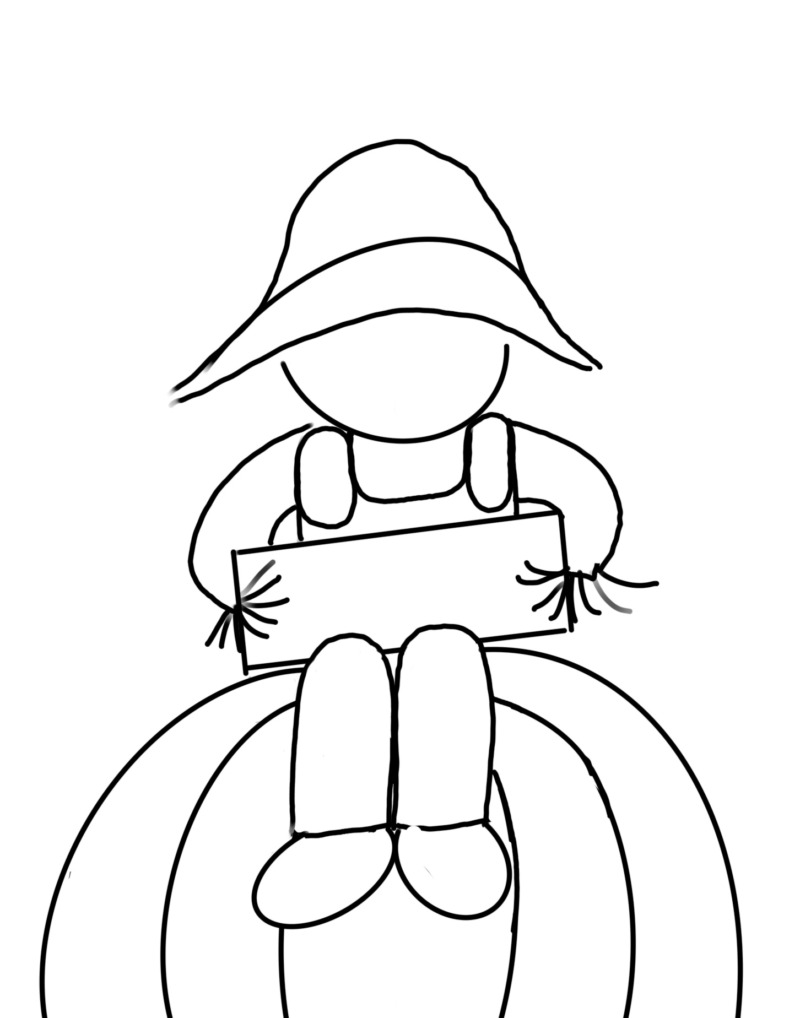
My sketch with chalk looks like this below. It doesn’t have to be pretty or very well defined. Just as long as we have all those basic shapes in and we can adjust as we start painting it in!
3. Paint Pumpkin With Light Layer Of White
To help the pumpkin to stand out against a dark orange/brown background, I recommend painting a white layer on the pumpkin first. Use the #12 bright brush (1/2″ flat) and white. Load the brush into white but wipe off a little excess paint. Start with the curve on the left side of the pumpkin and brush downwards. Your brush stroke should look kind of translucent/ almost dry brush style with some background layer still showing through. Repeat this for each of the curves of the pumpkins. Leave a little background showing through especially at the bottom of the pumpkin and in between the curves (the lines) of the pumpkin. You can choose to paint over the scarecrow’s legs or around them.
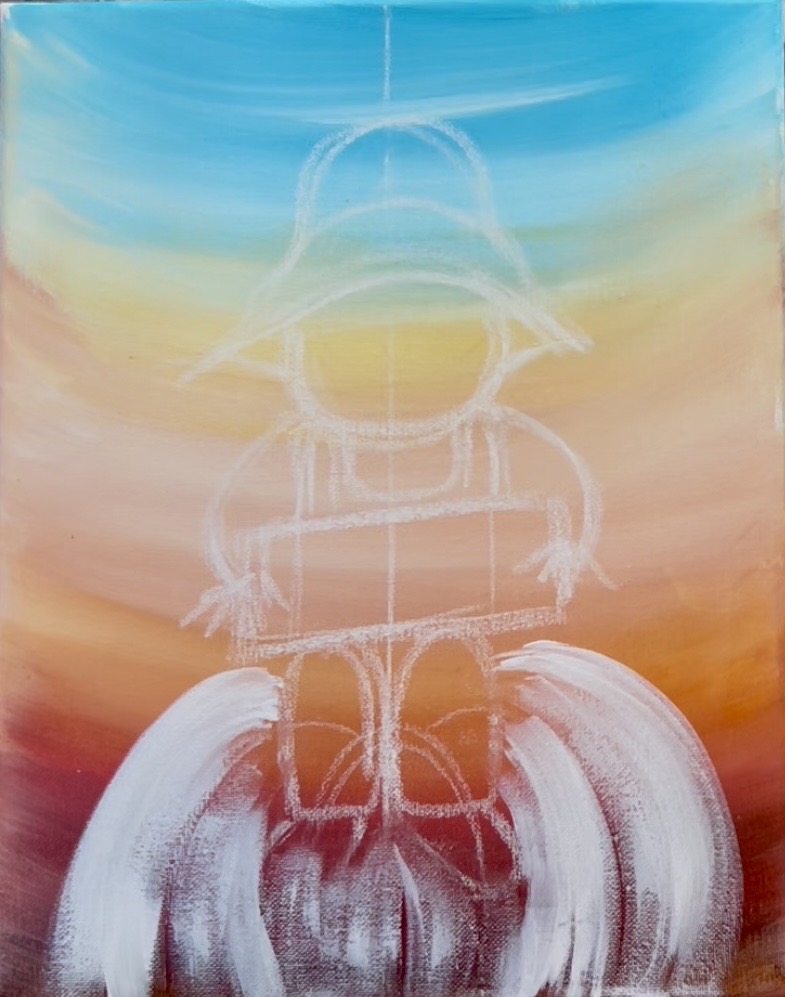
Let the white dry before painting the pumpkin orange.
4. Paint Grass & Sunflower Stems & Leaves
White the pumpkin is drying, paint the leaves, stems, brown circles and grass. Use the #8 long round brush and mix “Hooker’s Green Hue” (Green) with brown and yellow (about equal amounts of those colors, although you may want to use just a little brown so it’s not too dark). Paint grass lines from the bottom right and left corners and brush upwards. Release the pressure of the brush to get pointed lines. Then paint a set of wavy lines for the stems of the sunflowers. Paint a set of leaves on each stem.
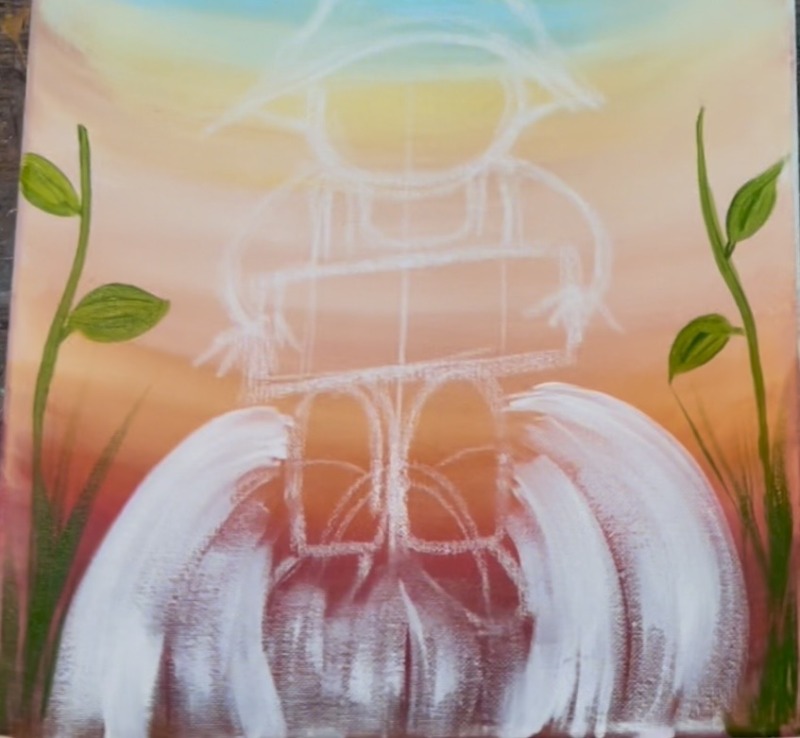
Next, highlight some of your grass. Mix a little white into your green mixture and then paint a few more grass lines overlapping your dark lines. Then use brown to paint a set of circles (for the sunflowers) on the tops of each of the stems.
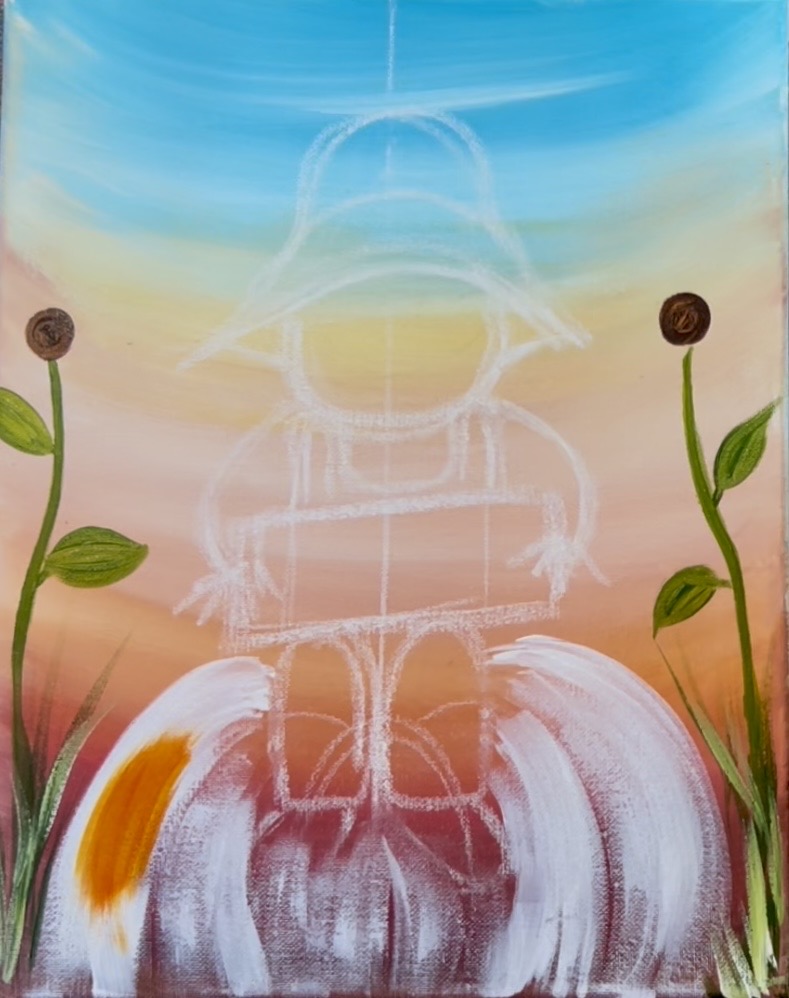
5. Paint Pumpkin Orange/Yellow Layer
Use the #12 bright brush to paint the pumpkin with a layer of orange. You will not just be painting this pure orange, you will be gently blending some yellow and red into it to create variations in color. Start by mixing 3 parts yellow and 1 part red on your palette to get your orange. Start on the left side of the pumpkin and paint your brush stroke starting at the top and stroking downwards.
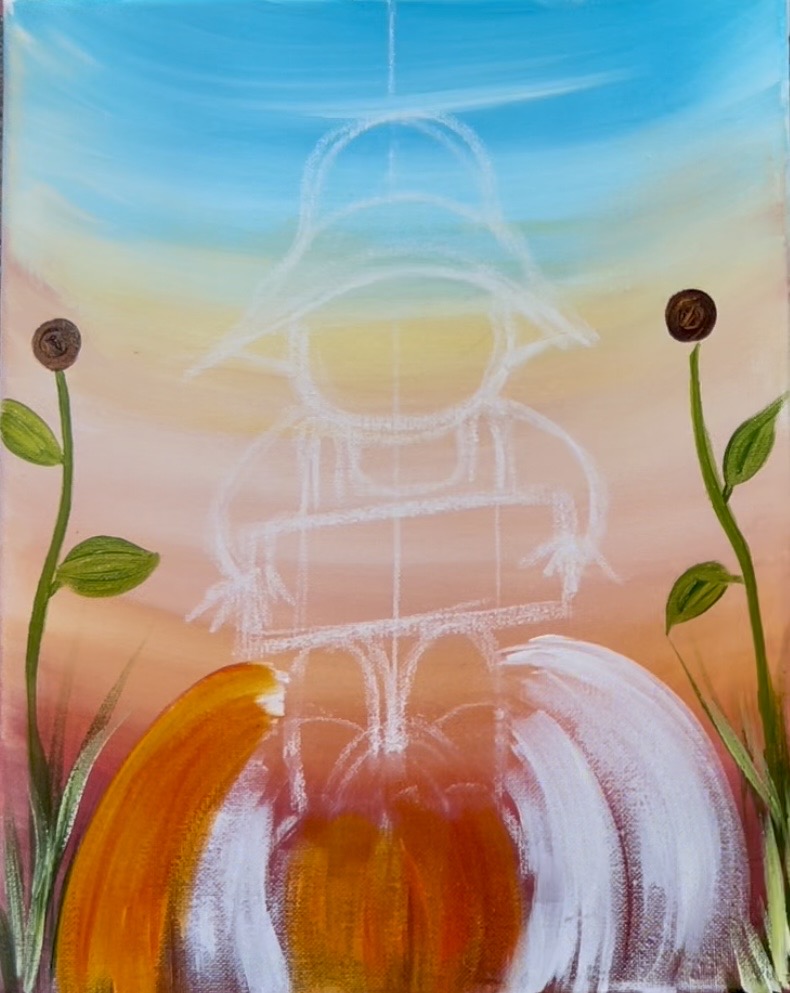
Repeat this for each of the curves of the pumpkin and make sure your brush stroke goes in the same direction as the white layer. Vary the color a little bit for each of the pumpkin curves. For example: one curve might be slightly lighter with more yellow and the curve next to it might be slightly darker with more red in it. For the middle “oval” part of the pumpkin, I ended up painting over the scarecrow pant legs and shoes, however, you may choose to paint around it.
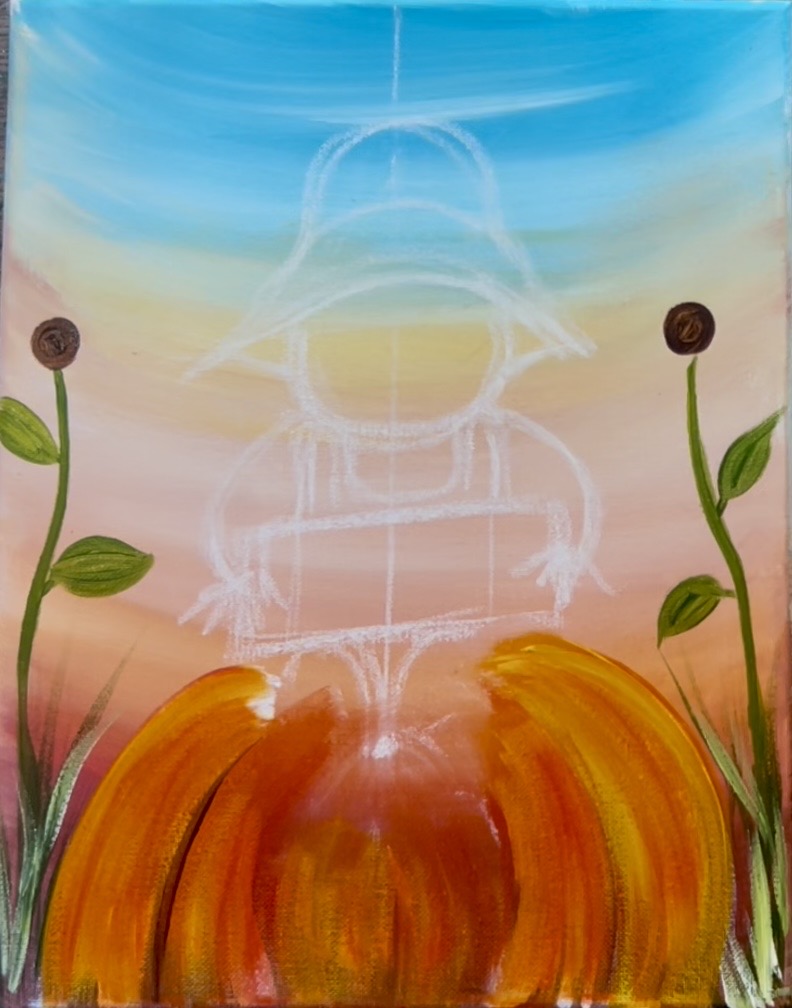
Then load brown on the tip of your paint brush and paint brown lines in between each of the pumpkin curves. This will help those lines to stand out better and make it look more like a pumpkin.
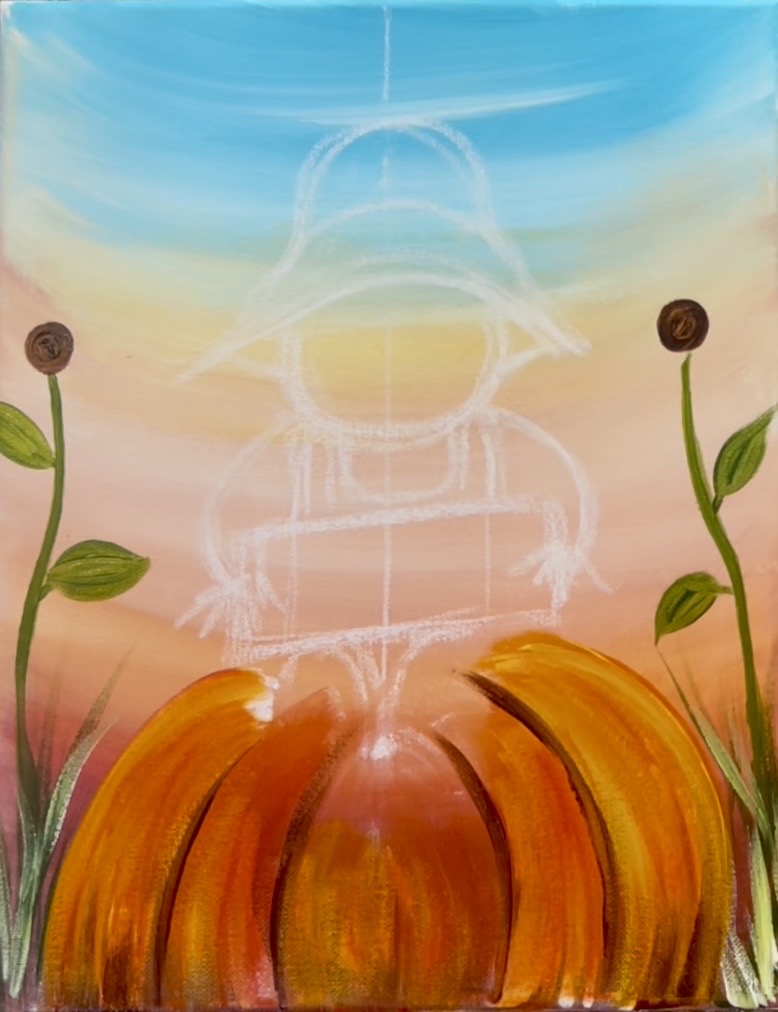
Next rinse the brush. Load it into yellow, a little orange and white. This will make a light yellow-orange color. Use that light yellow-orange color to highlight the far left and right curved edges of the pumpkin. This can help it stand out better against the background. Add a few of these brighter brush stroke throughout the pumpkin for more highlighting.
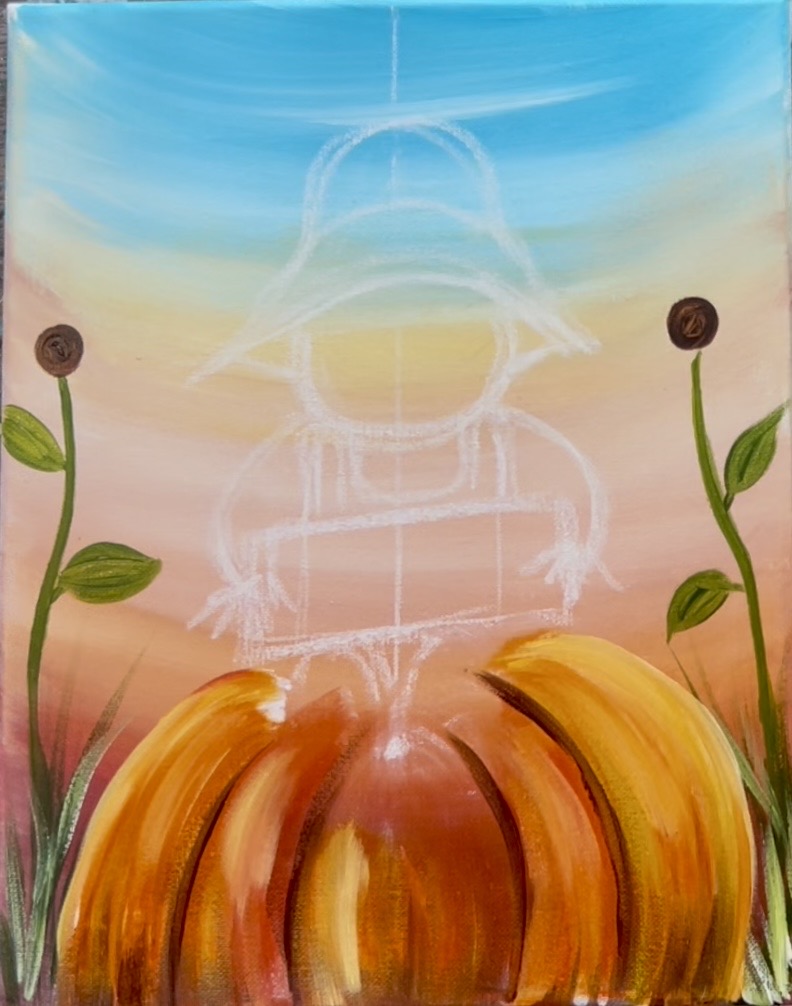
6. Paint Scarecrow Pants & Shoes
Use the #4 round brush and phthalo blue (Dark Blue) to paint pant legs.
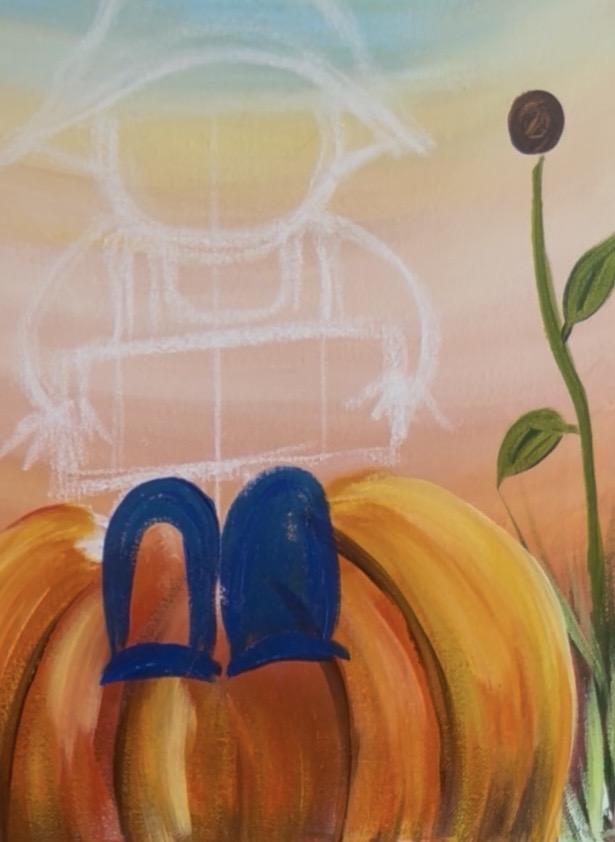
Then double load the brush in both white and dark blue. Paint the end cuff of the pant leg with this dark blue and white and allow them to mix into light blue. Paint the top of the knees with light blue but blend it down so the bottom of the pants are darker.
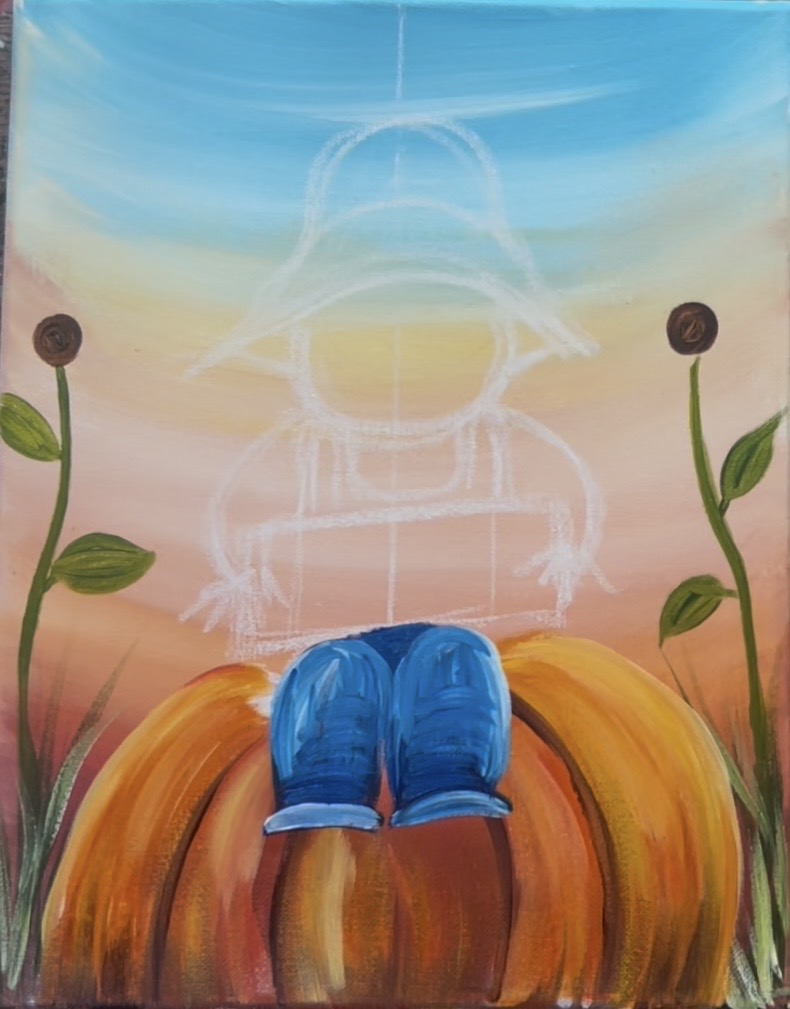
For the shoes, mix black and brown together and paint the oval shoe shapes. Then use a little white to highlight the outer parts of the shoes.
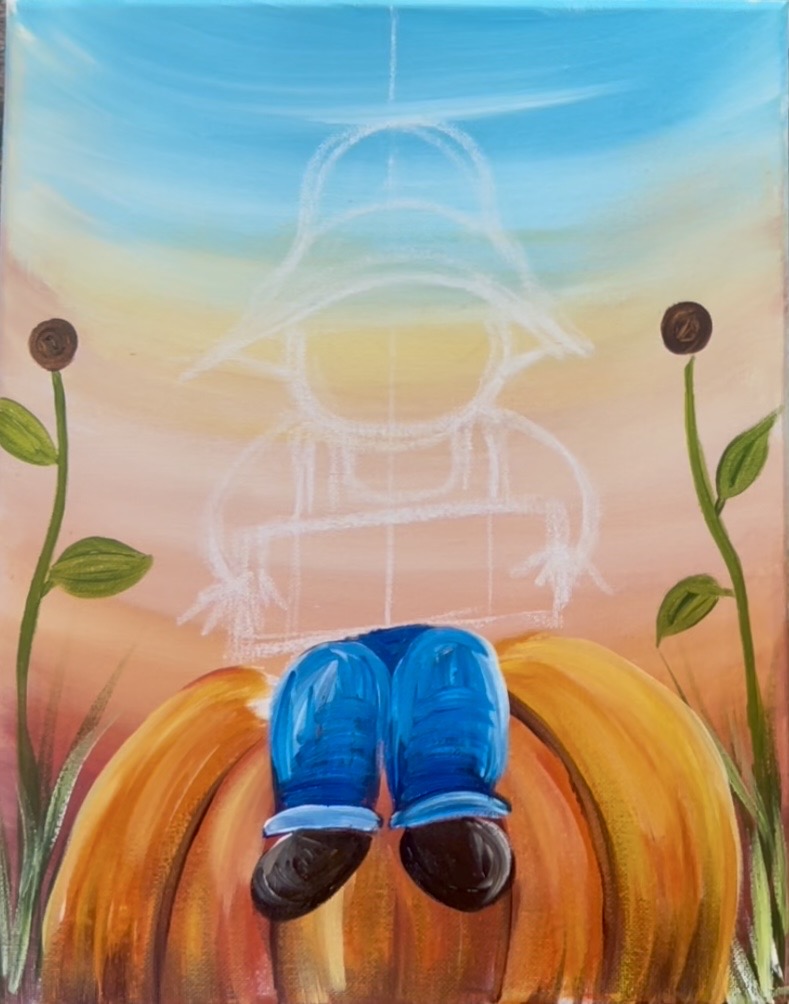
7. Paint Sign, Overalls & Shirt
Paint the sign dark brown using the #4 round brush.
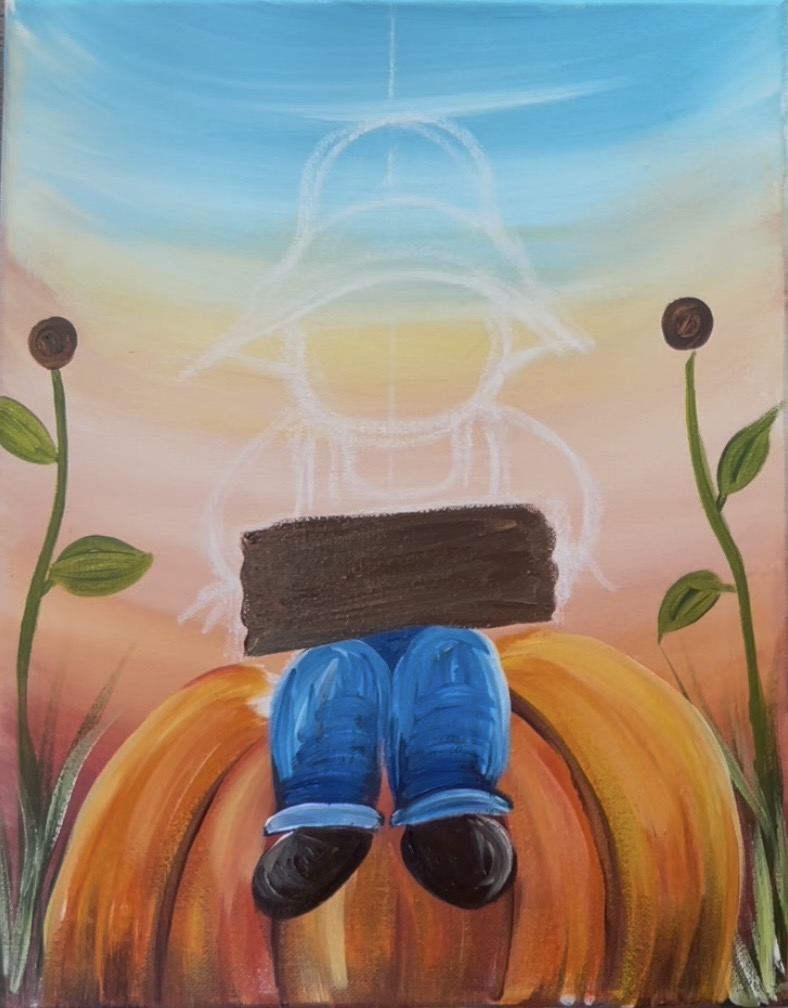
Paint the overalls dark blue.
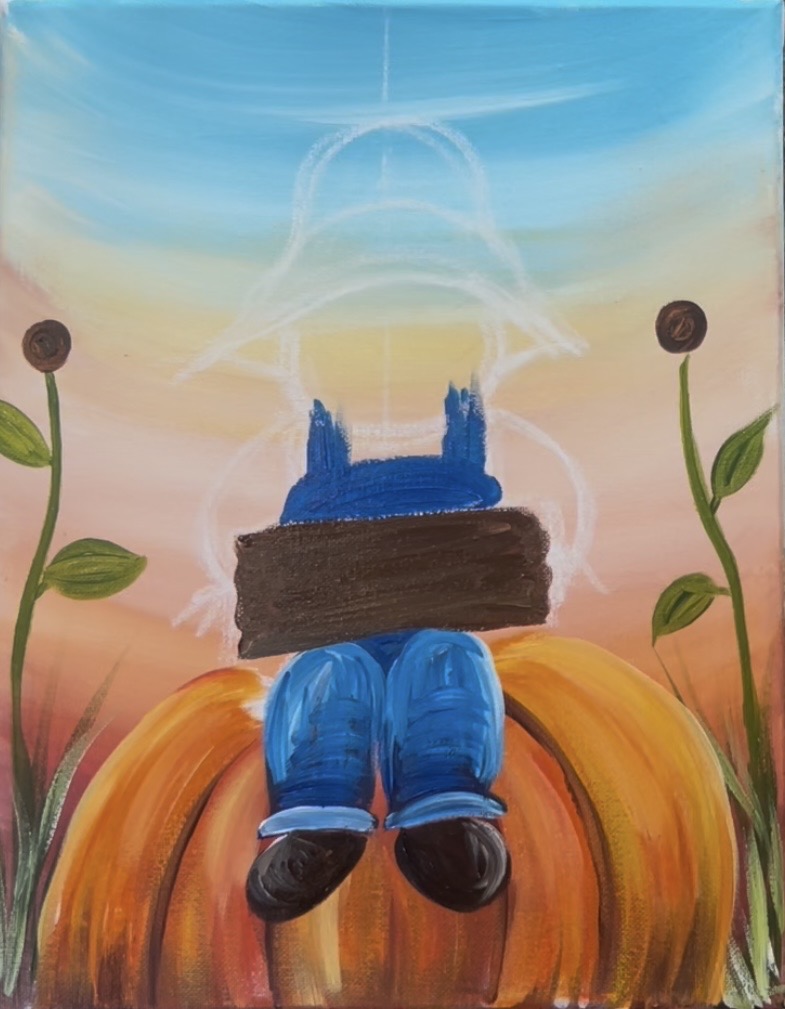
Paint the shirt and long sleeves white.
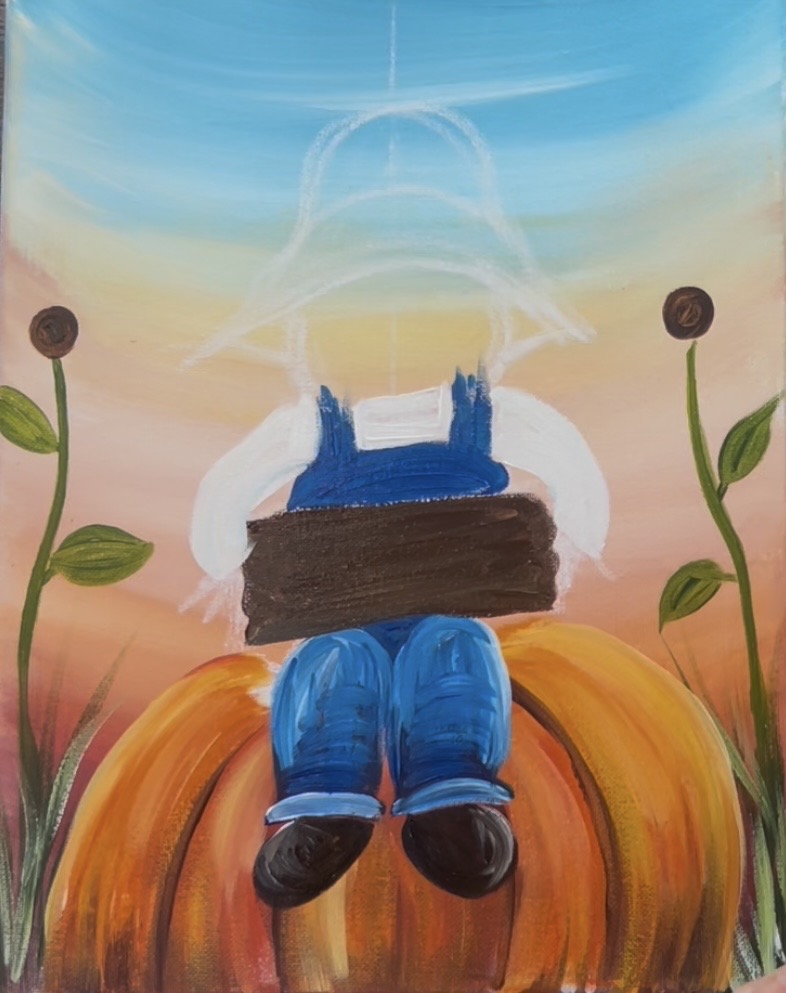
8. Paint Head & Hat
Mix a light pink/tan color on your palette by mixing 3 parts white, 1 part yellow, 1 part brown and 1 part red. (You may need to play around with the color a bit to get the tone you want or you can use a beige or peach color that you already have available). Use the round brush to paint the shape of the head.
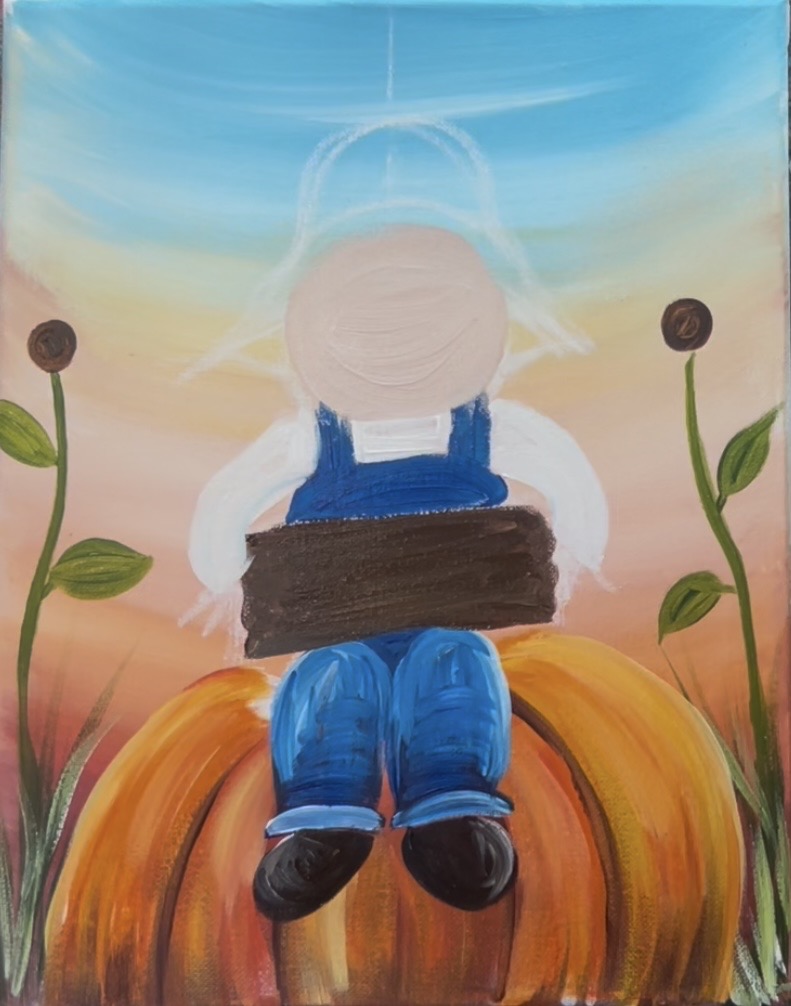
Then use dark brown to paint the hat. Use black to paint the part of the hat that goes around the head. Note that part of the hat overlaps the top part of the head.
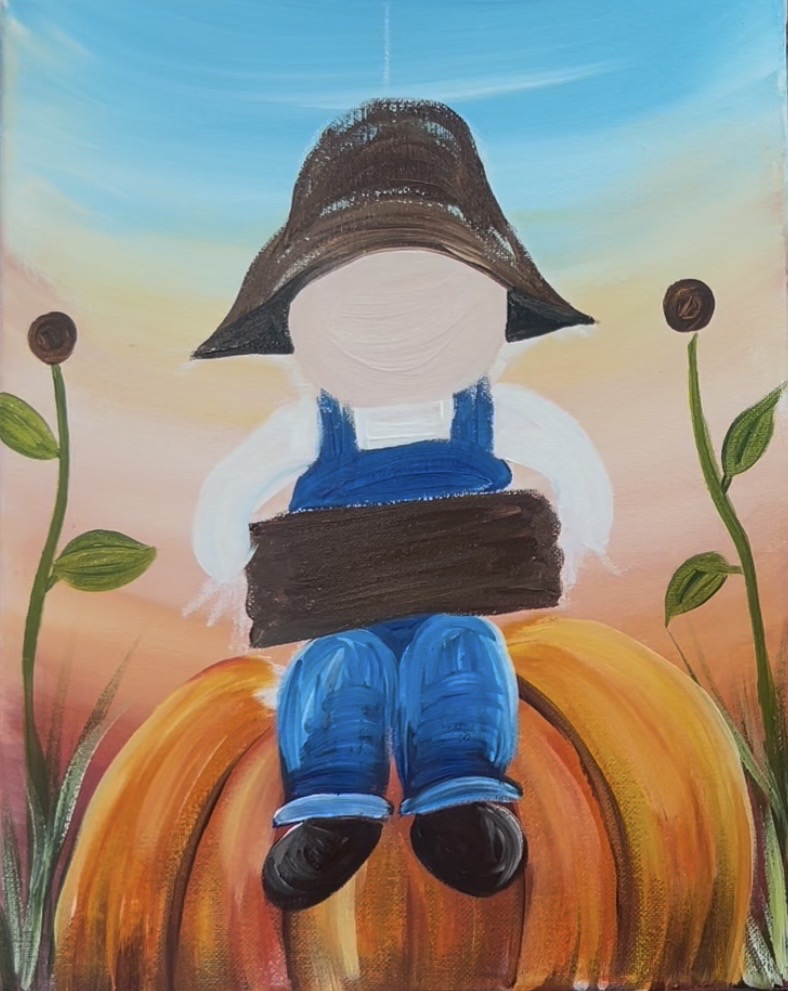
9. Paint Light Wood Layer On Sign
Mix a light brown on your paint palette. Mix 1 part white, 1 part yellow and 1 part brown. Add more white if needed. Then use the round brush to paint horizontal brush strokes over the dark brown but leave some of the dark brown (especially on the left and right edges) still showing.
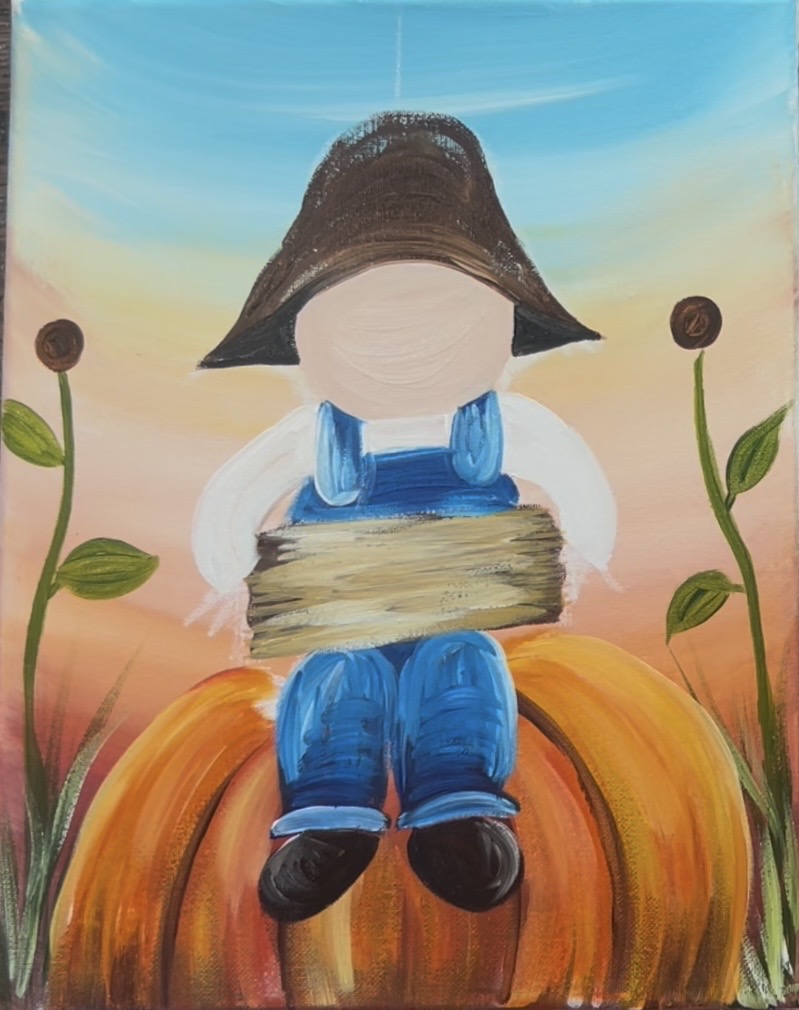
10. Paint Straw & Sunflower Petals
Mix yellow and white together. Then use the #4 round brush to paint little straw lines coming from the bottom of the paint legs and overlapping the shoes.
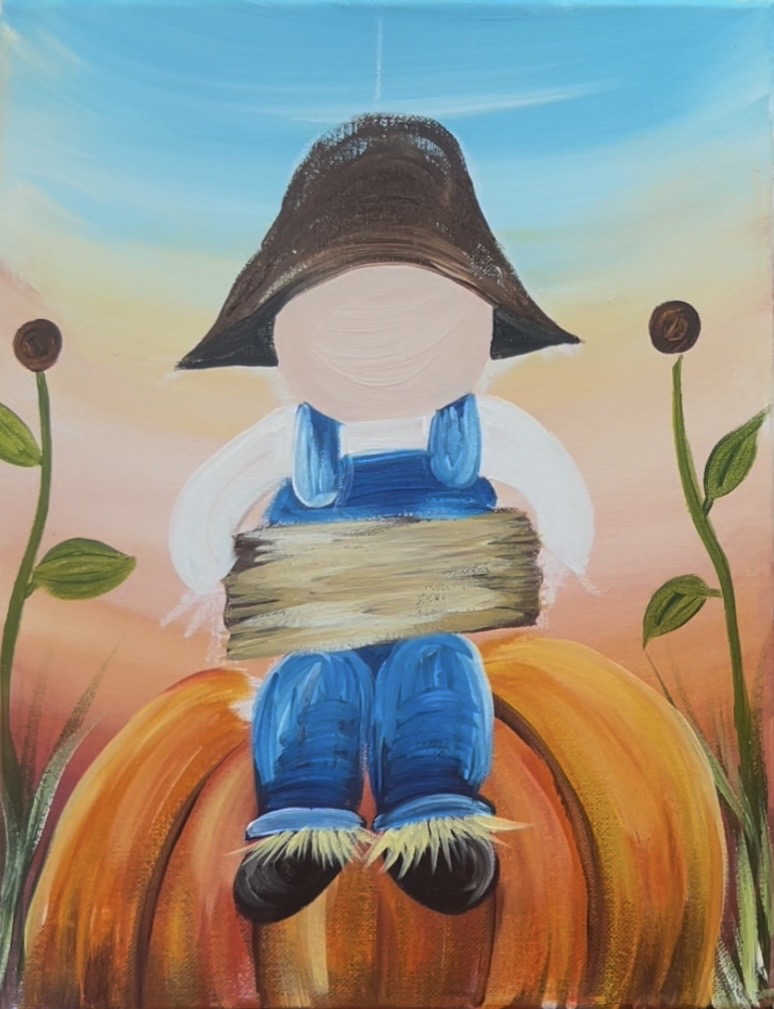
Use the same white and yellow to paint petals on the sunflowers. You can overlap the bottom of the petals over your brown circle in the middle (we will re-paint this circle later).
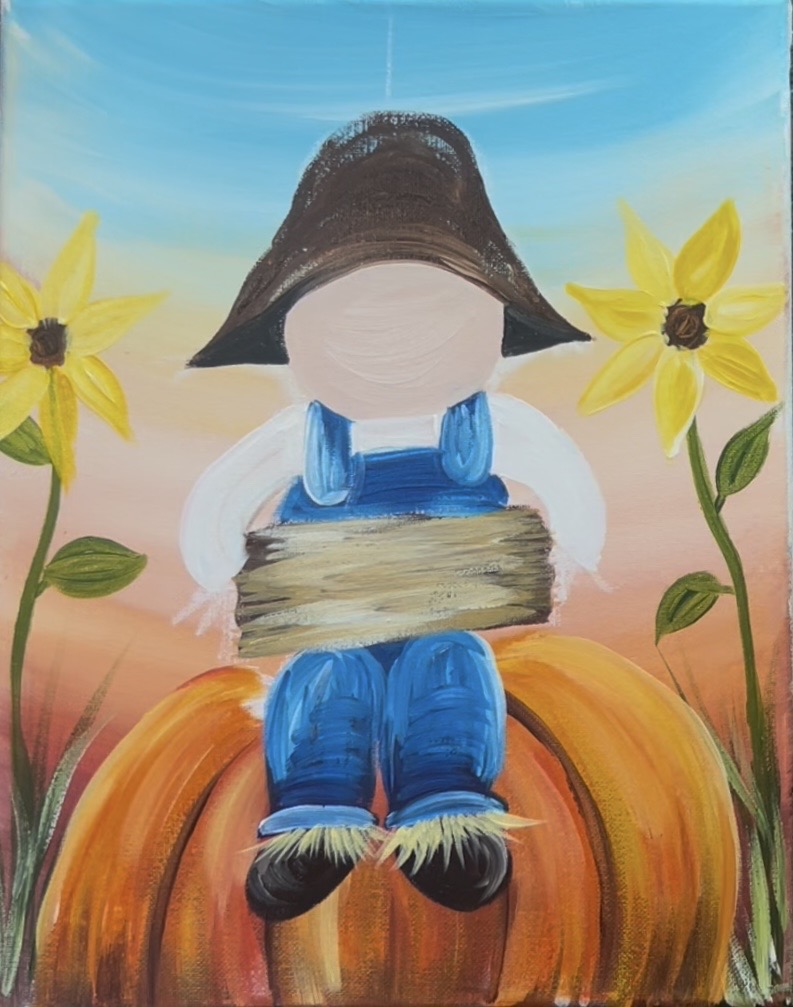
Then paint more straw under the head, and coming out of the sleeves and overlapping the sign to make it look like the scarecrow is holding the sign.
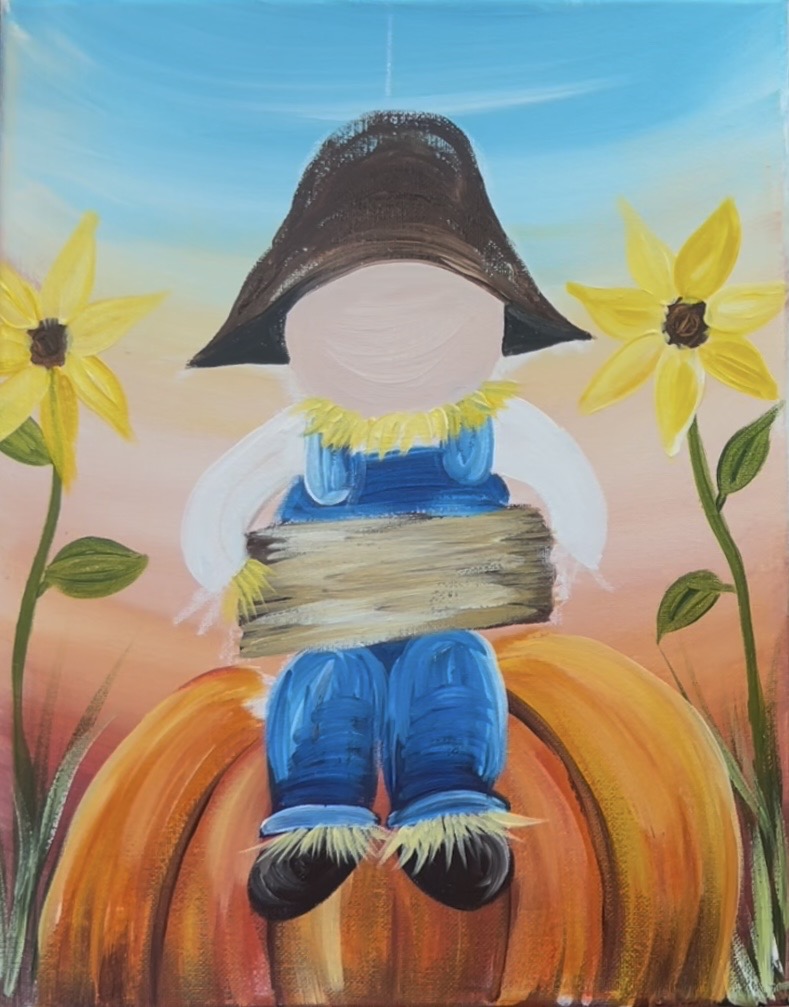
You can vary the color of the straw by loading your round brush into some brown and painting some darker straw lines. This is especially helpful under the head to give the straw in that area more shadowing.
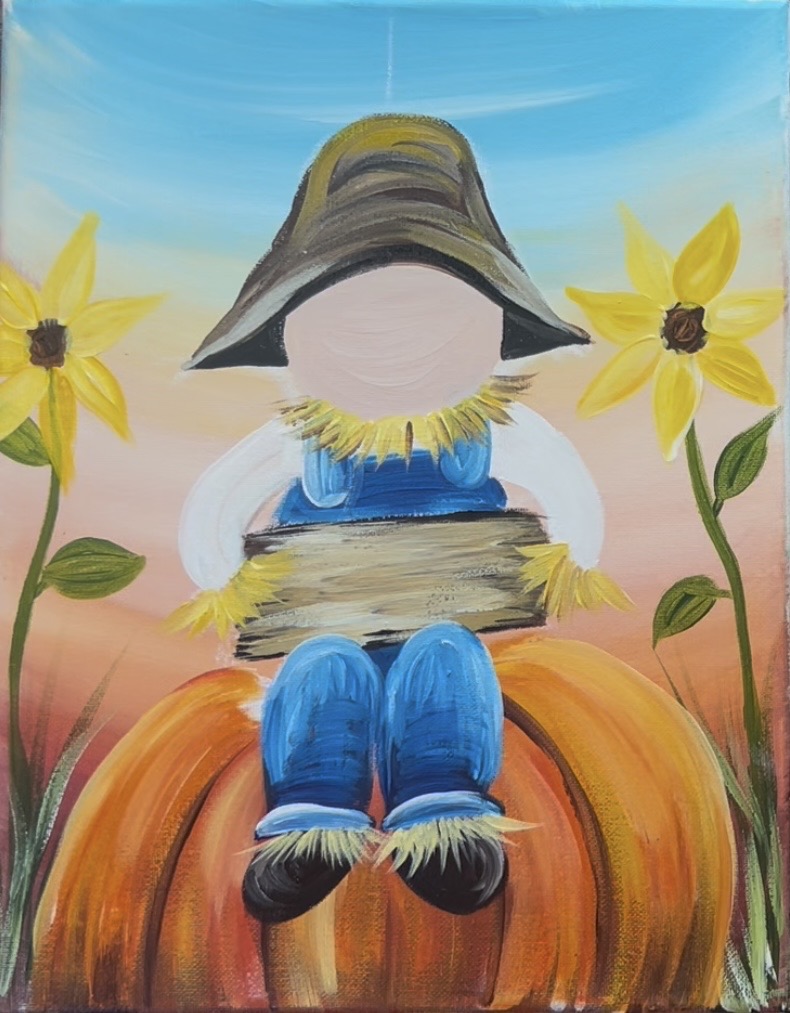
11. Paint Face On Scarecrow
Tip: using paint pens would be really helpful in this step! If you have a red paint pen, you can use it for the nose.
Use a round brush and red to paint a triangle nose right in the middle of the scarecrow’s head.
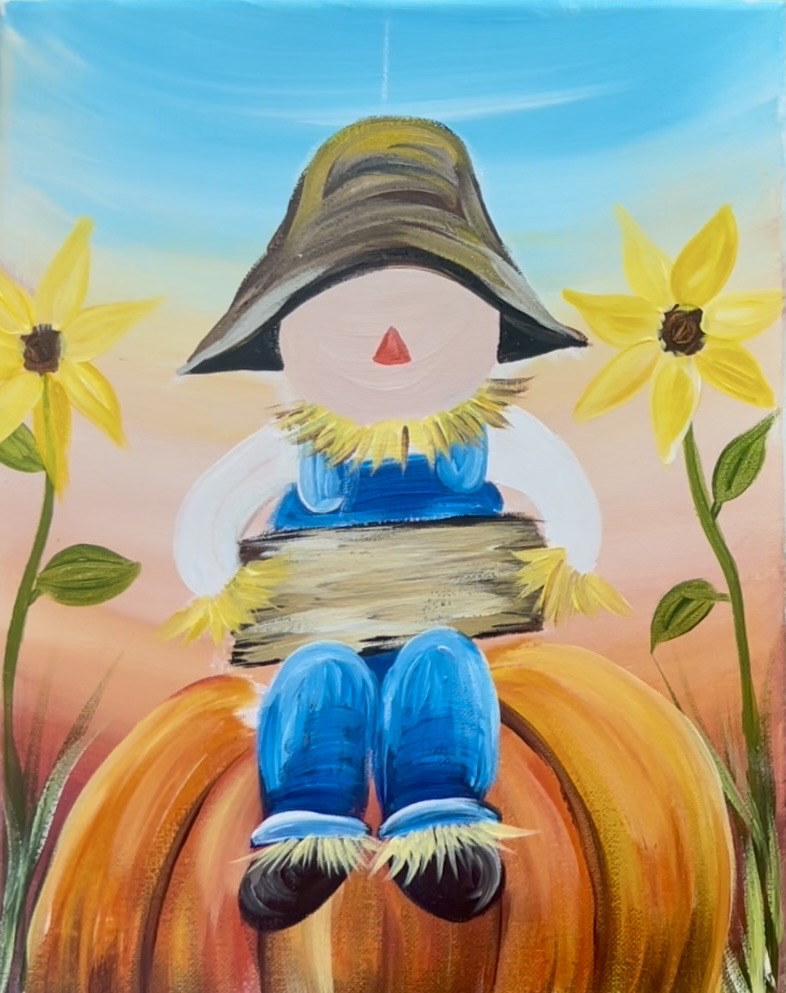
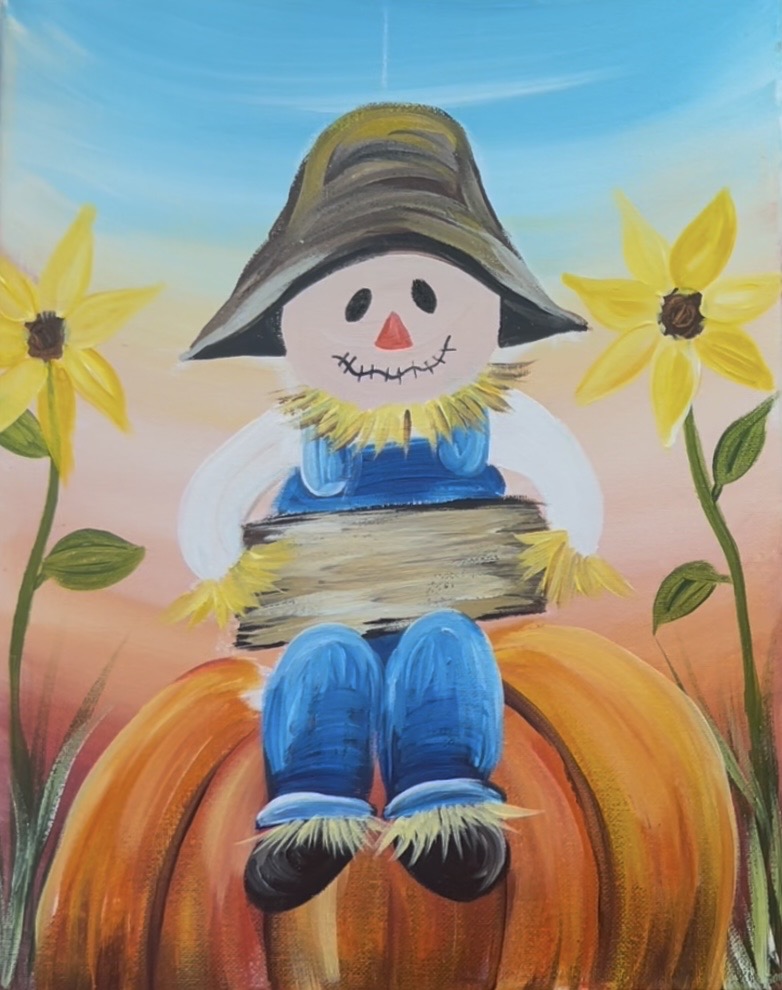
Then use a paint pen to draw the mouth and a set of oval eyes going towards each other at an angle.
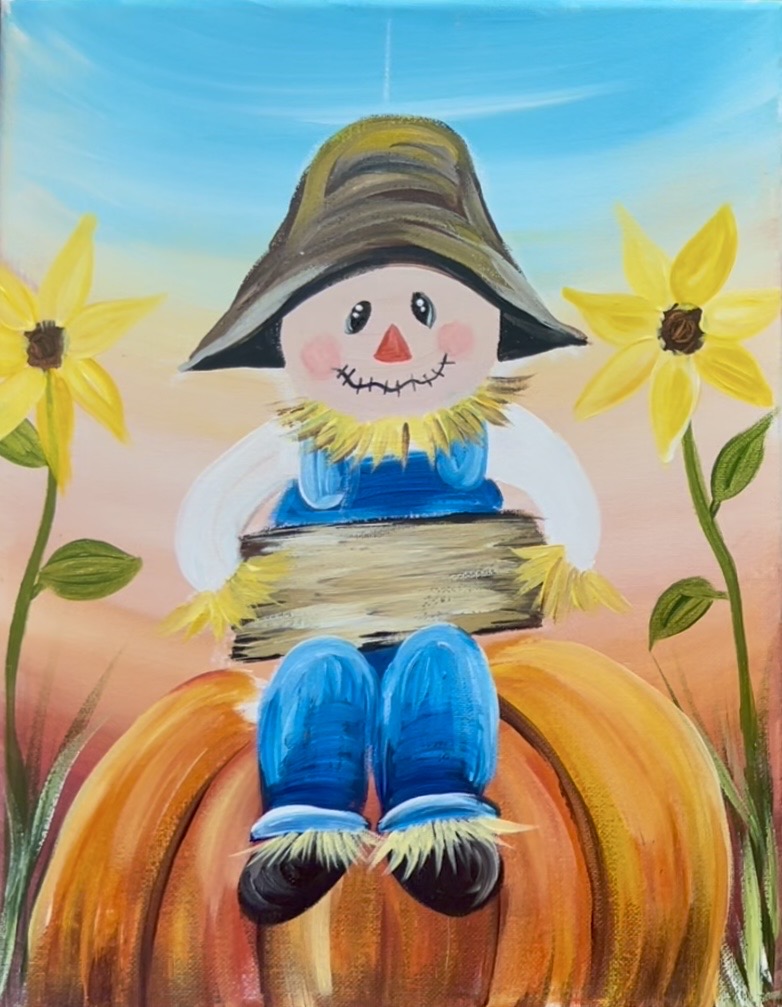
Use a toothpick or the round brush to paint a set of white dots inside the eyes. Then mix a very light red on your paint palette (3 parts white to 1 part red). Paint two very small circles for the cheeks. Then use your finger to lightly smear the paint to allow it to be translucent.
Use the same straw color to paint straw hair coming out from the bottom of the hat and overlapping the scarecrow’s forehead.
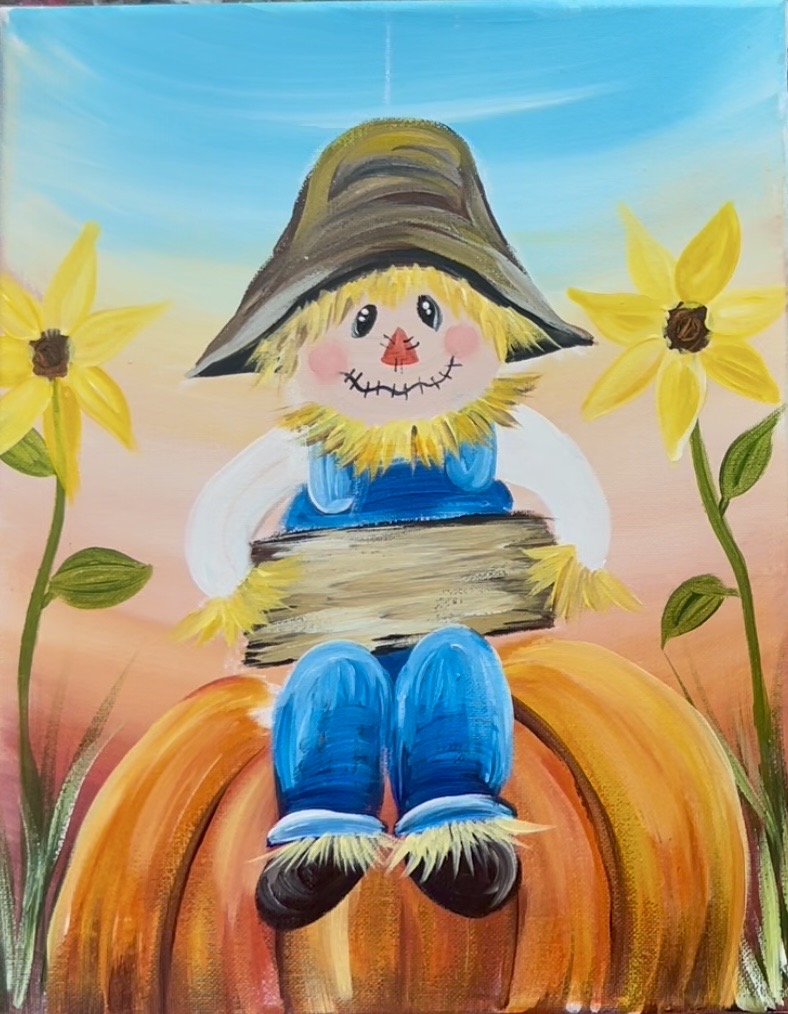
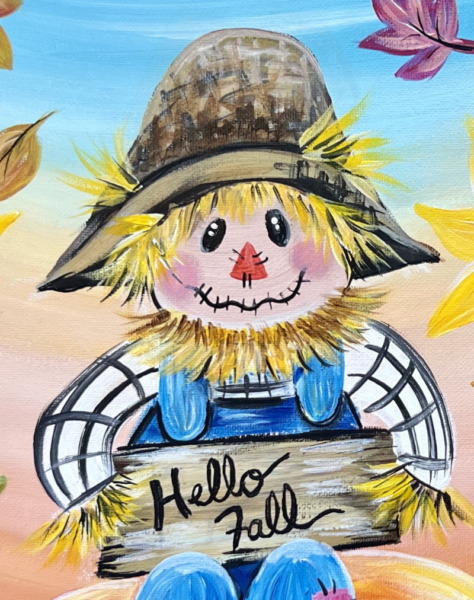
Here is a closeup of the face:
12. Plaid Design On Shirt & Textures On Hat
Use mars black and the round brush to paint plaid lines on the sleeves and shirt.
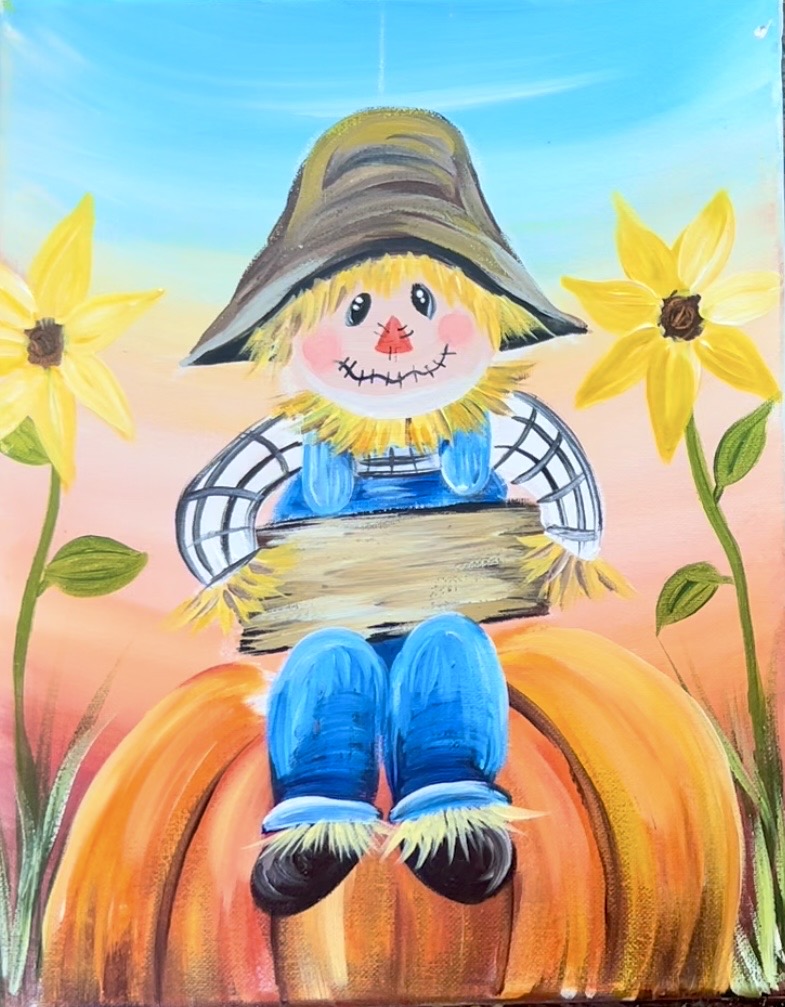
Then add texture to the hat. Use your light golden brown (light brown mixed with yellow) to paint little (+) marks and (x) marks. This creates texture on the hat. Use black to lightly outline the bottom brim of the hat for added contrast.
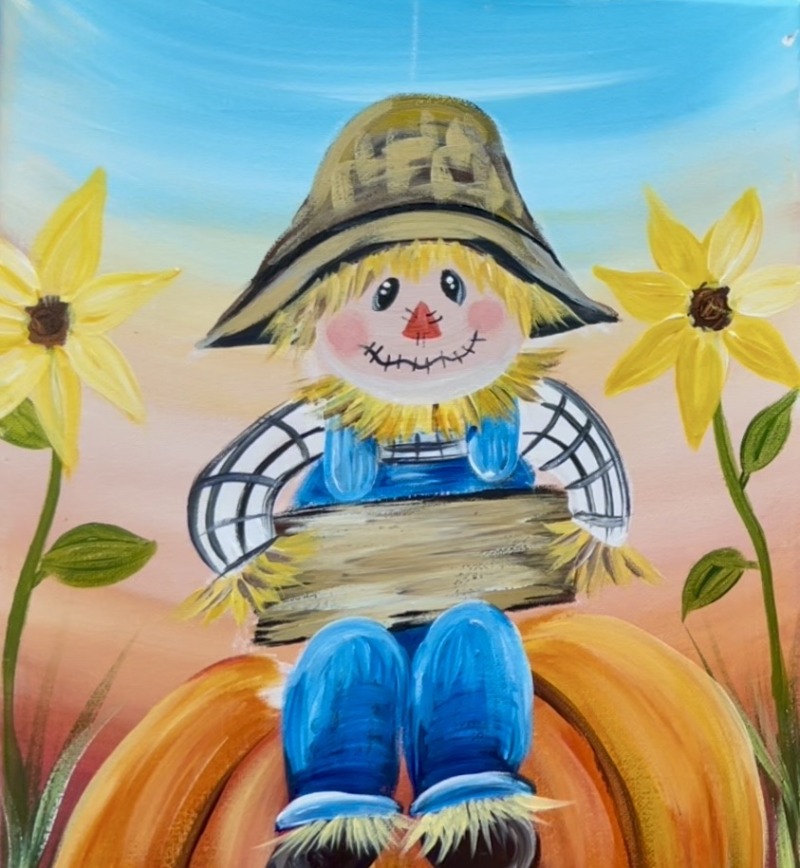
Then paint pieces of straw coming out from around the brim of the hat.
13. All The Final Details & “Hello Fall”
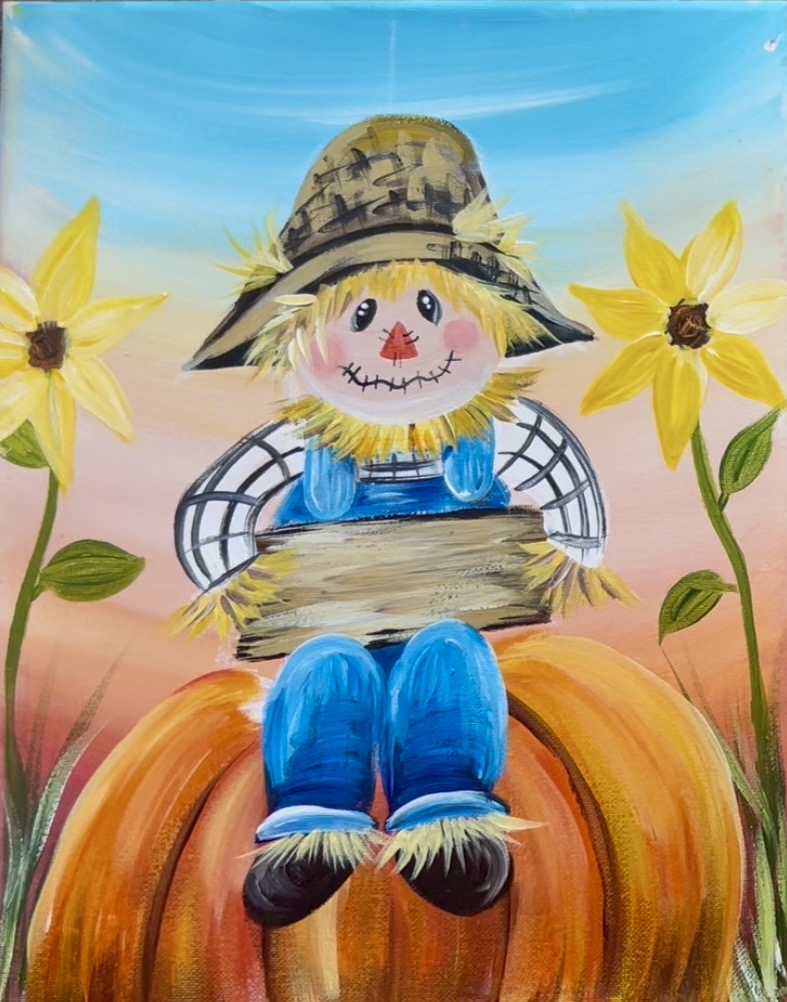
Paint a cute patch on the pants of the scarecrow using red and then use black to paint stitches around the patch. Use black to also lightly outline the bottom of the scarecrow’s head, overalls and anywhere else you feel needs extra loose outlining.
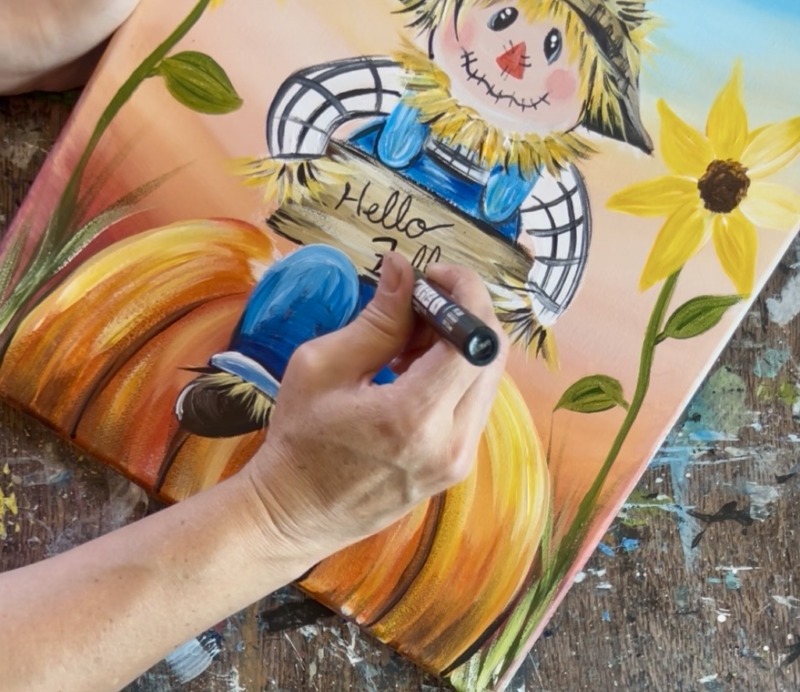
Use a paint pen to write “Hello Fall” on the sign. You can draw this out with a pencil first to practice. You can also change the wording to other fun fall phrases.
Paint fall leaves in the sky using red, orange and yellow. You can paint a variety of fall leaves going at different angles. Then lightly highlight the leaves by double loading your round brush in the color plus white and painting a light layer over the leaves.
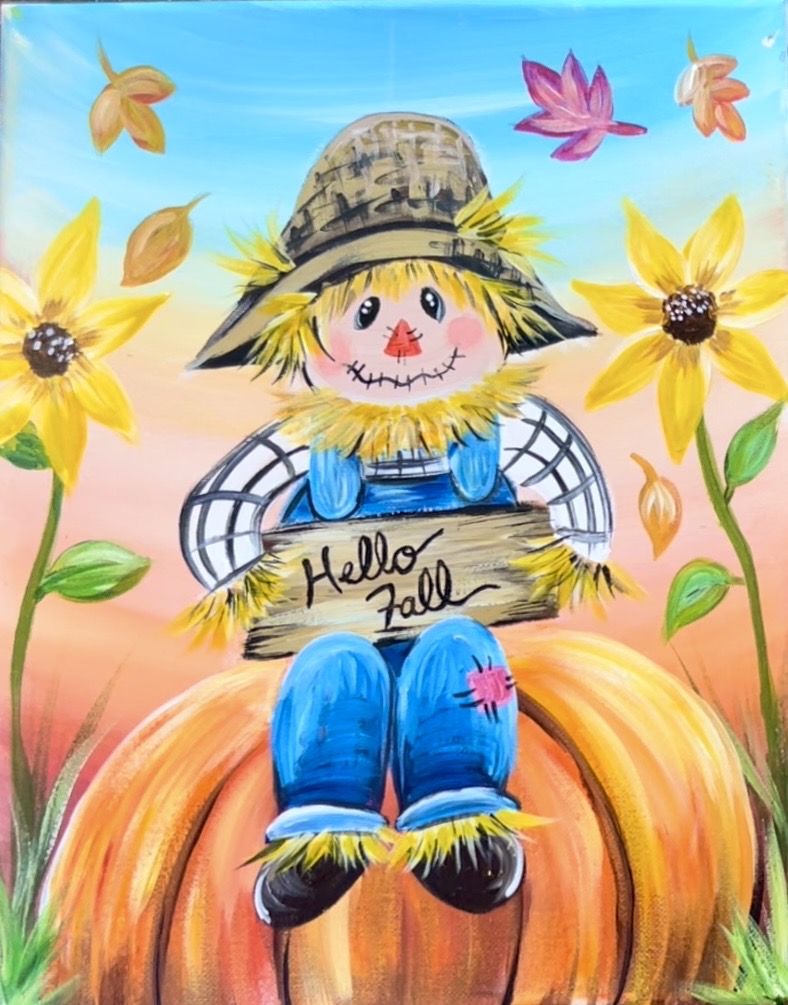
Other final touches include:
- Re-painting the middle circle of the sunflower by painting dark brown dots to form the circle shape. Then paint some white dots inside of it.
- Painting dark yellow (mix yellow and brown) lines on the bottom of each of the sunflower petals for added shadow.
- Painting some light green grass lines that slightly overlap the pumpkin on the bottom
- Adding a few dark straw lines throughout the scarecrow using black mixed with brown.
Finished!