Would you like to save this?
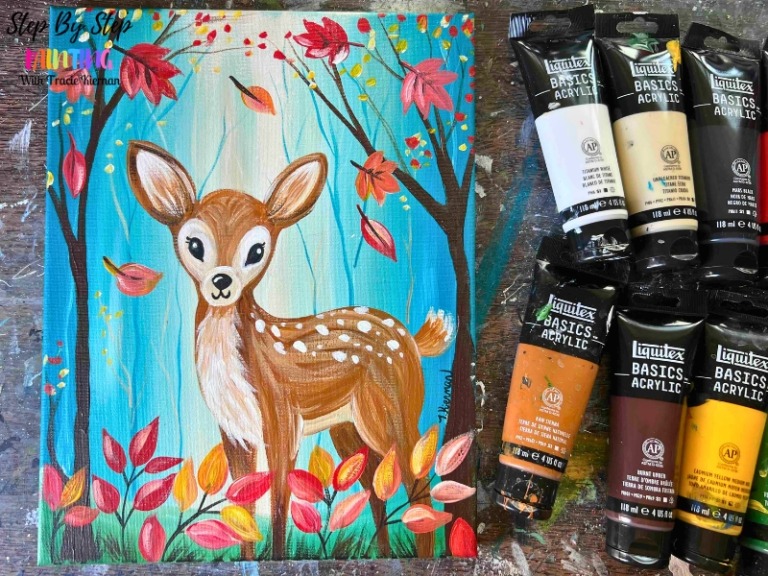
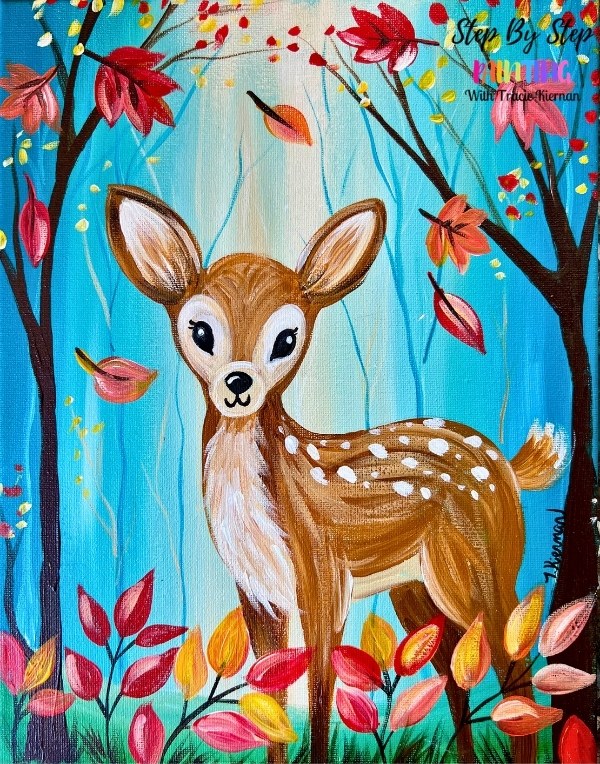
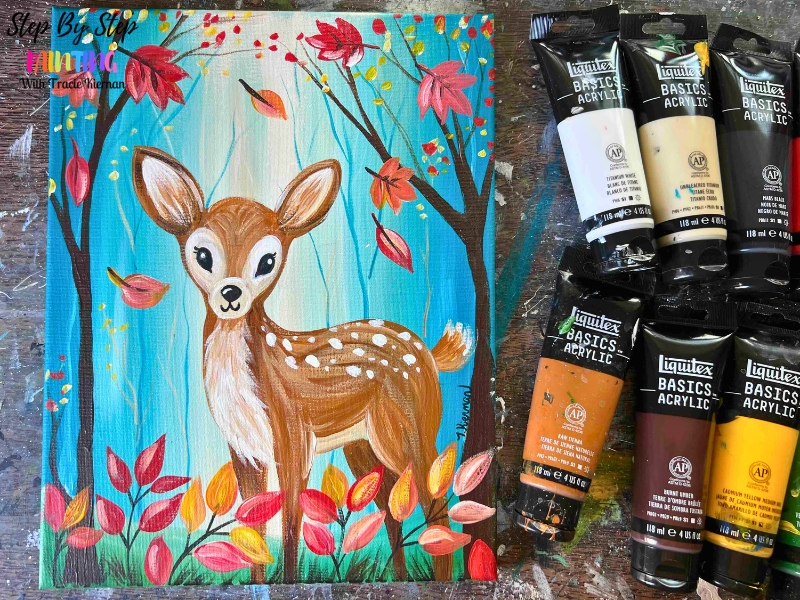
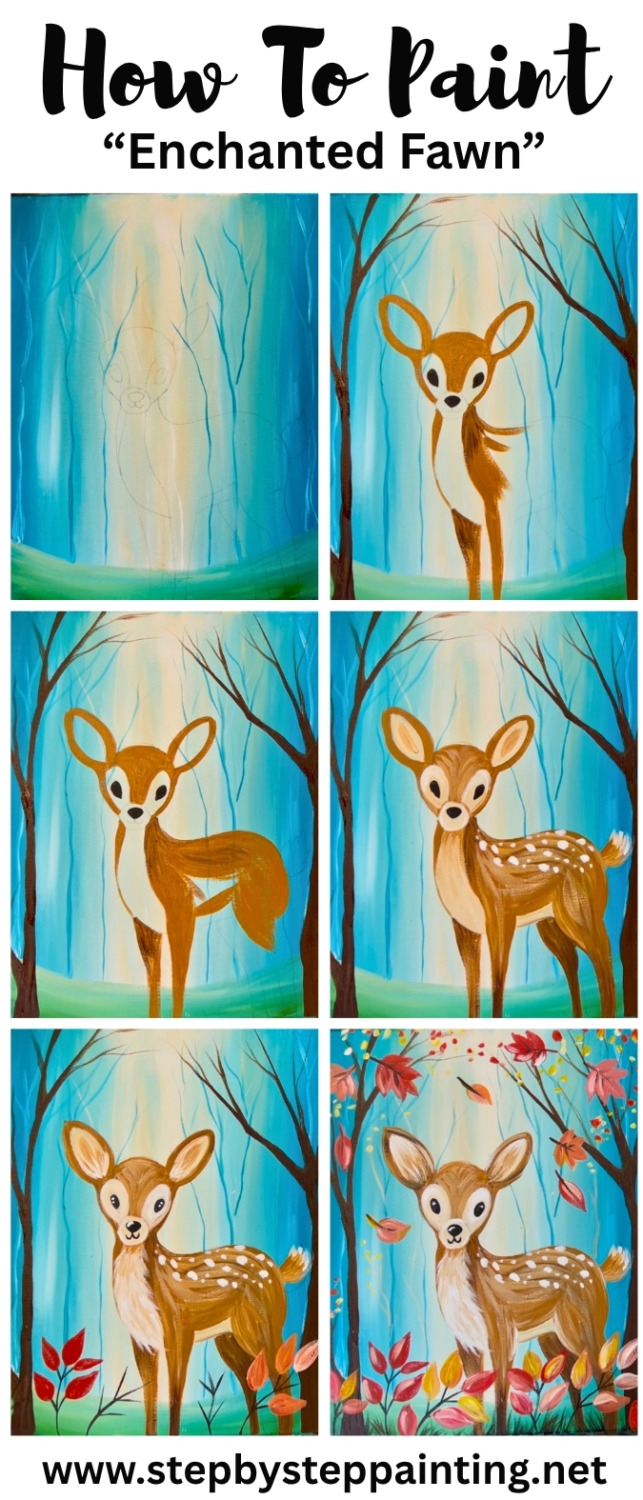
Bring a little autumn magic to your canvas with this Enchanted Woodland Fawn acrylic painting! 🦌🍂 This charming tutorial features an adorable fawn standing in a colorful woodland surrounded by autumn leaves, whimsical branches, and a bright, atmospheric turquoise-blue background.
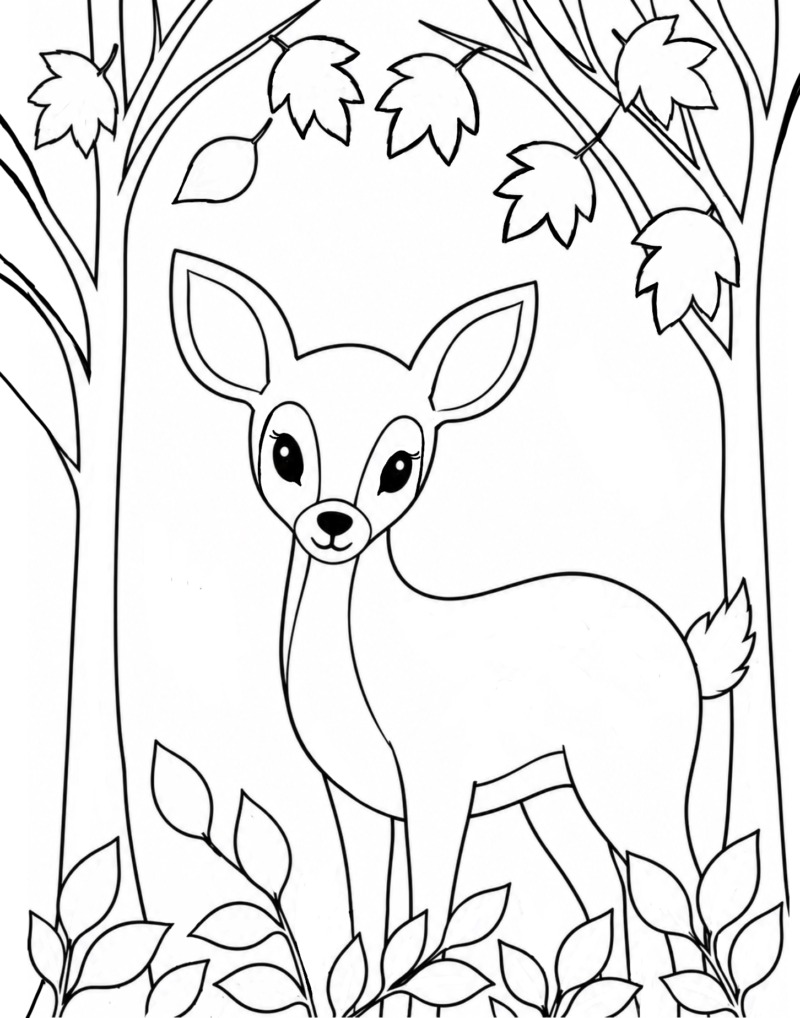
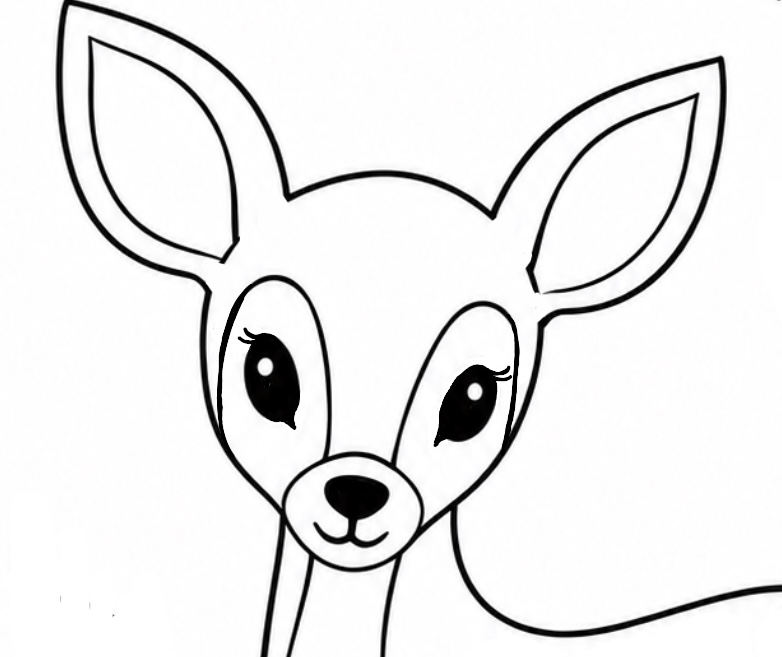
A traceable is included with this tutorial to make transferring the deer and main composition onto your canvas easy. You can focus on learning the painting techniques, layering color, creating the woodland background, and bringing your sweet little fawn to life rather than worrying about getting the drawing just right.
Perfect for a cozy fall painting session, paint-and-sip, or anyone who loves cute woodland animals and colorful autumn artwork.
Enjoy and happy painting!
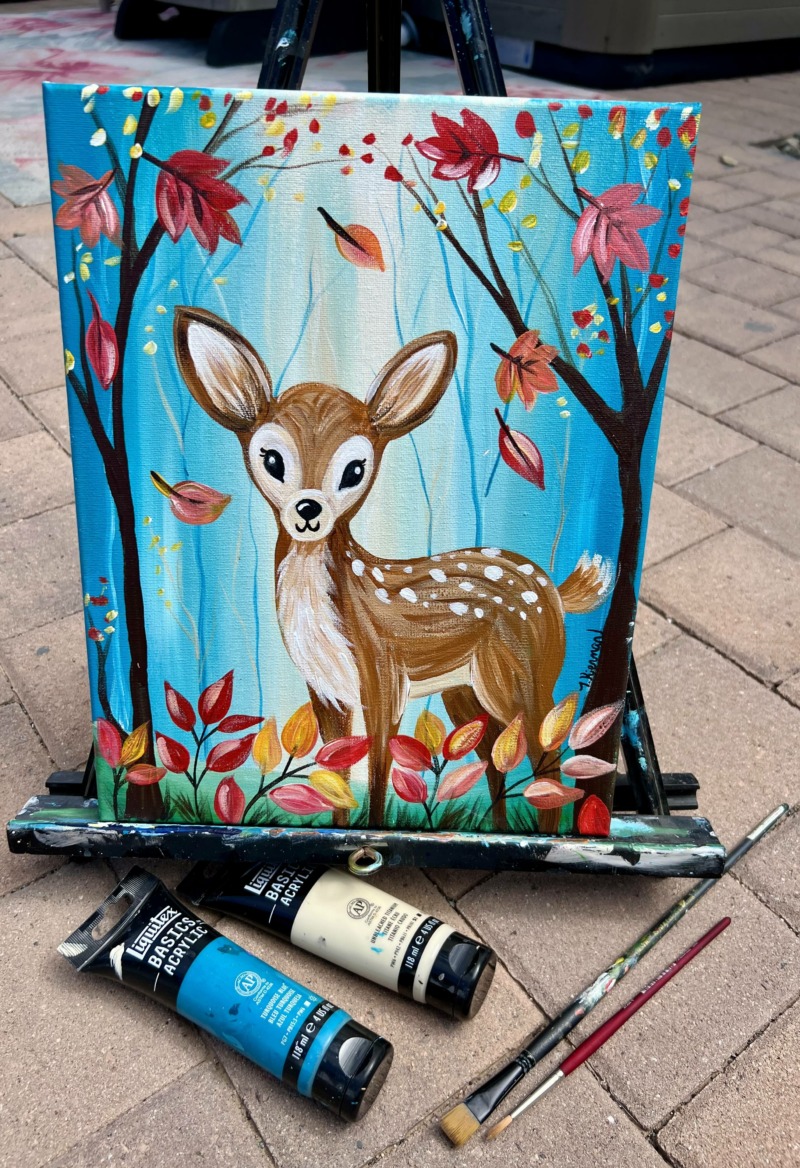
Materials Needed:
Enchanted Woodland Fawn - Acrylic Tutorial
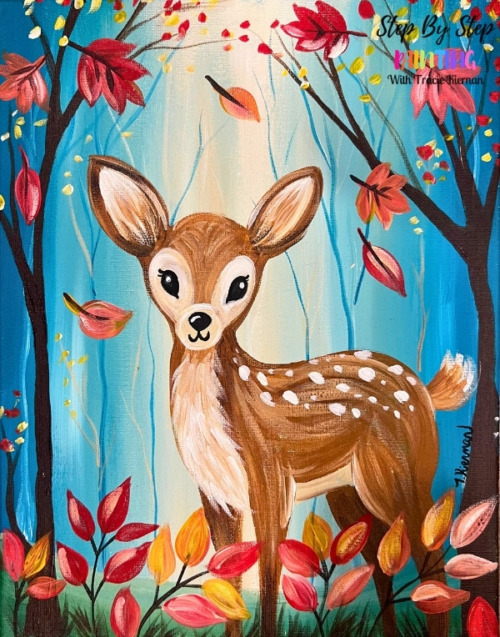
Paint a cute baby deer in an enchanted fall forest. This painting features a vibrant and glowing turquoise background with warm, bold colored fall leaves. Tutorial has a traceable for the deer, no drawing skills required.
Materials
- 11x14 Canvas (or any size)
- Acrylic Paints (I like Liquitex BASICS)
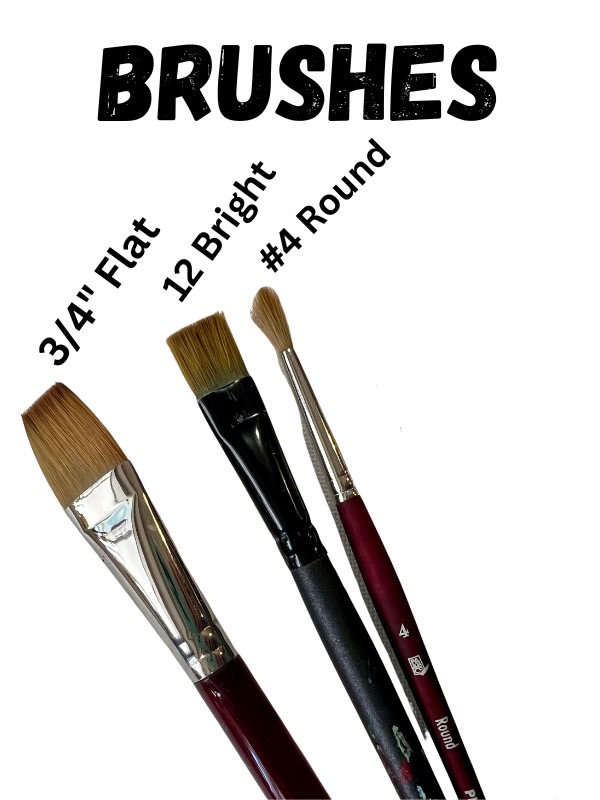
- Brushes (see brands/ sizes below)
- Traceable Printable
- Graphite Paper
- Pencil
- Paint palette, water cup, paper towel
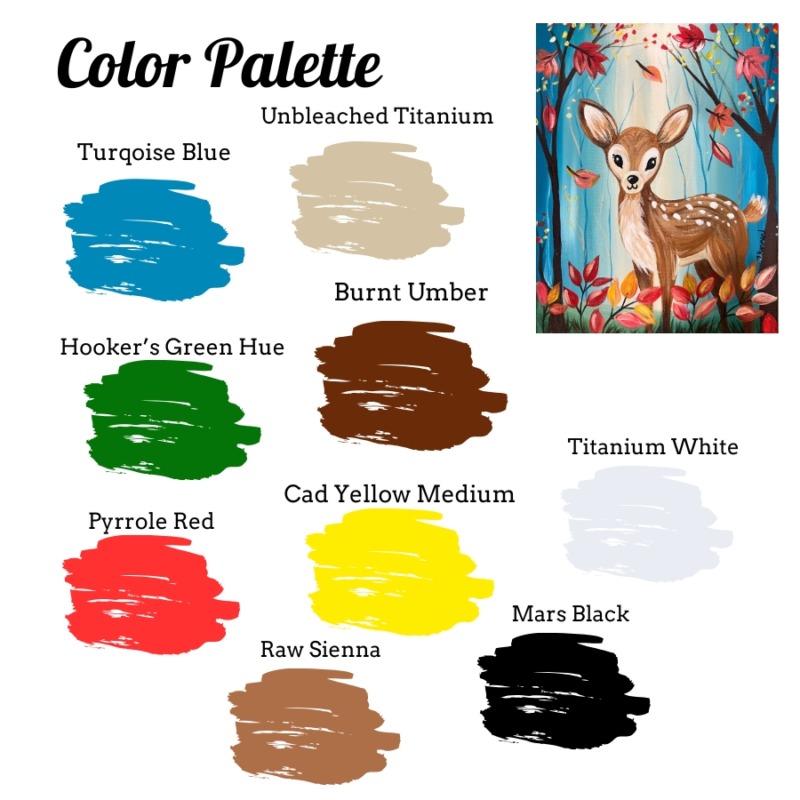
Colors
- Burnt Umber
- Mars Black
- Raw Sienna
- Titanium White
- Hooker's Green Hue
- Unbleached Titanium
- Turquoise Blue
- Pyrrole Red
- Cadmium Yellow Medium Hue
Brushes
Color Palette:
Directions At A Glance
Traceable
Looking for more sizes? You can purchase this download with additional canvas sizes in my PDF shop. Find out more here.
Video:
Step By Step Instructions:
1. Paint Background
The background consists of blended colors of white (titanium white) and beige (unbleached titanium) in the middle that gradually turn to dark turquoise on the left and right. The goal is to create streaks of color that mimic far away tree trunks because of the blended vertical streaks of color.
Start by loading the 3/4″ wash brush in both beige and white. Add a little water to the brush as well to ensure a thin layer of paint. Paint vertical brush strokes from the top to the bottom of the canvas. Paint about a 2″ wide beam with this vertical color.
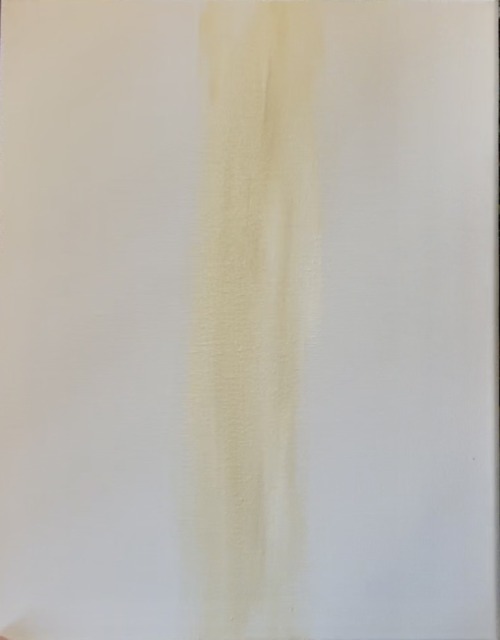
Wipe the brush off. Then load into turquoise. Paint the far right edge of the canvas with vertical brush strokes of turquoise. Again, slightly water paint down to ensure flow of paint and thin consistency. Then blend this turquoise to the left by loading the brush into beige and white and blending both beige and turquoise together. You want to gradually make the color lighter as it meets in the middle. Do not add any turquoise in the center of the canvas.
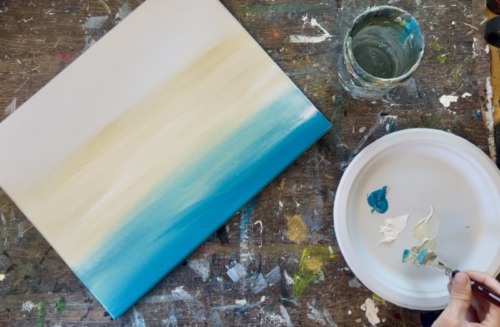
Repeat this on the other side of the canvas. Use white and beige to blend the turquoise in the middle.
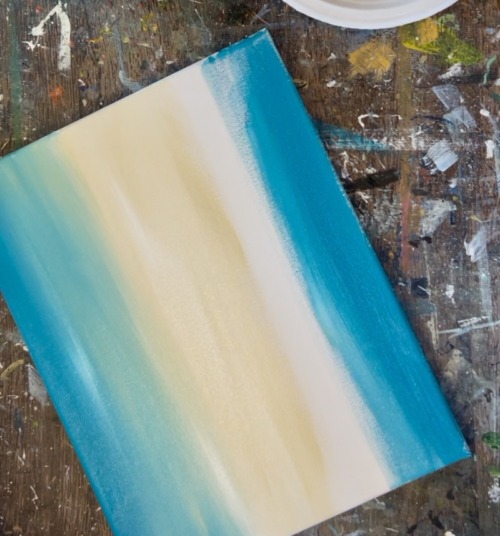
Rinse the brush. Then add beige and white to the brush and paint more of this bright color in the center of the canvas to ensure the center is the lightest part (be careful not to add any turquoise in the center). Then blend a few vertical strokes of white and beige throughout the turquoise area. You want many streaks in this background. Try not to “over blend” because the more you brush the paint, the more it will all turn the same color.
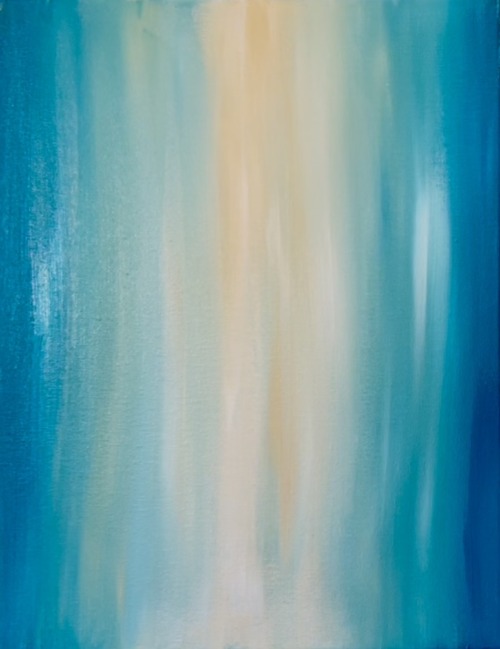
Rinse the 3/4″ brush. Then load it into “hooker’s green hue” (Green). Paint the forest ground using the 3/4″ flat brush. Paint a curve that goes downwards in the middle and upwards on the left and right of the canvas. Don’t go higher than 2″ for this ground. Then blend beige on the top of the green so the top of the forest floor becomes much lighter. This is to create depth in the background.
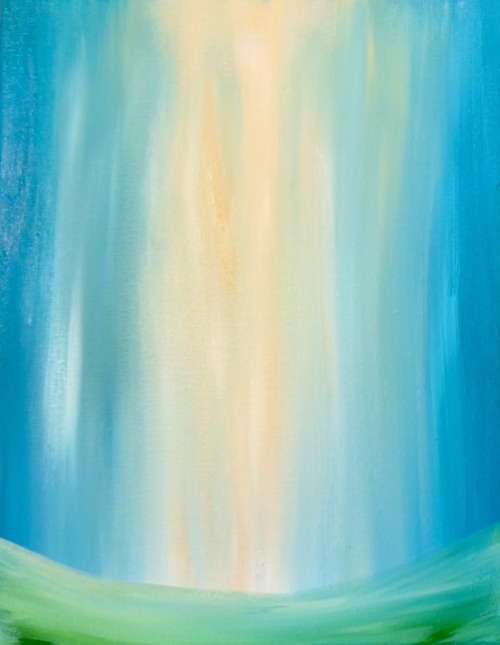
This step is optional and you can skip it if you don’t like painting branchlike trees!
Use the #4 round brush to paint a series of small branchlike trees in the background. These are far away trees so the lines need to be very thin and light in color. Start by loading the brush into both white and beige. Paint these light colored trees right in the middle. These are thin vertical lines with branches that go slightly wavy and also upright. Each tree starts on the top of your green ground (right above the top of the green) and all the way to the top of the canvas.
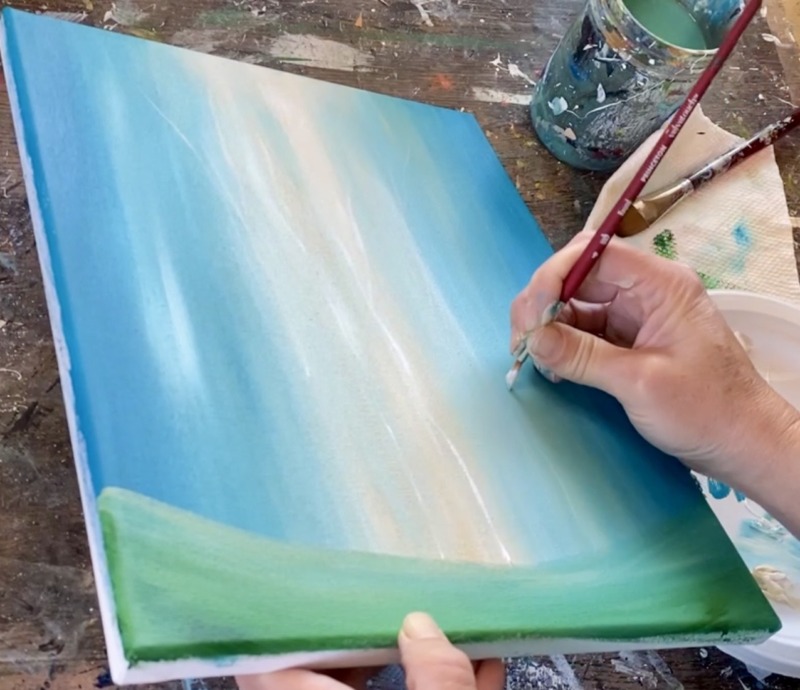
Use the turquoise mixed with white to paint more trees throughout the entire canvas. Vary the white and turquoise depending on where you are on the canvas so the trees show up against the background.
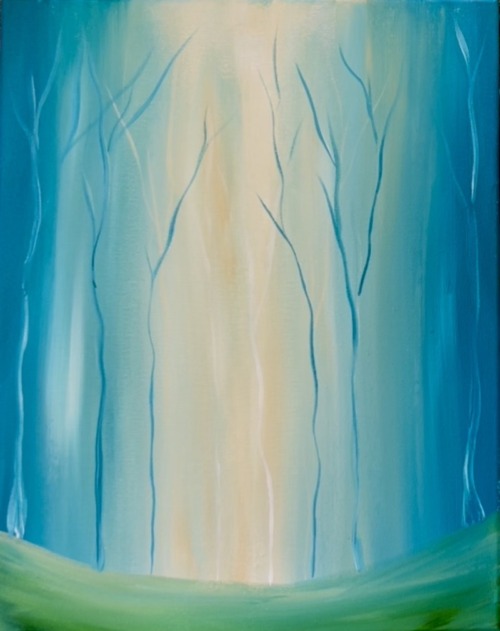
Wait for this to dry before going to the next step.
2. Transfer/ Draw Deer
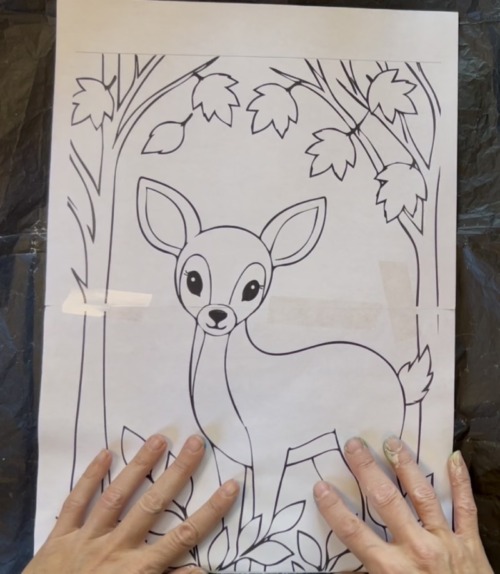
Print the design on two papers and tape together. Then place a sheet of graphite paper below. Trace the design. For this demonstration, I am only tracing the deer and not the nearby trees/ leaves. However, if it is helpful, you can trace all the trees and leaves. Press firmly so the drawing will show through onto the canvas.
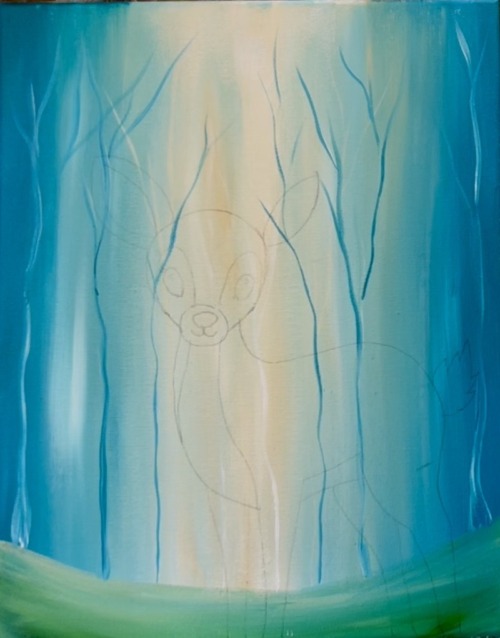
3. Paint Brown Big Trees On Sides
Use a #12 bright brush and dark brown (burnt umber) to paint two large trees on each side of the canvas. These trunks start at the very bottom of the canvas and overlap your green ground area. Make the trunks largest on the bottom, narrow at the top and branching out into thin branches. Note: switch to the #4 round brush for thinner branches. I made my two trees sort of meet in the top middle of the canvas. They kind of make a frame around the deer.
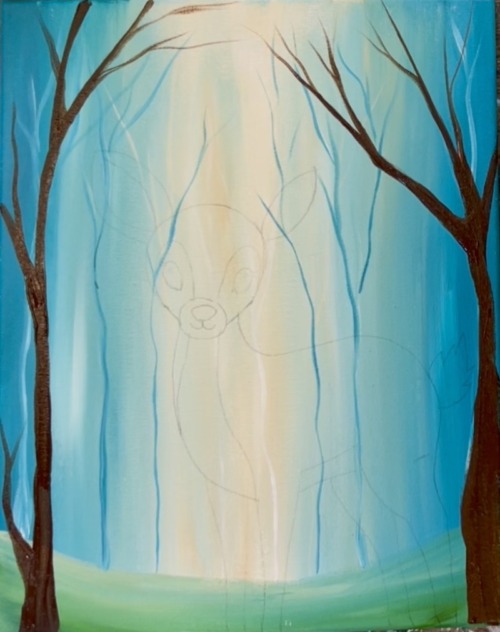
4. Paint Eyes/ Mouth
Use a black paint pen or #4 round brush to paint the eyes and nose black. (I omitted the eyelashes at this point. Those can be added in a much later step after all layers of the head are done.)
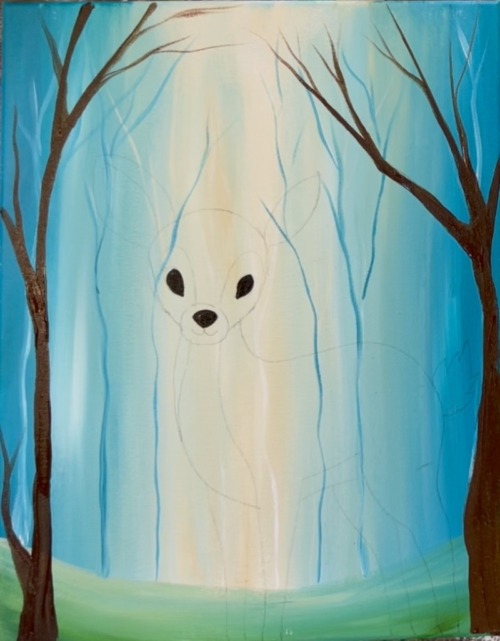
5. Paint Head/ Legs/ Back/ Tail
Use the color “Raw Sienna” (light brown) to paint the ears, around the eyes, front legs and around the chest of the deer. Slightly mix dark brown into the light brown in the area under the head and upper parts of front legs. This gives those areas some shadowing.
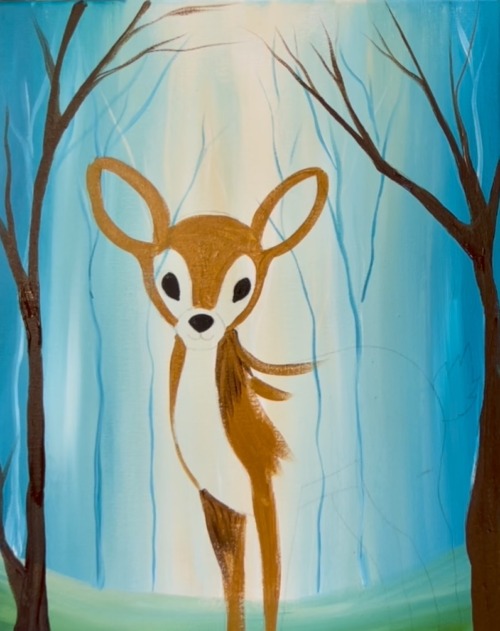
Follow the curve/ contour of the fawn’s body. Outline/ fill in. If you see color below this layer, you will be able to paint a second coat of paint later to cover any layers that may be showing through.
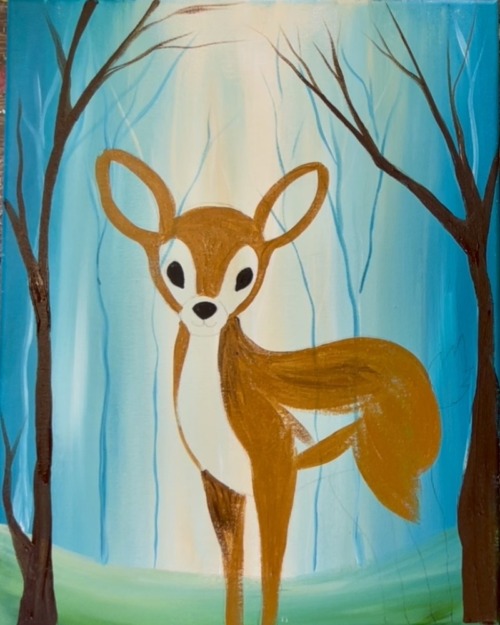
Paint the tail using the same light brown color. On the tip of the tail, add beige. Paint the back legs with brown mixed with light brown for added shadowing. Also, blend some of that dark brown on the bottom of the legs.
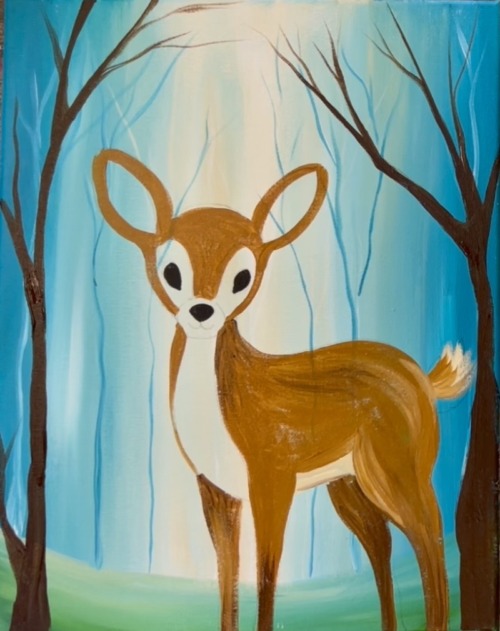
6. Paint Lighter Parts (Inside Ears, Around Eyes, Chest/ Belly Area)
The lighter parts of the deer are painted with beige. Paint around the eyes, inner ears, chest and belly. For shadowing, add a little bit of light brown just under the head (upper part of chest) and inner parts of ears.
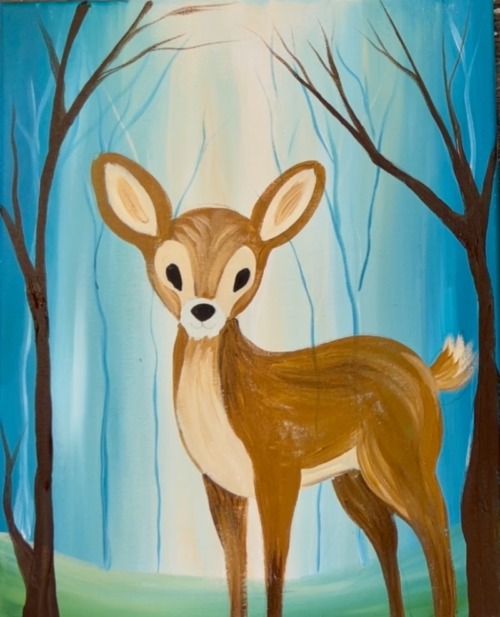
Paint a second coat over this if any lines from the background are still showing through.
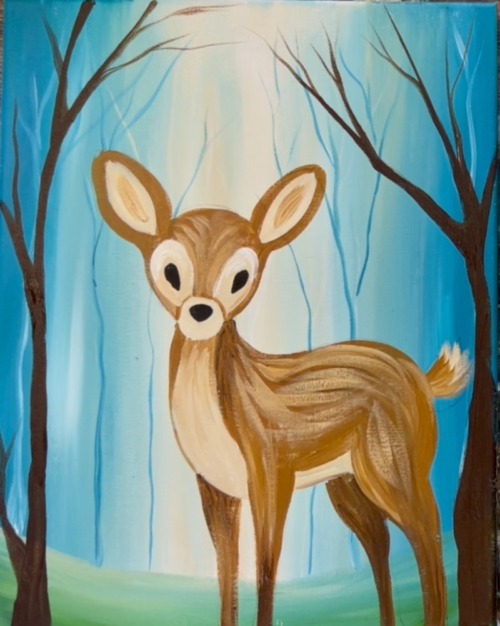
Optional: add some lighter fur textures over darker areas. Use beige mixed with light brown and paint curved/ contoured brush strokes on the back/ head of the deer. Don’t cover all of the first dark layer.
7. Paint Spots & Eye/ Nose Details
Use the #4 round brush and titanium white to paint small oval and small dotted markings along the deer’s back. Vary the size of the spots and don’t make them all even.
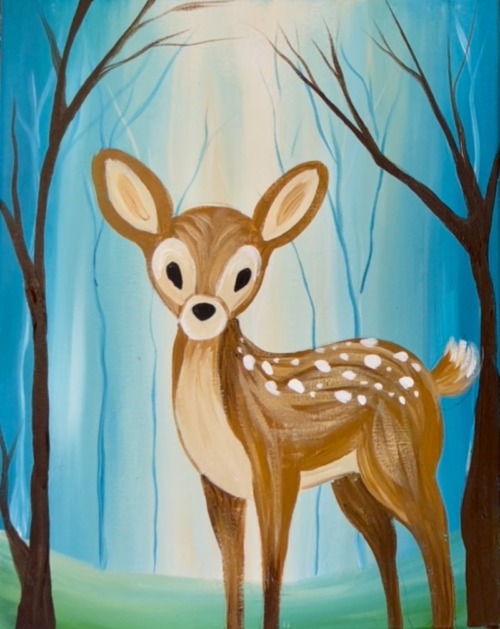
Use a toothpick or the very tip of the brush to paint little white dots (one or two) in the top part of the almond shaped eyes. Then paint a little curved mark on the top of the nose for a highlight.
8. Paint Light Fur Details On Chest
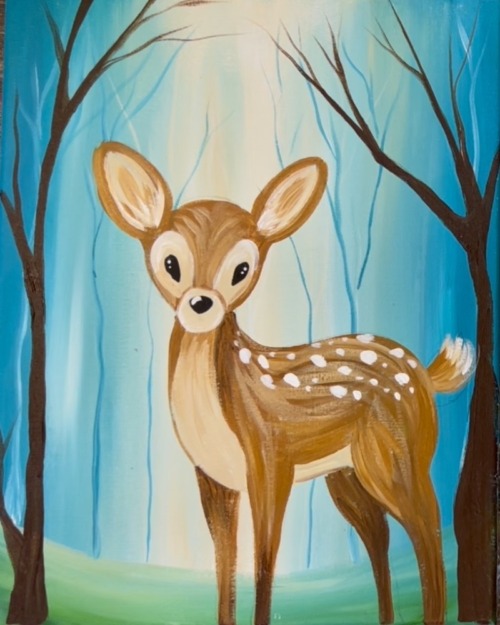
Double load the 4 round brush into white and beige. Then paint little fur texture paint strokes starting at the bottom of the front chest area of the deer and working your way up. Go outside the defined shape a little to create edging on this texture.
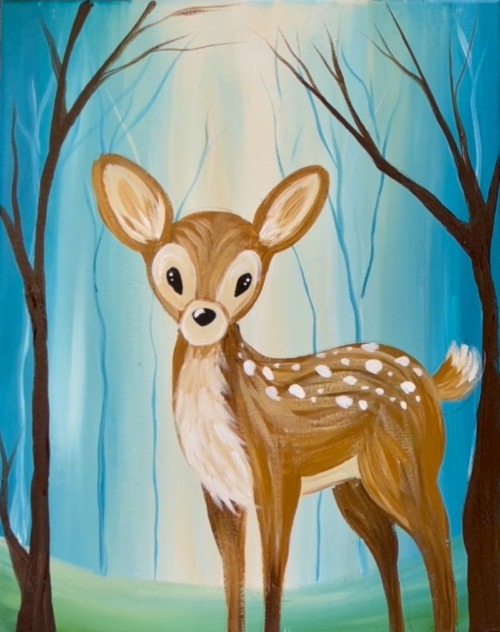
9. Paint Ground Branches/ Leaves
Double load the #4 round brush into black and brown. Then paint small twig shapes along the bottom of the forest floor. Make a few overlap the deer’s legs.
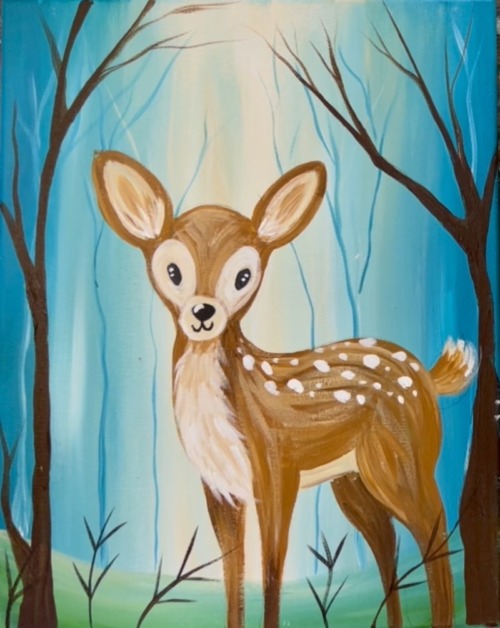
Use the #4 round brush and a combination of red, yellow and orange (mix red and yellow) to paint leaves on the ends of all of the brushes. Add a little bit of white into the colors to help the leaves show up more vibrant and opaque.
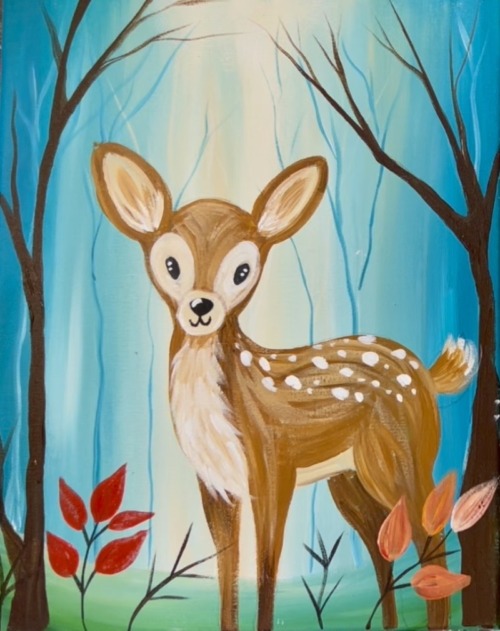
Paint a variety of colors! Then paint a few falling leaves. You can also “highlight” the leaves by lightly brushing white on one side of each of the leaves (before the color dries).
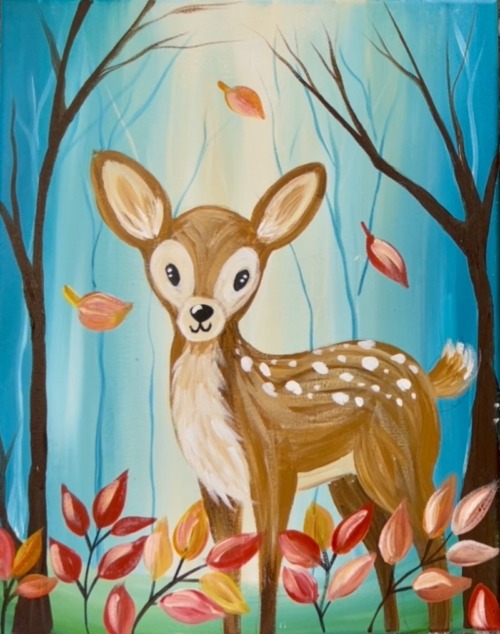
Paint maple leaves higher in the painting. Paint a line for the middle of the leaf and then two sets of diagonal lines on each side of the middle line. (see diagram below). Then paint leaf shapes on each of the diagonal lines including the end of the middle line. Then fill it in solid.
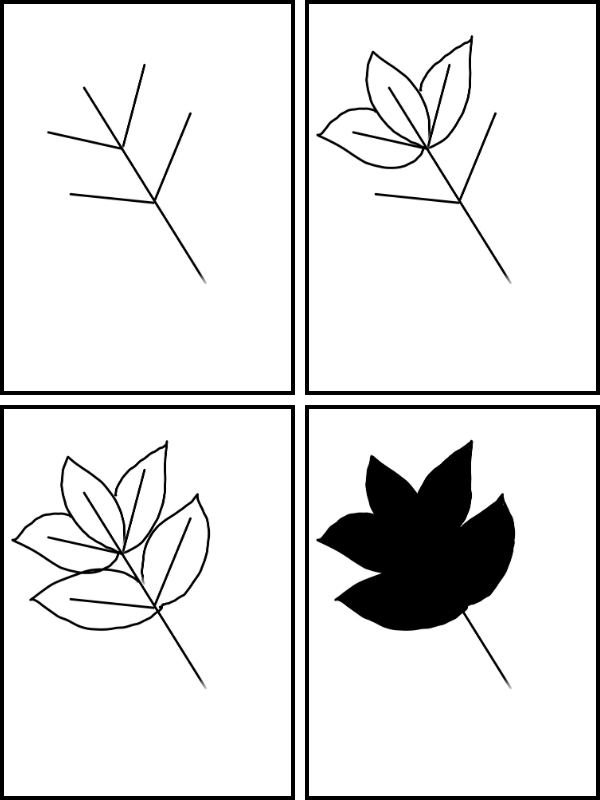
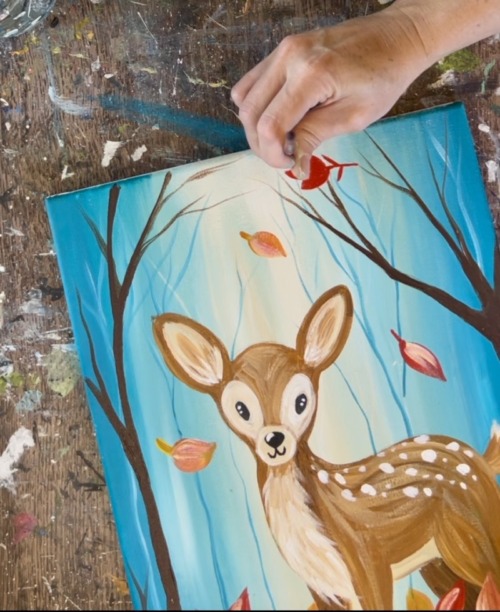
Use a variety of colors for the maple leaves and highlight them using white one one side of each of the leaves (before the color dries so the white blends with the color of the leaf).
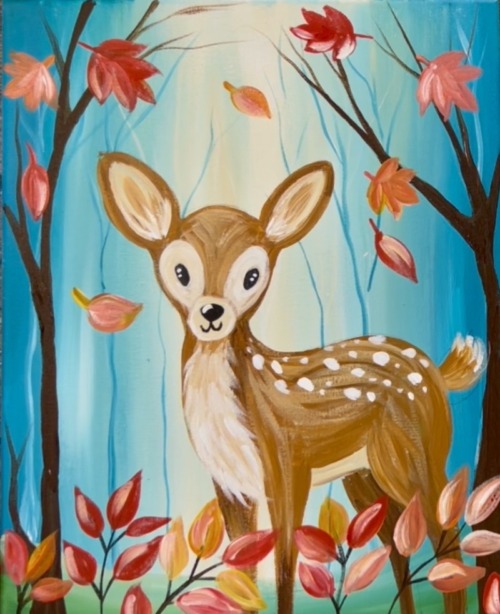
After these leaves dry, use brown mixed with black to paint the stems of each of the falling leaves.
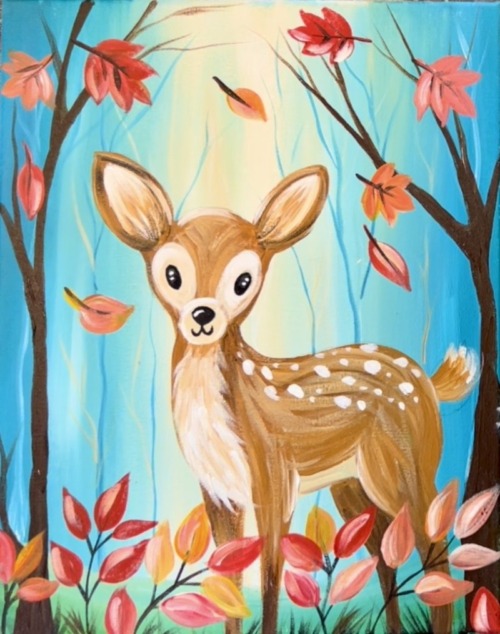
Final Details
For the final details, I decided to change the eyes. These are like the eyes on the template. I added a small point on the lower part of the almond shape and a set of two tiny curves for lashes. This is optional! You can decide what style of eye you like best.
Another detail to add is more leaves in the trees. This time make them little dotted marks along the branches. This creates more depth and color up high in the painting. In addition to that, I added dark colored grass lines along the bottom edge of the canvas using the round brush and black mixed with brown. This adds more shadowy texture on the bottom of the painting.