Would you like to save this?
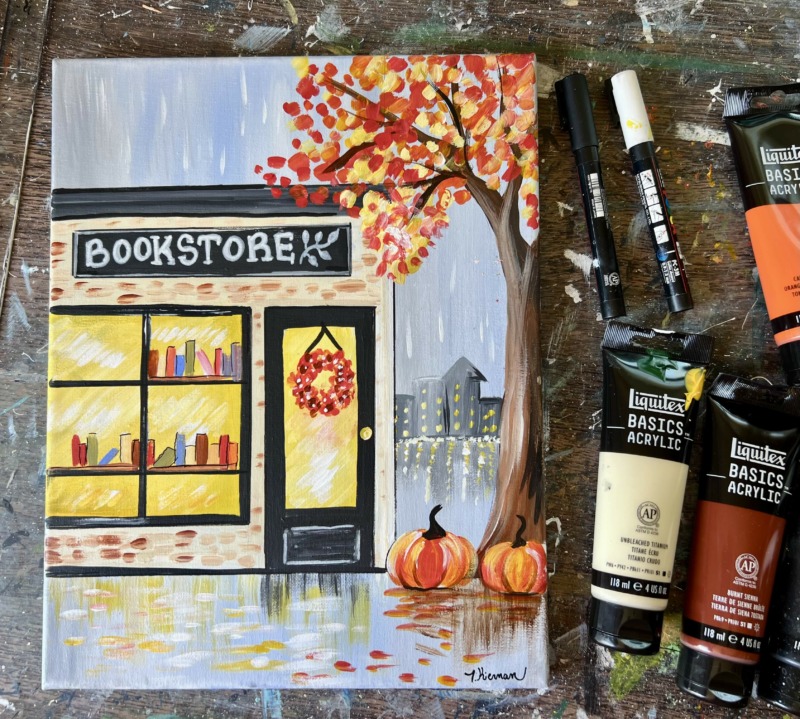
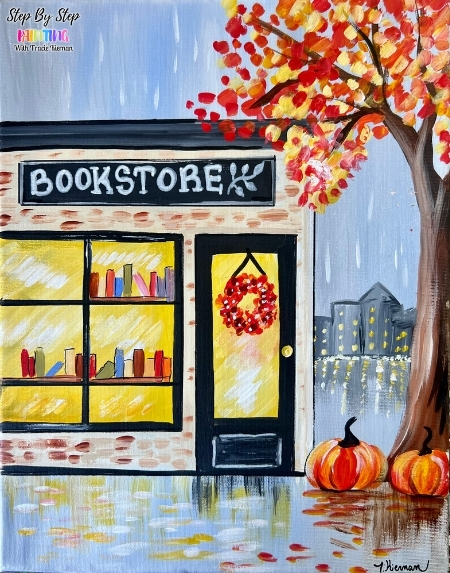
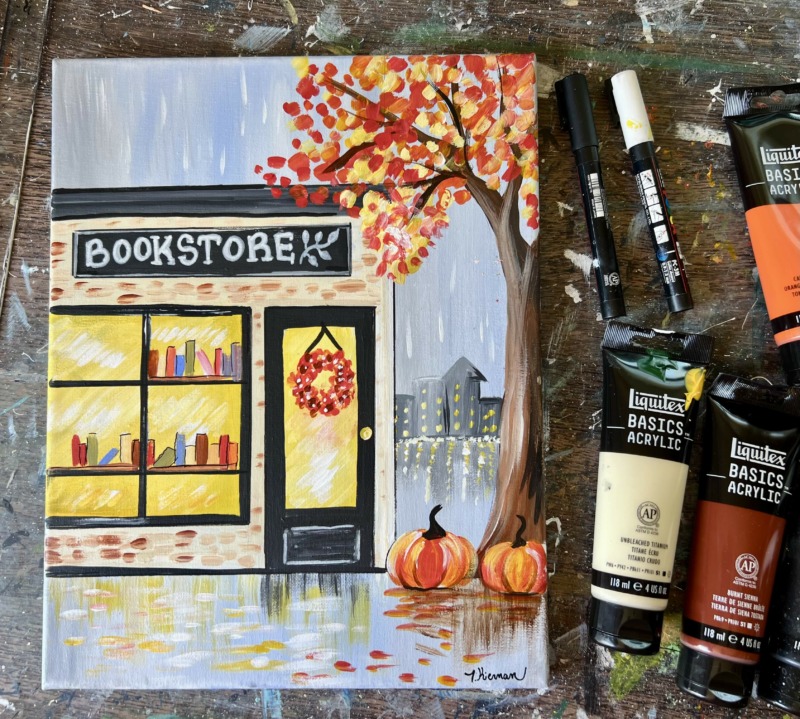
Bring the ultimate cozy fall vibes to your canvas with the “Autumn Bookstore” acrylic painting tutorial! Perfect for absolute beginners and seasonal art lovers alike, this step-by-step lesson guides you through creating a charming, warm storefront nestled under a vibrant canopy of autumn leaves. You will learn how to balance cool, atmospheric rainy day tones with the inviting, golden glow of a book lover’s paradise.
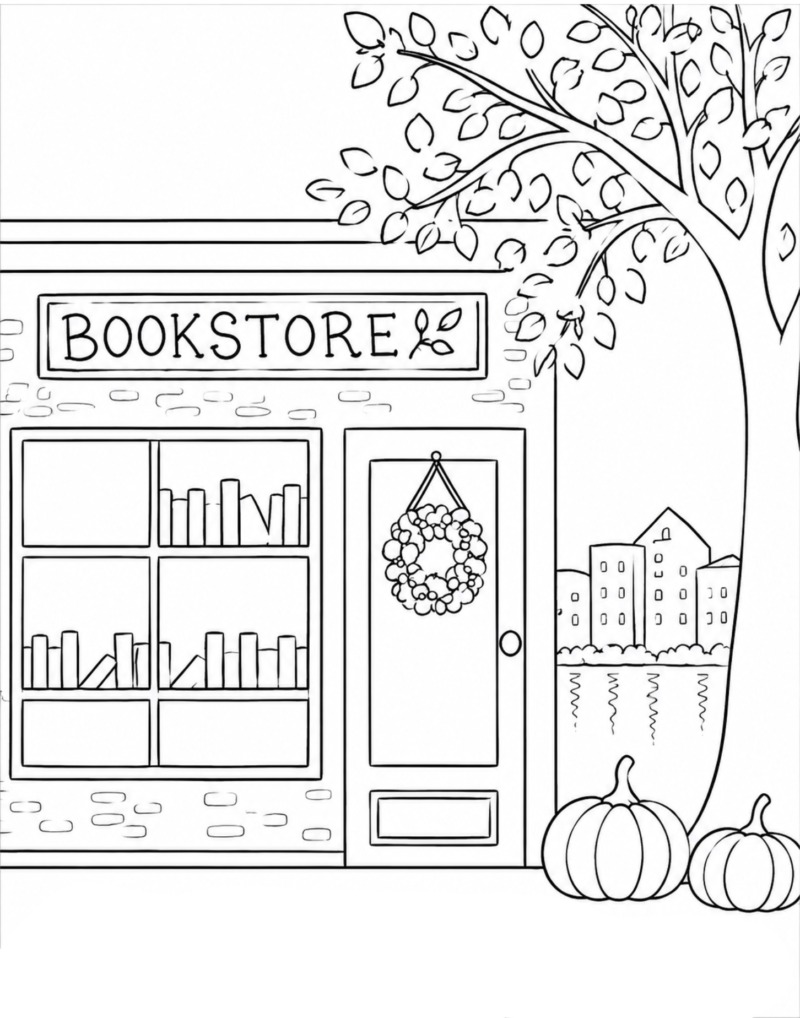
There is an optional traceable template for this provided in this tutorial if you need help getting all those lines drawn out because architectural/ buildings in paintings can get a little tricky.
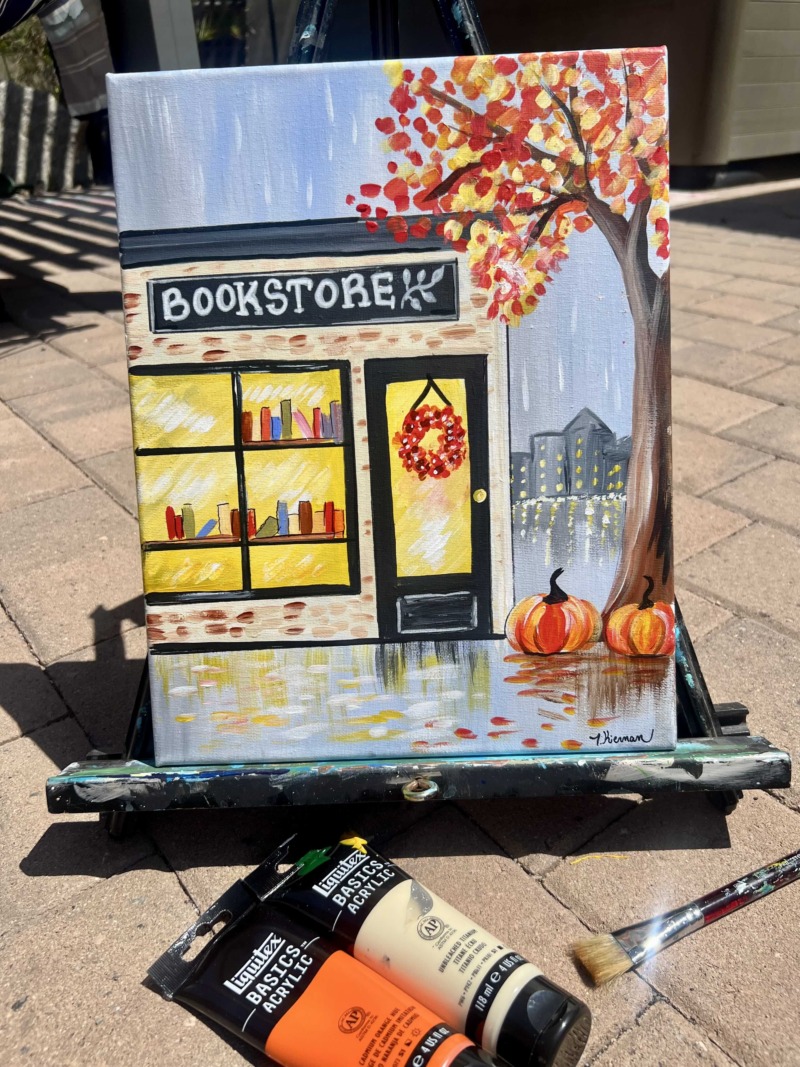
Enjoy and happy painting!
Materials:
- 11×14 Canvas
- Acrylic Paint
- Brushes
- Ruler
- Pencil
- Black Paint Pen
- White Paint Pen
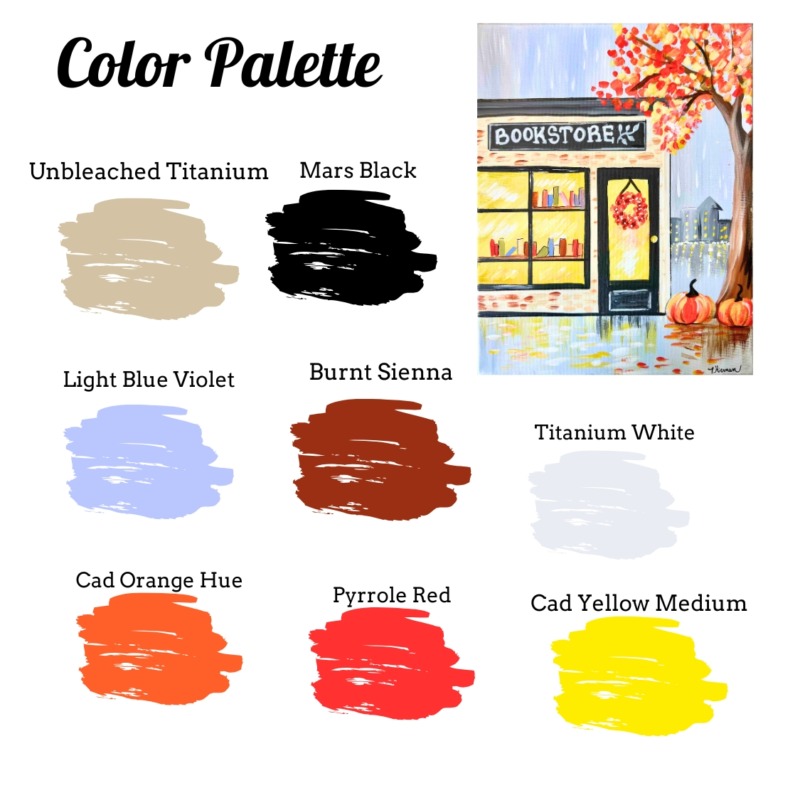
Colors:
- Titanium White
- Unbleached Titanium
- Mars Black
- Burnt Sienna
- Cadmium Orange Hue (optional)
- Pyrrole Red (or Cad Red Hue)
- Cad Yellow Medium (or primary yellow)
- Light Blue Violet (optional)
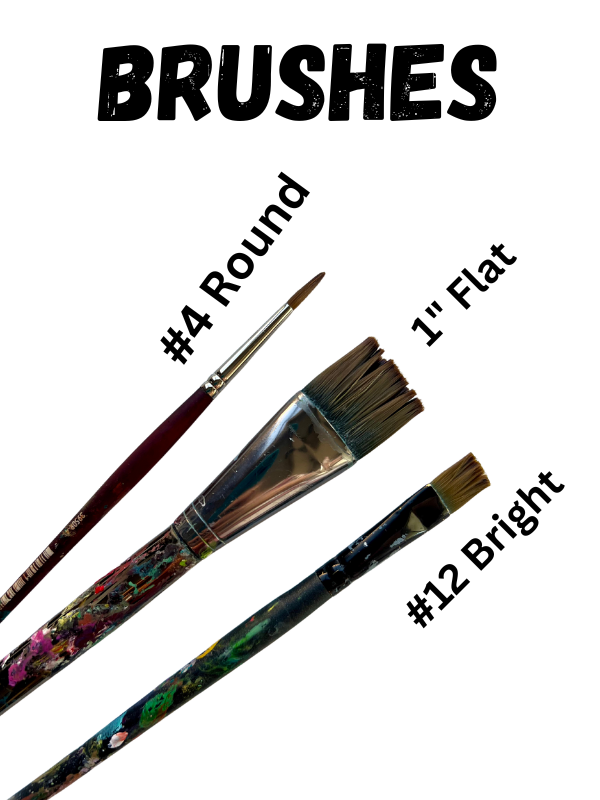
Brushes:
- 1″ Flat
- #4 Round
- #12 Bright (1/2″ Flat)
Optional Traceable:
Looking for other sizes? You can purchase more traceable resizes and download this tutorial in my PDF shop. Learn more here!
Directions At A Glance:
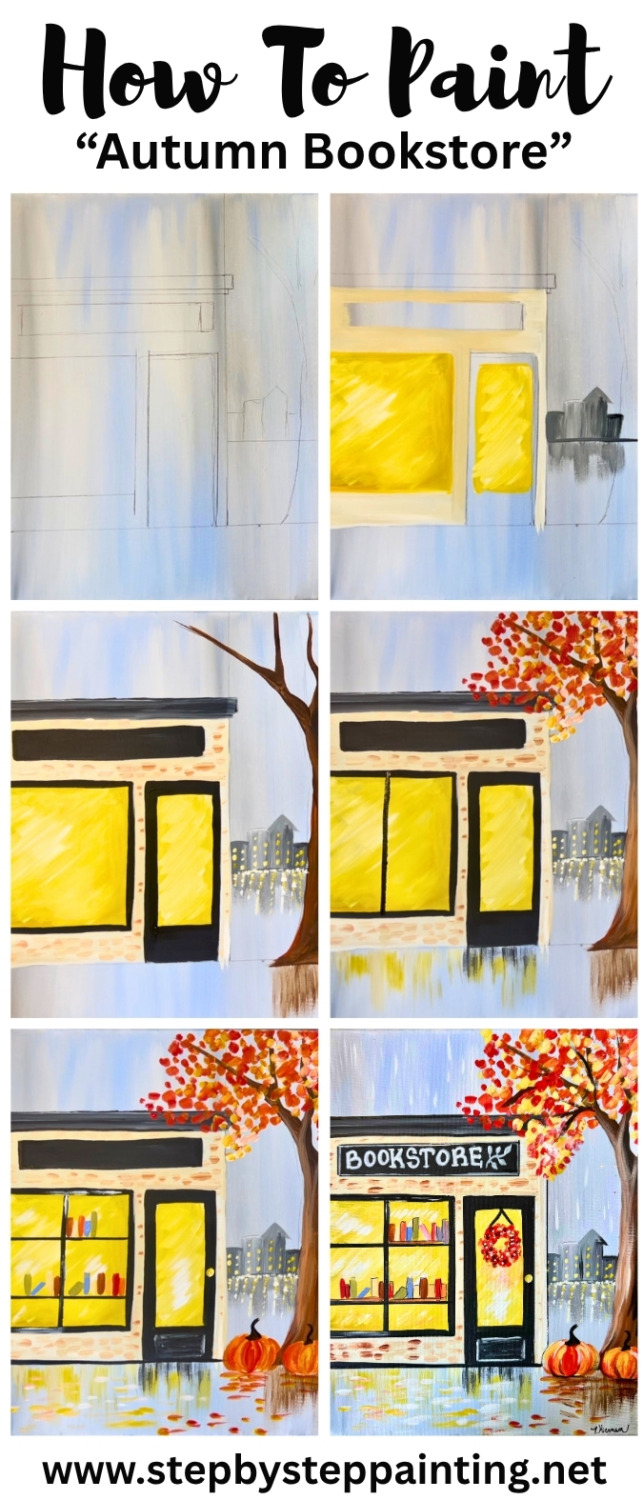
Video:
Step By Step Instructions:
1. Paint Background
Load your paint palette with the three colors: light blue violet, mars black and titanium white. Use the 1″ flat brush and load the full width of the brush into white. Then load a tiny dot of black and blue on each corner.
Paint full width vertical brush strokes to fill the canvas. You will create a light to medium gray color with colors that gently mix together. The goal is to create a rainy background.
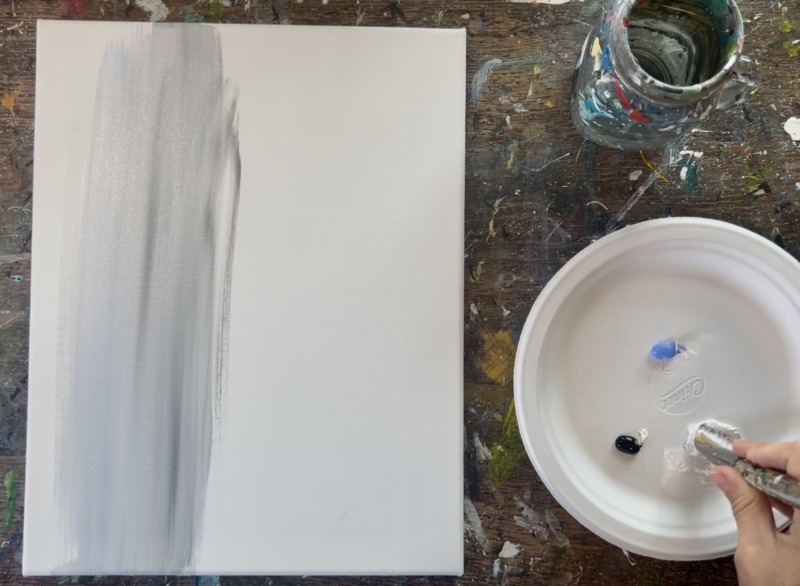
You can blend more blue or more black into the background as needed.
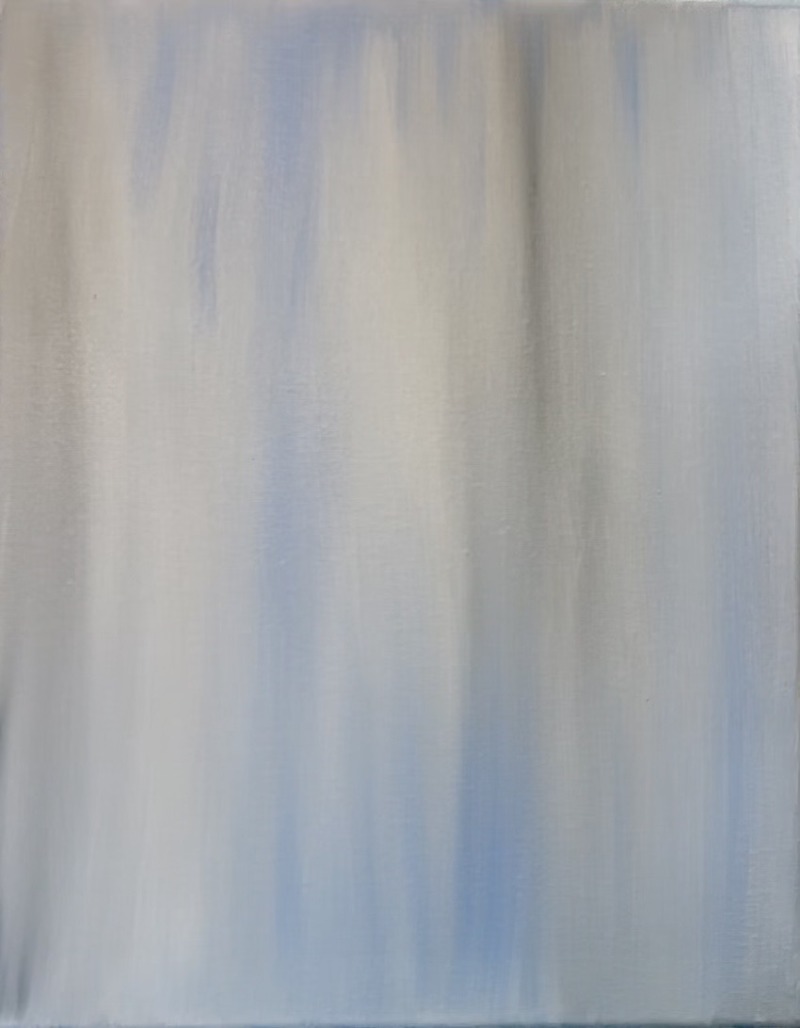
Let this dry before going onto the next step.
2. Draw building/ composition OR use traceable and transfer to canvas
These are approximate measurements for the building and they do not have to be exact. The measurements are for an 11×14 canvas, however, if you are doing a different size canvas you will need to estimate the placement of the building.
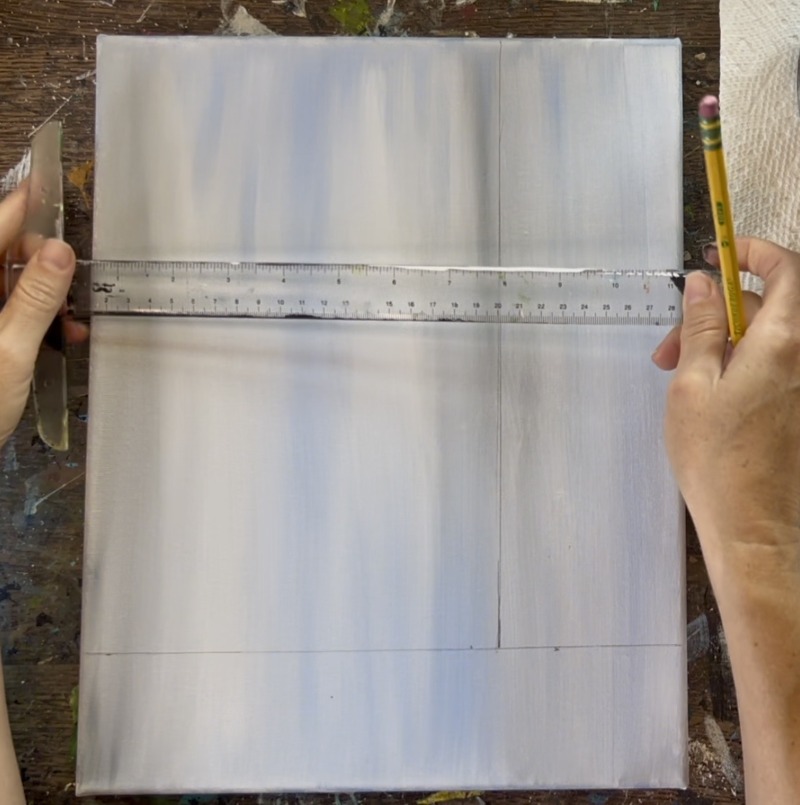
- Use a t-square ruler and measure 2.5″ from the bottom edge of the canvas. This line represents the bottom edge of the building and also where the large tree will start.
- Measure 5.5″ from the bottom edge of the canvas and draw a horizontal line. This line represents the “horizon line” or where the city buildings in the background will be.
- Use the ruler to draw the bookstore building rectangular shape starting from the bottom line. The building is approximately 7.5″ wide and 8.5″ tall.
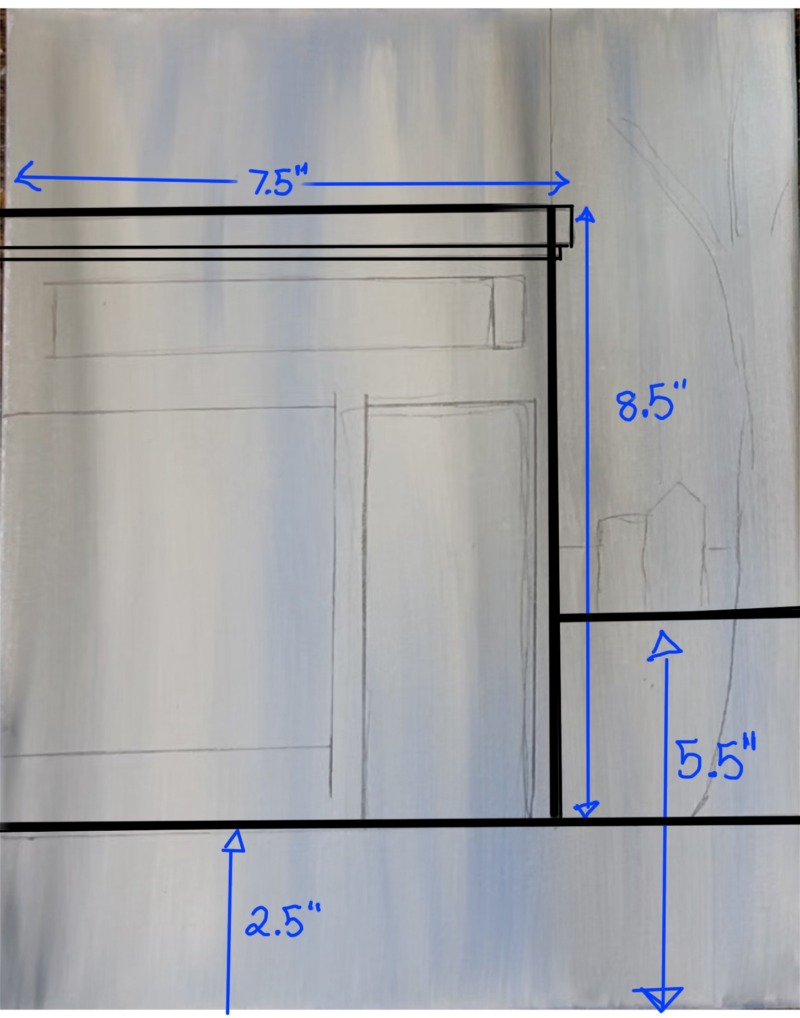
4. Draw the sign, window and door. I recommend sketching these out with a pencil first before using the ruler and then going back over the lines with the ruler to straighten the lines. Add a small rectangular flat shape on the top of the building for the roof.
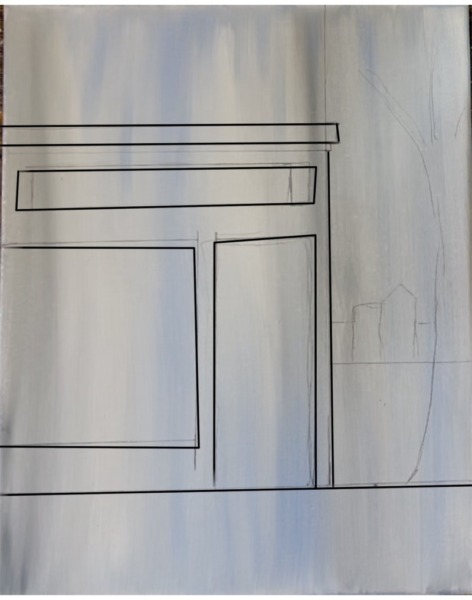
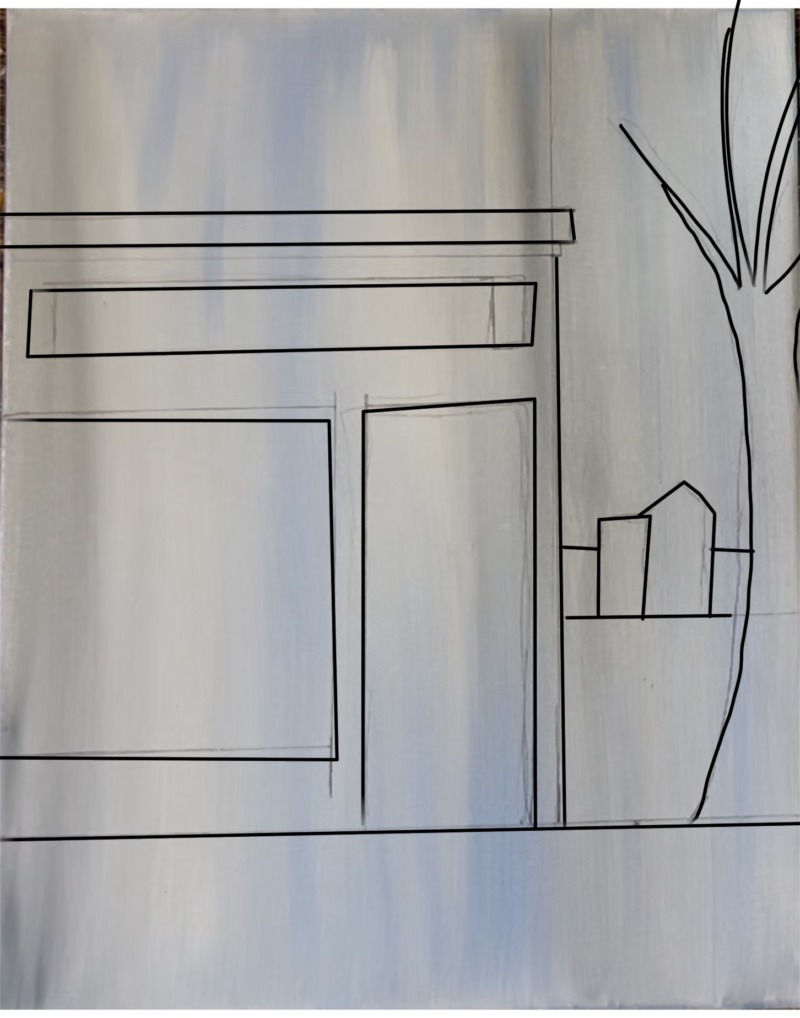
Draw a tree on the far right side of the bottom line. Then draw basic buildings along the horizon line.
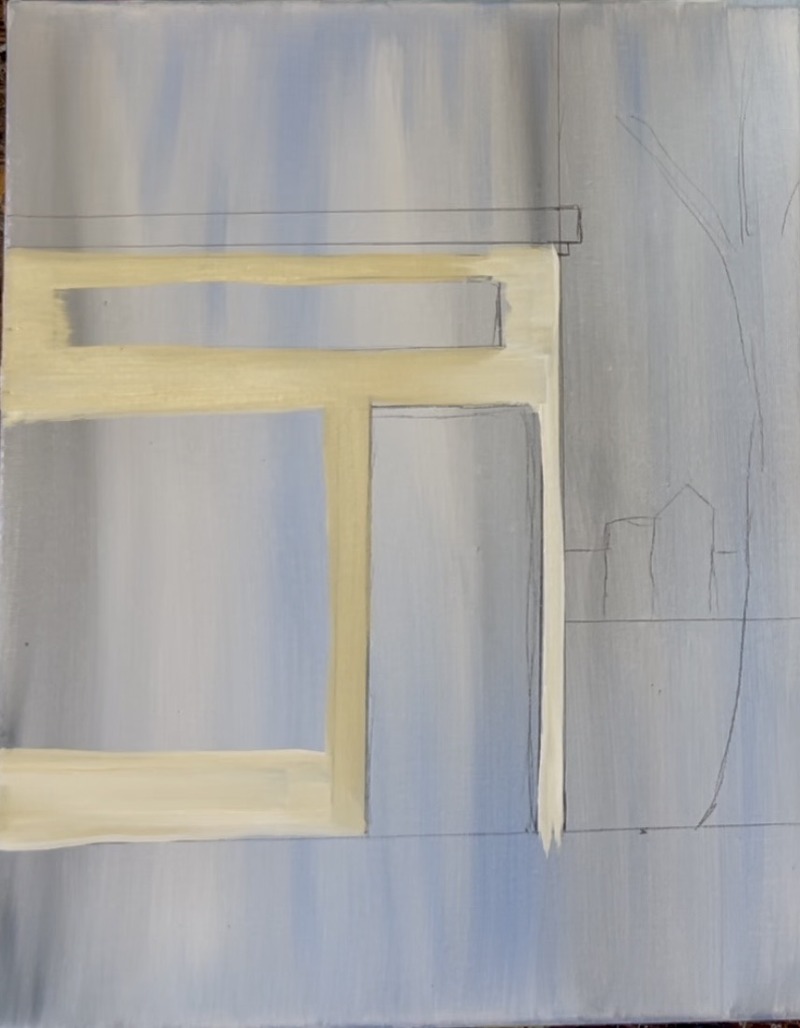
3. Paint Building Walls Beige
Use the color “Unbleached Titanium” (Beige) and white to paint the building exterior wall. Paint around the sign, window and door shape. Gently mix the beige and white together to create different variations of the color.
4. Paint Windows
Use a #12 bright brush to paint the windows. Start by painting the windows solid “Cadmium Yellow Medium Hue” (Yellow). Then double load the brush into white and yellow. Paint diagonal paint strokes blending the yellow and white together so the middle parts of the window look brighter especially towards the middle. Layer on more white and blend it further using diagonal paint strokes right in the middle of the window.
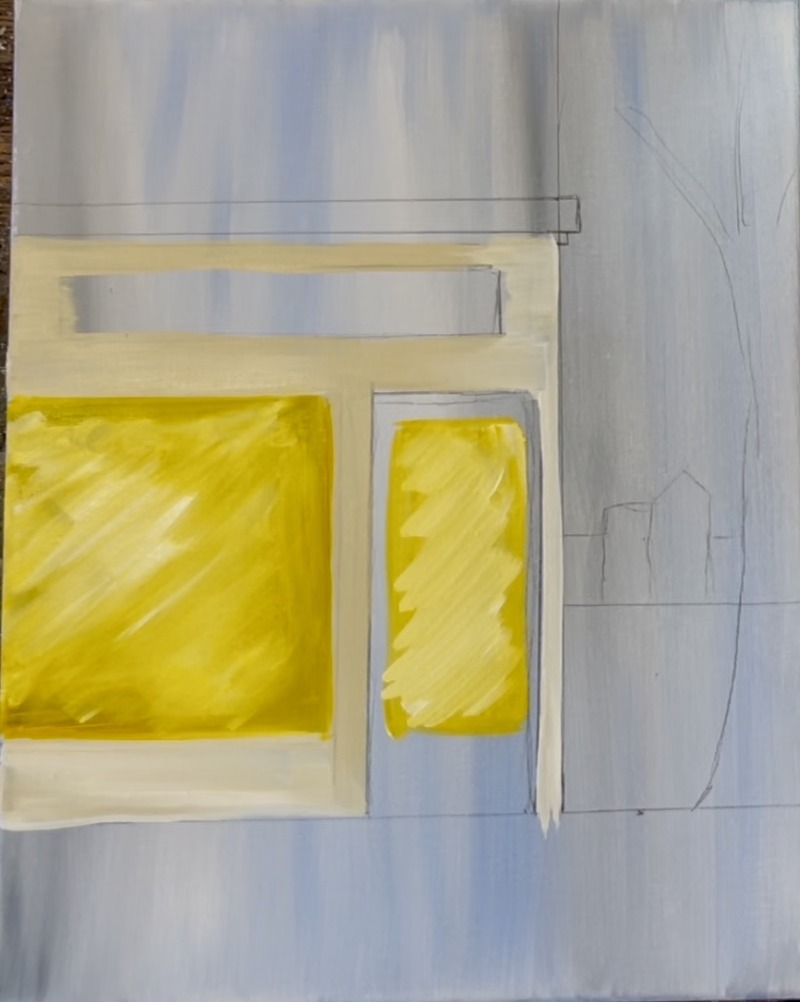
Note: it’s okay to paint outside the lines at this point! We can define the window/ door later with the black lines.
5. Paint City Buildings In Background
Use a #12 bright brush and a combination of different shades of dark gray to paint buildings on top of the horizon line. Paint these in vertical brush strokes. Then “dry brush” vertical reflection marks below the buildings using the full width of the #12 bright brush. When you dry brush, wipe the paint brush off and make the marks so they appear slightly translucent.
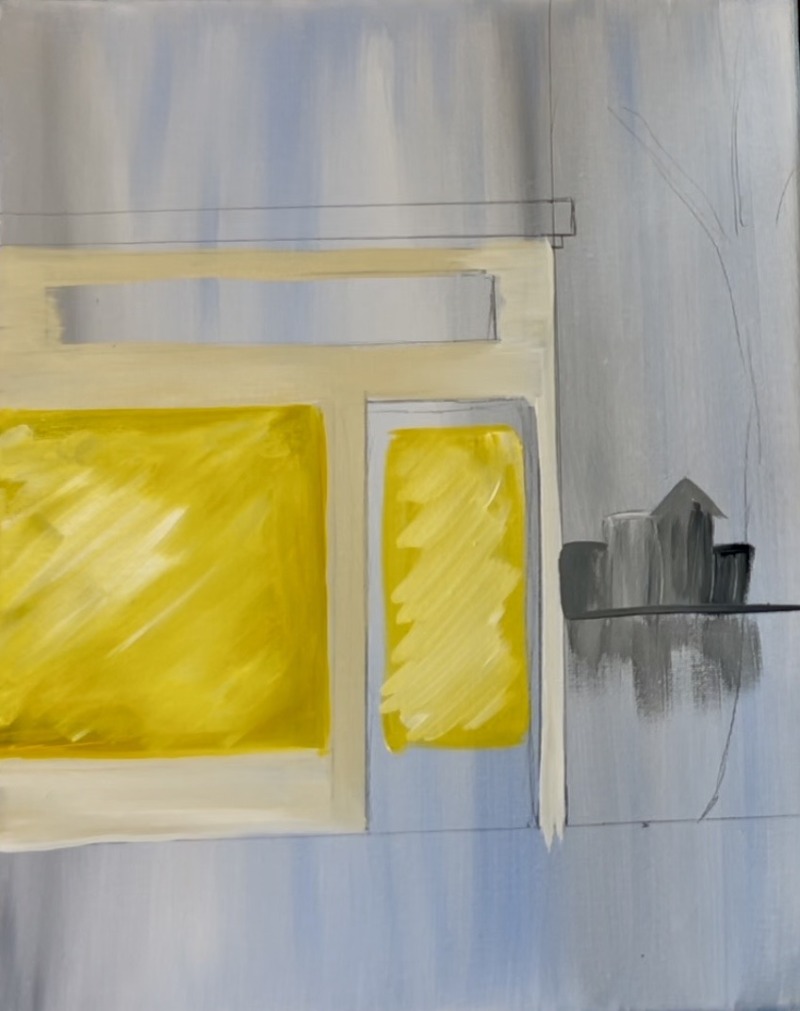
Then use either the round brush or the edge of the #12 bright brush to outline the horizon line a dark gray color (the line at the bottom of the buildings).
6. Paint Tree
Use the #4 round brush and “Burnt Sienna” (Brown) to paint the tree. Start the trunk on the bottom lined up with the bottom of the building. Paint a wide fluted trunk shape that goes slightly more narrow as the tree gets painted vertically upwards. Then paint a large branch extending out that overlaps the top of the building. Paint several more smaller branches extending out from the main branch. Since this tree is on the far right edge of the canvas, we only see half the tree. Then blend a little black on the bottom and far right edge of the tree for shadowing.
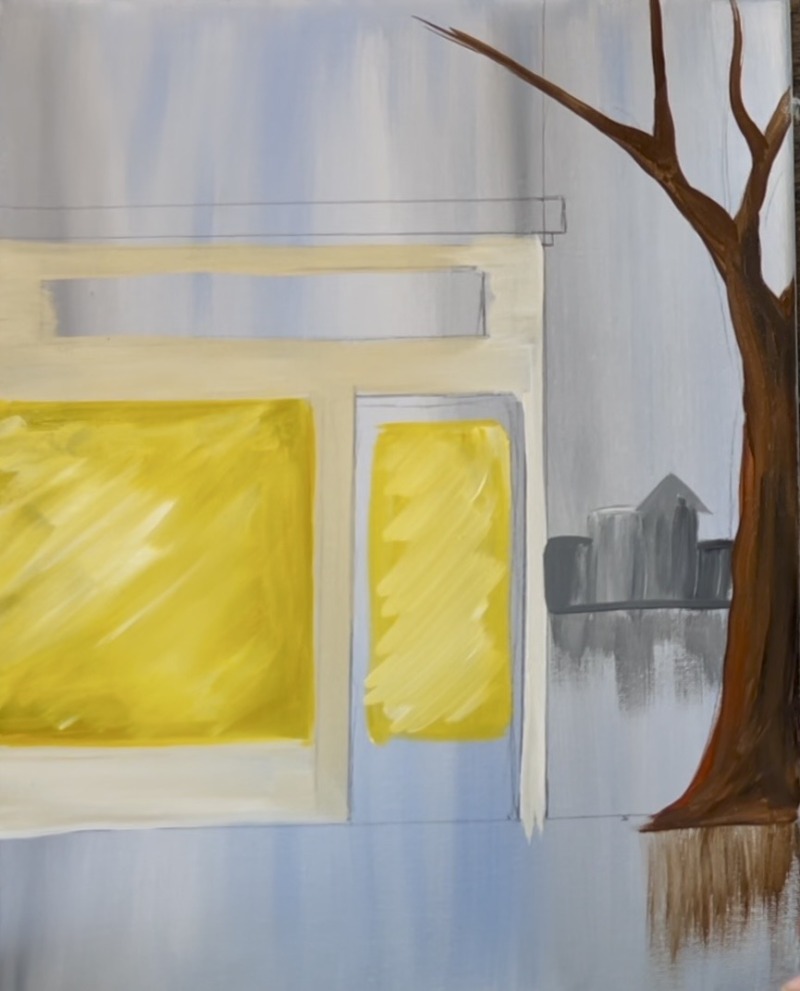
Use the #12 bright brush to “dry brush” brown reflection below the tree. This will make it look like the tree is reflecting on the wet sidewalk from the rain.
7. Paint City Lights & Reflections
Use a #4 round brush and mix yellow and white together. Paint little marks for the window lights on all of the buildings. Then paint little marks going in a vertical direction and reflecting on the streets below the building. Then paint a row of tiny white dots all along the horizon line.
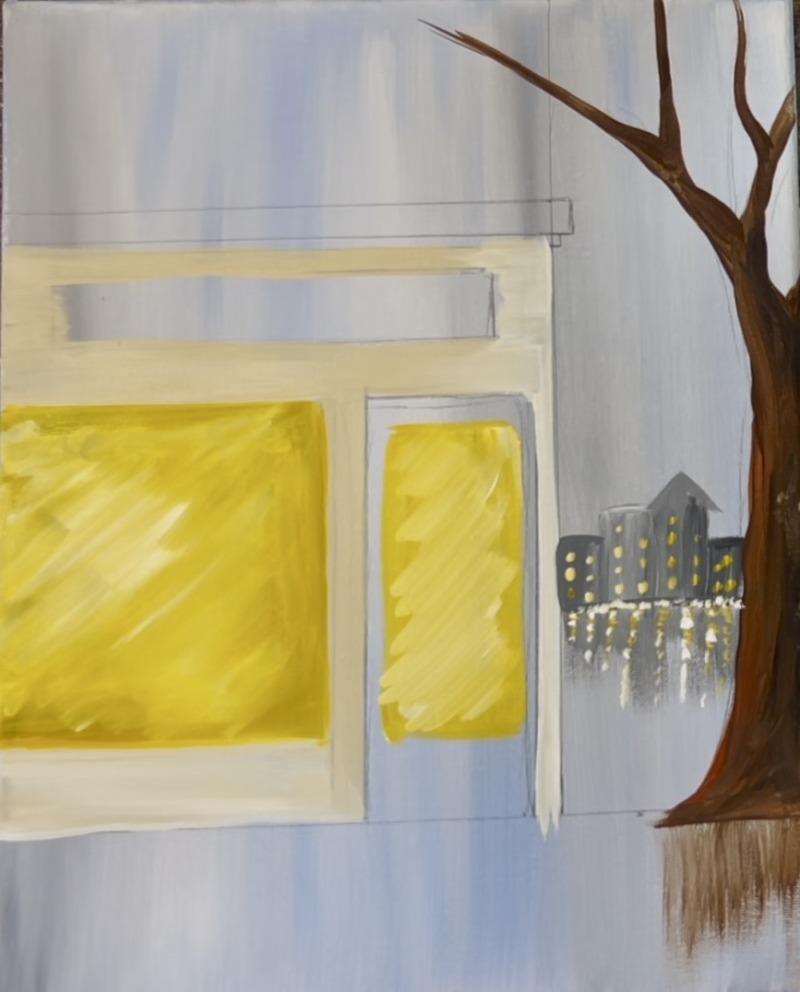
8. Paint Roof, Door & Window Border + Brickwork
Use the ruler to help with your outlines as needed. Use the #4 round brush and black to outline the window, paint the rectangular sign shape and paint the black part of the door that goes around the door window. For the roof, double load the brush in black and white to create a dark gray color.
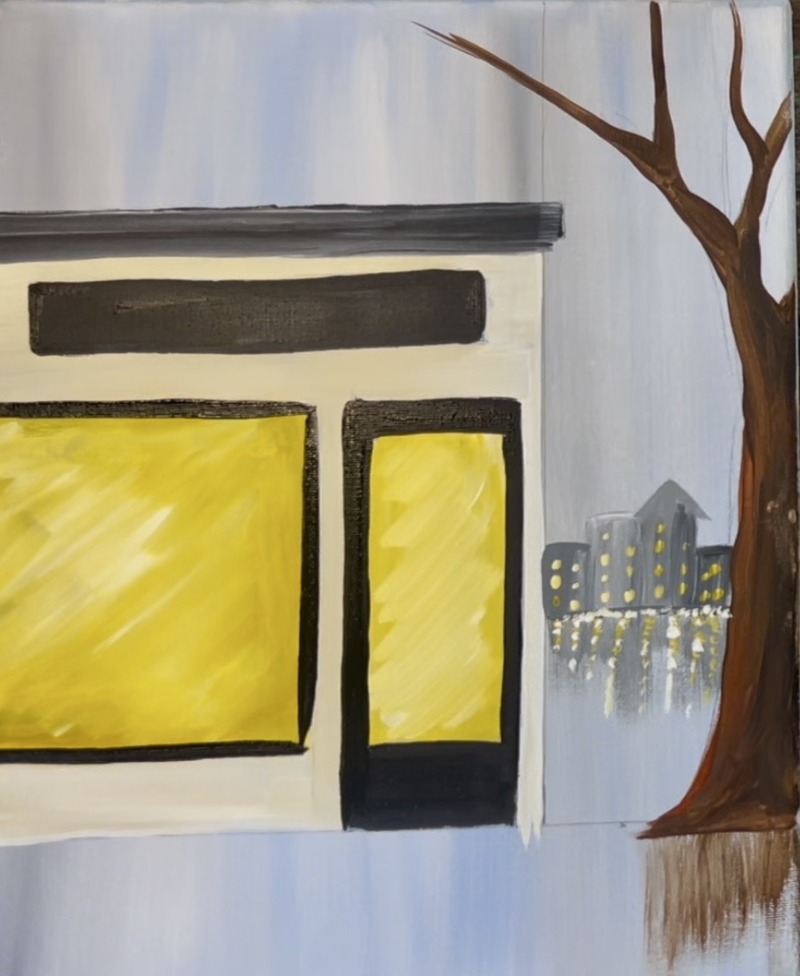
Paint some detail brickwork on the building by using the #4 round brush. Double load the brush into brown and beige and then paint little horizontal marks on the walls of the building.
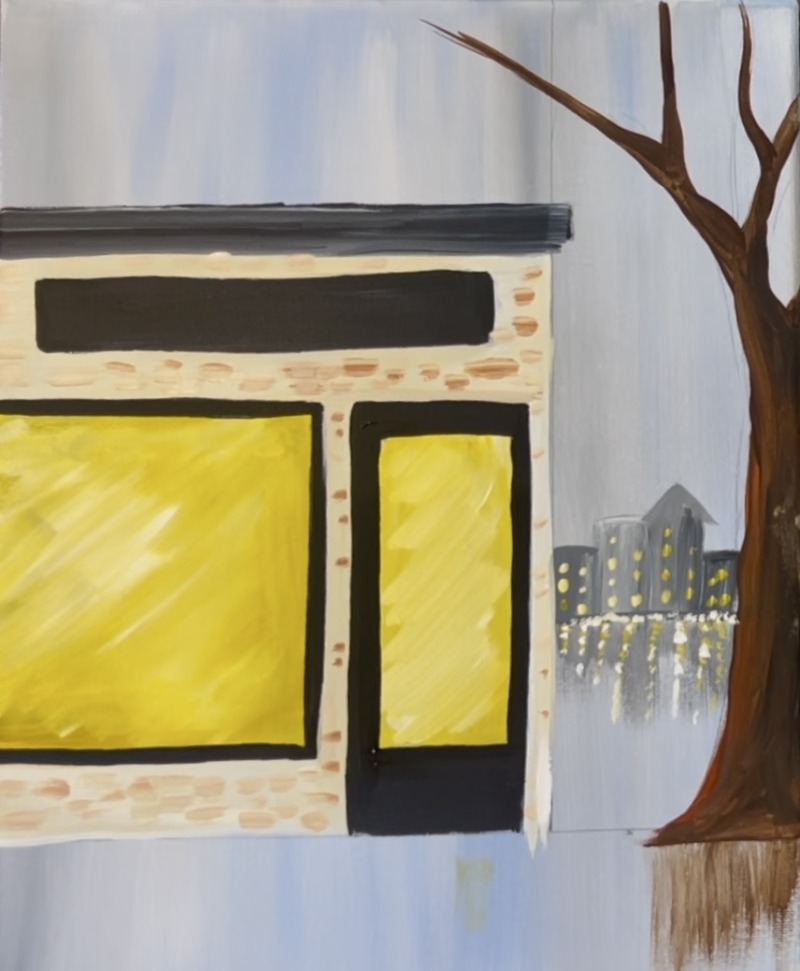
9. Paint Leaves On Tree
Use the #4 round brush and a combination of red, yellow and orange to paint little dotted marks on the tree branches to create fall leaves.
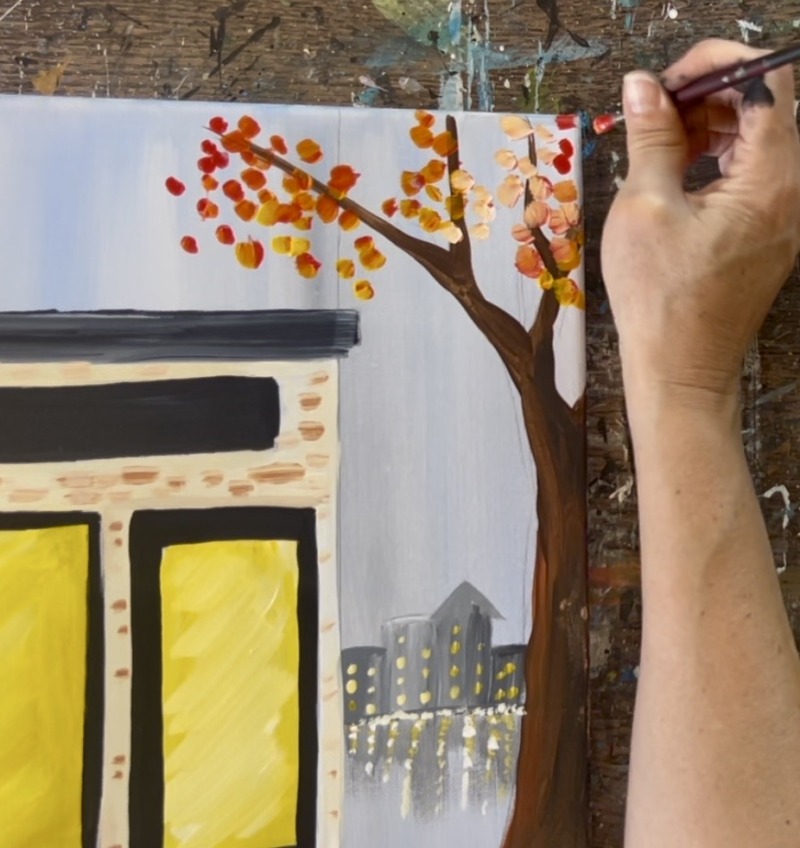
Do this all throughout the upper tree area and overlap the building slightly with leaves.
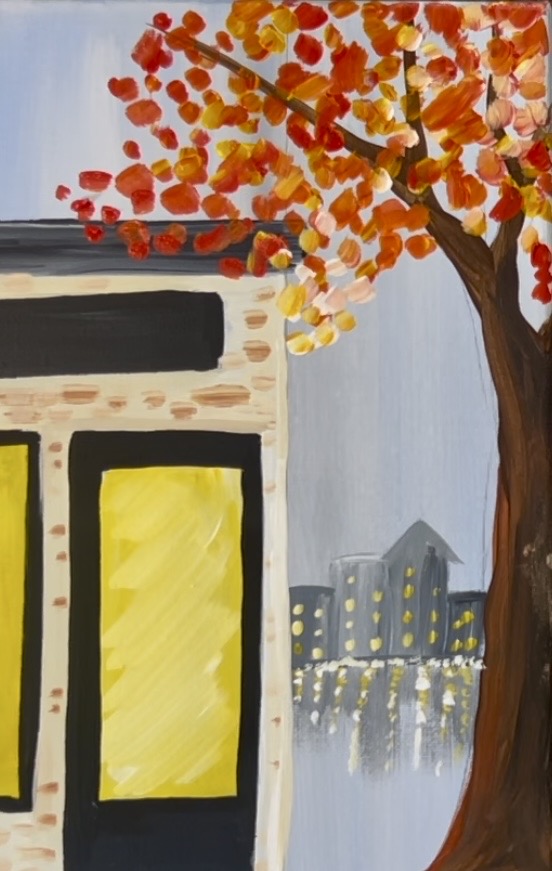
10. Reflections under building
Use the #12 bright brush to drag colored dry brush strokes under the building. Use a combination of yellow and black to create reflection on the sidewalk that looks like the door and the bright window reflecting on the wet sidewalk.
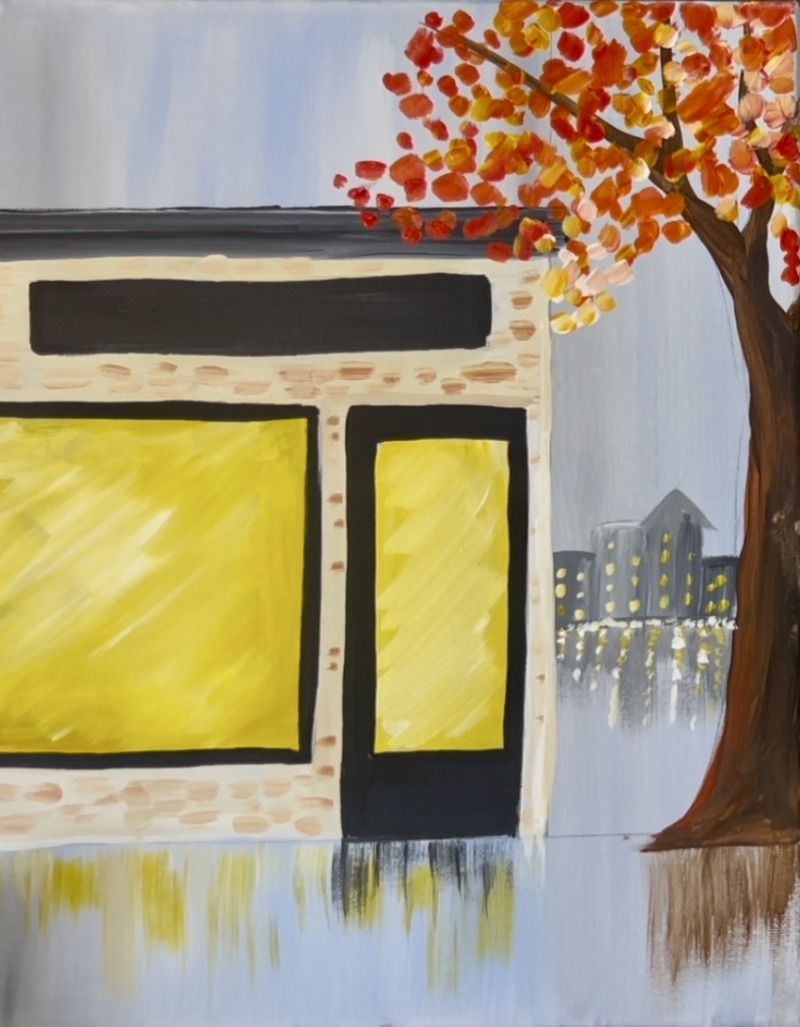
11. Window Pane Lines
Use a ruler and either a paint pen or a #4 round brush with black to paint horizontal lines and vertical lines for the window pane lines.
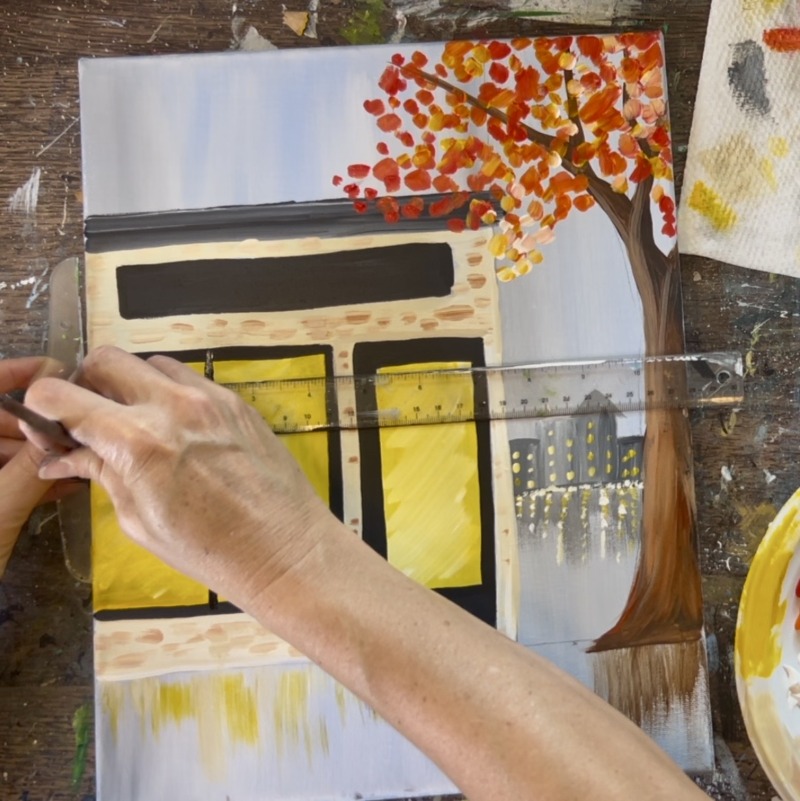
Optional: lightly highlight the black window pane lines with some white that slightly blends with the black.
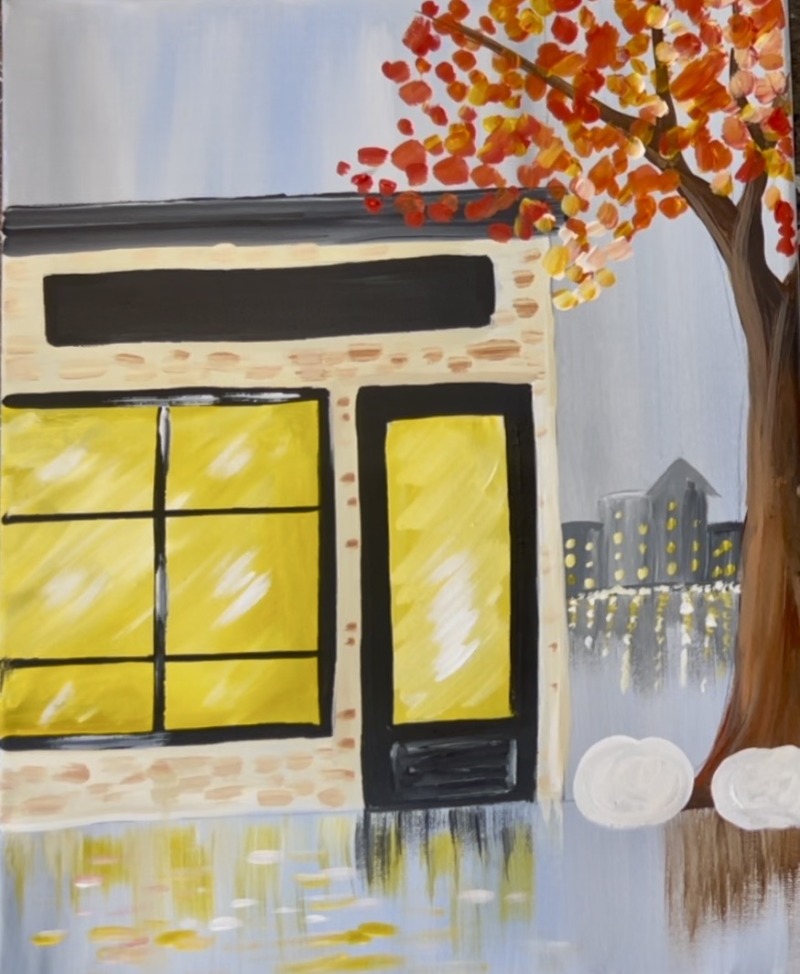
12. Paint Books, Pumpkins & Optional Wreath
Use white to paint the shapes of both of the pumpkins resting next to the tree. Then use a variety of colors on your palette to paint little rectangular brush marks in the window for the books. You can be as simple or as intricate as you would like with the books showing through the window. Also, use yellow mixed with white to paint a small circle for the doorknob.
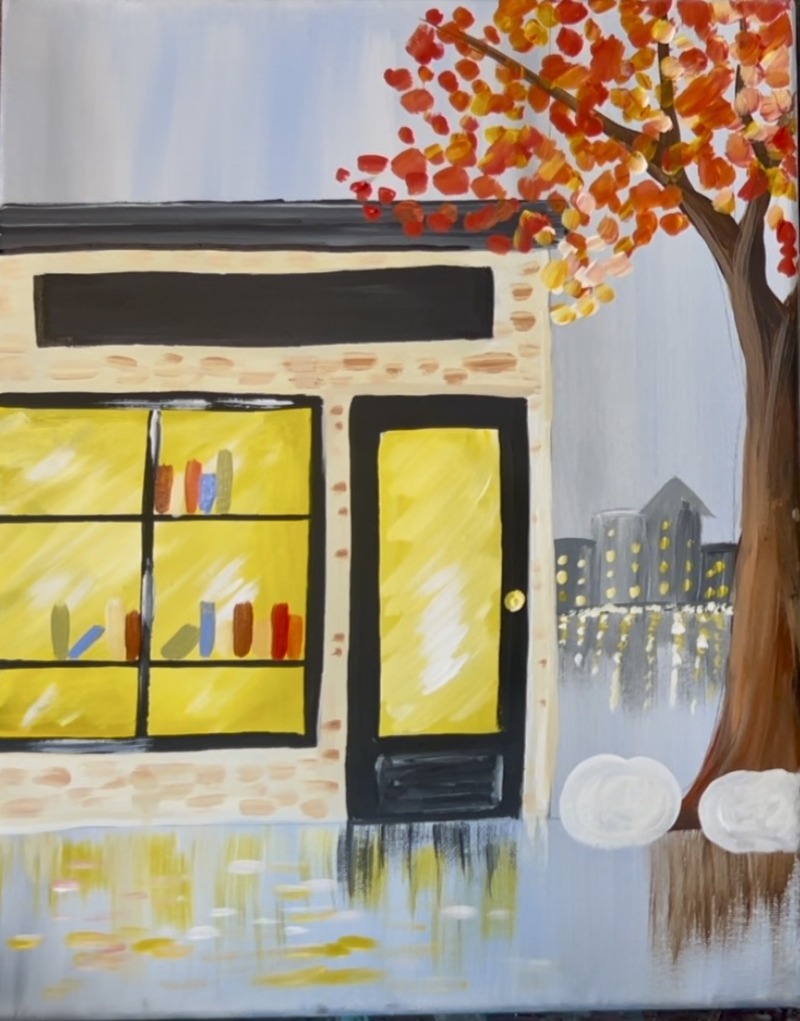
After the white layer for the pumpkins dry, use a round brush and red/orange/yellow paint to brush on curved paint strokes to fill the pumpkins with color. Start in the center of the pumpkin and paint an oval shape. Then paint curved brush strokes on each side of the center. This gives the pumpkin form when you paint the curved brush strokes and also slightly alter the color.
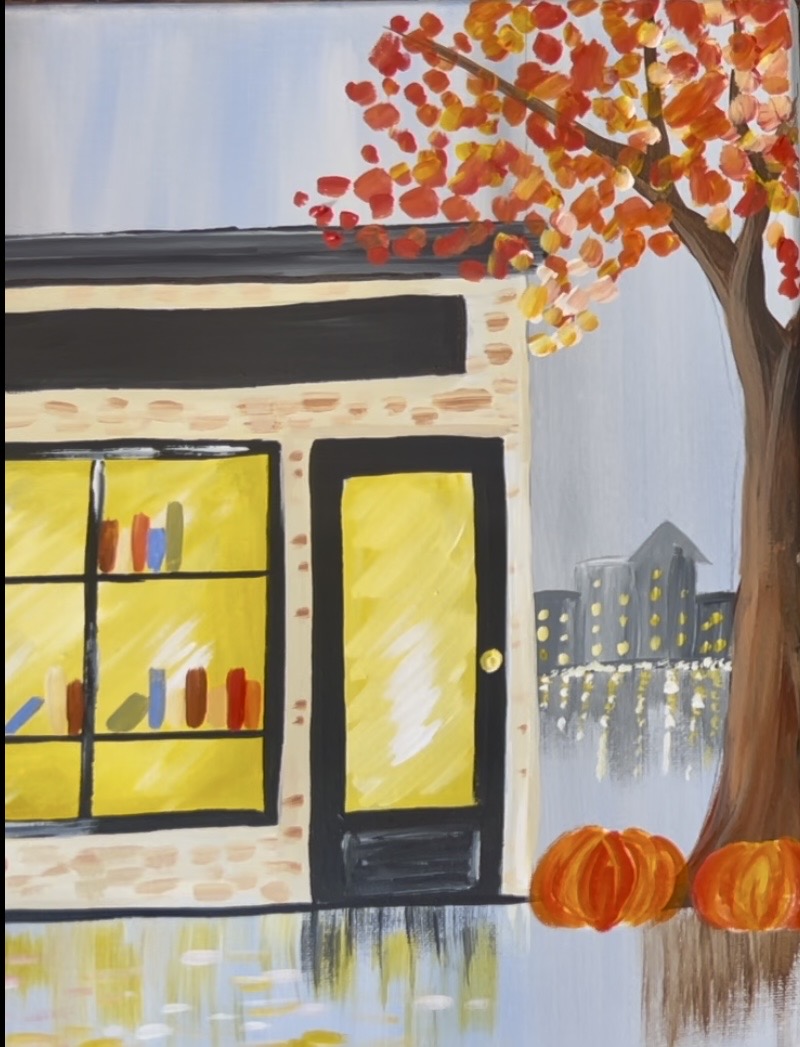
Then paint black or dark brown stems onto the pumpkins. Use orange to paint little horizontal brush marks underneath the pumpkins for more reflections on the ground.
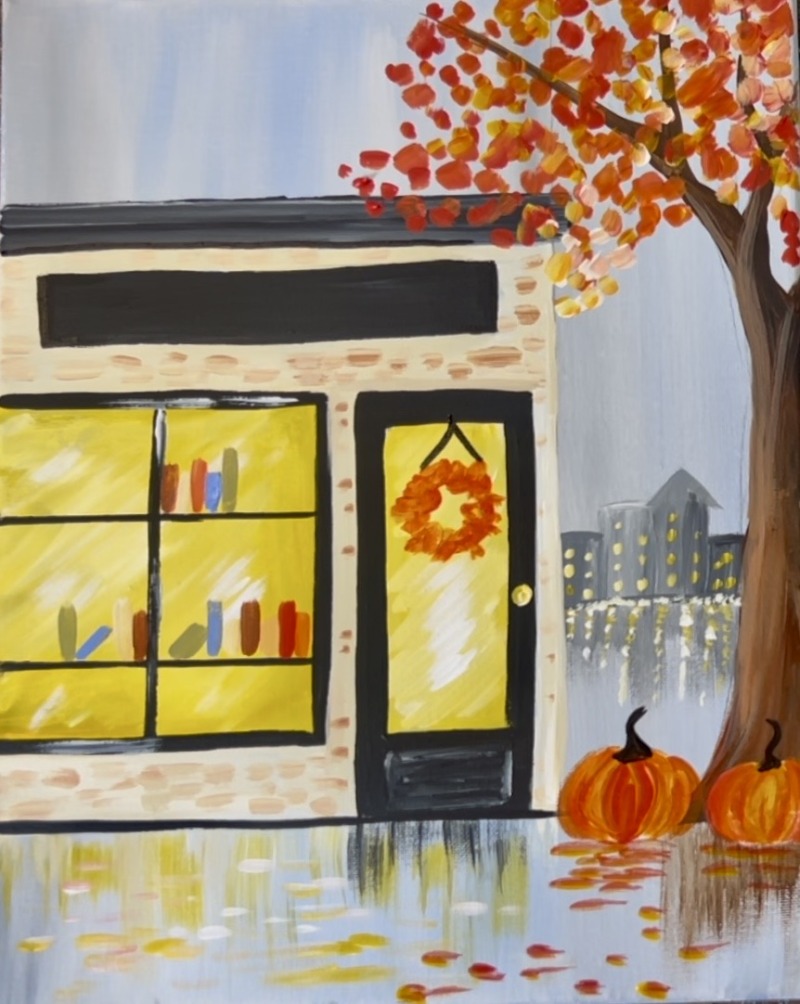
Paint a wreath on the door by painting a simple orange circle. Then paint little “X” marks around the circle for texture. Blend in some yellow and reds into the wreath and then complete it with a simple black string that attaches to the top of the door.
13. Bookstore Sign Lettering
Use the white paint pen to write out the lettering for the sign. You can write “Bookstore” or your own custom name/ wording.
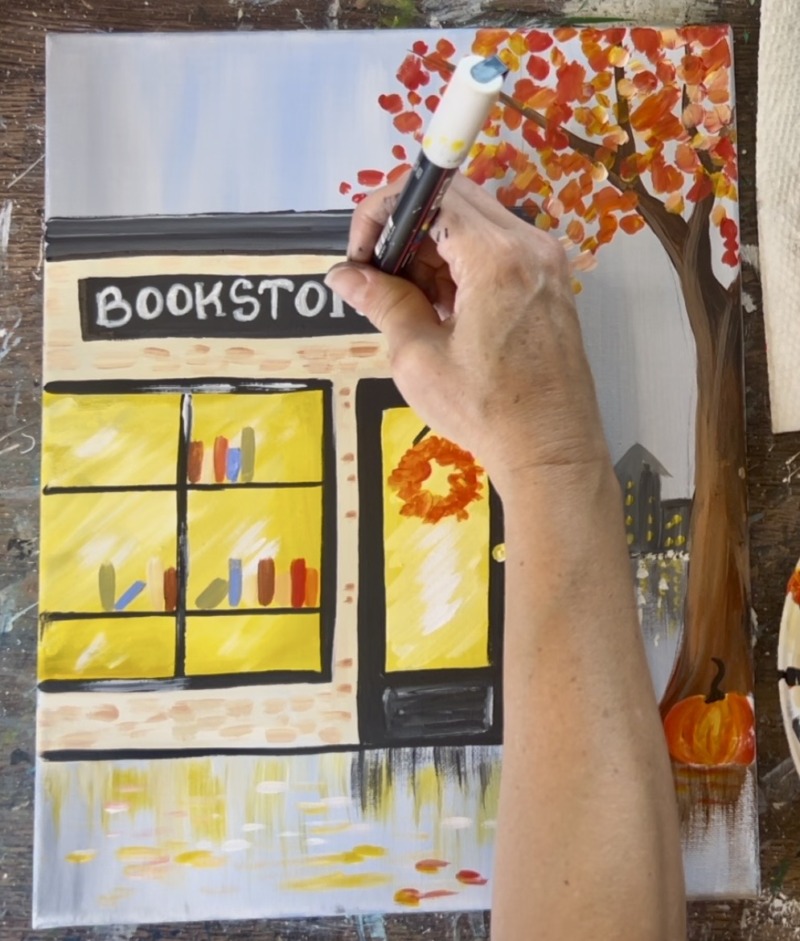
If there is extra space on the sign, you can fill it with a symbol or pattern (I did a simple leaf).
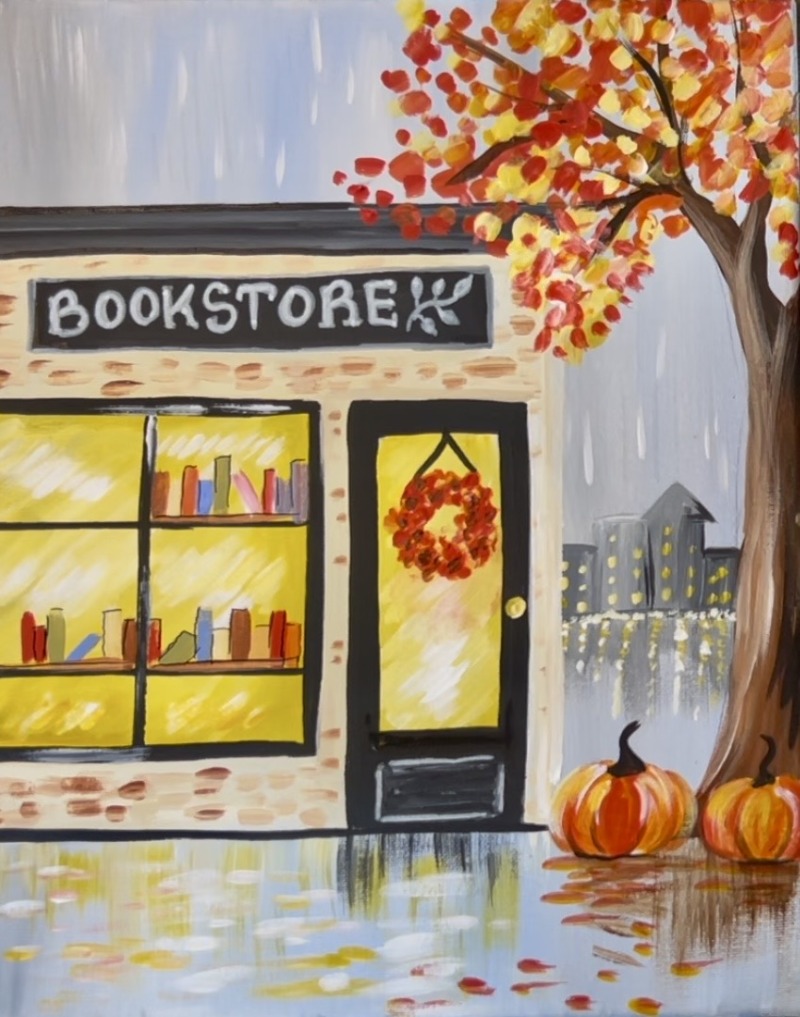
13. Final Details
There are some extra intricate details you can add to this painting to bring everything together!
- Use a fine black paint pen (if you have one) or a fine detail brush and black paint to lightly outline the books inside of the store. This gives them more definition.
- You can also add more layering to the wreath, more leaves on the tree and dark lines on the pumpkins.
- If you would like to make the window and door lines straighter, use a ruler a black paint pen to go back over the edges of the line.
- Also, adding a black vertical line on the right edge of the bookstore building helps with the contrast!
- Finally, adding white thin vertical rain lines throughout the sky area will help to exaggerate the look of a rainy day!