Would you like to save this?
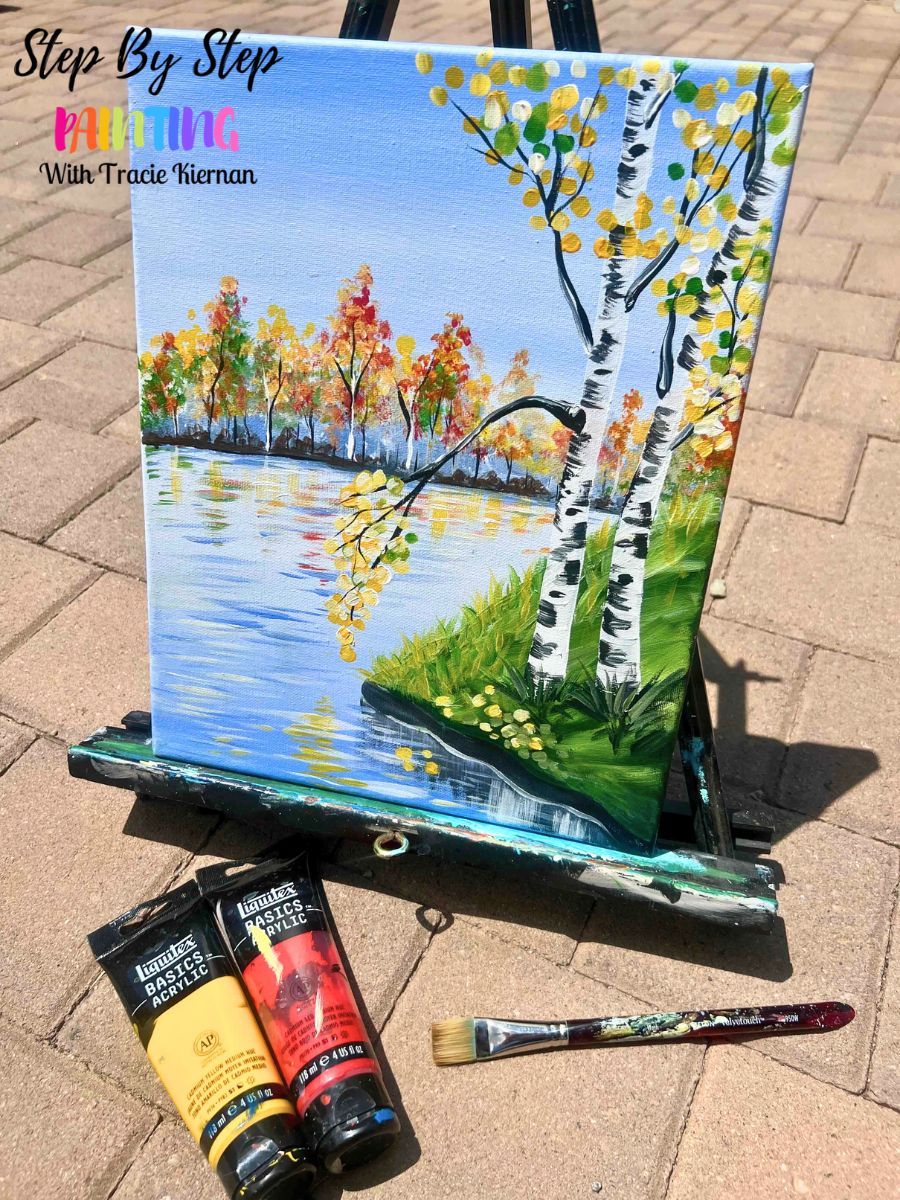
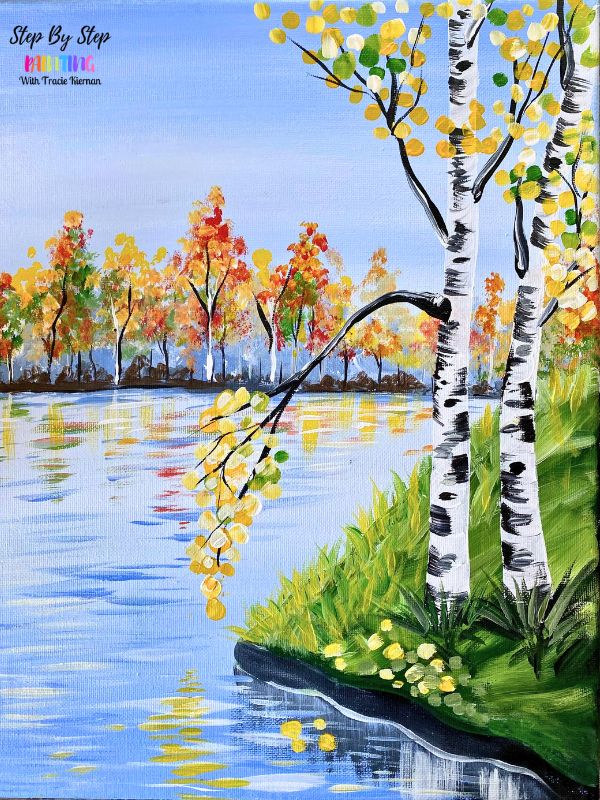
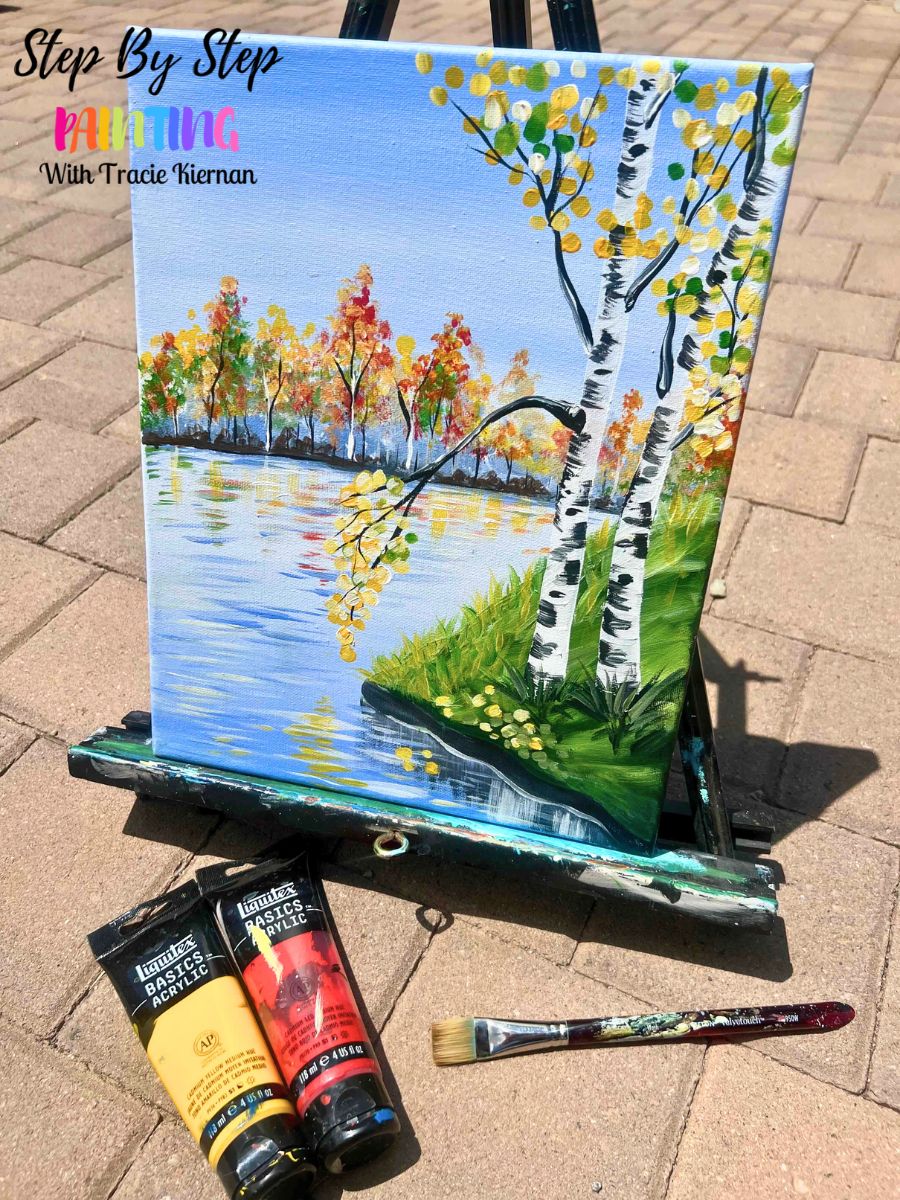
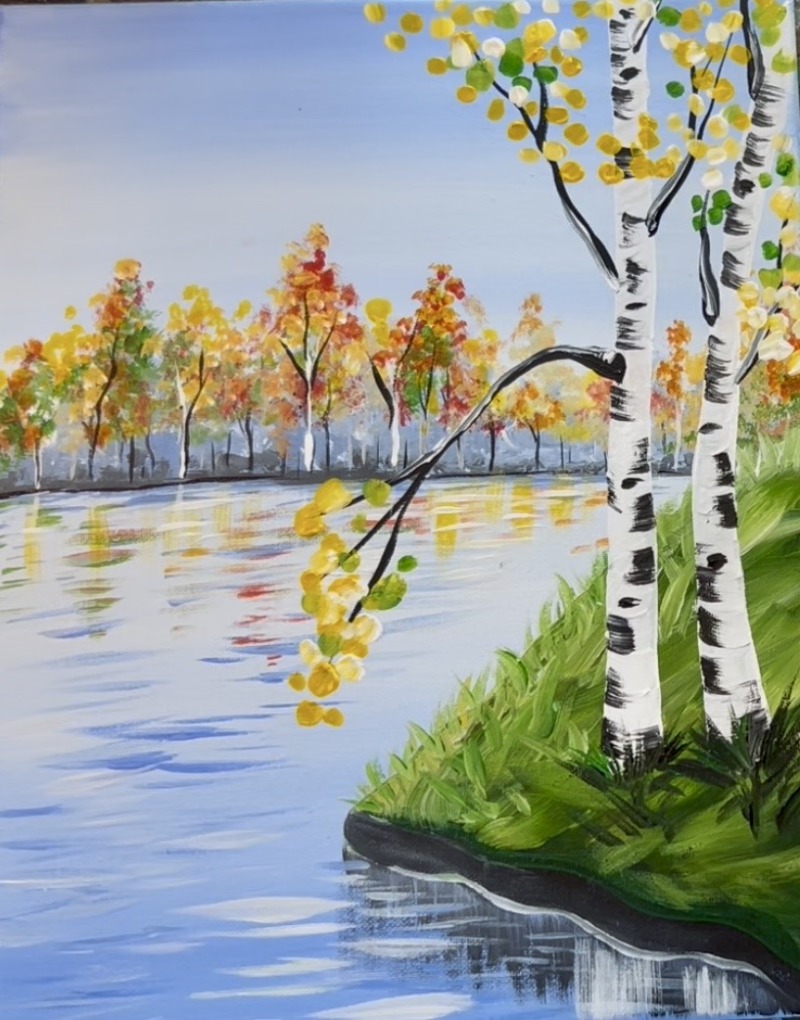
Capture the beauty of that brief transition between summer and fall in “First Hints of Fall“. This peaceful lakeside scene features aspen trees, colorful reflections, and distant trees just beginning to show their first touches of golden, orange, and red.
In this tutorial, we’ll focus on creating landscape perspective, simple reflections on the water, and the changing colors of the trees without making the scene feel like full-blown fall. It’s all about those first subtle signs that the season is beginning to change.
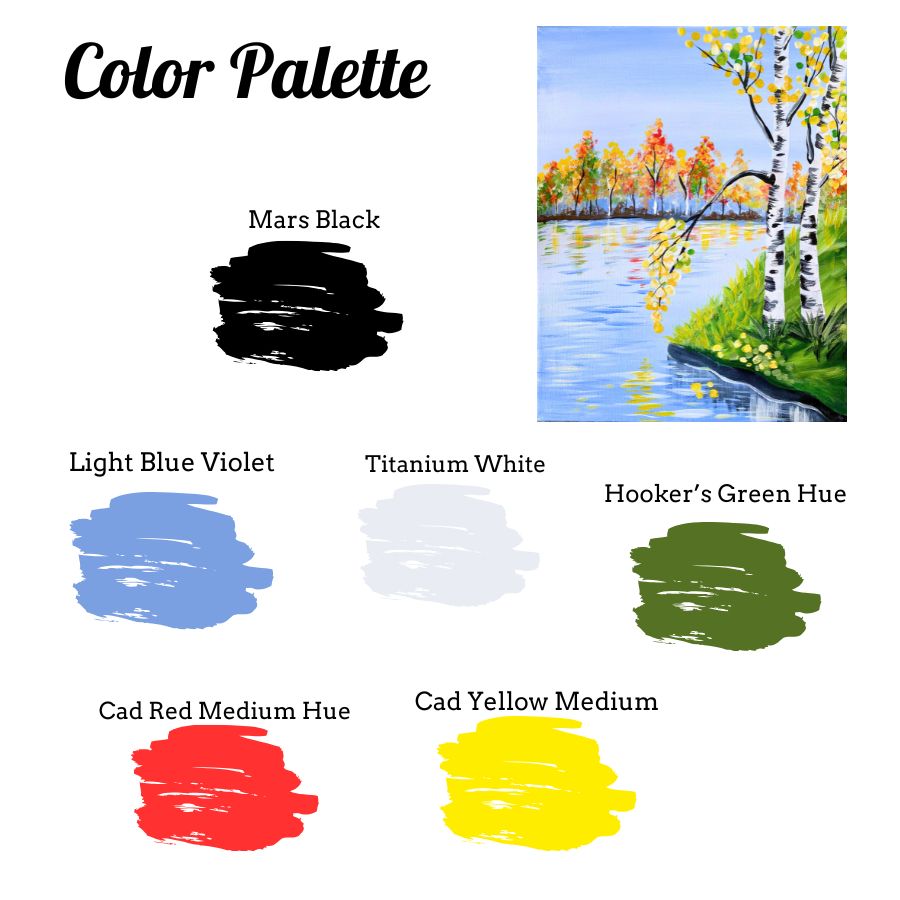
You’ll enjoy the minimal color palette in this one (only 6 colors)!
Enjoy and happy painting!
Looking to download this?
You can purchase PDF instructions, bonus tracers and video download in my shop! Find out more here.
Materials Needed:
- 11×14 Canvas (or any size)
- Acrylic Paints
- Brushes
- Ruler & Pencil
Colors:
- Mars Black
- Titanium White
- Cadmium Red Medium Hue
- Cadmium Yellow Medium Hue
- Hooker’s Green Hue
- Light Blue Violet
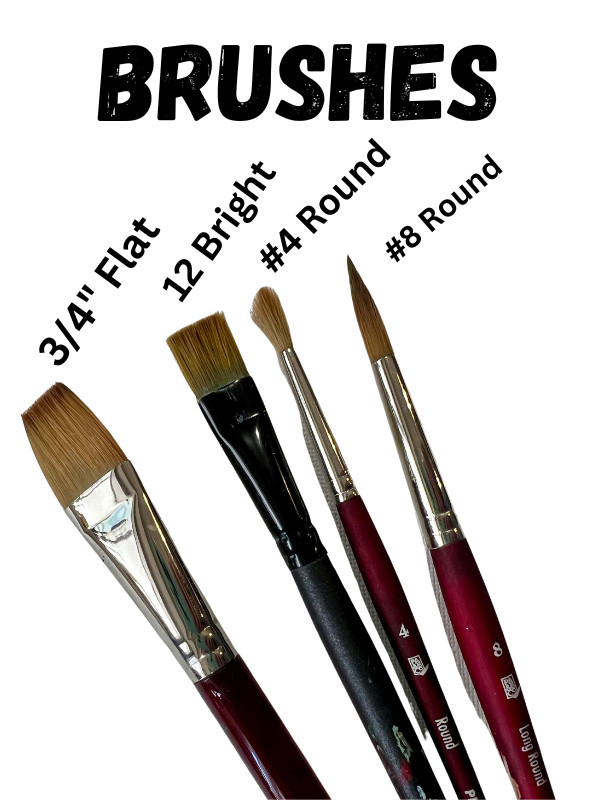
Brushes:
- 3/4″ Flat Brush
- #12 Bright Brush
- #8 LONG Round Brush
- #4 Round Brush
Directions At A Glance:
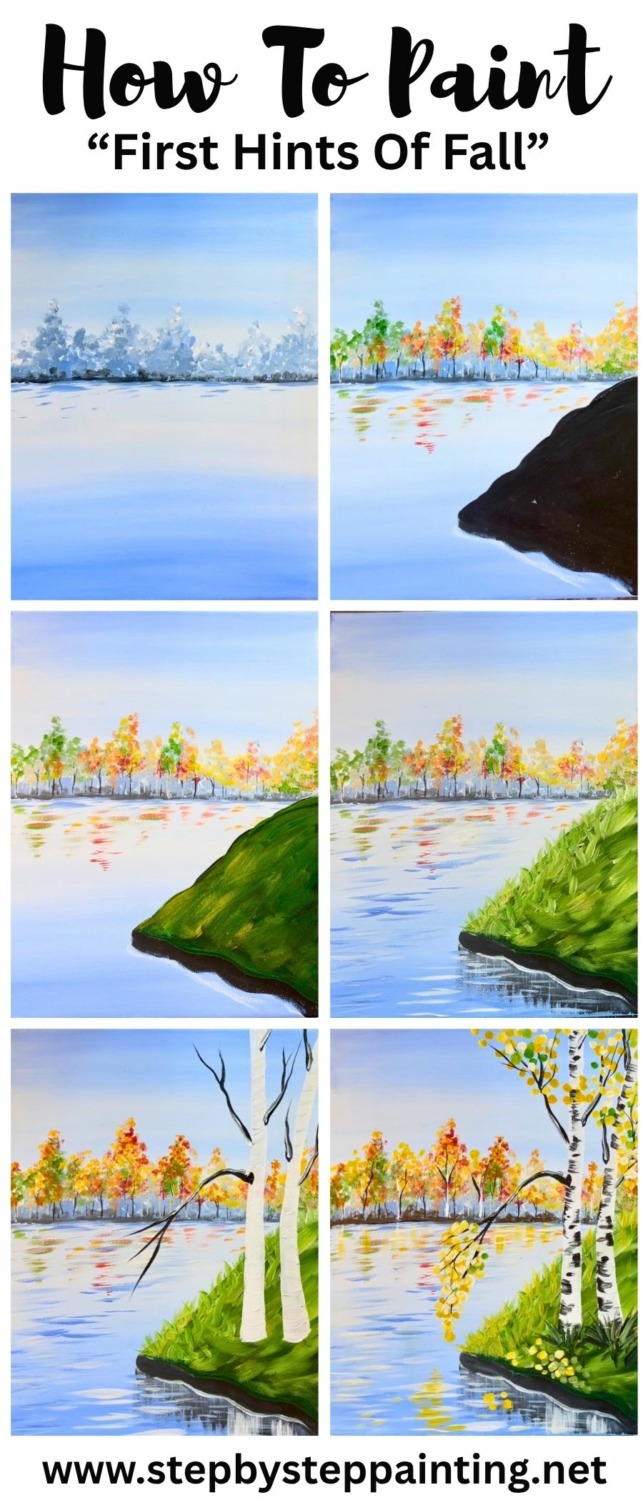
Video:
Step By Step Instructions:
1. Paint Background
Paint a gradient blend of the two colors: light blue violet and titanium white. Start by mixing equal parts blue and white together. Then use the 3/4 flat brush and start at the top. Paint left and right paint strokes that go all the way across the canvas. Work your way down, brushing this thin layer of paint and as you work your way down, add more white to the brush and blend it. Let the color become very bright and light blue in the middle of the canvas. Then repeat this for the bottom half of the canvas but make the gradient go all the way to darker blue on the bottom of the canvas.
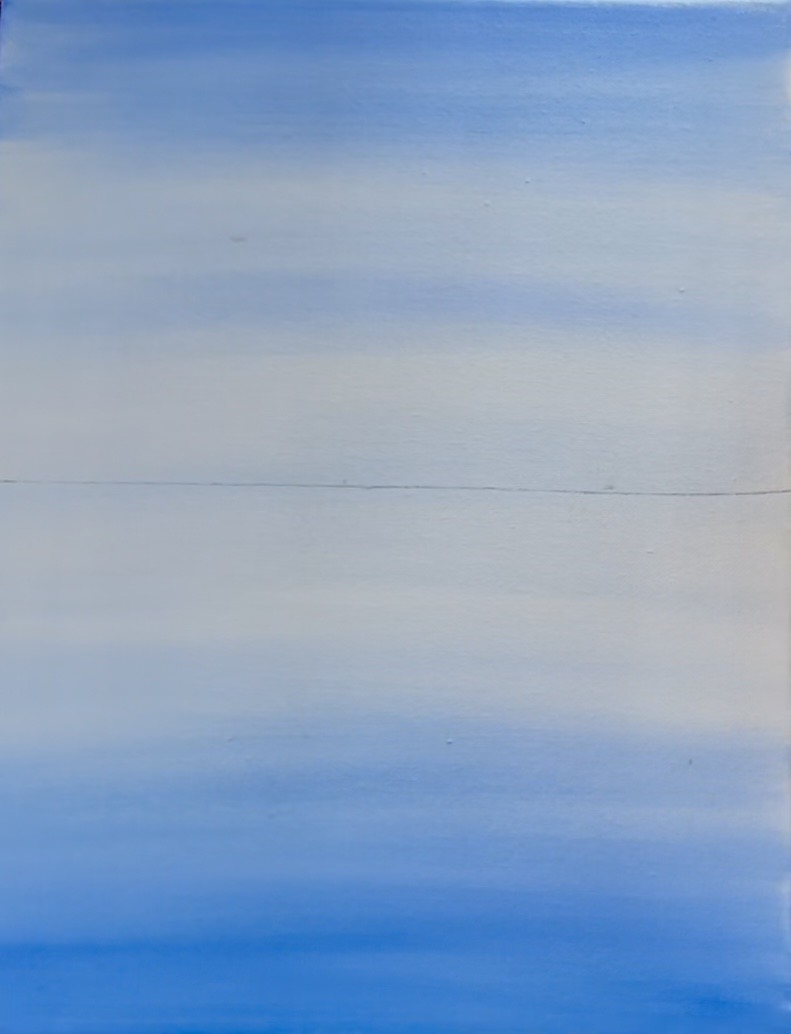
After this dries, locate the center of the canvas with a ruler and draw a horizontal line across the canvas.
2. Gray Gradient Trees In Background
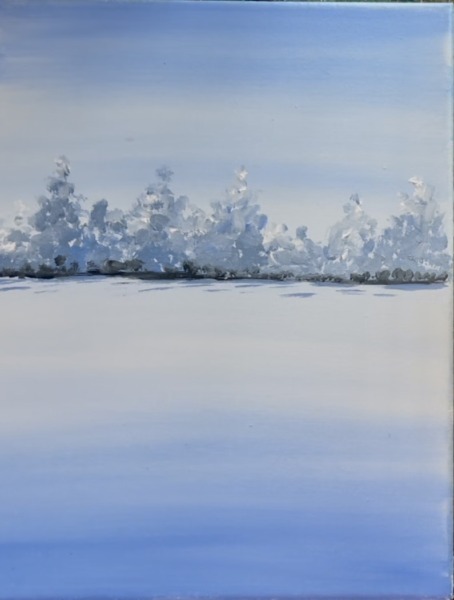
The deciduous trees that are along the horizon line are going to be painted “blue-gray” first. This will help to “tone the colors down” and make them appear further away. Start by mixing a blue-gray on your paint palette by mixing 1 part black, 4 parts white and 2 parts blue. Use the round brush to “blotch” paint strokes to form abstract tree shapes.
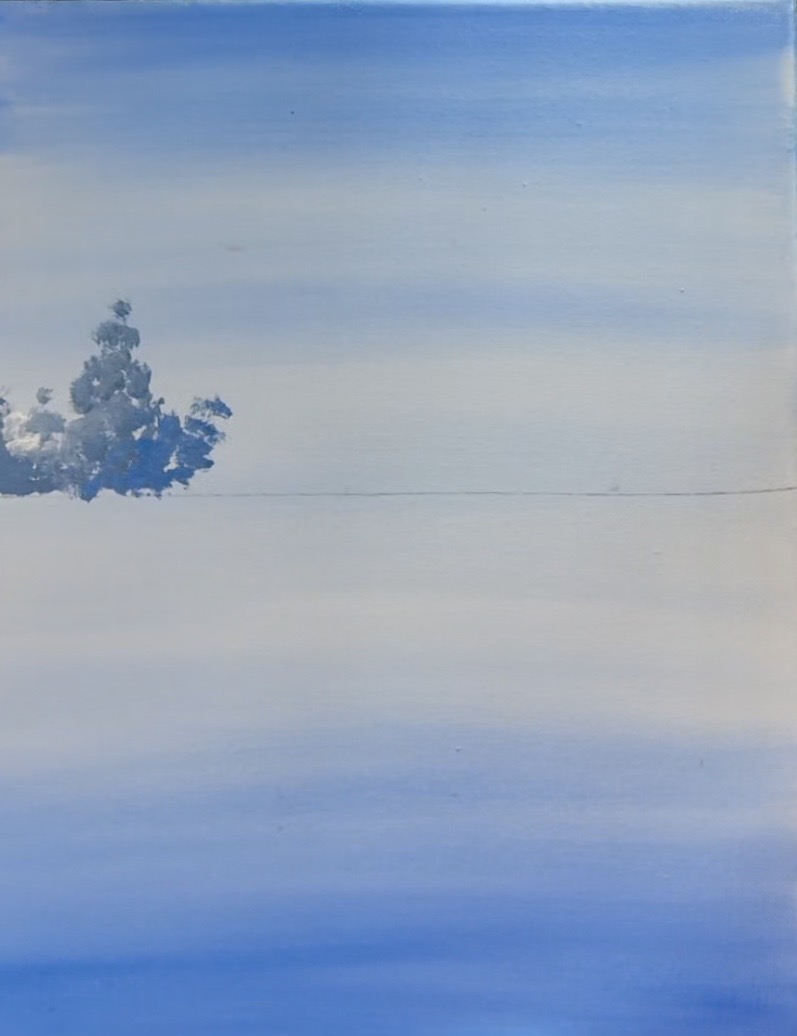
Do this all across the horizon line painting trees of different heights (just the foliage not the trunks). At the top of the tree canopy, blend in extra white so the color becomes softer at the top.
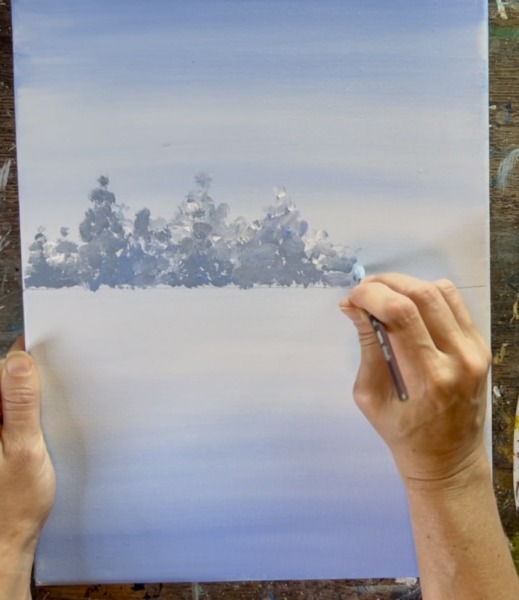
Right now it looks relatively abstract but we will be able to layer on more to the trees in later steps.
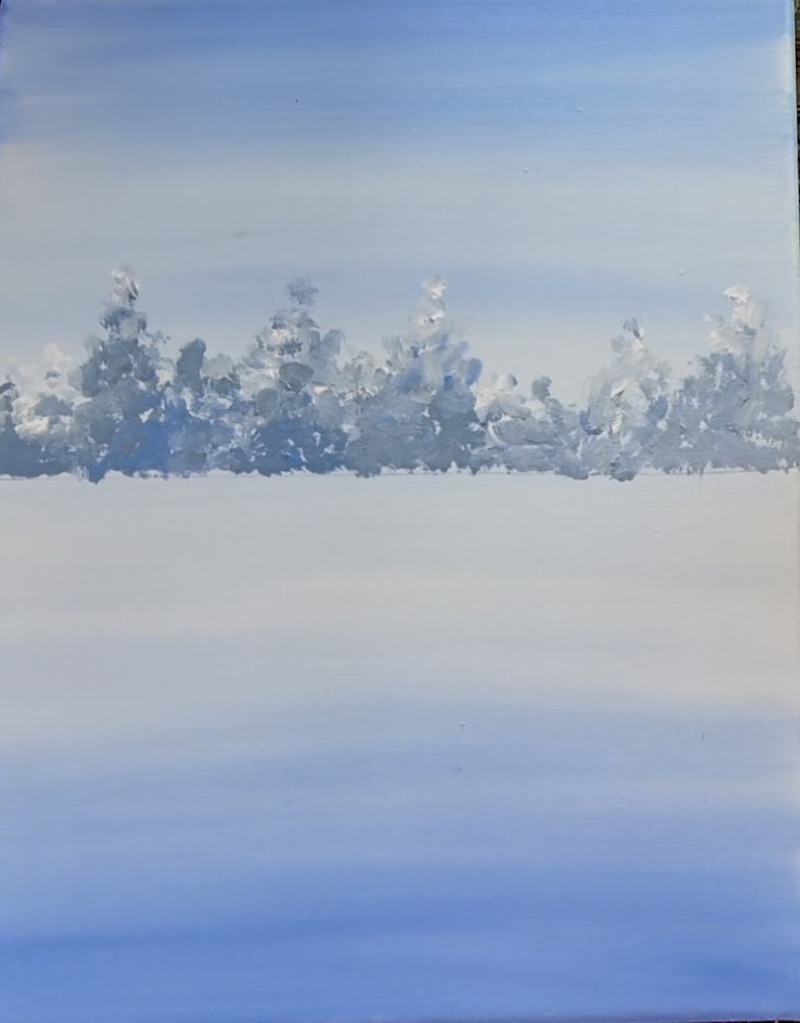
Add just a touch of black to your brush and paint a thin horizontal line across the horizon line. Then paint dark gray blotches just above this line so the bottom of these trees are very dark.
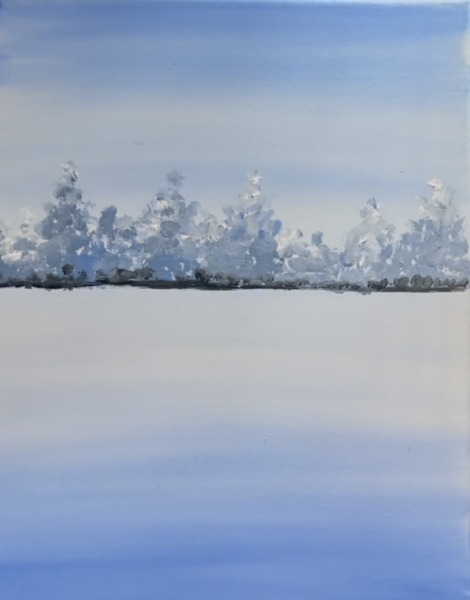
Then use the “light blue violet” and the 1/2″ flat brush to paint loose horizontal lines below the trees for some water reflection lines. Just a few thin, short lines.
3. Land Peninsula On Right
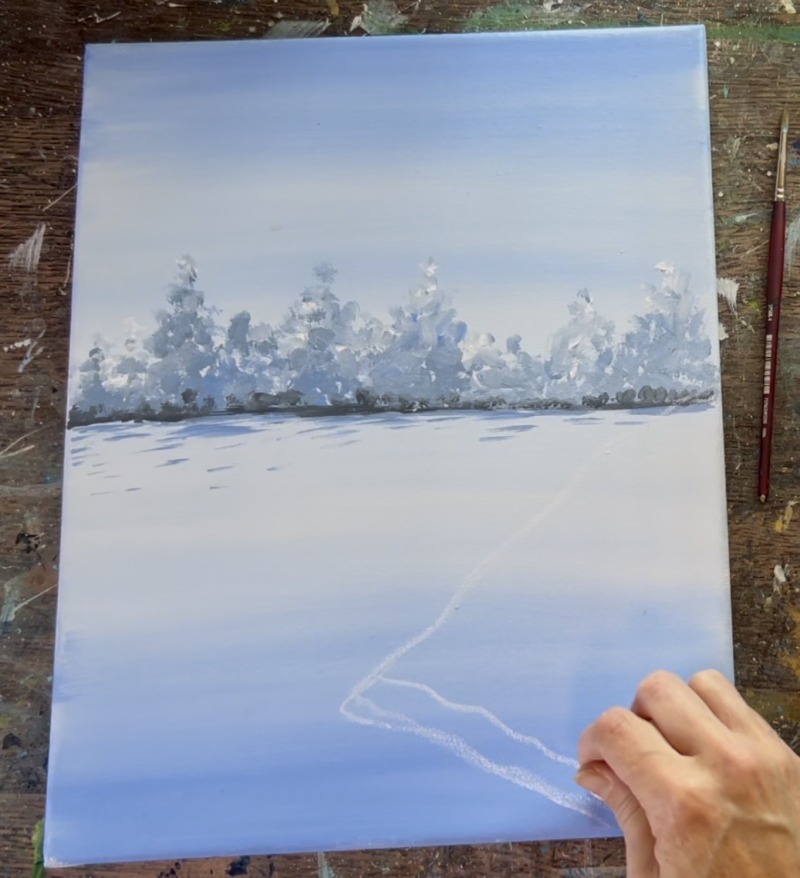
Use a piece of chalk to draw the shape of the peninsula on the right side of the canvas. This shape starts on the right just slightly above the horizon line, goes diagonally toward the left of the canvas and then bends to the lower right corner of the canvas (triangular shape). Draw another line parallel to the bottom of the peninsula for the “bank” that runs along the water.
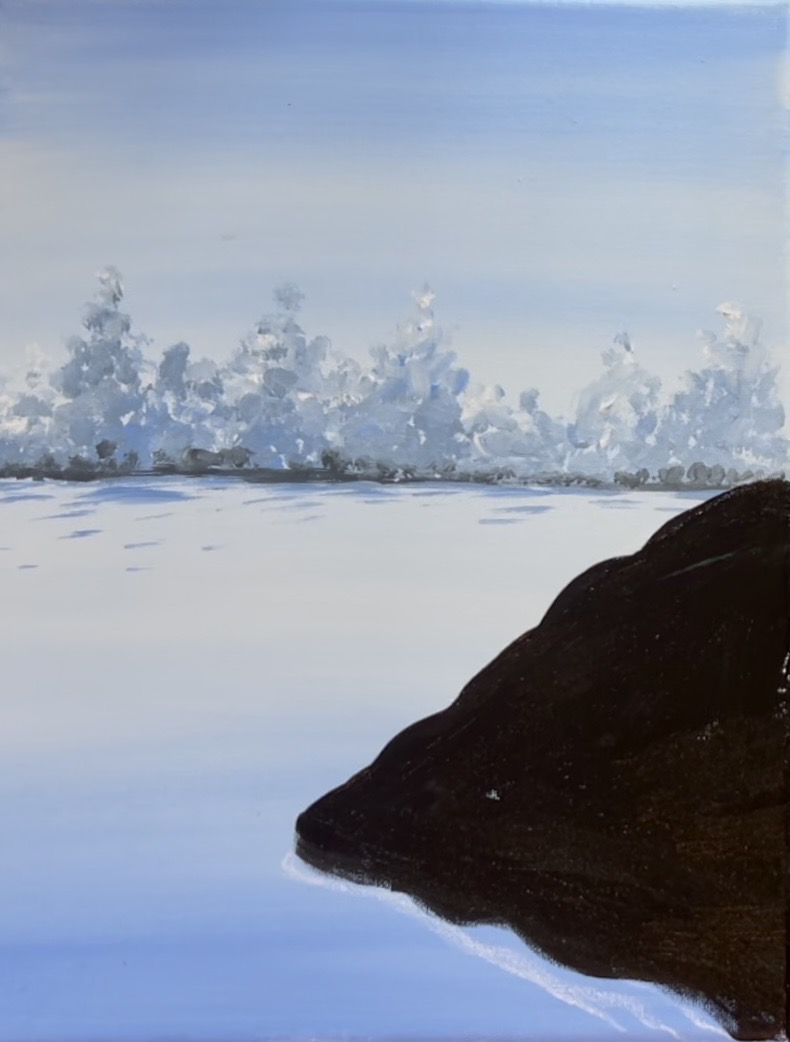
Then use the #12 bright brush and paint the entire peninsula a solid coat of black paint.
4. Tree Trunks In Distant & Colors On Leaves
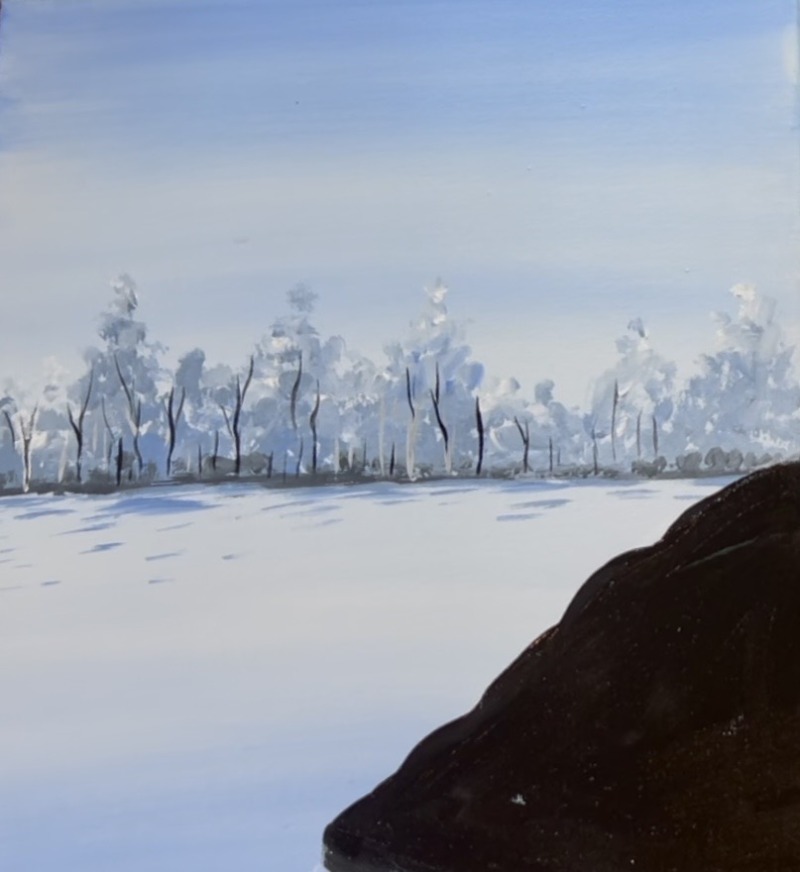
Use the #8 long round brush (the fine point of the brush or a tiny detail brush) to paint the vertical tree lines above the horizon line. Start out using just thinned down black paint and paint little vertical marks. A few of those marks can have branches going diagonally outwards. Then use white to paint a few more vertical tree trunk lines.
Use a #4 round brush to paint green blotches on the trees. Tone the “hooker’s green hue” color down by mixing gray into the green. Then lightly blotch this gray-green color just on the tops of the trees but leave the gray still untouched on the bottom.
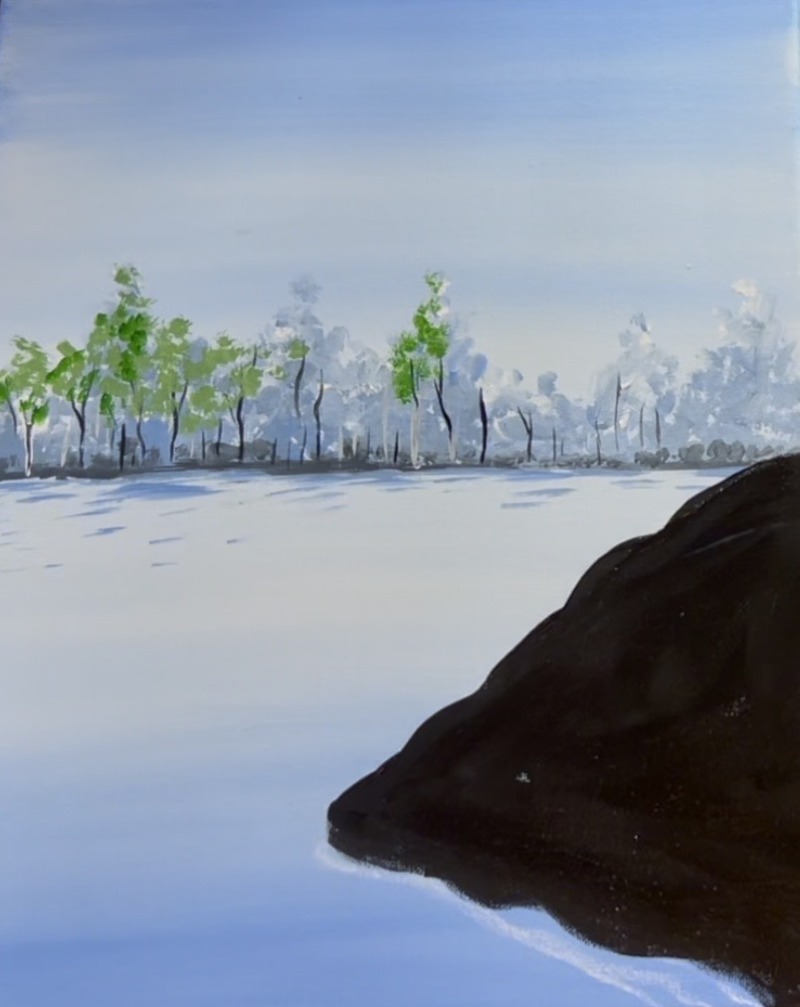
Paint a few of the trees with the green and then transition to yellow. You can start by painting just the pure yellow and lightly blotch just the tops of the trees. Then tone the yellow down with white and/or gray. You don’t want this area to look too bright because it’s further away in the landscape.
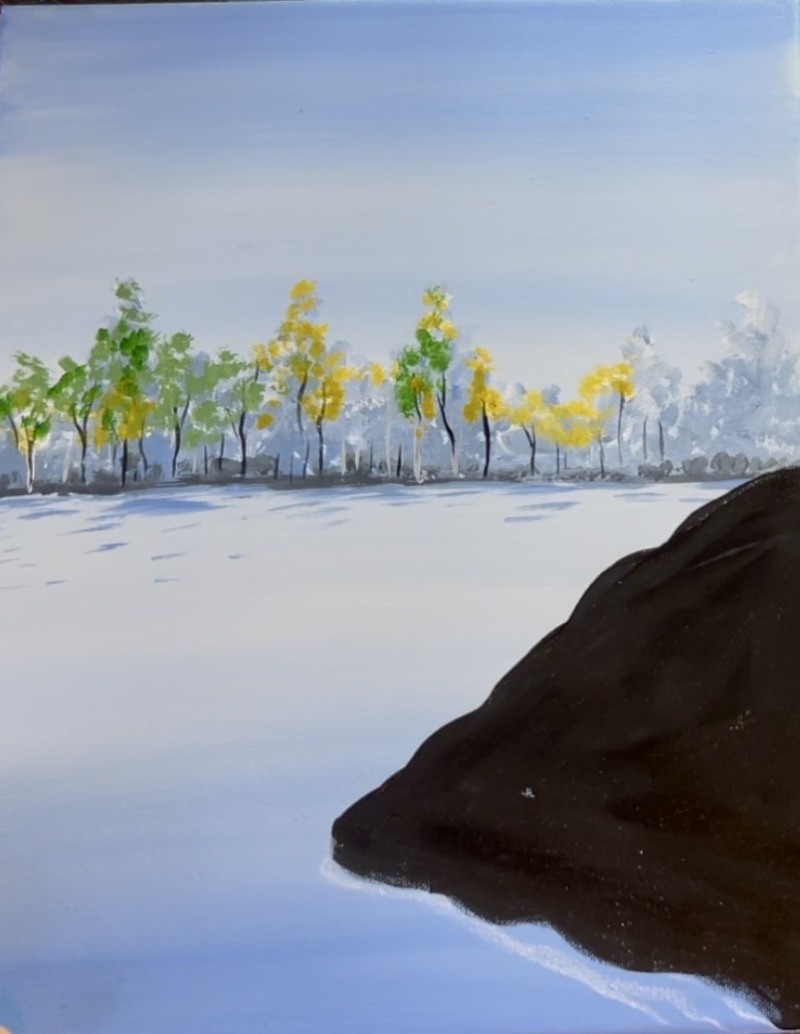
Continue to fill the tree canopy line with color. Add red to your palette and tone the red down with gray and/or white. Then paint red blotches on some of the tree. Repeat this with orange (mix red and yellow to create your orange). Then add more green or other colors as needed. Remember to keep the bottom gray (the tree trunks are covered).
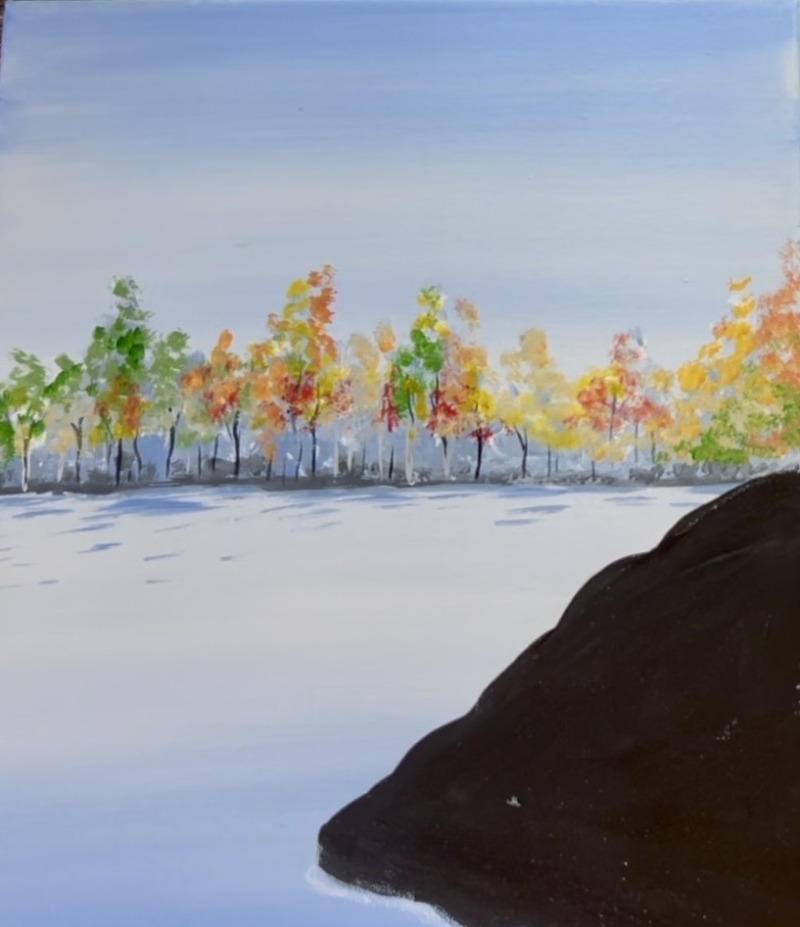
5. Reflections In Water
Use a round brush to paint loose horizontal marks with your colors (reds, yellows, greens). Tone those colors down as well because these reflections are further away.
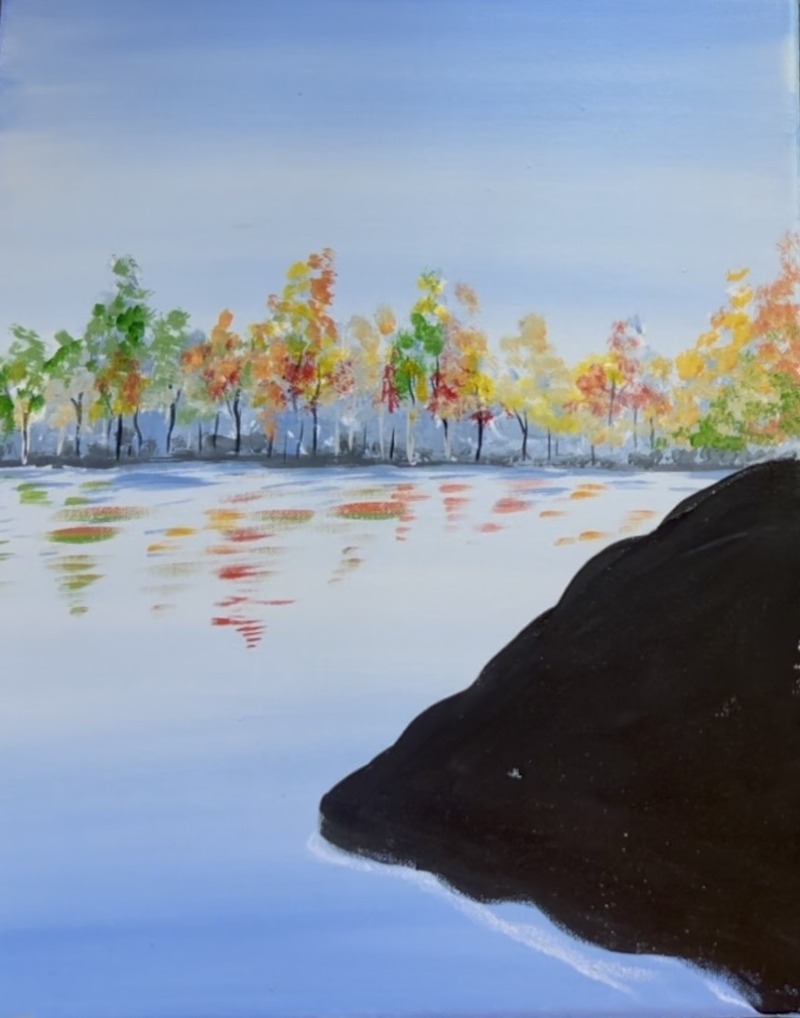
6. Green Detailing On Land Peninsula
Use the 1/2″ flat brush to paint the peninsula land area. Start by loading the brush in just solid green. Paint this area with large chunky brush strokes that go in a diagonal direction. Then, without rinsing the brush, load yellow onto the brush and paint yellow over your green and let it blend a little with the green. Leave the bottom part of the land where it touches the water black.
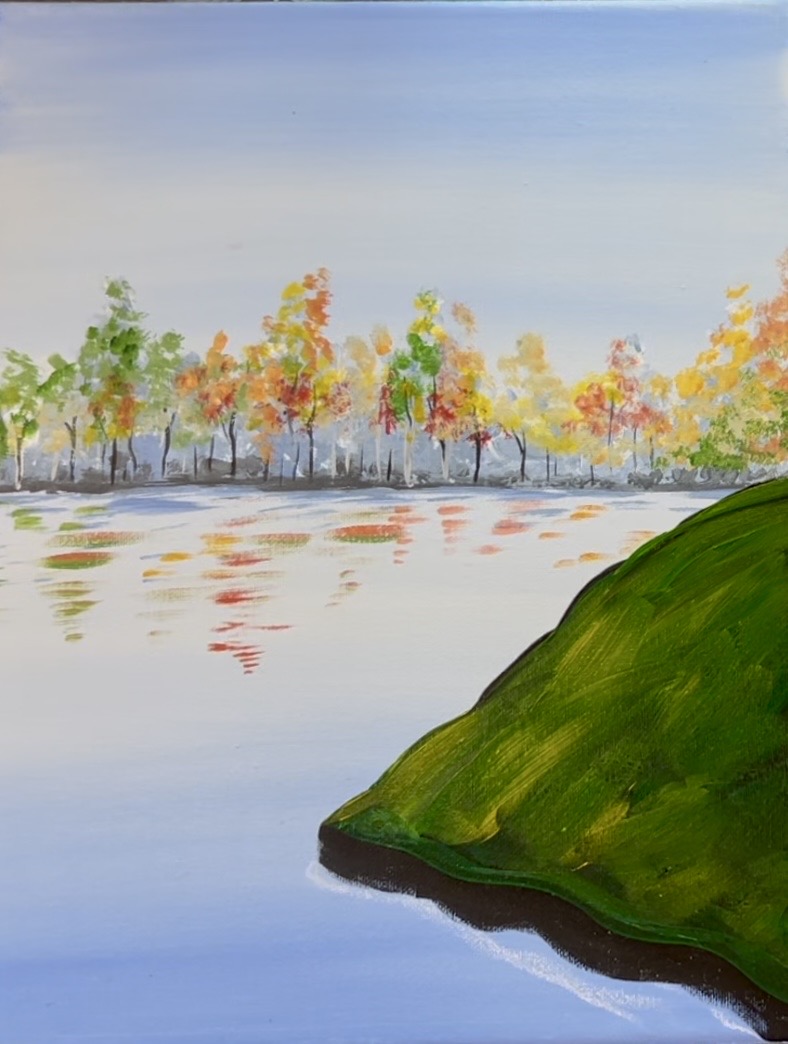
Then use the same 1/2″ flat brush but mix white with yellow and green to make a “yellow-green”. Paint another layer over the land area using large, diagonal chunky brush strokes. The idea is to create texture of grass with these layers of green. Leave some of your dark green still showing through the brush strokes.
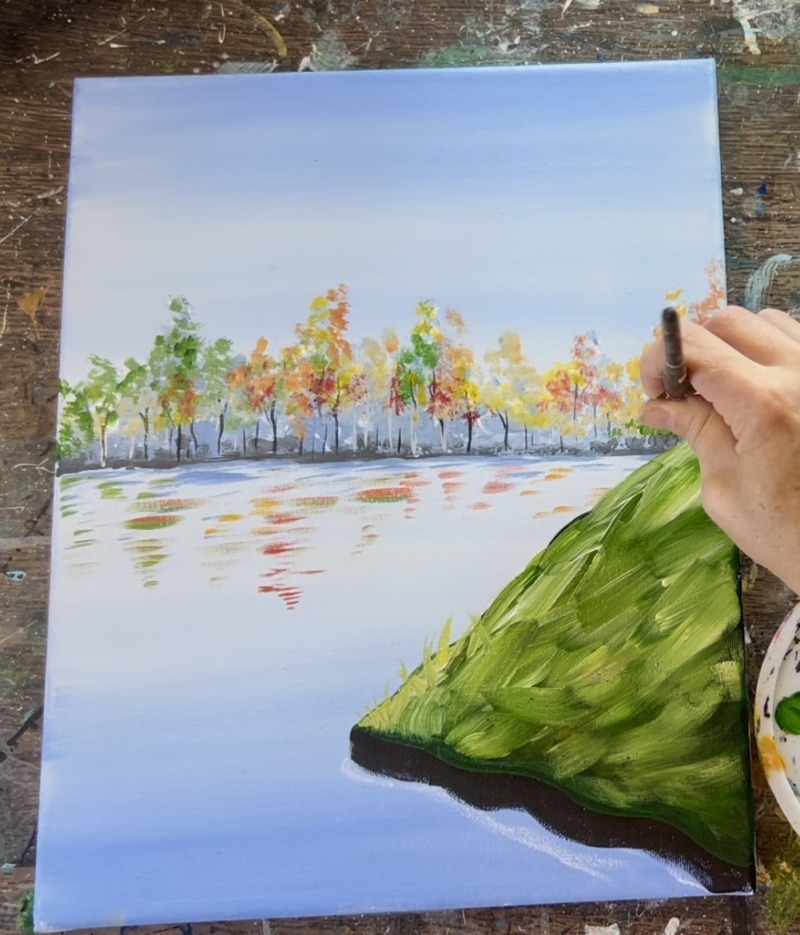
Use a #4 round brush next to paint some grass texture lines using the same yellow-green color. Paint this along the top edge of the land area and brush it outside of the lines. Paint a few more grass lines lower on the hill area, however, you don’t need to fill it all with tiny grass lines because the larger brush strokes still give the impression of a texture grassy area.
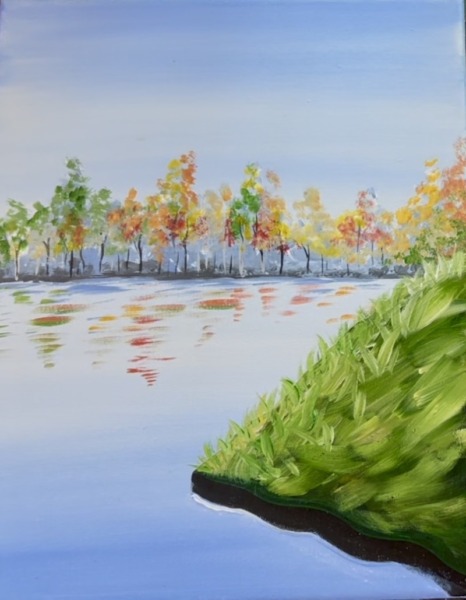
7. Reflections In Water
Use the #12 bright brush and load it into black. Then wipe the brush off. Paint vertical brush strokes below the land area into the water. These vertical brush strokes need to be lighter and more translucent than the actual land area to mimic a reflection in the water. After painting vertical markings, use the #4 round brush and outline the edge of the water line where it meets the land area with white.
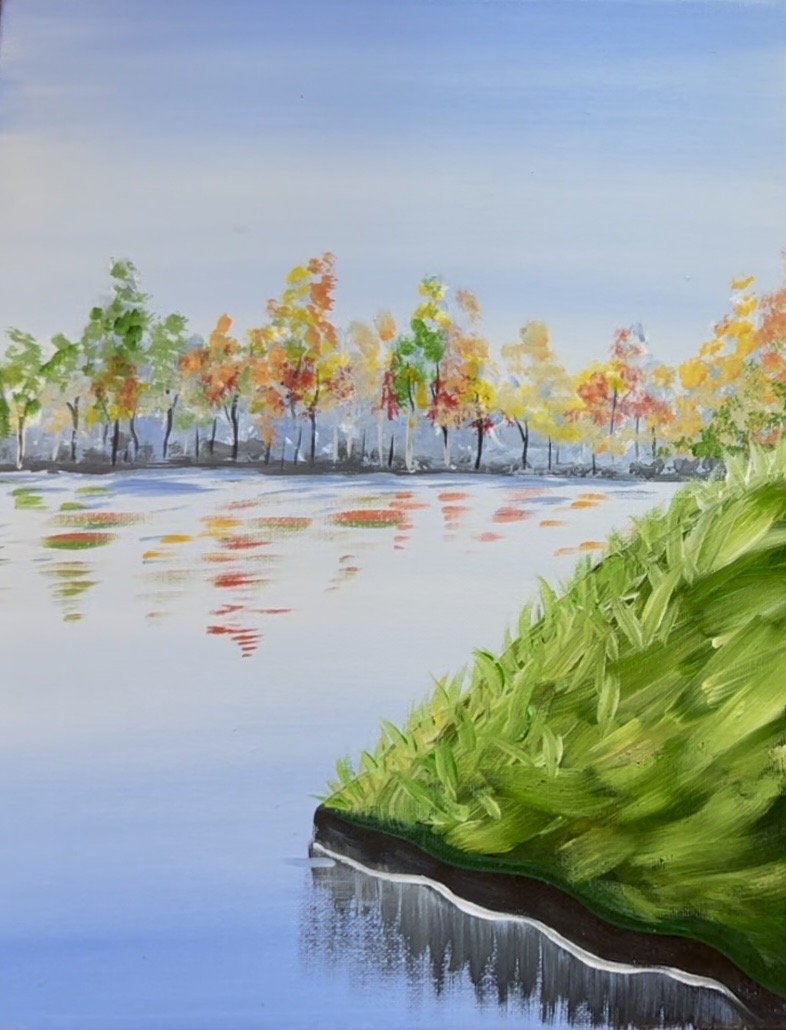
After doing your vertical brush marks and outlining the water line, use the round brush and the same white color plus “light blue violet” to paint thin horizontal water reflection lines going over your vertical lines. Paint more loose, horizontal water lines throughout the entire lake area.
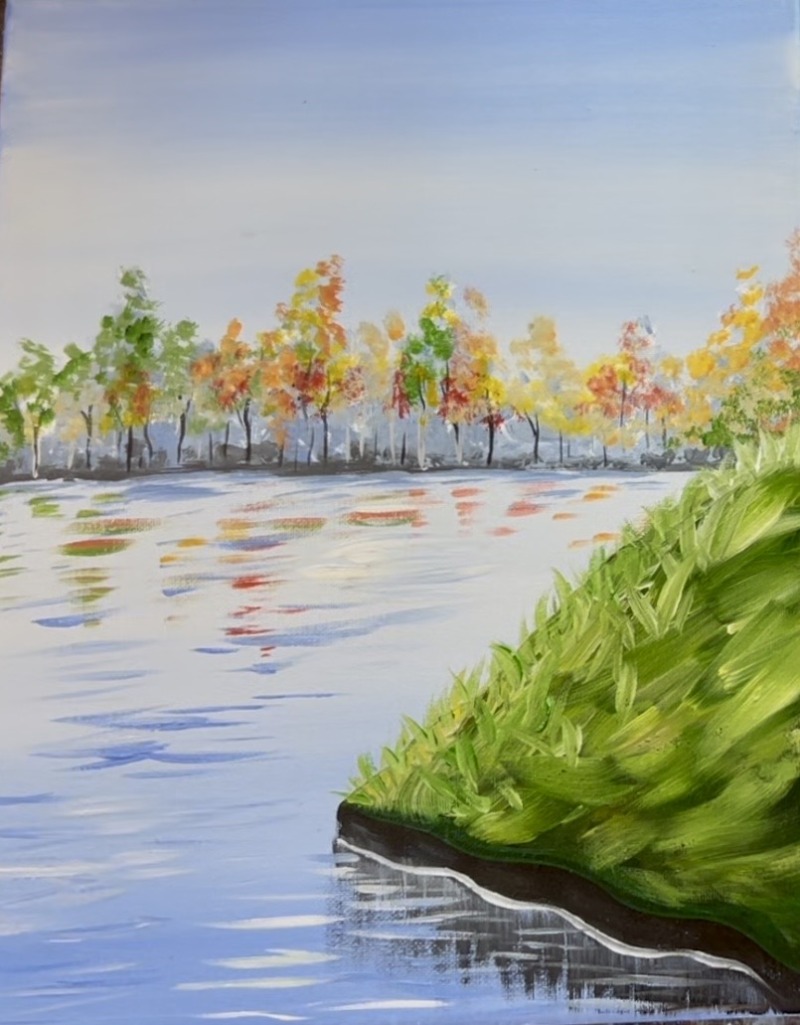
8. Aspen Trees
Use the #12 bright brush (1/2″ flat) to paint a set of aspen tree trunks with white. Paint the trunks so they “flute out” slightly on the bottom, become narrower towards the top and then off the edge of the canvas. The tree on the right, I painted slightly going diagonal to the right and off the top right corner of the canvas.
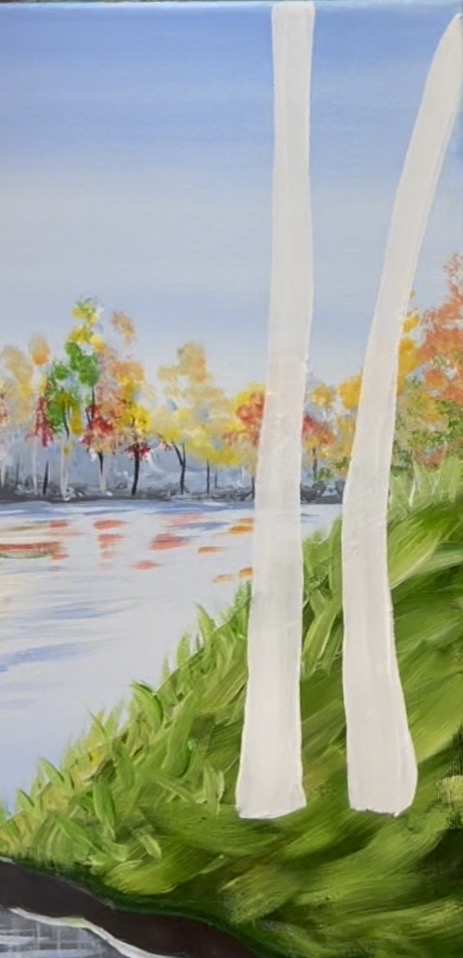
After painting the trunks, use the #8 long round brush (or tiny detail brush) to paint branch lines on the edges of the trunks. These branch lines go diagonally up and become pointed on the end. Paint one large branch that bends down towards the surface of the lake.
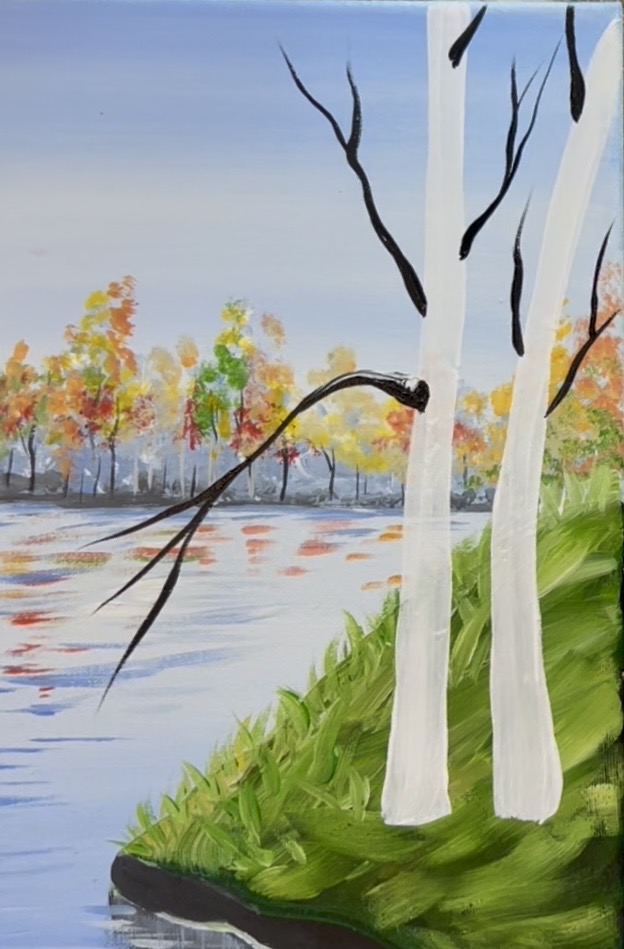
Next, paint a second coat of white paint on the trunks of the aspens using the 1/2″ flat brush (12 bright). This time, instead of painting the trunk using vertical brush strokes, use the full width of the brush to paint horizontal (slightly curved) brush marks up the trunk of the tree. This gives the trunk a little bit more “dimension”. This second coat of paint should also cover any paint colors showing through. Then, use the same brush and white paint to “dry brush” vertical paint strokes below the trunks of the trees into the water for more reflection.
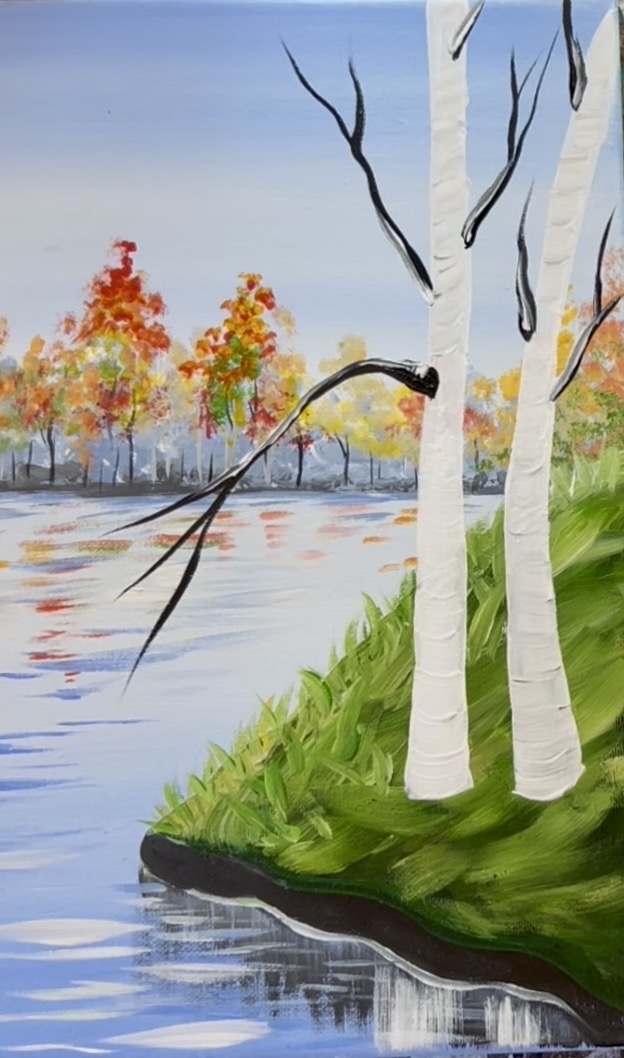
While this layer on the tree trunks dry, add more tree branches/ trunks in the distance. Use white to paint some taller trunks where some of the taller tree foliage is. You can even paint some vertical light reflection lines in the water beneath these trees. In addition to adding taller tree trunks, use your reds, yellows and/or greens on your paint palette to add more layers to the taller trees. Just a little more pop of color is all that is needed! Remember to keep a lot of the gray and “muted colors”.
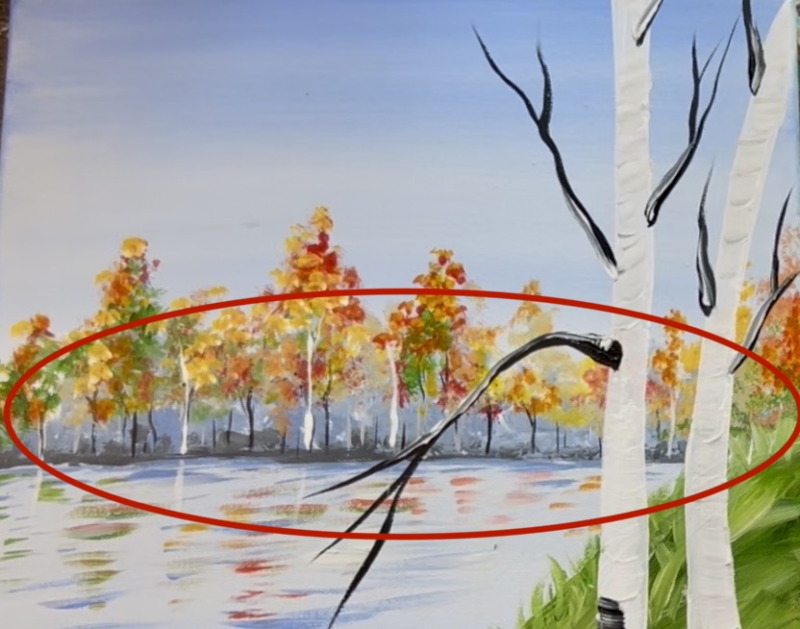
Next, make the dark markings on the aspen trees. Use a #12 bright brush and load into black but wipe off excess paint. Then “dry brush” the marks using the full width of the brush in horizontal directions all up the tree trunks. You can also use a round brush to paint little “eye” shapes with the black.
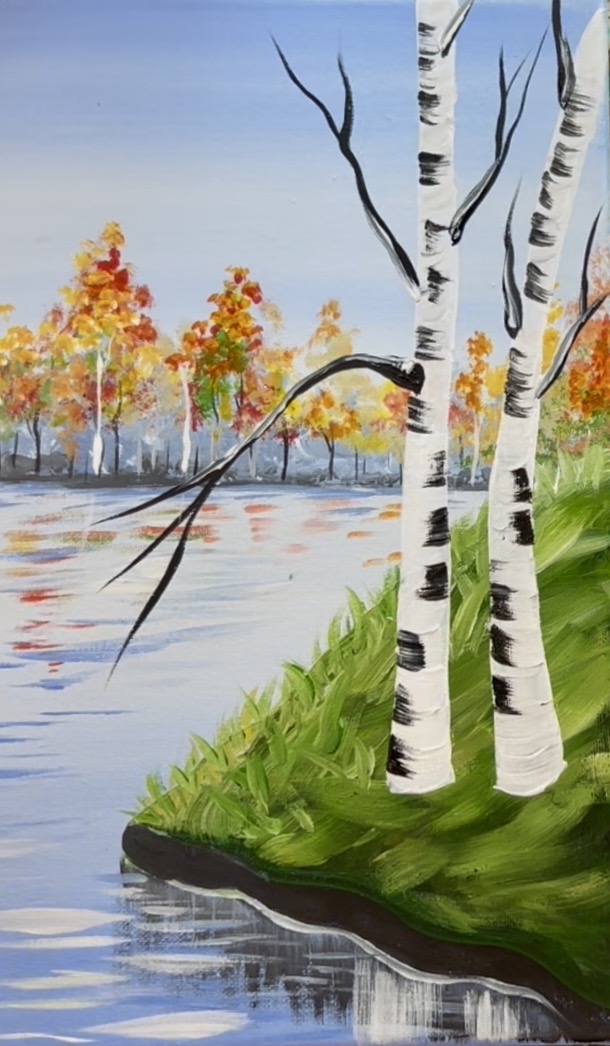
Then use the round brush to paint the leaves. Aspen trees have rounded leaves so you can do this very easily by dotting rounded, thick brush marks with your colors. Start with the yellow and paint a variety of thick round markings on the edges of the branches.
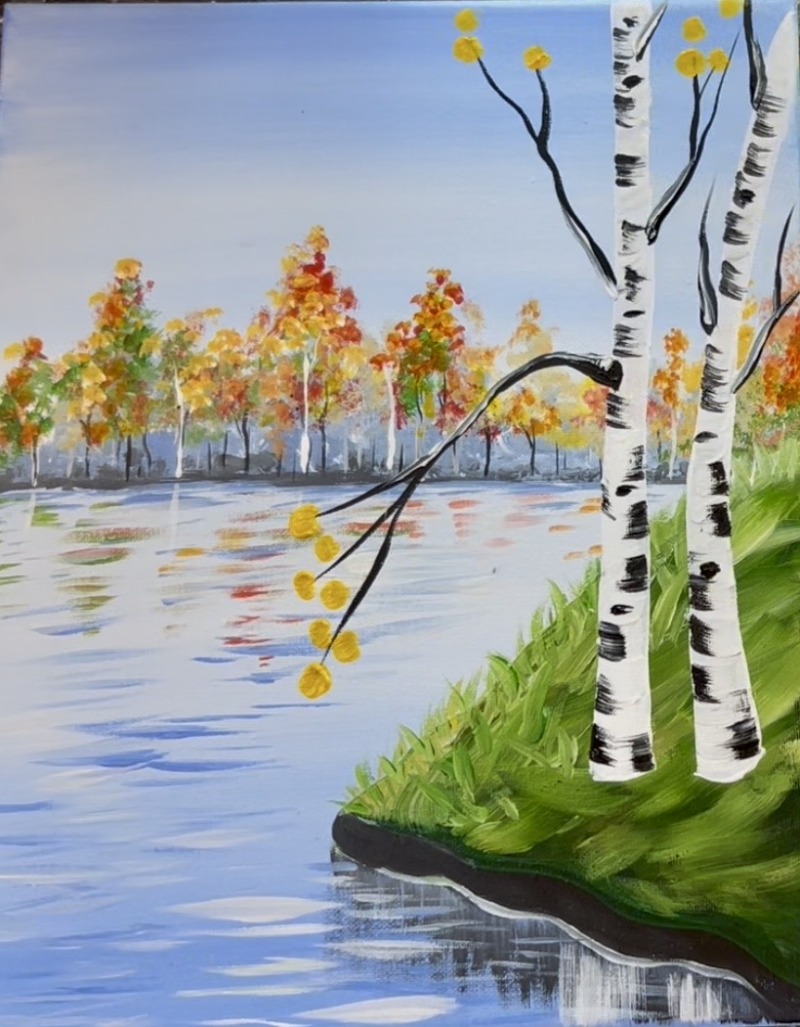
Then incorporate green and white into your colors. Since we are capturing the moment when the leaves start to turn, paint some of the leaves yellow-green and dark green.
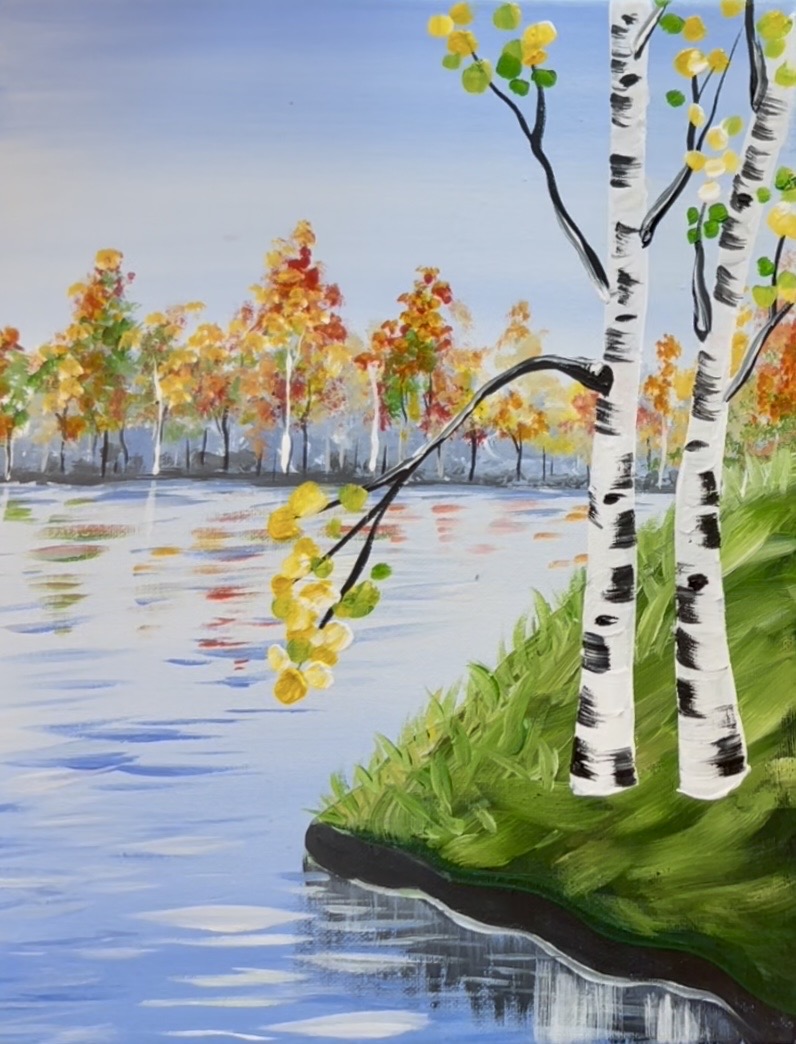
Mix some of your white with yellow too!
9. Final Details
There are a lot of final touches you can do to this landscape painting!
- Add more leaves on the aspen trees.
- Paint dark grass lines that overlap the bottom trunks of each of the aspen trees.
- Paint yellow horizontal reflection marks in the water especially below the large branch hanging down in the front (my favorite touch!).
- Mix a dark brown on your palette (mix red and green together) and paint some blotches of dark brown all along the horizon line on the base of the trees in the background. This makes that area just slightly darker and defines the water line/horizon line a bit better.
- Paint some leaves fallen on the ground next to the aspen trees and/or some leaves floating in the water.