
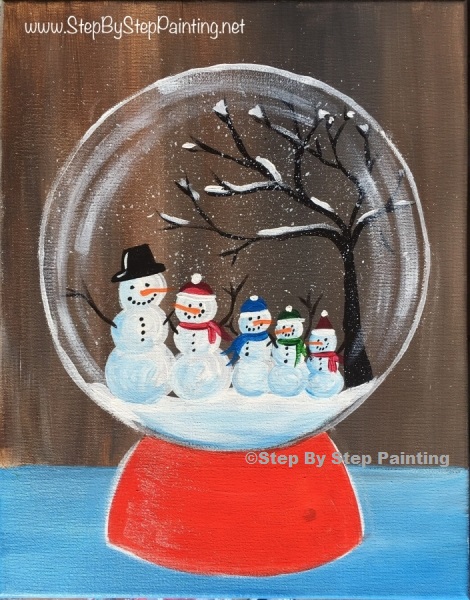
How To Paint A Snow Globe
Hi friends! I am going to show you how to paint an easy snow globe on stretched canvas with acrylics!
This is one of those customizeable paintings. Not only can you change the colors but you get to customize your snowman family & name as well!
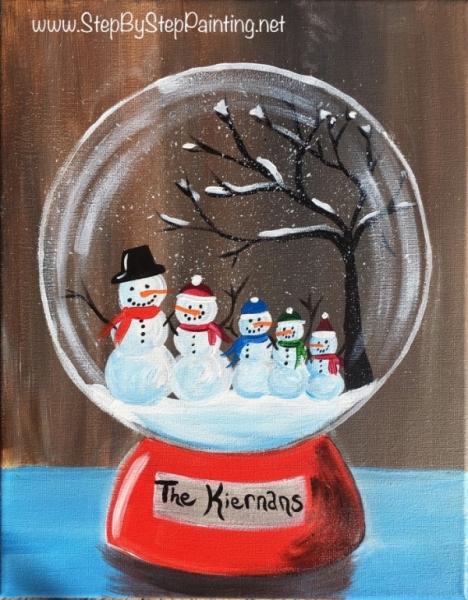
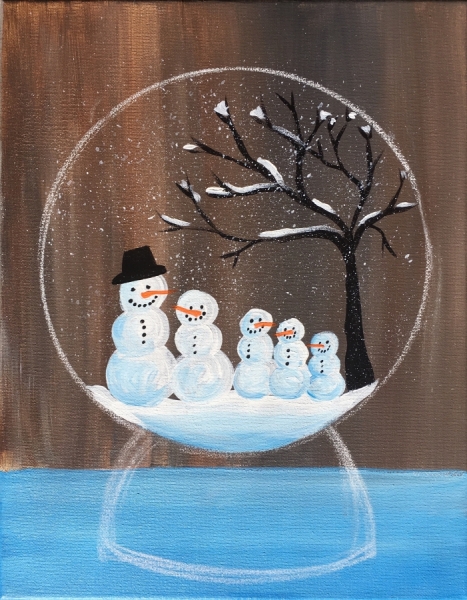
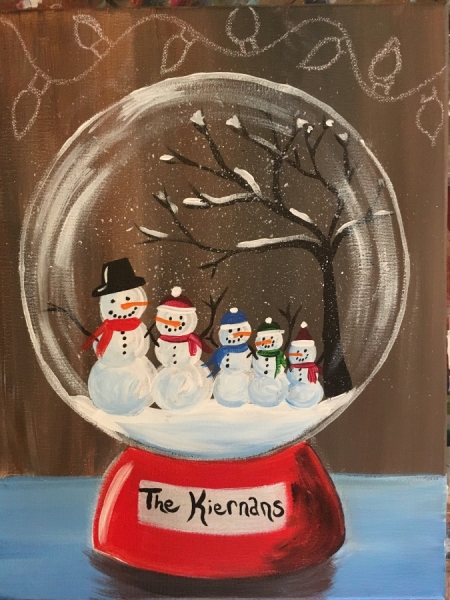
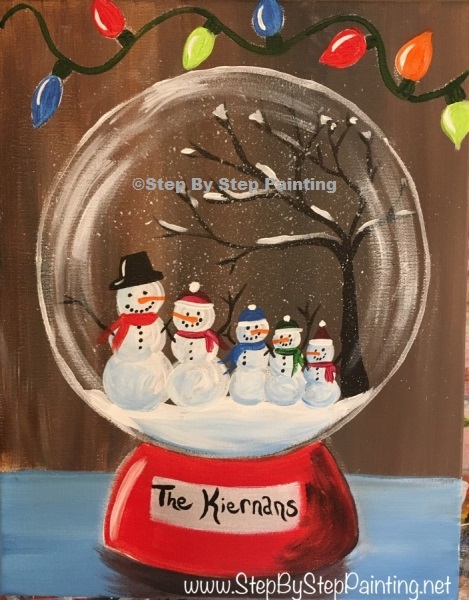
My snow globe includes a family of five snowmen each to represent my own family – my husband and my three boys.
I also added our family name on the snow globe name plate. You get to change this snow globe to represent your snow tribe!
Let’s talk about that globe/ glass illusion. Don’t let it intimidate you because the effect is so easy and simple. I used the “dry brush” technique to do it!
That circle was traced with a paper plate.
Enjoy and happy painting!
Materials
How To Paint A Snow Globe

Learn how to paint an adorable snowman family in a snow globe! This step by step tutorial is for the beginner!
Materials
- 11" x 14" Canvas
- Acrylic Paint
- White Chalk
- 9" Paper Plate For Tracing Circle
- White Graphite Transfer Paper (only if you're using the traceable)
- T Square Ruler
- Paper Towel
Colors
- Alizaron Crimson Hue Permanent
- Cad Red Medium
- Cad Orange Hue
- Hooker's Green
- Cerulean Blue
- Burnt Umber
- Titanium White
- Mars Black
- Gold or silver for name plate
Brush Sizes
- 3/4" Flat
- #4 Bright
- #4 Round
- 10/0 Liner or 0 Round
- Toothbrush
Color Palette: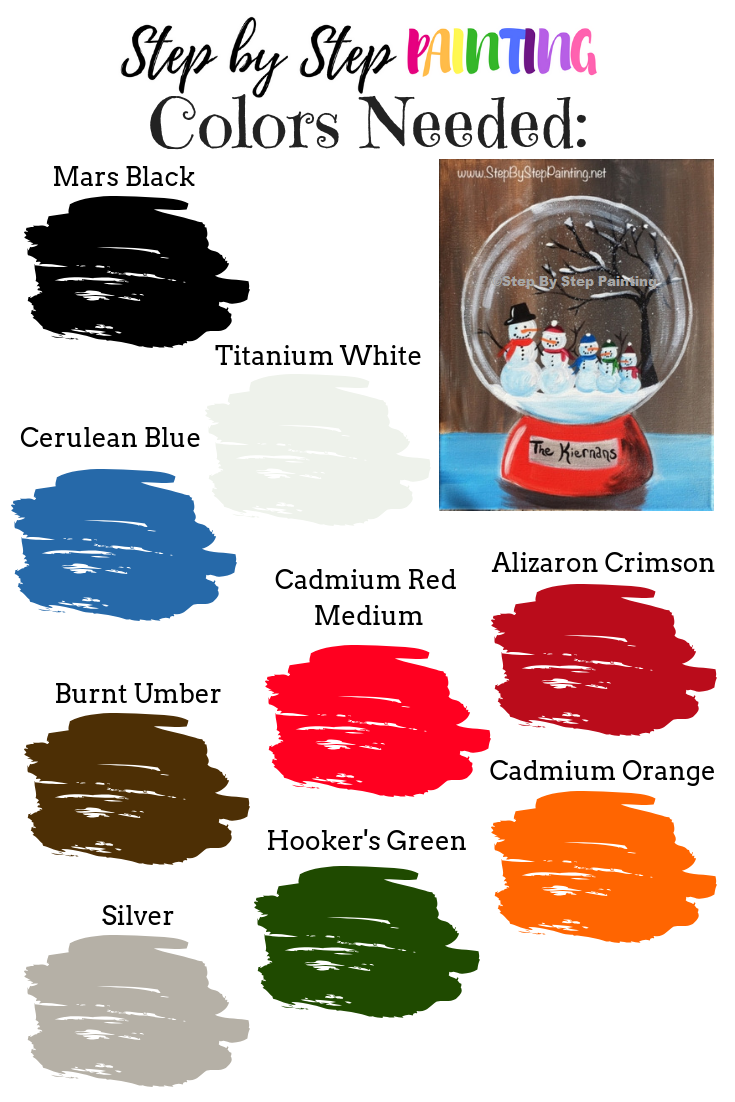

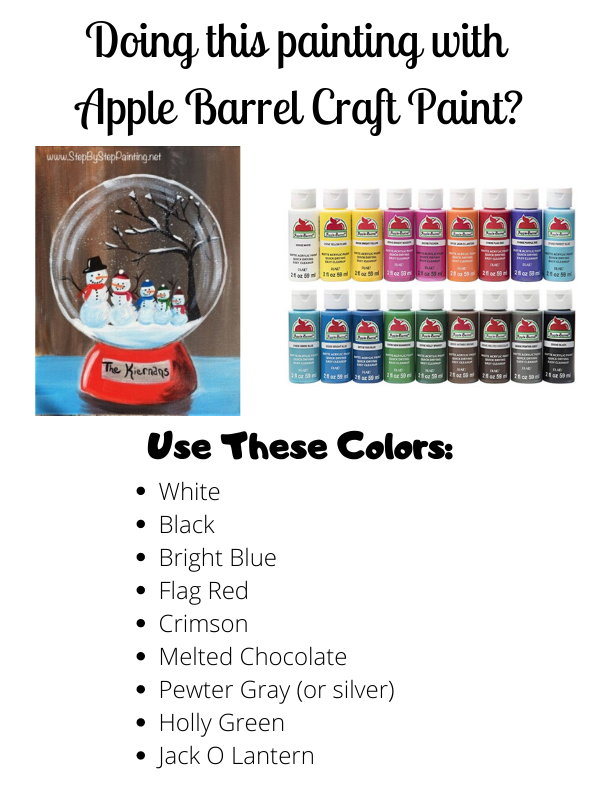
Craft Paint Color Suggestions:
Would you like to save this?
If you want to do this painting with the Apple Barrels, see my chart below for suggested color conversions.
Directions At A Glance: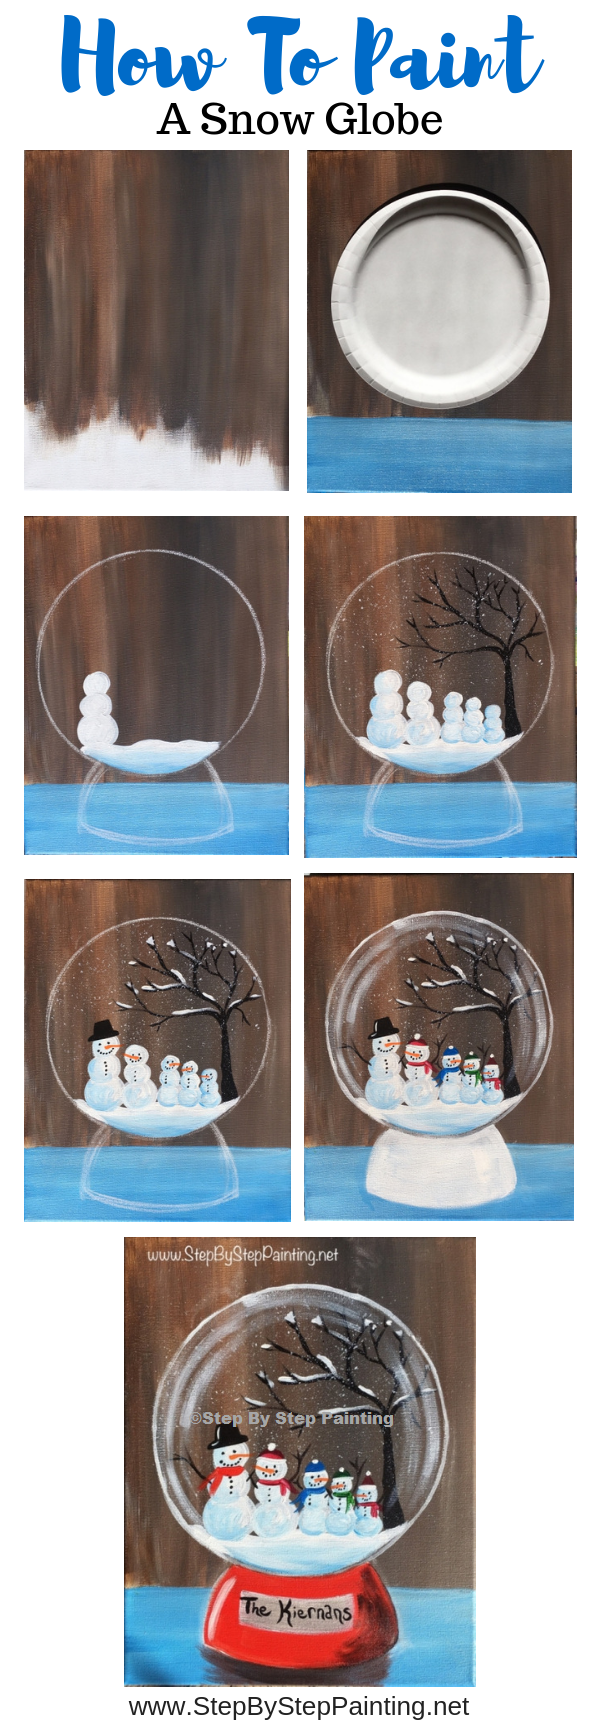

Video
Step By Step Directions
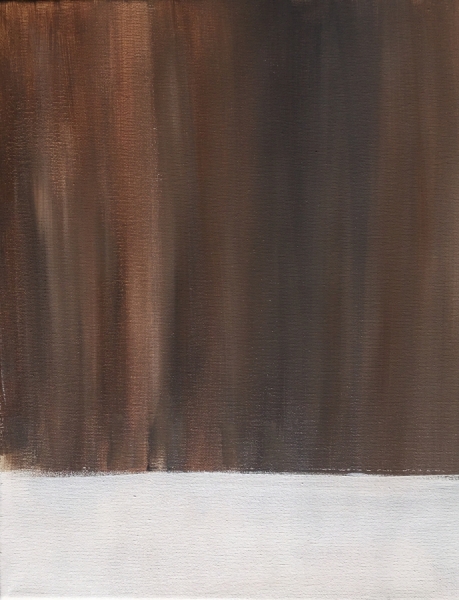
1. Paint the faux wood background
You’ll need the colors: titanium white, burnt umber and mars black.
This combination will create that dark wood background. Also needed is your 3/4″ flat brush.
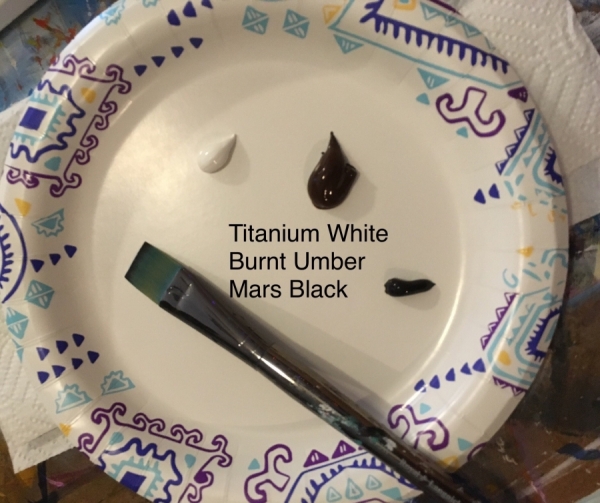
Dip your brush in the burnt umber. Then dip the corners in titanium white and mars black.

Drag the paint out a little on your palette to test how this will look on the canvas.
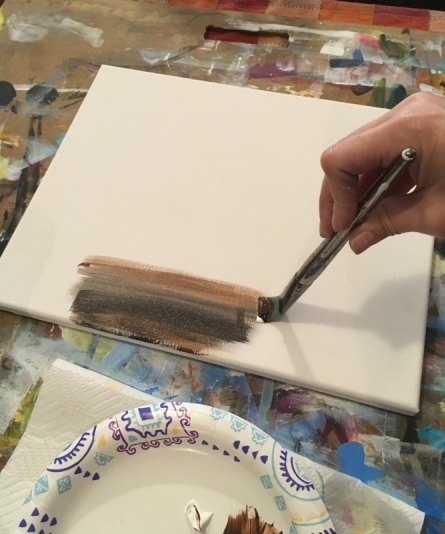
Paint up and down strokes on your canvas. The colors will blend together to create a dark brown washed wood look.
Don’t let the colors mix all the way. Allow them to blend smoothly.
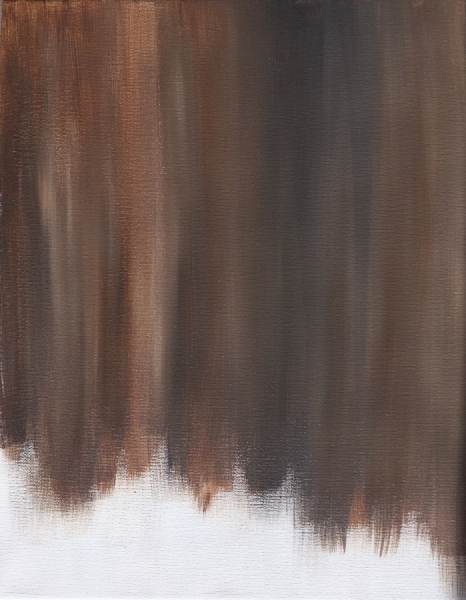
Make sure your strokes are nice and long with no harsh brush marks showing.
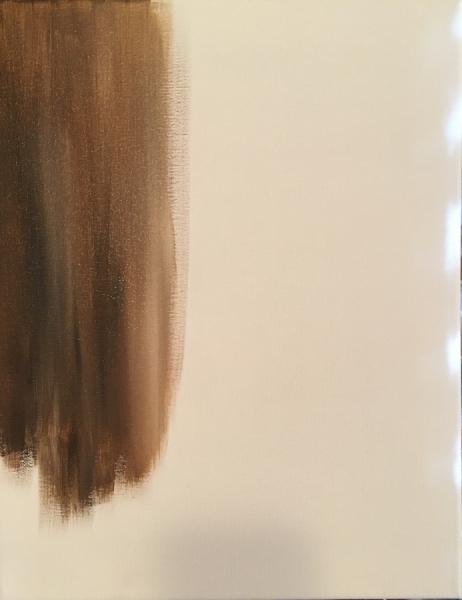
As you go to reload your brush, dip it in the same combo but you may want a little more white in some areas and a little more black in others to get that inconsistent look.
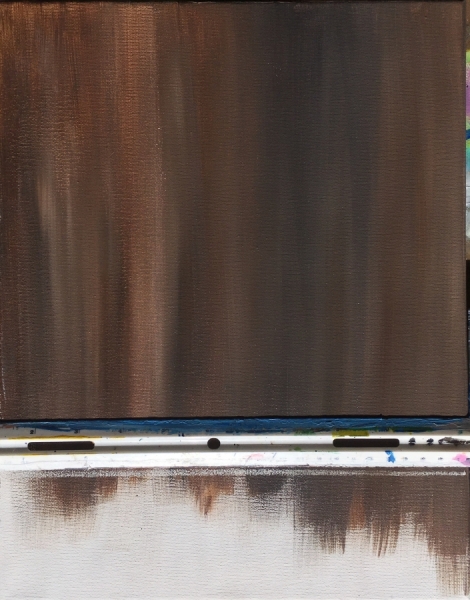
Leave a little it of a gap on the bottom of the canvas (about 3-4 inches).
I did not divide my wood up into three panels.
I think it’s a possibility if you like that look but I was going for more of a simple background since the focus will be on the snow globe.
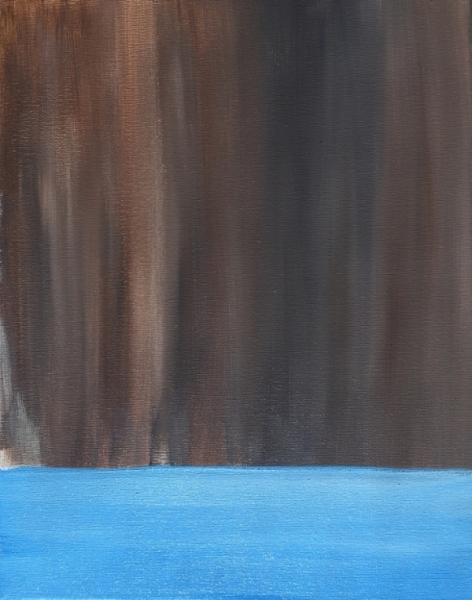
2. Paint the table/ground white then cerulean blue.
Use a T-square ruler and a piece of chalk to draw out a horizontal line to define the “table or ground line”.
This line was approximate, I did not measure it. I’d say it was about 4 inches from the bottom.
Then use a 3/4″ wash brush and titanium white to fill in the entire bottom area. The titanium white should cover up any of that brown.
Then paint the area with cerulean blue. I did not wait until that white dried all the way so my blue turned lighter.

This wasn’t a big deal, I kind of liked the look of the mixed blue with the white!
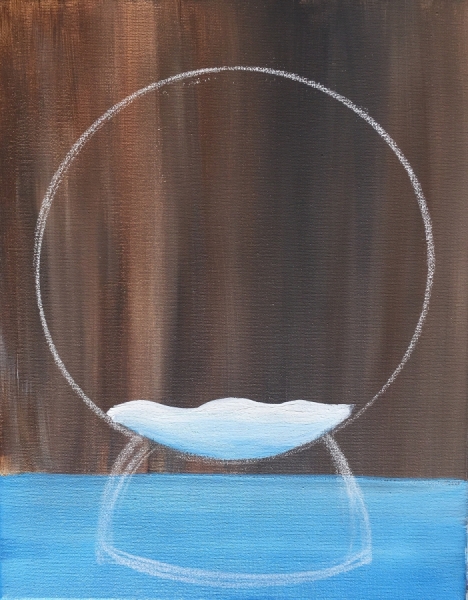
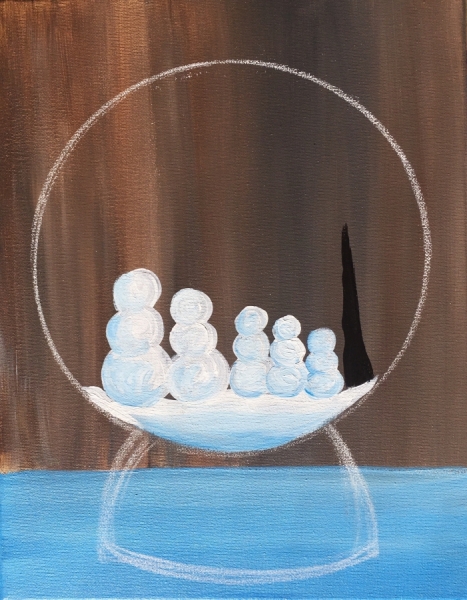
3. Trace a 9″ paper plate with chalk
Position the plate so that it is above the blue area with a little bit of a gap.
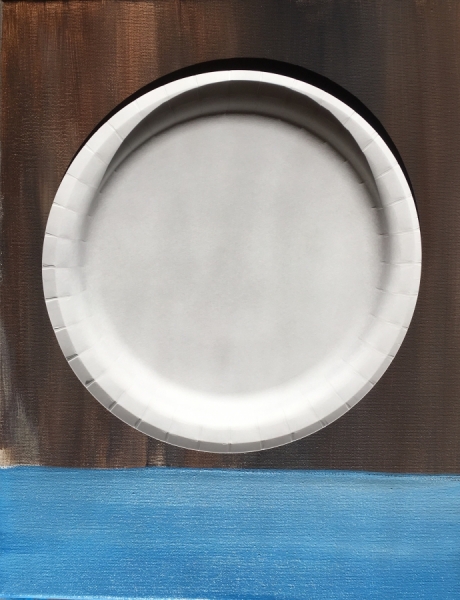
Center it in the middle of the canvas. Then trace the plate with a piece of chalk.
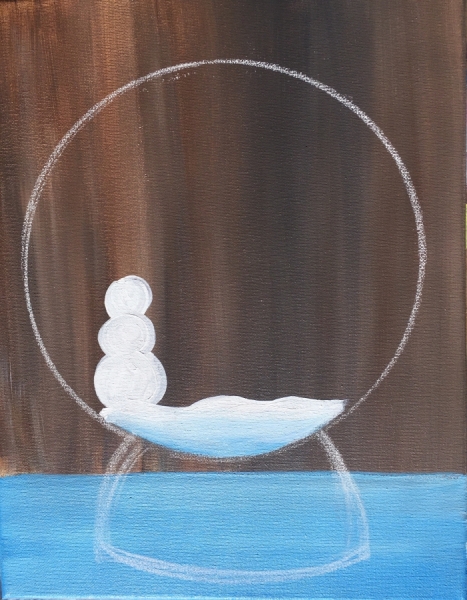
4. Draw the base of the snow globe with chalk
Sketch out the base of the snow globe using your chalk. It’s basically two curved lines on the left and right with a curved base.
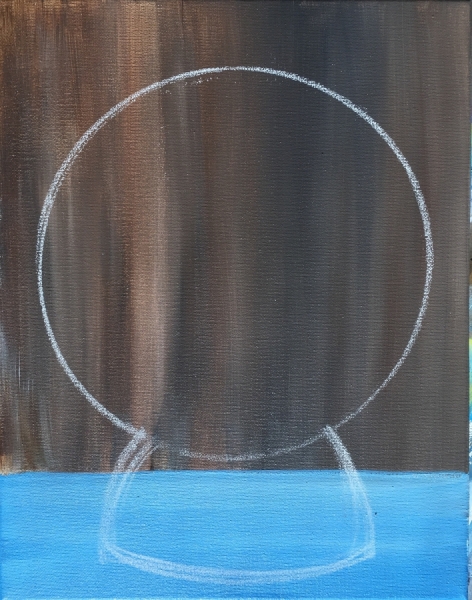
Remember that chalk can erase on canvas with a wet finger or wet paint brush if you mess up!
5; Paint the snow on the ground of globe and snowmen
Use a #4 round (or any medium size round brush) and titanium white to paint snow on the bottom of the globe.
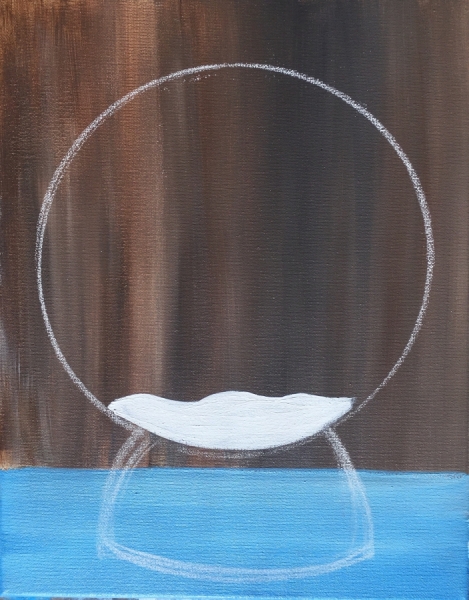
Then add a tiny bit of cerulean blue to the tip of your brush (not rinsed, it still has white on it).
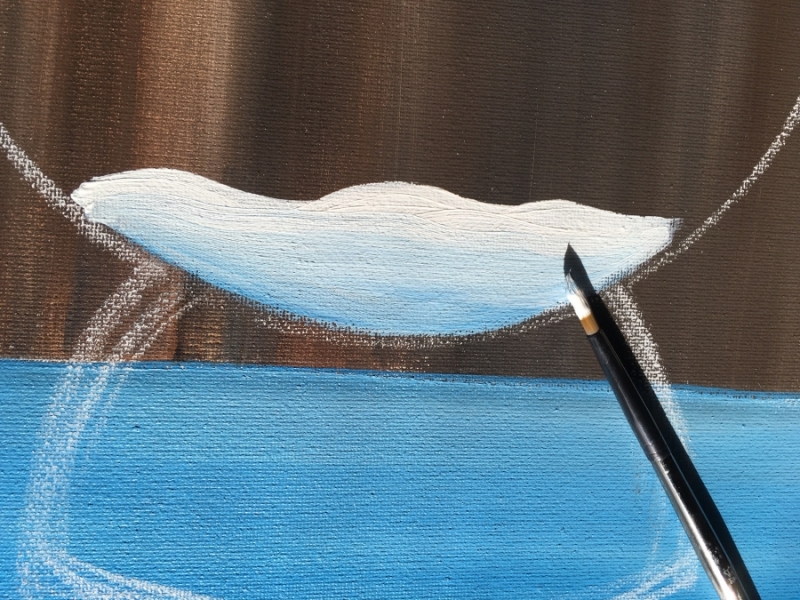
Paint that cerulean blue on the bottom of the snow and blend it up. The snow should be lightest on the top and gradually blend to cerulean blue on the bottom.
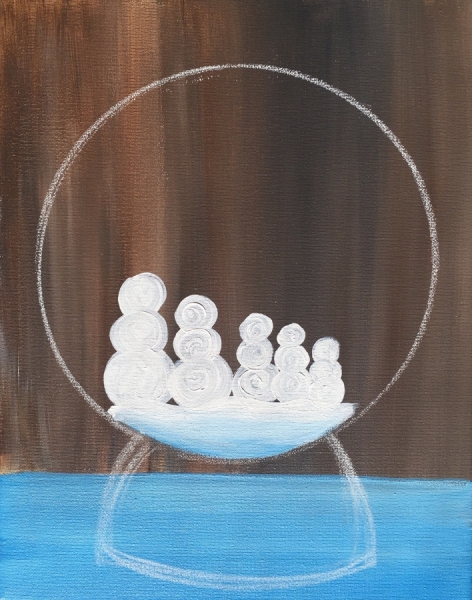
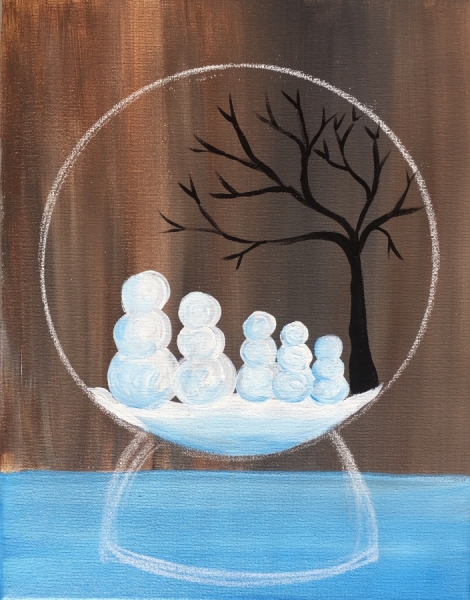
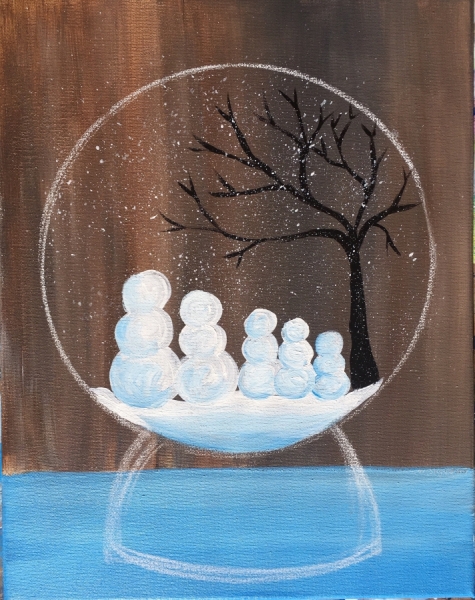
6. Paint the snowmen
Use a #4 round brush and titanium white to paint the snowmen.
When you paint your snowmen, start with the bottom circle and work your way to the top.
I did five snowmen for each member of my family.
You may be doing a different amount so you may need to space them differently.
Leave a little bit of room on the right if you are doing a tree.
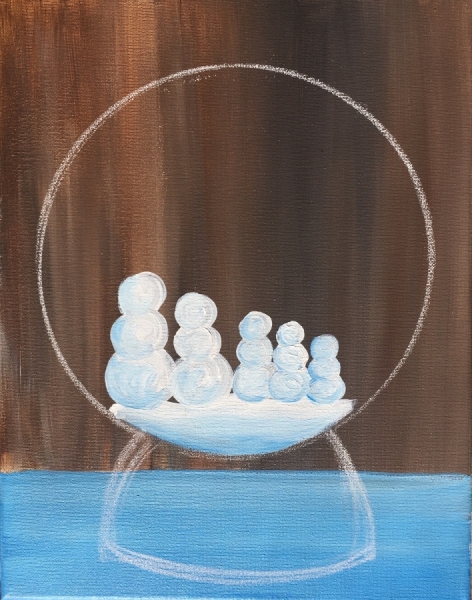
To add shading to the snowmen, dip the tip of your brush in a little bit of cerulean blue (while the brush still has white on it) then paint on the bottom and left sides of all the circles.
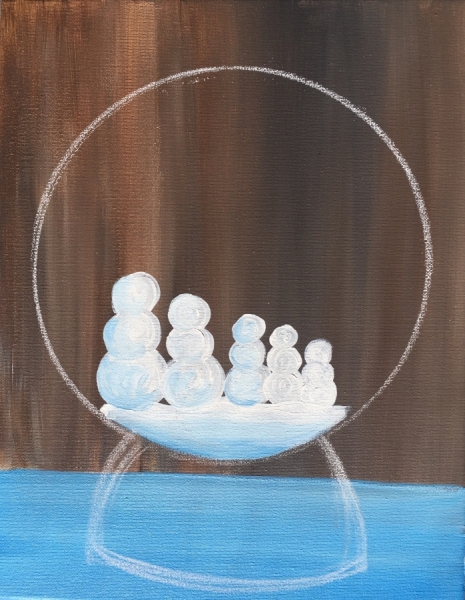
Always start at the bottom circle and work your way up so the circles will overlap each other.
7. Paint the tree
Use mars black and the #4 round brush.
Start with the trunk and paint a thick base that gets thinner towards the top.
Then paint the branches stemming out from this tree trunk. Each branch stems out like the letter “Y”.
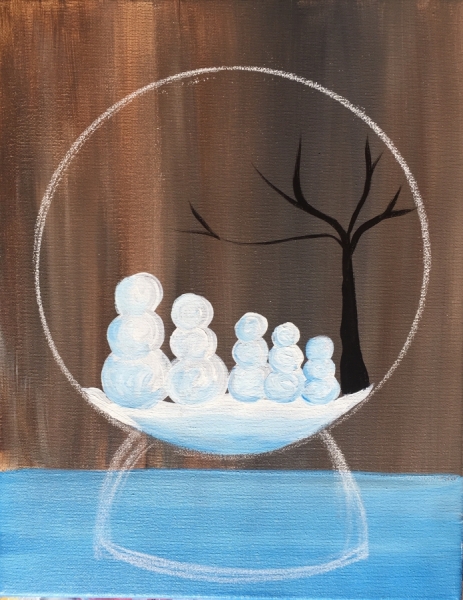
At this point you may want to switch to a 10/0 liner brush or a #0 round brush to get the smaller branches.
8. Splatter on snow with an old toothbrush
To splatter the snow, use a toothbrush. Wet the brush a little and pat dry and dip it in the titanium white.
You want it “ink consistency”.
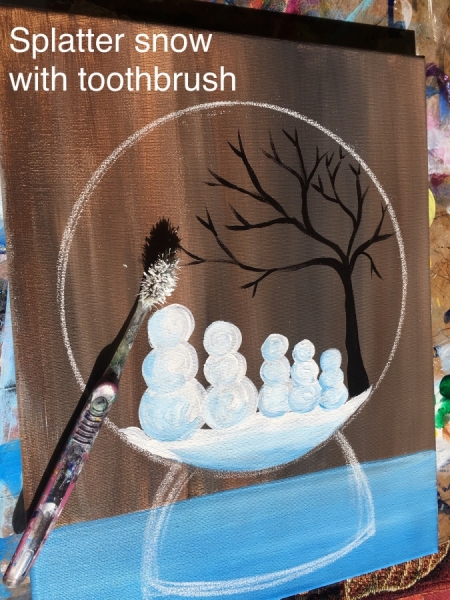
It shouldn’t be dripping but it shouldn’t be thick either.
Try not to get the splatters outside of the globe.
If you do, keep a damp paper towel handy so that you can quickly wipe off any excess splatters that go out side the globe.
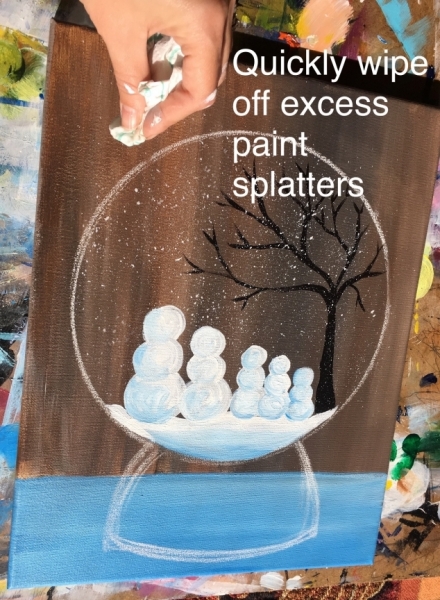
Don’t fret if it doesn’t come off! Mine didn’t all the way and it’s not noticeable in the end.
9. Paint snow in the tree
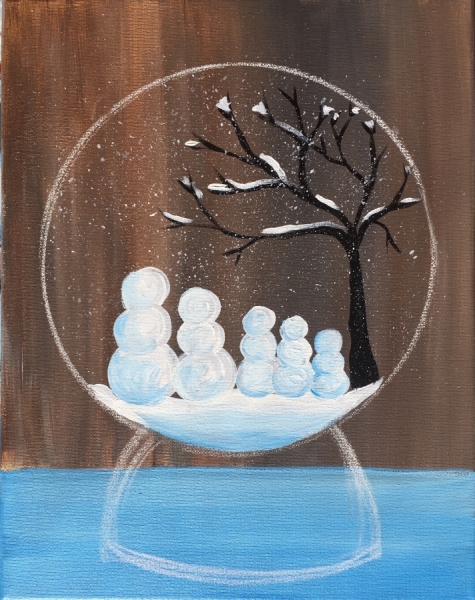
Use your #4 round brush to paint titanium white globs of snow on some of the tree branches.
10. Decorate your snowmen
I started with mars black and did the hat, all the eyes, mouths and buttons on the snowmen.
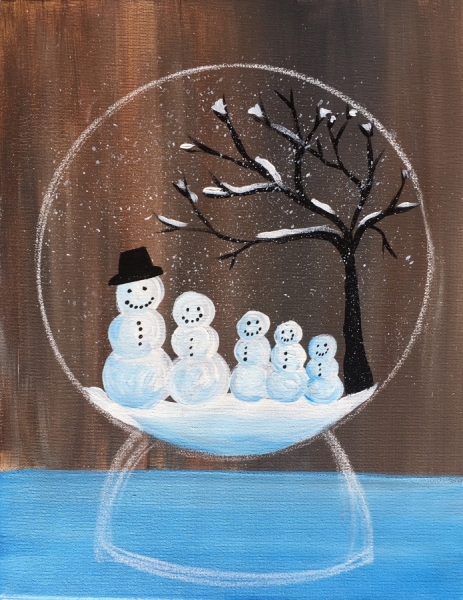
Use a 10/0 liner or a #0 round brush for this step because it is detailed!
Then I did cadmium orange medium for the noses.
You’ll definitely want to use a 10/0 liner brush for this step!
Isn’t if funny how the direction of the nose defines which direction the snowman is looking?
Then I did all the scarves and hats.
I used alizarin crimson hue for the reddish hats/ scarves, cerulean blue for the blue hat and scarf and hooker’s green for the green hat and scarf.
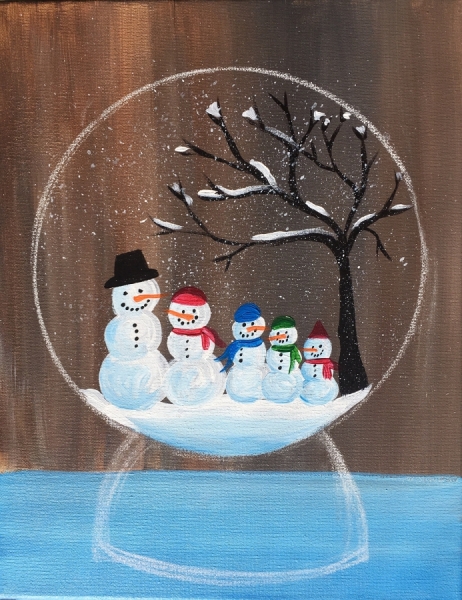
Of course you can customize your colors with this step!
For the arms I used both mars black and burnt umber.
It may be difficult to figure out the placement of the arms but I only made them visible where there are gaps between the snowmen.
You can also do your snowmen without arms if you think it will look “too busy”.
11. Paint the base of your snow globe titanium white
This was done with a 3/4″ wash brush.
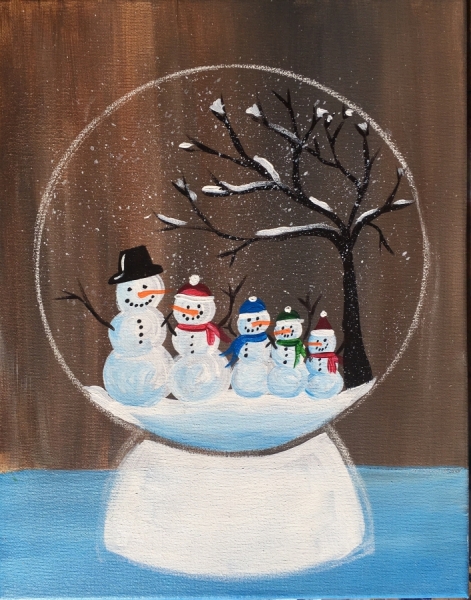
Basically just paint the base like you are whiting out the area because the red will not cover the colors underneath unless you white the area out.
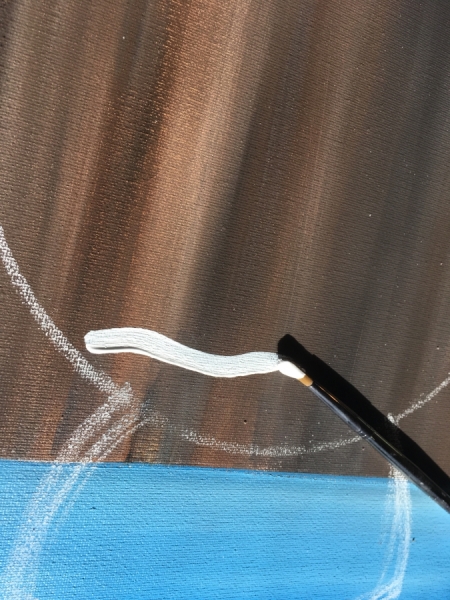
12. Paint the reflection on the globe
First you’ll need to outline the entire circle using a small round brush and titanium white.
I used a #4 round brush for better control.
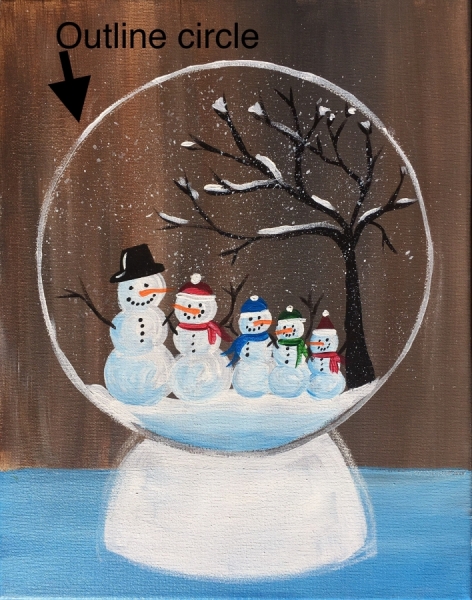
Your chalk will erase as you paint over it but if there is excess you can always go back and erase when this line is dry.
Then you’ll need a #4 bright brush to paint the reflection on the globe.
Basically dip your brush in titanium white.
Use a paper towel to wipe off excess paint. Your brush should look like it only has a little bit of white on it.
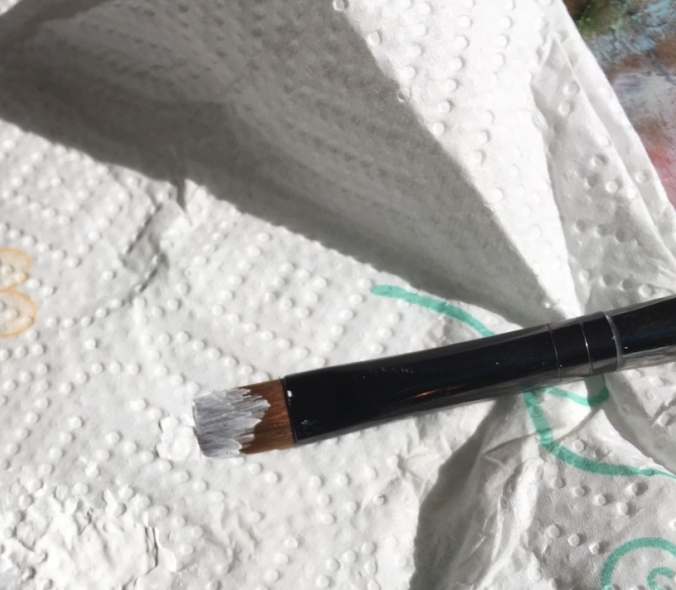
This will help you make a dry brush stroke!
Then paint the reflection.
Your stroke should look like a dry brush stroke.
It’s a bit translucent.
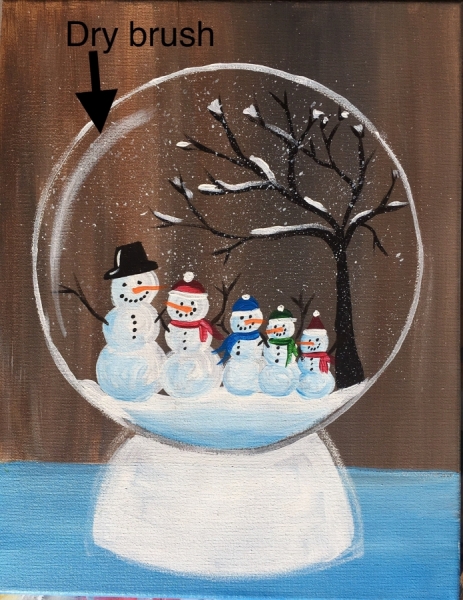
You should be able to see anything you paint over. This technique will give you the illusion of reflected glass.
Add these dry brush stokes on the outer edges of the snow globe circle.
I did two rows of these type of strokes and did not do them at all in the very center of the circle.
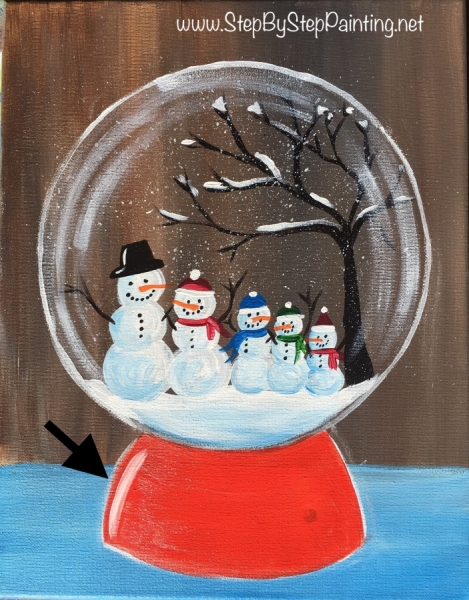
13. Paint the base of the snow globe
I used cadmium red medium and that 3/4″ wash brush. Paint the entire base of the globe. I love how bright that cadmium red is!
14. Paint some reflection and shadow on the base
For the reflection, I used titanium white and my #4 round brush.
Then for the shadow, I mixed cadmium red medium with a little bit of black and watered it down a bit.
I used my #4 bright and painted just the area below the base all the way to the edge of the canvas.
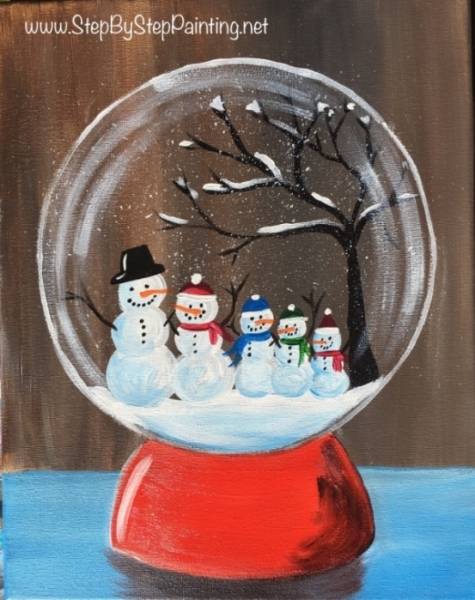
I used that same color on the base of the snow globe but on the right side to create a darker shadow area.
15. Paint the name plate

Before painting the name plate gold or silver, you will need to white out the area first. Use the 3/4″ wash brush to do this.
Then when it dries, you can go ahead and paint the plate in with silver (note I used gold in the video).

After that dries, use a 10/0 liner brush or #0 round to paint your family name!
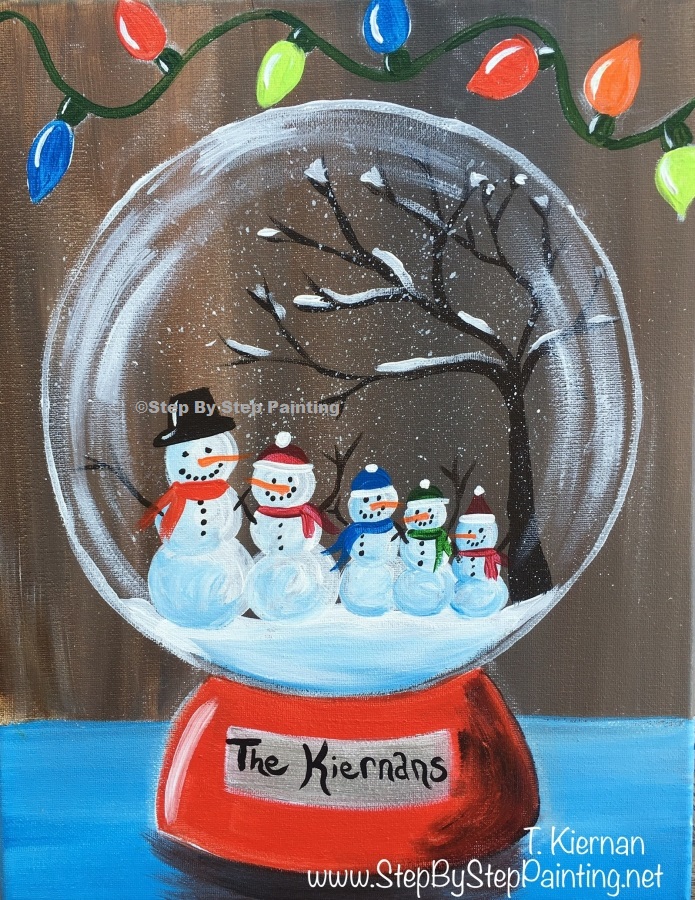
16. Optional added step: draw out Christmas lights with chalk.
To do the Christmas lights, I first drew them out with chalk. Start by drawing a wavy line for the string.
Then draw small squares attached to the line. On top of those small squares are the actual bulbs.
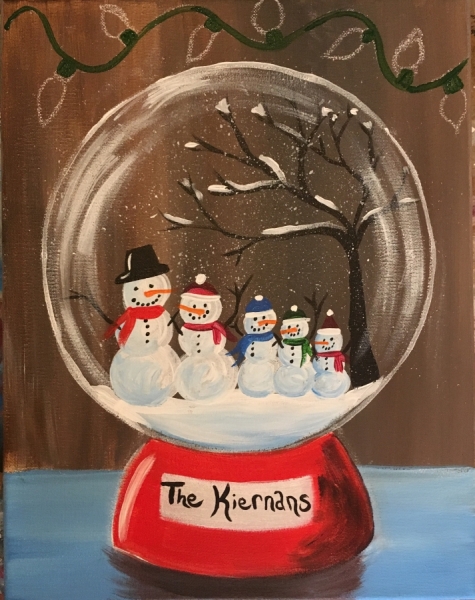
Next paint the string and the sockets in with hooker’s green. I used a #4 round brush for this.
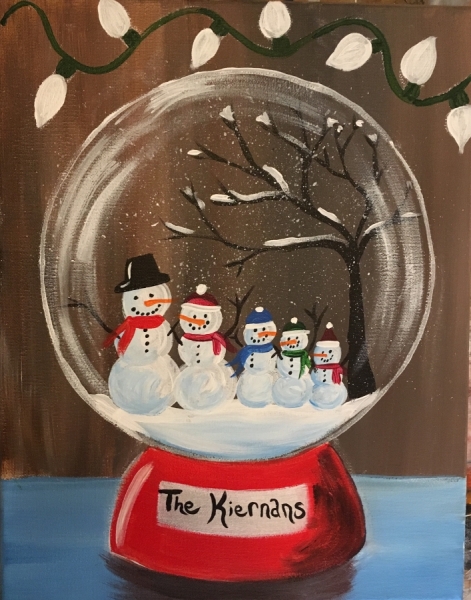
Then you’ll want to white out the bulb shape, let that white dry and paint the color of each bulb over the white.
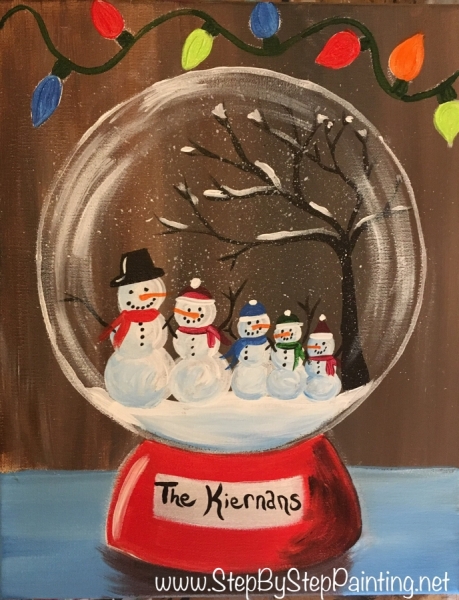
Wait for the colors to dry and use a small round brush to paint a white reflection on all of the bulbs.
I did my reflection on the right side of the bulbs to keep it consistent.

Finally, I did a reflection on the right side of all the sockets!
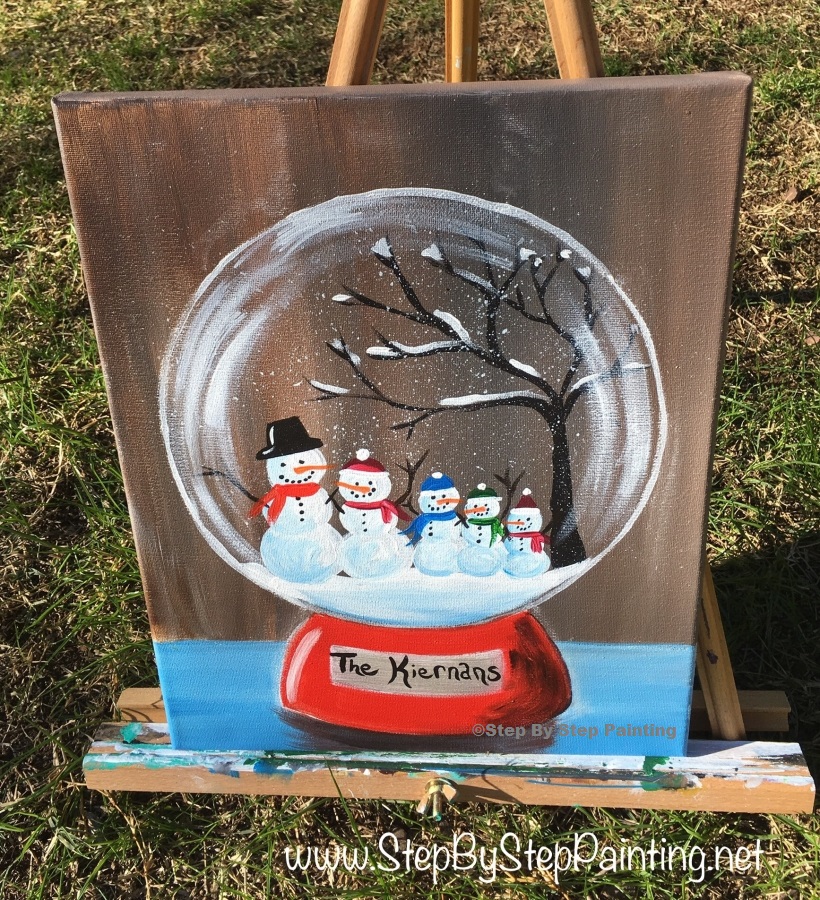
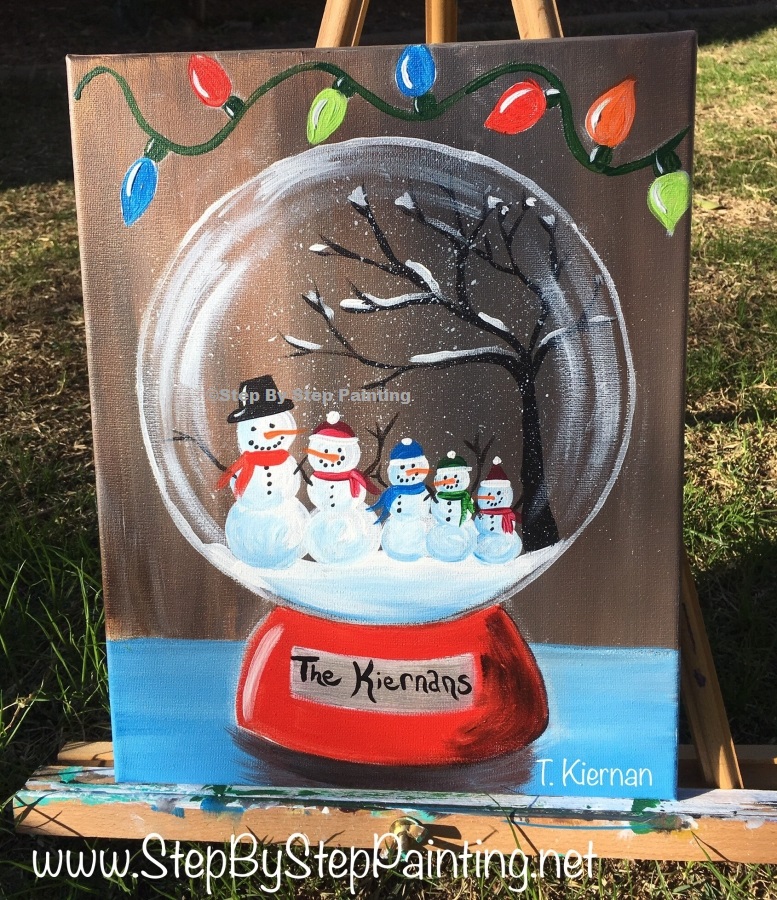
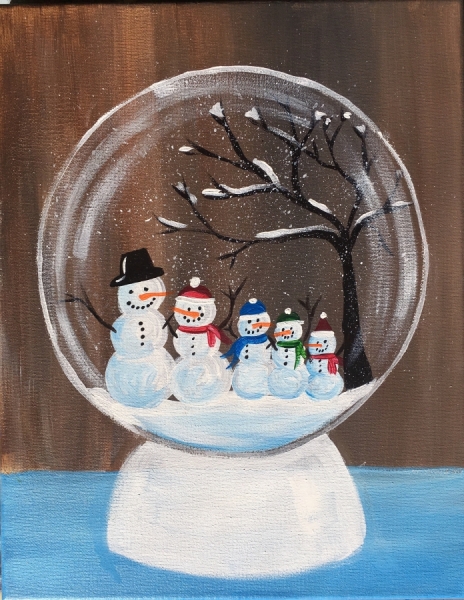
Finished!
Share your art!


In the video you did not shade the right side of the globe base , do I need to shade or leave it be ?
Hi Devon! Yeah the video is different. It’s up to you. If you like the shading you can do it. Or you can leave it be.
Fantastic wonderful idea going to try one for next year
This is just darling. I love the snow globe! Thank you for the tutorial.
Thank you Jessi! So glad you enjoy the Snow Globe painting Tutorial!
This is a lovely painting and I love the personalization. Such a fun item for a Christmas gift with a small easel to include.
I had done a family of skiing snowmen once and it became a hit- so anxious to do this one. Love my snow people…….
Thanks for this painting and how to do it!
Thanks Joan! I love snow people too!! And yes that would be a cute Christmas gift idea with the little easel!
As a beginner I found this really easy to follow. Thank you
Thanks Elaine!!
I love this idea and have wanted to paint my own version of yours, which I finally got to do. Thank you!
I have a quesiton on the lights…how would you do like a warm glow, white light??? Instead of a multi coloroed strand?
You can paint the lights a yellow color that has more of a warm tone to it or add a bit of orange to the yellow.
Ok! Thanks so much for the help!! LOVE your teachings! I have a list of them to do!!
I made a small one for our family dice game. Roll doubles get a present from the table. Gifts have to be $1-$2 so my canvas cost me that much! Mine is smaller than yours 9×12 so I had to use a smaller plate. It turned out so cute! I plan on making another one but on the 11×14 to cover my 6 person family. I watched your video and made the pine tree. I think next time I will do the regular tree (I didn’t do the wind either). Thank you.