
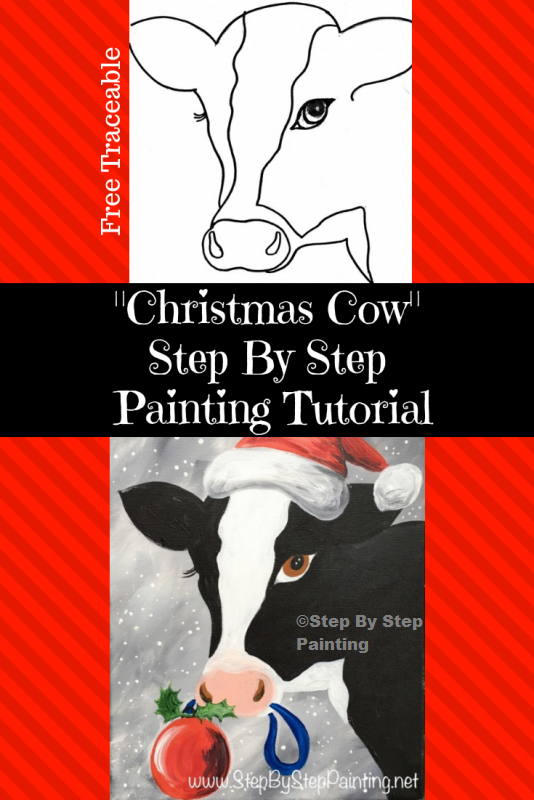
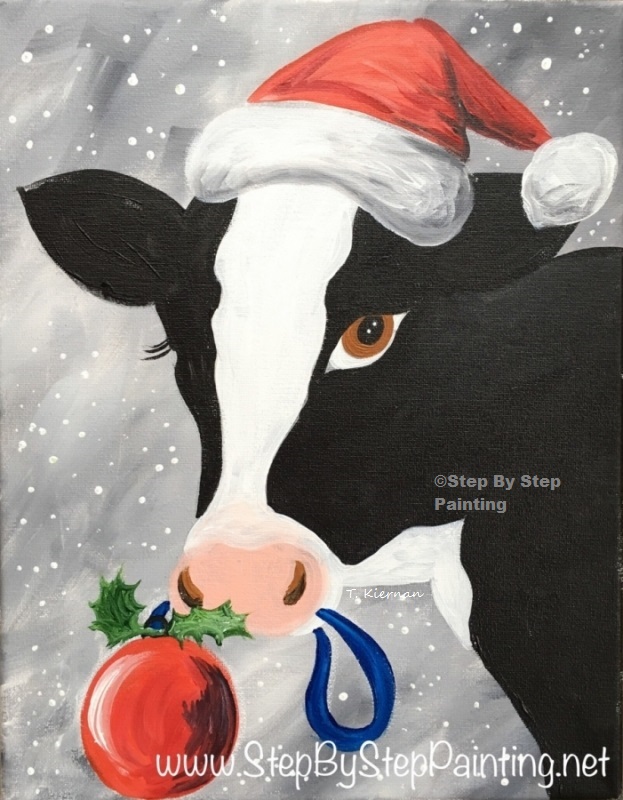
How To Paint Christmas Cow
Would you like to save this?
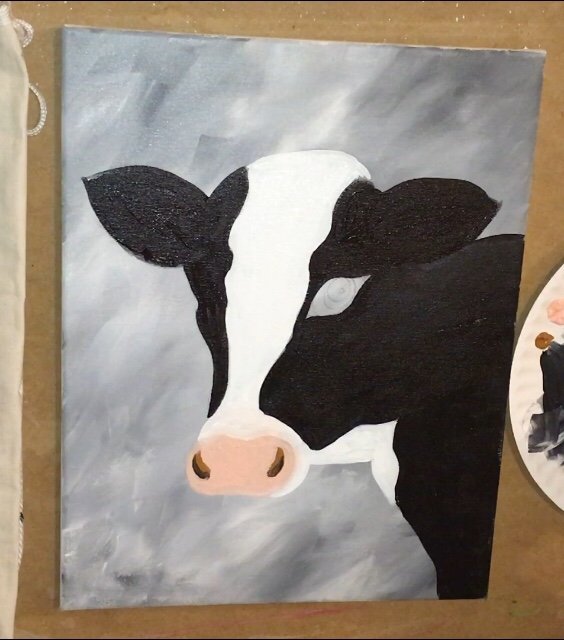
Learn how to paint your very own Christmas cow with this online acrylic painting tutorial for beginners. 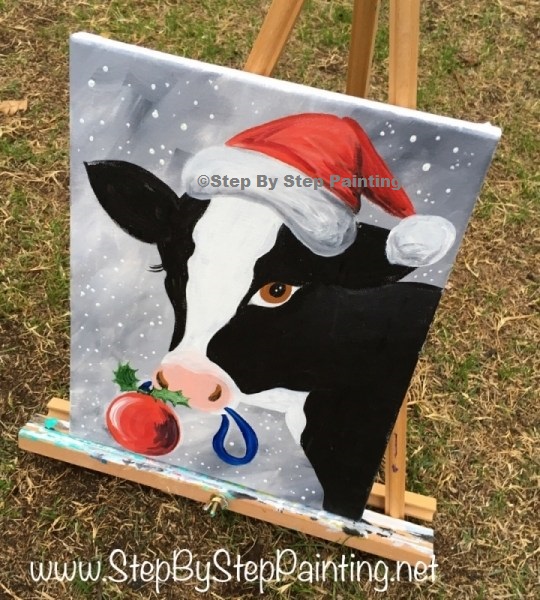
This guide will show you the steps on how to paint the black and white Christmas cow. As a fun, festive touch, you will also learn how to paint a Santa hat an ornament in the cow’s mouth.
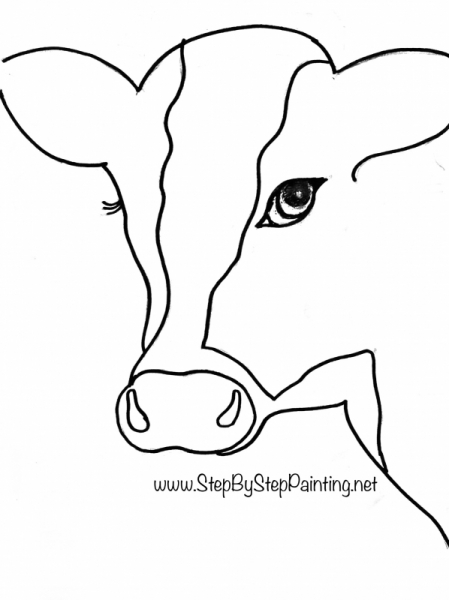
Don’t let this fool you, it is an easy design! I provide the traceable for you so you don’t have to worry about drawing the cow. Then you paint the design in using different techniques!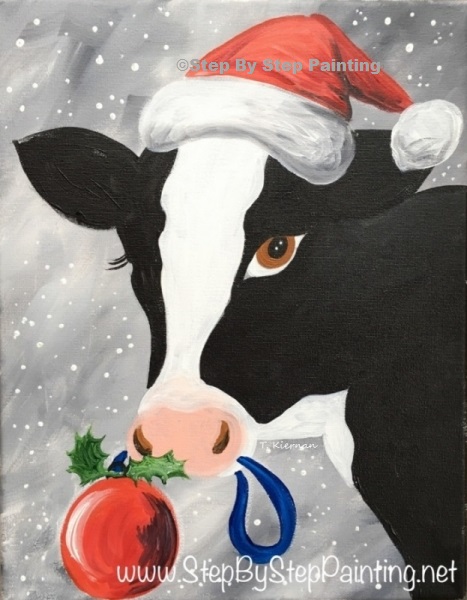
There is no blending or shading except in a few areas and, as always, you can simplify things too!
You are also more than welcome to use it as a non-Christmas cow painting as well as to paint a different color cow.
Enjoy and happy painting!
This post contains affiliate links.
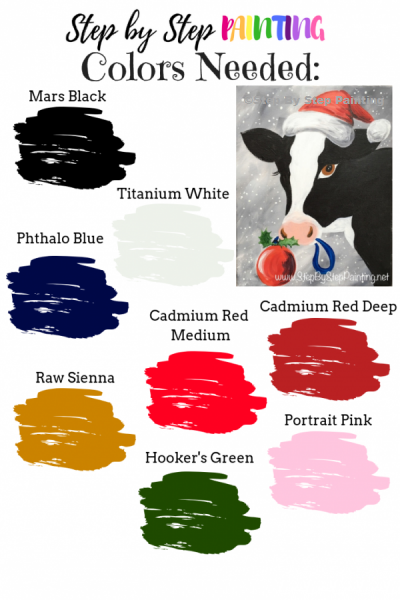
Materials For Christmas Cow Painting
Christmas Cow
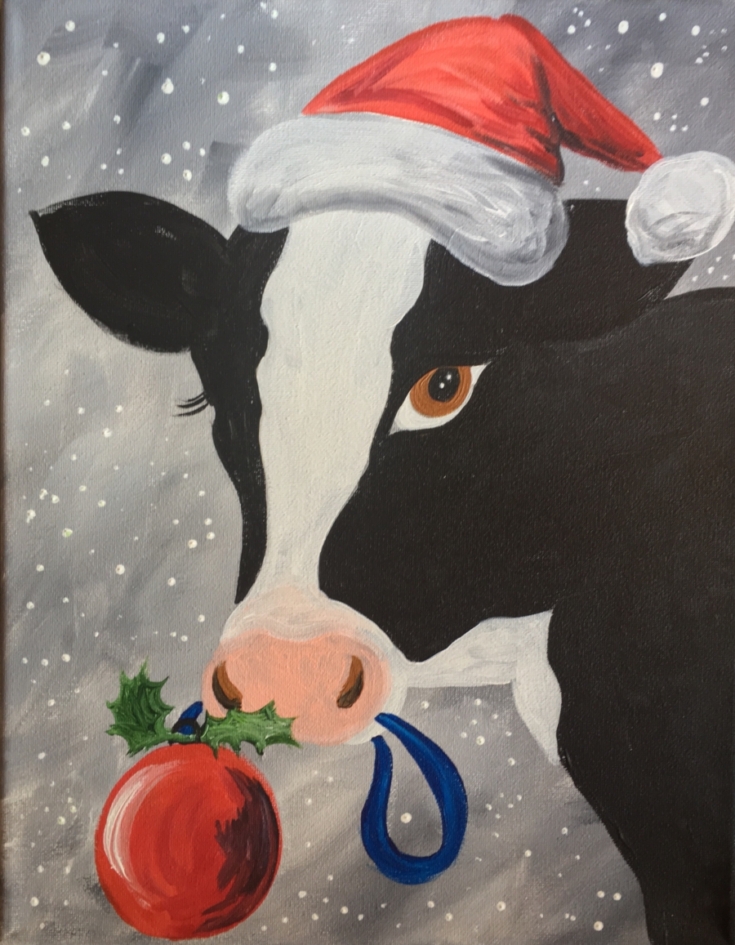
Paint your very own adorable Christmas cow with this step by step acrylic painitng tutorial for beginners.
Materials
- Acrylic Paint
- 11 x 14 Canvas
- Chalk
- Bottom of a Plastic Solo Cup to trace circle
- Cow Traceable
- Graphite Transfer Paper
Brushes
- 3/4 Flat
- #4 Round
- 10/0 Liner
- 4 Bright
Colors
- Mars Black
- Titanium White
- Cadmium Red Medium
- Cadmium Red Deep
- Phthalo Blue
- Hookers Green
- Raw Sienna
- Portrait Pink
Instructions
- Paint the gray background
- Dry the canvas then transfer the cow design to the canvas.
- Paint the black areas of the cow using a round brush and mars black.
- Paint the white areas of the cow using a round brush and titanium white.
- Paint the nose portrait pink.
- Paint the eye with mars black, raw sienna and titanium white. Use a 10/0 liner for the eye area.
- Draw the ornament and Santa hat with chalk.
- White out the area of the Santa hat and chalk with titanium white paint.
- Add some gray shadow to the bottom of the hat.
- Paint the ornament string with phthalo blue.
- Paint the ornament with cad red medium.
- Paint the Santa hat with cad red medium and darker areas of the hat for shading with cad red deep.
- Paint the holly leaves on the ornament.
- Dot little snowflakes in the background.
Color Palette
 Traceable:
Click here to get the download.
Directions At A Glance:
Video For Christmas Cow:
Step By Step Directions For Christmas Cow:
1. Paint the gray background
This is an easy and highly effective technique for filling up a canvas with a mixed gray background. It’s “expressive” and extremely relaxing! Use a 3/4″ wash brush and the colors: titanium white & mars black. Double load your brush with white and a tiny bit of black. 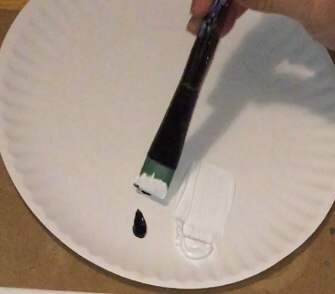
Paint in cross-hatching and “x-style” strokes. Your colors will blend beautifully into a mixed gray color. Try not to let this gray be too dark or you won’t get enough “contrast” with the black of the cow. It should be a medium gray. 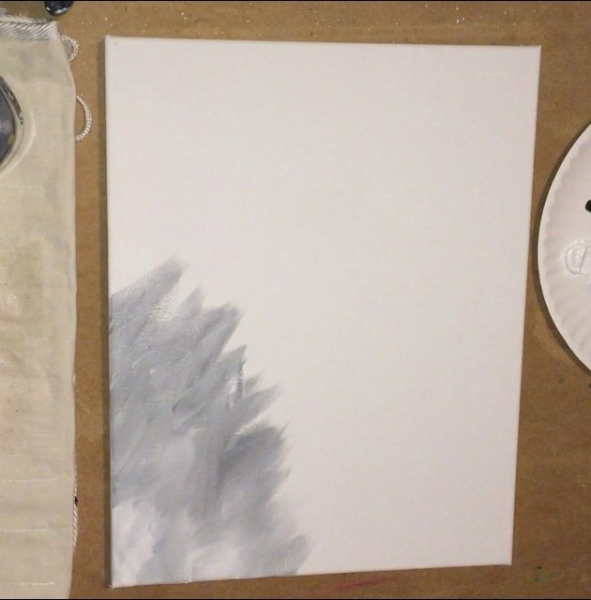
The goal is to not mix the colors all the way but to create “interesting” shades of gray that blend smoothly and beautifully around the canvas. You may have darker areas and lighter areas. 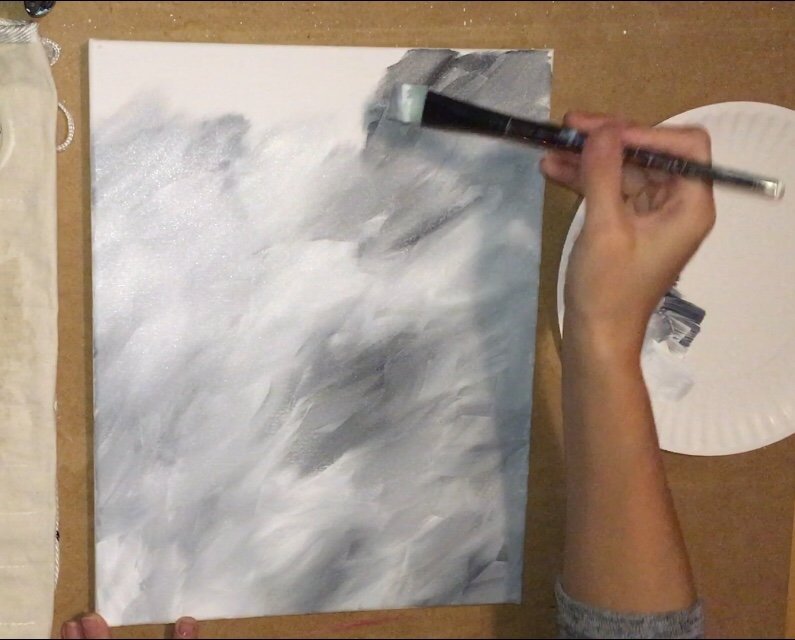
Try to smooth out your strokes so that no “sharp edges” from the brush is showing. However, it’s almost impossible to smooth out all the edges and it’s pretty when you see some of the strokes. Try to find a happy balance!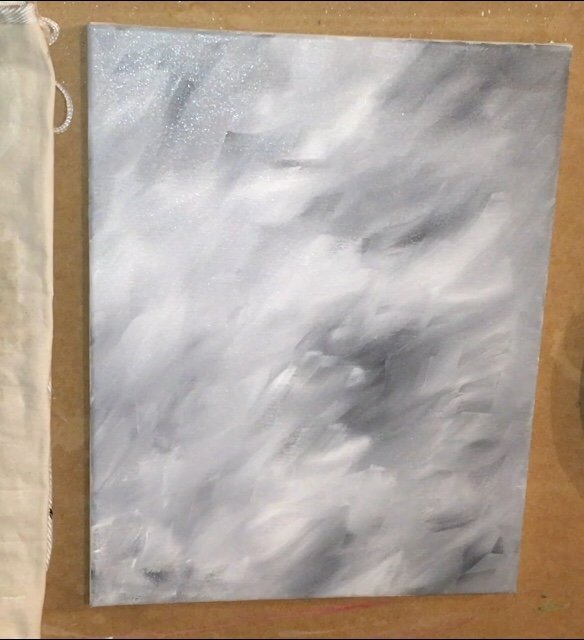
2. Transfer the cow design to the canvas
Wait for the paint to completely dry (about 20 minutes depending on the humidity level of where you’re painting). Then transfer the cow to the canvas using graphite paper. I positioned the cow on the bottom of the canvas but slightly off center to the left. 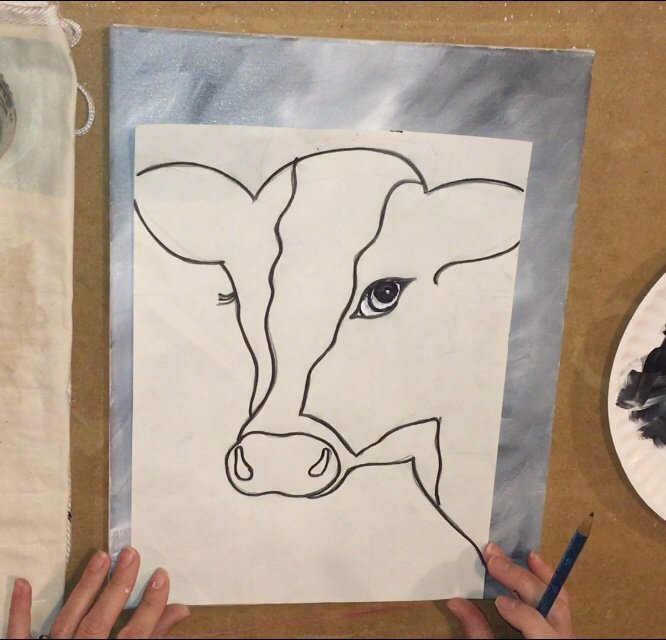
Try to press firmly so that it shows up dark on the canvas. It’s best to do this laying the canvas flat on a table and using a dull pencil. Another effective tip I’ve found is to place a book underneath the hollow area of the canvas (if you’re using a stretched frame canvas). 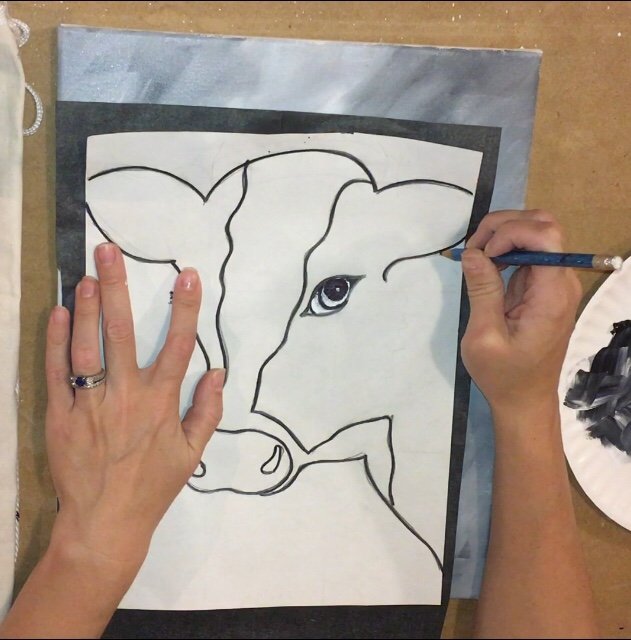
It’s also important that the eye area shows up in this painting so make sure you press extra firm there!
3. Paint the black areas of the cow with “mars black”
Start with a #4 round brush and loosely outline the areas that are black. Then start to fill in those areas. You may want to switch to a #4 bright brush (which is larger) to fill in the larger areas. 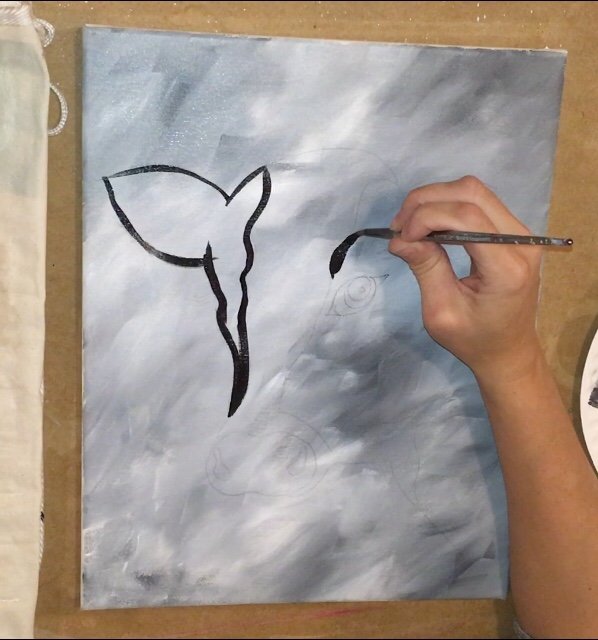
Although stroke direction is not “critical”, try to get your strokes to go in the direction of the object you are filling in. This gives a little indication of texture when you do this. 
Leave the area just under the right ear blank. In the next photo you’ll see how to add a bit of contrast so the ear will stand out and not disappear in all the black.
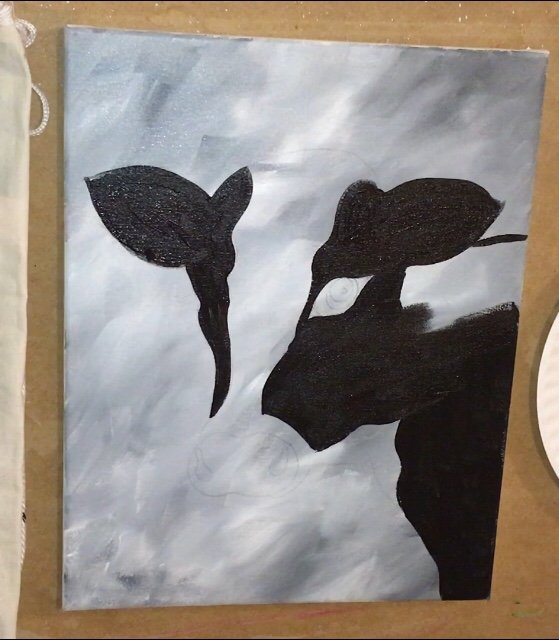
Add just a bit of white to your brush to make a lighter black. Use that color to paint under the ear you see on the right. This allows the ear to stand out. 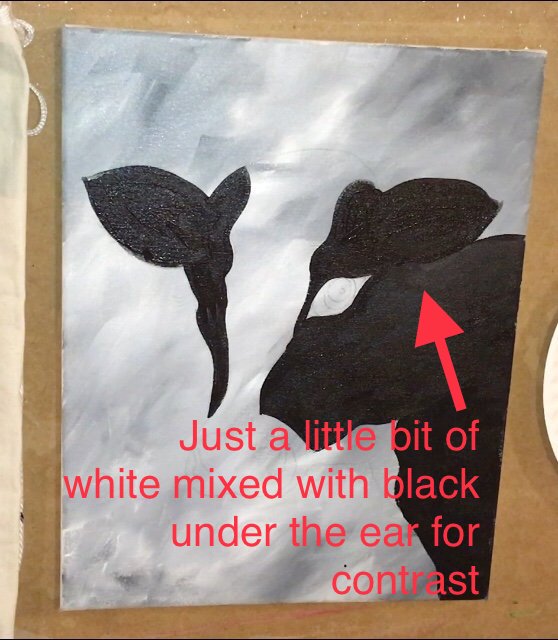
4. Paint the white areas of the cow in with “titanium white”
I used mostly the #4 round brush for this step. Outline the areas first and then fill them in with “countouring strokes” that go in the direction of the area you are filling in. 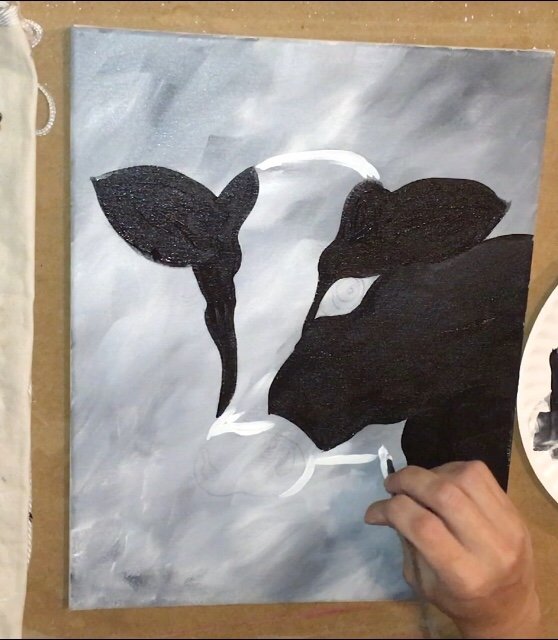
You may switch to a #4 bright brush for the larger areas or stick with just using the round brush. 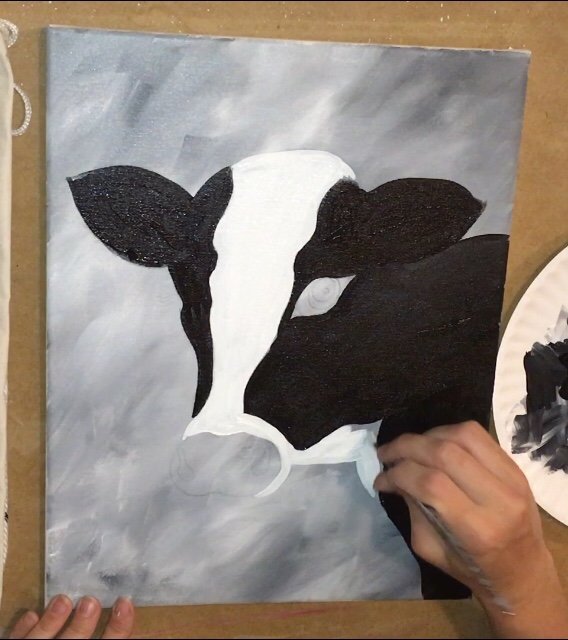
I used BASICS titanium white for this and in my experience, it is very opaque. If you are using a different brand of white you may need to add another coat so that it completely covers the gray. Or you may have to add another coat any way if your gray is darker. 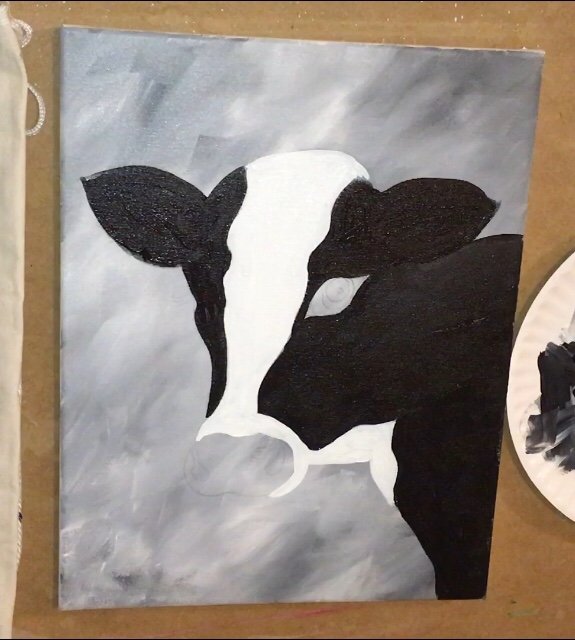
5. Paint the nose “portrait pink”
I used the #4 round brush for this step too. Fill in the nose with portrait pink. This color is fairly opaque so there’s no need to prime the area first. If it doesn’t cover the gray completely, try adding another layer or a bit of white base to the area. 
For the nostrils, I filled that area with “raw sienna” and “mars black”. Use your #4 round brush for this.
6. Paint the eye in with: “mars black”, “raw sienna” and “titanium white”.
Use a #10/0 liner brush for this step! It is very detailed but easy! Make sure your eye transferred from the traceable dark enough for you to see. Start in the middle by painting the “pupil” mars black. 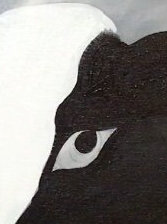 Then paint the “iris” raw sienna, or a different color if you’d like!
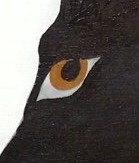 Then the white part of the eye, the “sclera”, was painted with titanium white. Optional: Leave a tiny bit of grey left on the far points of the eyes but keep the white part rounded.
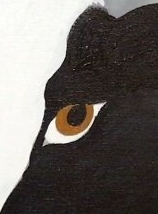 Wait for the paint to dry a bit then outline the entire eye shape with mars black (like you’re putting eye liner on!). This helps define the shape more and paint over any areas you may have painted outside of the lines of the eye.
 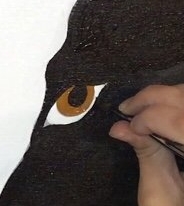 Then paint the eyelashes on the far left of the eyes. Also, when the black part of the pupil dries, paint two white dots on that part of the eye.
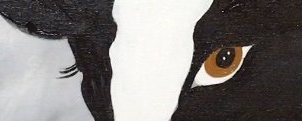
7. Draw the ornament and Santa hat using chalk.
Note: Chalk can easily be erased on canvas with a wet paint brush or a wet finger so there’s no worry about messing up during this drawing portion. For the ornament, I used the bottom of a standard size solo cup. If you don’t have one handy, find a circle that’s about 3-4 inches in diameter. Trace that with chalk to get a circle. 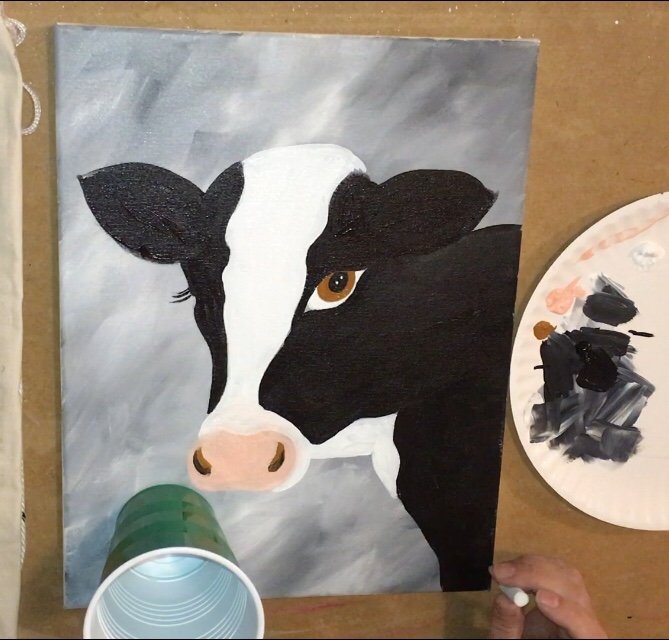
Draw out the string of the ornament with one end hanging out of the cow’s mouth as pictured below: 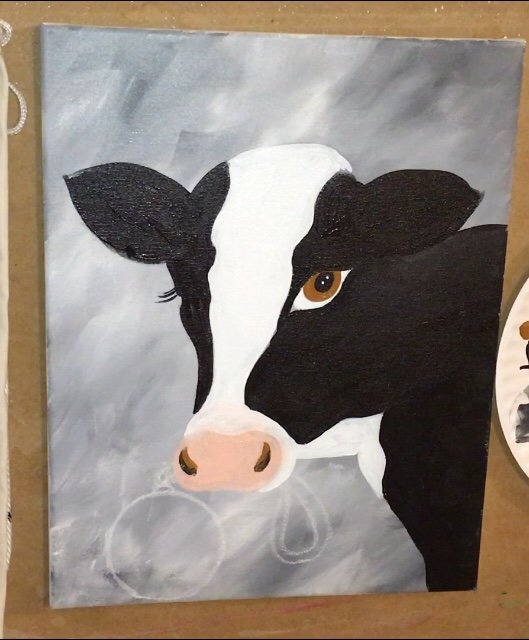
Draw the bottom part of the hat. This area will overlap the cow’s head slightly and it bends on the right part just over the top part of the ear. 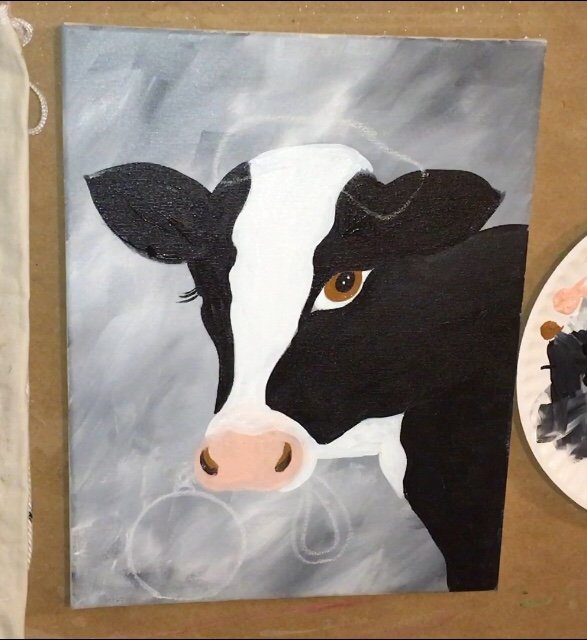
Next draw a triangle that slightly bends to the right. 
Draw the pointed tip of the hat so that it is hanging to the right side. This is also a triangular shape. 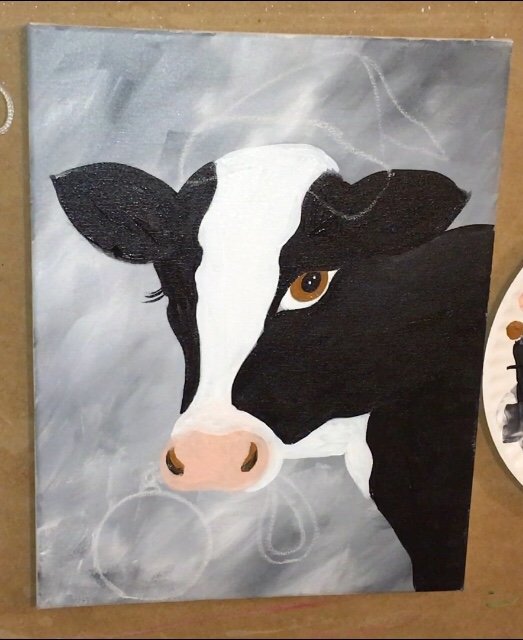
Finally draw the circle at the tip of Santa hat. 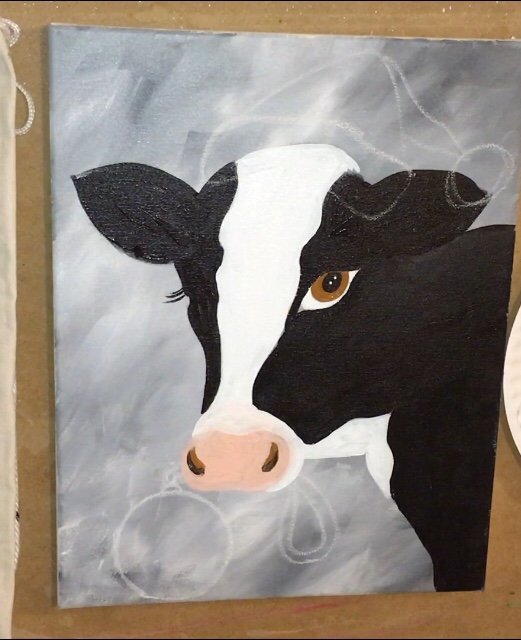
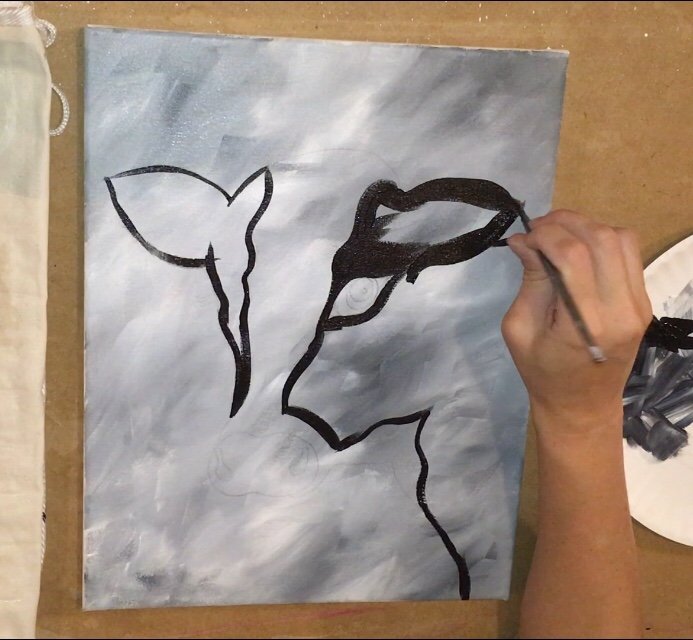
8. White out the areas of the ornament and Santa hat with titanium white.
When I do the technique of “whiting out” an area so the background doesn’t show through the paint, I do not fill it in solid white. Think of it like priming the area but you don’t need a heavy coat of primer. I used a #4 bright brush for this and titanium white. 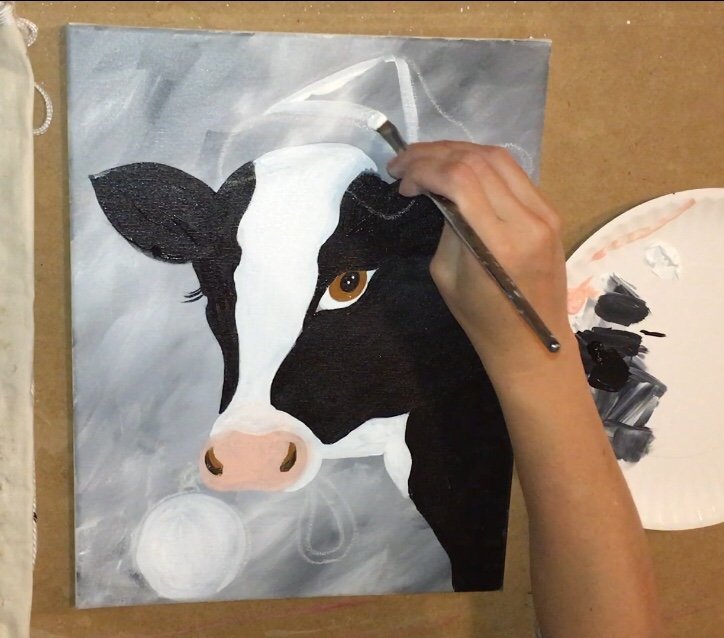
Do not load your brush with too much white. Remember, this doesn’t need to be solid. Fill in the ornament and hat areas. It’s okay if some of that gray is still showing through. Look at the hat and see where it’s darker in some areas. 
9. Optional: add some gray shadow areas to the Santa hat.
I’ll admit, this step might be a bit tricky! Try it…if you don’t quite get it this time around, you can always paint over and leave it white for simplicity!
Make sure the white on the hat is still wet. Mix on your palette a medium gray color (about five parts titanium white and two parts mars black). Paint just the far right of that hat and blend it into the white. Make short smooth strokes to give some texture. 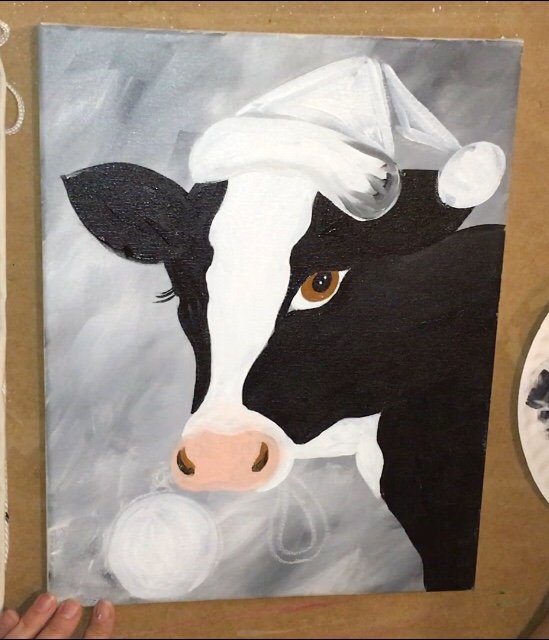
Blend it into the rest of the hat. I also added this medium gray to the bottom of the hat and, again, blended it into the rest of the white. Remember, this is just shadow and we aren’t going for realism! 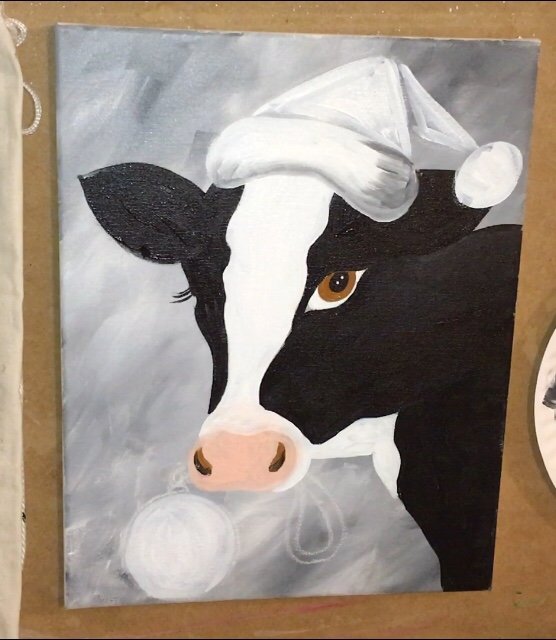
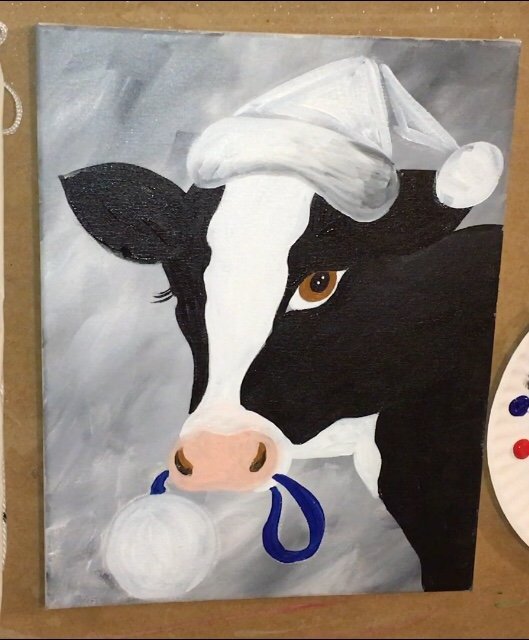
10. Paint the ornament string “phthalo blue” or chosen color.
I used a #4 round brush and simply painted the string in. Notice what part overlaps the cow’s mouth and which part doesn’t.
11. Paint the ornament in cadmium red medium.
Now this white area is dry, use a #4 bright to paint the ornament cadmium red medium.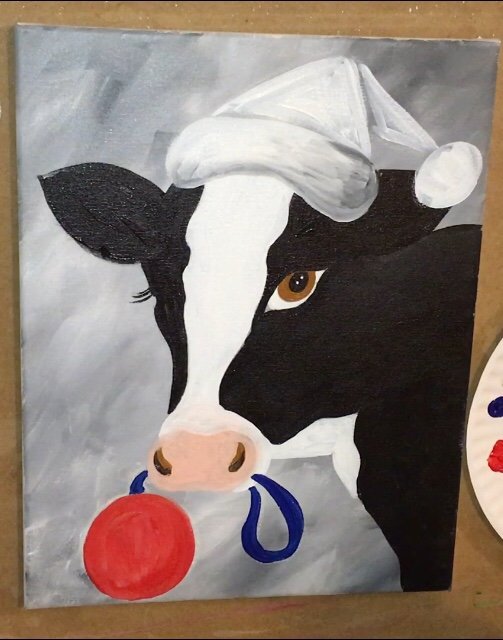
12. Paint the Santa hat in with “cadmium red medium” and “cadmium red deep”.
Again, I used my #4 bright brush for this and the same color as the ornament. Paint the first triangle in with cadmium red medium. 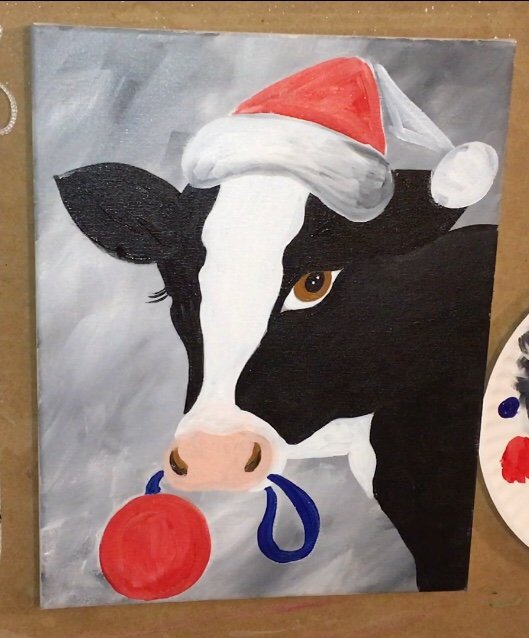
For the bent over triangle on the right, I used cadmium red deep hue. 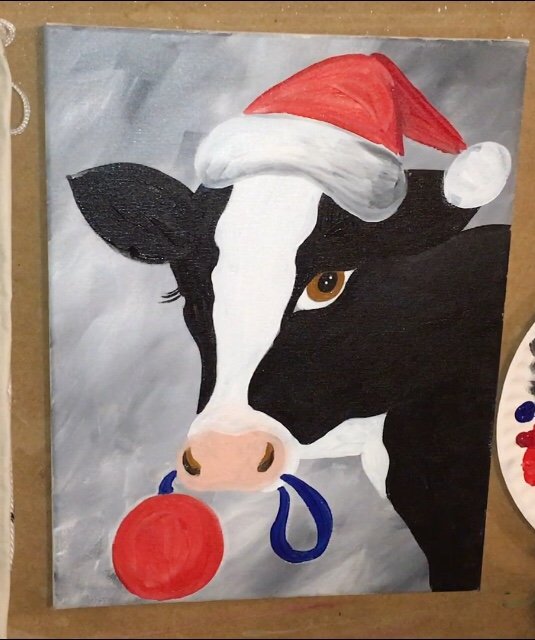
Optional: I also added some cadmium red deep hue on the far right part of the ornament and blended it into the rest of the cadmium red medium hue. 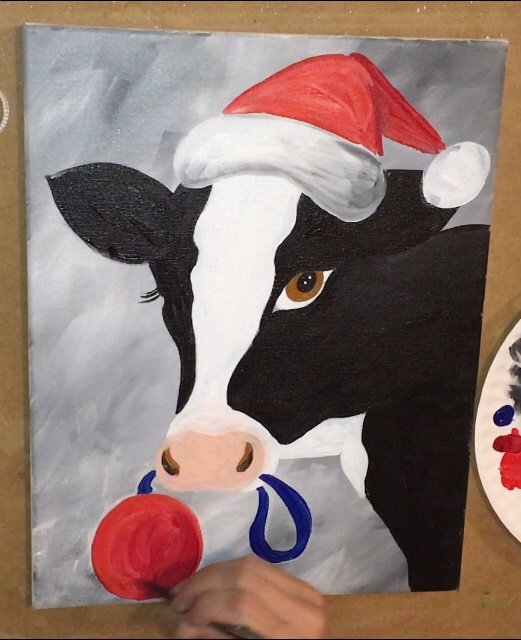
13. Optional: Add some black “wrinkle lines” on the right part of the Santa hat.
Note: this step is tricky too! The video should definitely help with this step because it is a bit advanced to explain with text! As always, try it and if you mess up don’t worry!
Use a #4 round brush and mars black. Paint some “wrinkle lines” just on the far right part of the hat.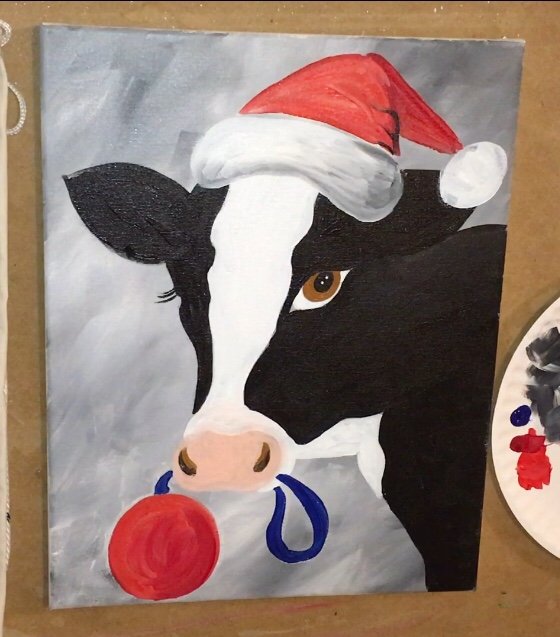
Paint a little bit of black on the bent over part of the cat tool. 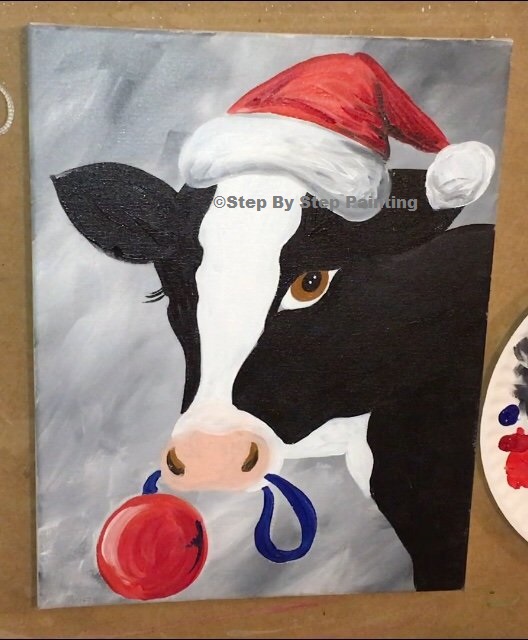
Blend the dark wrinkly areas in by adding cadmium red deep hue on to those lines. Also add a few “cadmium red deep” curved lines on other portions of the hat to give it that Santa hat texture. 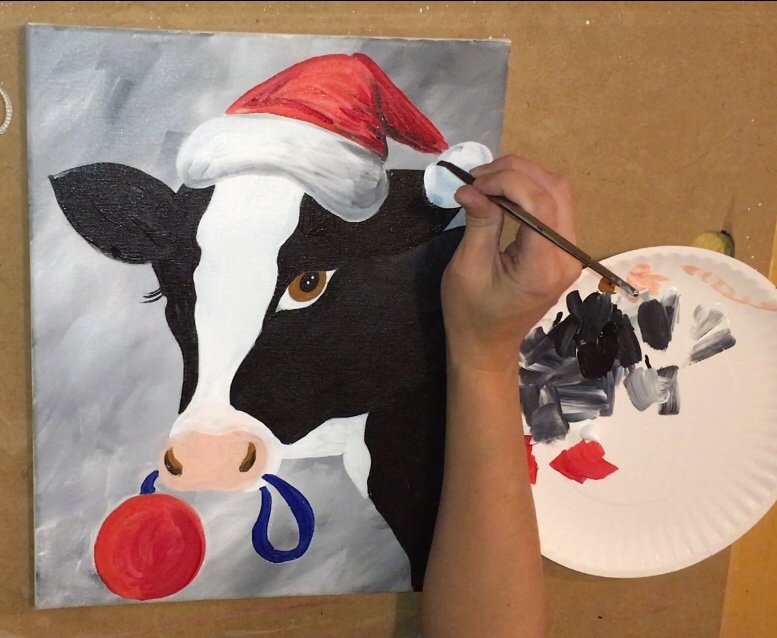
14. Paint a highlight on the ornament.
I tried to imitate my “Red Believe Ornament Painting”. If you haven’t seen it, it’s here so check it out! Basically I did the same thing with this ornament. I painted a highlight with titanium white using a #4 round brush. Then I painted a shadow/dark area with phthalo blue on the right using a 10/0 liner. 

15. Paint holly leaves using a 10/0 liner and the color hooker’s green.
I used a 10/0 liner and the color hooker’s green to paint holly leaves. Paint two on each side of the ornament. 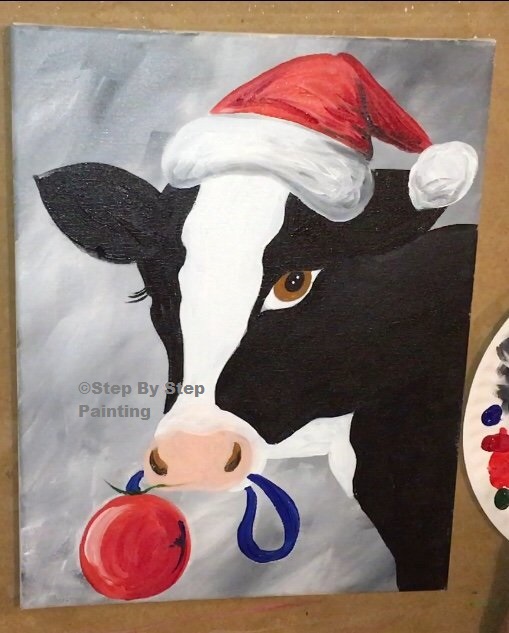
Outline the shape of the holly leaves.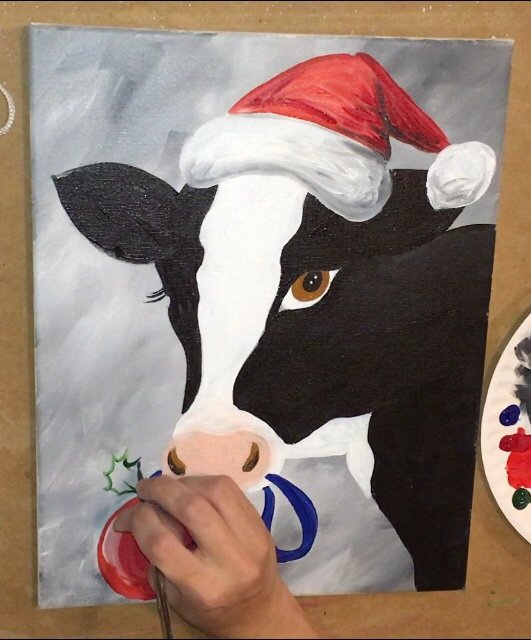
Then fill the holly leaves in. The holly leaf on the right overlapped the nose. Tip: if the green doesn’t show up well, double load it in some white. Hooker’s green tends to be a translucent color. 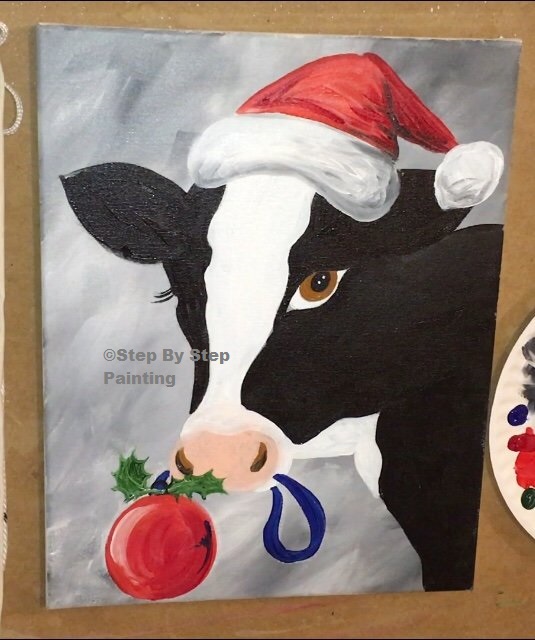
16. Optional: make the highlight brighter and the shadow darker then blend into the ornament.
I got sort of fancy here! I added more white on the highlight to make it brighter because my original stroke blended because the red wasn’t dry yet. Then I added some more phthalo blue to the shadow area and lightly blended it in with the red. Curve it in a sort of triangle shape to give the ornament depth. 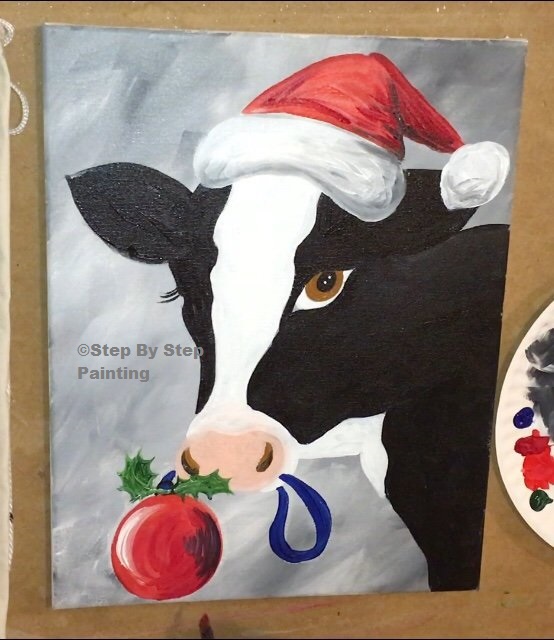
17. Paint snow using the back of a paint brush.
Basically dip the back of any paint brush in titanium white and stamp dots all throughout the background.
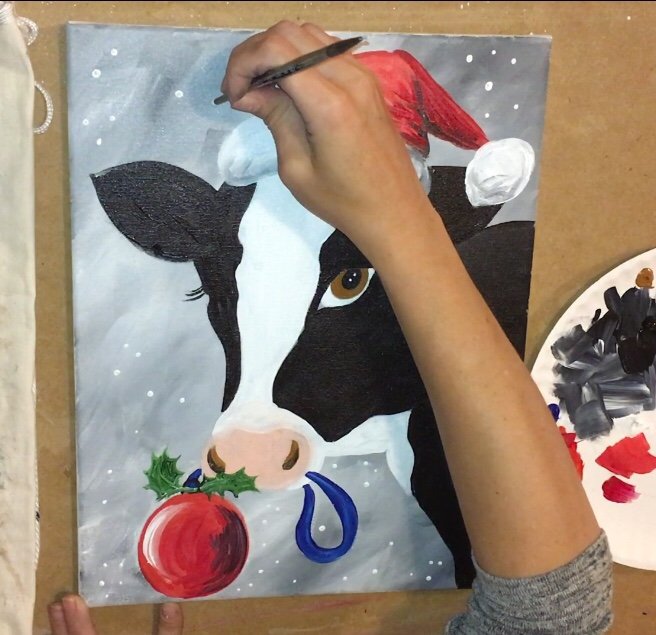
Tip: try using thicker handles and thinner handles to get various sizes of snowflakes. Also cluster some of the snowflakes in areas.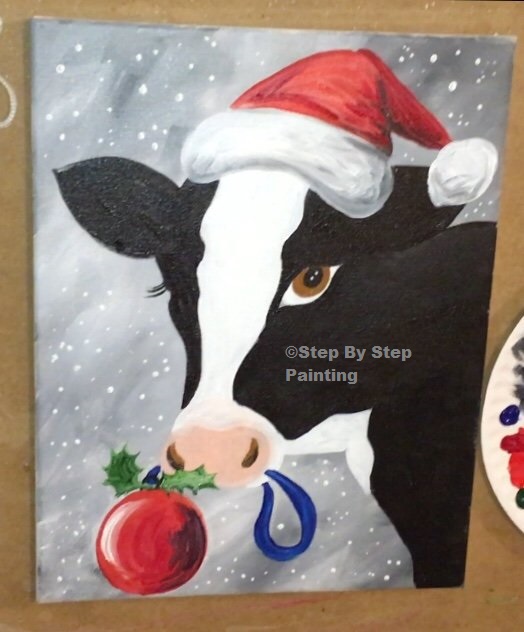
Finished!
Share your art!


Oh thank you for doing this. I love cows.
You’re welcome Sam!
Tracie I dearly love your paintings and all the help you give with the how to’s.. I am not lucky enough to have a printer so I can’t print out the cow pic.. I am going to try and pain this without a print.. I just wanted to thank you again for all your hard work and your kindness for sharing all of your lovely paintings…
I have started making them and giving them to family as gifts,. And they love them…
Thank you Renee for your kind words! I think you can definitely do this without printing the cow! ?
Omg your an AMAZING artist and I mean it I love cows!