
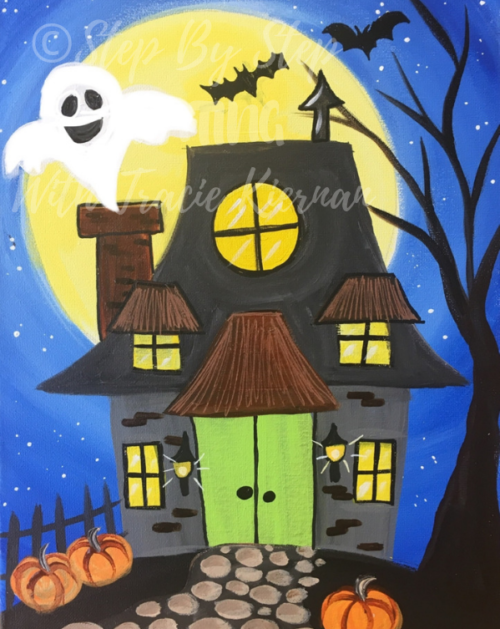
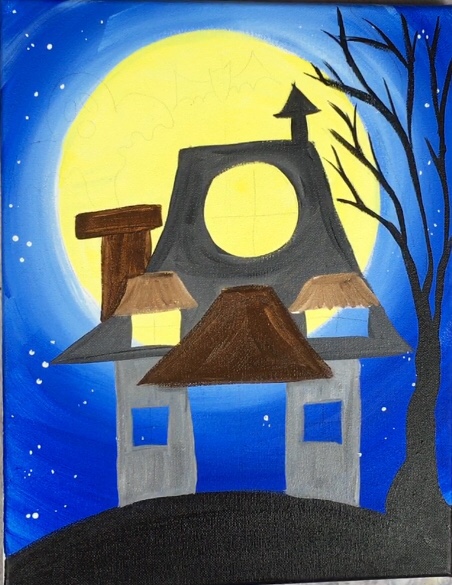
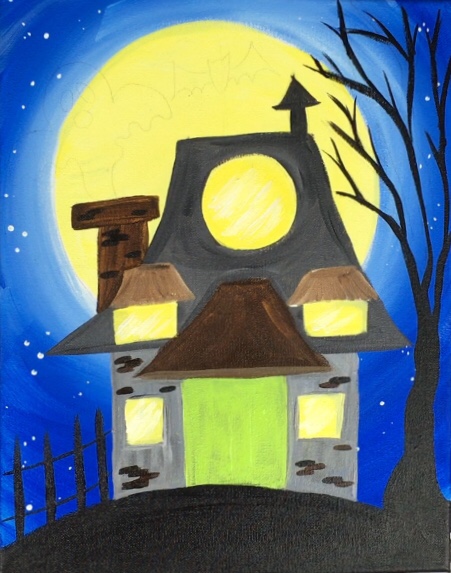
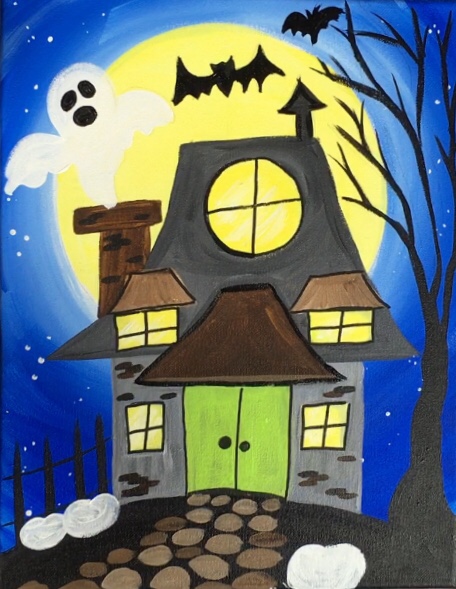
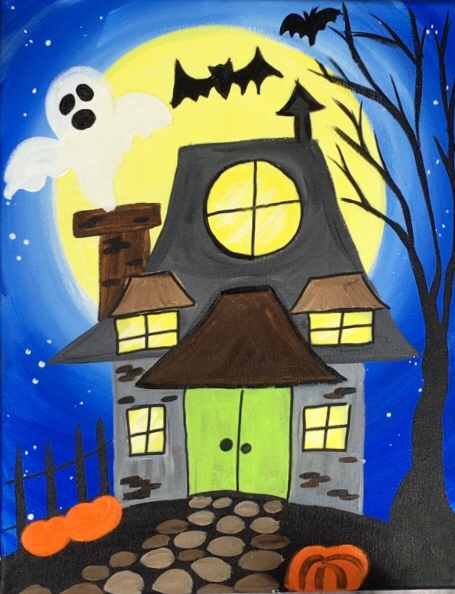
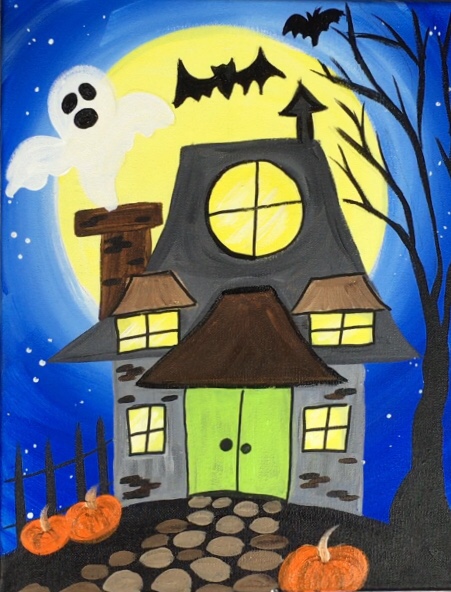
This acrylic painting tutorial for the absolute beginner will show you how to paint a Halloween Haunted House with acrylic paints.
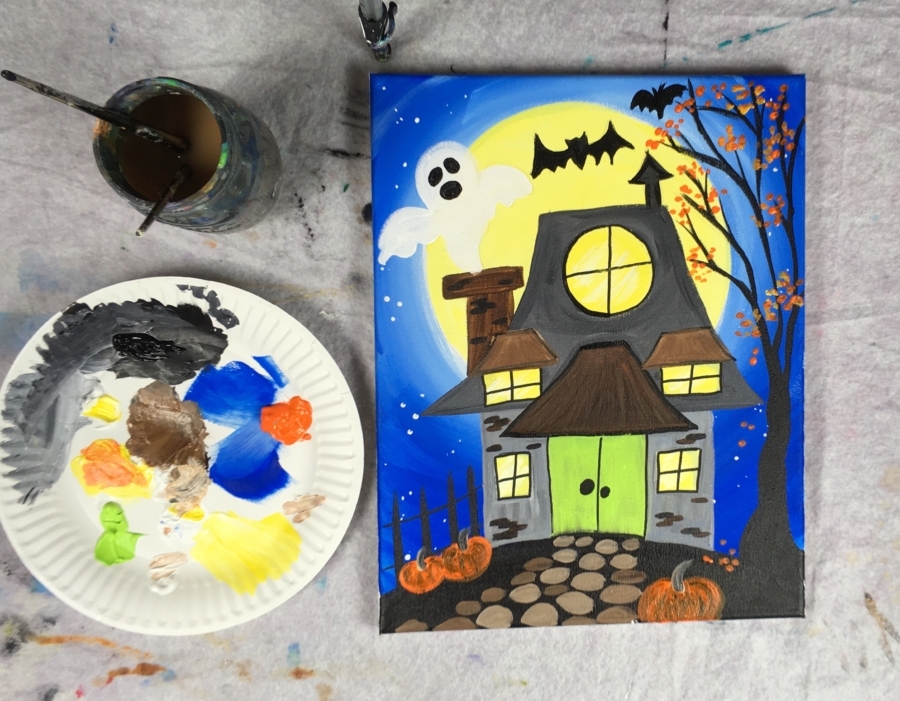
I did this on an 11″ x 14″ stretched canvas with acrylic paints.
There are so many details that you can add to this haunted house! And it’s a great one to do with the kids.
Enjoy and happy painting!
Would you like to save this?
Materials:
How To Paint A Haunted House
Learn how to paint this Halloween Scene of a haunted house! This step by step acrylic painting tutorial comes with a traceable so you can transfer the haunted house design to a canvas or you can draw it. Customize this haunted house with unique colors and fun Halloween details.
Materials
- Acrylic Paint
- Canvas
- Paint Brushes
- Graphite Paper
- Traceable
- Large Circle To Trace Moon (Optional)
Colors
- Cadmium Orange Hue
- Primary Yellow
- Brilliant Yellow Green
- Cobalt
- Mars Black
- Titanium White
- Burnt Umber
Brush Sizes
- 3/4" Flat
- #12 Bright
- #4 Round
- #10/0 Liner
- Black Paint Pen Or Sharpie (Optional)
Notes
This tutorial takes quite a bit of time (allow for 2.5 hours if doing in one session) because of all the details.
Color Palette:

Traceable:
If you plan on enlarging, you can find out more details about how to do that here. I have also converted this to a PDF file that will fit on an 11 x 14 canvas. You can get that here: 11 x 14 Haunted House

Directions At A Glance:
Video:
Note: there is only a quick video for this tutorial as it is one of my older painting lessons (before I did exclusively longer videos for all my paintings).
Step By Step Directions:
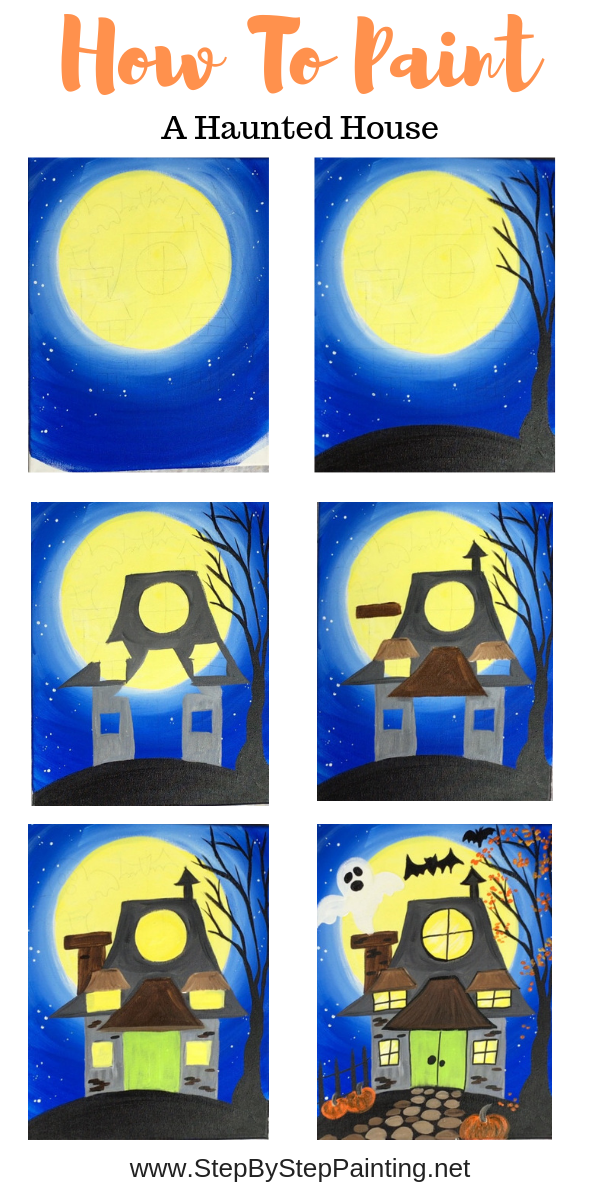
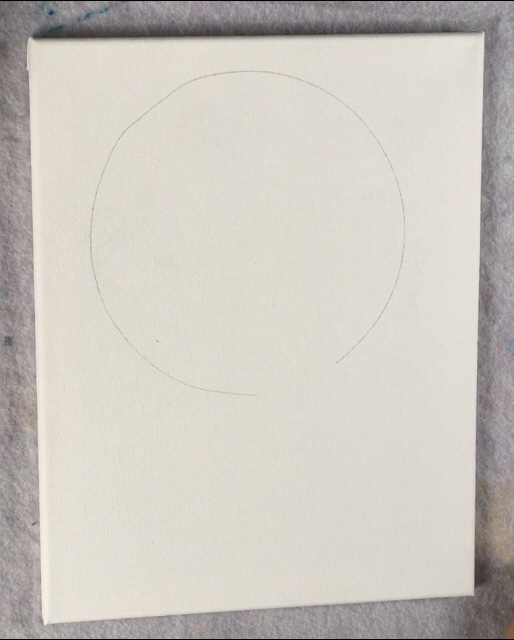
Step 1
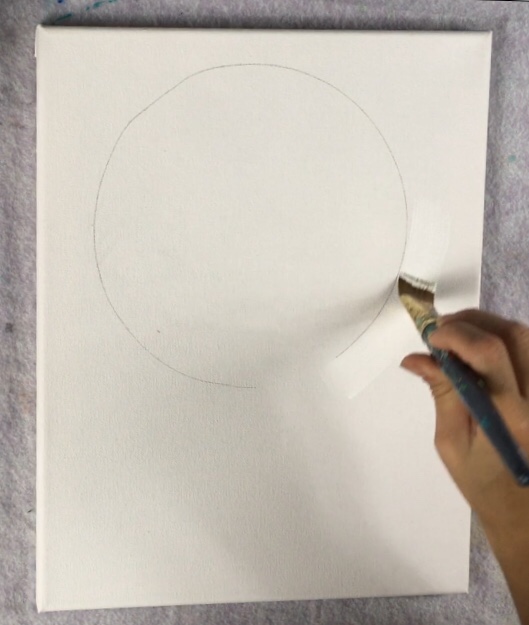
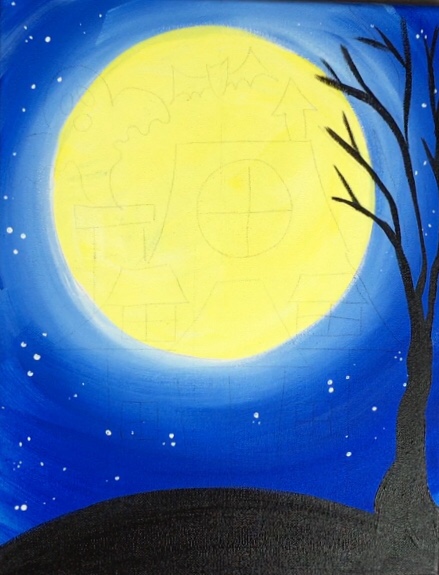
Trace a large circle on the canvas or use the provided traceable to trace the circle.


Trace a large circle or use the traceable to trace just the moon circle.
This circle was taken from a very large Tupperware container about 7.5″ in diameter. Trace lightly with a pencil so the circle is visible enough to paint around.
Step 2
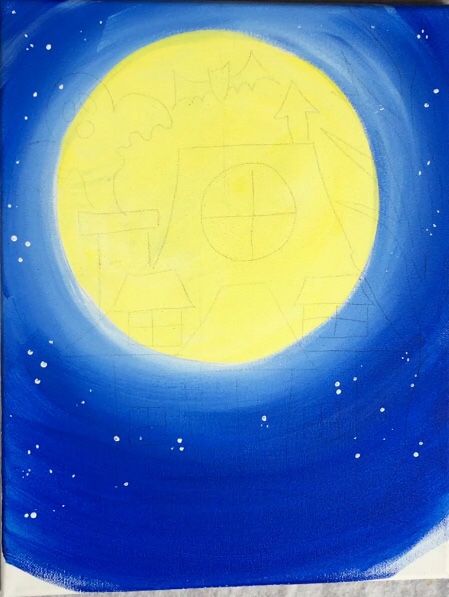
Load your pallet with cobalt and titanium white. You will also need a 3/4″ flat wash brush. Paint a white ring around the moon using your 3/4″ wash brush. Don’t let it dry because we will be doing wet on wet blending!

Start by painting a titanium white ring around the moon with your 3/4″ wash brush.
Then load your brush (not rinsed) in the cobalt blue. Add the blue around the moon blending the white with the blue so it makes a light blue color. This will be the light glow around the moon.
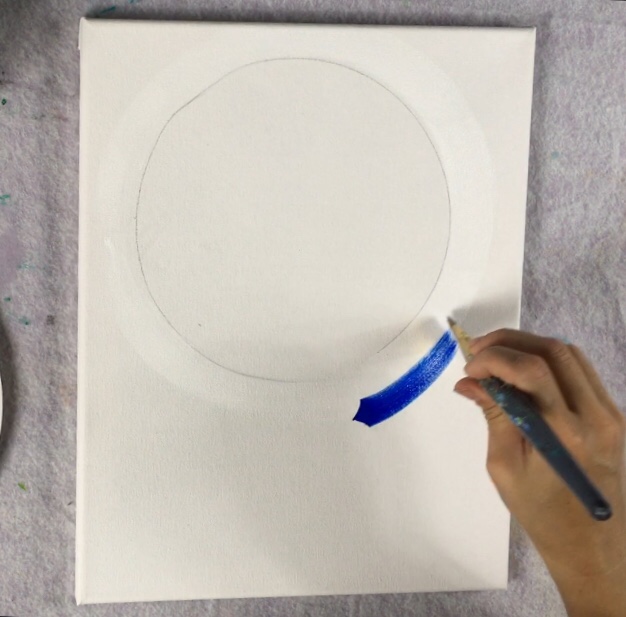
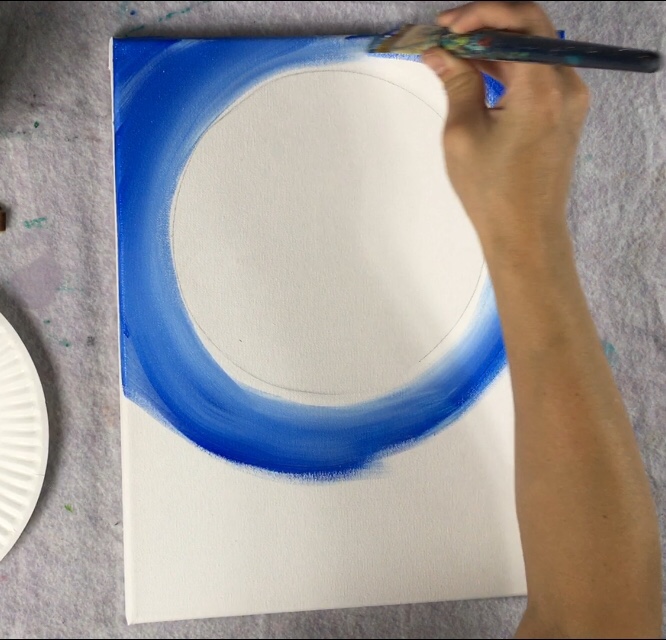
When you go to reload your brush, just add the cobalt. Continue to paint in circles around the moon until you fill up the whole canvas.

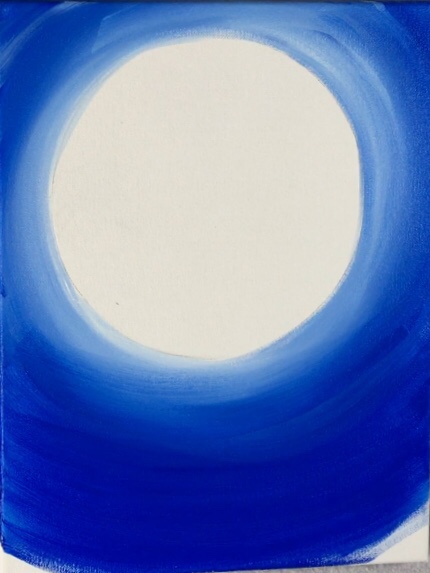

You may leave a little blank space on the bottom where the hill will be covering it up.
Step 3
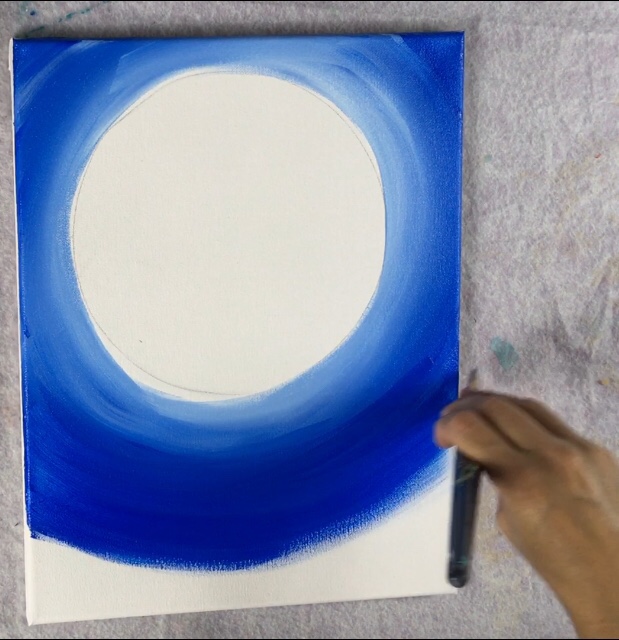
Load your palette in primary yellow and some fresh titanium white. Rinse off all that blue off of your 3/4″ wash brush. Paint the moon with both the yellow and white so the two colors blend on the canvas.
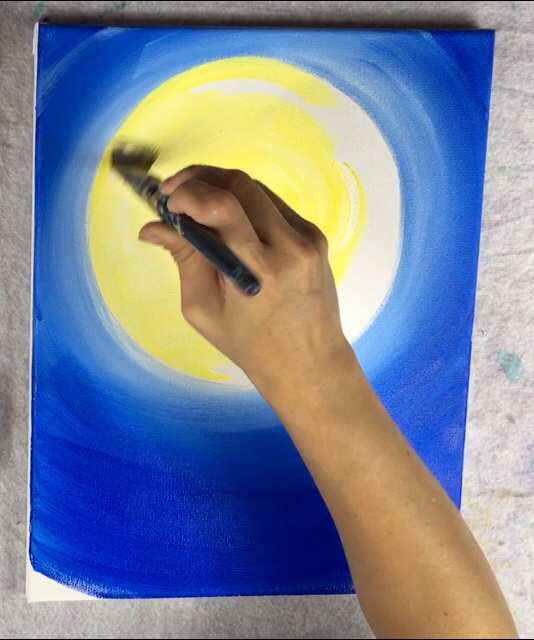

You can make your moon strokes go any direction you’d like. 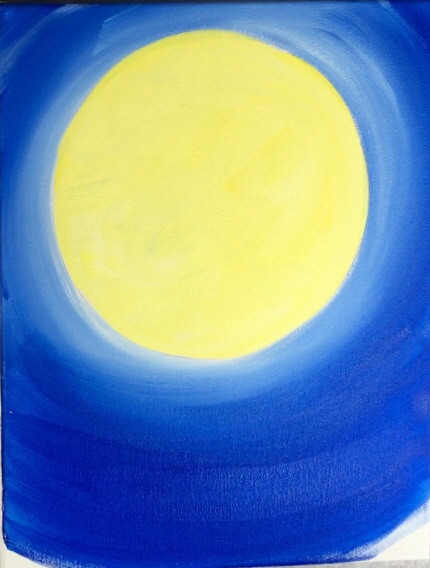

You don’t have to completely blend the yellow and white together.
Step 4
Paint stars in the sky! You can do this by flicking a toothbrush with titanium white paint. I decided to just use my 10/0 liner brush to paint little white dots in random clusters throughout the sky. You can also use the back of a paint brush handle to stamp the dots.
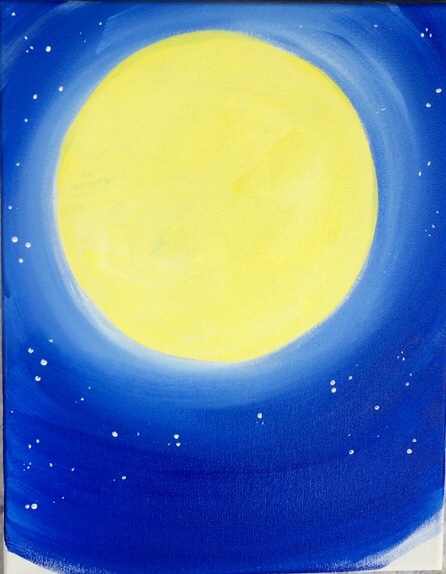
Let your painting dry before going on to the next step!
Step 5
Transfer the haunted house drawing onto the canvas (or draw it with a pencil if you are drawing your own haunted house).
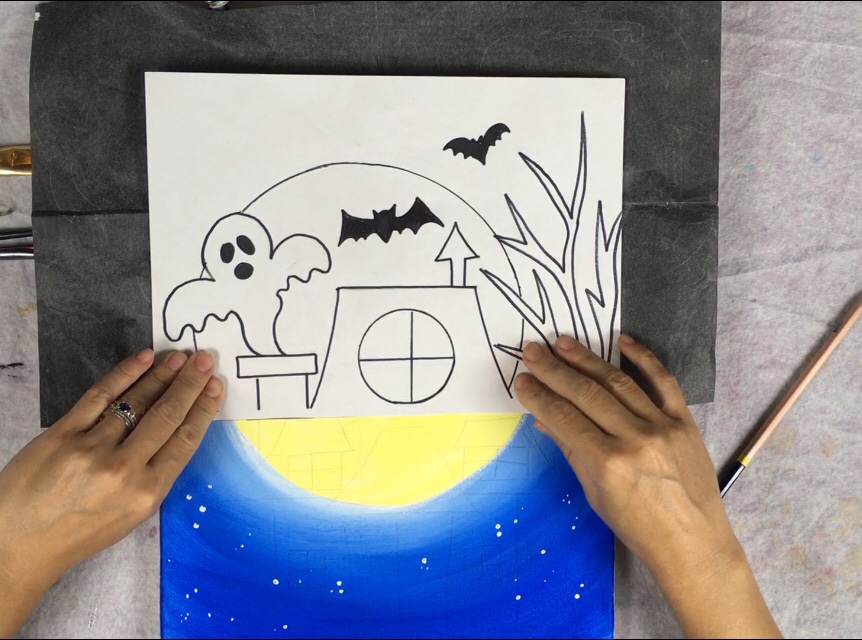
This traceable comes with two sheets, a top and a bottom. Trace each sheet separate.You’ll need a sheet of graphite paper (shiny side down) and a regular pencil to trace the lines. Press very firm and do so with the canvas laying flat on the table.
Step 6
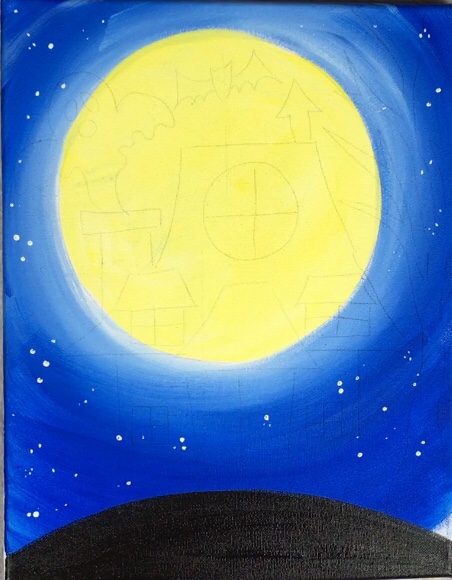
Use mars black and your 3/4″ flat wash brush to paint a hill. The traceable has the hill outlined for you, so all you’ll need to do is fill it in black.
Step 7
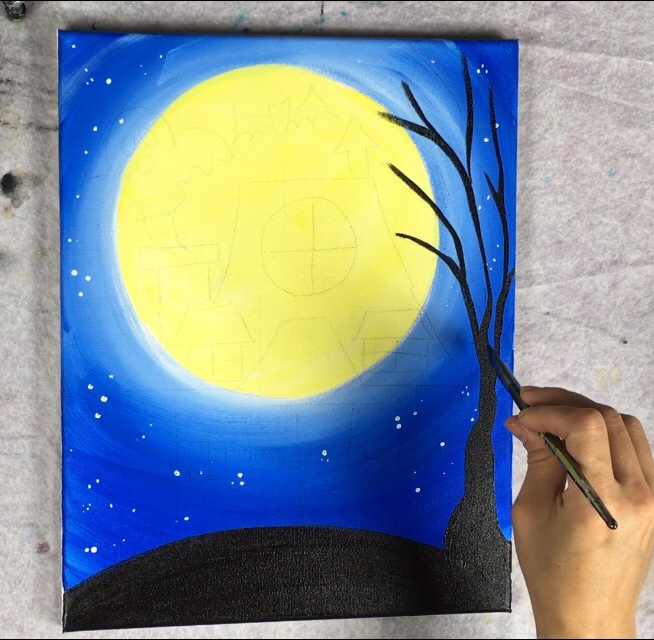
To paint the tree, use a #12 bright brush. Use the traceable as a guideline for filling the tree in. To get your branches to go to a point, use the brush on its side to get the thinner strokes.
Step 8
To paint this house in, I went in a specific order. I started at the bottom and painted the area with a light gray. To make a light gray, mix about 4 parts titanium white to 1 part mars black. Use your #12 bright brush for this area and paint around the windows (unless you want to paint over the windows later if that’s easier).
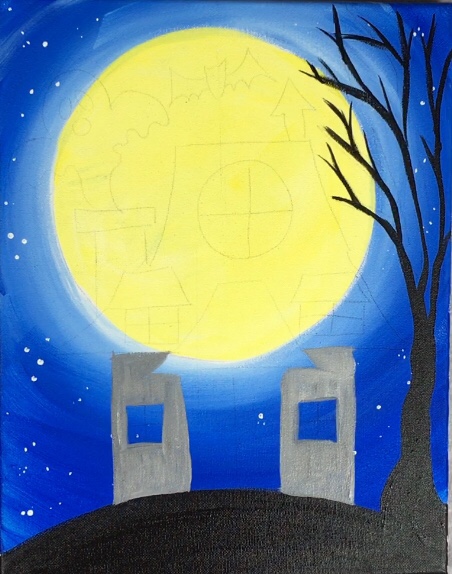

Mix a light gray to paint the bottom part of the house. 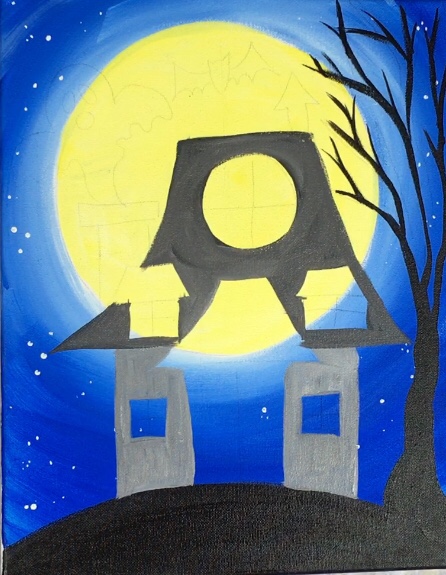

Mix a dark gray to paint the roof. 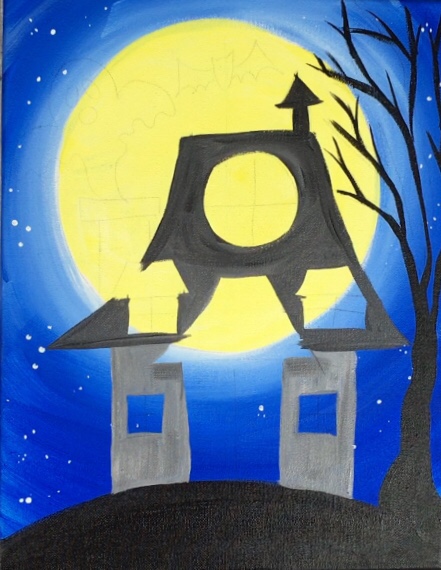

Paint the top vent mars black.
The roof was painted with a dark gray. To make a dark gray mix about 4 parts titanium white to 2 parts mars black. Then the vent at the top was painted with just mars black. You may use a smaller round brush for any of the areas that are small.
Step 9
Then I painted the roof parts (above windows and door) of the house with burnt umber. For the roof parts above the window, I mixed a little titanium white with the brown to make it look lighter.
The roof part above the door was painted with just burnt umber not mixed with white. The chimney on the roof was also painted burnt umber not mixed with white.
Step 10
For the windows, I used a combo of titanium white and primary yellow. By mixing those two colors (about 3 parts yellow 1 part white) you get an opaque yellow that will cover the shape of the windows.
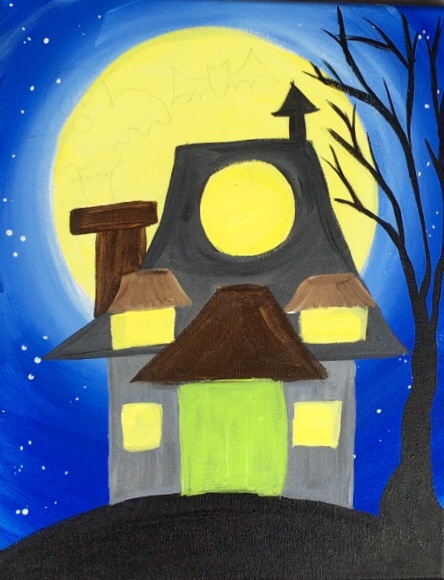
The door was painted with the color brilliant yellow green. You may need several coats of this to get it nice and solid.
Step 11
I used a #4 round brush to paint little brick texture on the bottom wall of the house as well as the chimney. I mixed burnt umber and mars black together to get a very dark brown (about equal parts).
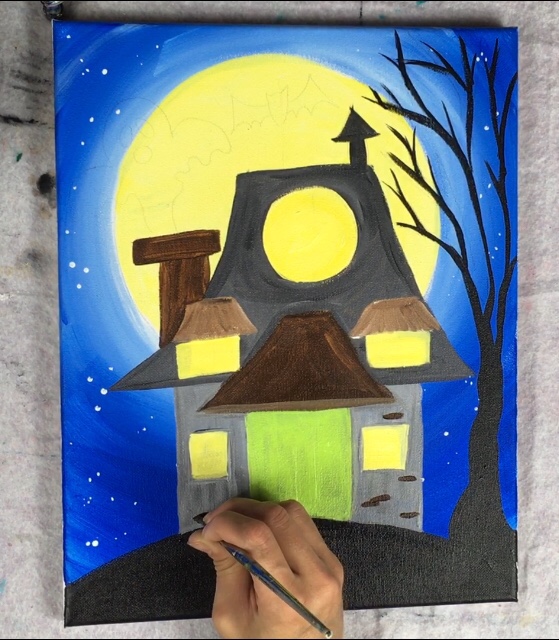

Paint little bricks 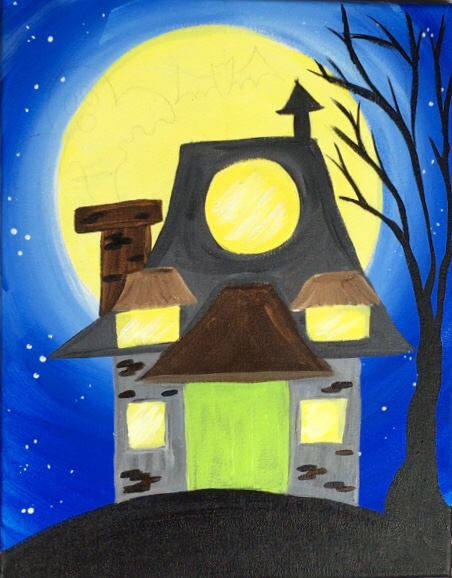

Paint brick texture on chimney too.
Paint little brush strokes of horizontal bricks staggered random areas. Also note that I painted some white lines going diagonal on the windows to give the windows a little bit of a glare.
Step 12
Then I painted a gate using my #4 round brush and mars black.
Step 13
To paint the cobblestone pathway, use a #4 round brush and the colors titanium white mixed with burnt umber (about 2 parts white, 1 part brown).
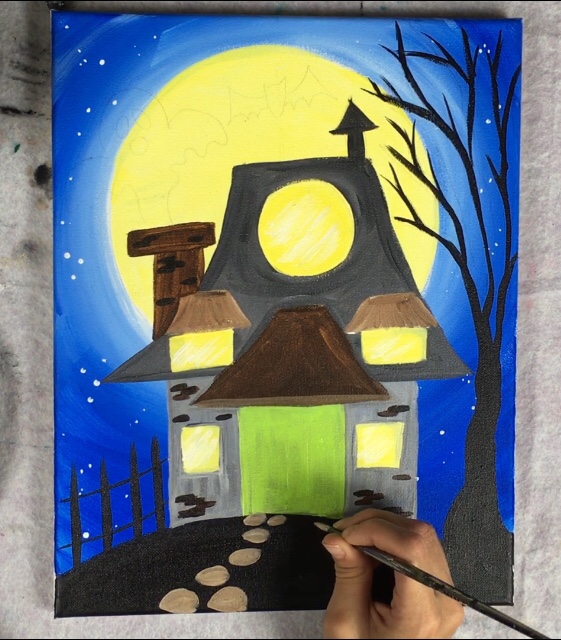
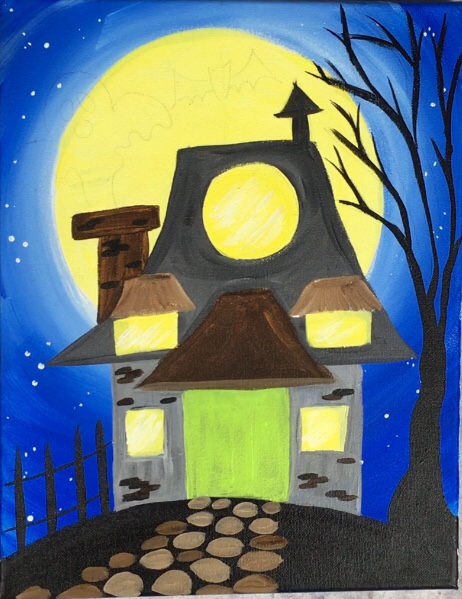
Make odd shaped circles that are smaller closest to the door and larger on the bottom. You may also wish to vary the light and dark of your brown to give it some color variation.
Step 14
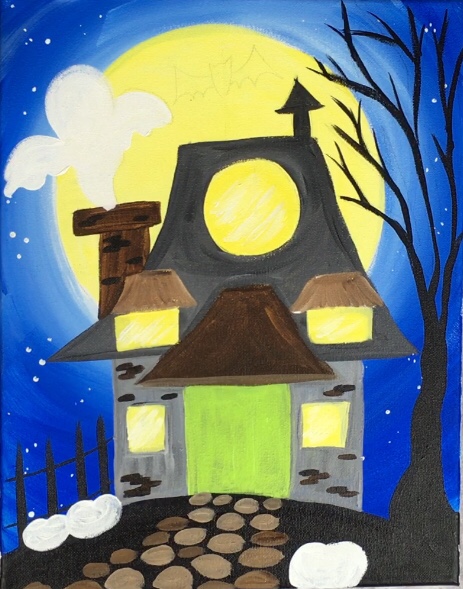
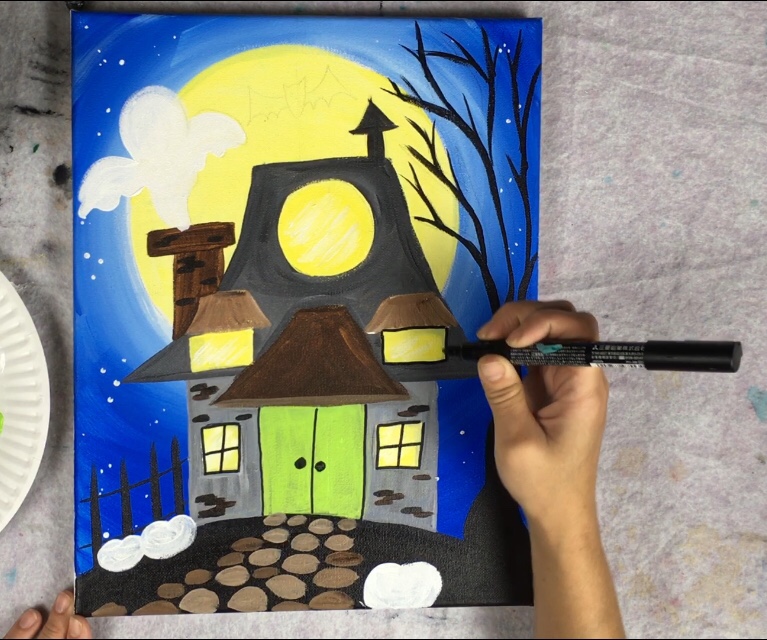
Paint the pumpkins and the ghost with titanium white. I used my #4 round brush for this step. For the pumpkins, simply paint an odd shaped circle that kind of dips down on the top middle.
Step 15
Use a black paint pen, sharpie or a 10/0 liner with mars black to paint window frames and other fine black line details.
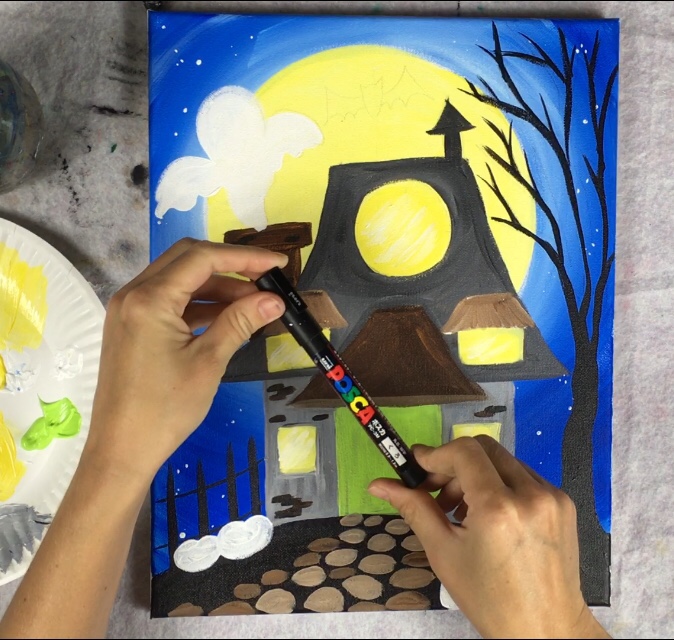
Outline the windows, draw the plus sign inside of the windows, outline the roof above the windows. For the bats, you may also use the paint pen or switch to your 10/0 liner and paint them in with mars black. Also, paint the ghost face in.
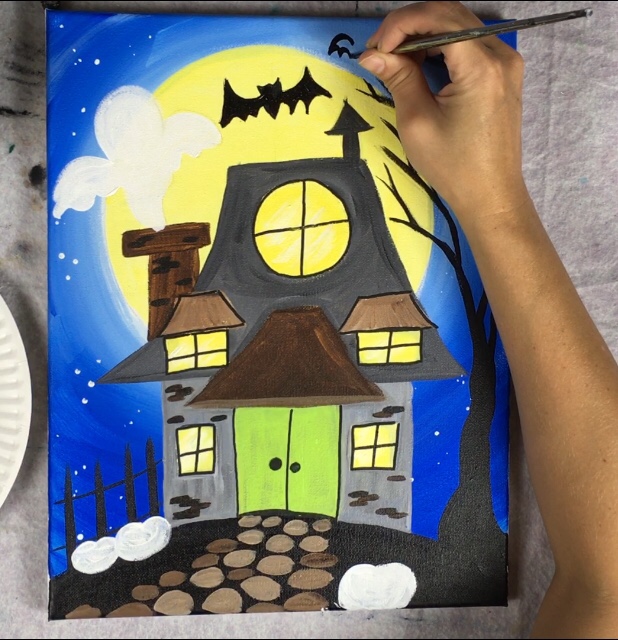
Step 16
paint the pumpkins in with cadmium orange hue. Then use burnt umber to paint the lines.
To make the stem, I used white mixed with burnt umber to make a light brown. Use the #4 round brush to paint the stem (or 10/0 liner if you prefer a smaller line).
Step 17
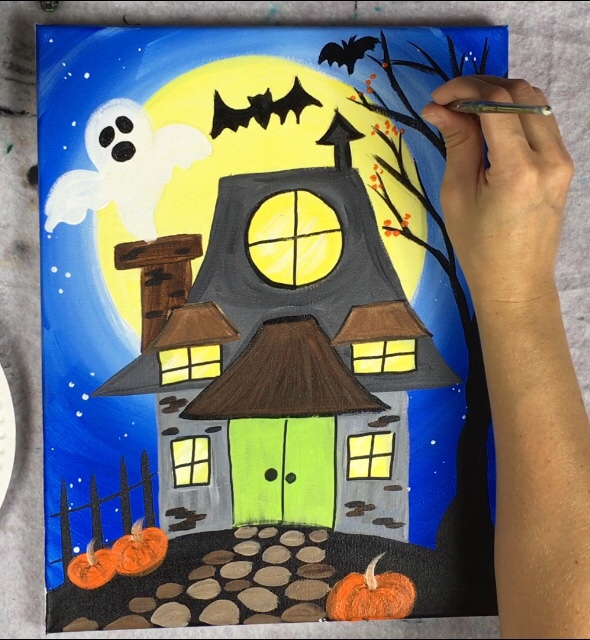
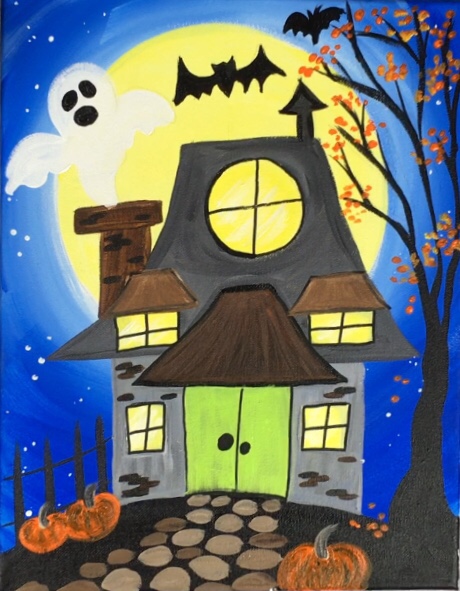
Then I painted little leaves on the tree using the orange and the yellow that was already on my palette. There are so many other details you can add to this painting! A spiderweb, porch lights, a cat, a witch in the sky!
Share Your Results!
Did you do this painting! You can share it on social media!


I ran out of my brilliant green in Liquitex, so I grabbed a bottle of Apple Barrel #21480E “Lime Sherbert”. The AB is slightly more white than the Liquitex but not significantly and I only had to paint two coats over the one L I managed to squeeze out of the tube. Lol. Thanks so much for this site, Tracie!!!
Awesome!! You are very welcome!
Forgot to add….my 8yo daughter and I are going to paint several of these on panels as gifts for her teachers at school! (Always with credit to you and this website written on the back!)
How neat! I’m sure your daughter’s teachers will love them!!