

How To Paint Pumpkins On Canvas With Wood Background
Would you like to save this?
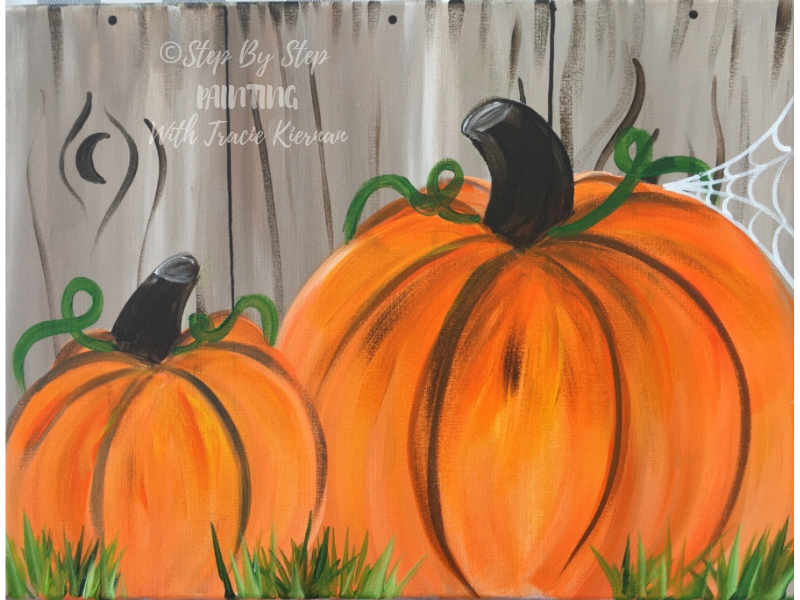
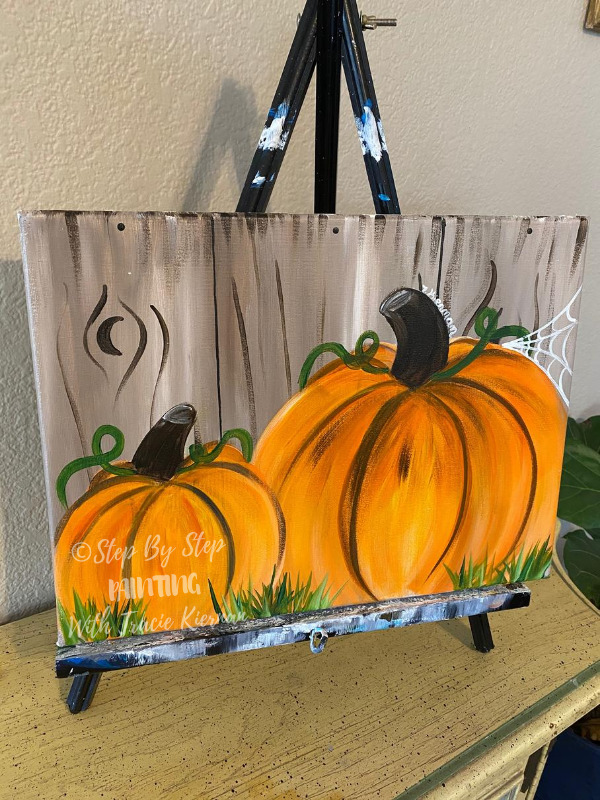
This acrylic painting tutorial will show you how to paint two pumpkins on canvas!
I did this on an 12″ x 16″ canvas and painted a faux wood background.
You can also do this on an actual wood panel and follow the same steps (minus painting the faux wood background).
Enjoy and happy painting!
Materials:
How To Paint "Pumpkin Patch"

Materials
- 16" x 12" canvas
- Acrylic Paint
- Paint Brushes
- White Chalk
Colors
- Cadmium Orange Hue
- Primary Yellow
- Hooker's Green
- Light Olive Green
- Raw Umber
- Titanium White
- Mars Black
Brush Sizes
- 3/4" Flat Wash
- #12 Flat Bright
- #4 Round
- #10/0 Round
Color Palette: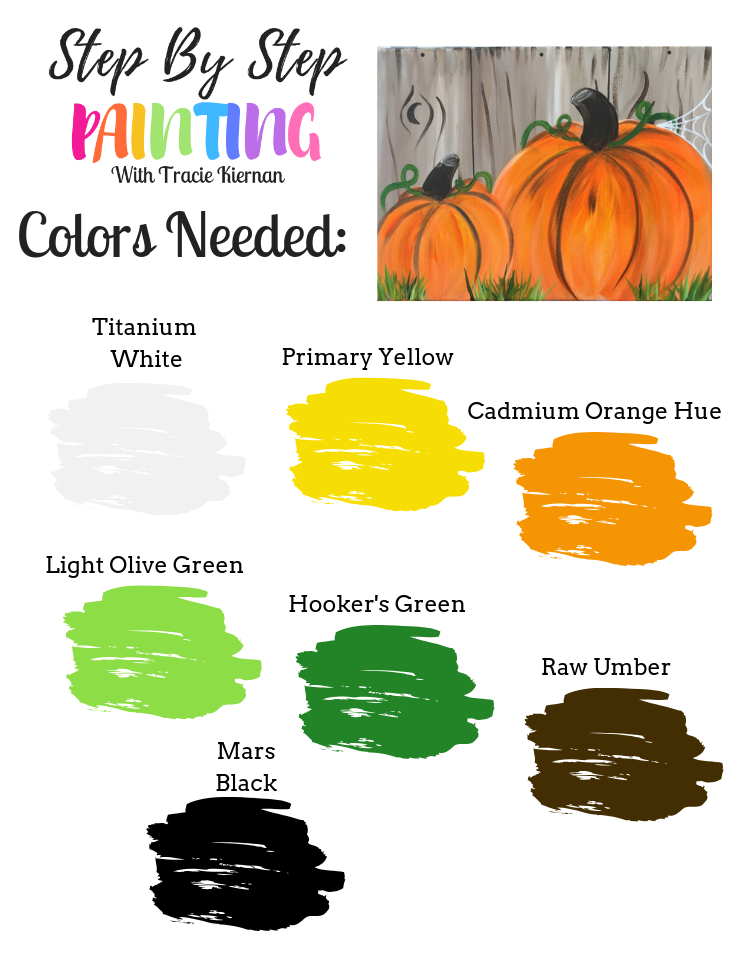

Directions At A Glance: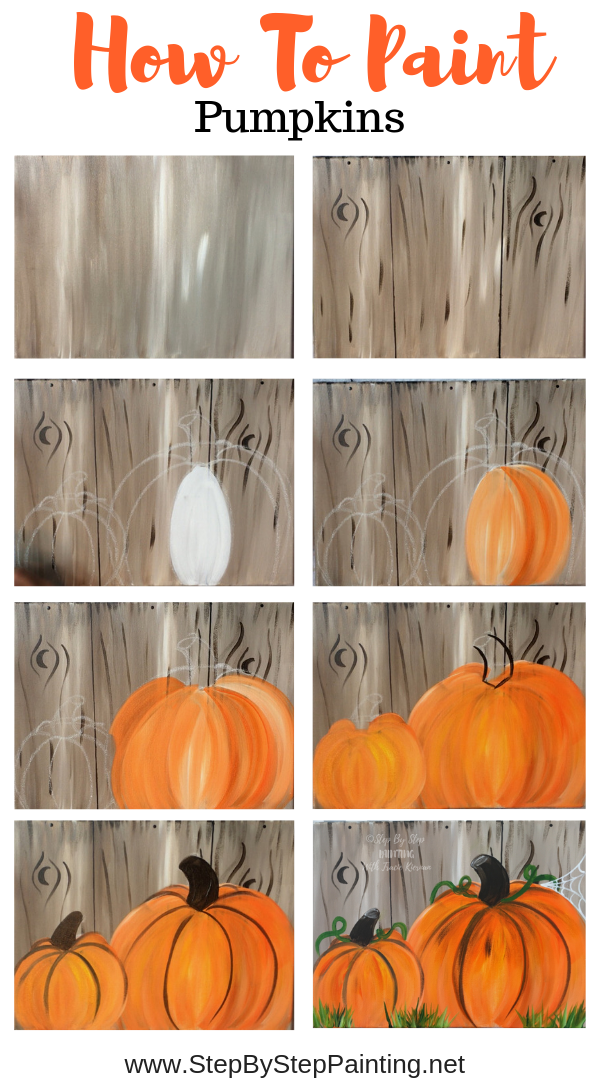

Video:
Step By Step Directions:
1. Paint The Background
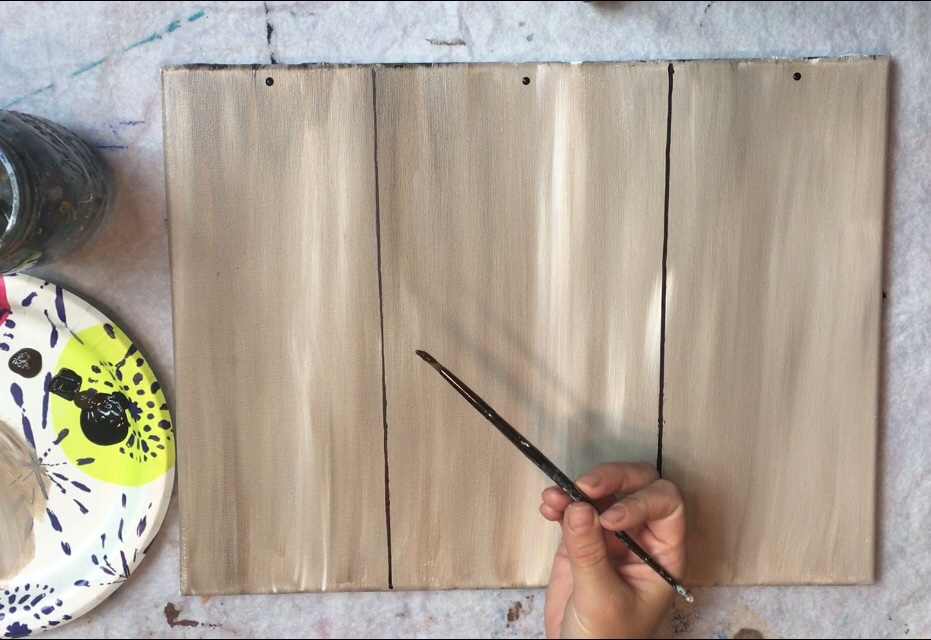
Start by using your 3/4″ flat wash brush and the colors raw umber and titanium white. Double load your brush in both the brown and the white (about equal amounts) and paint up and down strokes on your canvas.
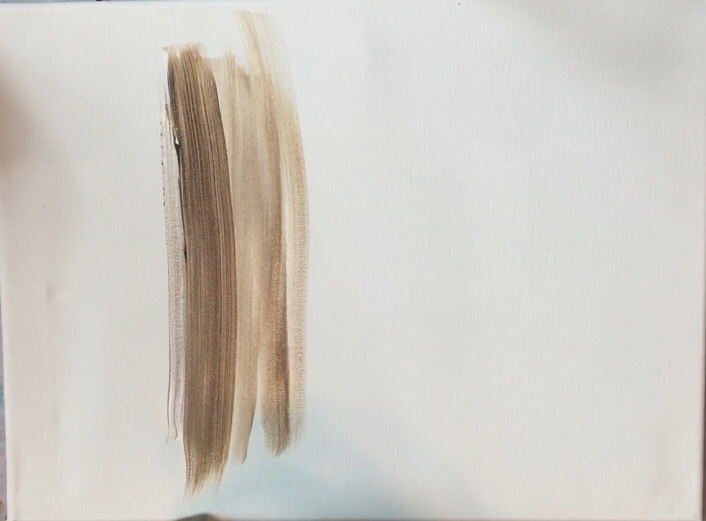
The brown and white will blend together to create a faux wood effect.
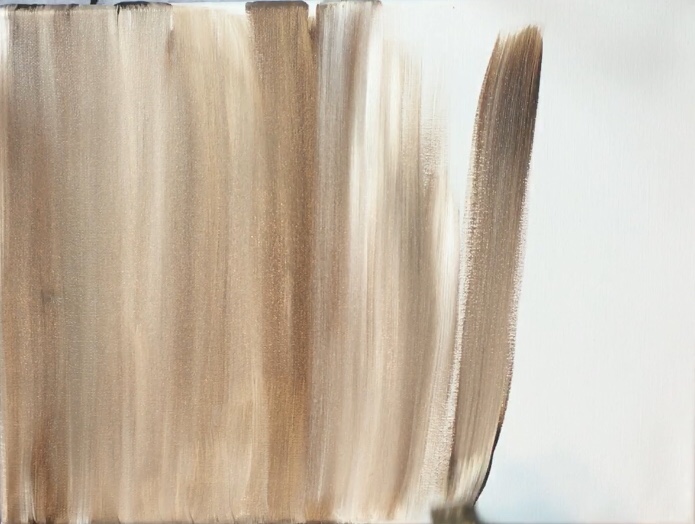
Continue to paint the canvas filling with this kind of color. Try not to over-blend because if you do, the colors will mix into one solid color and won’t look like a faux wood.
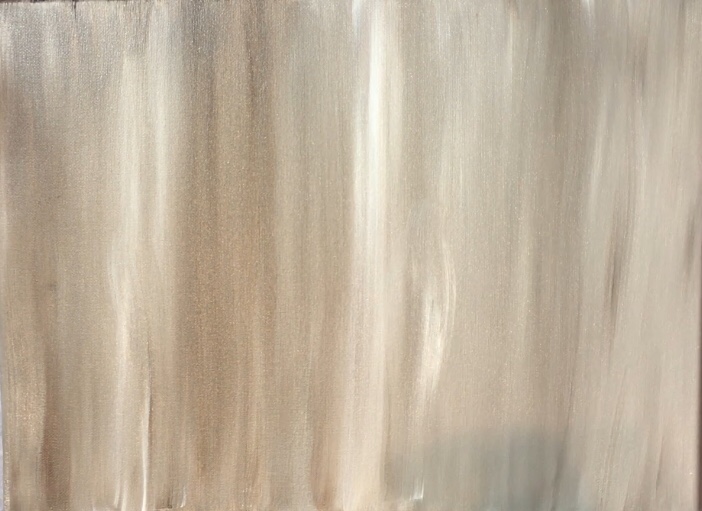
Let your painting completely dry (or use a hair dryer) before going on to the next step!
2. Paint The Faux Wood Lines
First use a T-Square ruler (or a straight edge) to divide the painting in thirds. Use mars black and a #12 bright brush on it’s tip to paint the thin line.
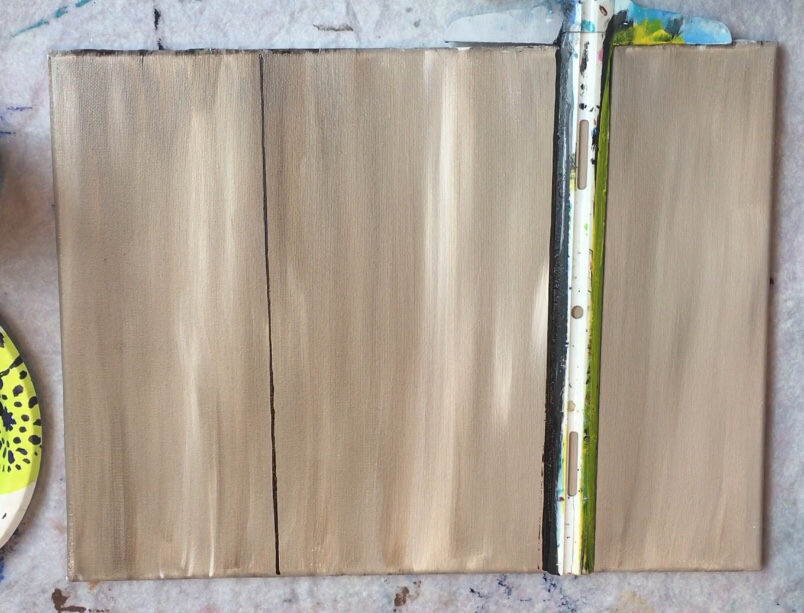
Next use your #4 round brush to paint three small dots on the top of the painting to represent nails.
To paint the wood texture, use your #4 round brush and raw umber mixed with a tiny bit of mars black. Paint a little crescent moon shape and some contouring lines around it to represent knots in the wood.
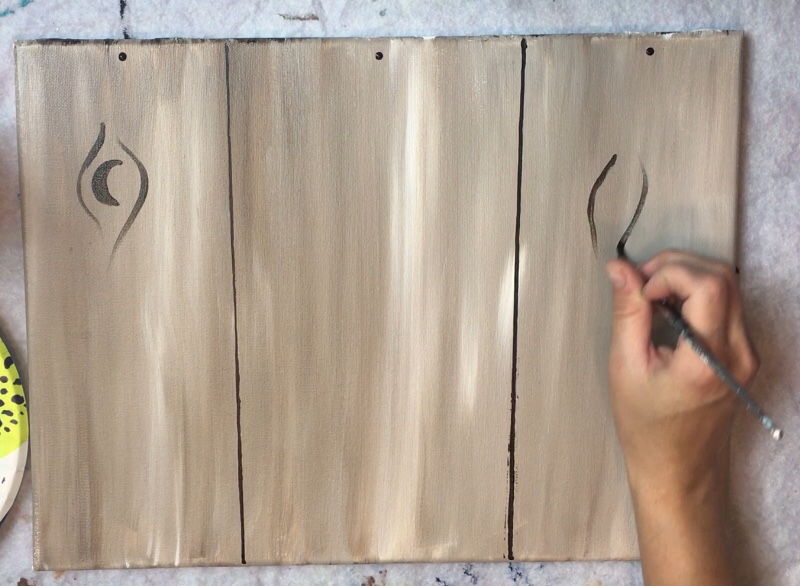
Then paint some vertical lines to represent wood texture.
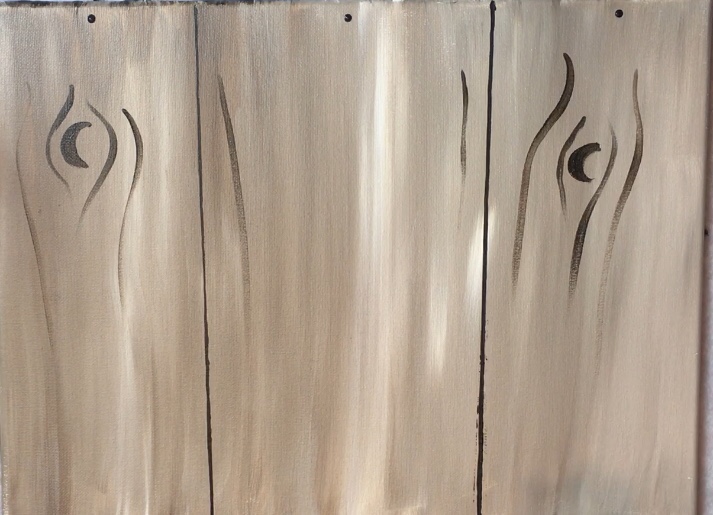
Tip: try to get your brush to be “dry”. Don’t add water to the brush and wipe off excess paint with a paper towel. This allows the paint stroke to be light and feathery and helps with creating the faux wood texture.
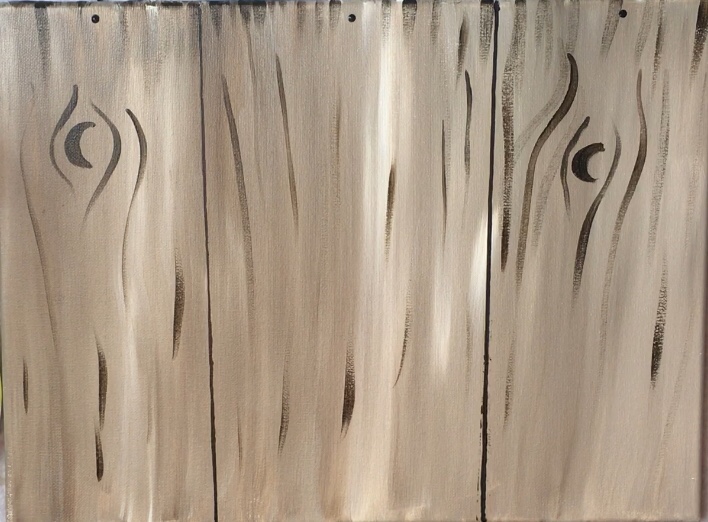
Wait for your painting to completely dry.
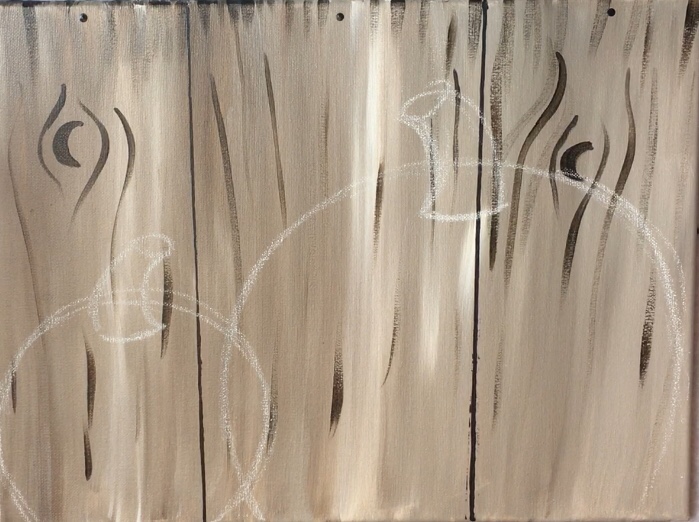
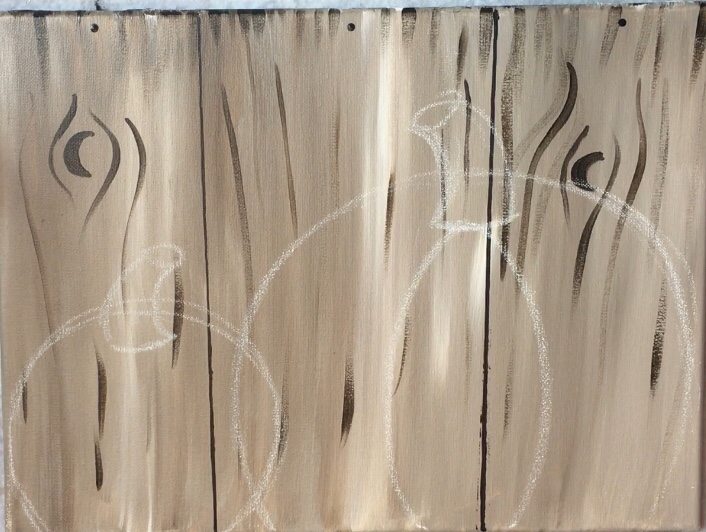
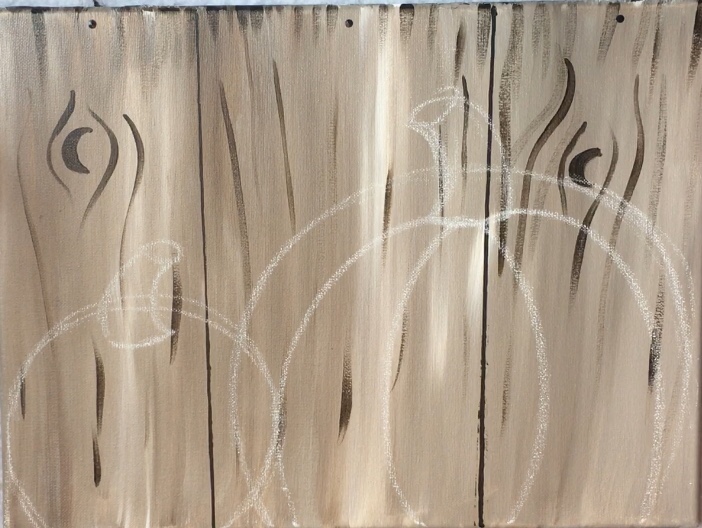
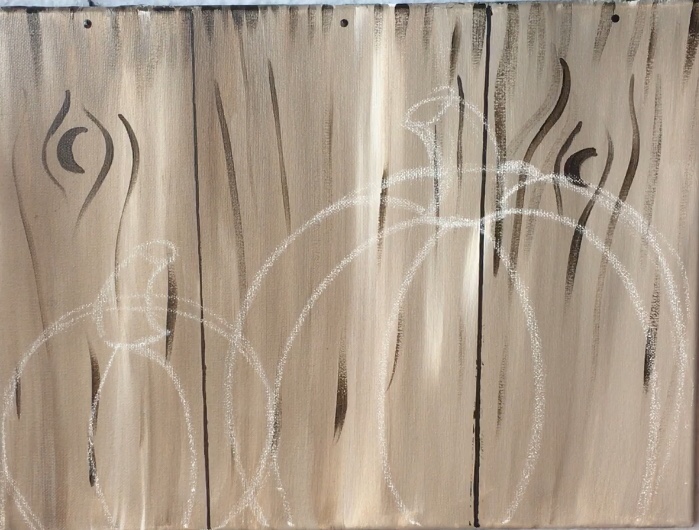
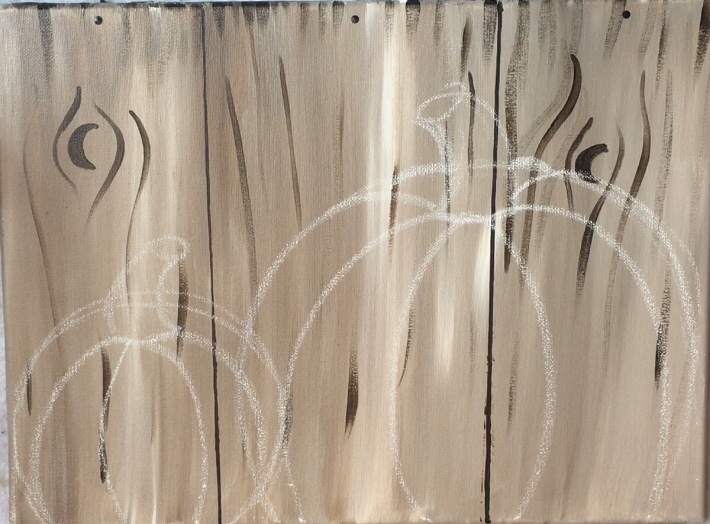
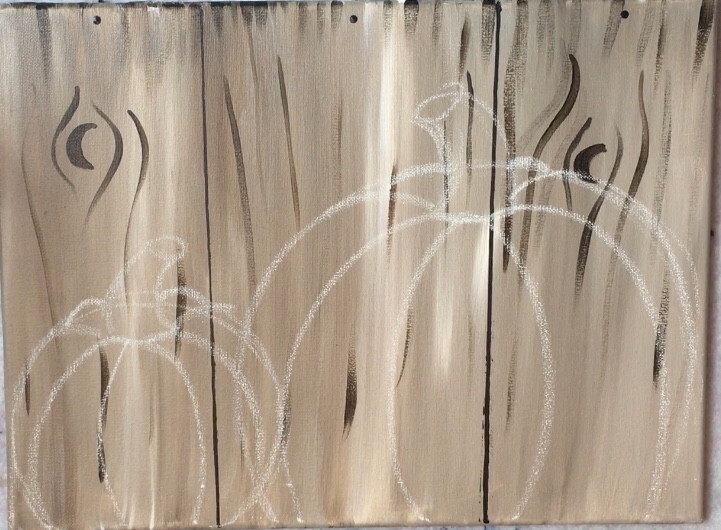
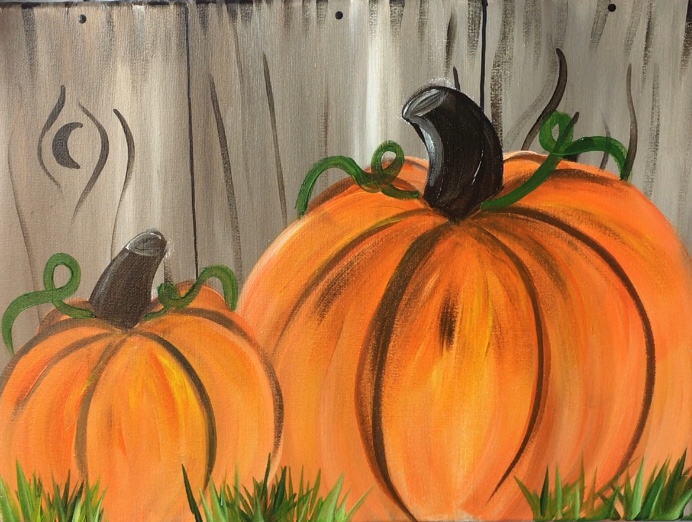
3. Draw The Pumpkins With Chalk
Position both of your hands on the canvas so the fingers are spread out like the picture below. The large pumpkin is a circle shape that can fit both hands inside.
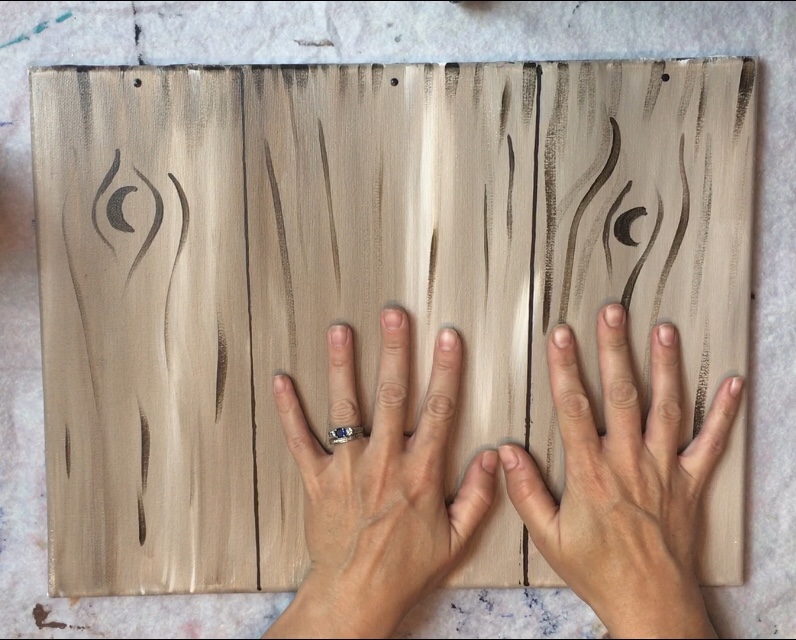
Draw a large circle with a piece of chalk in the lower right part of your canvas. As stated above, the size of this circle is the size of both hands as pictured below.
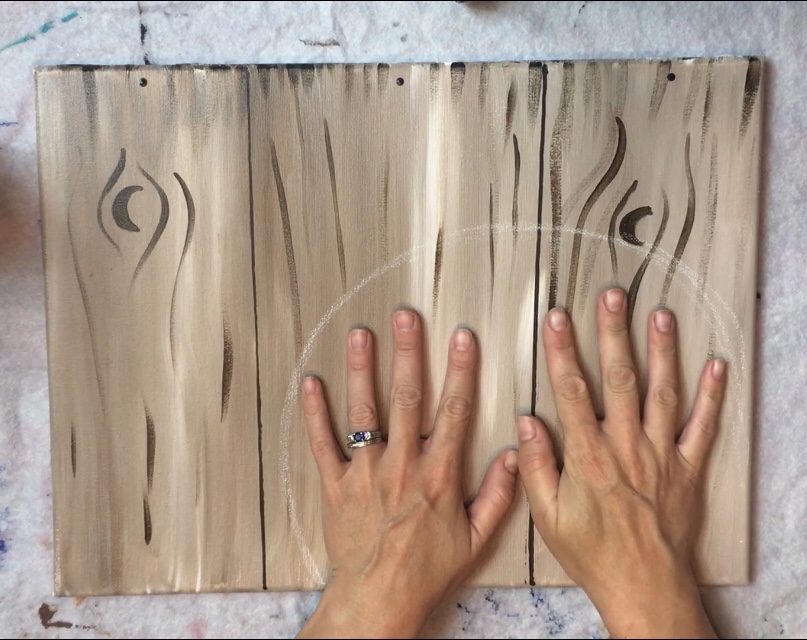
The second pumpkin is about the size of my fist. This smaller pumpkin will also overlap the larger pumpkin a bit.
Draw this smaller circle so that it is relatively a little larger than the fist and overlaps the large pumpkin.
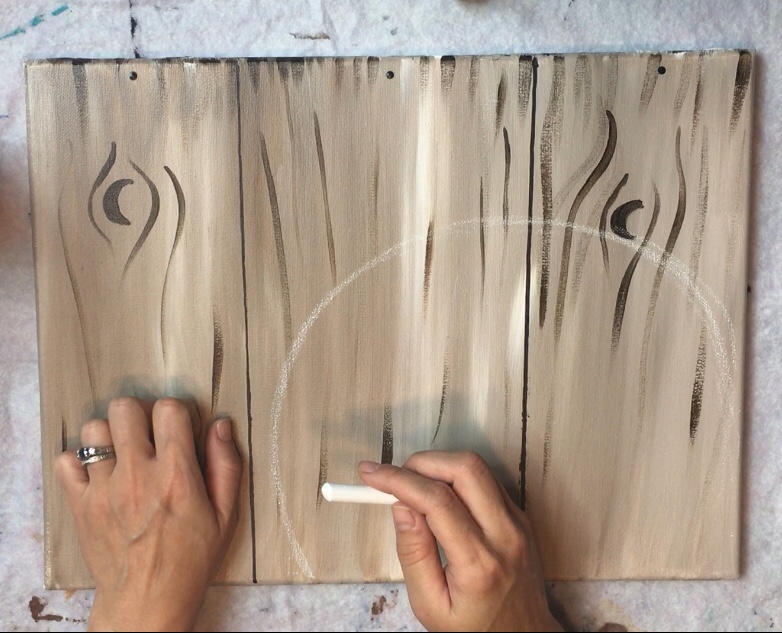
To draw the stems, start by drawing the curved line just below the top of the circle. Then draw the stem shape so that it curves or goes straight up and down (whichever way you want your stems to go).
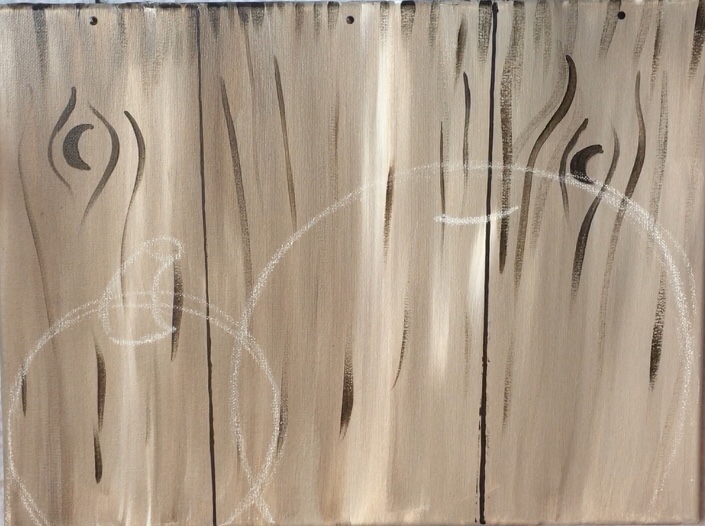
Draw an oval on top of the stems to make it look 3D.
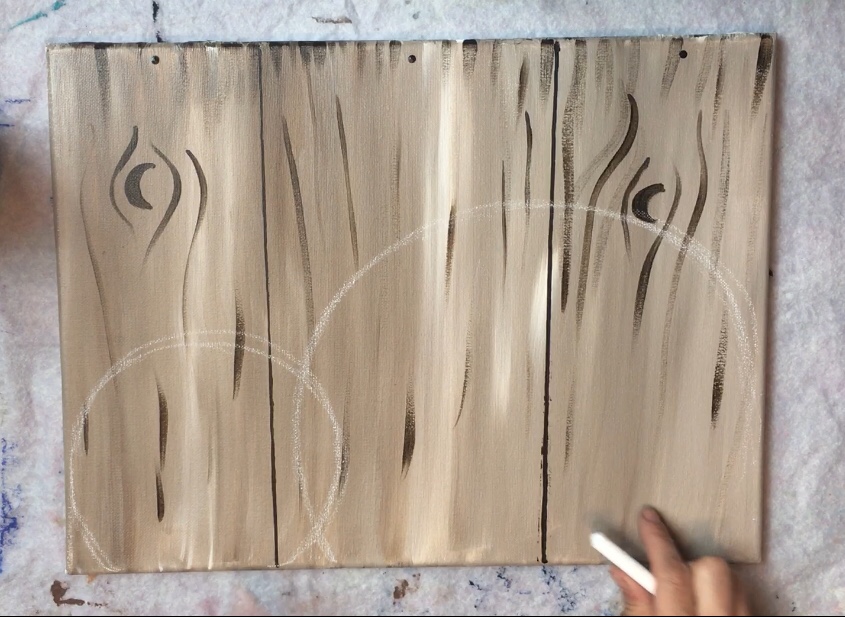
Then draw the lines on the pumpkin. Start in the middle of the large pumpkin. Start your chalk at the top at the base of the stem and draw two curved lines opposite from each other so they form almost a cat eye shape on the pumpkin.
Then draw two more curved lines that start at the bottom of the stem’s base and go down.
Then draw two more curved lines. There should be no more room inside the circle at this point but if there is, you can always draw another set of lines.
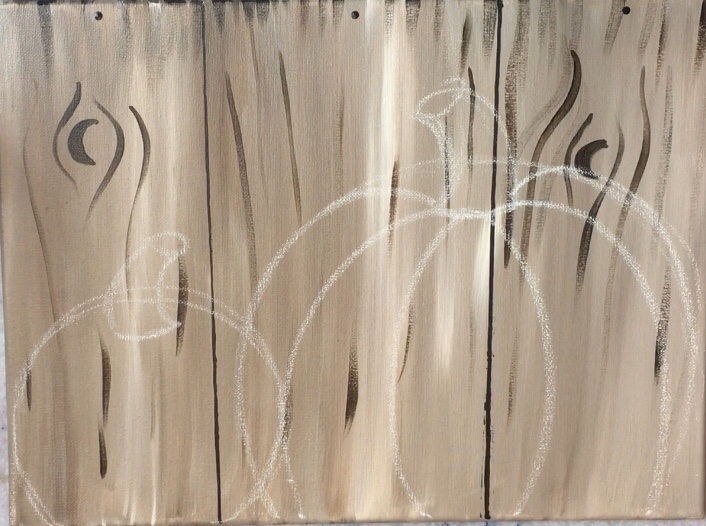
Then finish the bump lines in the very back of the pumpkin behind the stem.
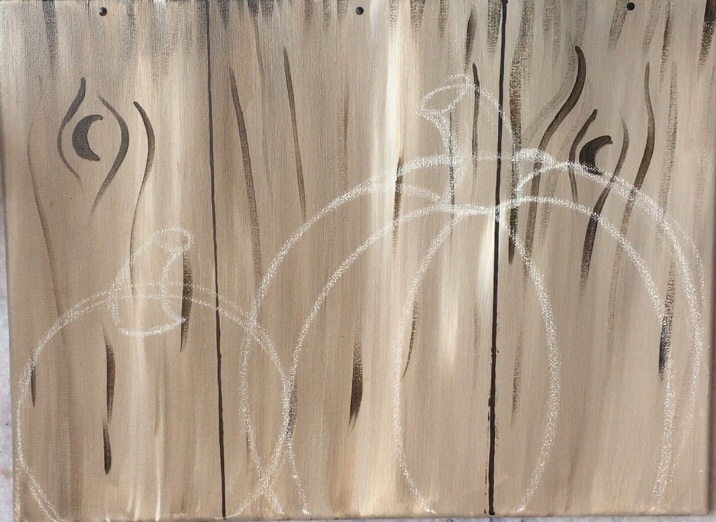
Repeat these steps for the smaller pumpkin.
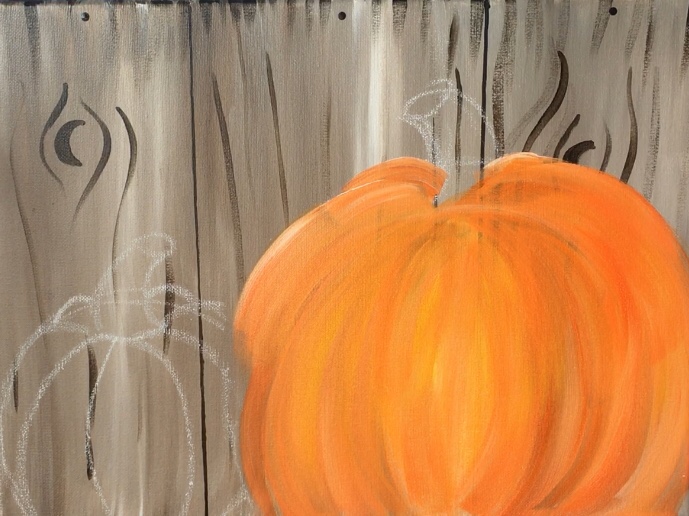
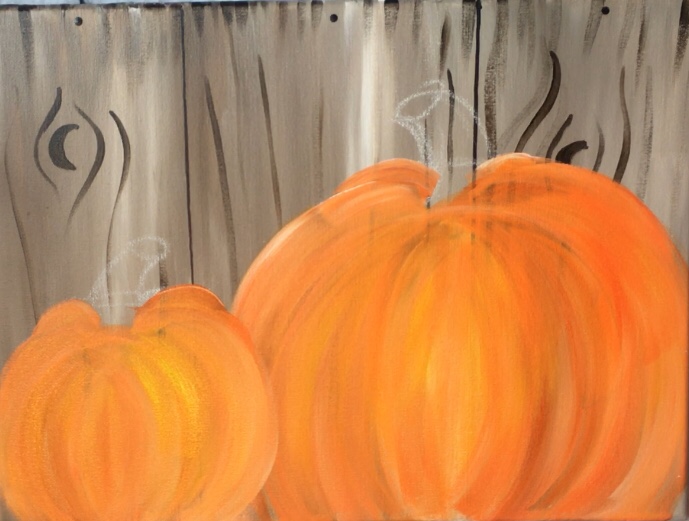
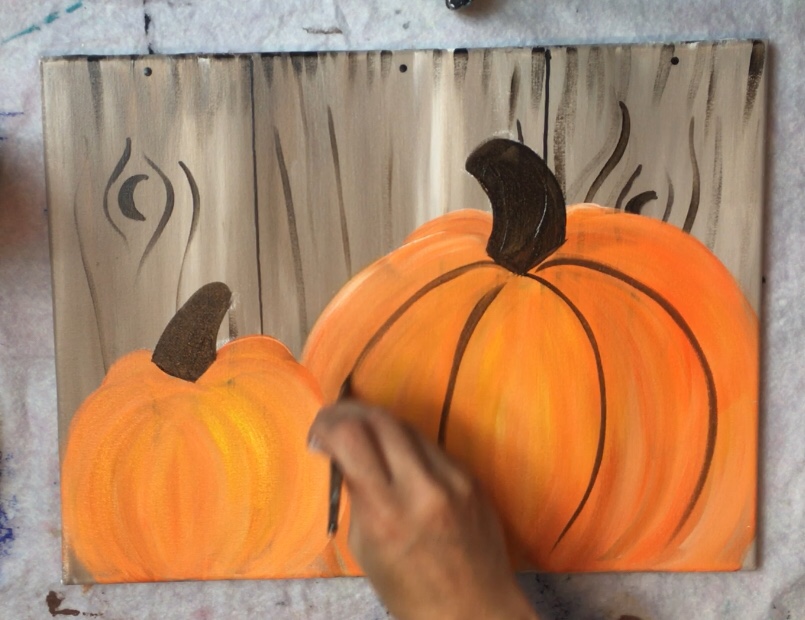
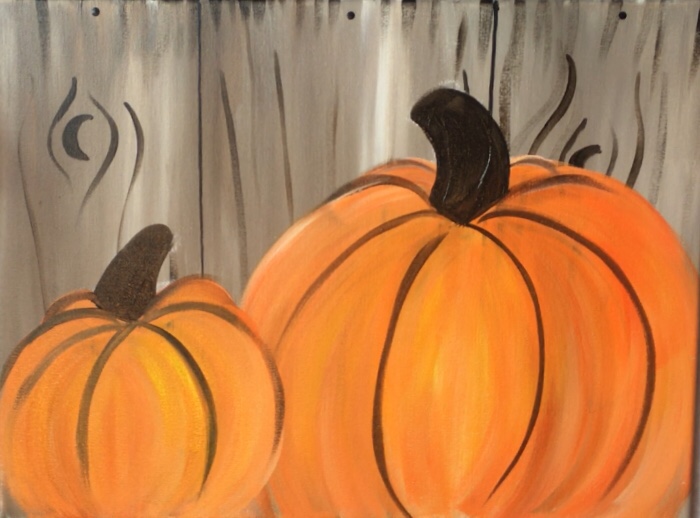
4. Paint The Large Pumpkin
To paint the pumpkins, you’ll need your 3/4″ flat and cadmium orange hue and titanium white. Start off by painting the middle area of the large pumpkin in with titanium white.
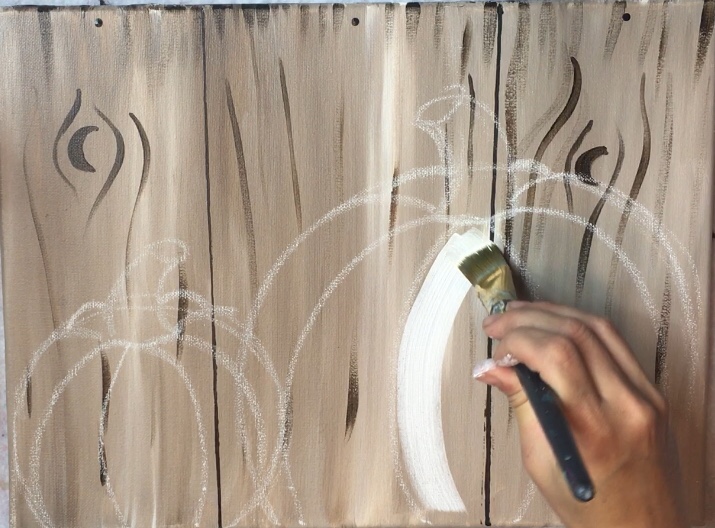
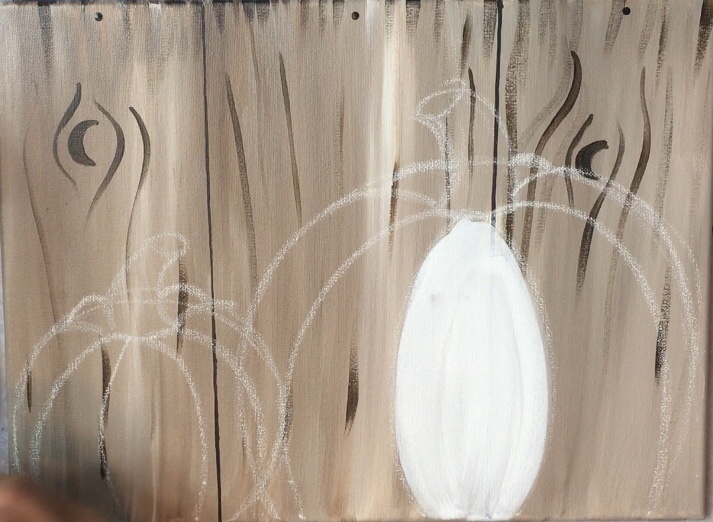
Then don’t rinse your brush off. If there’s a lot of white on your brush, wipe some excess paint off. Load your brush in cadmium orange hue. Paint the middle part of the pumpkin orange. Make sure your strokes are long and go in a curved direction to form the shape of the pumpkin.
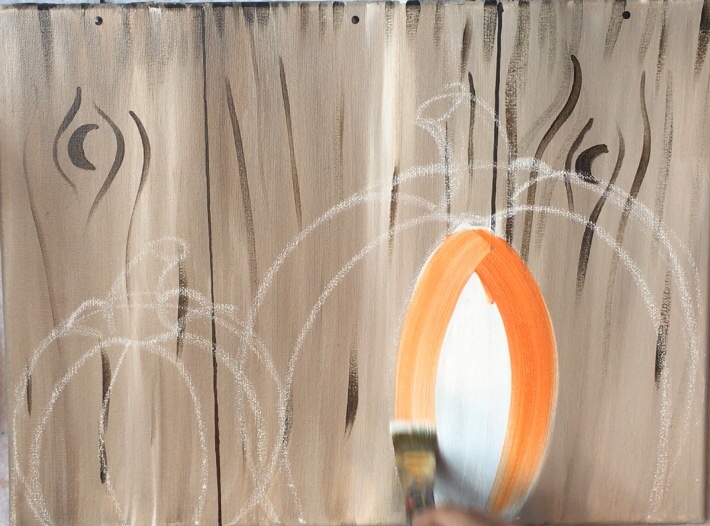
When you paint, don’t let your white and orange mix all the way to make one solid color. Let the color blend to create variations of a light orange. This helps create the “pumpkin texture”.
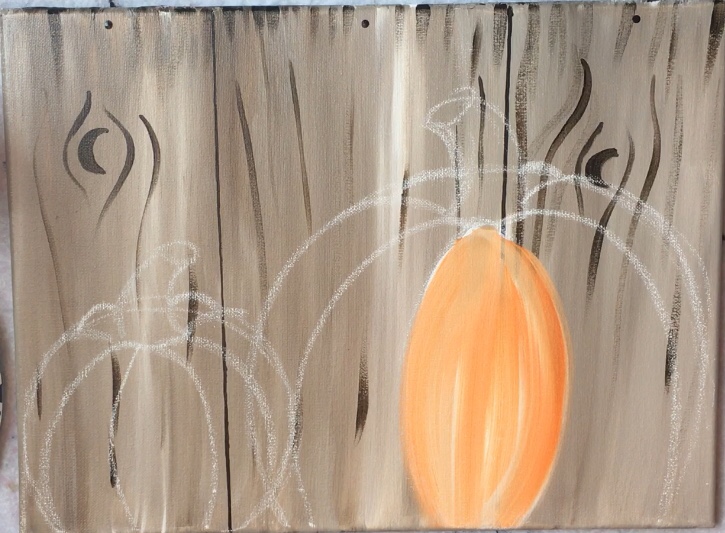
Repeat this with all the pumpkin curves. You don’t need to paint the first bump white first, you can “double load” the brush in white and orange. To create the variations in the orange, load with a little more orange when you load the brush then load with a little more white another time.
Use your #12 bright flat brush to paint the smaller bump areas in the back of the pumpkin. Also, use primary yellow to paint a few strokes on some of the bumps. This helps to create some color variation in the pumpkin. You only need a little yellow and it will blend with the orange. Make these yellow strokes go in the same direction as the orange/white strokes.
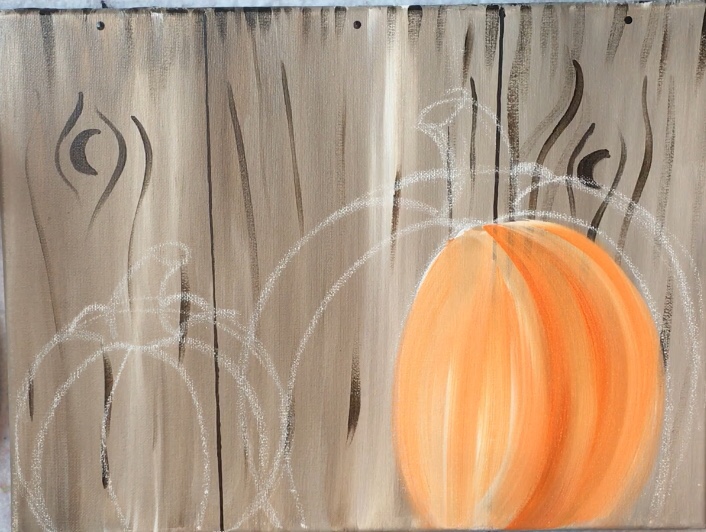
5. Paint The Small Pumpkin
Repeat these steps for painting the smaller pumpkin. Make sure you allow your smaller pumpkin to overlap the larger pumpkin by painting over that area.
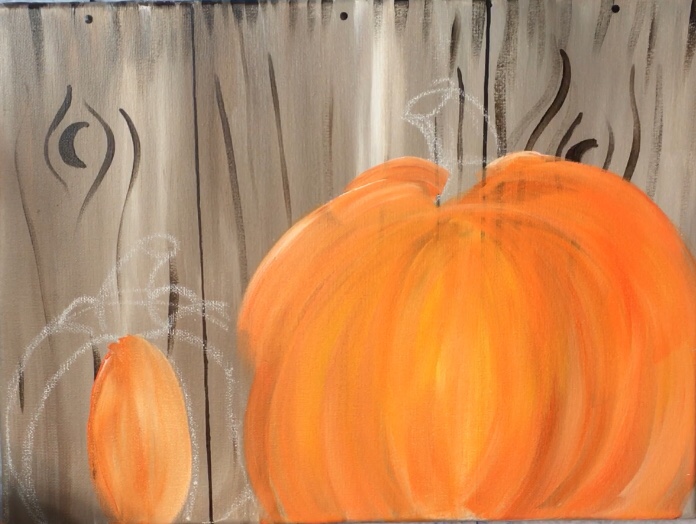
Add some strokes of yellow to the small pumpkin too.
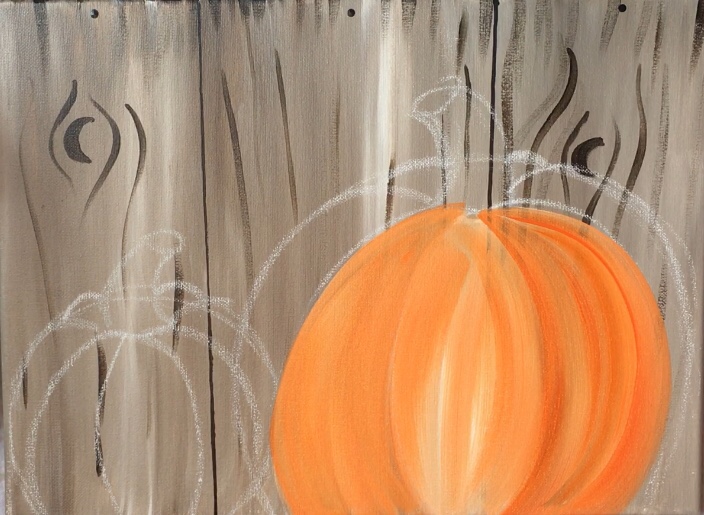
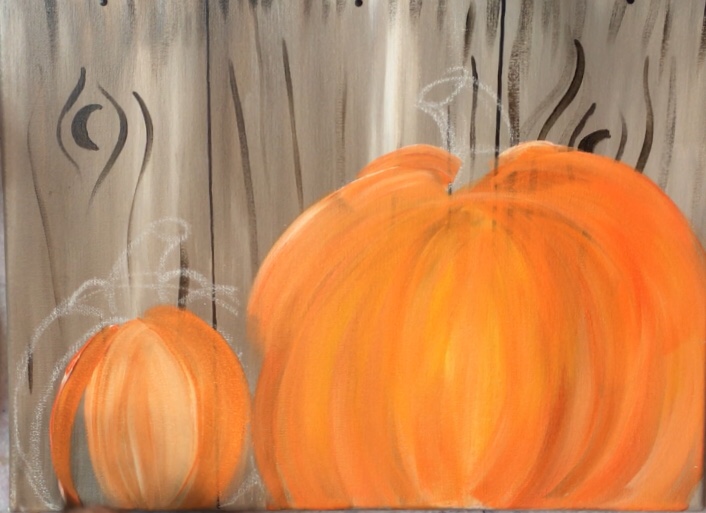
6. Paint The Stems
To do the stems, I used a #4 round brush and mixed raw umber with a little bit of mars black. Start by outlining the stem shape. Note that the base forms an upside down triangle shape.
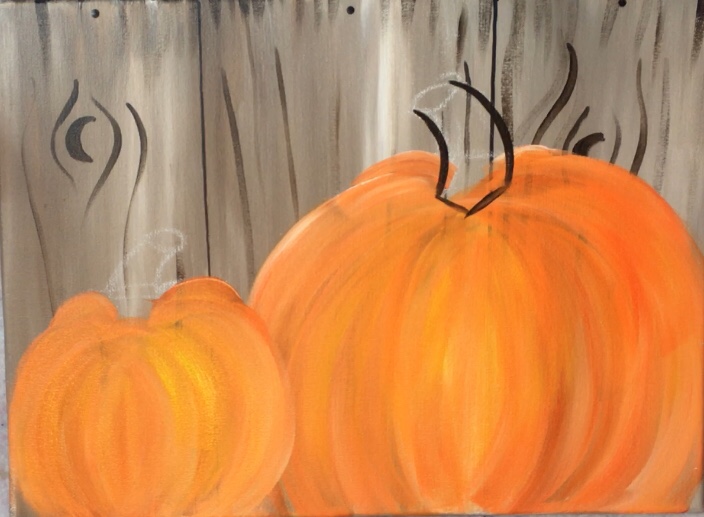
Fill the stem shapes in with this dark brown color.
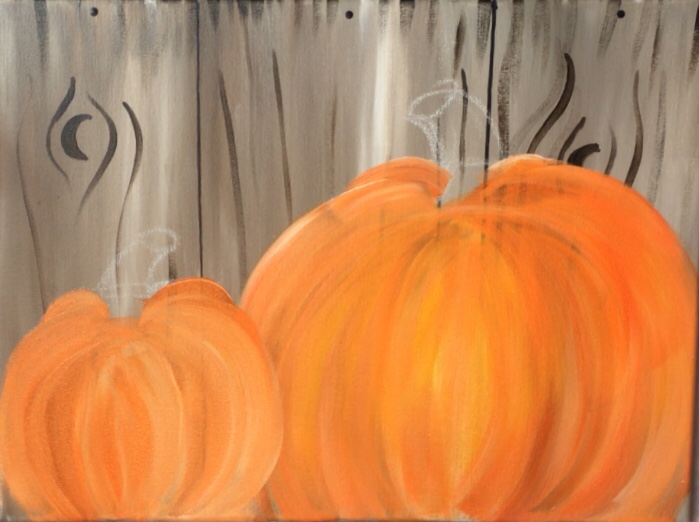
7. Paint The Pumpkin Lines
To do the lines, I used my #4 round brush and raw umber. Start at the top of the pumpkin and stroke each line down. It’s okay if your line runs dry or if you don’t have your line go all the way down.
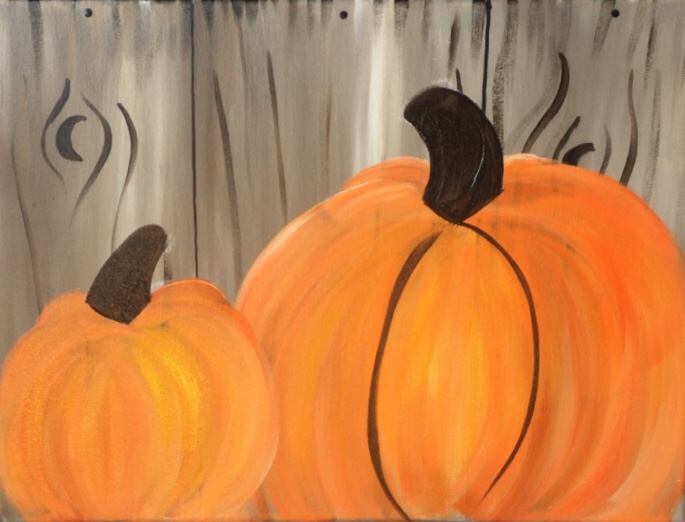
Do this for all the lines of your pumpkin.
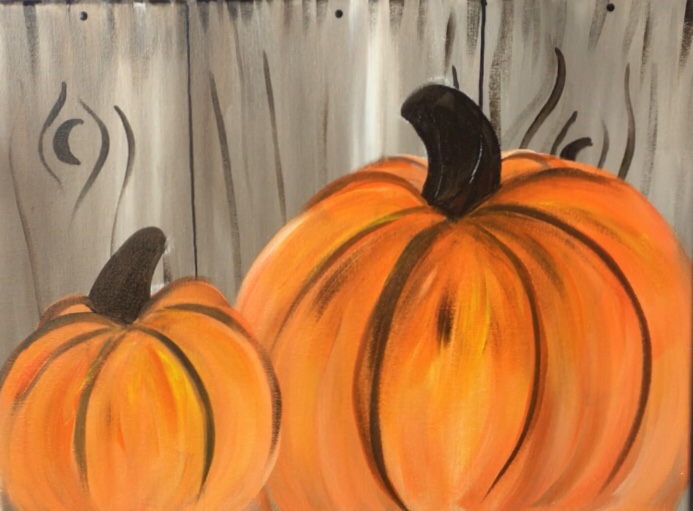
8. Paint Some Darker Shading (Optional)
This is completely optional. To create some extra shading, I painted a few strokes of cadmium orange hue mixed with a tiny bit of raw umber with my 12 bright brush. I did this on the top area and around the bump lines. I also did this “dry brush style” meaning no water is added to the brush and some paint is wiped off teh brush using a paper towel.

Make sure that if you are doing these darker strokes, that the strokes go in the direction of the shape of the pumpkin curves.
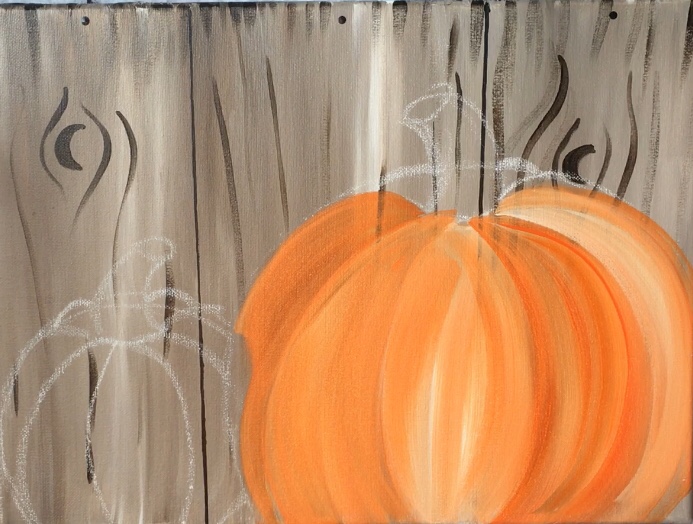
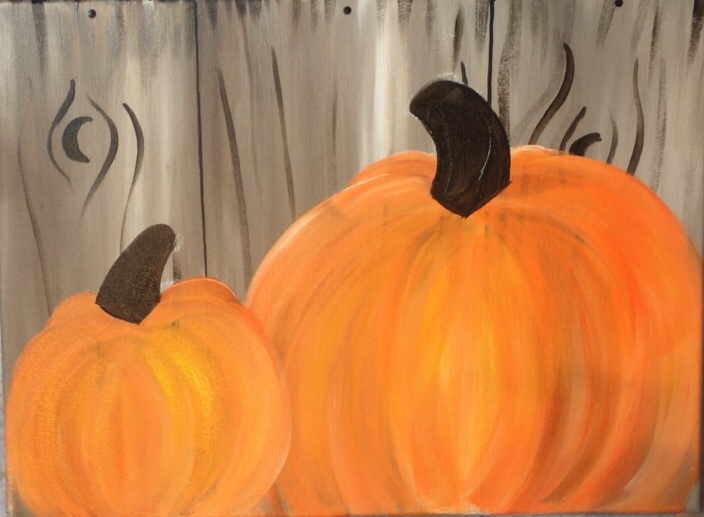
9. Paint The Top Of The Stem
I used a #4 round brush and titanium white to paint the curve on the top of the stem. This gives it more of a 3D look.
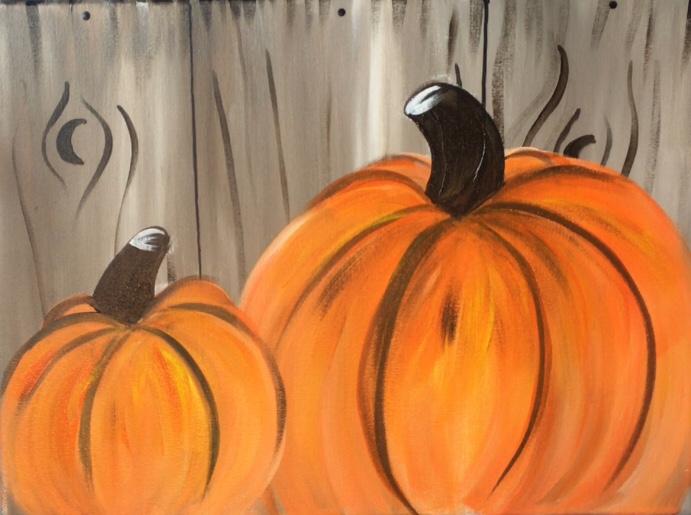
Then I blended it in more with the raw umber and added a little bit of this white/raw umber mix on the left of the stems.
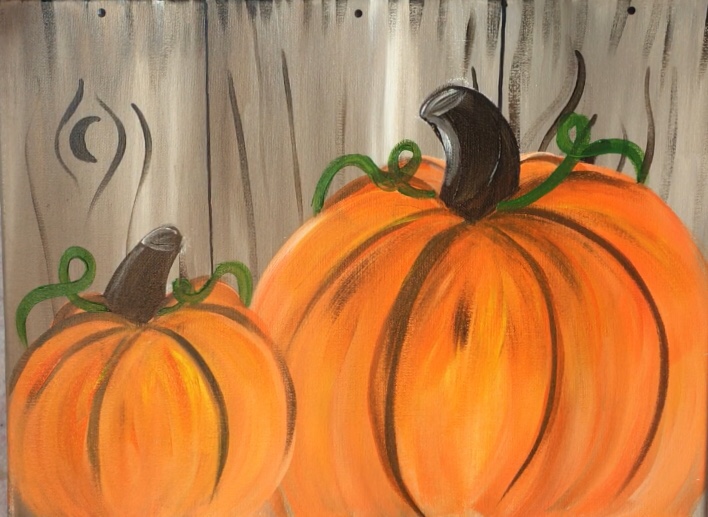
10. Paint The Vines & Grass
Next I used a #4 round brush and the colors hooker’s green and light olive green mixed together. Paint swirly lines for the vine.
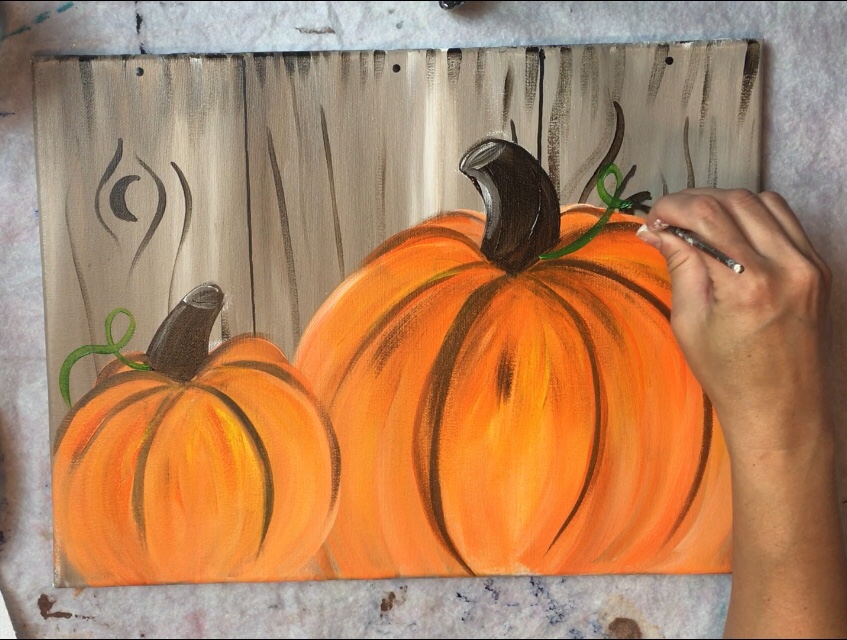
To do the grass, I used the same two color greens and a 12 bright brush. Use the tip of your brush to paint blades of grass starting at the bottom and stroking each grass stroke up. To get the various colors, dip your brush in the hooker’s green and then dip in the light olive green.
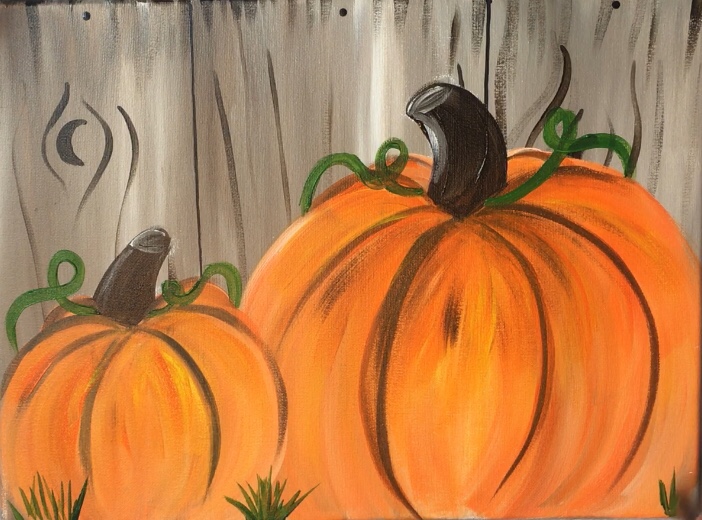
You can even add a little bit of white in the green to create some lighter green strokes.
11. Paint The Spiderweb
To do the spiderweb, I used my #10/0 liner brush and titanium white. Start by painting the two lines – one on the edge of the pumpkin and one above.
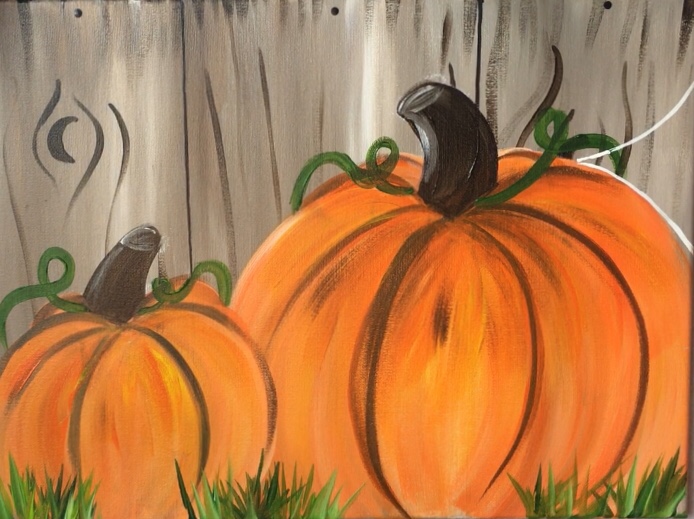
Then paint two more lines in between those lines. Paint the webbed curve lines so the points touch each of the diagonal lines (see below).
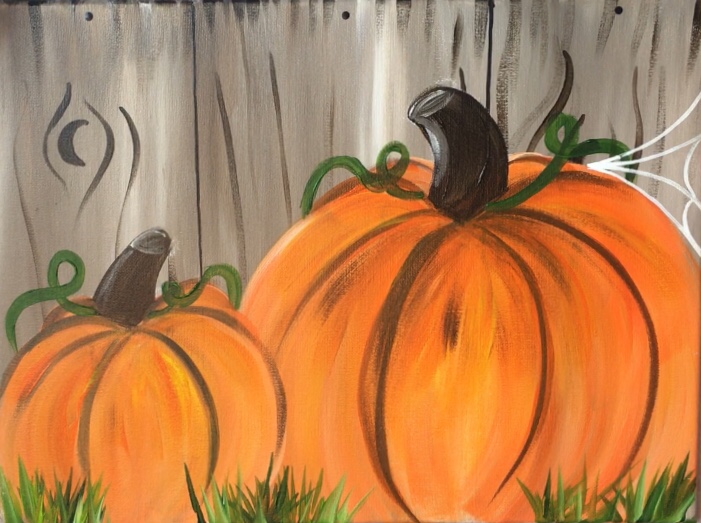
Fill in the rest of the webbed lines.
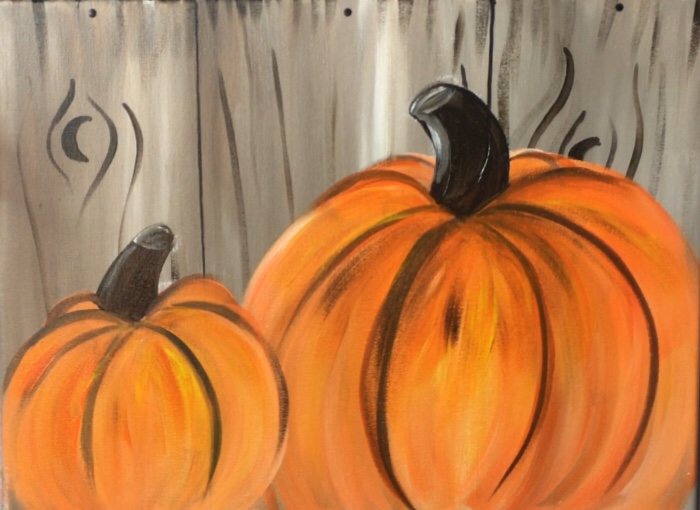
Finished!!
I need help finding the video tutorial on the “Painting Pumpkins on Wood Background” Thanks Dani
Hi Dani! There’s a quick “process” video in the materials section. The full length video is actually not quite ready yet but will be sometime tonight or tomorrow ?.
Thank you! I’m not finished yet. I’ve been trying to just use the written directions to see if I could do it. So far so good. I did paint late into the night though so it’s not finished yet. I just wanted to say thank you for the fun fall tutorials!
Great tutorial! Thanks for sharing!
Great tutorial. Painted on terra cotta pot as a gift!
Thank you!
Even when I wait for my paint to dry and then paint over with a different color it mixes. Is this due to the quality of the paint? Help!
Possibly. What paints are you using?
My first painting. You made it easy & fun. Thank you
You’re welcome!!
The cheapest paint from Walmart/hobby lobby. Anita’s, folkart.
I painted 23 years ago when I had Cancer to get my mind working during Chemo. Unfortunately I was going to work taking care of our Children, house ect. but was allowed to to take art classes in order to get my mind working again. But life happen now with Covid I am trying to get back to painting. I have some time for myself. You are a great teacher I hope i can do more from you. With you. I painted more with Oils. Could’t find the correct orange then finally did. Than you again.
My 9 year old did this painting. It was an easy video for him to follow with very little help. Everyone loves the final product and definitely boosting his artistic confidence!! Thank you
How awesome Melissa! So glad he is proud of his pumpkin painting!