
How To Paint A Bald Eagle Step By Step

Would you like to save this?
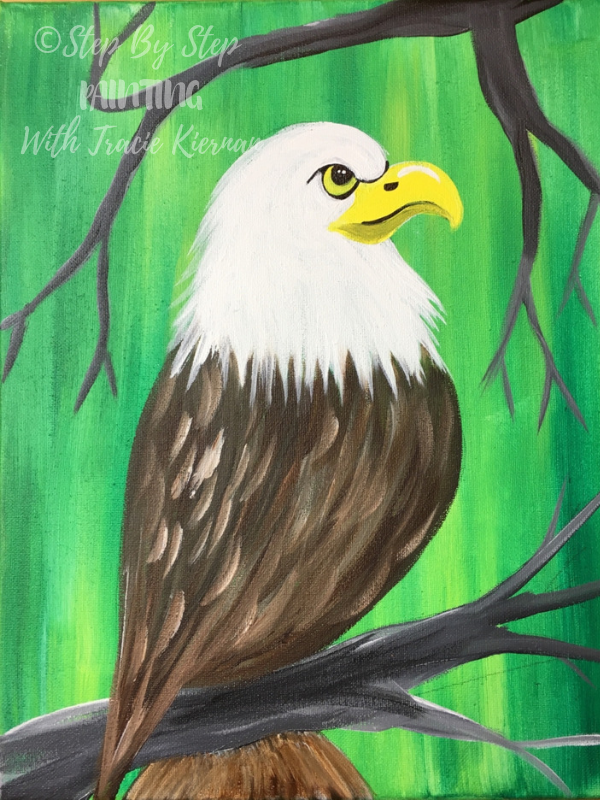
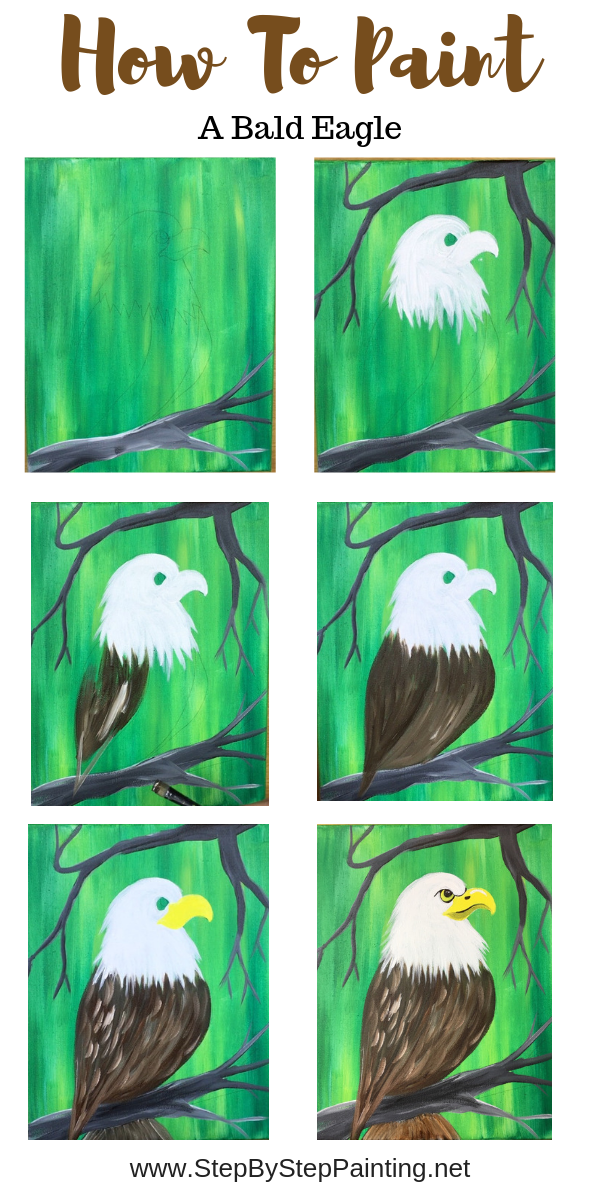
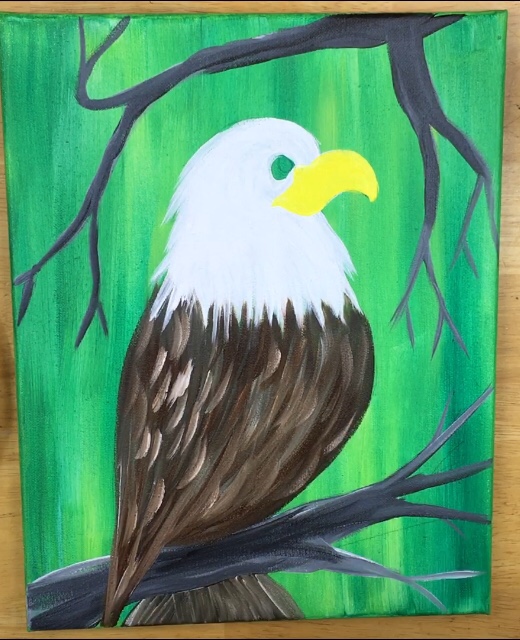
Learn how to paint an easy simple bald eagle acrylic painting! This tutorial will guide you through each step on how to render this kind of painting.
Included in the tutorial is a traceable of the bald eagle that you can print and then transfer onto your canvas using graphite transfer paper.
That background is extremely easy! I used three different kinds of green for it and I used a flat wash brush to paint the colors up and down.
Enjoy and happy painting!
See Also:
Materials
How To Paint A Bald Eagle
Learn how to paint an easy bald eagle with a green background and branches! This is an easy tutorial that includes a printable of the bald eagle.
Materials
- 11x14 canvas
- Acrylic Paint
- Paint Brushes
- Traceable
- Graphite Paper
- Pencil
Colors
- Titanium White
- Mars Black
- Cadmium Yellow Light
- Phthalo Green
- Deep Green Permanent
- Brilliant Yellow Green
- Raw Umber
- Burnt Umber
Brushes
- 3/4" Wash Flat
- #12 Bright
- #4 Round
- 10/0 Liner or Black Paint Pen
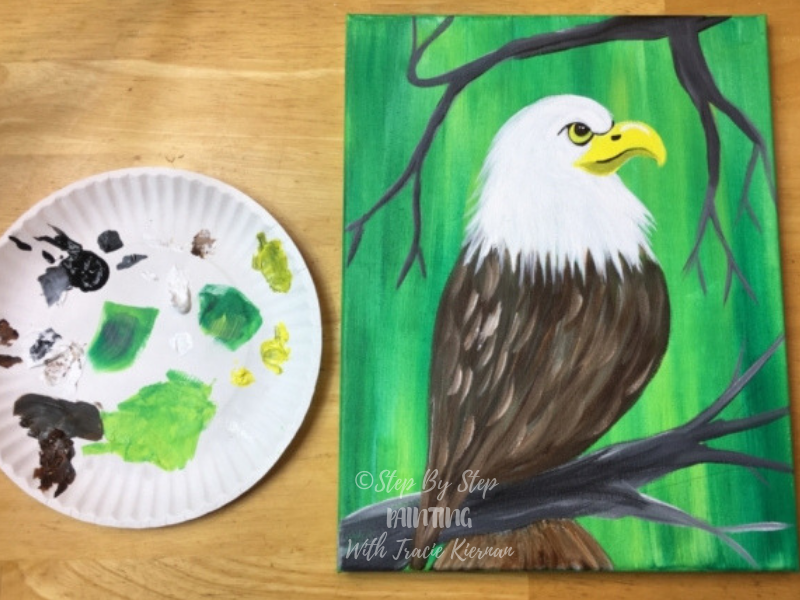
Color Palette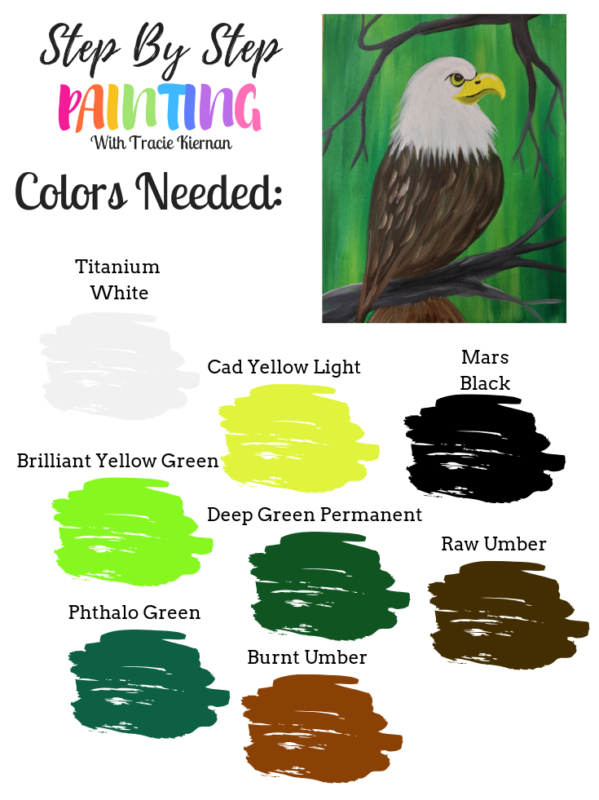

If you want to simplify this color palette, you can omit one of the browns and one of the greens (besides brilliant yellow green).
Traceable
To get the PDF, go to the PDF library and scroll to find the Bald Eagle. Print this out on standard size computer paper for use on an 11 x 14 canvas. If you are painting on a larger canvas, enlarge the traceable by 50% (depending on the size of the canvas). See directions about that here.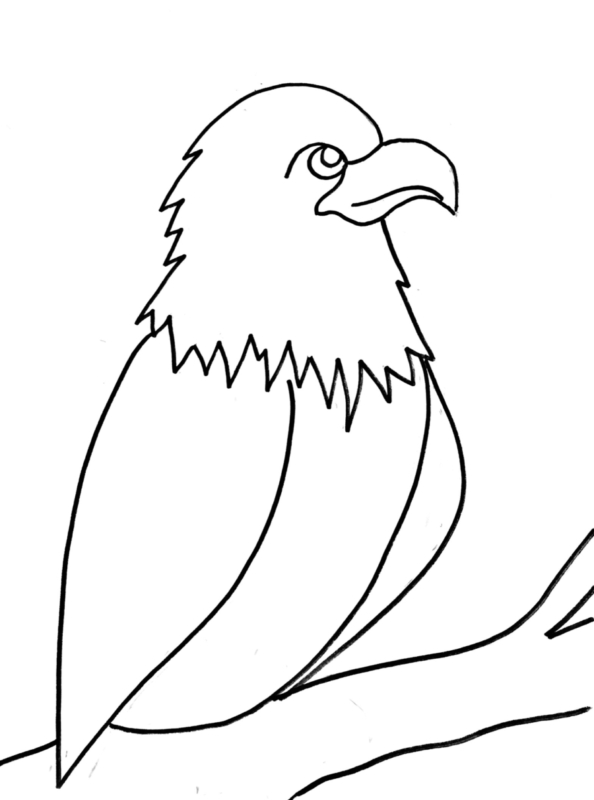
Directions At A Glance:

Video:
Step By Step Directions:
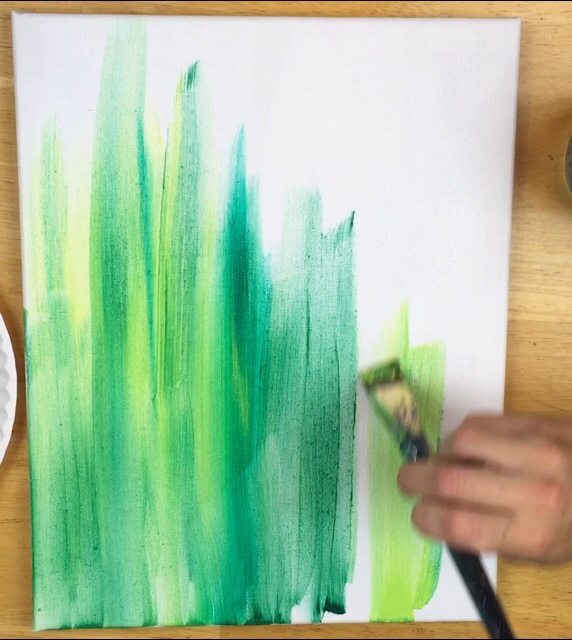
1. Paint The Background
Before applying any color, I first wet my canvas with my 3/4″ flat brush. Basically use your brush to paint one layer of water all throughout (up and down strokes is best). Don’t let it drip, just an nice even consistent layer of water. 
Next load your palette with brilliant yellow green (a big glob of it) and a little bit of deep green permanent and phthalo green. Triple load your 3/4″ flat brush with the brilliant yellow green and the other two greens on the corner.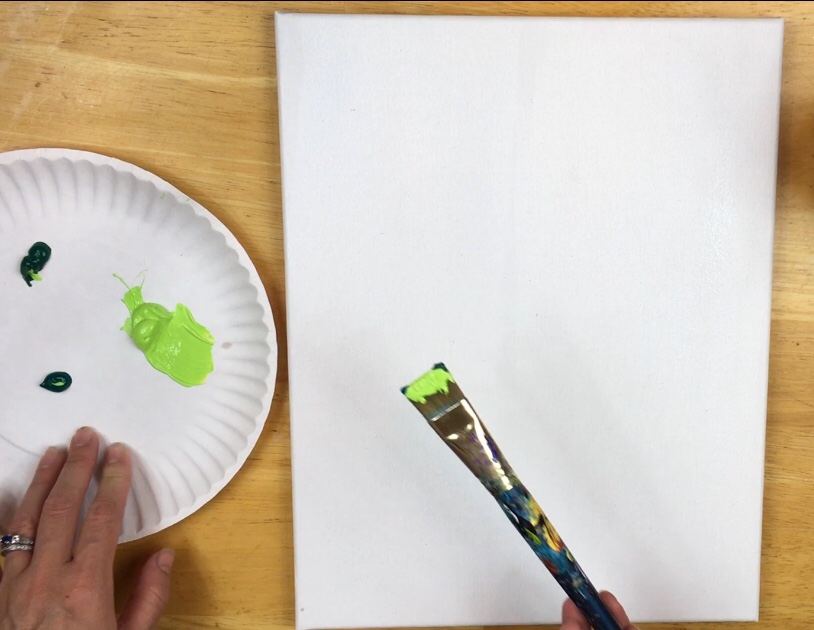
Paint full width up and down strokes. Because your canvas is wet, the paint will spread (and blend) fast. 
Try not to over blend the colors. Keep them unmixed to give the background some interesting and unique green tones. 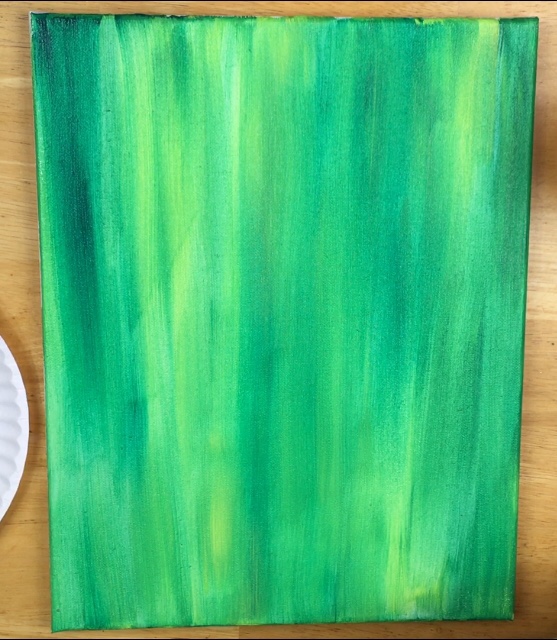
Wait For Your Canvas To Completely Dry Before Going On…
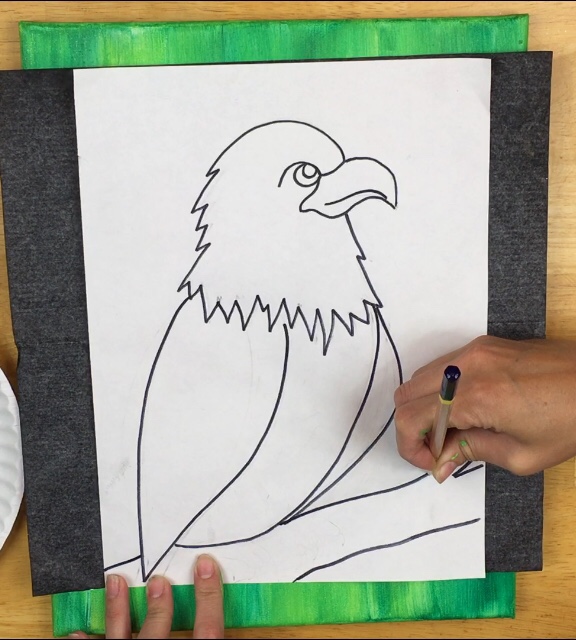
2. Transfer The Eagle Design Onto The Canvas
Use a sheet of graphite paper under the printable. The printable is positioned pretty much in the center of the canvas with the same amount of leftover space from the paper to each side of the canvas. 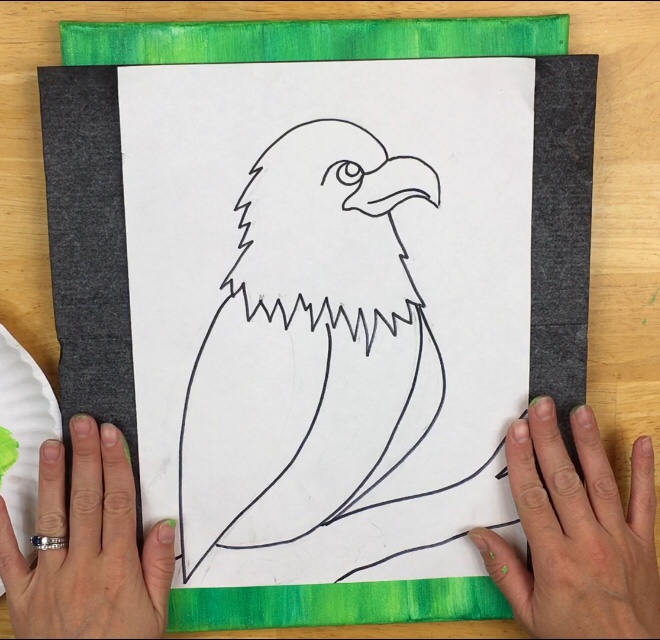
Press firmly with a pencil and trace the eagle. 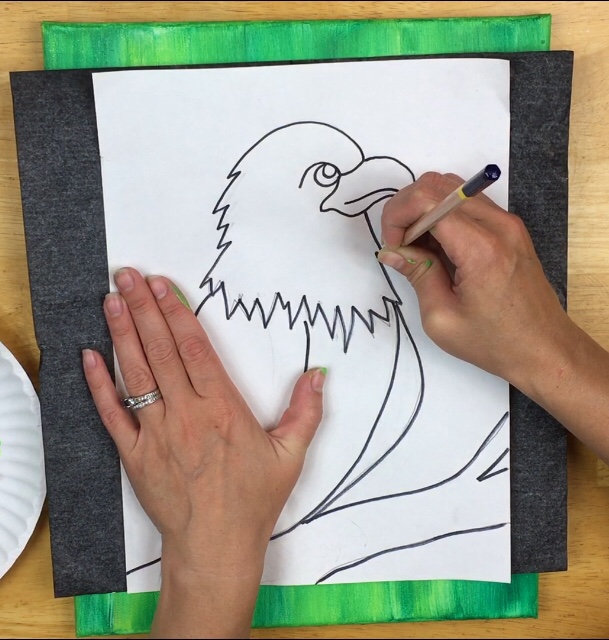
Your eagle should be visible enough to see. If it is not, you may need to press harder or draw over it. 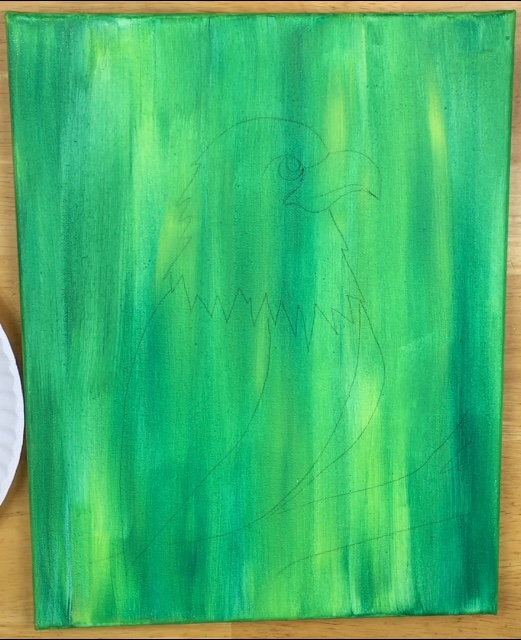
3. Paint the branches
The branches were done with a #12 bright brush and the colors mars black and titanium white. Double load your brush (dip it in both colors) and start painting in the bottom branch. The black and white will blend on the canvas to create variations of gray. You don’t need to over blend it to one solid color, let the colors blend on the canvas to create their own variations in the branch. 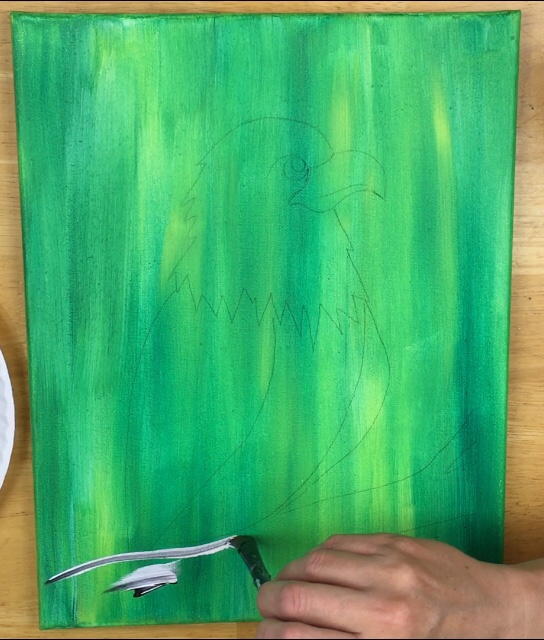
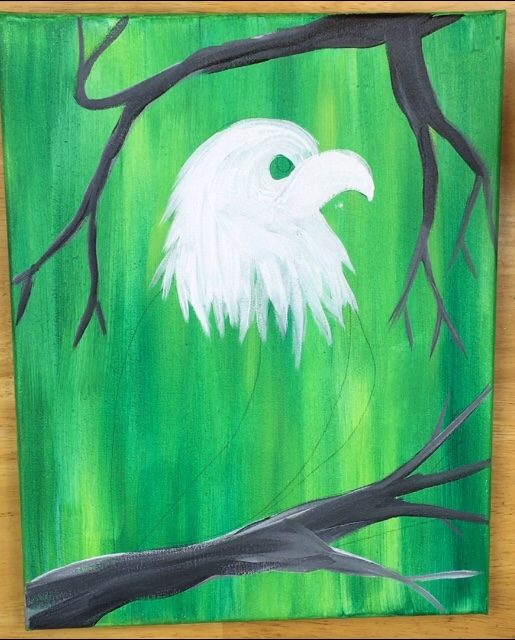
You may go ahead and paint other smaller branches that were not on the traceable. Use your brush to paint these branches with the base always being thicker and then getting thinner to the tip of the branch. 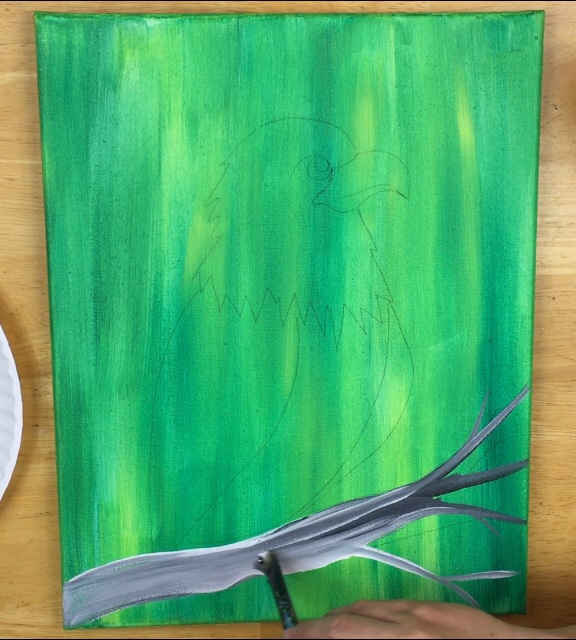
Above the eagle’s head, I painted more branches (but thinner). Again, that gray is simply the black and white blending and mixing on the canvas. Remember that branches are thick at the base and get thinner towards the tip. 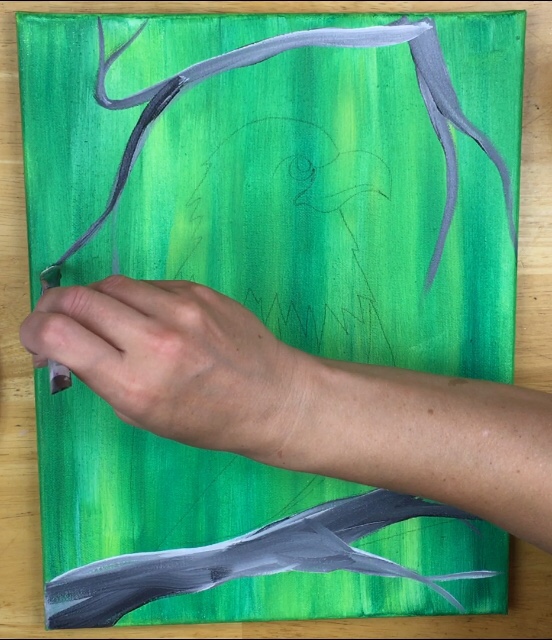
I also went back and added a tad bit more black to my branches to make them darker. 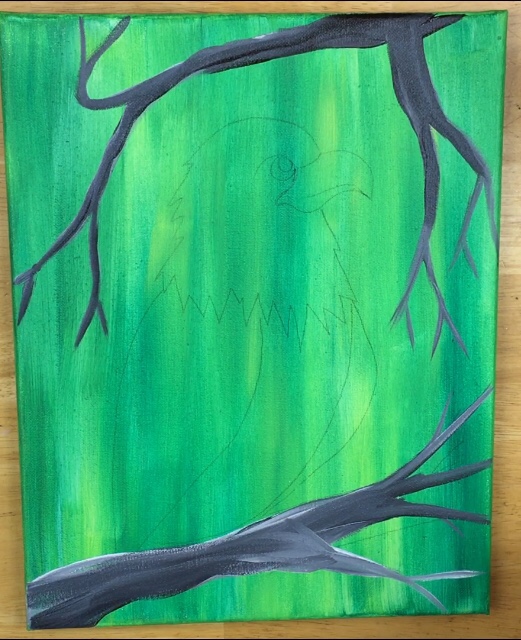
4. Paint the White Head Of The Eagle (Including the beak)
Next completely clean off all the black on your 12 bright brush and rinse out your water too! Load it in titanium white. Paint the head of the eagle. To get the pointed tips around the edges, use the tip of your 12 bright brush on its side to create the thinner line. 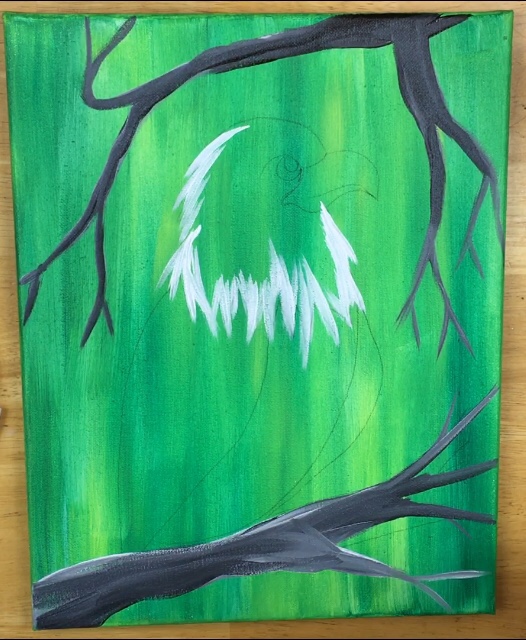
Fill in all the eagle with the white and go around the eye. 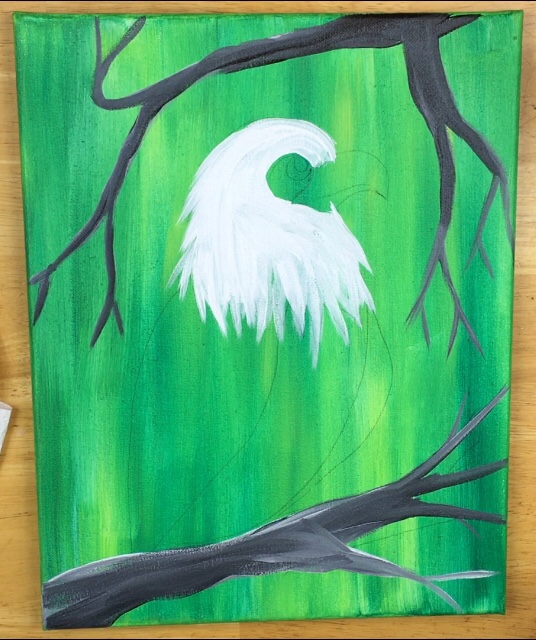
For the beak, I recommend using a #4 round brush to fill it in. You will need to fill in the beak solid white so the yellow will show up nice and bright later. 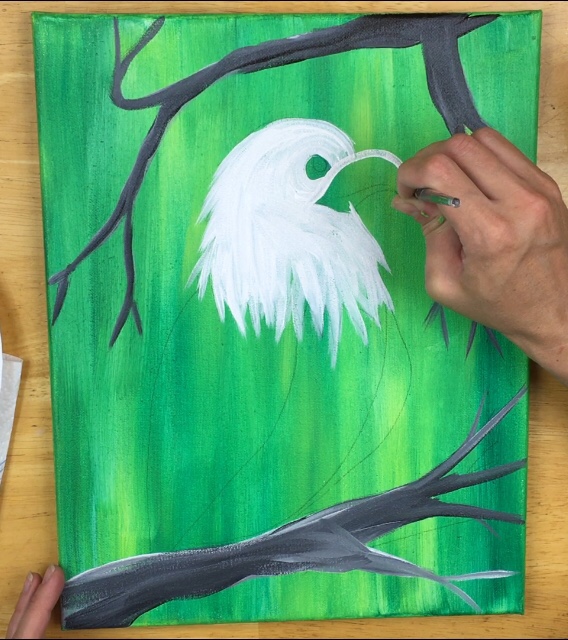
4. Paint the brown part of the eagle
Next you will need your #12 bright brush and the color raw umber. Raw umber is a cool, dark brown color. When you double load it in titanium white, it creates almost a grayish gray color. We will paint the wings and body with this raw umber/ white double load. 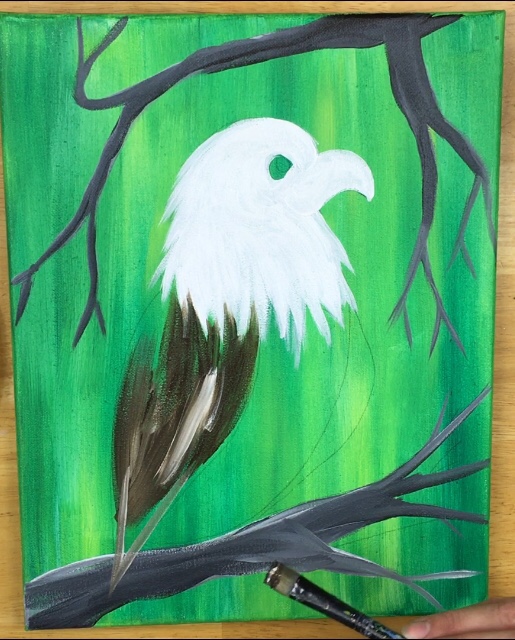
Basically paint the far left wing first. Make sure your wing tip overlaps your branch. Also, you don’t need the brown and white to blend completely together to make a solid color. Leave the variations in brown.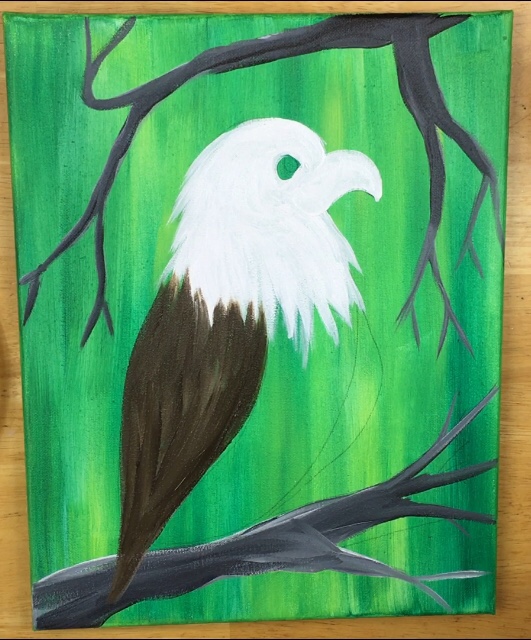
Paint the belly/body of the eagle with the same color combo (raw umber and titanium white). Also, as your are painting these areas, make sure your brush strokes “contour” with the shape of the area you are filling in. In other words, in the belly area, I made my strokes curve with the shape. 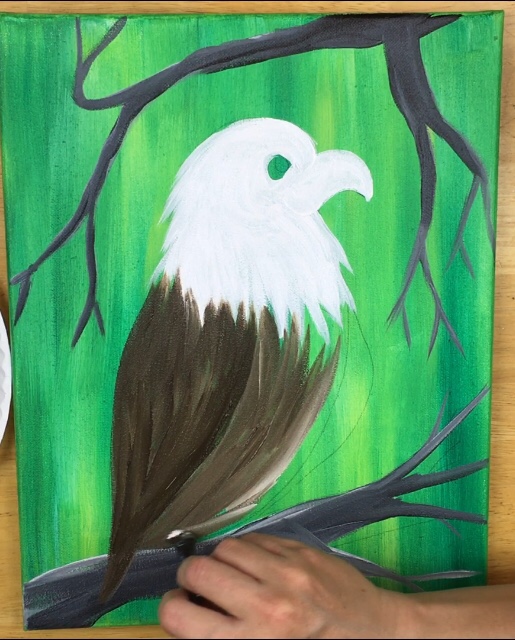
Paint the far right wing next. I purposely added less white here to make that area look a bit darker and stand out. You can do the same or keep it consistent throughout. 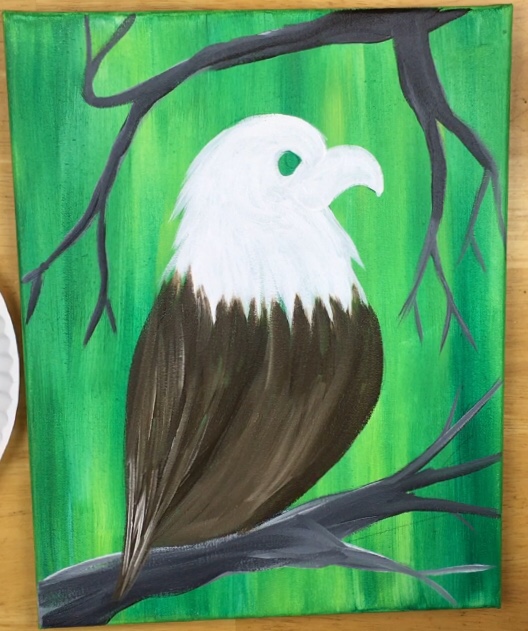
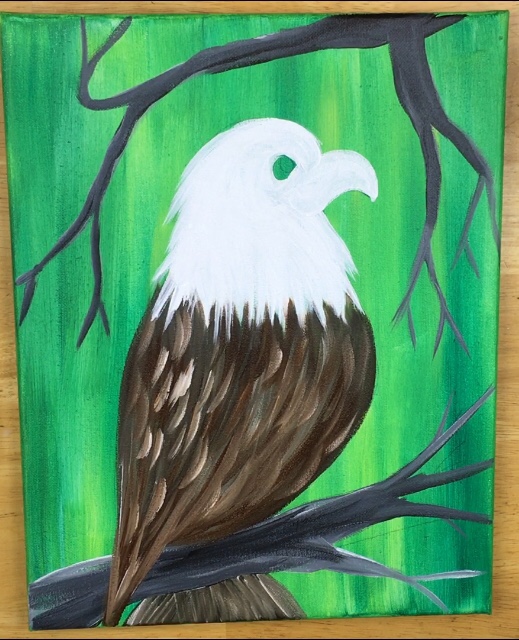
5. Paint The Tail
The tail feathers were painted with the raw umber/ white combo but I added a bit more white. Basically paint the tail so that it is going diagonally downwards like a trapezoid shape.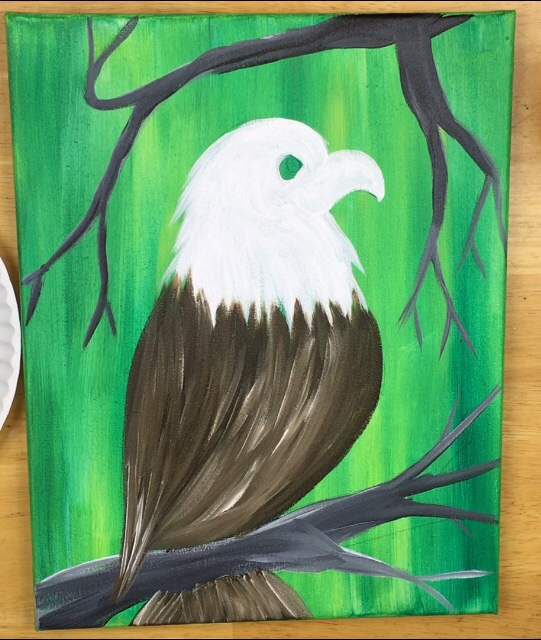
6. (Optional) Add Burnt Umber On The Raw Umber
I felt like the eagle’s body needed another shade of brown it it so I added burnt umber. This is a warm dark brown versus the other color which was a cool dark brown. Basically use your 12 flat to double load in the burnt umber and a tiny bit of white. Lightly paint strokes of this color throughout. 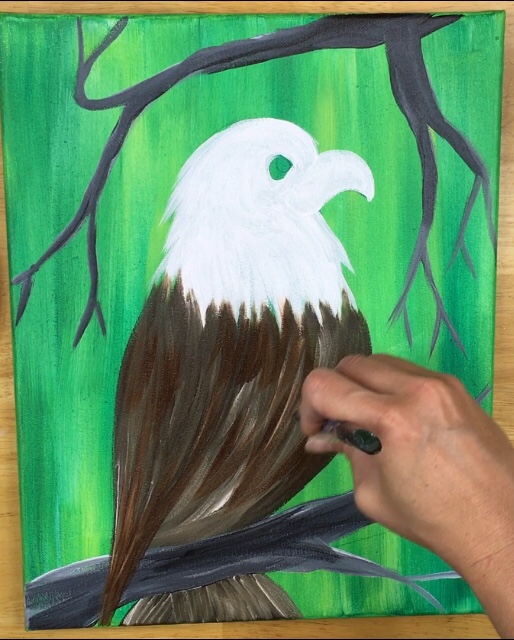
7. Paint Feather Texture
The “feather texture” was done by loading both burnt umber with a little bit more titanium white so the white shows up. Paint little curved strokes going in a diagonal direction. The white will blend slightly with the already wet brown and you will create some feather texture. Be careful not to add too much white! If you do, you can always add more brown. 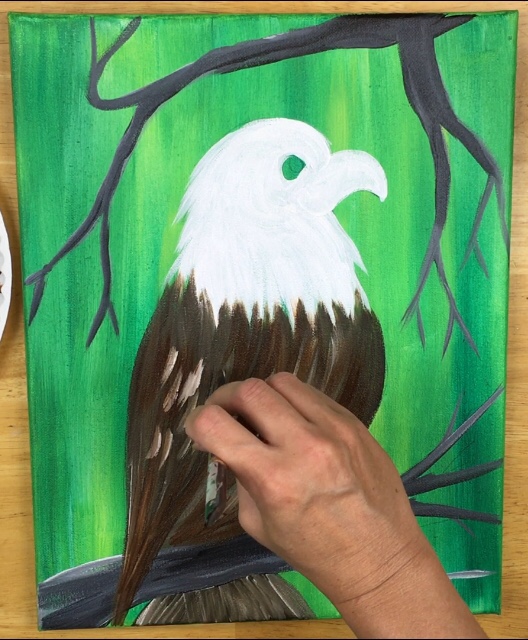
8. Paint the beak
Use your #4 round brush and cadmium yellow light to paint the entire beak. It is very helpful to refer to the traceable at this point to see where the curves are on the eagle’s head. If you need to, you can re-trace the eagle over the painting so you can see where the lines are. 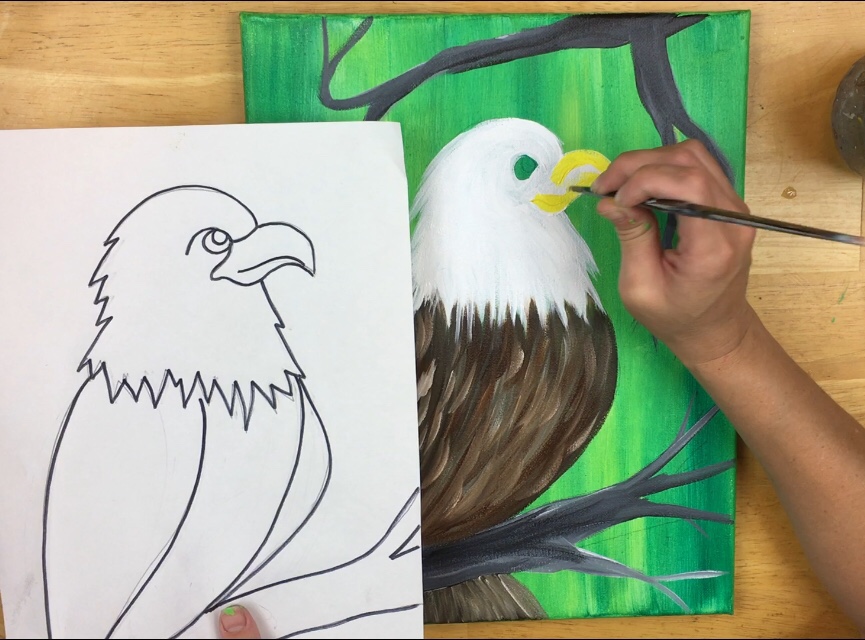
9. Paint the eye
Next paint the eye with the same cadmium yellow light. Your yellow will look translucent here because we didn’t paint a white layer first (and that is okay). 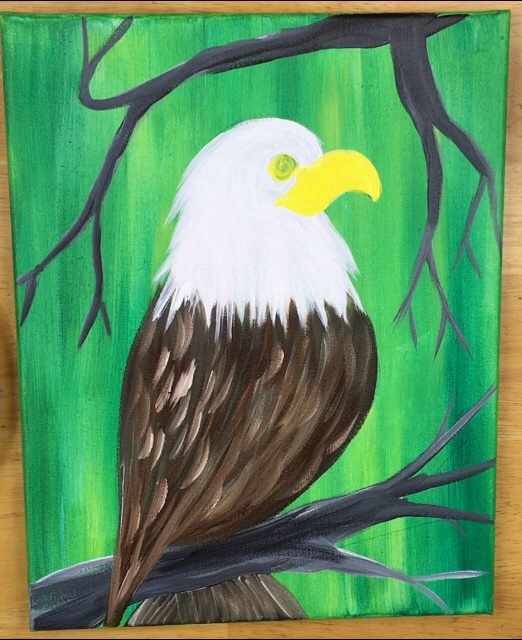
Wait for your painting to dry before proceeding to the next step…
10. Paint the final details in the eye and beak
Refer to your traceable to see where that black line is that goes over the eye and beak (look’s like an eyebrow). You can also re-transfer the traceable if needed. Use a 10/0 liner or a black paint pen and mars black. 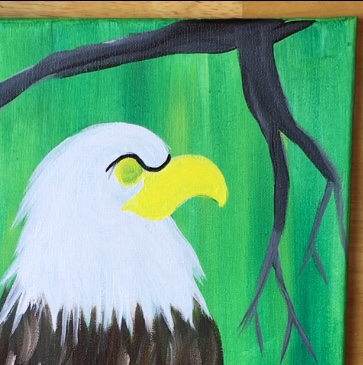
Paint a very fine line under the eye so the entire eye is outlined.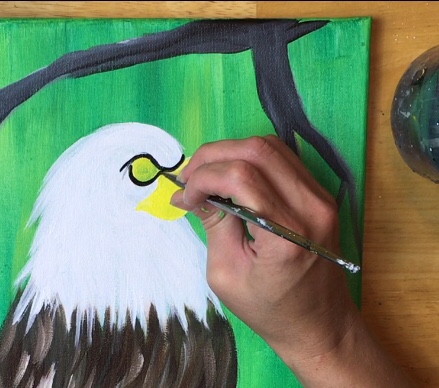
Paint the pupil. This is a small black circle at the upper right top of the eye. 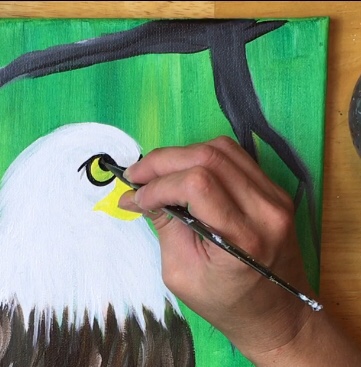
Then paint a small black mark on the left part of the beak just under that black line curve. 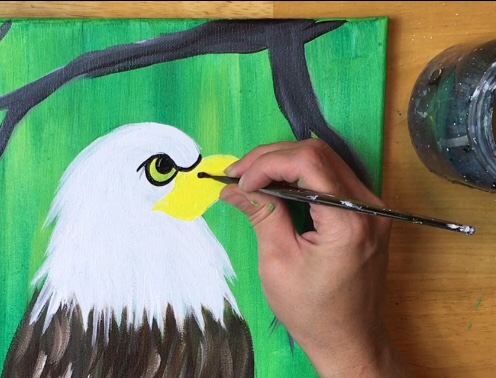
Next paint the line that divides the top and bottom of the beak. Refer to the traceable for this line placement. Make sure you are painting this line very fine by using the very tip of that round brush lightly! you can also use a black paint pen or sharpie for this step. 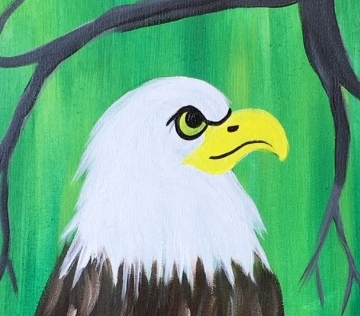
To create a little bit of “shadow” under the beak, I mixed cadmium yellow light with a TINY bit of mars black. It makes a grayish-yellow color. Paint only the bottom part of the beak with this color. I did this step with a #4 round. 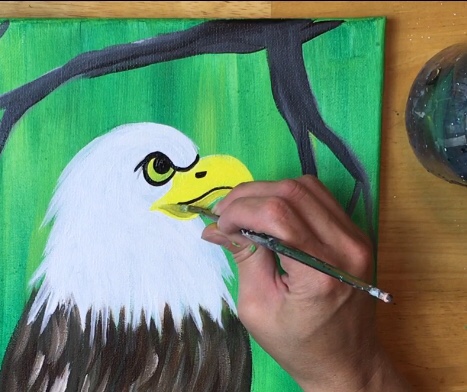
Next paint a “highlight” on the top of the beak. If you look at the image below there is a titanium white curved line just next to the black mark. 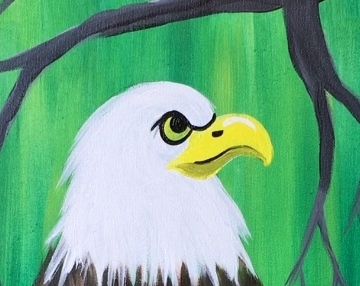
Then (if you eye is dry by now), paint two very tiny white dots on the pupil. I did this with the 10/0 liner. 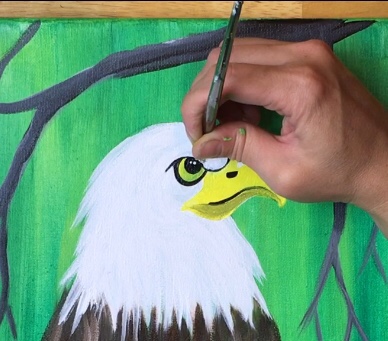

Finished!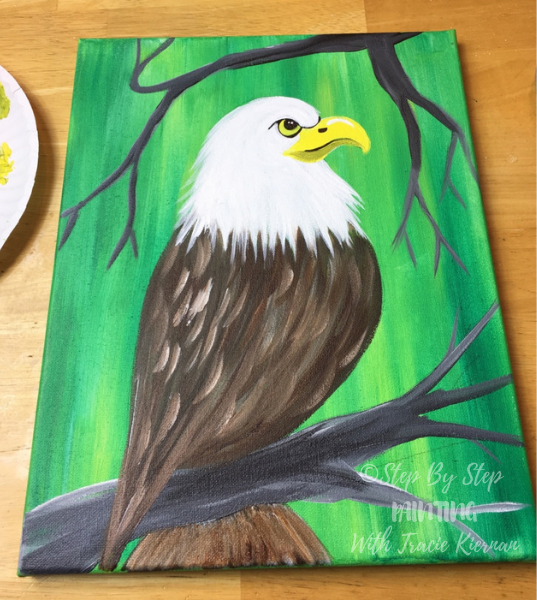

Share Your Art!
Did you do this painting? Share it on social media!

