
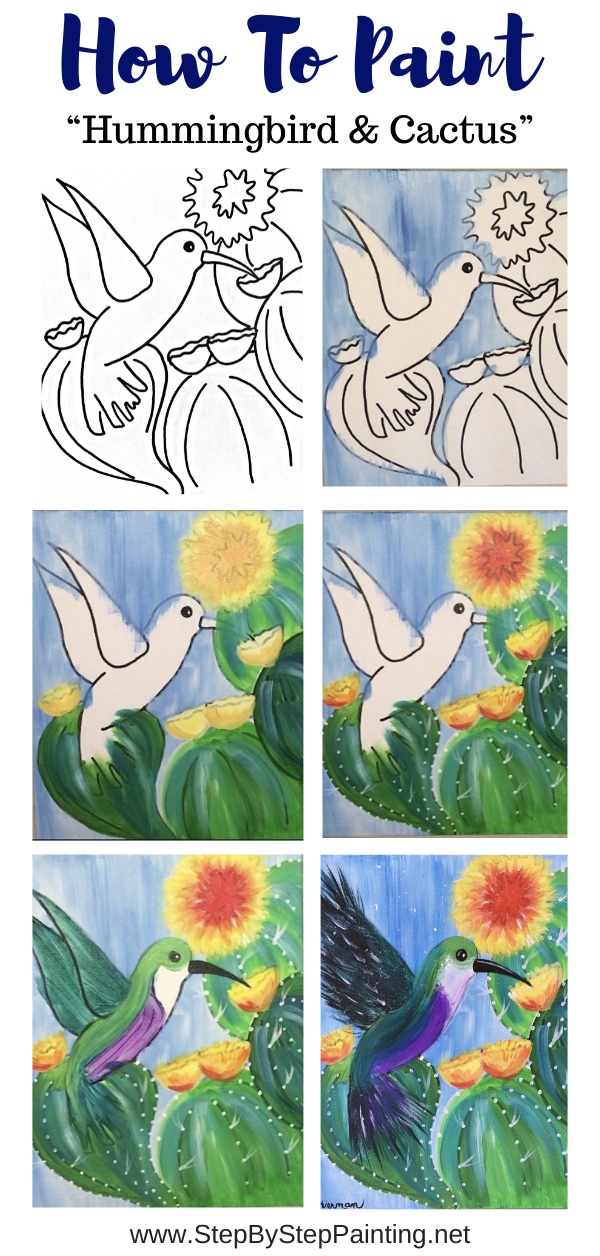
Hummingbird Painting
Description
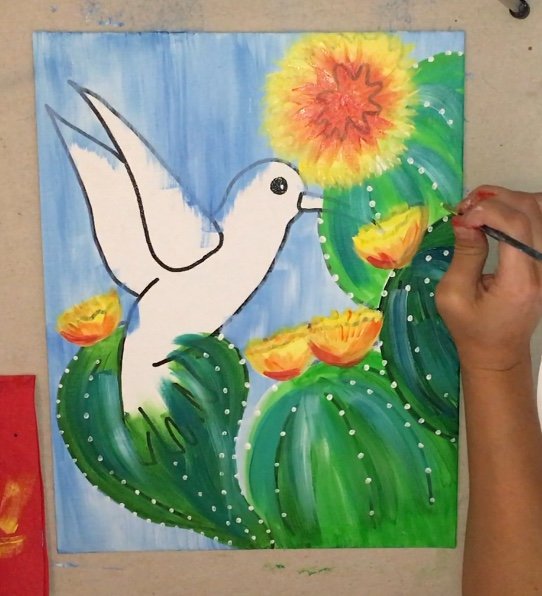
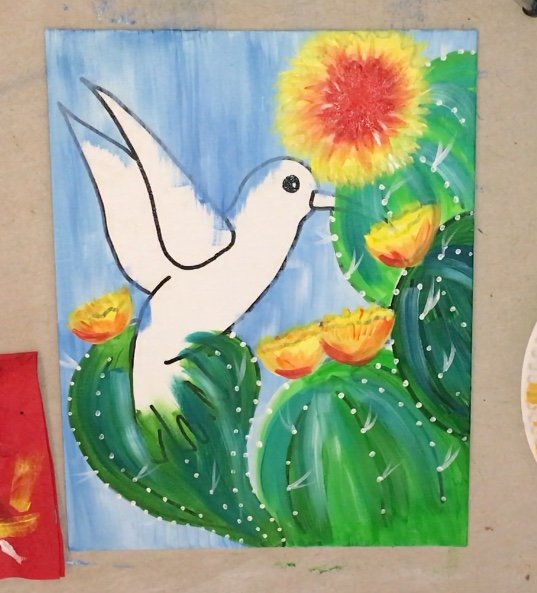
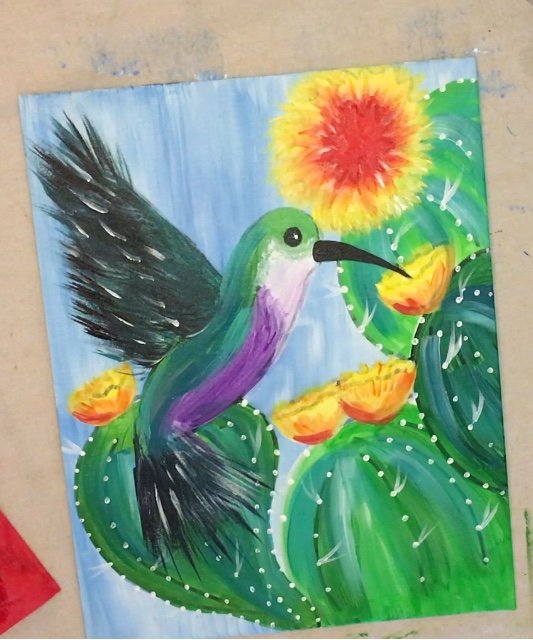
Learn to paint this acrylic painting of a hummingbird and a cactus with blossoms!
You will be guided step by step with process pictures a FULL video, materials/ color list and a free traceable!
Do you have the “cactus fever”? Is that even a thing? I sure do! Cacti have been one of my favorite subject matter to paint for years now!
They are such interesting shapes and are actually very easy and forgiving to paint.
Here in Arizona we have desert plants blooming all over the place from about mid March through pretty much the whole summer.
I’ve lived here for most of my life and every Spring I still get amazed by how colorful everything gets.
One of my favorite blooms to see is the barrel cactus. The blossoms are so bright, so cheerful and delicate compared to the gray green, spiky plant!
We also have our fair share of hummingbirds here too in the desert.
Any how, I hope you enjoy this tutorial!
Happy painting artists!
Materials
How To Paint A Hummingbird
This hummingbird painting tutorial will guide you step by step. Use my traceable to transfer the design on the canvas and then follow these painting techniques to created the beautiful desert scene of a hummingbird next to a cactus.
Materials
Colors
- Cadmium Red Medium
- Cadmium Orange Hue
- Naples Yellow
- Cadmium Yellow Light
- Light Green Permanent
- Hookers Green
- Phthalo Green
- Bright Aqua Green
- Cerulean Blue
- Dioxazine Purple
- Titanium White
- Mars Black
Brushes
- 1” flat or 3/4” flat
- 1/4” flat or 12 bright
- 1/8” flat or 4 bright
- 1 Round
- 0 Round
- Fan Brush
Instructions
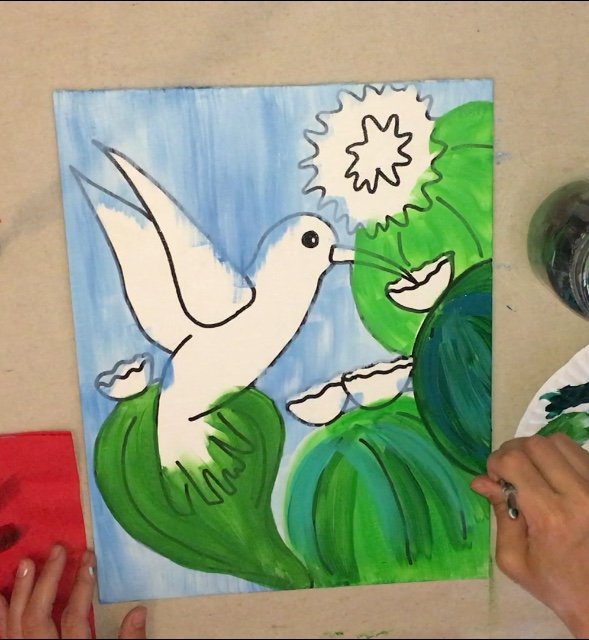
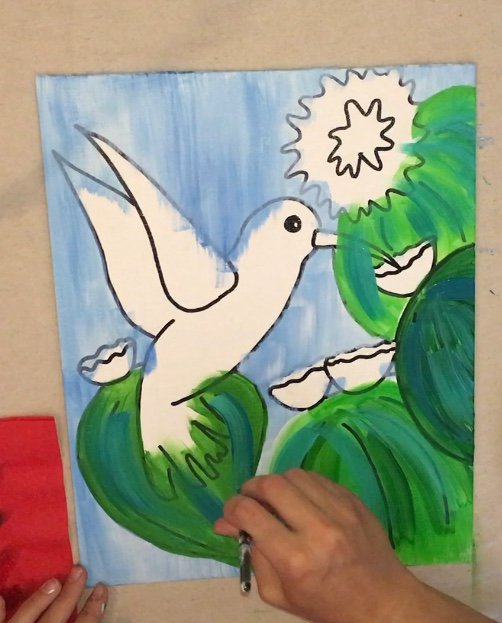
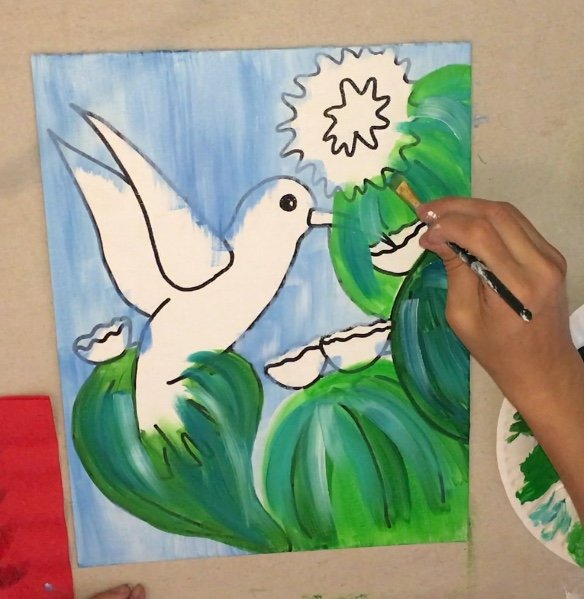
- Transfer the hummingbird and cactus design to your canvas.
- Paint the background with cerulean blue and titanium white. Paint all up and down strokes using a 3/4” flat brush.
- Paint the barrel cacti using various shades of the greens and turquoise.
- Paint the cactus flower using Naples yellow, cad yellow, titanium white and a few shades of cad orange medium and cad red medium.
- Paint white dots on the cacti then paint some spikes.
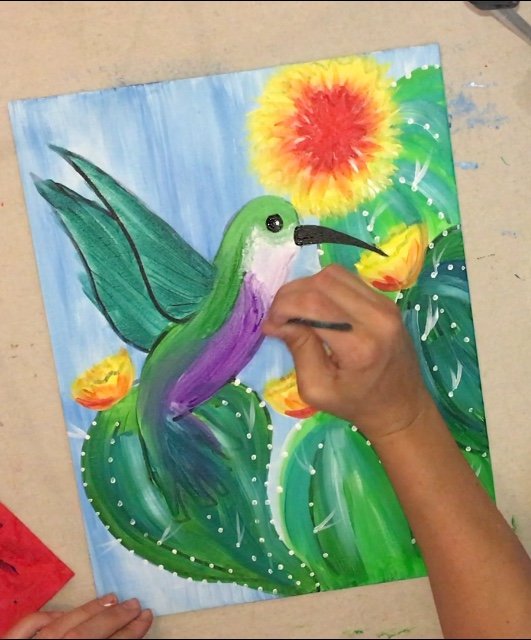
- Paint the hummingbird beak black.
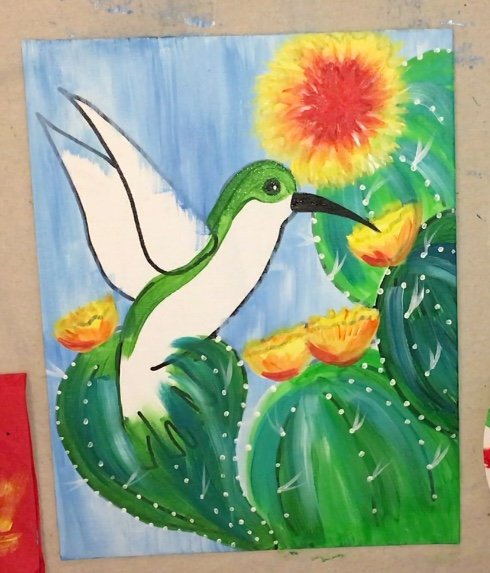
- Paint the green areas of the hummingbird.
- Paint the purple areas of the hummingbird.
- Paint the wings of the hummingbird.
- Use a fan brush to add texture to the hummingbird tail and wings.
- Optional: use a toothbrush to splatter some little dots to create an expressive effect.
Notes
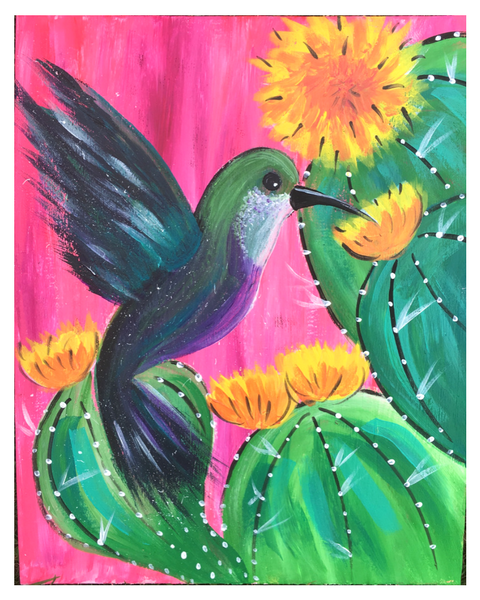
If you want to do the background pink, use fluorescent pink, magenta and titanium white.
Choose your background color for this painting:
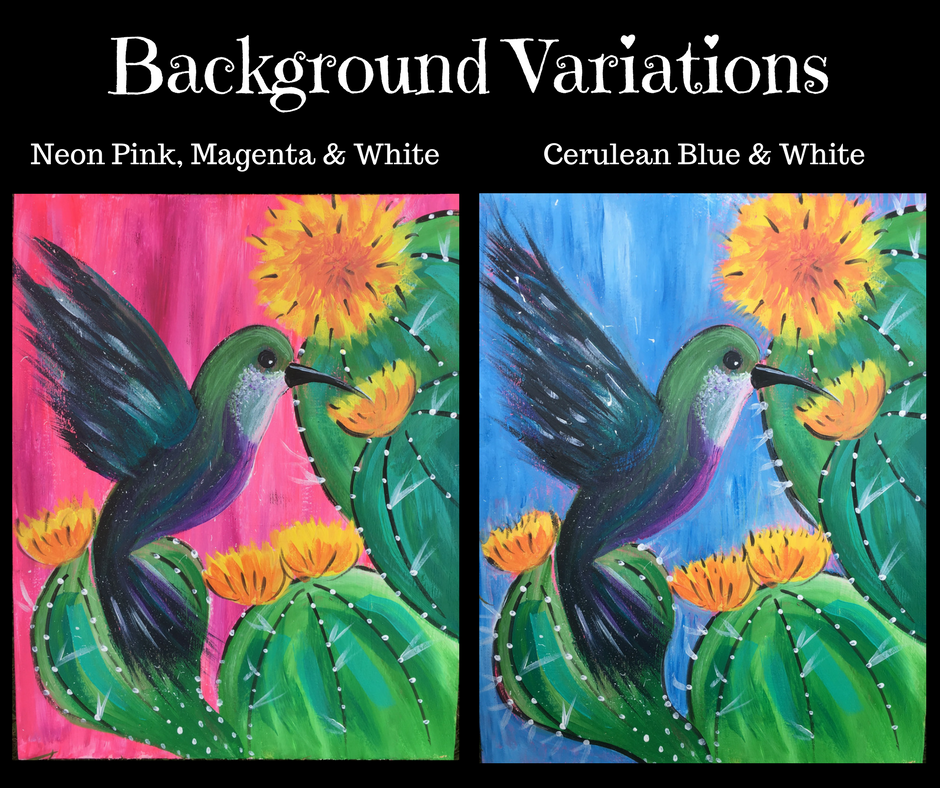
I demo the background in blue but if you want to do the pink background, use fluorescent pink, magenta and titanium white.
Printable
Go to PDF library. If you need instructions on how to enlarge this from a standard size computer paper, click here.

Directions At A Glance
Video Of Hummingbird Painting:
Step By Step Pictures:
1. Transfer And Draw The Hummingbird & Cacti
Use graphite paper for the transfer.
I outlined my drawing with a paint pen.
This helped for demo purposes but is OPTIONAL.
The acrylic paint will go over most of the black paint pen in the end. 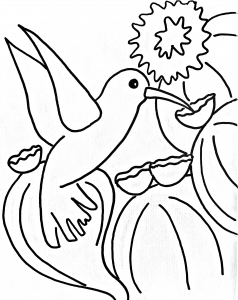
2. Mix Cerulean Blue with White & Paint The Sky
Use a 1″ flat brush to paint the background a mixture of cerulean blue and titanium white.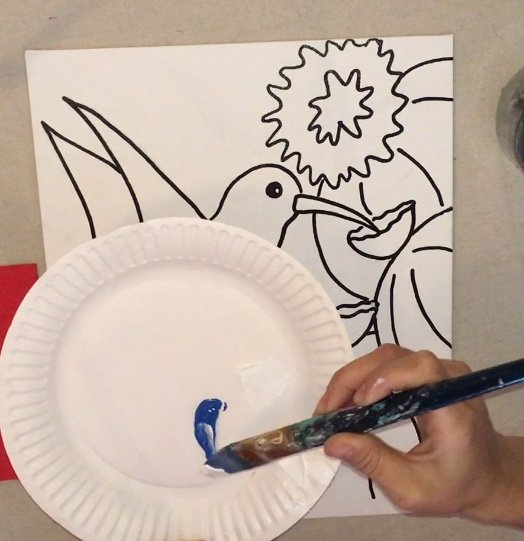
Use more white than blue (about 4 parts white to 1 part blue).
To get a nice color variation, don’t mix the two colors all the way.
Allow them to blend on the canvas.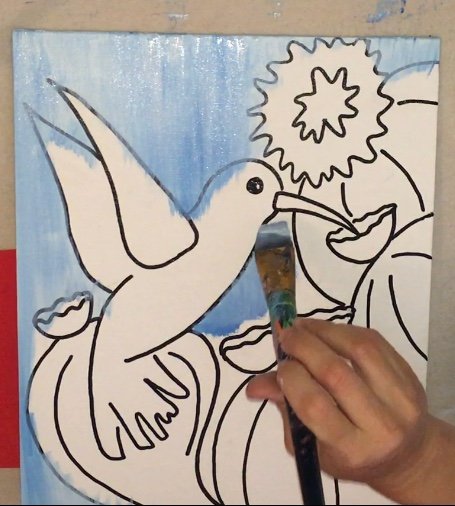
Paint in all UP & DOWN strokes.
Don’t worry about painting over some of the lines in the drawing. 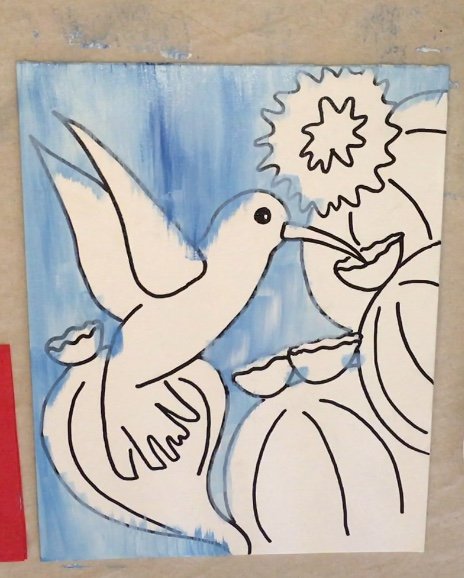
NOTE: if you want to do the pink background, use neon pink, magenta and white.
3. Paint The Bottom Middle Cactus Light Green Permanent
Start with light green permanent.
Use a 1/2″ flat brush. Paint the bottom round cactus.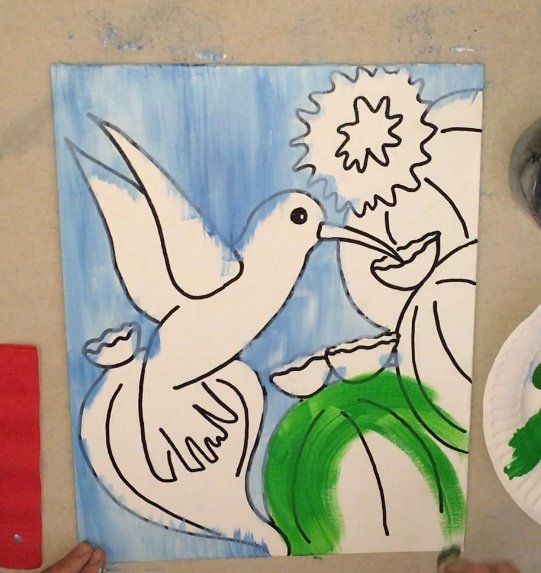
When you’re painting these cacti, make sure your strokes go in the direction of the lines that I drew on the cacti.
4. Paint Some Dark Strokes of Hooker’s Green on Bottom Middle Cactus
Using a 1/4″ flat brush, paint in some hooker’s green strokes on top of the light green. I did this directly over the black lines. 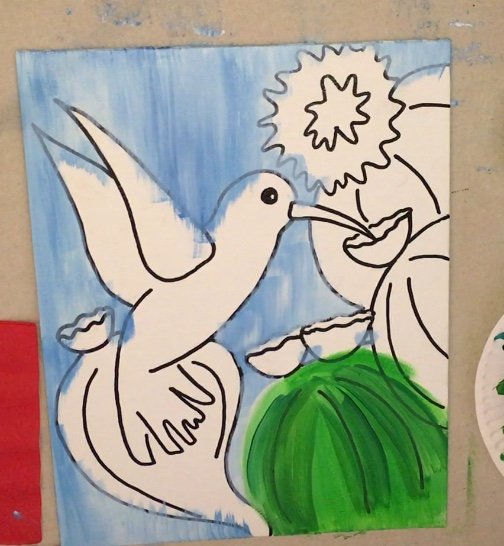
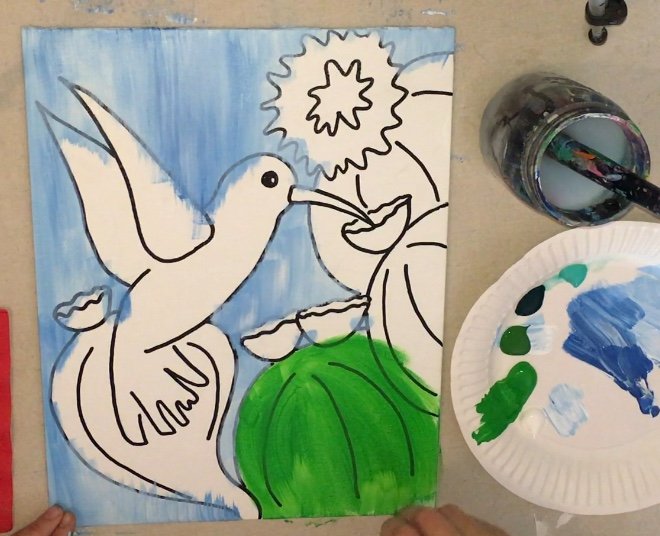
5. Paint the next cactus Hooker’s Green
In order for these cacti to stand out against each other, they can’t all be the same shade of green.
I chose to paint this next cactus Hooker’s Green.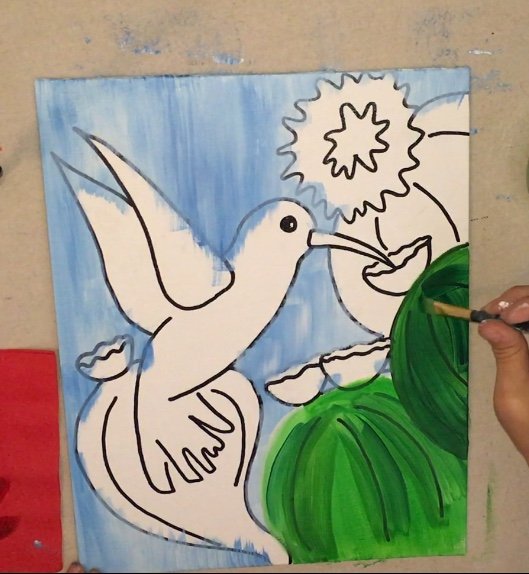
Also, I used a 1/2″ flat brush for this. And…make sure your strokes go with the direction of the lines!
6. Paint the top right cactus Light Green +White
I mixed light green permanent with white (about 50-50). Then I painted this top right cactus with that tint of green. 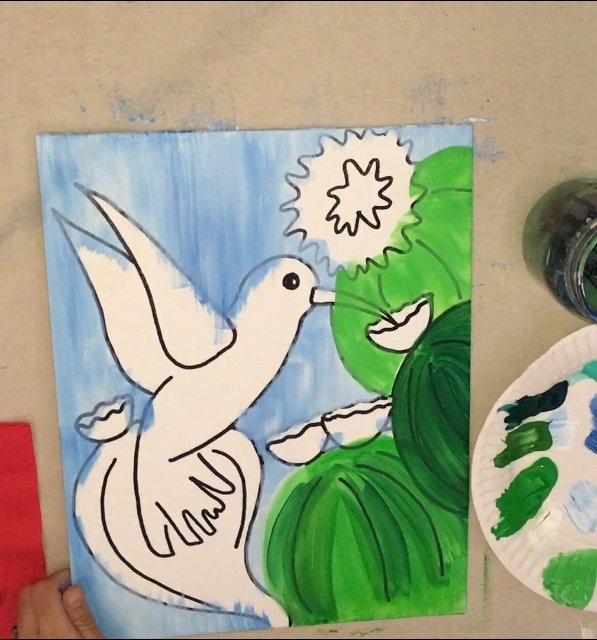
7. Paint the bottom left cactus hooker’s green + white.
Here’s a tip: you don’t have to follow the greens I am using!
Just make each barrel a different shade of green by using either the solid or mixing it white white.
Anyhow, for this far left cactus, I mixed hooker’s green with white and painted it.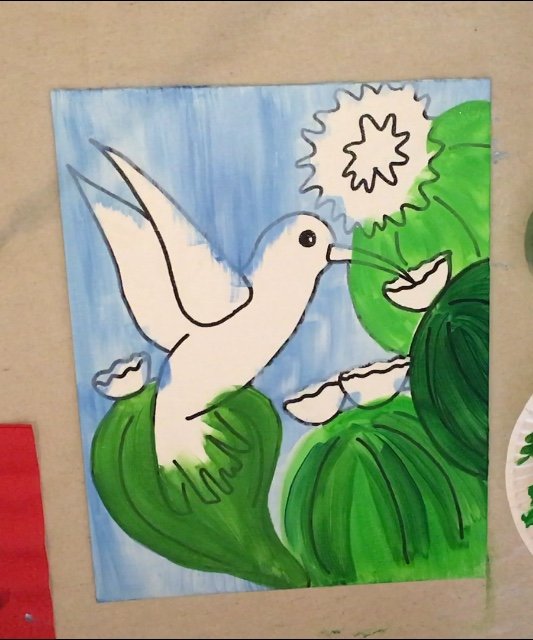
8. Add some strokes of Bright Aqua Green
For this next step I used a 1/2″ flat brush and bright aqua green.
Basically, I added one stroke over each of those black lines that were drawn with the paint pen.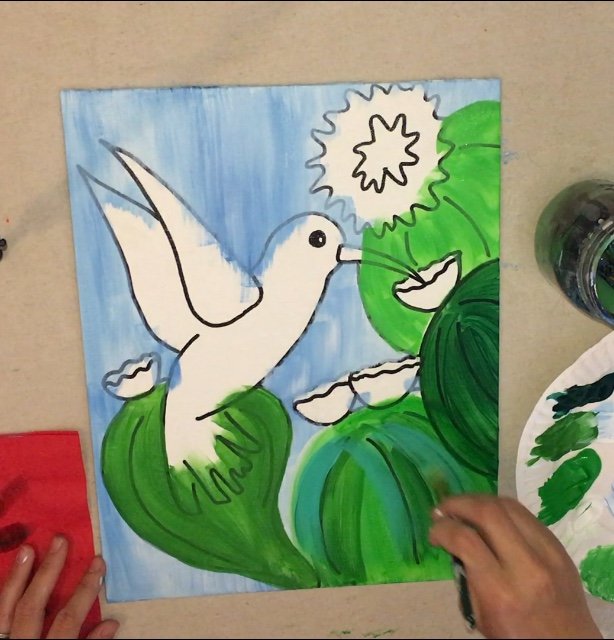
This is a light stroke. You can see the color below!
Its an effect that adds dimension and color variation to the painting. Don’t think too hard. Just paint one stroke and move on to the next!
9. Paint Some Strokes of White + Bright Aqua Green
I continued with this one stroke thing and mixed bright aqua green with white.
I painted another layer of strokes overlapping the aqua green stroke.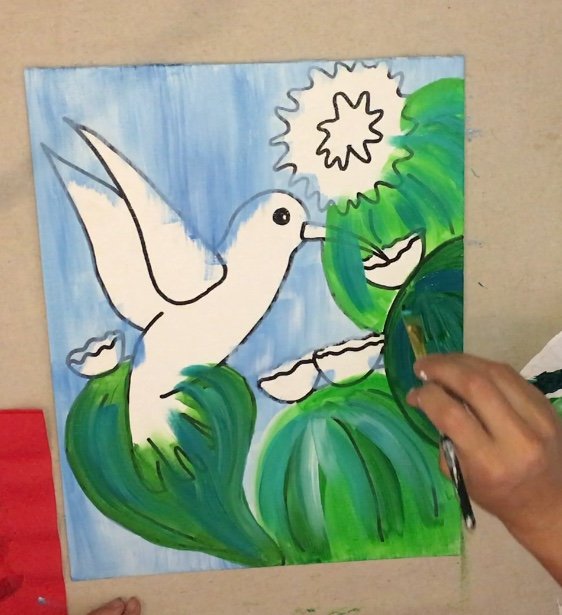
Again, these are light and translucent. You can see color underneath them.
It adds so much nice dimension to these cacti!
10. Paint The Blossoms Yellow + White
For the blossoms, I used a 1/4″ flat brush. I mixed equal parts of white and yellow.
Then I painted the “base layer” to all the flowers.
That white should cover up the black pen a bit. For the large circular flower, I painted long strokes starting from the center and pulling out (almost like you’re painting the sun). 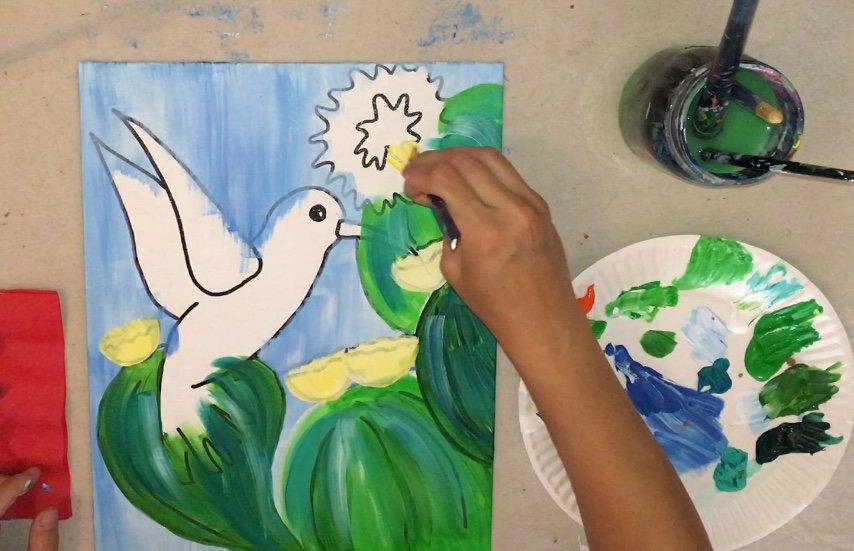
11. Add in Naples Yellow & Orange To The Flowers
Using the same 1/4″ flat brush (rinsed off and cleaned), paint Naples yellow in the center of the flower.
Pull each stroke from the middle to the outer edge. Then add in orange.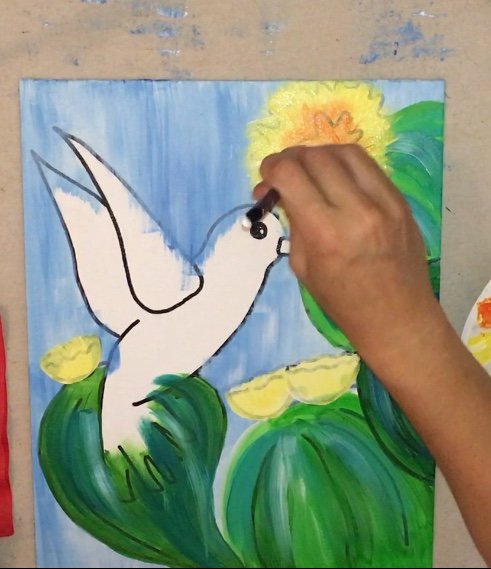
Again, pull each stroke from the middle and pull out. The center of that flower is more orange and it fades to yellow.
Then go to the other flowers and and add in some Naples yellow and orange to the bottom areas.
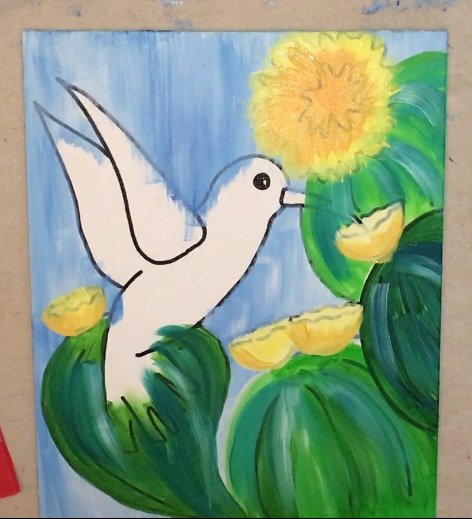
12. Add in Cadmium Red Medium To the Flowers
Then I added in some cadmium red medium in the middle of the large flower.
Again, strokes in the middle and pulling out. It’s almost like painting a sun or a bursting star! I also added hints of red to the other flowers. 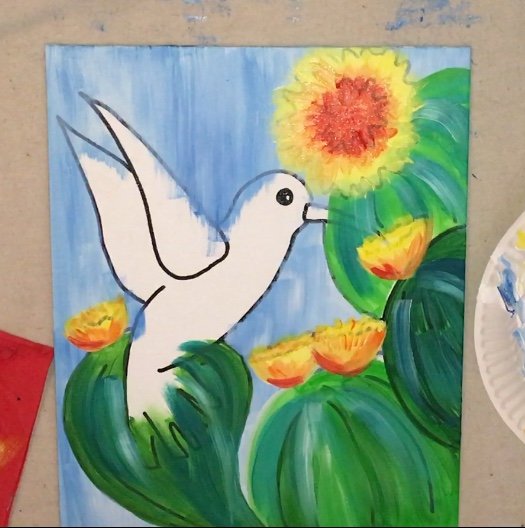
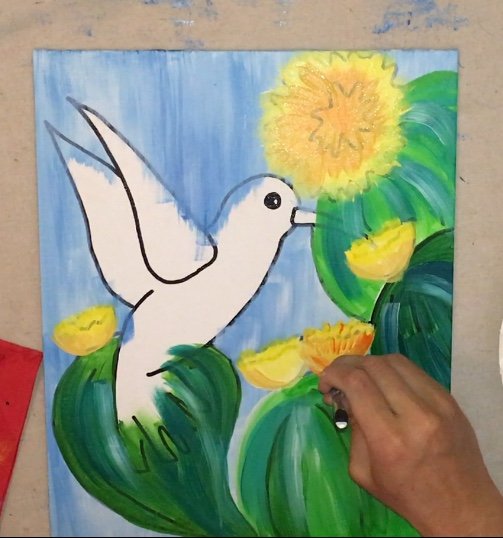
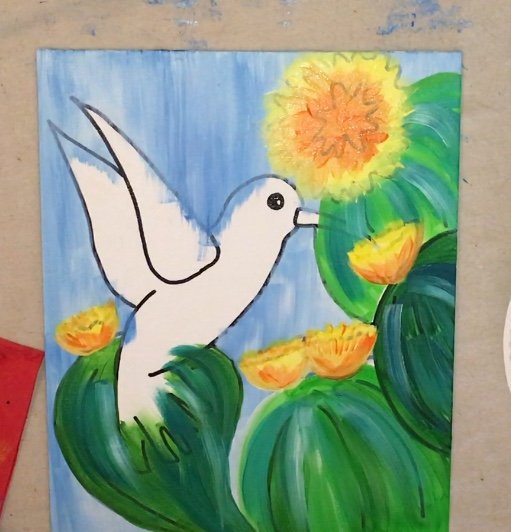
13. Paint White Dots on the Cacti
Use a #0 round brush for this step.
Dip your brush in titanium white and paint little white dots along the edges and inside the cactus.
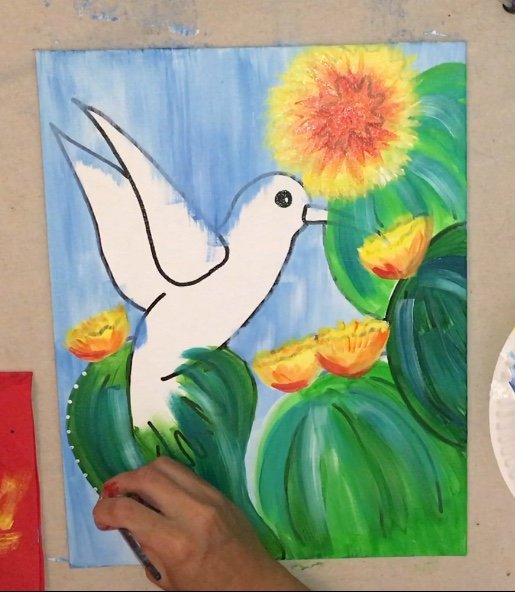
If you can still see the original black lines of the cacti, use those lines as guidelines to where to paint the dots.
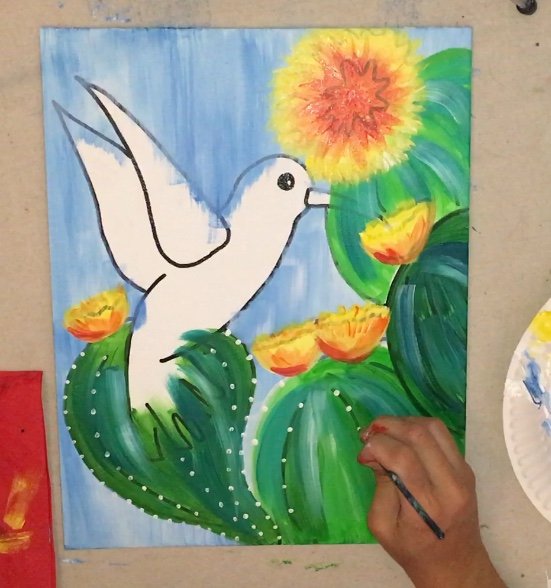
Each dot was about a finger width apart. This does not have to be exact. In fact, it’s more natural to not keep those dots exact.
14. Paint some spikes
Use that same #0 round and paint some spikes.
I only painted a few here and there.
The spikes only add a subtle texture to the painting and I think it would be too busy if I added too many!
So…just paint a few here and there!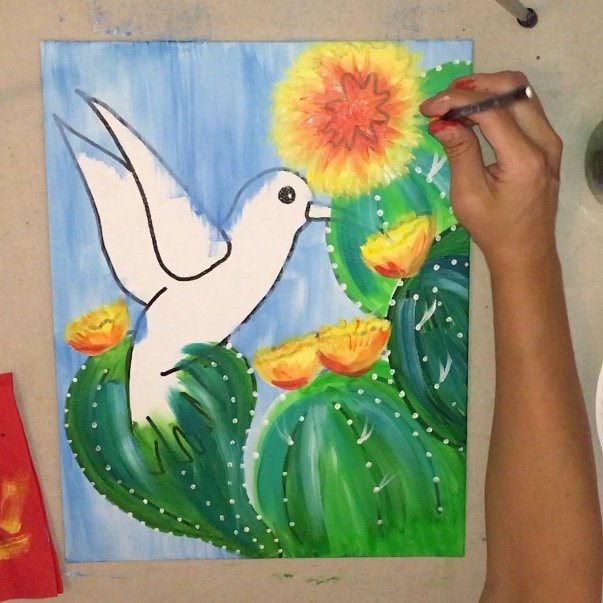
15. Cover up any unneeded paint pen lines
The large flower had too much black from the drawing showing through.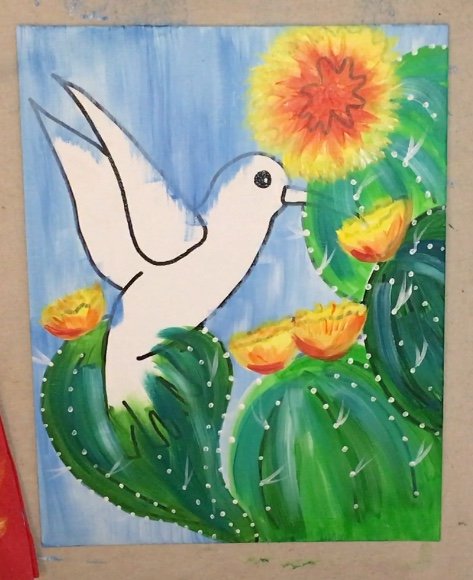
I decided to cover that up.
To do this, I used titanium white. I painted over parts of the black.
Then when that titanium white dried, I went back in and painted over the white with more red and orange.
16. Paint The Beak Black
Use a small #1 round brush to paint in that beak black.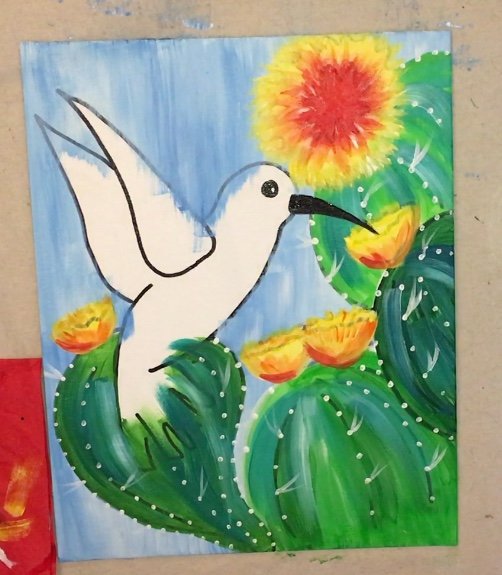
Easy peasy!
Now take a deep breath…It might get kind of tricky for the next few steps.
17. Paint The Head & Back Hooker’s Green
I used hooker’s green and a 1/8″ flat brush.
Paint in the area of the head and back as shown below.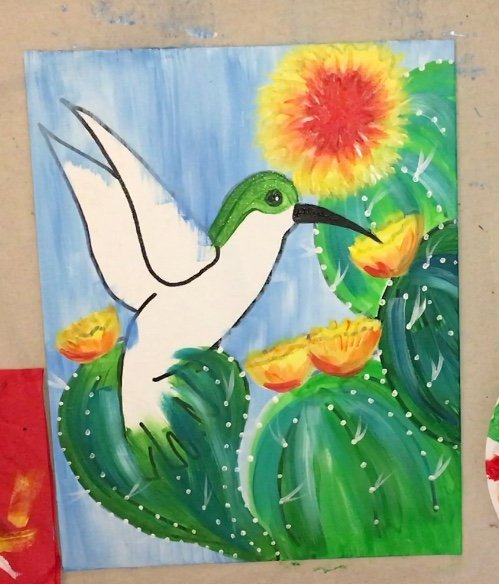
Your strokes should go with the direction of the lines/ shape of the hummingbird.
18. Paint The Tail and Middle Area Phthalo Green
With the 1/8″ flat brush and phthalo green, I painted the tail and the middle area as shown below.
Keep in mind that this is a bottom layer. It might look kind of translucent for now.
19. Paint in the belly area Deep Violet
Still using that 1/8″ flat brush, paint in the belly area as shown below. 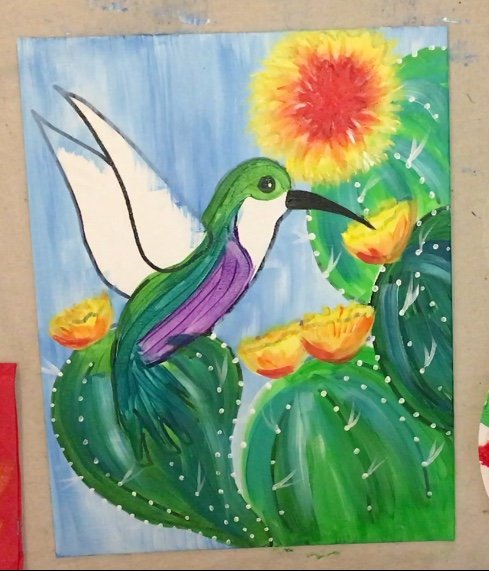
20. Paint the wings Phthalo Green
I believe I switched to a 1/4″ flat brush for the base layer of the wings.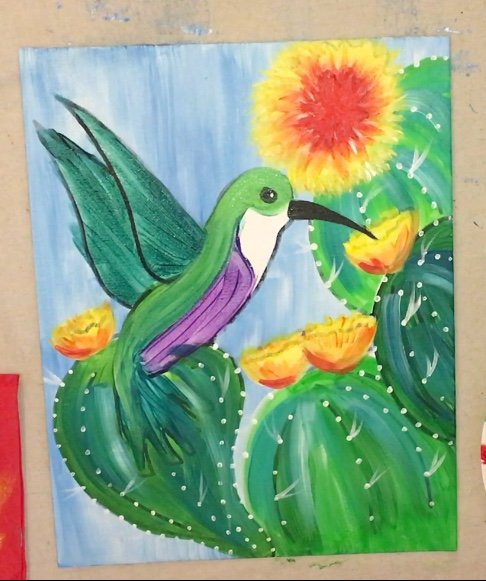
Paint them in phthalo green. The strokes should go in a diagonal direction.
You may also paint outside the lines a it.
21. Blend some purple and green together
Use a 1/4″ flat brush and paint some purple over the green area so it blends together with the green a bit. 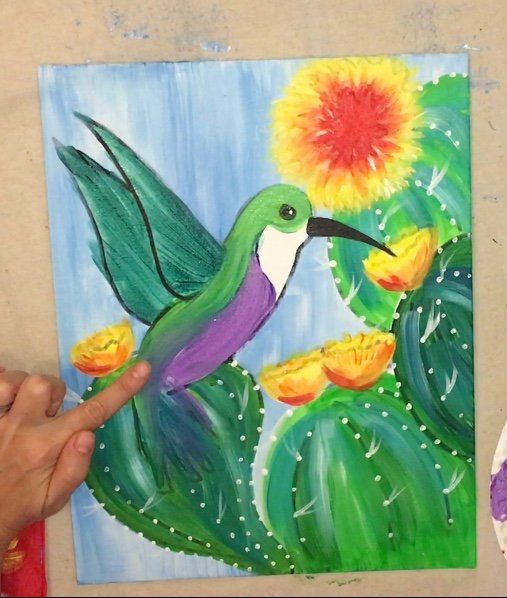
22. Stipple some white dots on the neck and cheek area.
I used a #0 round brush and white to stipple white dots along the area where the green and white meet.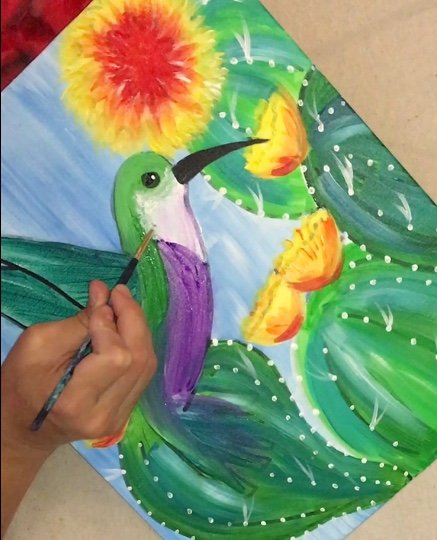
This adds a nice texture to the bird.
It gives it a bit of a realistic effect.
Stipple right along that line and around it. I think I did maybe 3-4 rows of stippling.
I also stippled the area where the purple and white meet. It’s almost as if you are using stippling to blend the two colors together.

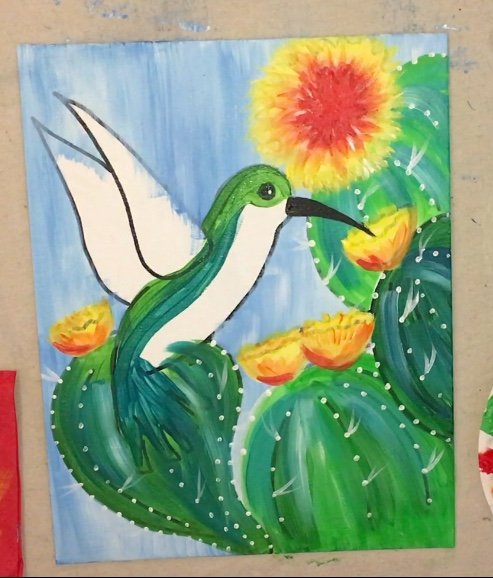
23. Paint a second layer of Phthalo Green
Then I went in with a 1/4″ flat brush and painted over the green on the hummingbird’s back.
Just another layer!
That initial green layer was translucent so I did a second coat. 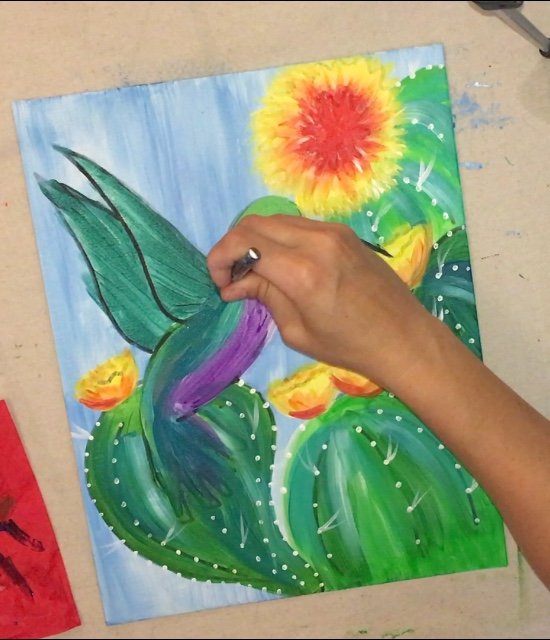
24. Use a Fan Brush to Paint the Tail Mars Black + Phthalo Green
I recommend practicing with the fan brush on paper so you can get a feel for it.
I mixed equal parts phthalo green and mars black.
Then I used the fan brush to paint the tail. Drag each stroke lightly.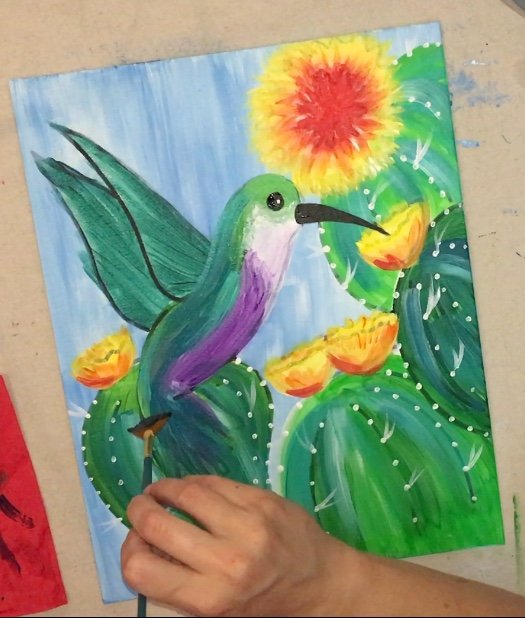
Try turning the fan brush on its side to get a thinner stroke.
25. Use A Fan Brush To Paint The wings
Next I used the same mars black + phthalo green to paint the wings.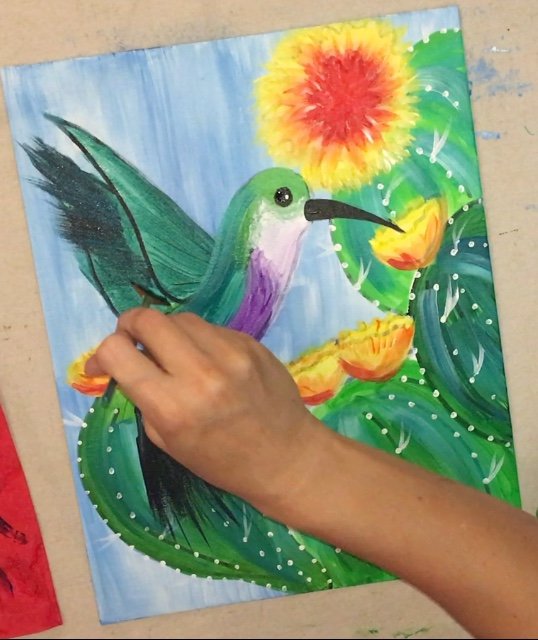
Use that fan brush in the same way too! Lightly pull each stroke along the wings.
If the two wings look like they turn to one don’t worry!
26. Fan Brush Some White
Next I fan brushed some white on the tail and wings. Don’t use too much white.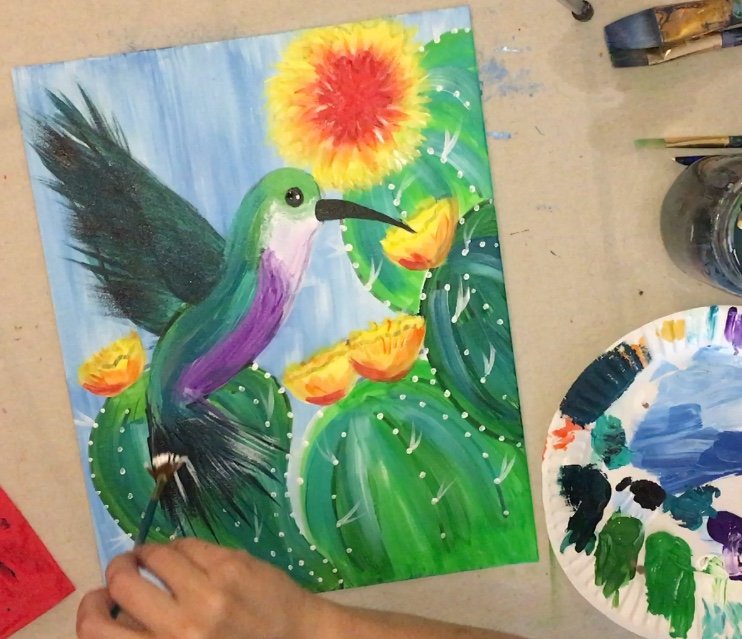
Just a little!
27. Use a Round Brush To Add Some White To Wings
Then I went in even more with a #1 round brush and titanium white.
I added some strokes of white on both the wings.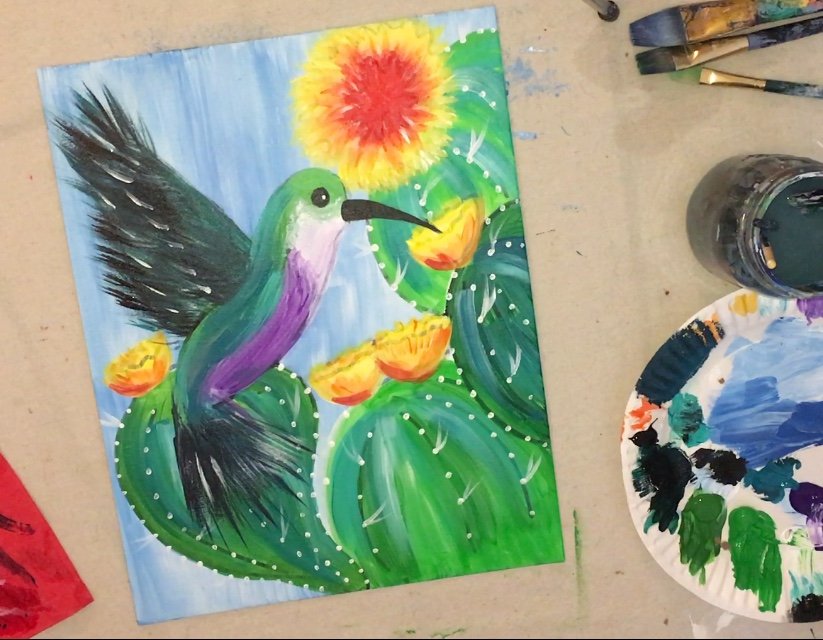
Using the different brush allows the strokes to stand out a bit here!
28. Use A Toothbrush to Splatter Some White
This step is optional but I think it adds a nice effect!
Use an old toothbrush to add some splatters on the wing area and slightly around it.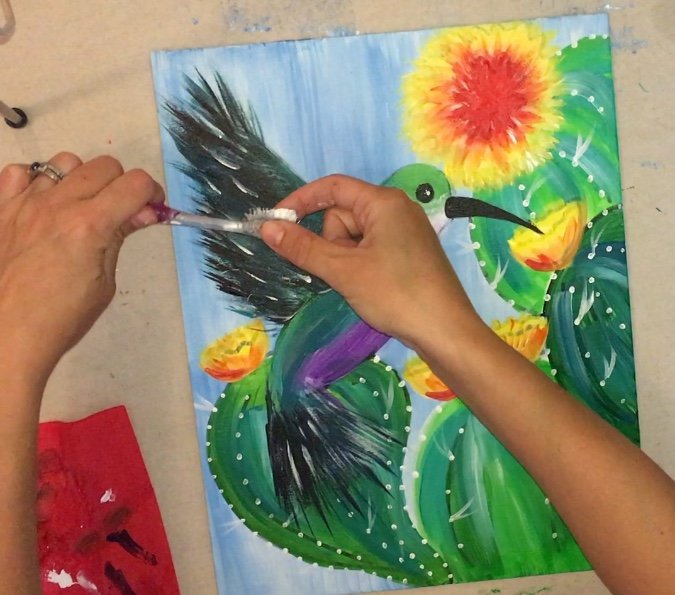
The splatters give off a nice expression for the hummingbird!
His wings are going so fast, we want to express what that would look like!
Maybe pollen is flinging in the air!

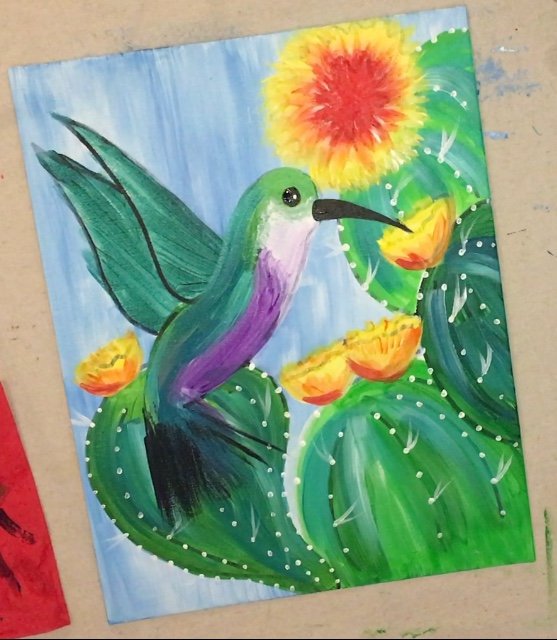
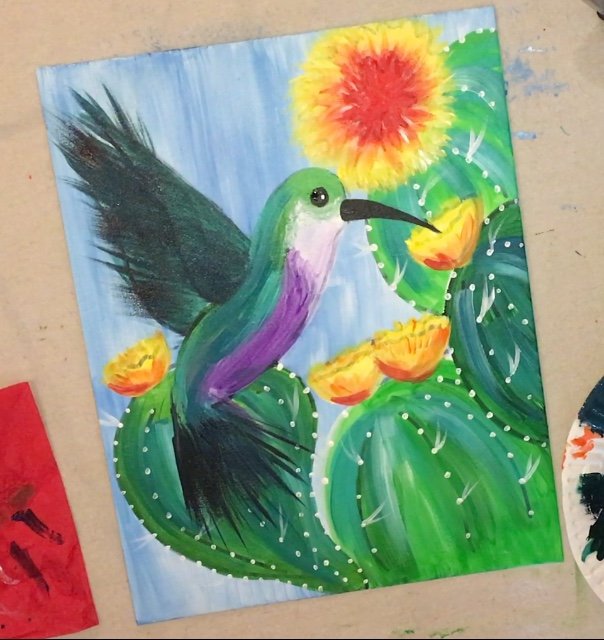
29. Some final touches and Finished!
If you look closely, there is a white highlight right along the top area of the beak. I also added a bit more highlight in the eye. 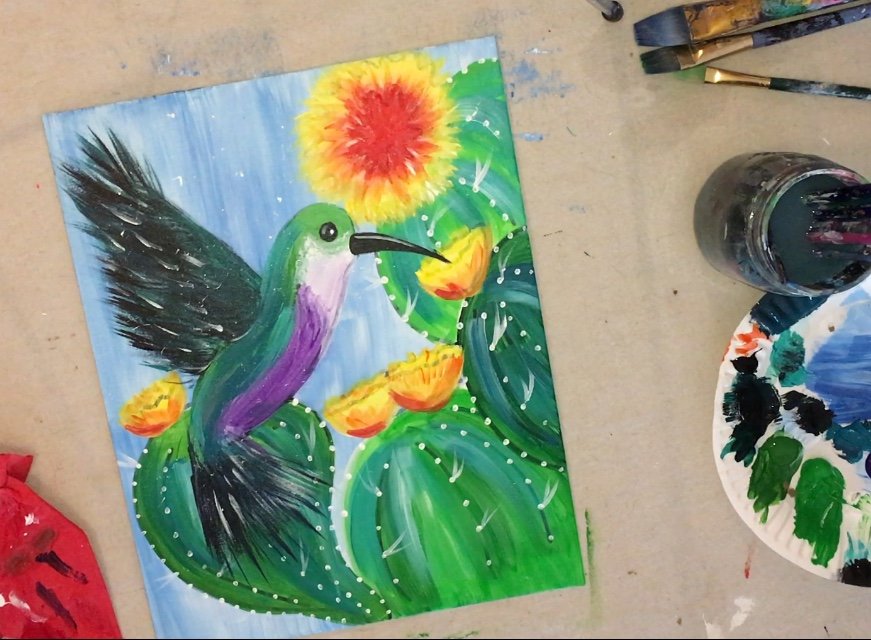
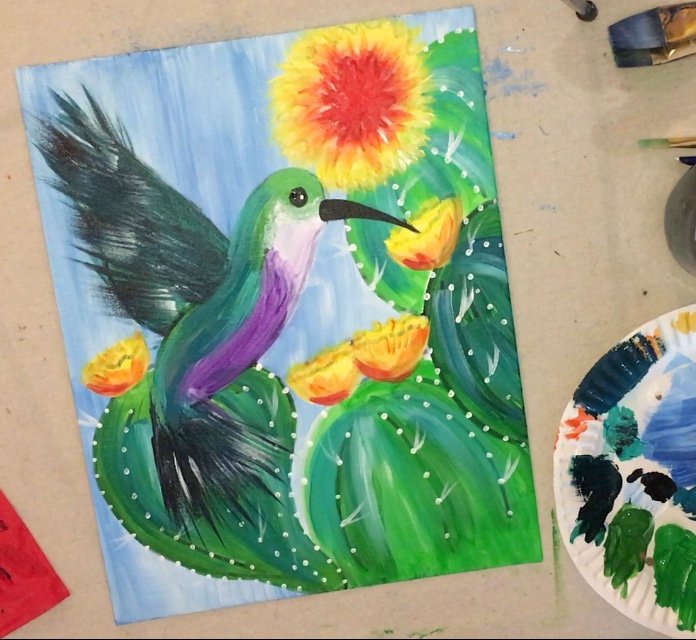
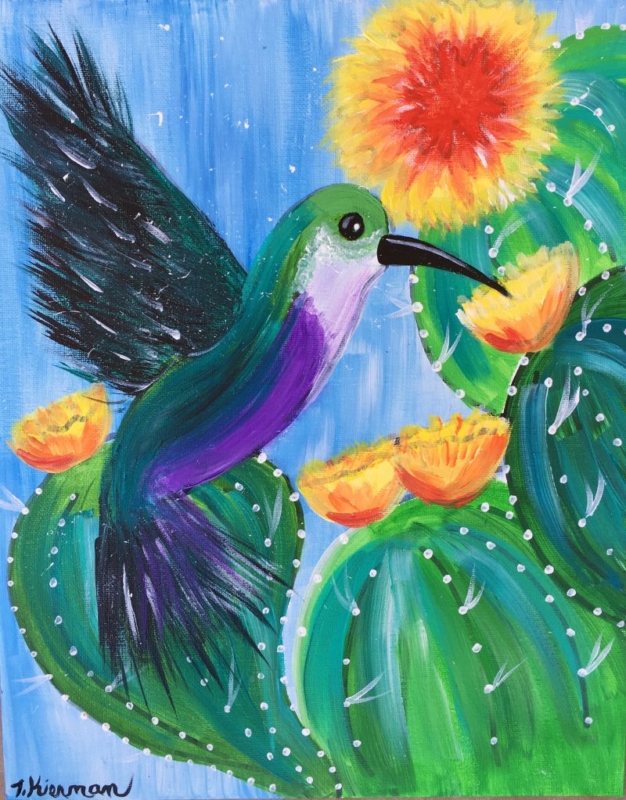
Finished!
By the way, we had a fun little vote on the SBSP Facebook page about which background looks best!
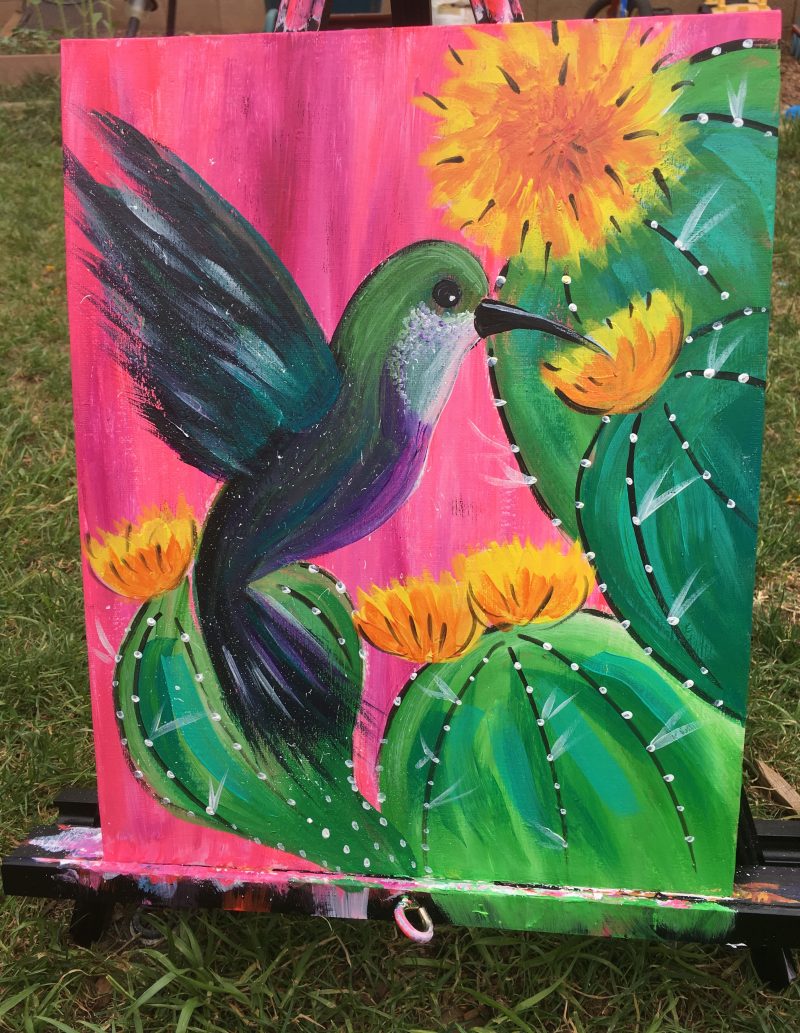
Blue won but there were quite a few hot pink fans in the mix! If you can’t decide, you can always paint it twice!


My cactus doesn’t really look like yours but I think still pretty.. Love your work.
I like that you tell what brunch and what direction