
Learn How To Paint A Horse
Channel your inner wild horse (or pony) running in the sunset! I’ve been wanting to do a horse acrylic painting tutorial for awhile now and I’ve finally gotten to do one!
It’s actually a highly requested painting from so many of you. I will show you how to paint a horse in this tutorial.
Would you like to save this?
I find horses are tricky to paint, draw or create with any medium for that matter. I always have troubles getting the proportion of the eyes, ears, muzzle down without it looking like a Picasso :-p.
If you wanted to draw your own horse on your canvas, I recommend doing a “grid” method of drawing which is a technique of dividing your reference image up in squares and drawing each square one at a time on the canvas. This ensures proper proportion.
I did create a traceable for this you are welcome to print out and use!

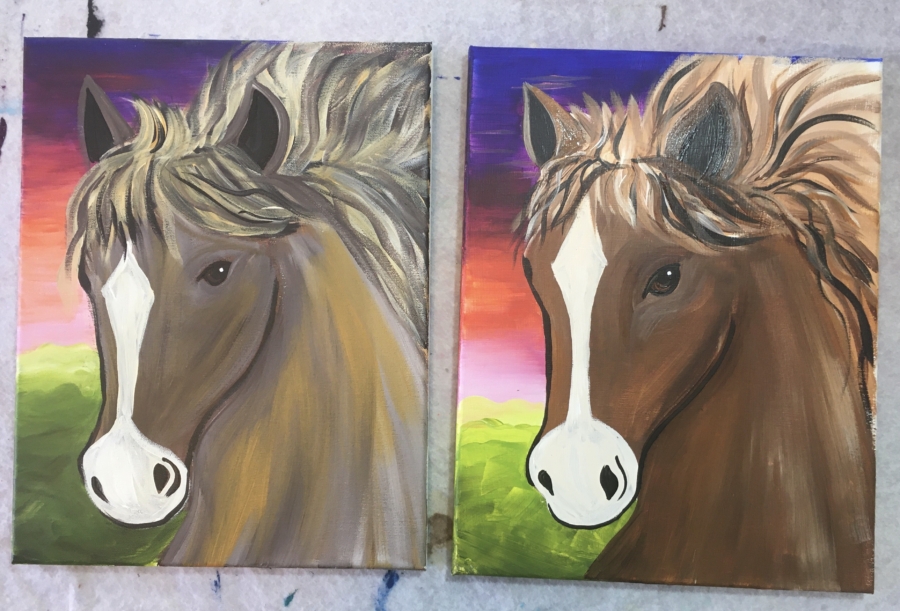
You can go in different directions on this and make a different color horse, different markings, different background or even add a horn and make it a unicorn. I did this painting twice and for some reason the colors came out differently. Yours will too!
Simplify this design with a solid black or Payne’s Gray background. Follow the same steps except sub the sunset background with a solid color.
Enjoy and happy painting!
Materials
How To Paint A Horse

Materials
- Acrylic Paint
- Paint Brushes
- 11" x 14" Canvas
- Horse Traceable
- Pencil & Graphite Paper
Colors
- Titanium White
- Mars Black
- Burnt Umber
- Raw Sienna
- Ultramarine Blue
- Deep Violet
- Cad Red Light
- Medium Magenta
- Light Olive Green
Brushes
- 3/4" Flat
- #4 Round
- #12 Bright
- Black paint pen (optional but might be helpful for eye)
Instructions
- Trace the horse onto your 11 x 14 canvas in vertical mode.
- Paint the sunset starting from the top and working down to the horse's muzzle.
- Paint the green field.
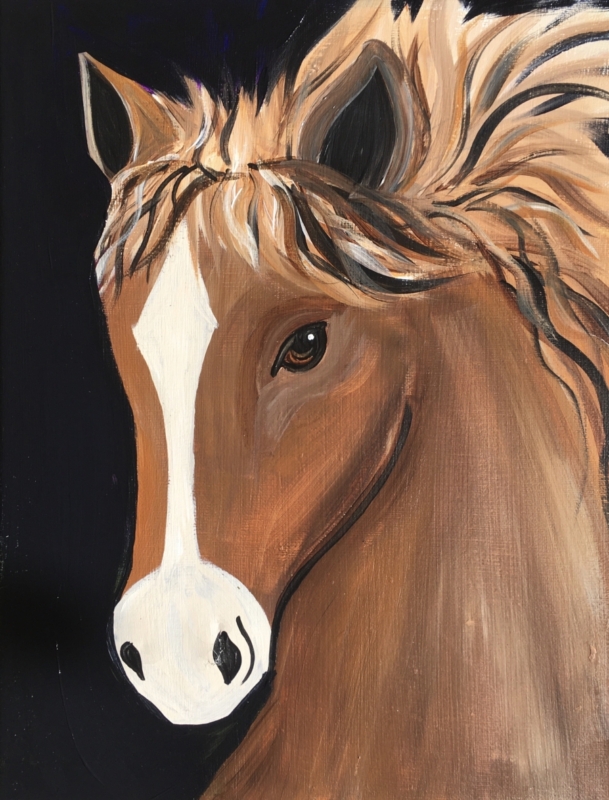
- Paint two coats of burnt umber + titanium white on the horses head with contouring strokes with the 3/4" flat brush.
- Paint the outline of the under neck, inside of ear and left line of the head.
- Paint the eye.
- Paint the white marking on nose and muzzle.
- Paint the rest of the eaers.
- Paint the hair.
Recommended Products
As an Amazon Associate, Michaels Affiliate and a member of other affiliate programs, I earn from qualifying purchases.
Color Palette

Traceable
This traceable is optimized for an 11″ x 14″ canvas. Print it on two 8.5″ x 11″ computer paper (standard size) and tape the two together. You can also download an 8 x 10 version of this traceable.

Directions At A Glance: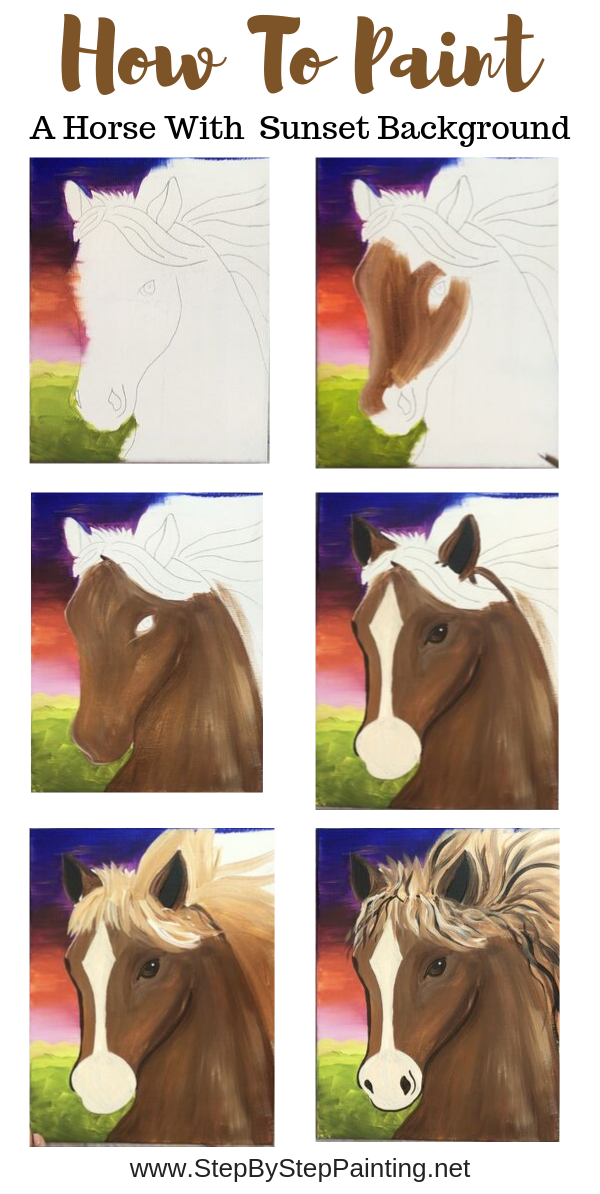

Video:
Step By Step Directions:
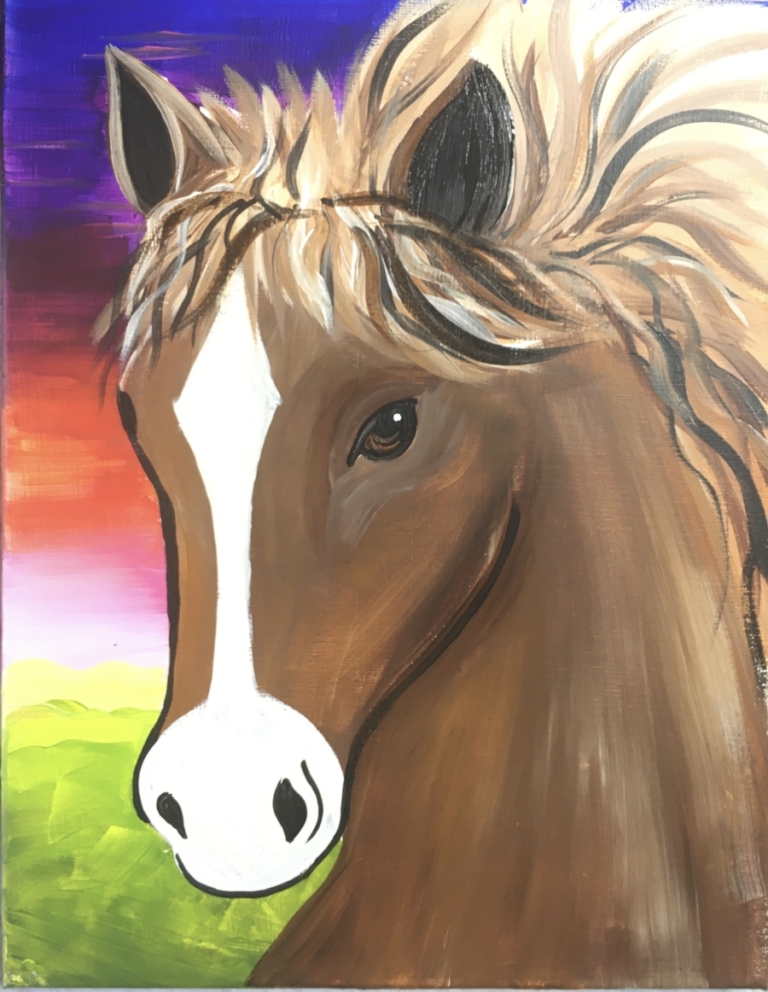
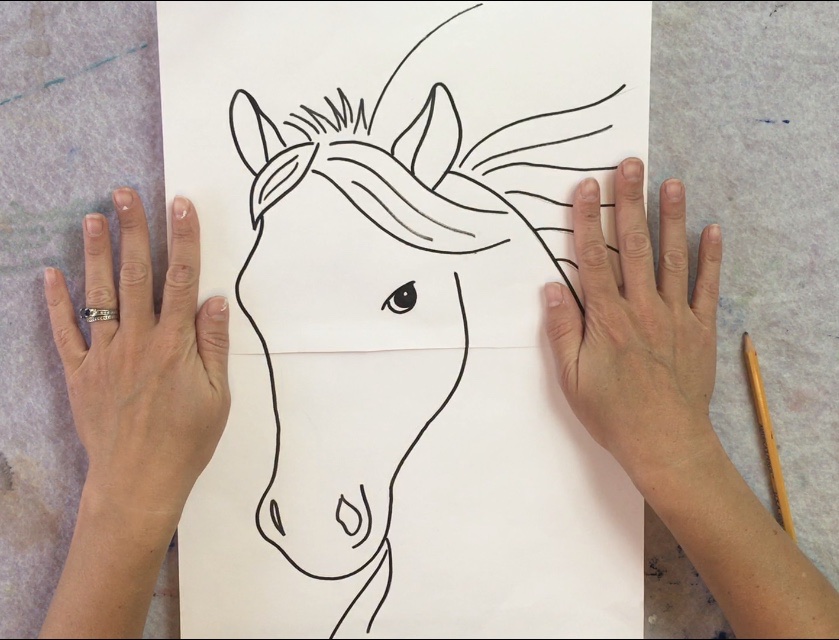
1. Trace (Or Draw) The Horse Onto The Canvas
As stated above, you’ll need to print the traceable on two sheets and tape them together. Place a sheet of graphite paper below the horse and trace firmly with a pencil. It helps to trace flat on the table versus on an easel.
The horse should be positioned mostly centered but with a good amount of area on the left because of the background.
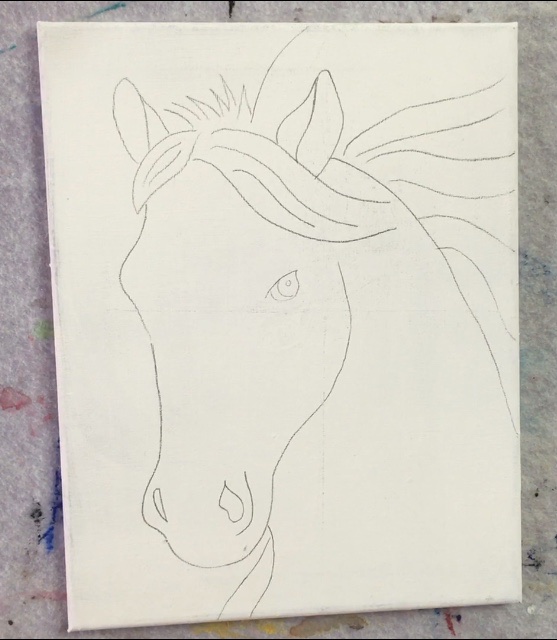
Tip: if you’re working with your child on this painting, it may be helpful to outline with a black paint pen. This ensures the lines will still show through when we paint the horse (making it easy to not loose the basic shapes of the drawing).
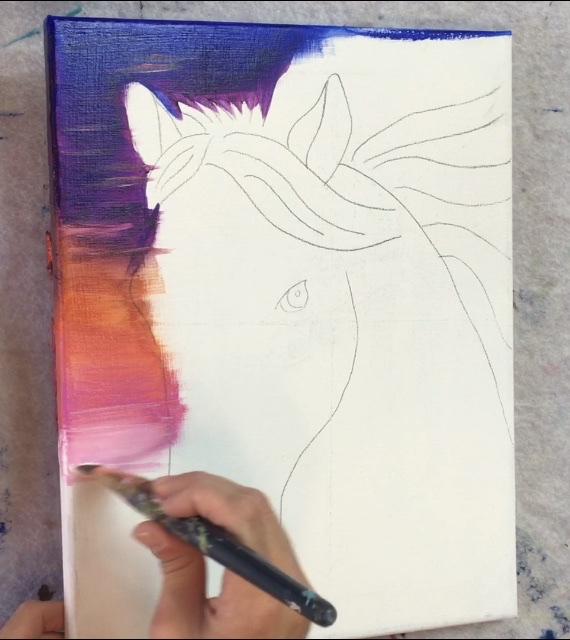
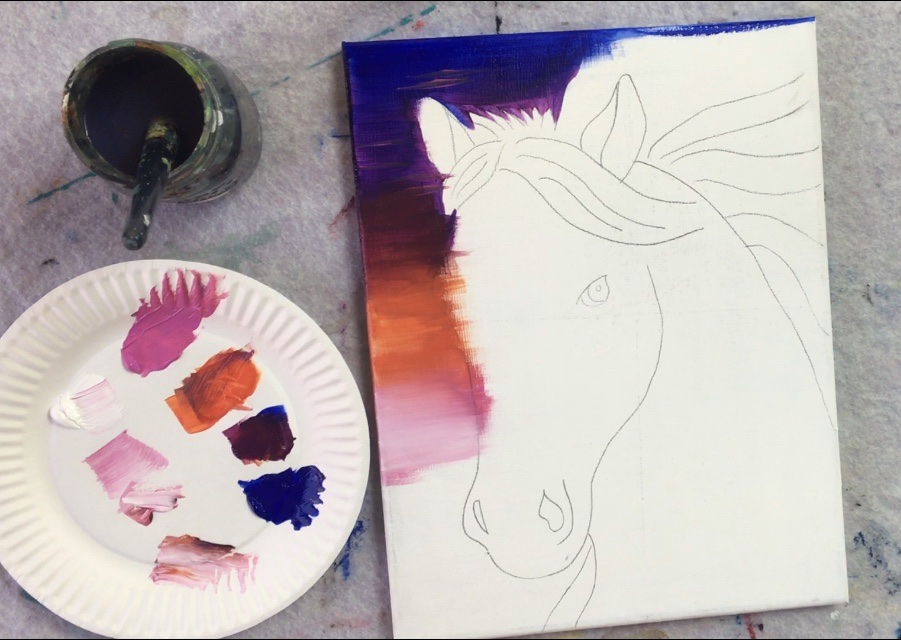
2. Paint The Sunset
For the sunset, I used a 3/4″ wash brush and the colors in this order: ultramarine blue, deep violet, cadmium red light, medium magenta, titanium white. Start with Ultramarine blue.
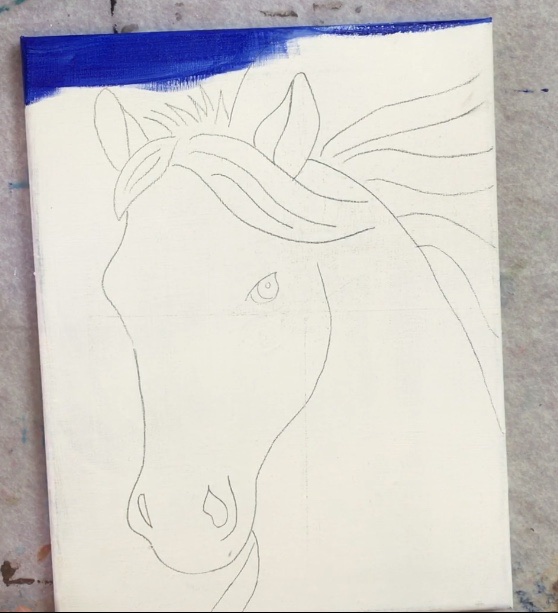
Paint horizontal strokes that go left and right but not all the way across (stop where the hair is at the top). Then blend in deep violet (without rinsing the brush). When you blend the blue and purple, go over the color and do “wet on wet blending” allowing the colors to mix together on the canvas.
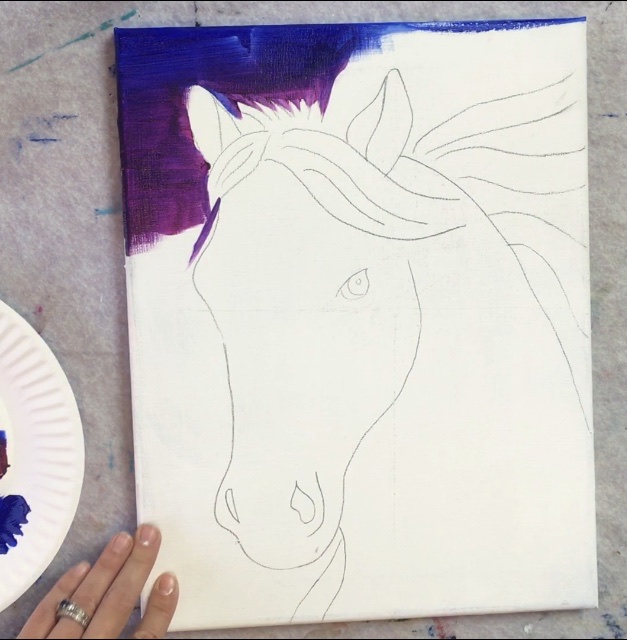
Next rinse your brush. Blend in cadmium red light (which looks like an orange). It may be tricky to go from the purple to orange so you may have to add some more deep violet to your brush to get it to blend. Also, try not to paint over the horse but if you go over the lines a little that is okay!
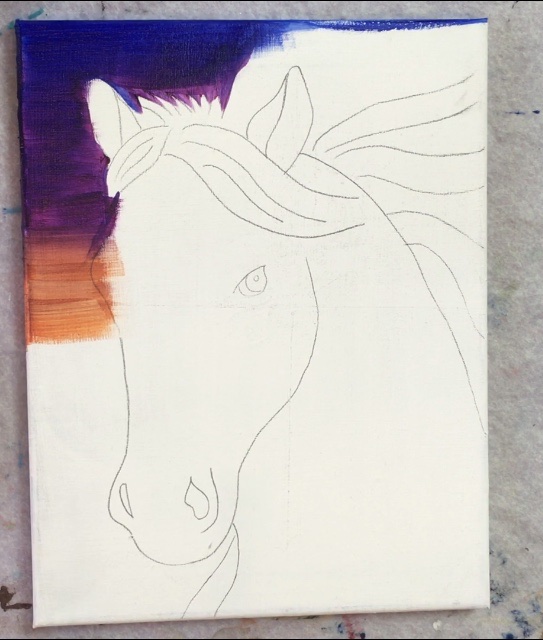
Next continue on by adding medium magenta to your brush. Blend the medium magenta down to just above the horse’s muzzle.
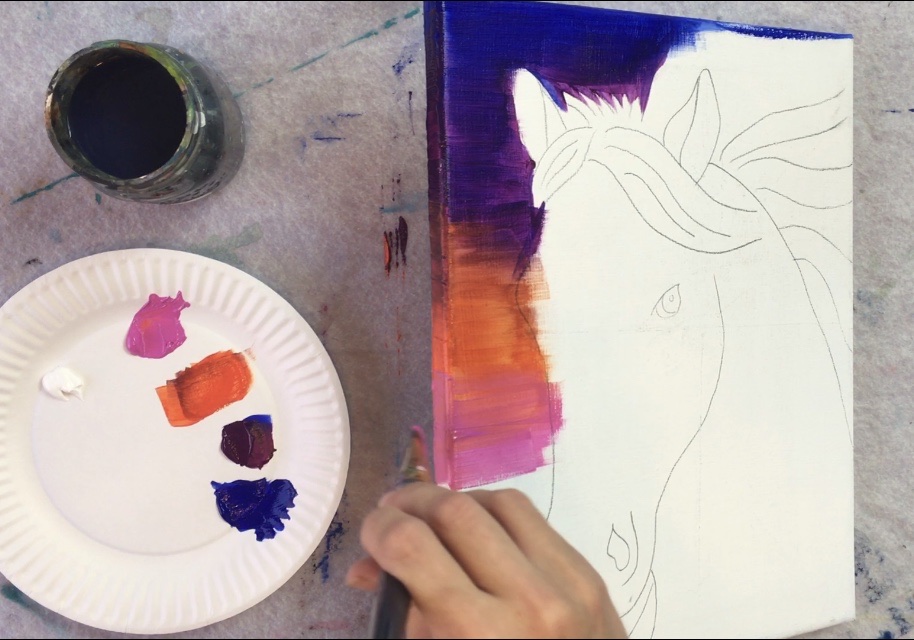
The last color you’ll need to blend is titanium white and I recommend rinsing your brush off to get all the extra colors off of it. Then blend the white at the bottom of the medium magenta to make a bright glowing pink color.
3. Paint The Green Field
This green is meant to be very light and bright along the horizon and then gradually get darker. That creates the illusion of depth in a painting. Also, since the focus of the painting is the horse, the green field was purposely left to be somewhat abstract and blurry. So definitely don’t fret about details in this step!
First I used my 3/4″ wash brush and mixed about equal amounts of titanium white with light olive green to make a light green on my palette. 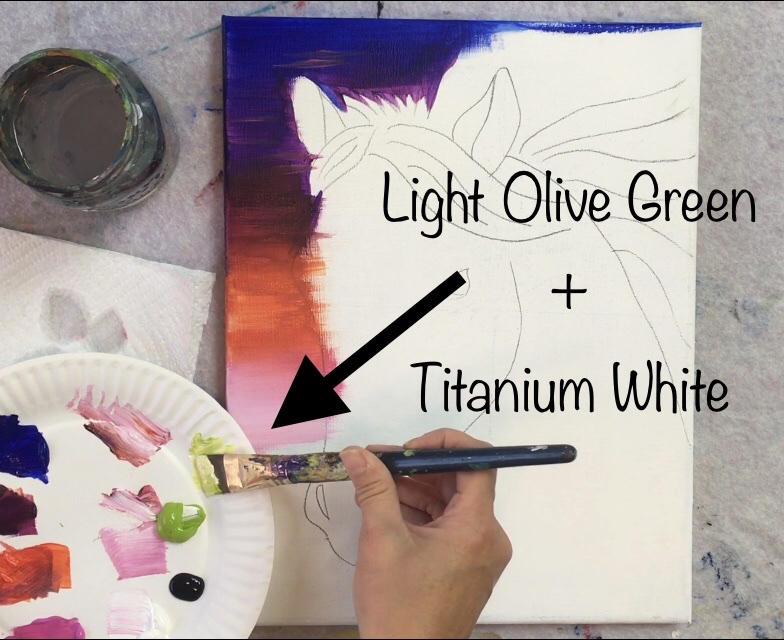
Then paint a sort of uneven line just above the bottom of the pink (like painting a mountain way in the distance). 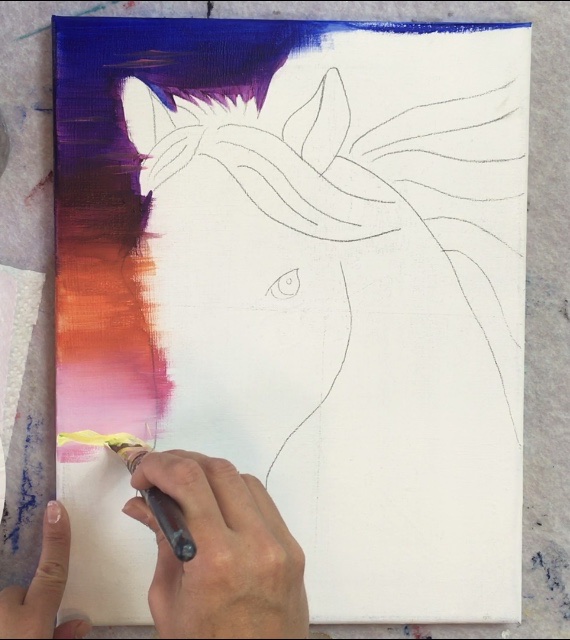
Then work your way down a little bit. Add more light olive green to your brush so the color gets a tad darker. Paint in wavy strokes like you’re painting small hills way in the distance. 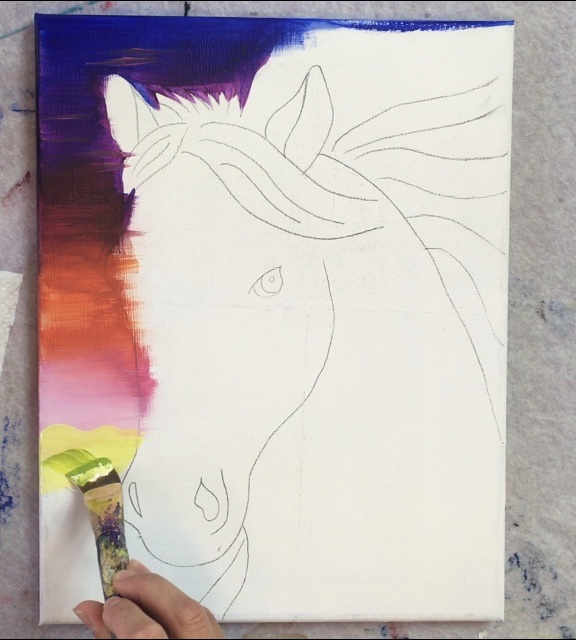
I did three layers of three different tints of this green. The bottom was a pure form of this green with no white in it. 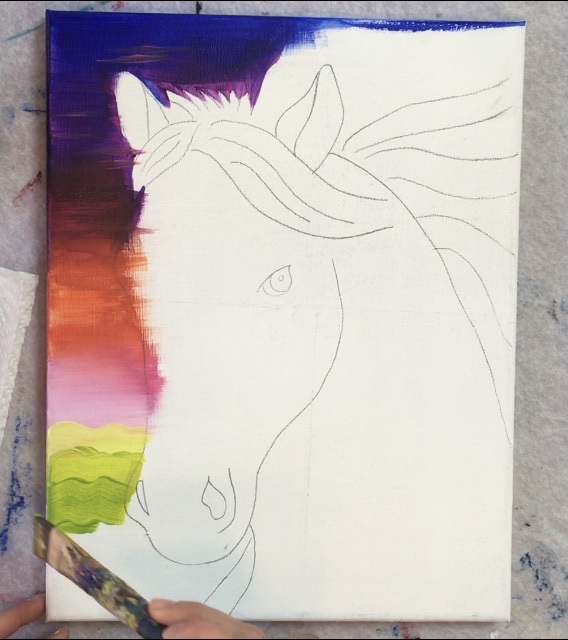
Then rinse your brush completely. On your palette, mix light olive green with a TINY BIT of mars black. This will make a darker shade of green. 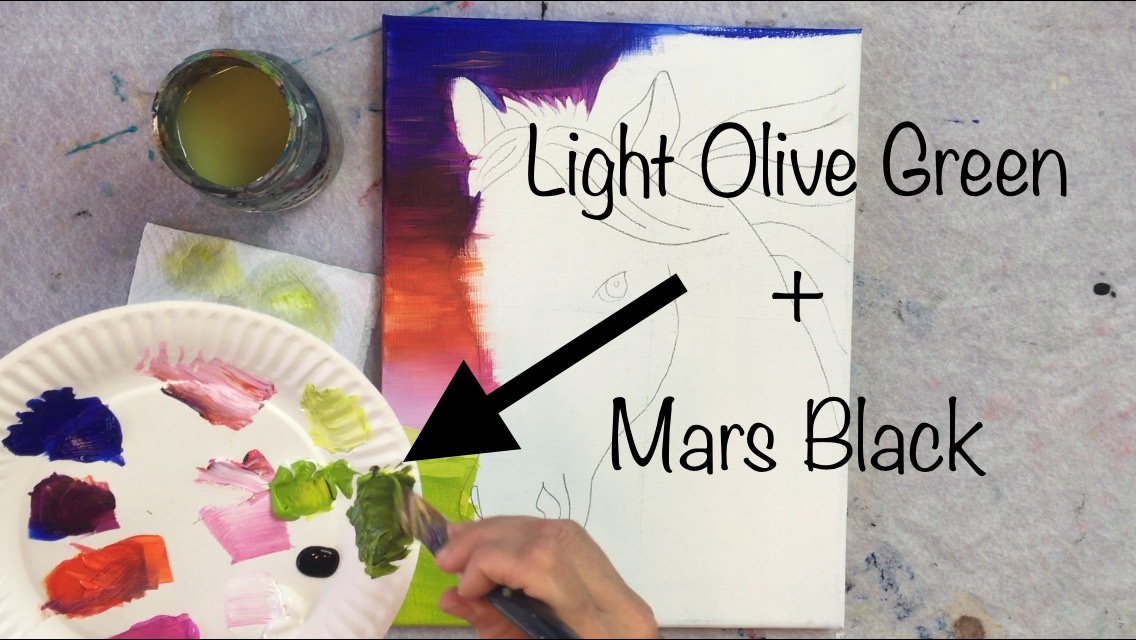
Paint the rest of the bottom of the green field with this darker green. You can even go a shade darker if you want at the very bottom. 
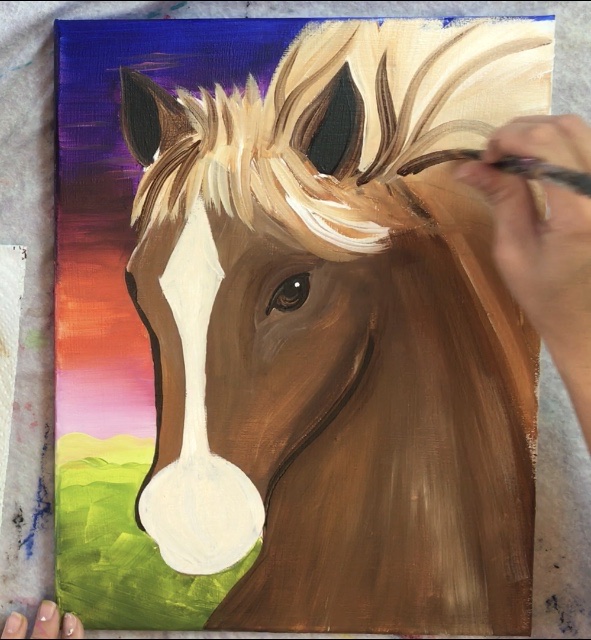
4. Paint The First Coat Of Paint On The Entire Horse
The colors I used on the horse were: burnt umber, titanium white and raw sienna. I also used my 3/4″ flat brush. First dip your brush in a generous amount of burnt umber and dip the corner of the brush in titanium white. 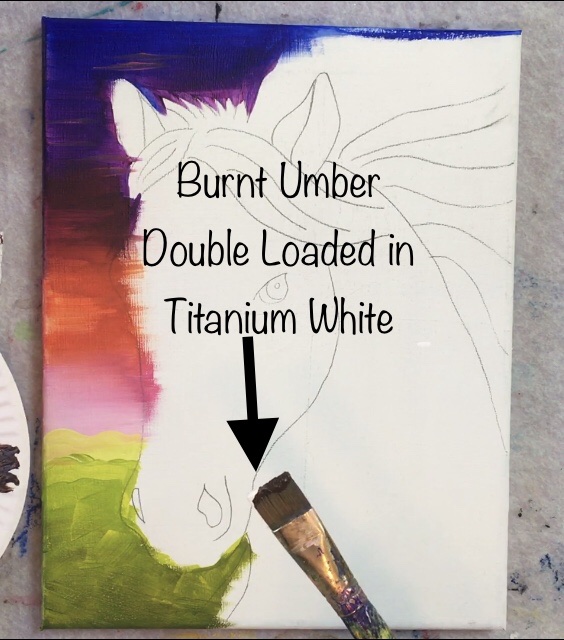
When you paint the horse in, use the full width of the brush and “contour” with the shape of the horse. The brown and the white will blend together. I started on the left size of the horse’s head and muzzle. 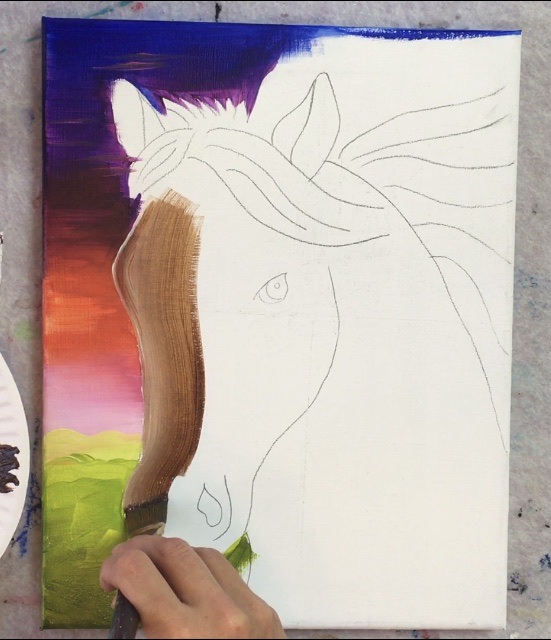
Make sure you go around the eye and hair. You can also go around the nostrils (but I ended up painting over them). 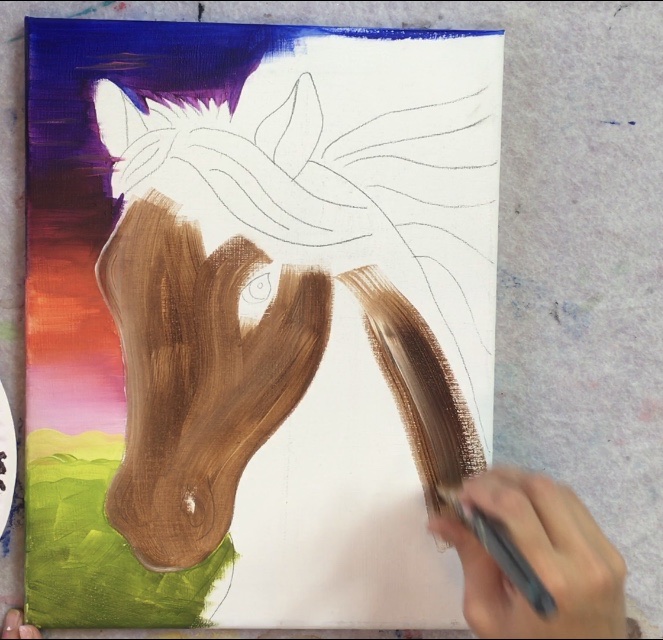
Continue working to fill in the entire horse head and neck in. Make sure you’re doing long contouring strokes using the full width of the brush. Let the brown and white blend to create various tints of that burnt umber. 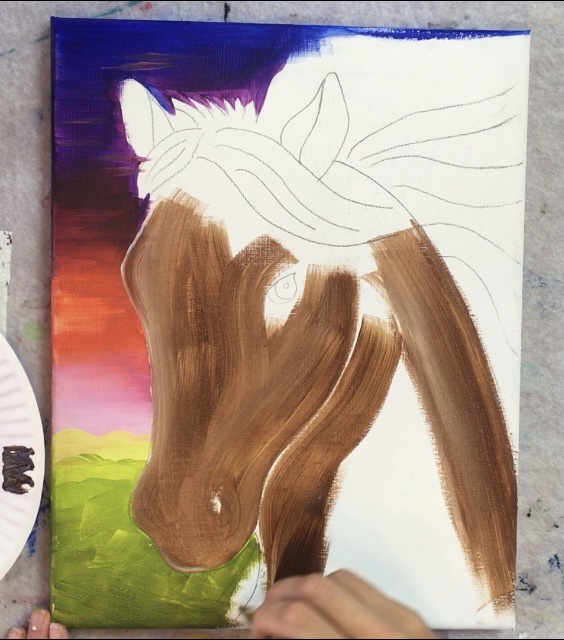
This first coat will look kind of translucent and, of course, unfinished. I did emphasize that under the chin area (where the head and neck divide) by adding a bit more brown in that area. 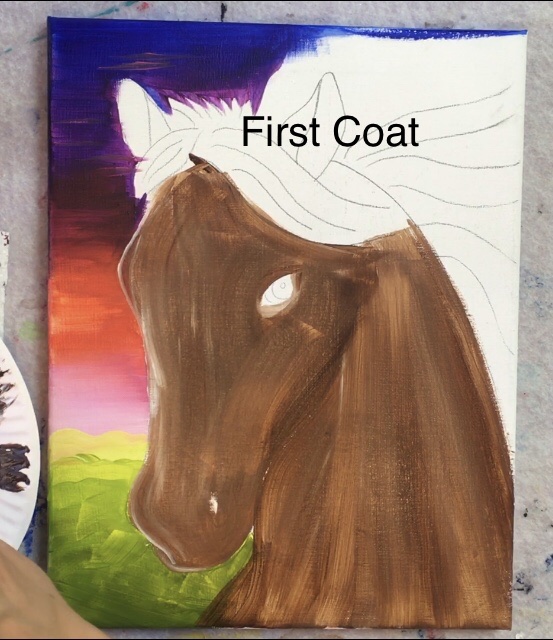
Then do the same thing again to create a second coat (same colors with the double load of the brush). The horse will start to look more solid. Try not to make it all the same tint of brown. 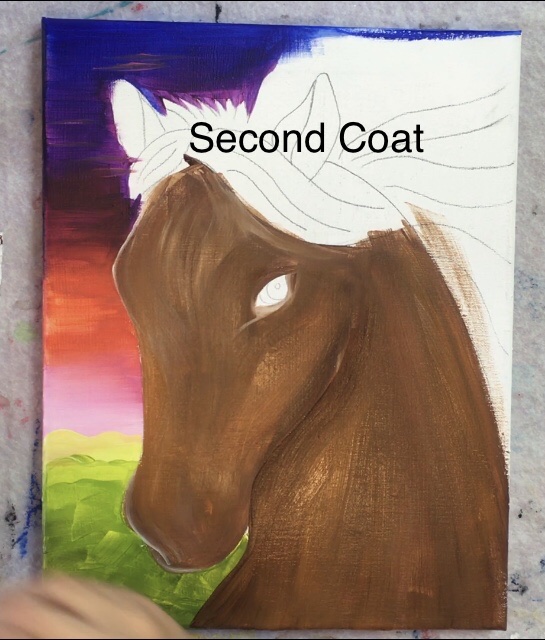
If your horse look too “brown”, you can always add a few strokes of white in there and blend it in with the brown. I did this on the neck area on the right side. It creates that “shiny look” too. 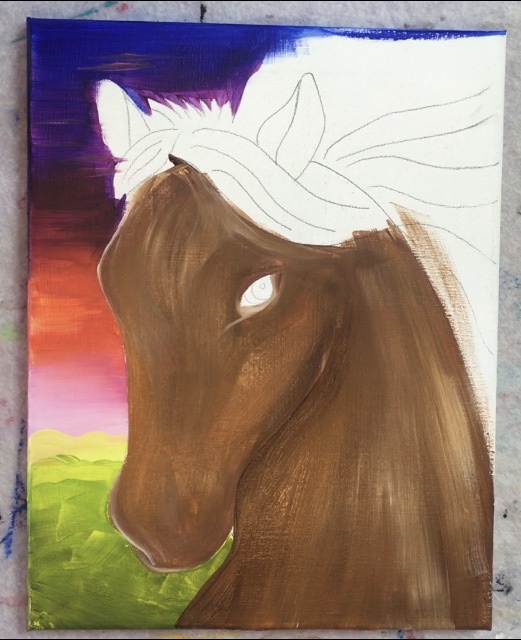
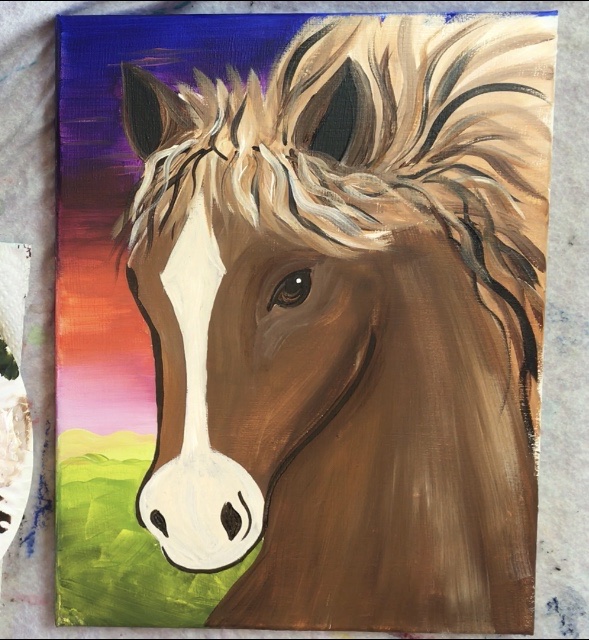
5. Paint The Inner Ears & Line Of The Muzzle & Under Neck
Next I used a #4 round brush and the color mars black. Outline the line that separates the head from the neck. Start at the bottom where the muzzle is and work your way up. If you lost that line during the painting, you may need to retrace it or just refer to the traceable. 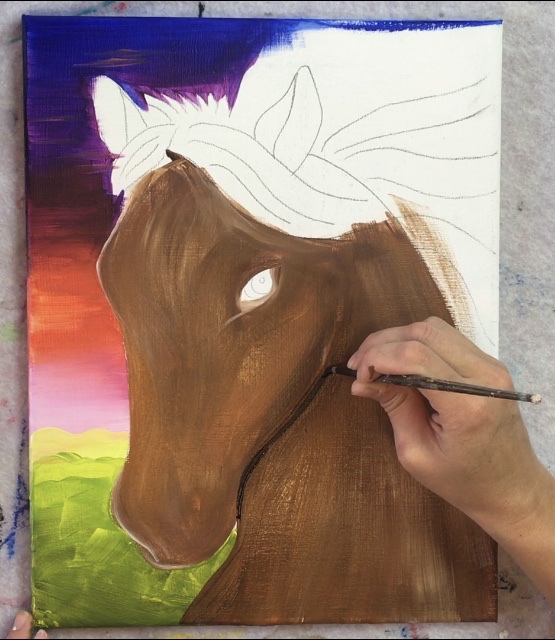
Next I painted the line on the left side of the horses head including the black dot area where it is assumed the other horses eye. Also, I painted the inner part of the ears a solid coat of mars black. (Ignore my black smudges)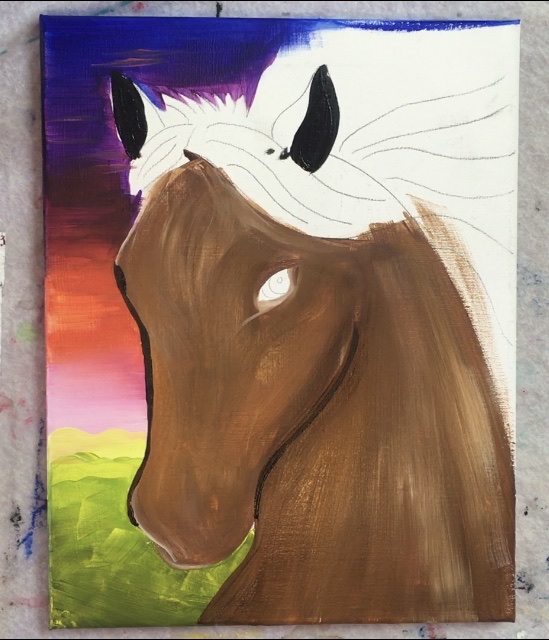
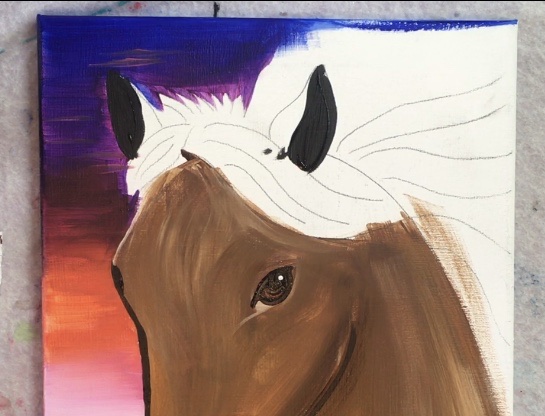
6. Paint The Eye
For the eye, I used the colors burnt umber, mars black and titanium white. First paint in the iris area burnt umber.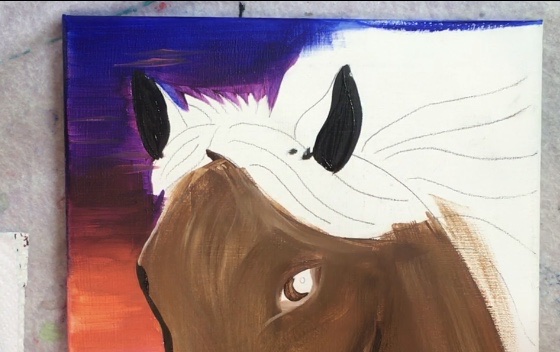
You can leave the “white area” area white (the part left of the brown iris) or paint it in brown. I chose to paint it in brown. 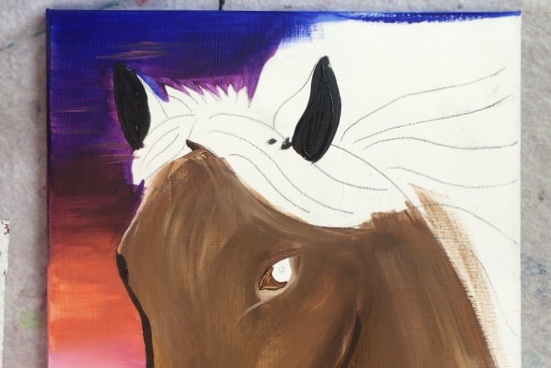
Then paint the pupil black.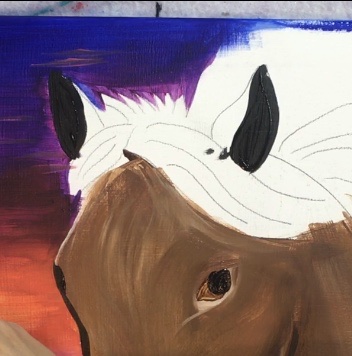
Next outline the eye with black. Refer to the traceable as needed for this step. You’ll need a steady hand for this step to get a nice thin line! It might also help to use a black paint pen or sharpie. 
Then when the black pupil is dry enough, paint one small dot in the upper right of the pupil. 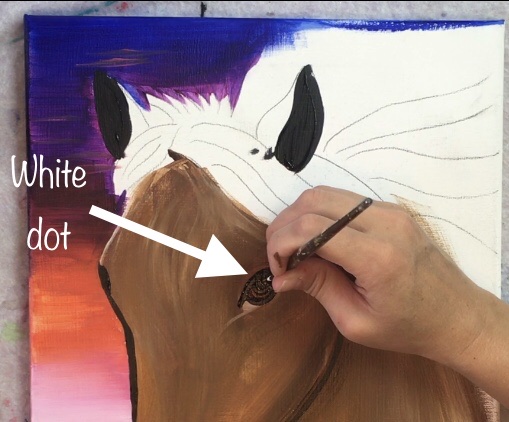
Tip: if you outlined your eye too thick, wait for it to dry and then go back with the brown & white (the horses’s color) and paint really close to it to ensure a thinner closer outline of the eye.
Then I went in and filled in any spots that needed more brown around the eye. I did this with my round brush and burnt umber/ titanium white. 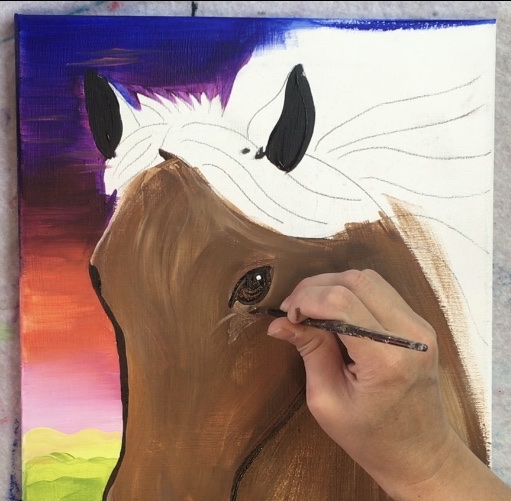
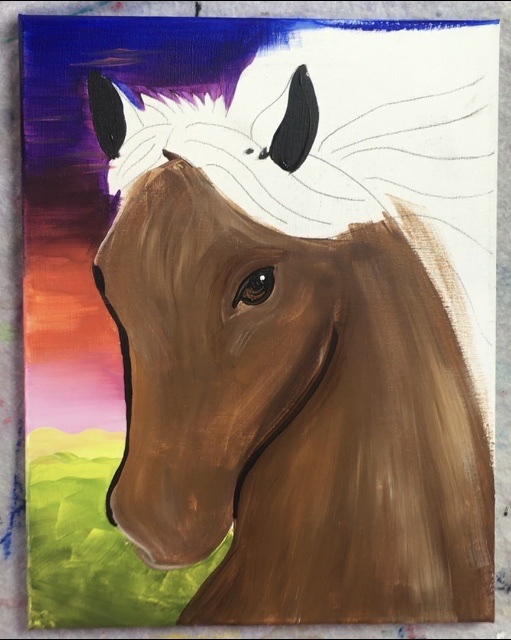
7. Paint the white marking on the horse’s nose
For the marking, I used my #4 round brush and titanium white mixed with a little bit of raw sienna to make an off white color. 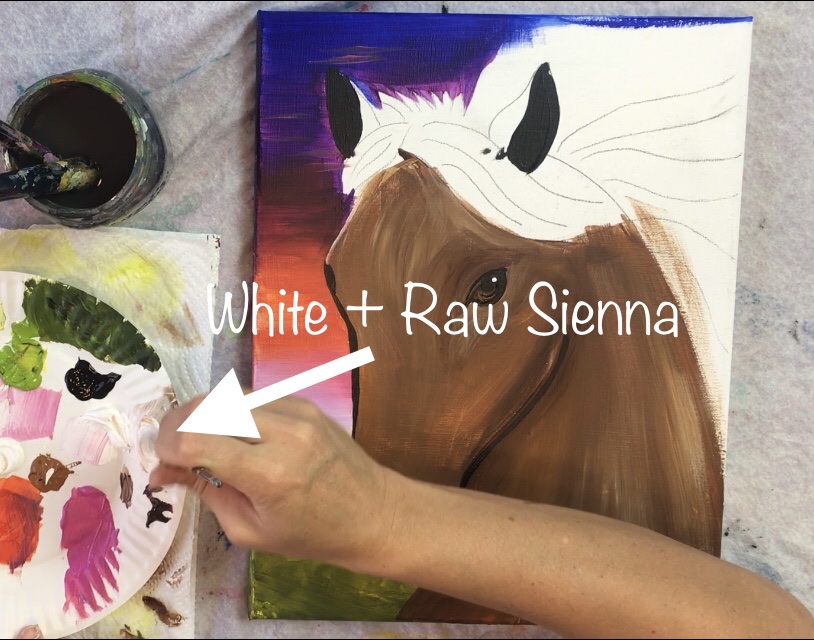
Paint the bottom part of the horse’s muzzle. This should form a circle shape but still fill in the actual shape the way you traced it on the canvas. 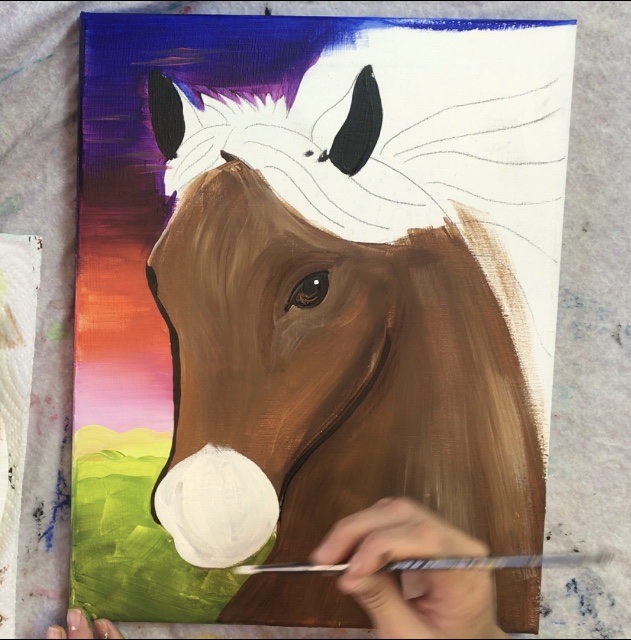
Note: If you feel more comfortable, you can draw the marking out with white chalk first (chalk will erase). Then fill it in.
Then work your way up vertically/ diagonally up the nose. 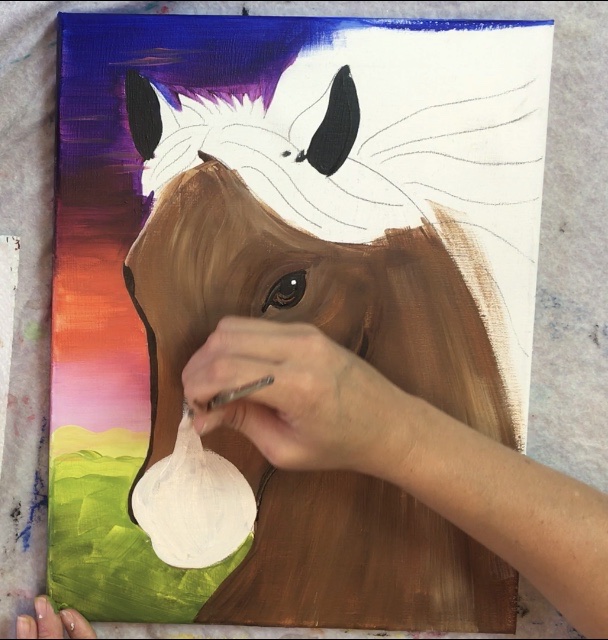
And paint a diamond top. I went all the way to the top of the horse’s forehead. 
And fill it in solid. You’ll need to wait for this to dry before painting the nostrils.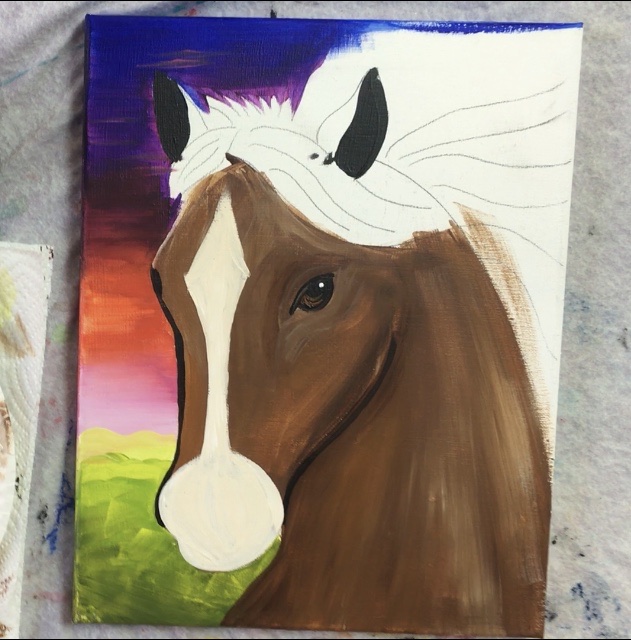
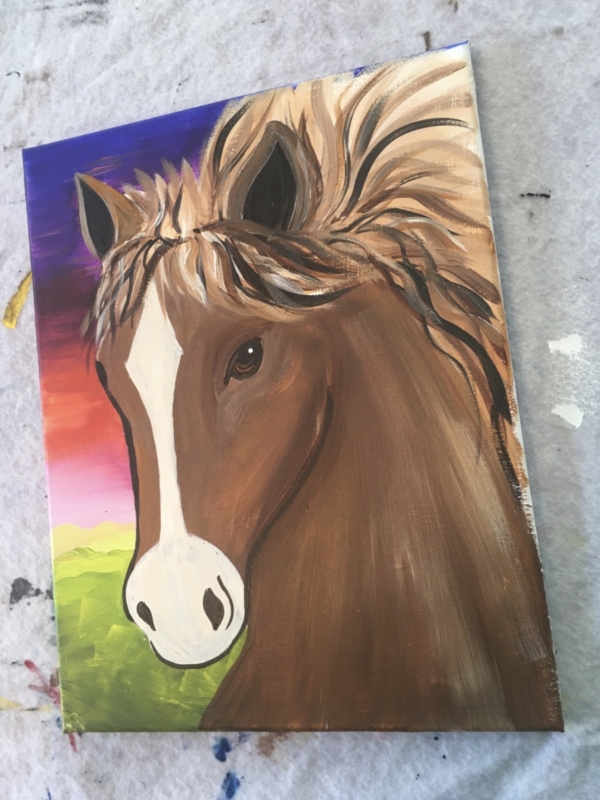
8. Paint The Ears
Next rinse your brush off and grab that burnt umber again. Paint the rest of the ear (the outer brown area). You can add a bit of white in there as well. 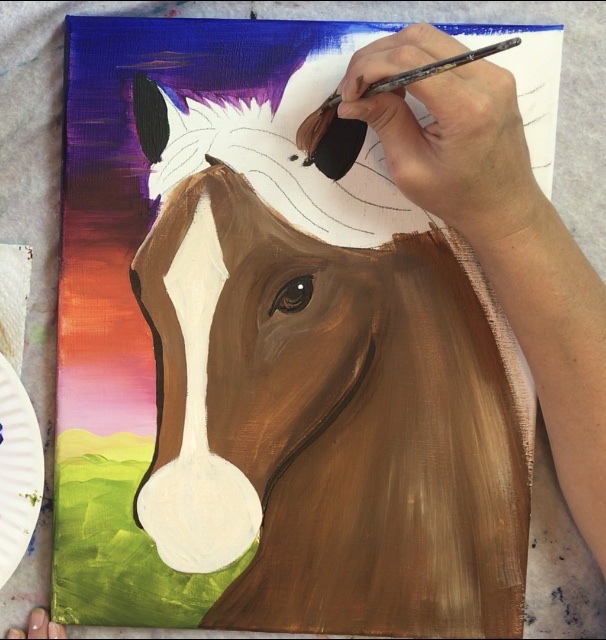

9. Paint The Hair
For the hair I used the colors: raw umber, titanium white, burnt umber and mars black. Start by using your #12 bright (you can also use a round brush if your prefer). Double load it in both titanium white and raw sienna. Follow the lines drawn from the traceable and paint each strand starting from the head and stroking down (or up depending on which way the hair is going). 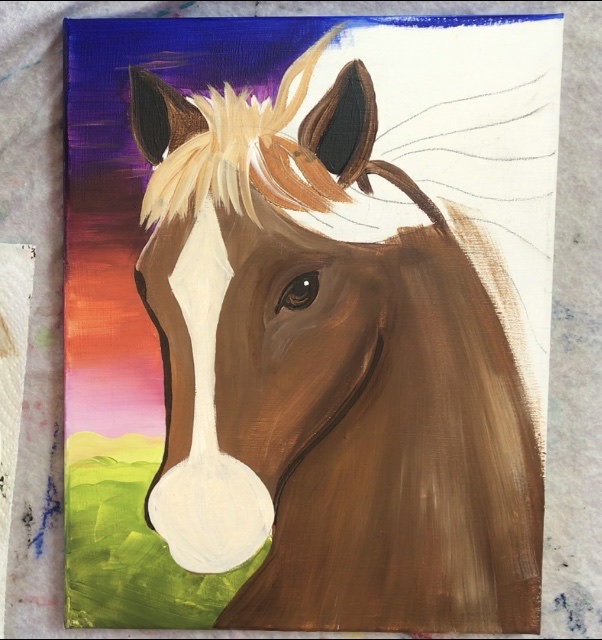
The colors raw umber and titanium white will blend on the canvas to make a nice light brown color. Paint the hair flowing in the direction of the lines. To get the thinner pointed strands, I just used my brush on its side. I did not worry about mixing the colors, I just let them blend themselves on the canvas. 
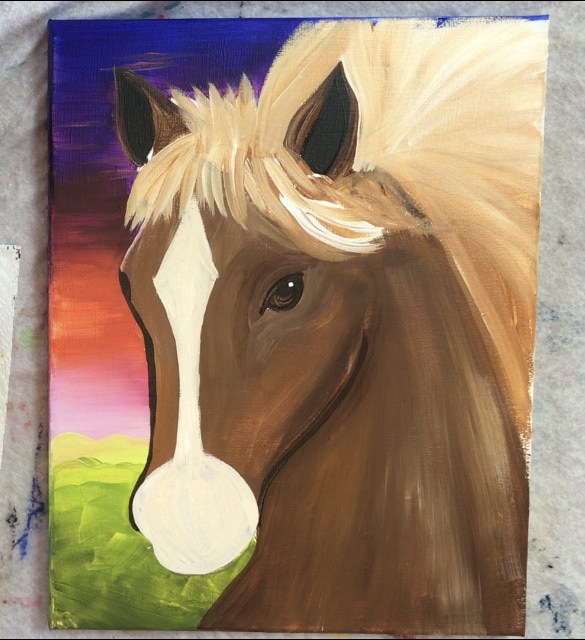
Then I did the “texture thing” by using my #12 bright brush and just burnt umber. I painted along some of the lines that were already drawn but also created some new lines. 
Then I went kind of crazy with this hair and channeled my inner wild horse! 😉 I used my round brush and mars black to make some more wavy strands in there. 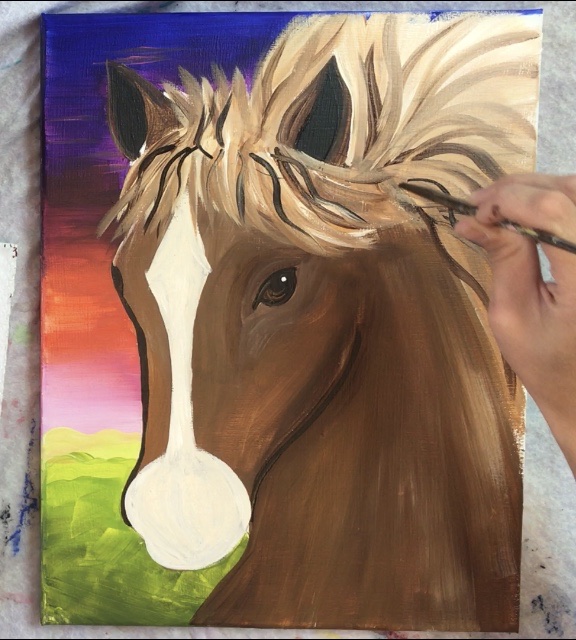
I also used titanium white to add a few more wavy strands. So many colors in that hair!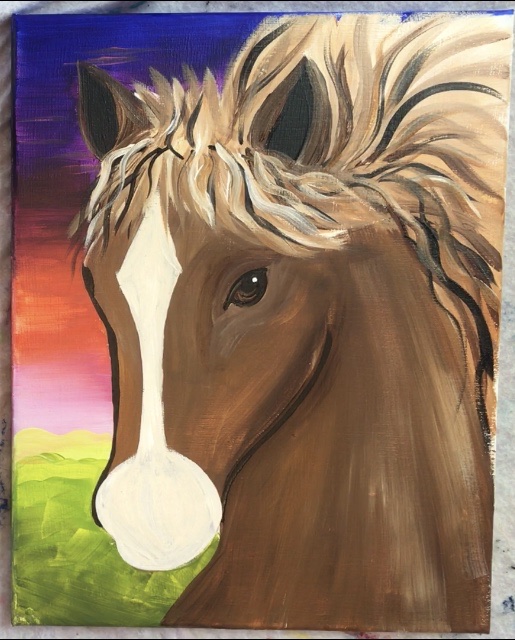
10. Paint The Nostrils
You may need to refer back to the traceable if you cannot see the nostril lines again. Use your round brush to paint the left and right nostril shapes solid black. 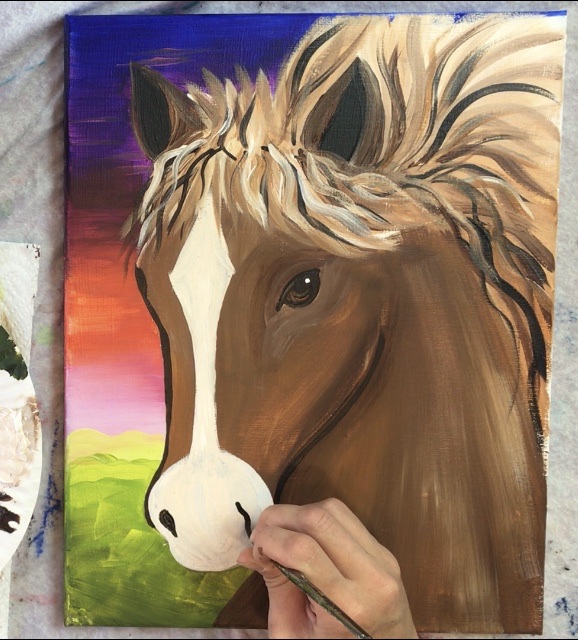
Finished!
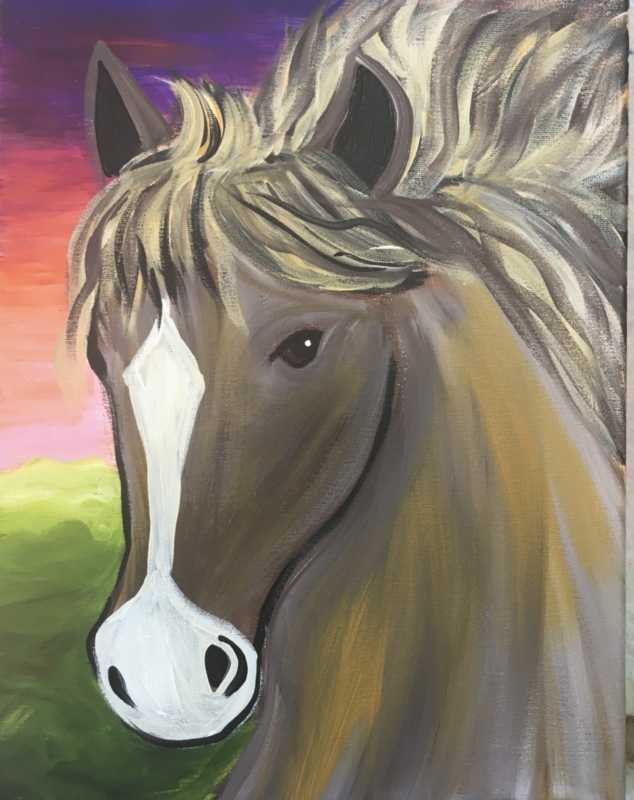
This horse below was done with some more gray tones. I did that by adding a tiny bit of mars black into the horse’s main color to create the gray tones. I also did a few layers of raw sienna on top (the golden looking streaks).
Share Your Art! Did you do this painting? Let’s see!


Is there a way to slow your video so I can use for a paint party?