
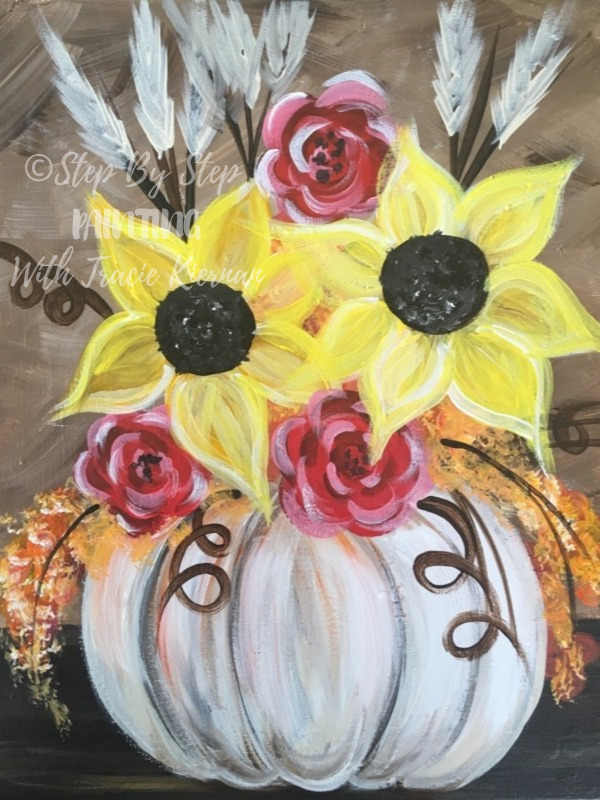
How To Paint A Fall Bouquet
Learn how to paint a fall bouquet of sunflowers and roses in a white pumpkin vase. There are details in this painting that you can customize (like colors, flowers, overlapping, etc.) I actually did this painting two times, one with the sunflowers in front of the roses and the other with the roses and sunflowers kind of overlapping in different areas.
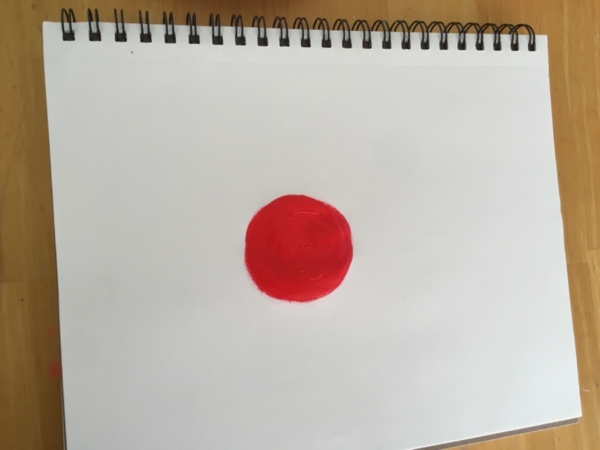
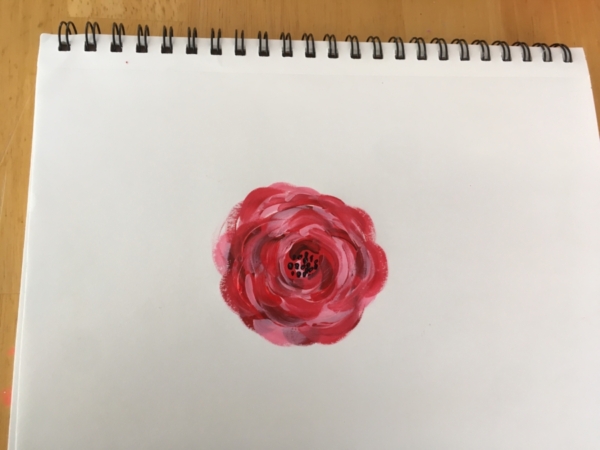
The roses are actually surprisingly simple to do! You can try out this exercise right now in your sketchbook as a pre-practice to the painting.
A Quick Practice For Painting Roses:
Would you like to save this?
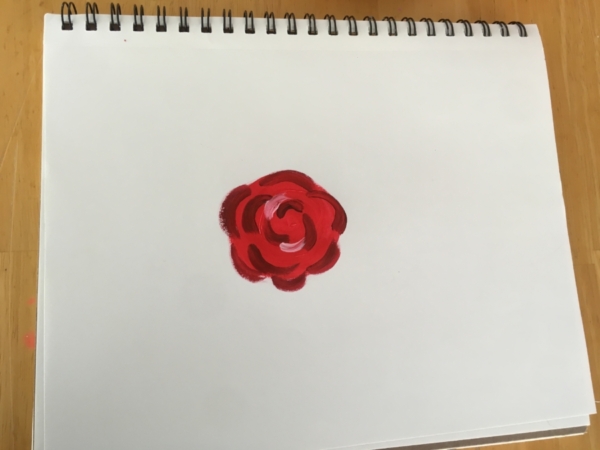
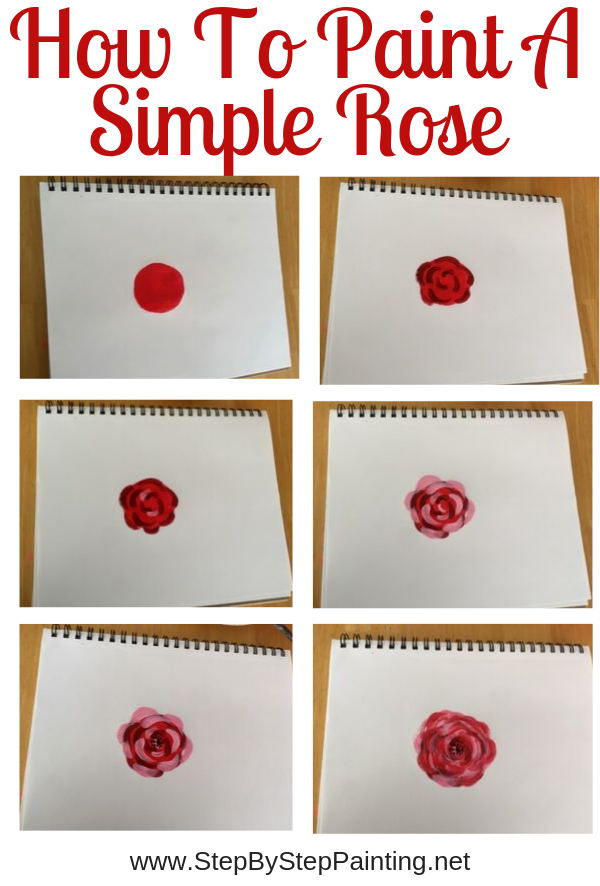
1. First paint a solid color circle with your choice of rose color (I used naphthol crimson red).
2. Then mix a darker version of that color by blending a tiny bit of mars black with the naphthol crimson.
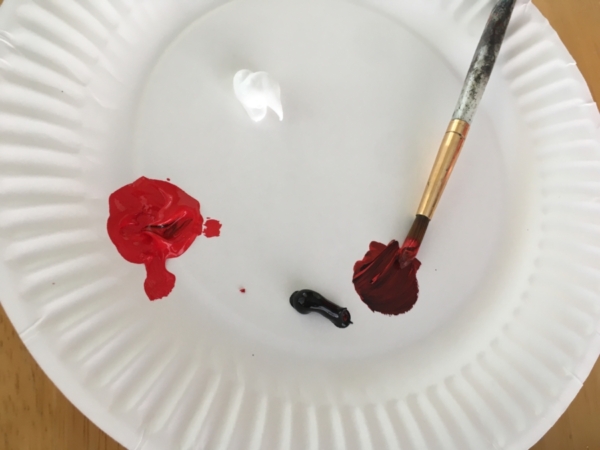
3. Using a round brush, make little C style strokes that blossom outwards to the edge of the circle.


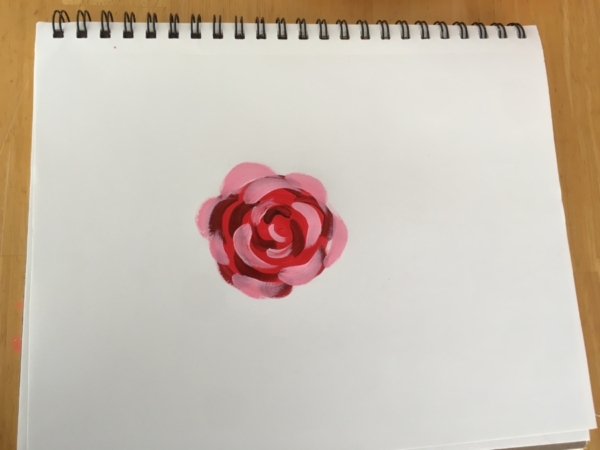
4. Then rinse your brush. Mix on your palette a lighter version of the naphthol crimson by mixing titanium white with the red.
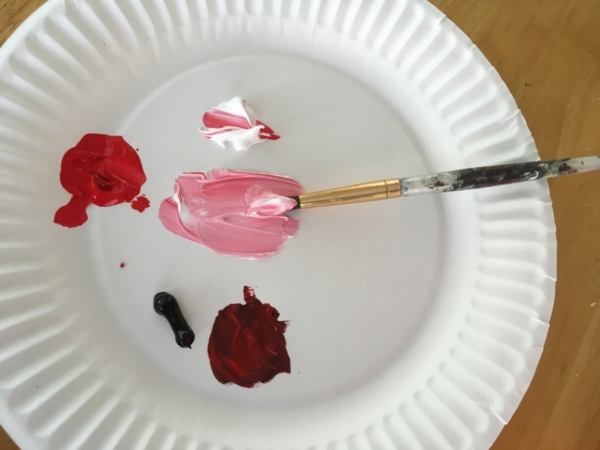
5. Repeat step 3 but try not to cover too much of the darker strokes.
6. Use mars black to paint little dots in the center.
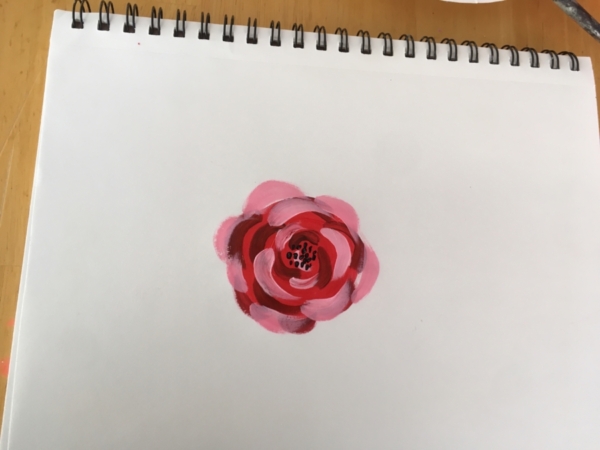
7. You can get more detailed with this if you’d like! To get to this point, I simply used different variations of the red, white and black mixed on my palette and kept adding more of the “C” strokes around the rose so the colors blended together. The more strokes you make, the more blended the rose becomes. Just be careful not to do too many!
Now let’s paint a bouquet! Enjoy and happy painting!
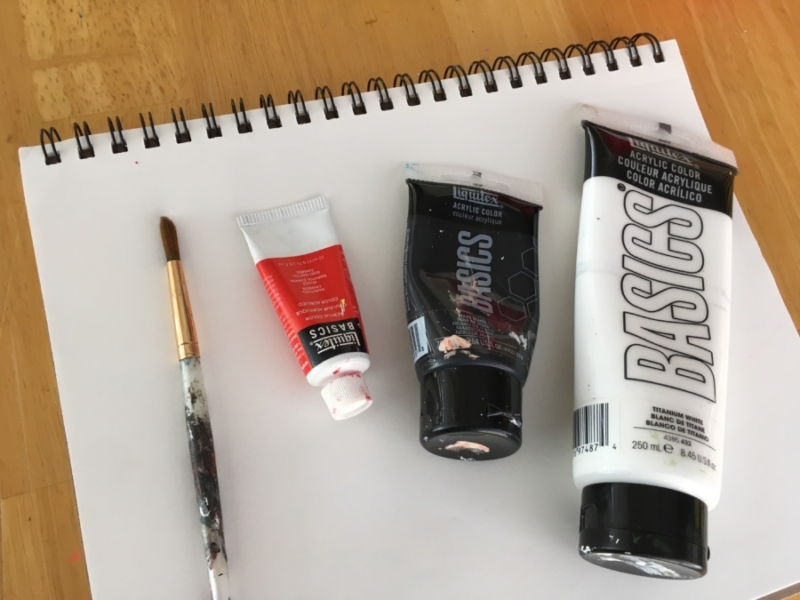
Materials:
How To Paint A Fall Bouquet
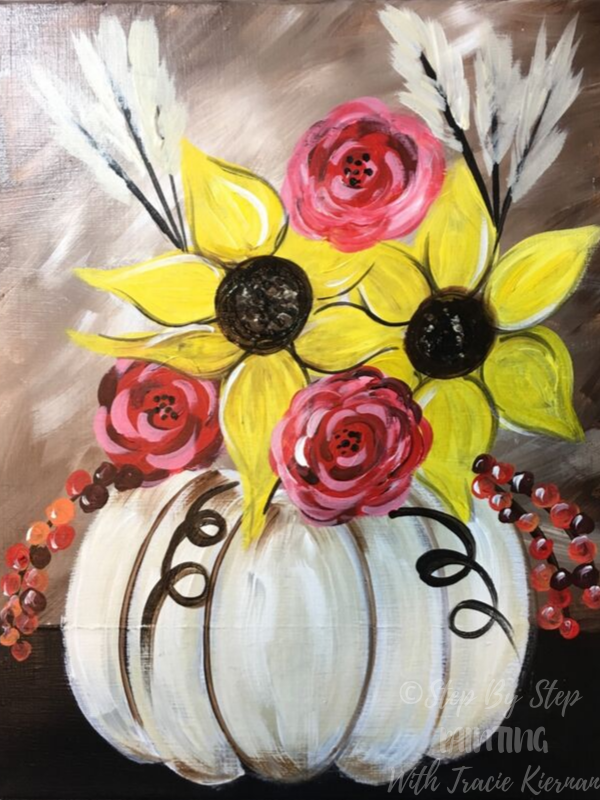
Learn how to paint a fall floral arrangement of sunflowers and roses in a white pumpkin vase.
Materials
- Acrylic Paint
- Paint Brushes
- 11" x 14" canvas
- Water cup
- Palette
- White Chalk
- T-Square Ruler
Brushes
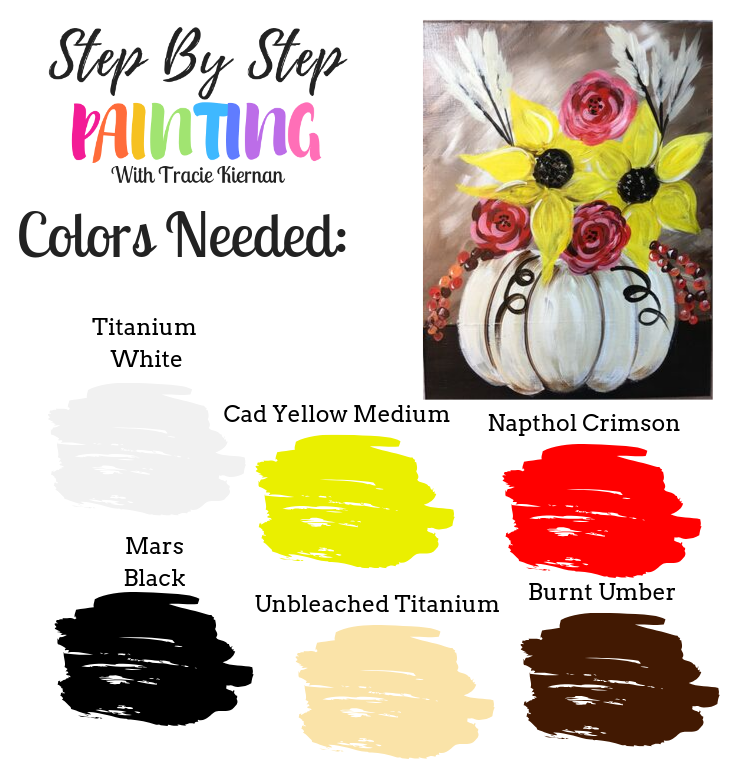
Colors
Recommended Products
As an Amazon Associate, Michaels Affiliate and a member of other affiliate programs, I earn from qualifying purchases.
Color Palette:
Directions At A Glance: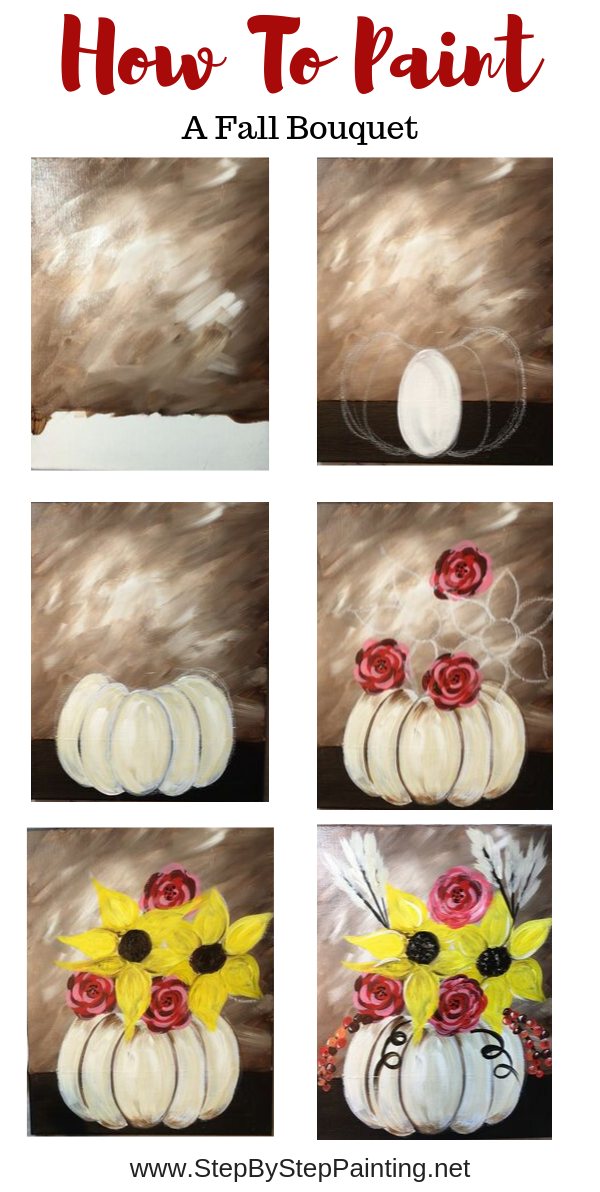

Video:
Step By Step Directions:
1. Paint The Background & Table Top
The canvas should be positioned in portrait mode. Mark on your canvas 3″ up. This will be where the table line is. Use your 3/4″ flat brush to paint a burnt umber line. Use your t-square ruler to make sure it’s nice and parallel to the bottom edge of the canvas. 
Then start painting the background above the table line. You will need: titanium white, burnt umber and mars black on your palette. Dip your 3/4″ flat brush in titanium white and a little bit of burnt umber. Paint abstract style strokes that go in all different directions to blend this brown and white to make a light brown in the middle of the canvas. 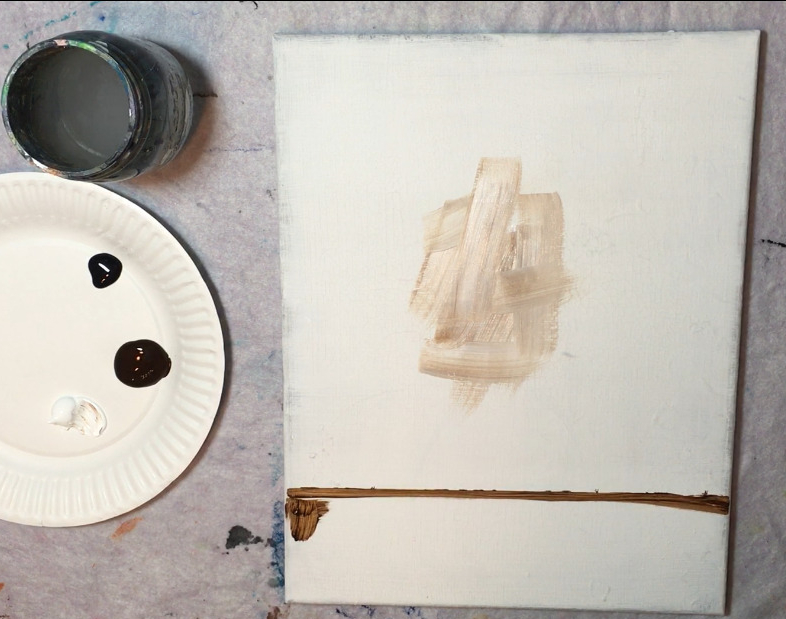
Work your way outwards from the middle gradually letting that brown get darker by adding less white to you brush and more brown. These strokes are short, expressive and meant to go in all directions. You can also think of it as painting little “X’s” everywhere. The colors will blend on the canvas, however, try not to over blend so that the background turns into one solid color. 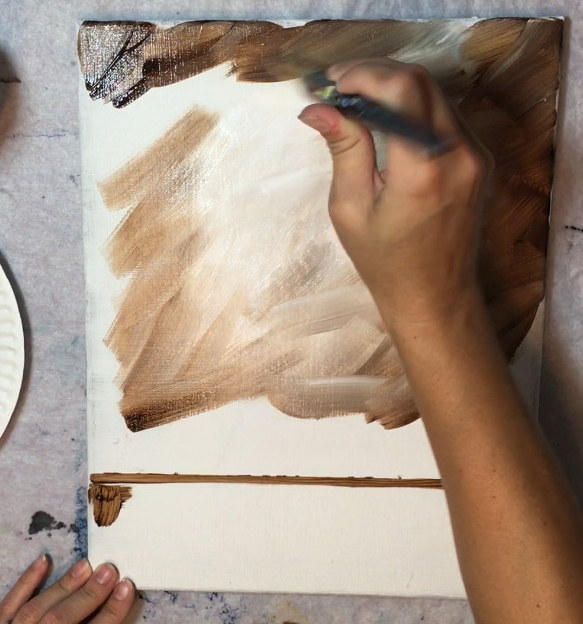
I left the middle of may painting mostly light in color and my edges darker. Now is also the time where you can paint the sides of the canvas if you are working on a 3D stretched canvas over wood frame. 
Next paint the bottom table area. To do this, you’ll want to completely rinse your brush. Then dip it in about equal amounts of black and burnt umber. You will create a very dark brown. Use your 3/4″ brush to paint left and right horizontal strokes in this area.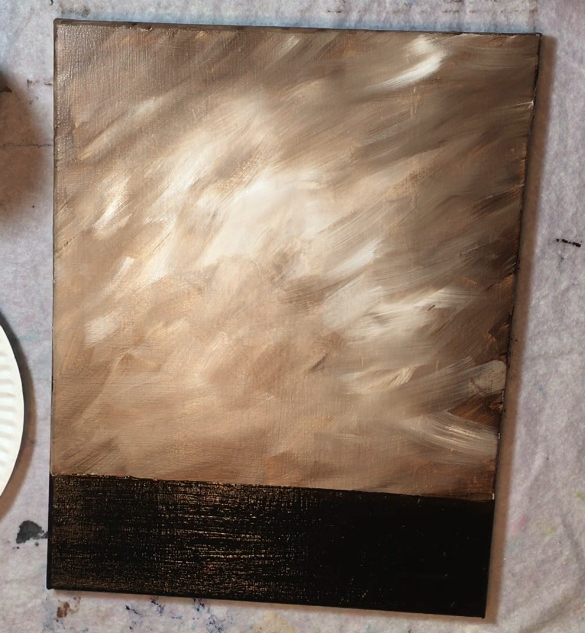
Wait for your painting to dry before moving on to the next step (or use a blow dryer).
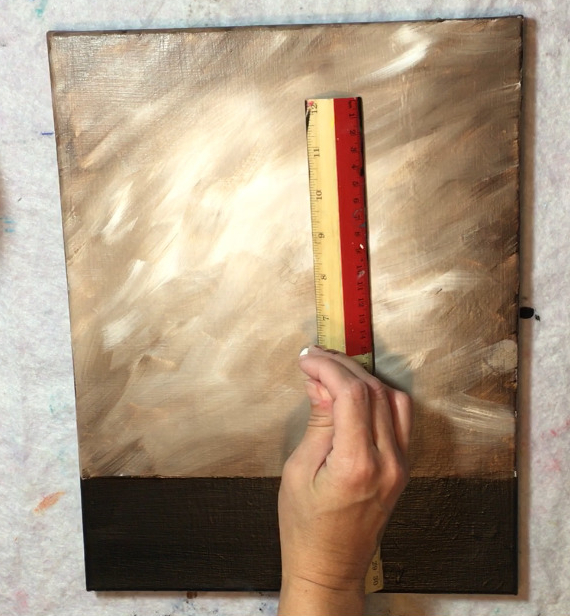
2. Draw The Pumpkin Vase With Chalk
To draw the pumpkins, you’ll want to ensure your painting is dry. Use a ruler to measure 6″ from the bottom of the canvas. This will be how high the pumpkin needs to be.
Using your chalk, draw a curved, almost flat, line on the bottom of the canvas with a little bit of space below. 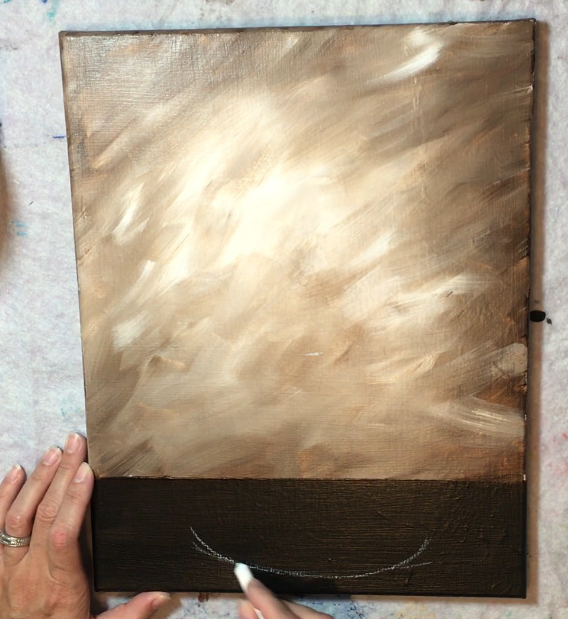
Then draw left and right curves to form the width of the pumpkin. Think of this shape as a rounded sort of flat oval shape. Then draw the opening at the top where the flowers will be sticking out. This opening dips down a bit into the pumpkin as if the top has been carved off. 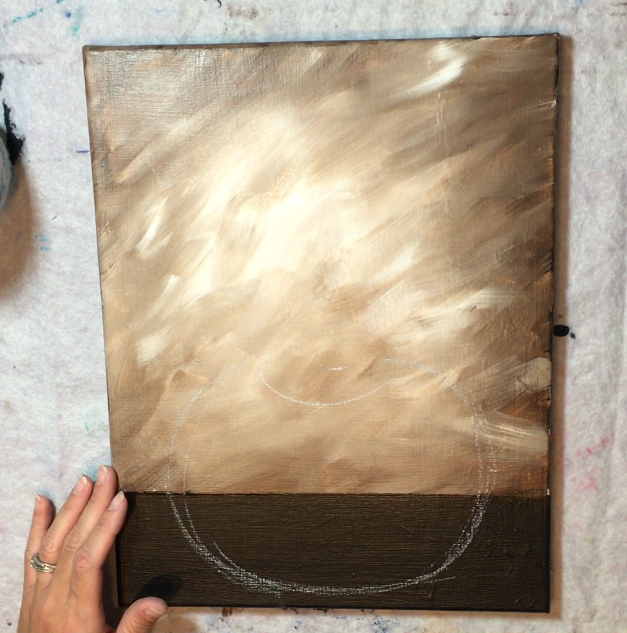
Next draw the lines of the pumpkin. Start in the middle and draw an oval. This bottom part of the oval can dip down below the bottom line to make the “bottom bump” of the pumpkin. 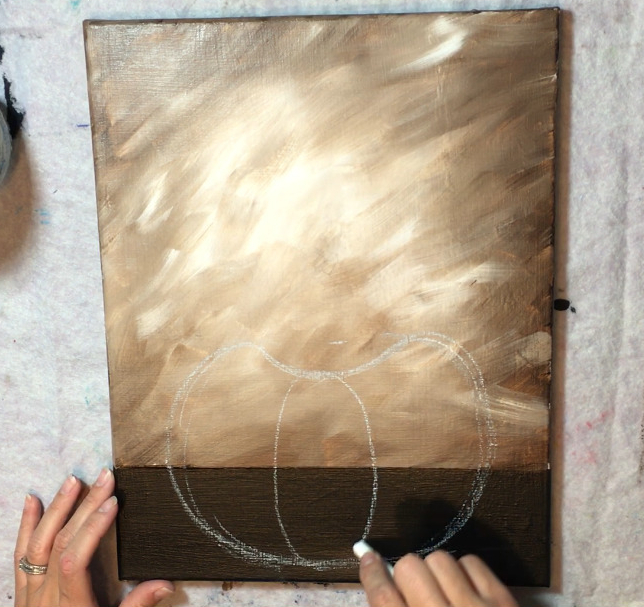
Then proceed to drawing the left and right bumps. With each bump, start at the top and draw a curved line down with a bump at the bottom. I drew two more lines on the left and right sides. 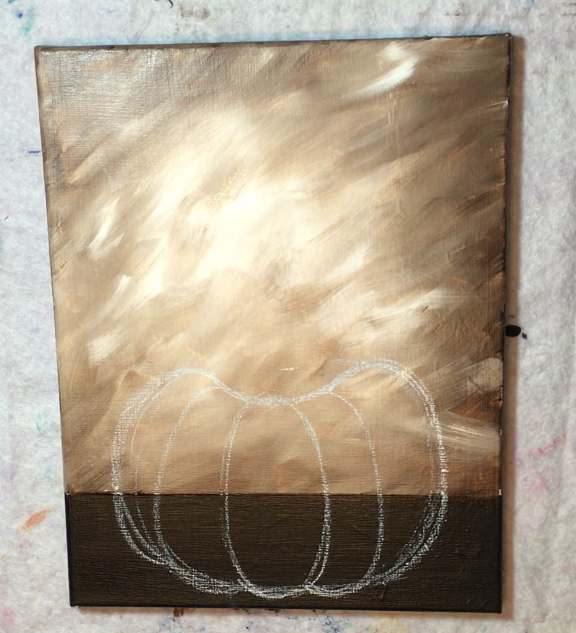
3. Paint The Pumpkin White
Next you’ll need your 3/4″ flat or your #12 bright whichever you feel more comfortable with. Start with the color titanium white and paint the oval in the middle of the pumpkin. You want to make sure your strokes are rounded forming the shape of the oval and using the full width of the brush. 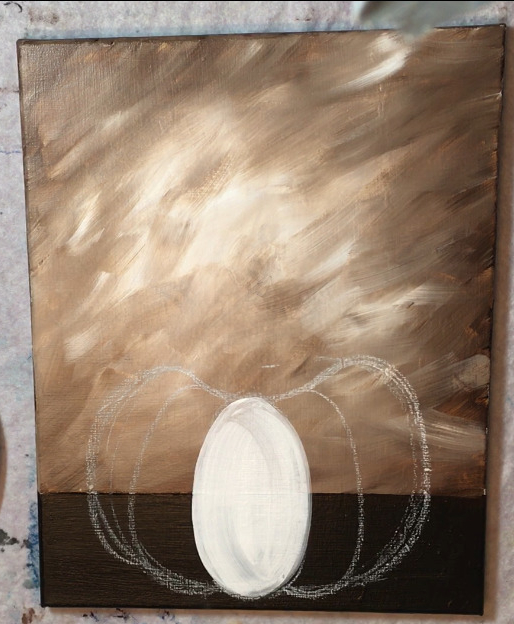
To do the other bumps, start at the top of the pumpkin, use the full width of the brush and stroke DOWN. With each stroke, make sure that it is curved and going with the shape of the bump of the pumpkin. Try to leave a little bit of a gap between each pumpkin bump.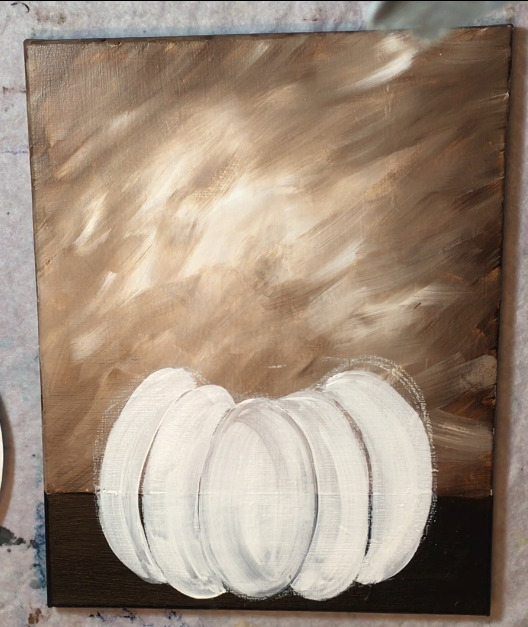
4. Add some cream color to the pumpkin
Then I used unbleached titanium to add a few strokes to my pumpkin. I did this before the white dried. It helps to make these strokes “dry brush style” by wiping off some paint with a paper towel and not using any water. You don’t want to hide all the white, rather, you want to see a little bit of the cream color and the white. 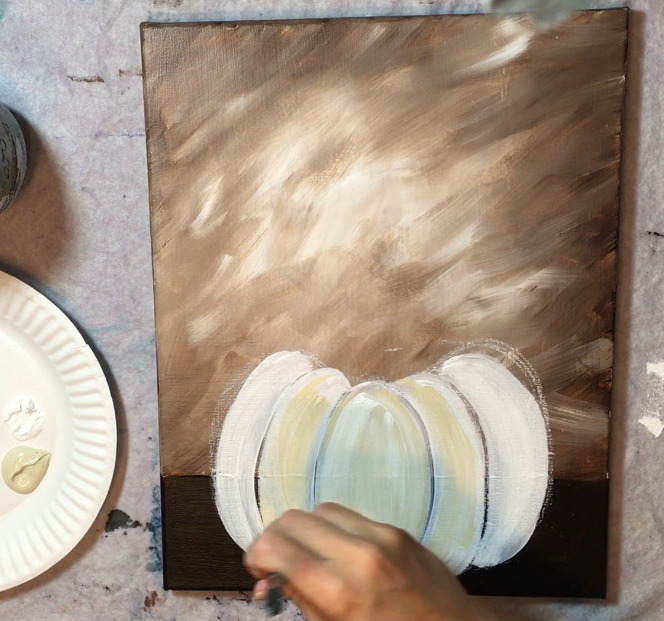
You can go back and add some more white strokes if your unbleached titanium took over too much. 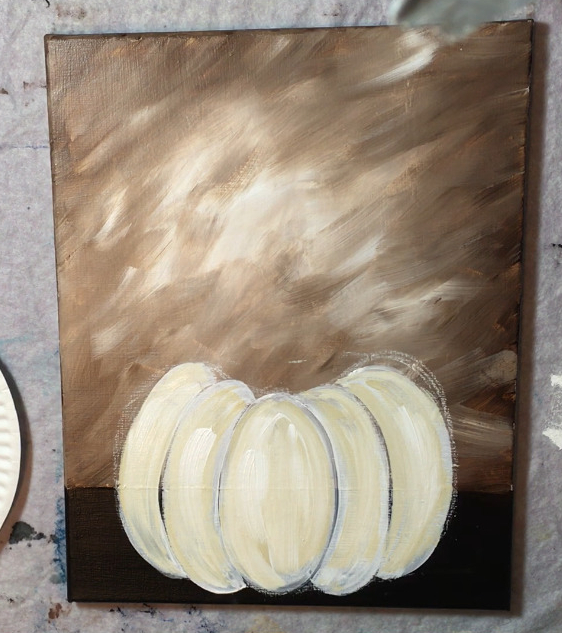
5. Add Brown on the Lines of the Pumpkin and on Top & Bottom
Next I added a little bit of burnt umber to the top and bottom of the pumpkin. Do a dry brush style stroke (no water, wipe off some paint with a paper towel) to make these strokes light and feathery. Paint some of these darker strokes at the tops and bottoms of the bumps.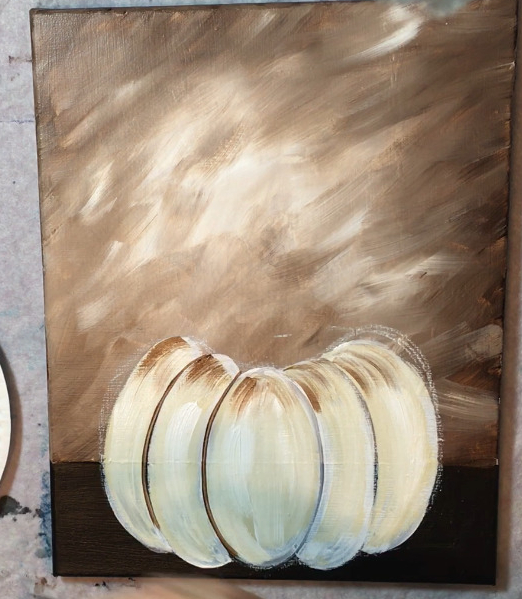
Also, using the tip of your brush, paint thin lines of the burnt umber where the lines of the pumpkin bumps are. 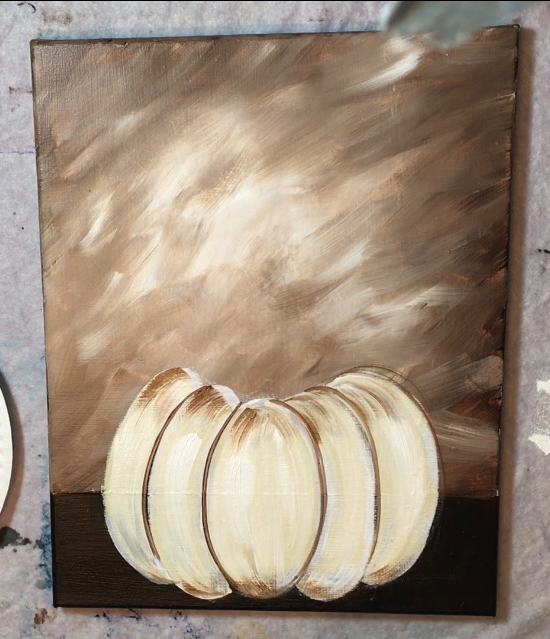
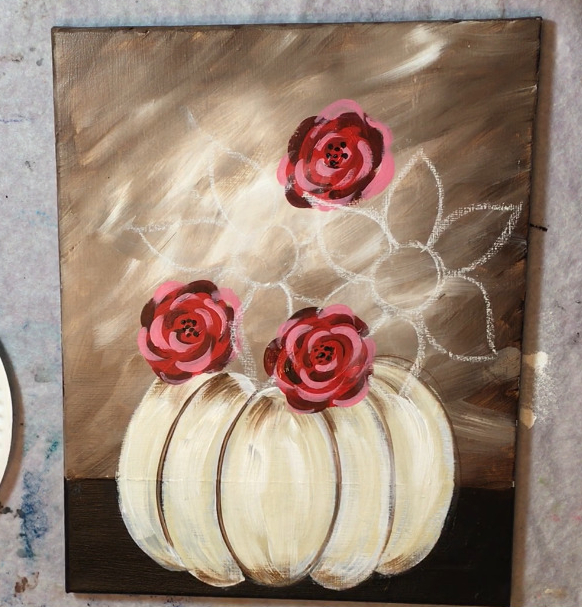
6. Paint The Roses
You can refer to the practice exercise at the top of this post! You’ll need your #4 round brush, napthol crimson, titanium white and mars black. Start by painting a napthol crimson circle that sort of overlaps the top of the pumpkin vase. 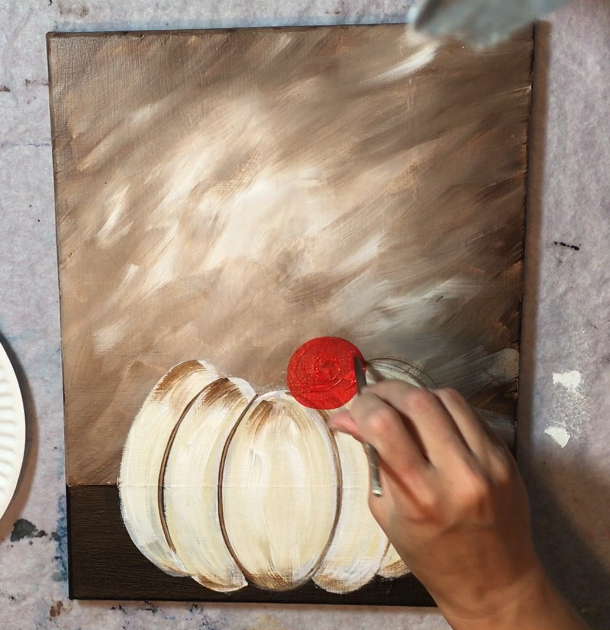
Paint a total of three circles. I recommend one up high and another one on the left that overlaps the top of the vase. These circles are about 2-3″ in diameter. 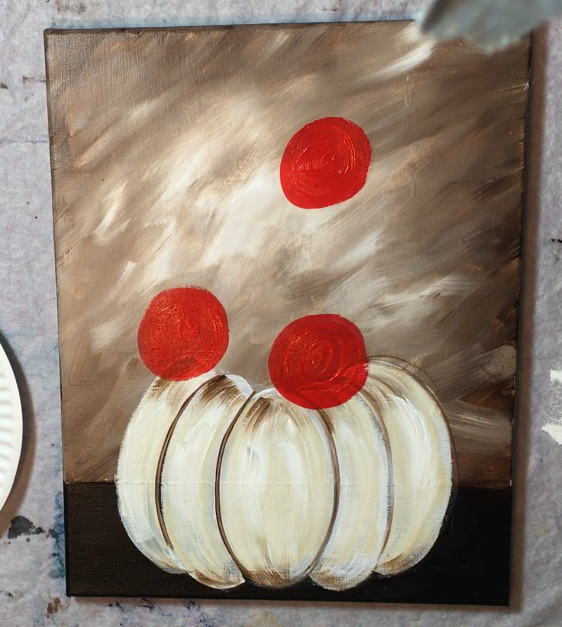
Then on your palette, mix a TINY bit of mars black with the napthol crimson. This might take some experimenting to do but you’ll need to create a dark red. 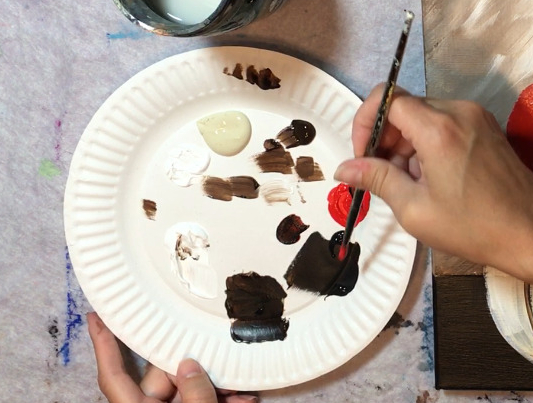
Using the #4 round brush, paint little C style strokes starting from the middle and going outwards to the edge of the circle. 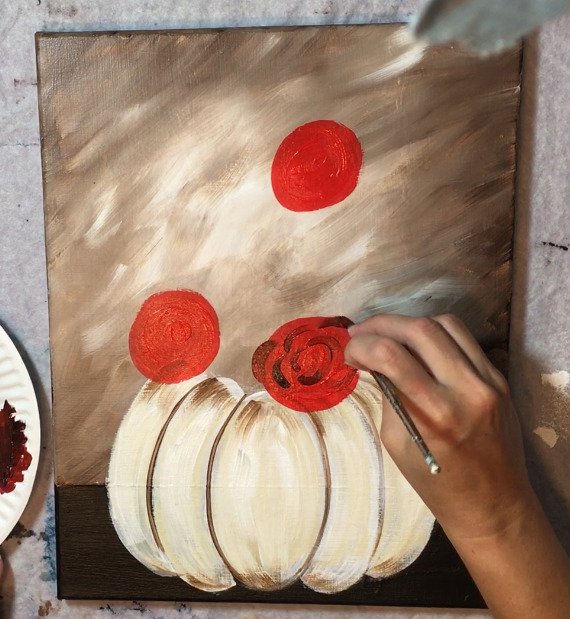
Do this to all three of the roses. Note that the little C strokes make the circles form a flower shape and not a circle anymore. 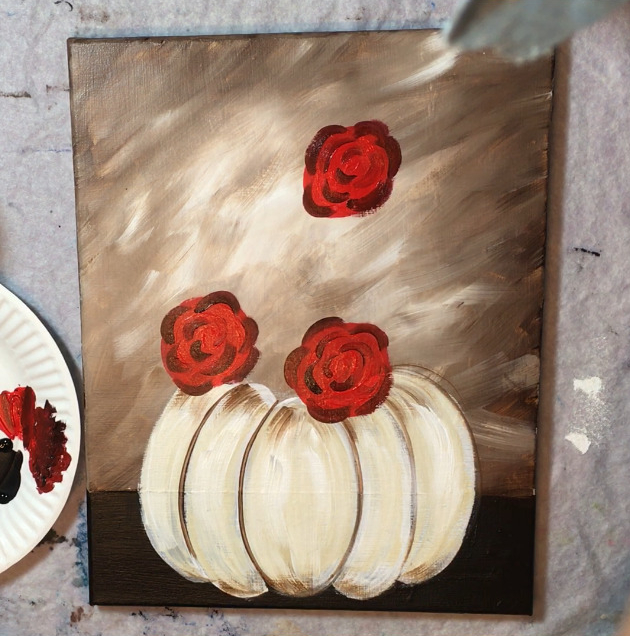
Next mix titanium white with napthol crimson to make a light red (pink tint). 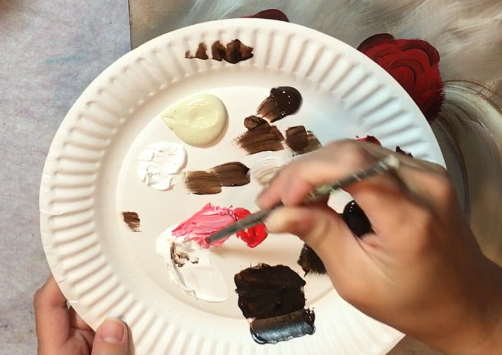
Paint the same type of strokes starting in the center and working outwards. It’s okay to overlap some of the darker areas but not too much. 
Thn in the center of each rose, paint little black dots. 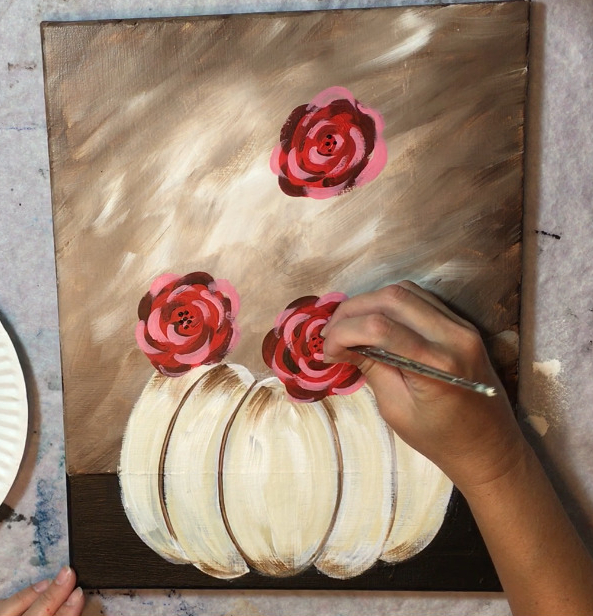
Wait for your painting to dry
7. Draw Sunflowers With Chalk
Next you’ll want to make sure your roses are dry before drawing the sunflower. Decided where you want to put your two sunflowers. Start by drawing the circles and then the petals. You’ll want to think about whether you want your petals to overlap the roses or visa versa. 
8. Paint Sunflowers
Start by painting the centers of the sunflowers with burnt umber and the #4 round brush. 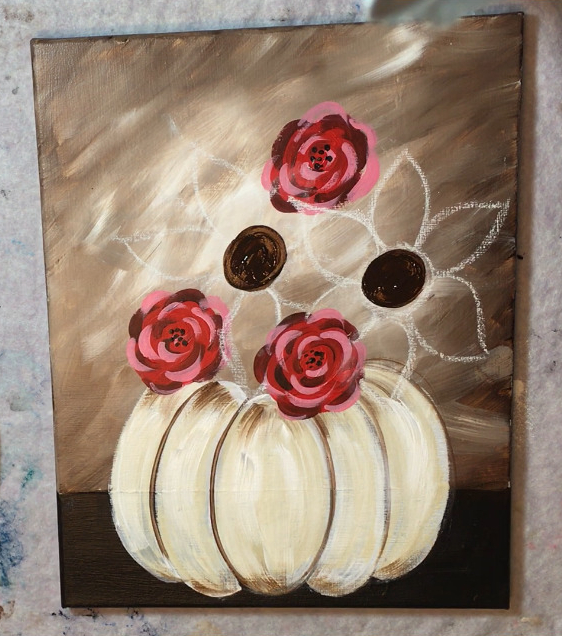
Then paint the petals using the #4 round brush (rinsed off) and the colors: cadmium yellow medium and titanium white. You can either double load your brush in the white and the yellow or mix the two together on your palette. Since cadmium yellow medium is a “transluscent color” you’ll need the titanium white to make it look “opaque”. 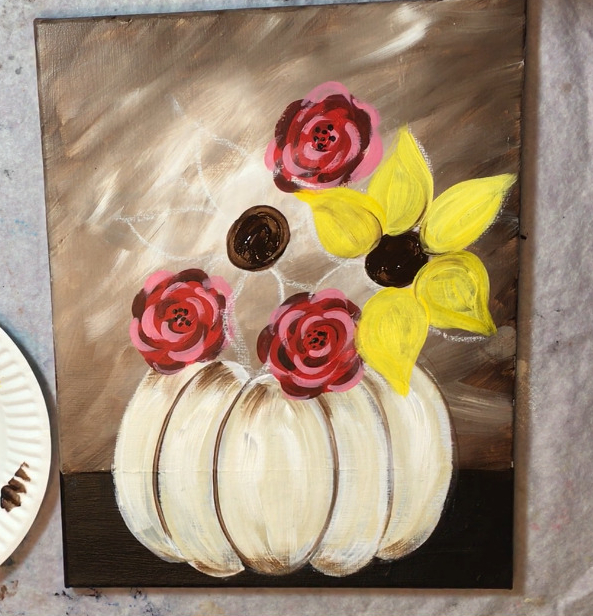
If you grab the burnt umber from the centers (on accident or on purpose), it gets your sunflowers to have a bit of brown in the yellow. 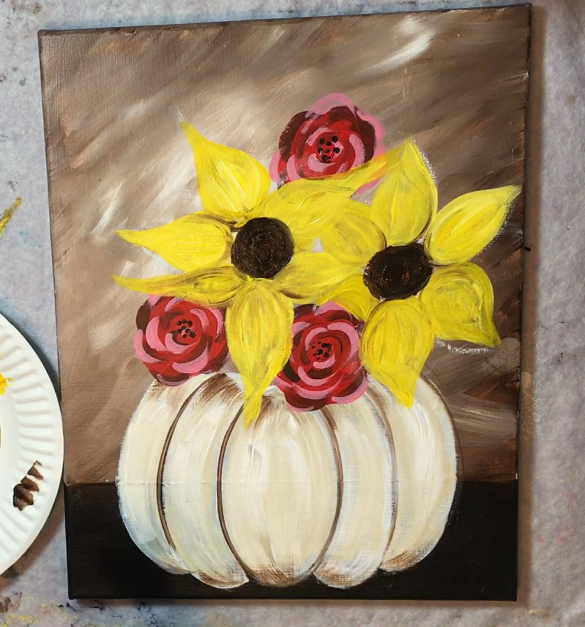
Then to paint the dots in the center, I used my round brush and unbleached titanium. Just paint little dots. you can go back with brown and black dots as well.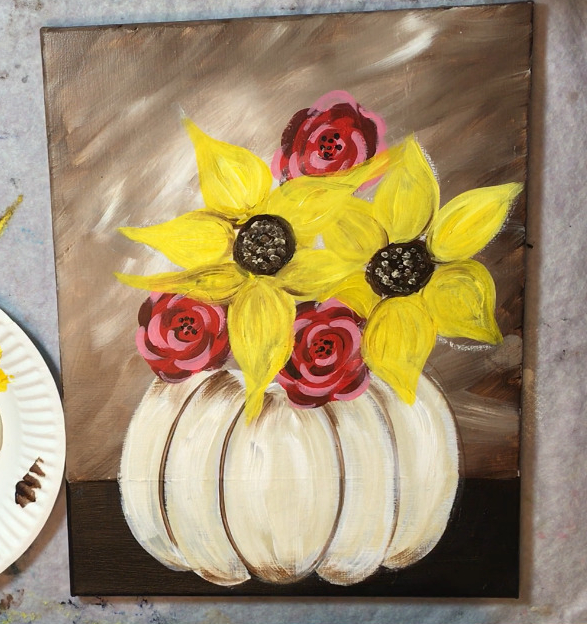
10. Paint More Details In Bouquet
Next I used my #12 bright brush and raw umber mixed with mars black to paint some “wheat stems” sticking up above the sunflowers. I also used my #4 round brush and that same color to paint some spirals sticking down from the pumpkin and stems for the little berries I painted later. 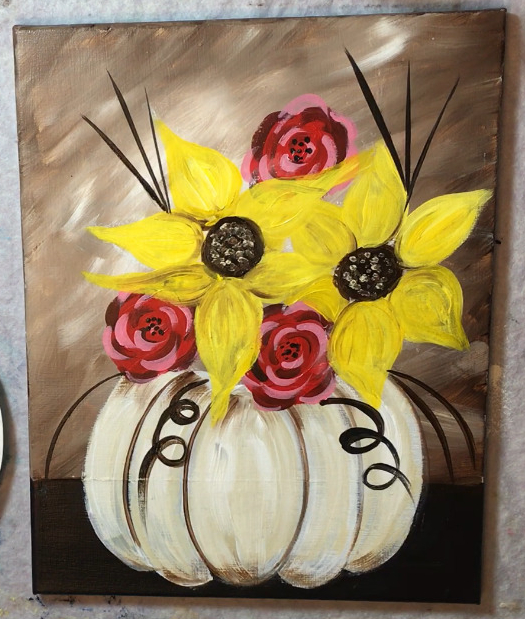
To paint the “wheat” use unbleached titanium and your #12 bright brush. Use the full width of the brush to make short strokes that angle upwards.
Then I decided to make this rose at the top overlap the sunflowers. If you decide this too, paint the red rose again using the same technique you used to paint the original part of the rose. 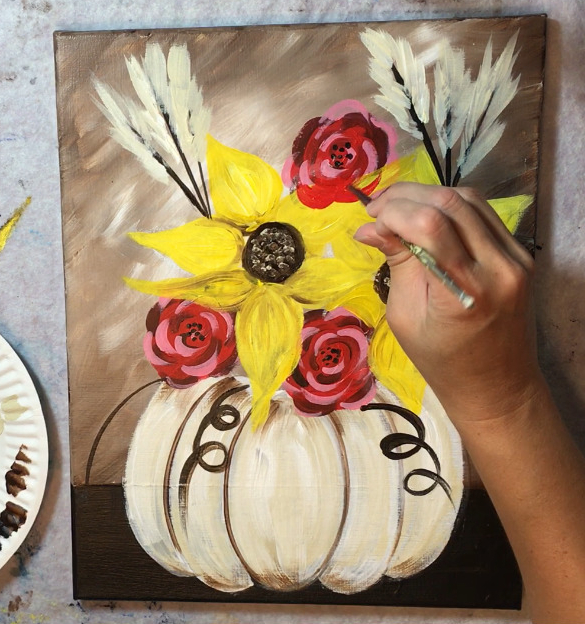
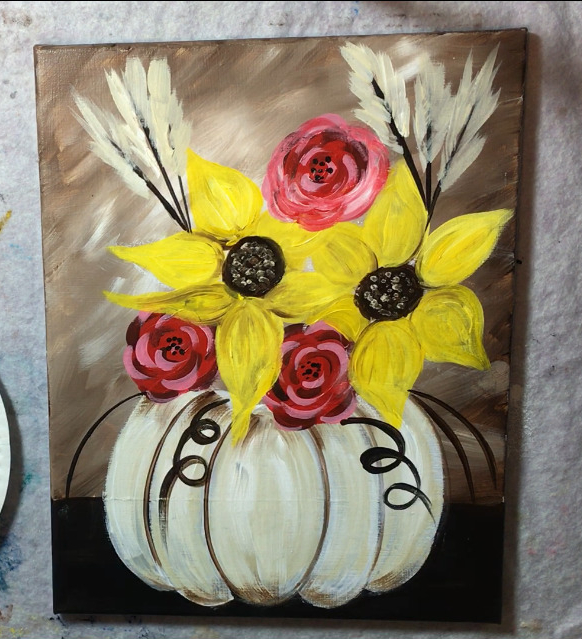
To do the berries, mix orange on your palette by blending cadmium yellow medium with the napthol crimson. I used my #4 round brush to paint little circles. I made these circles various shades of orange, naphthol crimson and even a little bit of naphthol crimson mixed with black. 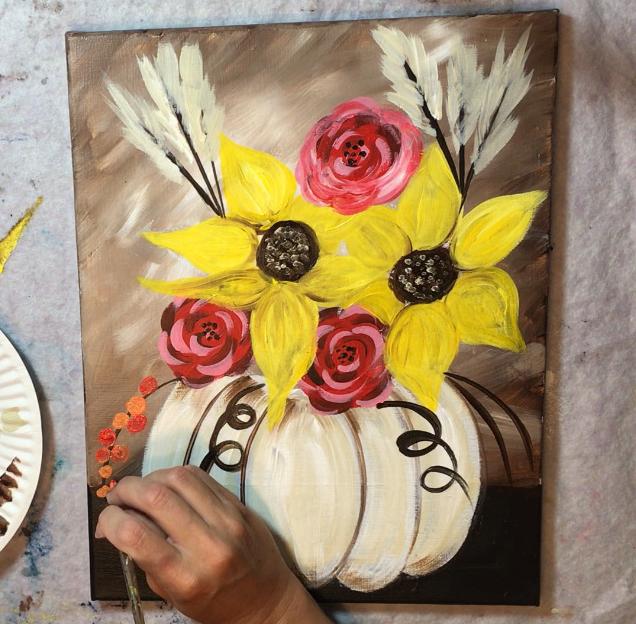
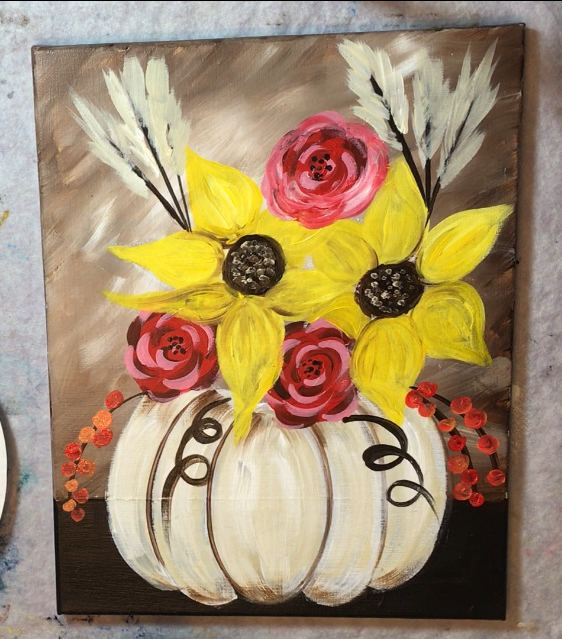
As an alternative, you can use your brush to “sponge” on the area to create a bundle of orange/yellow/white. I did this with my round brush by dabbing all the colors. I also added a little bit of orange streaks on the pumpkin of this version.
You can also use white to add a little highlight to all the berries and a little bit of white on the sunflower petals. 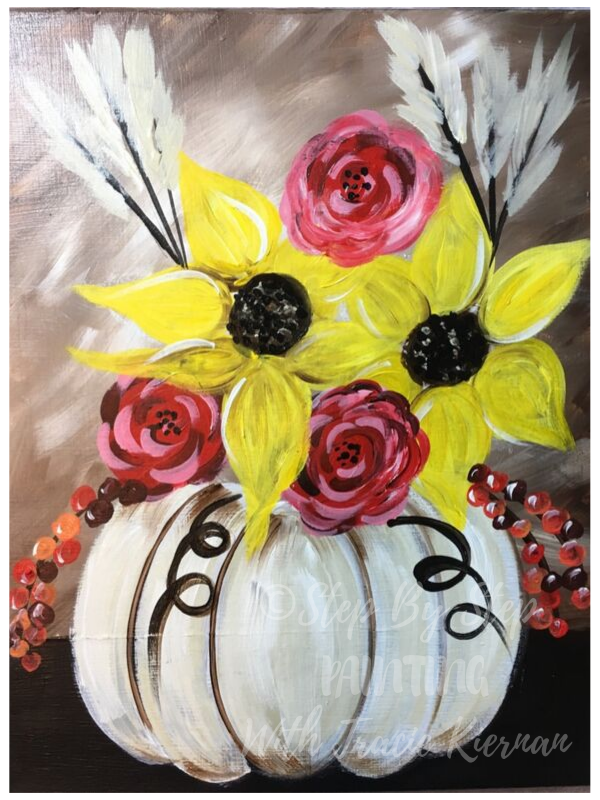
Marvellous
It a pleasure to watch your tutorials. So simple and just apt for beginners.
Keep coming.
God bless you ?