Would you like to save this?
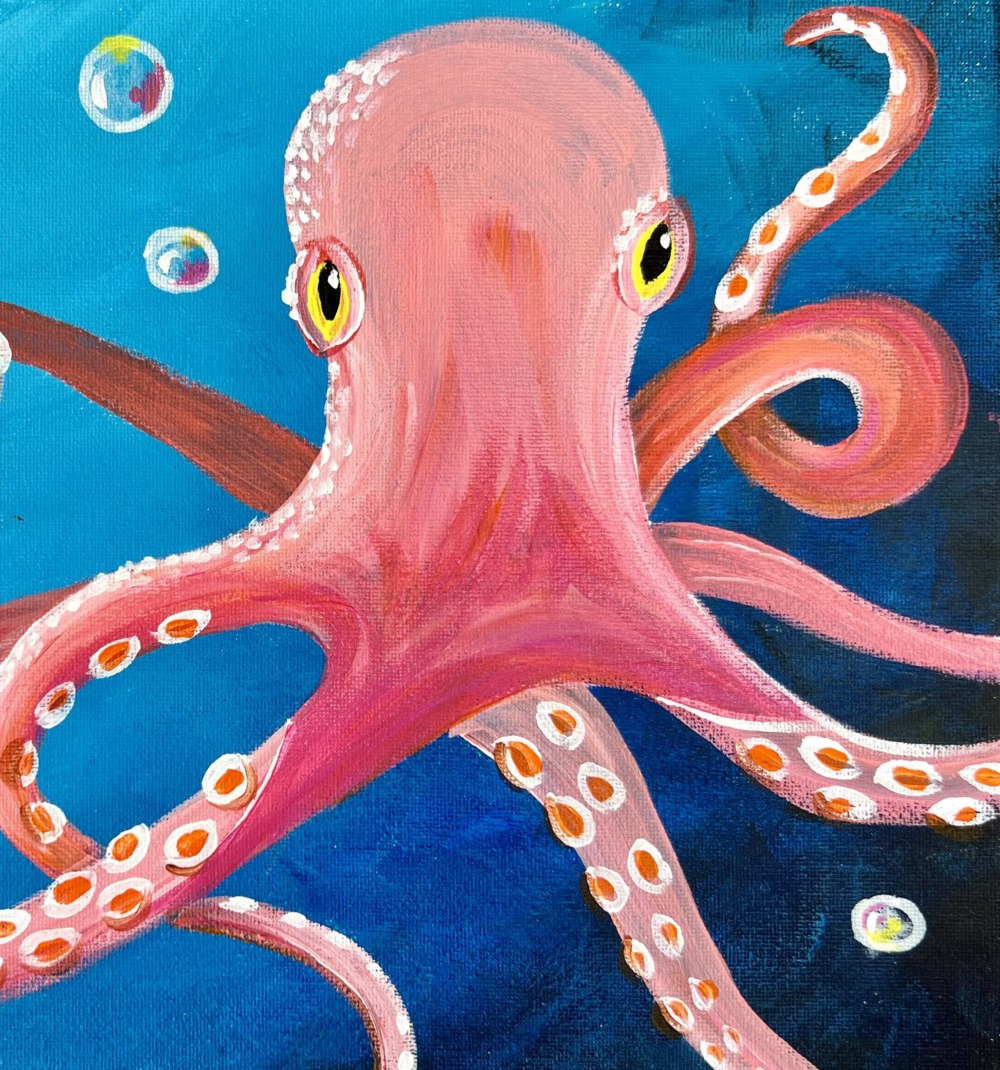
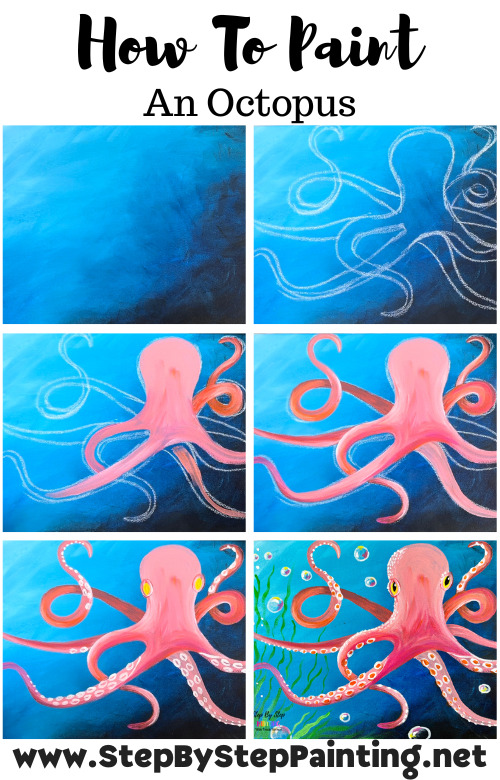
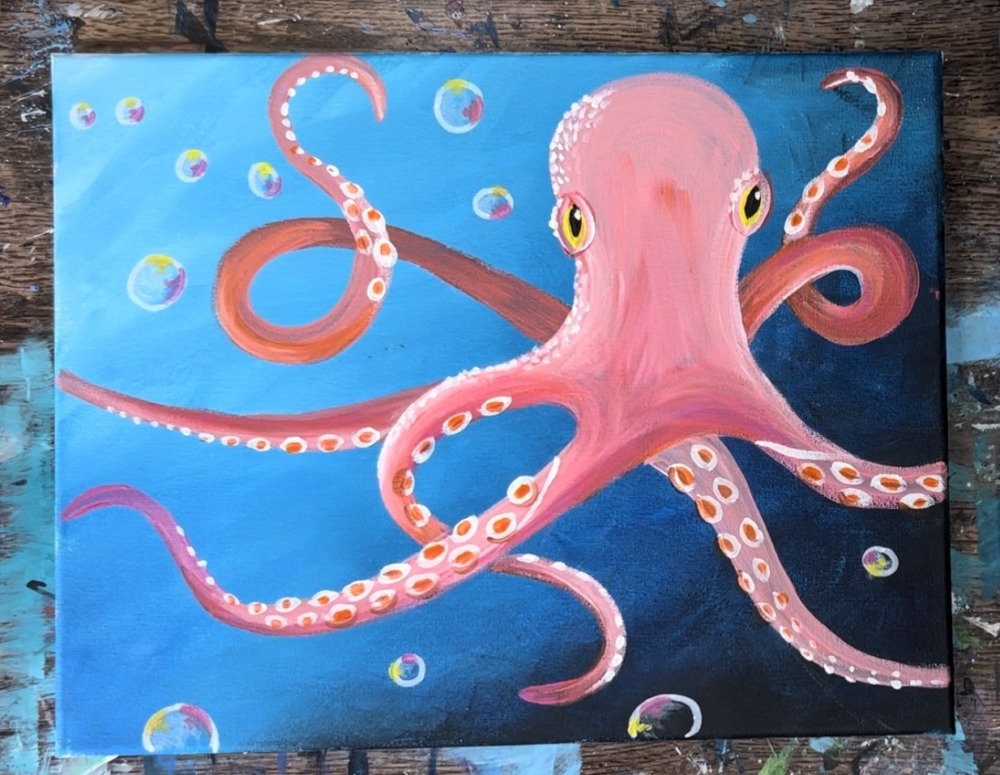
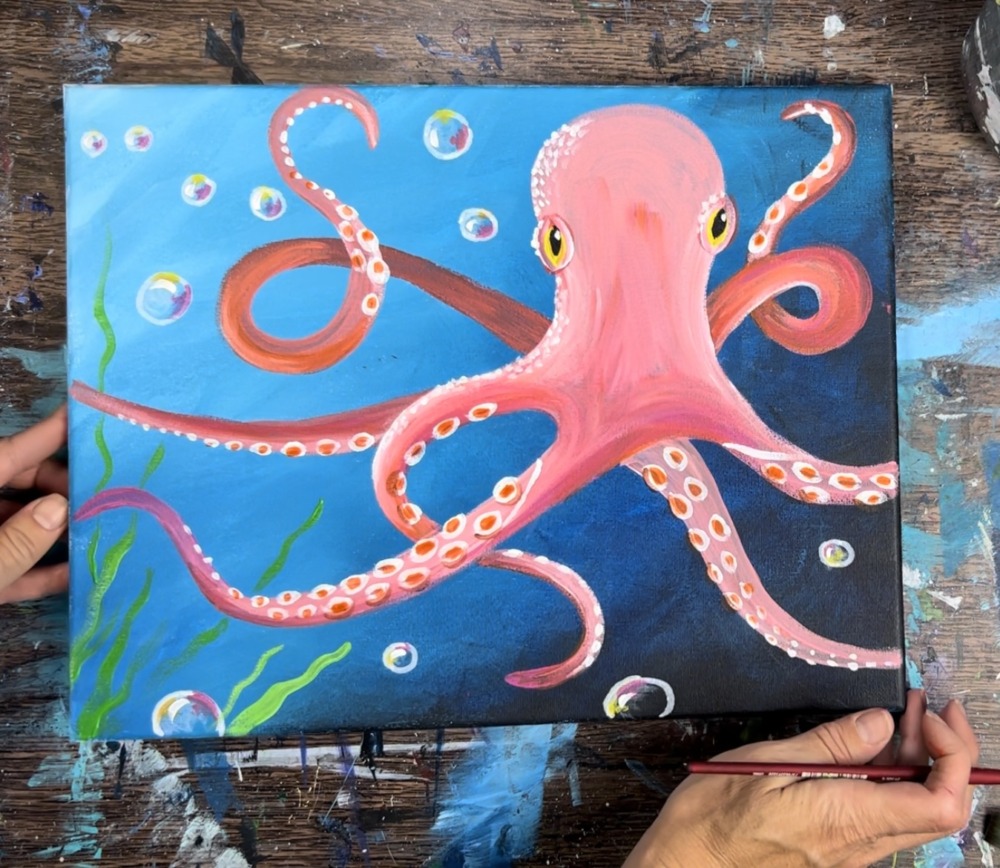
Let’s paint an octopus! This underwater theme painting tutorial is demonstrated on an 11 x 14 canvas, however, you can do this on any size! You are also welcome to change the color of the octopus.
The tutorial below comes with an optional traceable template for the octopus.
There is something very relaxing about painting and blending curved arms! I found this painting to be very “zen”!
Enjoy and happy painting!
Materials Needed
- 11 x 14 Canvas (or any size!)
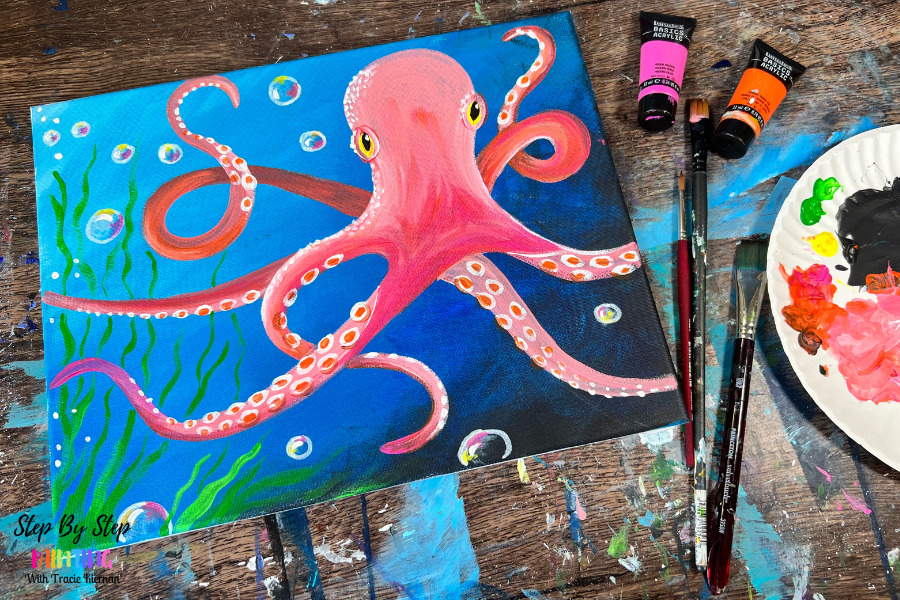
- Acrylic Paints (I use Liquitex BASICS)
- Paint Brushes (I used Princeton Velvetouch and Royal & Langnickel)
- Paper Plate For Palette
- Protected Workspace
- Water Cup
- White Paint Pen (optionals)
- White Chalk Pencil or Plain White Chalk
- Optional Traceable
- Optional Graphite Paper (this transfers traceables to the canvas)
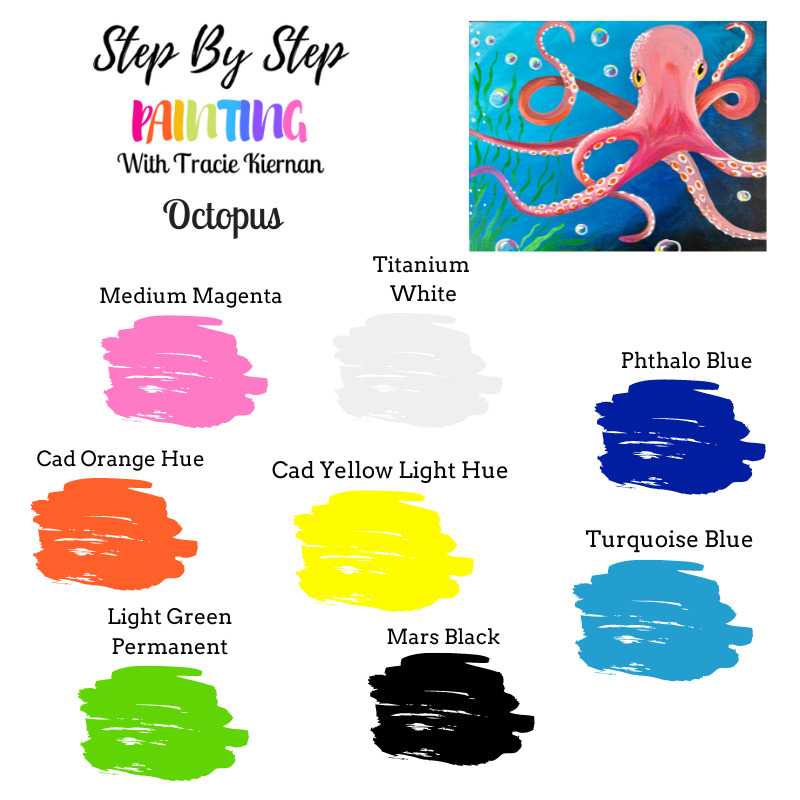
Colors
- Titanium White
- Mars Black
- Phthalo Blue
- Medium Magenta
- Cadmium Orange Hue
- Light Green Permanent
- Cadmium Yellow Light Hue
- Turquoise Blue
Brushes
- 3/4″ Flat Wash Brush
- #12 Bright Brush
- #4 Round Brush
Color Palette
I used Liquitex BASICS acrylics for this tutorial. If you are using a different brand, you can use the color chart below to help you match colors:
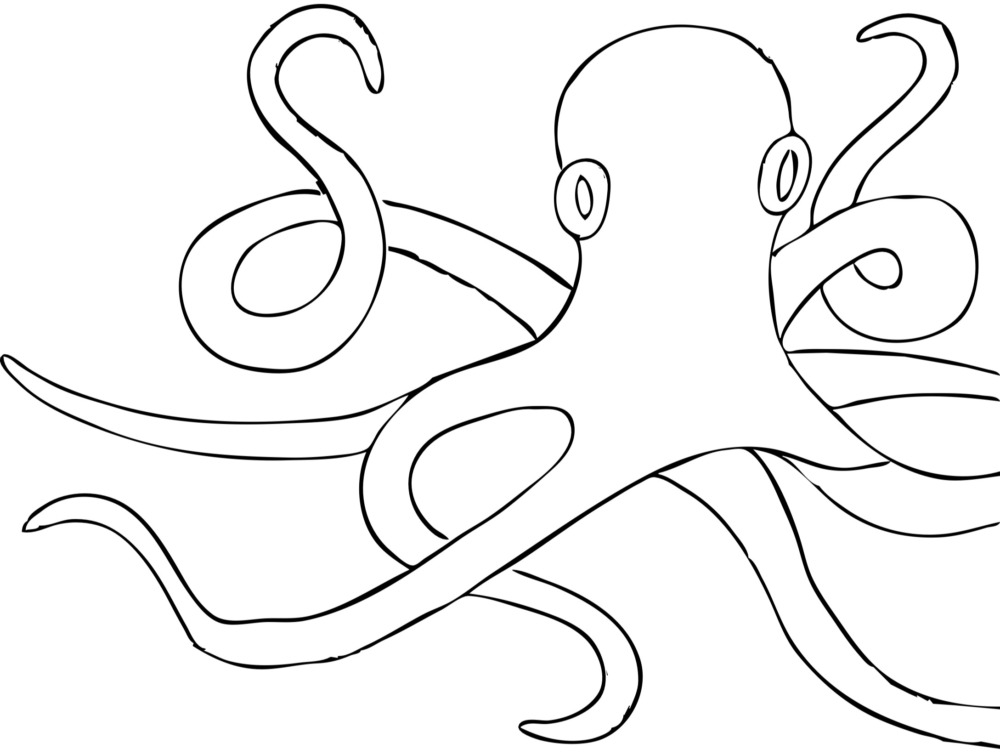
Traceable
This is optional! I draw the octopus in the tutorial instructions as well as video and you can draw with me! If you do find that you struggle with the drawing portion, you are welcome to use this traceable template!
Directions At A Glance
Video
Step By Step Instructions
1. Paint The Background
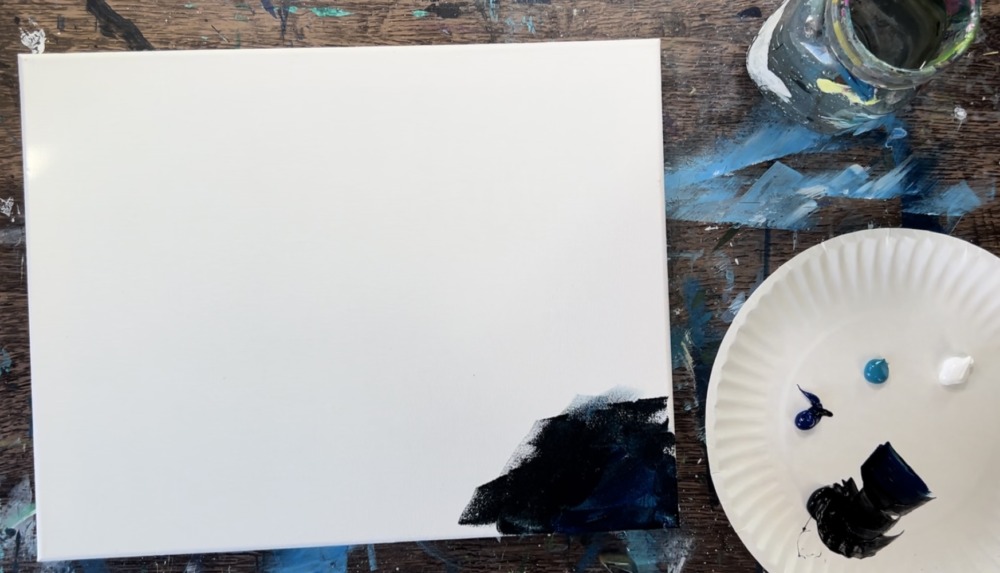
Load your paint palette with the colors: titanium white, turquoise blue, phthalo blue and mars black.
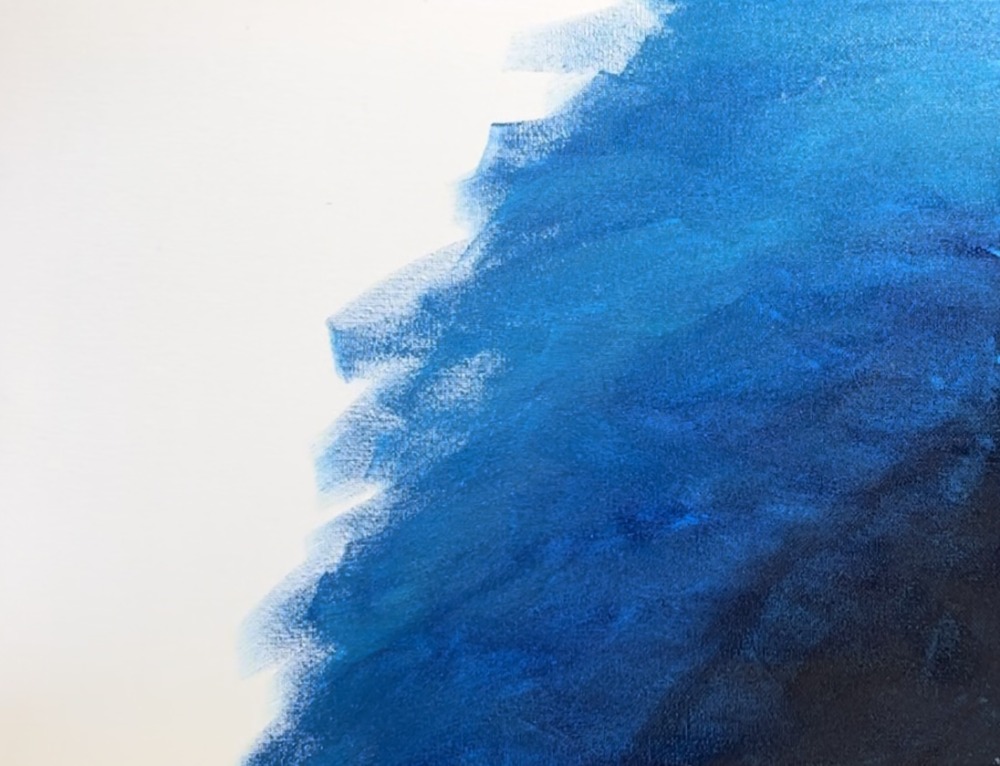
Use a 3/4″ flat wash brush. Load it into the water and tap dry. Mix about equal parts phthalo blue and mars black to make a very dark blue color. Apply this dark blue to the lower right corner of the canvas. Paint short, choppy angle strokes.
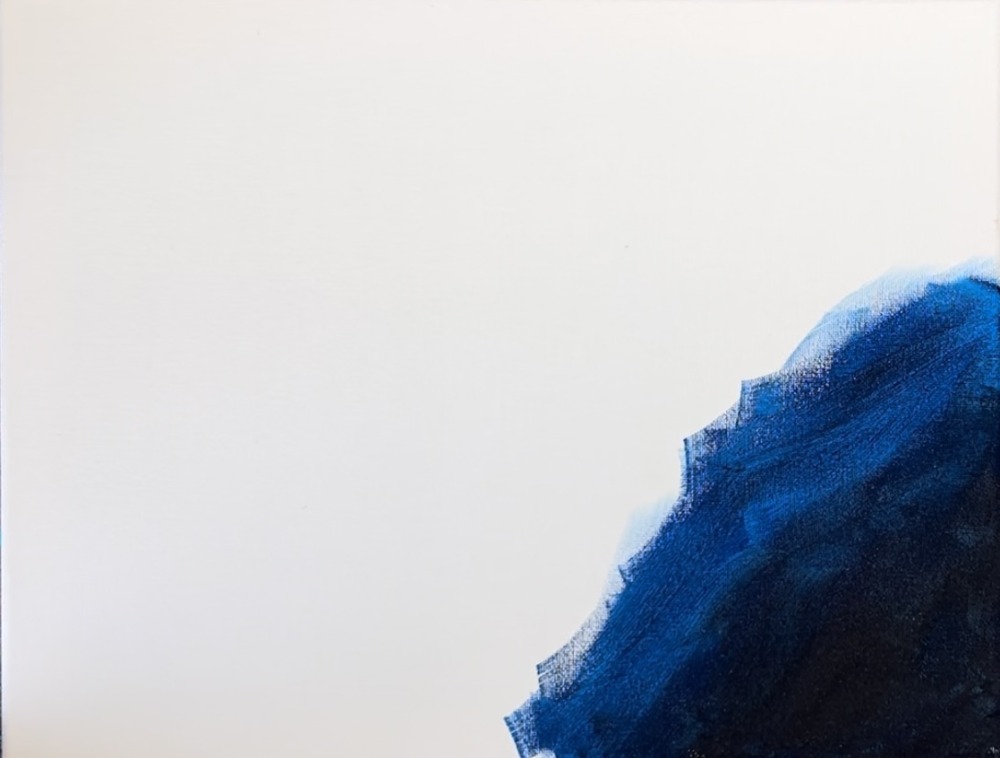
Fill the lower right corner with this dark color.

Rinse the brush. Then load it into just phthalo blue. Blend phthalo blue with the darker black-blue. Apply this pthahlo blue a few inches inwards (you are working diagonally from the lower right to upper left.)
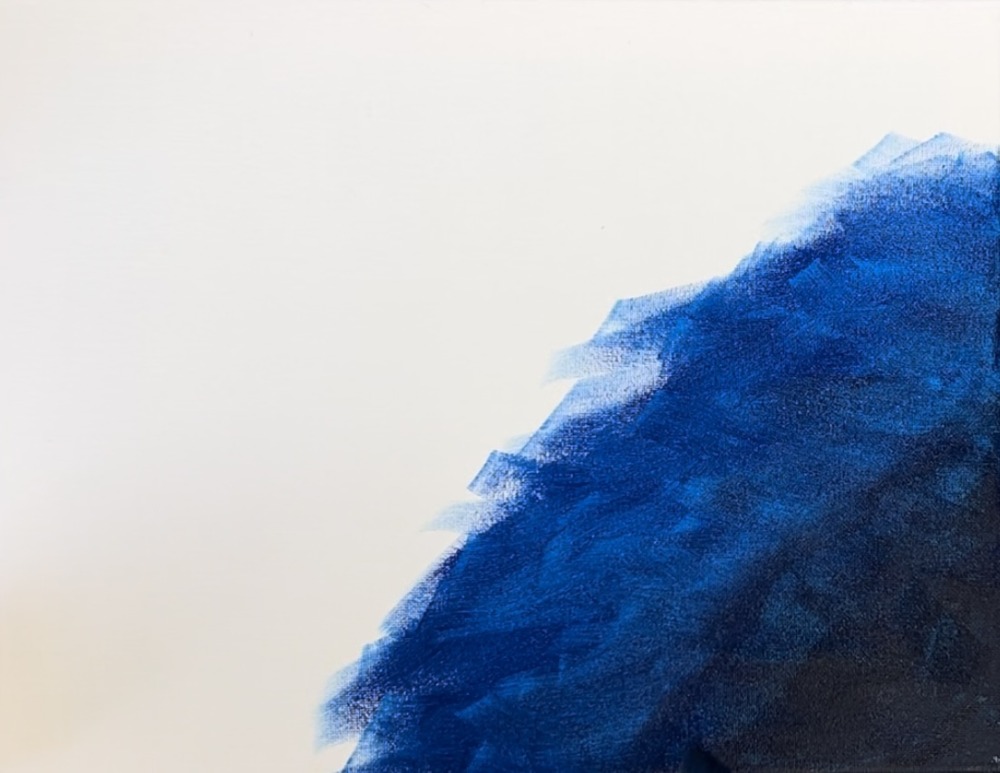
Without rinsing the brush, load turquoise blue. Blend turquoise blue with the phthalo blue. If needed, add more phthalo blue to your brush to help it to blend. You want to continue working diagonally and blending the colors with short, choppy angle strokes.
Completely rinse the brush when you are ready to introduce the titanium white. Mix a little bit of turquoise blue into titanium white to make a light aqua color. Apply that to the upper left part of the canvas with the same type of brush strokes. This will be the lightest part of the background and you will be blending that in with the rest of the turquoise/phthalo blue color.

Blend the white gently into the middle portion but try not to add too much white. Add more turquoise or phthalo blue as needed. The background doesn’t have to be perfectly blended and it should look sort of textured. Add darker colors in the lower right portion as needed.
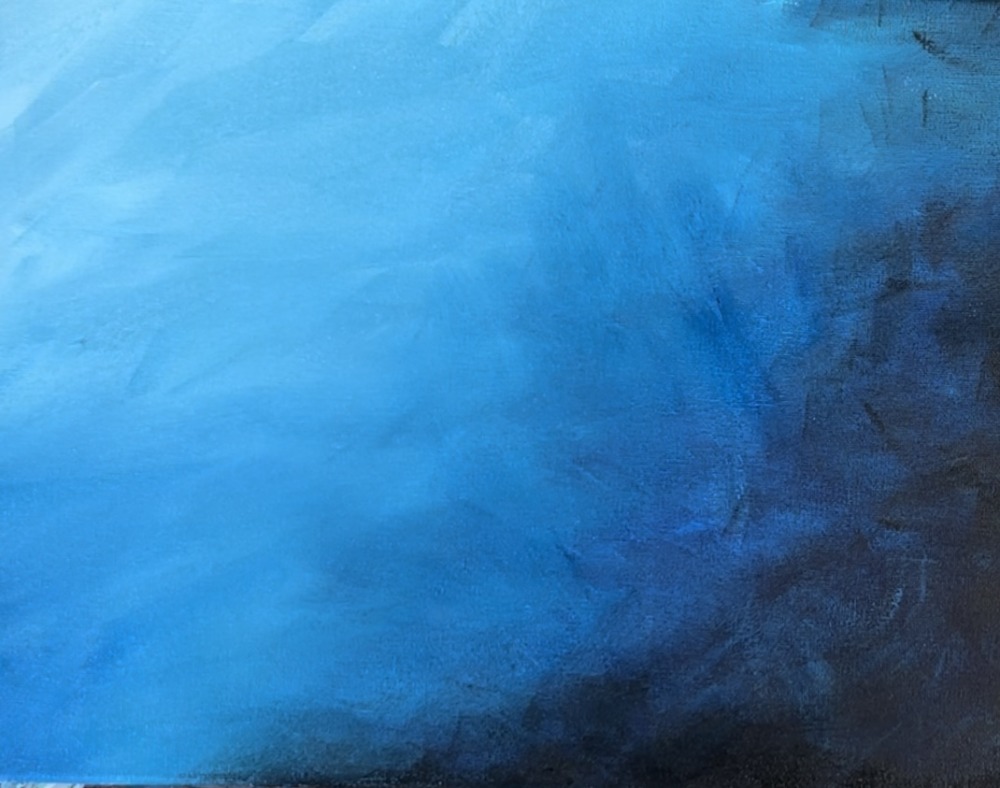
Let this dry before going onto the next step.
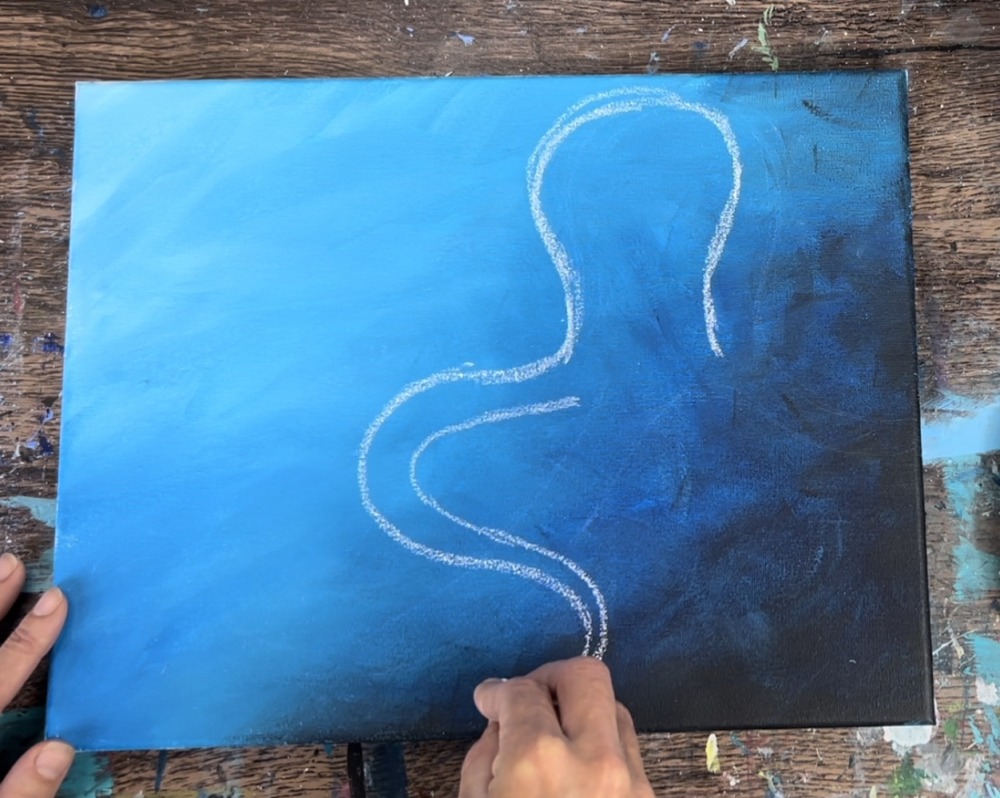
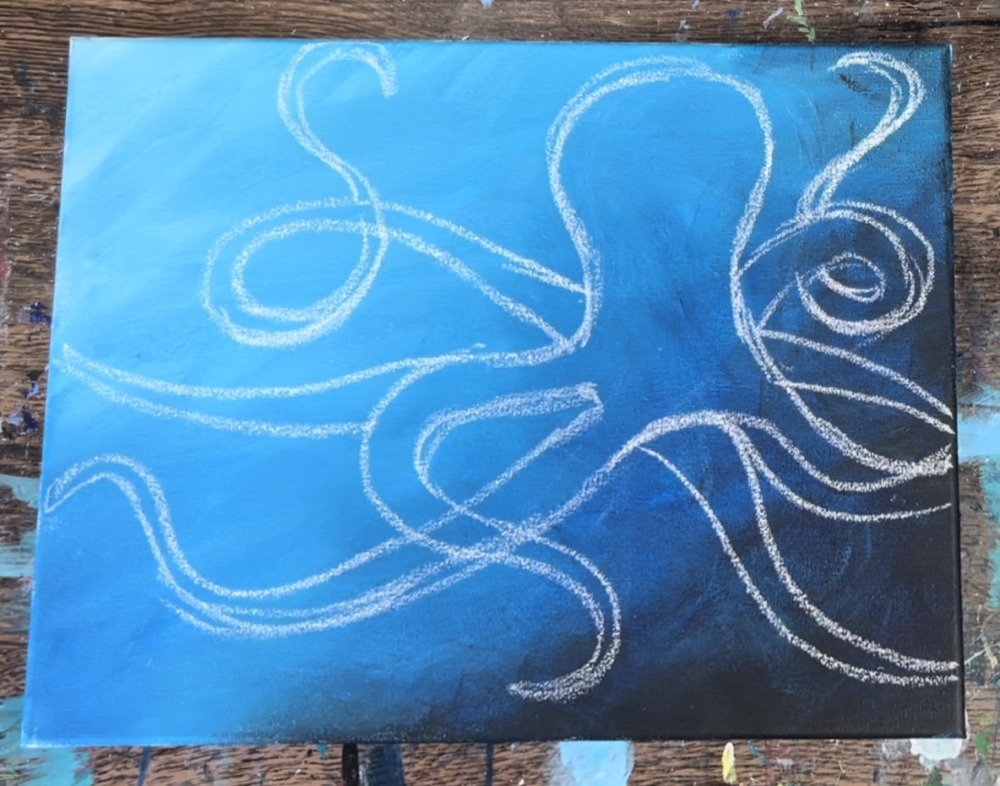
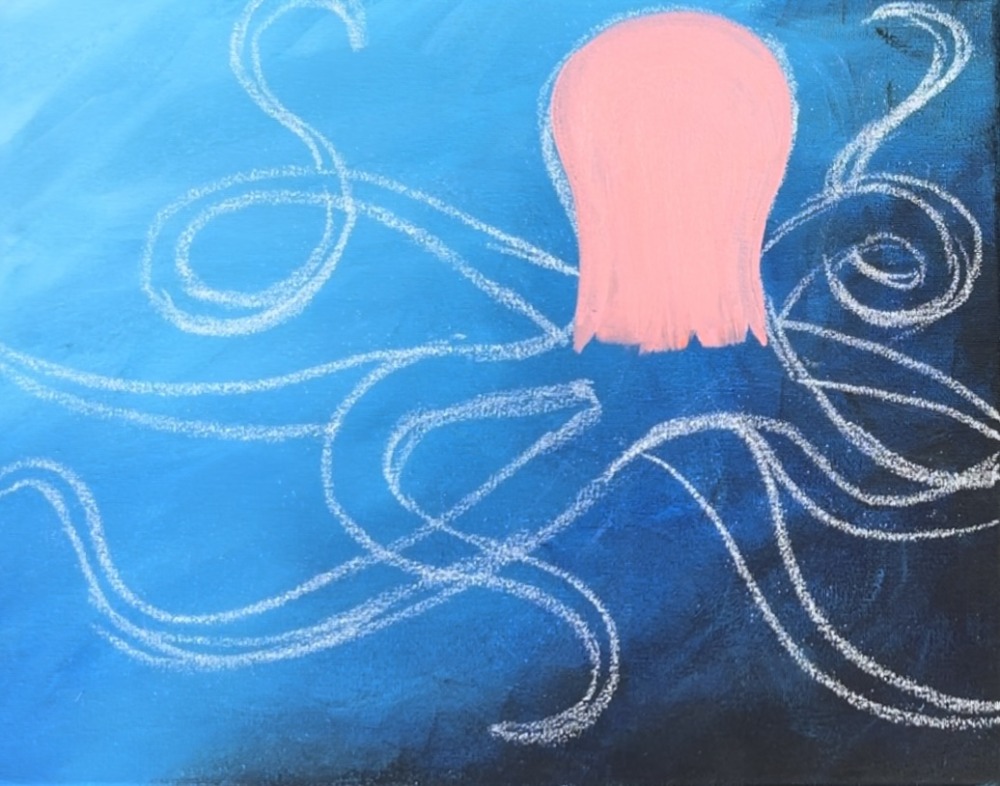
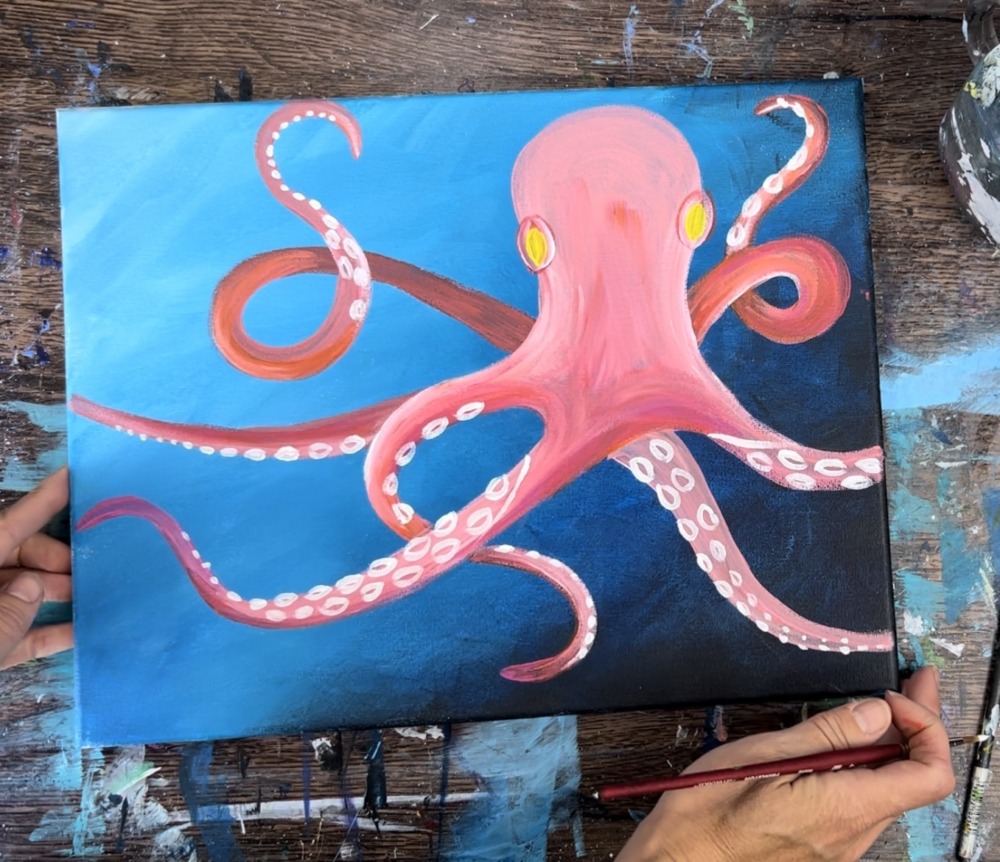
2. Draw Octopus

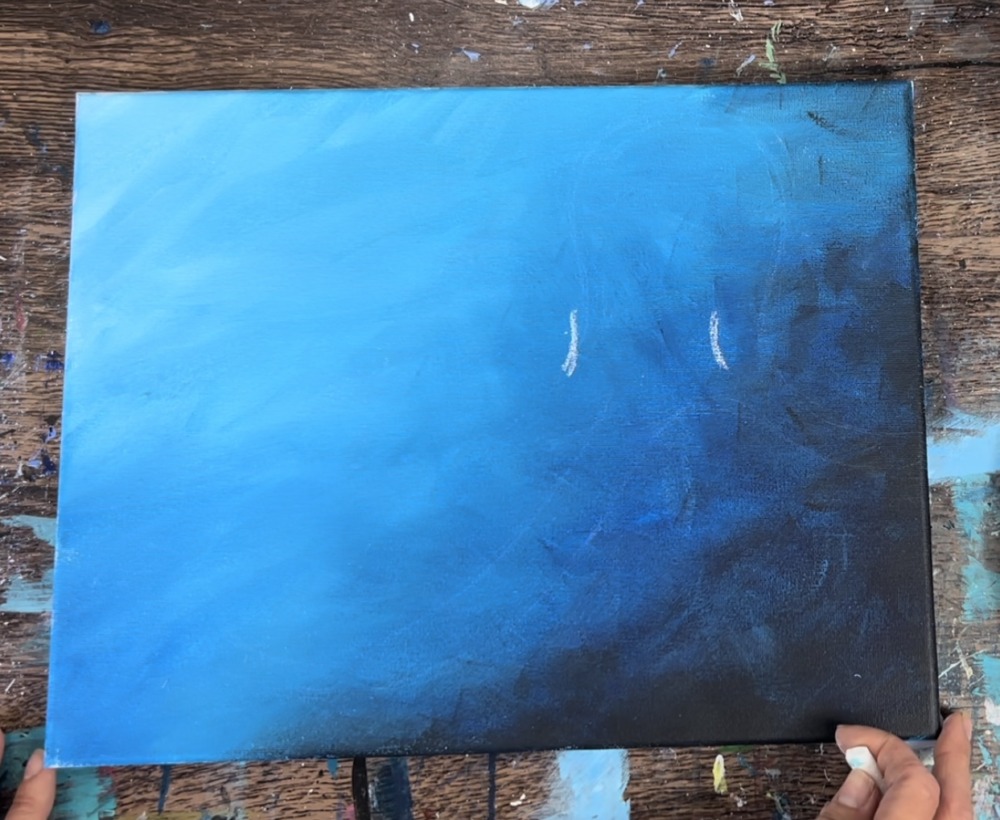
Use a piece of chalk to draw the octopus. Start by drawing two vertical/curved lines about 1″ high and about 2.5″ inches apart. This will be the start of the head. Draw this on the upper right quadrant.
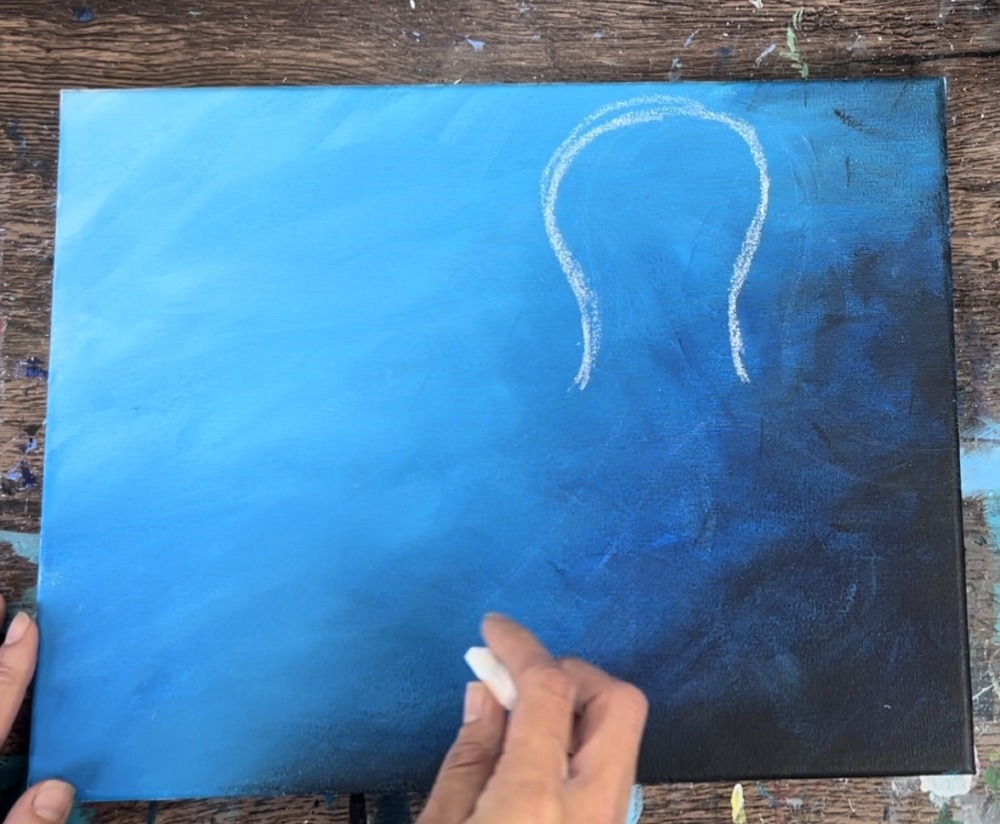
Then draw the rest of the head that curves up like a light bulb shape.
Draw the first arm of the octopus. Draw a long, wavy line that curves left and then right.

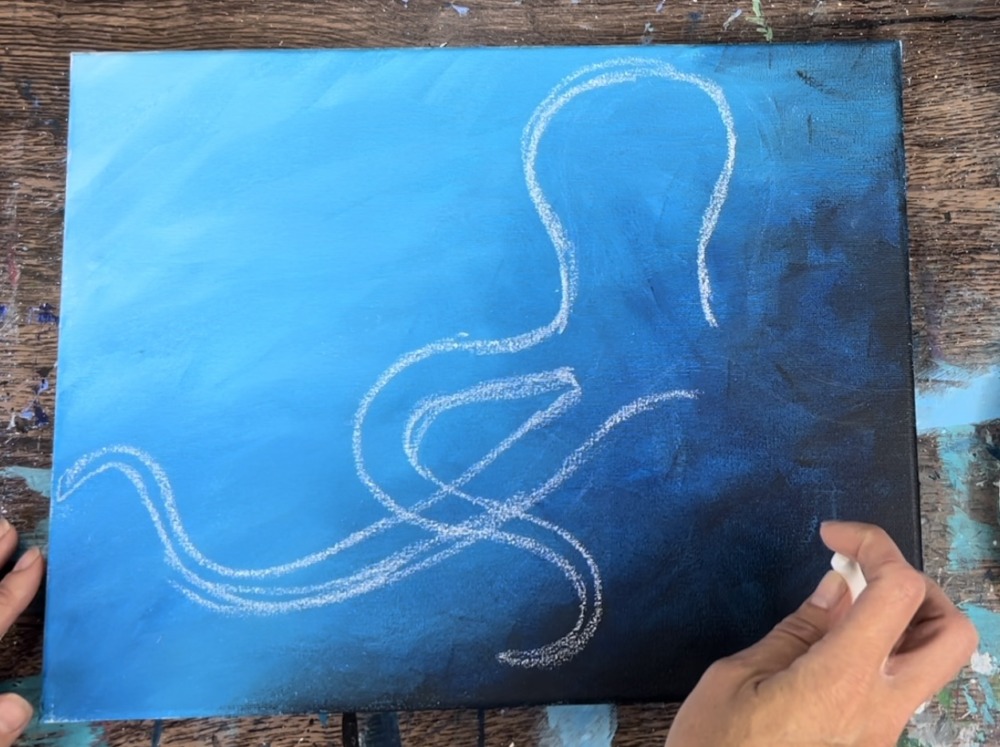
With each of these arms, you want it to go thinner at the tip and wider at the base. Draw the second line to form the shape of the arm.
Draw a second arm that extends down straight and then curves slightly upwards. Again, it’s easier to draw one line first and then draw the second line to form the shape.
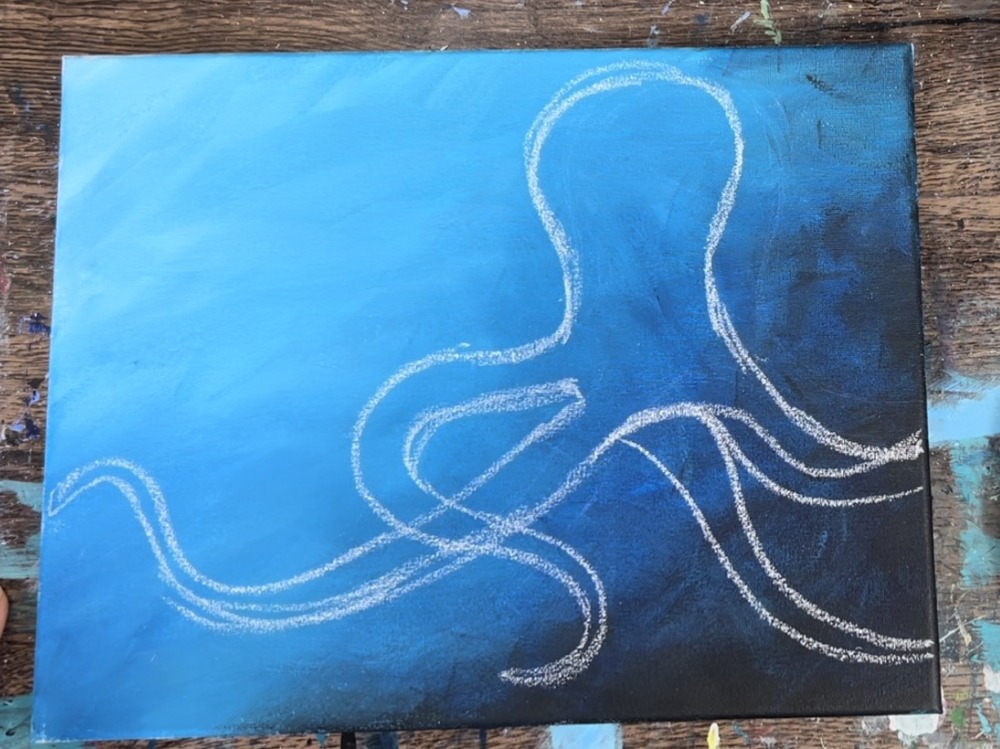
Draw two more arms on the right that extend off the canvas.
Draw an arm that loops around. For this one, try sketching both lines and loop them around a circle. Try to make the end of that arm thinner and the start of it wider.
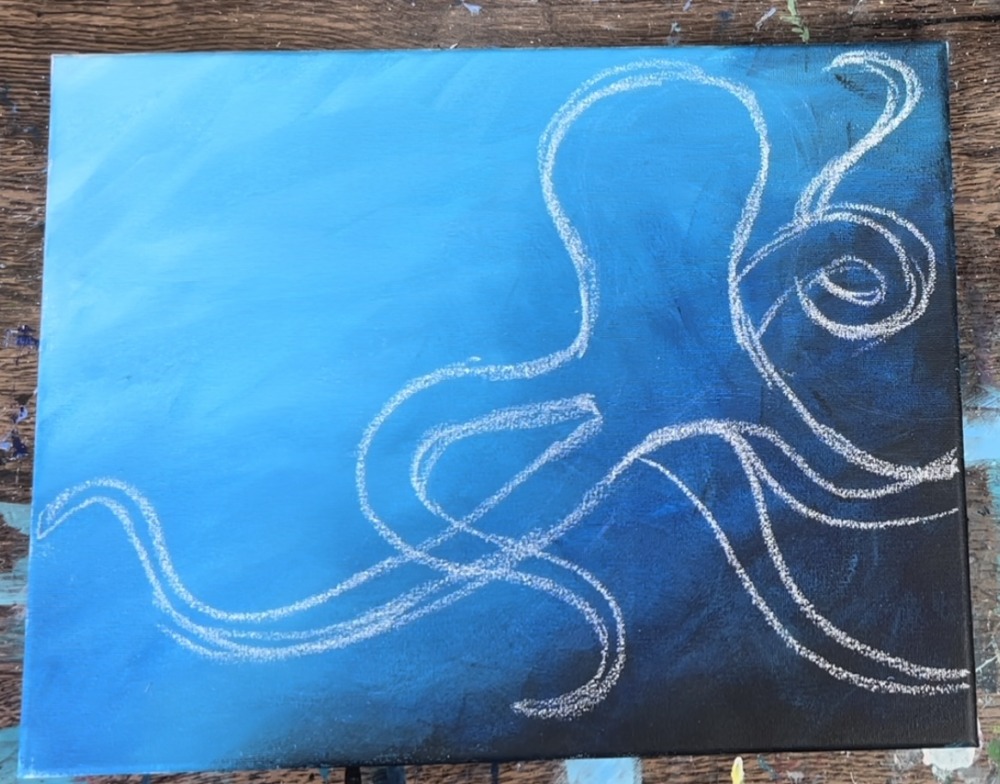
Then draw another long arm on the left that also has a loop. Try drawing one continuous line that loops around. Then draw the second line to form the shape.
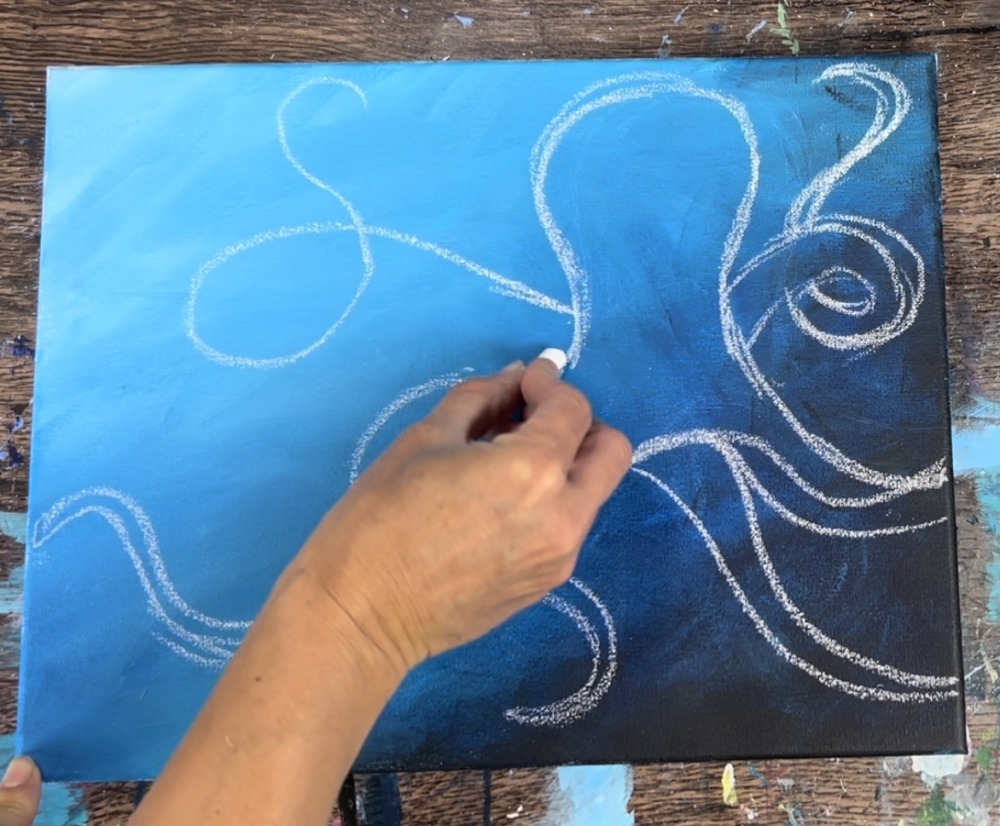
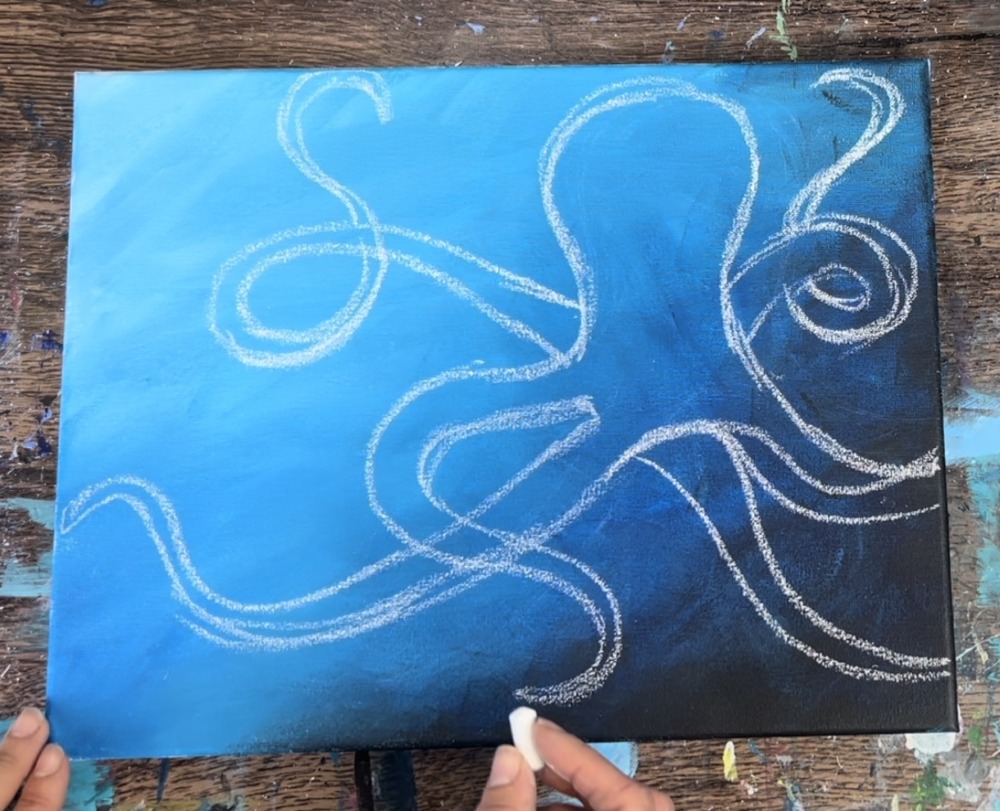
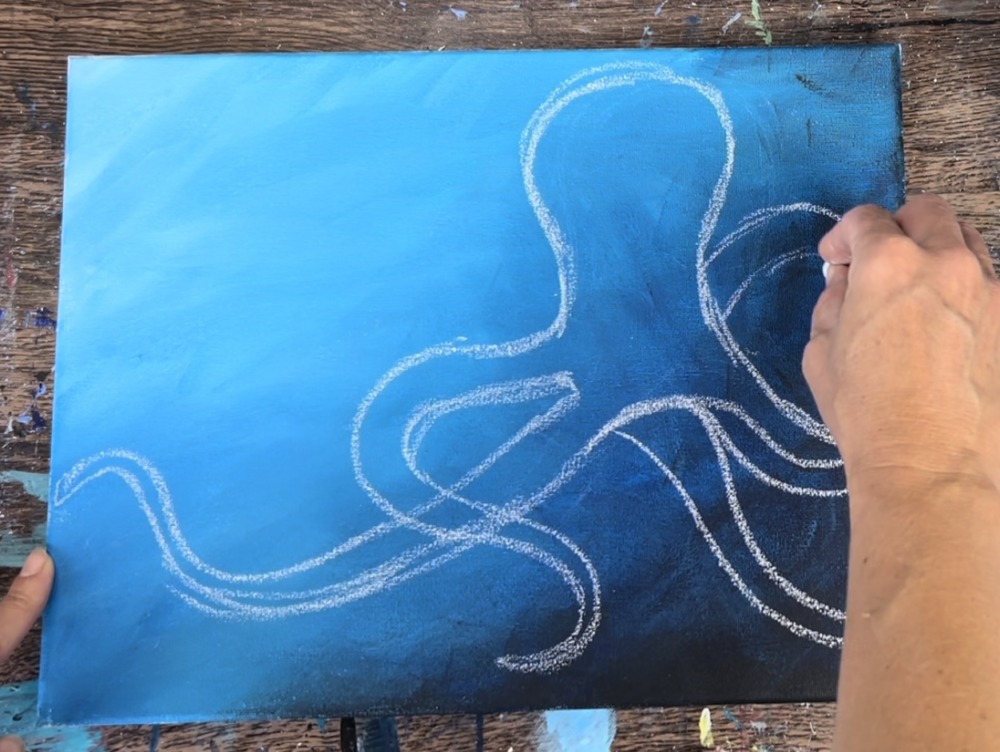
Draw the other arms until you have a total of eight. These may have to go behind the arms in order to fit. It’s okay if they go off the edge of the canvas.
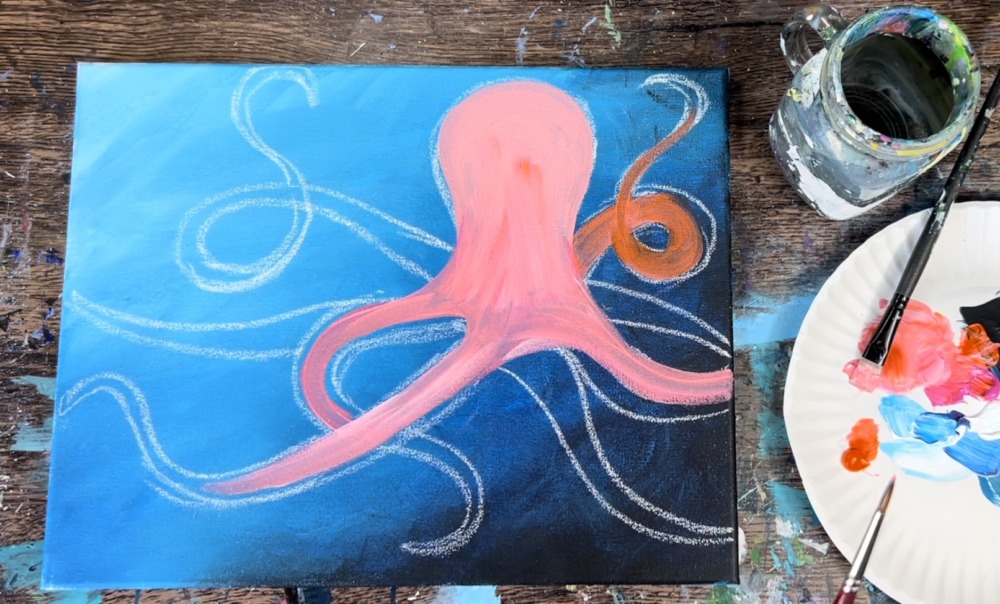
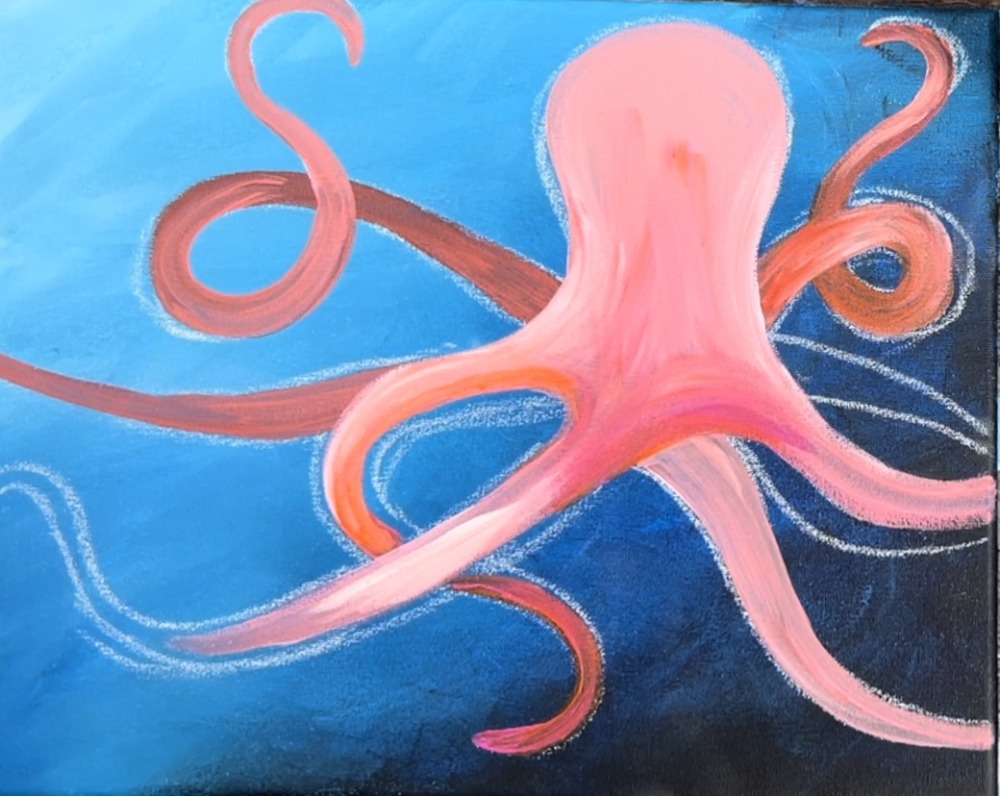
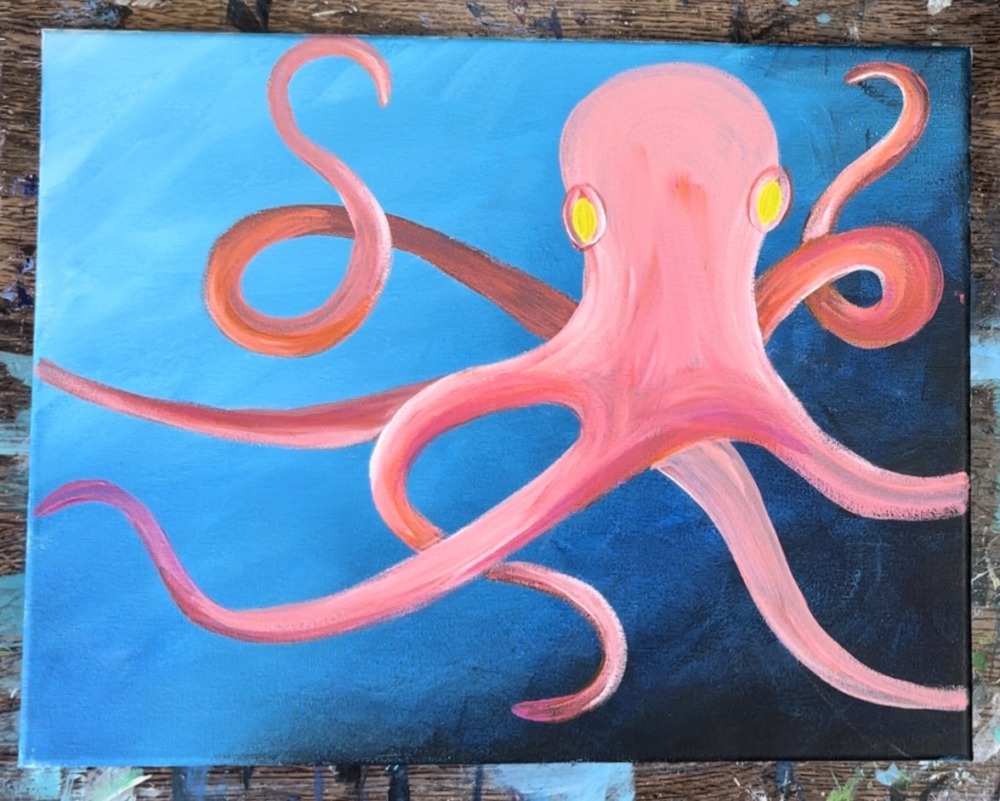
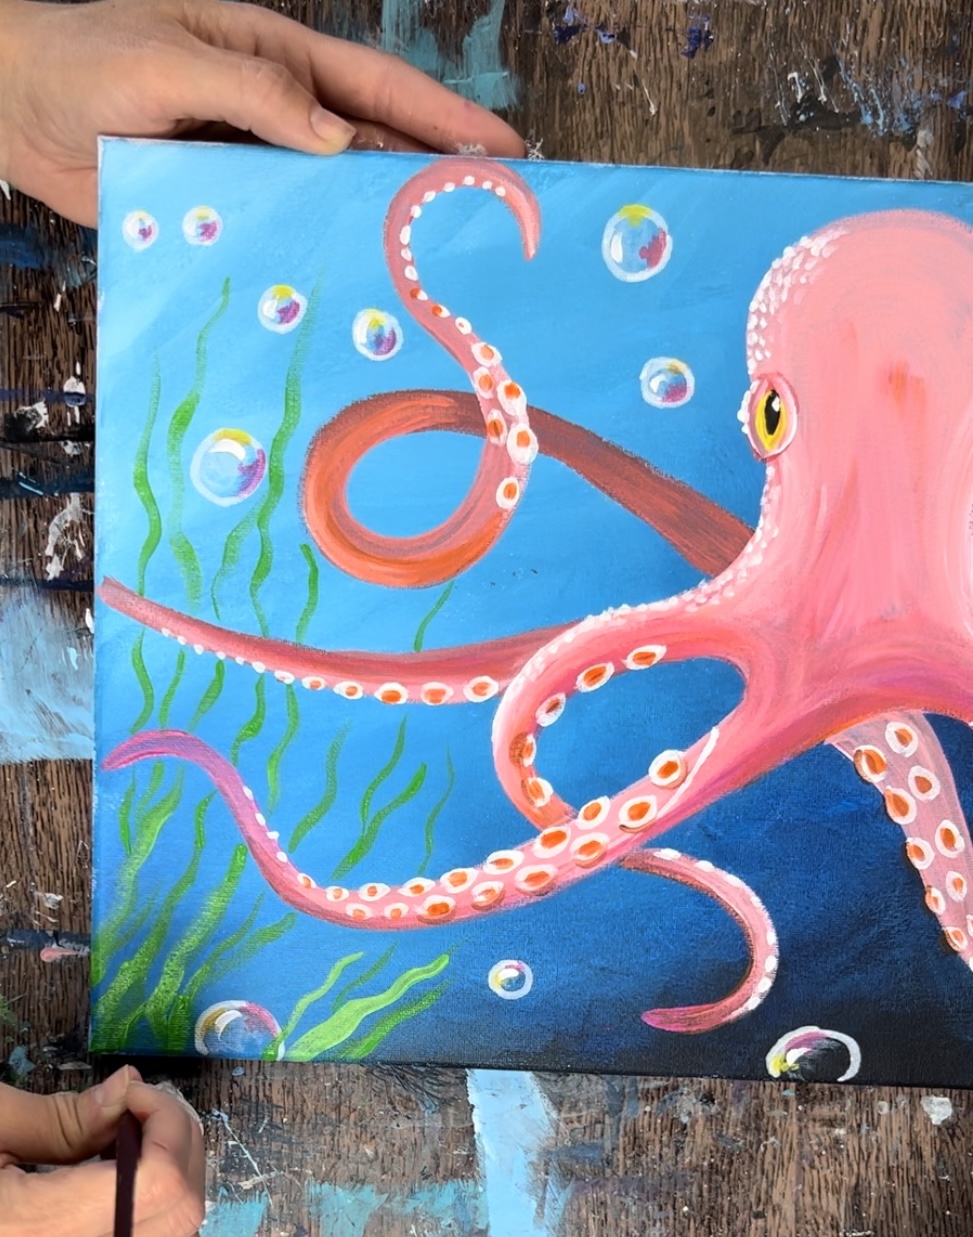
3. Paint First Layer Of Octopus
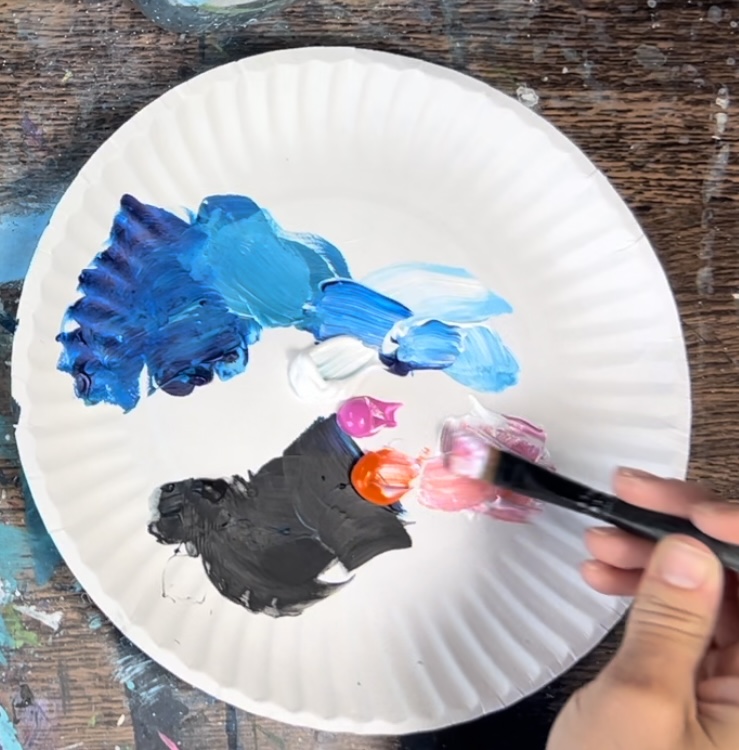
You’re welcome to change the color of this octopus. I painted this with a “coral/ peach” color. Load your palette with titanium white, medium magenta and cadmium orange hue.

Use the 12 bright brush to mix about 4 parts white, 2 parts orange and 1 part pink (this does not need to be exact).
Start by painting the head. Use the tip of the brush to outline the shape of the head and then the full width of the brush to drag the color downwards.
Next, use either the 12 bright brush or the 4 round brush to paint the arms. The trick with the arms is to alter the color so that it varies from light to dark.
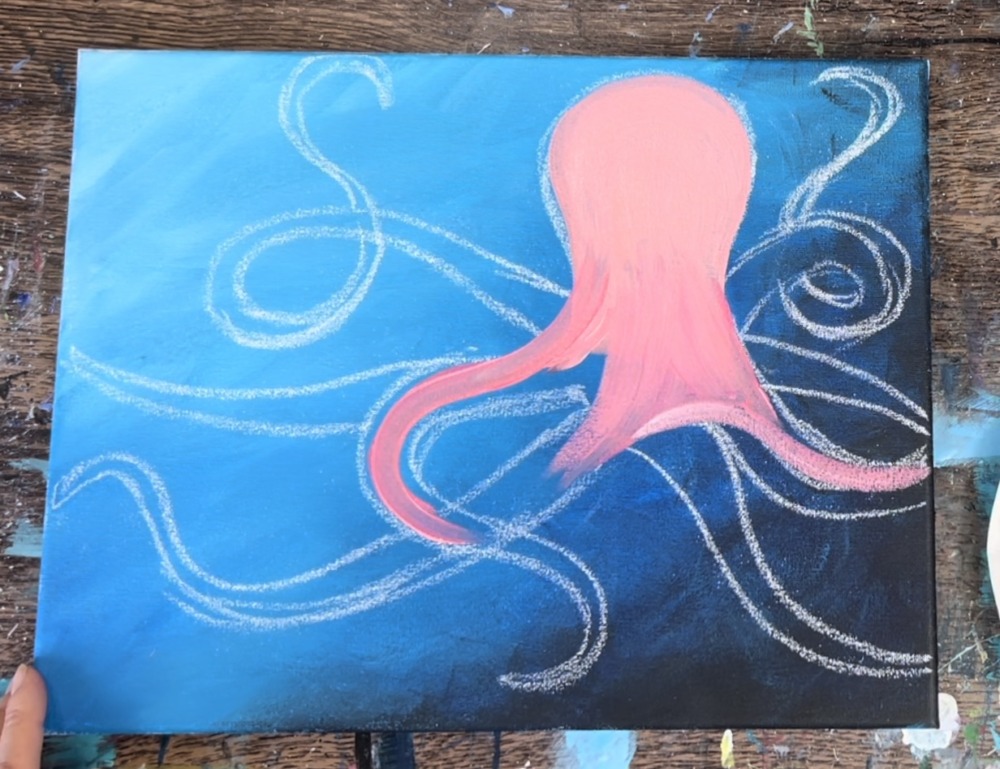
For overlapping, add more white to the pink/orange color so that it appears lighter and add less white to the arm that goes under. This will create the illusion that one arm is overlapping the other (darker for further back and lighter for front).
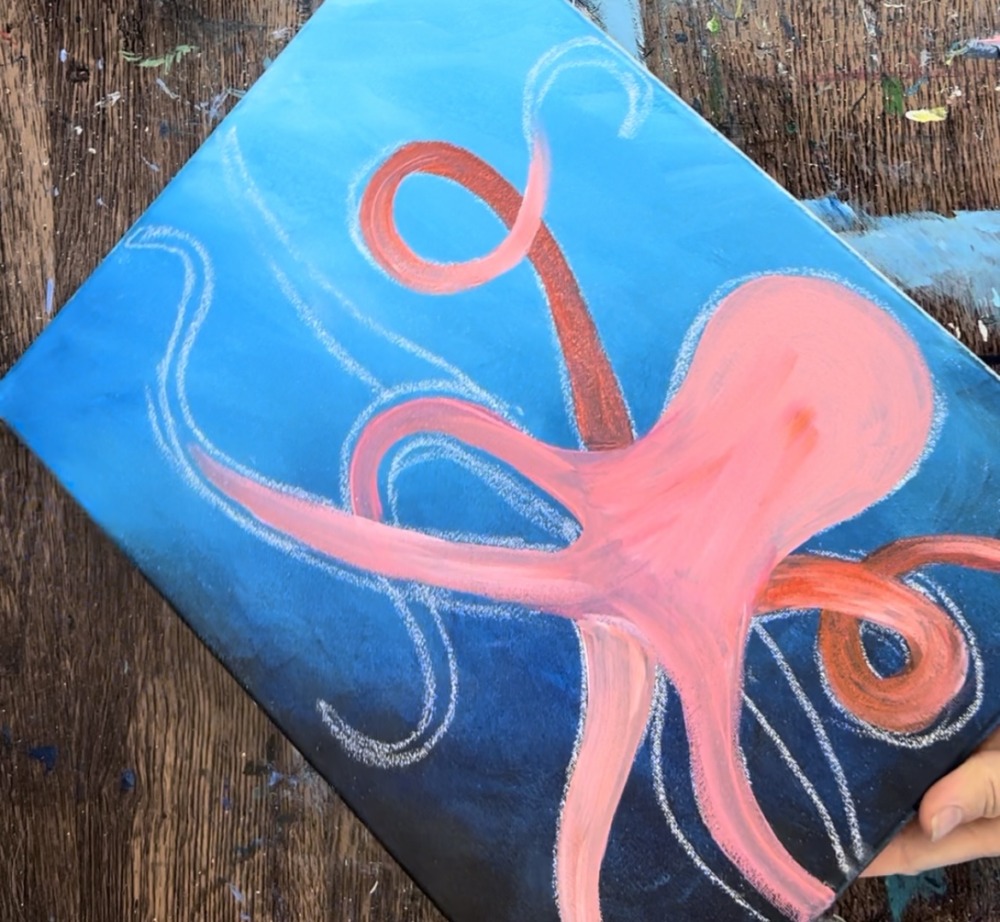
Paint the “loop arm” on the right with more orange and less white to make it appear in the back.
Then blend a little white on the part that loops in front.
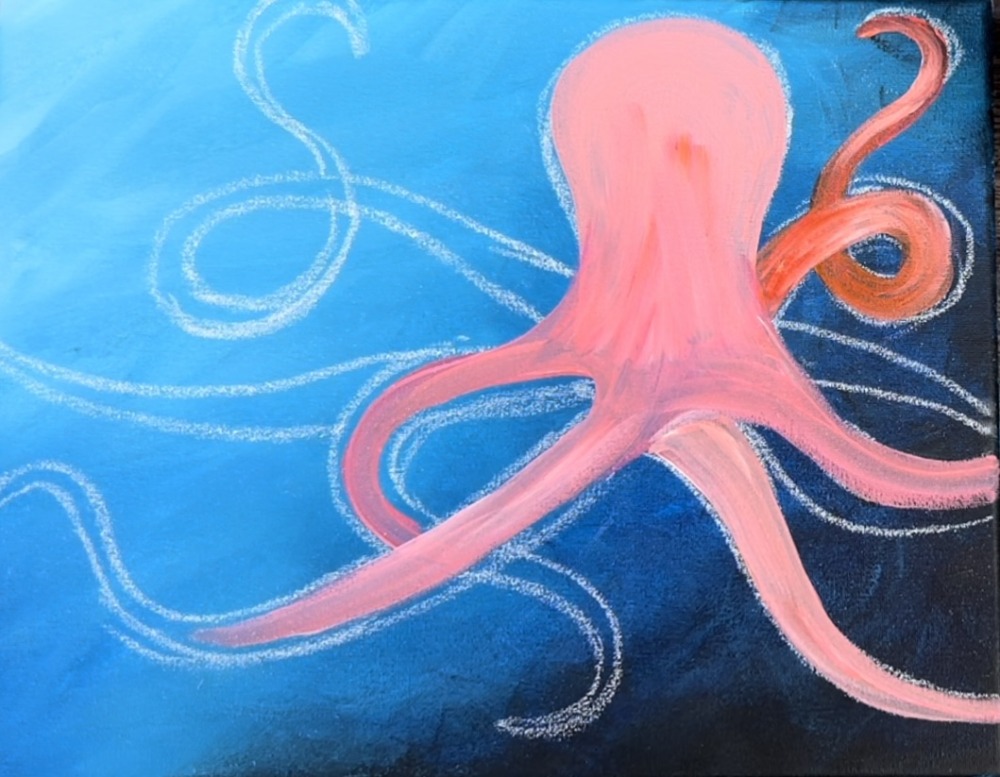
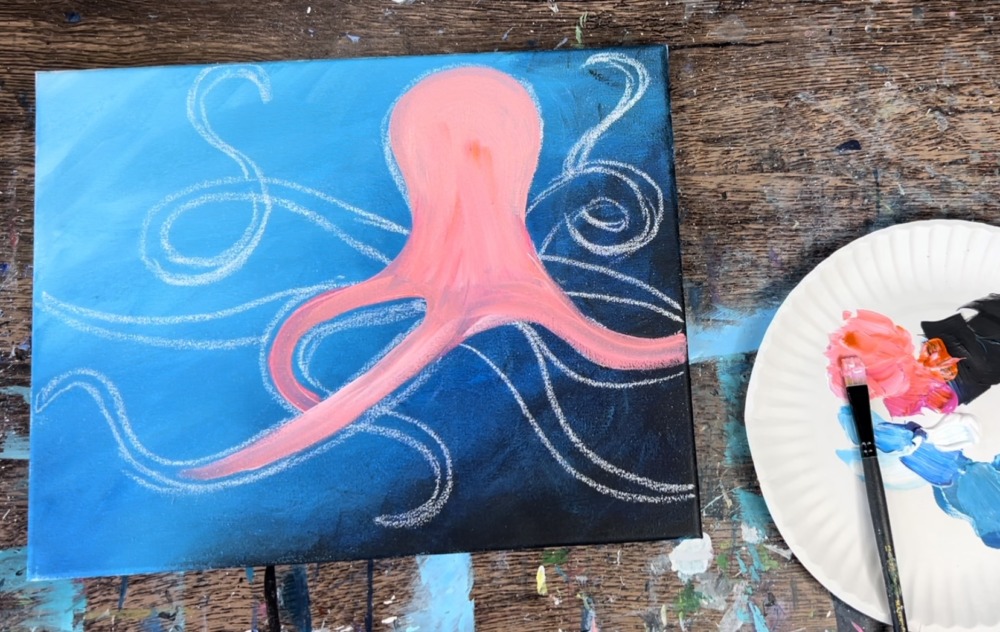
Repeat this for the arm on the left. Start by painting it darker and then paint it lighter on the part that curves and overlaps in front.
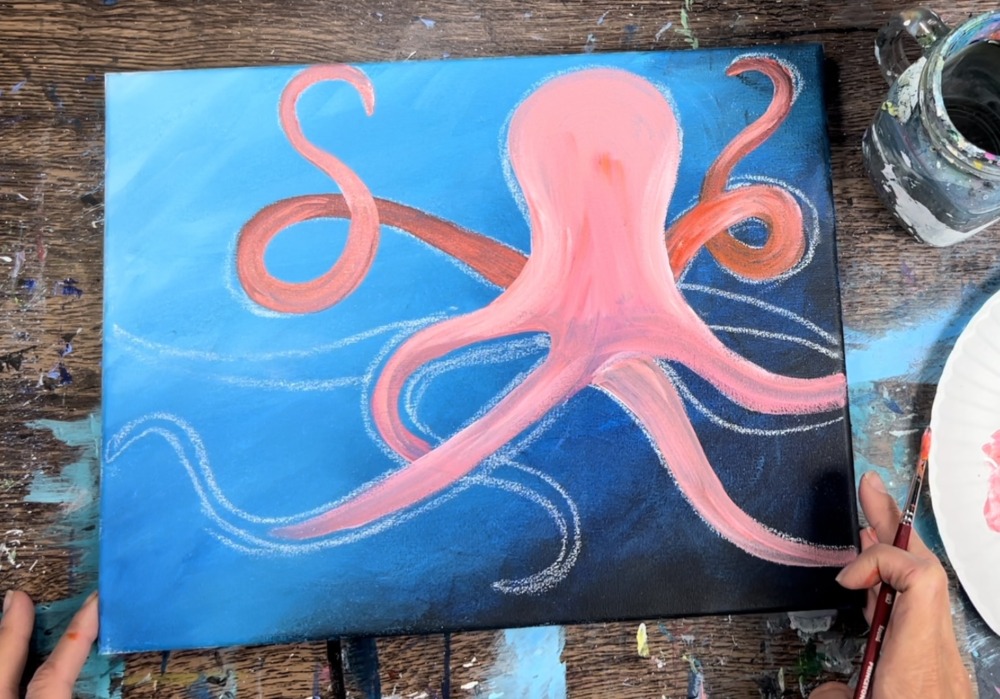
Continue painting the rest of the legs, alternating the lights and darks and blending the colors on the canvas. It’s okay if your lights and darks are in different places than mine!
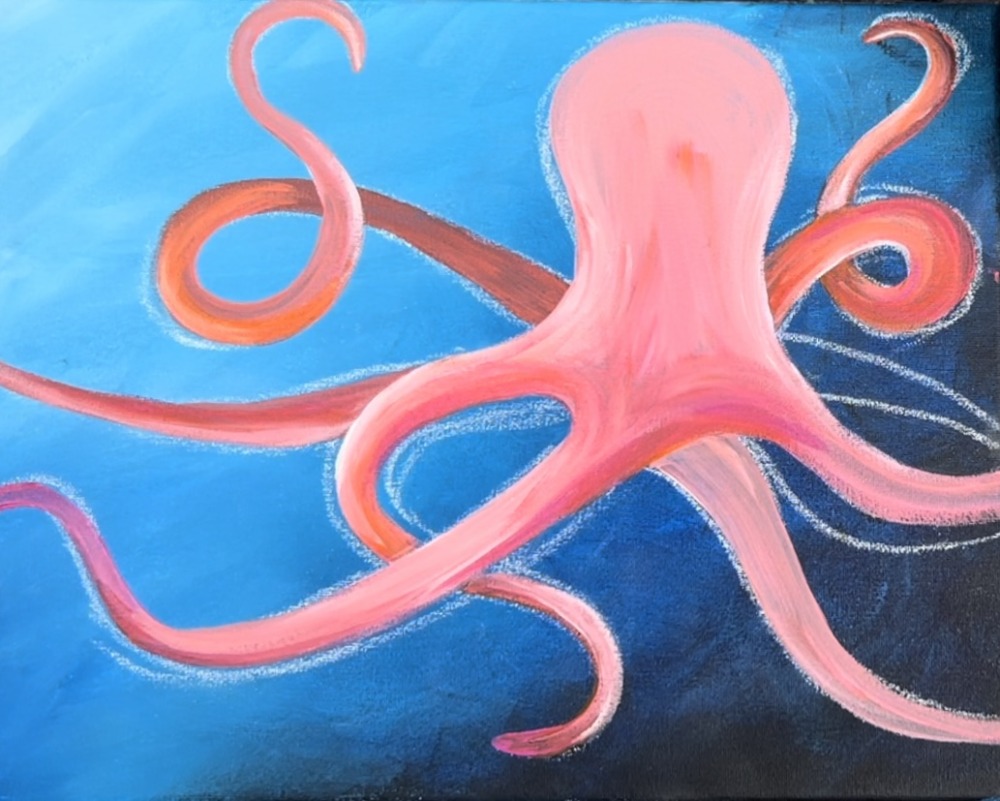
Note: in the pictures, I forgot to paint the 8th arm. That arm was painted at the very end using the same colors and technique 🙂
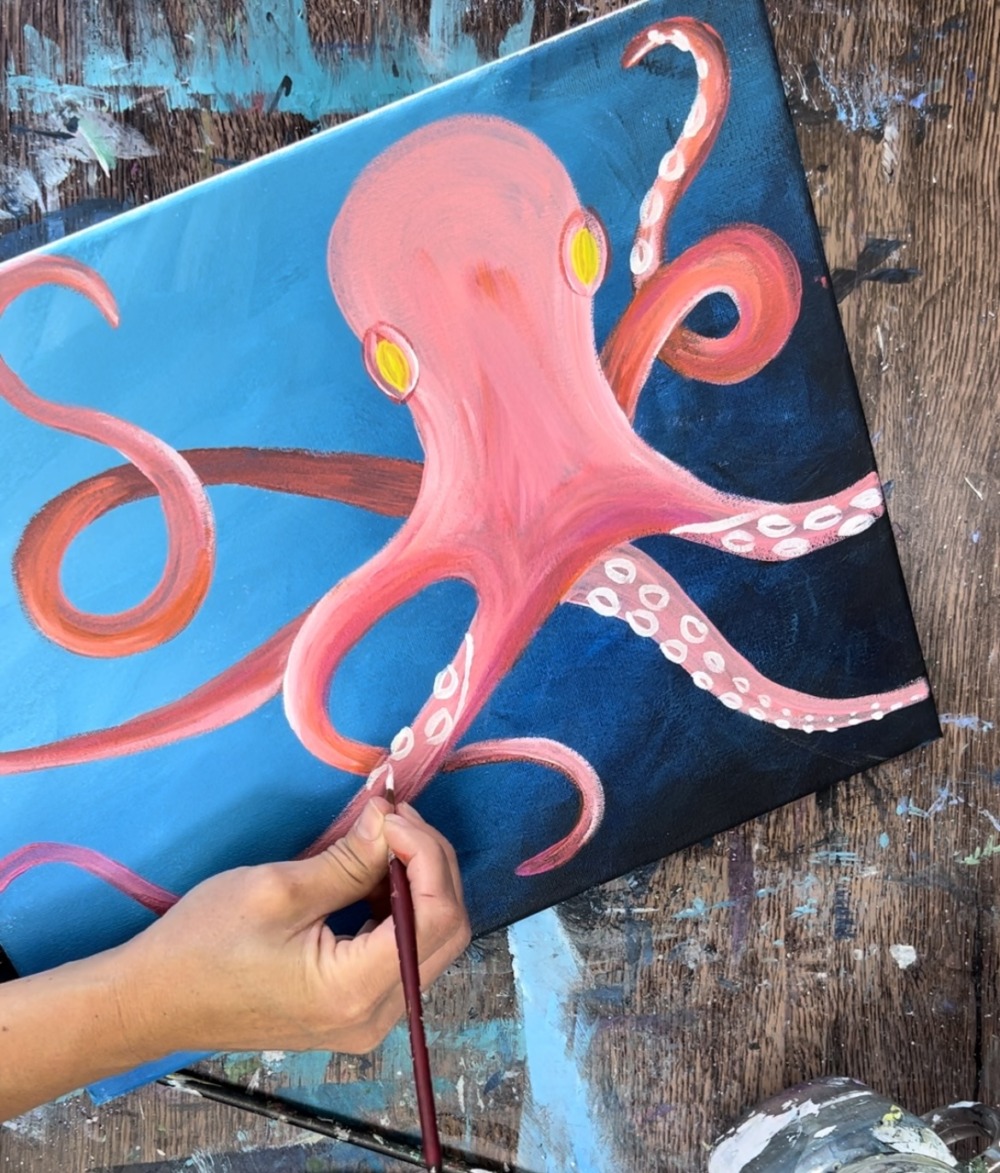
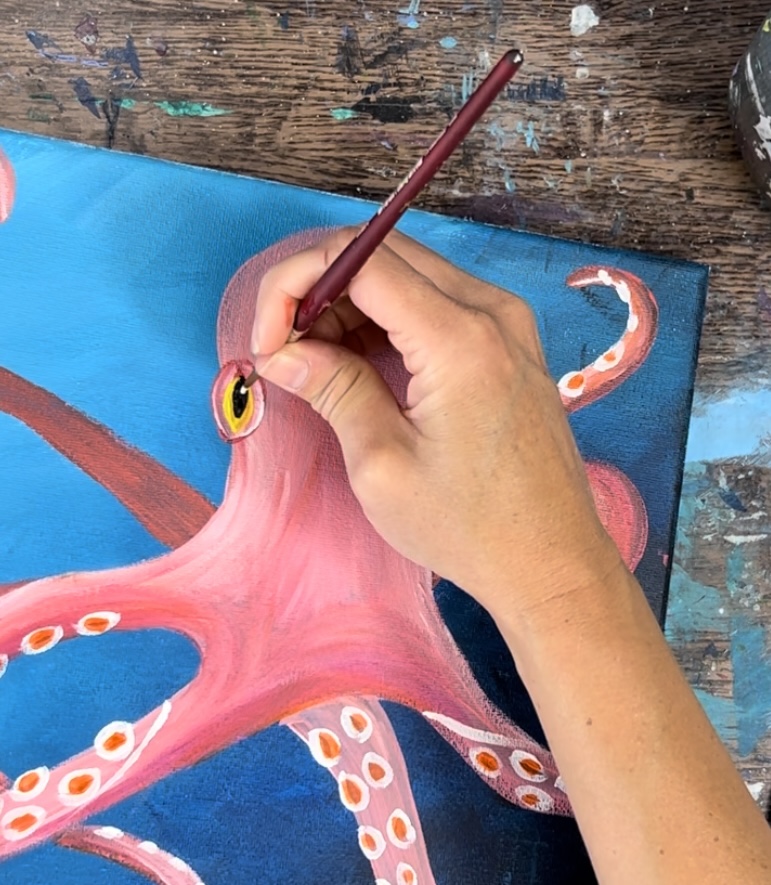
4. Paint Eyes
Use the #4 round brush and cadmium orange hue to paint two ovals for the eyes. These are on the lower part of the lead and stick out a little on the sides.
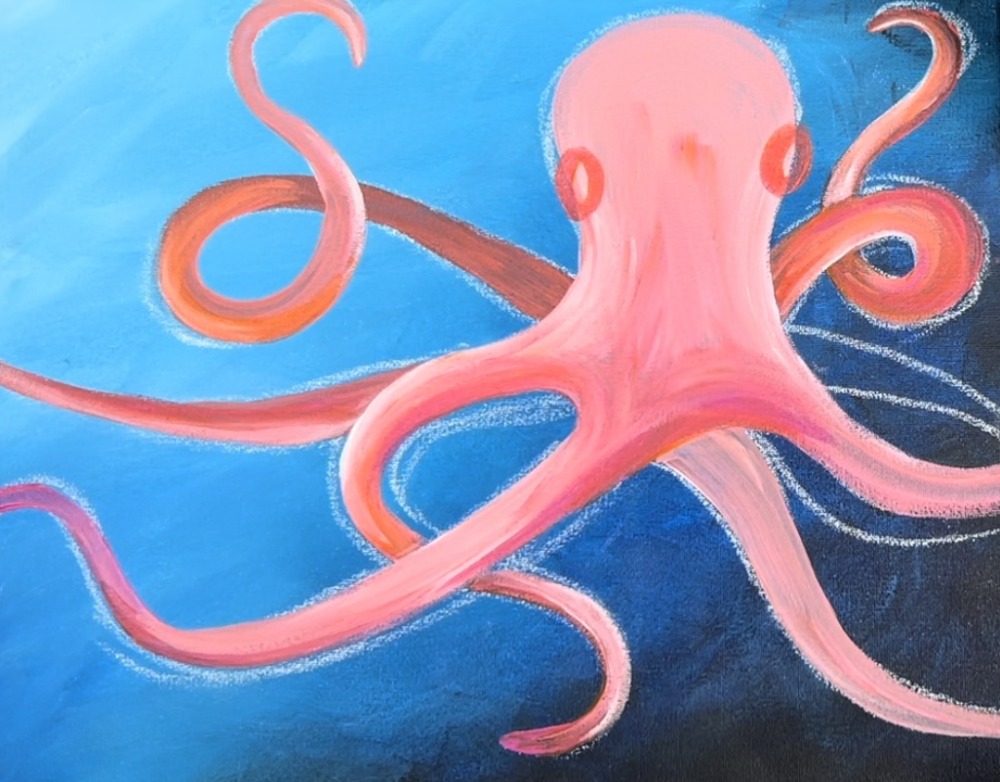
Next, add a little titanium white to your brush (without rinsing). Paint the inside of the oval shape but don’t paint over all of the orange.
Let this dry (or dry with a blow dryer). Then use a soft wet wipe to gently erase the leftover chalk lines.
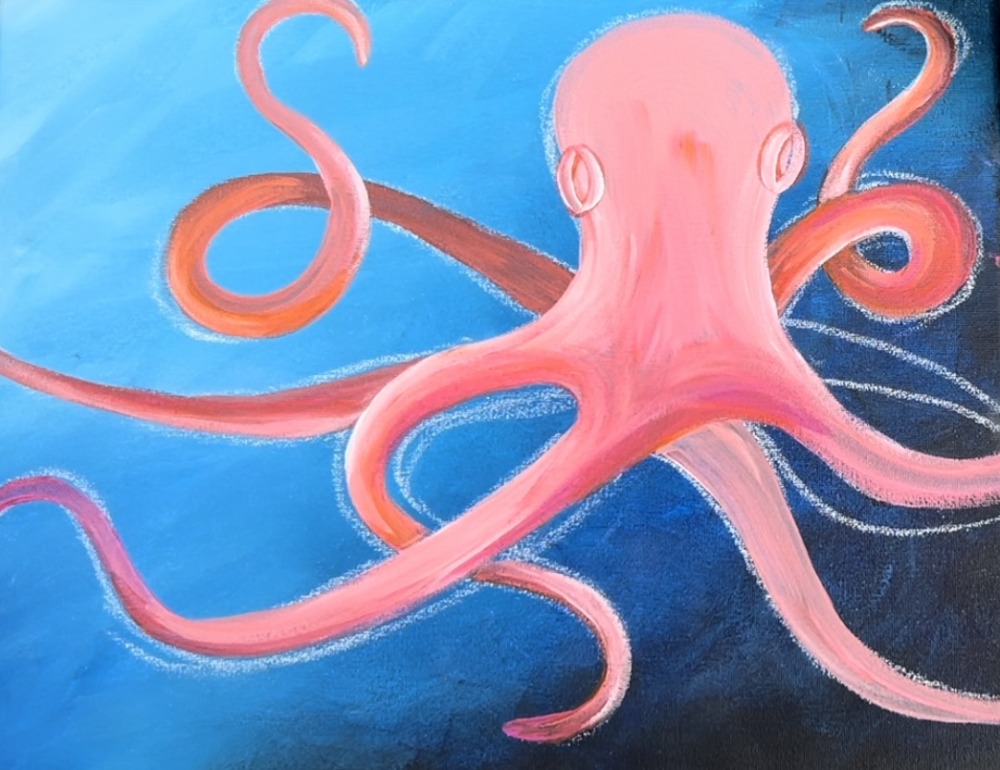
Then load your palette with cadmium yellow light hue. Paint the inside of each of the eyes with a thin oval shape.
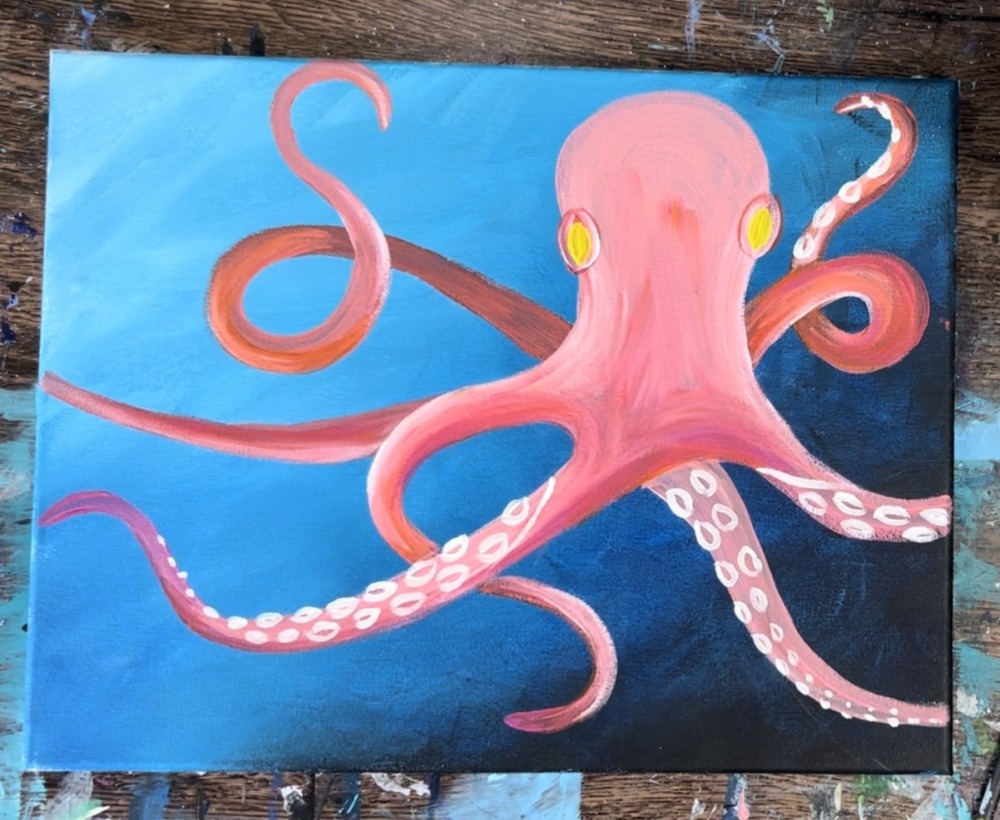
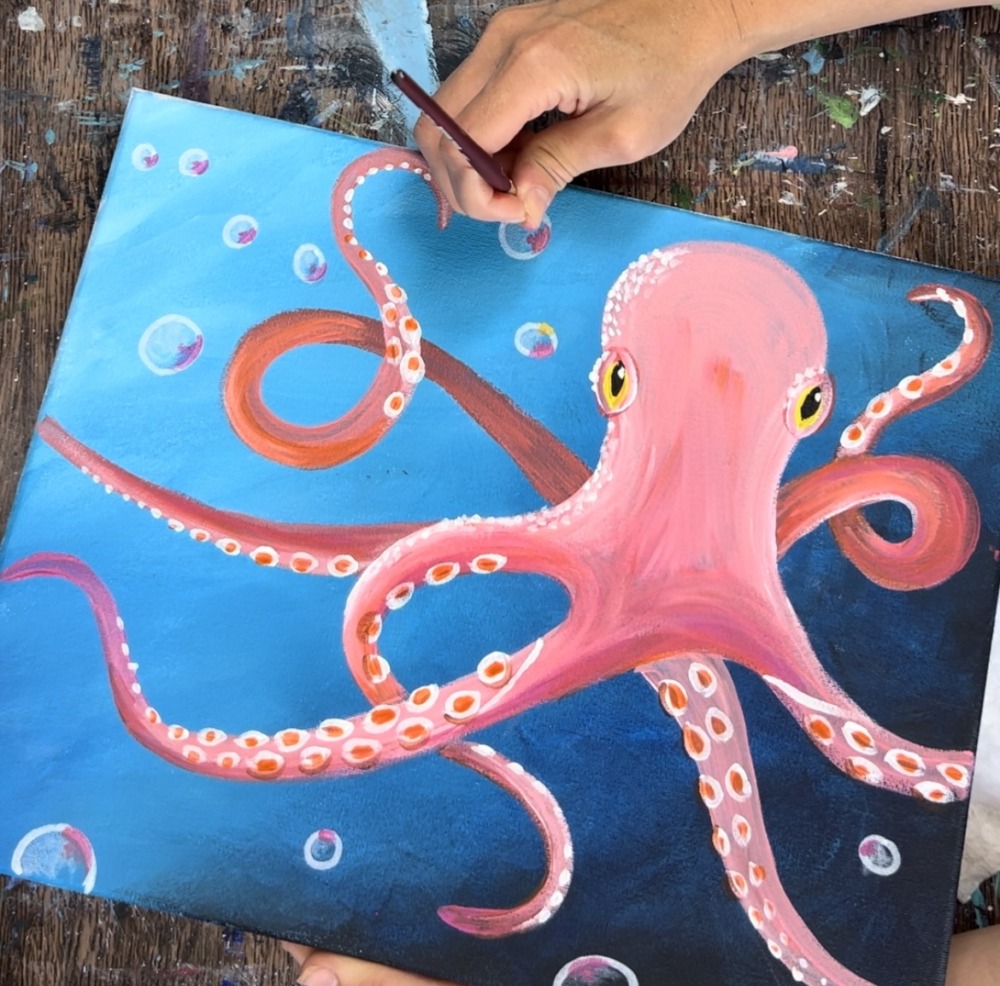
5. Paint The Suckers
Use a #4 round brush and titanium white to paint the suckers on most of the arms. Start by painting small oval/donut shapes on the far left of the arm. As you paint them down the side of the arm, allow each of the donut shapes to get smaller and smaller until it turns into just a dot.
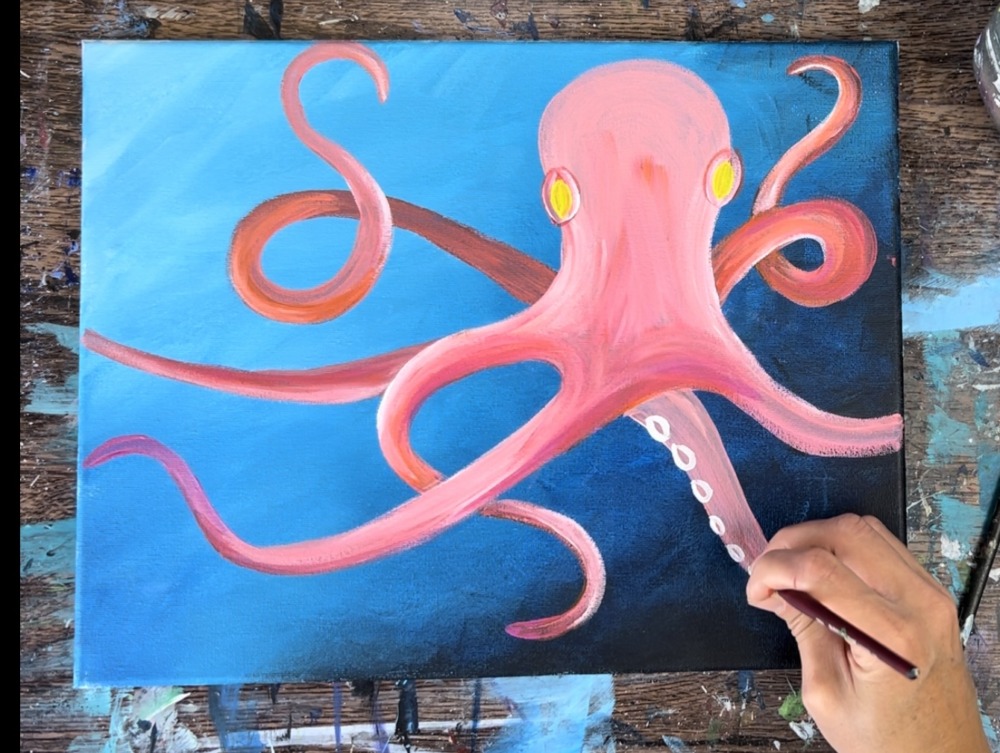
Paint a second row of donut shapes the same way. Paint them down until they turn into dots.
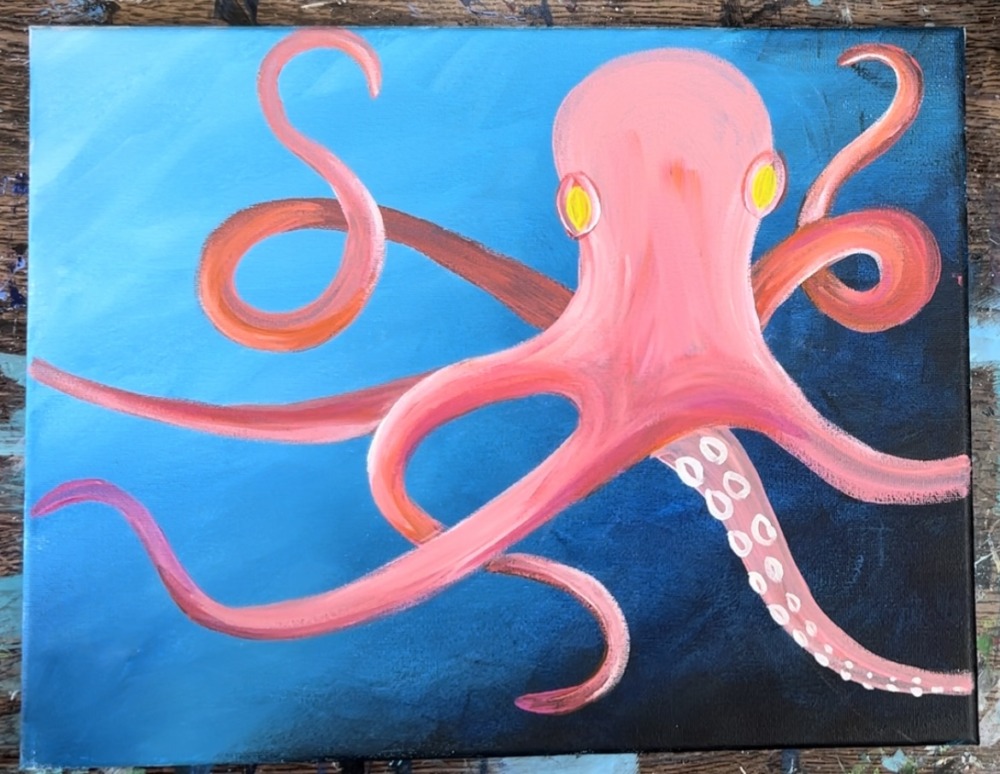
The position of these “suckers” will vary depending on the arm. For the arm on the far right, I did a little diagonal line that made it look like the arm twisted on its side. And then I did the little donut shapes on the bottom.
Next, paint the little suckers on the left side of the twisted arm. This one shows one row of the suckers.

With each arm, decide which side has the donut sucker shapes. Some have two rows, some have one and it depends on the position of the arm.
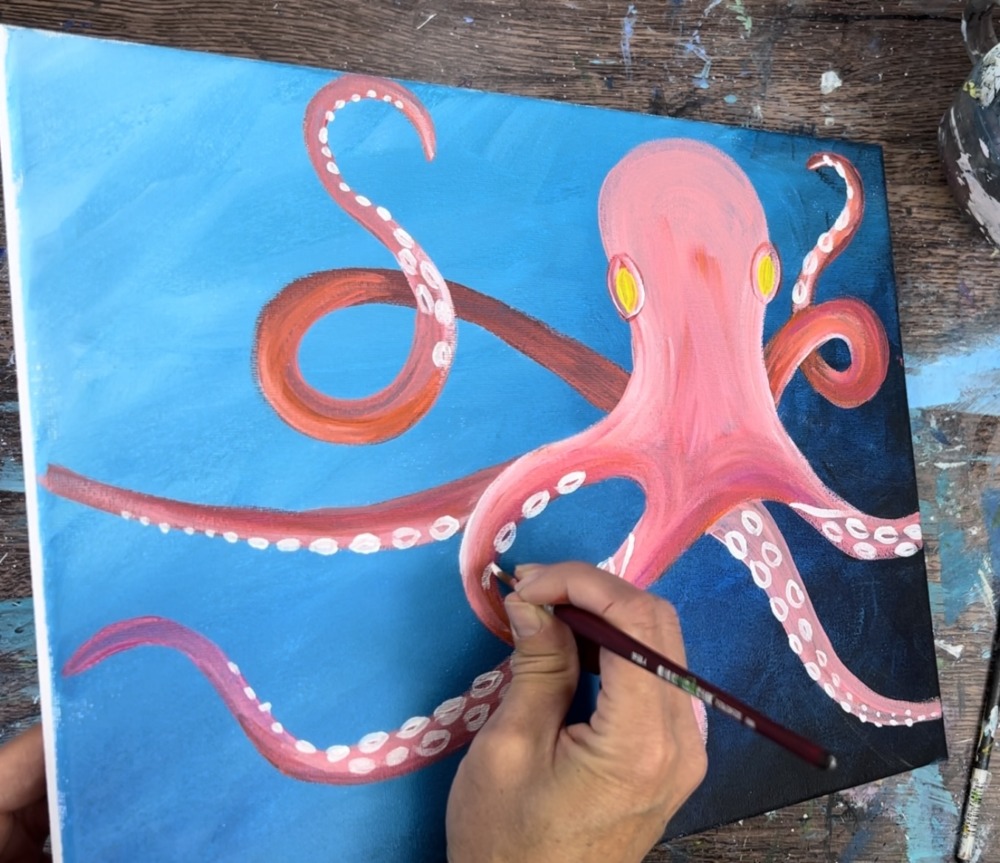
Leave a lot of the areas open that don’t have suckers. This will help create the illusion that the arms are swaying in all different directions and not all the suckers are showing.
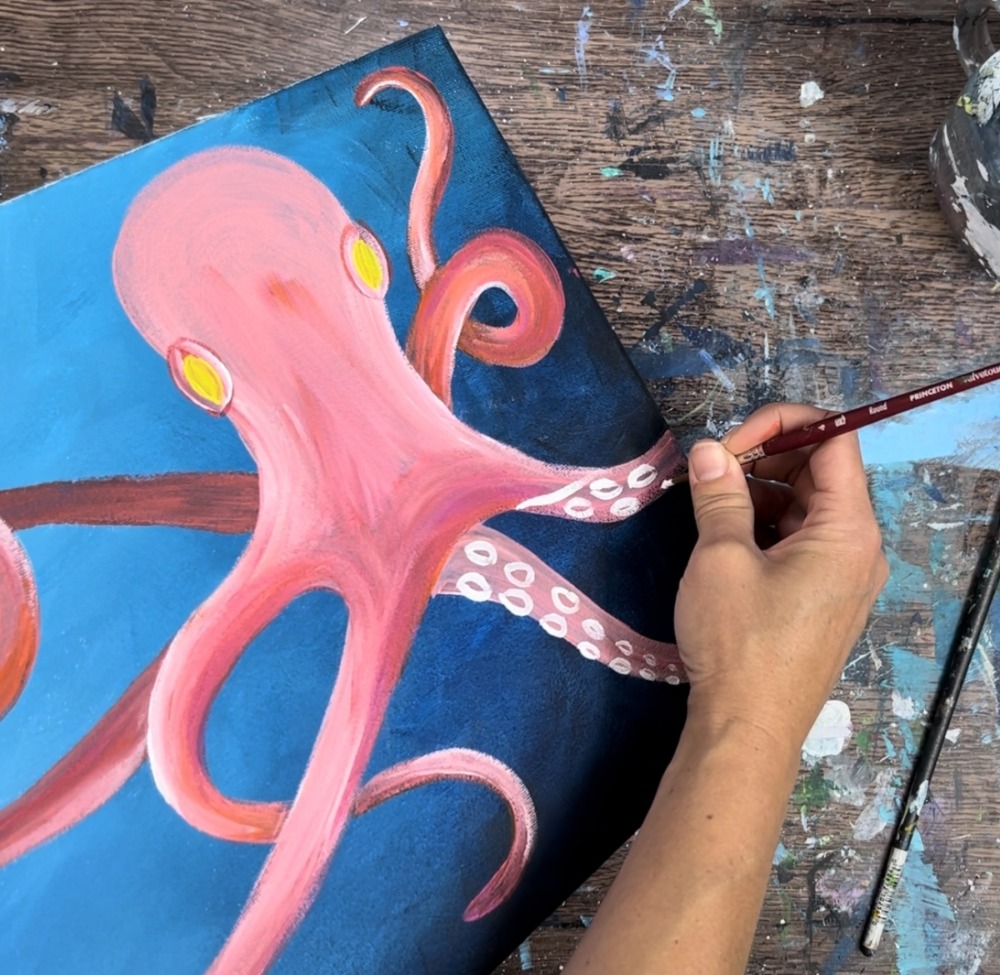
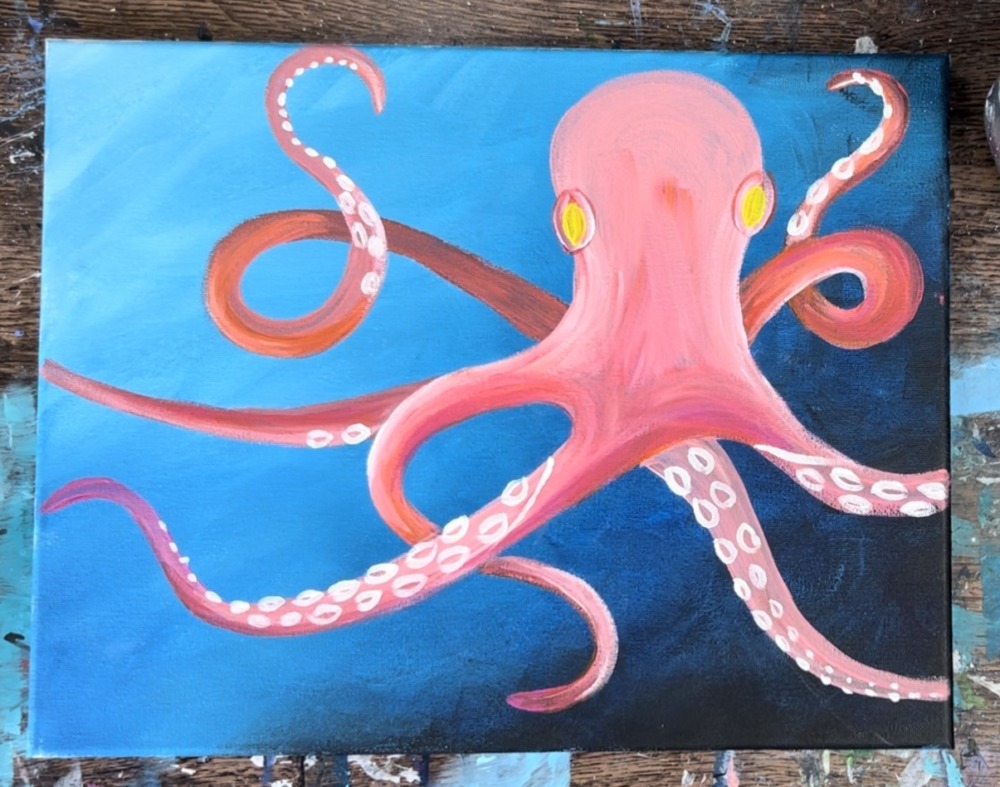
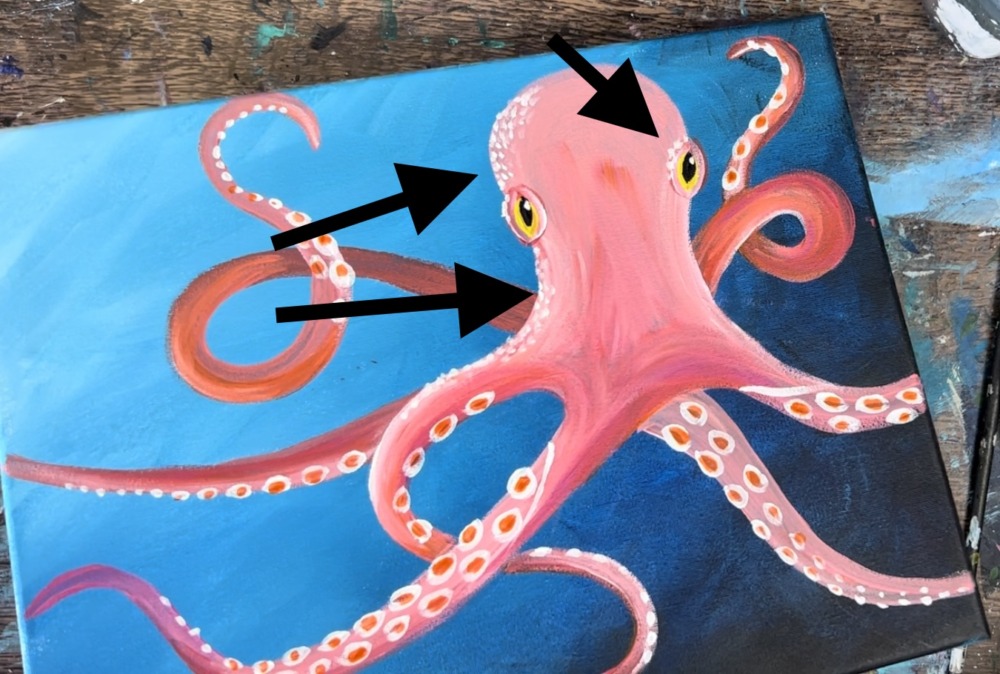
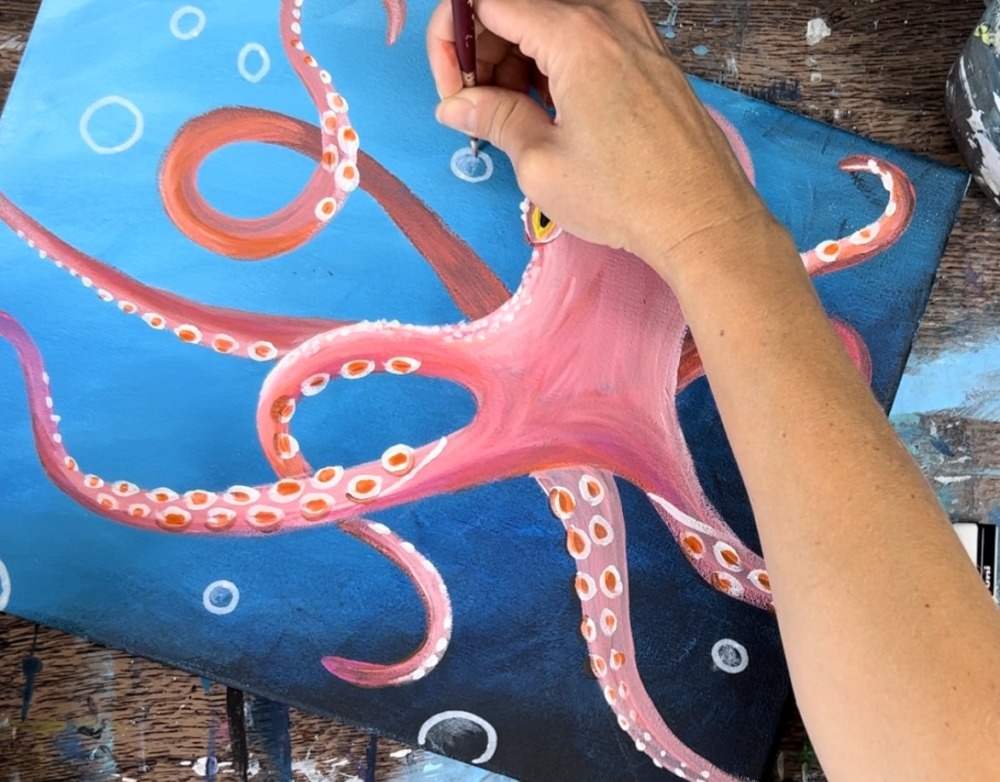
6. Paint black in eye, orange in suckers & texture spots on head
Use a #4 round brush and mars black to paint a black oval inside of the eye leaving the yellow and pink/white portion still showing.
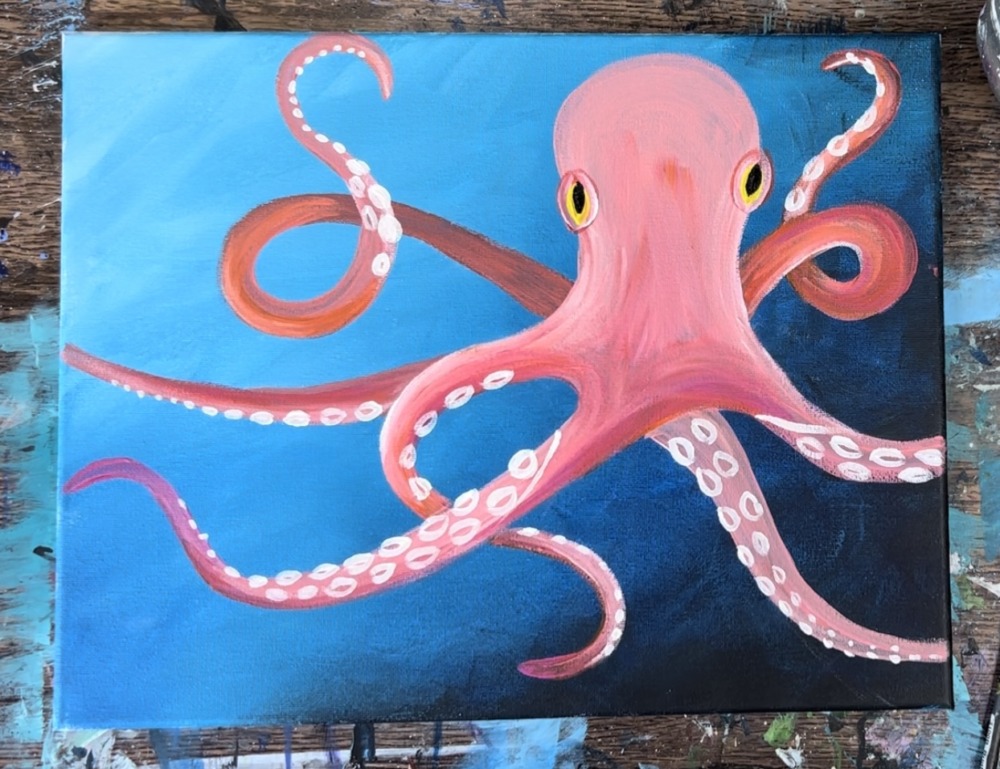
This next step is optional, you can leave the suckers as they are. I decided to use the #4 round brush and cadmium orange hue to paint an orange oval inside each of the oval suckers.

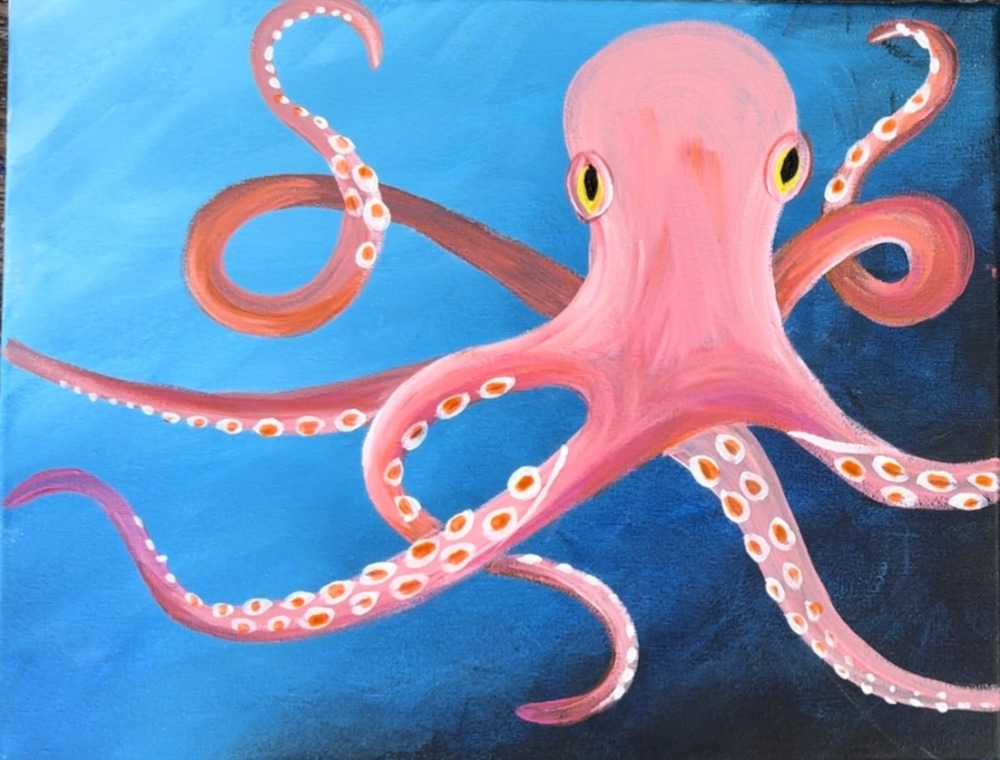
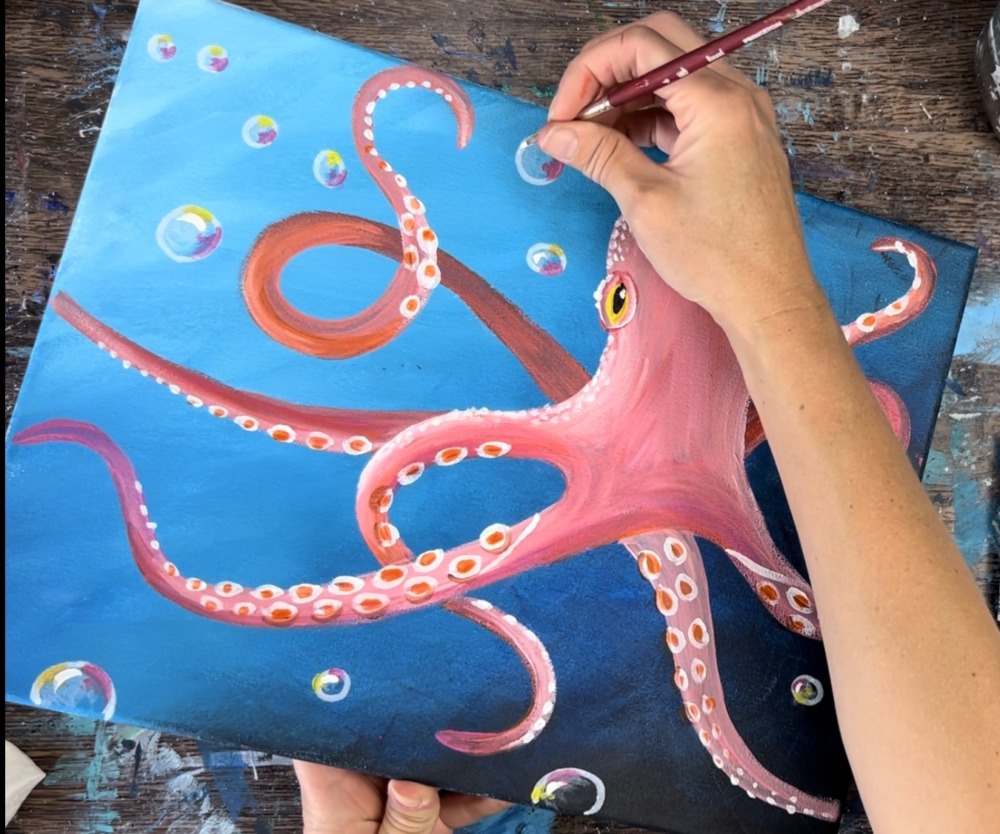
Next, assuming the black part of the eye is dry, use the round brush and titanium white to paint a white dot in the upper right area of the black portion. This will highlight the eye. You can also do this with a white paint pen or toothpick because the dot is very tiny.

This step is also optional. I added some texture on the left side of the octopus’s head and on the left part of the eyes. Use the #4 round brush and titanium white. Load a small amount on the tip of the brush. Paint tiny white dot strokes on the left side of the head. Then “dim” the white a little bit by adding some pink into it.
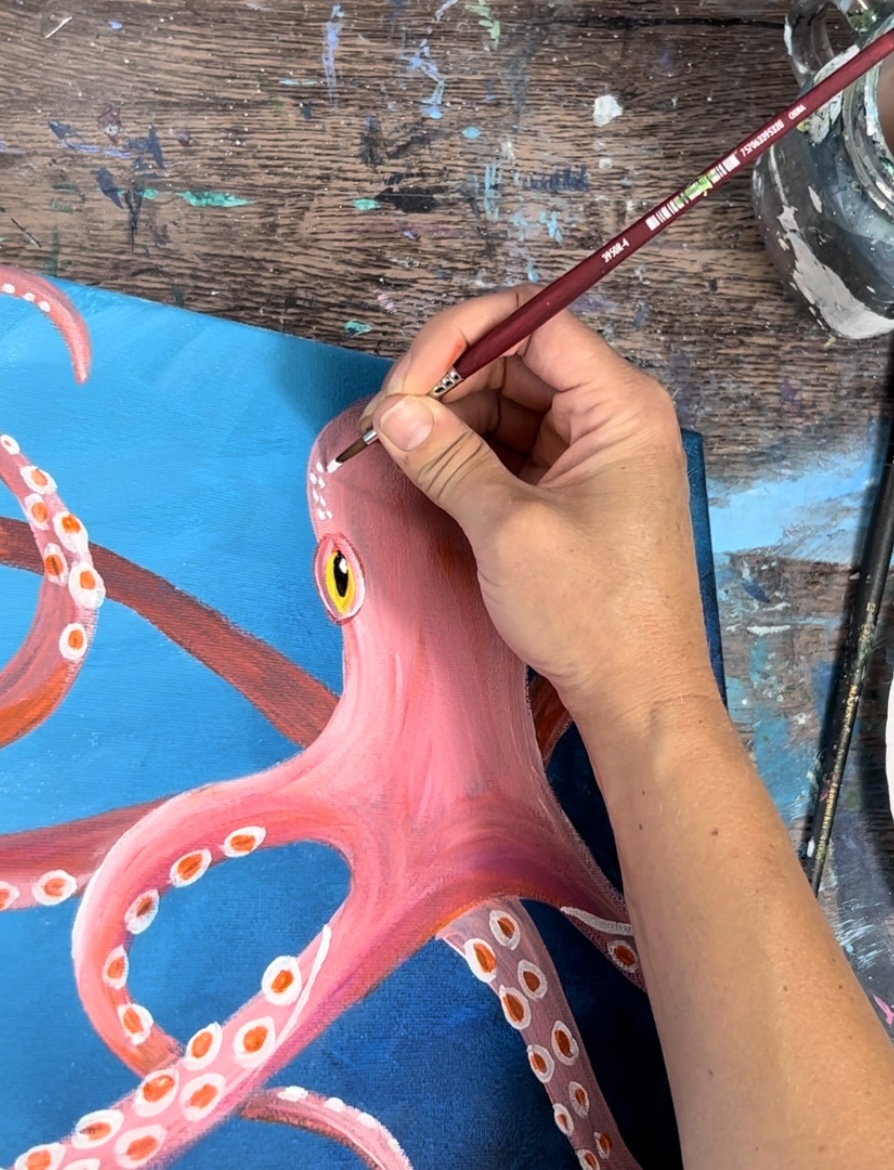
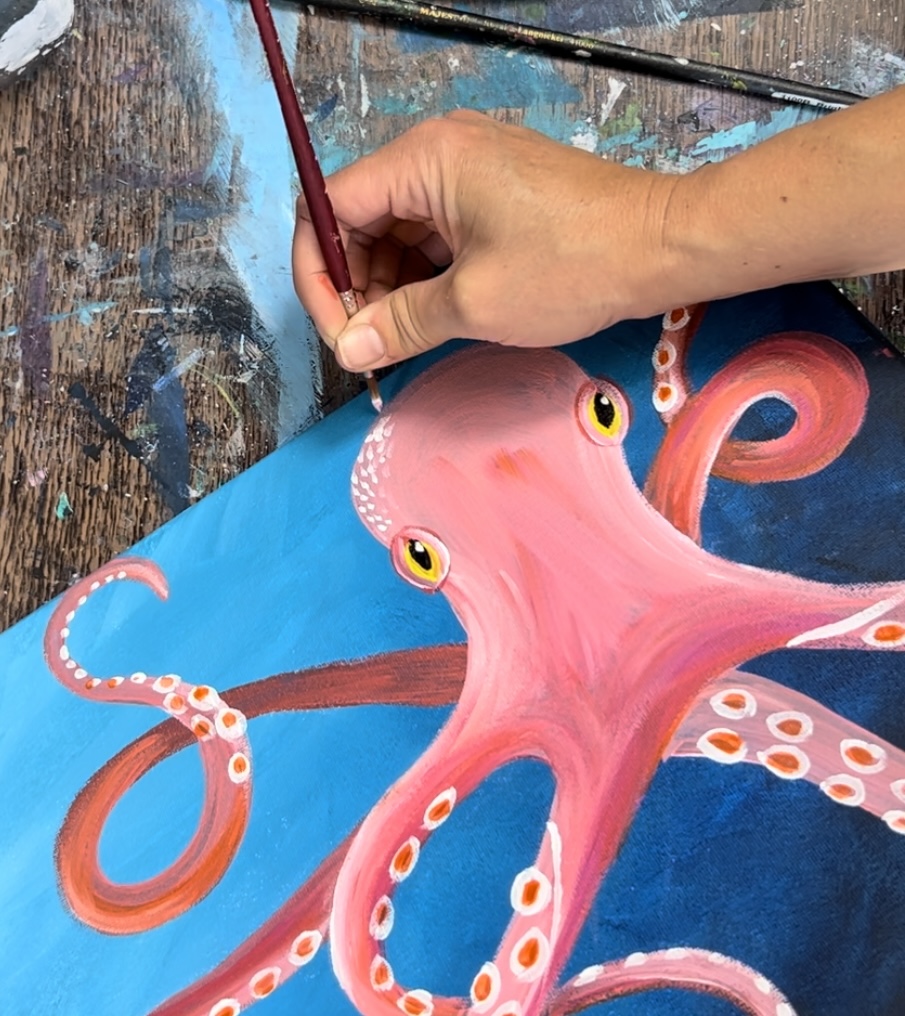
Do this on the left side of the head, the left side of part of the arm and the left side of the eyes.
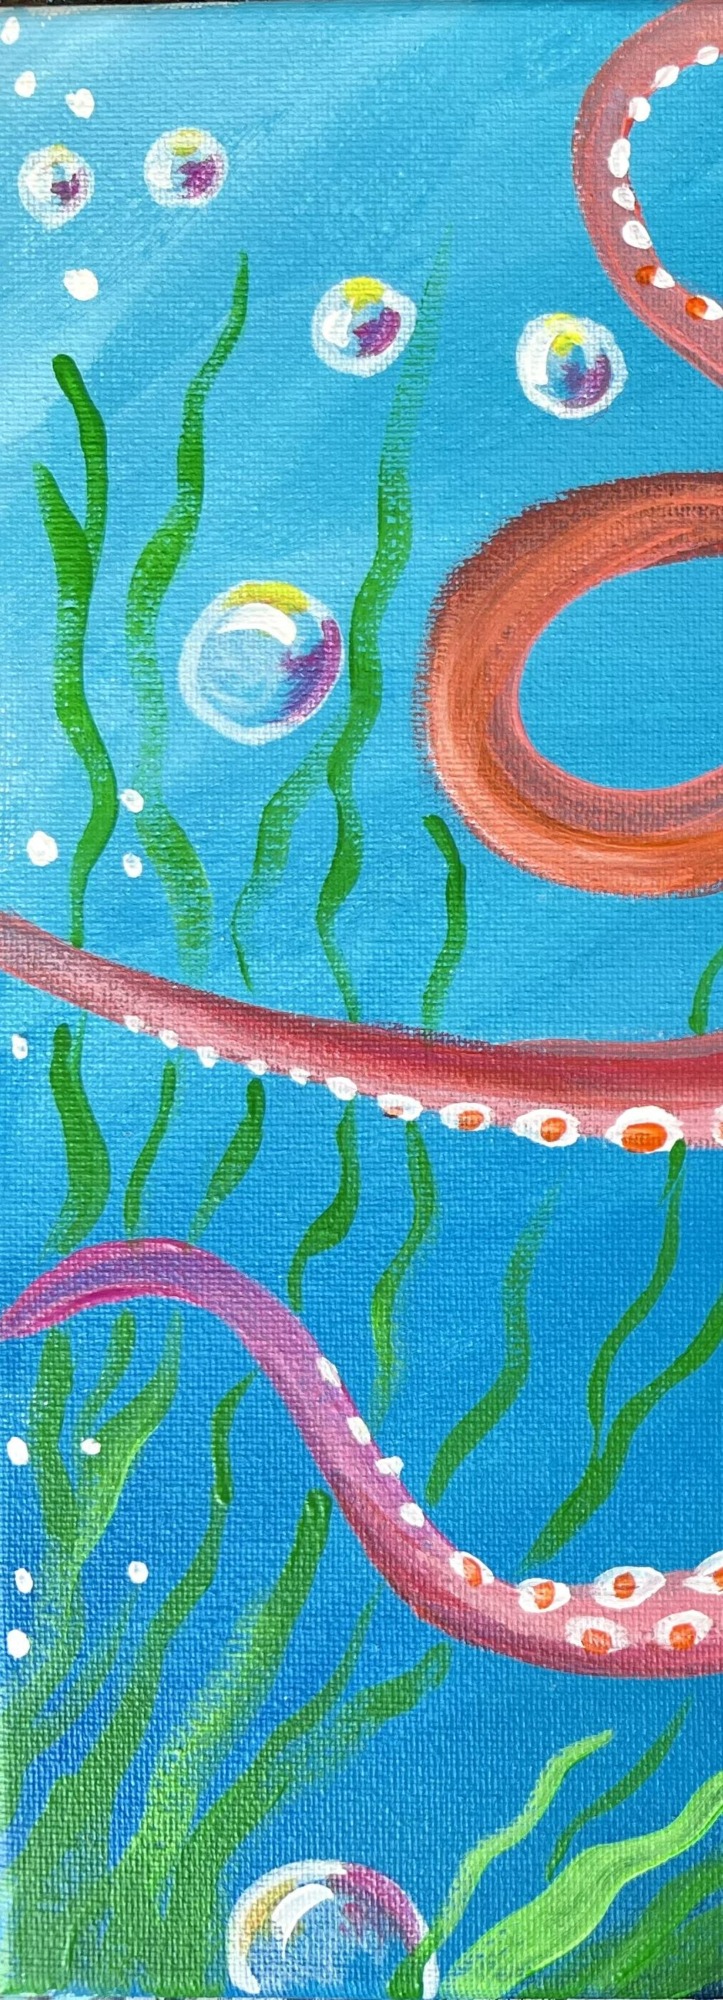
7. Paint Bubbles & Seaweed
Use a white paint pen (or the round brush) to paint various size circles throughout the water area.
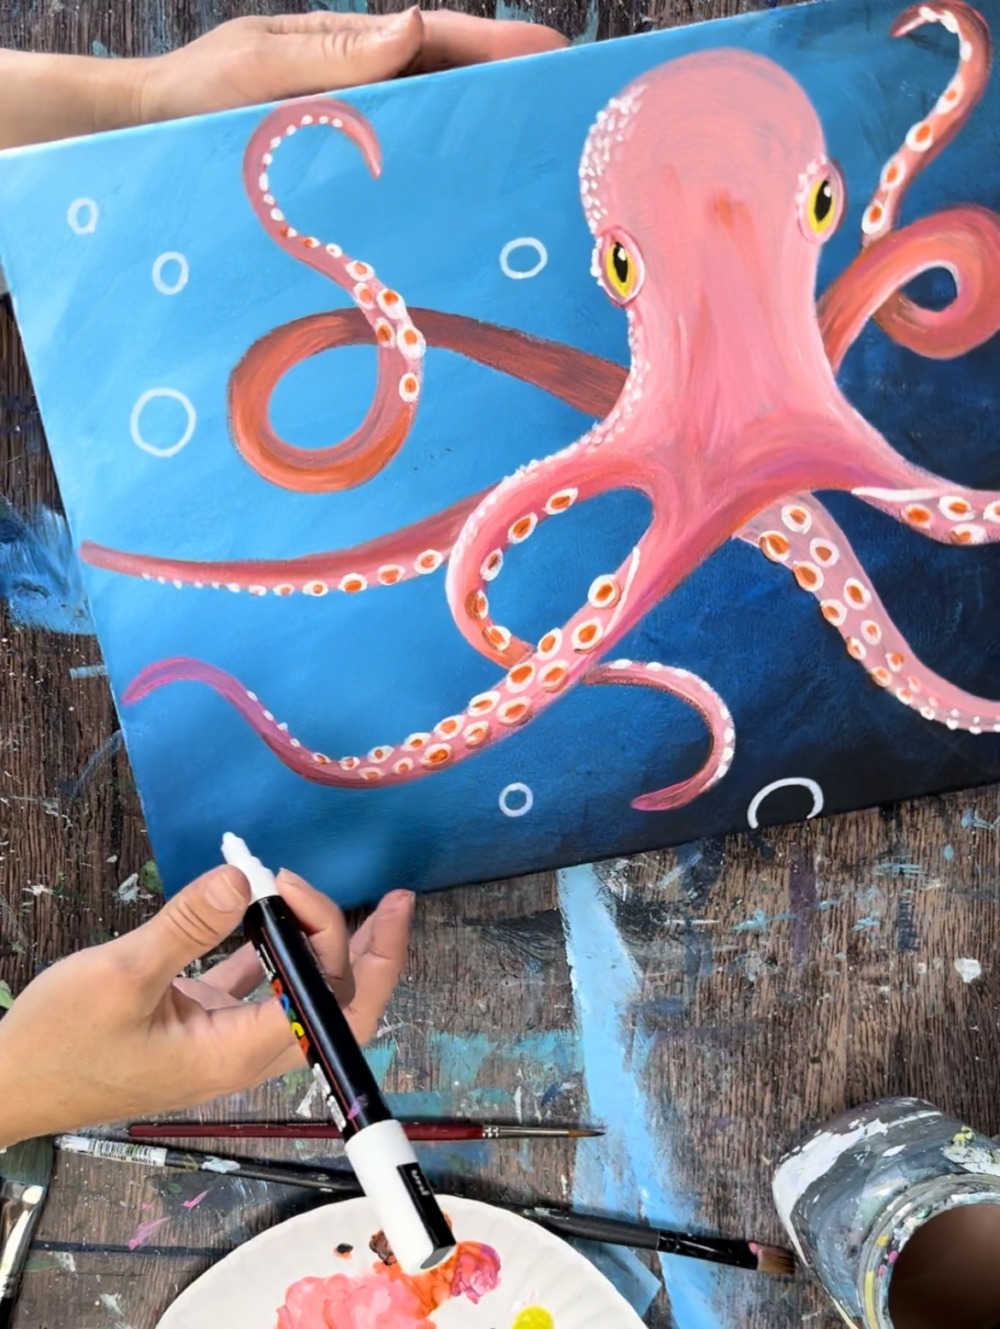

Next, “dry brush” the inside of each of the bubbles. This means that you load only a small amount of titanium white paint on the round brush but wipe off some of the paint. Then paint the inside of each of the circles so there is barely any paint on the canvas. It should look see-through/ translucent.
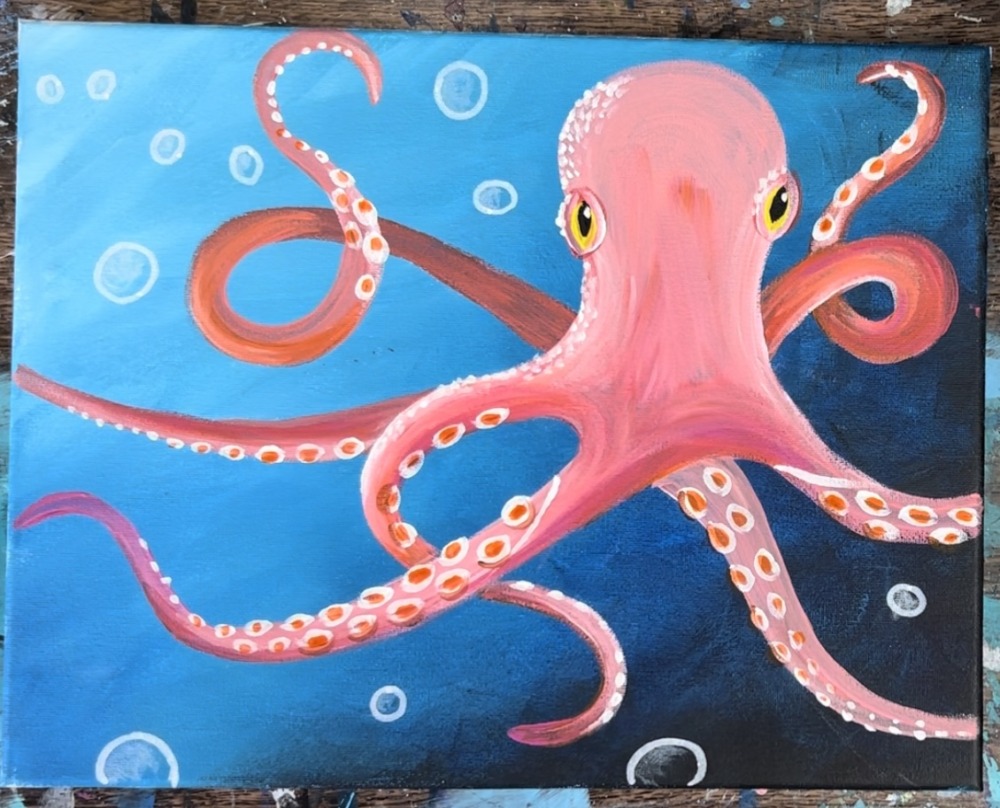
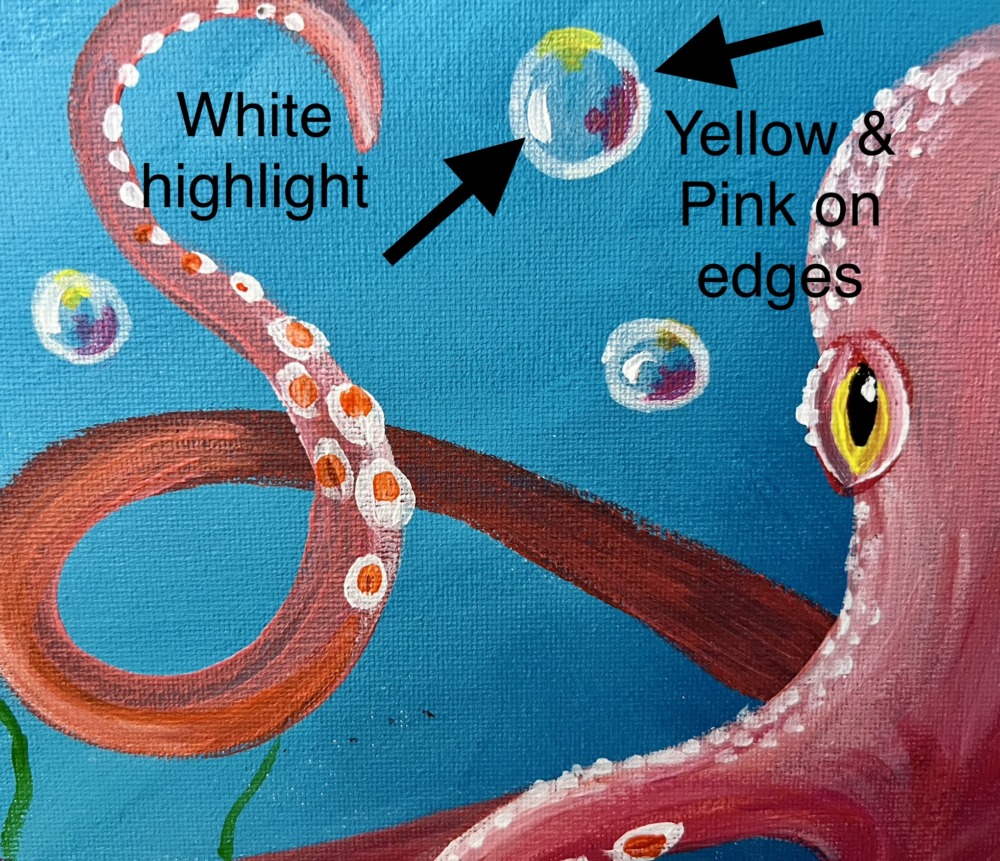
Next, add color to each of the bubbles by painting a small amount of pink on the side of the bubble facing the octopus. Paint very loose curved strokes that form almost a triangle shape.
Then add a small amount of yellow on another side of each of the bubbles. Paint very small, loose strokes on the edge of each of the bubbles.
Finally, add a white highlight on the upper left of each of the bubbles using a thick stroke of titanium white.
Paint seaweed with the color “light green permanent”. Use the #4 round brush to paint loose, long wavy lines starting at the lower left portion of the canvas. Add a little white into some of the seaweed and blend it on the canvas so some of the green is lighter in some areas.
I made the seaweed go behind the arms of the octopus. Additionally, the seaweed is only on the lower left area. If you want to change this and add seaweed other places, you can!
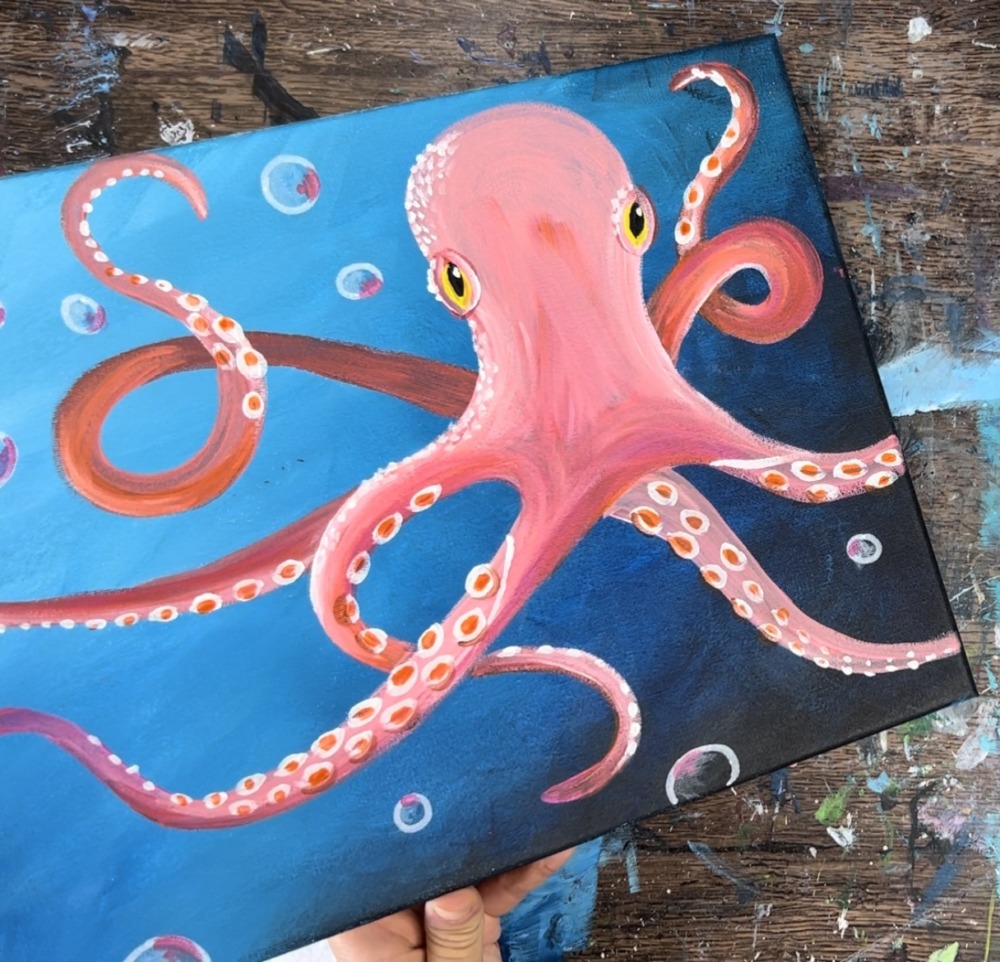
As a final detail, I added some small white dots mainly on the left side of the canvas to represent tiny bubbles.
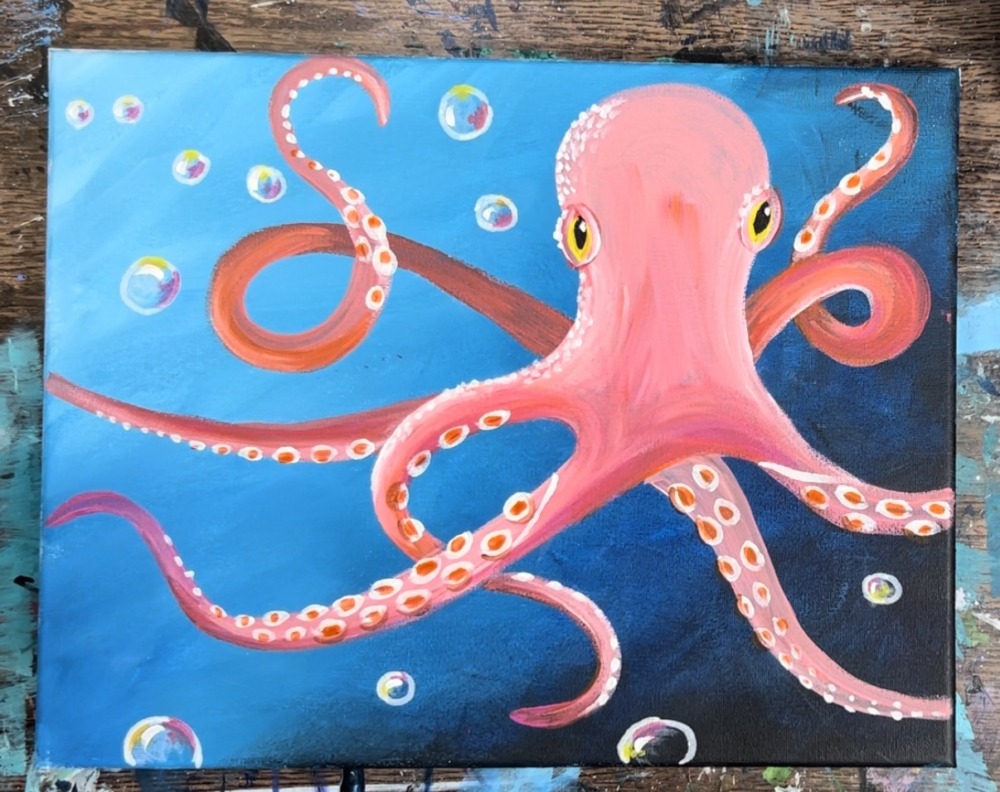
Finished!