

Would you like to save this?
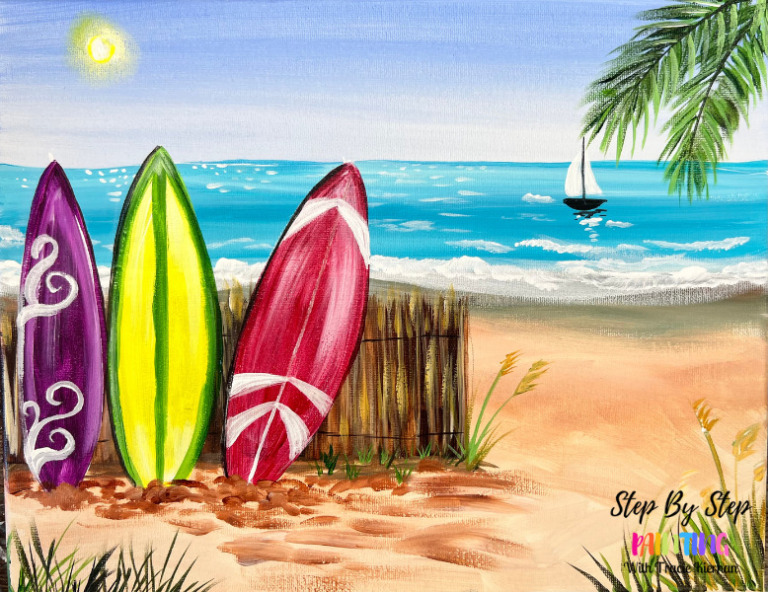
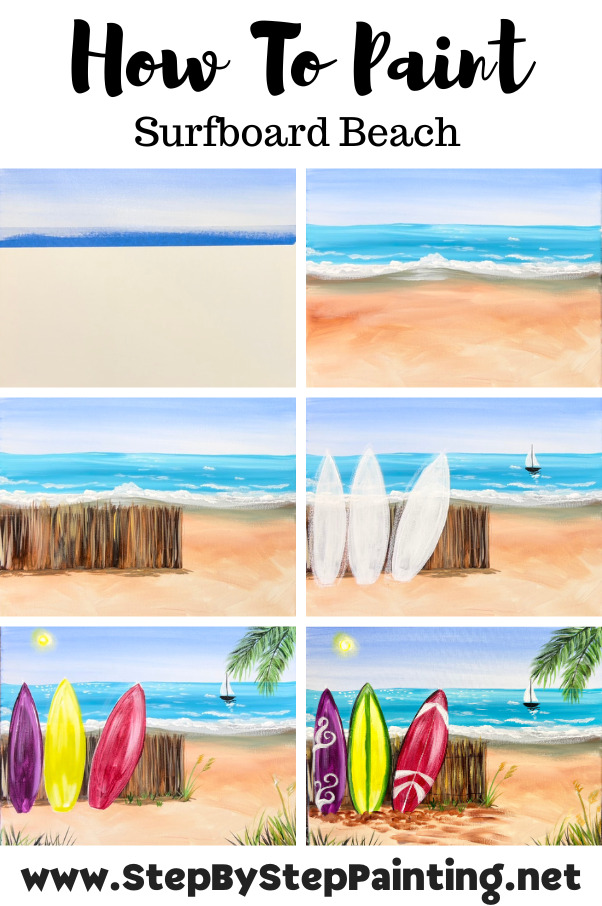
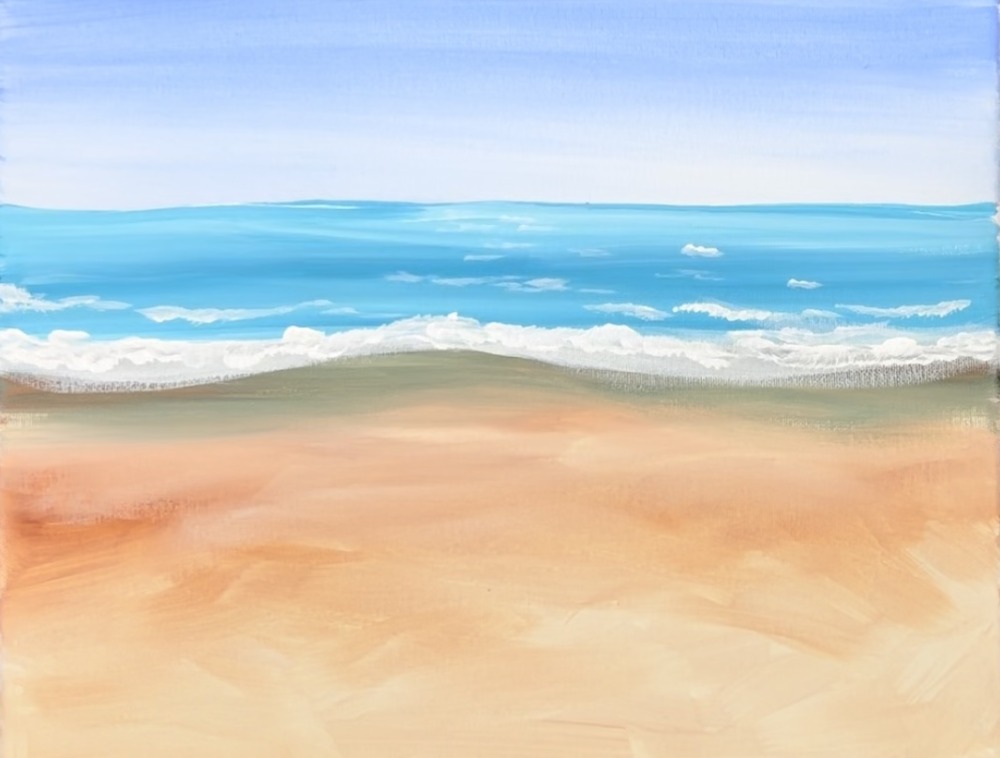
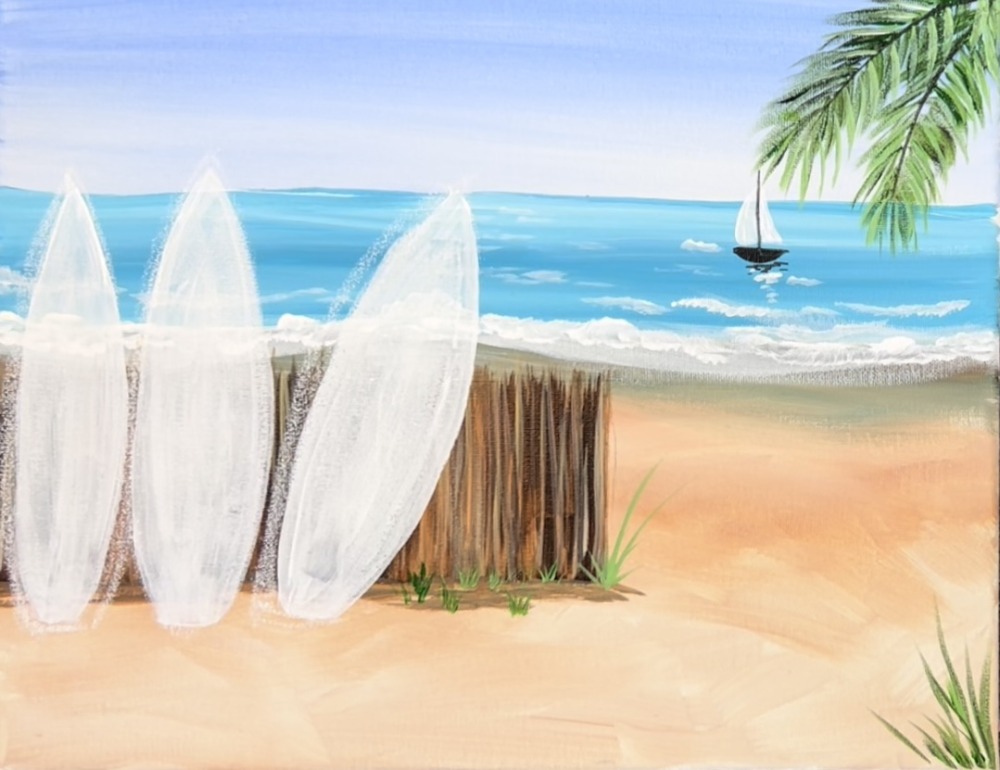
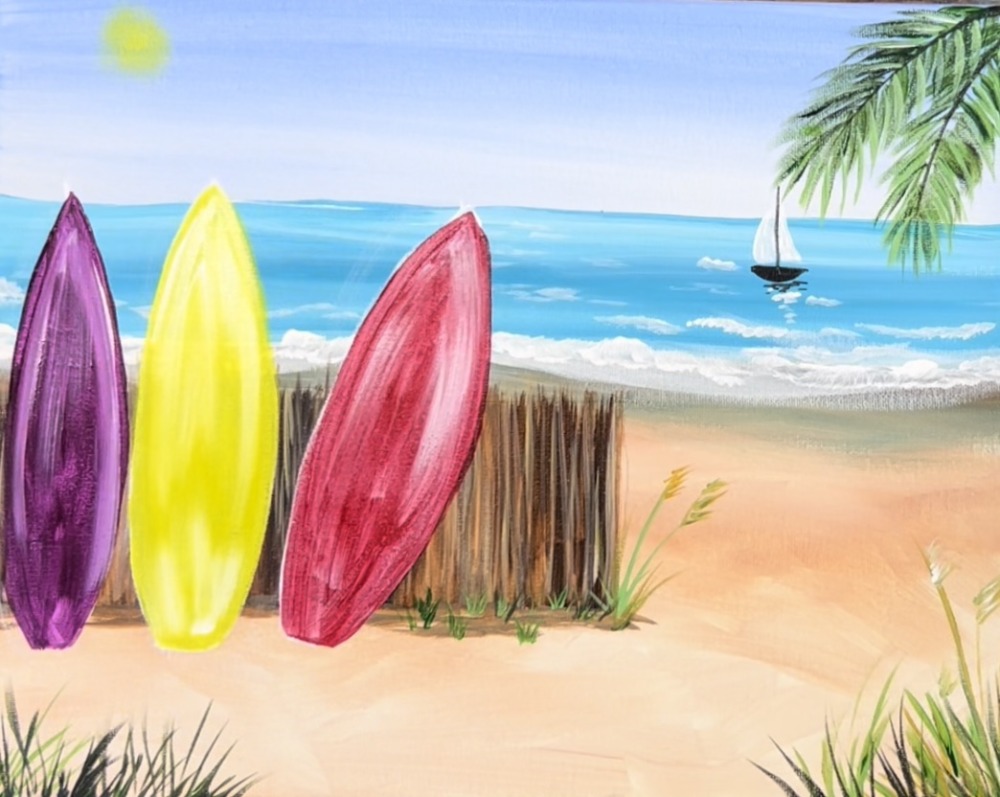
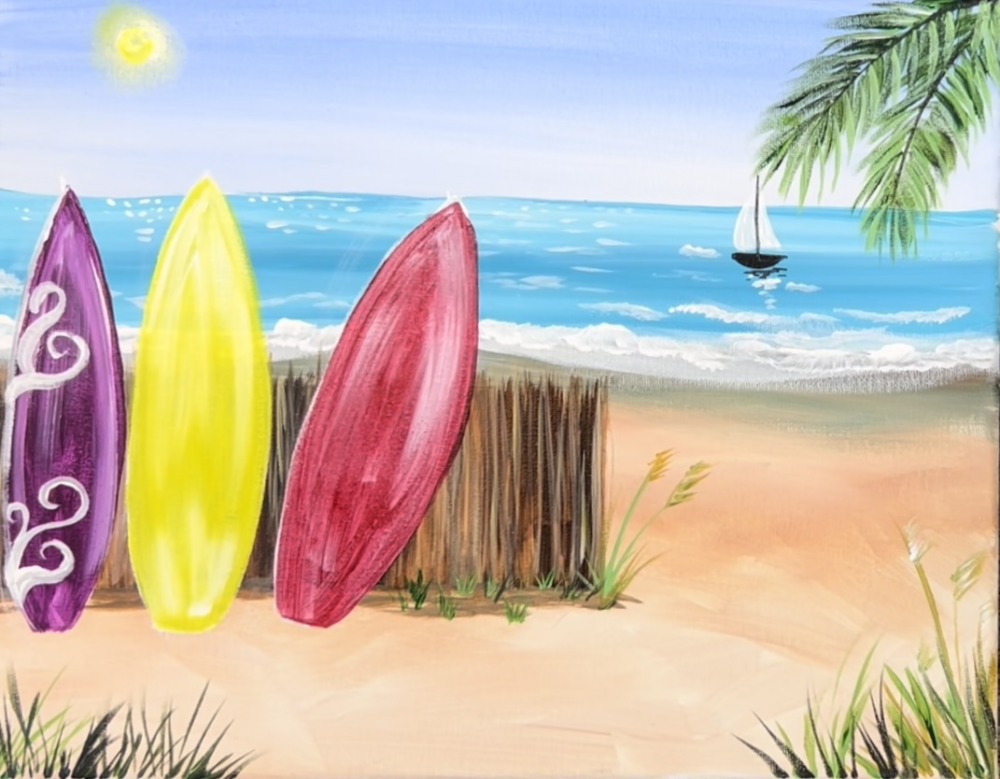
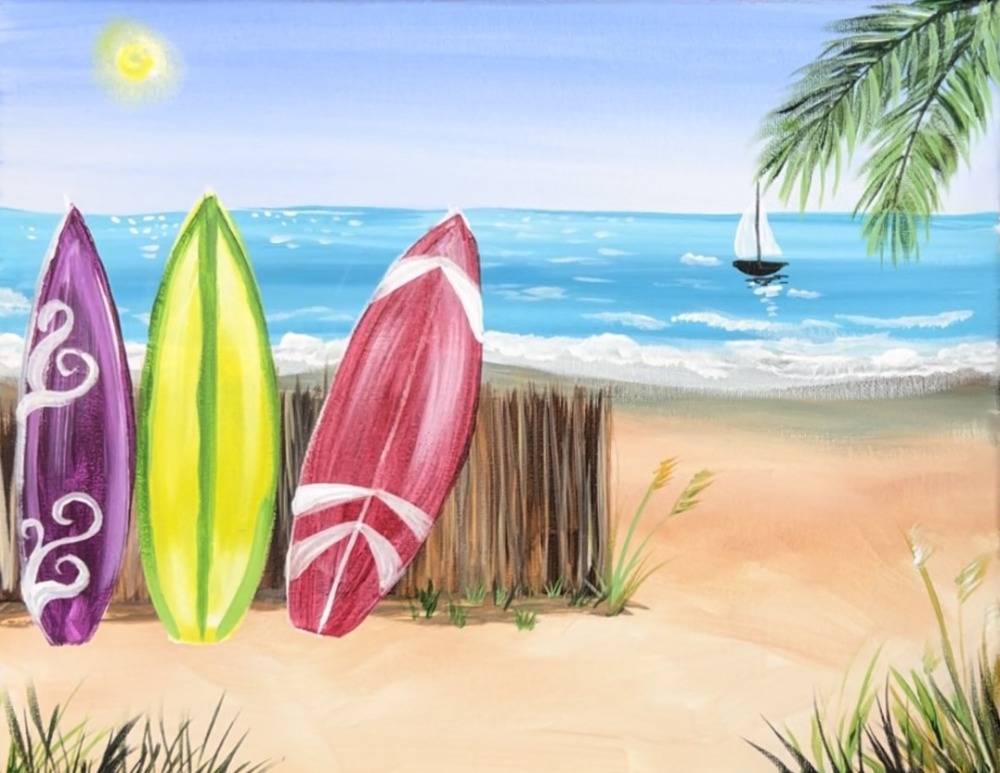
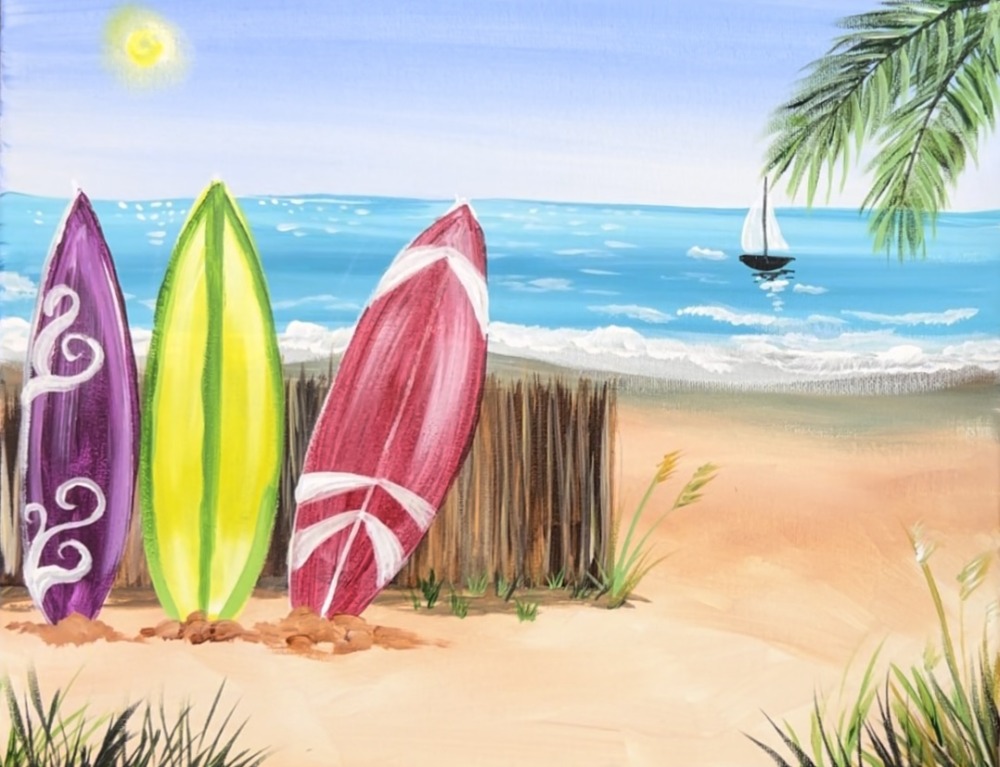
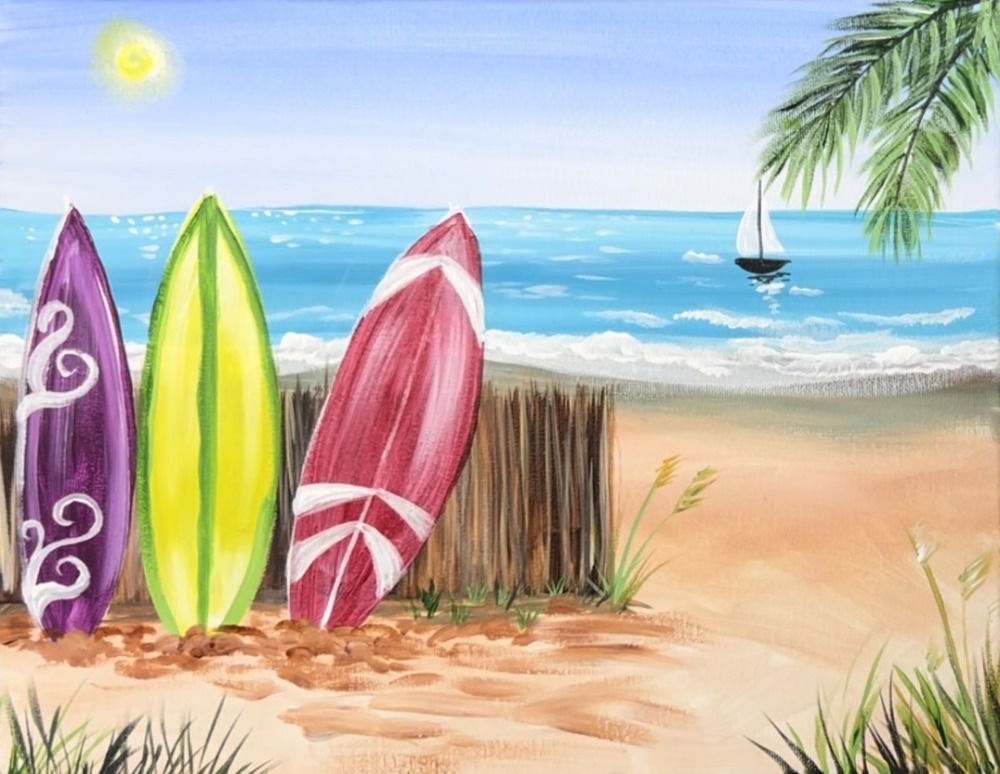
Learn how to paint “Surfer Beach”, a painting with three surfboards, sail boat and sandy beach shore.
This surfboard painting tutorial will show you techniques for painting a beach including simple waves. If you want to learn further in depth techniques for painting waves, you can also check out my “Beach Day” painting tutorial!
You can customize the designs on colors on the boards!
Enjoy and happy painting!
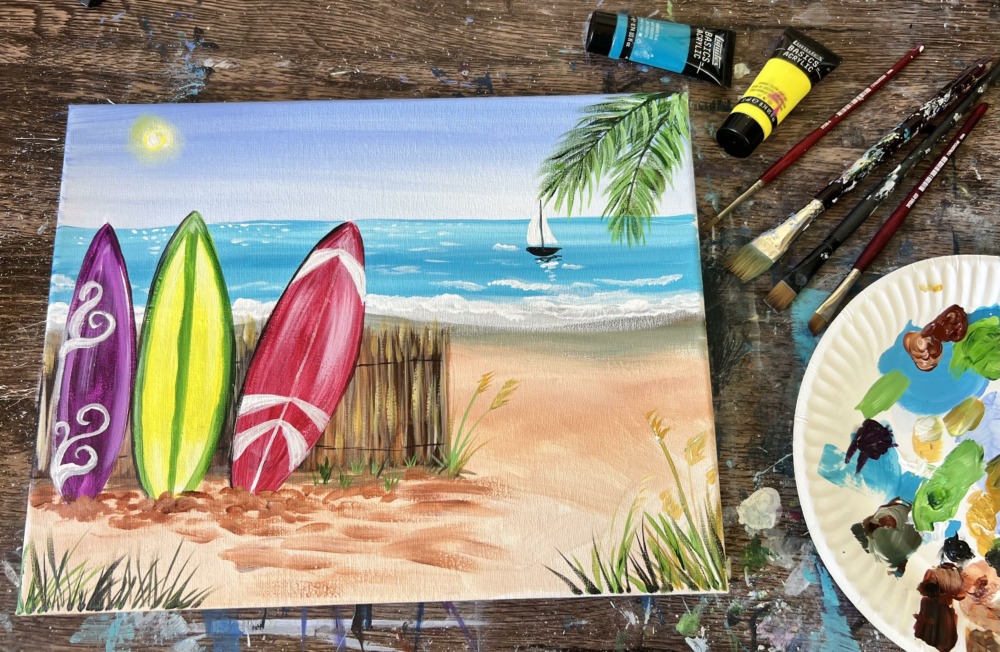
Materials
- Acrylic Paint
- Paint Brushes
- 11 x 14 Canvas
- Paint Palette
- Water Cup
- Painters Tape (optional)
- Pencil
- Ruler
- White Chalk (optional)
Colors
- Titanium White
- Mars Black
- Alizarin Crimson Hue Permanent
- Primary Yellow
- Hooker’s Green Hue Permanent
- Light Blue Violet
- Turquoise Blue
- Burnt Sienna
- Naples Yellow
- Deep Violet
Brushes
- 3/4″ flat wash
- #12 bright brush
- #4 round brush
- 3/8″ angle brush
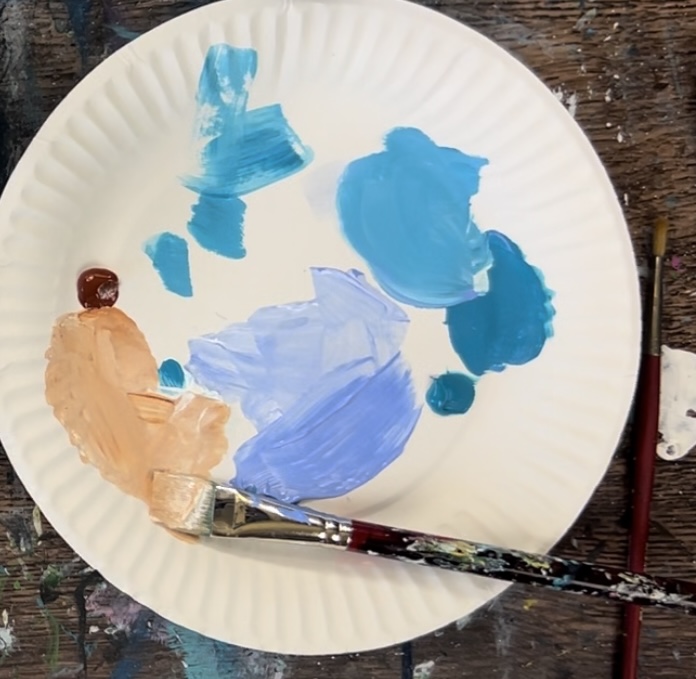
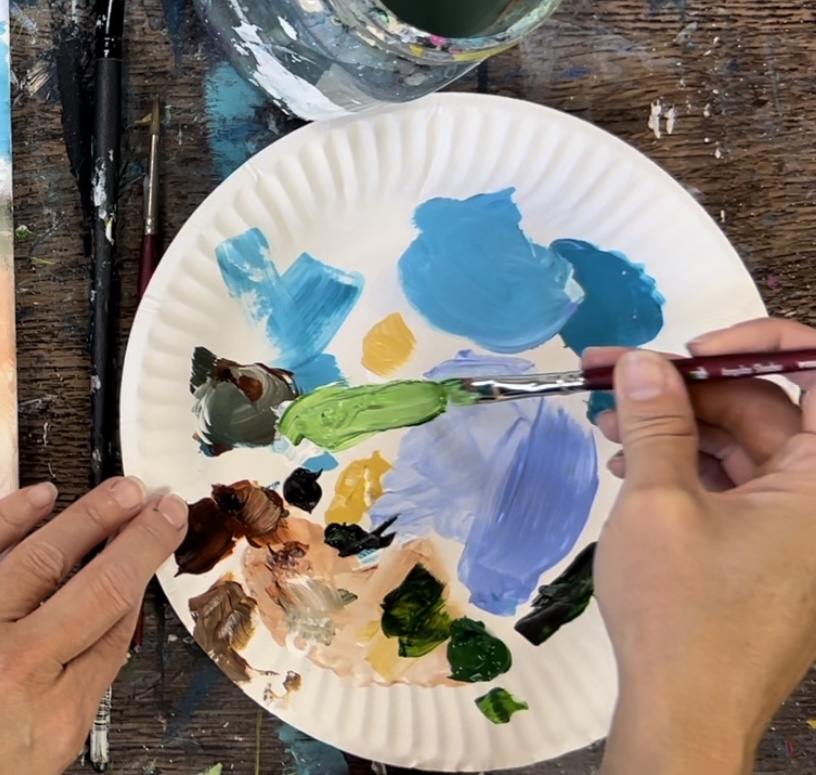
Color Palette
There are a lot of colors in this painting! Some of these colors can be changed to customize the colors of the surfboards. I used Liquitex BASICS acrylics for this tutorial. If you are using a different branch, you can sub to these colors:

Craft Paint Conversion
If you are using craft paints such as Apple Barrel Craft paints, I would recommend subbing to:
- White
- Bimini Blue
- Black
- Yellow Flame
- Nutmeg Brown
- New Shamrock
- Parrot Blue
- Purple Irish
- Flag Red
- Any Kind of Beige/ Sand Color
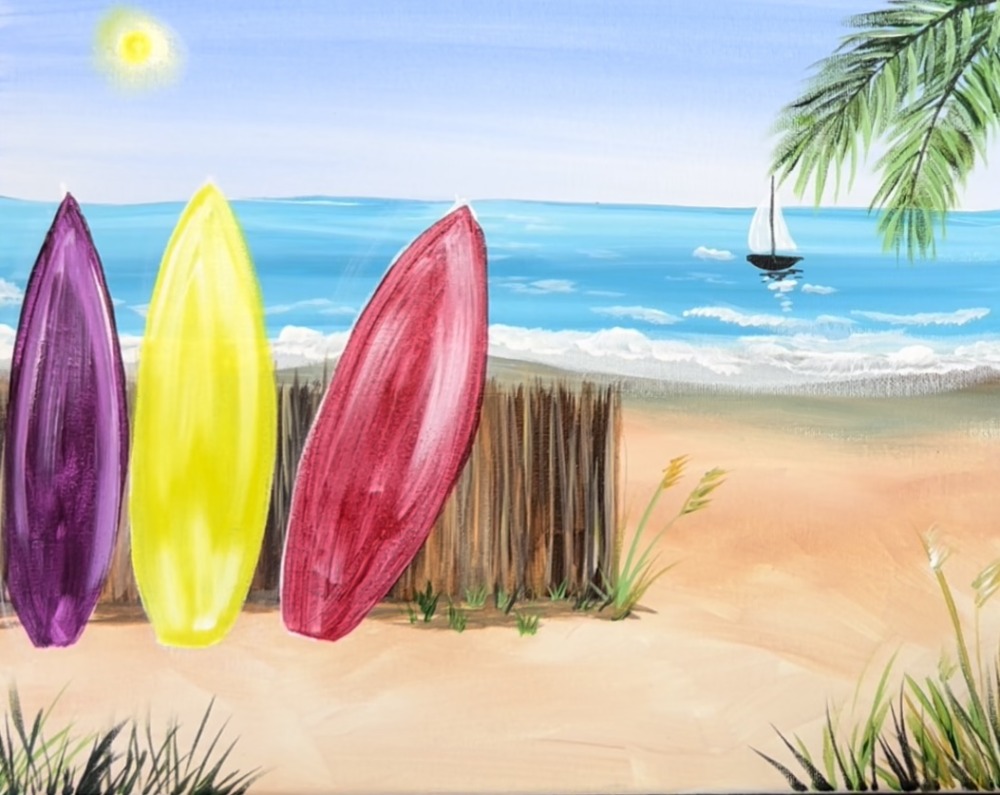
Directions At A Glance
Video
Step By Step Directions
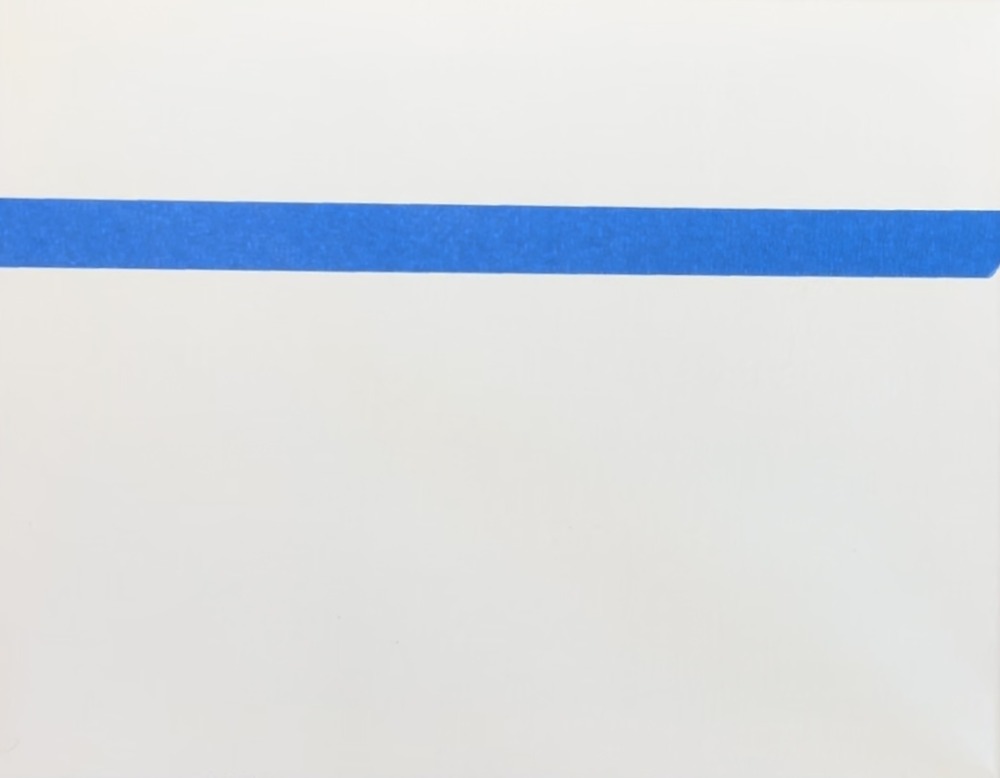
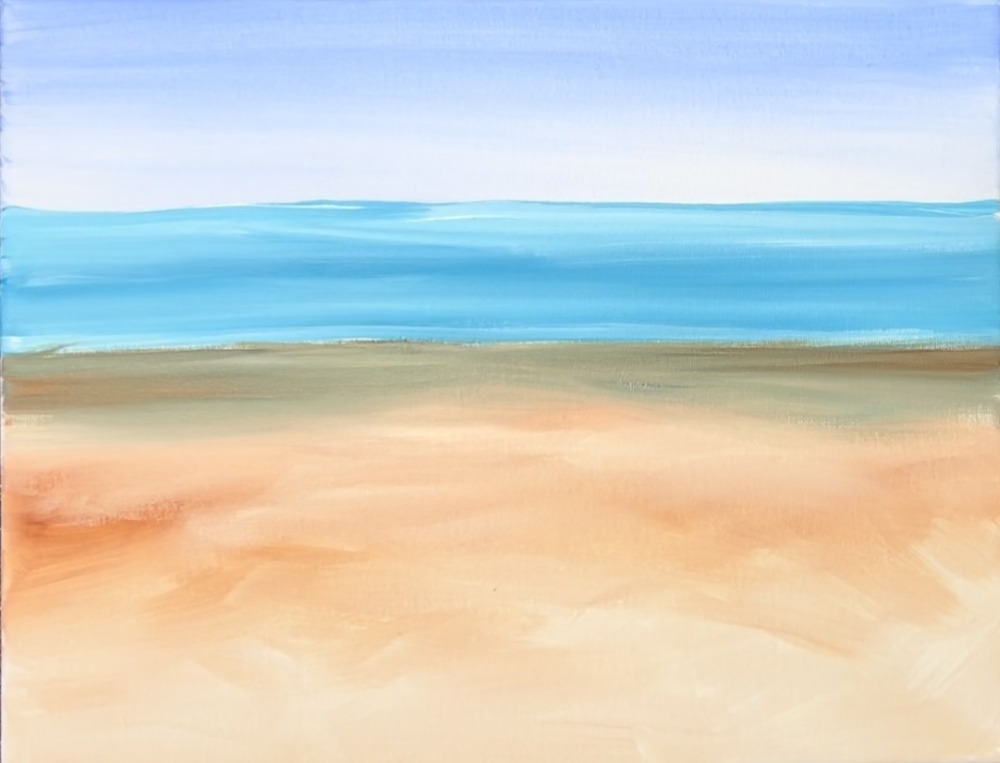
1. Paint Sky
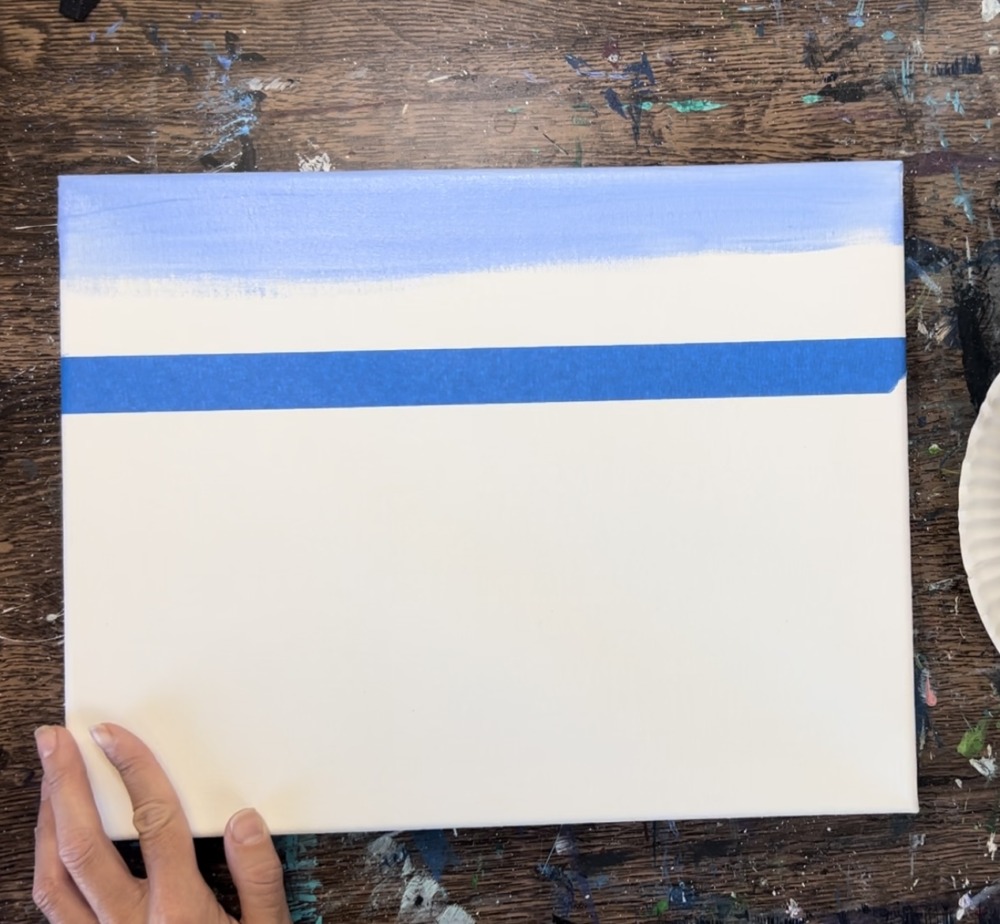
Position your canvas in horizontal mode. Then measure about 3″ from the top edge of the canvas. Place a piece of painters tape horizontally across the canvas. This will establish where the horizon line is for the beach!
Next, load light blue violet and titanium white onto your palette. Use a 3/4″ flat wash brush to mix equal parts blue and white together.
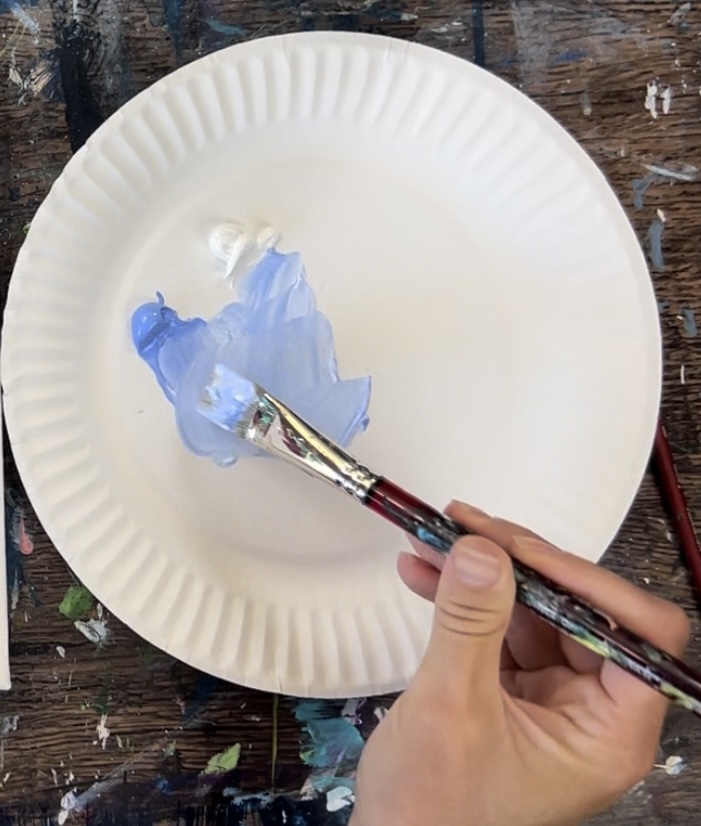
Paint horizontal strokes across the canvas and go about halfway down the sky.
Then add more titanium white to your brush. Add this lighter color on the bottom and blend it up. This will allow the sky to be darker on the top and lighter on the bottom.
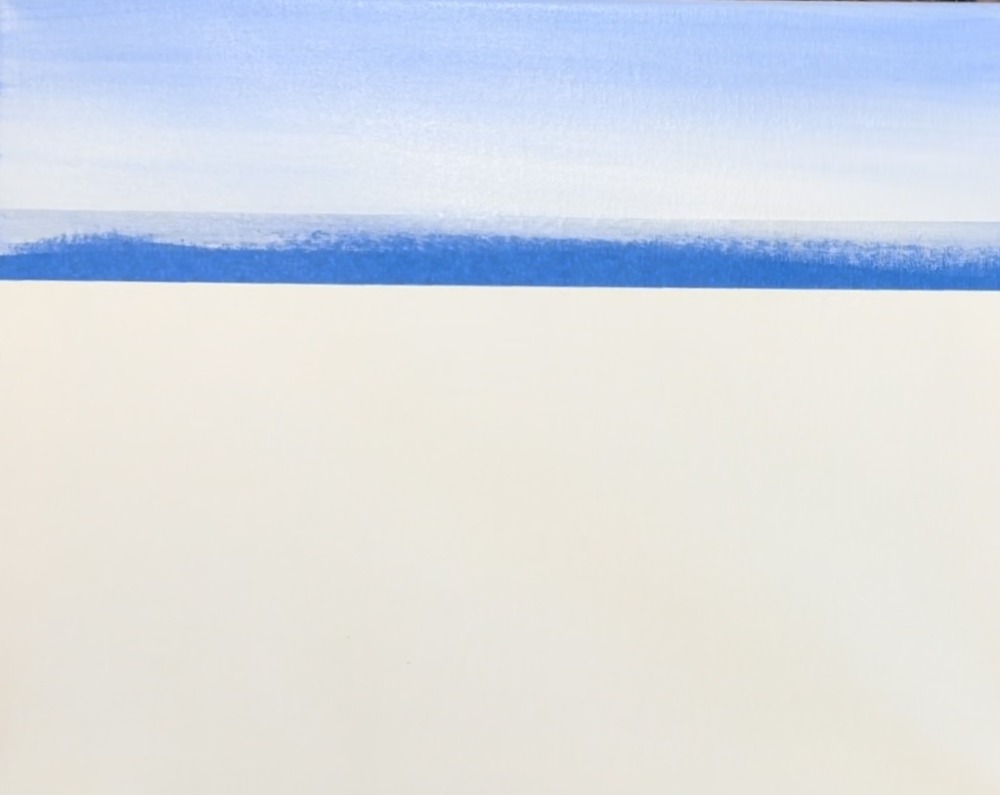
Then gently lift the painters tape.

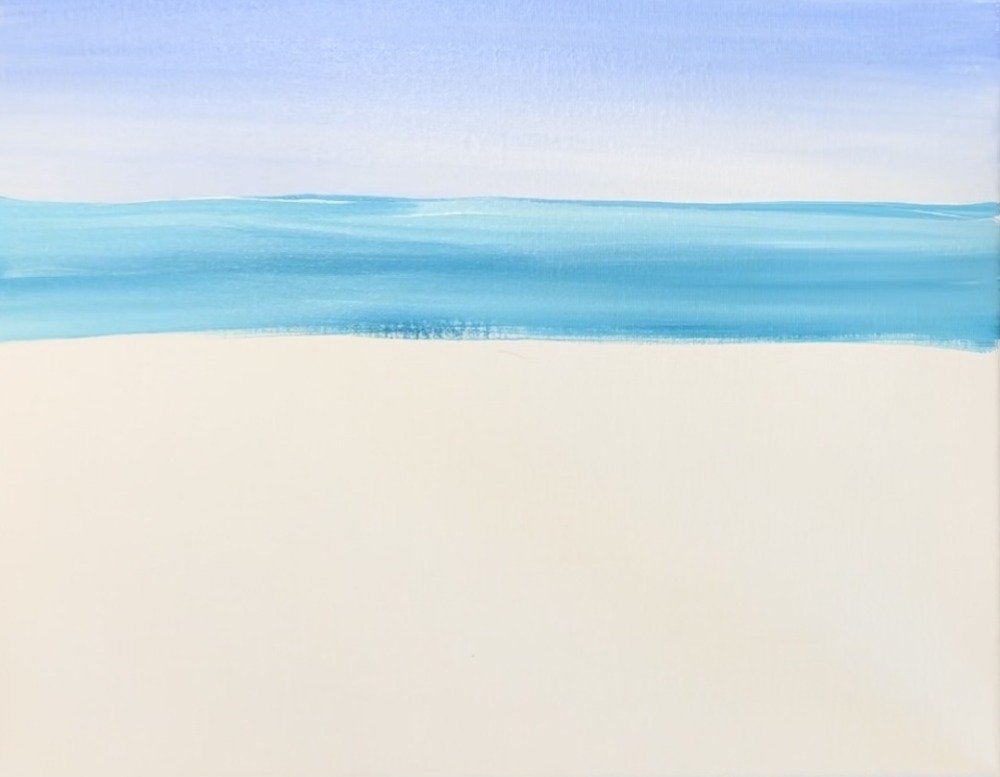
2. Paint Water
Load the color turquoise onto your palette.
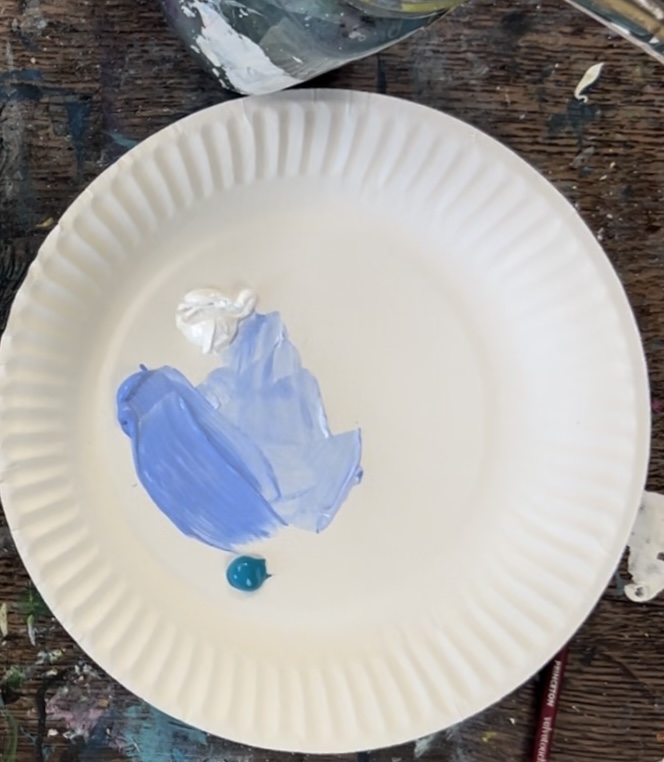
Mix the turquoise with equal amounts of titanium white and (optional) add a little bit of light blue violet into the mix. Essentially, you want a medium to light turquoise color for the ocean water.

Measure 2″ down from the horizon line and make a little mark. This is how far down the ocean water will go until it is the sand.
Use the 3/4 flat brush to paint the water along the horizon line. Add a little more white to your brush as you paint the water further in the distance. Then blend it down so it’s a bit darker in the middle.
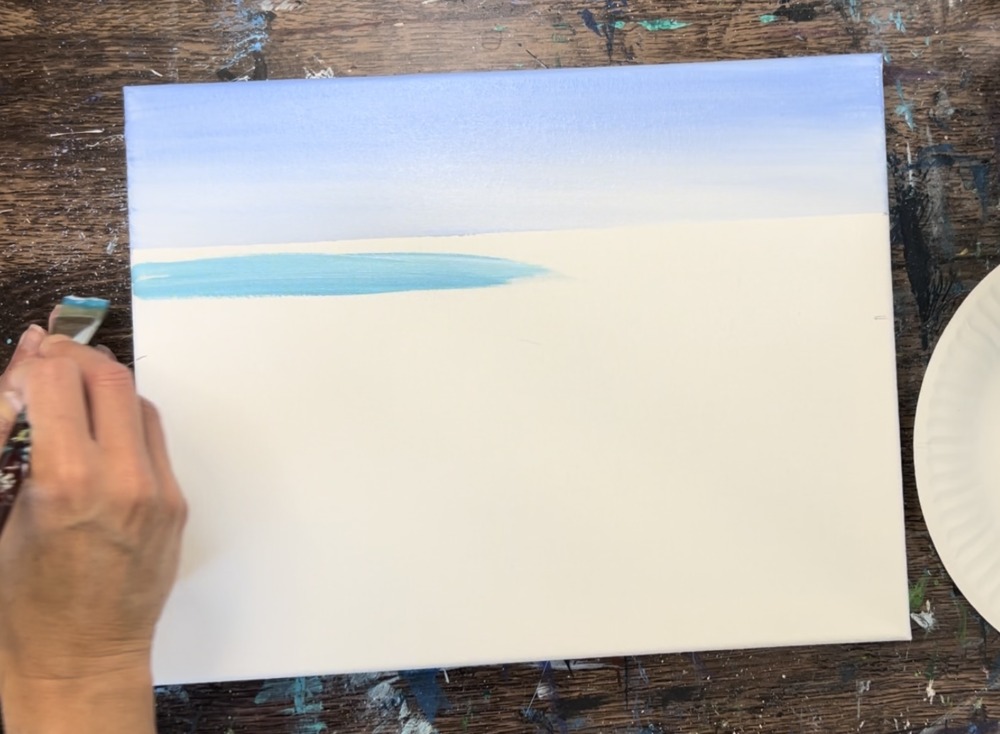
Paint this entire area with the turquoise/white and try not to “over blend” the colors to one solid color.
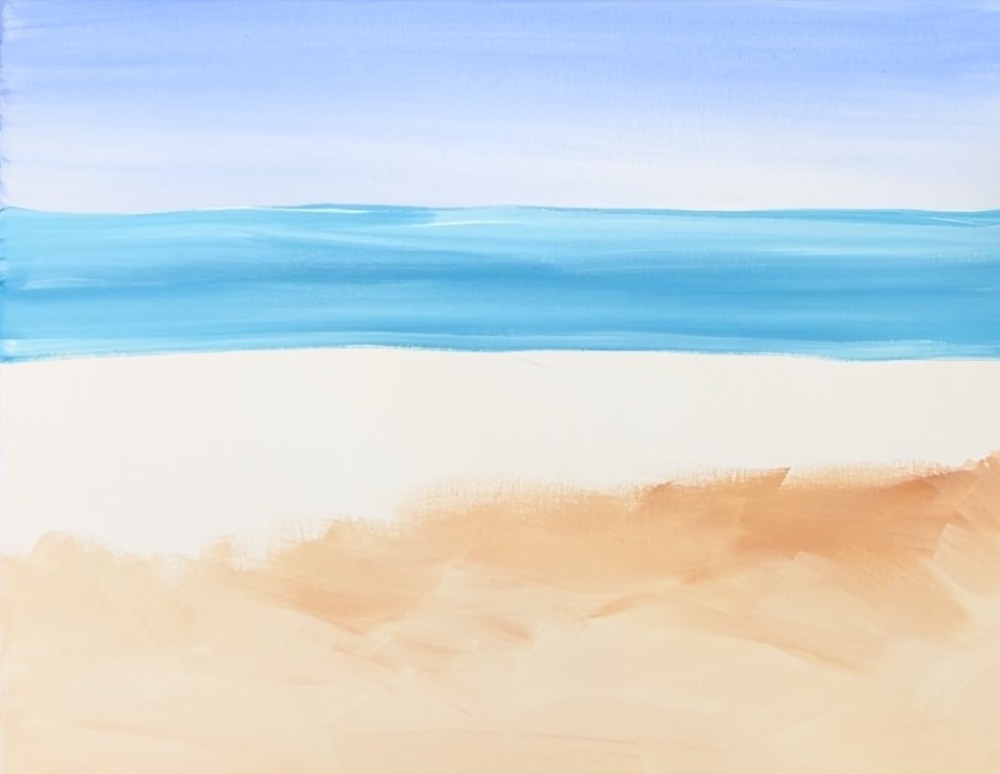
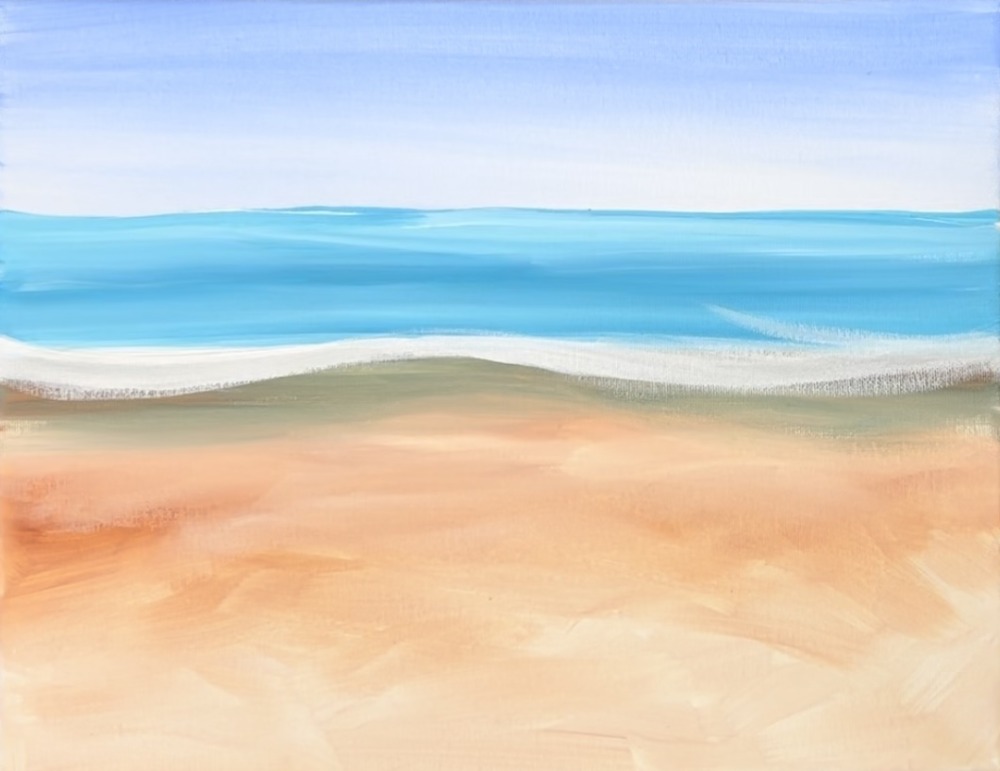
3. Paint Sand
Load the color burnt Sienna onto your paint palette. Add titanium white on your palette too if you need more.
Mix about 3 parts white to 1 part brown to get a light brown sand color.
Use the 3/4″ flat brush to paint loose, sort of wavy strokes on the bottom of the canvas.
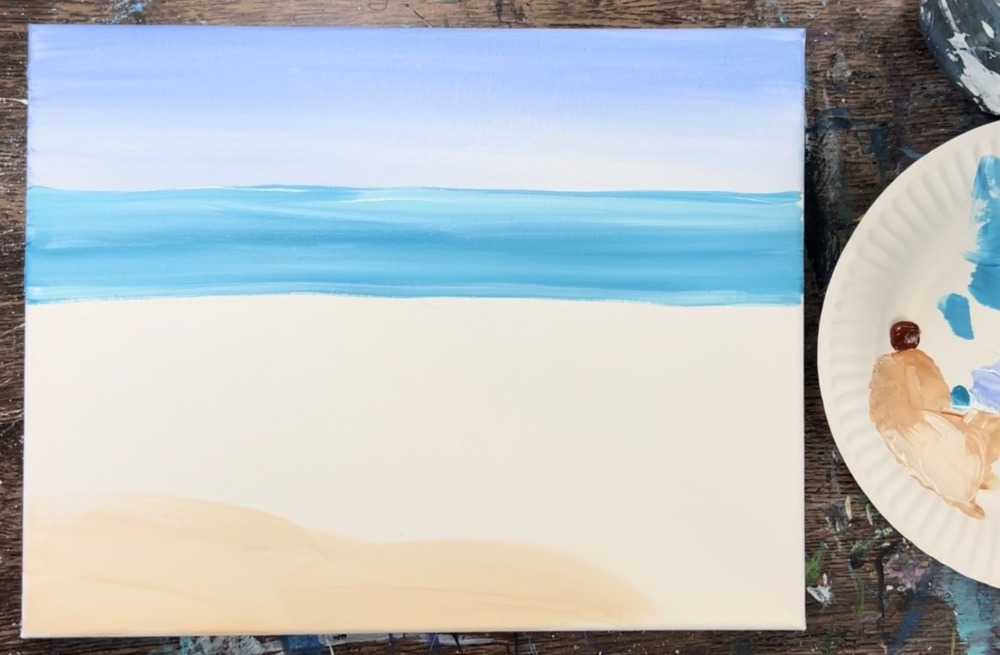
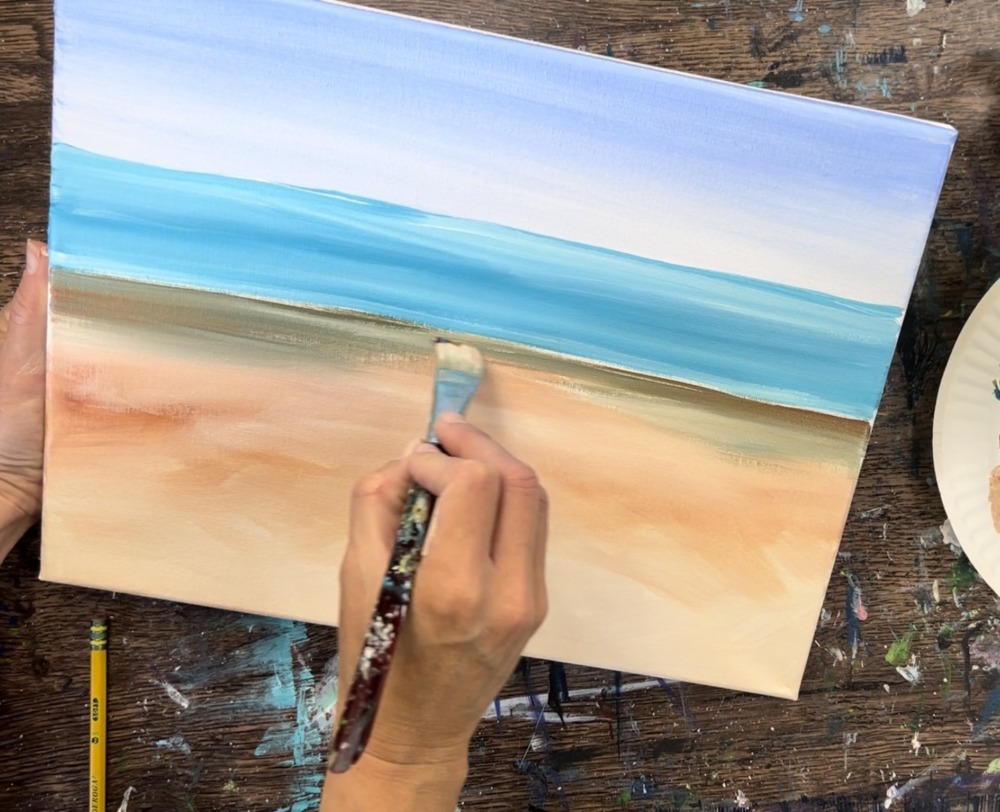
As you work your way up to the water area, gradually add more burnt Sienna to the brush. Paint medium choppy strokes to blend some of the darker color into the lighter sand color.
Leave about an inch gap below the water area. Then on your palette, mix a darker brown. Mix about 2 parts brown, 1 part turquoise and 2-3 parts titanium white. Mixing the little bit of turquoise into the brown is fine and it will make it look like a wet sand color.
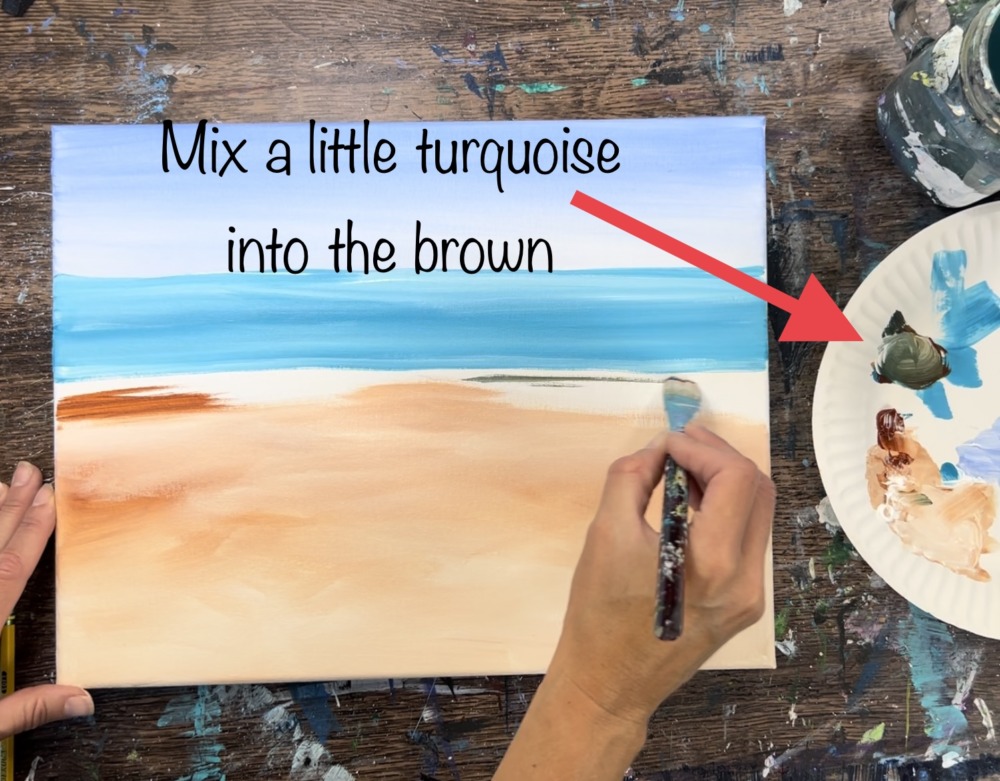
Paint this dark brown color along the edge of the water and blend it into the rest of the sandy area.
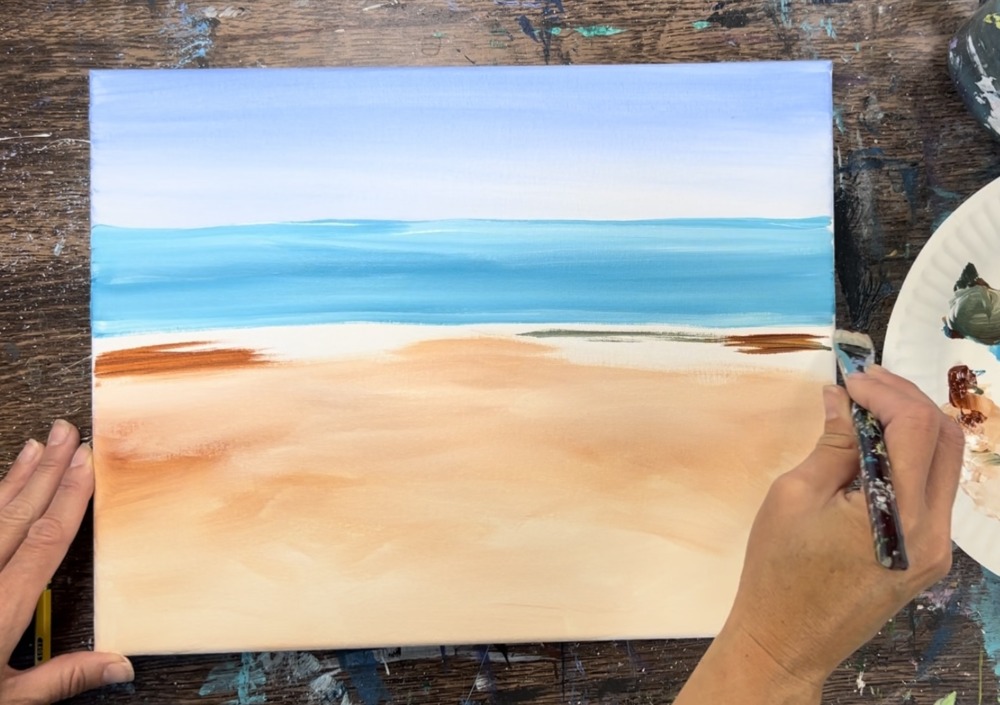
If needed, add more of the lighter sand color and blend it into the darker color.
Let this dry before continuing. The waves will be painted over the darker sand area in the next step.
4. Paint Waves
Load some fresh titanium white onto your palette. Use a 12 bright brush and load a small amount of white onto the tip of the brush. Paint a loose, wavy line across the area where the blue and sand meet. You will overlap a little bit of the turquoise & brown. This is to define the edge of the short/ sea foam.
Next, load more titanium white on the tip of the bright brush. Tap the brush to create wave texture along the edge of the shore and in the ocean.
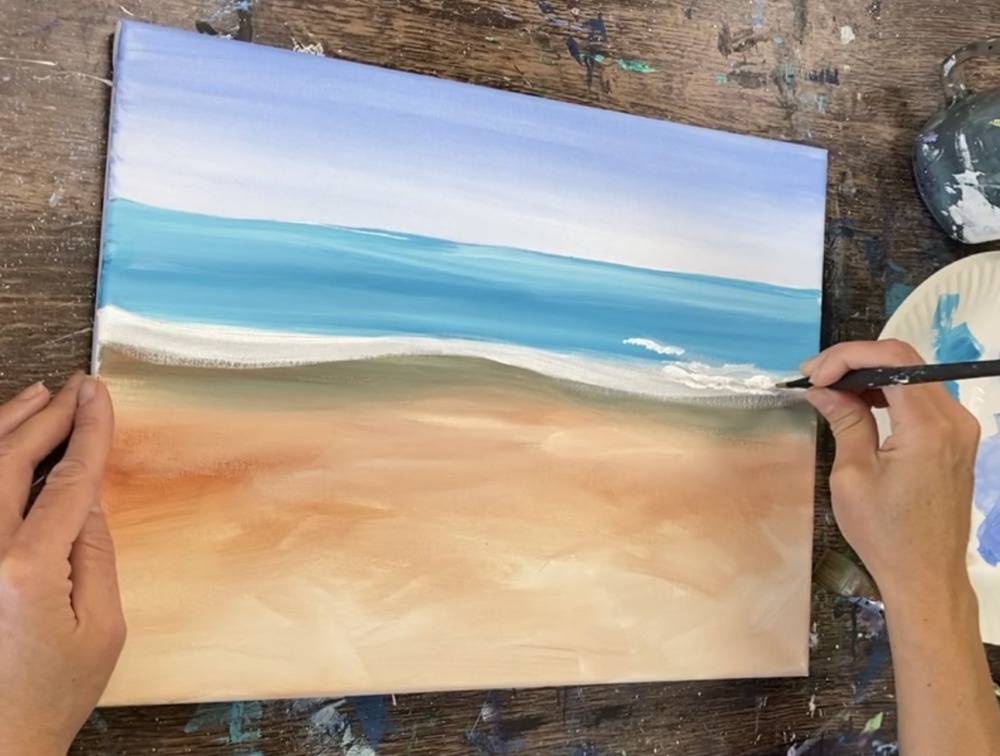
Paint these small, curved strokes that are thick and bright white along the shoreline.
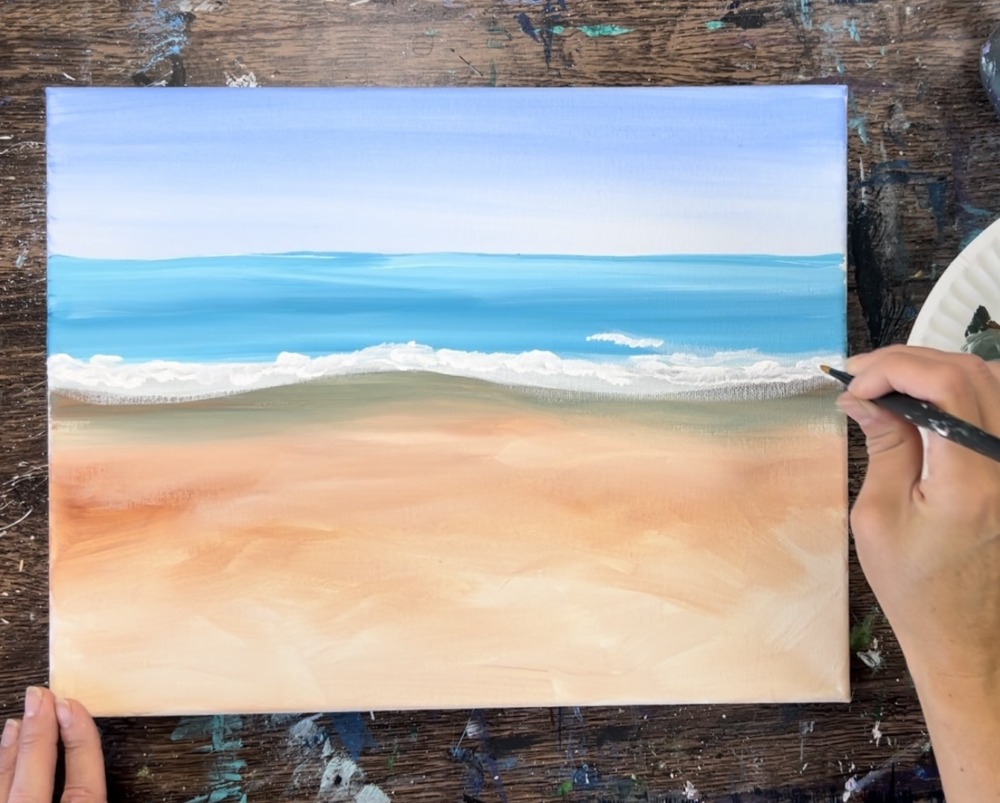
Add more textured wave strokes in the water area. The further away, the smaller the waves.
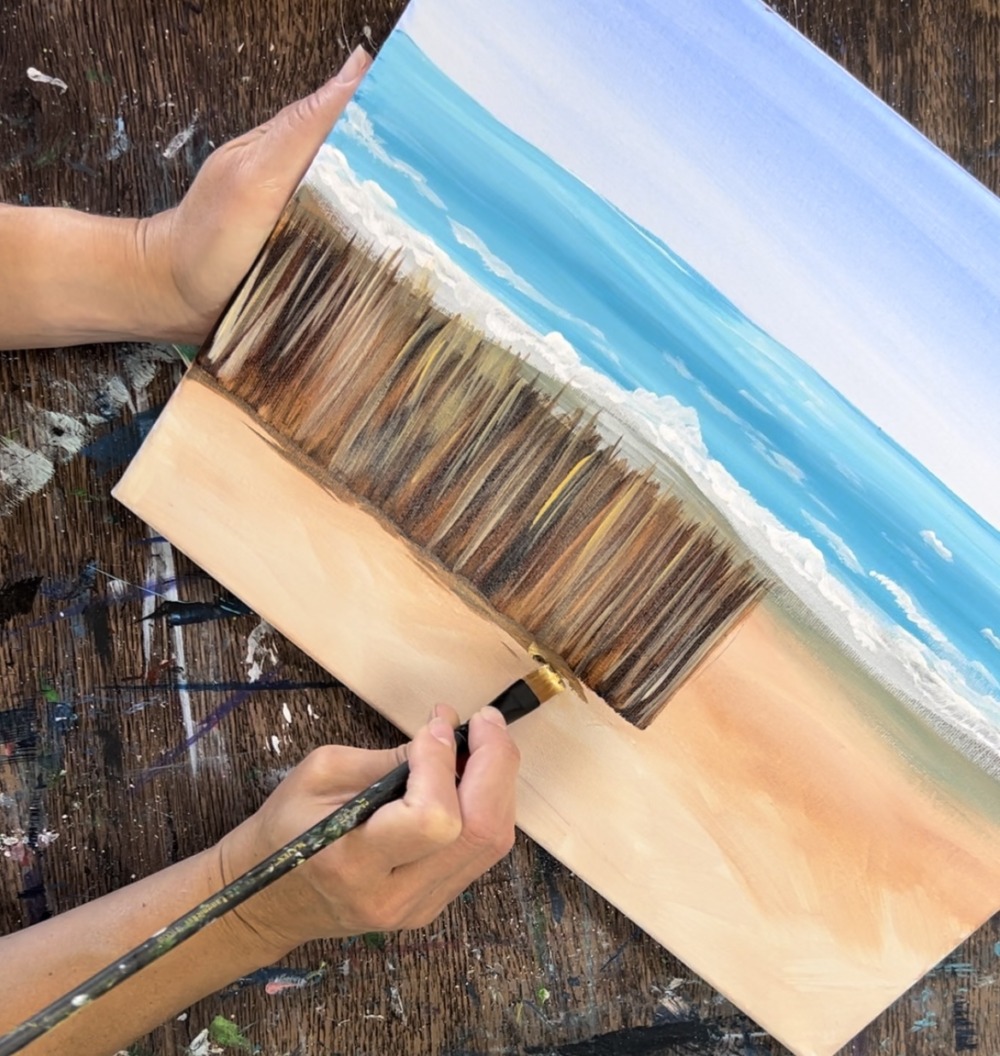
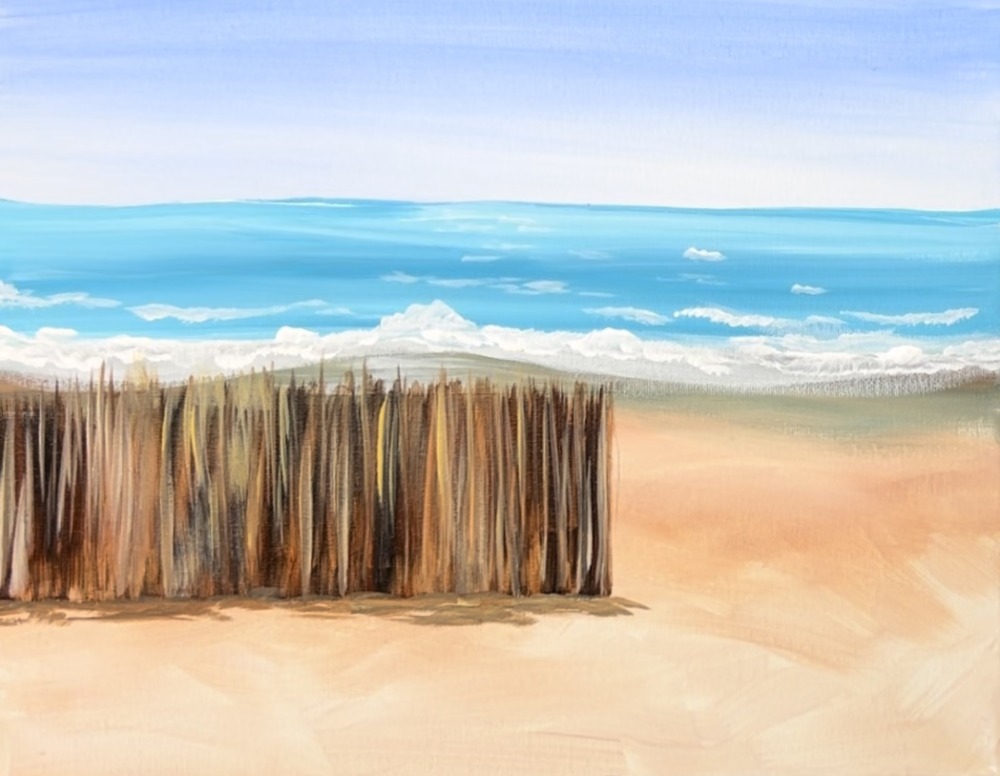
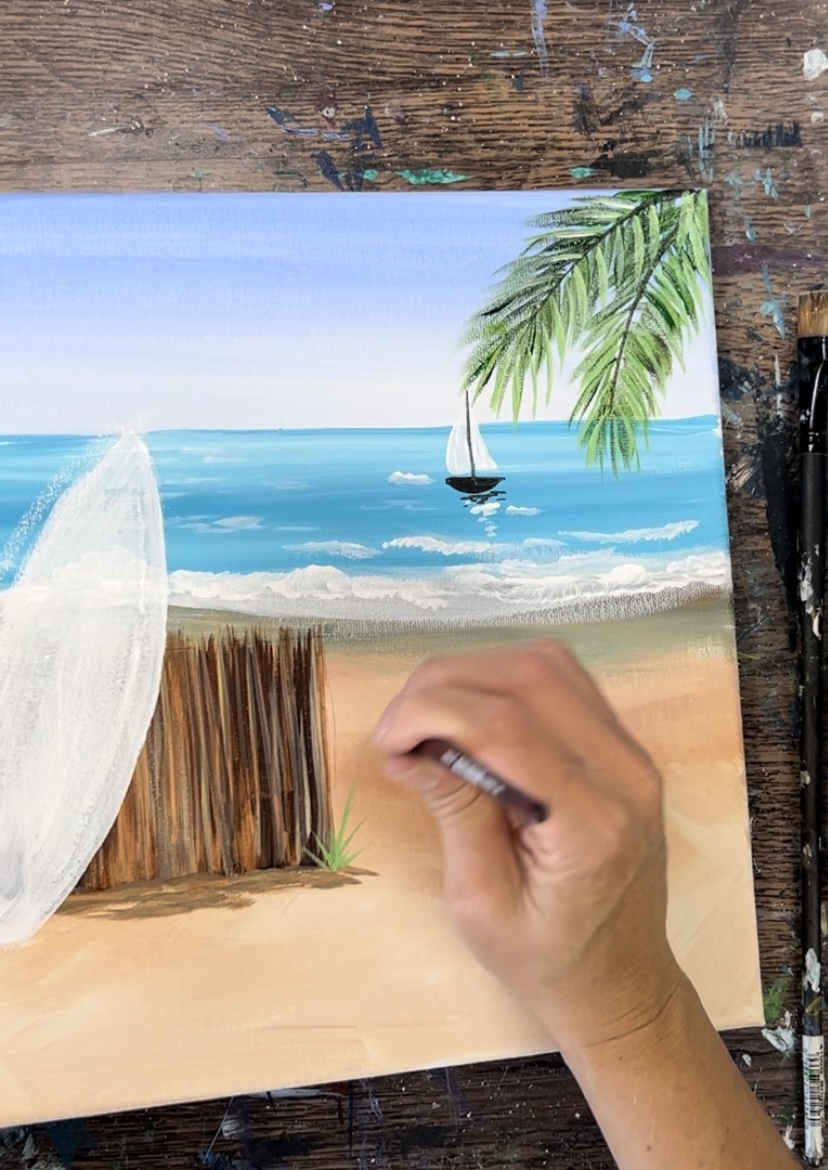
5. Paint Bamboo Fence
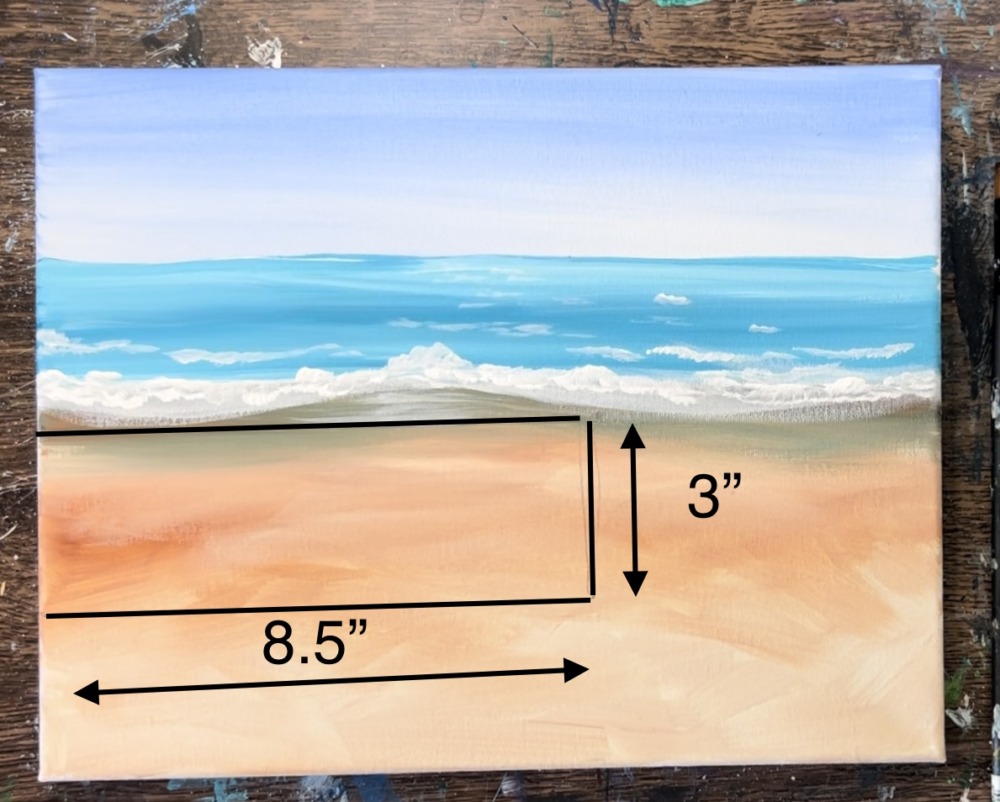
Use a ruler to measure a rectangular area for this bamboo fence.
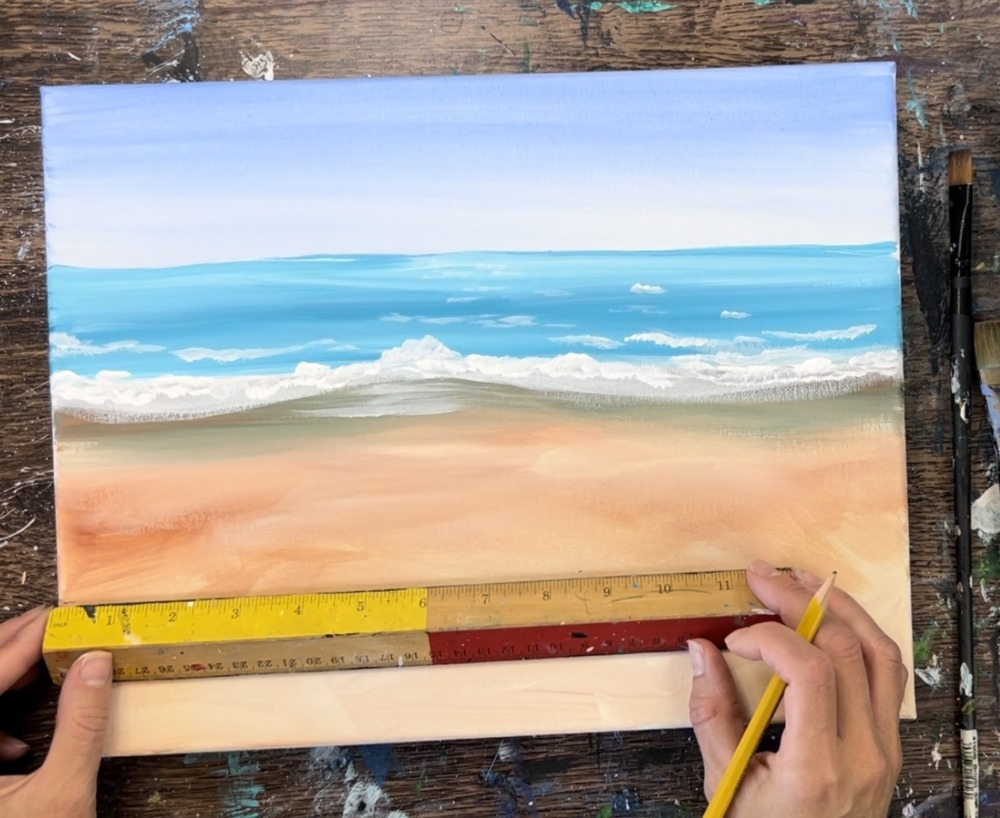
These measurements do not have to be exact, but I made my fence rectangle about 8.5″ wide and 3″ high. It is about 2.75″ from the bottom of the canvas. Lightly draw this with pencil.
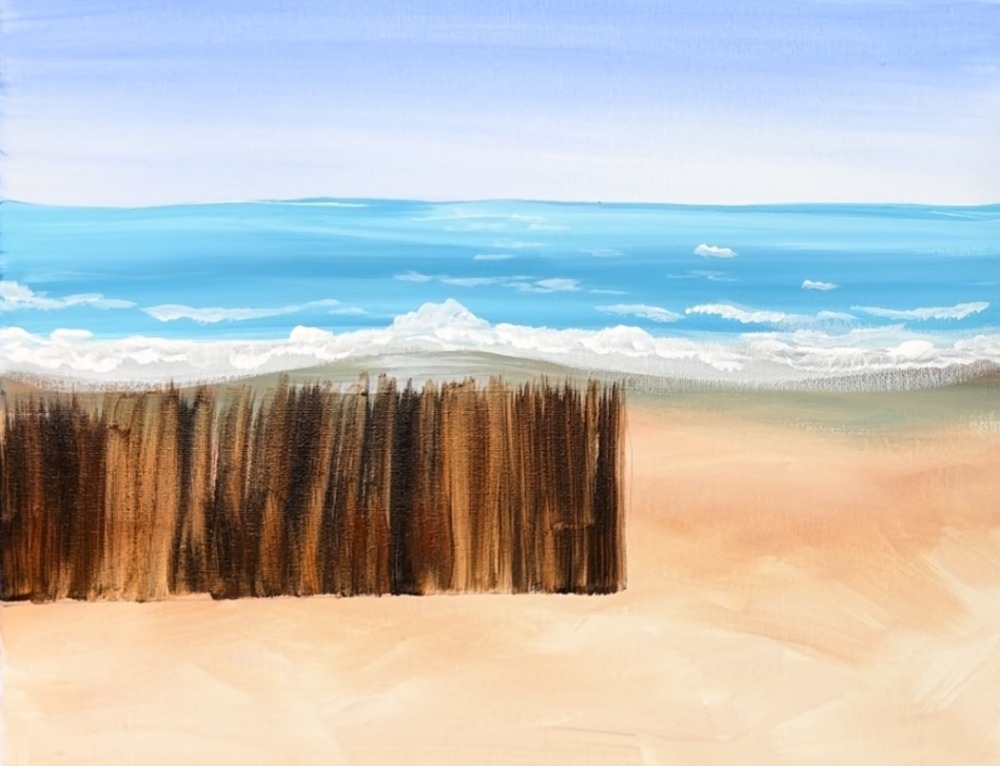
Load your palette with mars black and burnt Sienna. Use the 3/4″ flat wash brush. Double load it into both the brown and the black (you’ll actually only need a small amount of black and mostly brown on the brush). Use the full width of the brush to paint vertical strokes on the fence. Start at the bottom and paint each stroke going upwards.
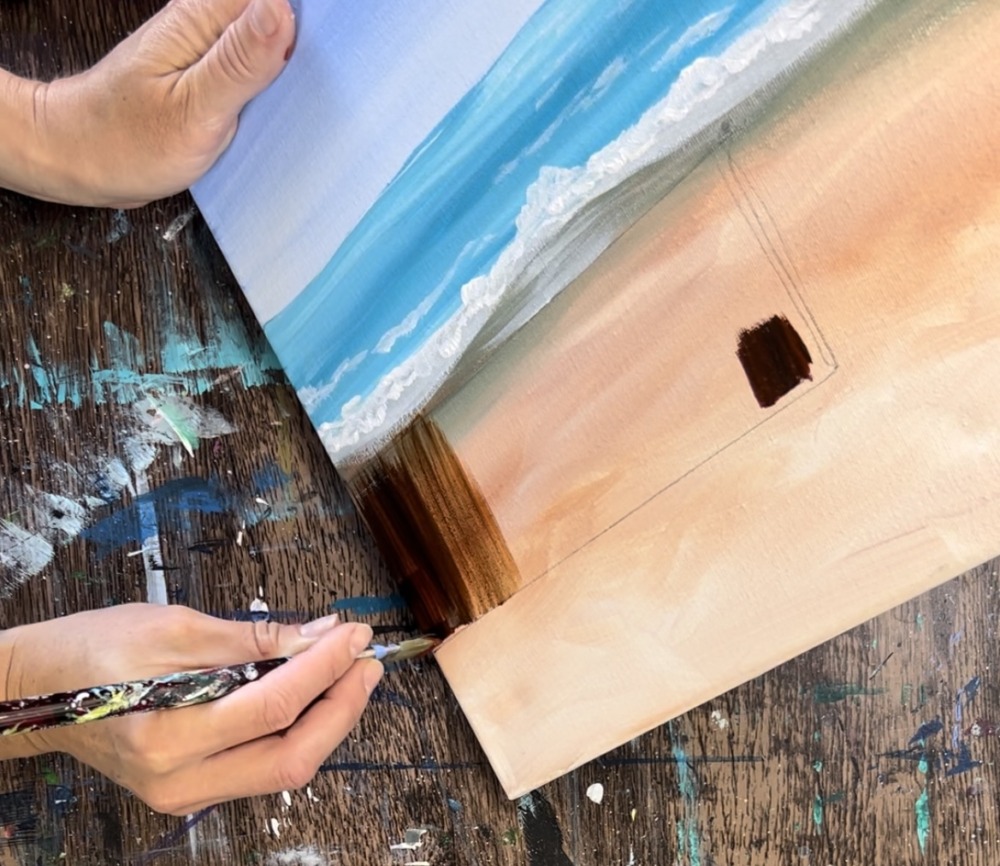
Let the black and brown blend together to create vertical variations of color but don’t blend it all the way. Each stroke can go a little bit past the horizontal line at the top to create some of the top edging of the fence.
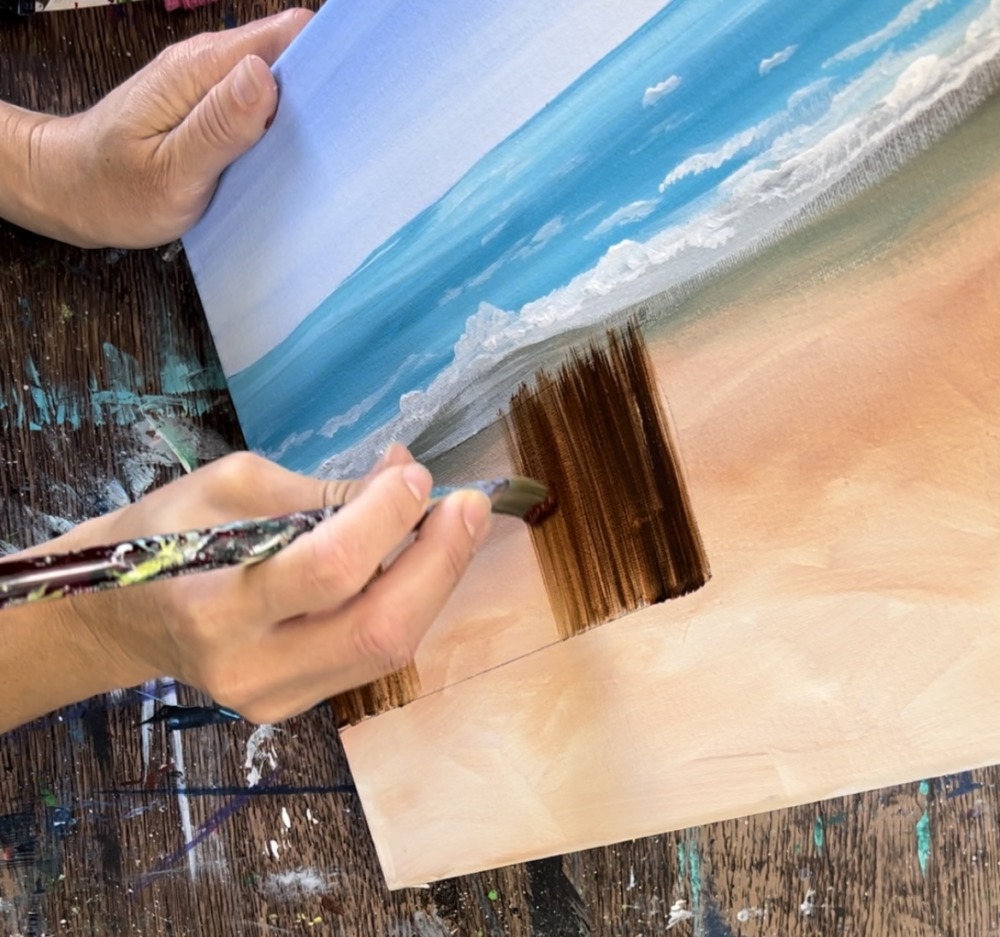
You will start to get this faux wood look just by gently blending the brown and black together. Some areas will have darker streaks of black and some lighter brown. Just make sure not to add too much black.
Next, load Naples yellow onto your palette. Use a clean 12 bright brush and load the Naples yellow just on the tip of the brush. (Do this before the brown & black dry completely)
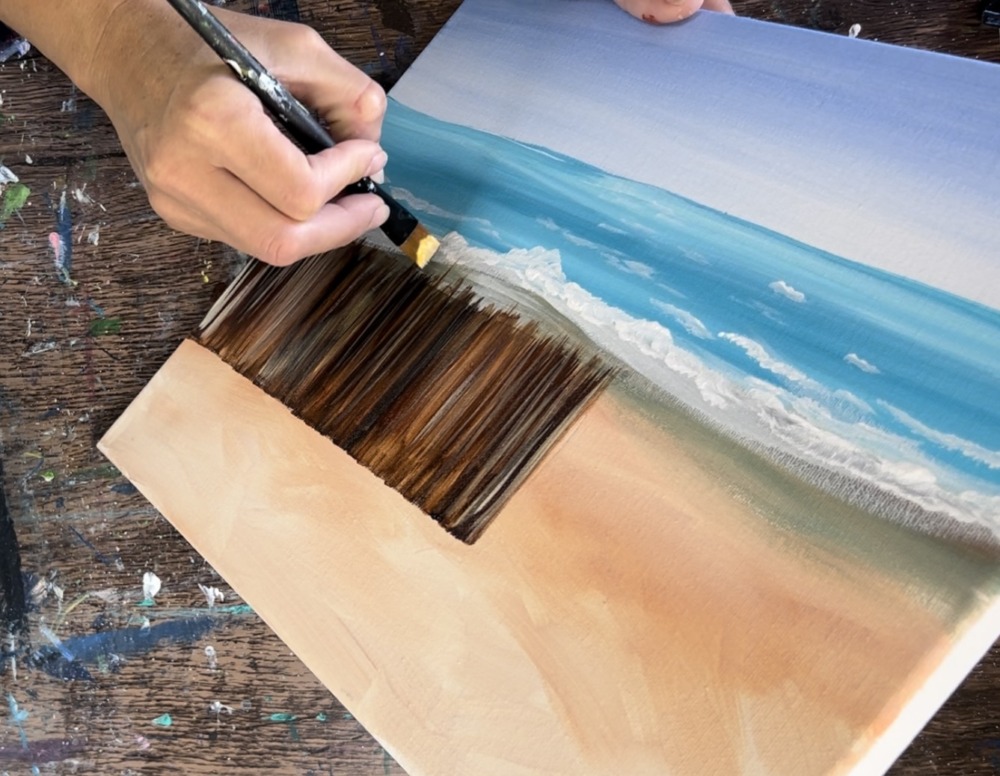
Paint vertical marks on the fence. This will create light yellow-brown colors to give it more of a bamboo fence look. Do this using just the tip of the brush to create thin strokes. You can also use the full width of the brush to create variations in the strokes (some thick and some thin). The yellow will blend with the brown/black a bit and that is okay! You can also use a little titanium white if needed to lighten some of the colors. The idea is to create variation in the brown and not blend all the way to give it that “faux wood” look.
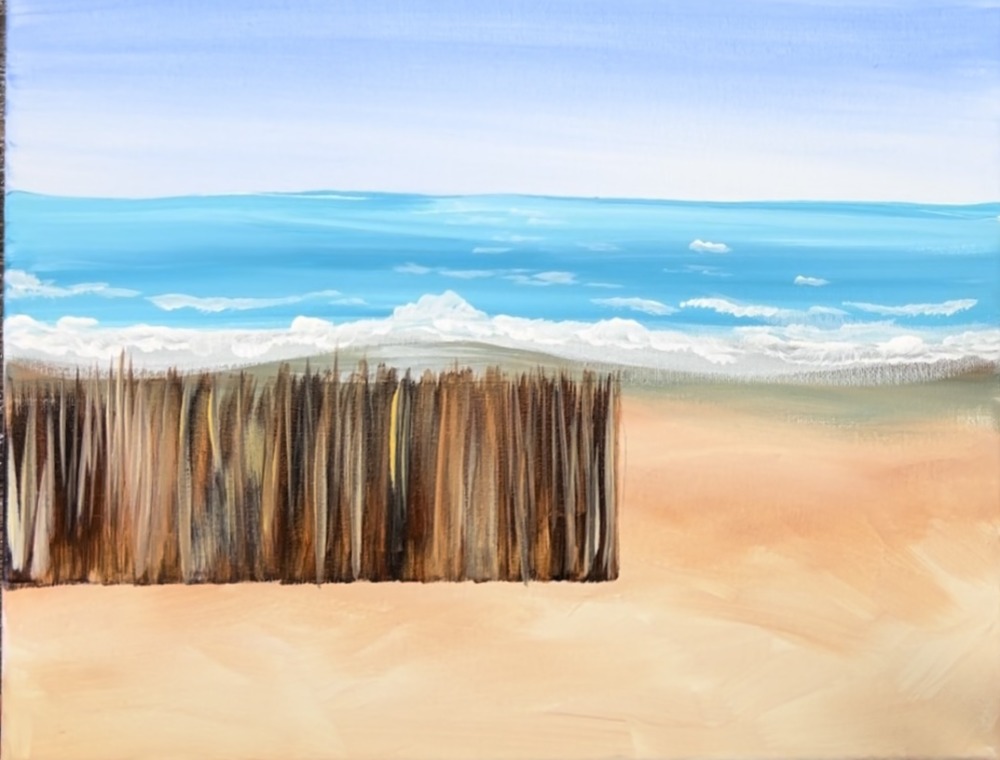
Next, without rinsing the brush, load burnt Sienna onto the tip of the brush. Create a layer of dark sand that piles up just slightly at the bottom of the fence. Do this by tapping just the tip of the brush to create textured strokes.
This will make it look like the fence is on the ground and not floating.
Wait for the fence to dry before drawing and painting the surfboards.
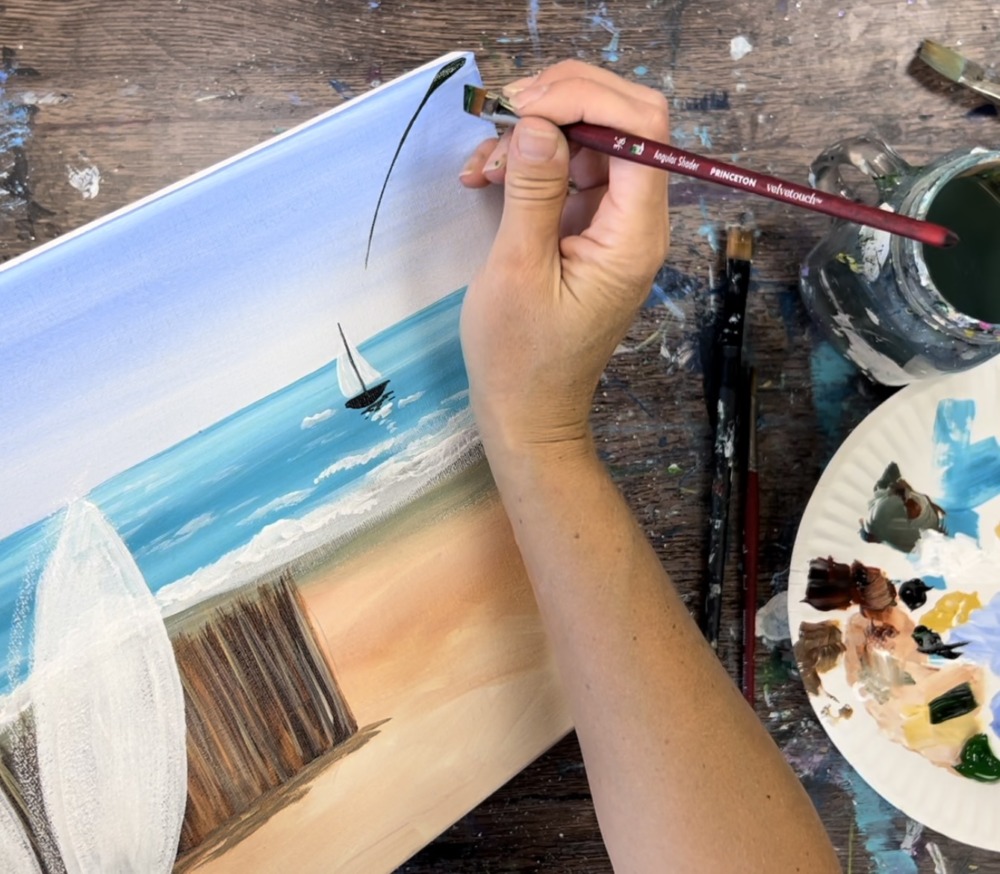
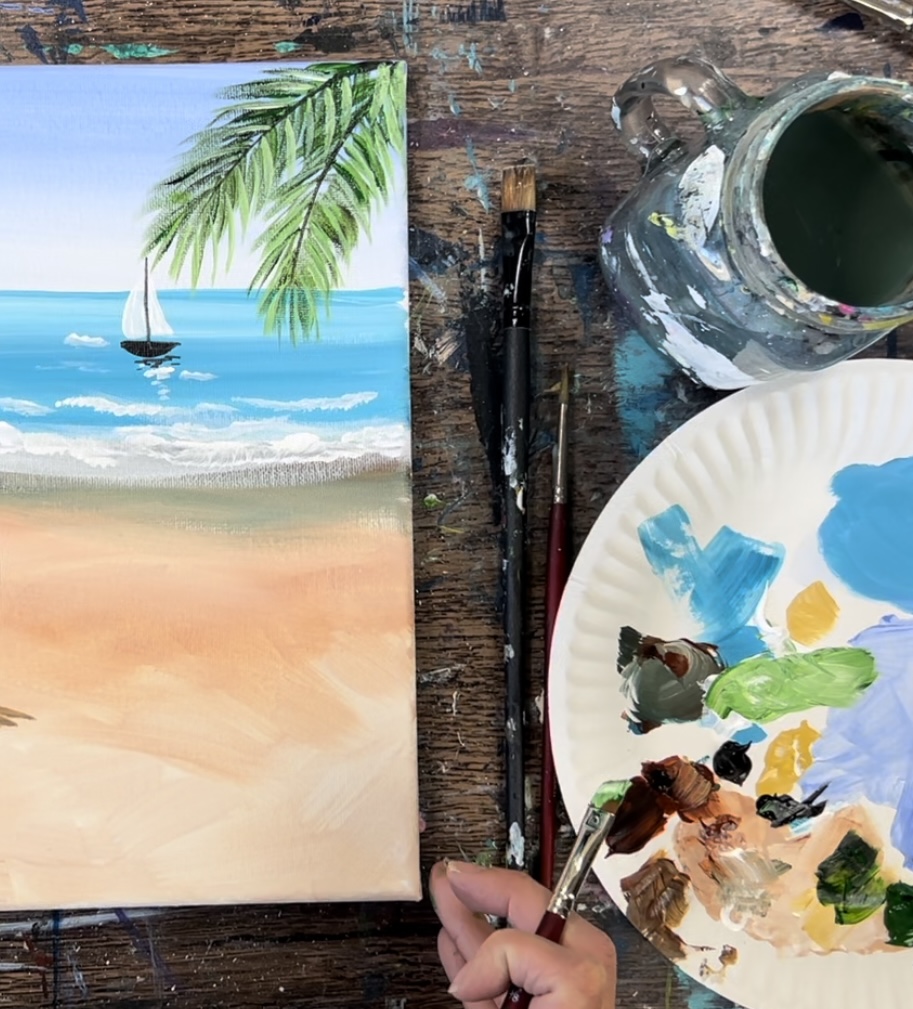
6. Paint Sailboat
Use a #4 round brush and titanium white to paint a curved triangular shape and a second smaller triangular shape next to it.
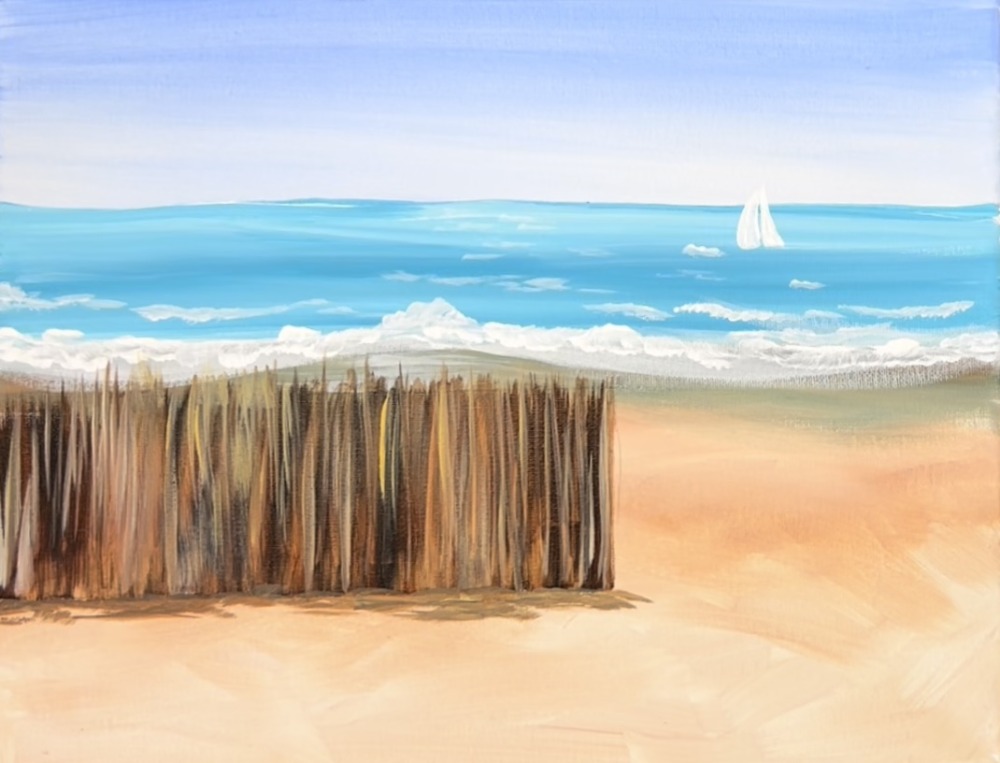
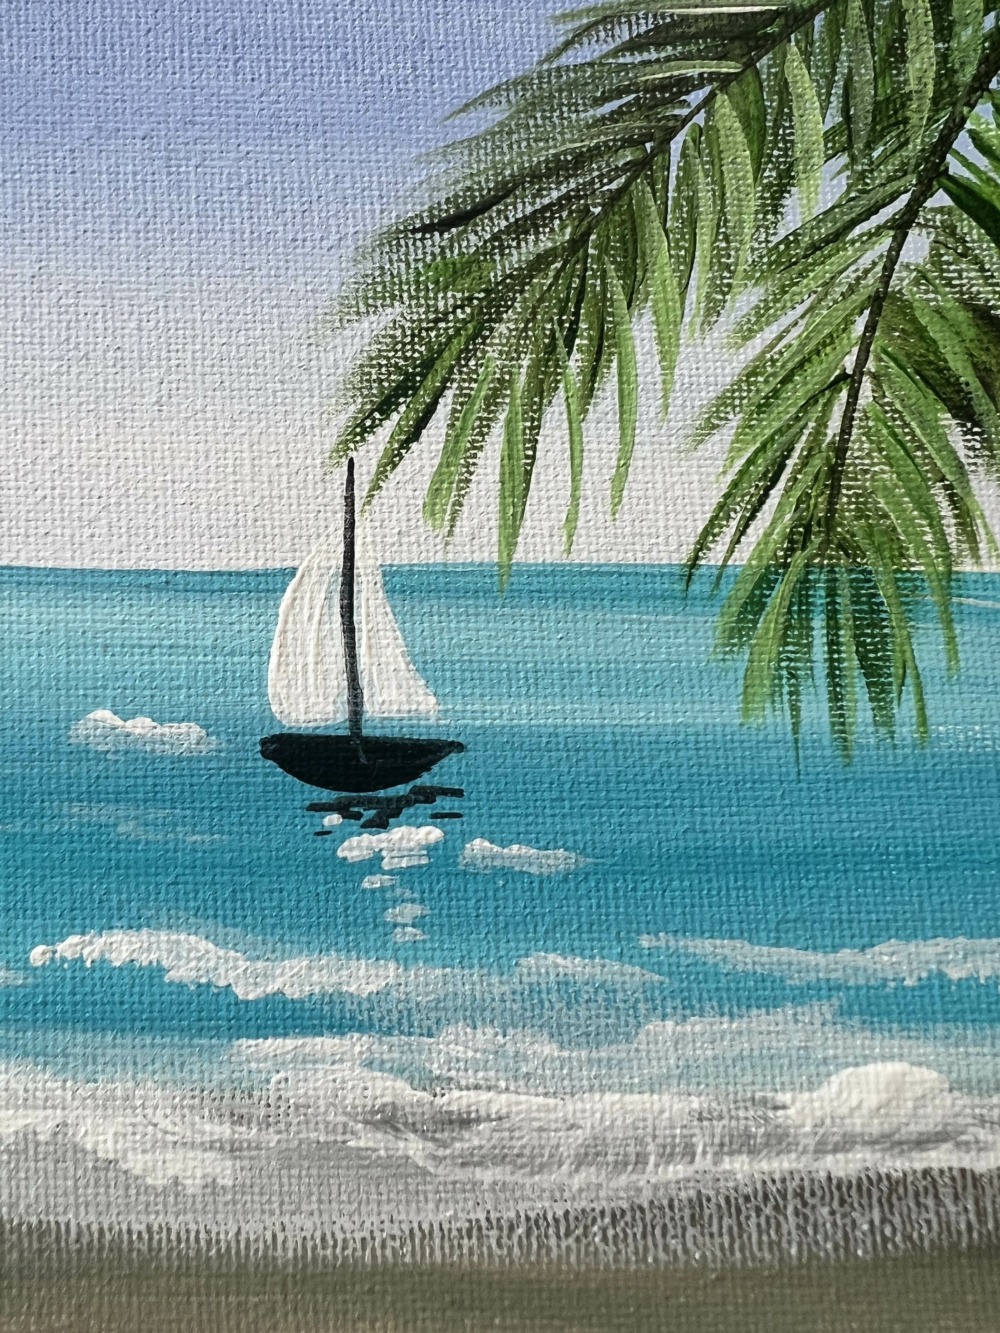
Then use mars black to paint a small boat shape below the sails as well as a black vertical line. Add reflection in the water by painting loose horizontal strokes with the black and white below the boat.

Below is a detailed close up of the boat with palms. (Palms will be painted in later step).
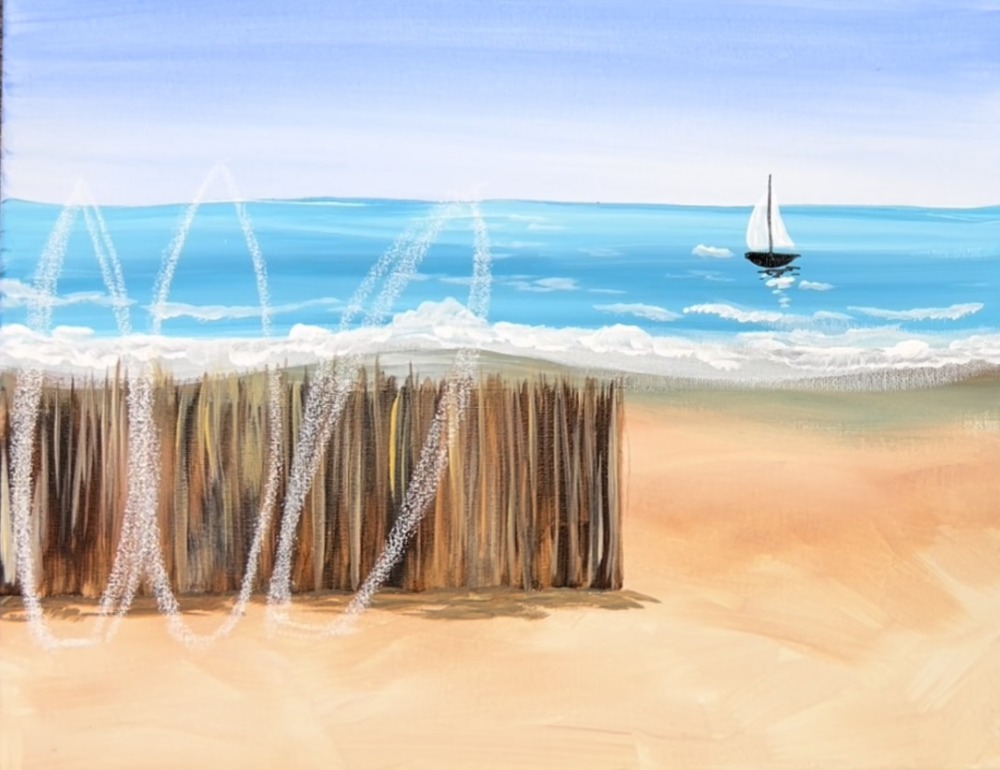
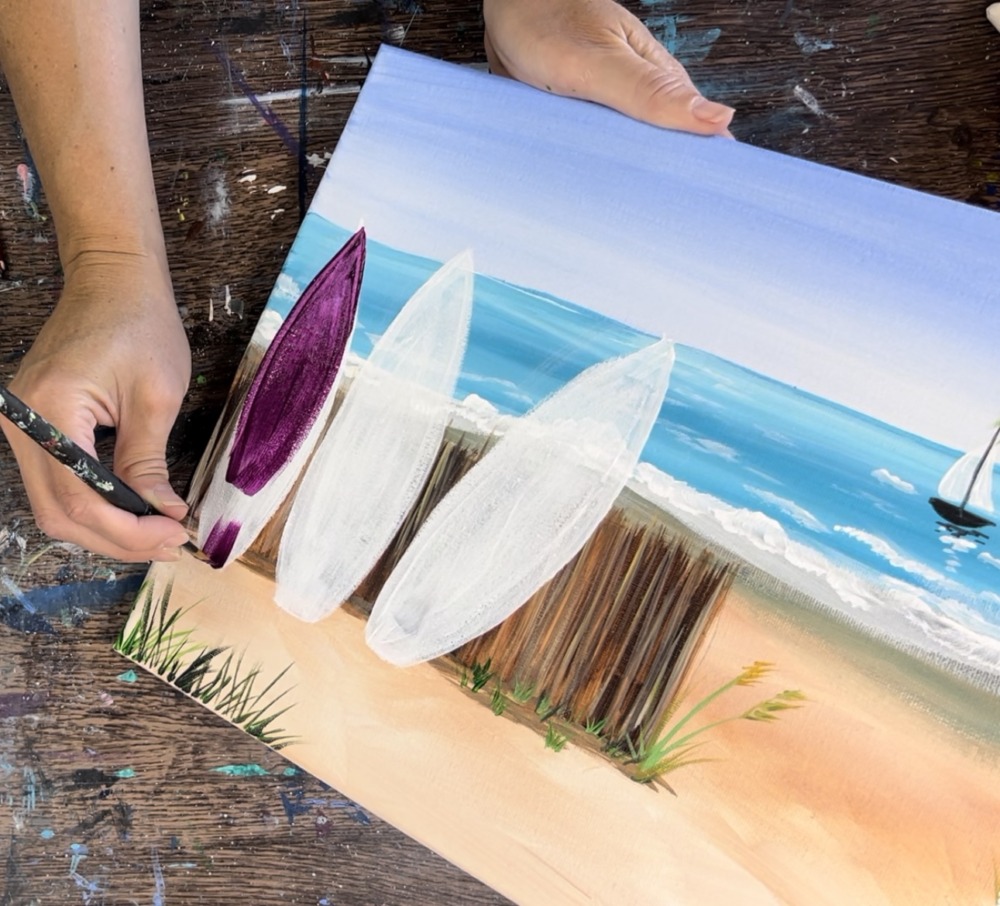
7. Draw & Prime Surfboards
Use a piece of plain white chalk to draw the surfboards. I did three surfboards about 6.5″ high and 2.25″ wide (this does not have to be exact). I did one surfboard that is leaning to the right. Draw the surfboards so they are pointed at the top and flat on the bottom. Sand will be covering the bottom of the surfboards.
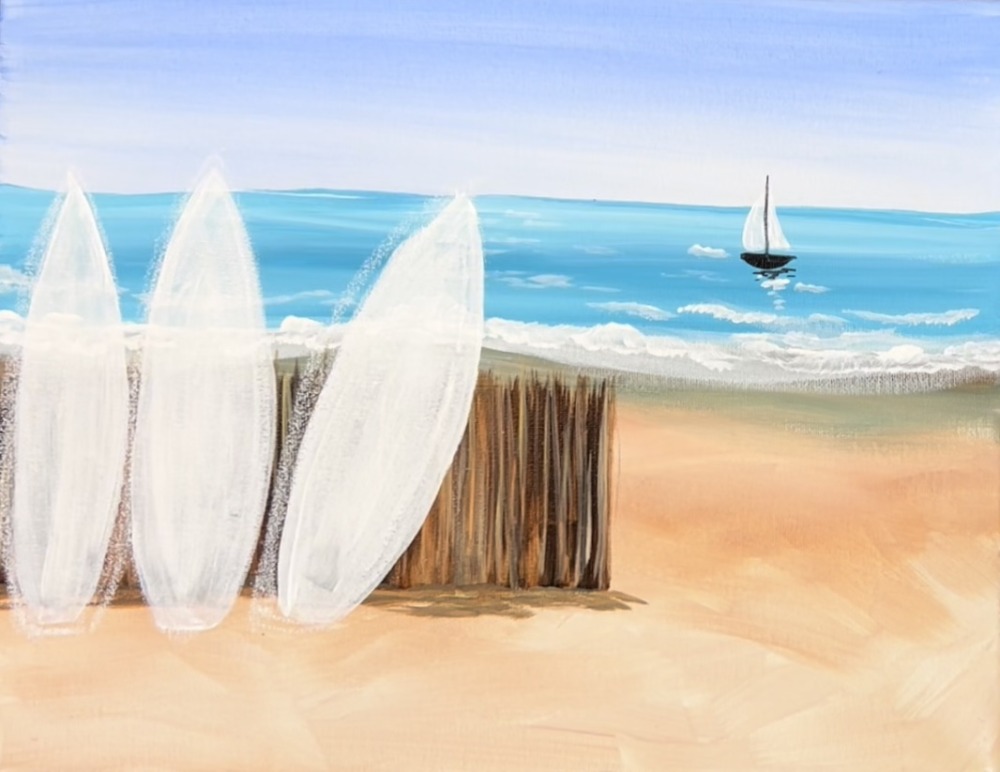
Next, use titanium white and a 12 bright brush to paint the surfboards a solid coat of white paint. You can also use the round brush to get into the smaller pointed area. These need to be painted white first before adding the color to ensure brightness and coverage of the paint.
8. Paint Palmtrees & Paint Grass
Use the 3/8″ angle brush to paint the palm trees. On your palette, mix about 1 part mars black with 3 parts hooker’s green hue permanent. This will make a very dark green color.
Load the dark green on the tip of your 3/8″ angle brush. Paint the two centers of the palms. Use just the tip of the brush to create the thin line and hold the angle brush so the highest part of the bristles are on the opposite side of the direction you are painting.
Then paint the individual palm fronds. You can do this with just the thin line using the tip of the angle brush. Or you can use the full width of the angel brush to drag the palm fronds to create thicker strokes.
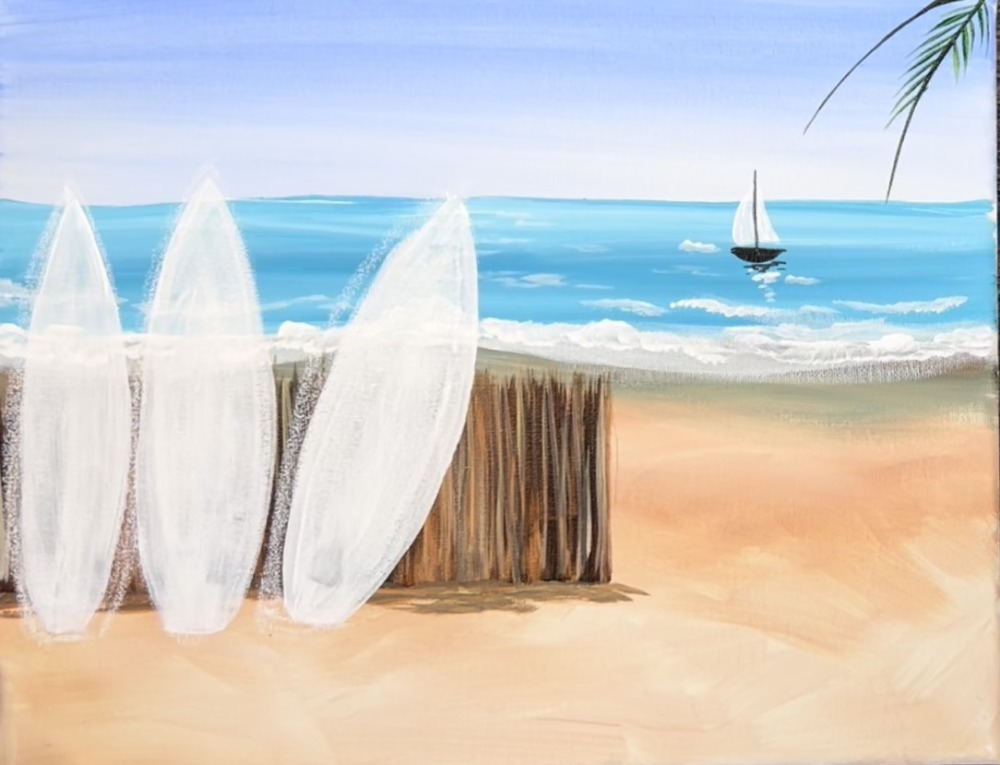

Fill up both palm fronds with the leaves. Then go over it with a layer of lighter green color. Mix equal parts titanium white and green on your palette. Then paint more palm frond leaves over the darker ones (but don’t cover all of the black).
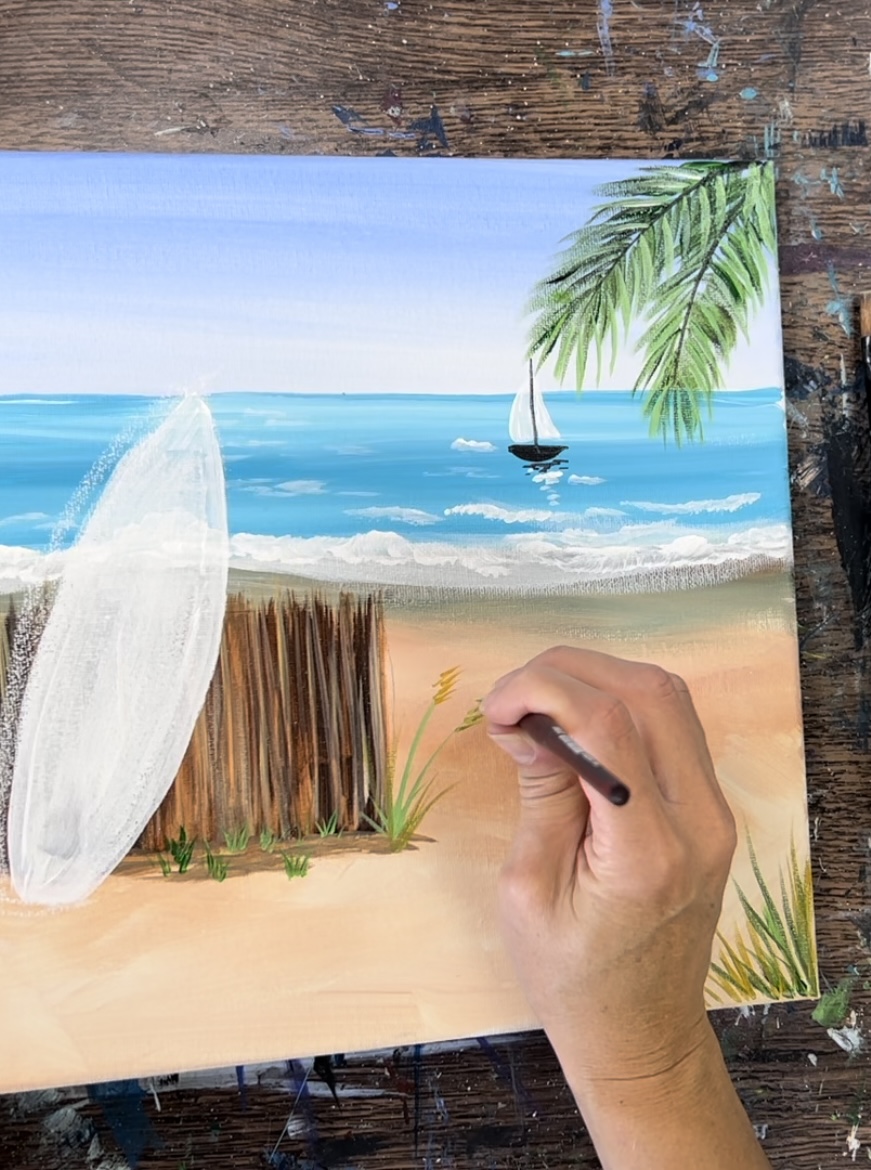
Next, paint areas of grass through the sand. Use the 3/8″ angle brush (or whichever brush you like to use for grass). Paint a patchy area of grass on the bottom right area of the fence
Use a combination of the green, white, black and Naples yellow on your palette to create different variations of color in your grass strokes.
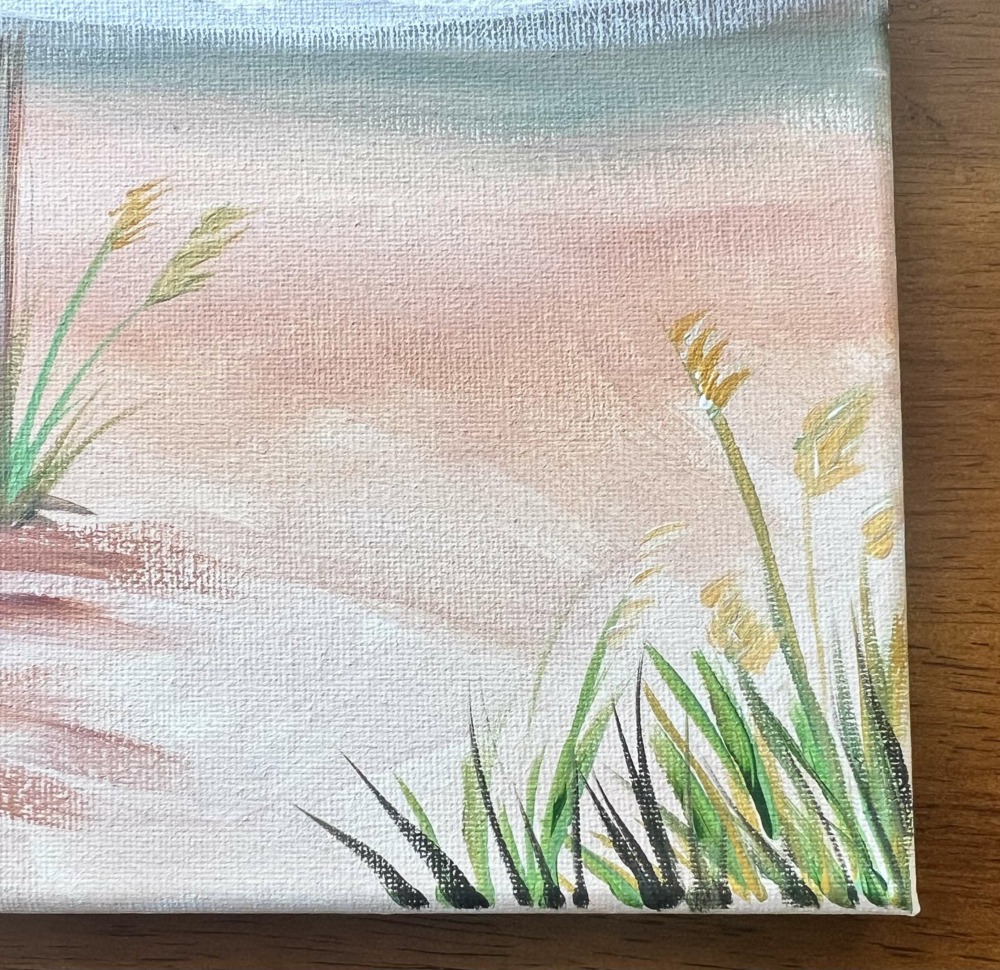
Paint larger grass blades in the lower right area of the canvas. These are slightly darker.
Then paint smaller strokes on the tips of some of the longer blades to create “reed like” grass blades. I did this with Naples yellow and white as well as a little bit of the green. If needed, use the round brush or a smaller brush to help create these smaller details.
Create darker grass on the lower left area of the canvas but try not to overlap any parts of the surfboards.
9. Paint Color On Surfboards
Load your palette with the colors that will be used for the surfboards. Use the 12 bright brush and the round brush (if needed) to paint the surfboards a solid color first before painting the designs.
The surfboard on the far left was done with deep violet color.
Then to give it more of a “shiny look”, add a small amount of titanium white to the brush and blend a little bit of white into the purple on the surfboard. Do this with curved strokes on the side and let it gently blend with the purple but not all the way.
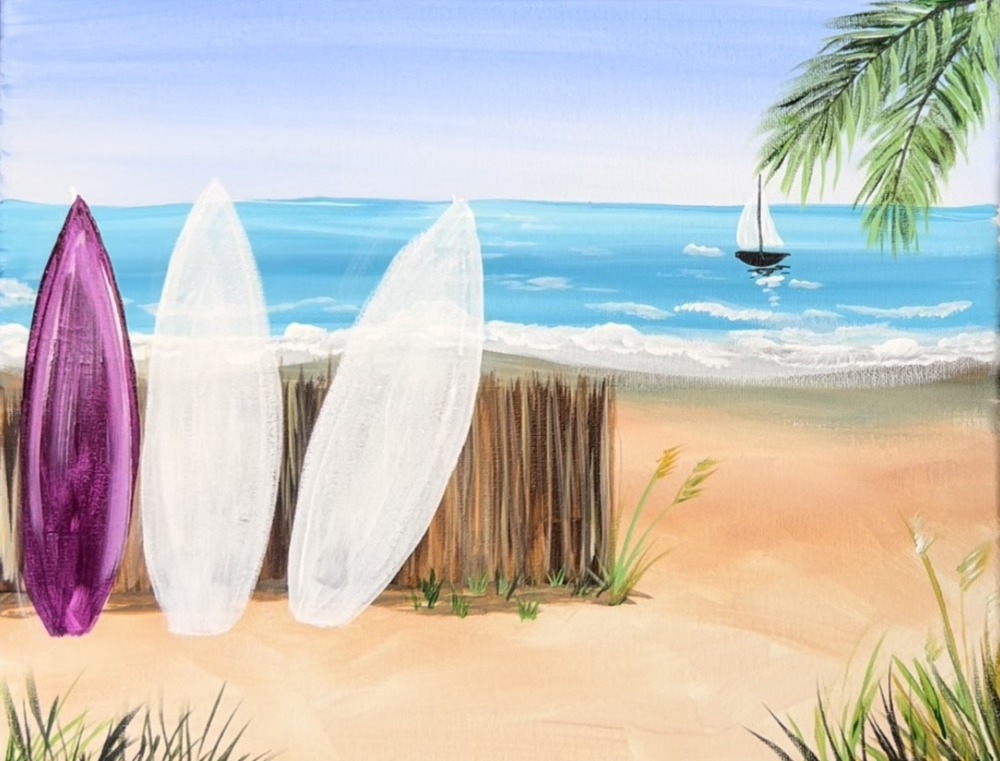
Let this dry before painting the designs.
Paint the middle surfboard with primary yellow.
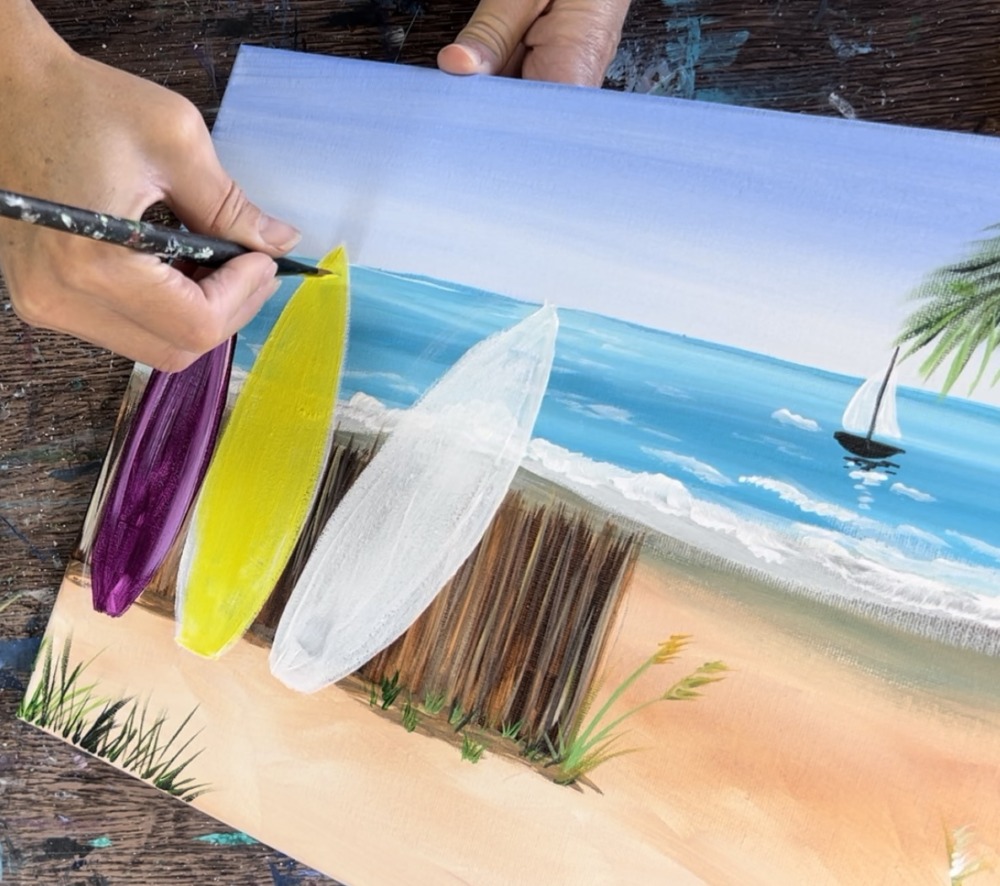
Add the little bit of white into the surfboard and blend it gently to give it that shiny look.

The far right surfboard was done with alizarine crimson hue. Paint this one using the same technique as the other two.
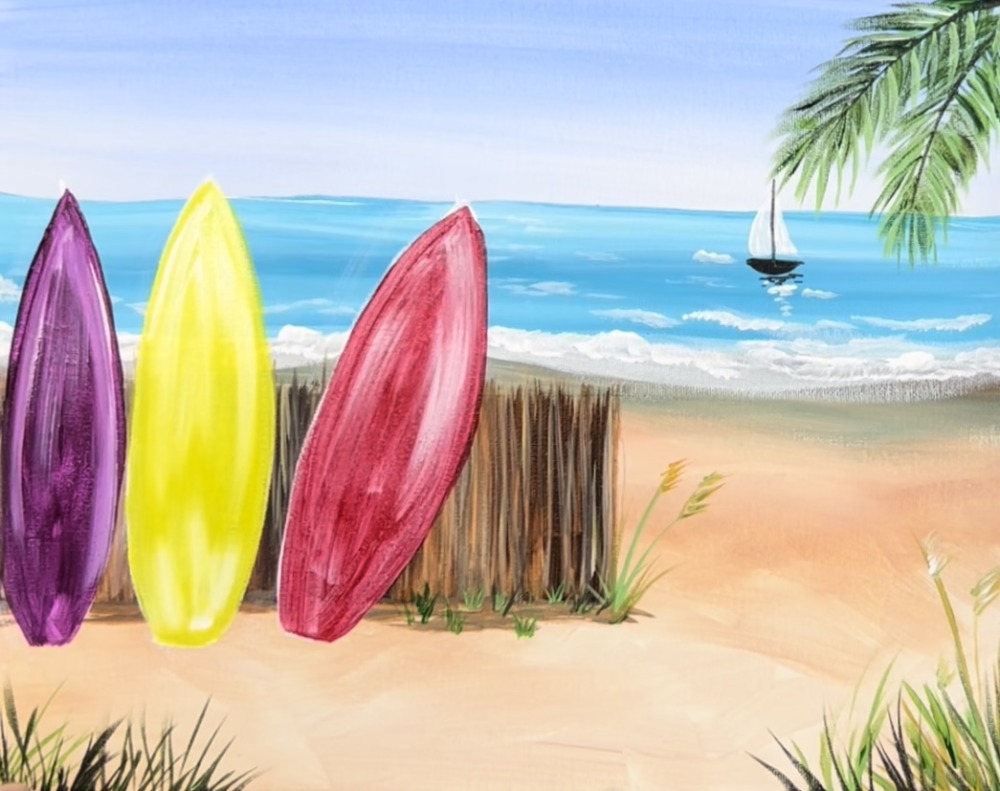
Wait for these to dry before painting the designs.
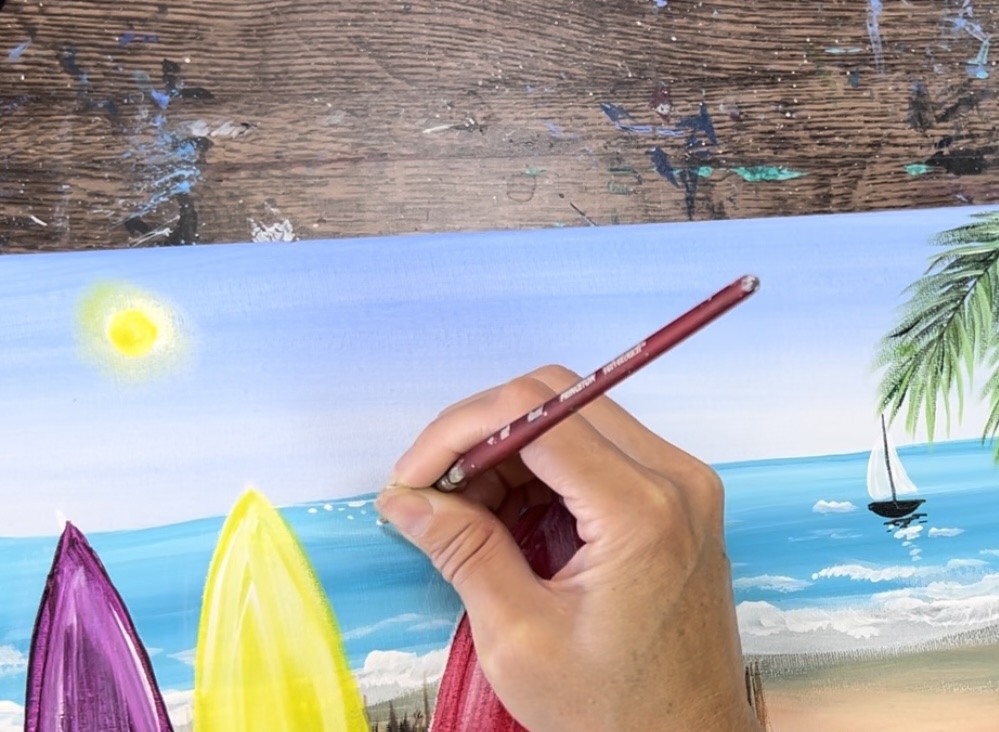
10. Paint Sun
Use the primary yellow to paint a small circle in the upper left corner of the sky area. Then smear it with your finger to create a yellow glow.
Then re-paint a small yellow circle in the center of that. You can also add a little white into the yellow to make it brighter.
Then you can add little white dots in the water just under the sun using the 4 round brush. This makes it look like the water is sparkling way in the distance.
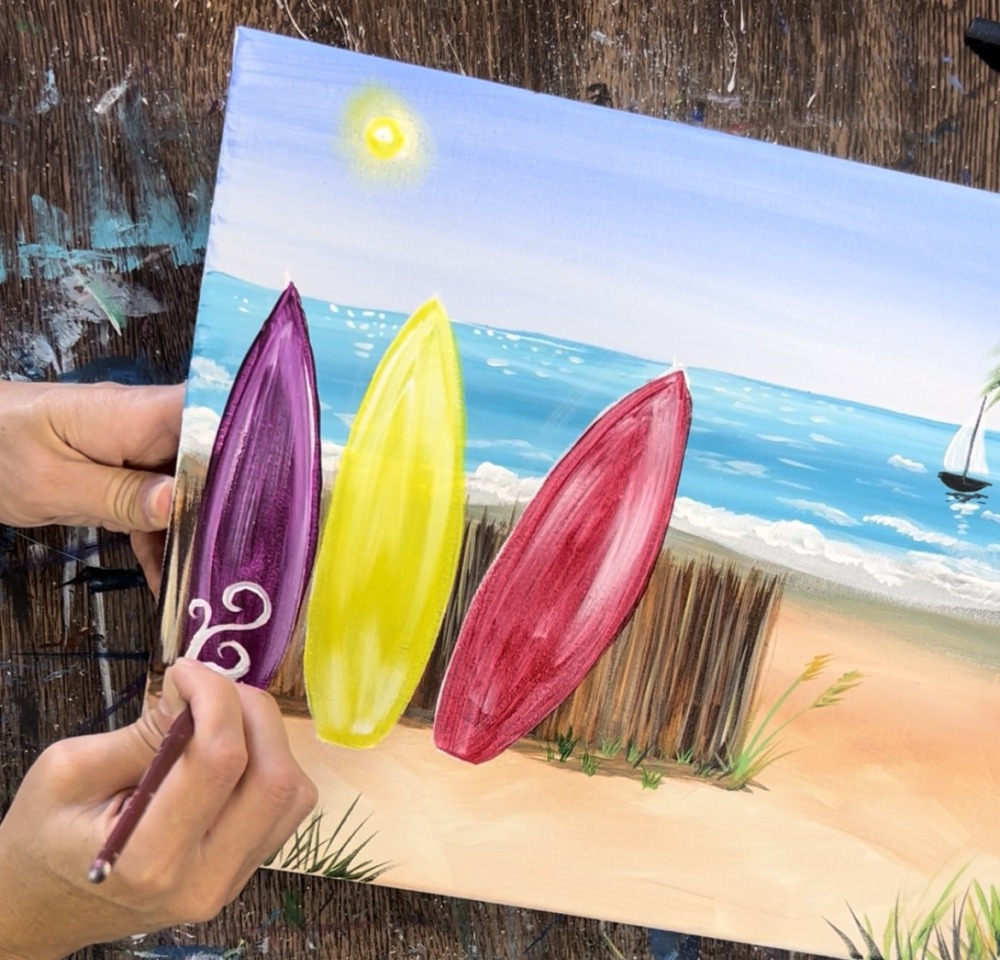
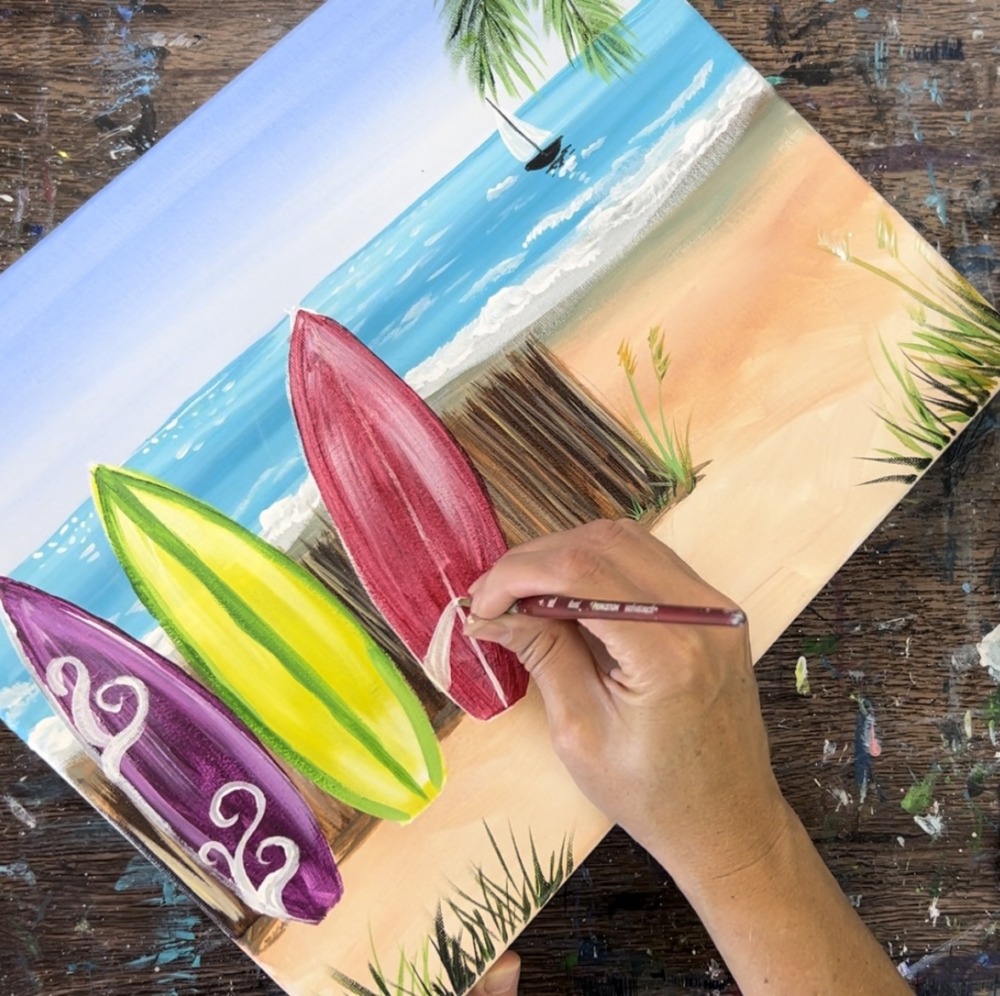
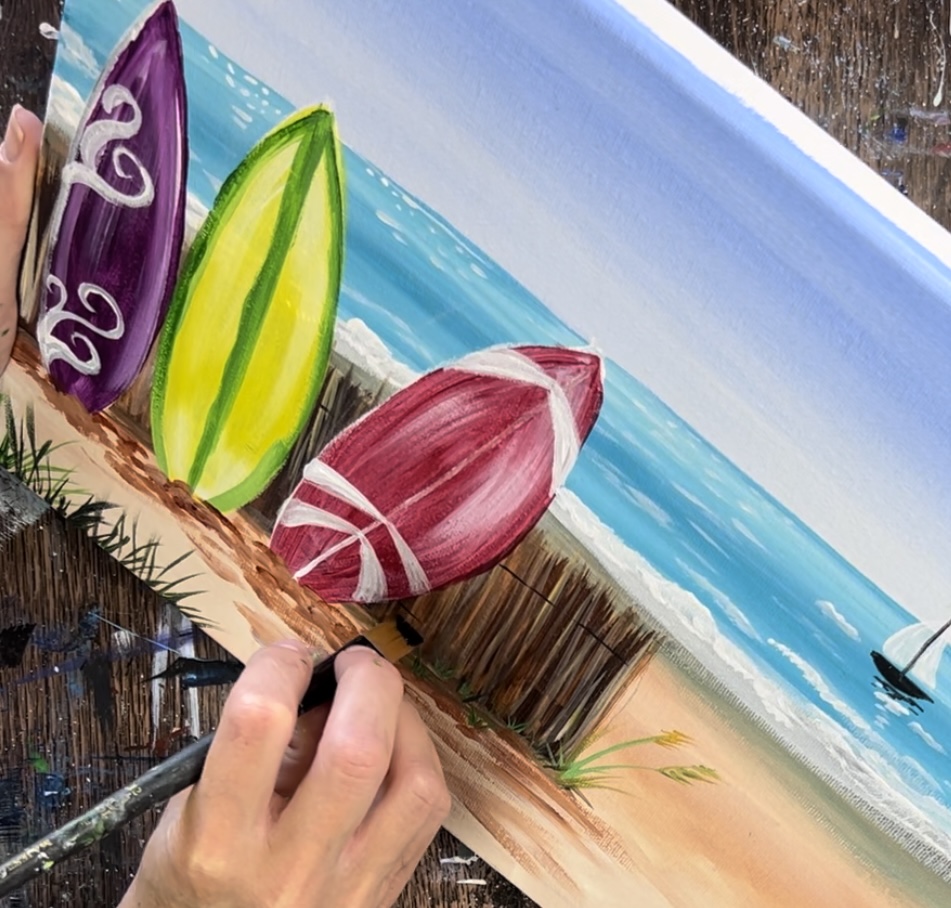
11. Paint Designs On Surfboards
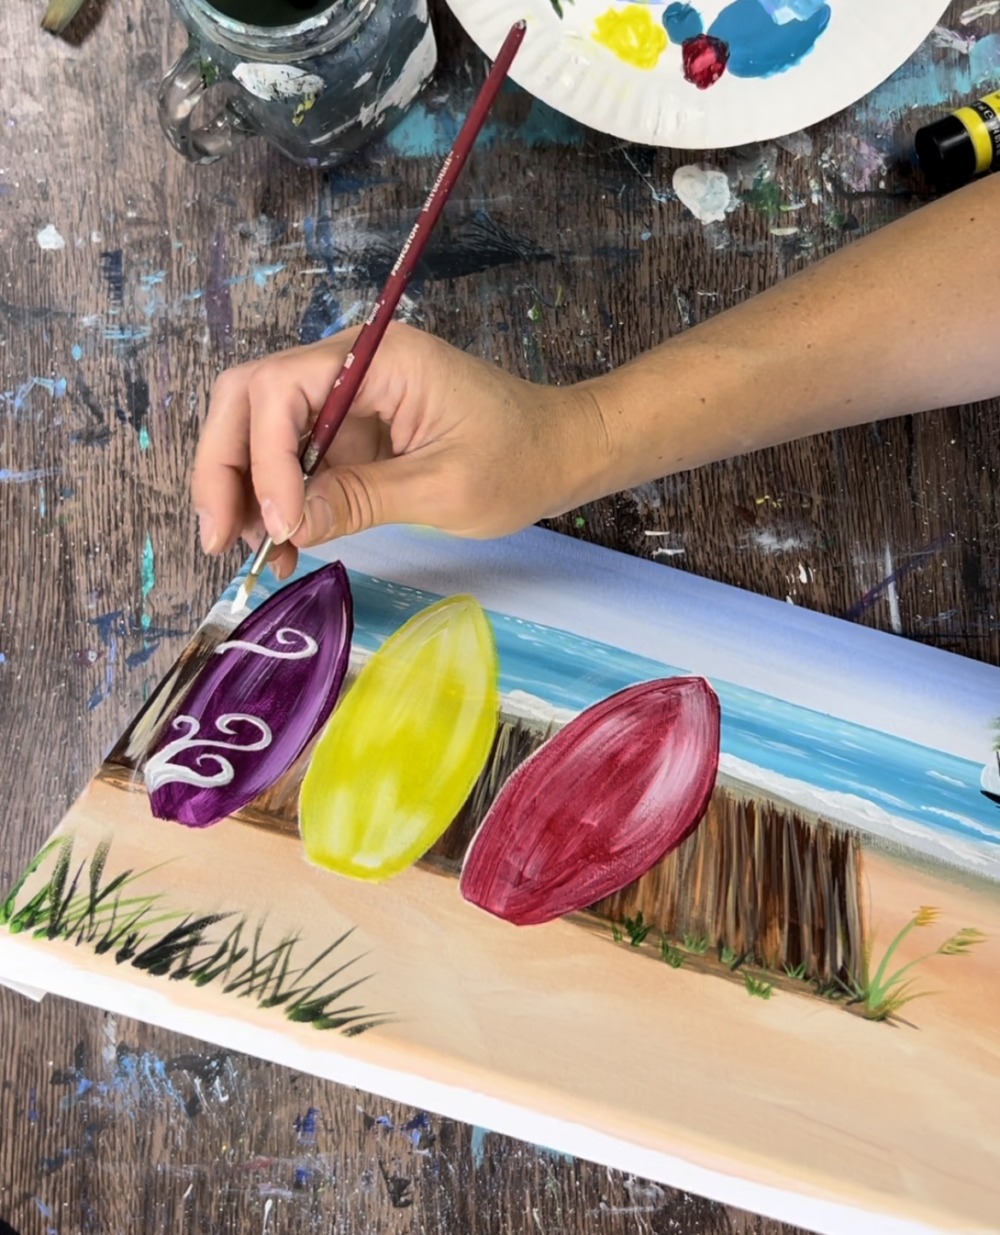
Use a #4 round brush to paint the designs on the surfboards. You can customize these designs or do the same ones that I did! For the surfboard on the left, I did spirals using titanium white.
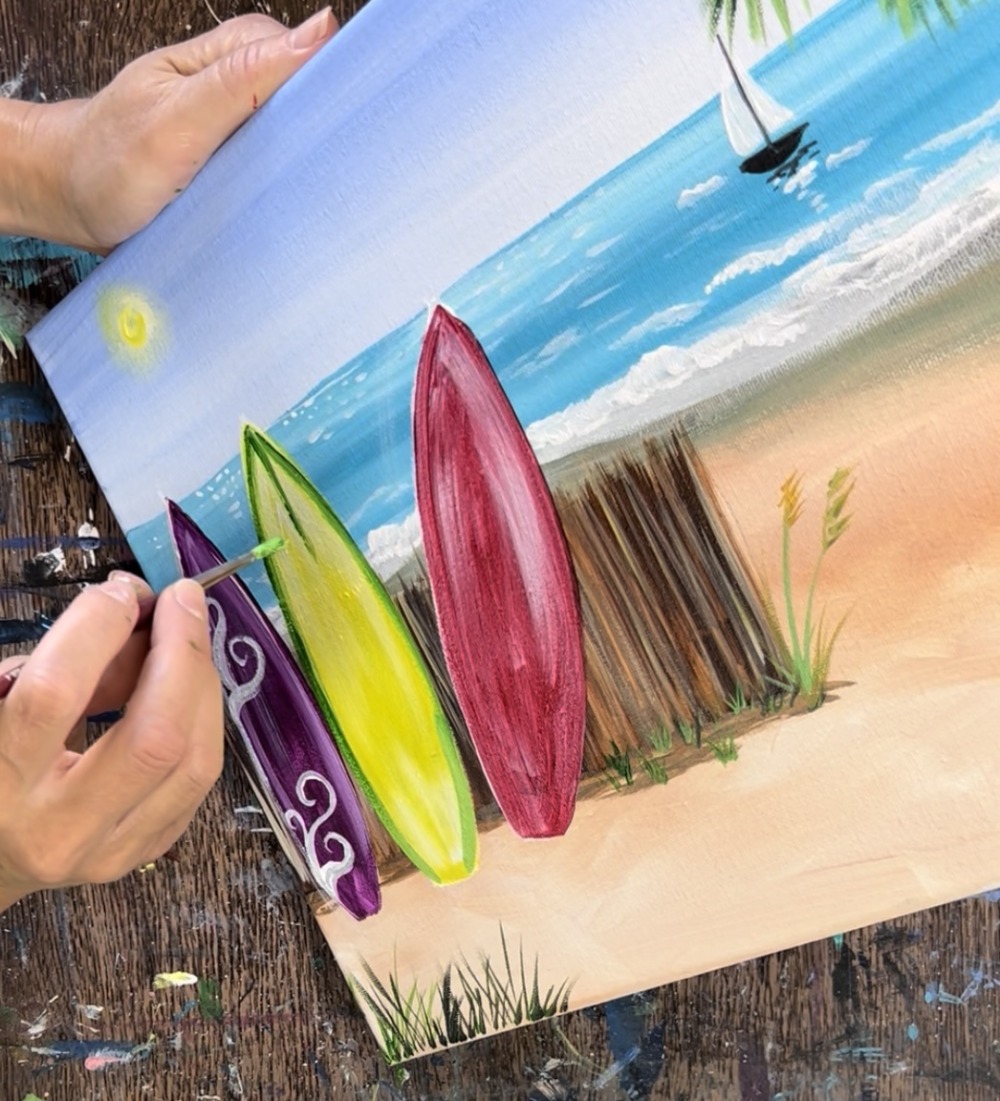
Then I did a border and a line down the middle on the center surfboard. This was done with hooker’s green mixed with a little yellow and white.
I did a titanium white line down the middle and triangles on each side for the surfboard on the right.
12. Paint Sand Under Boards
Next, use the round brush to paint bunched up sand that slightly overlaps the bottoms of the surfboards. Do this with burnt sienna mixed with a little white (it just needs to be darker than the sand color already there so it will show up).

Next, paint looser strokes throughout the bottom sand area. Do this with burnt Sienna mixed with a little bit of titanium white.
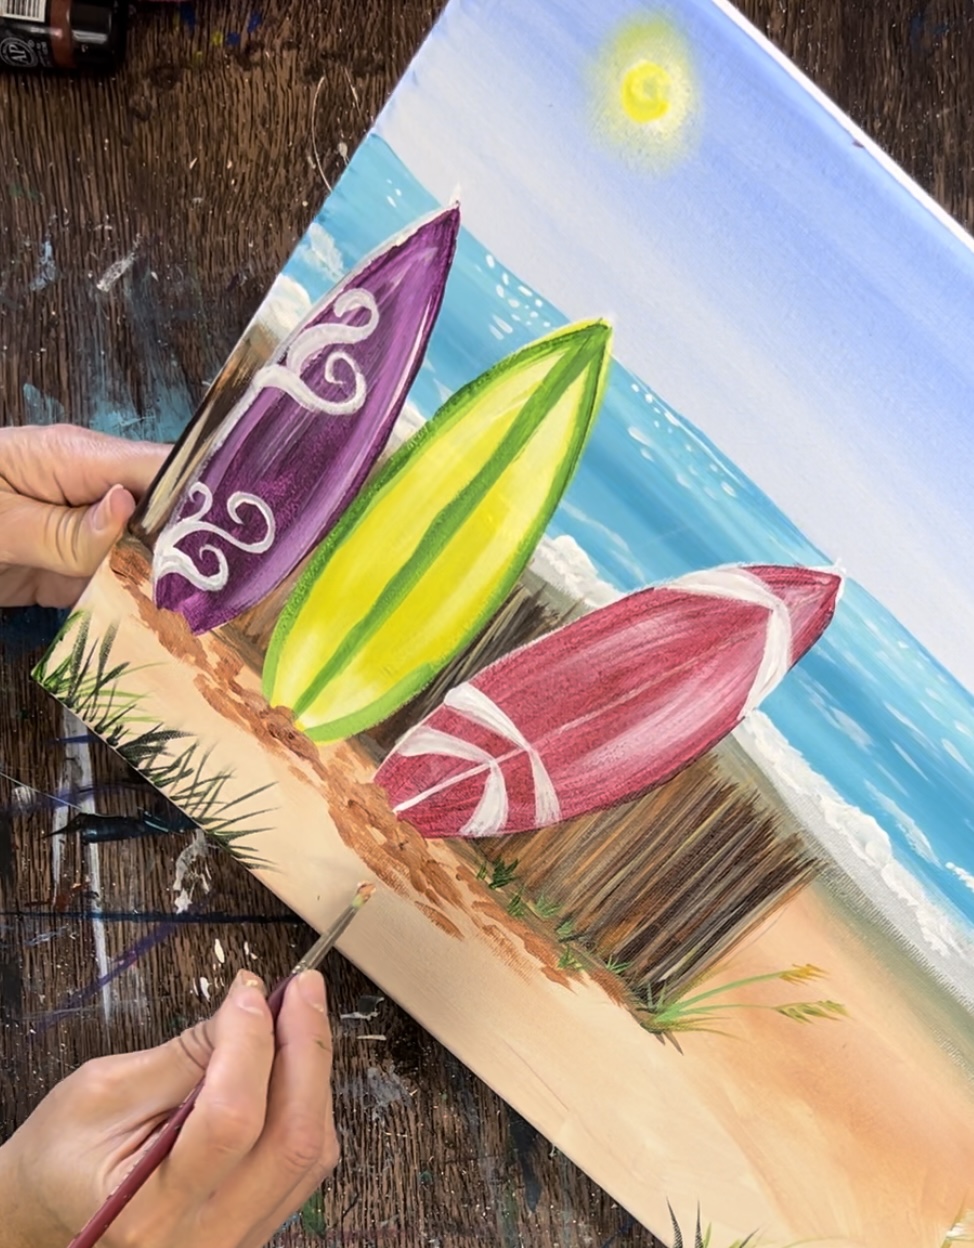
This creates more texture/ shadows in this area!
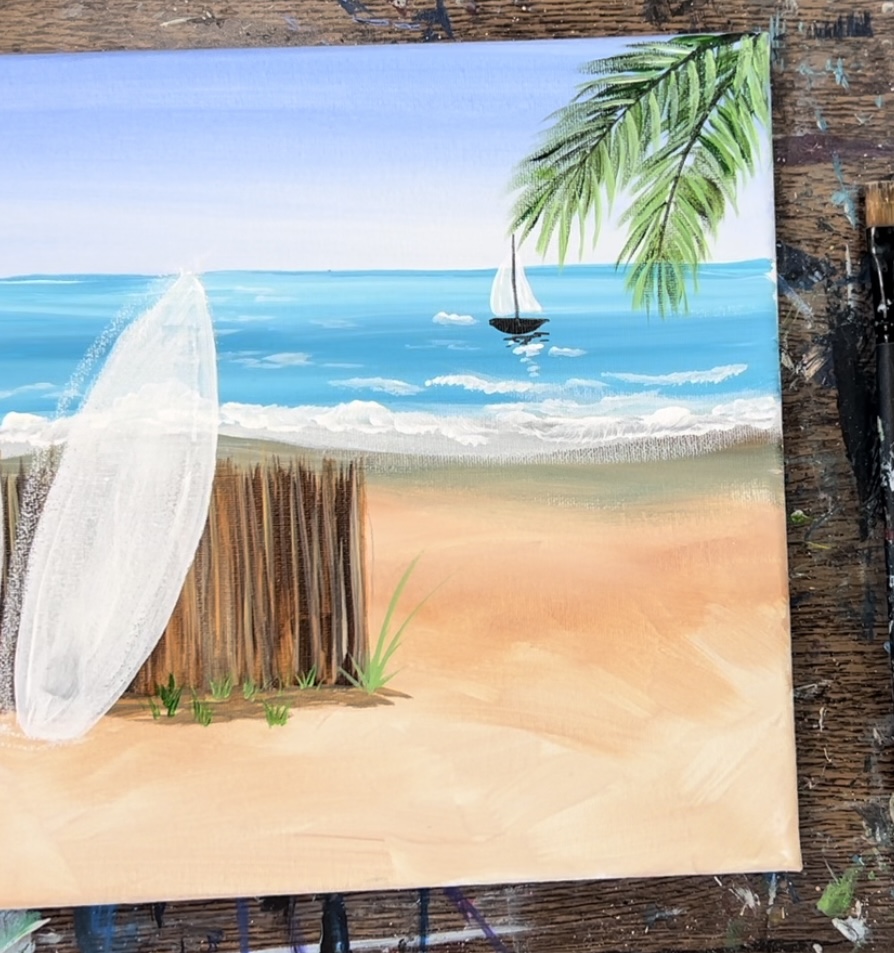
13. Final Touchups To Fence
A final touch up you can do is add a black horizontal line along the top and bottom of the bamboo fence. I did this with the tip of the 12 bright brush.
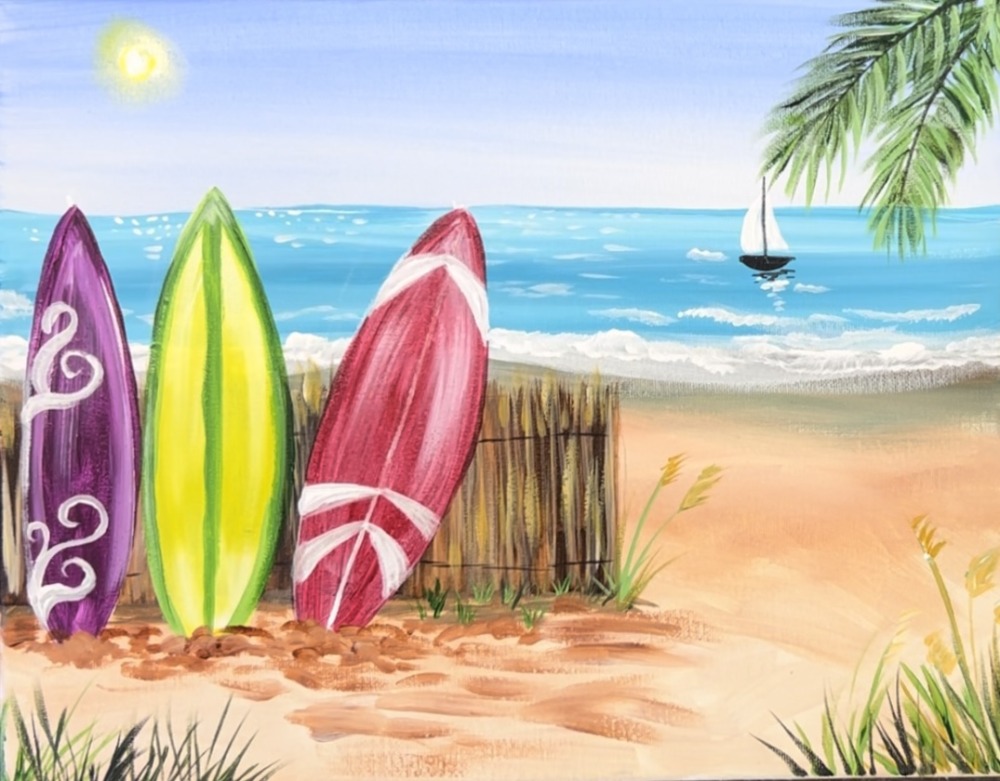
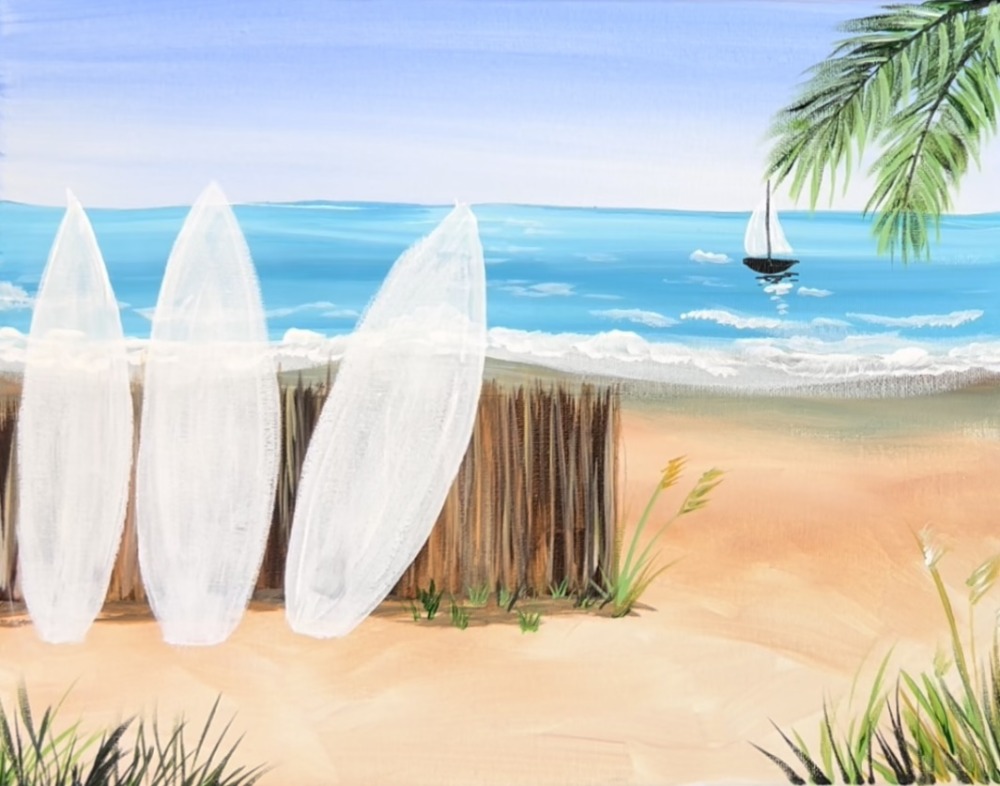
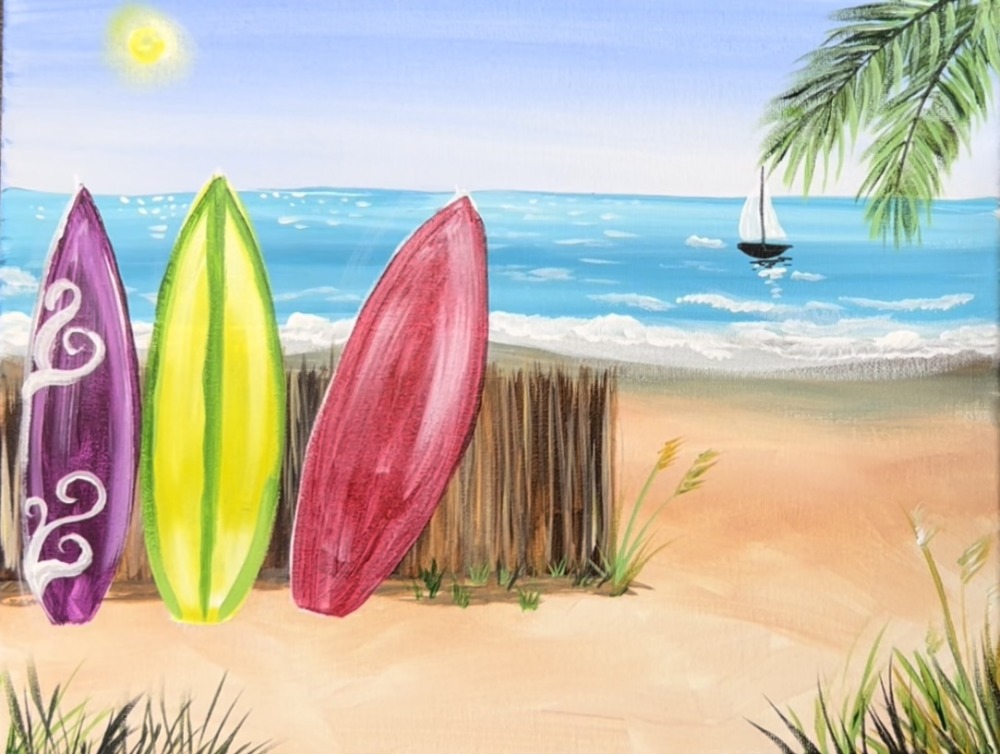
Finished!
See Also:
- Day At The Beach
- Palm Tree Hammock
- Flip Flops On The Shore