

Would you like to save this?
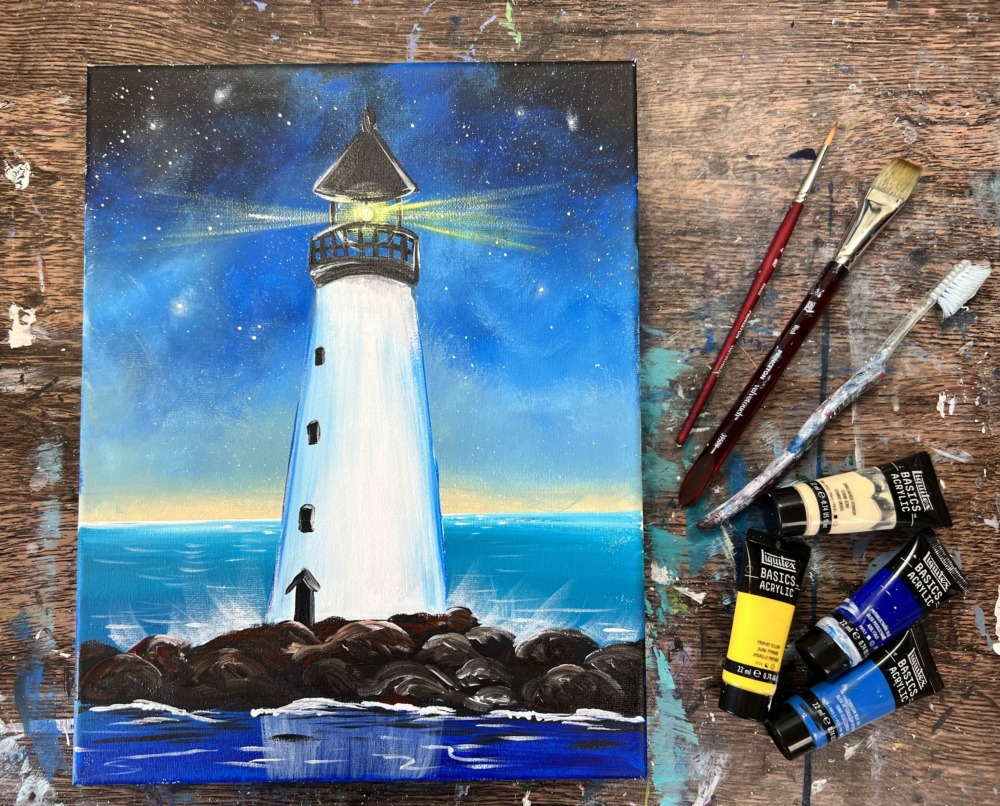
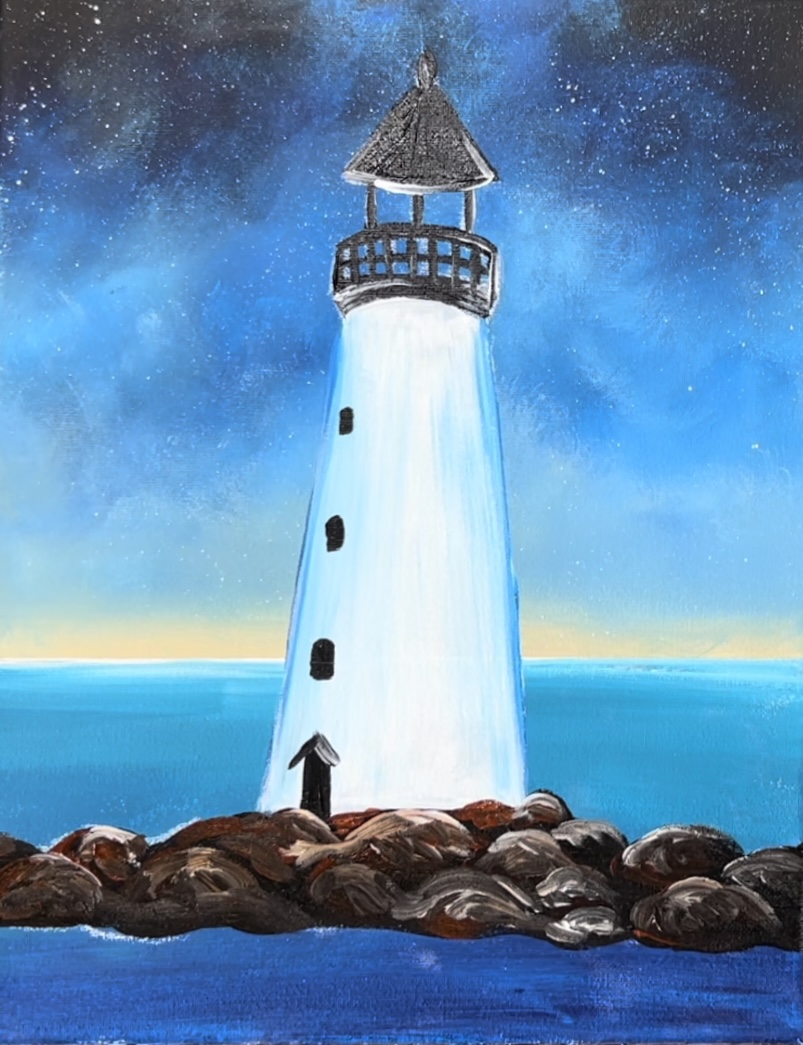
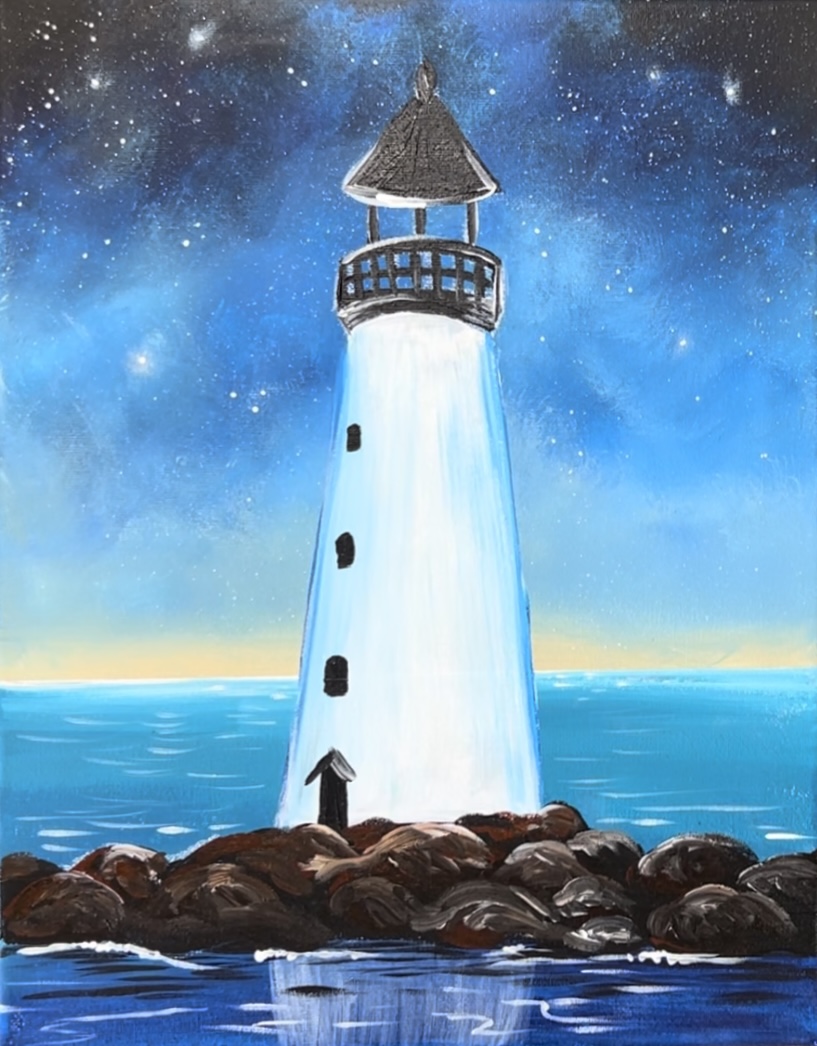
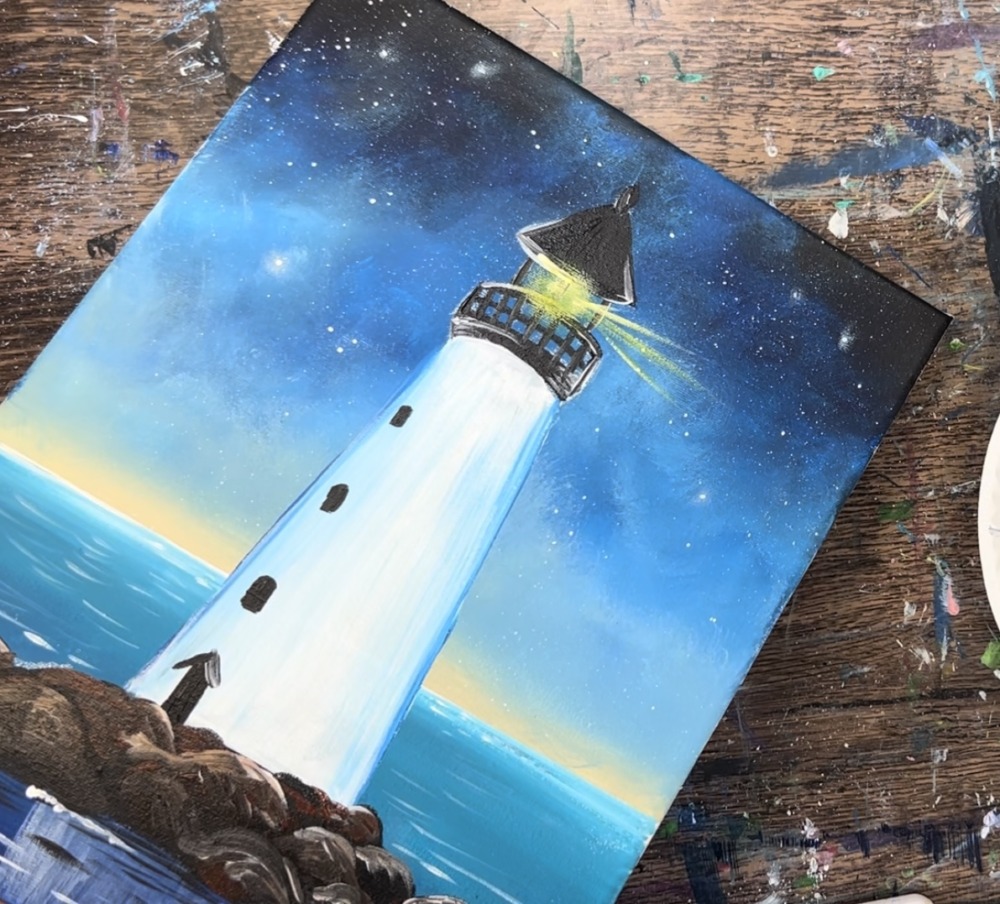
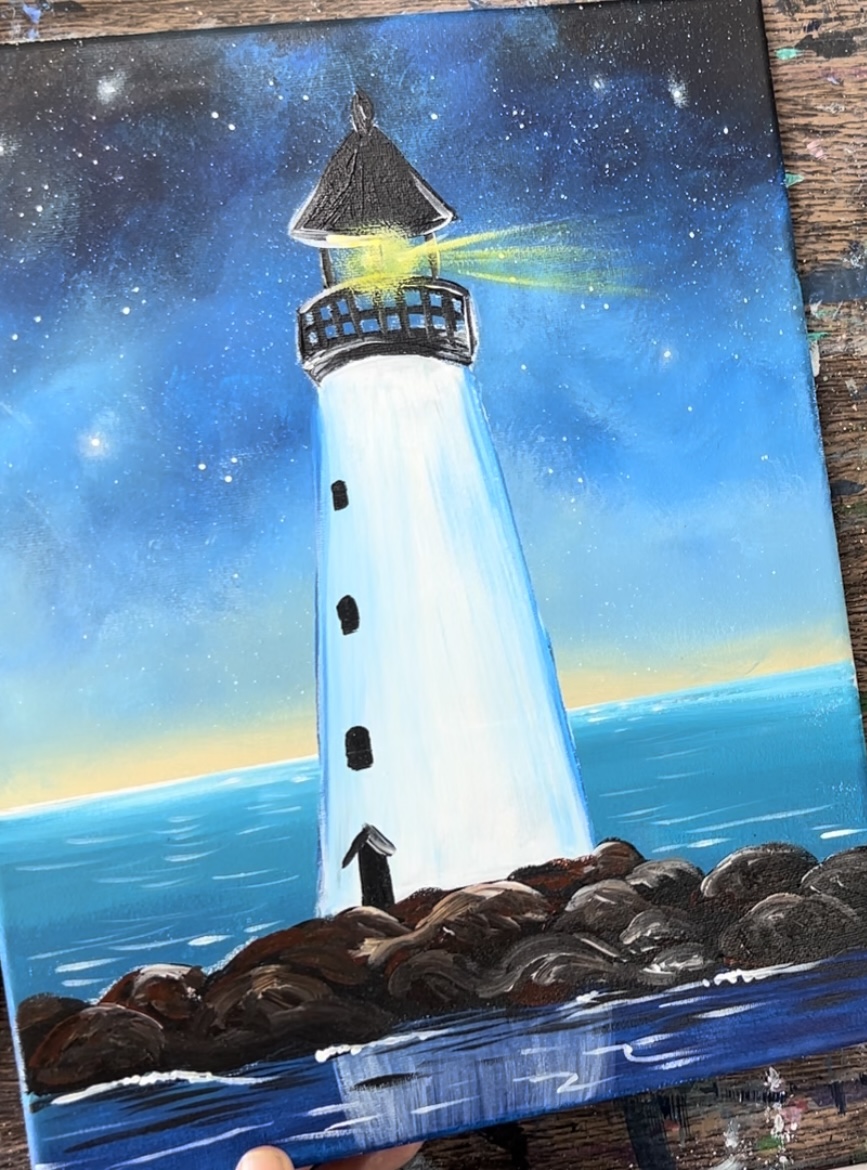
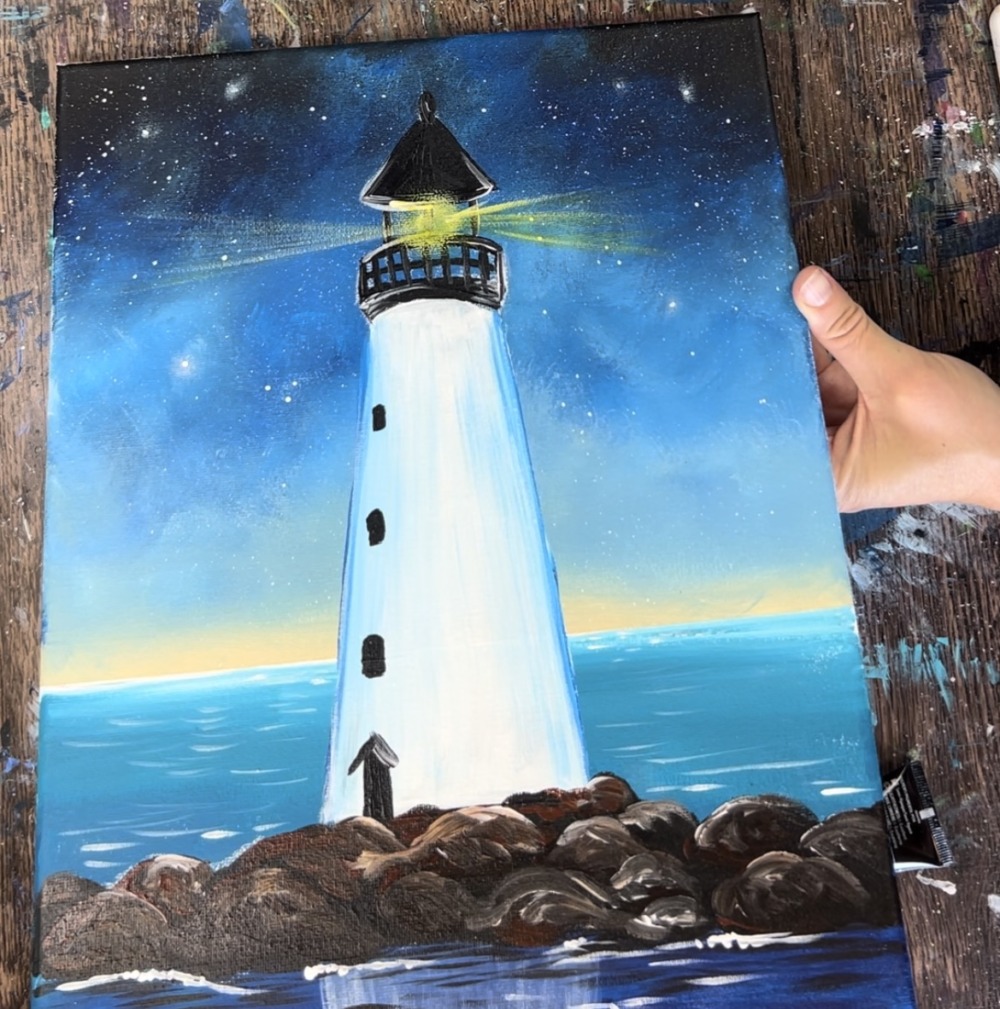
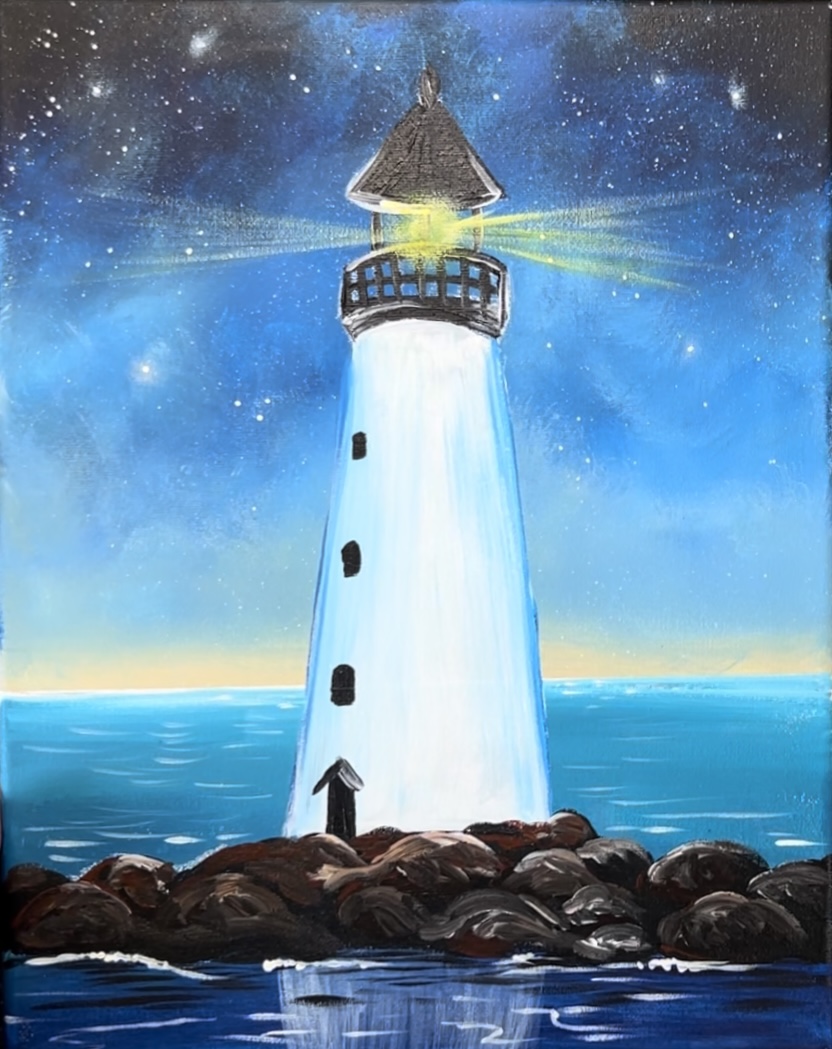
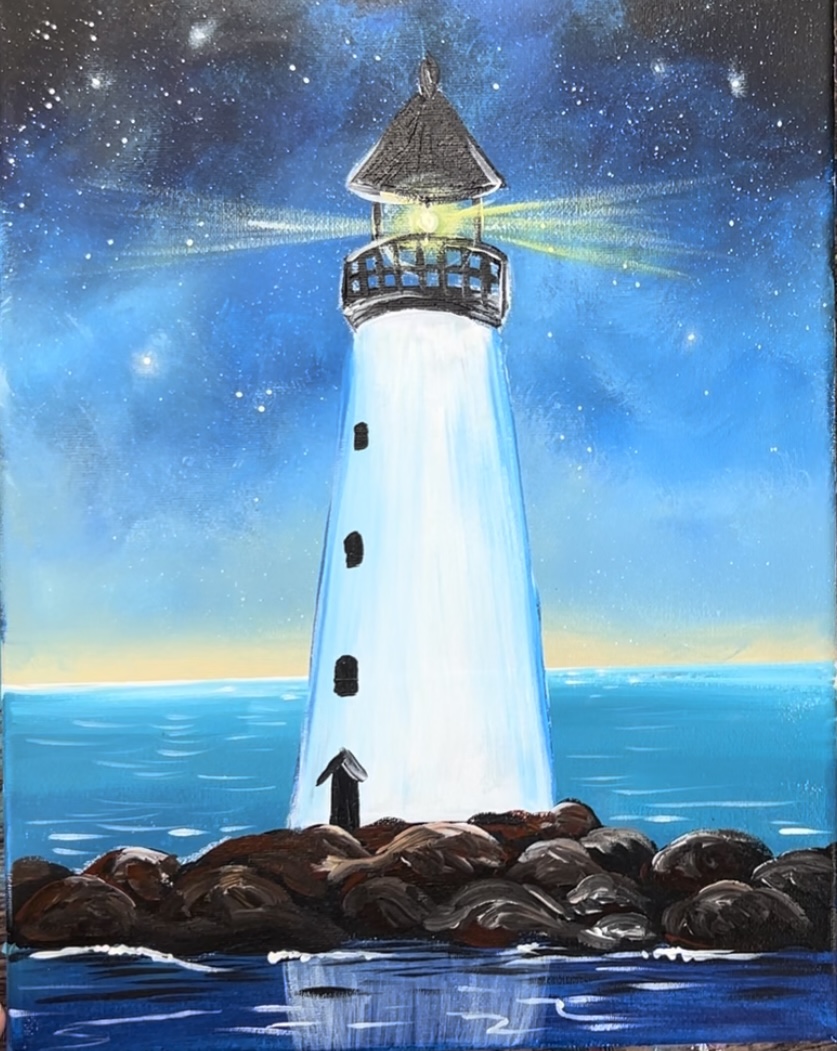
This acrylic painting tutorial will show you how to paint a lighthouse with a galaxy style sky. You will learn how to “dry brush” the light beams as well as the splashes behind the rocks.
Enjoy and happy painting!
Materials Needed
Colors
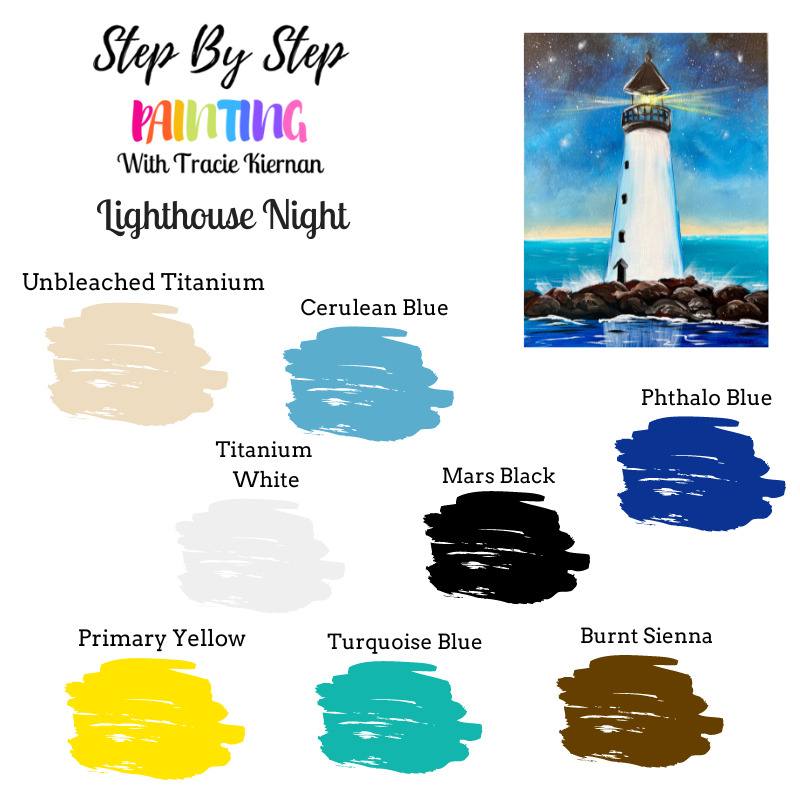
- Mars Black
- Titanium White
- Unbleached Titanium
- Turquoise Blue
- Phthalo Blue
- Cerulean Blue
- Primary Yellow
- Burnt Sienna
Brushes
- 3/4″ Flat Wash
- #4 Round Brush
- Blender Brush (optional)
- Toothbrush (optional)
Color Palette
I used Liquitex BASICS acrylics for this tutorial. If you are using a different brand, use the chart below to help match colors.
Craft Paint Conversion
If you are using Apple Barrel Craft Paints or similar, I would recommend these craft paint colors:
- Black
- White
- Navy
- Bimini Blue
- Nutmeg Brown
- Bright Yellow
- Bright Blue
- Any Beige Color
Directions At A Glance
Video
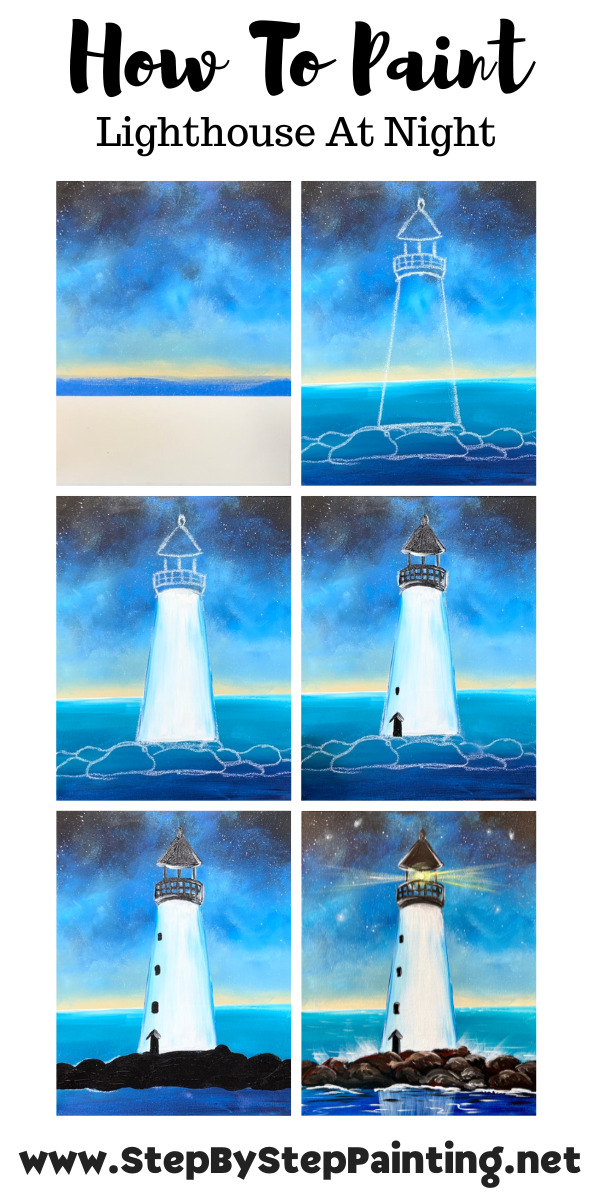
Step By Step Directions
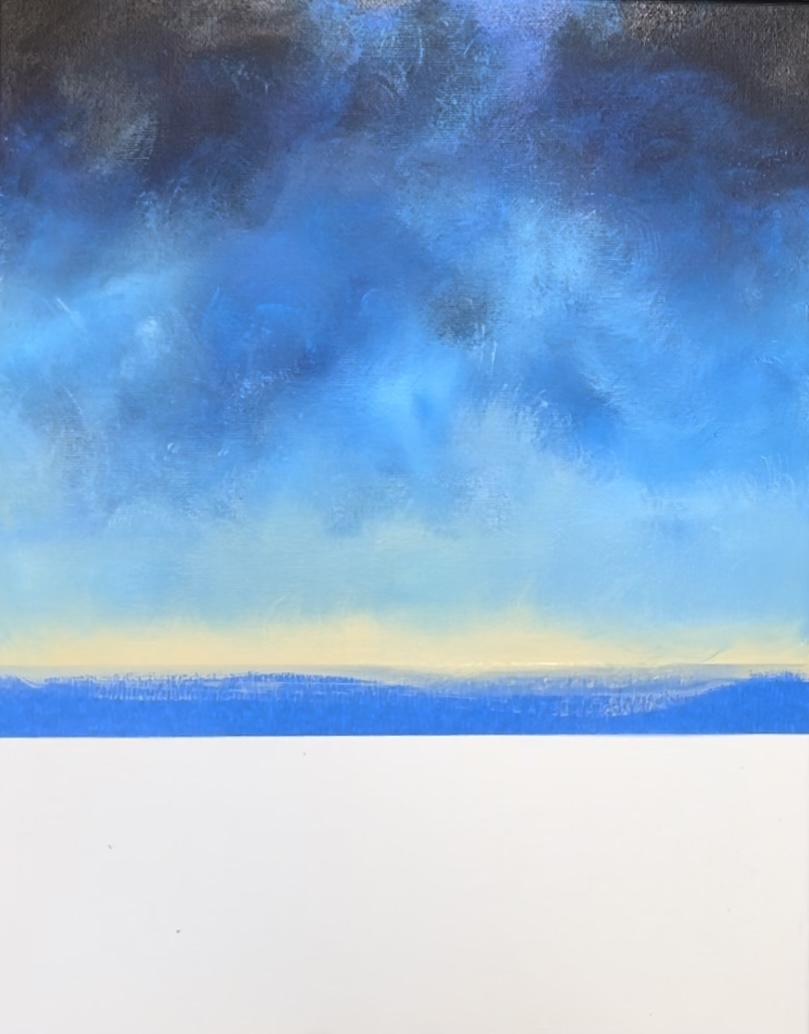
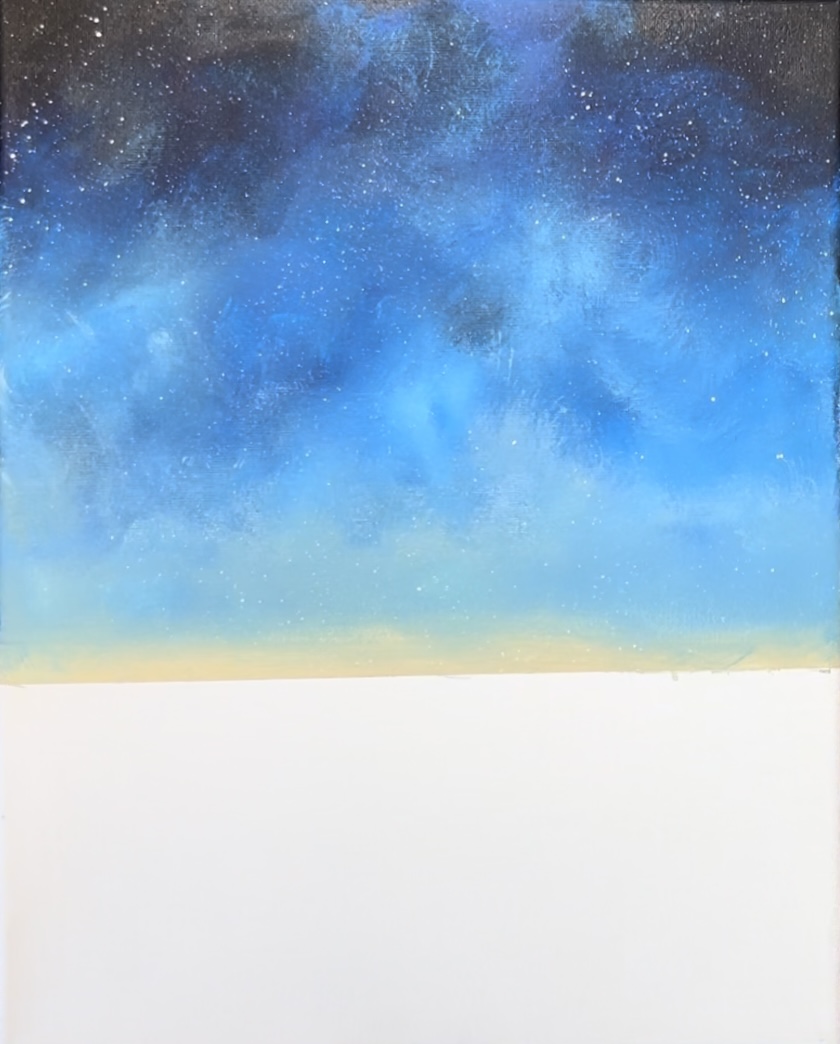
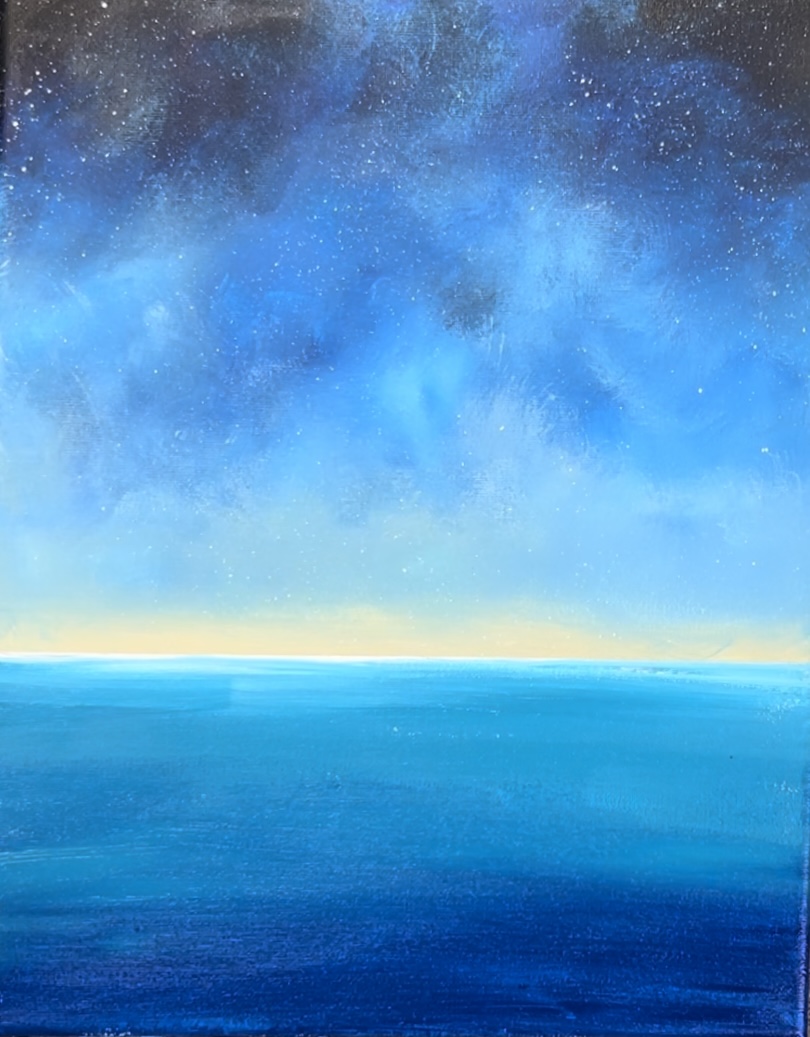
1. Paint Galaxy Sky
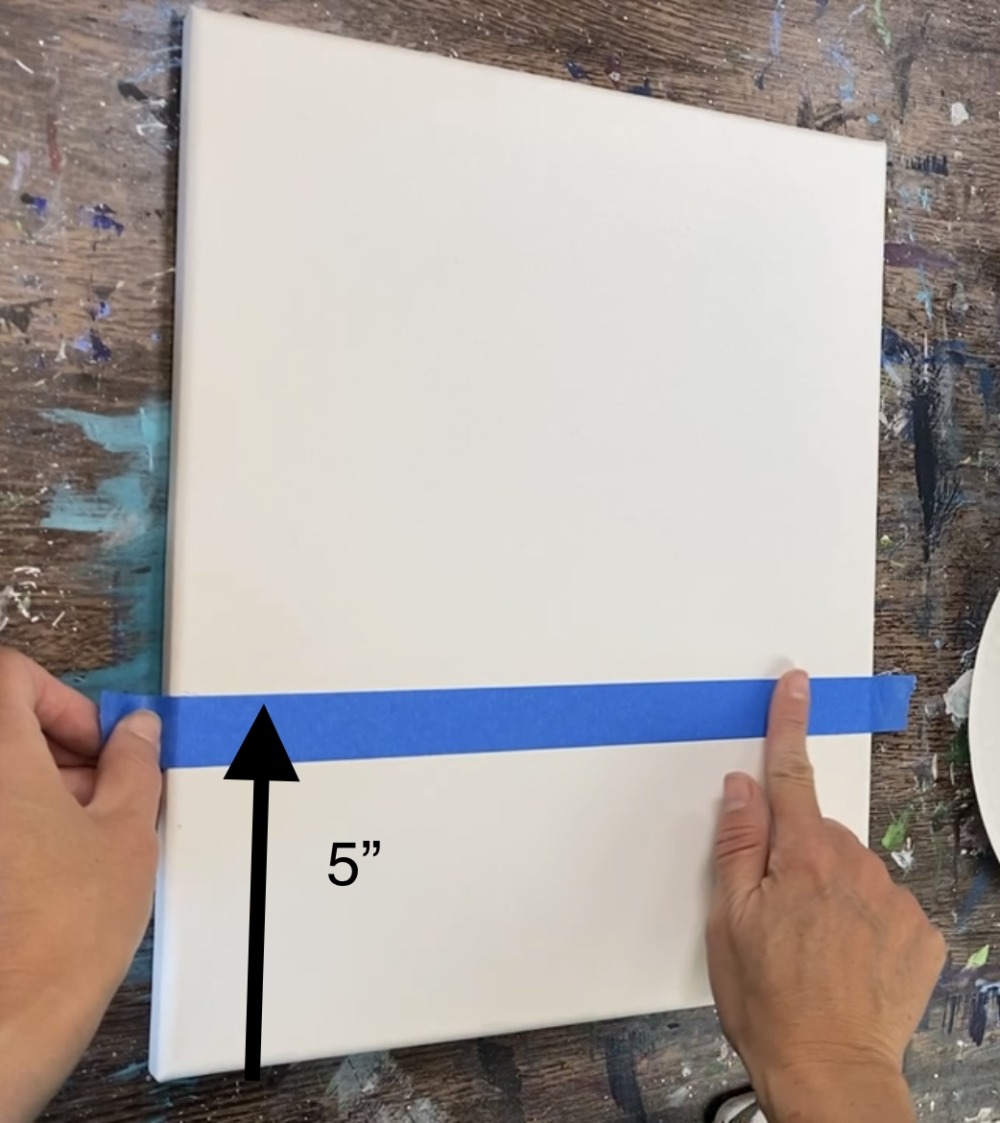
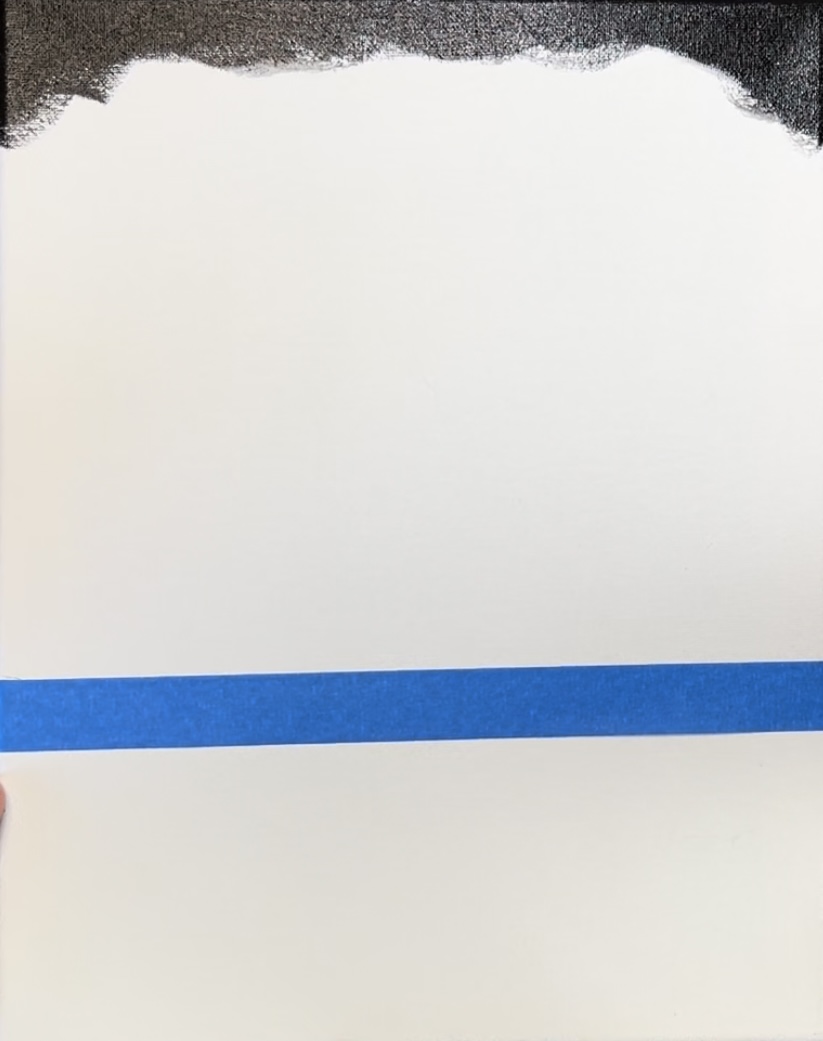
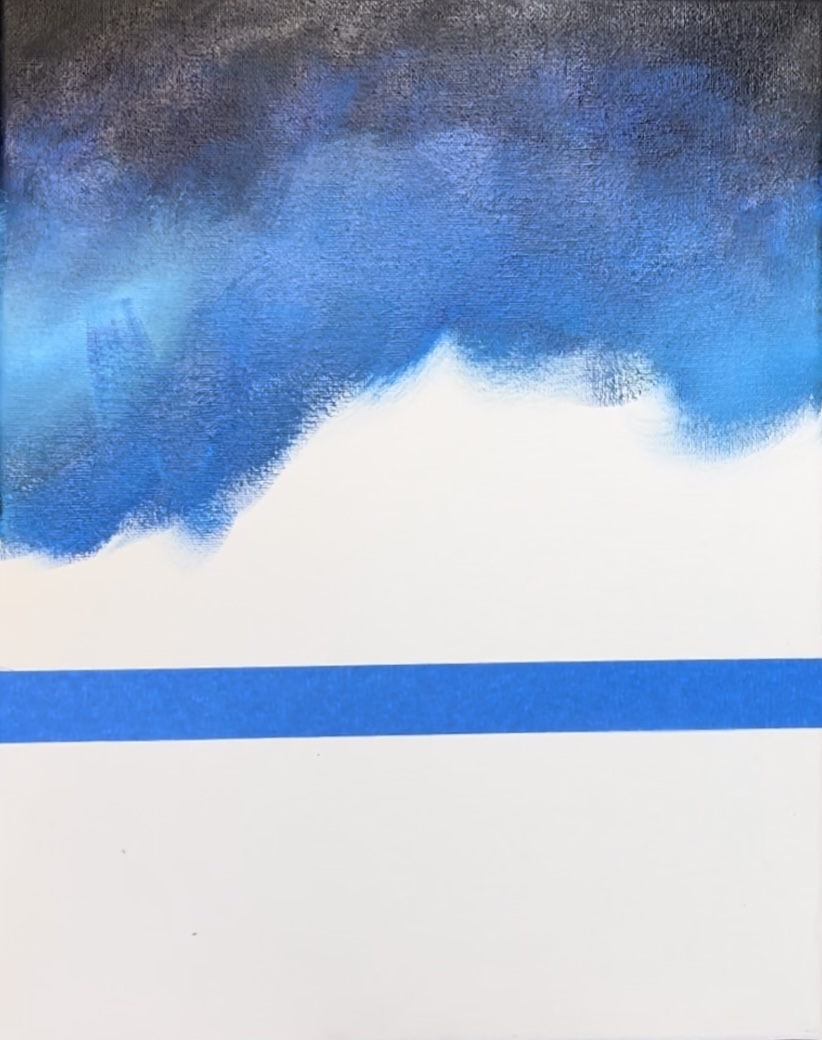
You can use painters tape or use a straight edge to draw a horizontal line across the canvas. Measure about 5″ from the bottom of the canvas. Then place the painters tape below the 5″ mark.
Then load your 3/4″ flat wash brush into water and tap dry. Load a small amount of mars black paint on the tip of the flat brush. Paint a small arch area at the top of the canvas and do this with short choppy strokes.
Next, wipe the brush off. Load it into phthalo blue and apply more short and choppy strokes that blend with the black. The goal with this sky is to allow it to get lighter as it gets closer to the horizon line.
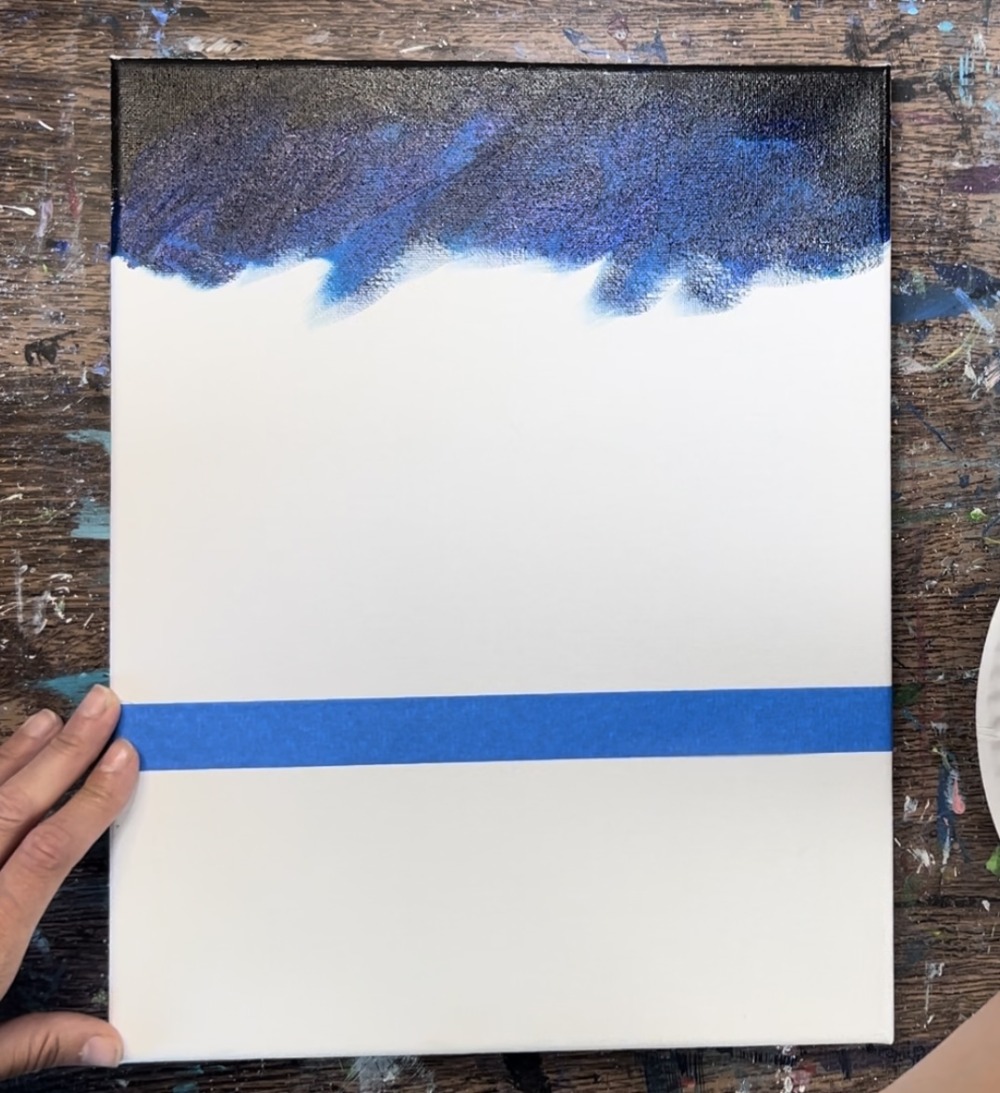
Then add a layer of cerulean blue under the phthalo blue area.
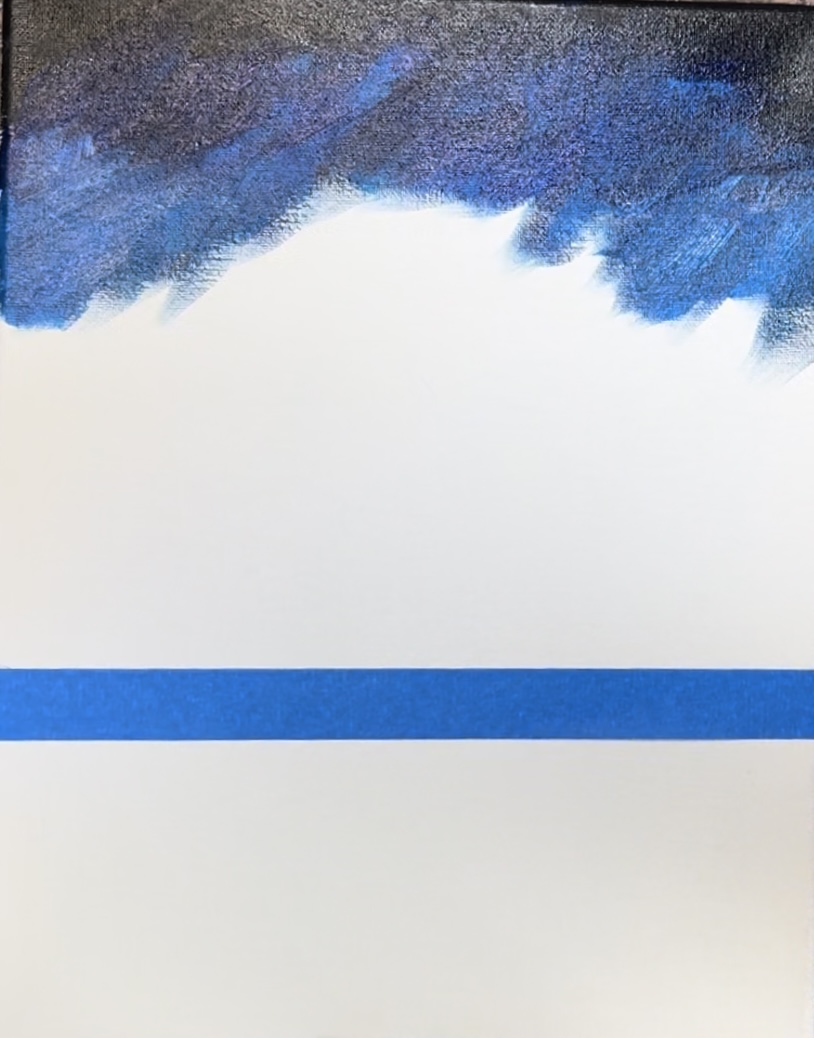
Before this dries, use a blender brush to smooth the strokes. You don’t want to load this brush into any paint or water. Simply use it dry and use the tip of the bristles to paint in circular strokes to blend the colors together and smooth the strokes.

Next, load the 3/4″ flat wash brush into phthalo blue and titanium white. Add this lighter blue area to the middle part of the sky and use the blender brush to smooth the paint strokes.
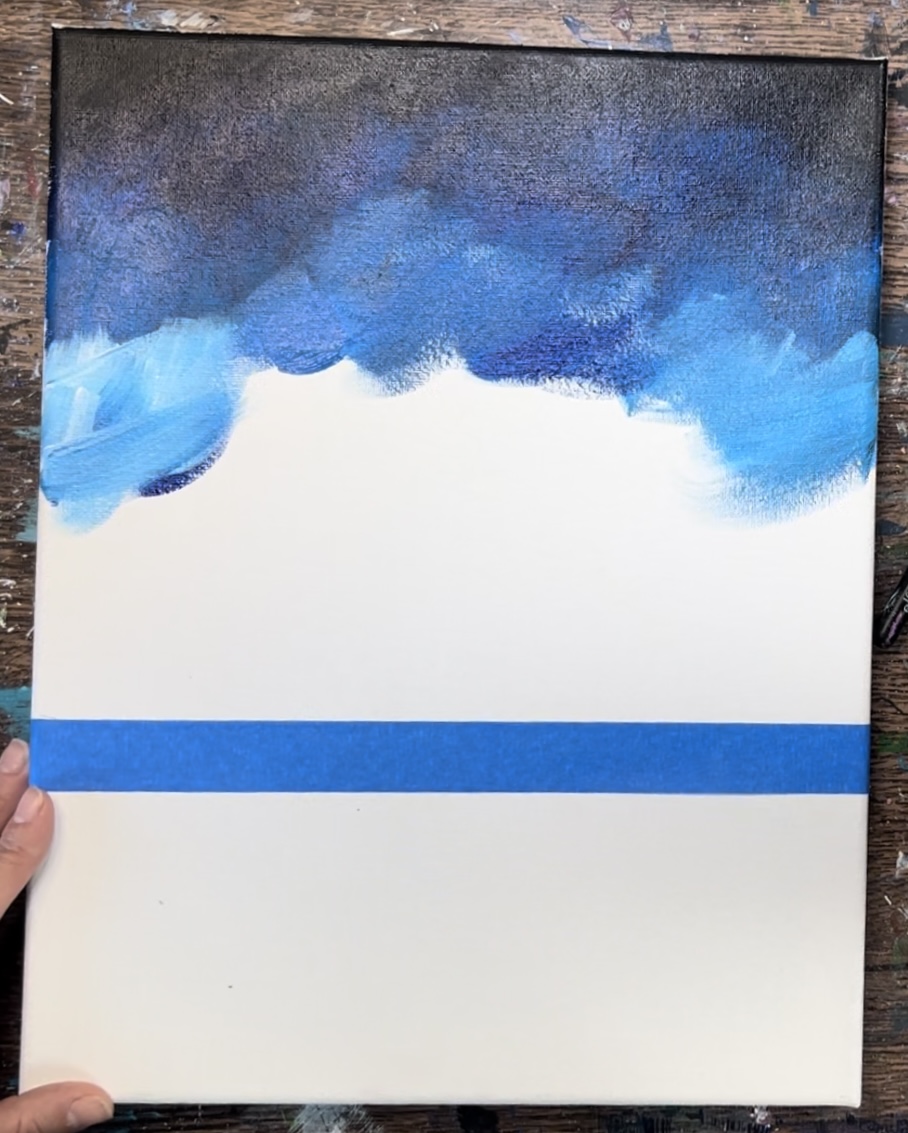
You can use the blender brush to bring some of the lighter color up into the darker part of the sky.
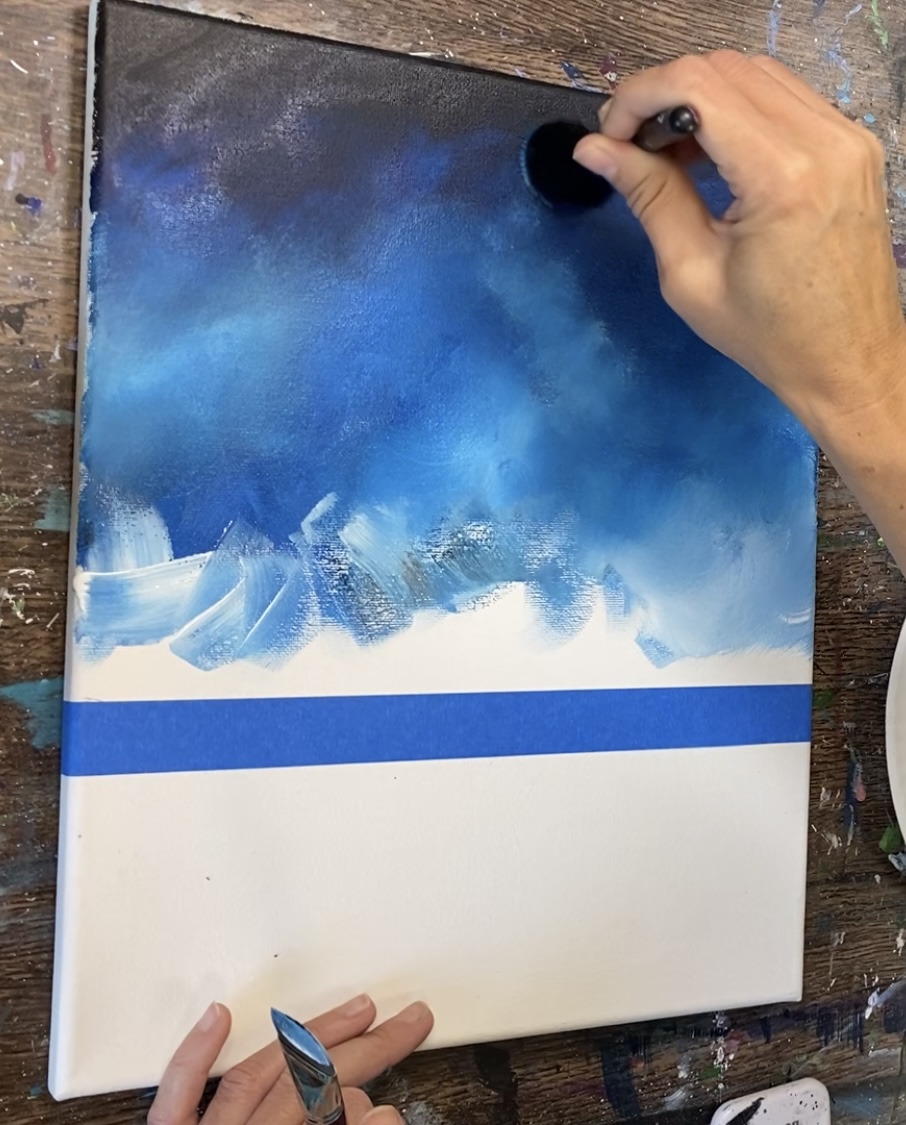
Continue to work your way down to the horizon line. As you approach the horizon line, add more white to the 3/4″ flat brush so that it is a lighter blue in that area. Then use the blender brush to smooth the strokes.
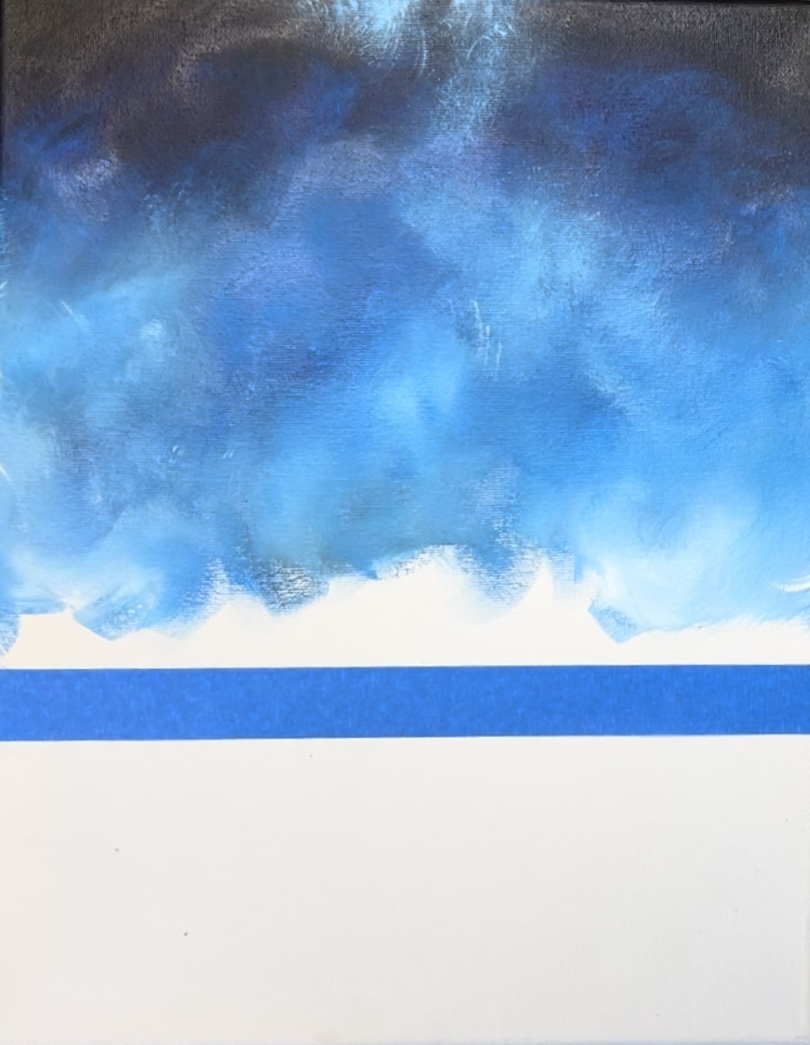
Next, load your palette with unbleached titanium. Use the 3/4″ flat wash and paint horizontal strokes along the horizon line. You only need a small amount of this color to create that warm glow above the horizon line. Add a little cerulean blue above it to help it blend back up into the sky.
Then use the blender brush to help blend that beige color into the blue.
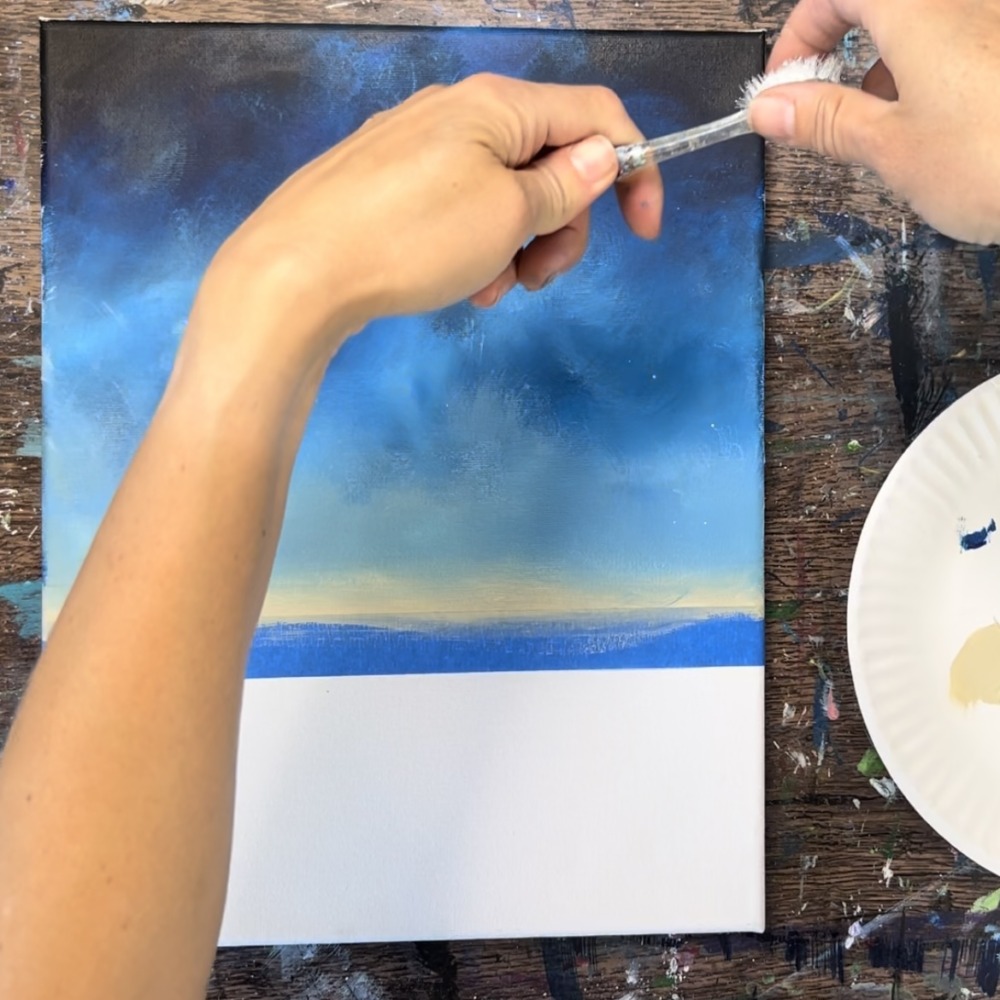
Next, use a toothbrush to splatter little white specs in the sky. Try slightly watering the white down (but not too much water). Test out another surface first before splattering. Then flick the brush all over the canvas to create stars.
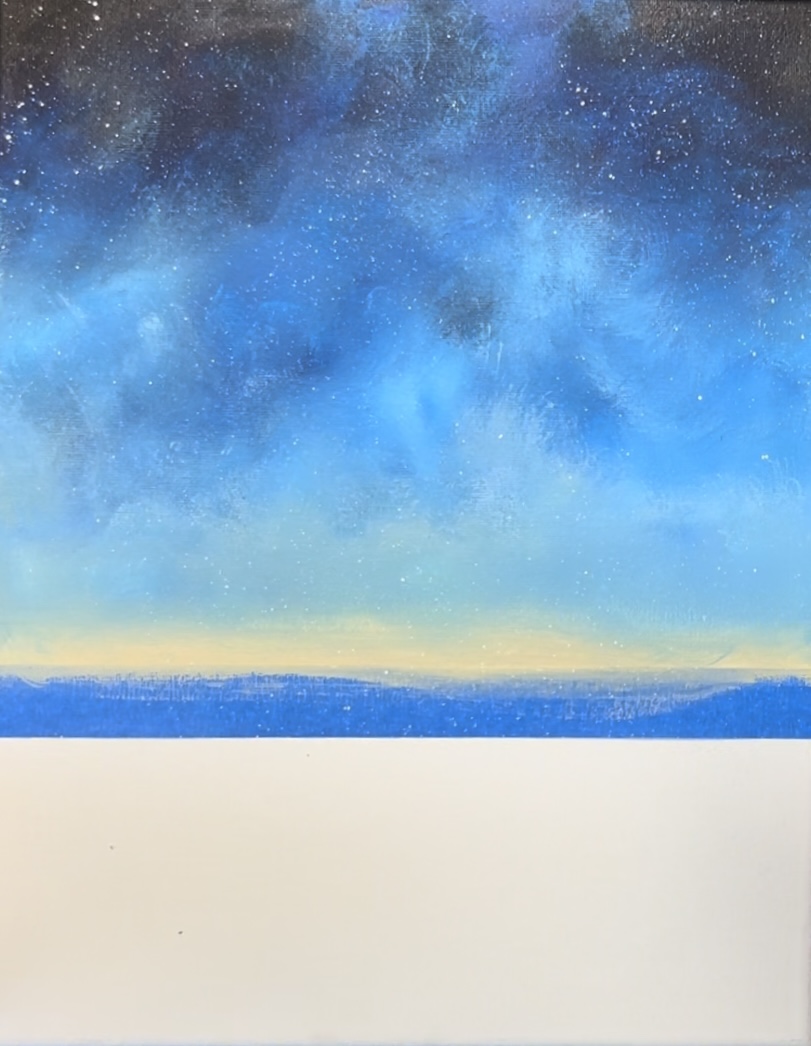
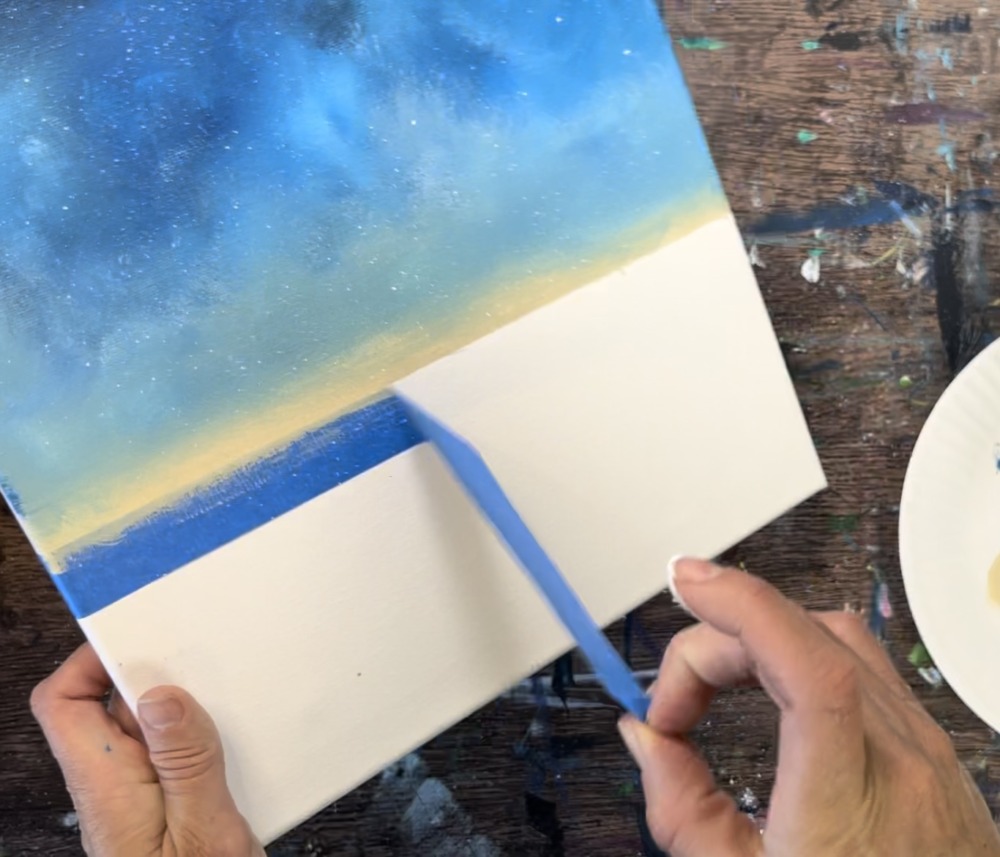
Next, gently pull the paint tape line off.
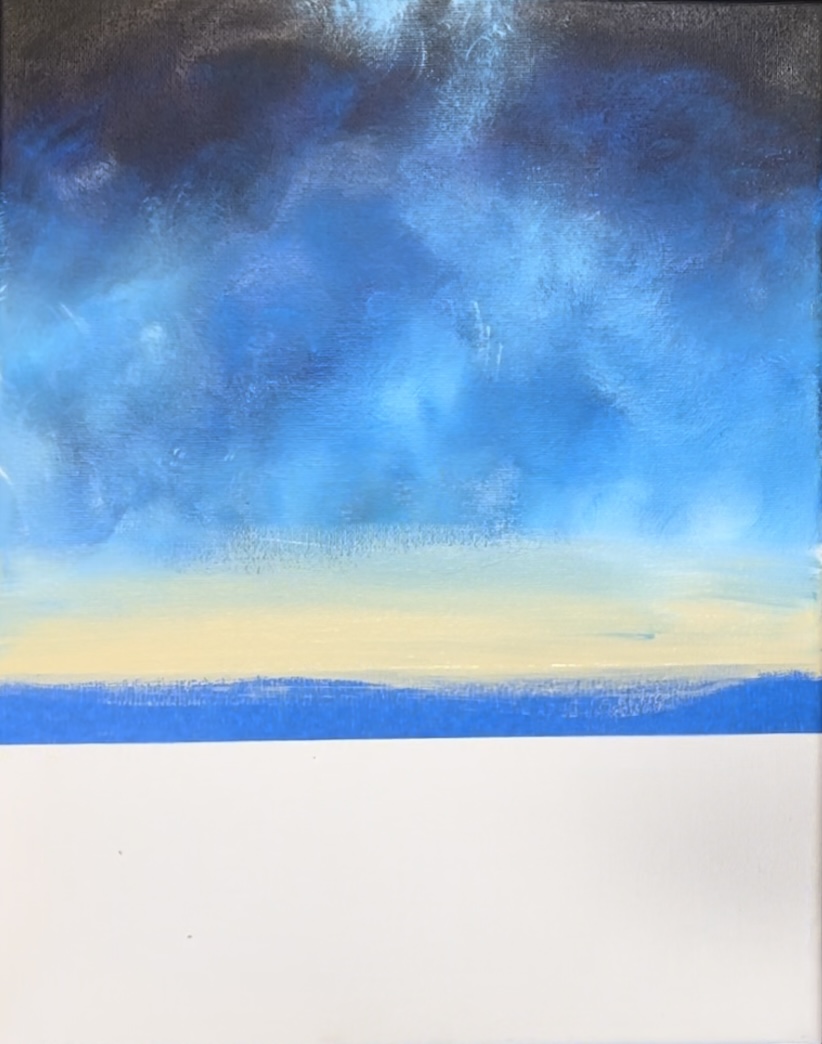
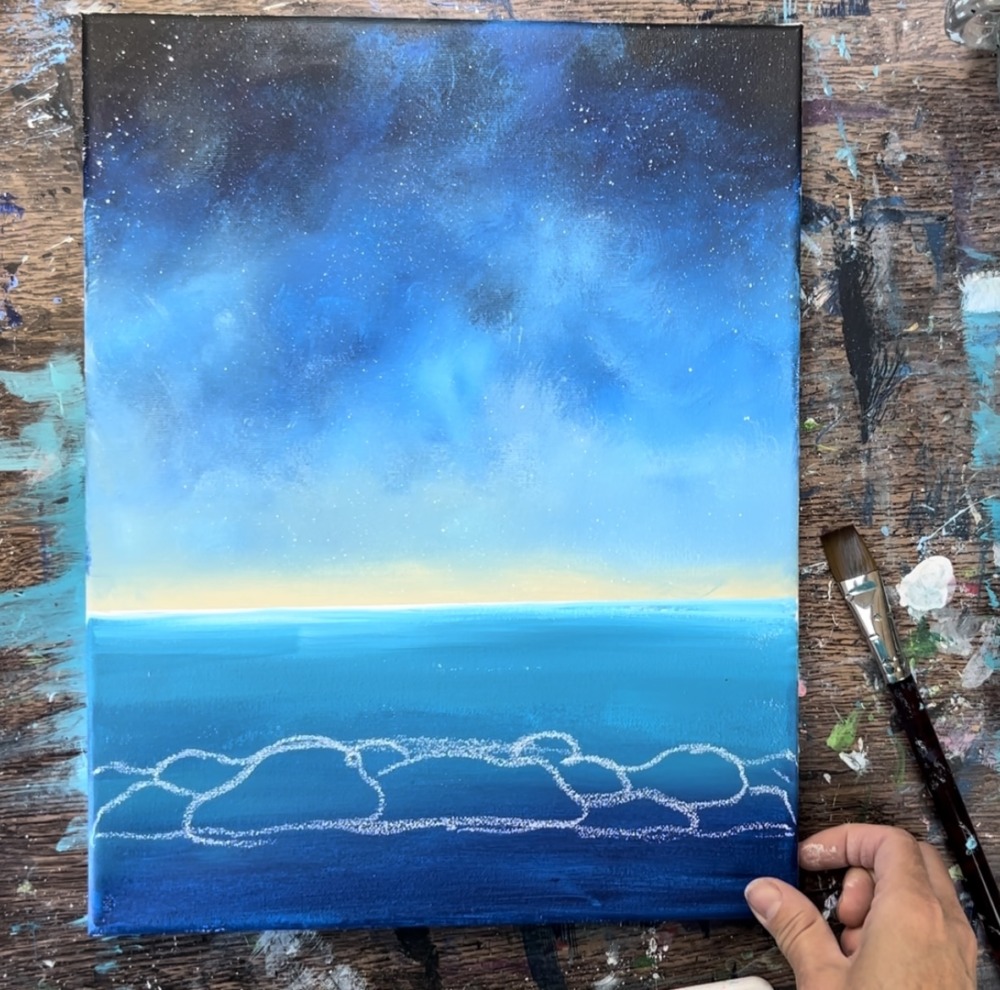
2. Paint Ocean Water
Load your palette with turquoise blue. Then load your 3/4″ flat wash brush with equal parts turquoise and titanium white. Use the tip of your brush to paint horizontal strokes. Do this just under the horizontal horizon line and get as close as possible to the edge.
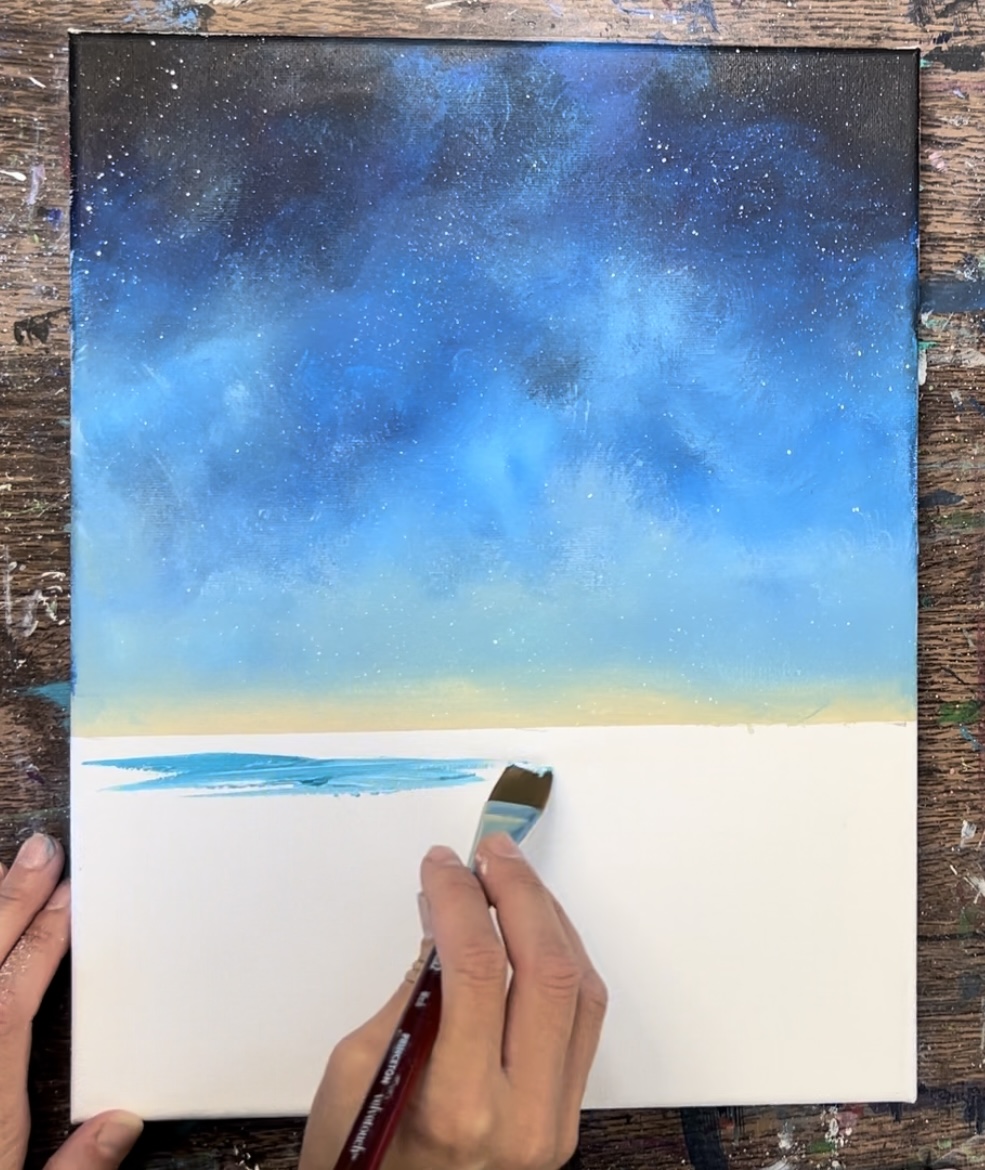
This part of the water should be the lightest part. Then it quickly becomes dark as you work your way down the canvas.
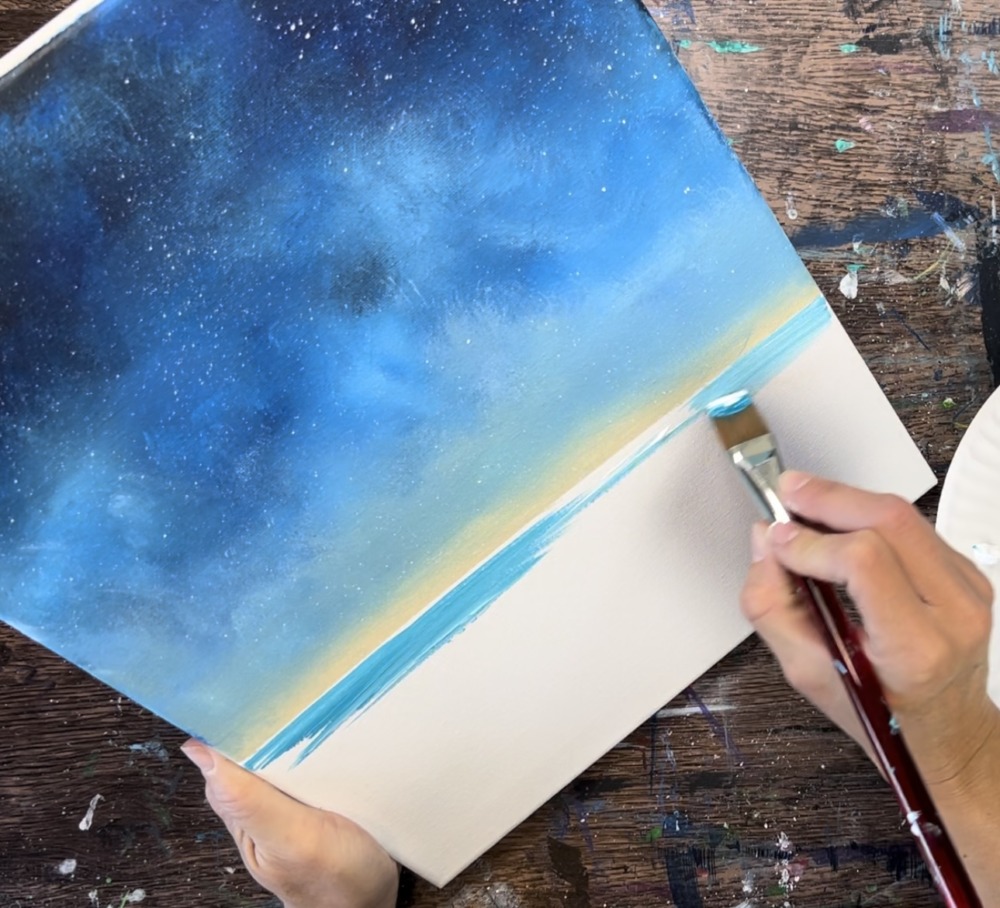
Load your brush into just the turquoise color. Paint horizontal strokes using the full width of the brush. Go a little more than halfway down the water area.
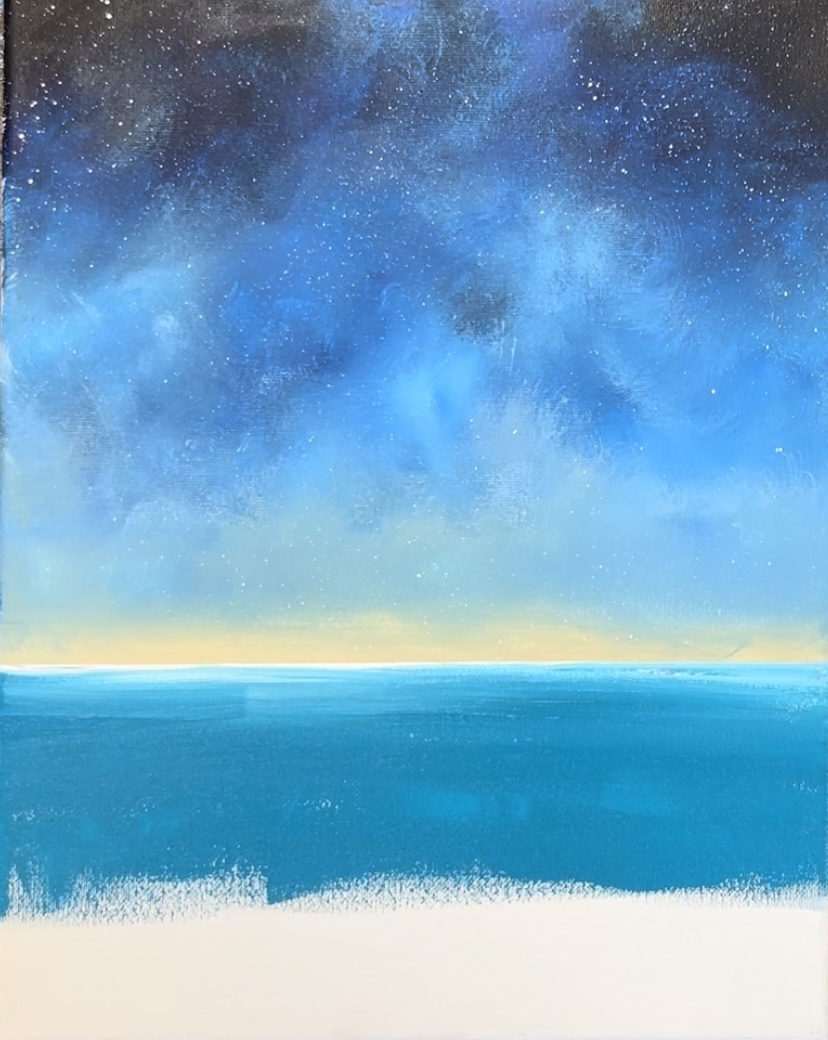
Then, rinse your brush. Load it into just the phthalo blue and blend that phthalo blue up into the turquoise. The water should be darkest on the bottom of the canvas.
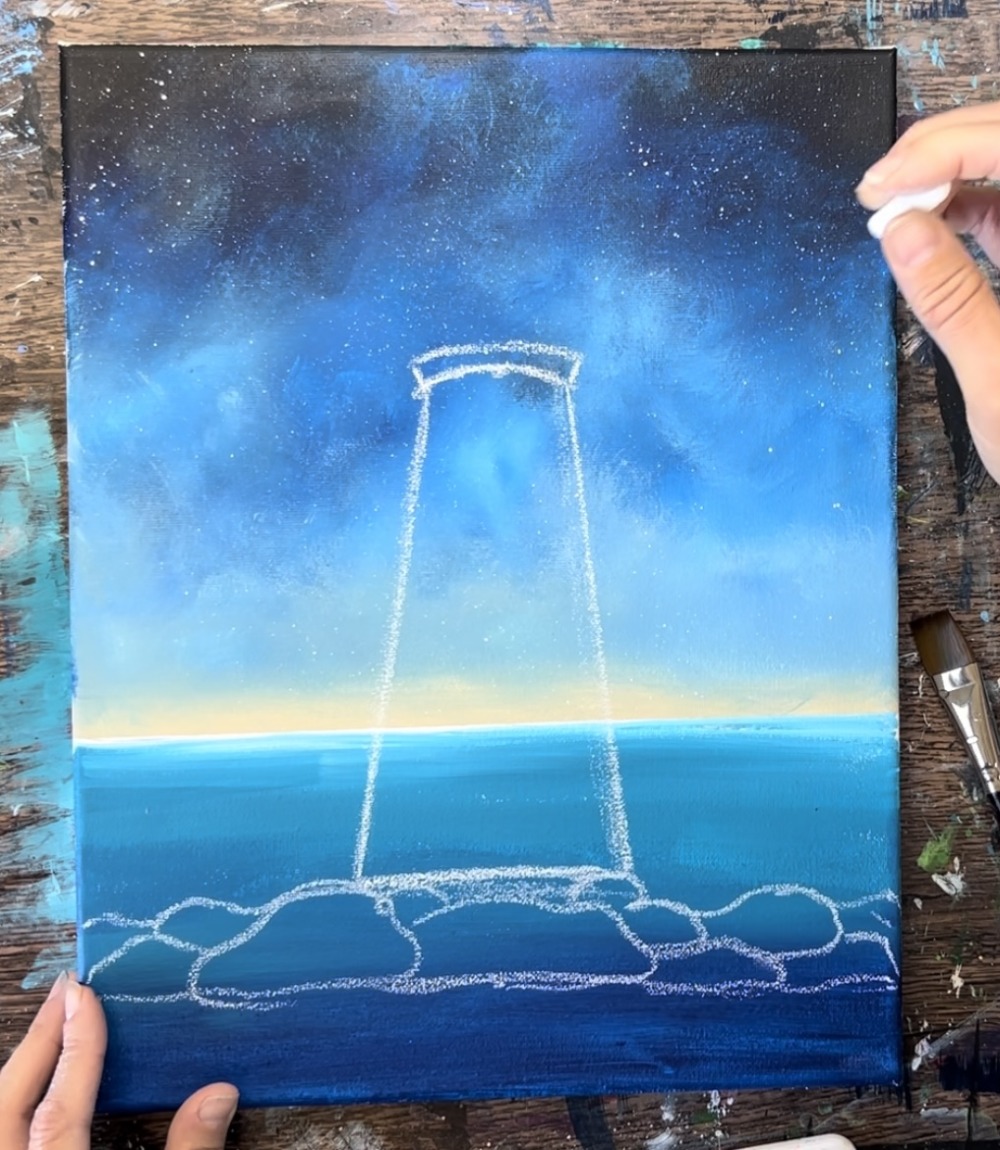
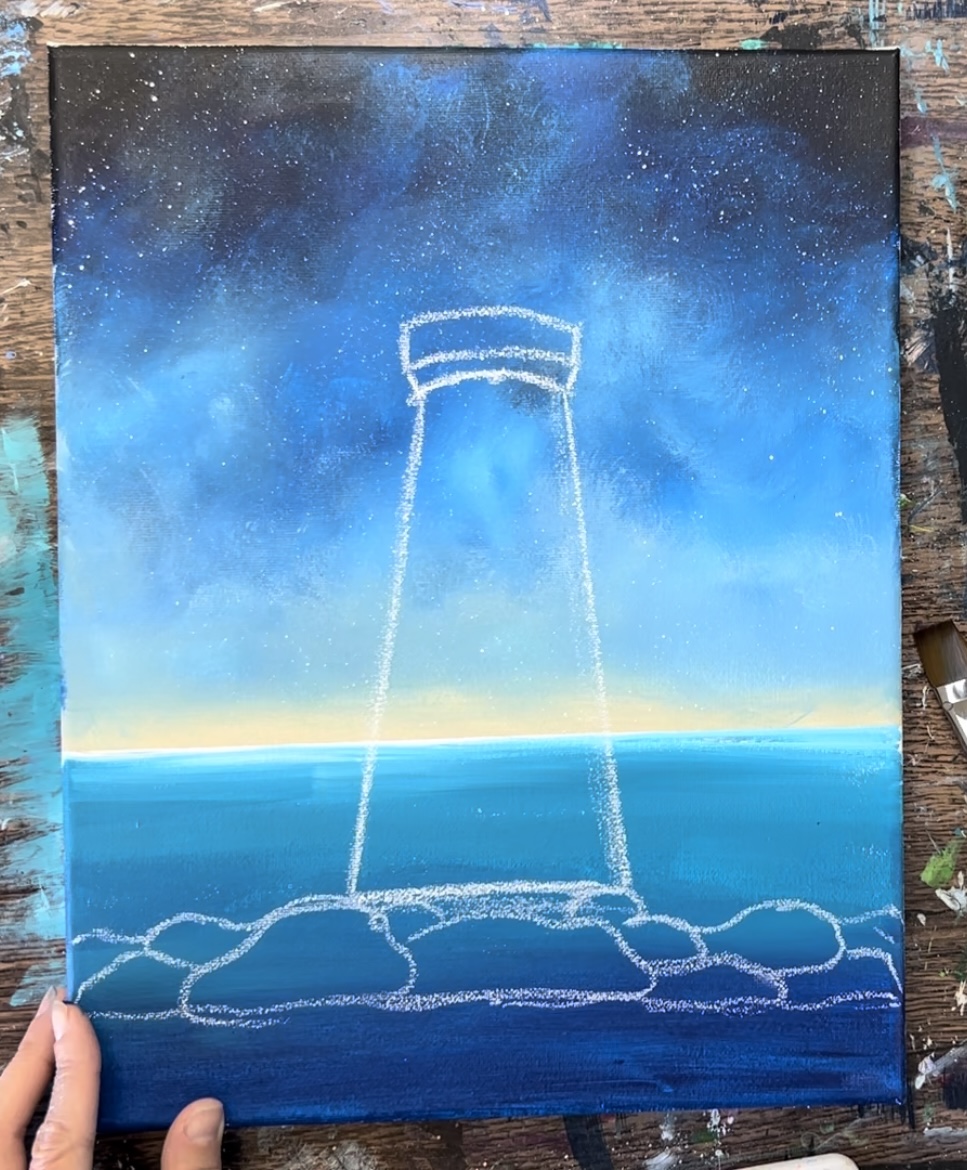
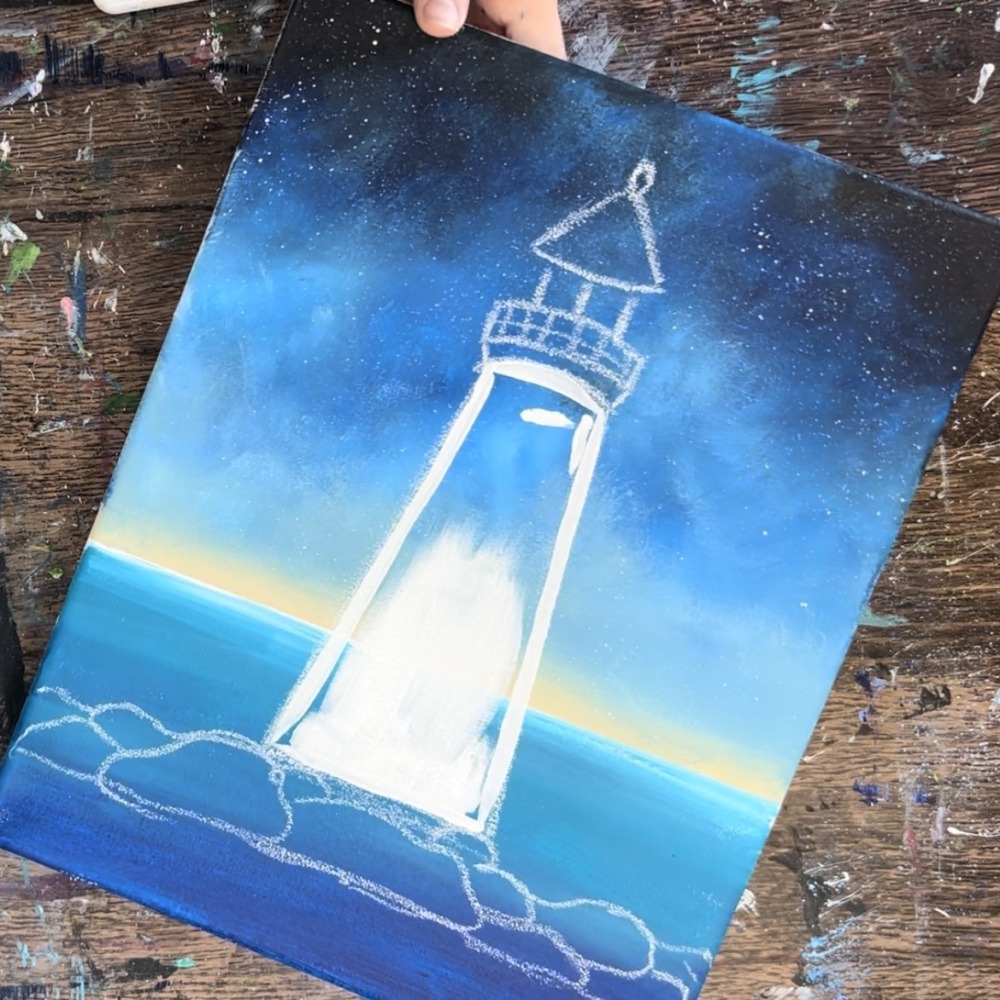
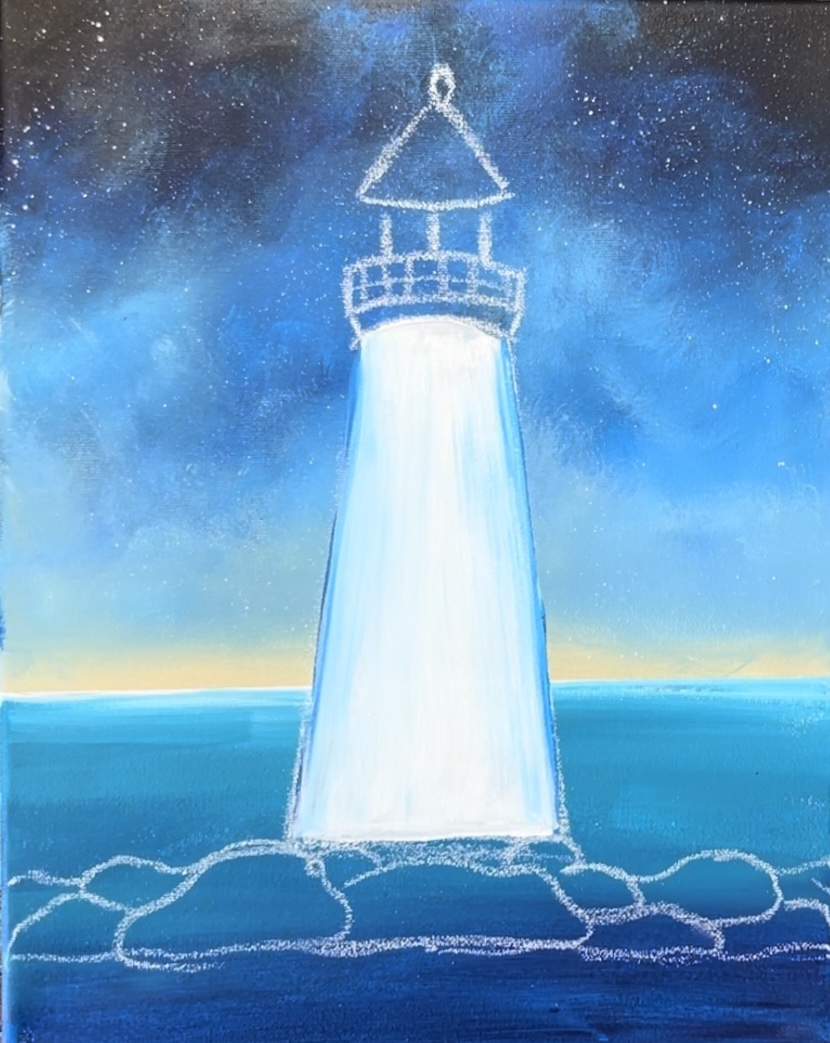
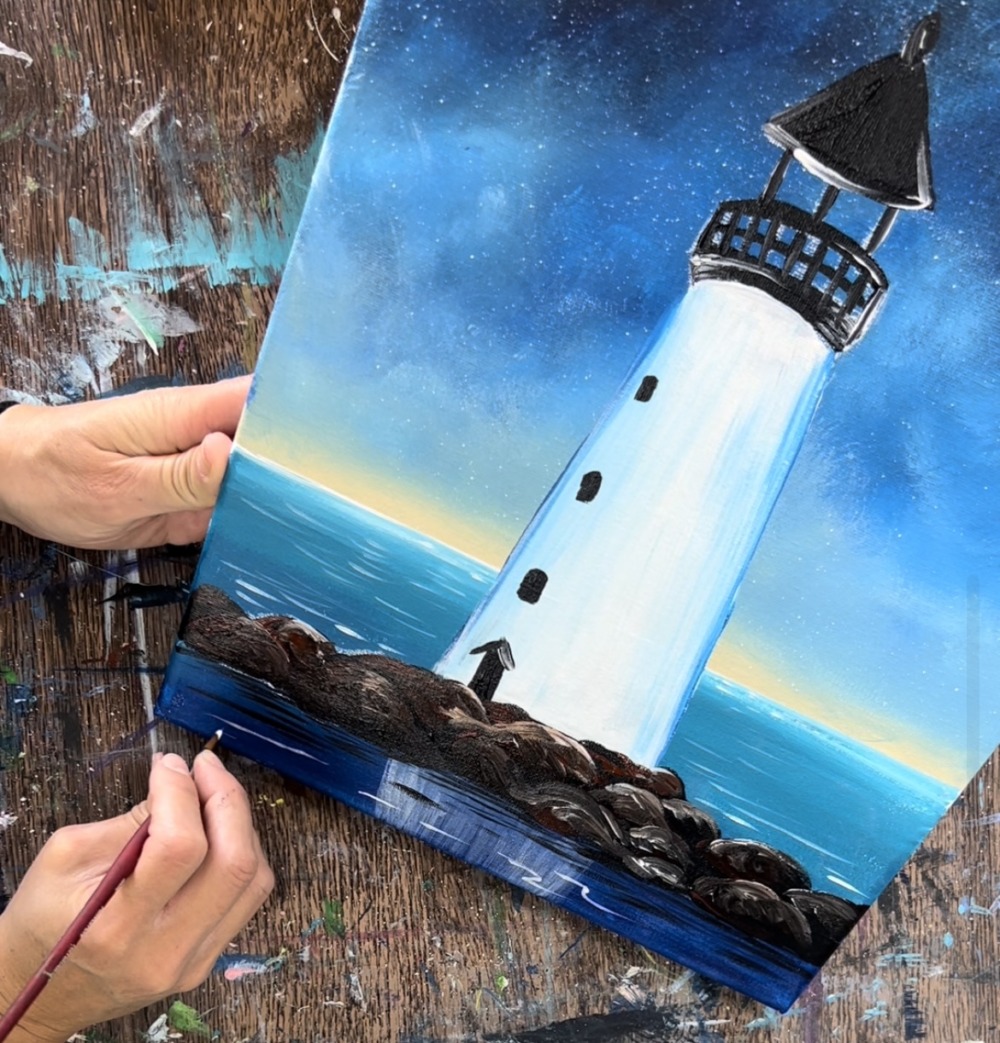
3. Draw Lighthouse & Rocks
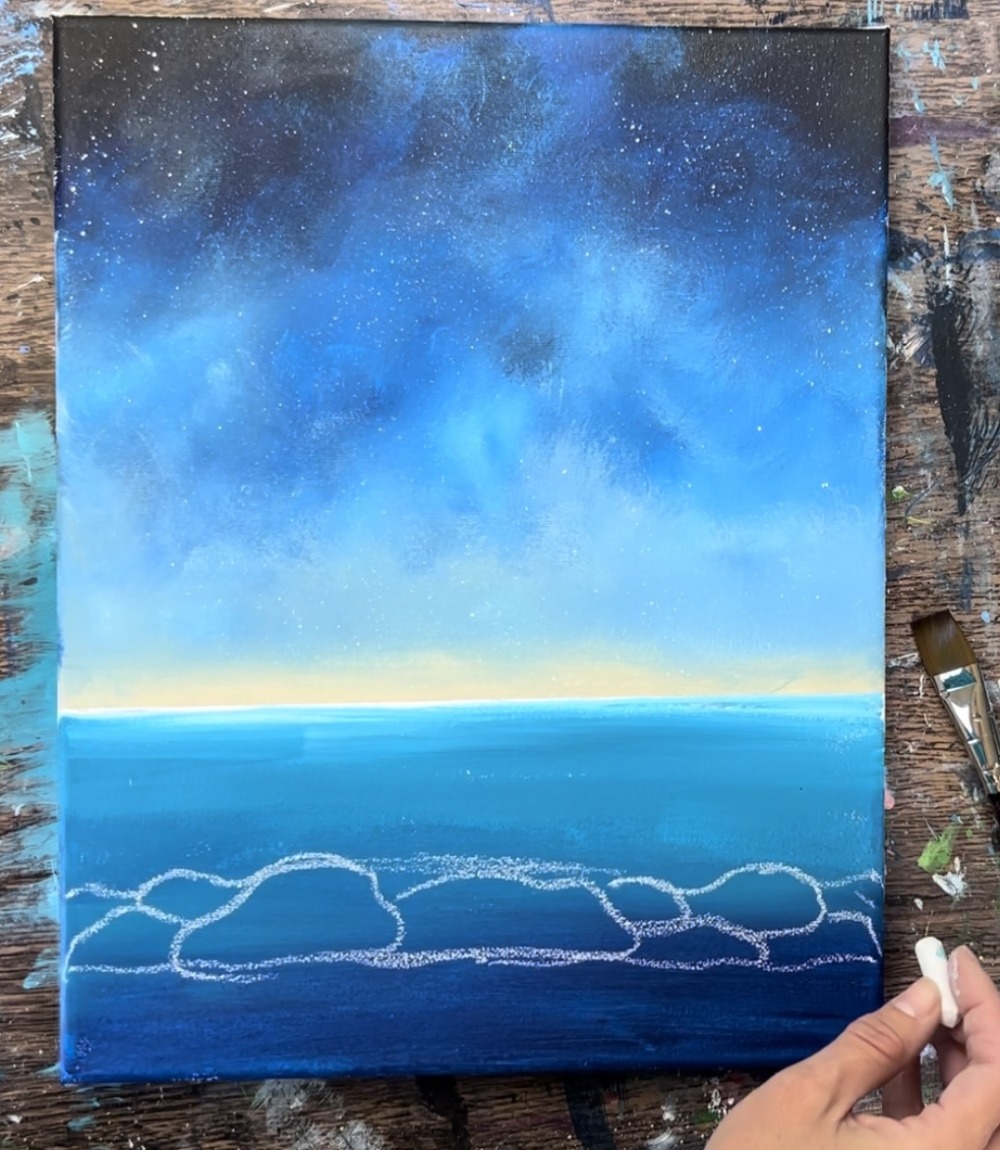
Make sure the painting so far is dry before doing this step. Use a piece of white chalk (or pencil) to draw a horizontal wavy line across the canvas that is about 1.5″ from the bottom edge of the canvas.
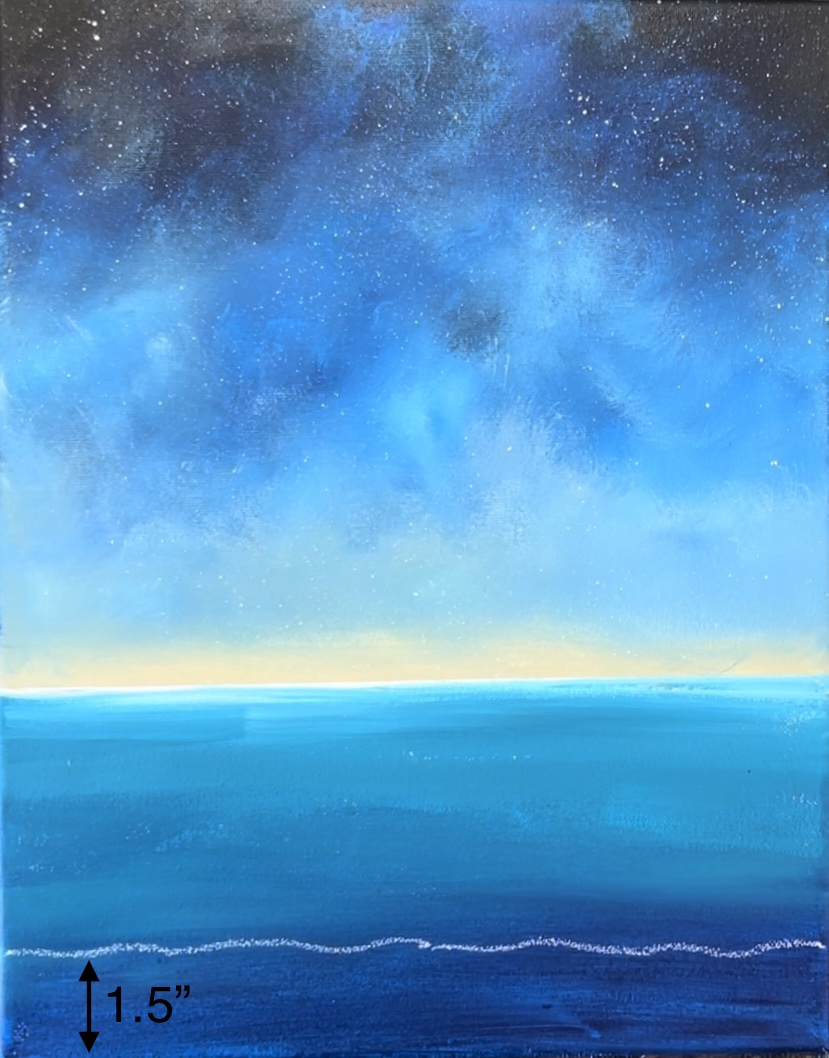
Then measure about 1.5″ from that line and draw a horizontal line that is about 4″ wide.

This horizontal line is the flat land area the lighthouse will be situated on.
Then draw two wavy lines on the left and right of that horizontal line.

Next, draw actual rock shapes that are embedded inside that land area you just drew. Some are large and some are small. Make some that overlap others and some that are stacked.
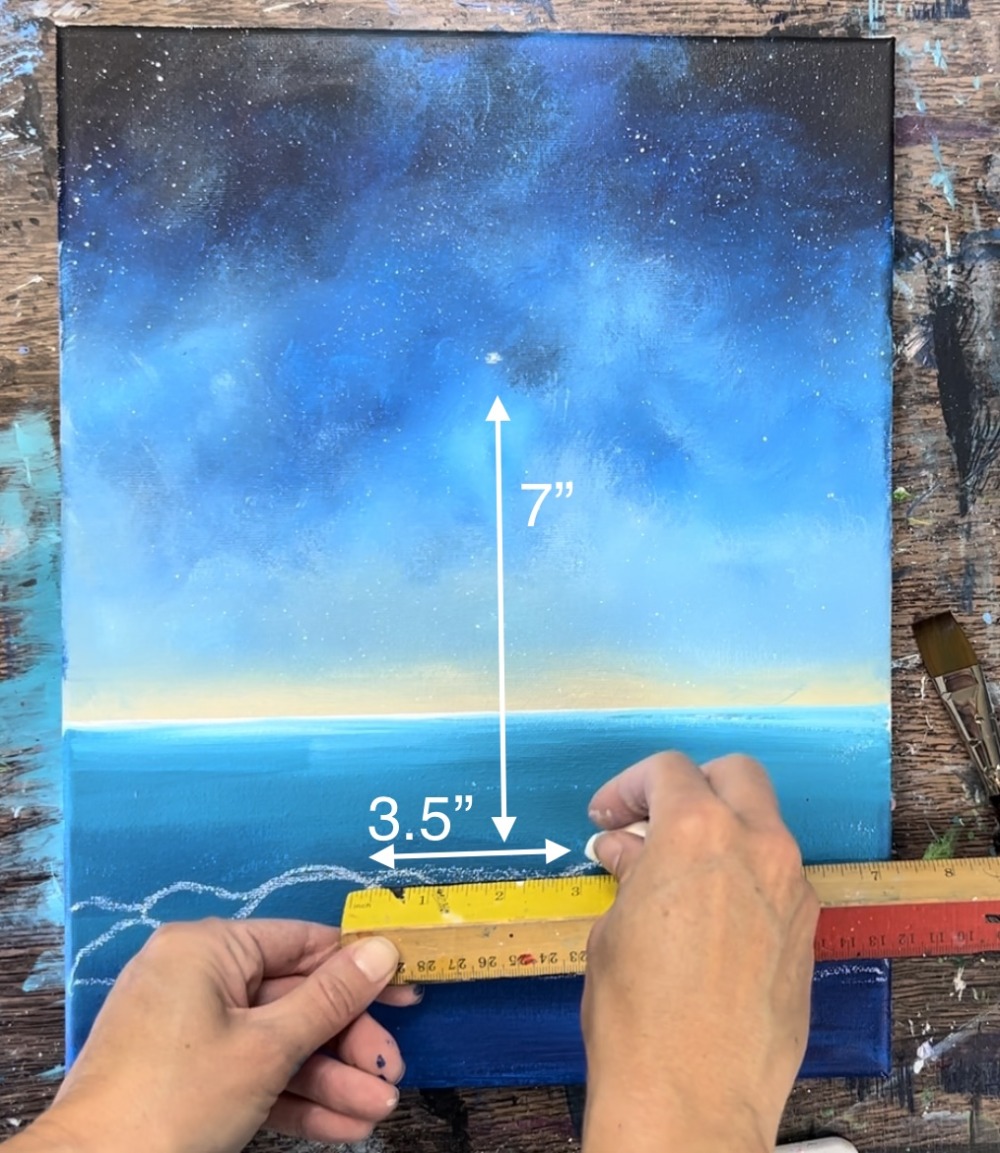
Next draw the lighthouse. Measure about 7″ from the top of your rocky area and make a mark. Try to make this mark as centered as possible.
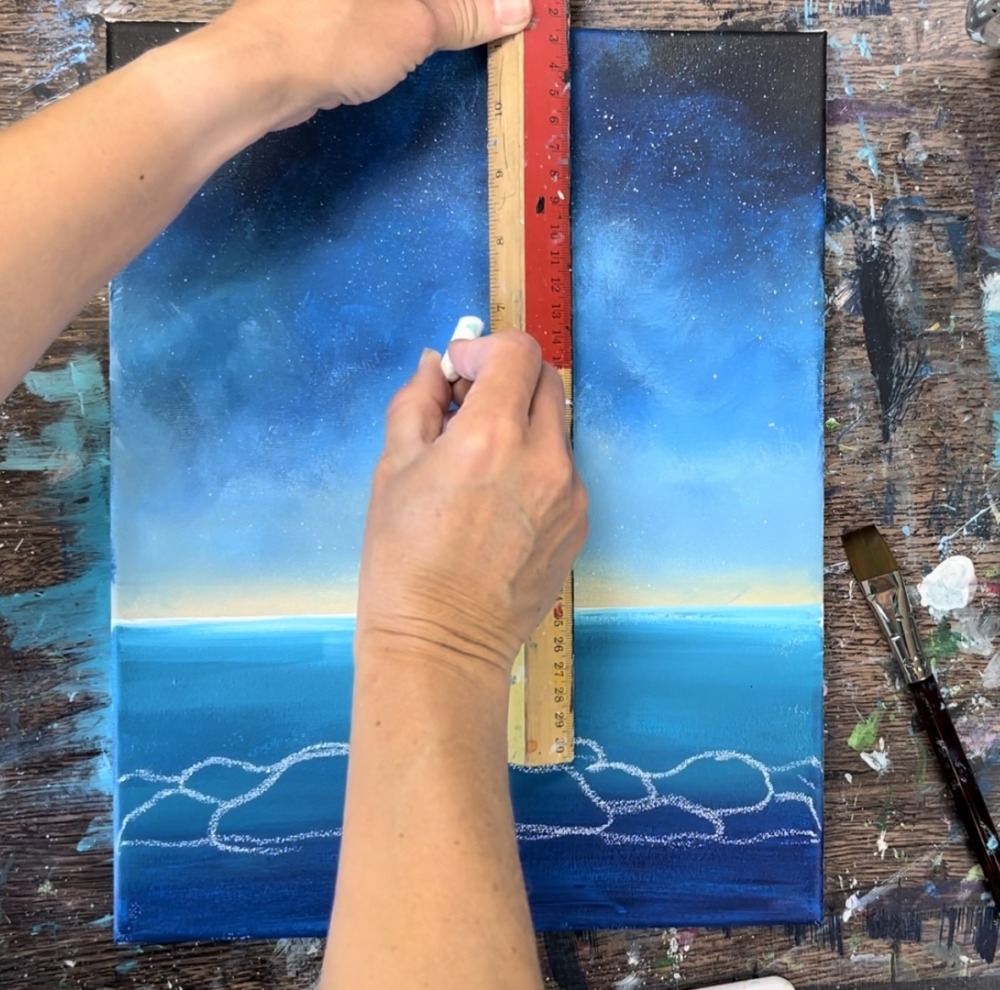
Next draw a horizontal line for the base of the lighthouse. This line is about 3.5″ wide and is positioned on the flat part of the rocky area.
Then sketch the two diagonal lines so that they go more narrow but do not go to a point.
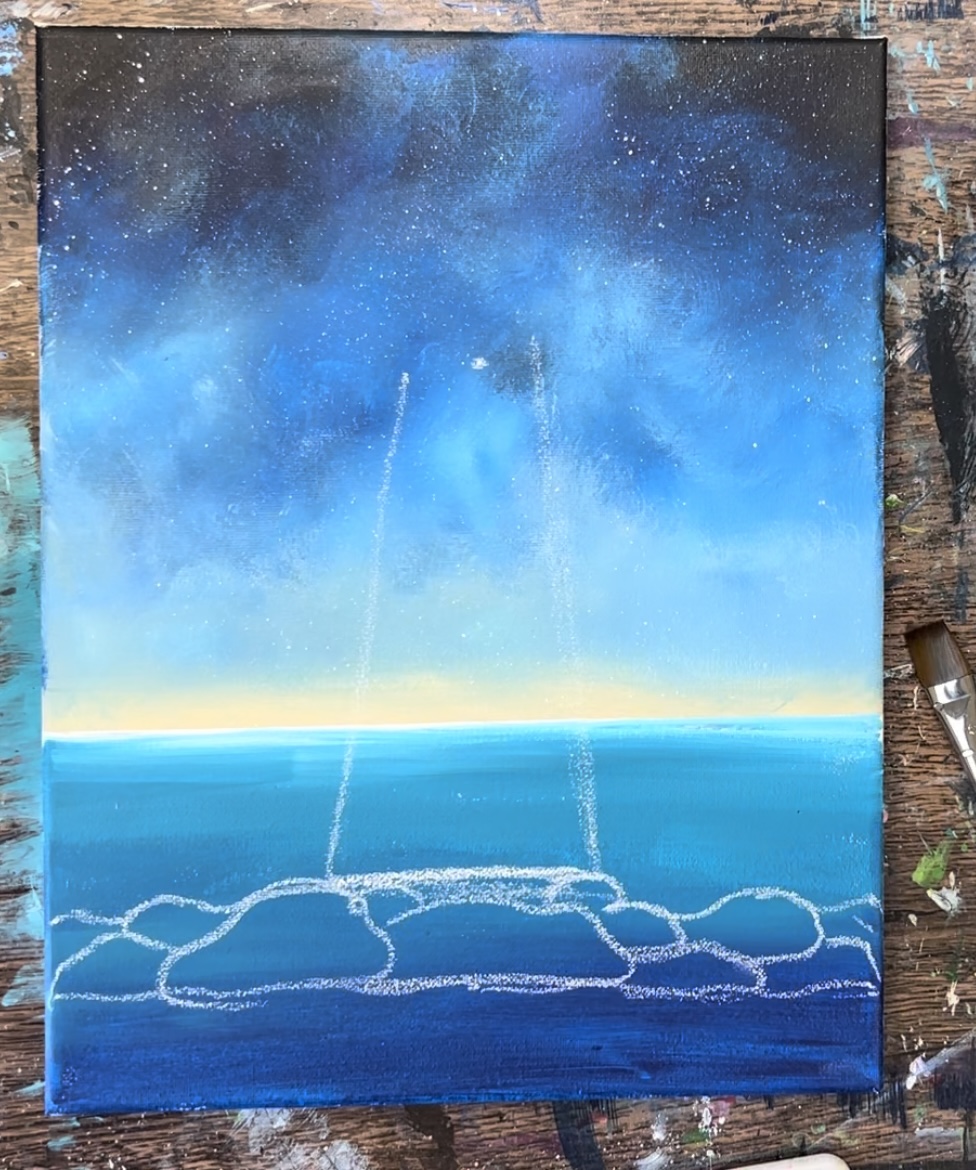
Draw an arc a the top. This arc is about 3″ wide.
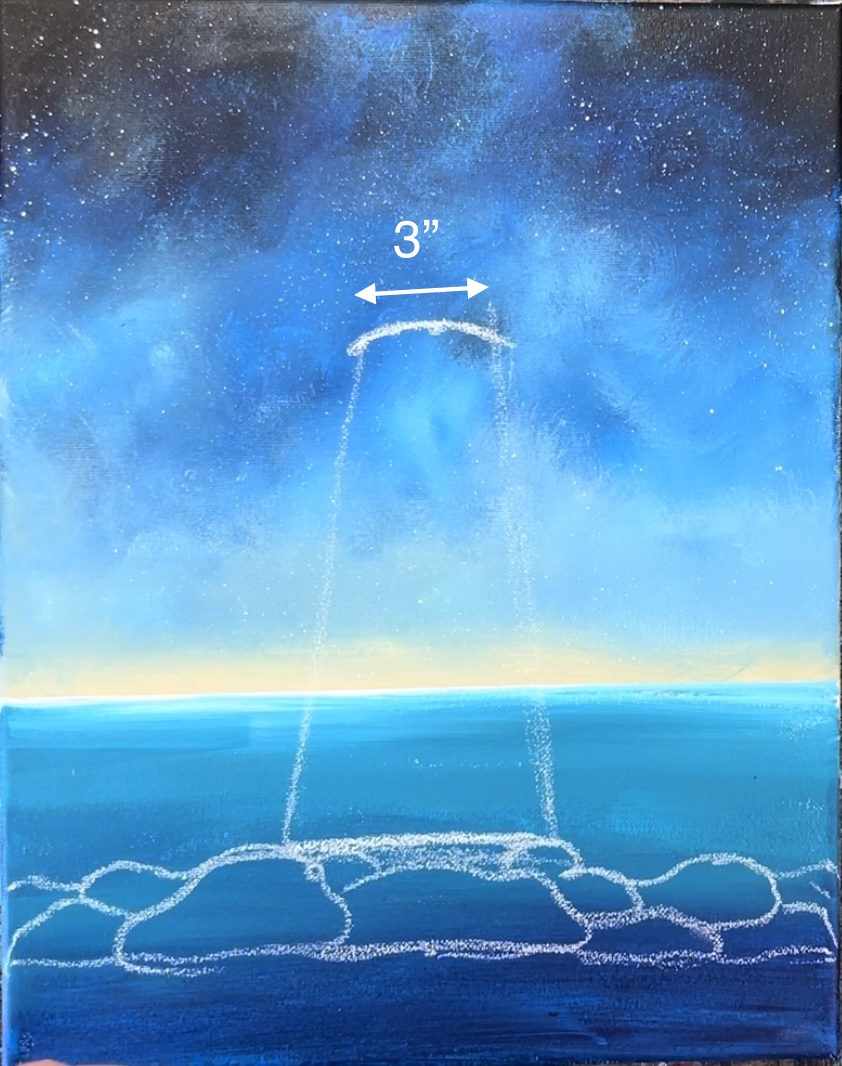
Then use a ruler to redraw your diagonal lines so they become straight.
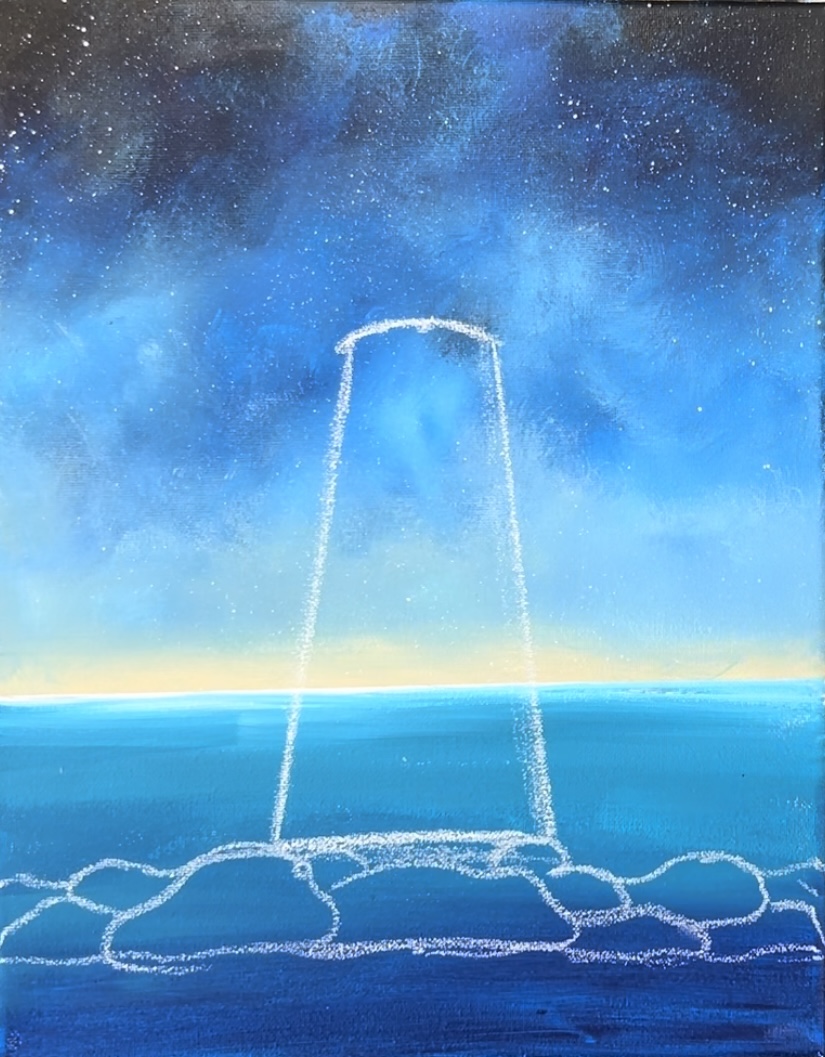
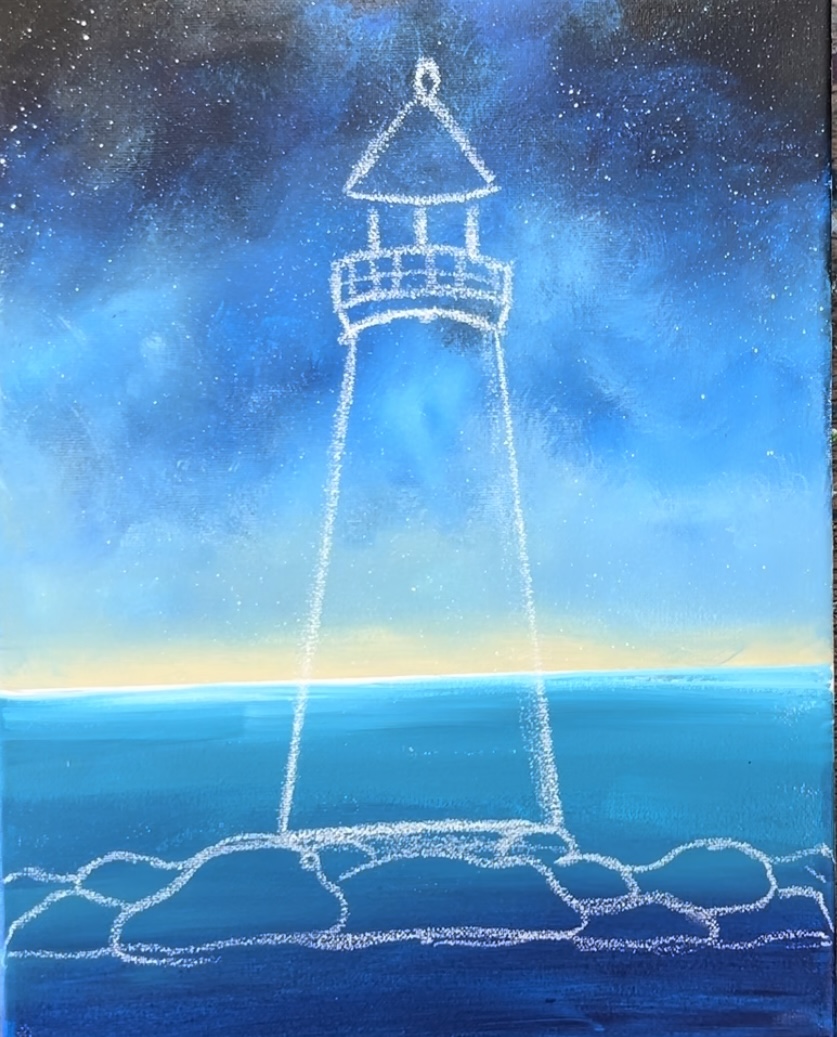
Next, draw the balcony, light box and dome. Draw an arc shape that goes up about an eighth of an inch.
Then draw the balcony area. Draw two vertical lines that go up about a half inch and then draw another arch.
Draw three vertical lines for the light box. Then draw a curve going downwards for the bottom of the dome.
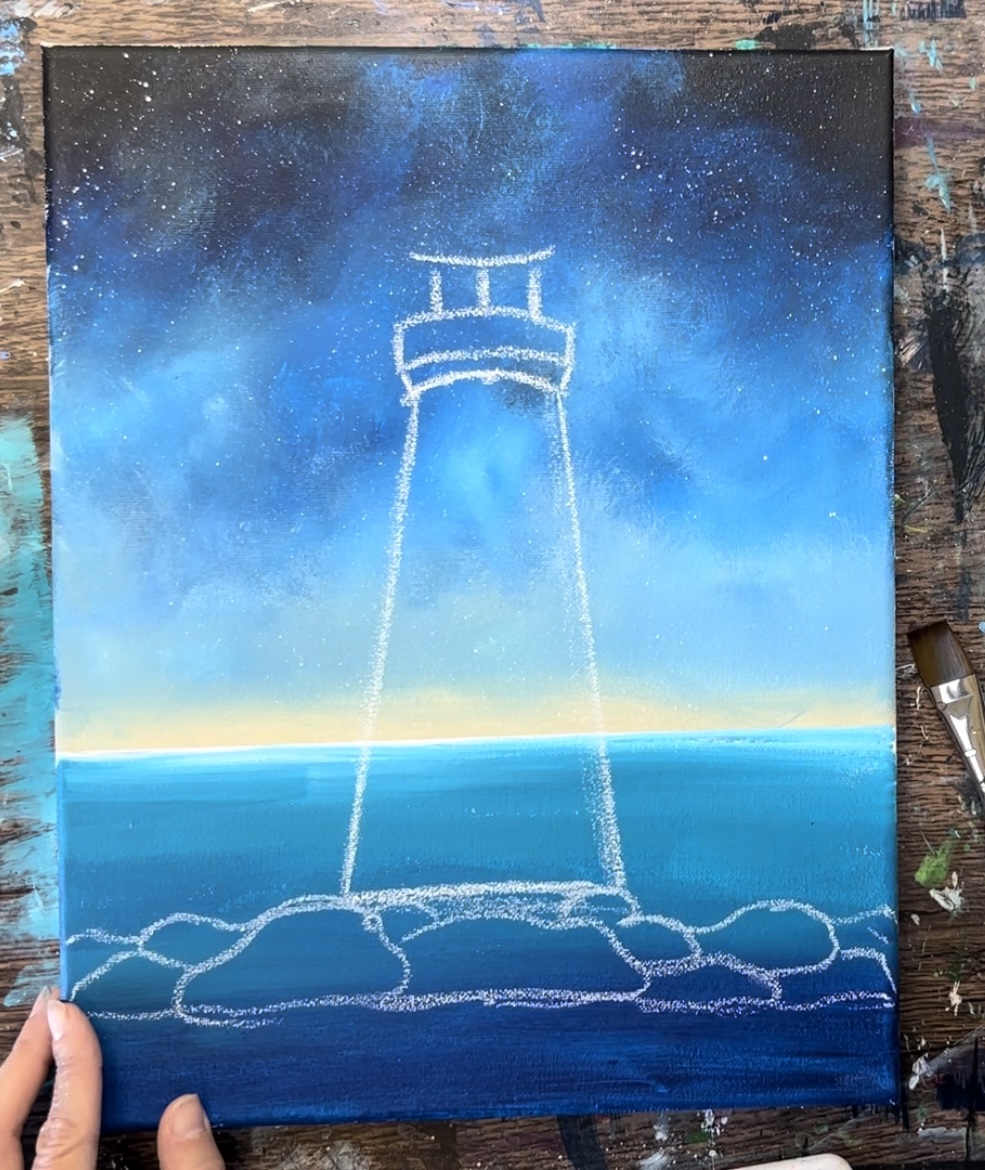
Then draw the rest of the triangle dome and draw an oval or circle at the top.
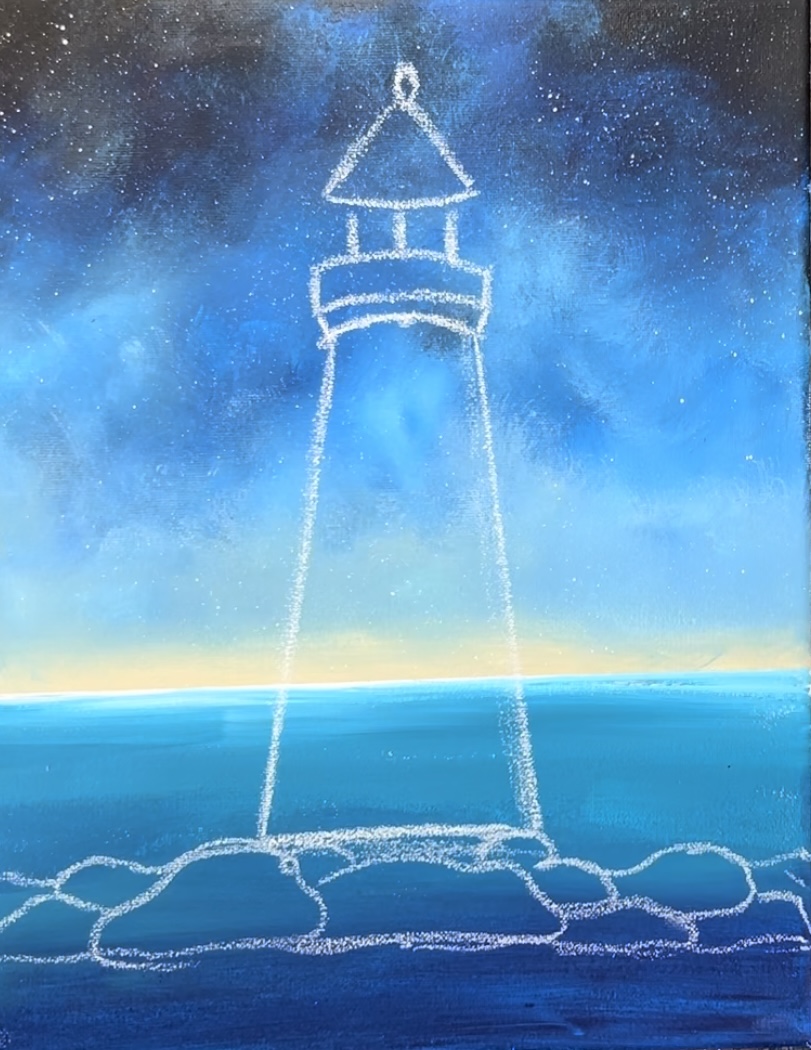
Draw rails on the balcony. Draw vertical lines going across and a horizontal line going down the middle.
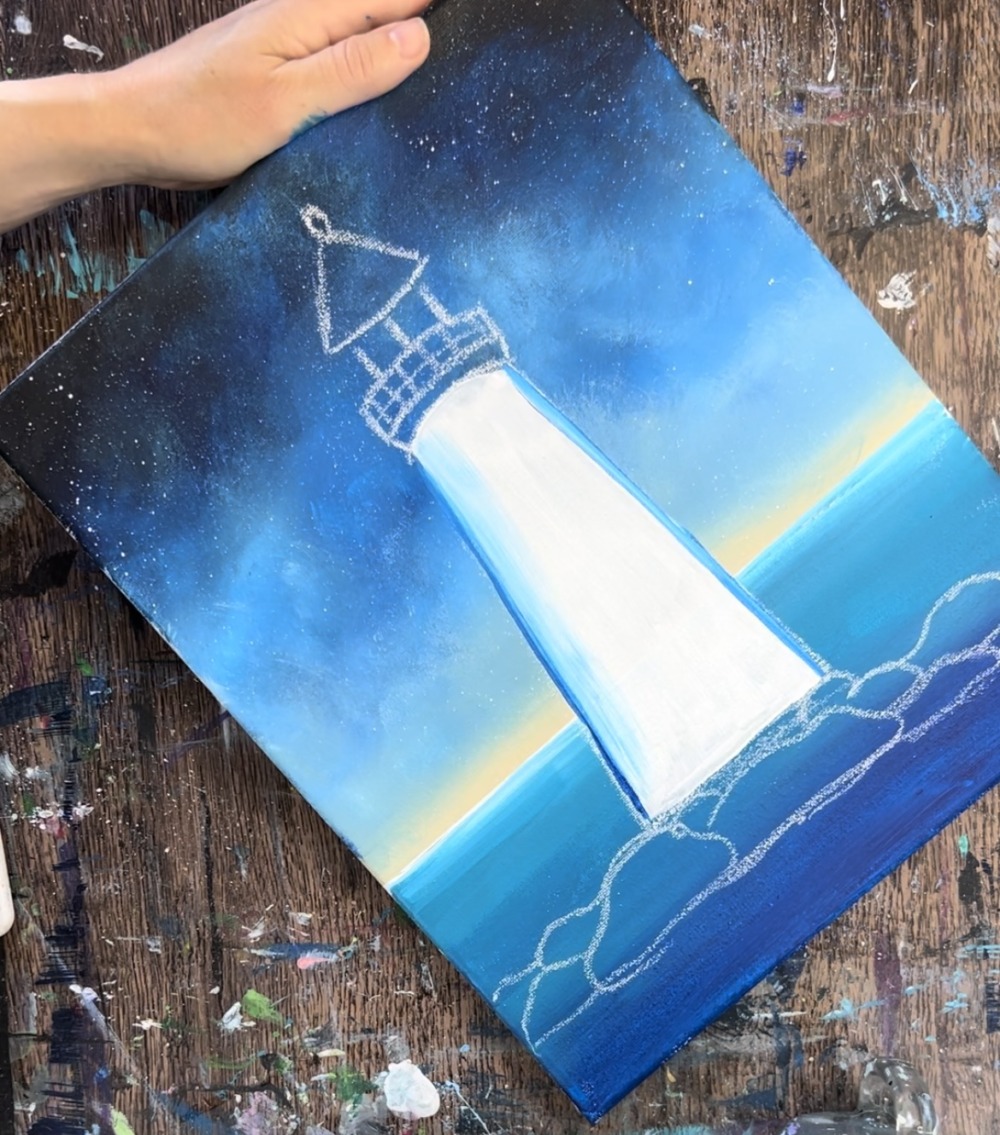
4. Paint Lighthouse Tower
Use the 3/4″ flat wash brush to paint the tower a solid coat of titanium white paint. Use the tip of the brush the outline the inner edge of the tower. Then fill it in using all vertical strokes. You may need to add extra thick white in the area around the horizon line so that it won’t be showing through the paint.
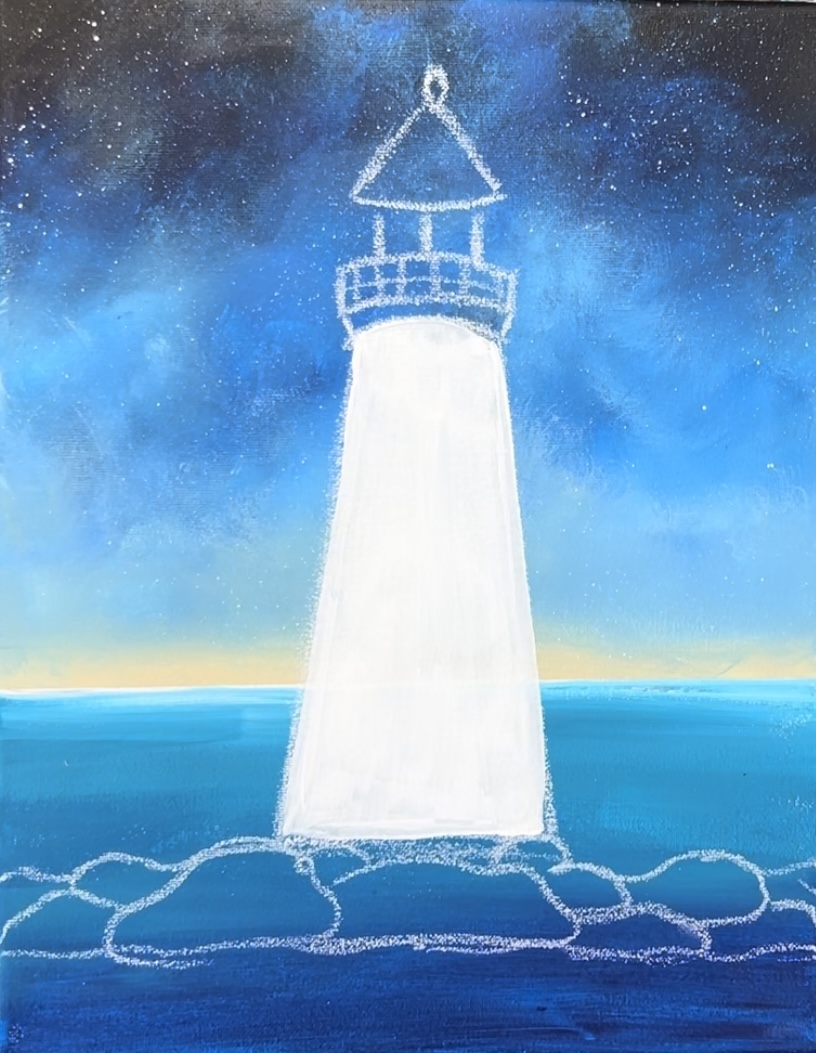
Next, add shading to the lighthouse. Do this by adding a very small amount of phthalo blue on both edges of the lighthouse. Then blend it in gently with the white.
You may need to add more white to your brush when blending. Keep the center of the tower bright with the most white and the edges fade to a dark blue on the very edge.
5. Paint Light House Balcony & Ball vent/ Dome
Use a #4 round brush and mars black. Outline the railing and the arcs that were drawn with the chalk.
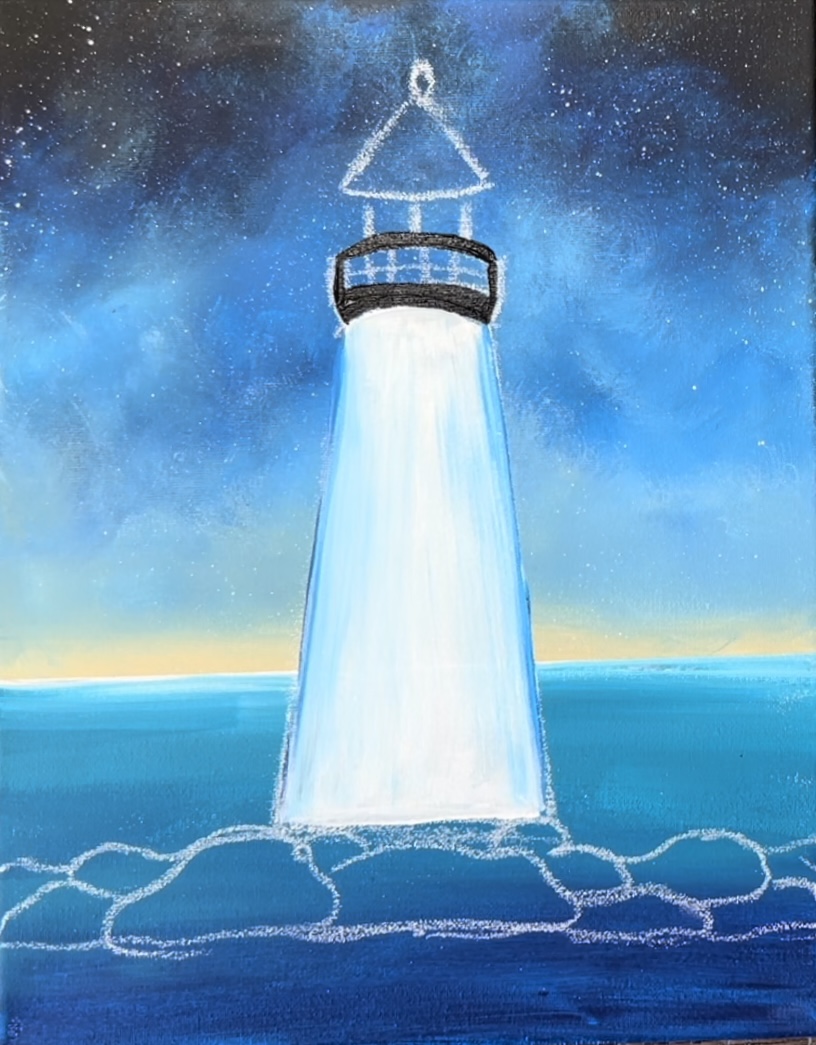
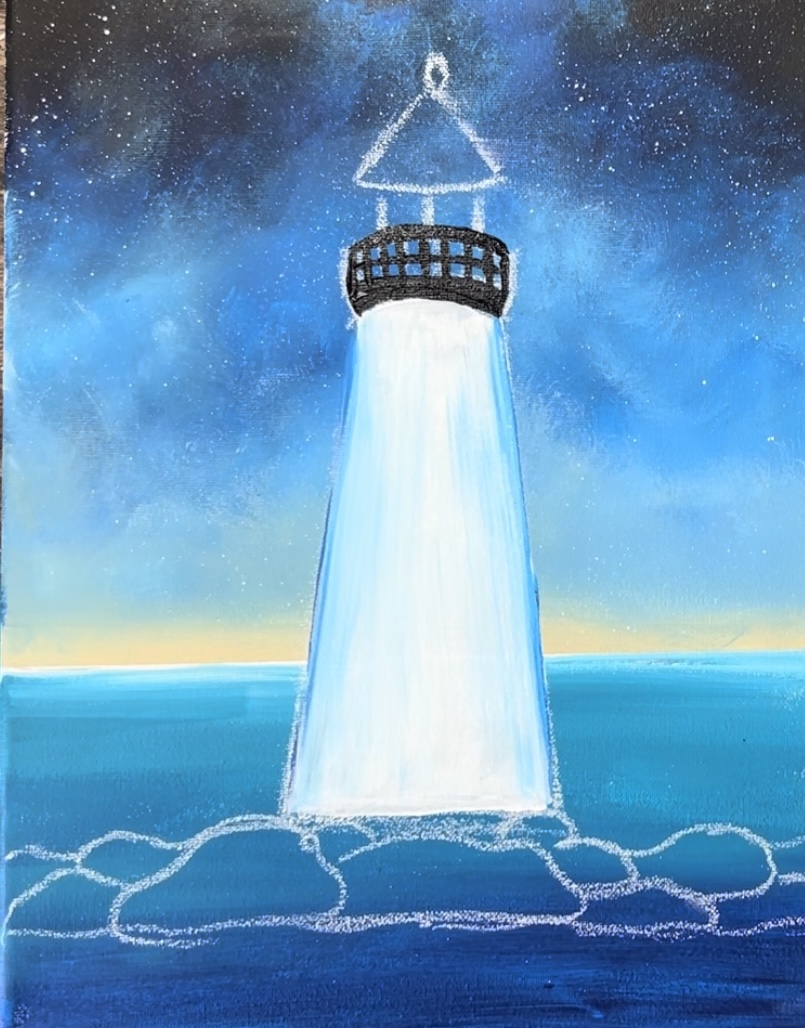
Then add a very small amount of white to the brush. Lightly blend it on the sides of the arc lines so that it gives it kind of a shiny/ highlight look.
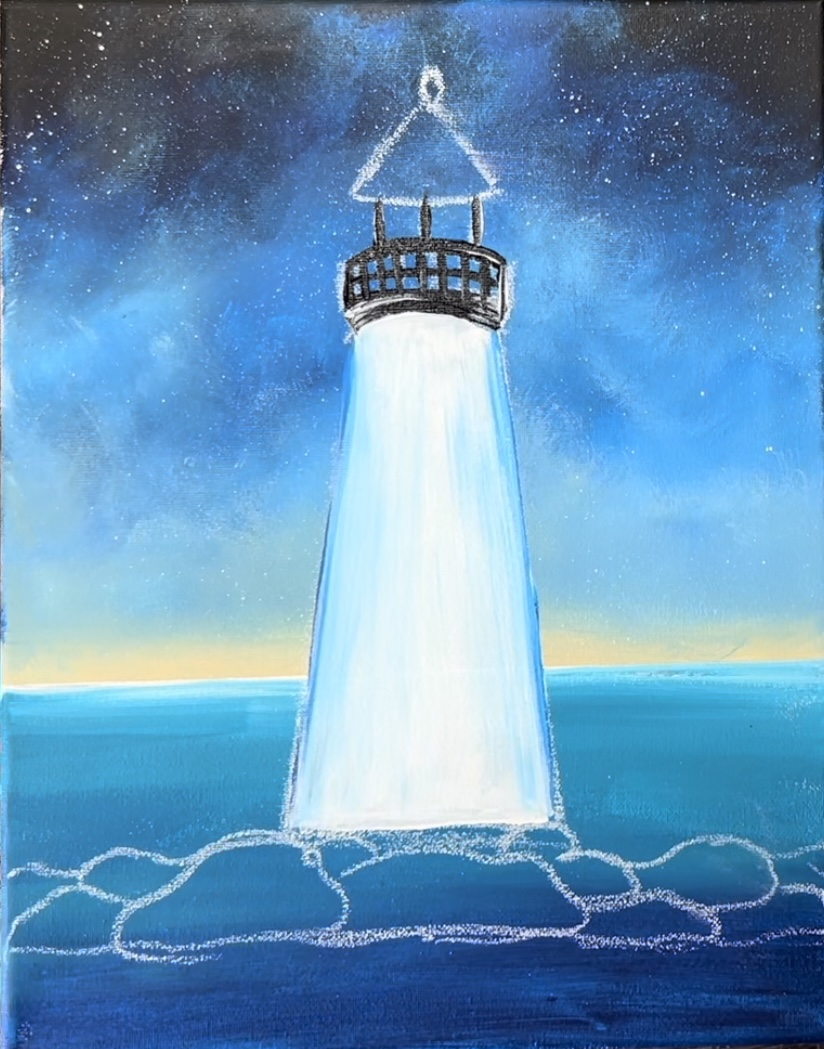
Then paint the triangular dome and add a small amount of white on the bottom edge.
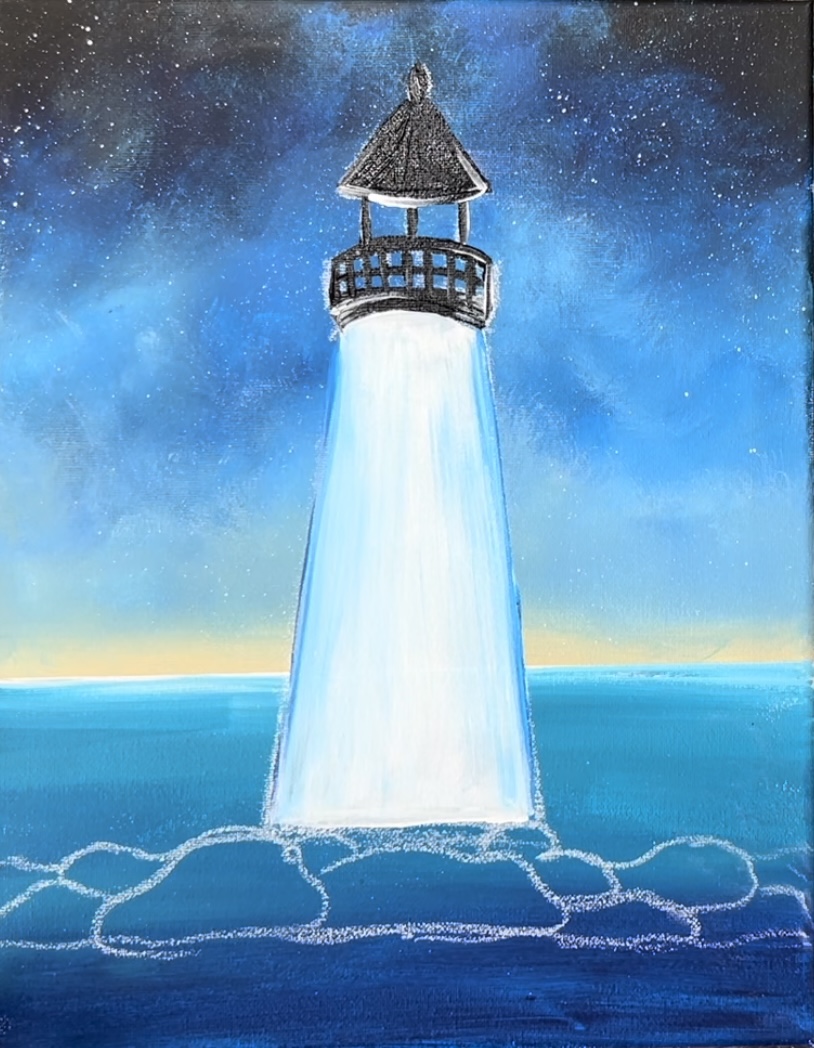
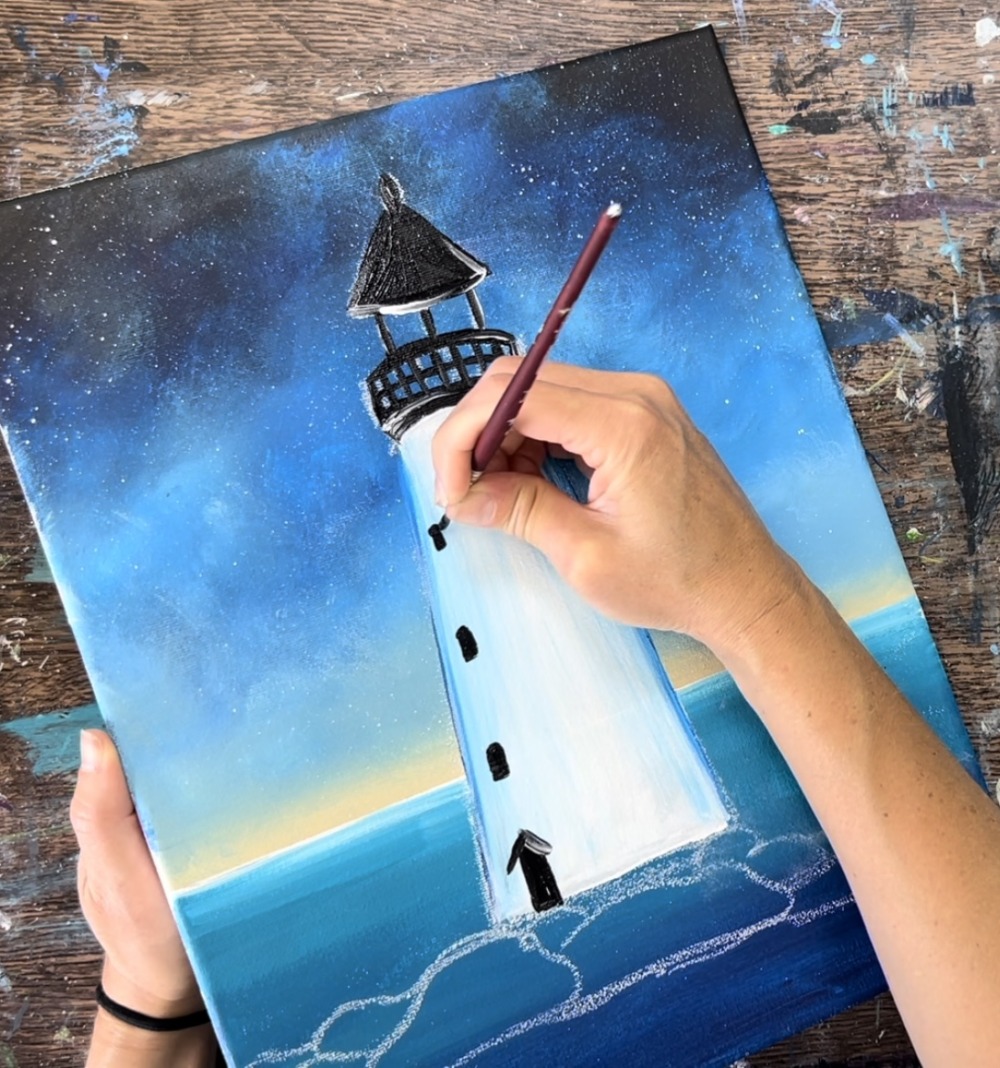
6. Paint Windows & Door
Use the #4 round brush and mars black to paint the door and three windows. Paint a small rectangle with a little triangular shape on top. You can add a small amount of white to the top piece of the door for highlight.
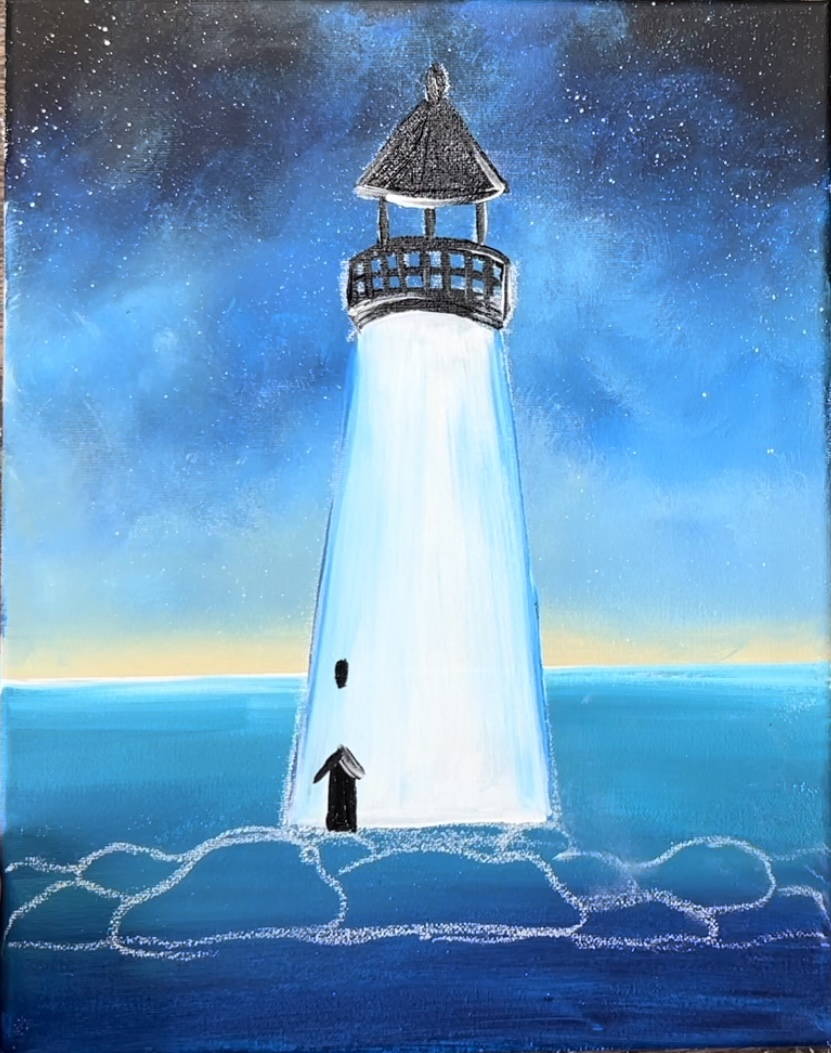
Paint each window so the top of the window has a little arc. Each window gets smaller as it goes up the lighthouse.
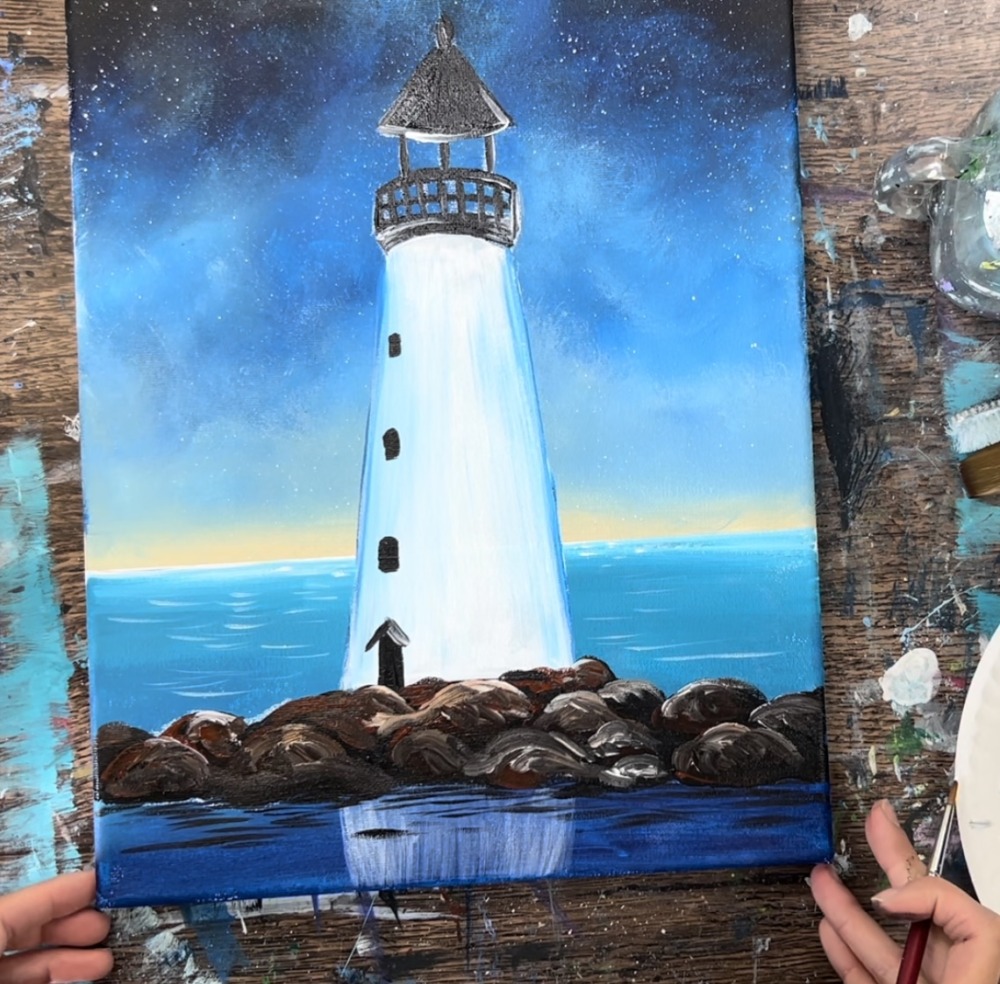
7. Paint Rocks
Use the #4 round brush and mars black to paint the rocky area. I recommend painting each individual rock first even though this whole area will be solid black.
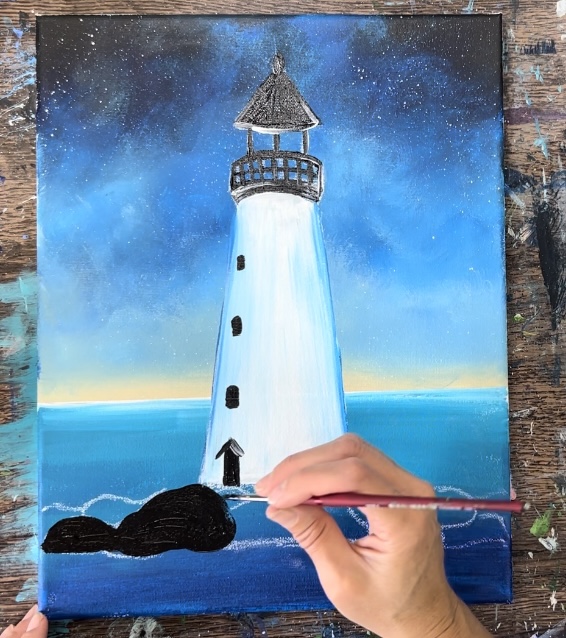
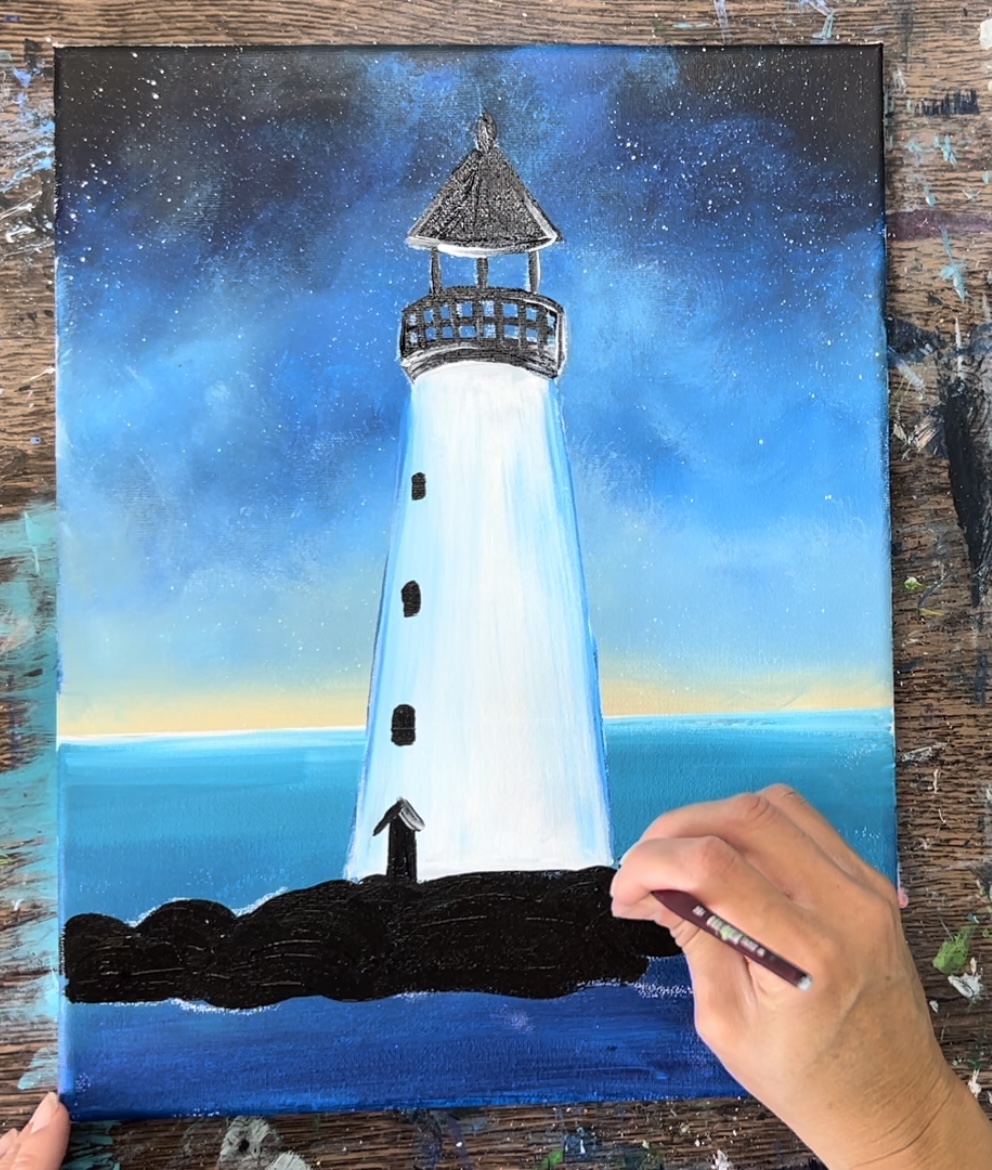

Next, load your palette with burnt Sienna. Use the #4 round brush to paint the left side of each of the rocks. Then blend it into the still-wet black paint. If the black is dry, add more black to brush and paint the right and bottom parts of the rock black and blend with the brown. Do this with abstract, curved strokes.
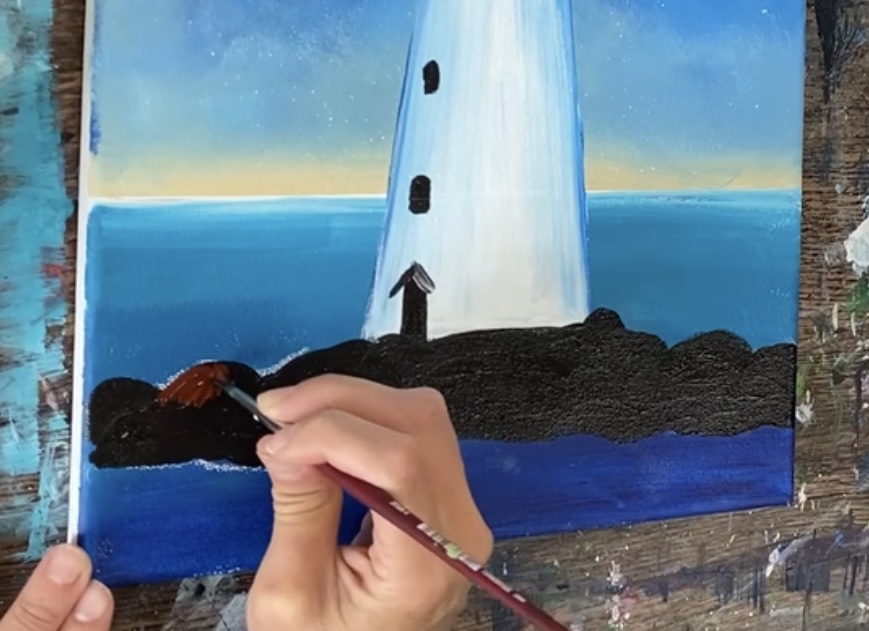
Leave a lot of the black as the dark shadowy part of the rock.
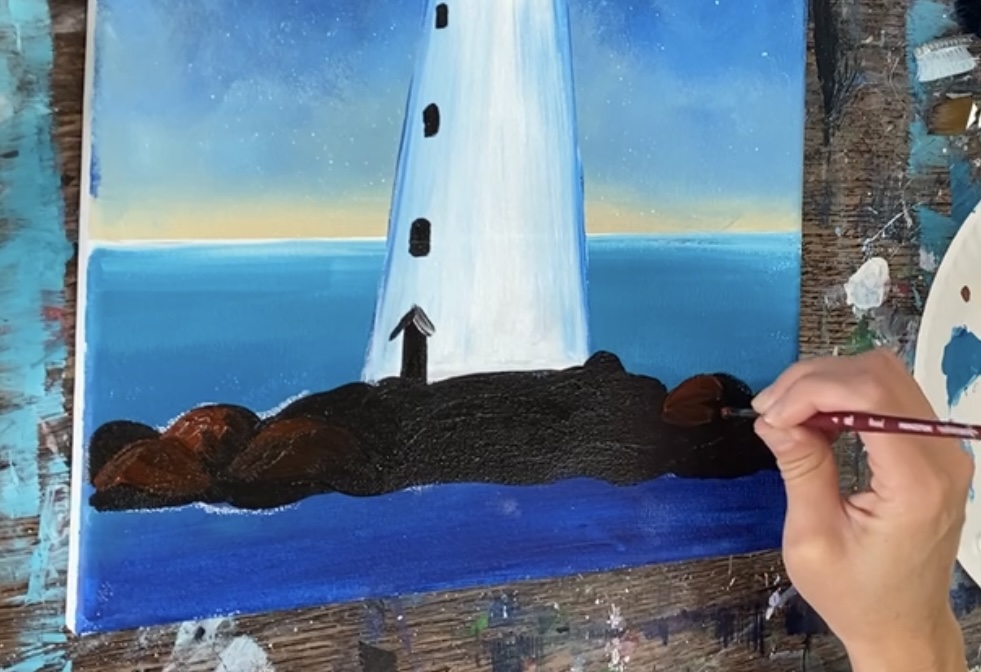
Next, load a small amount of titanium white to your brush. Loosely blend this white on the tops and right sides of all of the rocks. Be careful not to add too much. If needed add more brown or black to keep it dark.
Do this in loose, abstract strokes.
Add more lighter color to the layers of rocks on the tops and right edges of each of the rocks but still leave a lot of the dark still there.
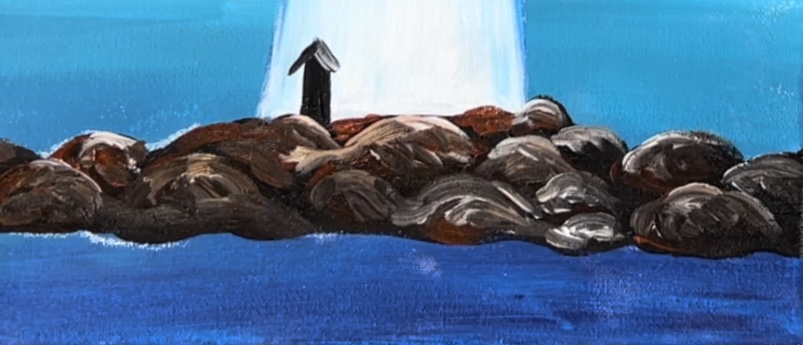
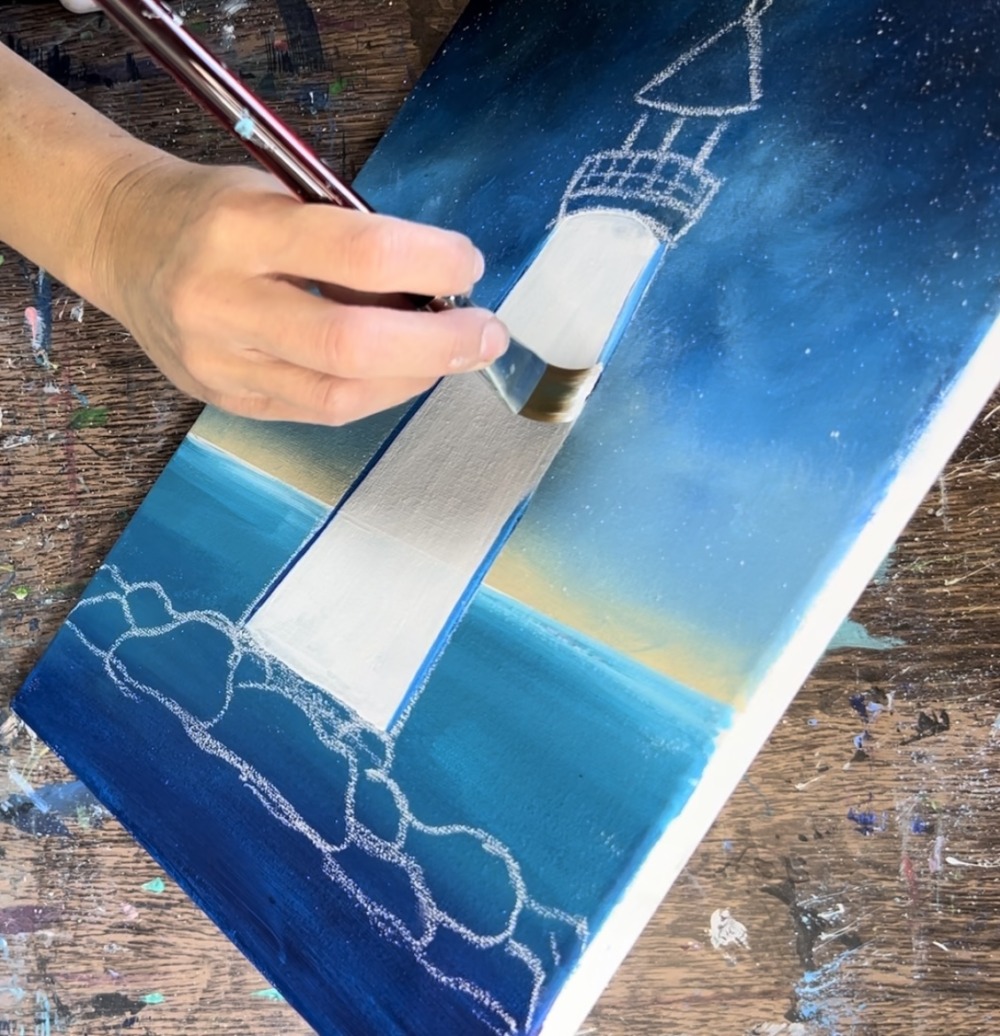
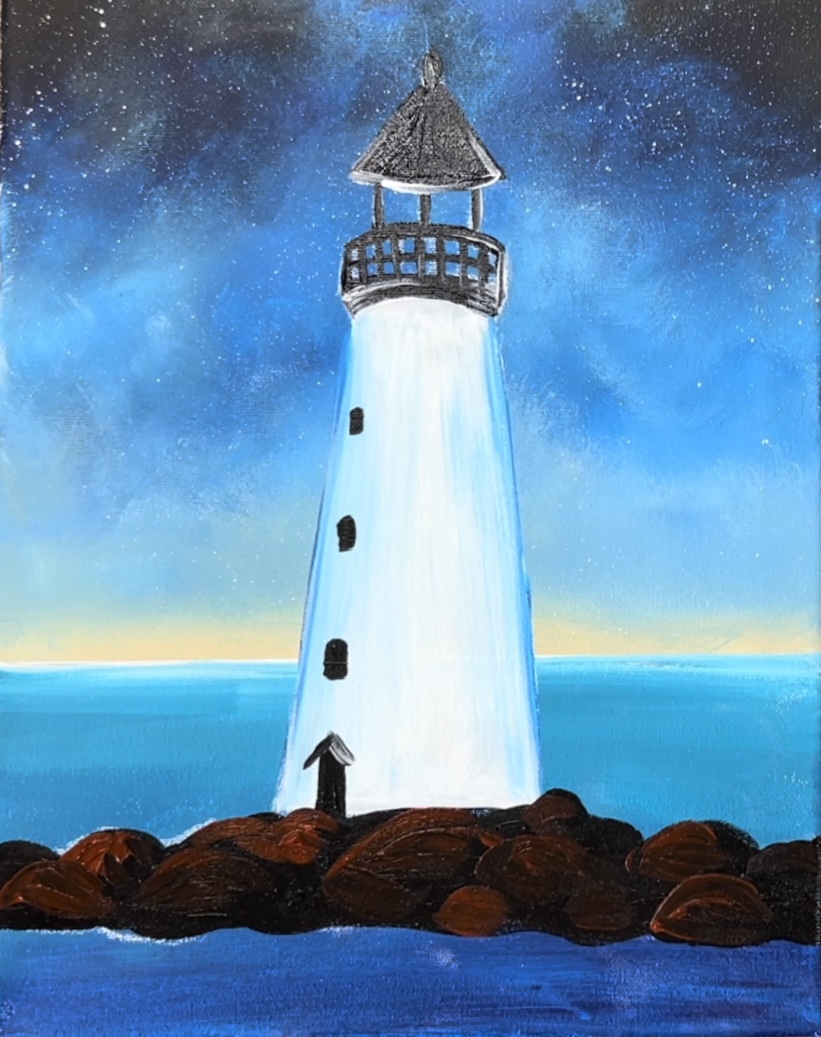
8. Paint Reflection Of Lighthouse Tower
Use the 3/4″ flat wash brush and titanium white to create the reflection of the lighthouse tower in the water. Make sure you do this dry brush style. Only load a small amount of white paint on the tip of the brush and wipe some of the paint off. Drag the white down from the bottom edge of the rock to the edge of the canvas.
Paint this so the shape is reversed. You can use the tip of the brush to define the two diagonal lines to re-create the shape.
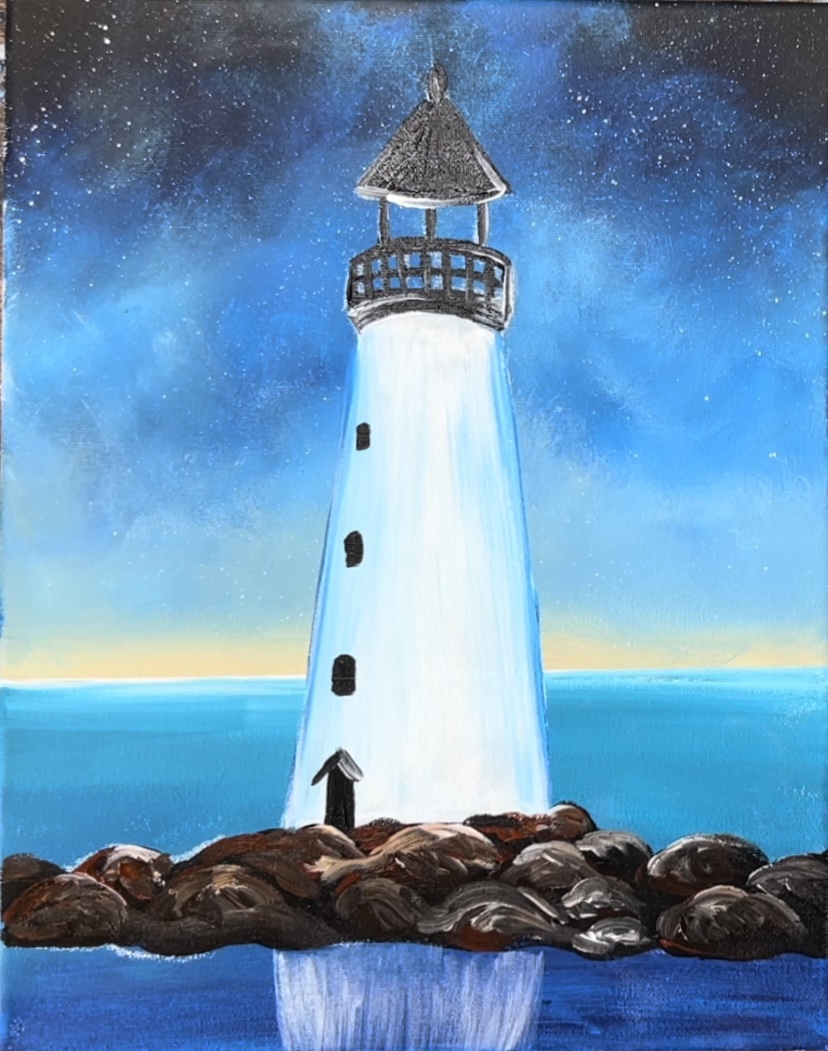
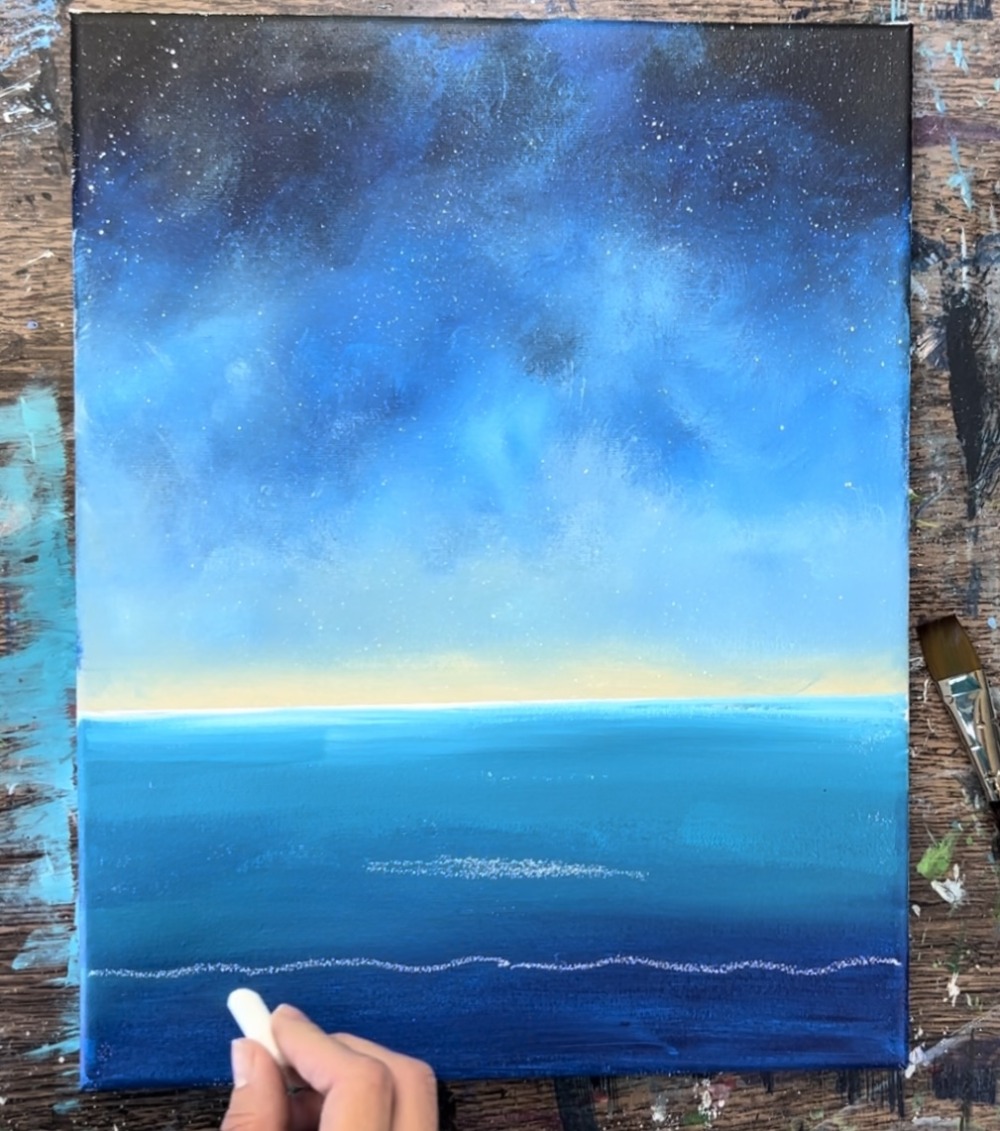
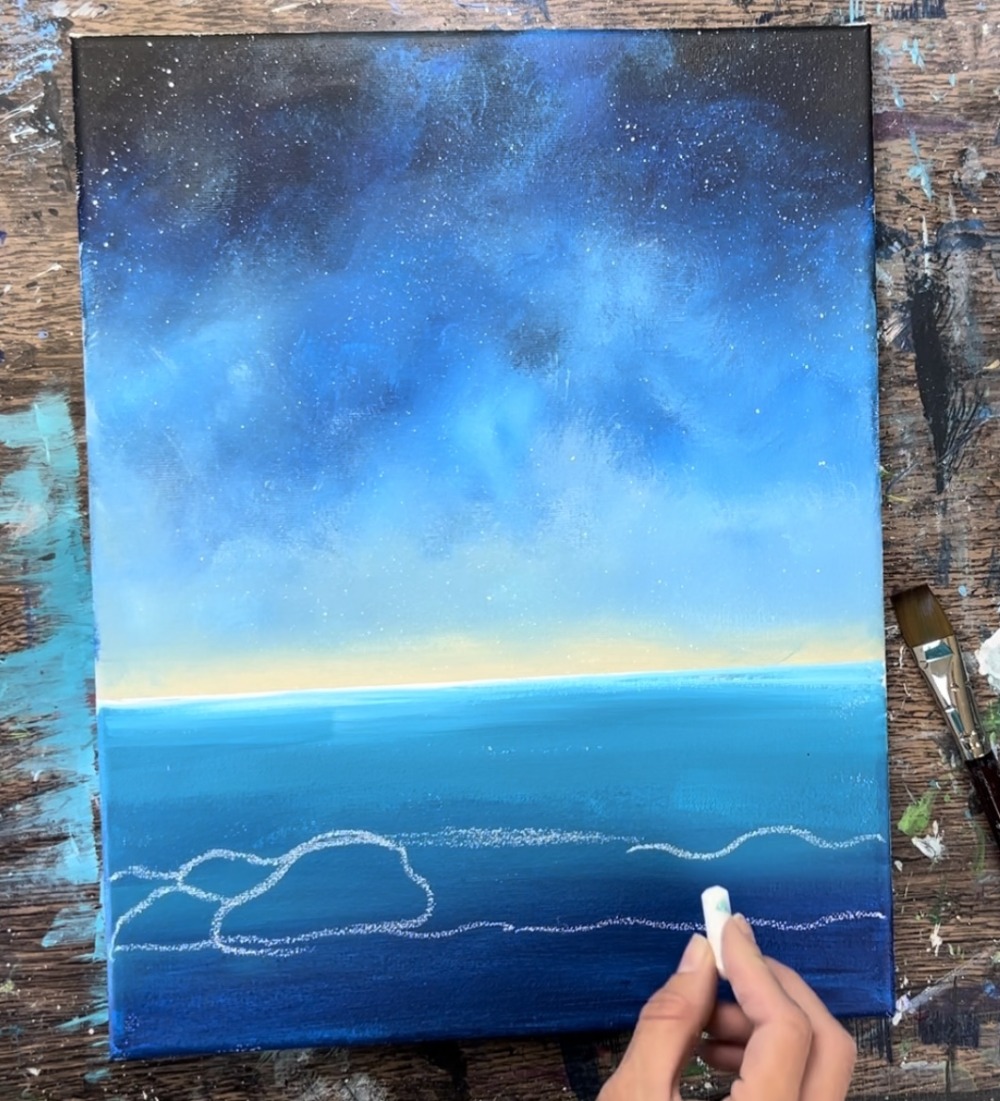
9. Paint Black Water Lines
Use a #4 round brush and mars black to paint water reflection lines. Loosely paint horizontal lines in the bottom water area. You can paint lines over the white reflection as well.

10. Paint White Water Lines
Then rinse the brush. Load it into titanium white. Paint white water reflection lines in the turquoise water area. Paint thinner lines that are closer together closest to the horizon line. Then paint the lines so they are more spread apart and longer closer to the rock area.
Then paint a few white water lines in the dark water area in front of the rocks. These water lines are thicker and further apart.
Make a few extra thick water lines along the base of the rocks for some soft waves.
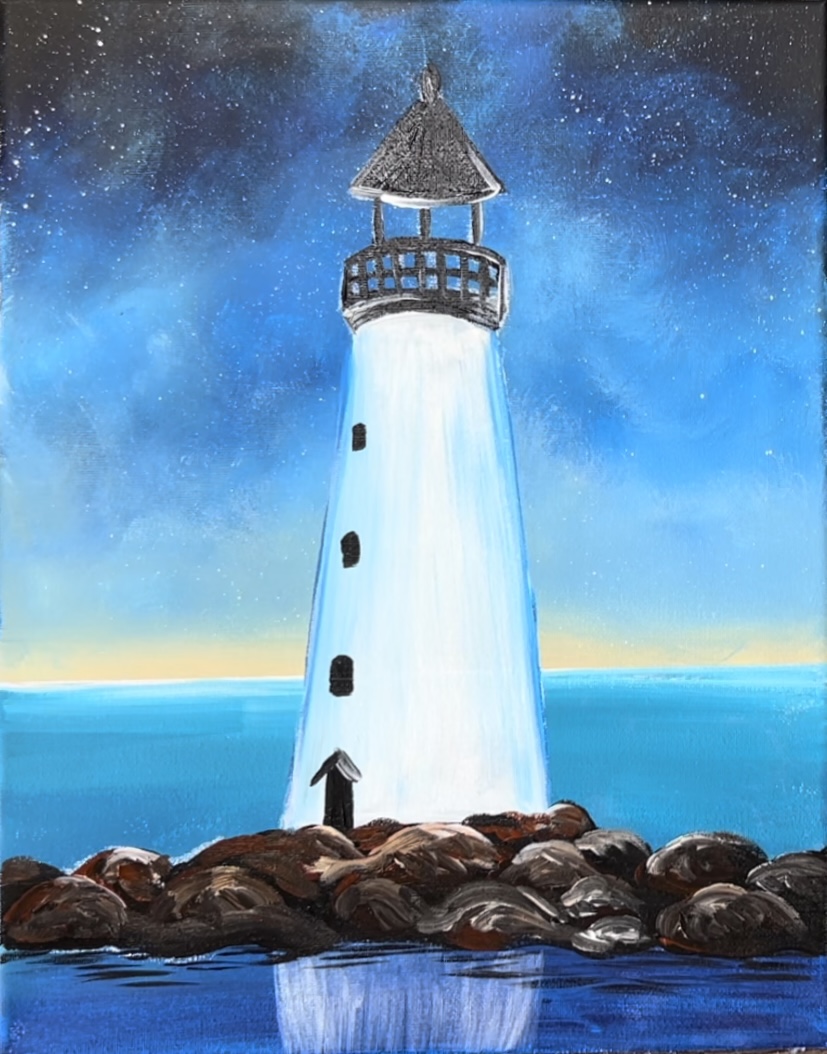
11. Paint More Star Details
Use the #4 round brush to paint more star details in the sky. Paint small dots and smear the dot with your finger to create a “glowing effect” for the star. Then paint a small dot inside the glow.
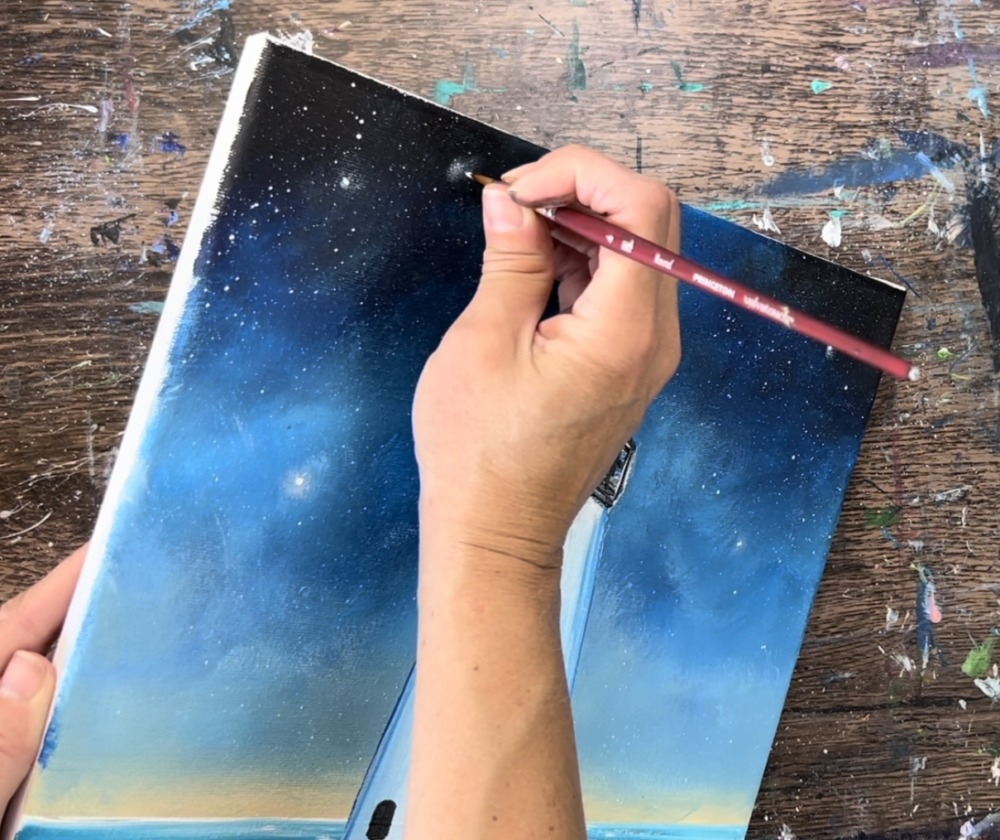
Paint these dots in clusters throughout the sky. You can also paint constellations!
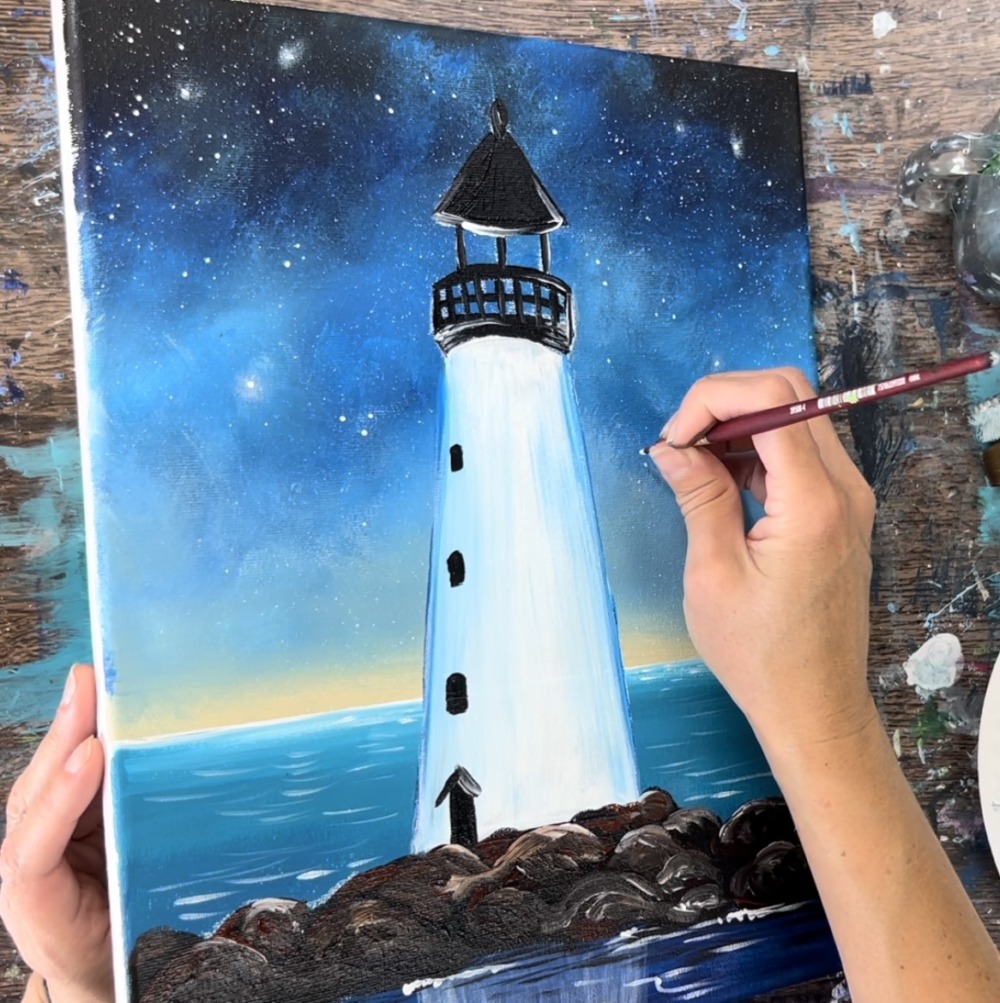
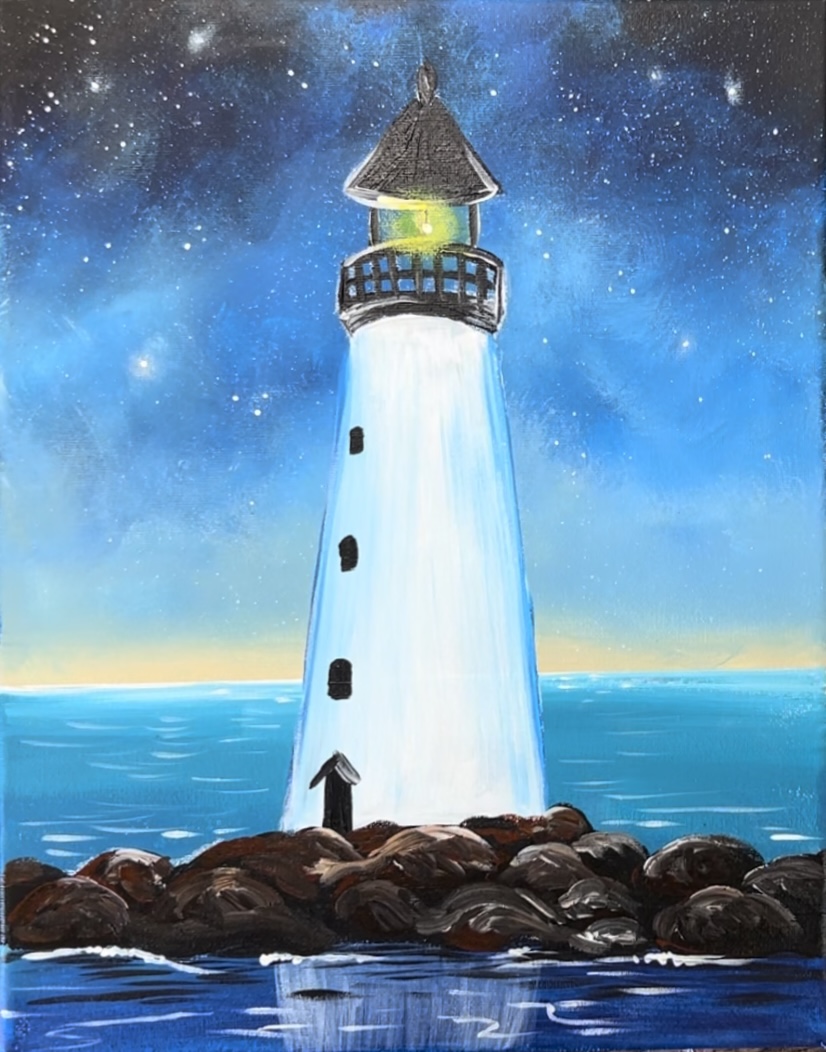
12. Paint Light Inside Lighthouse
Load your palette with primary yellow. Use your #4 round brush to paint a small yellow dot in the light box area. You’ll have to paint over the middle vertical line.

Use your index finger to smear the dot so that it becomes blurry and creates a glow.
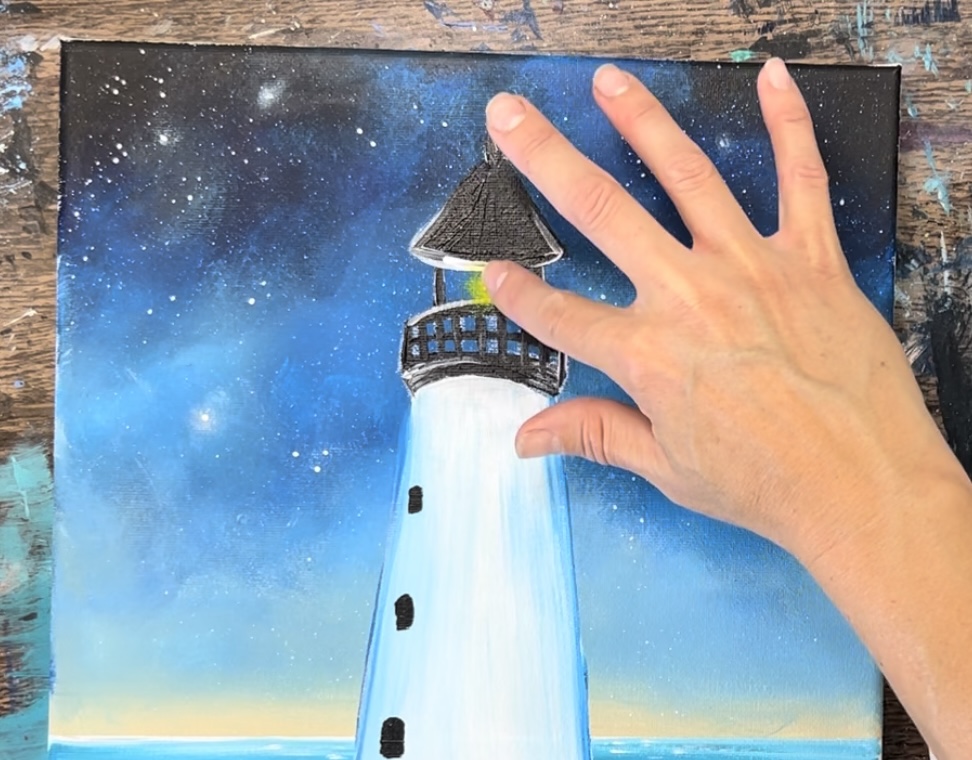
You may have to repeat this a few times to get that glow to be brighter.


Then paint a small white dot in the center of that circle. This will make it look like the light is bright right in the center.
Then use the #4 round brush to paint the light beams. You’ll want to do this “dry brush style”. That means you only load a small amount of paint on the brush. Wipe off the brush to ensure of this. Then paint a very translucent line with both titanium white and primary yellow mixed together.
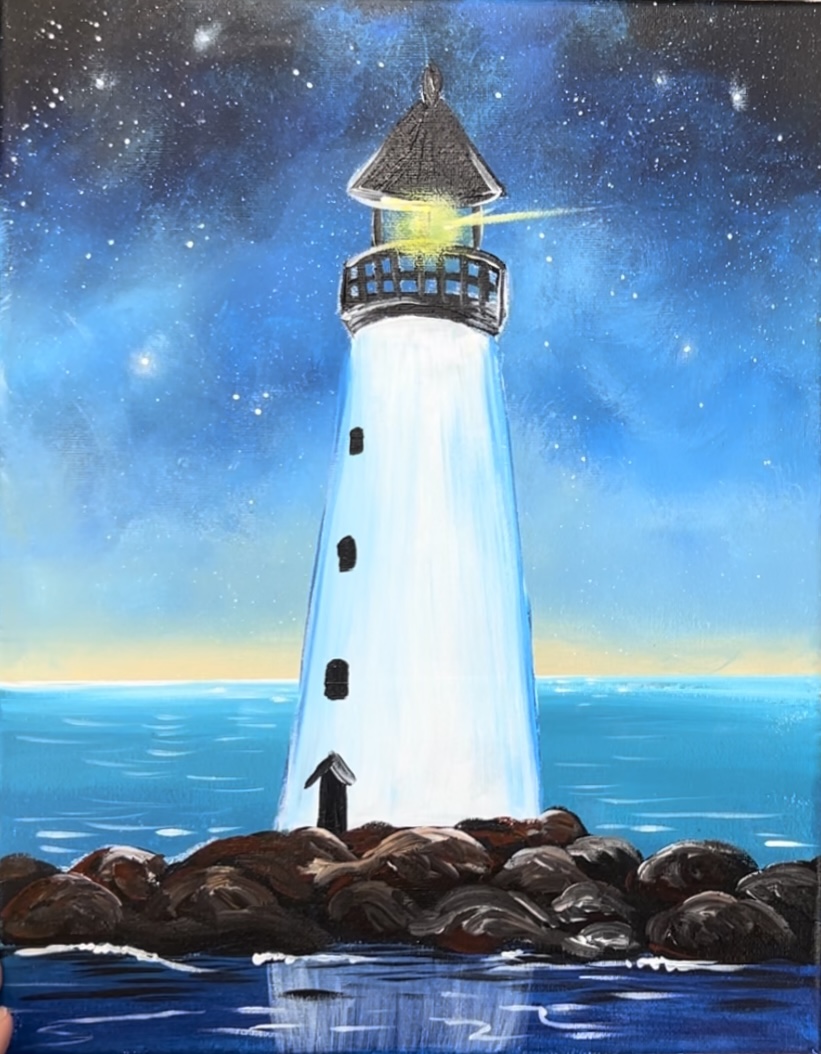
Paint several of these light beams on both sides of the light (or on one side if you prefer).
These light beams (as long as you make sure you’re using very little paint and no water) will look translucent.
If needed, paint the black lines of the balcony where you would like them to overlap the light.
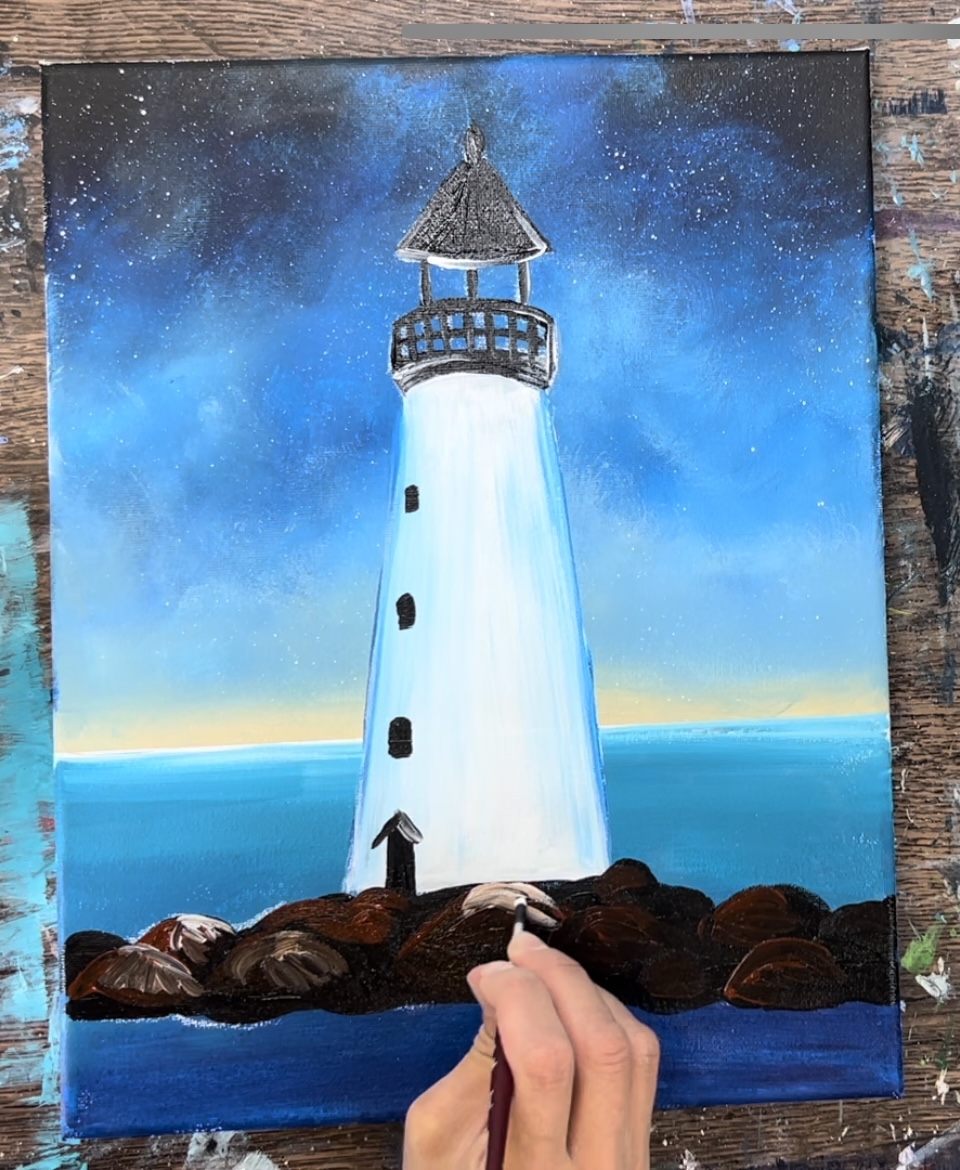
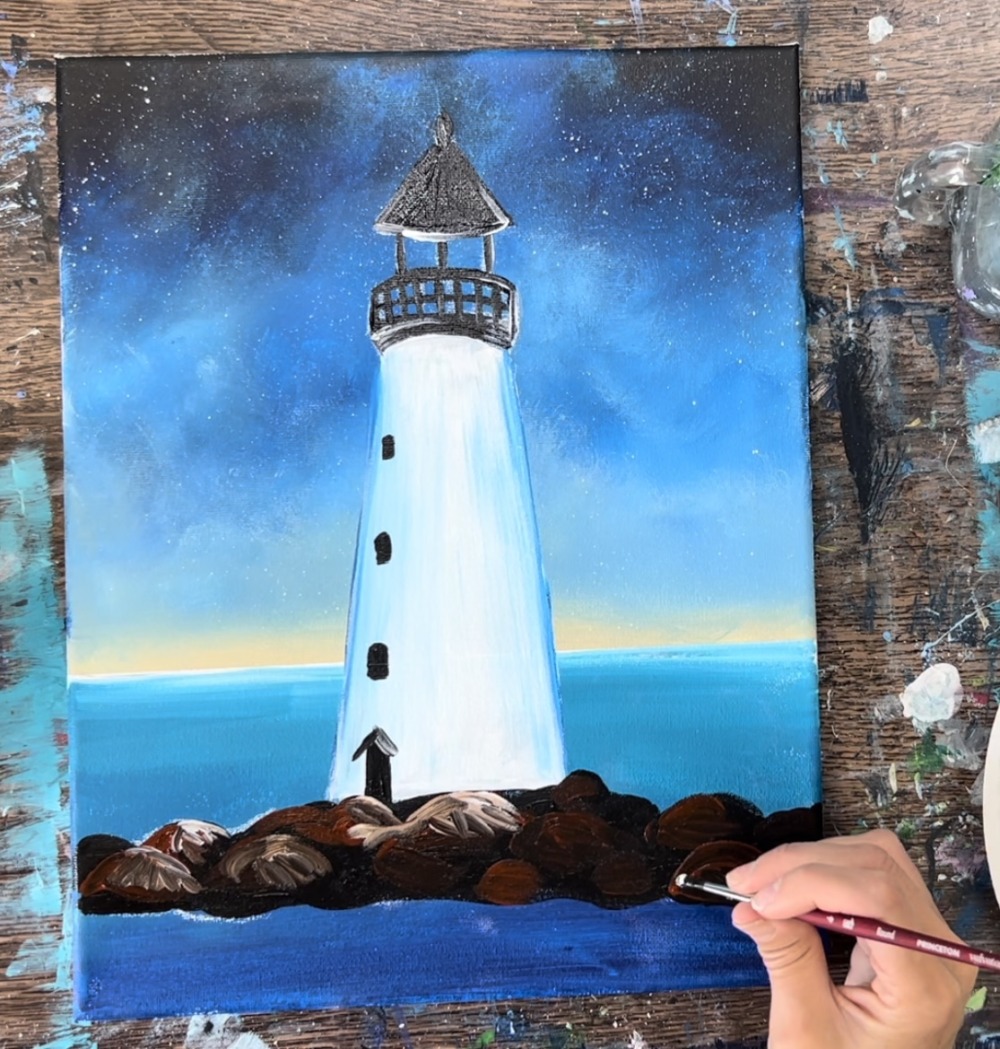
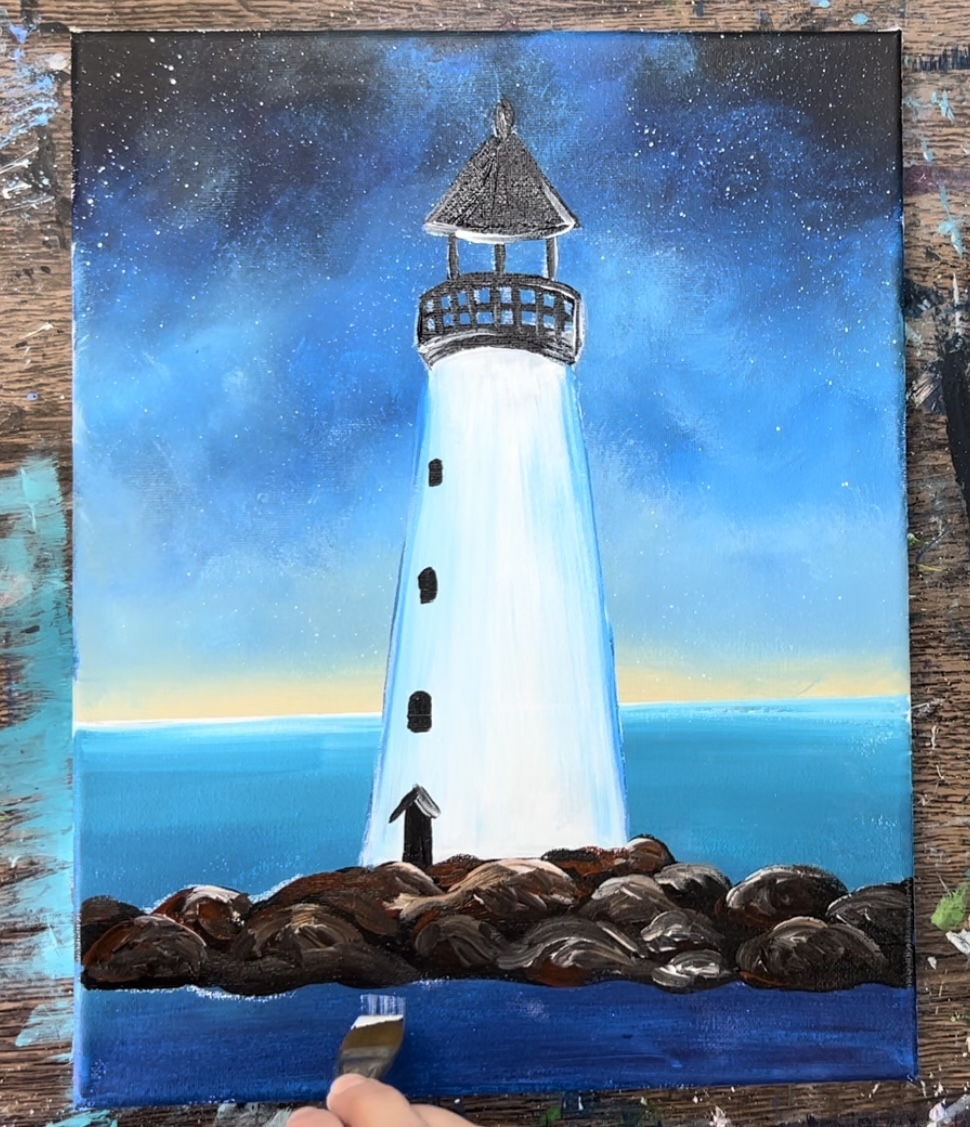
13. Paint Splashes Behind Rocks
Use a 3/4 flat brush and titanium white to paint the splashes. You’ll want to do this dry brush style just like you did with the light beams and white reflection in the water.

Load only a small amount of titanium white on the tip of your flat brush. Wipe some of the paint off. Then paint small angle strokes from the tops of the rocks.
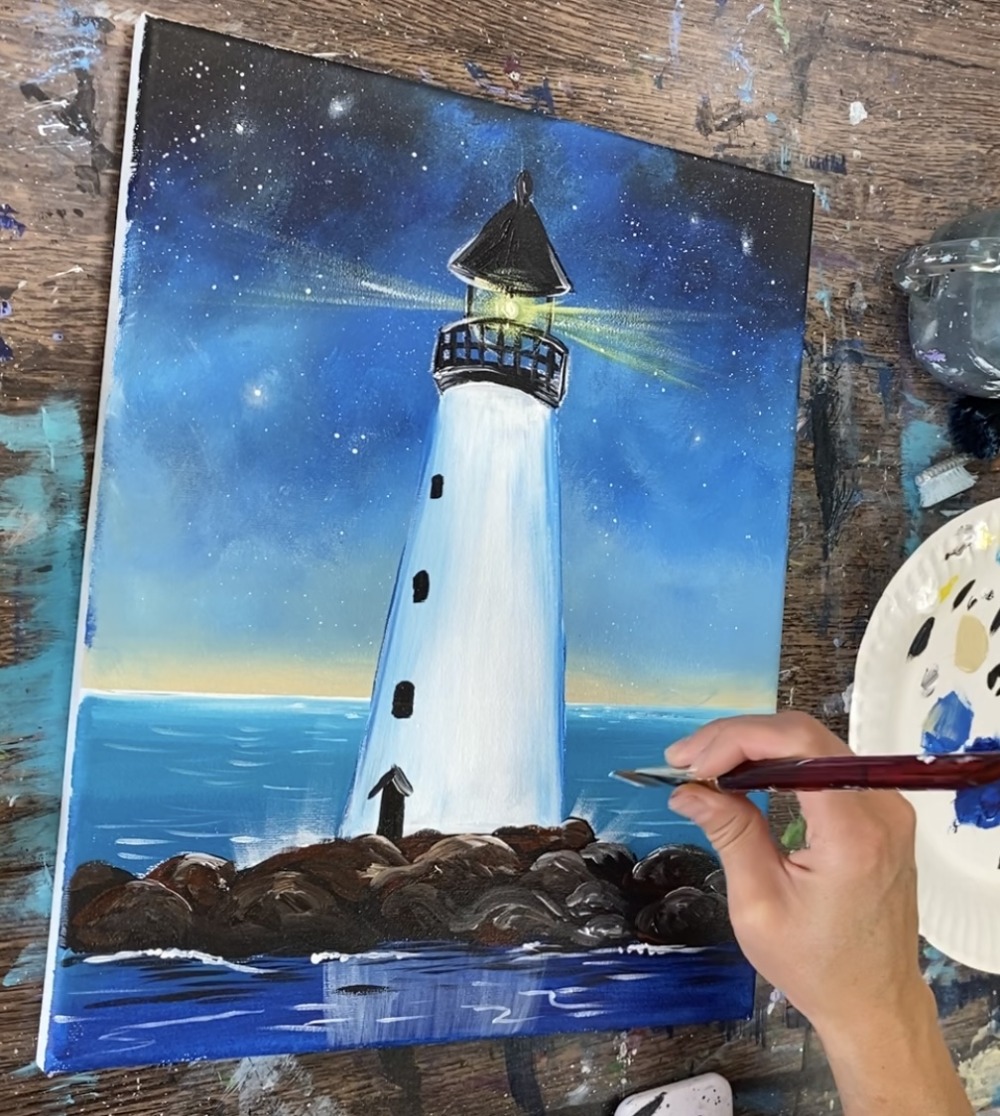
Do this technique kind of all throughout the top of the rock area to create the impression of waves splashing against the rocks.
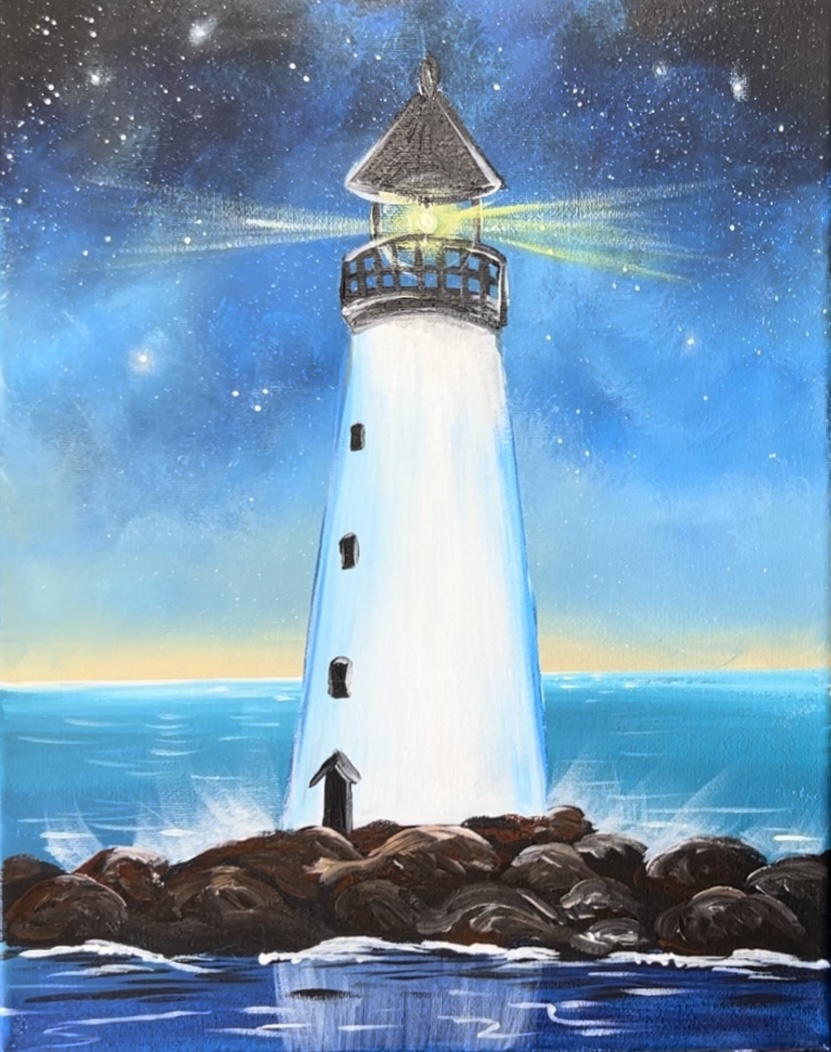
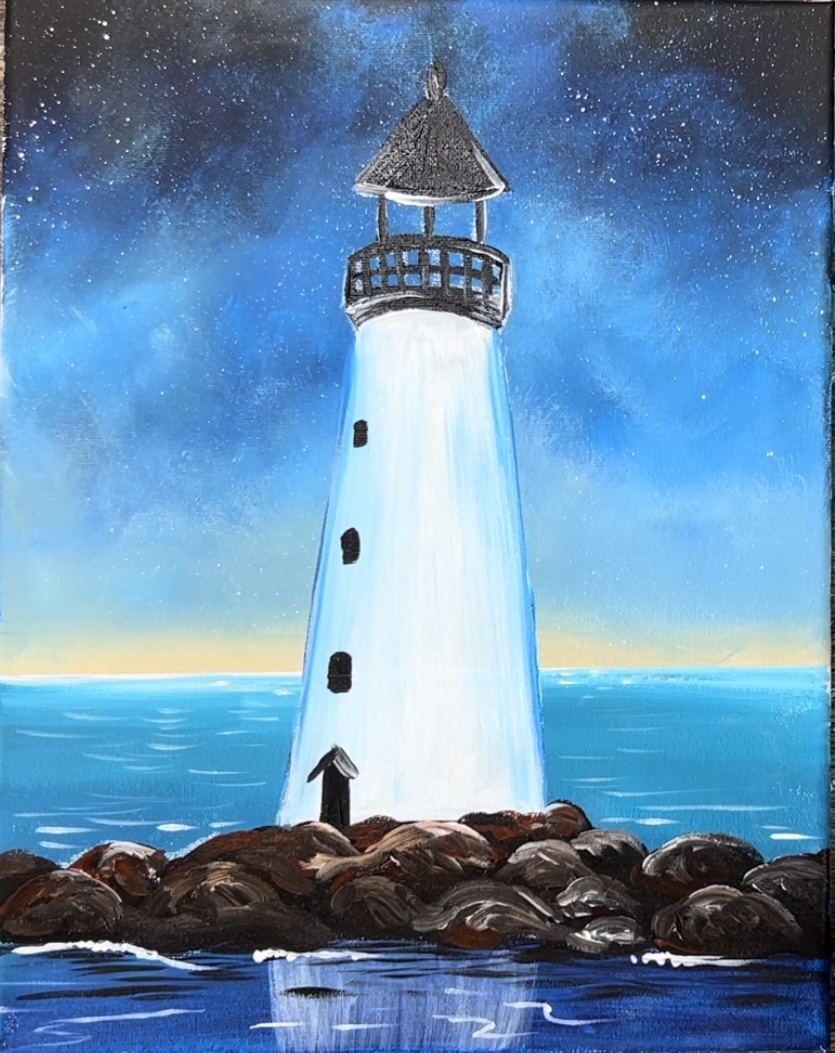
Finished !