

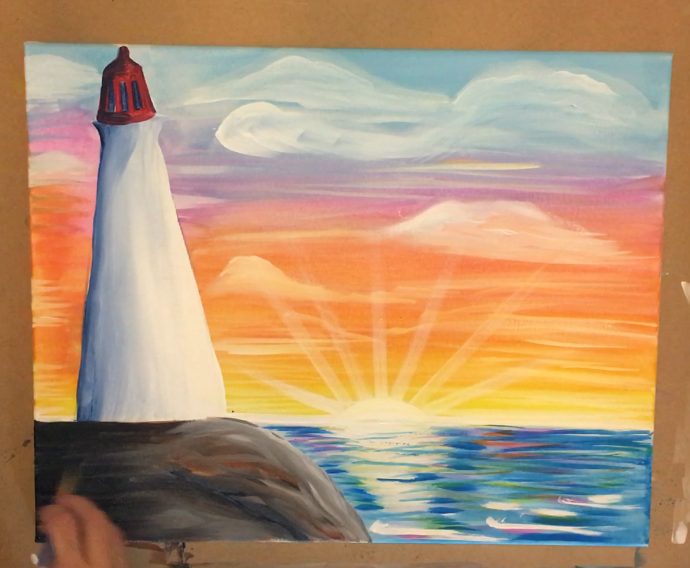
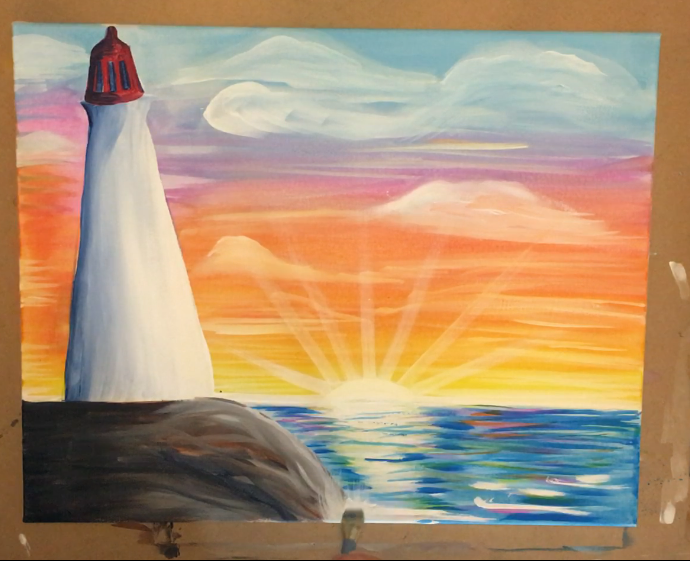
Lighthouse Painting Tutorial
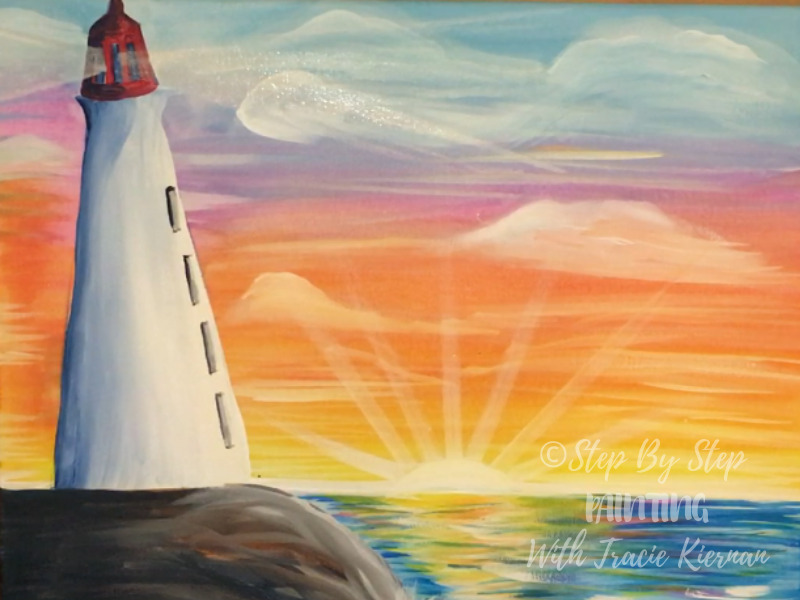
Create your very own lighthouse painting! Learn how to paint this beautiful lighthouse sunset with sun rays and a glowing ocean.
This is an easy acrylic on canvas painting tutorial for beginners. I did this with Apple Barrel Craft Paints!
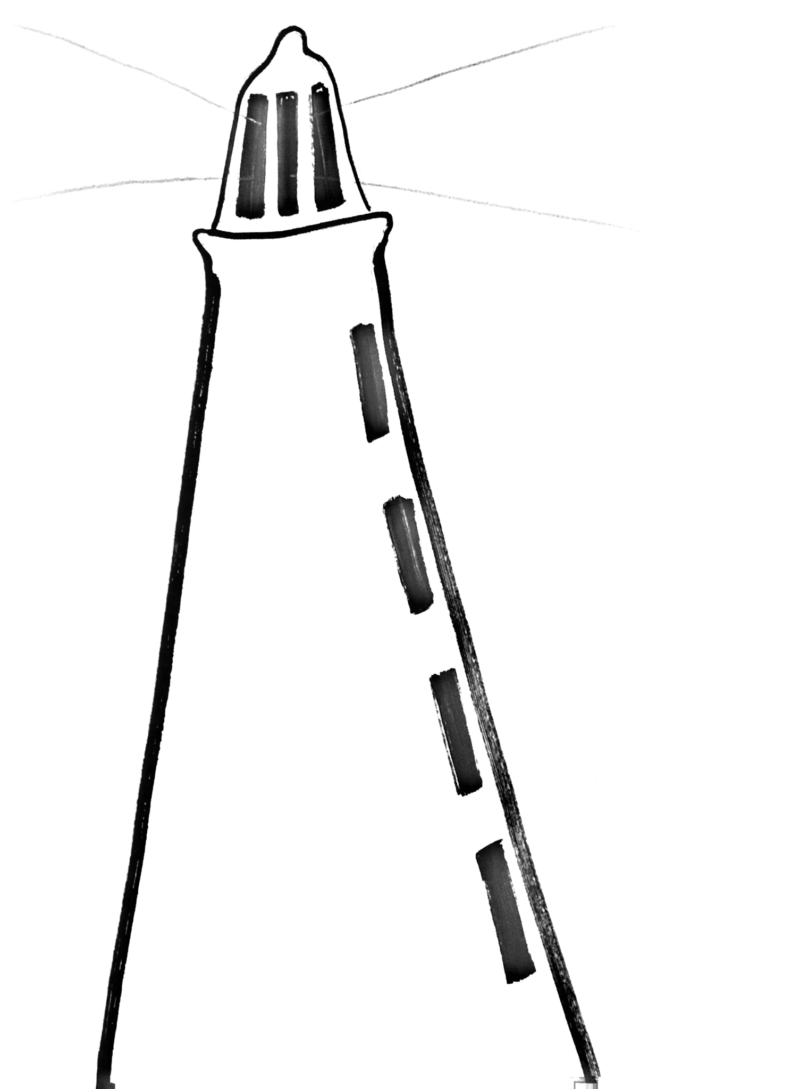
You will be guided step by step with a video and process pictures. There is a material list and a traceable for the lighthouse!
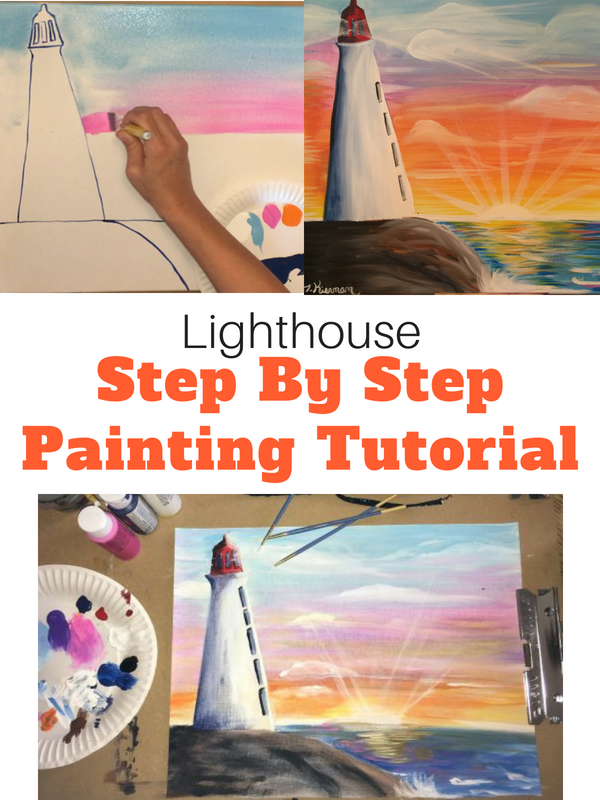
One of the versions I did for this painting was on a smaller 11″ x 12″ canvas paper. The other was done an a 16 x 20 canvas.
Don’t forget to share your version of the painting on Pinterest or Facebook!
I can’t wait to see how it turns out. Happy painting artists!!
Materials For Lighthouse Painting:
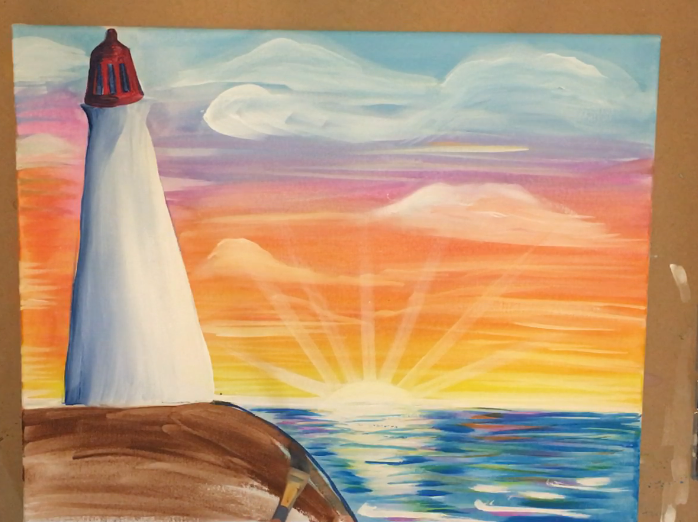
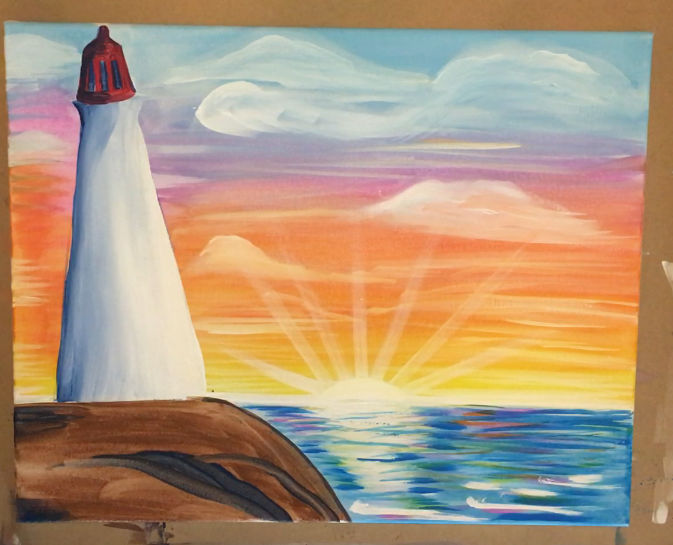
Lighthouse Painting
Create your own lighthouse acrylic painting of a sunset over the ocean.
Materials
- Acrylic Paints (I used Apple Barrel)
- Paint Brushes
- Canvas
Colors
- Jack O Lantern
- Bright Yellow
- Flag Red
- Fuchsia
- Black
- White
- Nutmeg Brown
- Navy Blue
- Primary Blue
- Parrot Blue
Instructions
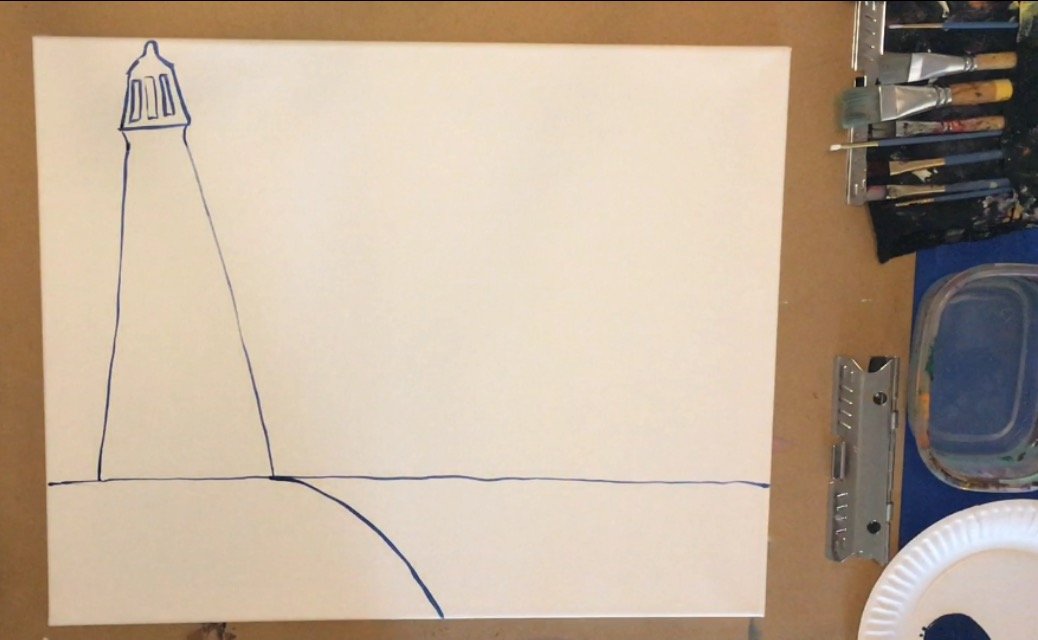
- Draw the composition of the lighthouse, horizon line and hill.
- Paint the sky.
- Paint the clouds.
- Paint the sun.
- Paint the rays from the sun.
- Paint the lighthouse white.
- Paint the shadow of the lighthouse then blend it in with the white.
- Paint the top red area of the lighthouse.
- Paint the reflection under the sun and in the water.
- Paint the rock formation under the lighthouse.
- Paint the windows on the lighthouse.
Directions At A Glance: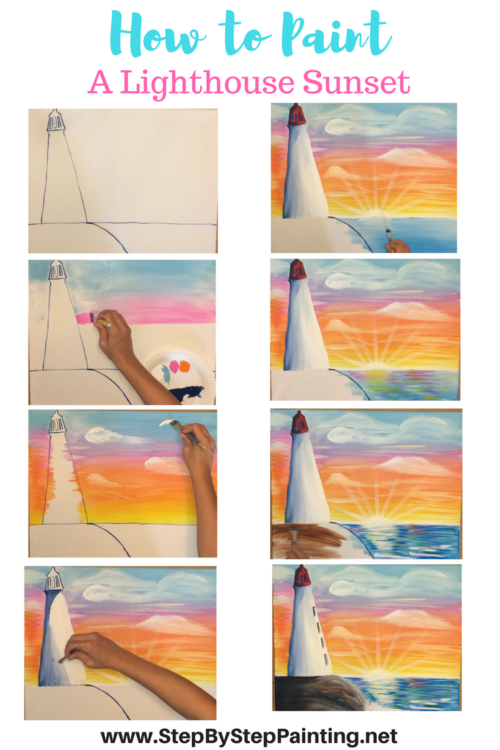

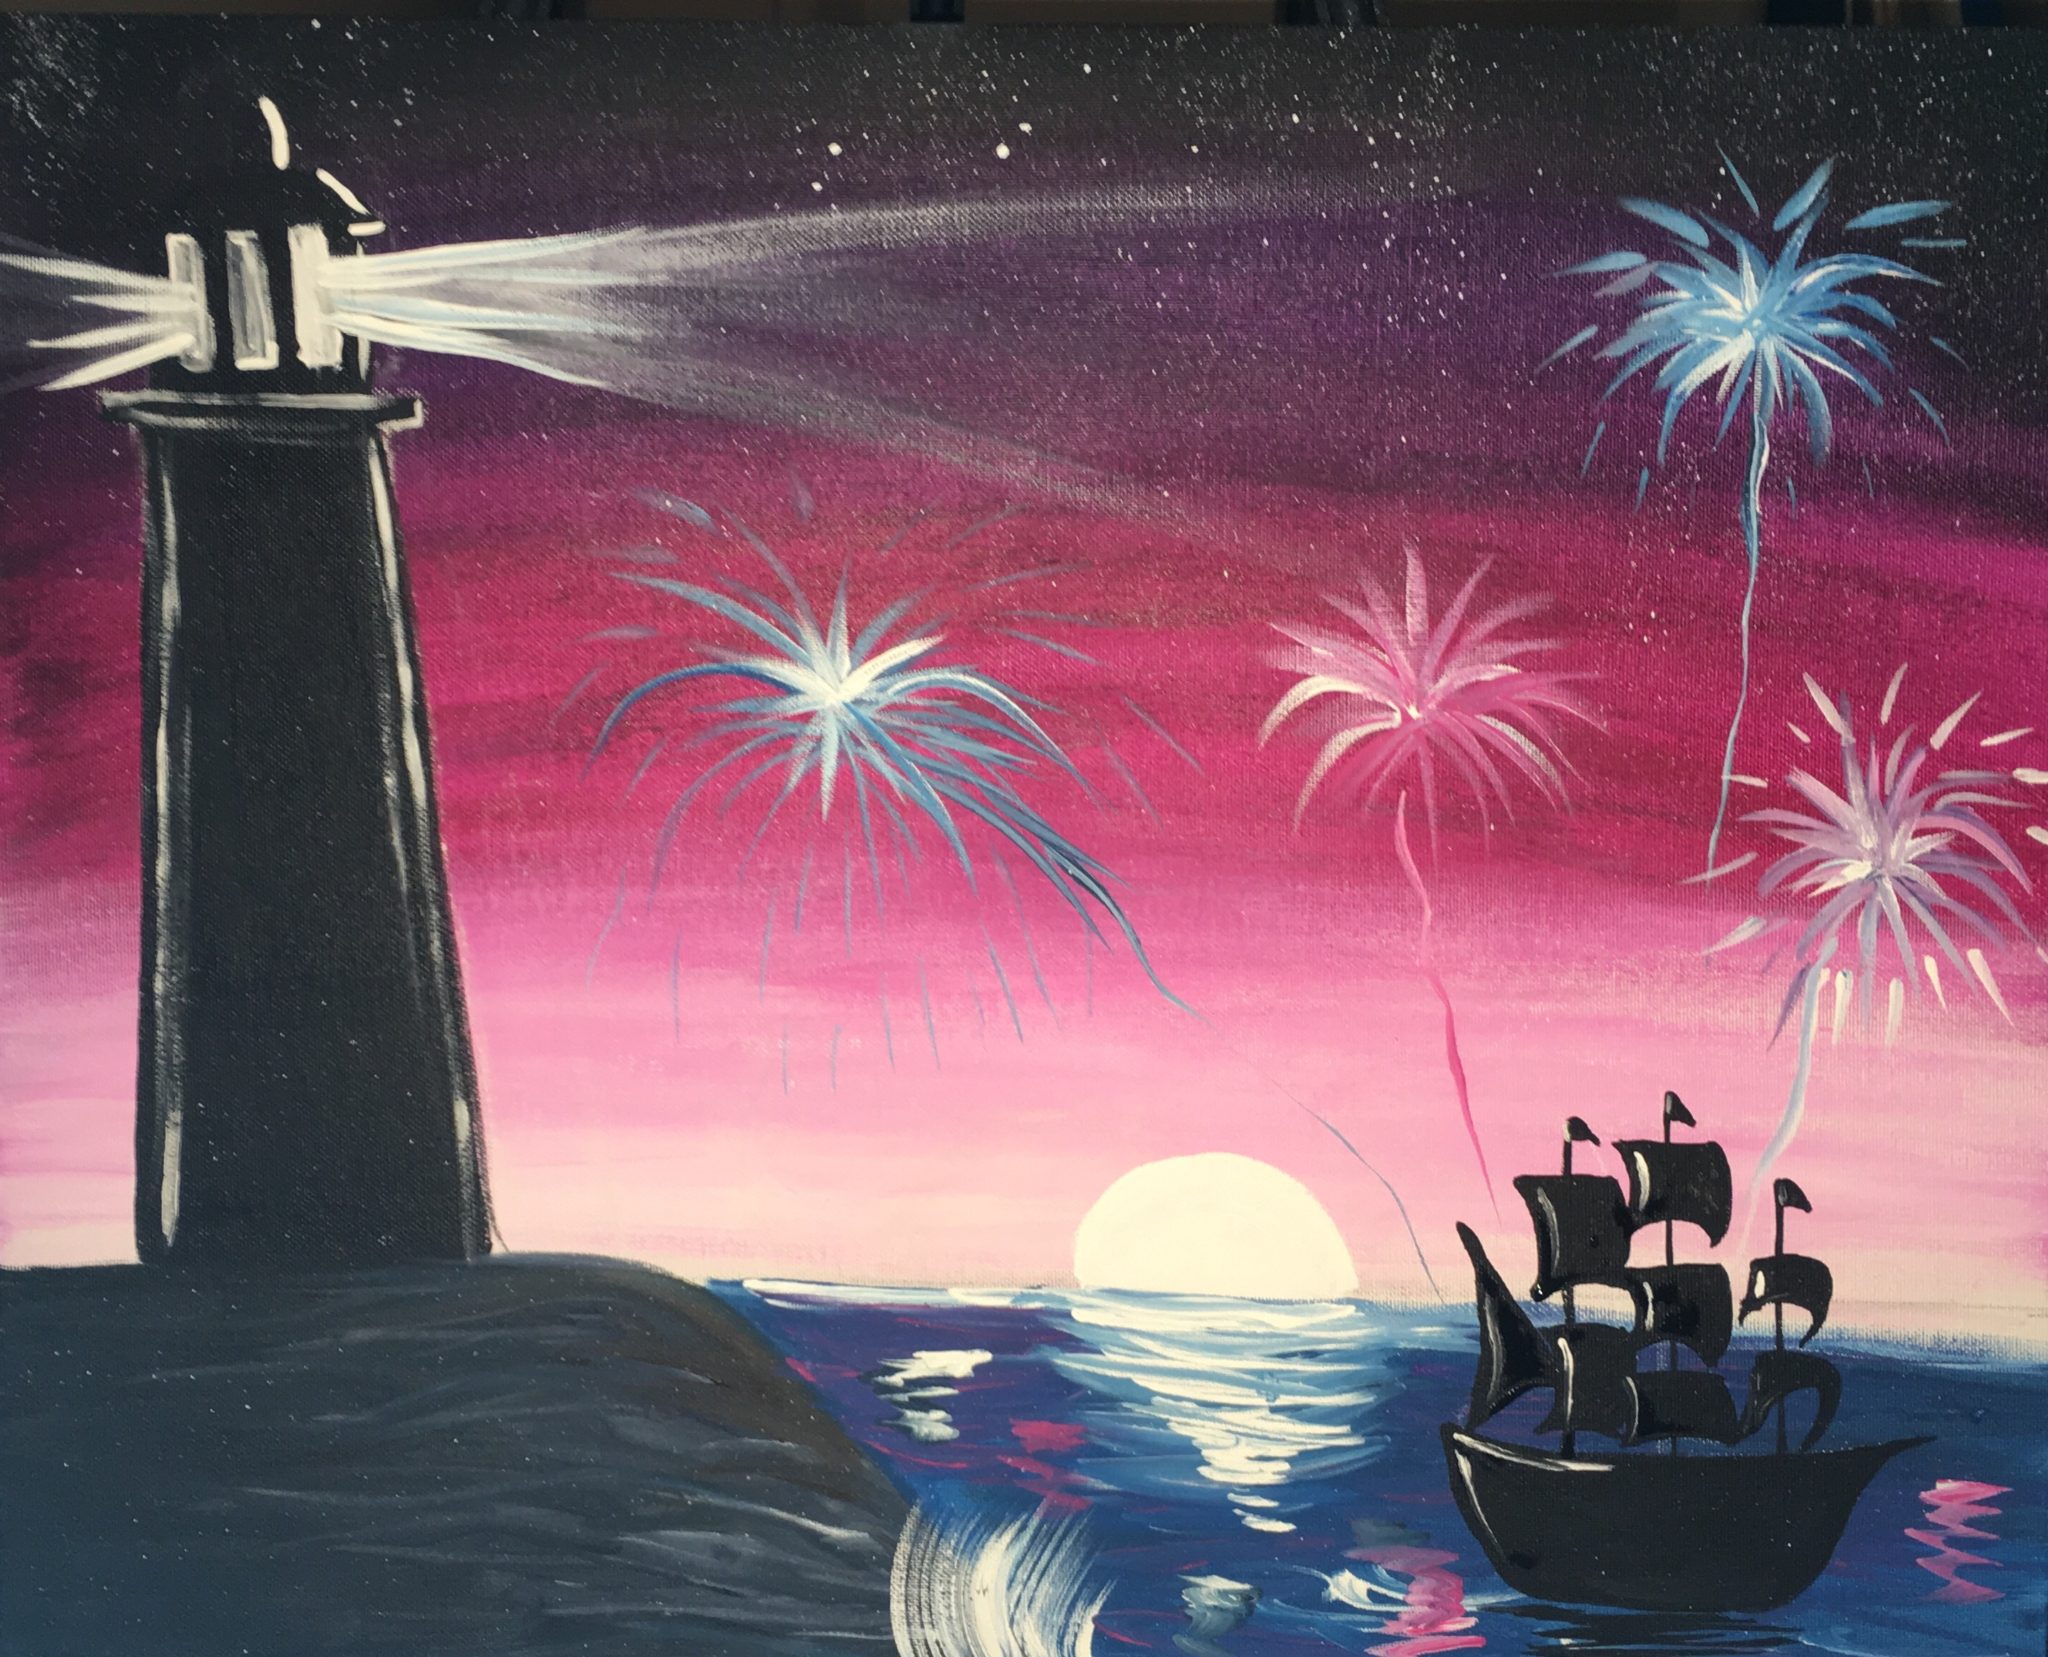
Design Variation
For this design variation, I changed the colors in the sky to black, violet and magenta. I did the lighthouse all silhouette as well as added a ship and fireworks.
Traceable For Lighthouse:
Video For Lighthouse Painting:
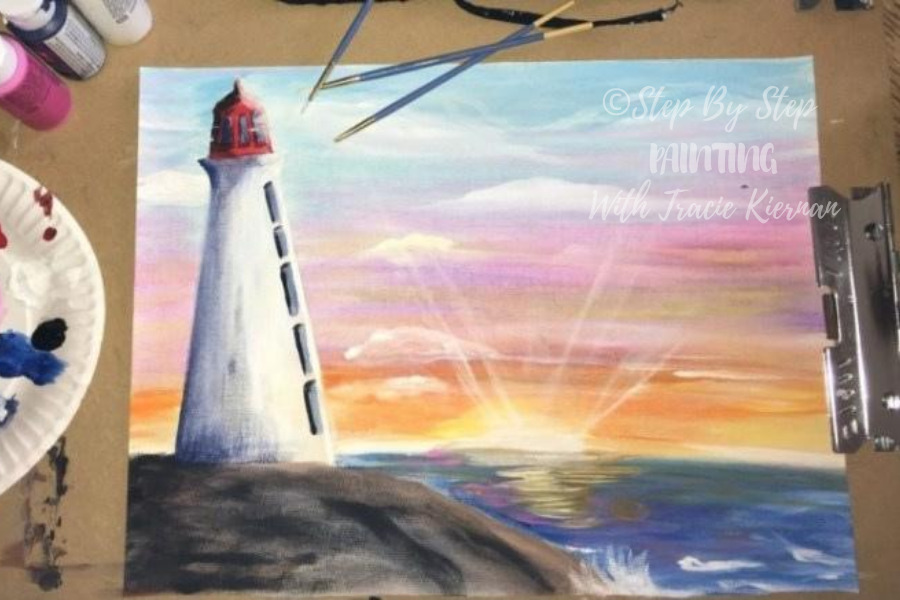
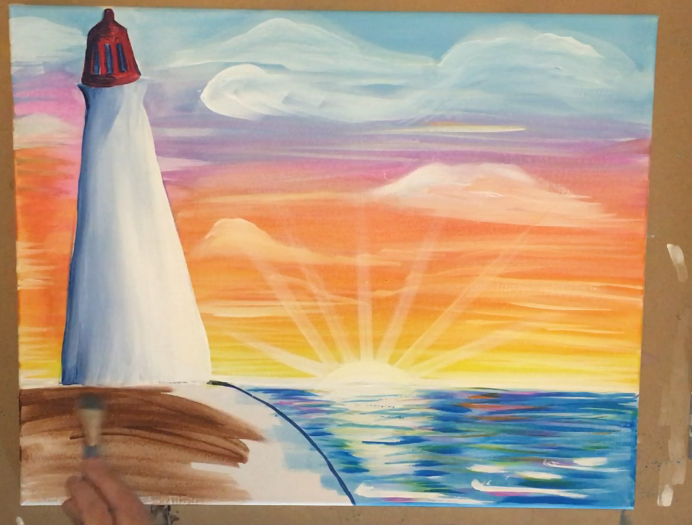
Step By Step Picture Directions
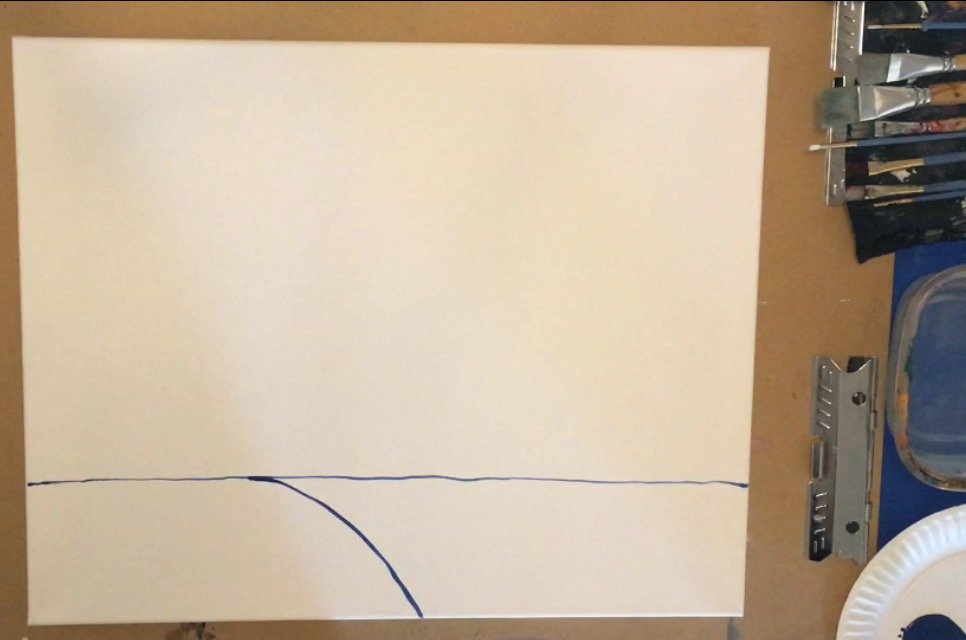
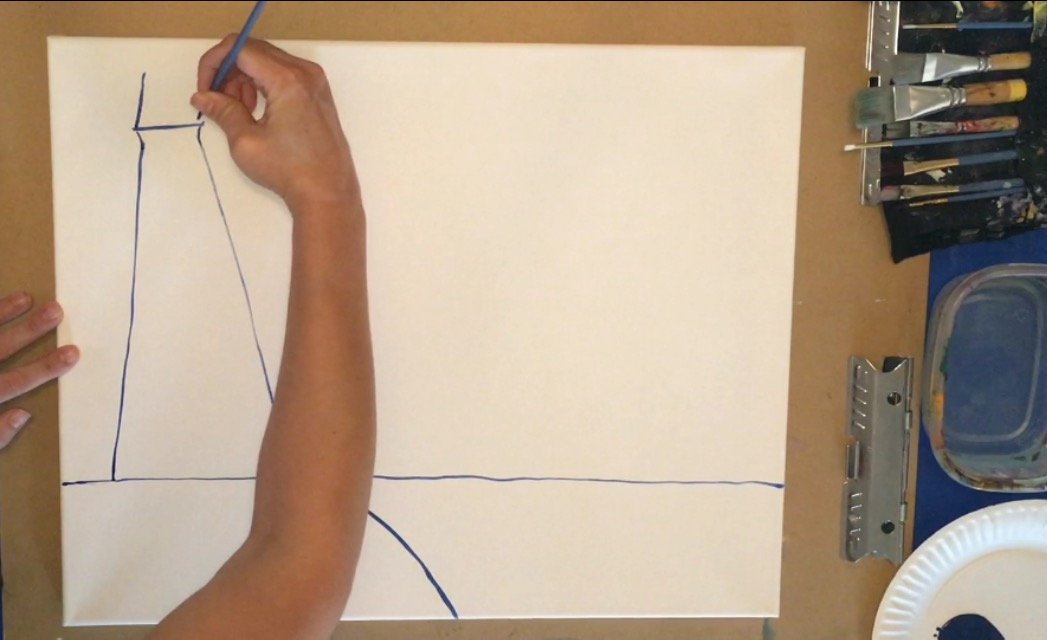
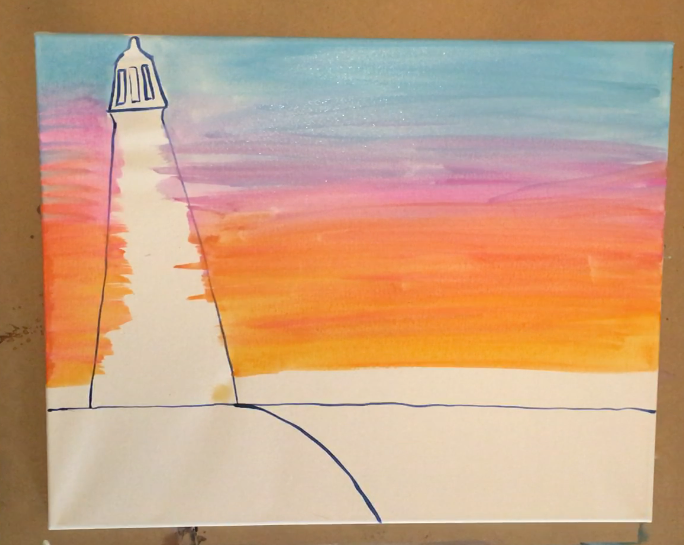
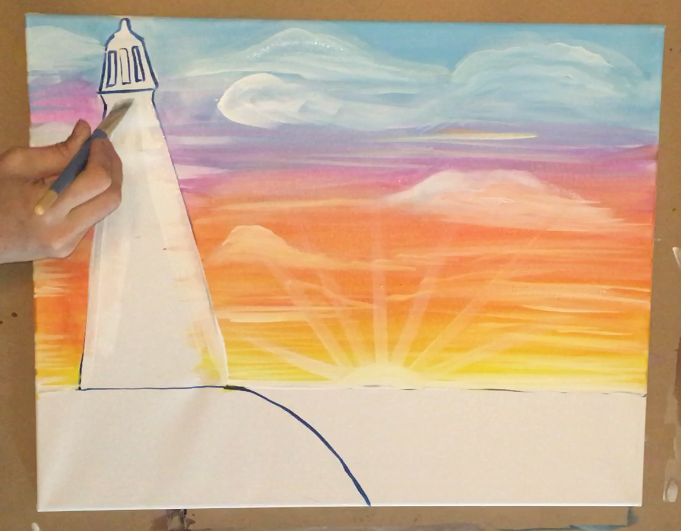
1. Draw the Composition Out First
First I painted out the composition of the lighthouse, the hill and the horizon line.
To do this, I used watered down navy blue paint and a tiny brush.
Note that you can always draw this in pencil first and then go over it with the navy blue paint.
You want to make sure that navy blue line is very thin.
Anything thick will show up in the finished painting and we don’t want that to happen!
The pictures below show the progression of drawing.


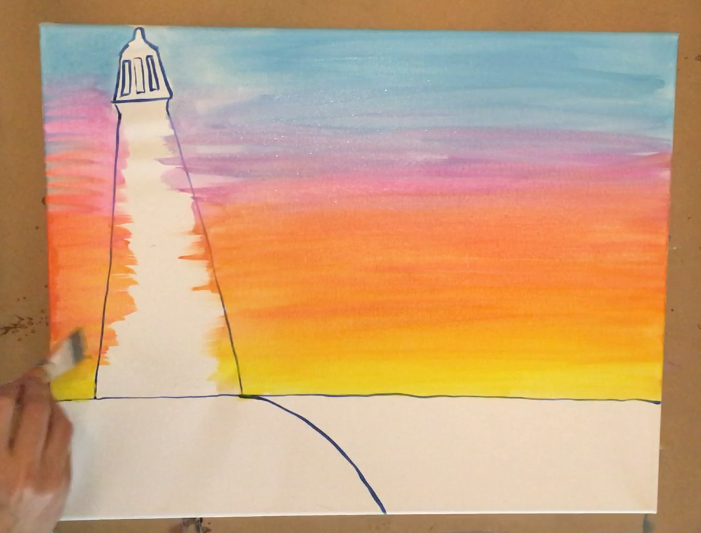
2. Paint The Sky
Then I painted the sky. I started this by creating a “wash” with parrot blue.
A “wash” is applying water to the canvas first and then adding the paint on the color. When you add the paint, it spreads fast!
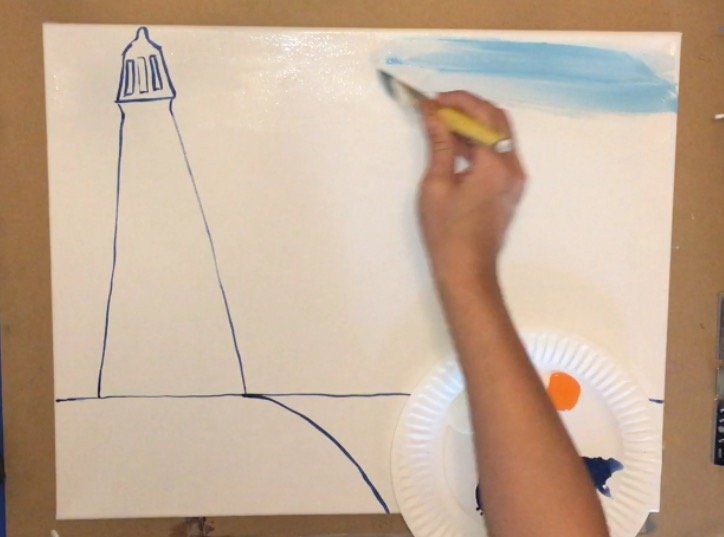
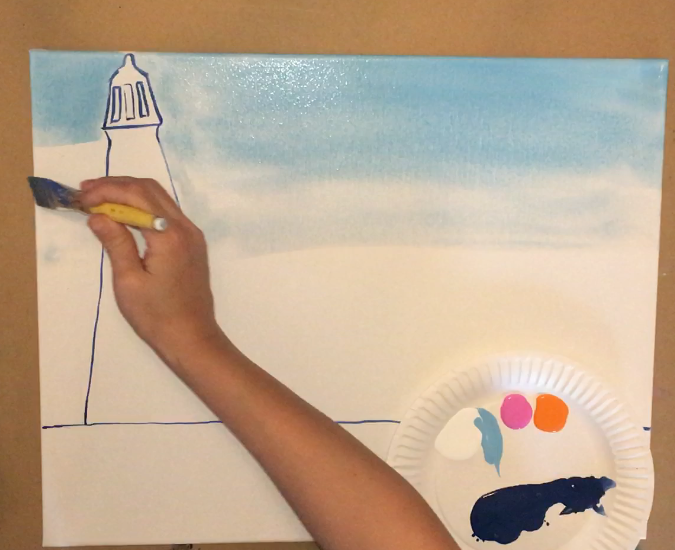
Then I cleaned off my brush and did another wash below the blue.
I painted fushia pink in this area. Also, I overlapped some of the pink over the blue to kind of “blend” the two colors together. 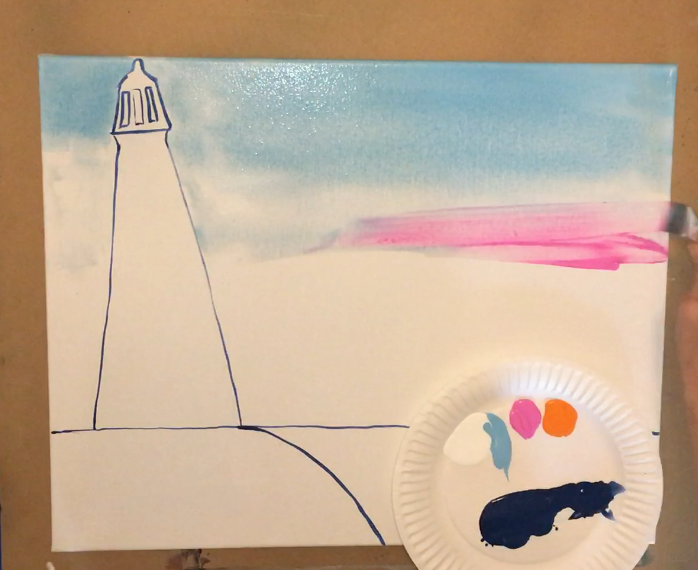
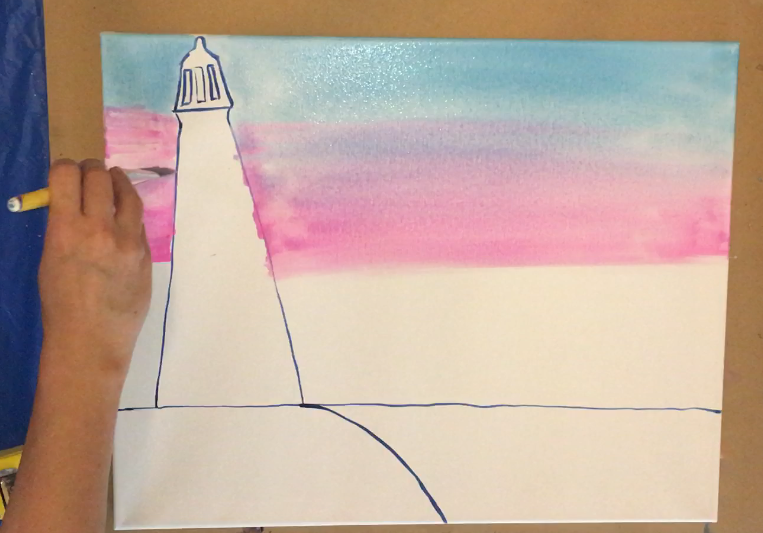

Then I did another “wash” of orange.
I painted orange almost all the way down, leaving about an inch of blank space left. 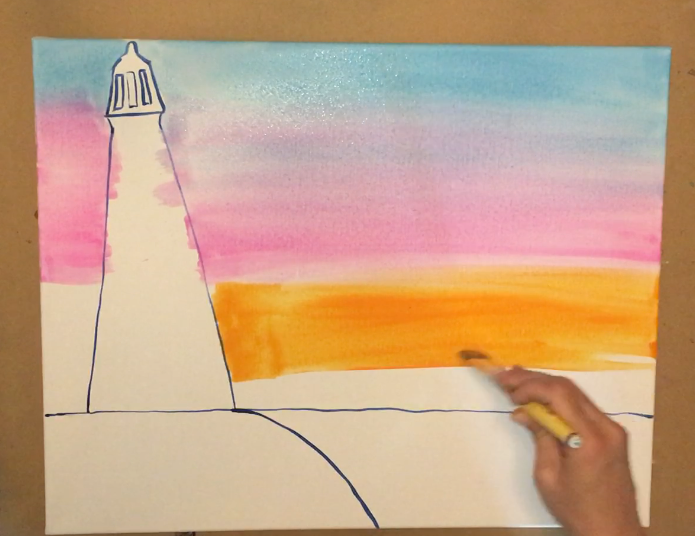

Next I painted the bottom inch that was blank – yellow. I blended this yellow in with the orange a little by painting that yellow over the orange. 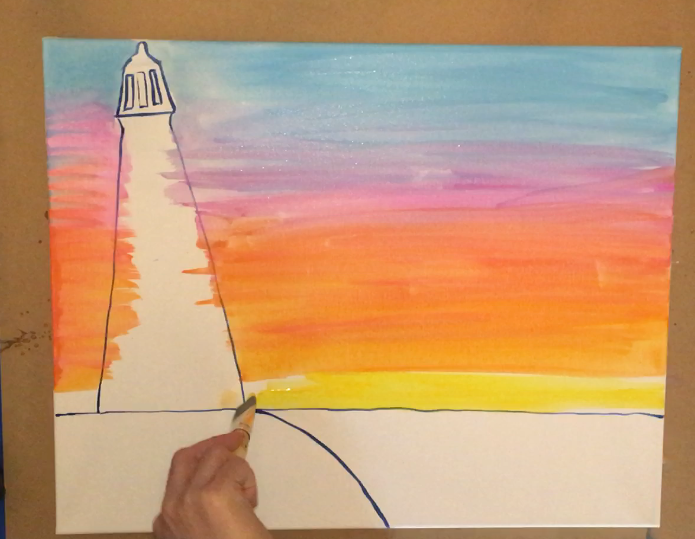
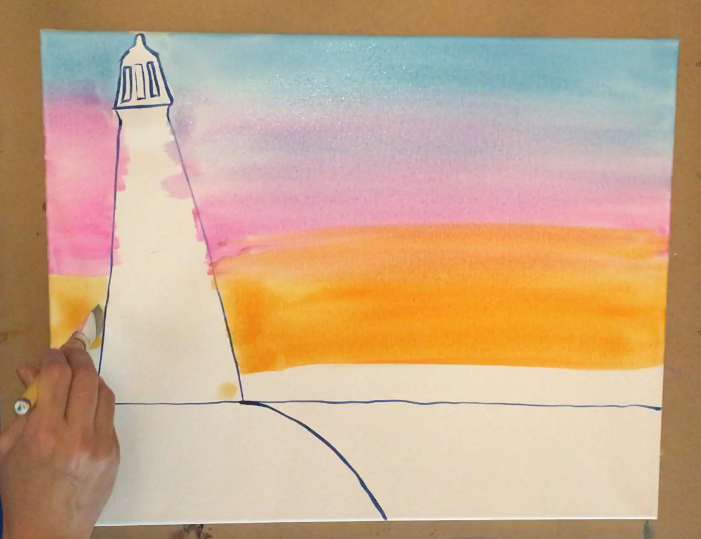
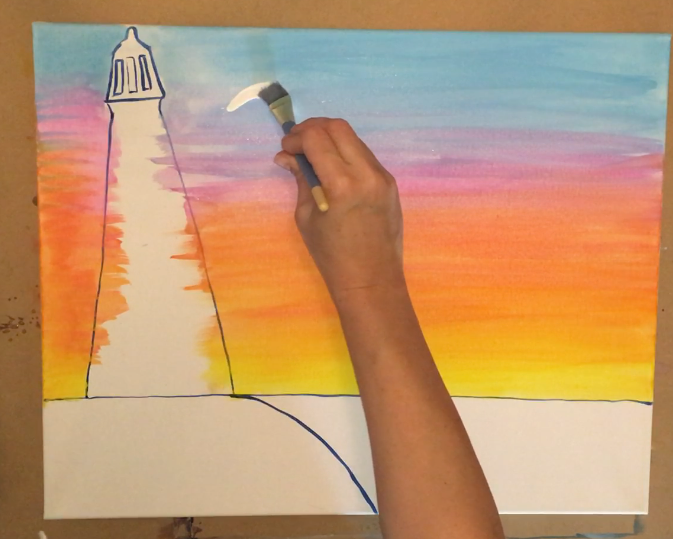
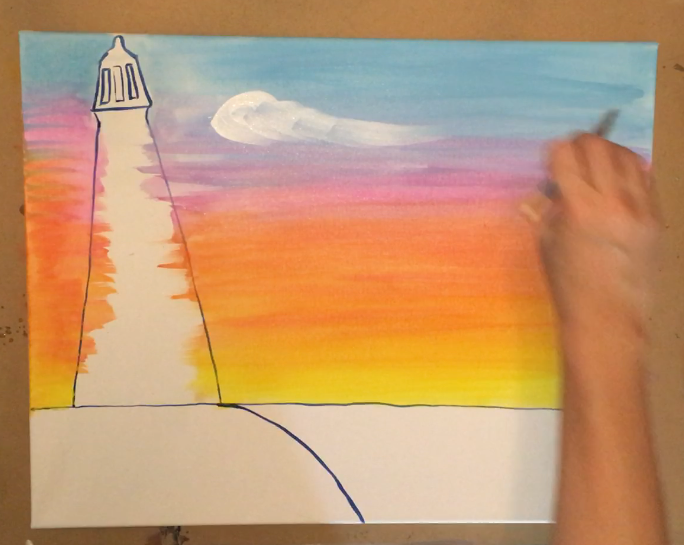
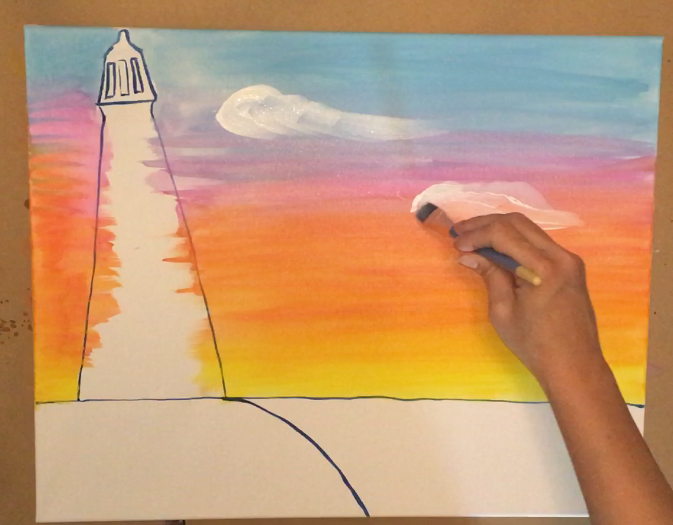
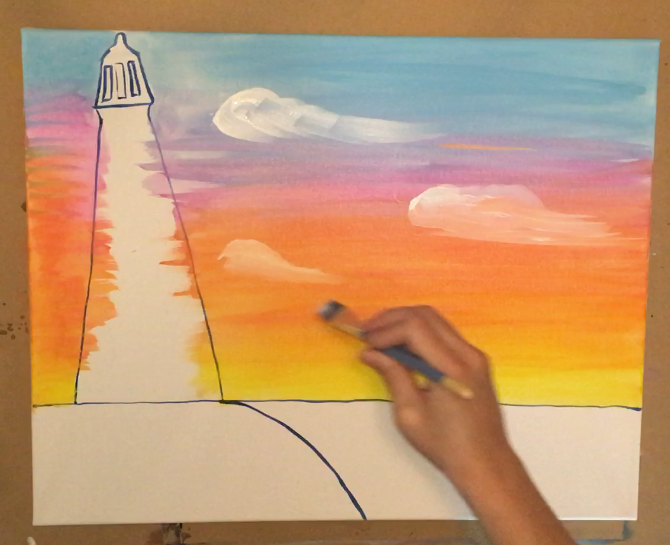
3. Paint Clouds
Next I painted in the clouds with a 1/2″ flat brush and white paint.
Note that you can use any size paint brush for this! The pictures below are a progression of how I did the clouds.

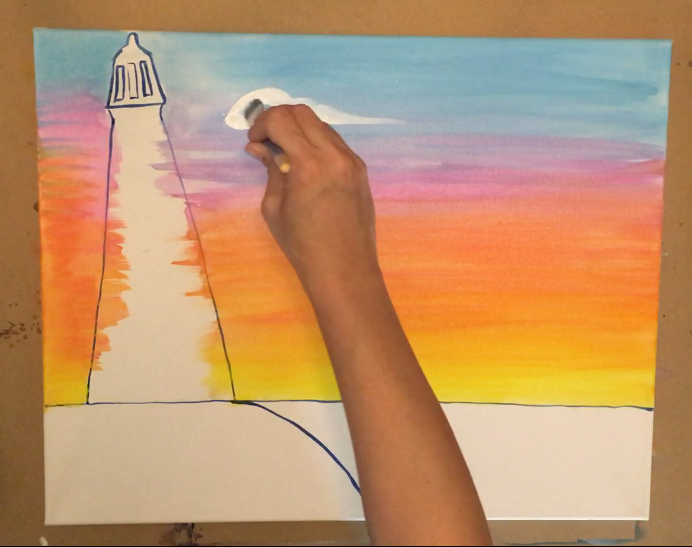
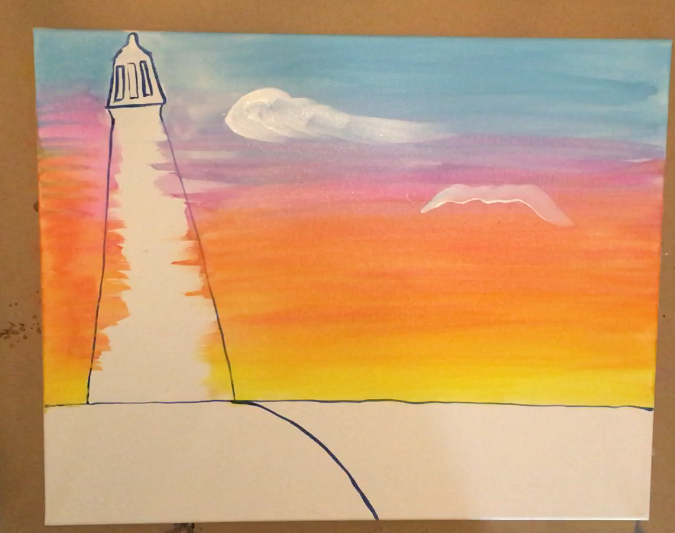
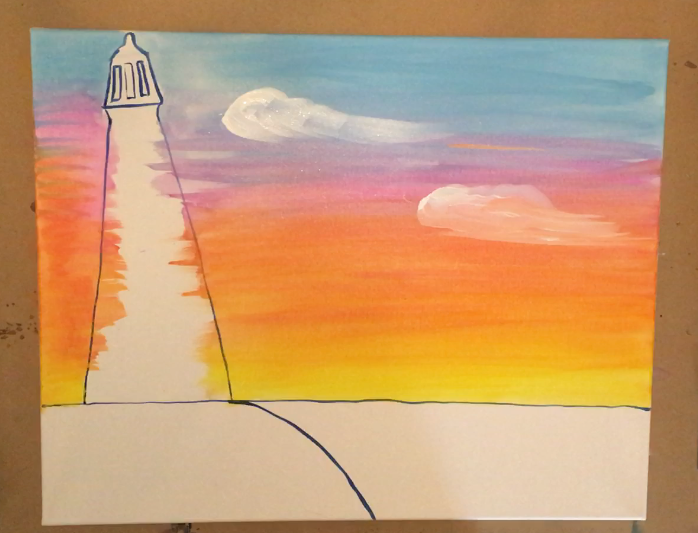
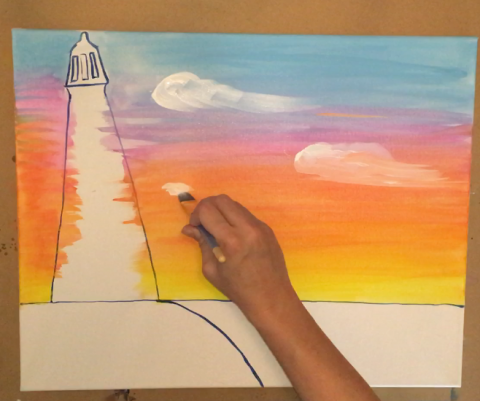

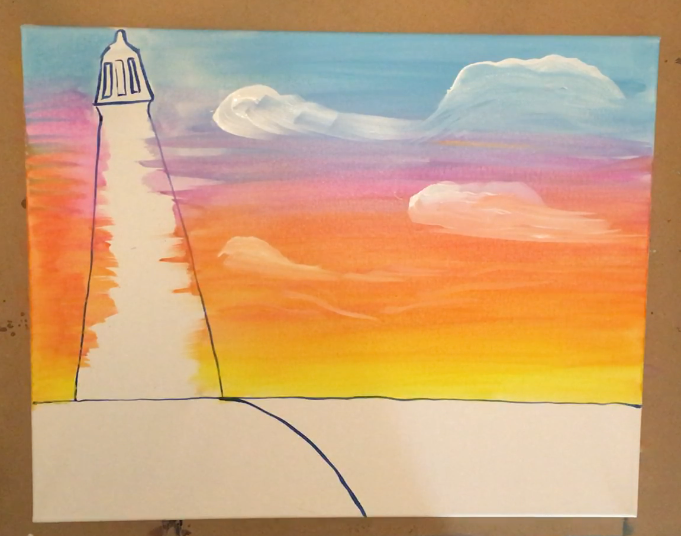
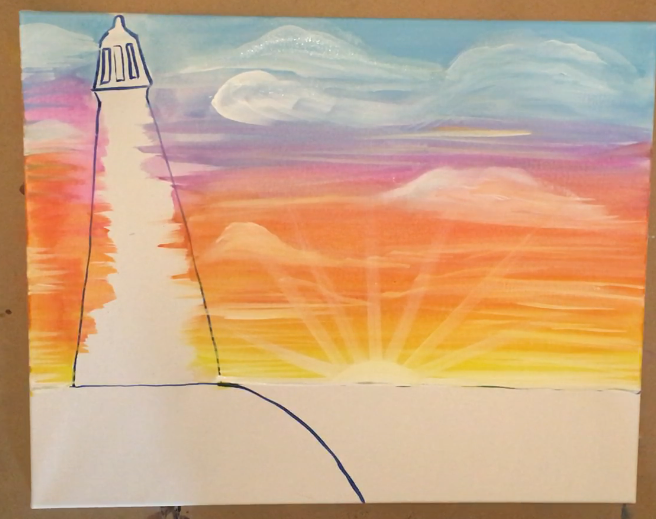
4. Paint The Sun
Next I painted a solid white line on the horizon line and just a little above into the yellow.
You want this to be the brightest part of the sky because that is where the sun is! I also painted a small half circle right in the middle of the horizon line.
That half circle was also solid white.

5. Paint The Rays
To paint the sun rays I used very very watered down white to make the line look translucent.
Each ray is just one stroke of very translucent white!


6. Paint The Lighthouse White
Next I painted in that lighthouse.
First I painted the lighthouse in solid white to cover up any of the sunset paint marks that I got on it.
Also, my white covered up any of the navy blue line that was left. I used a flat brush for this to make sure my line on the edge was as crisp as possible!

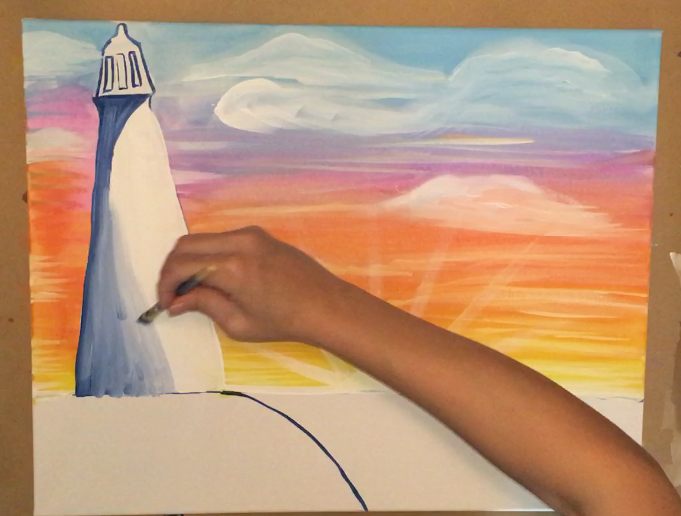
7. Paint The Shadow Of The Lighthouse
There is a very distinct shadow on this lighthouse and it is on the left side.
I painted the shadow in with a solid coat of navy blue paint. Note the shape of the shadow and where it curves in the middle. 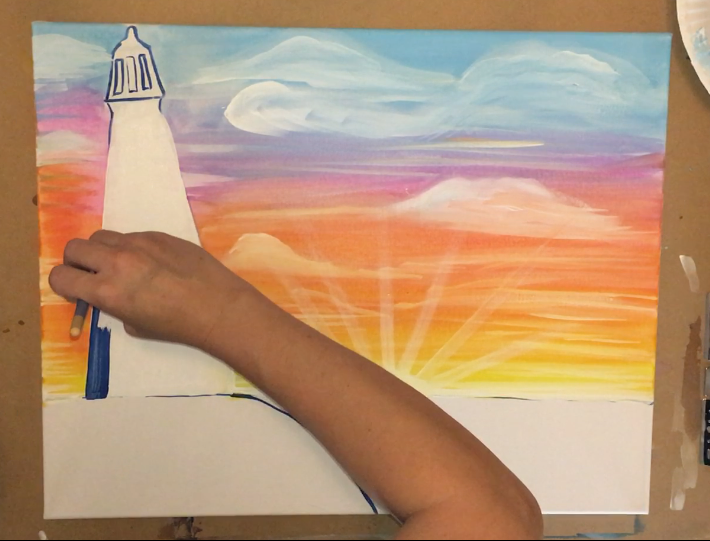

There are a couple ways you can blend the shadow.
You can use a wet brush to fade the blue into the white.
You can pull the navy blue paint to the white until it fades away.
You can add layers of translucent white over the navy blue. Or you mix your colors on your palette (mix navy blue with white) and then apply the paint.
Just make sure that your line stays darkest on the far left and fades to get lighter on the right!
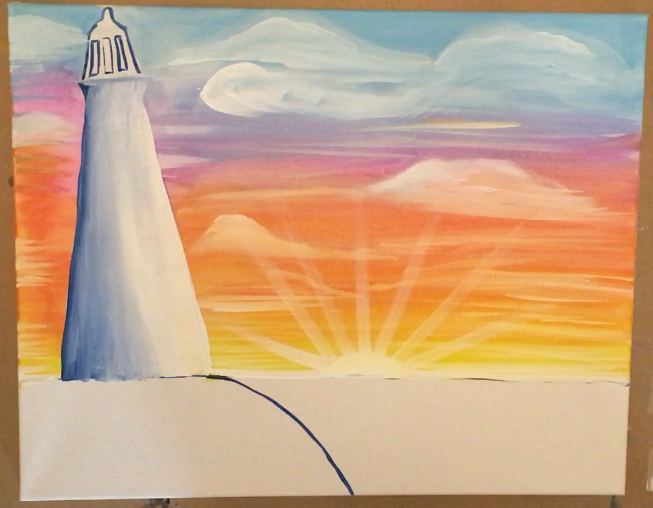
8. Paint The Lighthouse Top
I used a tiny brush to paint the top of the lighthouse red. Leave the windows blank for now. 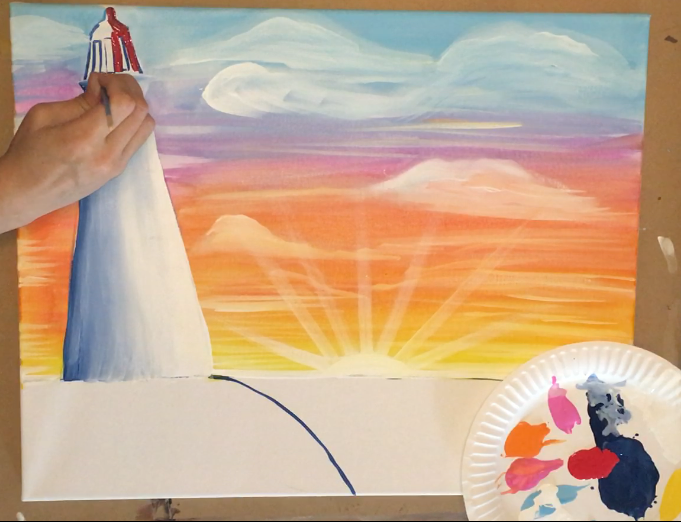
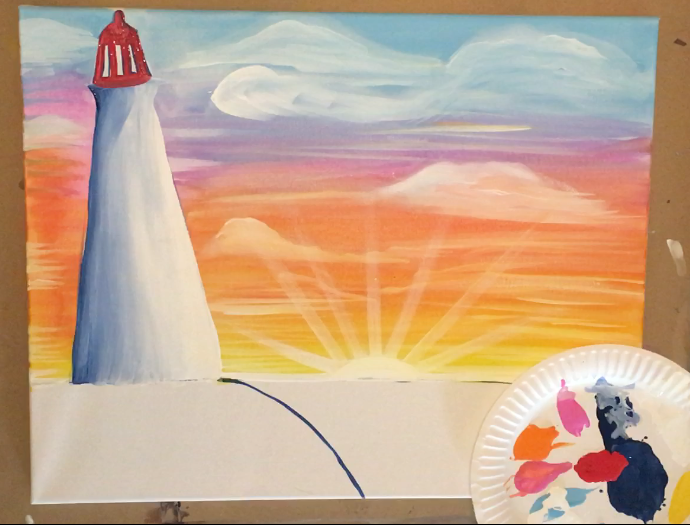
For the shadow of the red area, I used navy blue paint. 
9. Paint The Lighthouse Windows
The windows were painted in solid navy blue. 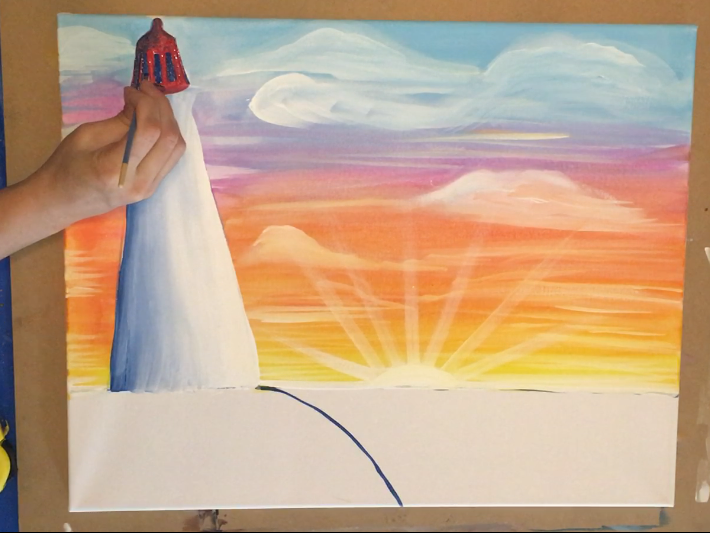
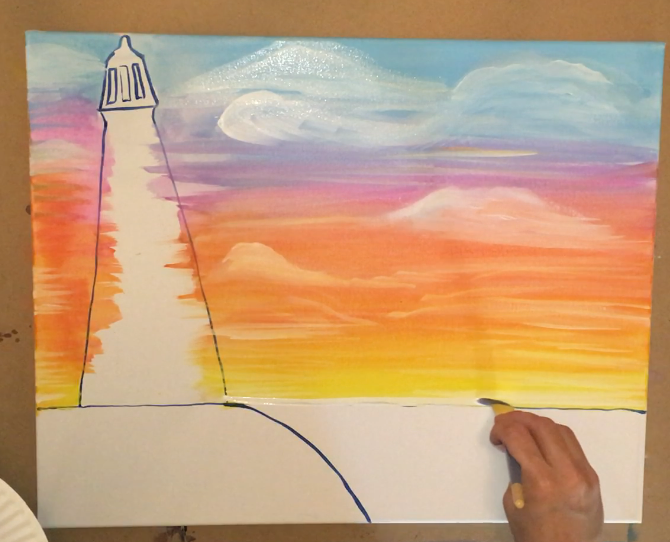
10. Paint The Ocean
Next I painted the ocean water.
To do this,I did a “wash” of bright blue. Paint the ocean with clear water first and then add the blue. I
started from the bottom of the canvas up to the horizon line so my blue would get lighter as it gets up. Don’t worry about the reflection and water texture yet.
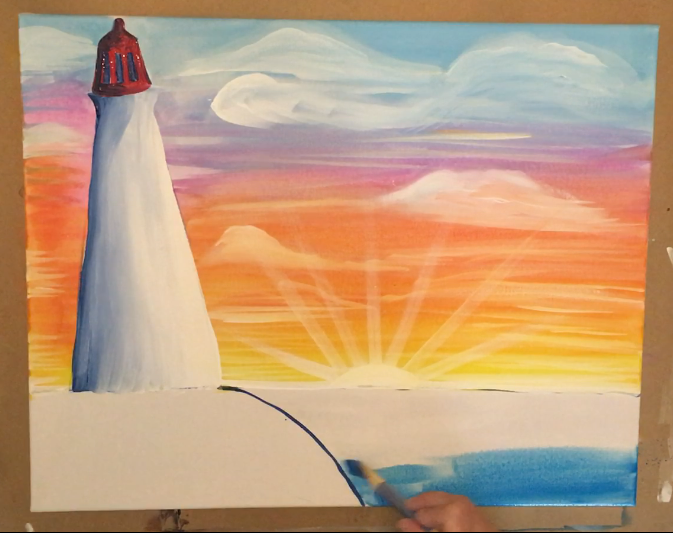

Then I let the blue dry!
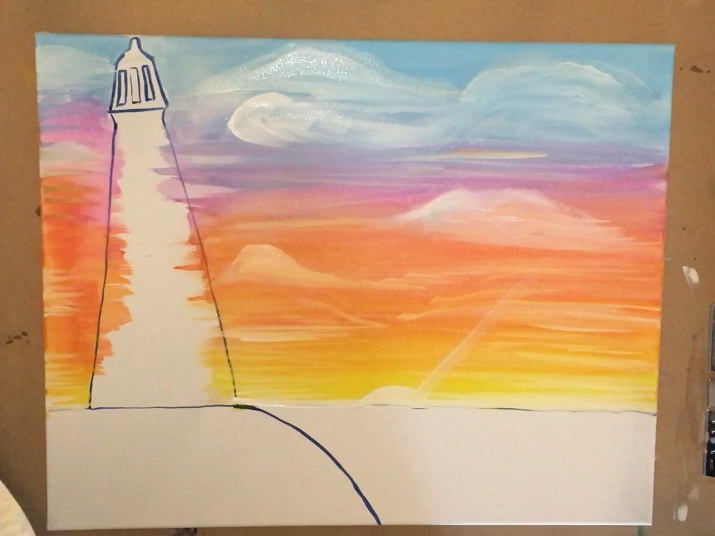
12. Paint The Reflections
The trick with painting water with acrylic is to add layers of horizontal strokes or very condensed “zig-zag” strokes.
The color of the horizontal strokes are the same color of the sky because the water is a reflection of the sky.
So…first I added horizontal white strokes just under the sun. Yes, these strokes were kind of translucent but can be opaque as well.
Then I added more horizontal strokes of white in the foreground (bottom). These were brighter and more opaque.
Then I added horizontal strokes of pink!
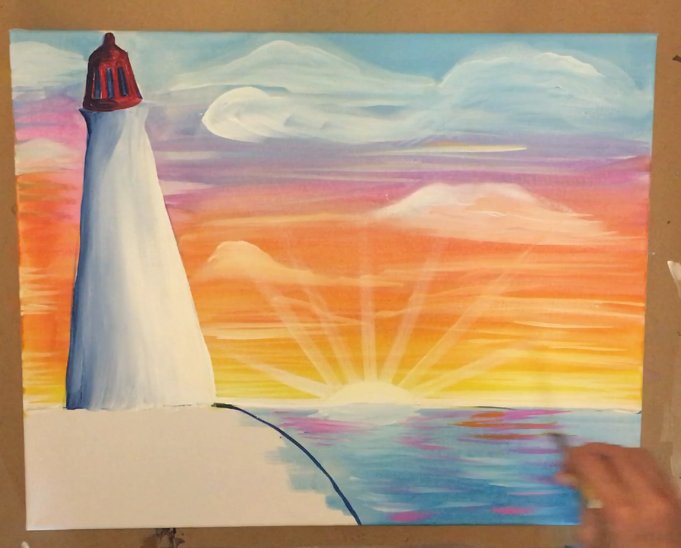
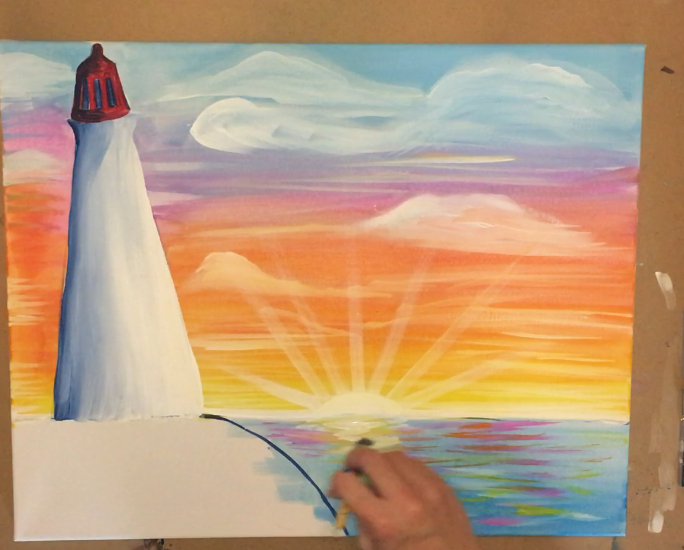
Then I added horizontal layers of yellow strokes. Be careful with the yellow! The yellow that I was using was not an opaque yellow, it was translucent.
This made it kind of turn green when it was applied on top of the blue.
Then I added another layer of horizontal white strokes. This was just under the sun because that is the brightest reflection of the water. 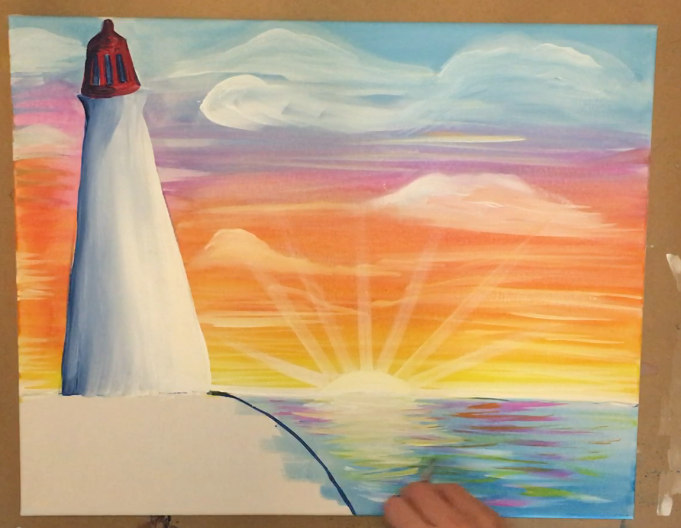
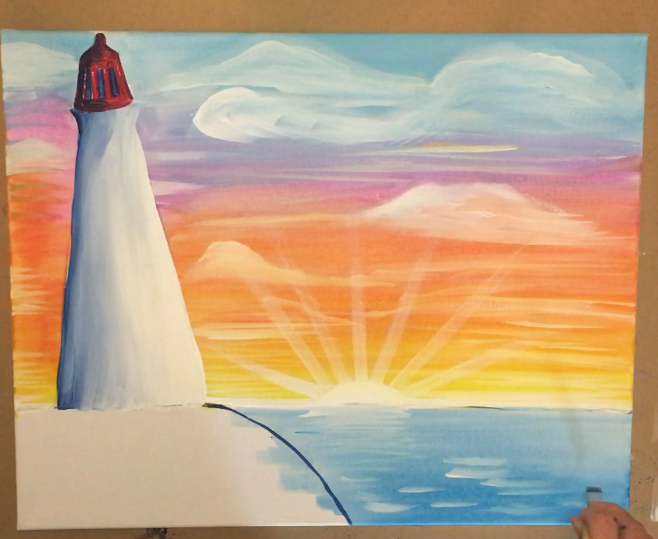
You can leave this as is. Or keep going with layers of more colors! I decided to add more blue because I wanted my ocean to look darker and more “water texture”.
So I went in and added more horizontal blue strokes. I probably could have added more pink and orange too. Just keep adding your layers until you like the way your ocean looks!
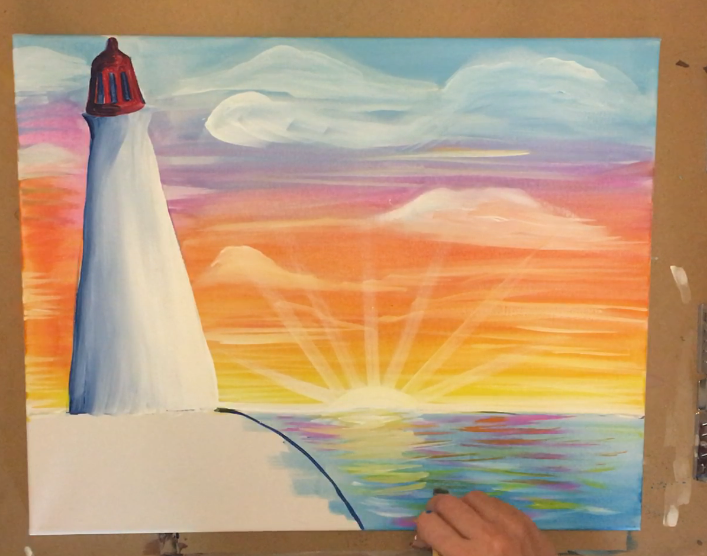
13. Paint The Rock
Then I painted the hill. The first step was applying a “wash” of brown paint. My strokes went in an “arc” line.
For the dark areas of the hill, I painted navy blue. 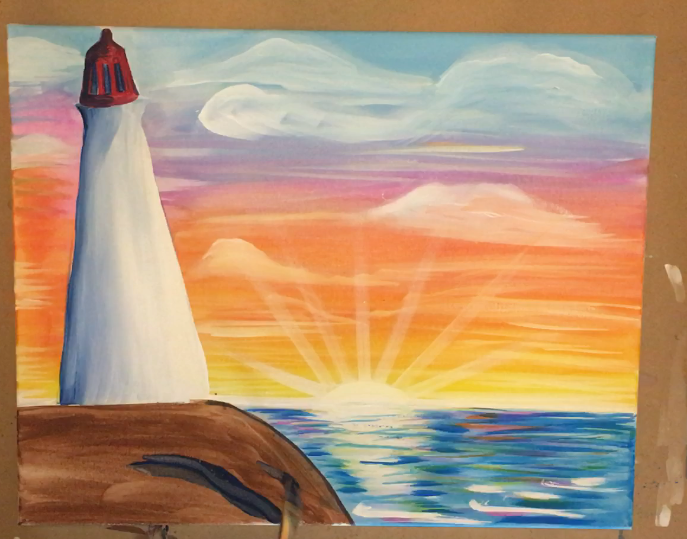
Then I made the area just behind and under the lighthouse even darker by using black. Keep this black translucent by watering it down.

Then I added white to my brush that already had black in it. This will turn the white gray. I painted the right side of the hill and some of the area toward the bottom.
I cleaned off my brush entirely and added white. Then I painted some “waves” on the bottom of the hill to make it look like they are crashing into the hill.
14. Paint The Windows
For the windows, I painted four diagonal black lines that were parallel to the angle of the lighthouse line. The lines got slightly shorter the higher they got.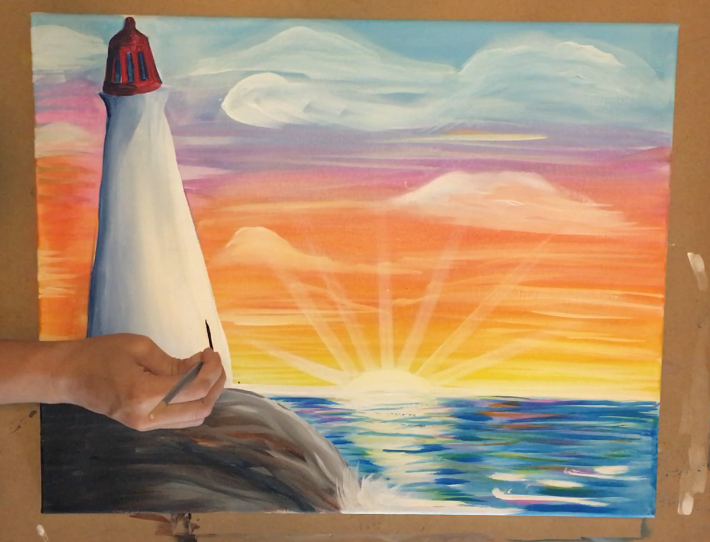
Then I painted a gray (white mixed with black) stroke next to the black line. 
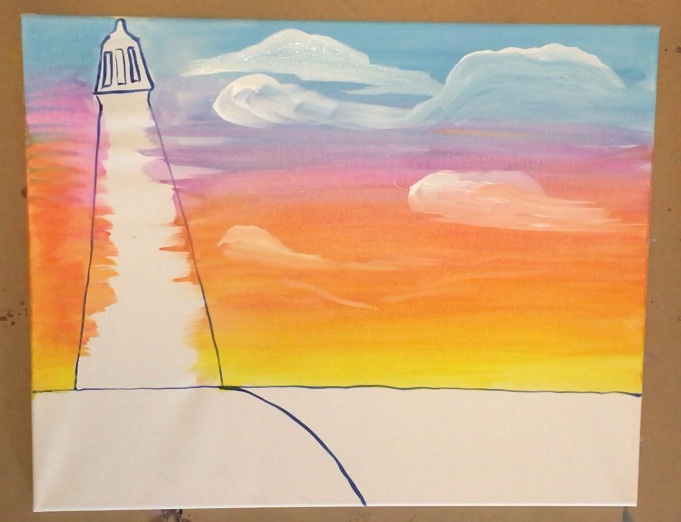
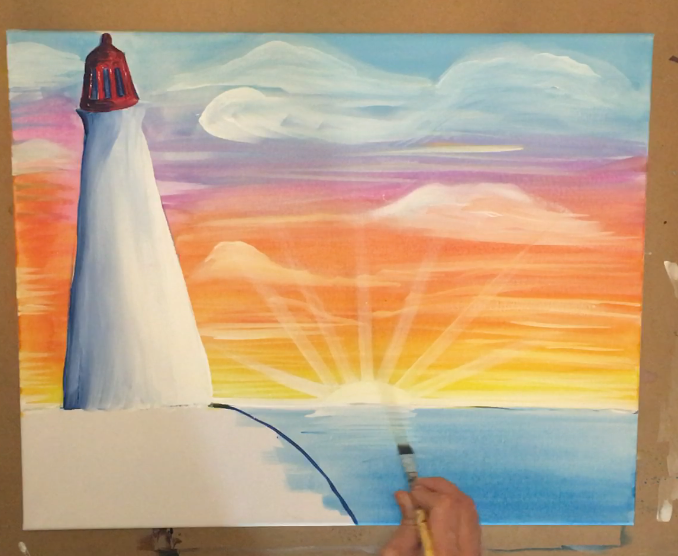
Finally, my final touch was making the lighthouse appear as though the lights were shining!
I did this the same was as I did the sun rays. Make a very very very translucent white.
Paint a triangular shape coming out of the lighthouse from the window on the right and left.
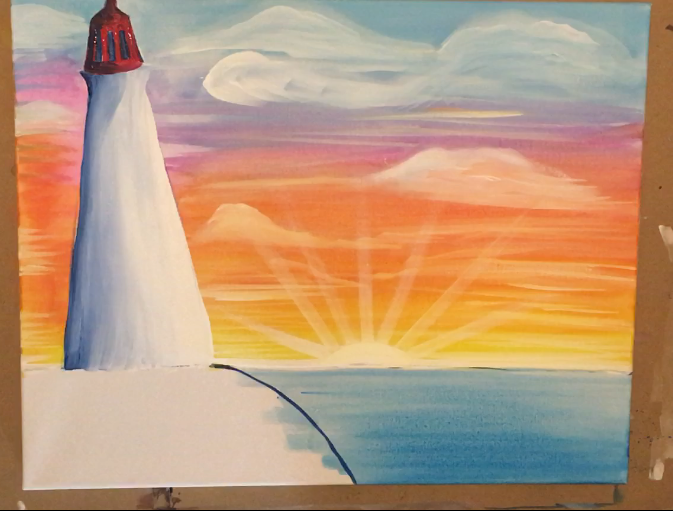
I also went in and added more yellow into the water just below the sun.
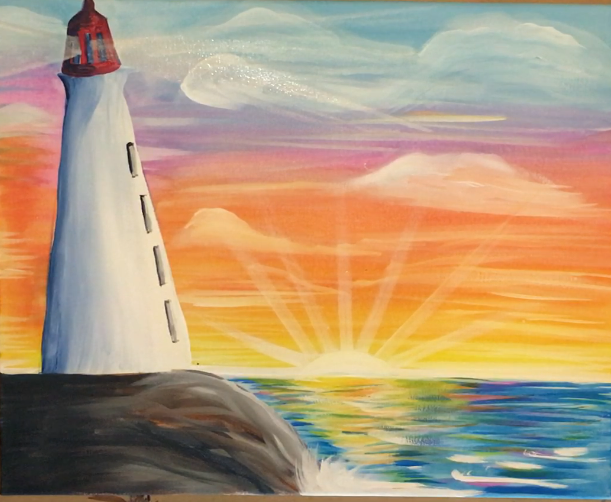
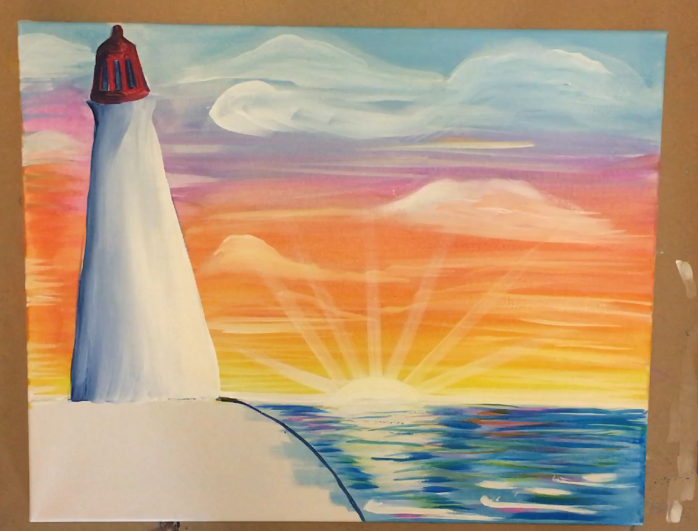
Finished!
Share Your Art Here:


These were awesome guide lines I am 11 and I thought it was super easy
That’s wonderful Kaidence! So glad you found it easy. Enjoy painting!!!
Love your tutorials. This is my third painting of yours. Still need some info. What size brushes should I use?
Thanks so much.
you are so good
Thank you so much for your talent and generosity! I made a very different version, using the apple barrel paints but found that their matte white was not at all opaque. Is there another white of theirs or others that is compatible? Also, can you please share what brushes you use? Finally, do you know of any sets of colored handle brushes that are different, so you can say “everyone grab the purple handled (big flat bristle) brush…or the red handled (small bright)…”??
Hi Sherry! Yes the Apple Barrel White is notorious for being transparent. I don’t think they make a version that is extremely opaque. I recommend getting a titanium White in a different brand like Liquitex or even Artist Loft if you’re going for an even more economical version. This is an older one of my tutorials so I used different brushes but I currently use the Royal and Langnickel Zen brushes. I think I used Royal for this tutorial but from a generic variety pack. Unfortunately there is no brush line that has color codes for the brush type. That would be an AMAZING idea though! Especially when you are teaching the class and you don’t have to explain what brush to grab. The one brush that sort of comes close to this concept is Royal and Langnickel Big Kids Choice brushes which come in different colors for the handles. Hope this helps! I’d be happy to answer any more questions you have!
Thank you for this thorough and speedy reply! I will check the sizes on these, variously colored brushes. I had gone to a paint and sip where they had color coded brushes but maybe they just collected them from different manufacturers. Glad I wasn’t crazy regarding the translucent white. Be well!
http://www.royalbrushstore.com/p/bk684-bk-4-pc-round-flat-brush-set More sets here: http://www.royalbrushstore.com/k/search?q=Flat+and+round+variety+pack
Yep those are the colored ones I’ve seen! Royal Brush makes them! And you’re welcome!
Just fyi – I bought Apple Barrel 2oz. at Walmart for 50 cents each and thought they were good…and just bought 16oz on Amazon for $4.50-5. !! Some blues more pricey. Have a great day. Done!