
Would you like to save this?
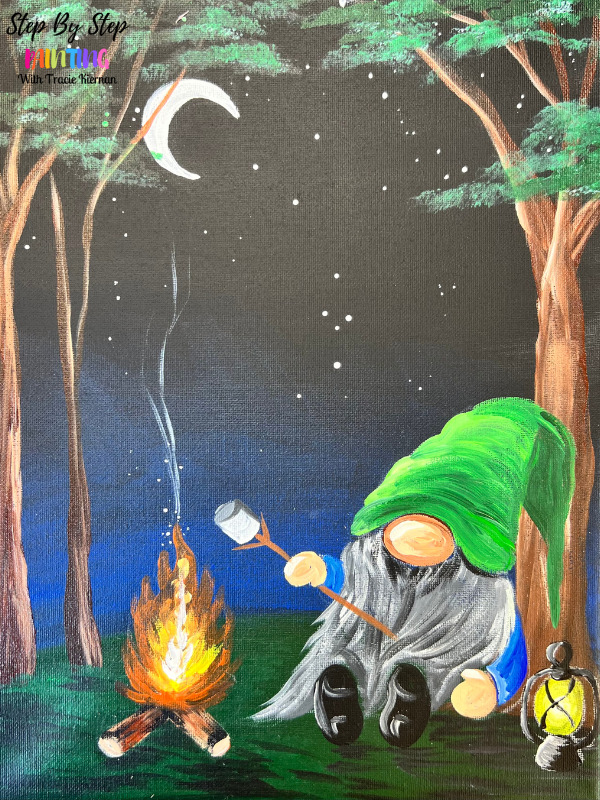
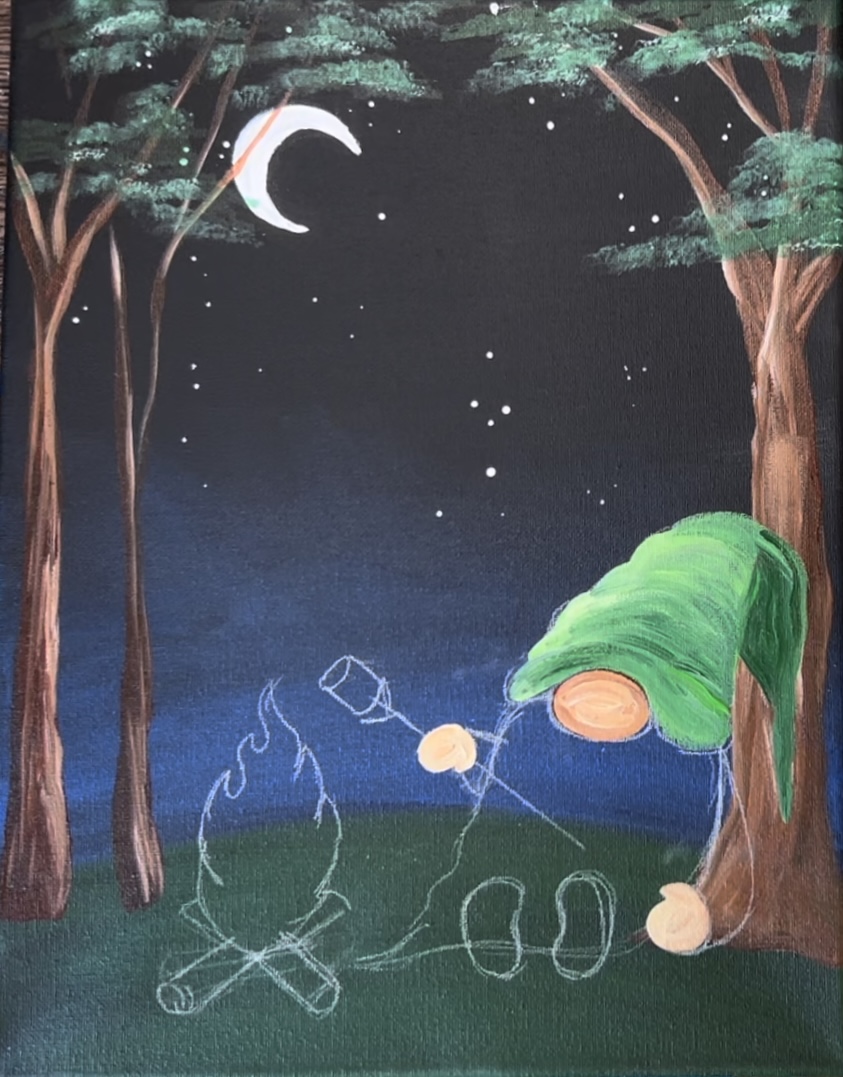
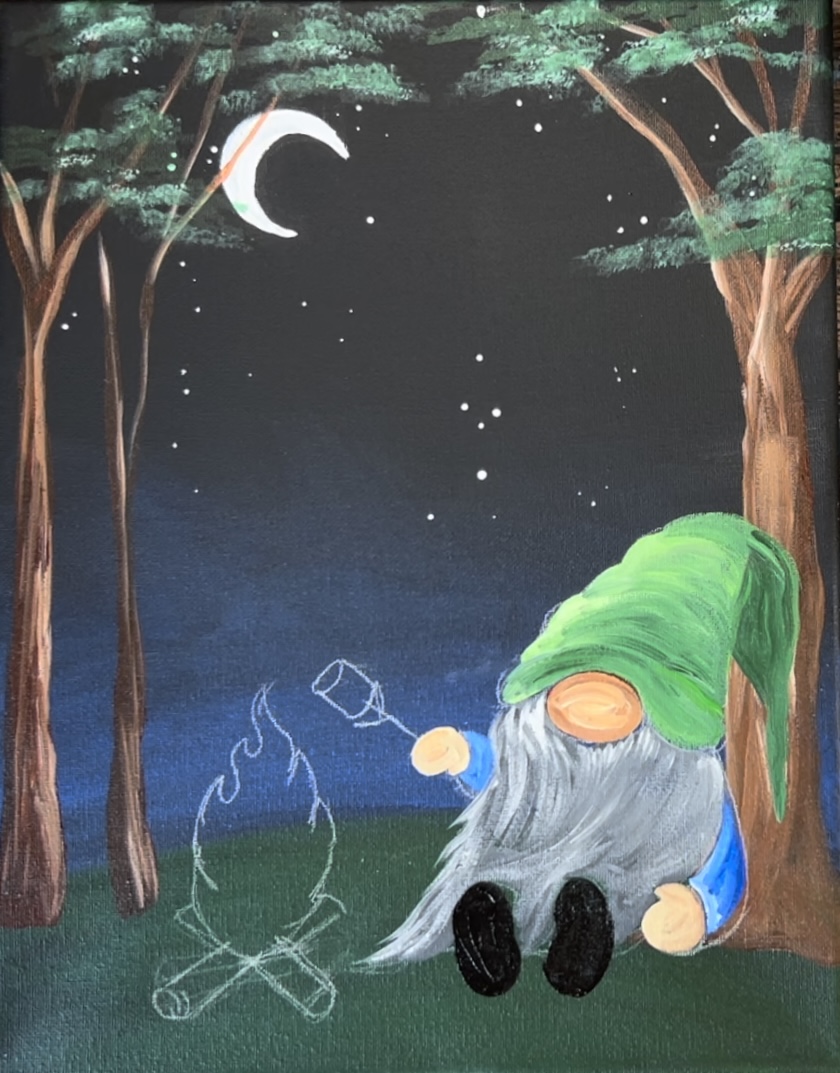
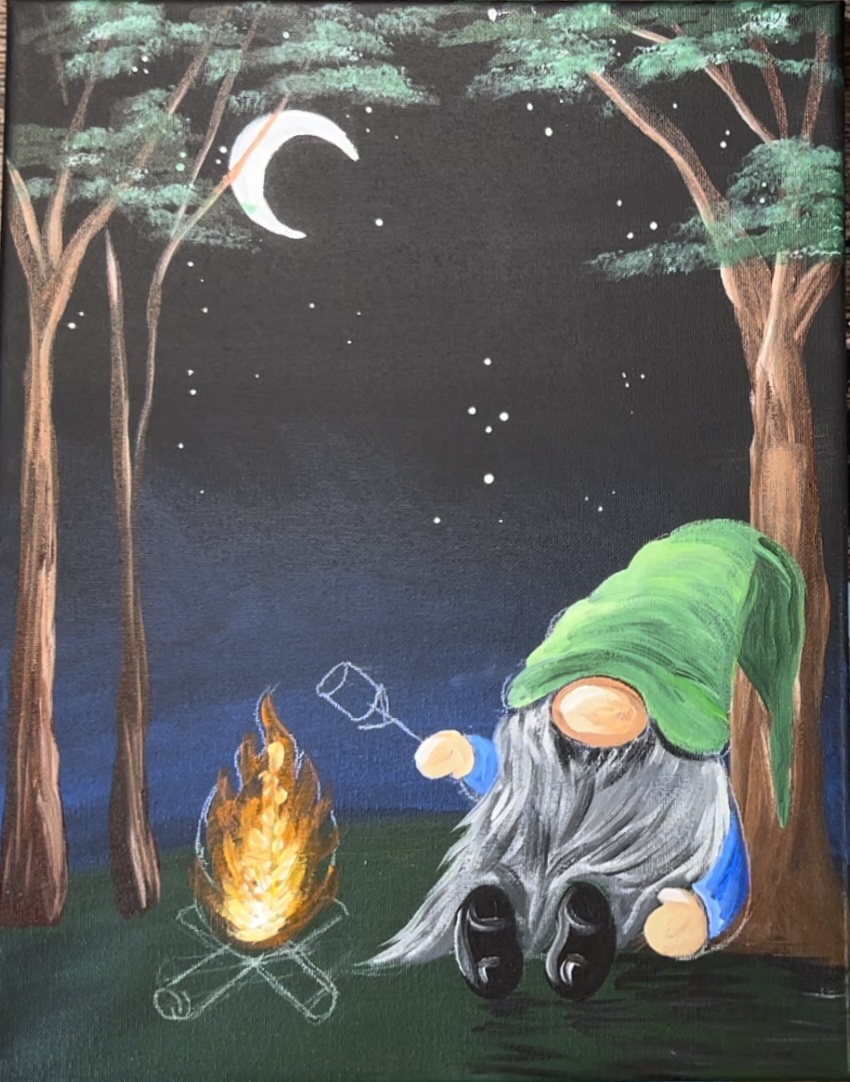
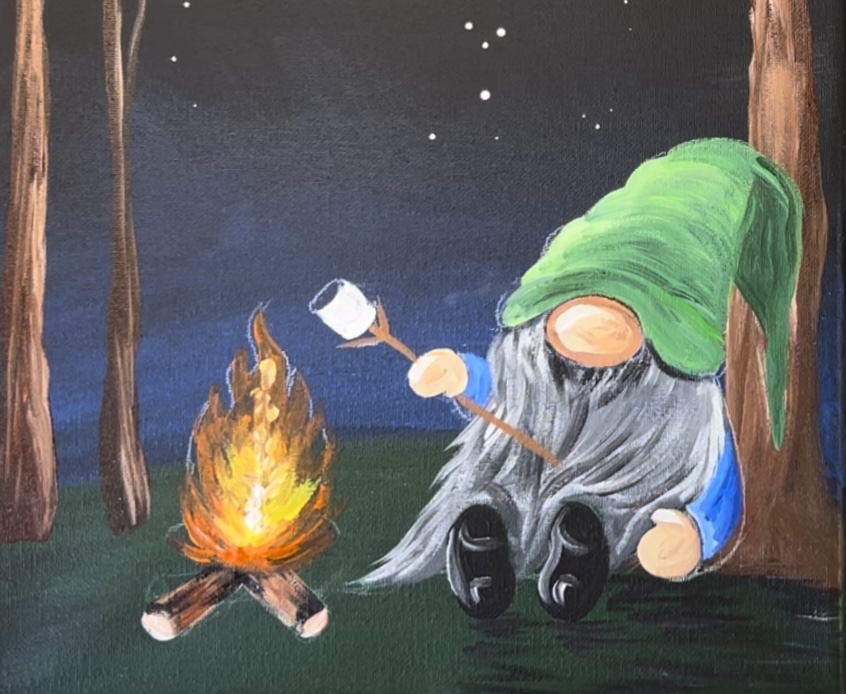
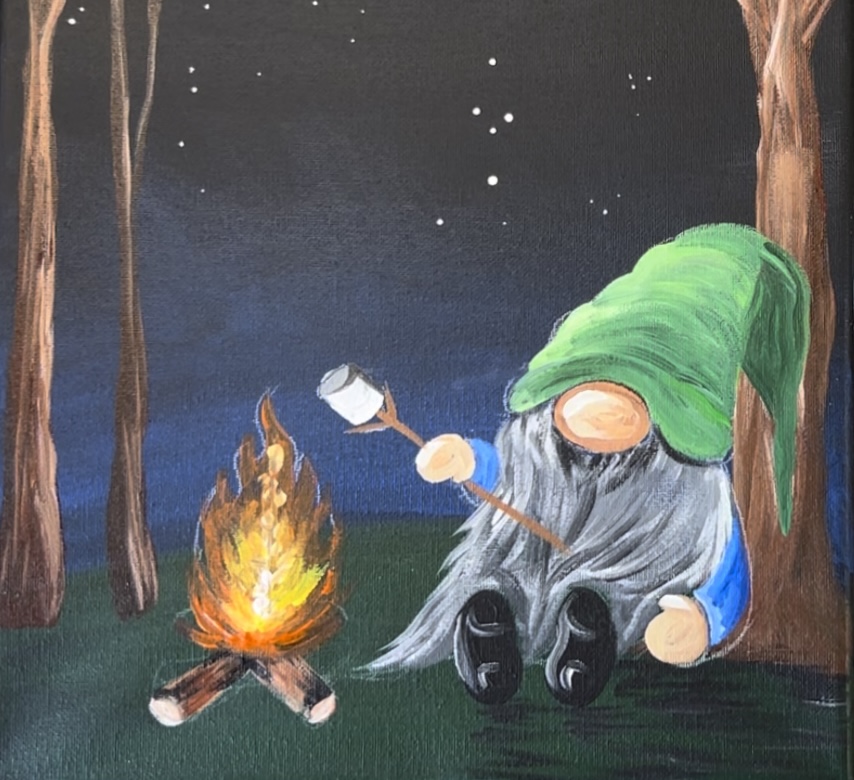
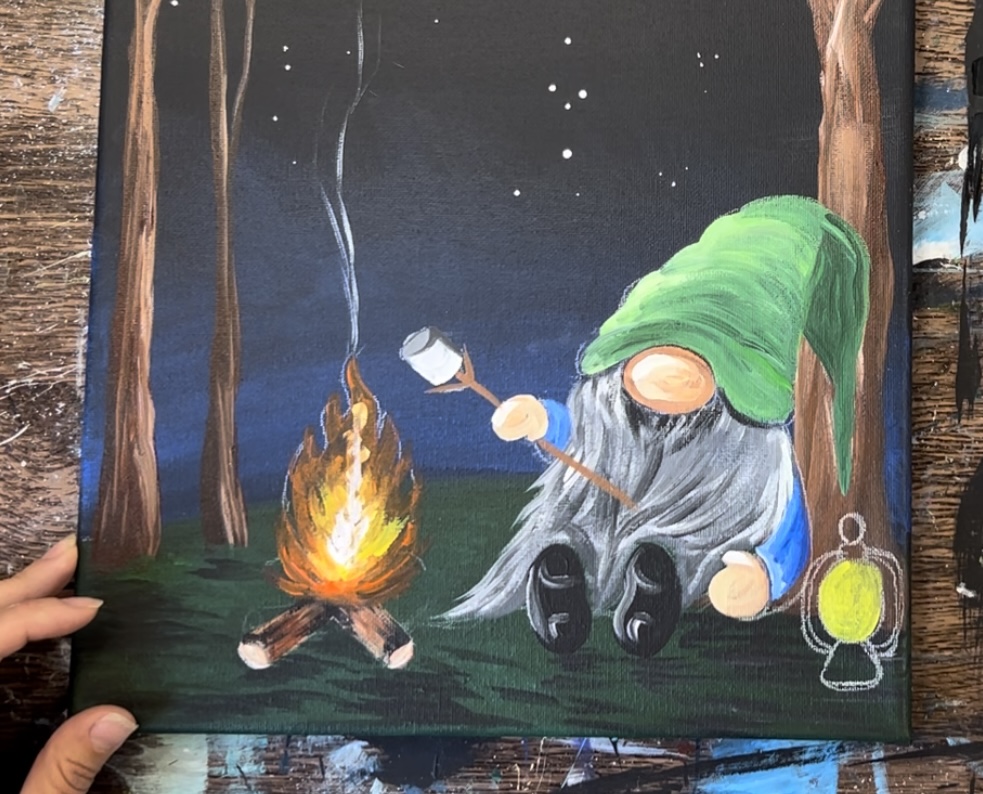
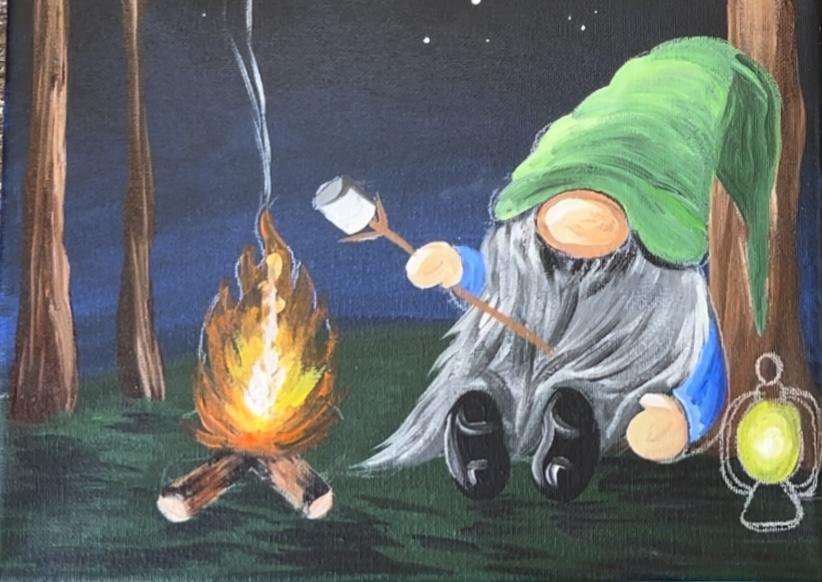
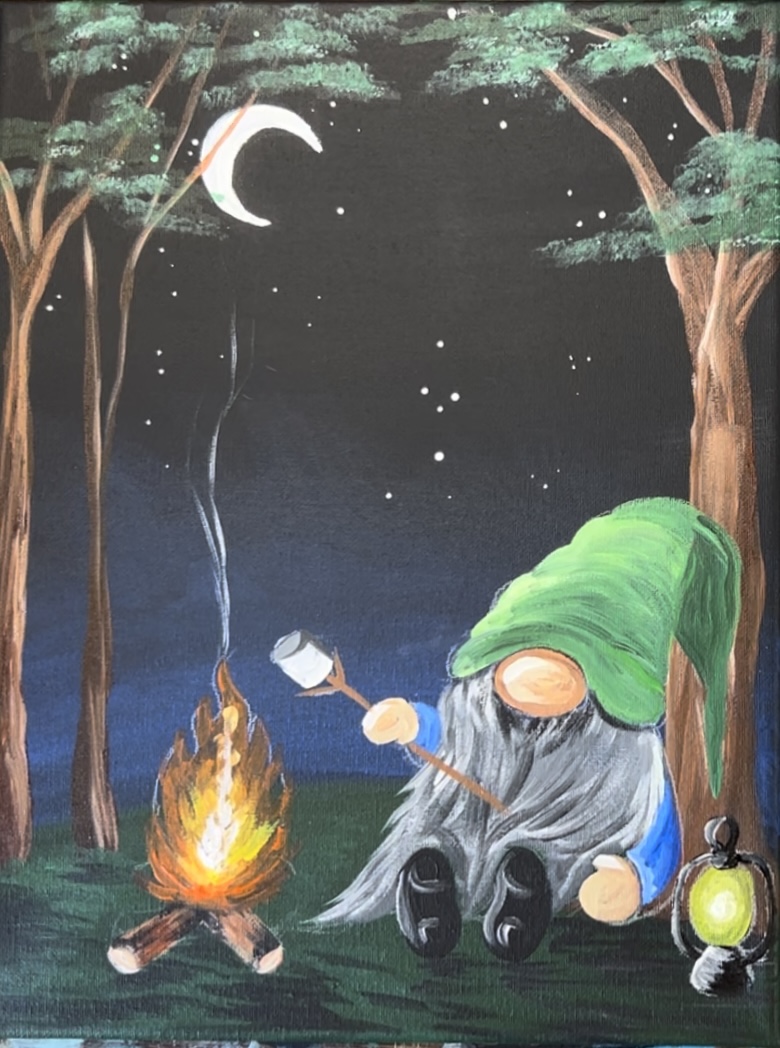
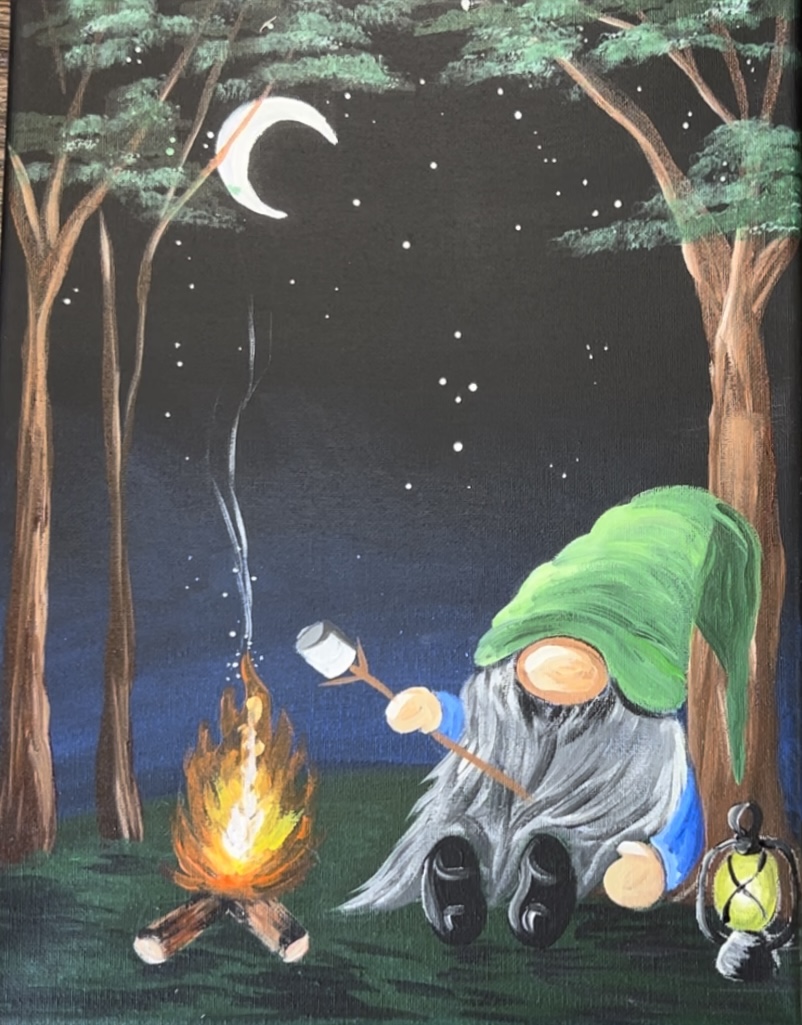
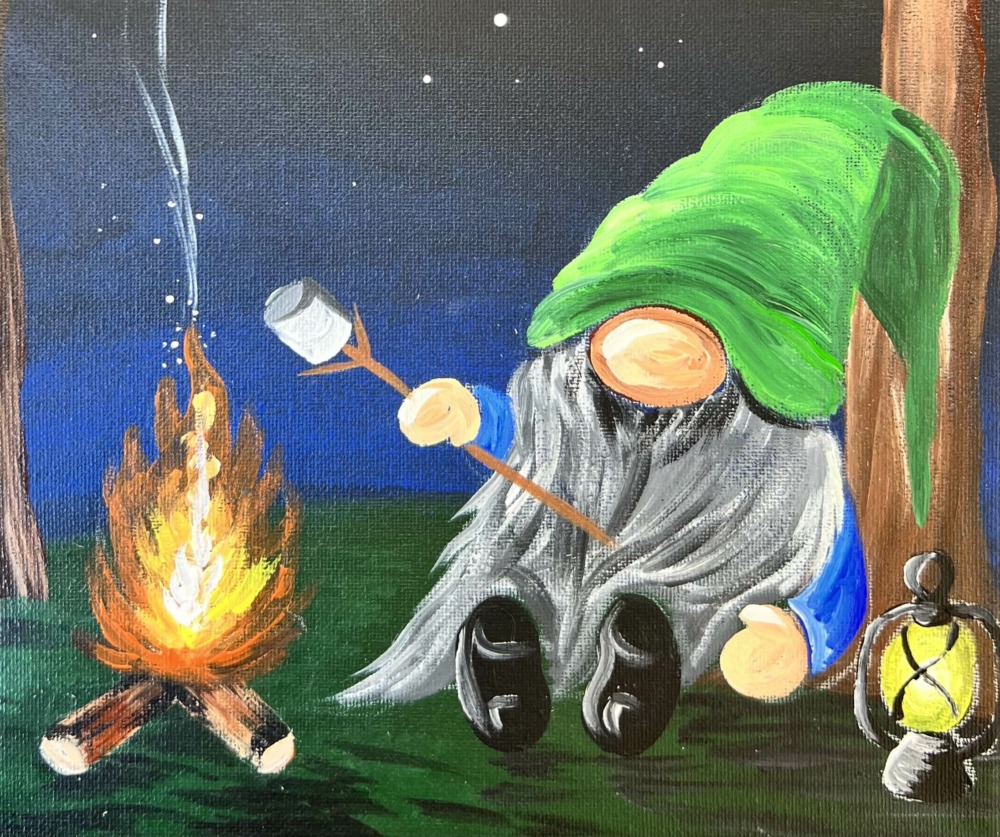
Paint an adorable camping gnome! This acrylic paint tutorial is done on an 11 x 14 canvas pre-painted black.
There is an optional traceable for this and I will also show you how to draw the gnome.
Enjoy and happy painting!
Materials Needed:
Camping Gnome - Acrylic Painting Tutorial

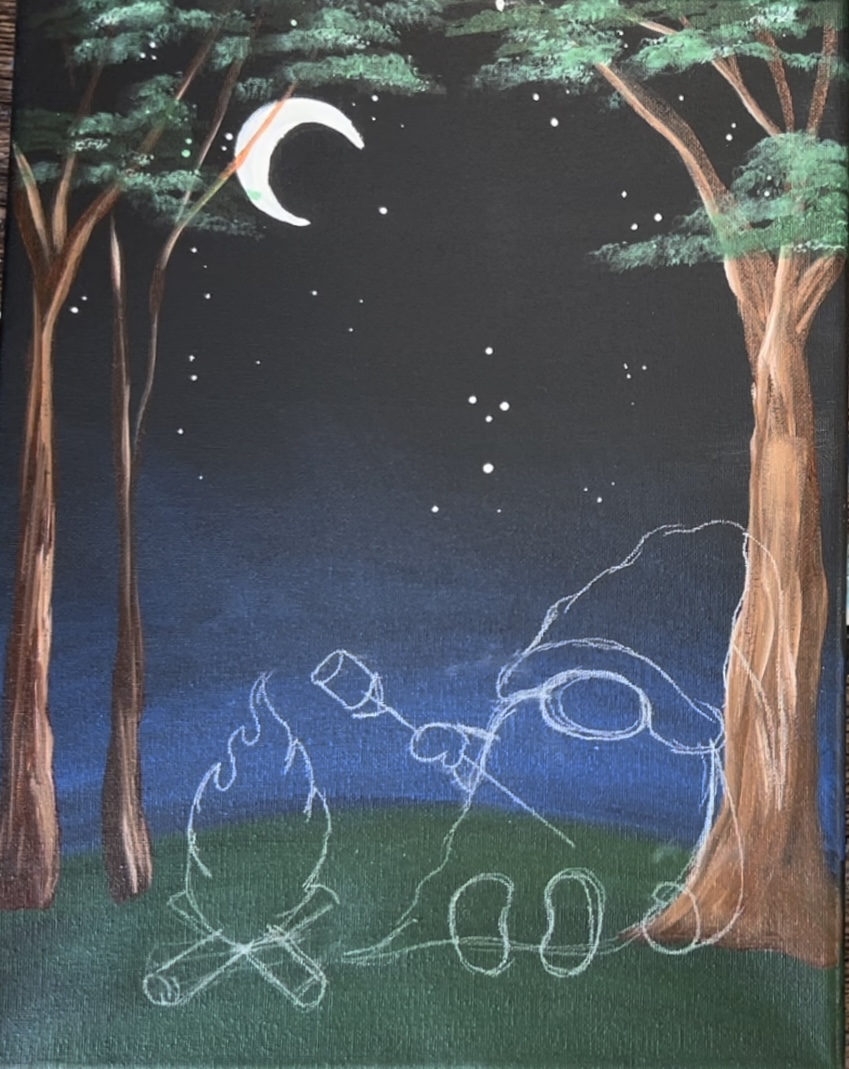
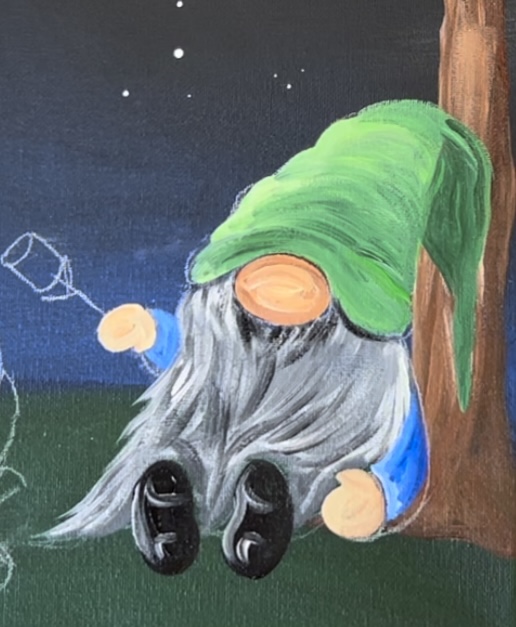
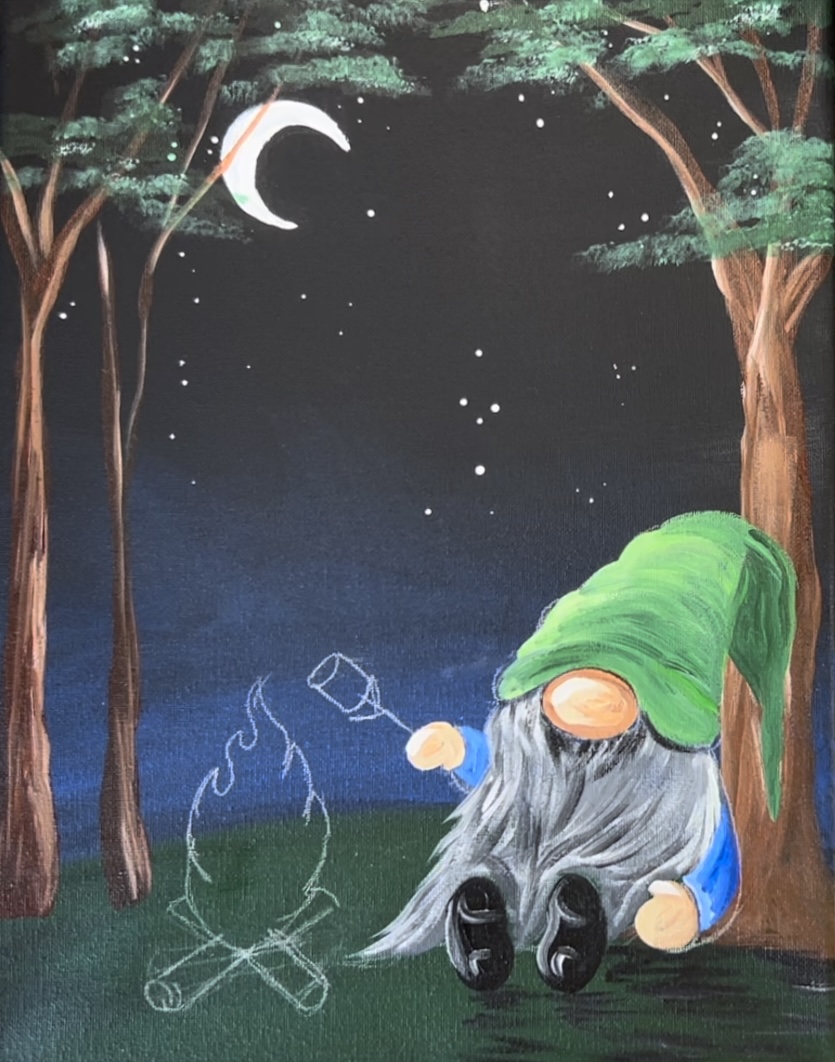
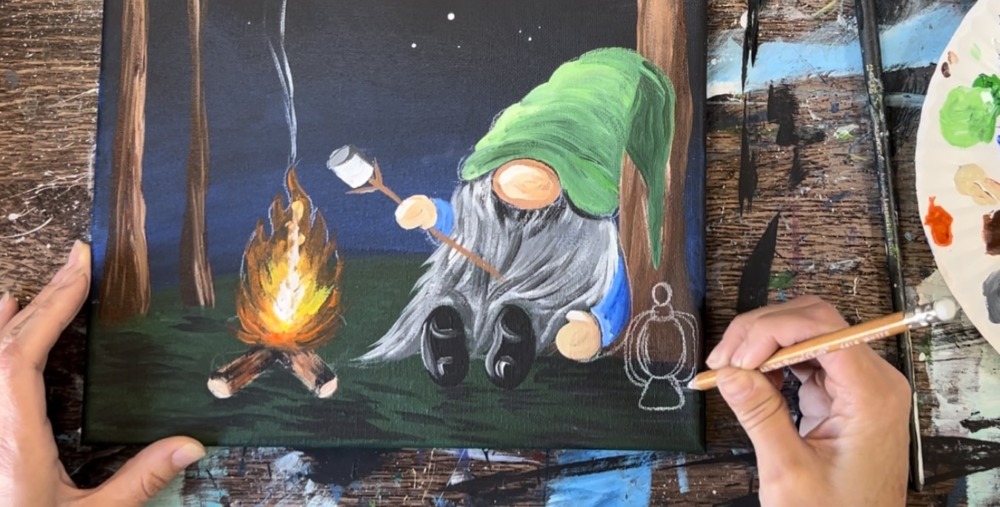
Let's paint a gnome! This gnome painting features a gnome sitting by a fire and rosting a marshmallow. This painting is done on an 11 x 14 canvas with a black background.
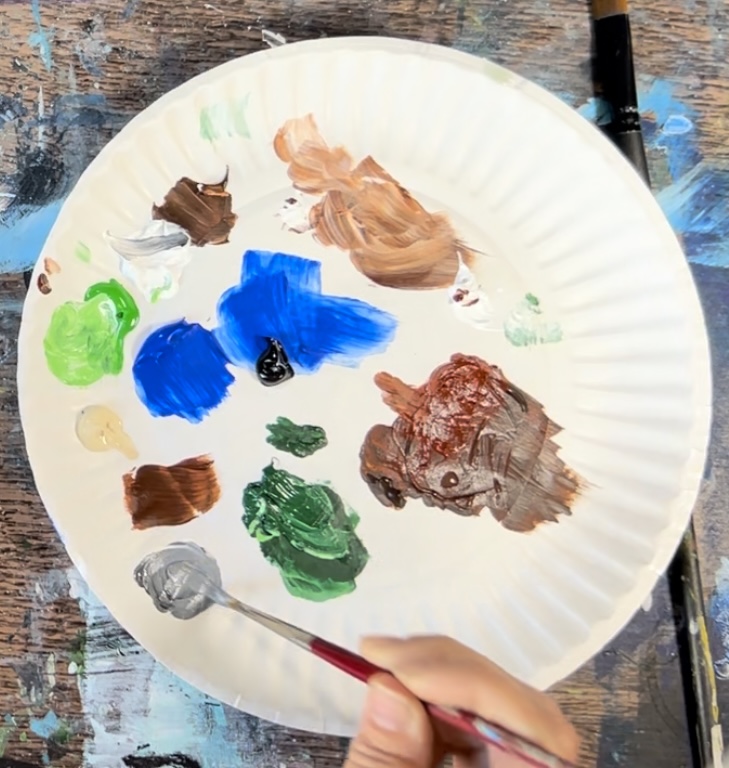
Materials
- 11 x 14 Canvas Painted Black
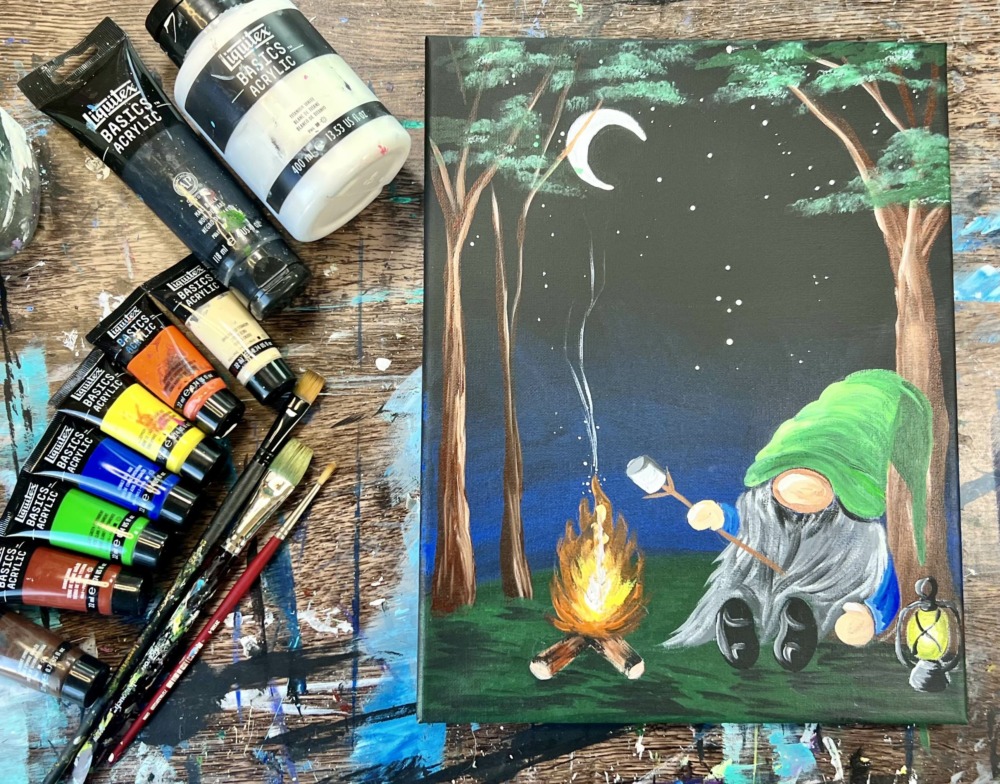
- Acrylic Paint (I use Liquitex BASICS)
- Paint Brushes
- Chalk Pencil
- Optional Tracer
- Optional White Graphite Paper
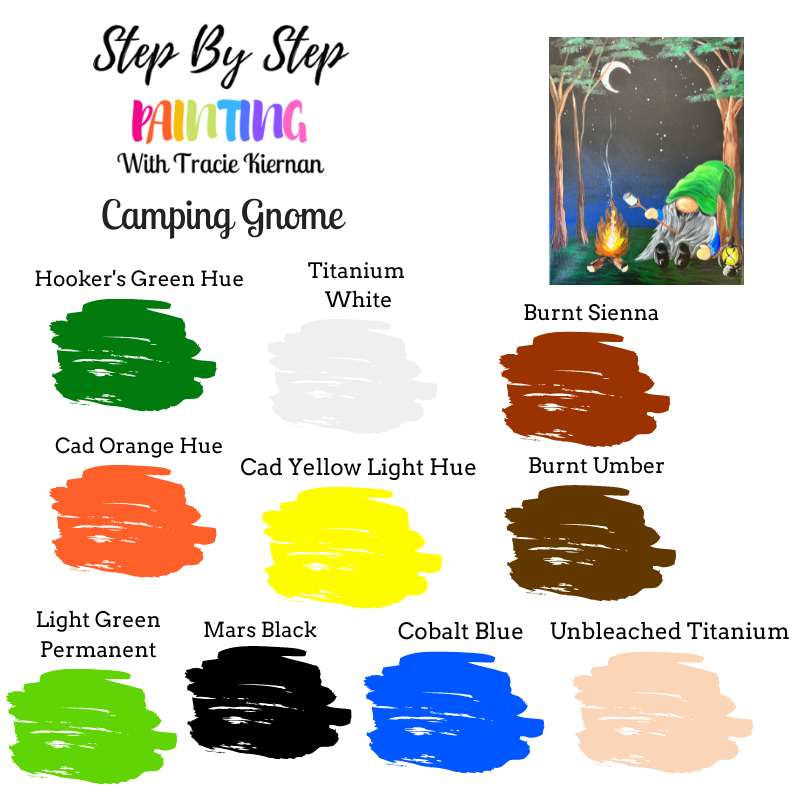
Colors
- Mars Black
- Titanium White
- Cadmium Orange Hue
- Cadmium Yellow Light Hue
- Hooker's Green Hue Permanent
- Light Green Permanent
- Burnt Umber
- Burnt Sienna
- Cobalt Blue
Brushes
- 12 Bright Brush (1/2" Flat)
- #4 Round Brush
- 3/4" Flat Wash Brush
Color Palette:
Using Craft Paints?
If you are using craft paints such as Apple Barrel Craft Paints, I would recommend subbing to these colors:
- Black
- White
- Holly Branch
- New Shamrock
- Jack-O-Lantern
- Nutmeg Brown
- Melted Chocolate
- Bright Blue
- Beige
Directions At A Glance
Traceable

Video
Step By Step Instructions
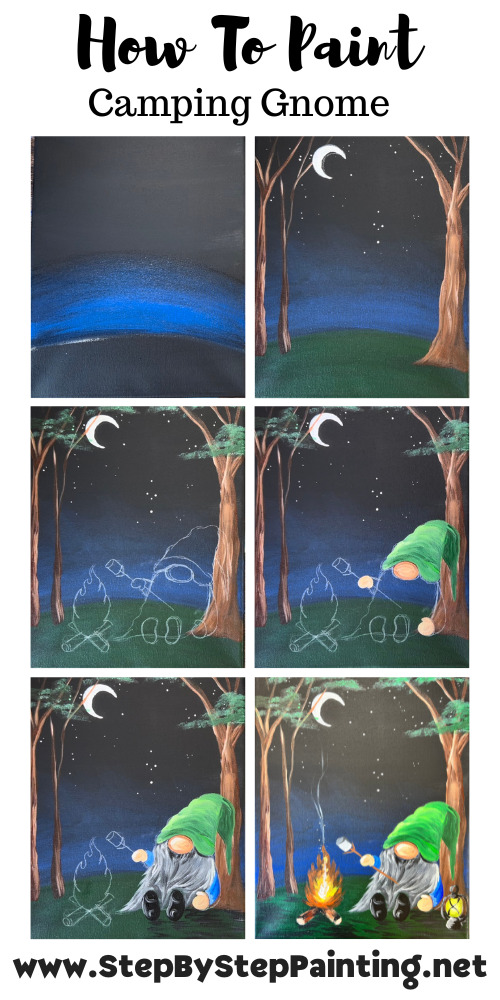
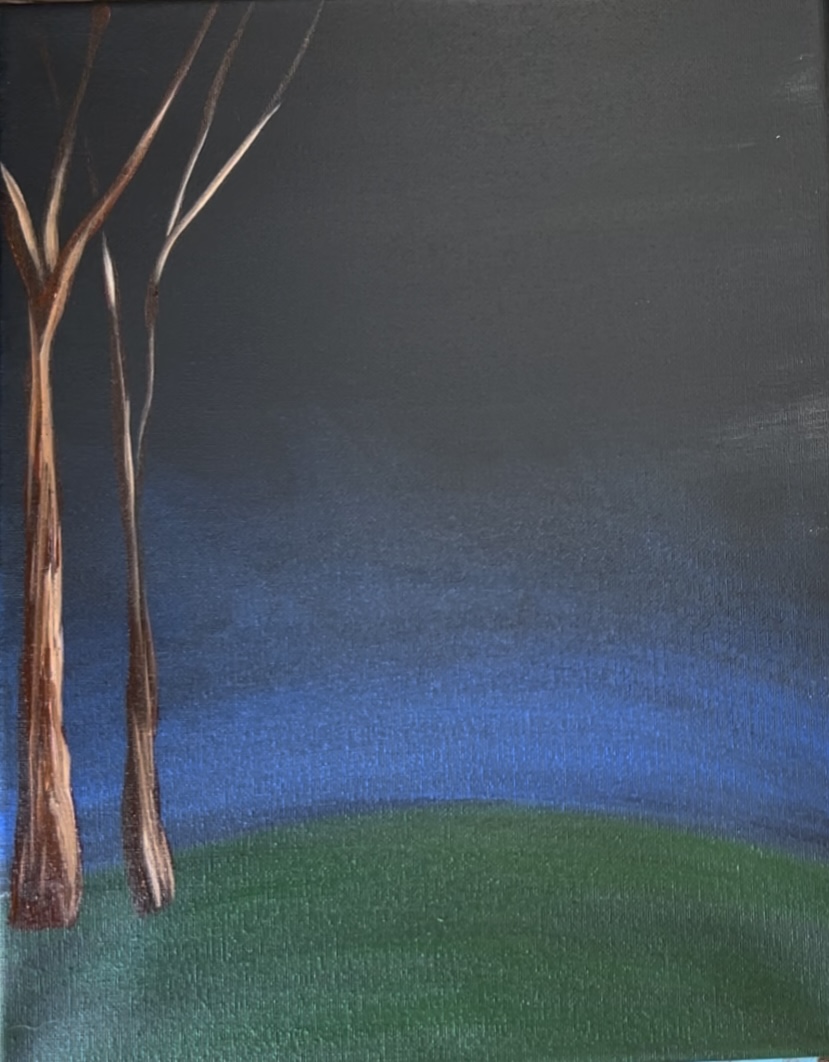
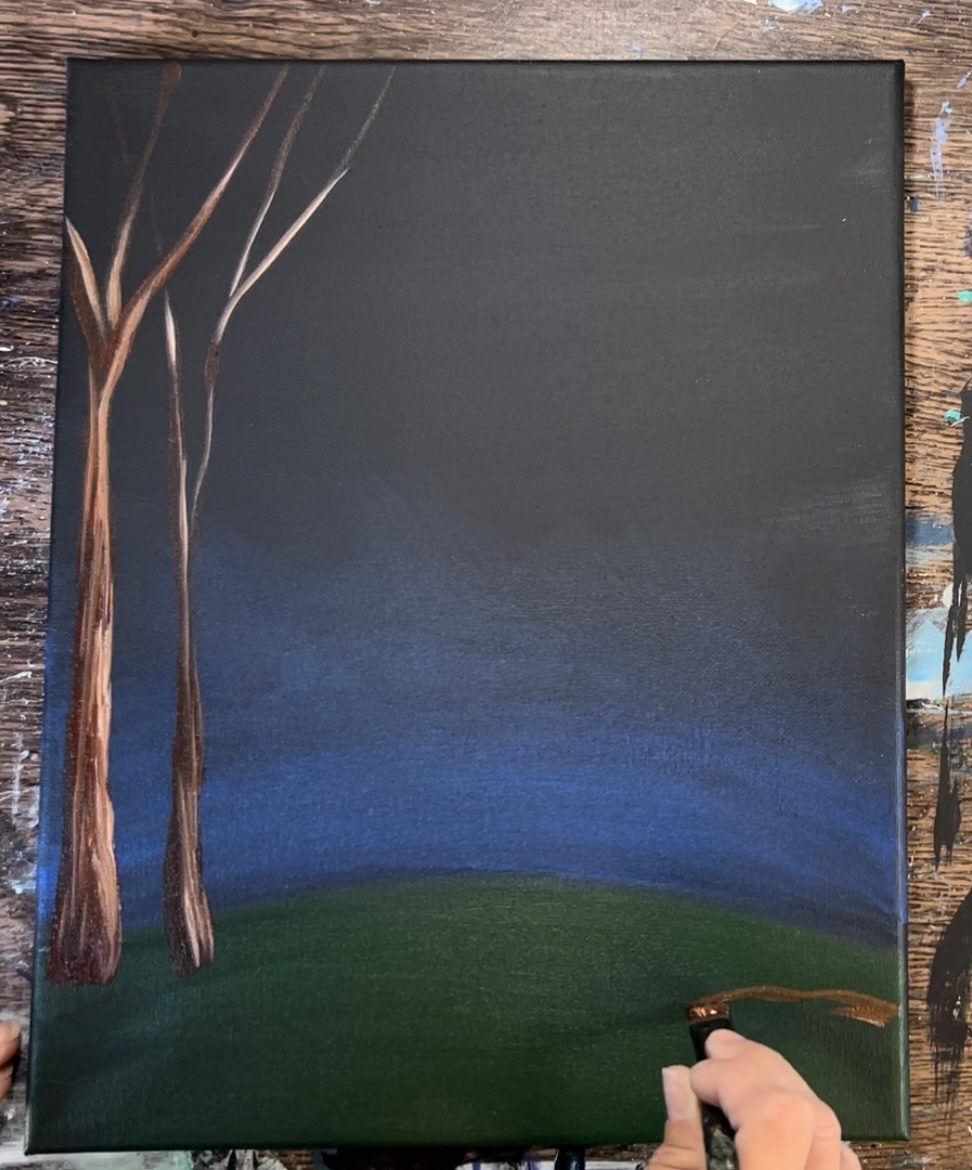
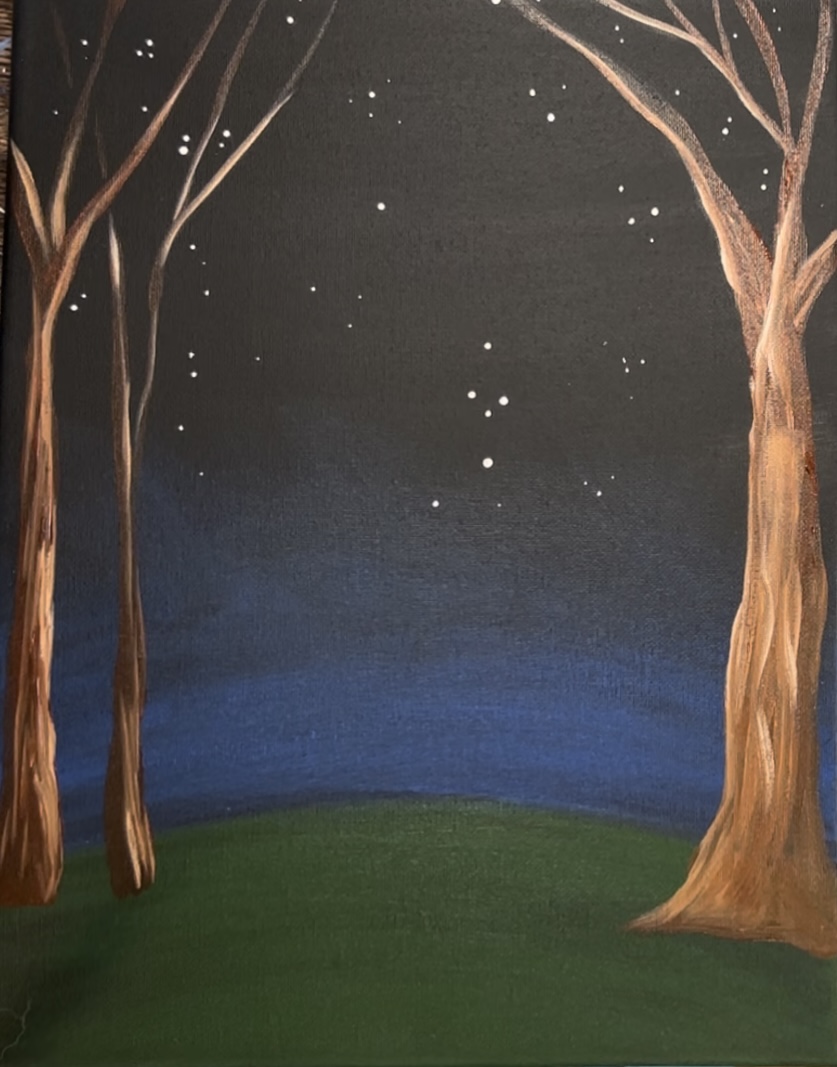
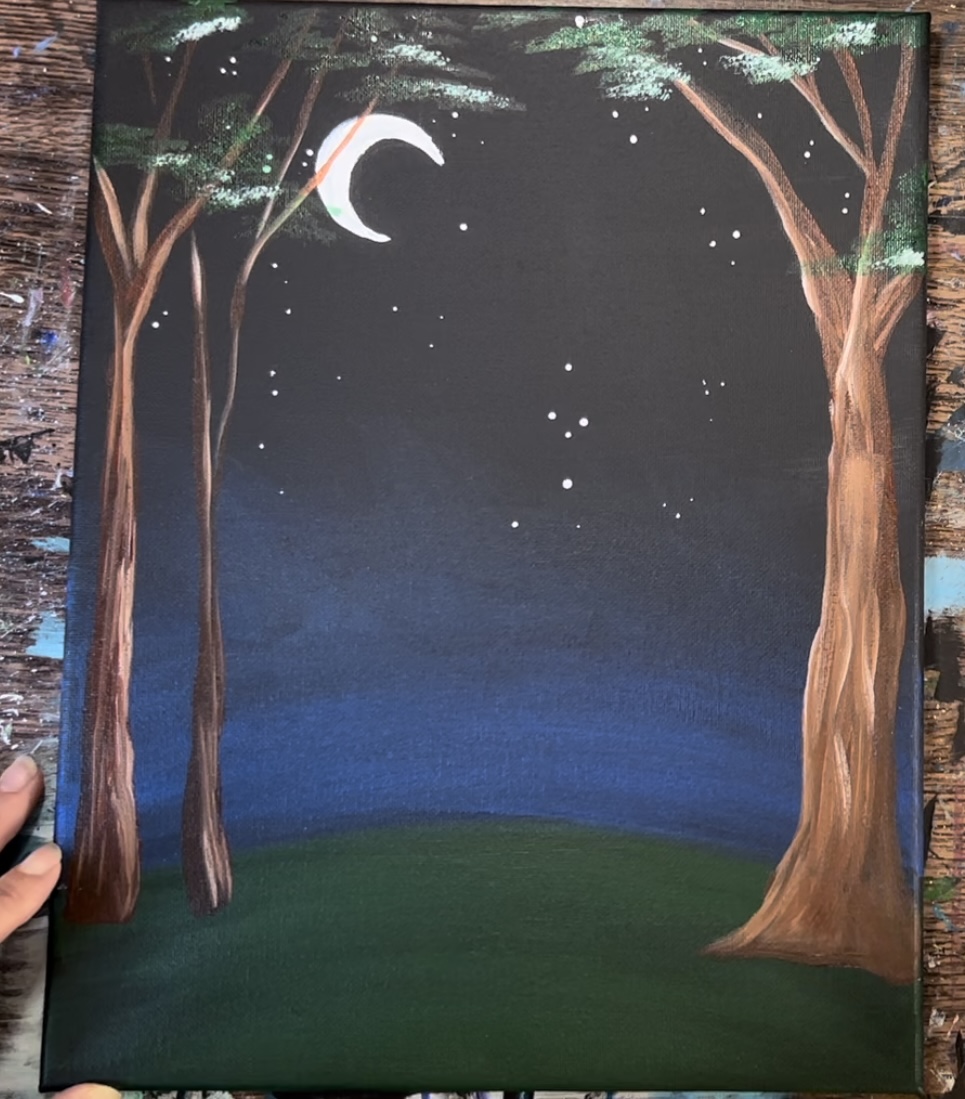
1. Paint Sky & Ground
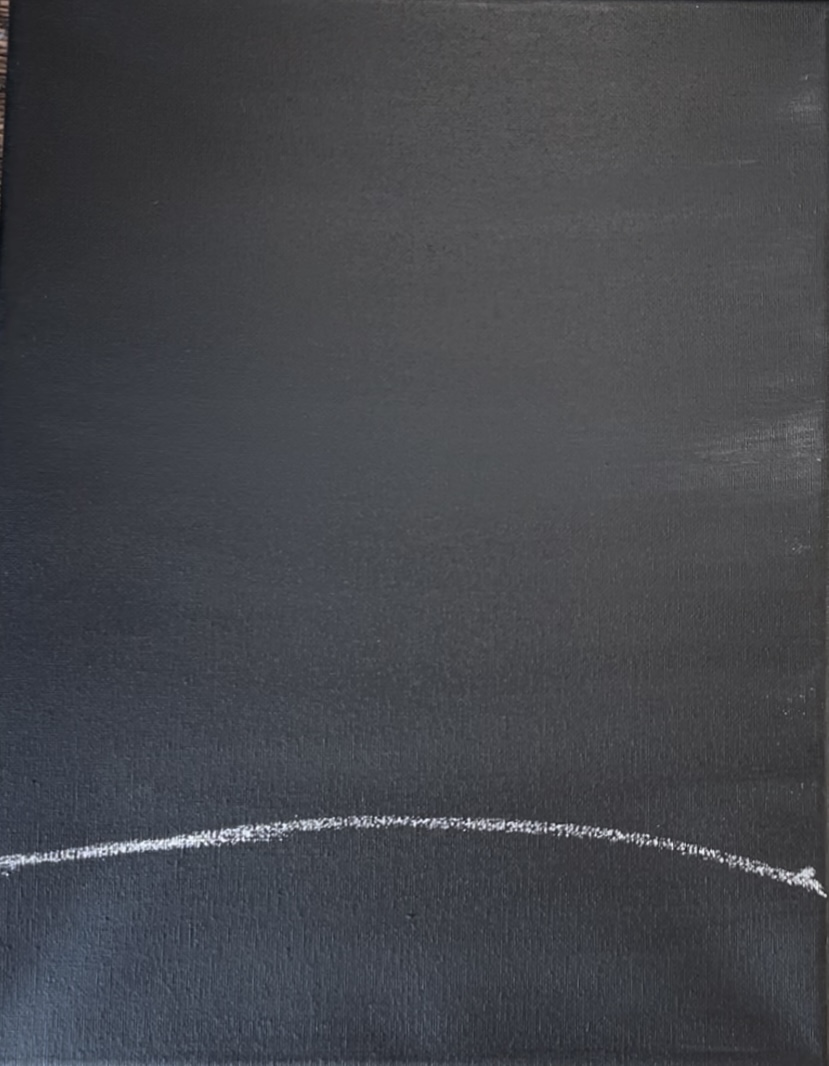
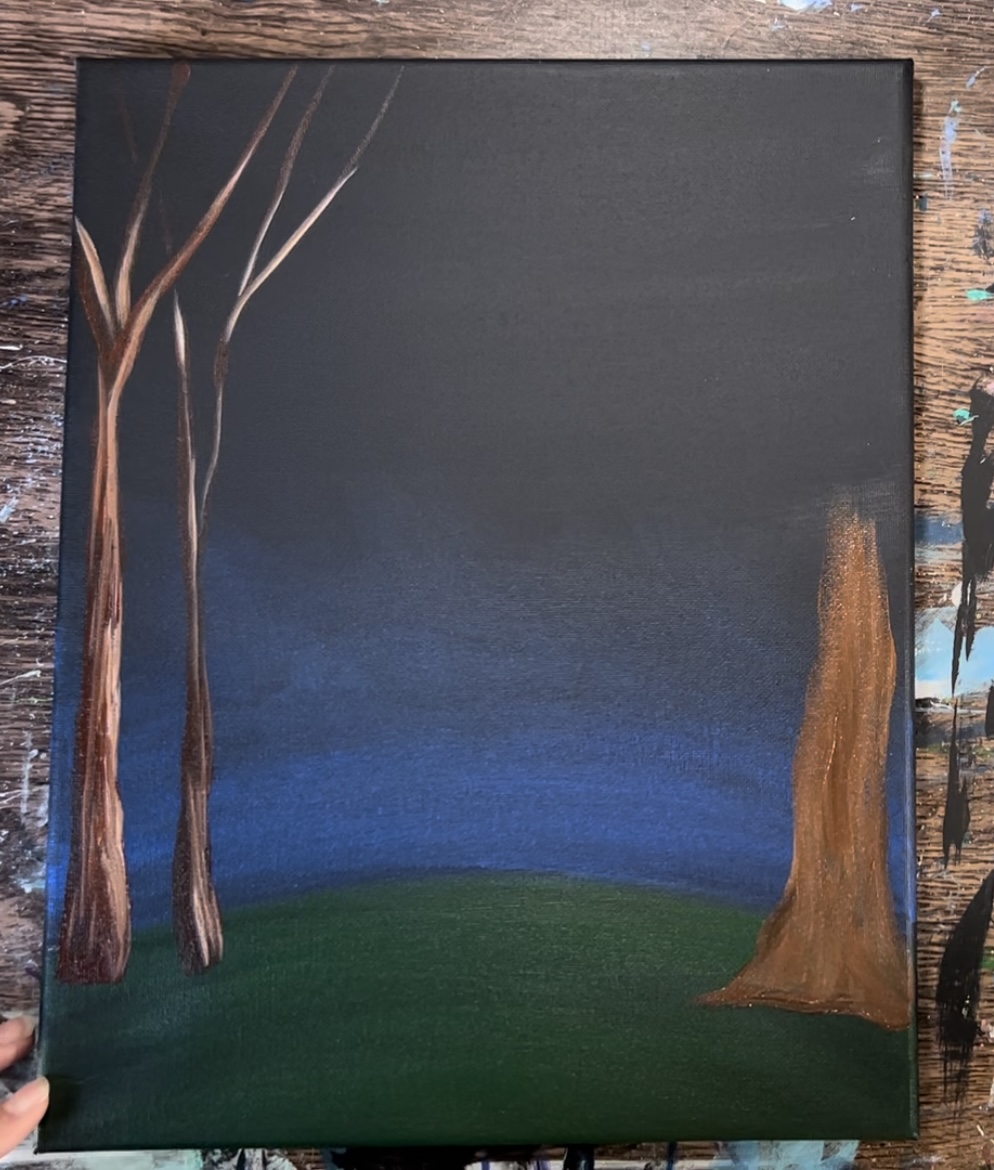
First paint an 11 x 14 canvas with one solid coat of Mars Black acrylic paint. You can use any large, flat brush to paint the canvas black, I used a 3/4″ flat wash brush.
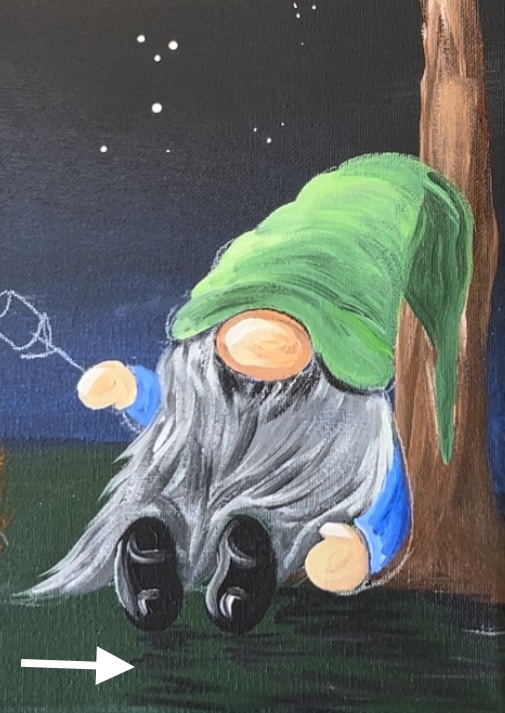
Then use a piece of chalk to draw the land line. Measure about 2.5″ from the left and the right. Then draw a slightly elevated hill line across the canvas.
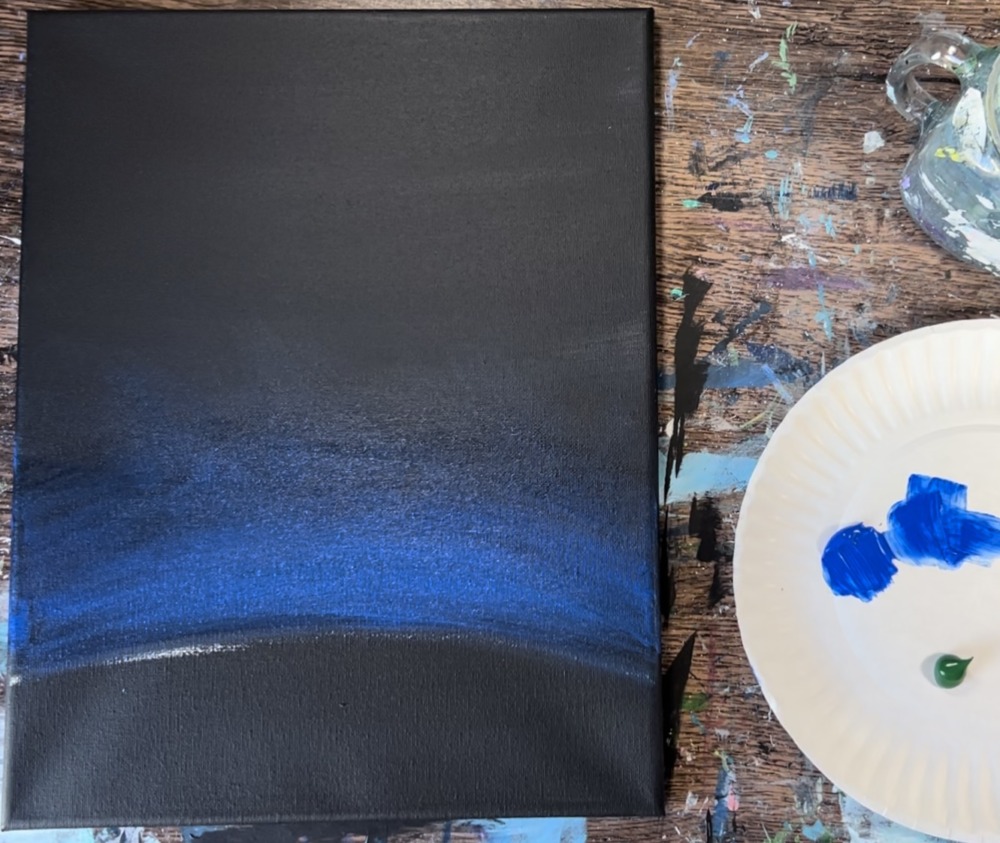
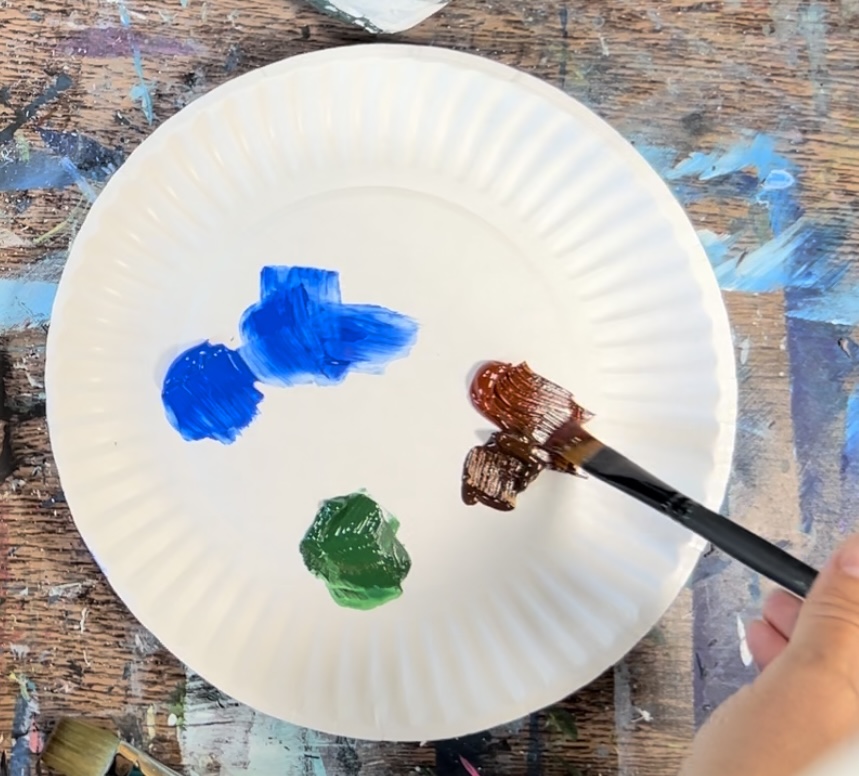
Next, load your palette with the color cobalt blue. Use a 3/4″ flat wash brush. Load a small amount of the cobalt blue onto your brush. With this step, you want to create a blue “glow” just above that chalk line with the blue fading away to the pure black sky.
Paint curved strokes that start out kind of opaque just above that line.
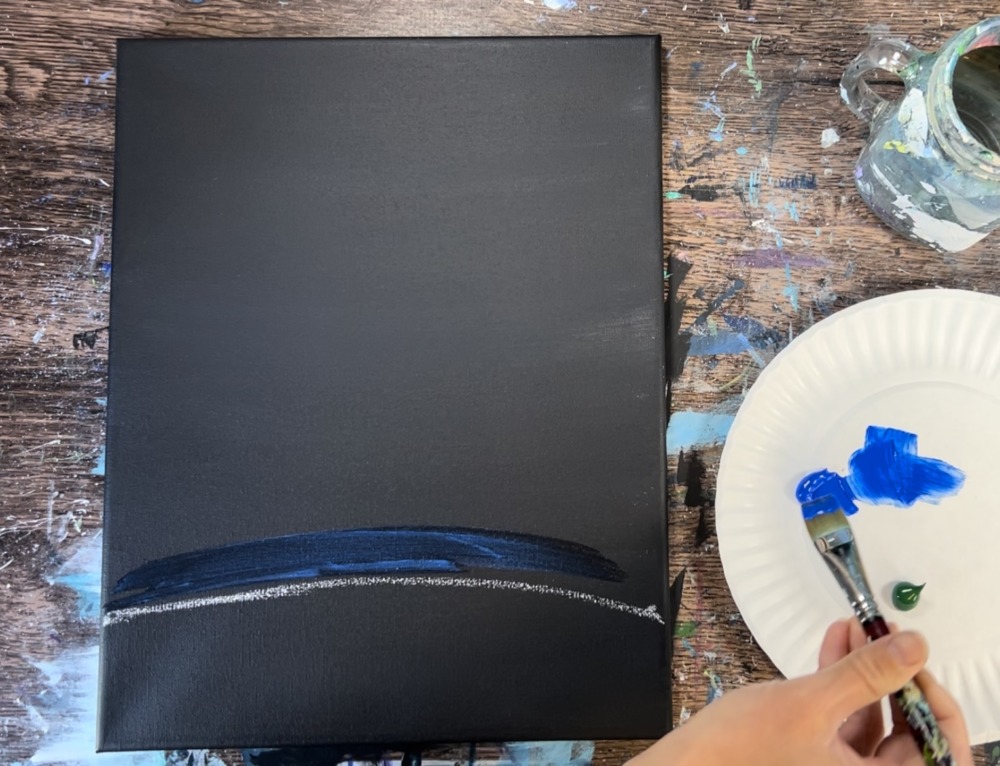
Go up about 4″ from that chalk line into the color “fades out”. To get it to fade out, don’t load anymore paint on your brush. Instead, use the brush to blend the color out into the black until it sort of disappears.
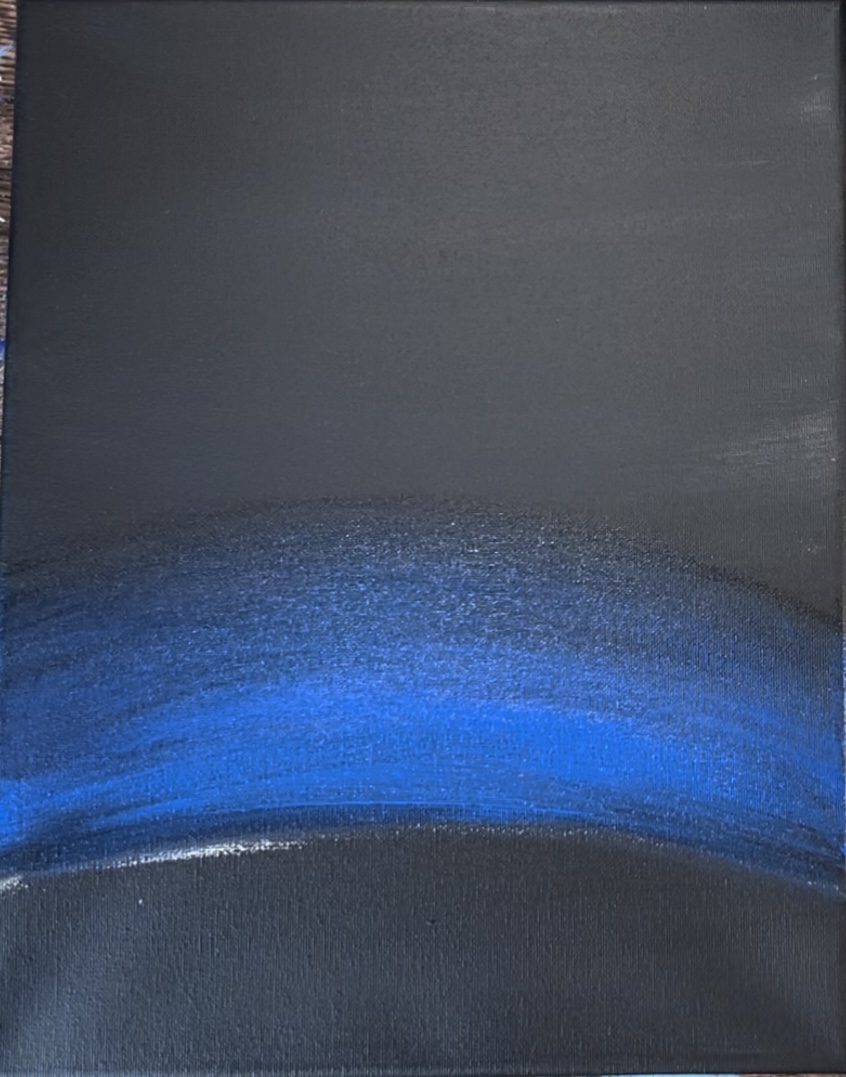
Next, rinse the brush. Load it into “Hooker’s Green Hue Permanent”. Paint curved left and right strokes with the 3/4″ flat wash brush. Fill the hill area with the green. Do this with only one coat. It is okay if a lot of the black is still showing through! This color is usually translucent.

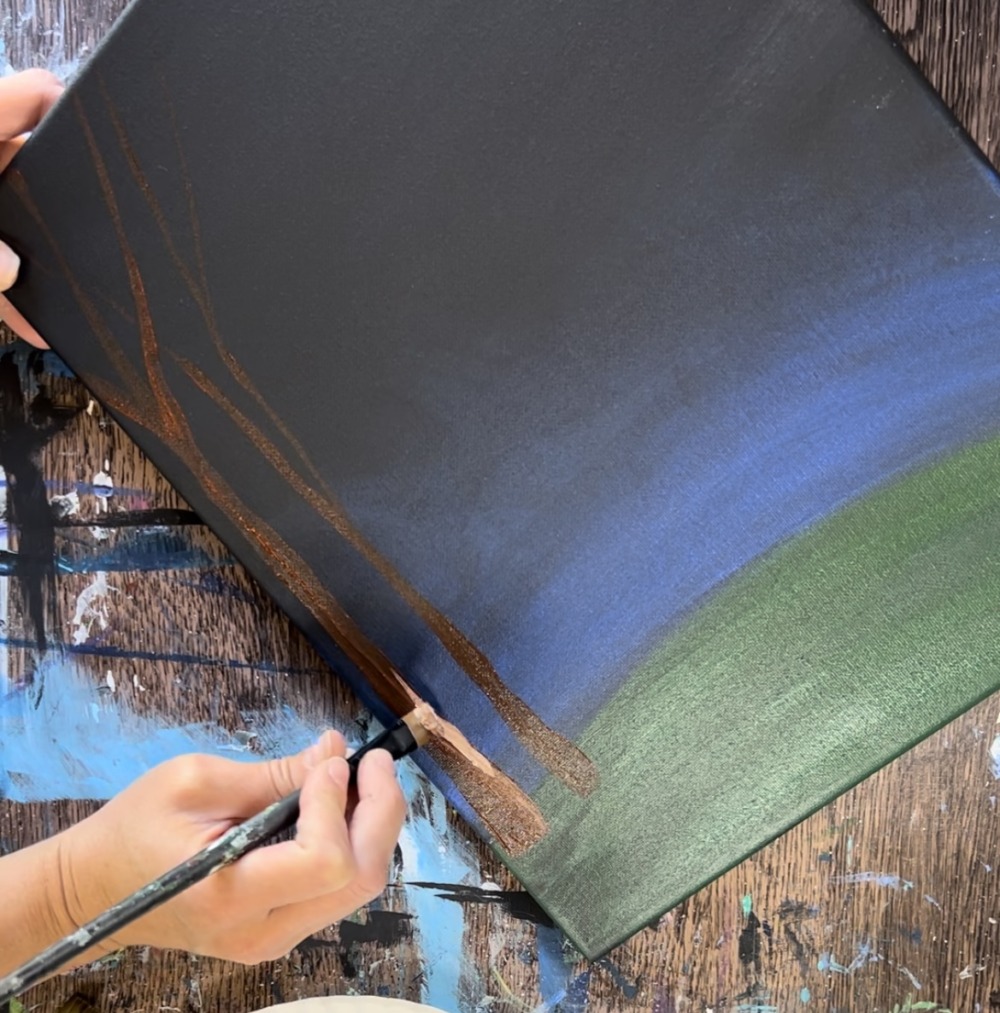
2. Paint Trees
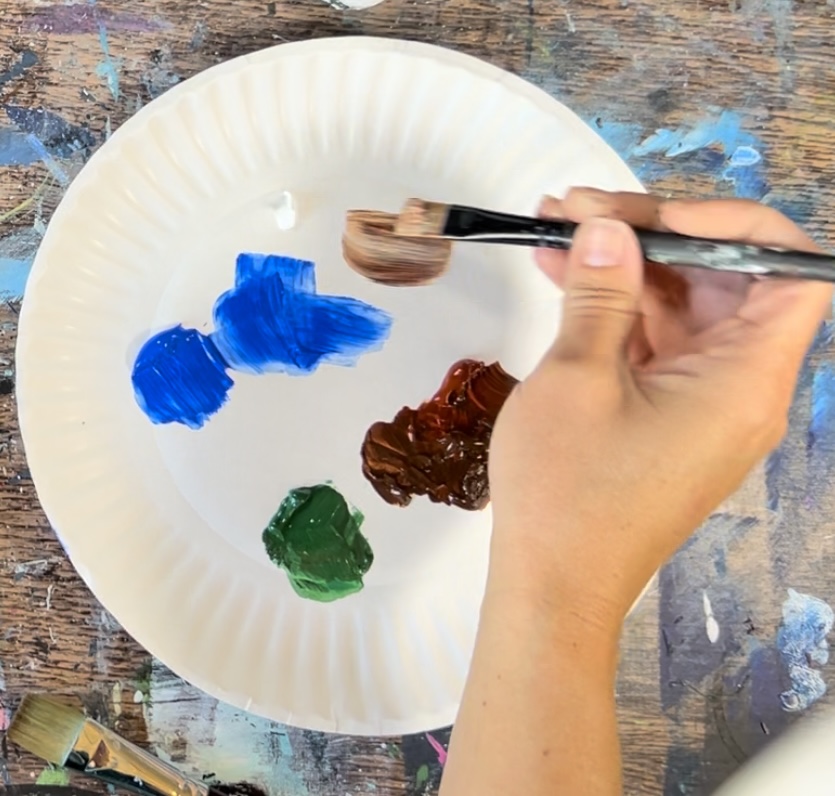
Use the #12 bright brush to paint two thinner trees on the left and one thicker tree on the right. Load your palette with burnt umber and burnt Sienna. Mix the two browns together on your palette.
Tip: it may be helpful to draw your trees with a piece of chalk first before painting them in!
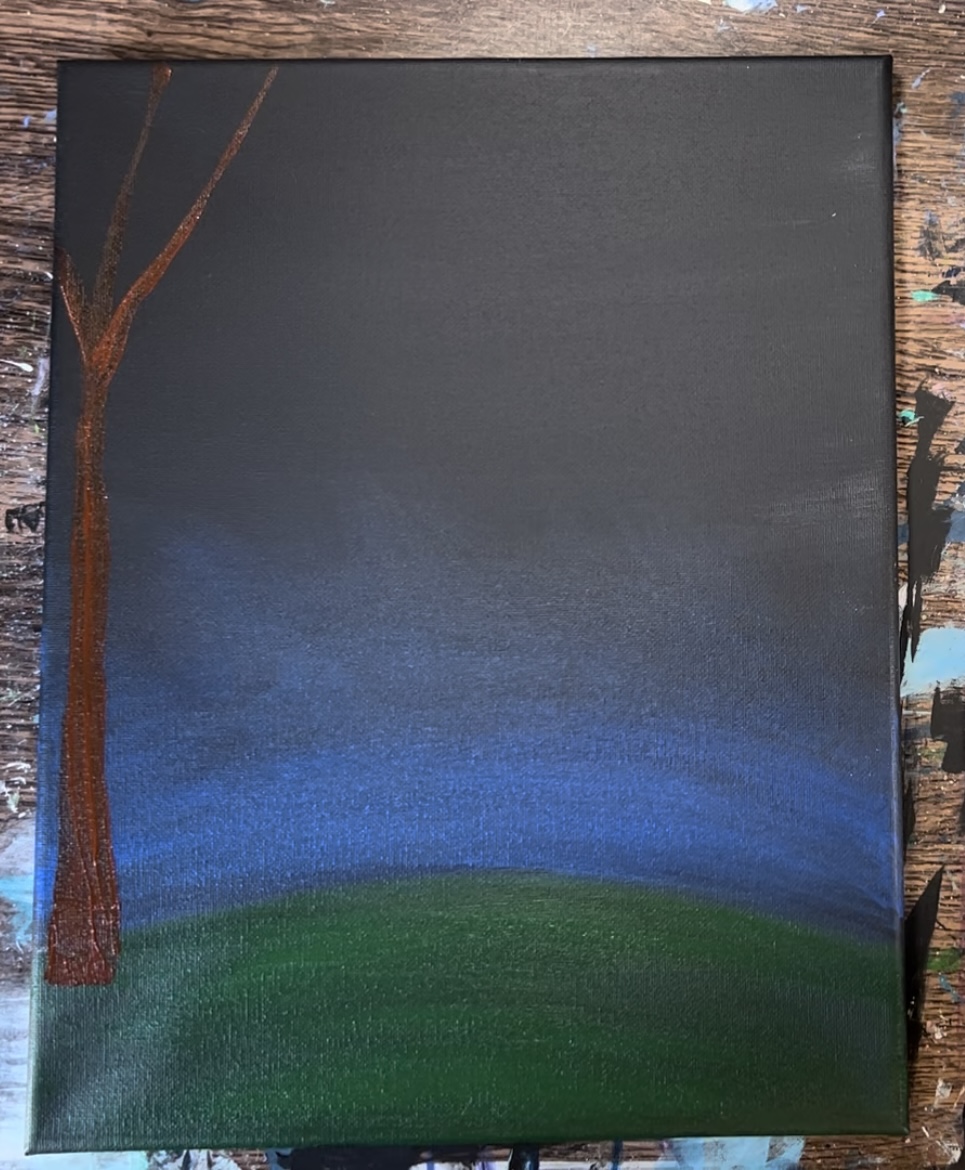
Paint two trees on the left of the landscape. The tree on the far left is a little larger and thicker and the tree on the right is a little thinner. Use the full width of the brush for the trunk of the tree and then turn the brush on its side and use the tip to paint the thinner branches. The branches of these trees go all the way to the top and off the edge of the canvas.
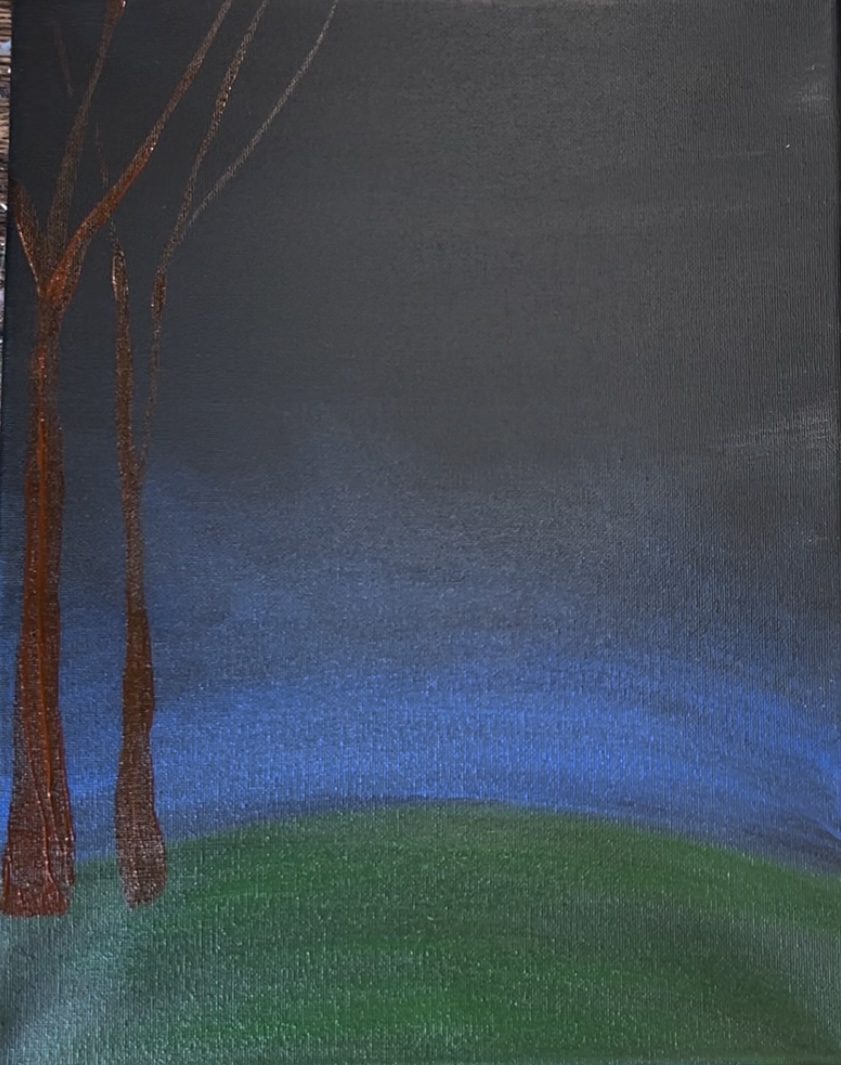
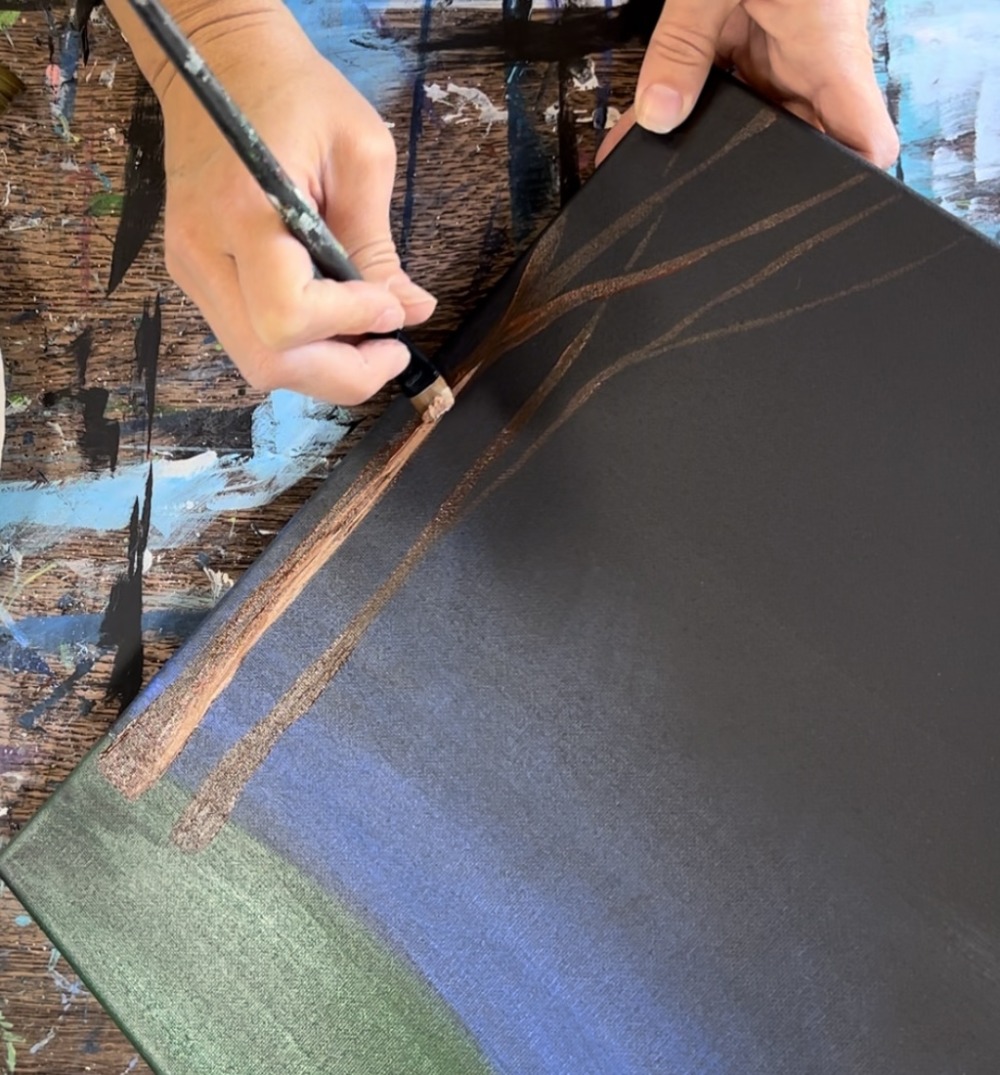
Highlight these trees before this brown dries. On your palette, mix a small amount of titanium white into the brown to make a light brown.
Use the tip of the #12 bright brush to paint just the far right edge of the tree trunk and branches. Blend it in with the darker brown. Do this with all short, vertical strokes.
Leave the far right side of the trees darker. If needed, add more of the darker brown in there to help it to blend but it doesn’t need to blend all the way.
Paint the tree on the right. This tree is a bit larger and a little lower in the canvas. Position the bottom of the trunk so that it is about 1.5″ from the bottom of the canvas. The width of the trunk is about 2″.
Use the 12 bright brush to paint the width of the tree. Then slowly paint the shape of the tree so the trunk is wide at the base and then gets thinner as you paint the tree up.
Use the tip of the brush to paint the smaller branches.
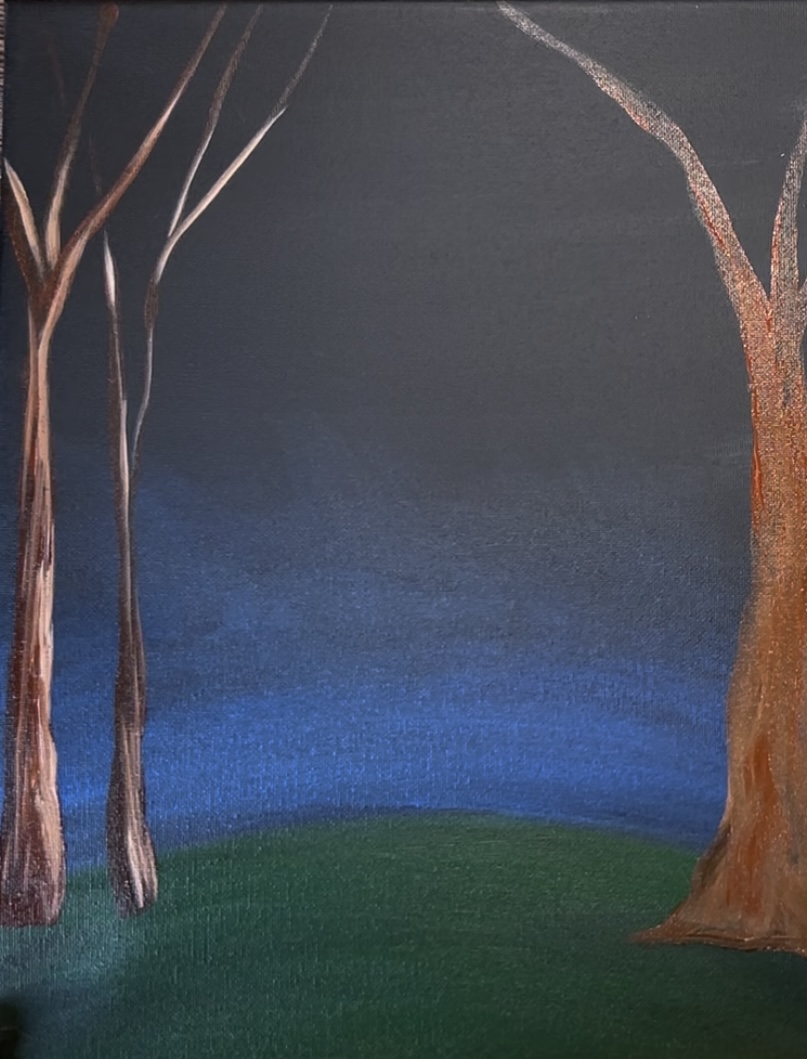
Then highlight the tree the same way you highlighted the other two trees.
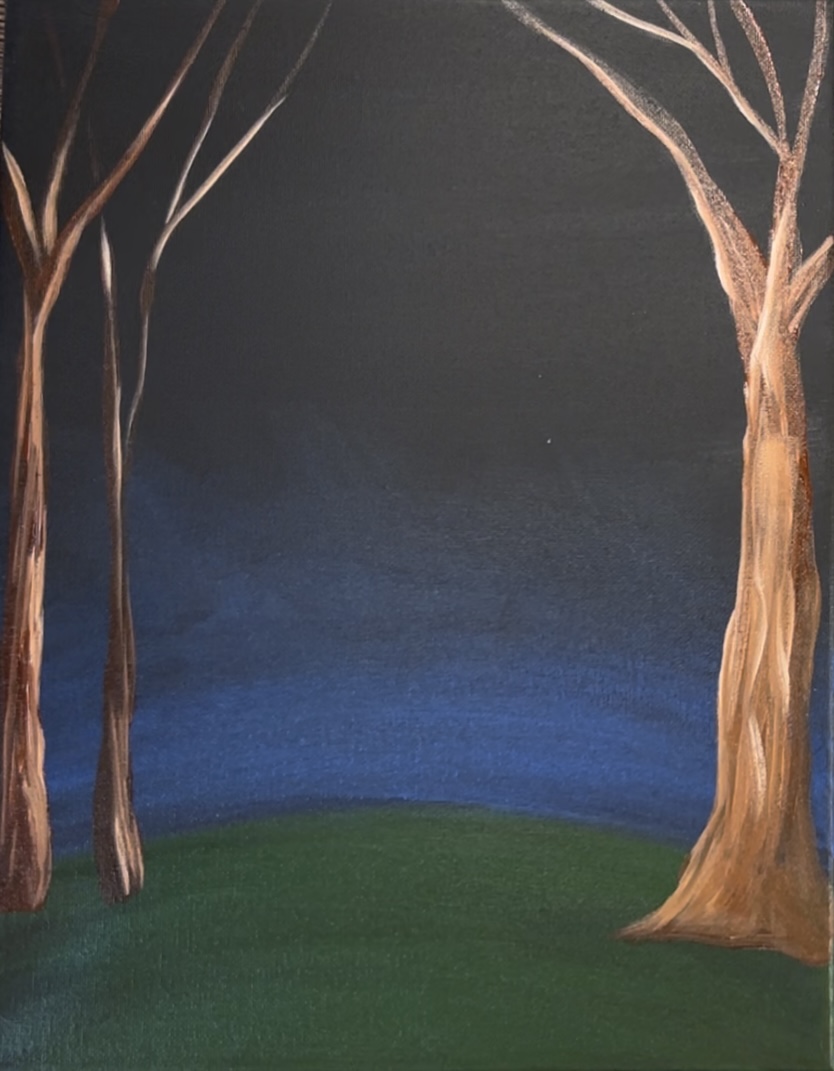
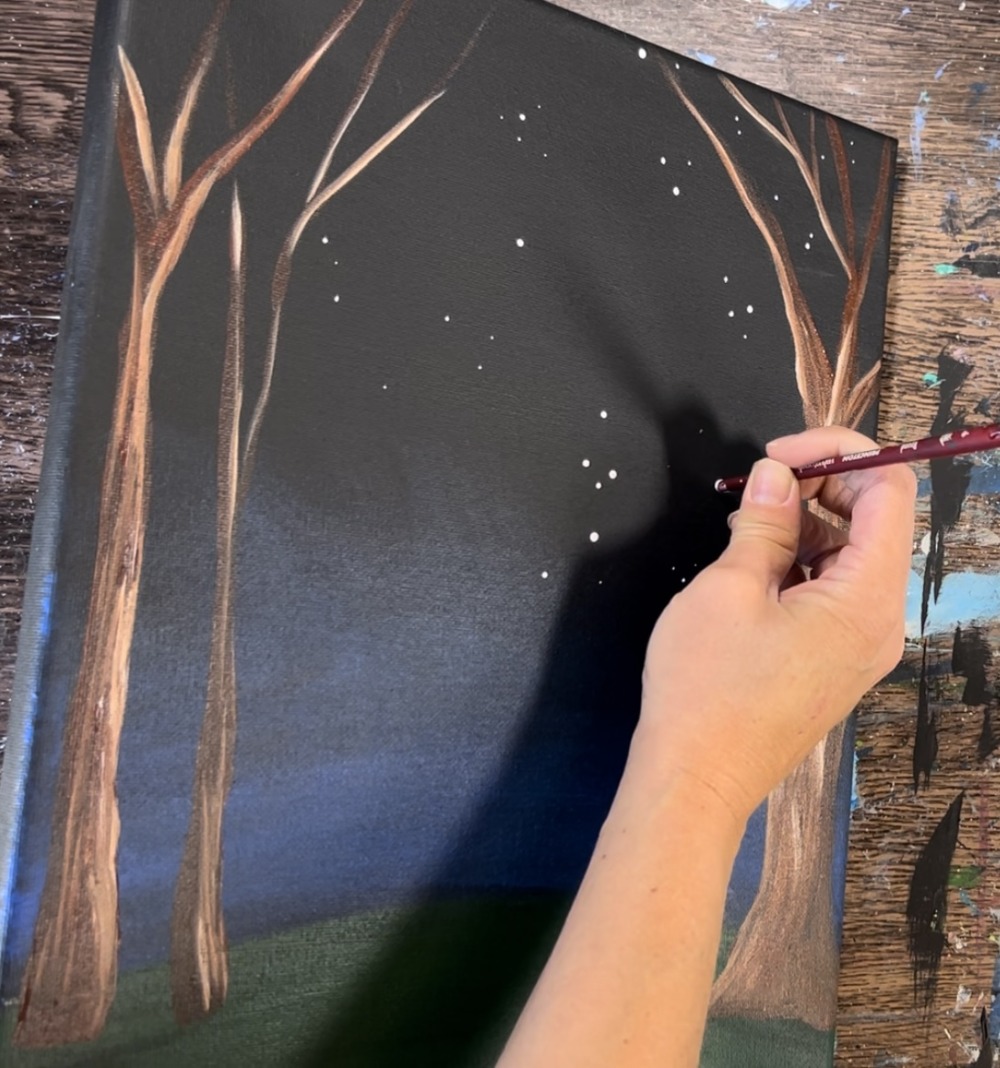
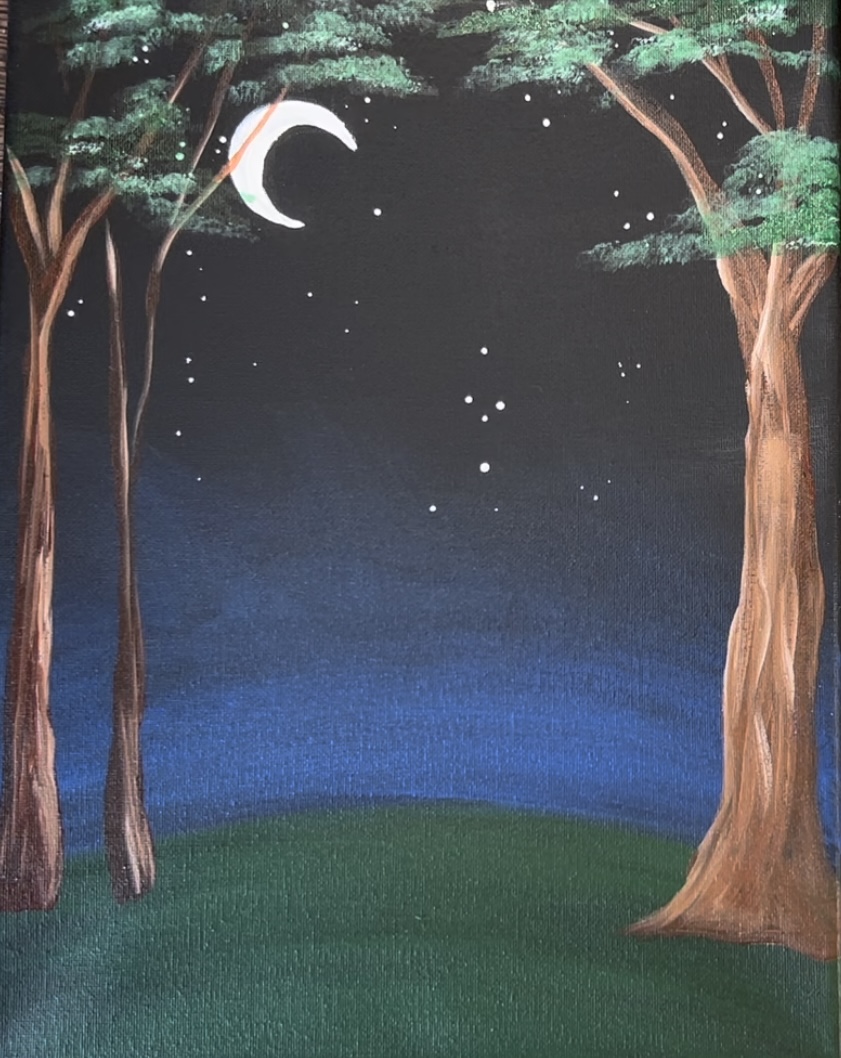
3. Paint Stars
Use the back of any of your paint brushes (I used the #4 round) to stamp the stars with titanium white paint. Paint a variety of stars. Some are larger and some smaller. Some are clustered together and some are further apart. If you want, you can paint constellations.
4. Draw & Paint Moon
Use the white chalk pencil (or any utensil) to draw the crescent moon shape.
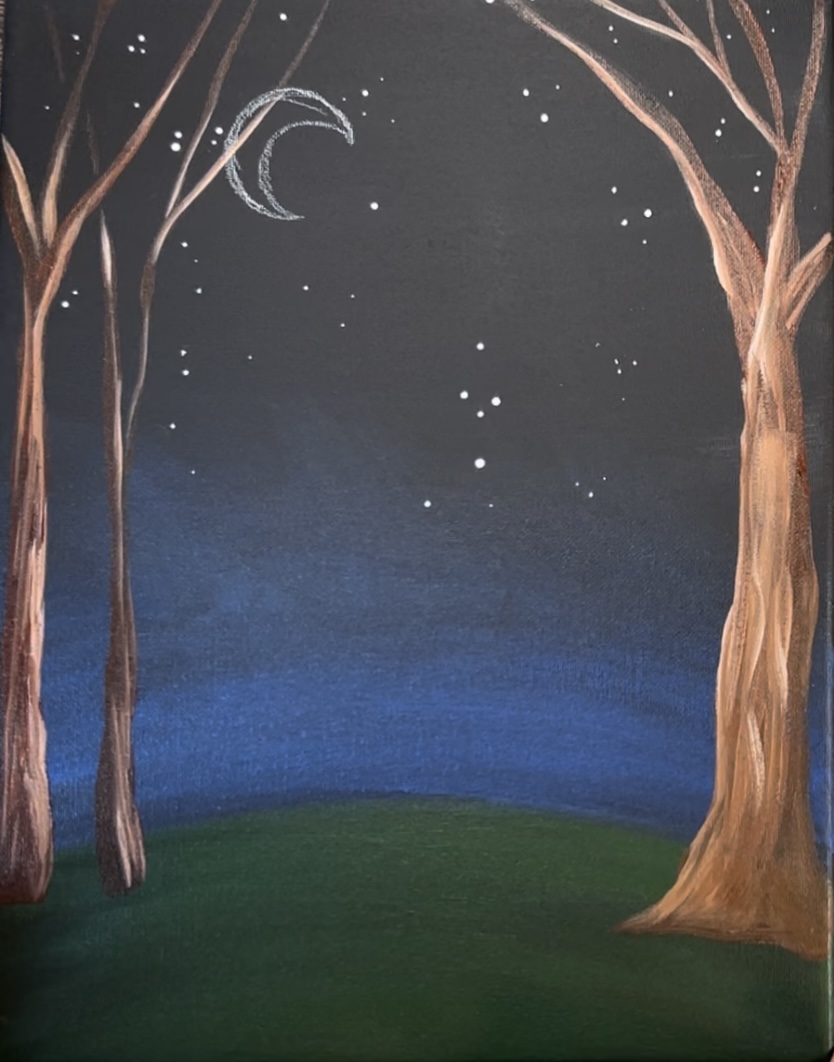
Then use titanium white to paint the moon a solid coat of titanium white paint.
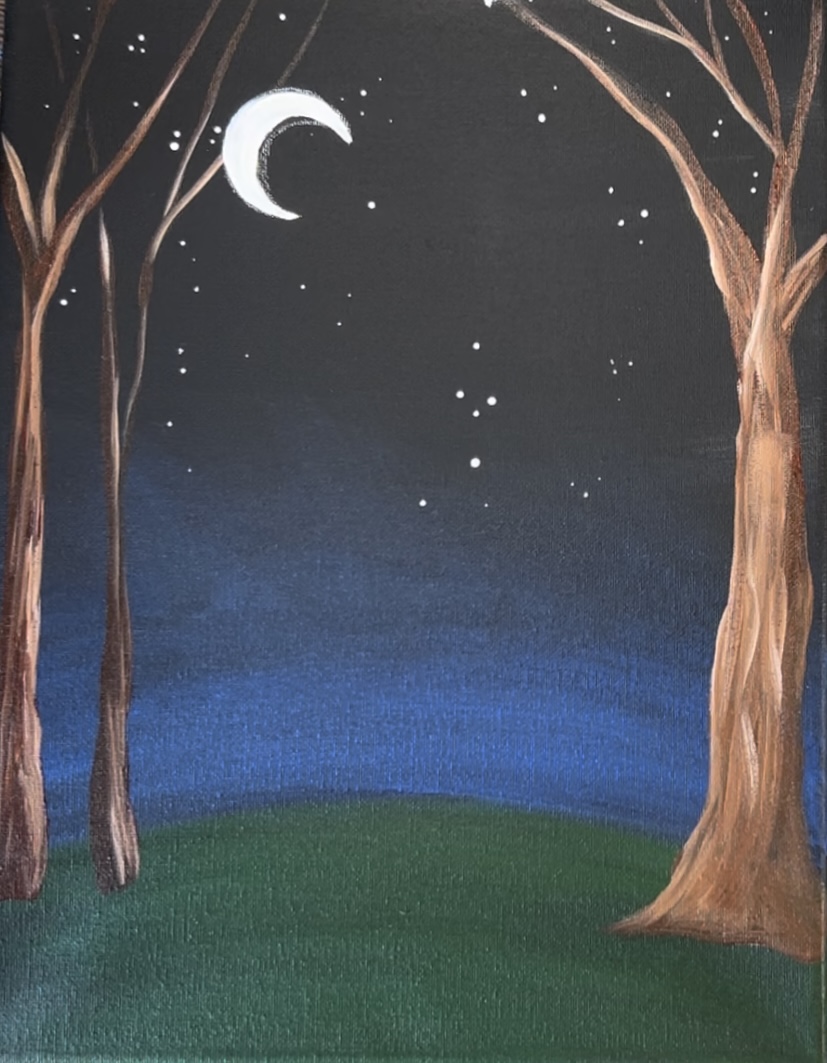
If needed, re-paint any of the branches that may need to overlap the moon.
5. Paint Leaves On Trees
Use the #12 bright brush to paint the leaves in the trees. Use the tip of the brush. Load it into “Hooker’s Green Hue Permanent”. Stamp the leaves on the trees at the top of the canvas. You are using just the tip of the brush to stamp the texture of these leaves.
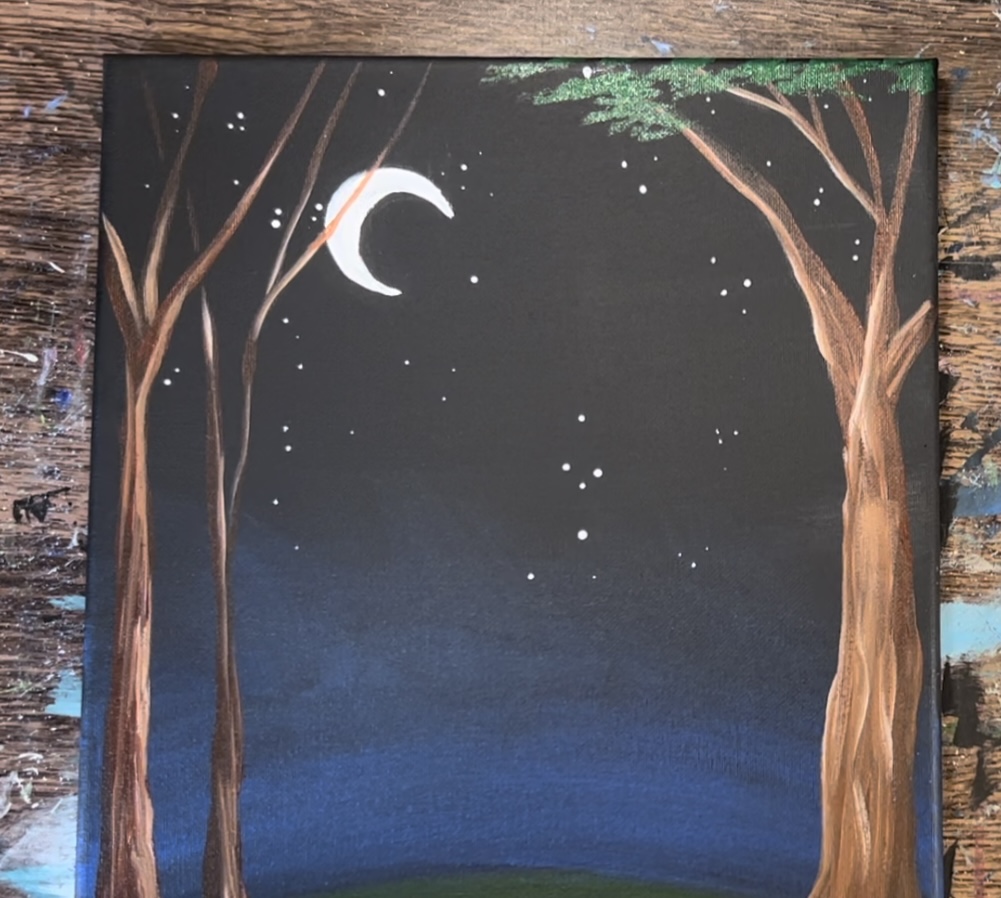
Leave a lot of the sky still showing through. Add a tiny bit of titanium white into the green and paint a layer of lighter green in the leaves as well.
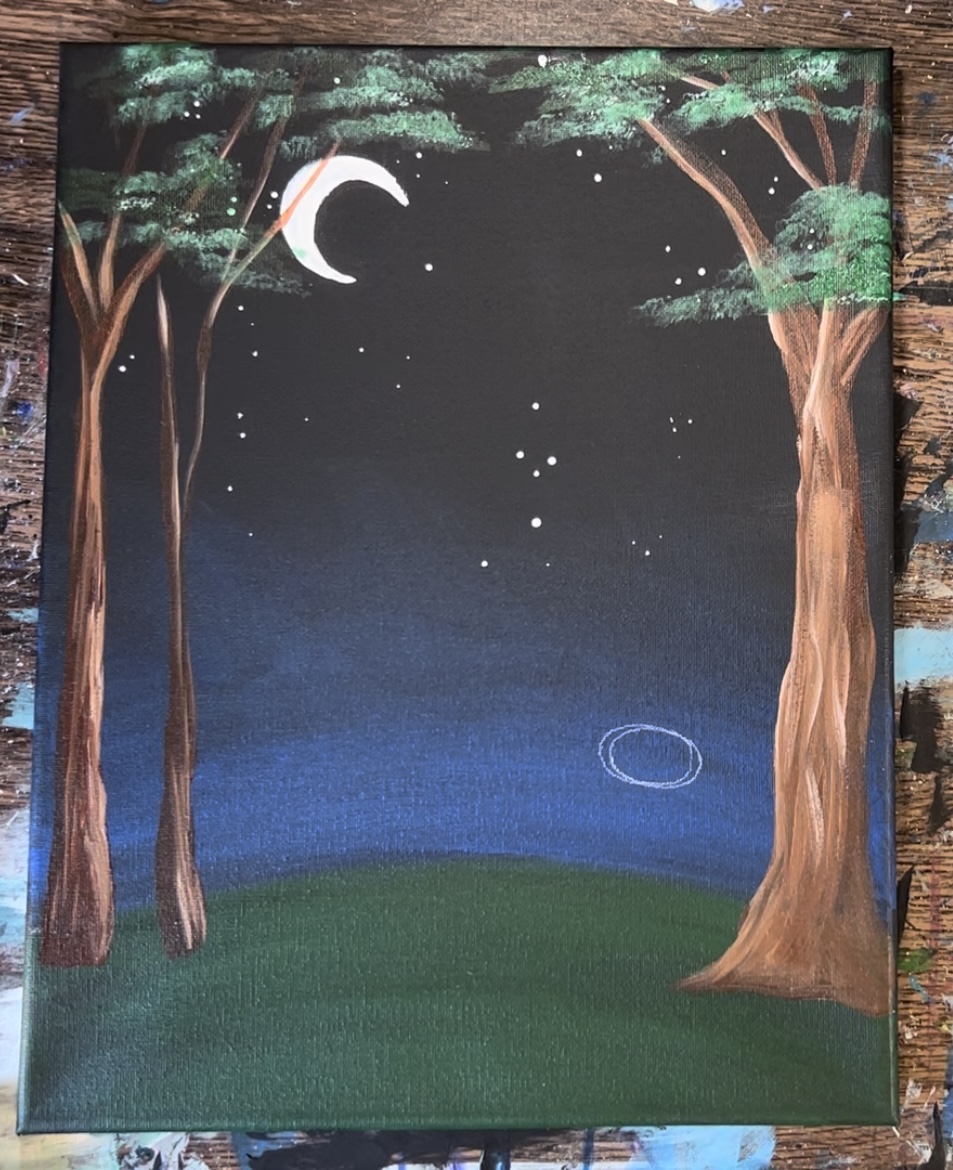
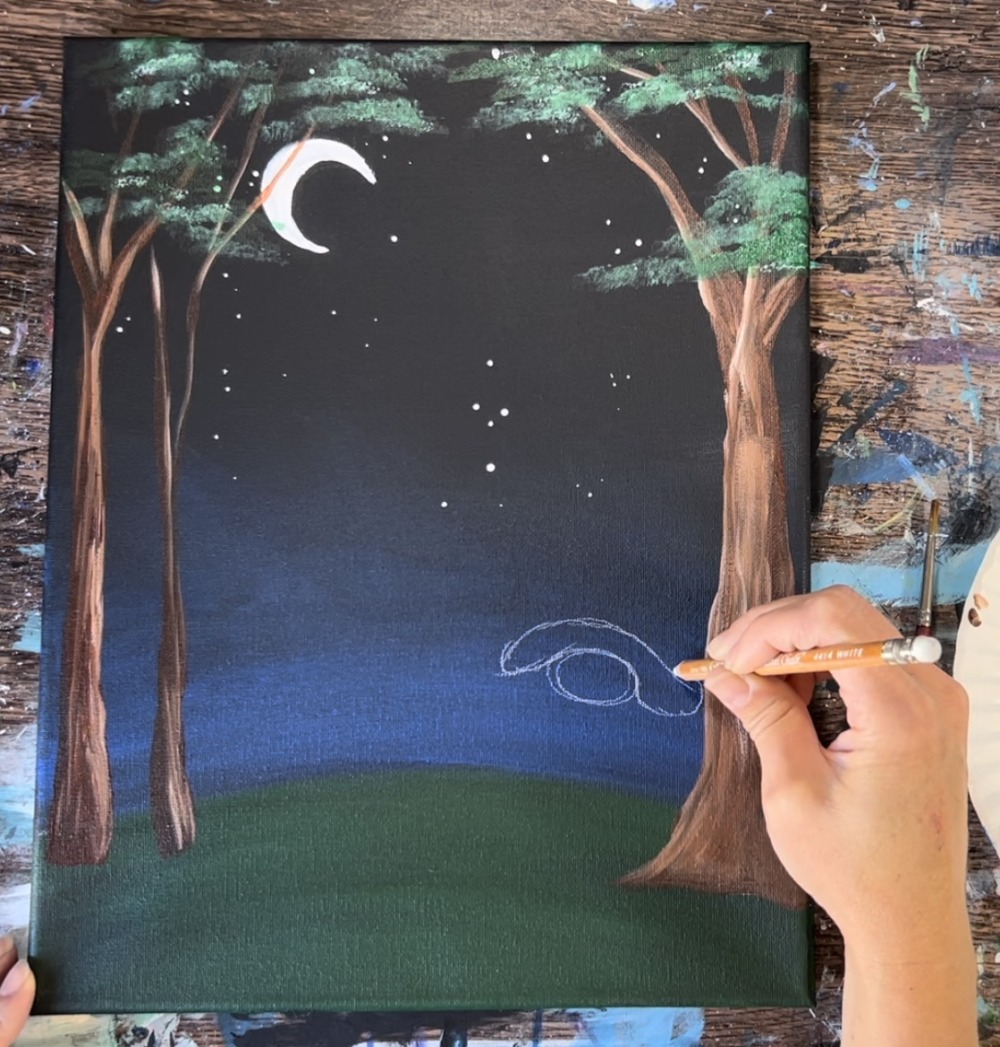
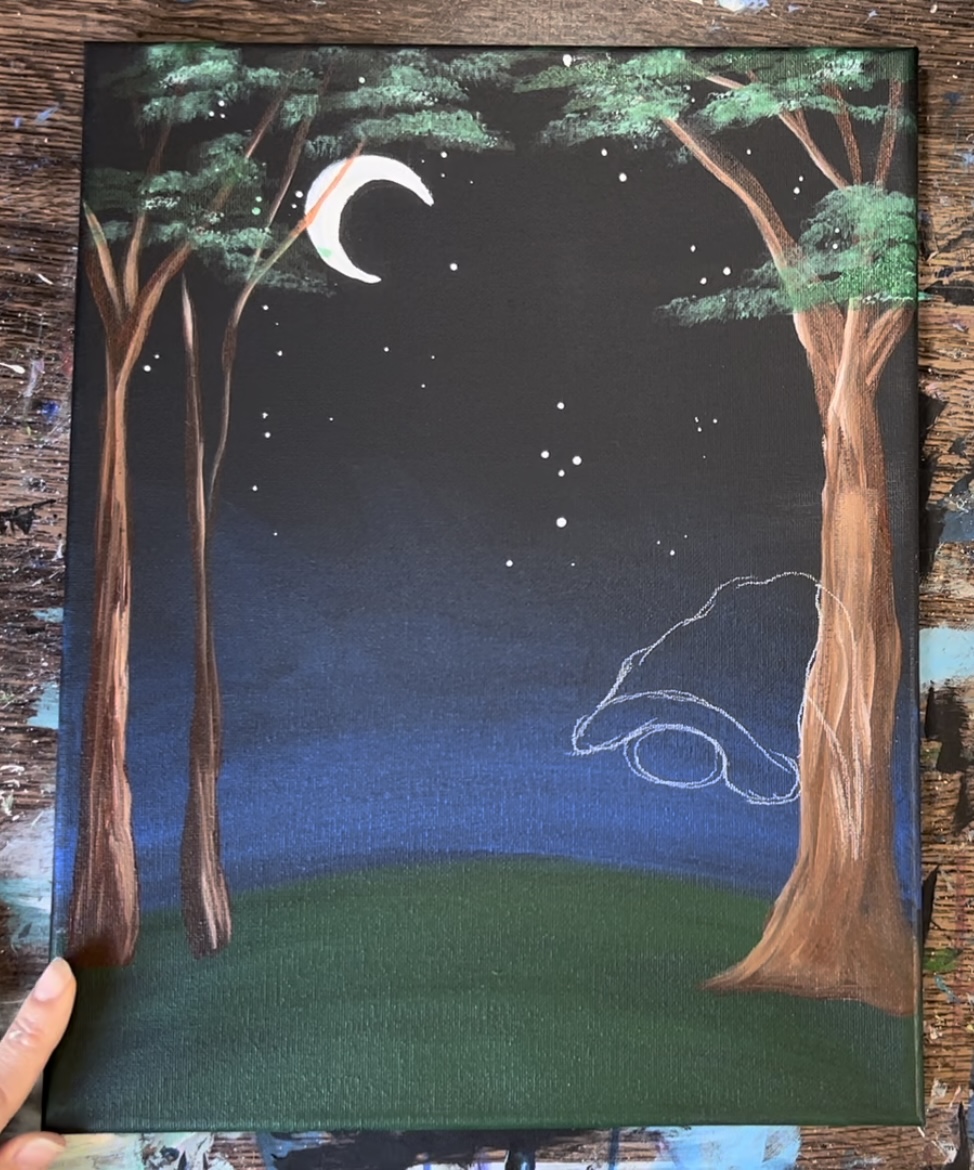
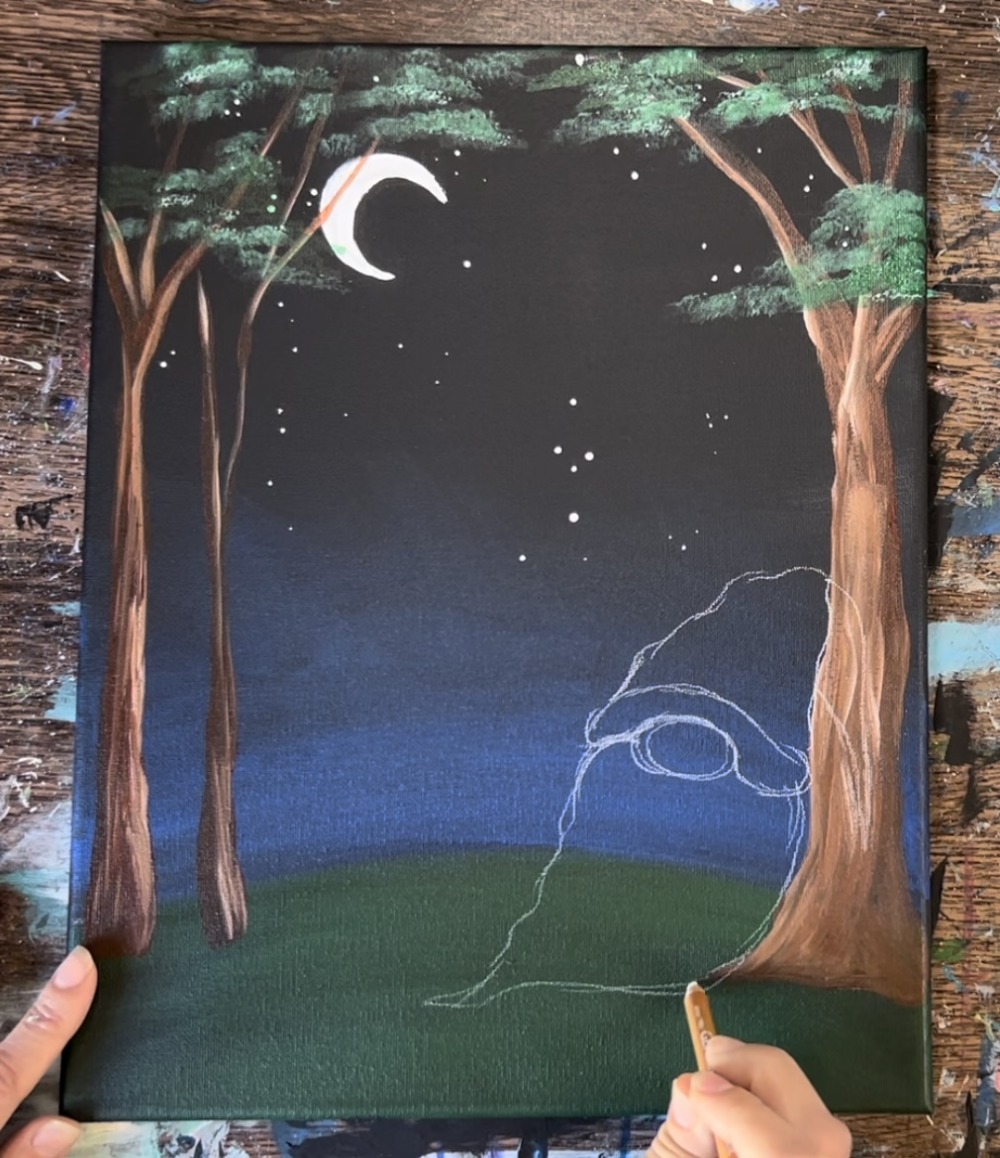
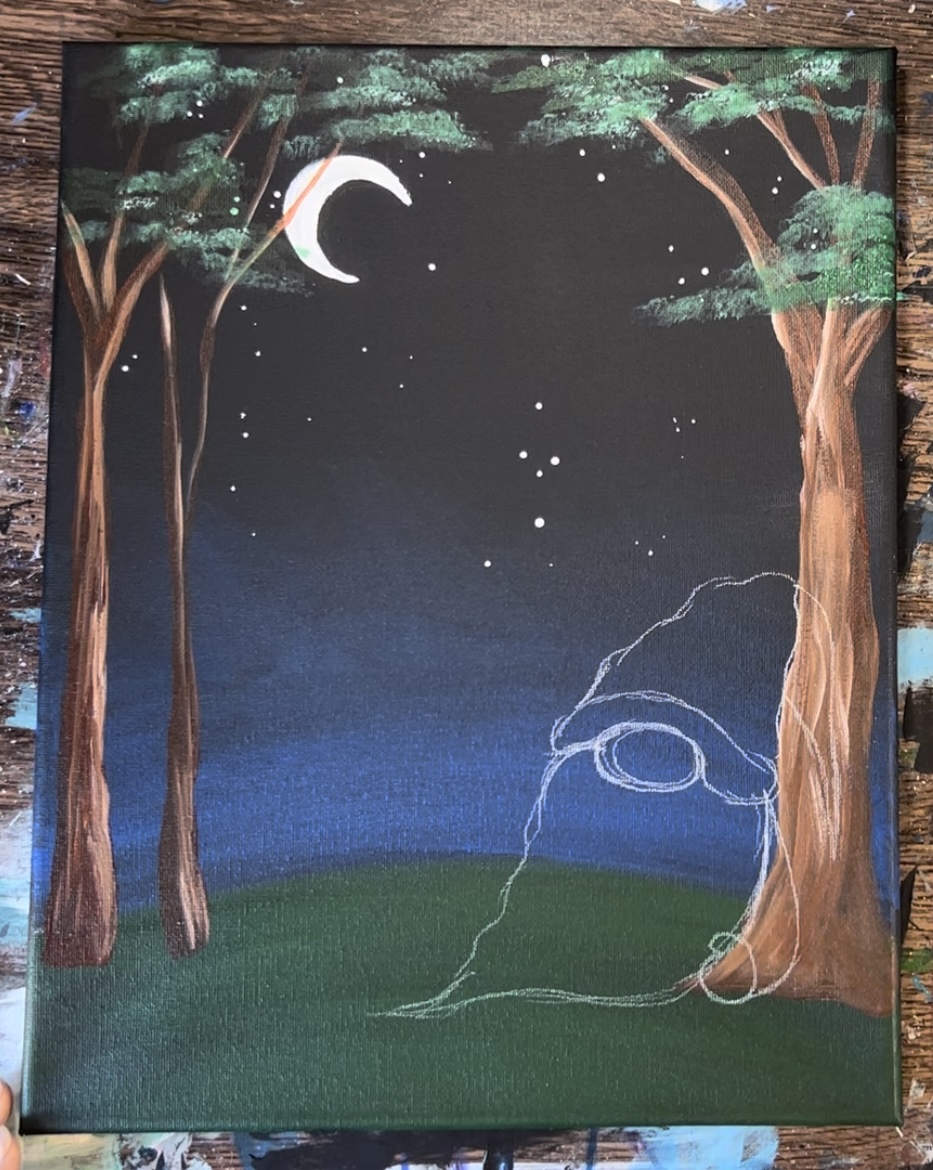
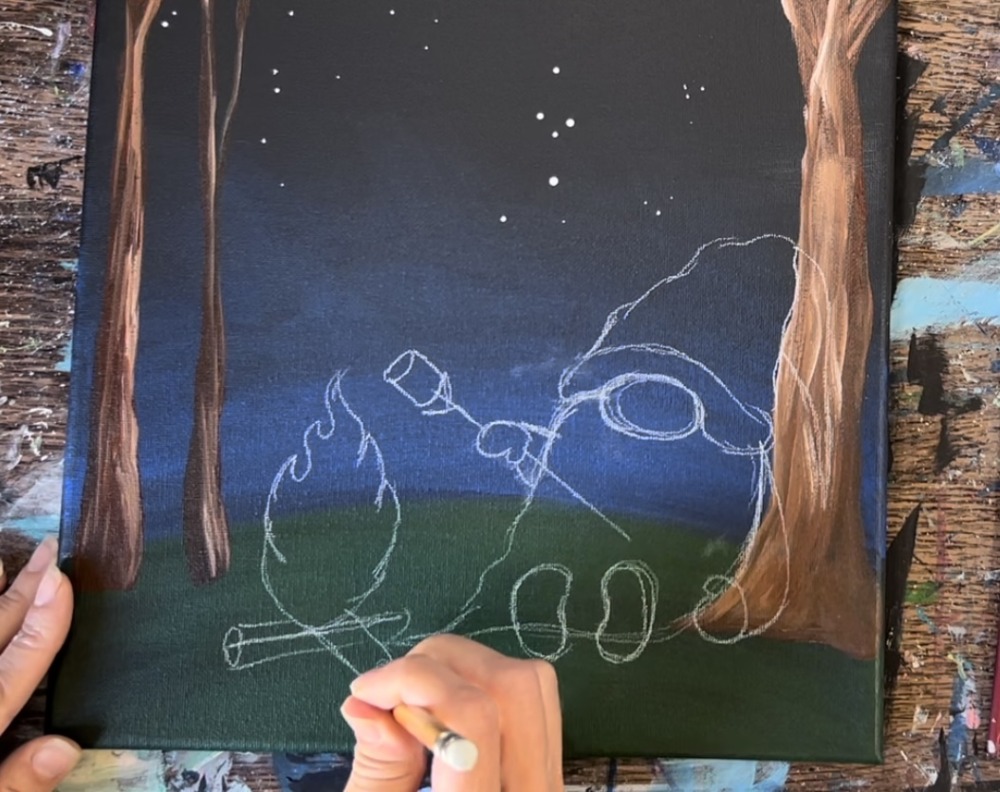
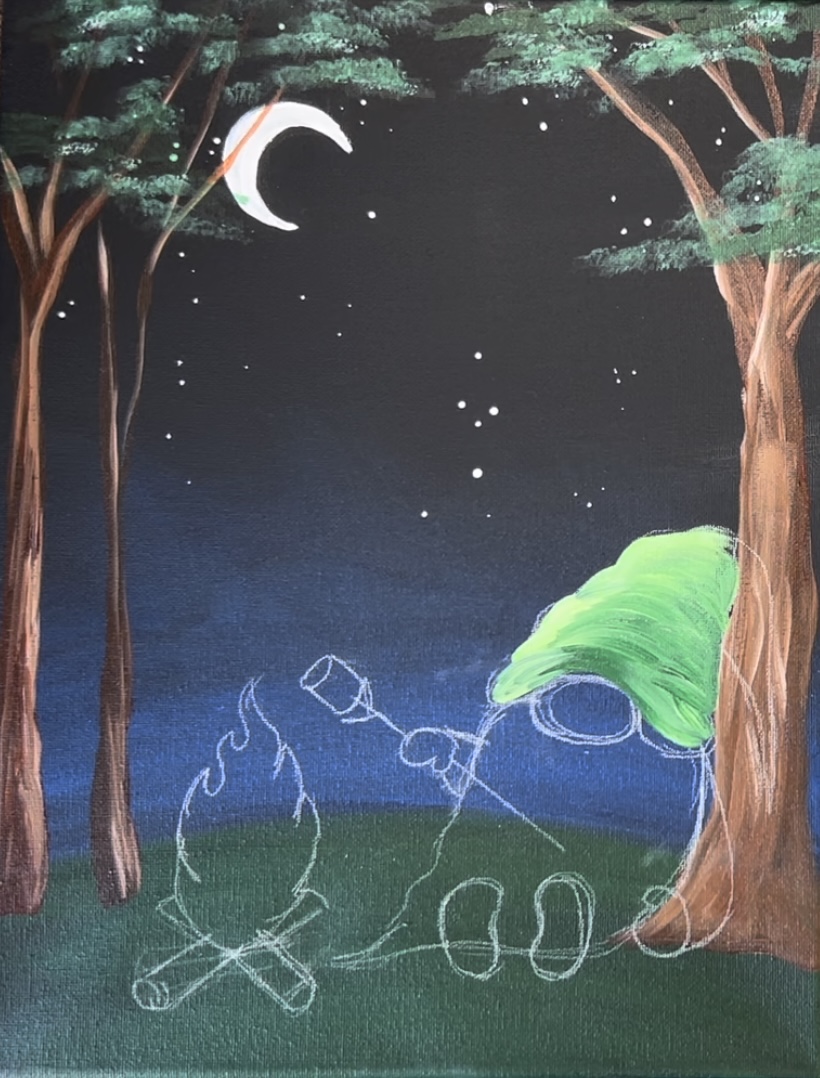
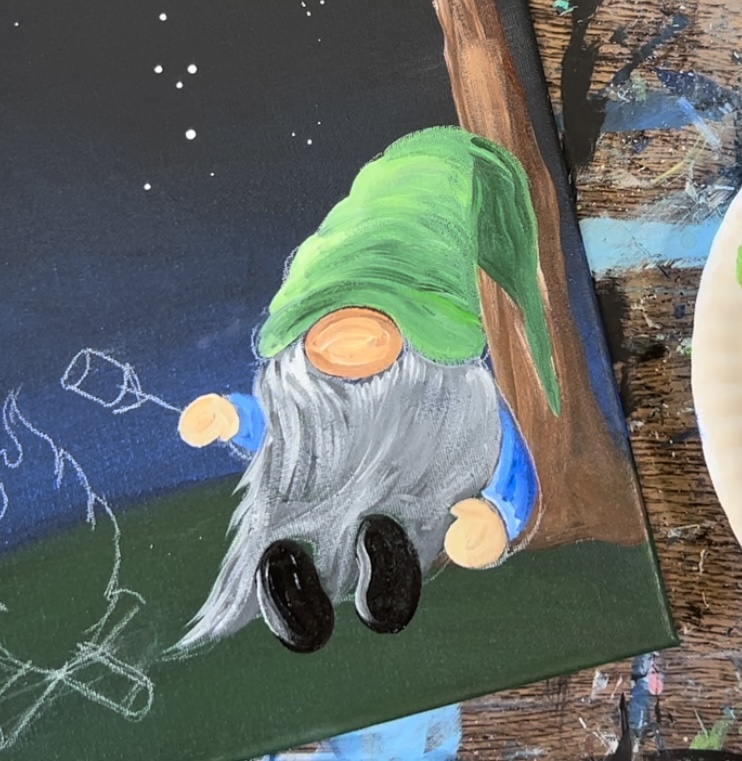
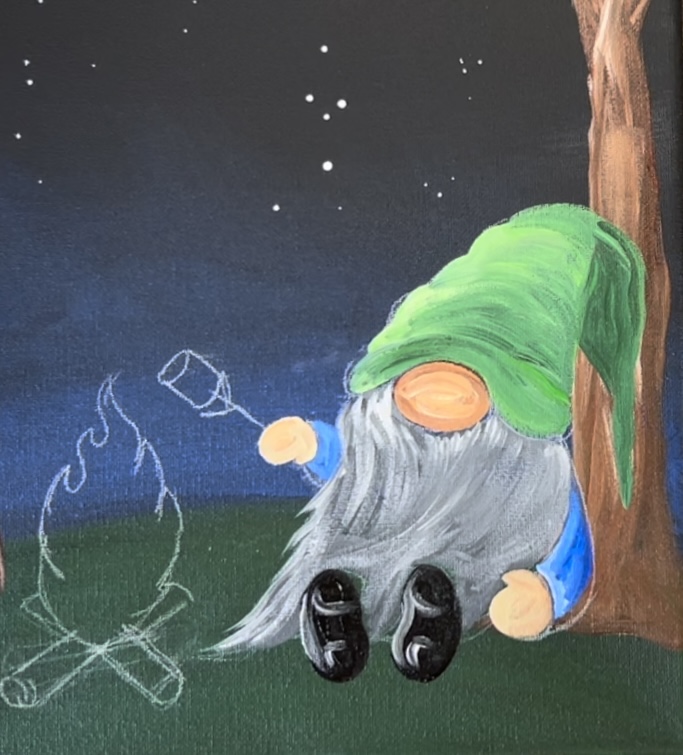
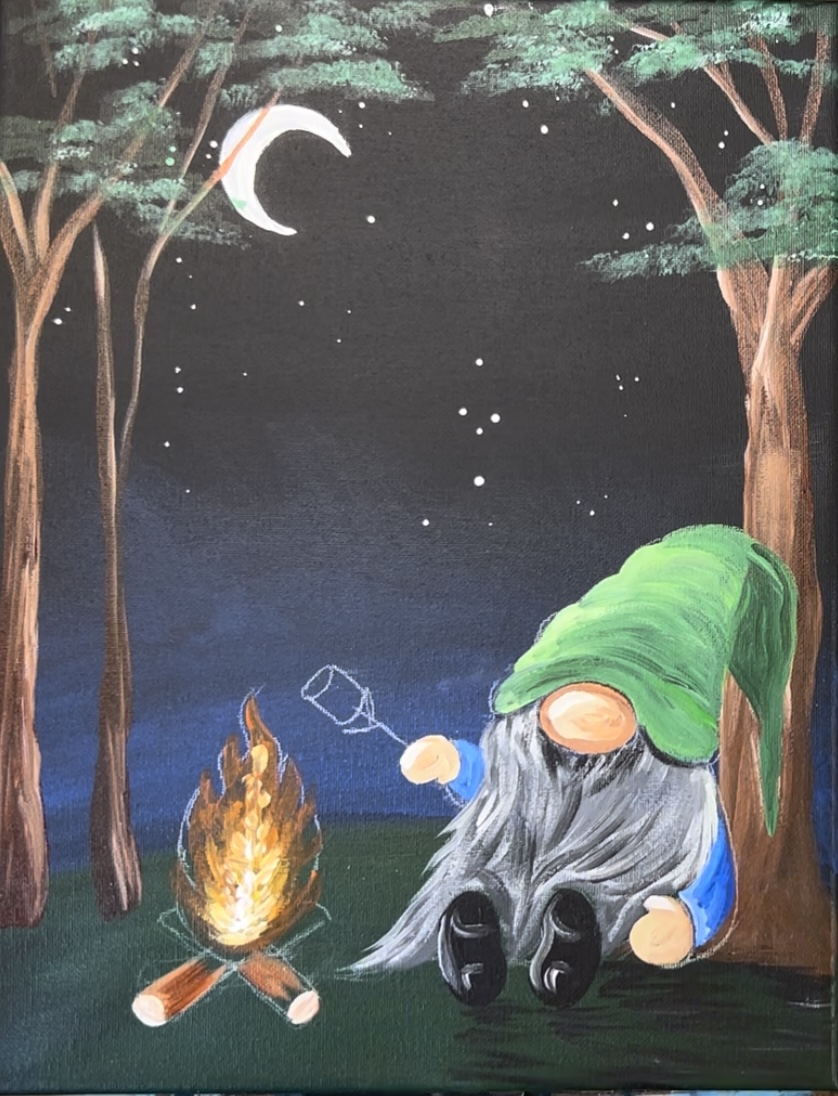
6. Draw Gnome & Fire

If you are using the tracer template, I recommend white graphite paper so it will show up against the dark background. You can also rub chalk or white color pencil on the back of the tracer and then trace.
If you are drawing the gnome, I recommend a white chalk pencil so the drawing will show up.
Start by drawing the nose and the bottom part of the hat. The nose is an oval shape that is going slightly diagonal (because the gnome will be leaning against the tree).
Draw the bottom of the hat so that it contours the top of the nose and is against the side of the tree.
Then sketch the hat so that it is leaning against the tree.
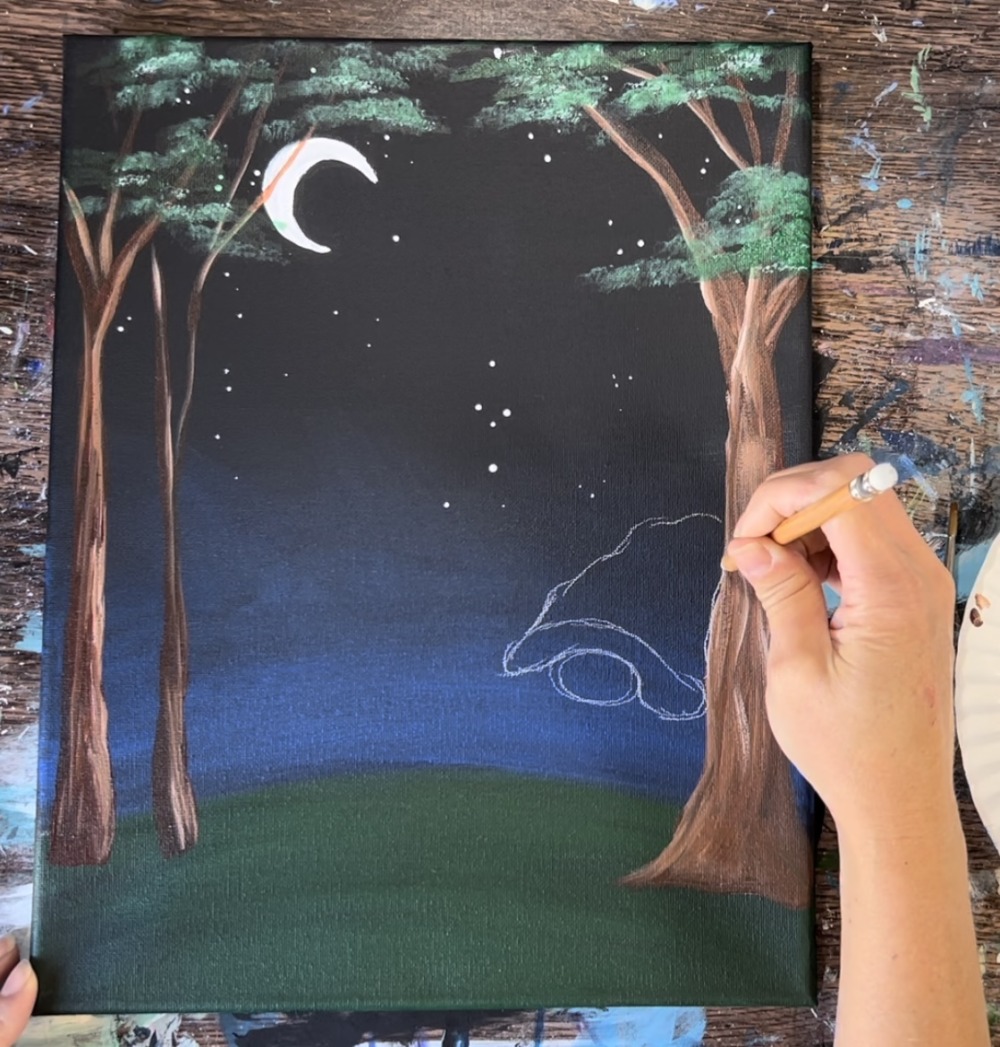
Draw the tip of the hat so that it is folded down on the right and overlaps the tree trunk.
Then draw the beard so that it sweeps down to the left and goes to a point. Draw it so that the curve hugs the left part of the tree trunk and the bottom of the beard goes slightly flat and goes to a point on the left.
Next, draw the arm so that it overlaps part of the tree and rests on the ground. Draw his hand so it’s resting on his side. This is a simple “mitten” style hand shape with just a large curve and a small curve for the thumb.
Draw the other hand so the thumb is pointing down. This hand will be holding the marshmallow stick. Draw the sleeve so that it attaches to the beard.
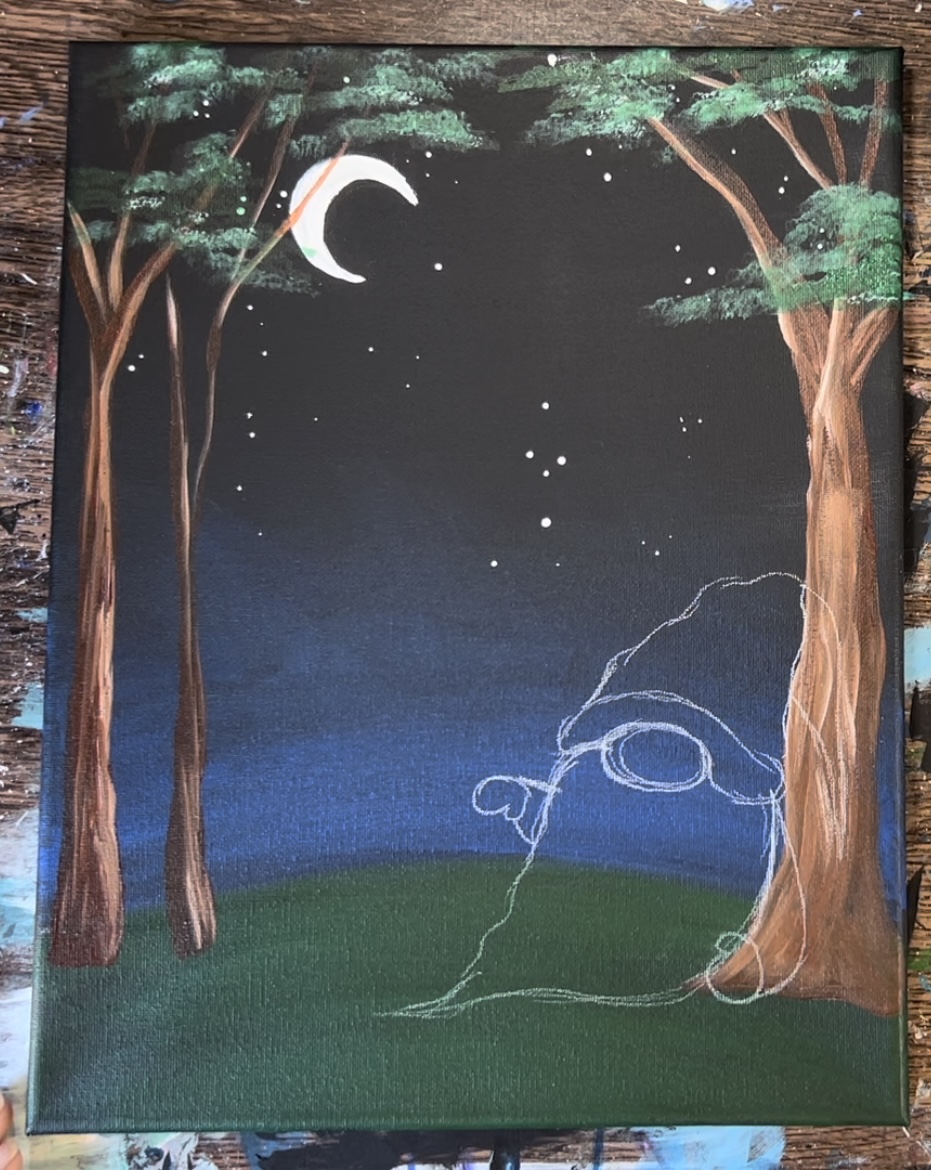
Then sketch a diagonal line for the stick he is holding.
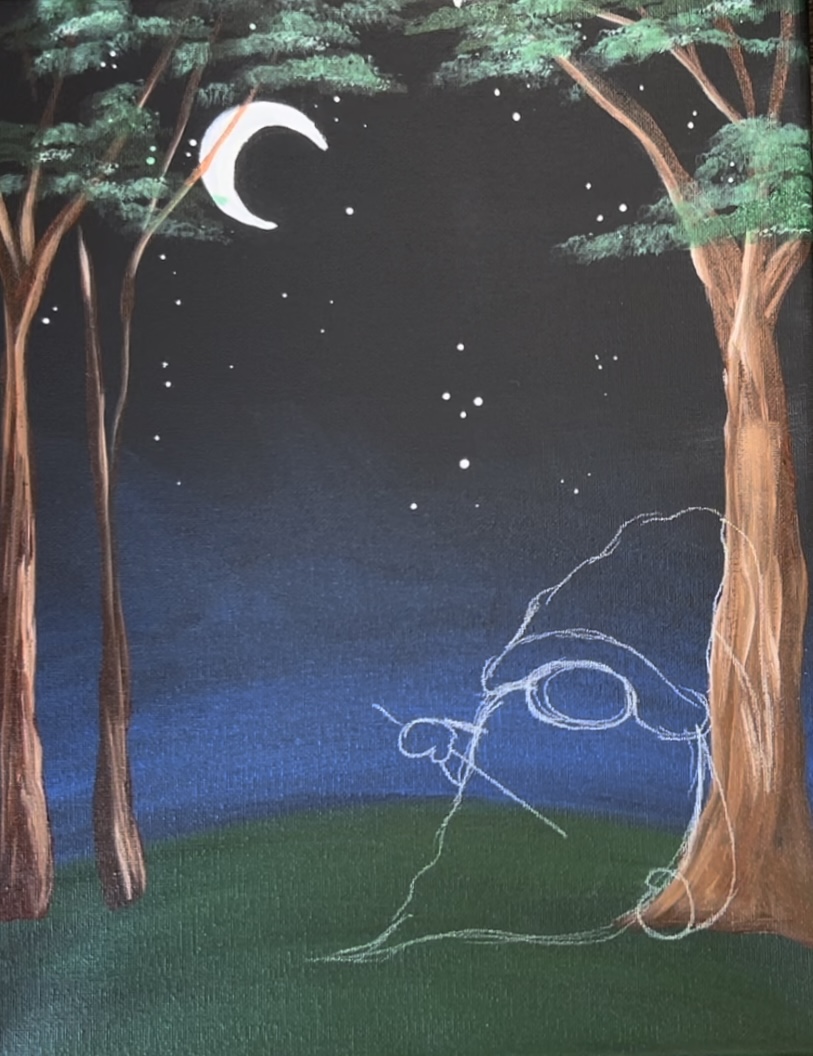
Draw the marshmallow. Then draw the shoes. These are two kidney-bean shapes that overlap the bottom edge of the beard.

Then draw the flame shape.
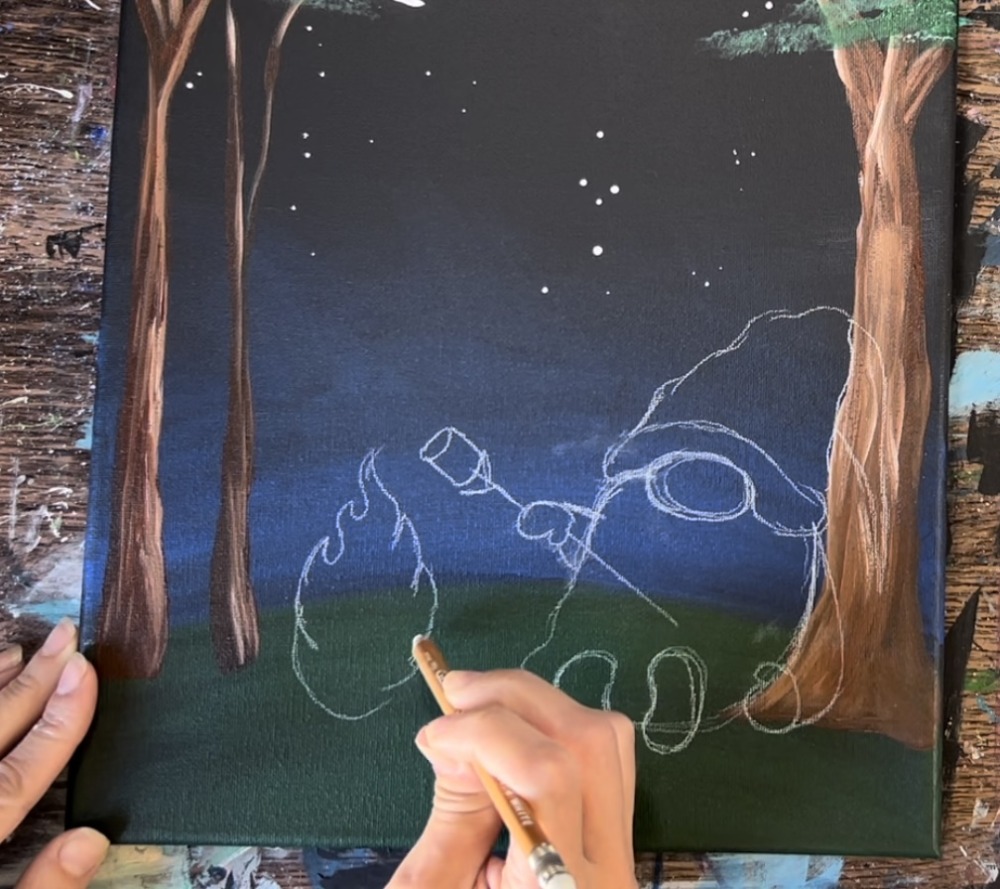
Draw two wood pieces crossing each other under the flame.
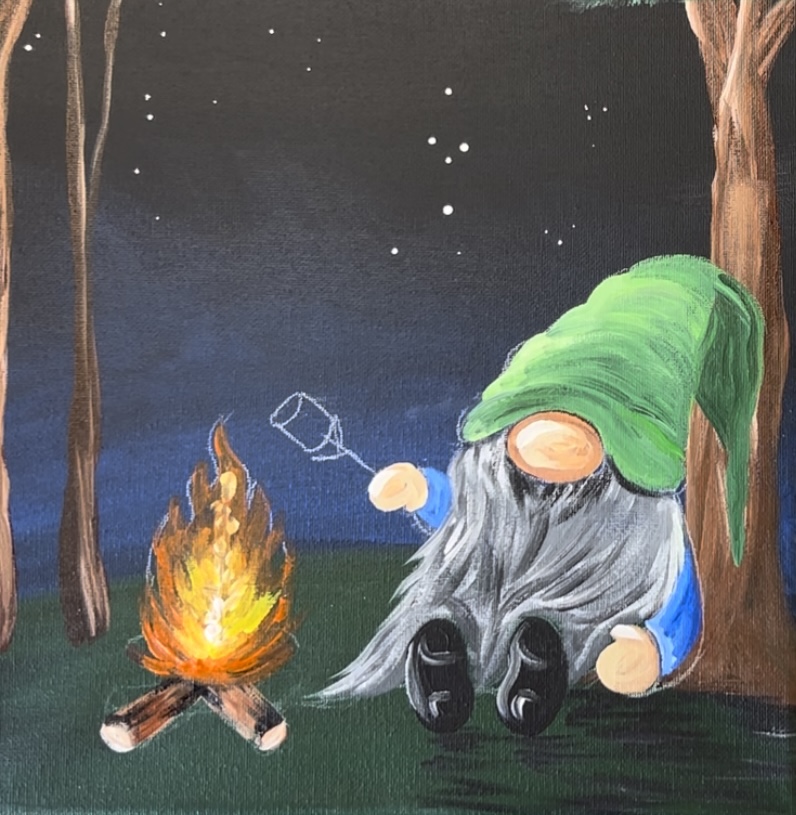
7. Paint Gnome
Use the #4 round brush to paint all of the gnome. Load your palette with light green permanent and titanium white. Mix about equal parts white and green together.
Then paint the hat. With this hat, you want to try to make it lighter on the left side and darker on the right (because the light of the fire would be reflecting the objects facing the fire).
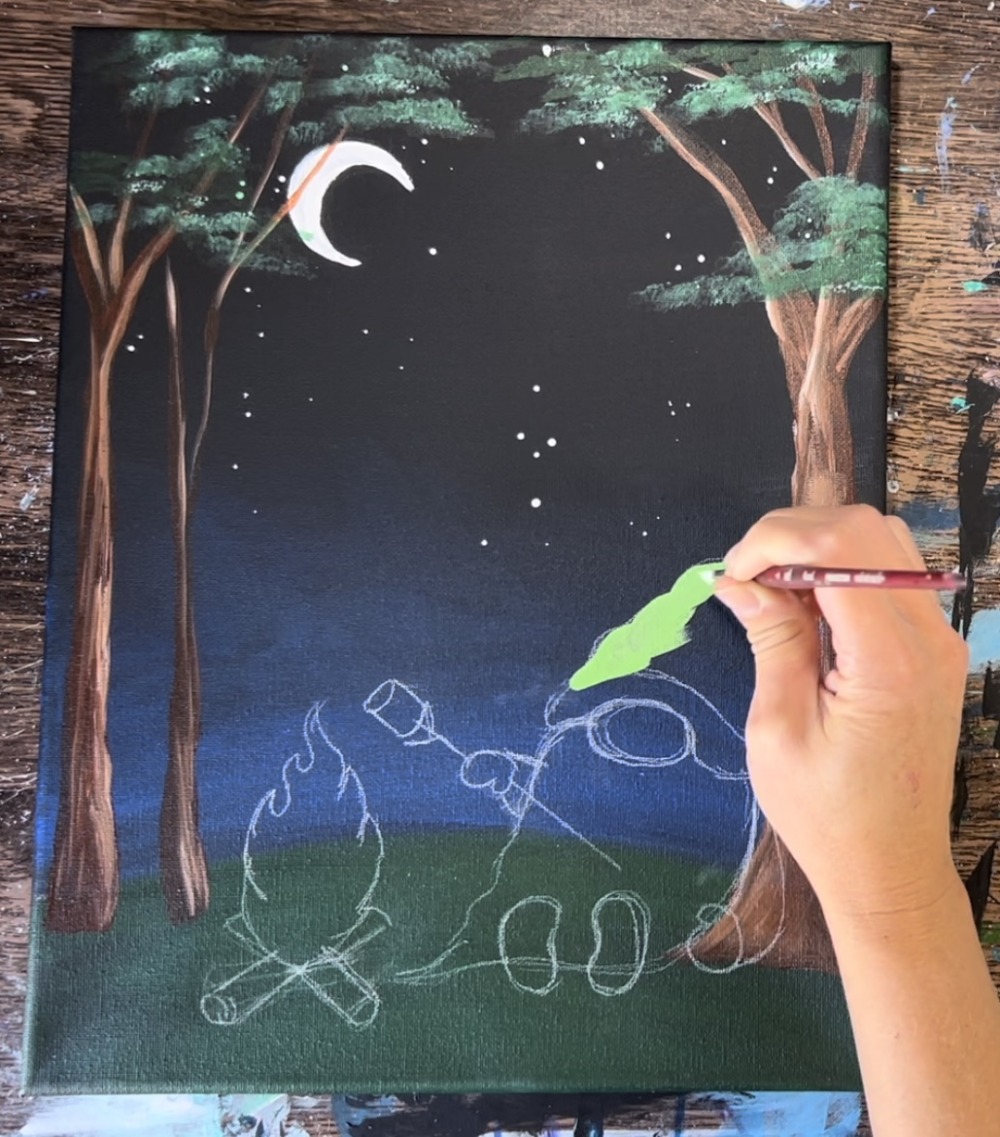
Load just the dark paint on your round brush (without rinsing) and paint curved strokes. Blend it so the left part of the hat is lighter and the right part is darker.
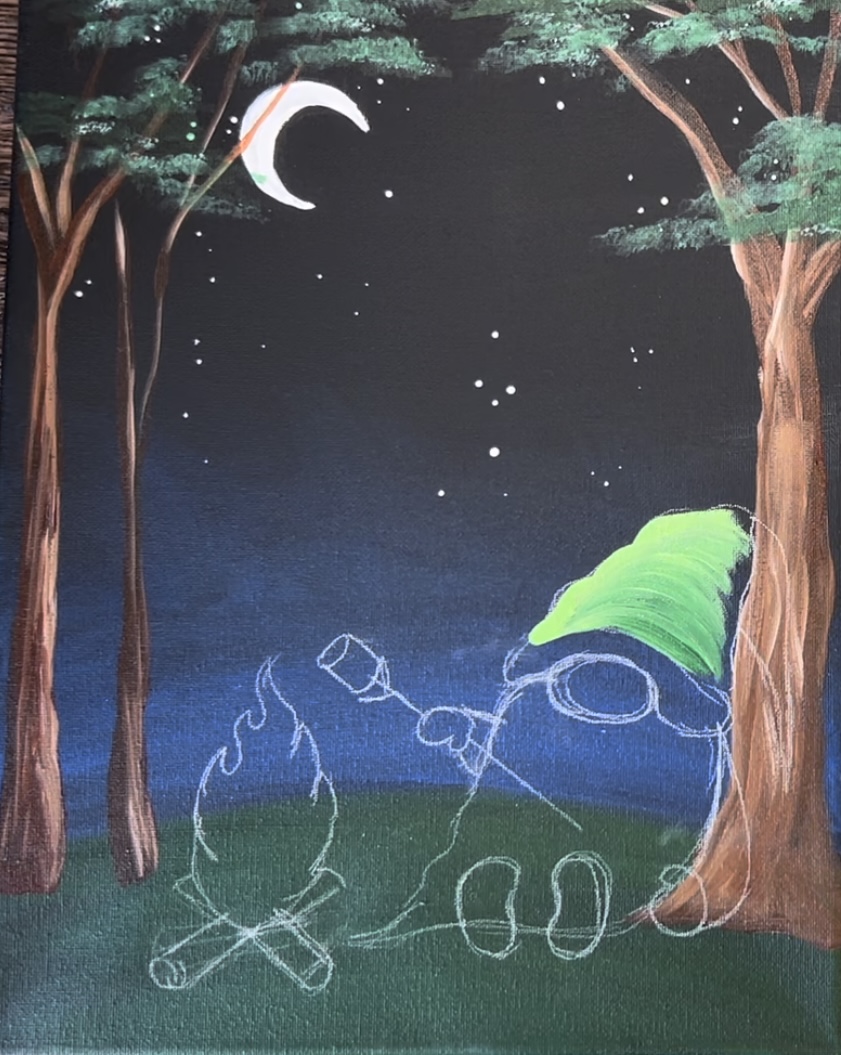
Then paint the tip of the hat with the dark green.
For the nose, use the colors burnt Sienna and unbleached titanium. Start out by using the round brush to paint the nose a solid coat of burnt Sienna paint.
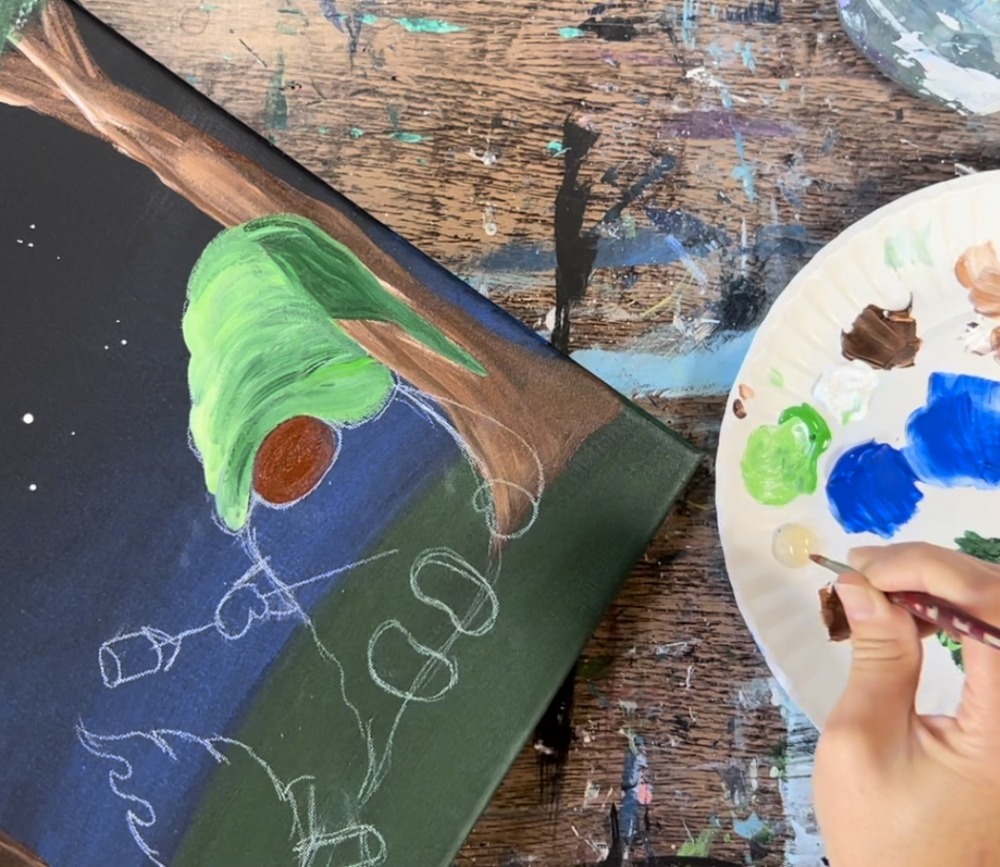
Wipe off the brush but don’t rinse it. Load a small amount of unbleached titanium on your brush. Paint the center of the nose and blend the brown so the nose is light in the middle and darker on the edges.
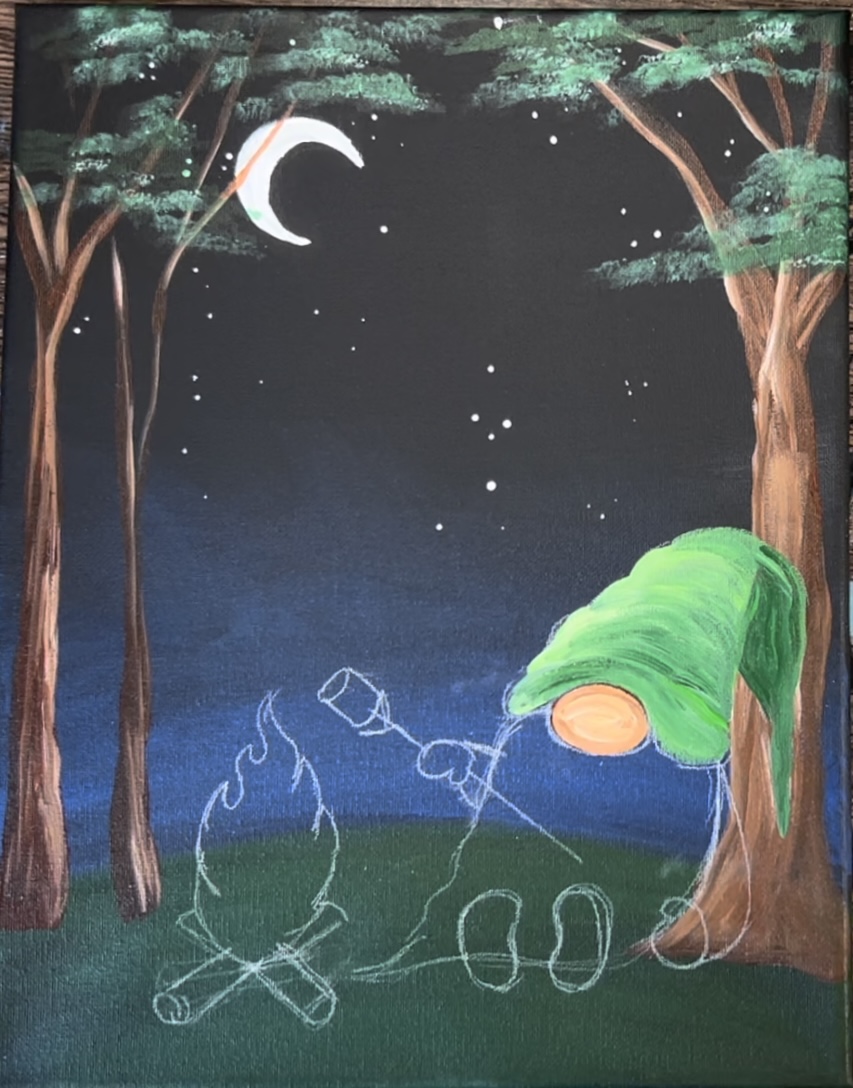
Then paint the hands using unbleached titanium mixed with a little burnt Sienna.
Next, paint the beard. On your palette, mix equal parts titanium white and mars black. Use the #4 round brush.
Start filling in the shape of the beard with curved strokes that contour and go in the direction of the shape. The hairs of the beard meet in the center under the nose and then go around the feet.

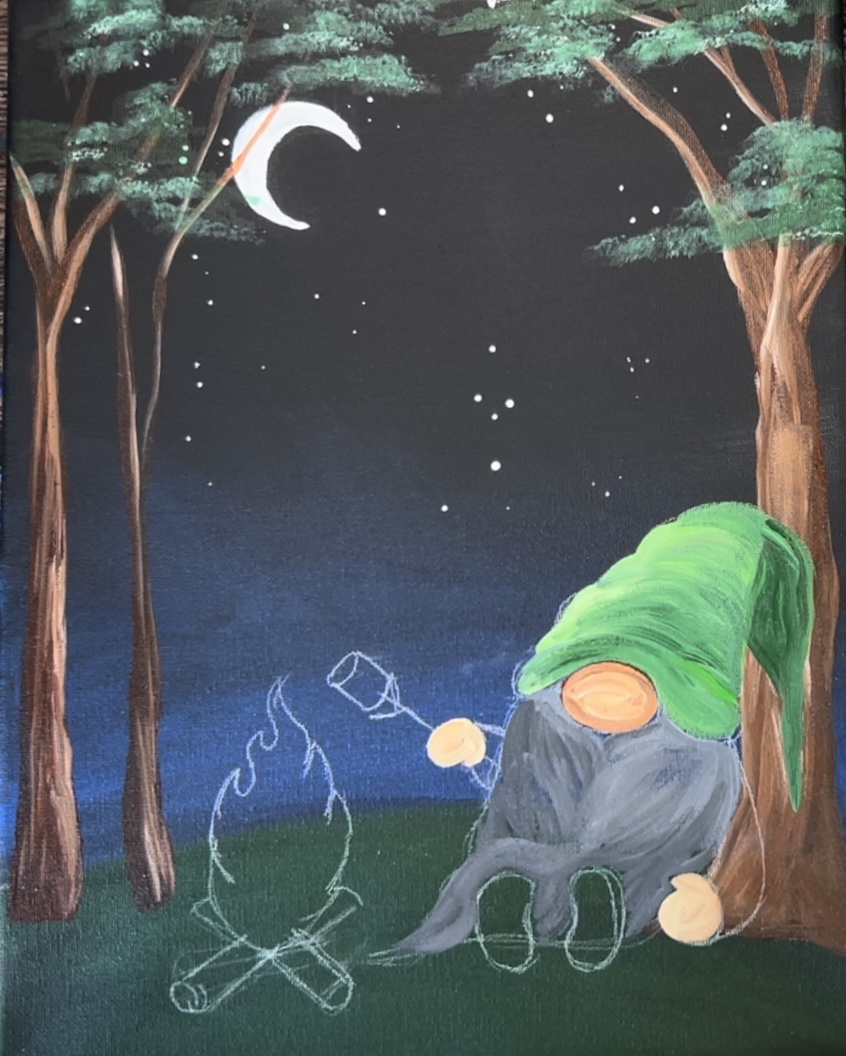
Then, load your brush with a bit more white to make a lighter gray. Paint more curved strokes that still go in the direction of the beard hairs. This layer should not cover up all of the darker layer. Paint a little bit of texture on the edge of the beard on the right (small angled “frayed” strokes that go outside the shape).

Next, paint the blue sleeves. Use cobalt blue mixed with a little bit of titanium white.
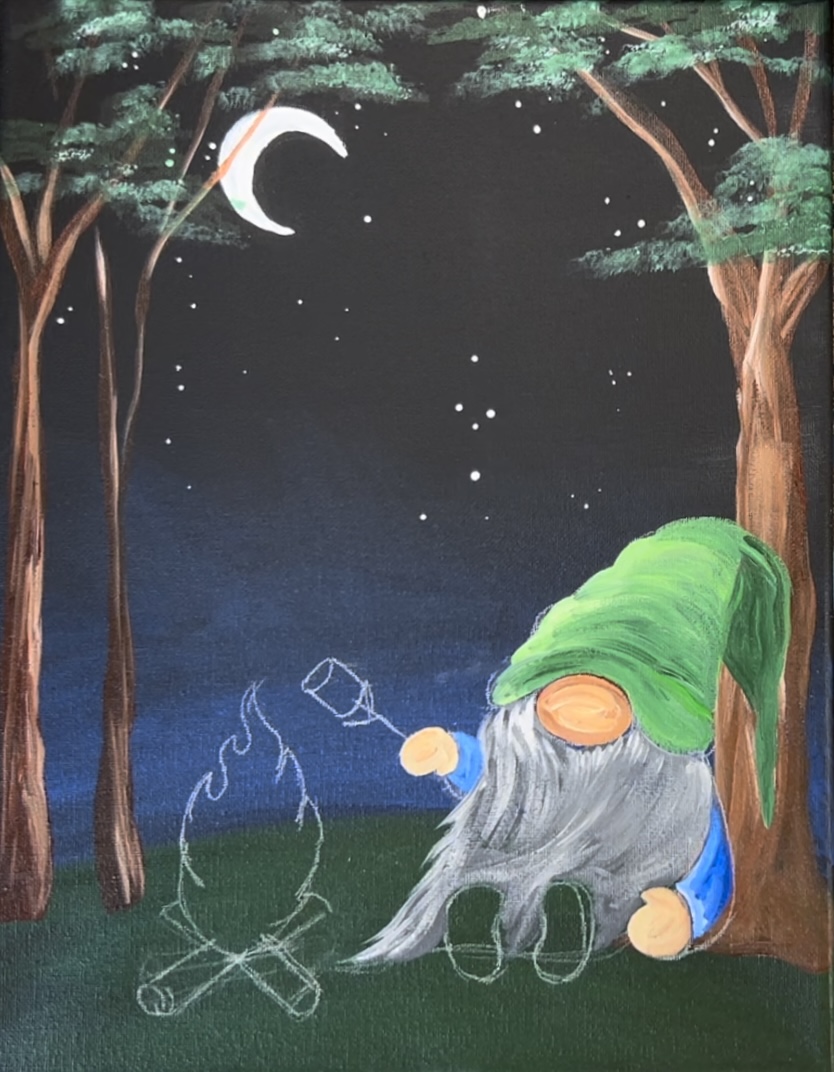
Then use mars black to paint the bottom of the gnome’s shoes. First paint them a solid coat of black (no blending).
Then wipe the brush off. Load a small amount of titanium white on the tip of the brush. Paint the far left side of the shoes (just a curved line on the edge). This makes it look like it has a highlight from the fire casting light.
Also, paint the heels by painting a small “right angle”. Then paint the top part of the shoe bottom but painting a small curved line.
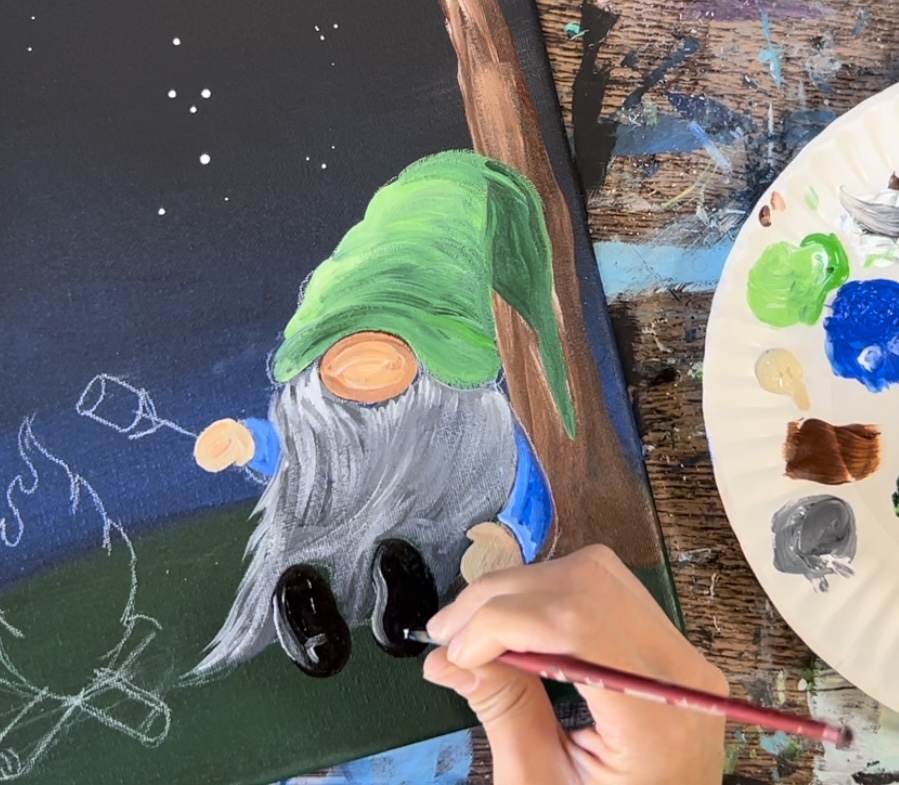
If needed, add more hair texture in the beard. I added a darker gray in some areas under the nose and in the center. Then I added a few more lighter areas and more texture on the side of the beard on the right that overlaps the sleeve.
Add a white highlight curved line on the top part of the nose and hands. Then use either the 12 bright or 4 round brush and mars black to paint loose left and right strokes in the ground area. This will create shadows on the ground. Do this under the shoes, hands and tree trunk.

8. Paint Fire
Load your palette with cadmium orange hue. Use the #4 round brush and the orange to paint the first layer of the flame. Paint this in contouring/curved strokes in the direction of the shape. It is okay if the orange is not bright right now! We will be adding layers on this to make it brighter with other colors. You only need to paint one coat of orange paint and it will look translucent.
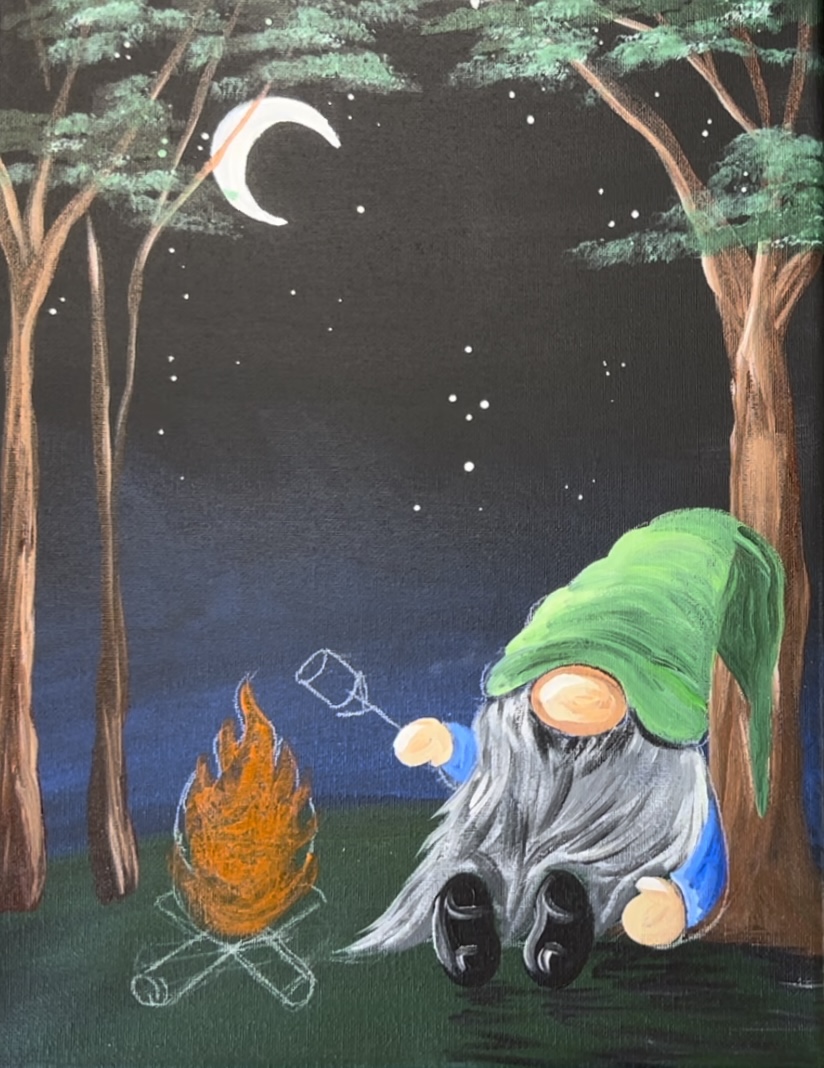
Next, load your palette with cadmium yellow light hue. Then use the #4 round brush to paint a flame inside of the orange flame shape but don’t cover all of the orange.

Next, load a small amount of titanium white on your brush (without rinsing it off). Paint a very small, vertical area in the center of the flame. This white will create the impression this flame is very bright in the center.
Next, paint the logs. Use a combination of the burnt umber, burnt Sienna and unbleached titanium. Use the round brush to paint diagonal strokes that blend the two browns together but not all the way. Paint the “oval” sides of the logs with unbleached titanium.
Add a little bit of black into the wood for shadow and texture but don’t blend all the way.
9. Paint Stick & Marshmallow
Use the #4 round brush to paint the stick of the marshmallow. Use burnt umber mixed with a small amount of titanium white.
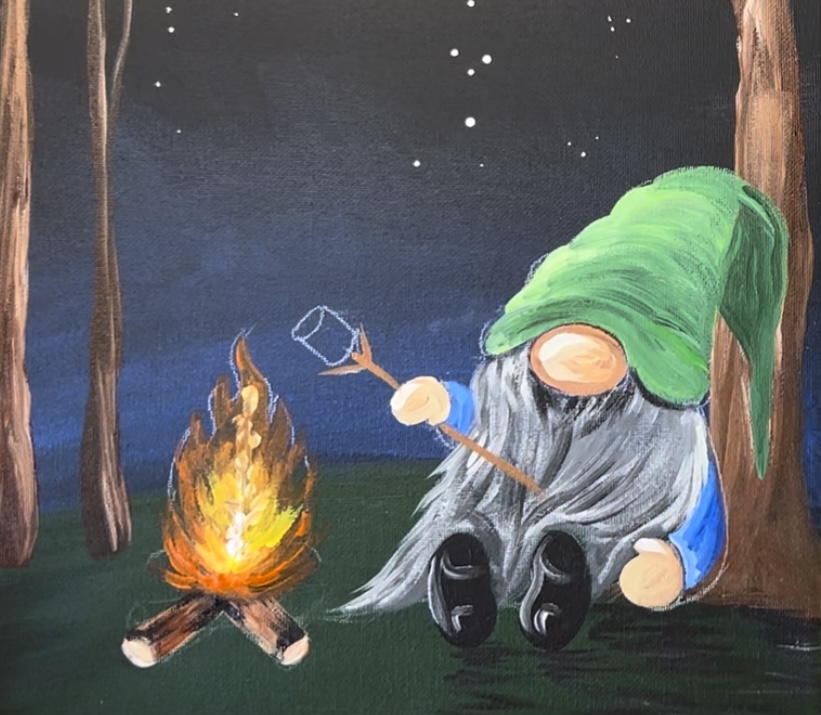
Then use titanium white to paint the marshmallow.
Add a small amount of black into the white to make gray. Paint the top scale of the marshmallow with gray.
Next, use titanium white to “dry brush” the smoke of the flame. Load the brush into titanium white. Wipe some of the white off so there was only a small amount of paint on the brush. Then paint a loose wavy line from the top of the flame to the top of the sky.

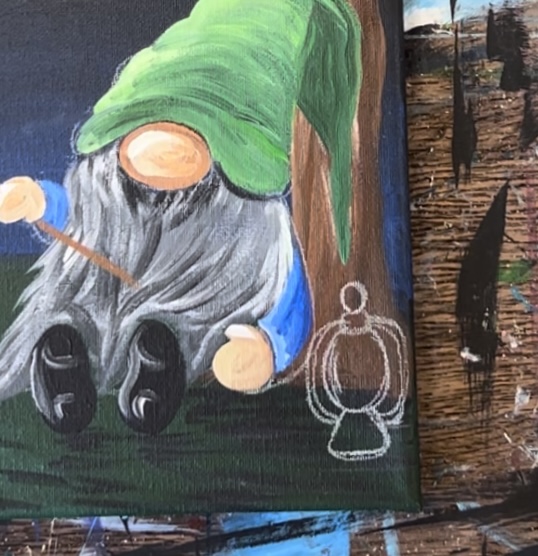
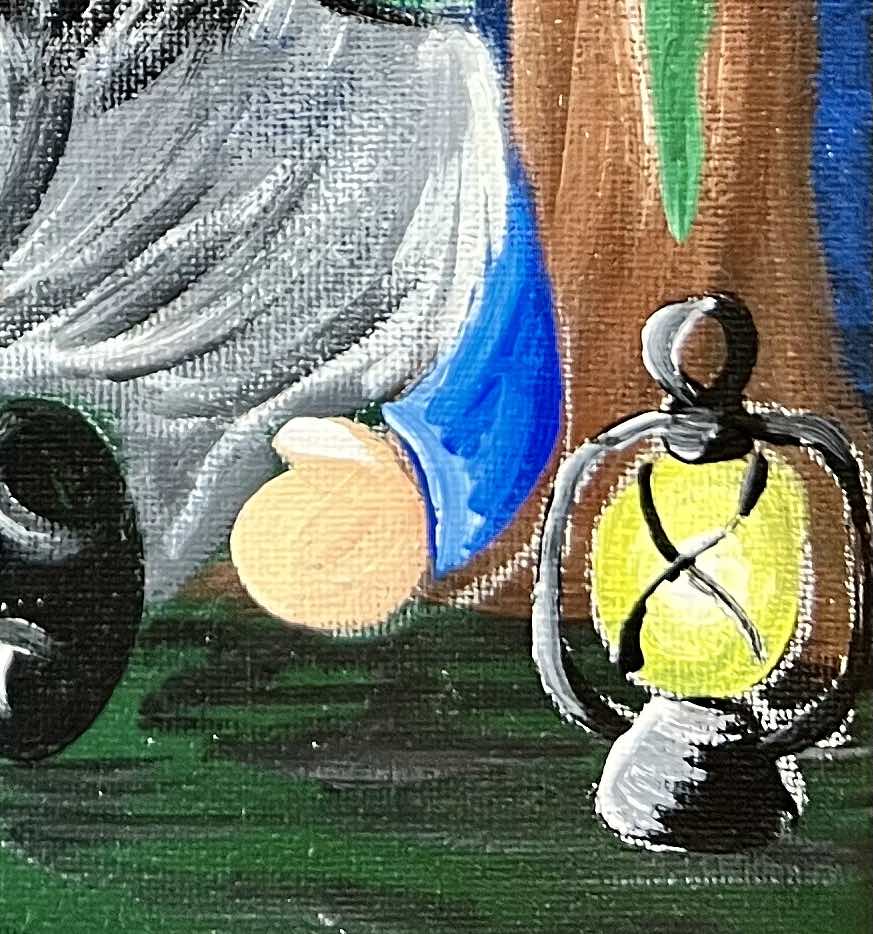
10. Draw & Paint Lantern
Use a white chalk pencil to draw the lantern. Draw an oval shape for the light piece. Then draw a square piece on top and an oval piece on top of that for the handle.
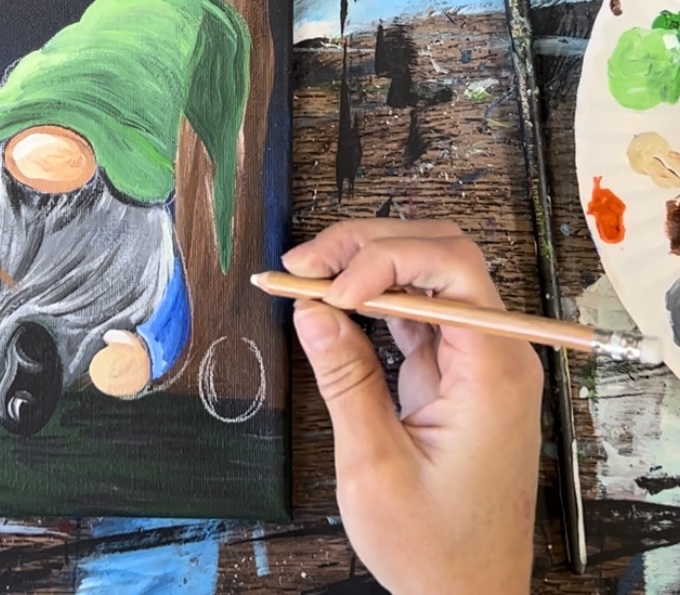
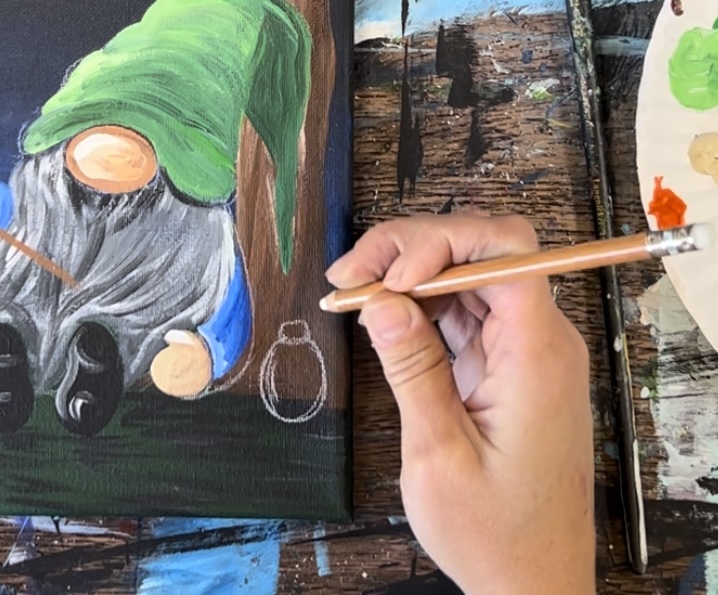
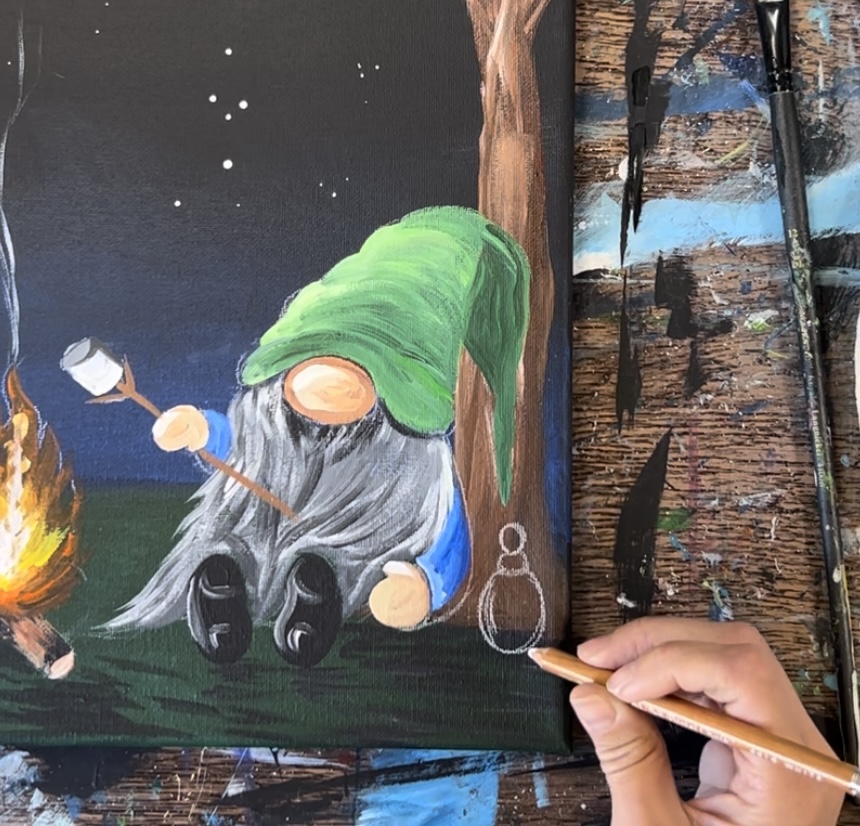
Then draw a trapezoid shape under the oval shape. This shape has curved edges.
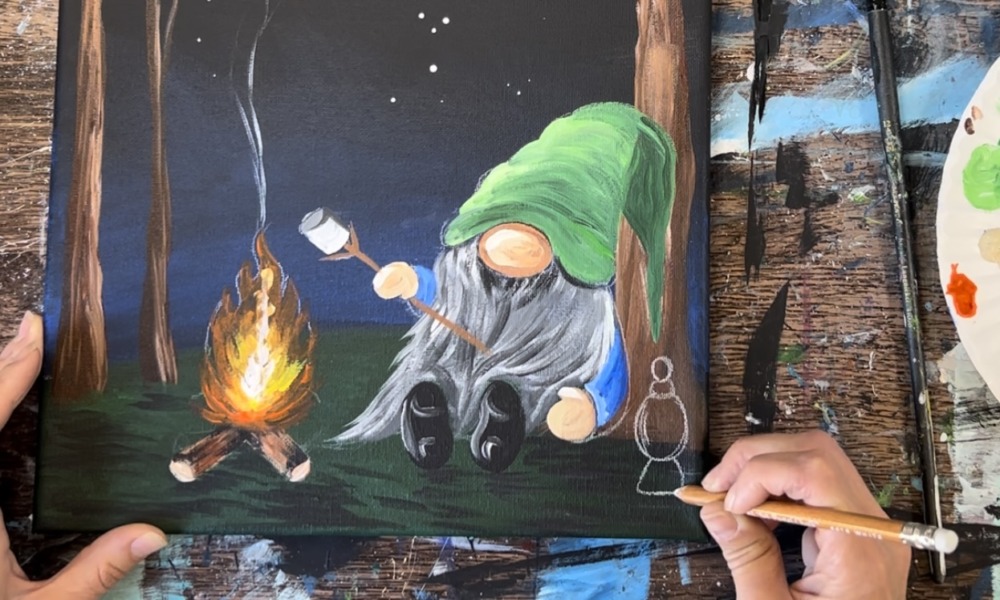
Then draw curved lines for the side handles of the lantern.
Then paint the lantern. Use the #4 round brush to paint the glass part of the lantern with cadmium yellow light.
Then add a small amount of titanium white in the center of the yellow to create more of a bright glow.
Then paint the side handles, base and top of the lantern with mars black.
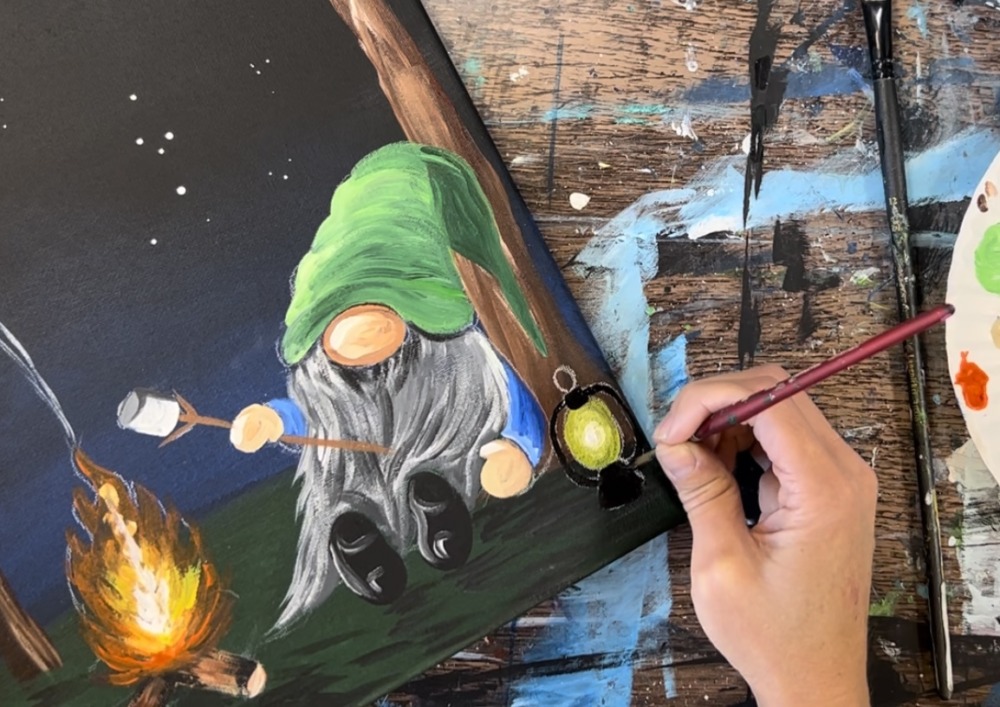
Next, load a small amount of titanium white onto the brush. Paint the left side of the lantern base, top and handles so that it is highlighted and lighter on that side and stays dark and shadowy on the right side.
Erase any leftover chalk line residue after the painting dries.
Finished!
Sign your name and show it off!