

Would you like to save this?
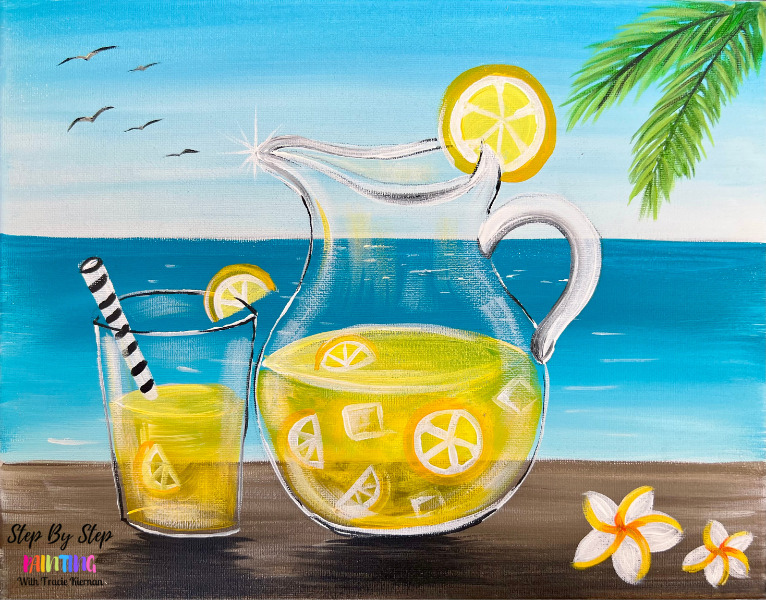
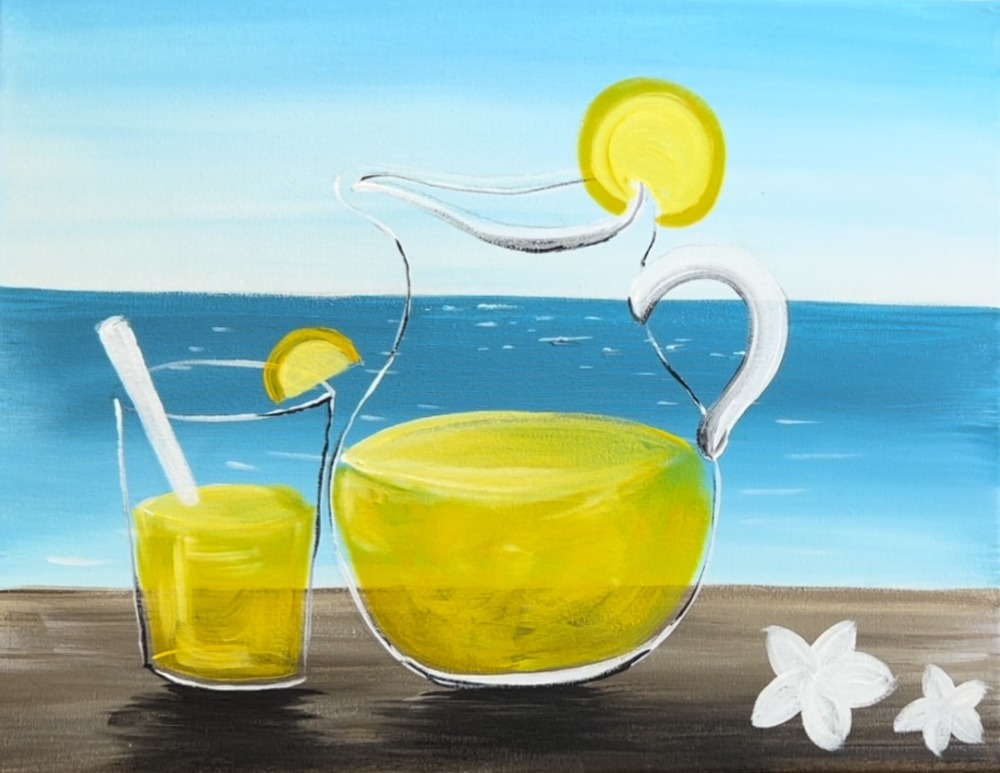
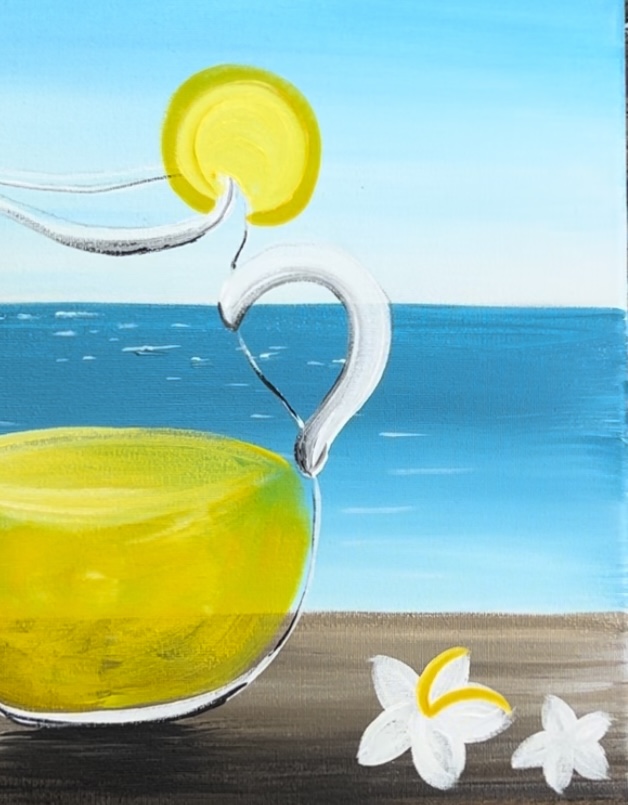
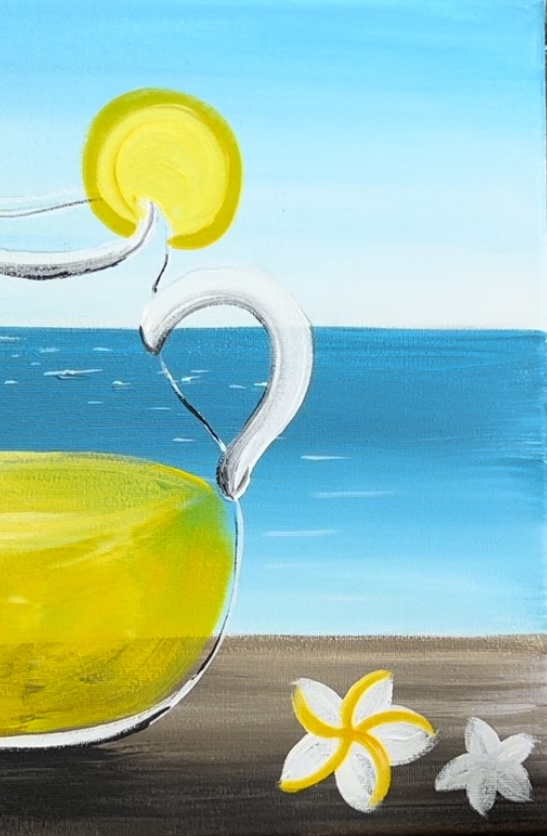
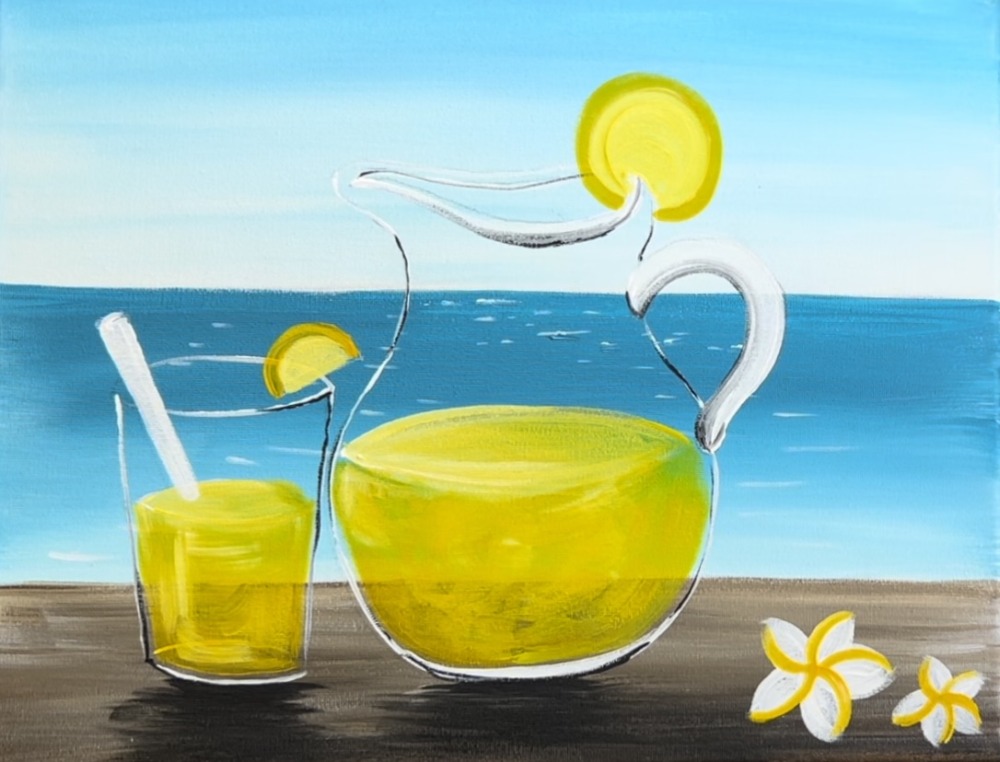
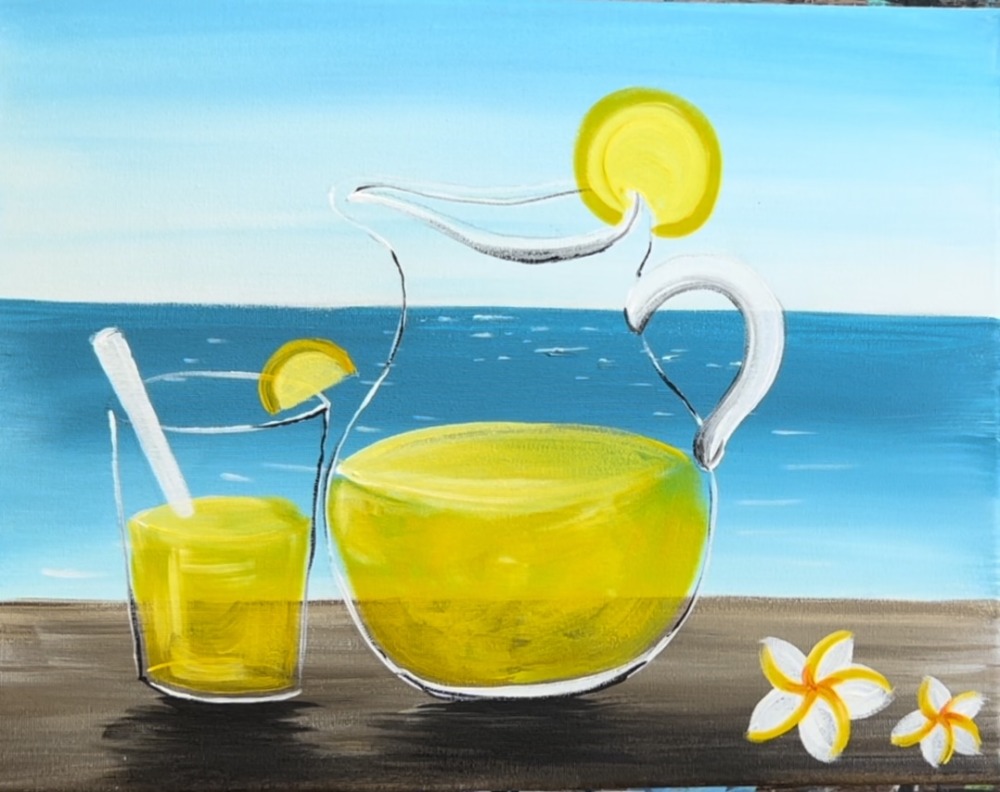
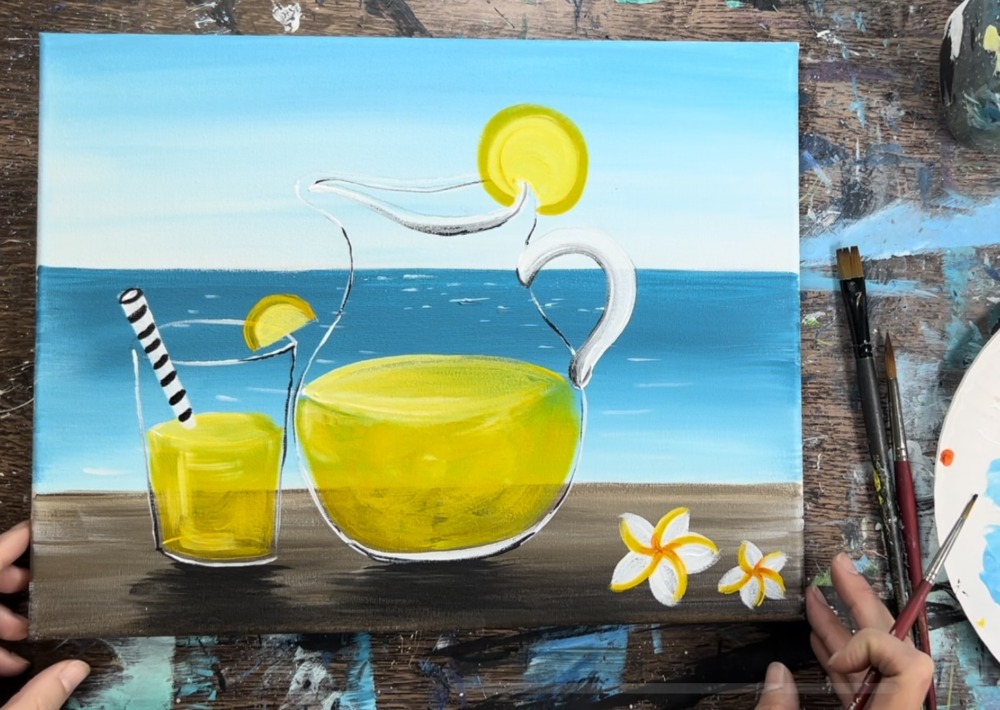
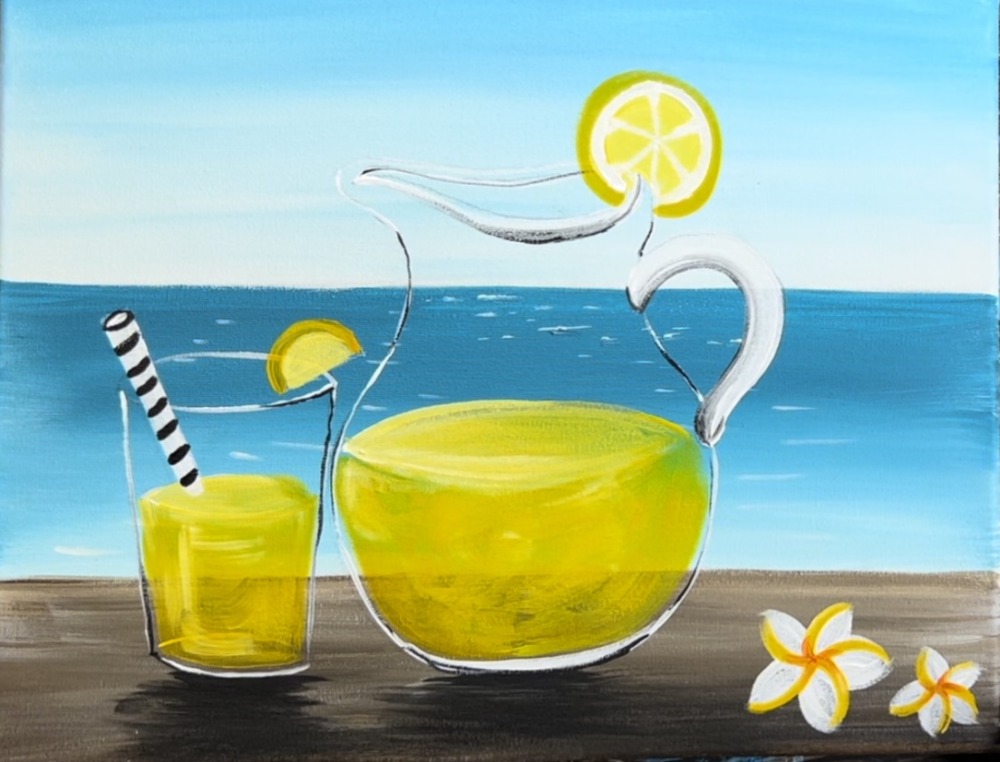
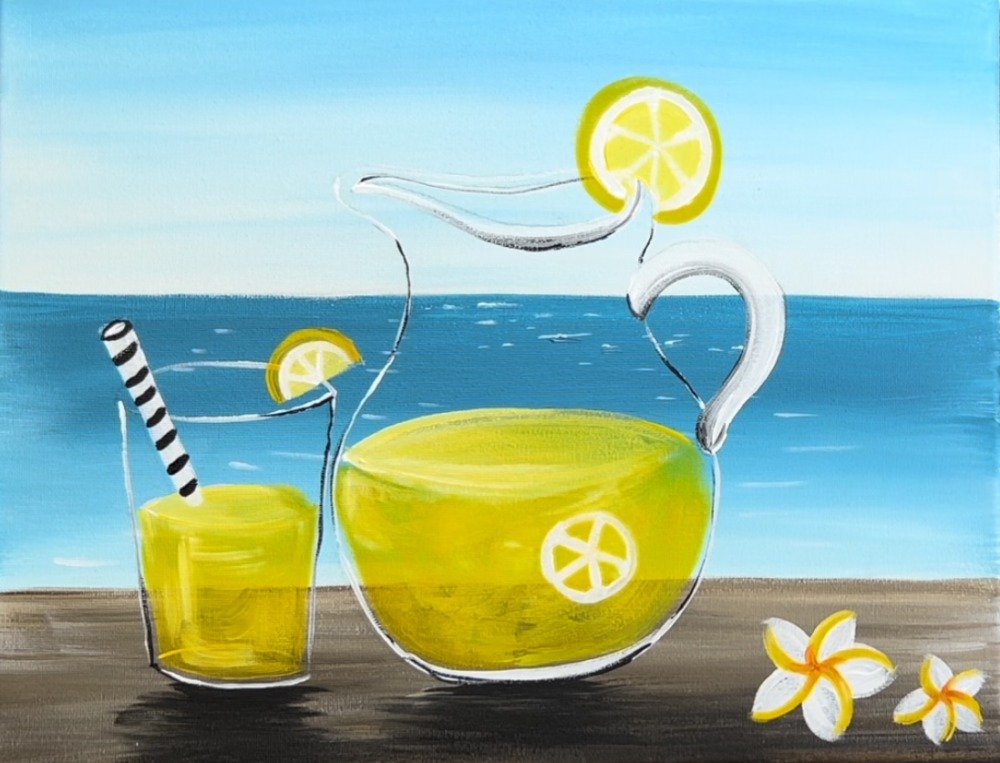
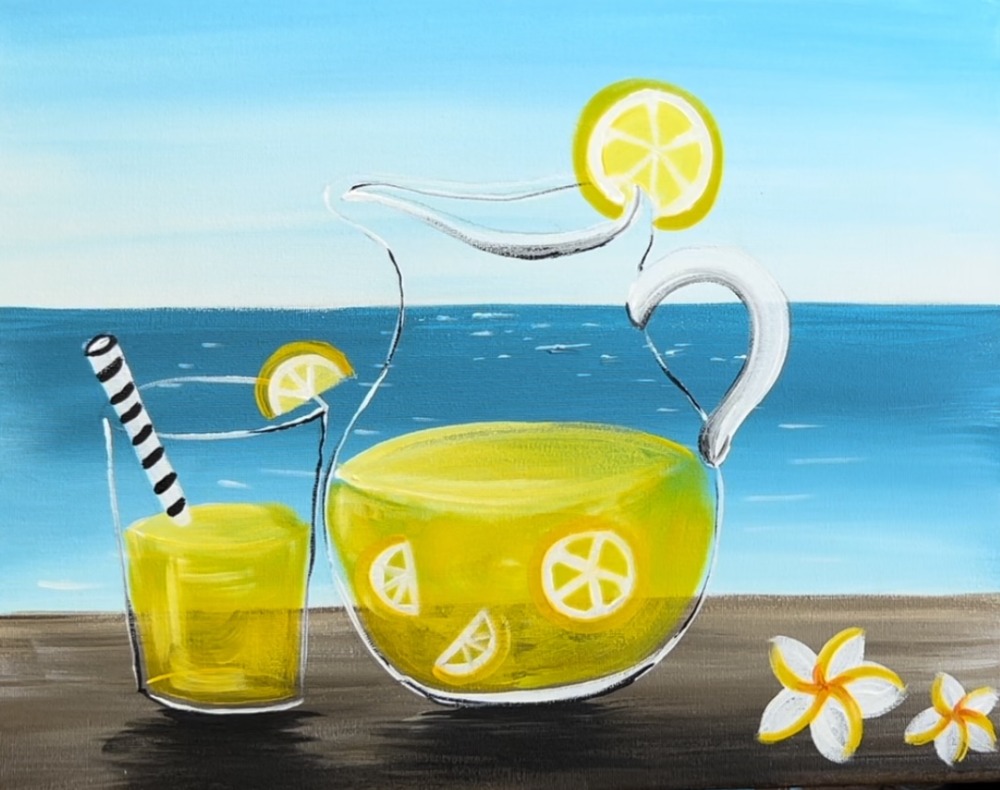
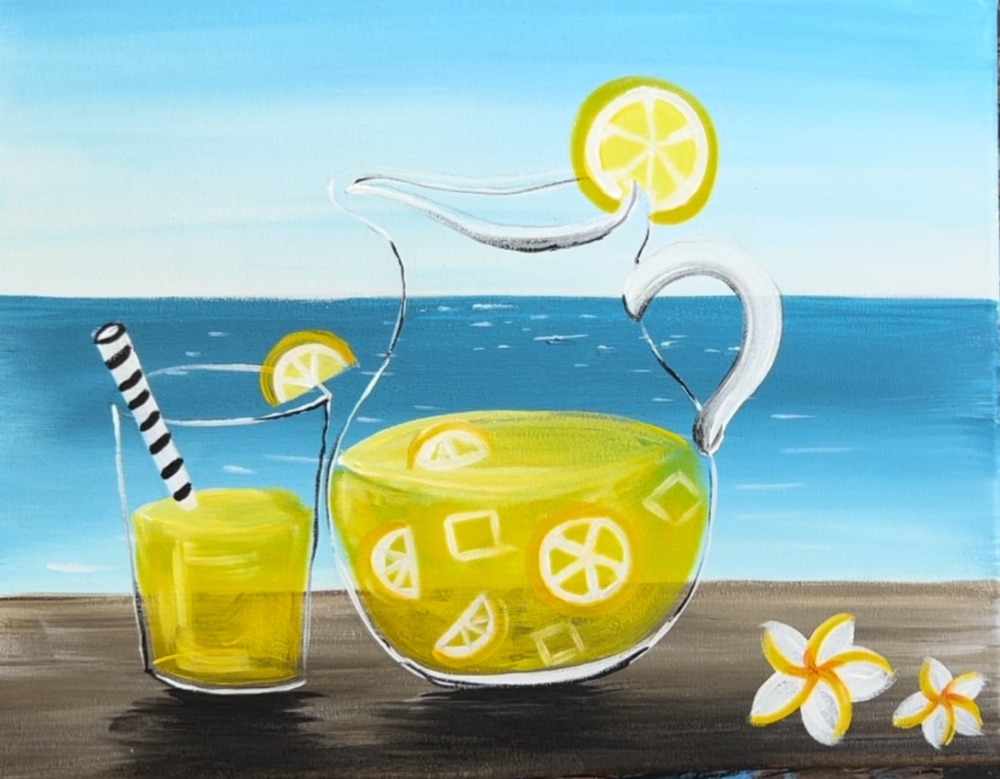
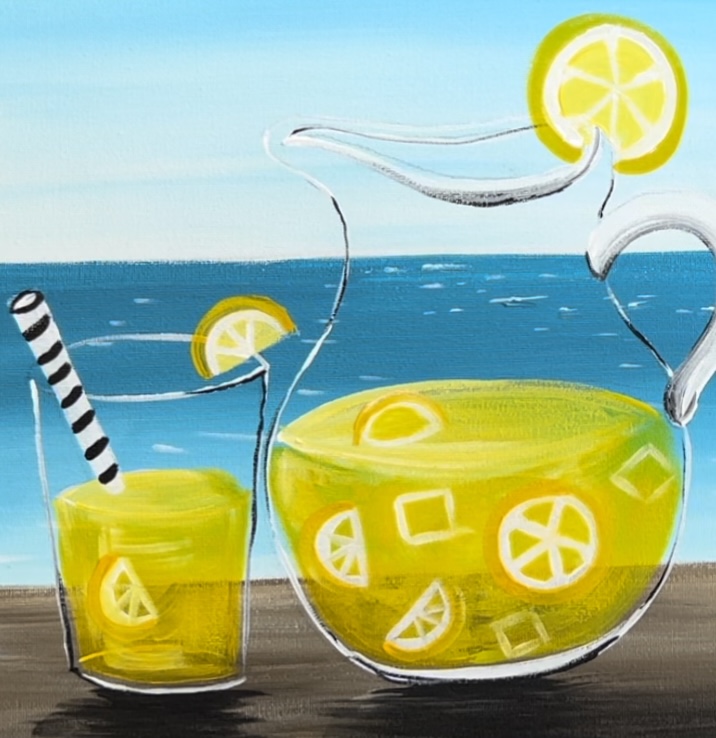
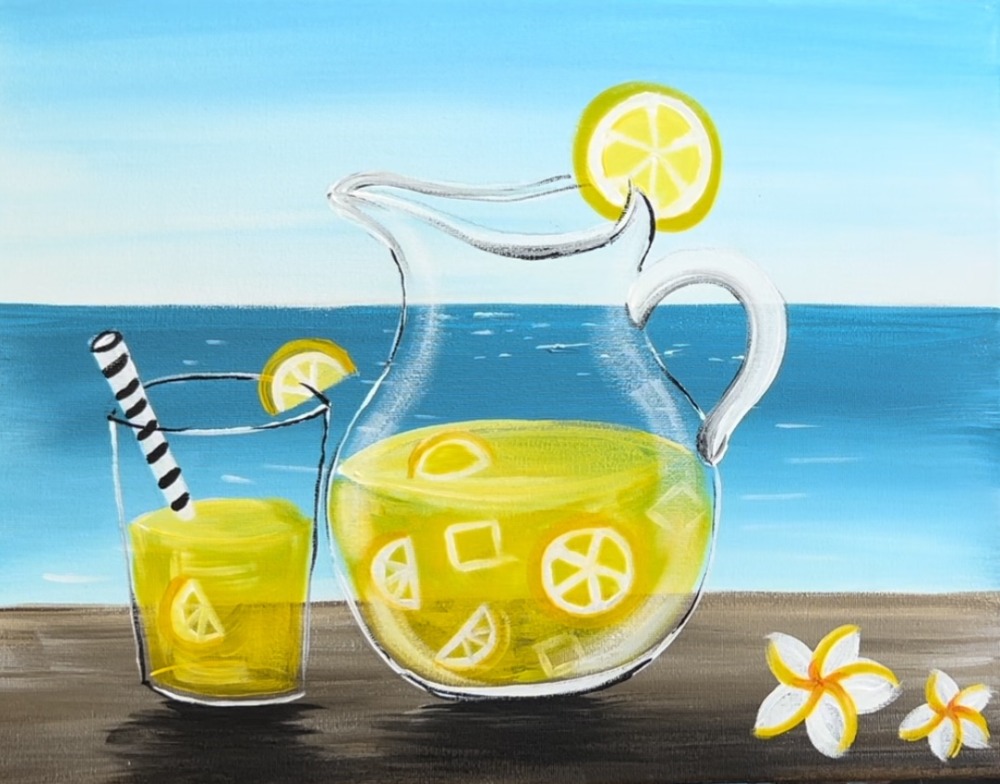
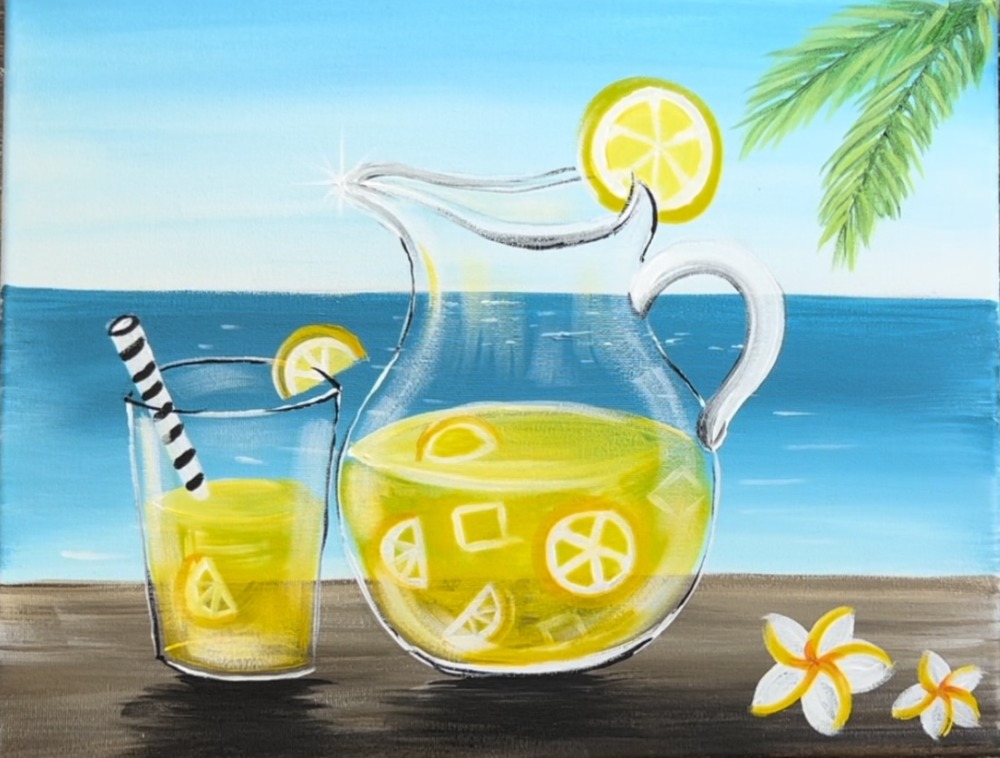
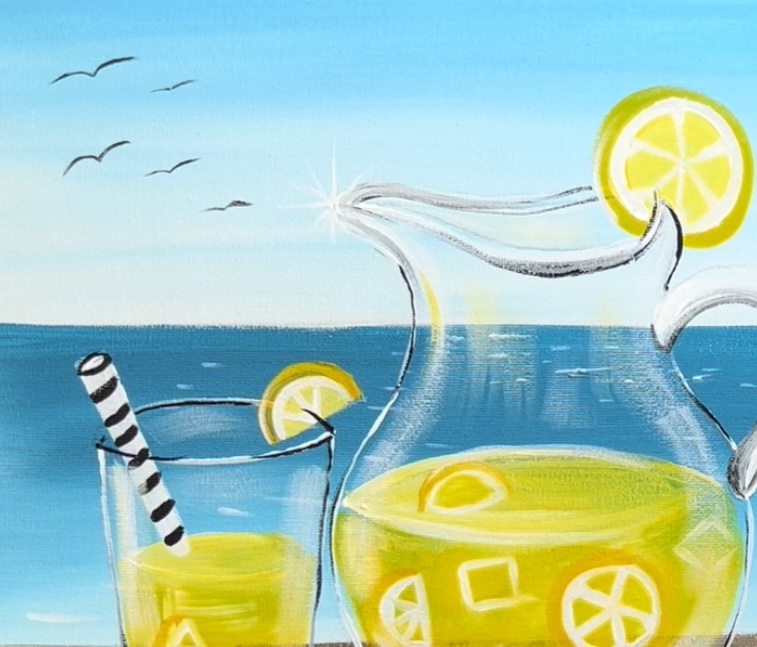
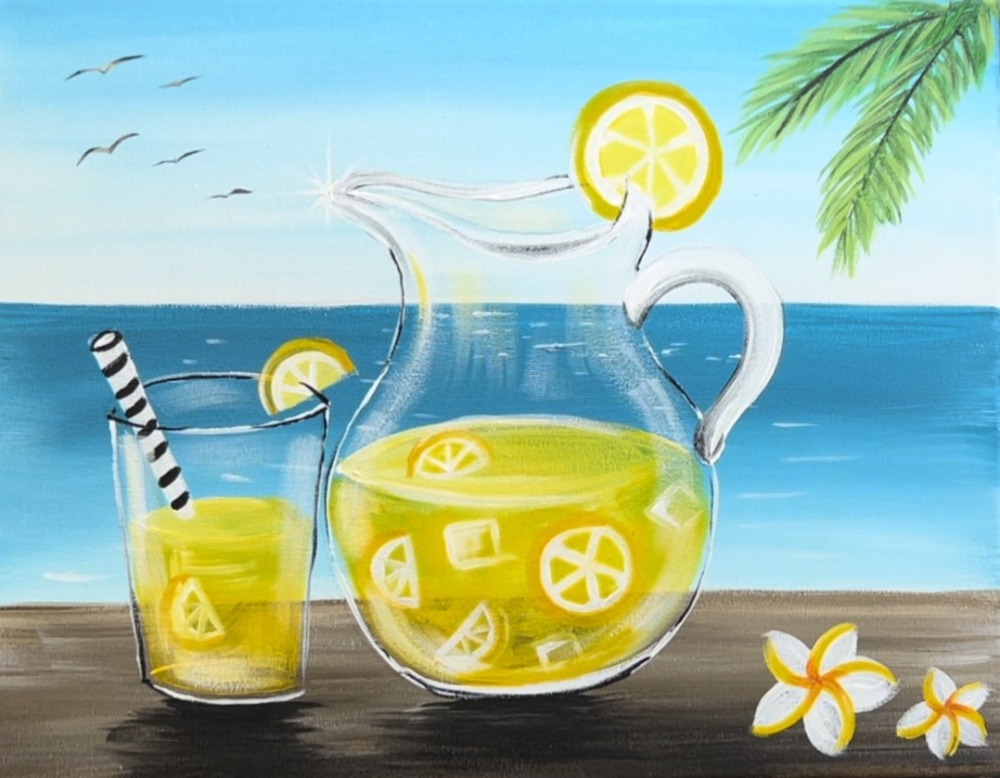
Learn how to paint a pitcher of iced cold lemonade by the ocean! This tutorial is demonstrated on an 11 x 14 canvas with acrylic paints.
See Also…
Materials Needed:
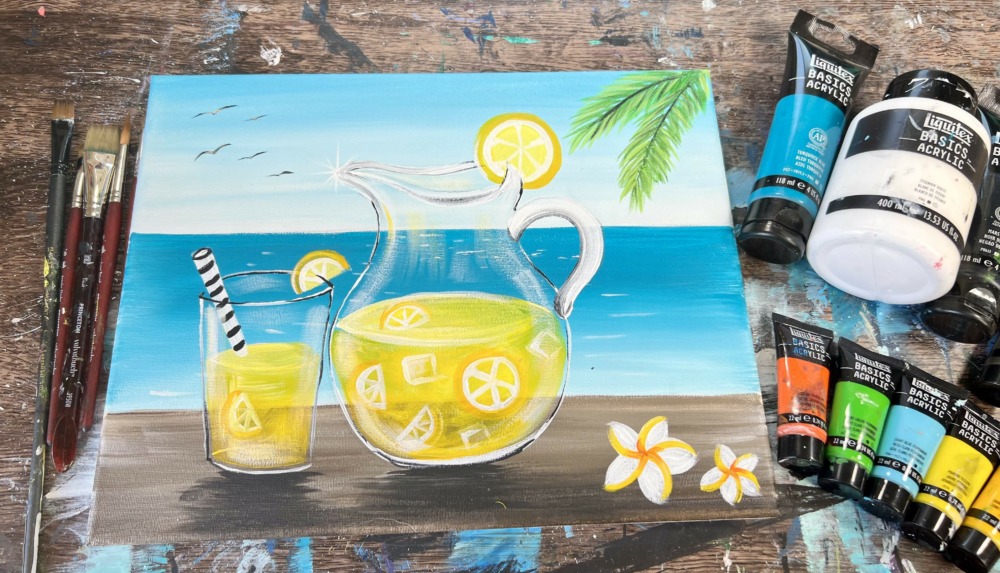
How To Paint "Lemonade By The Beach"
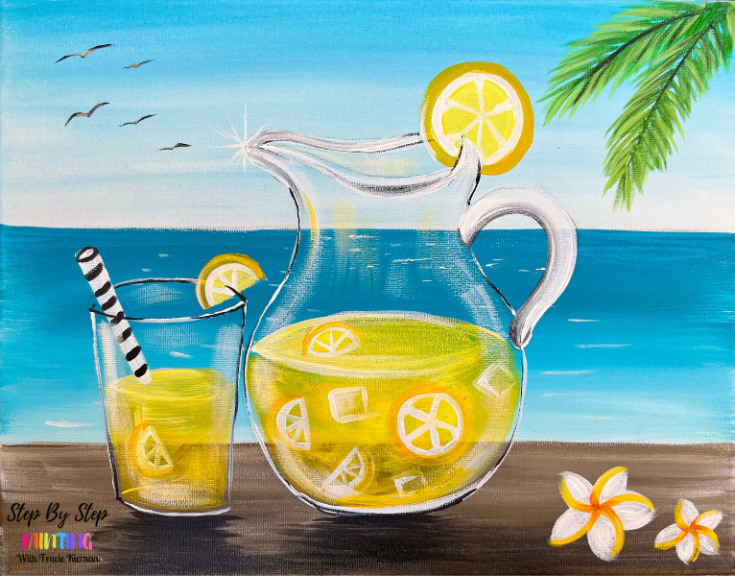
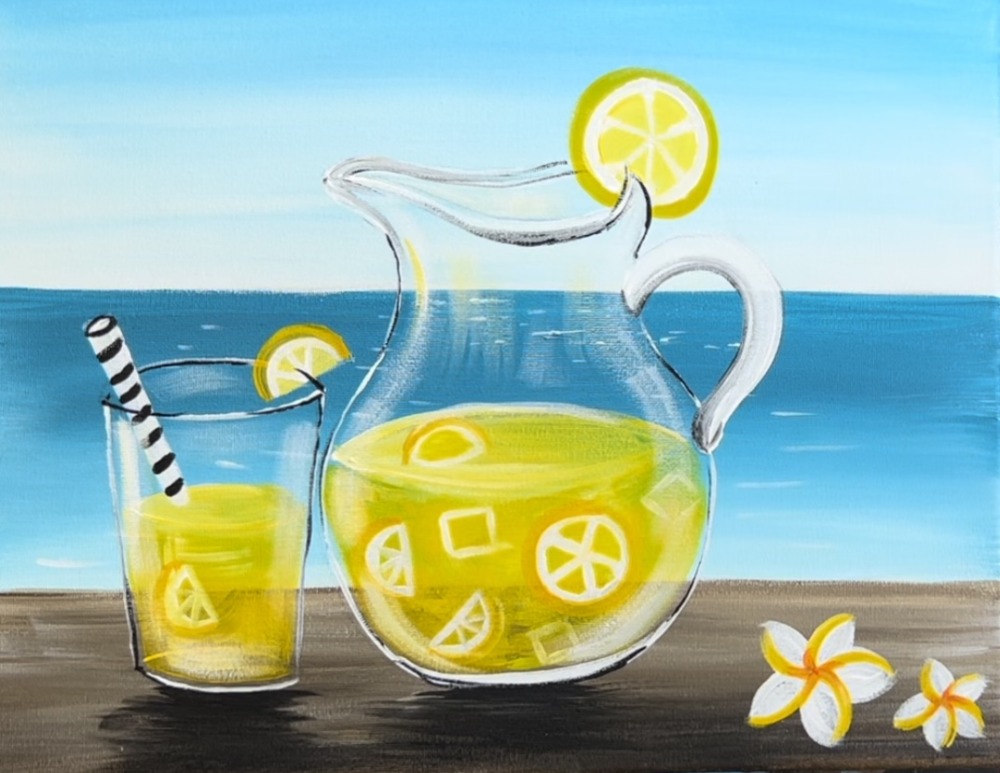
Paint a pitcher and class of lemonade by the ocean.
Materials
- 11 x 14 Canvas
- Acrylic Paint
- Brushes
- Tracer
- Graphite Paper
- Paint Palette
- Water Cup
- Ruler
- Pencil
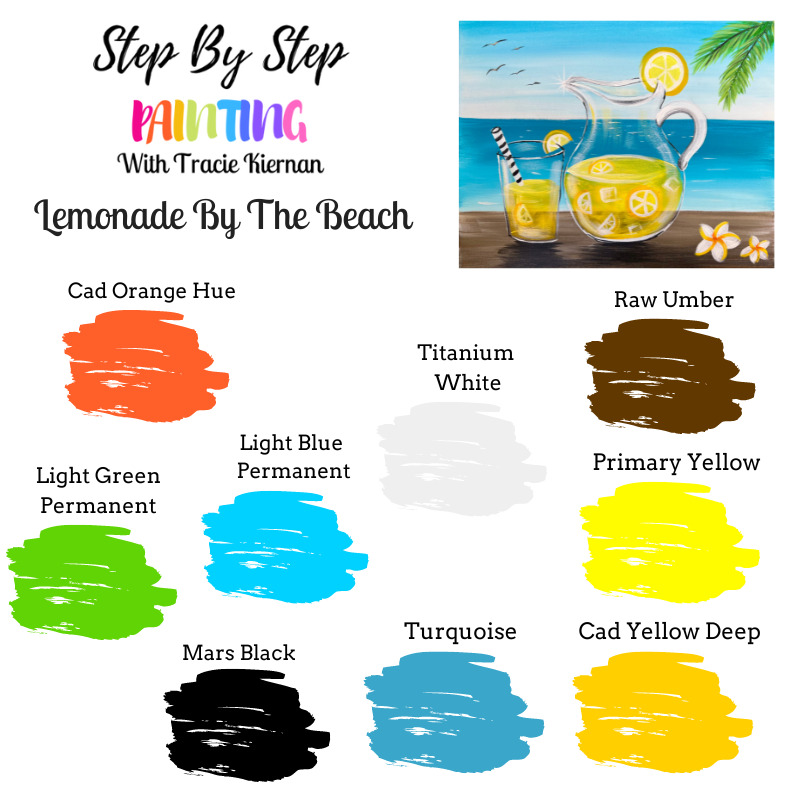
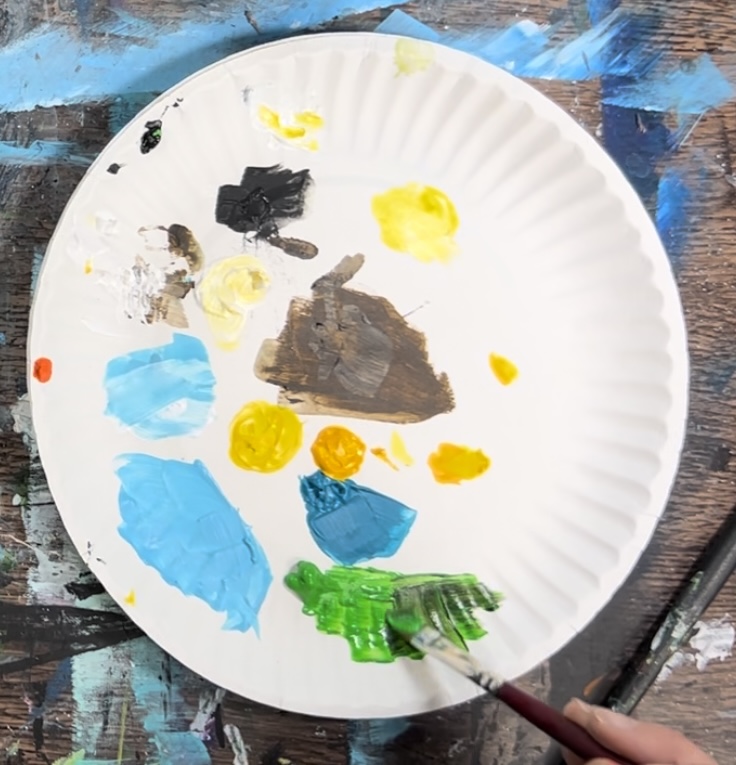
Colors
- Titanium White
- Mars Black
- Raw Umber
- Cadmium Yellow Deep Hue
- Primary Yellow
- Cadmium Orange Hue
- Light Green Permanent
- Turquoise Blue
- Light Blue Permanent
Brushes
- 3/4 Flat Brush
- 12 Bright Brush
- #8 Round Brush
- #4 Round Brush
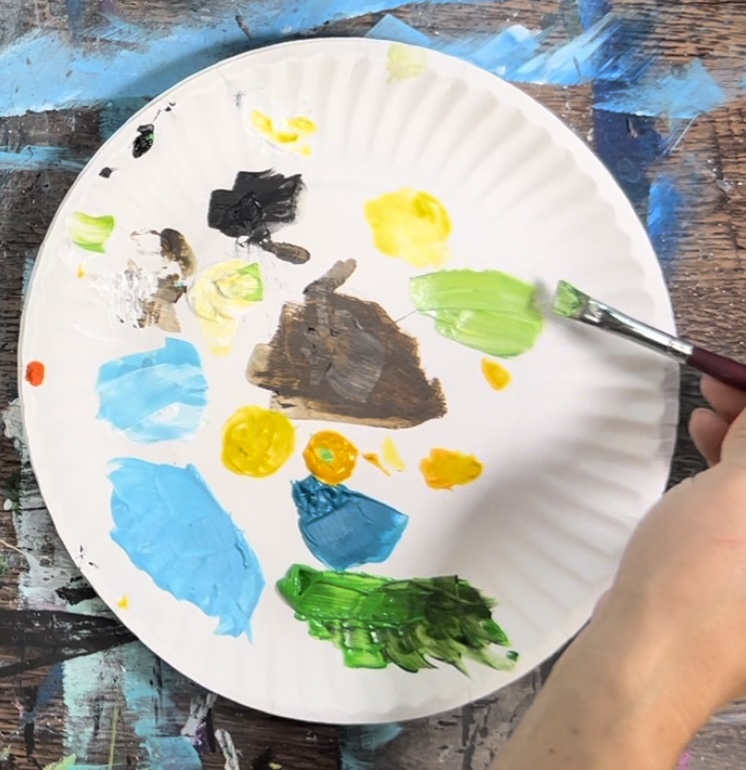
Color Palette:
I used Liquitex BASICS acrylics for this tutorial. If you are using a different brand, you can use the color chart below to help you match colors.
Using Craft Paints?
If you are using craft paints such as Apple Barrel Craft Paints, I would recommend subbing to:
- Black
- White
- Brown Oxide
- Regency Blue
- Laguna
- Yellow
- Pale Daffodil
- Parakeet
- Tropic Orange
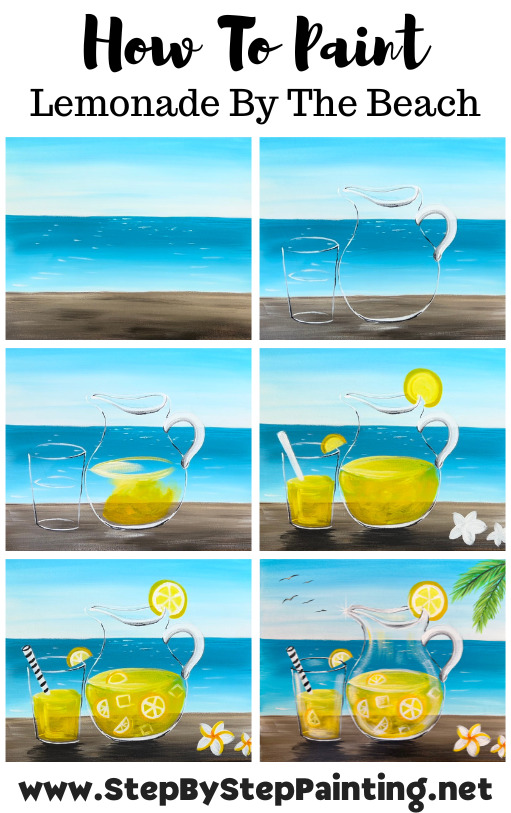
Directions At A Glance:
Traceable:
Video:
Step By Step Instructions:
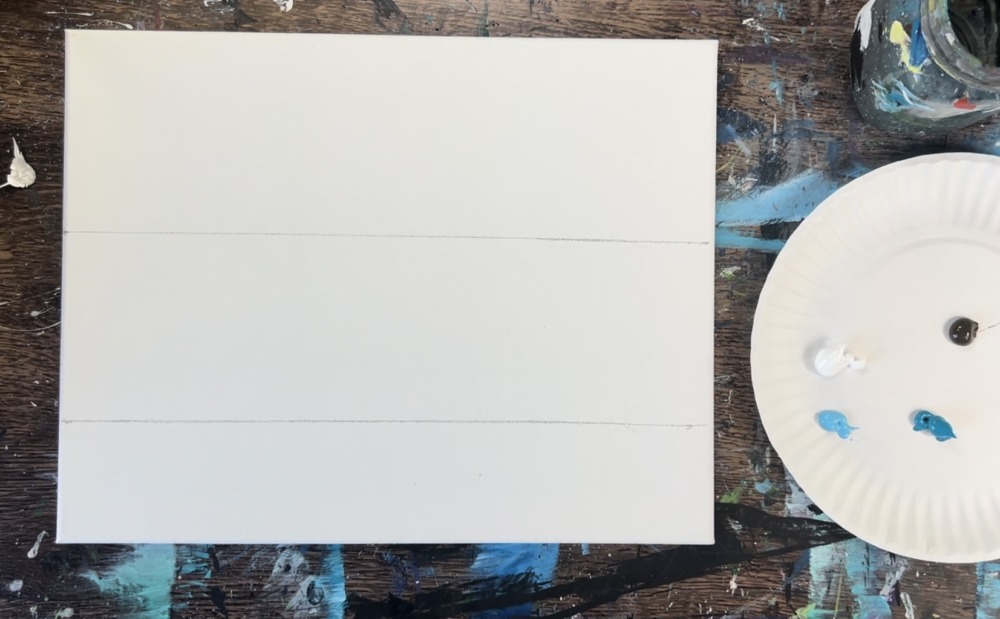
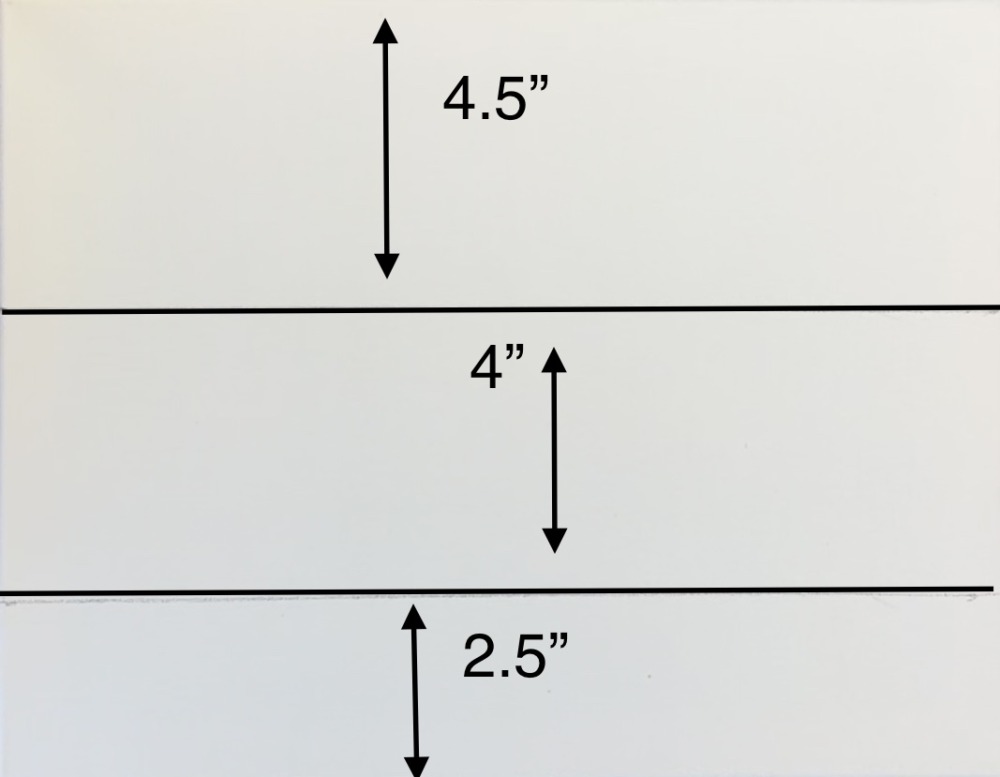
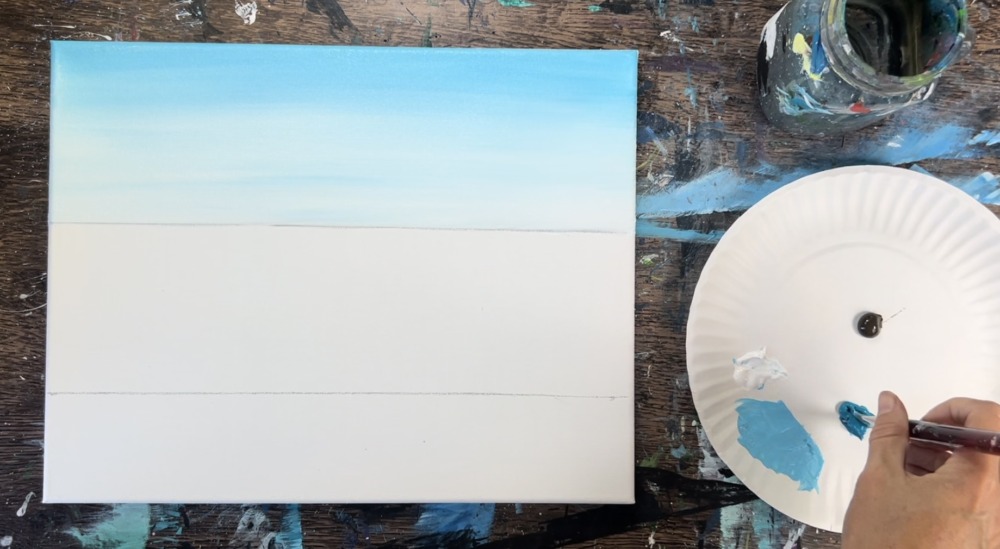
1. Divide The Canvas In Three Areas
Use a ruler to draw two horizontal lines on your canvas. On the bottom, measure 2.5″ and draw a line then draw another line 4″ from that line. The top area/ sky should be about 4.5″ high.
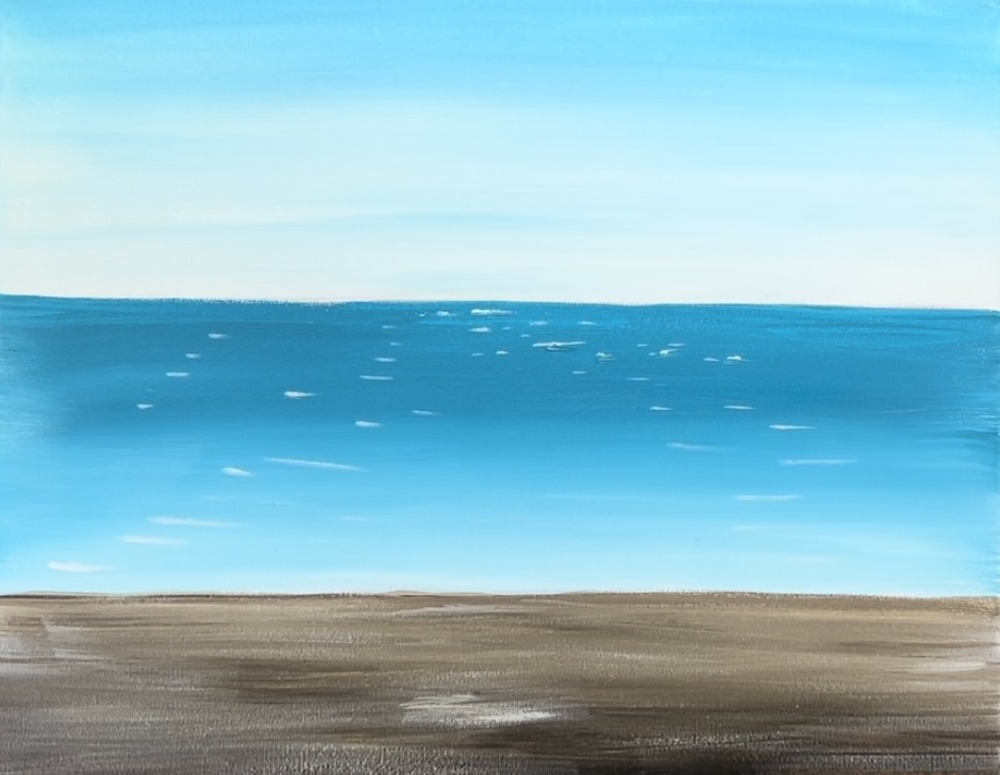
2. Paint Sky
Load your palette with the colors: “light blue permanent”, “titanium white”, “turquoise blue” and “raw umber”.
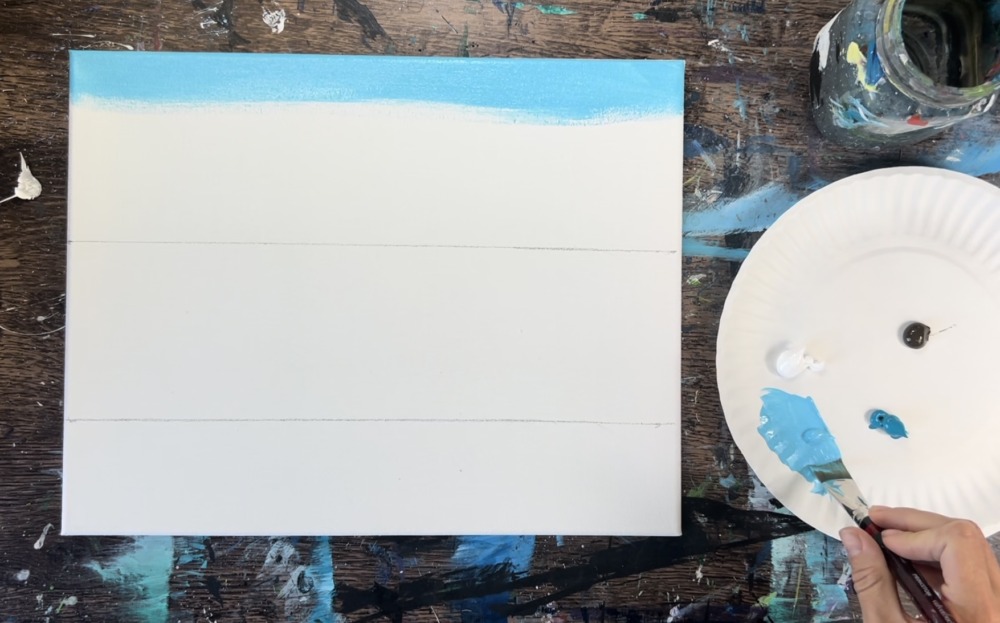
Use the “3/4 flat wash brush” to paint the sky. Start by loading your brush in just “light blue permanent”. Paint left and right strokes all the way across the canvas. Then load a small amount of “titanium white” on your brush and blend that into the blue.
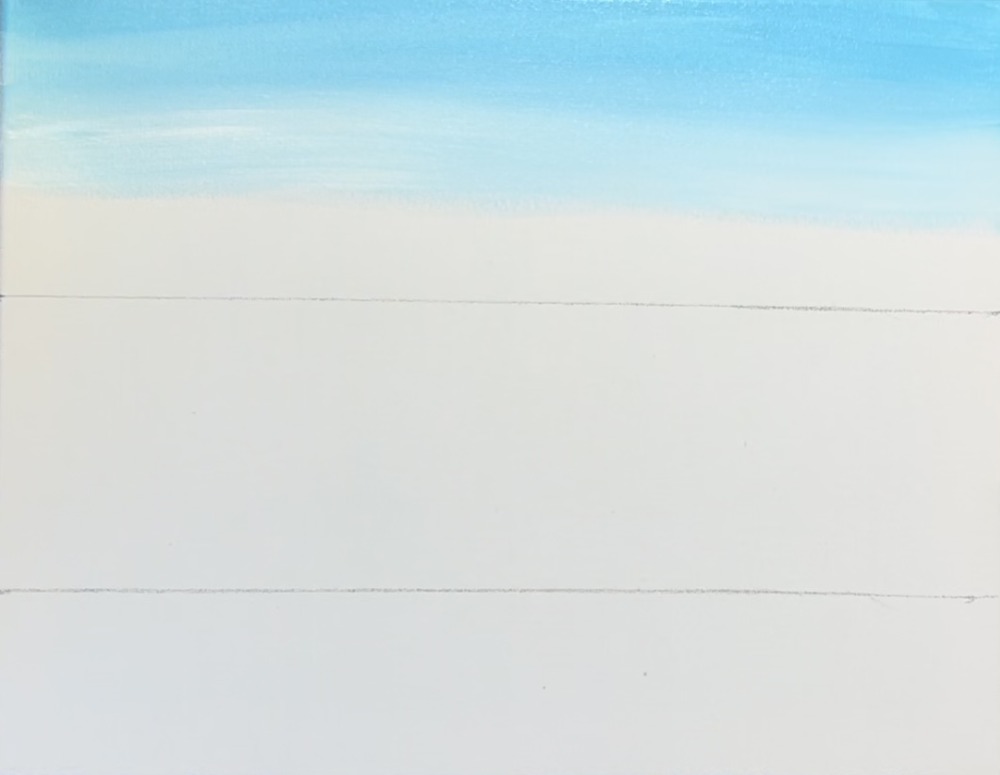
Blend the sky so the blue gets gradually lighter as it approaches the horizon line.
3. Paint Water
Next, rinse the “3/4 flat wash brush”. Load it into just the “turquoise blue”. Paint left and right strokes filling about half of the ocean area.
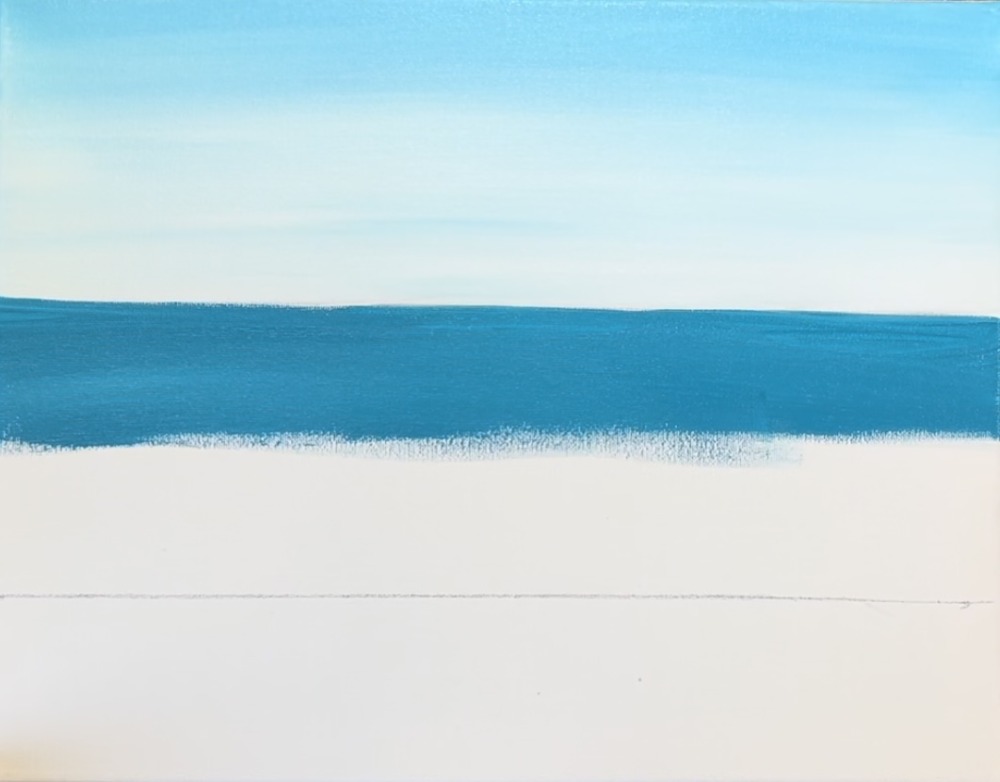
Then blend “titanium white” into the ocean water as you approach the bottom line. Blend it into the turquoise so the blue is darker at the top and lighter at the bottom.
4. Paint Wood Table Area
Load your palette with “raw umber”. Then paint the table area a solid coat of brown. Towards the top, mix a little white into the brown so that it gets lighter.
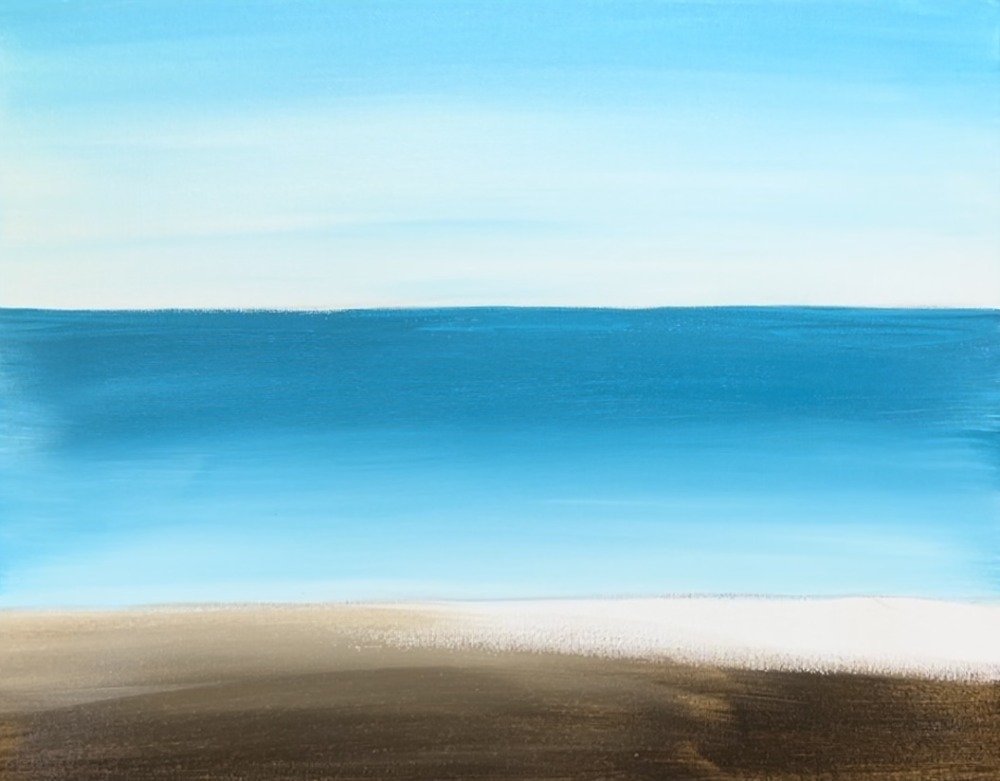
Create a faux wood look by adding variations of brown and white but not mixing the two colors all the way.
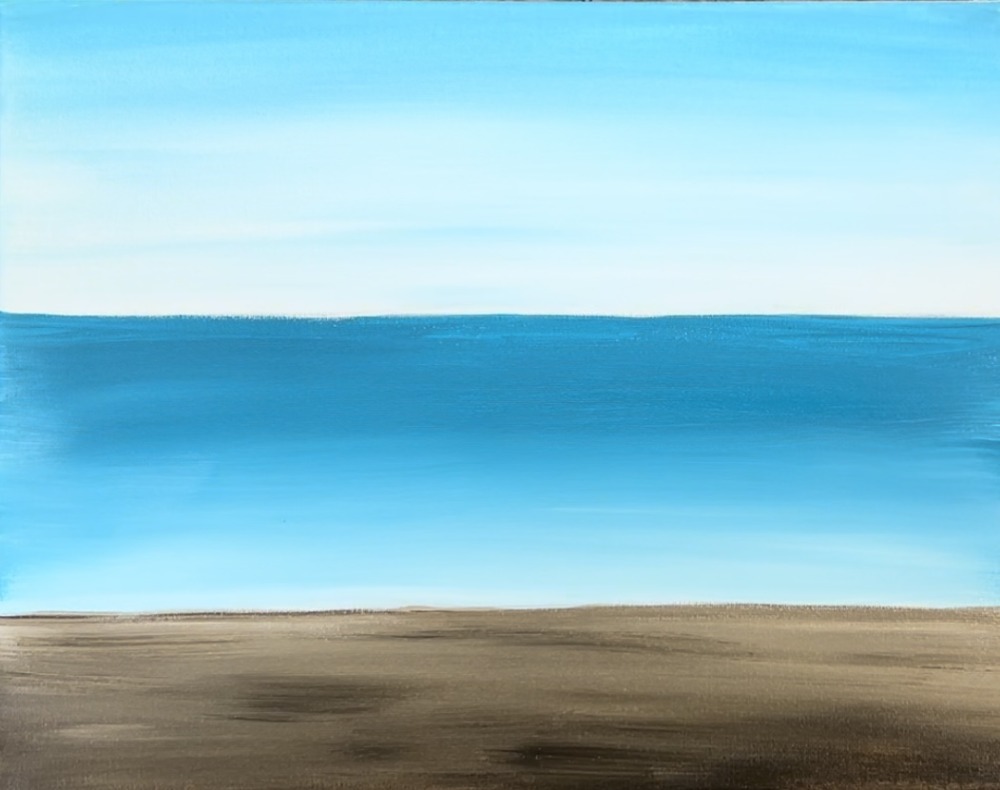
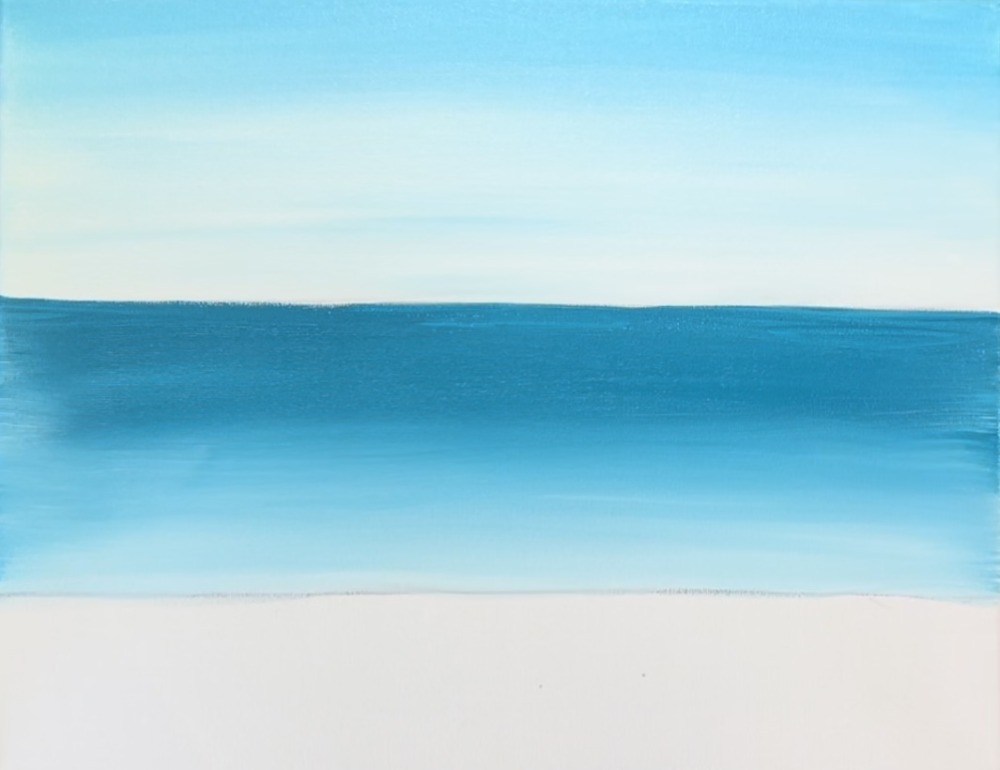
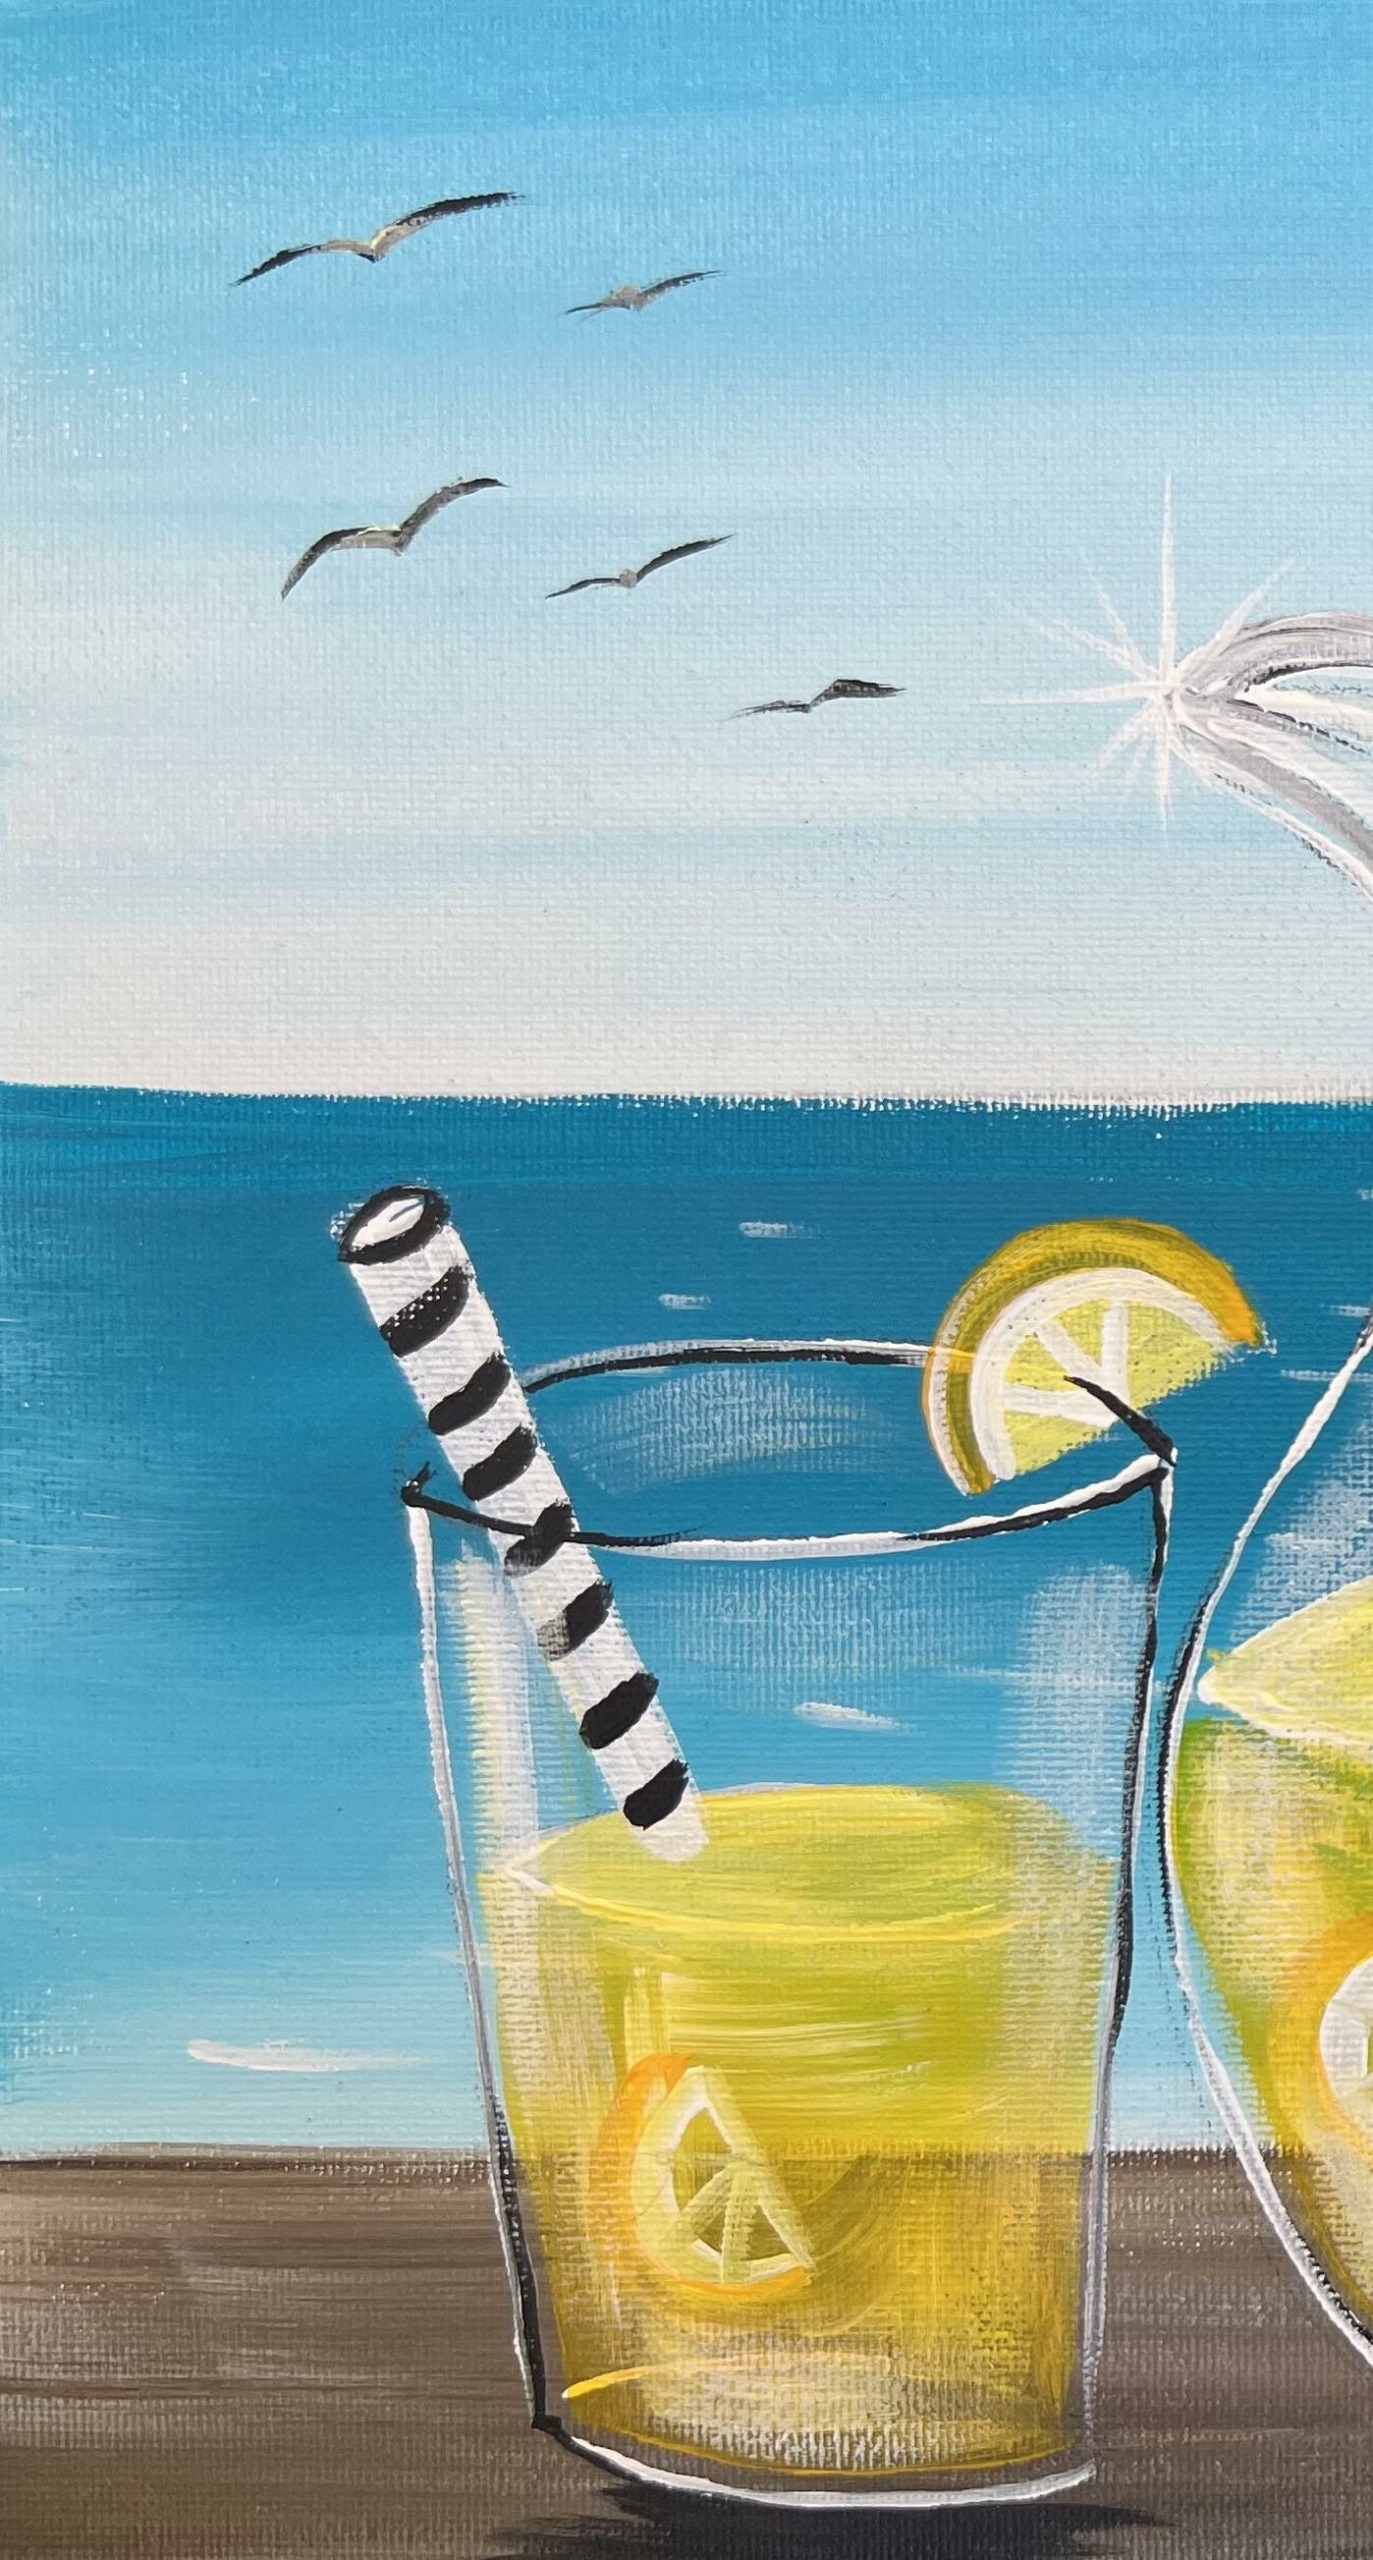
5. Paint Water Lines
Use a “#4 round brush” and “titanium white” to paint the water lines. Start in the back just under the horizon line. Paint smaller and more narrow lines. Then paint wider and more spread apart lines towards the bottom of the water area.
Wait for this to dry before going onto the next step.
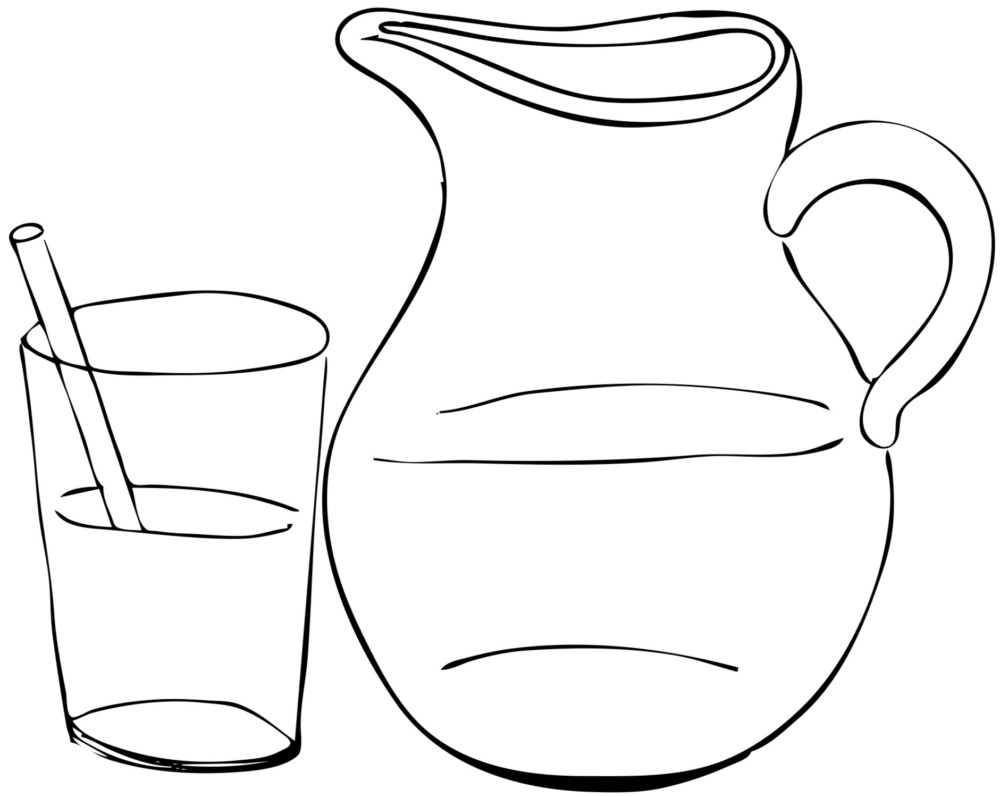
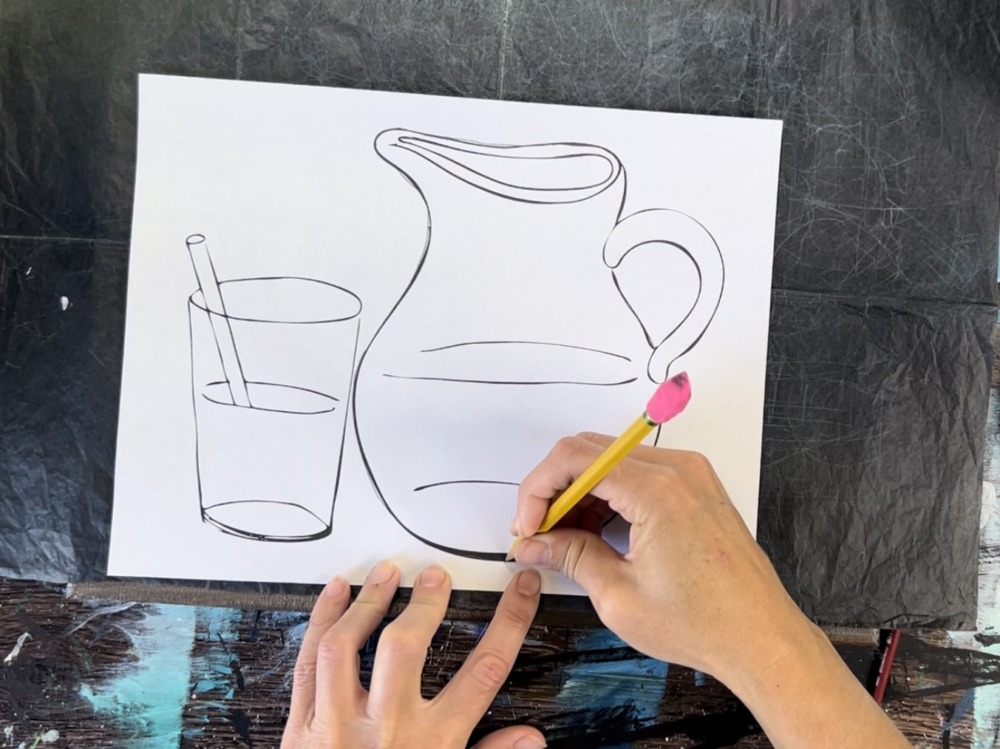
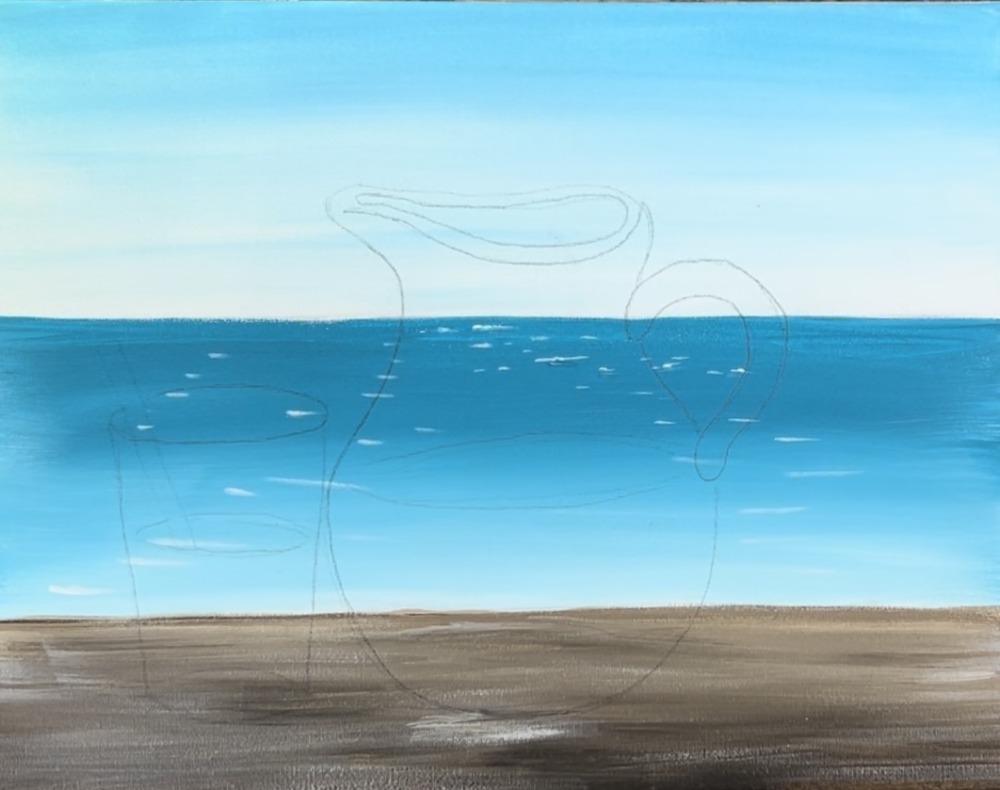
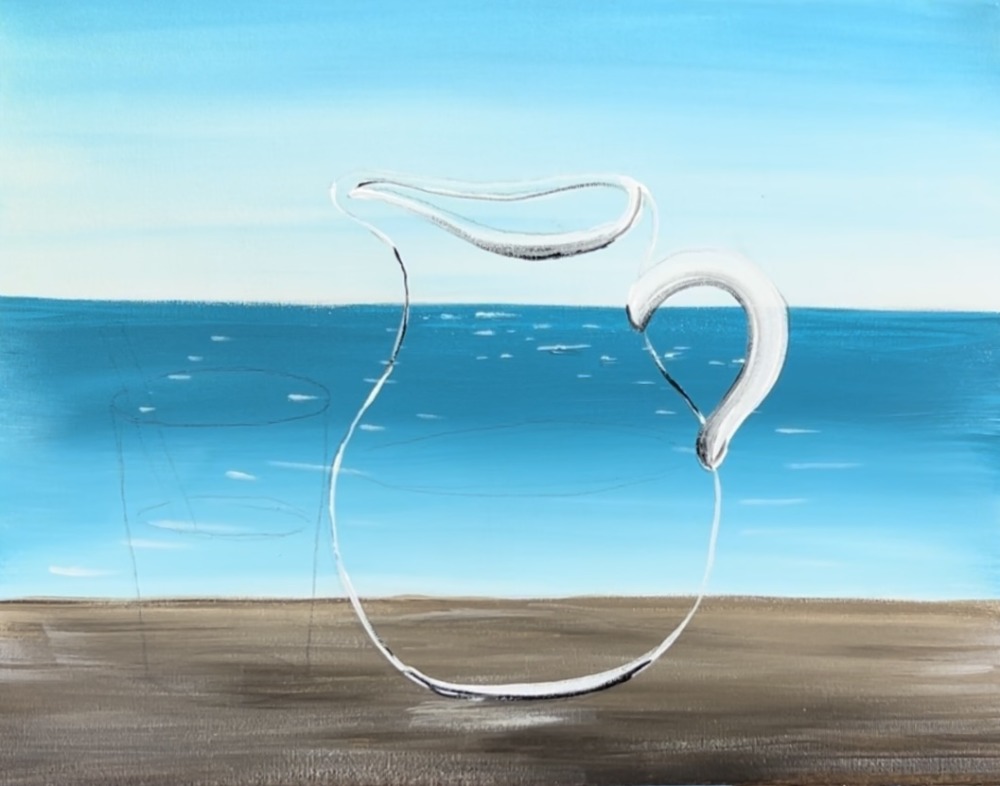
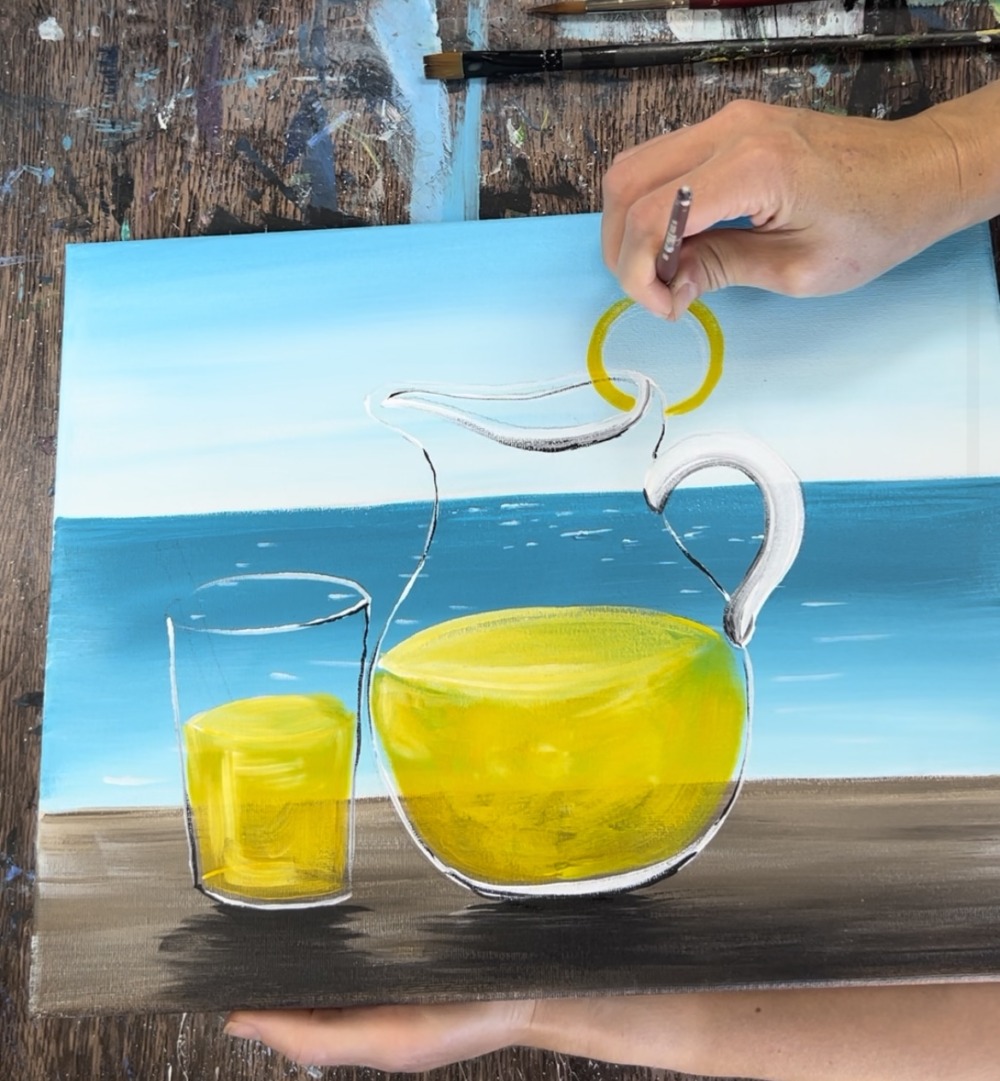
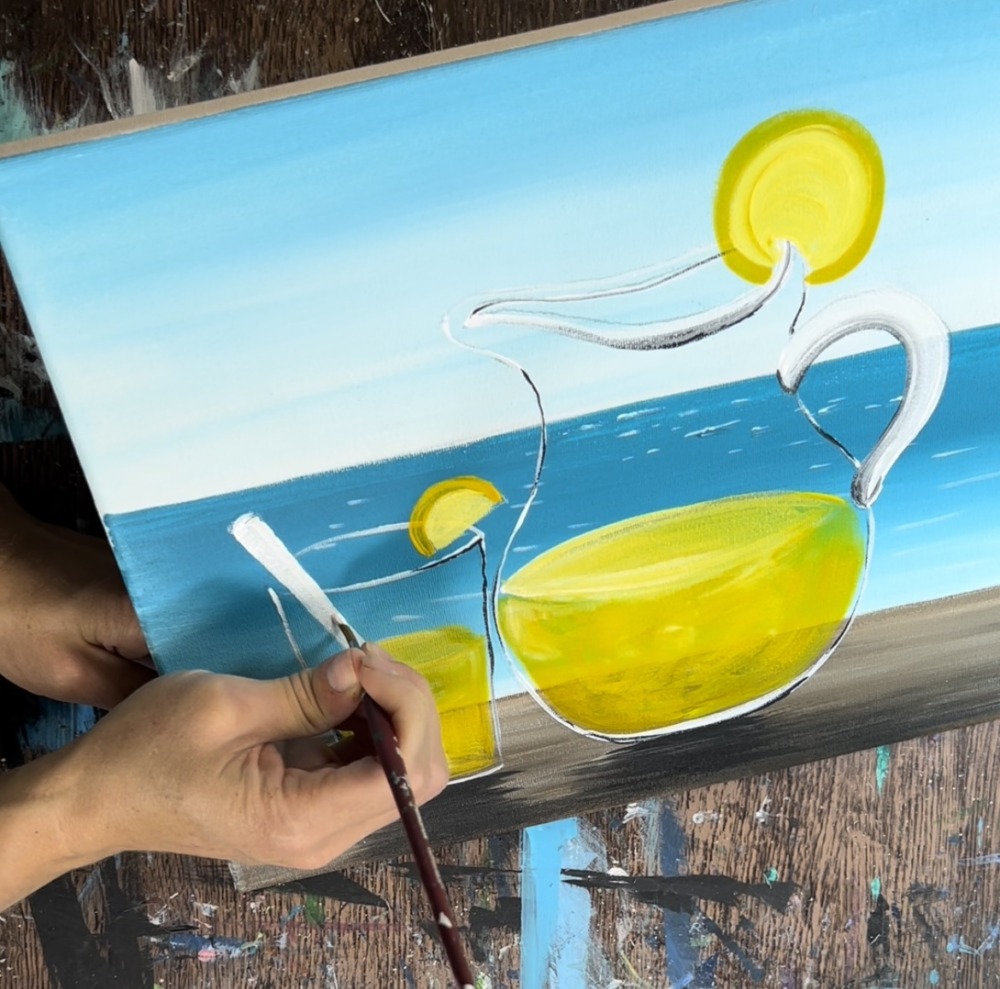
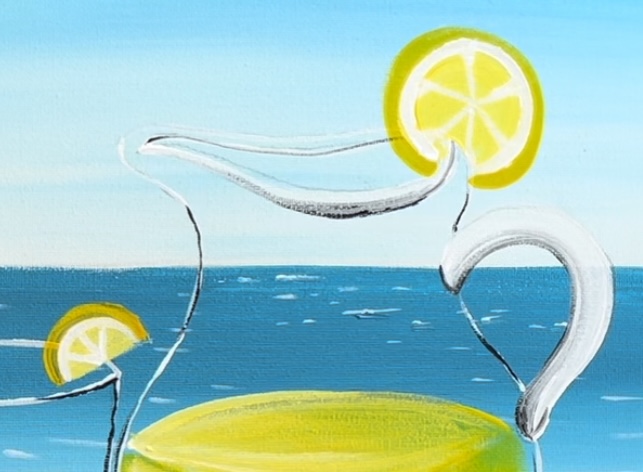
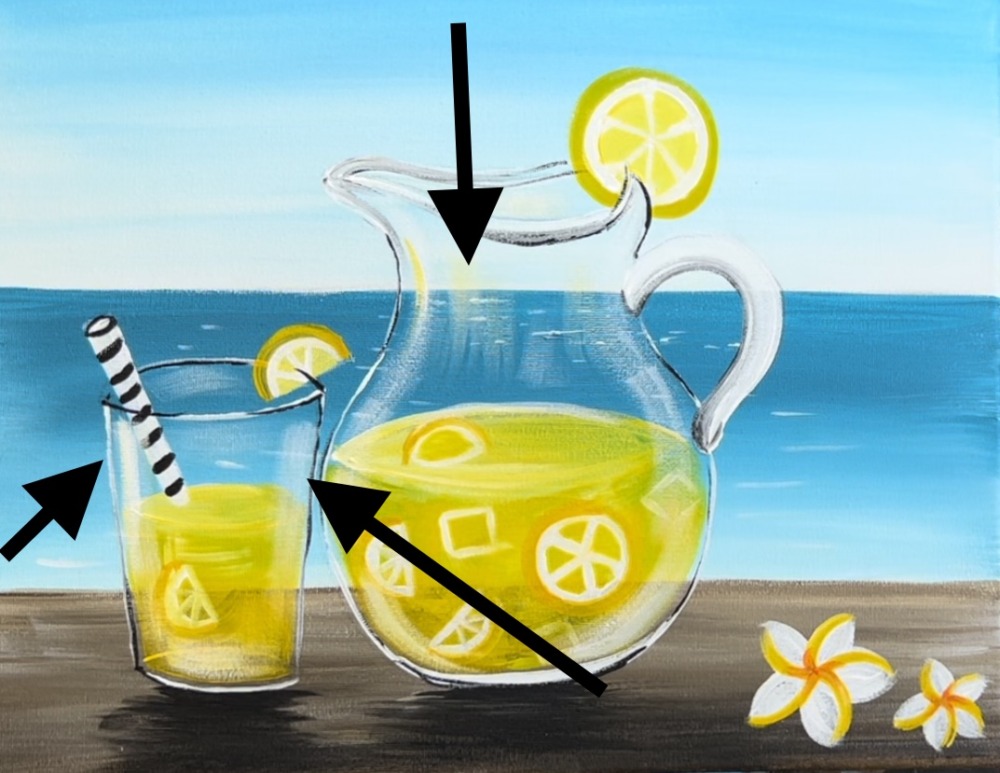
6. Draw/ Transfer The Pitcher & Glass
Position the traceable so the bottom of the pitcher is about 1.5″ from the bottom of the canvas and the furthest point of the straw is about 1.5″ from the left side. Place a sheet of graphite paper below the traceable and trace firmly with a pencil.
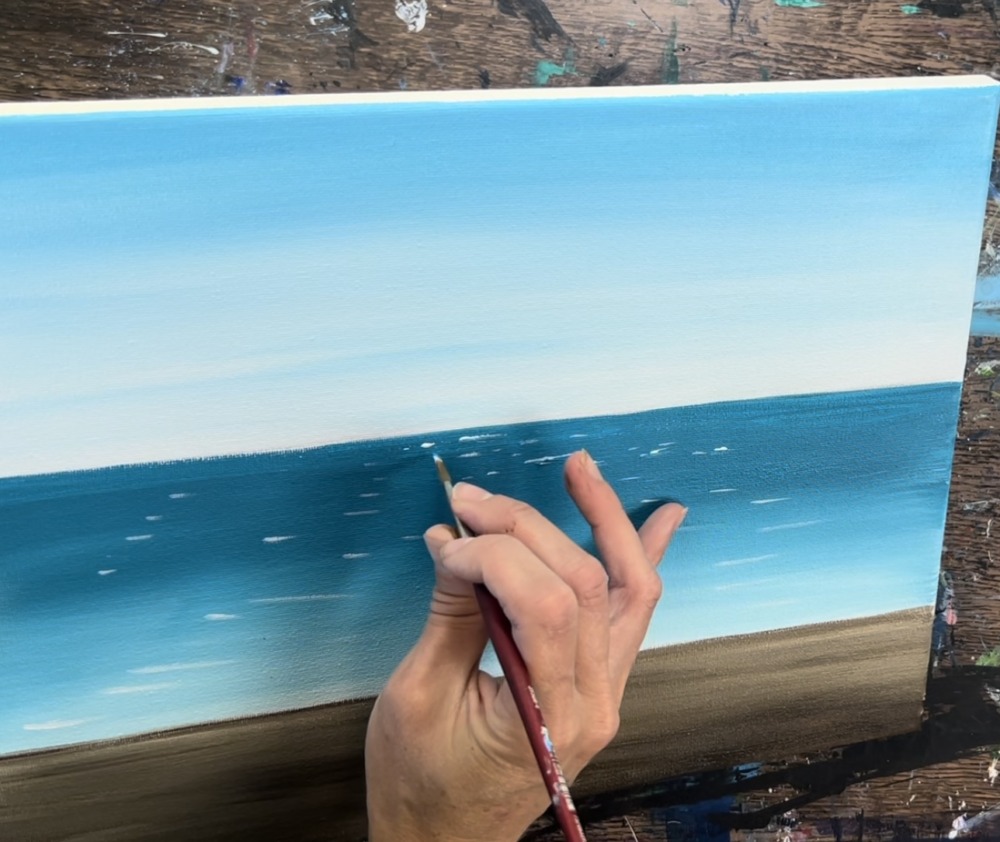
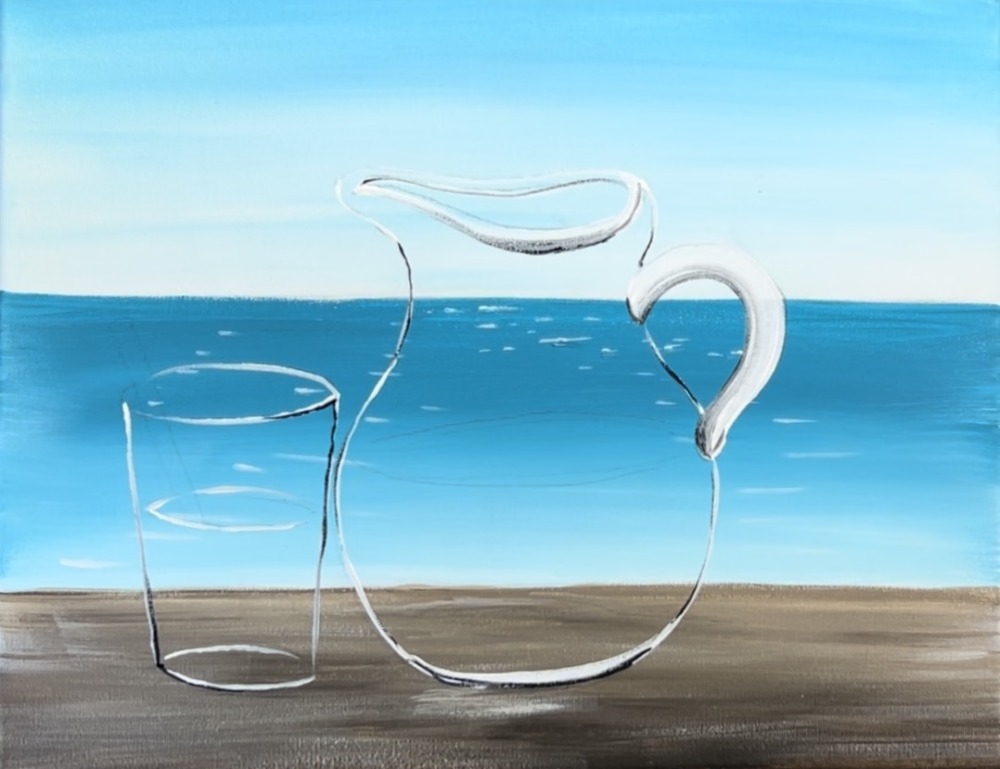
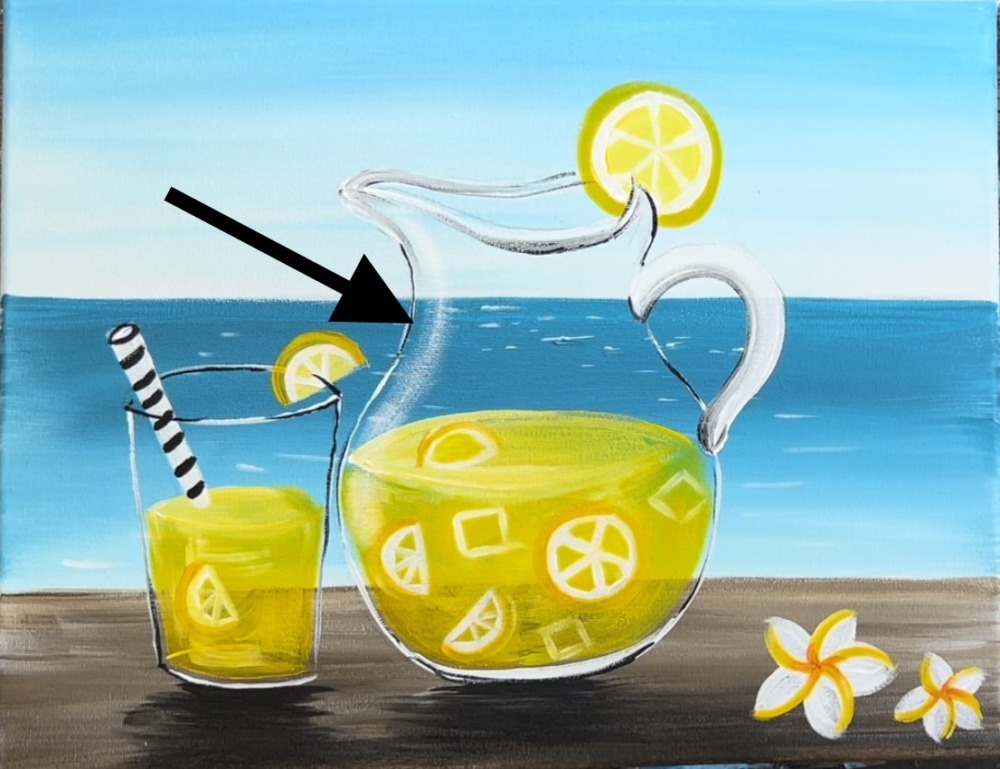
7. Paint The Pitcher & Glass
Next, load your palette with “titanium white” and “mars black” (only a small amount is needed). We will be painting the edge of the glass. Basically this requires just tracing the lines you drew with pencil!
Use a “#8 round brush” (or any brush that has a really fine tip on it). Trace the entire pitcher with “titanium white”.
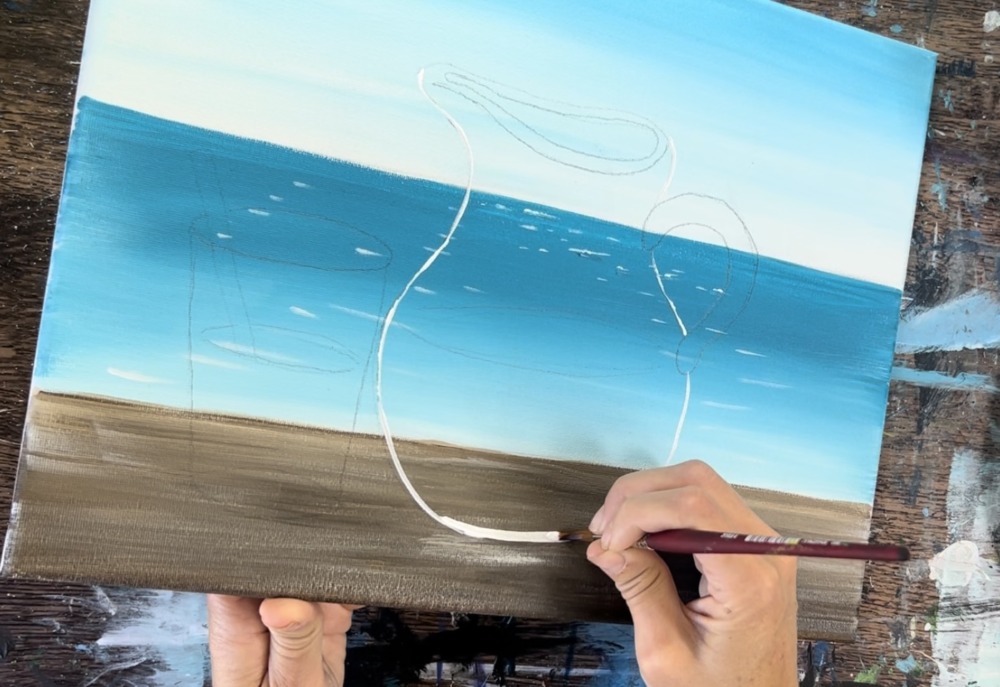
Some areas will be thicker such as the bottom of the pitcher and the top. Press harder on the brush to create those as thicker and solid. Also, paint the handle a solid coat of “titanium white”.
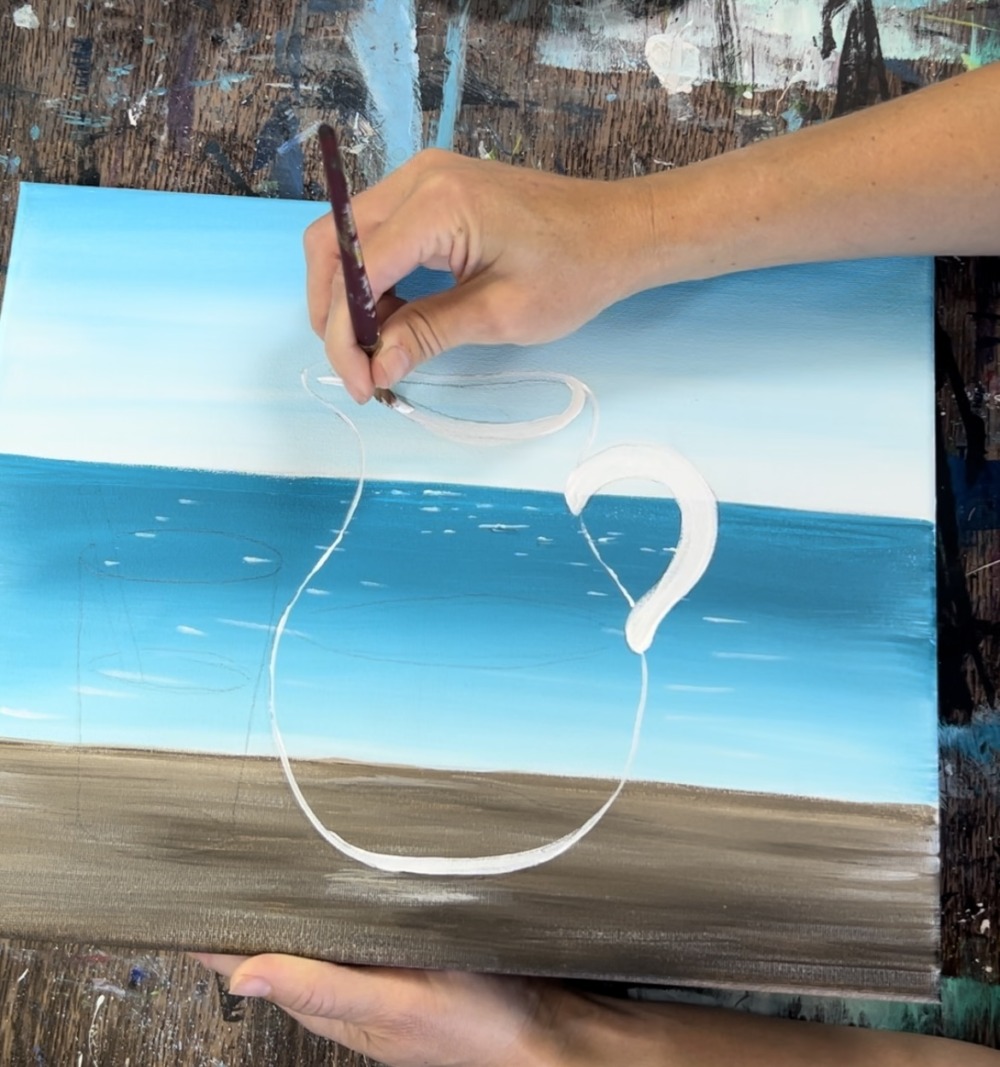
Before the white dries, blend in a little bit of black on the left side of the handle. Do this with curved strokes. The left side of the handle should appear slightly darker and the right side slightly lighter.
Then loosely paint some of the edges of the glass with mars black paint but leave most of the lines mostly white.
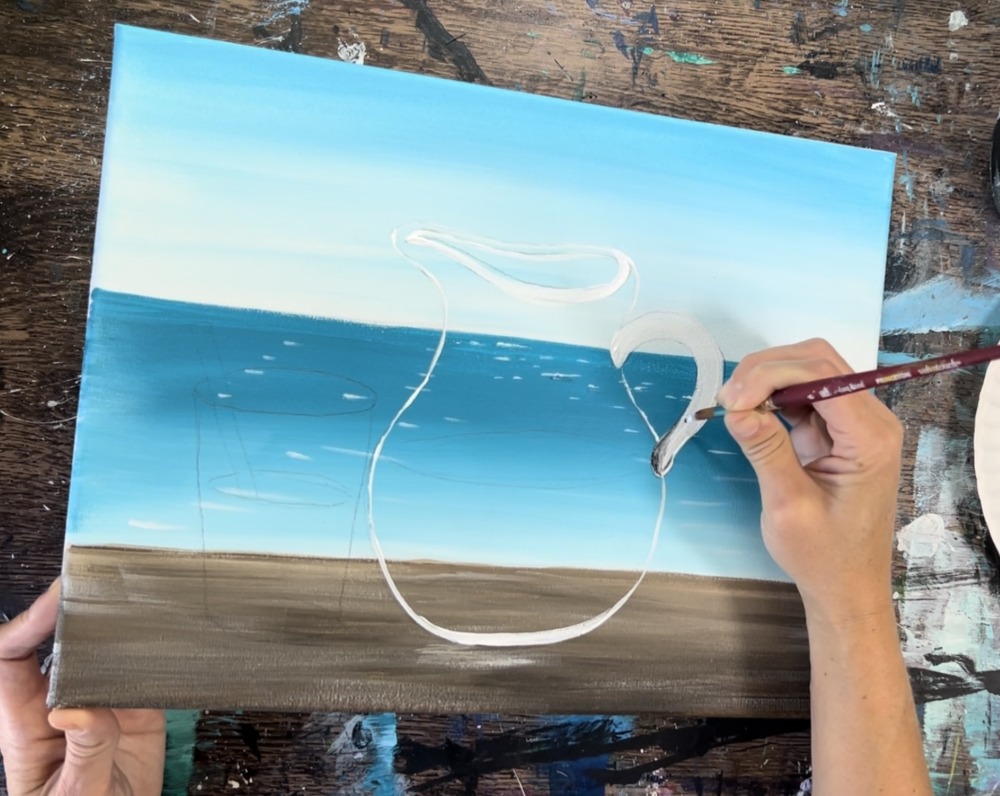
Then paint the glass cup. Use the same brush and titanium white paint to outline all the lines you drew with pencil.
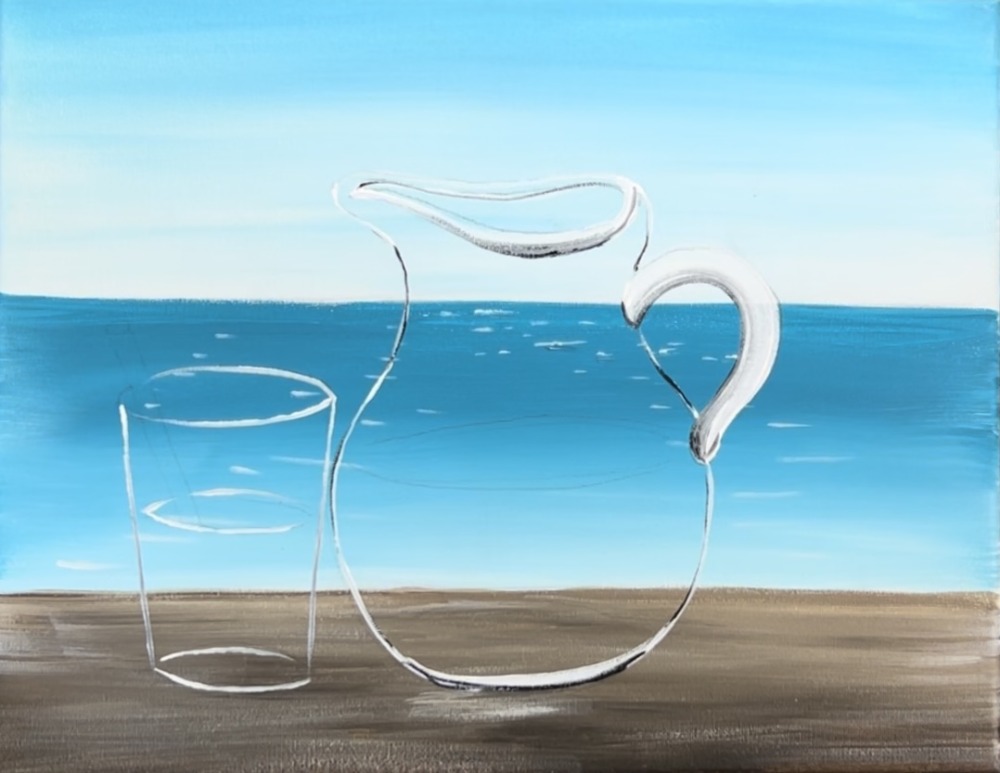
Then loosely outline some of the cup lines with black paint but not all of the lines.
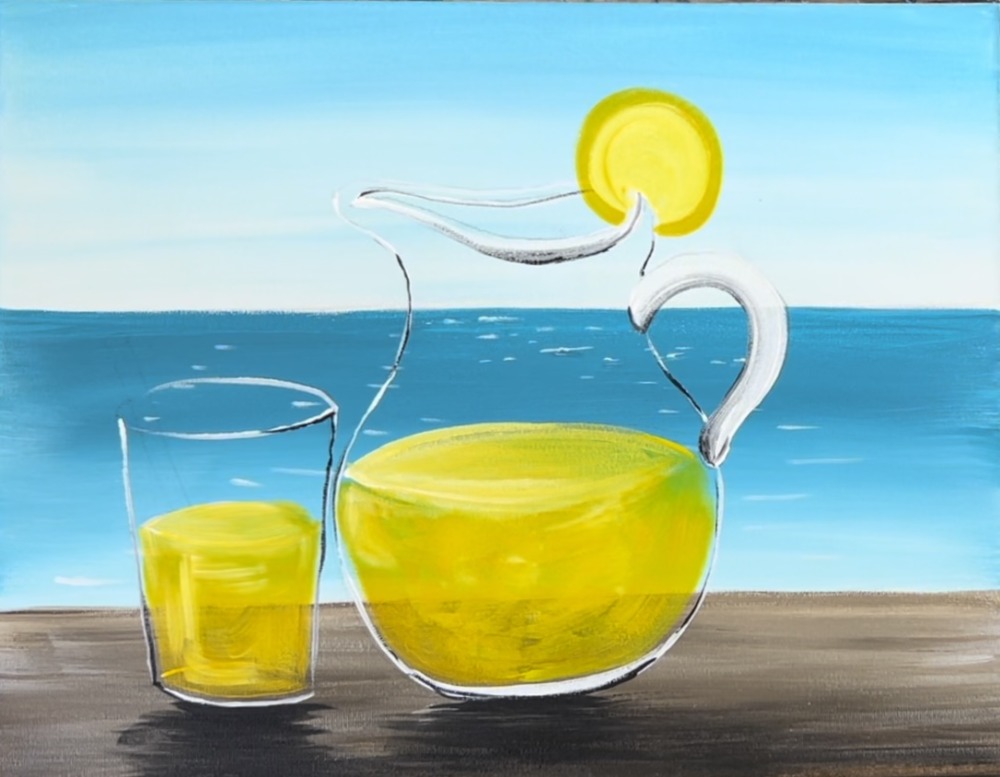
8. Paint Lemonade
Load your palette with: “cadmium yellow deep”, “primary yellow” and more “titanium white” (if needed). Use your “12 bright brush” to paint the lemonade, starting at the bottom.
The bottom of the liquid is going to be darker than the top. Also, you will be painting with short, expressive strokes.
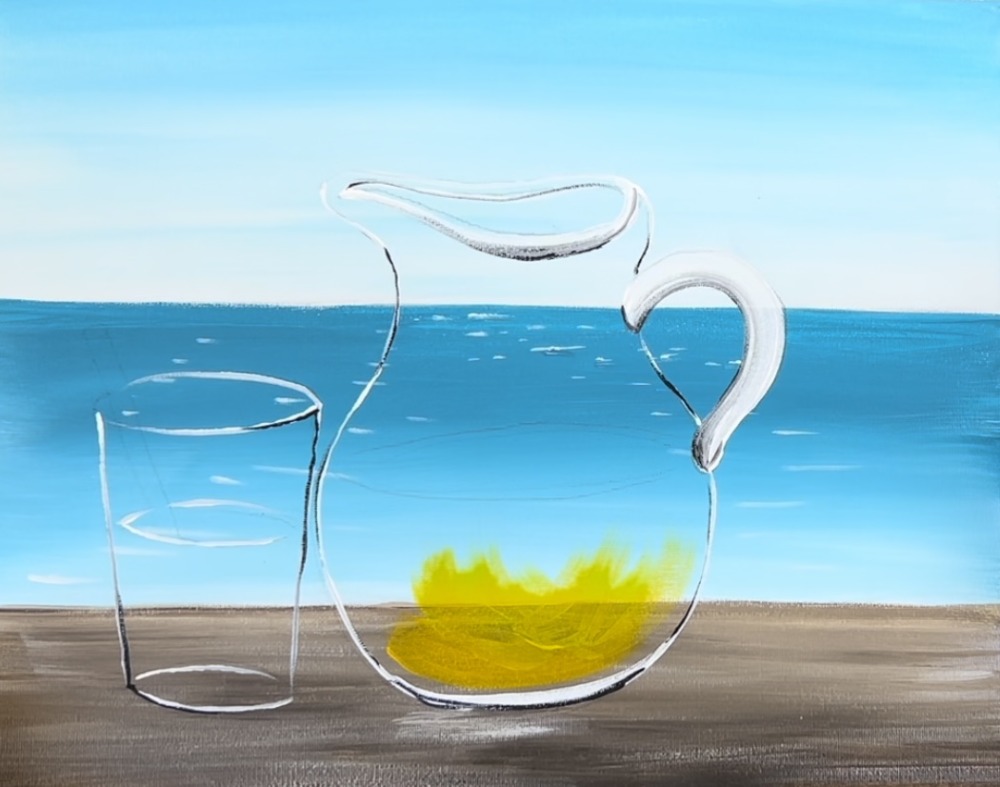
Load the tip of your brush in just the “cadmium yellow deep”. Paint the bottom of the inside of the pitcher.
Then load the “primary yellow” on your brush and paint the lighter yellow blending with the darker yellow. The colors blend, wet-on-wet on the canvas. Try not to over blend the colors.
Then load “titanium white” on your brush with the yellows (don’t rinse your brush). Outline the curve on the top.
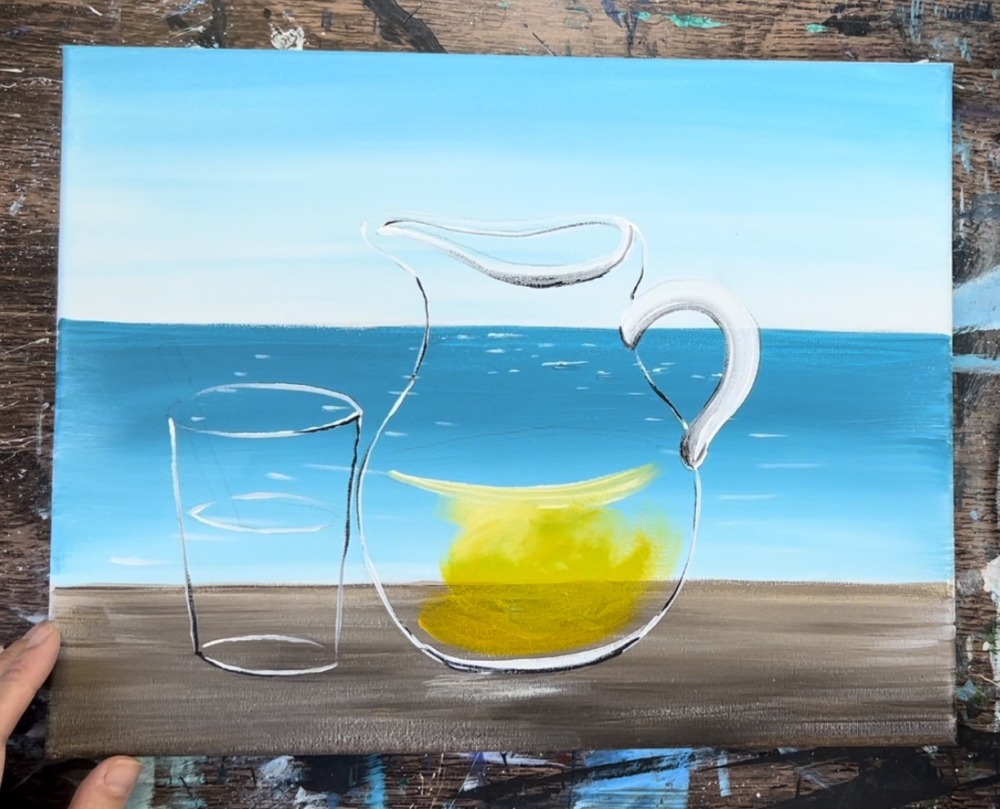
Then fill in the top part of the lemonade with white mixed with “primary yellow”. Paint this so that it is flat (strokes going left and right instead of angles).
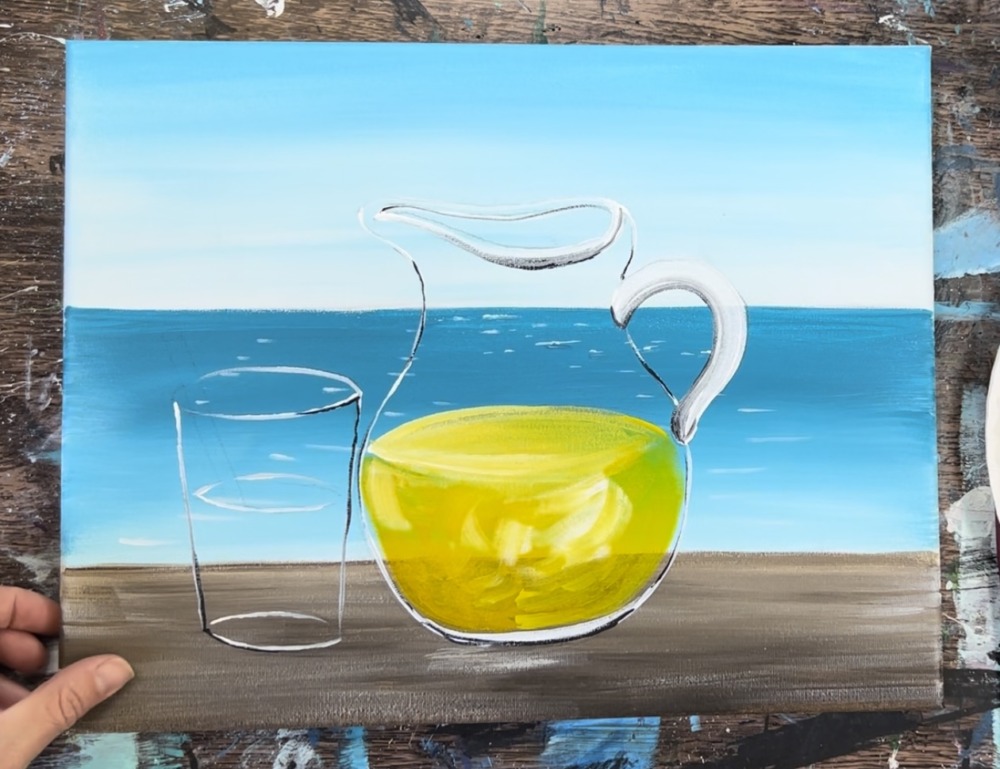
Then use the “12 bright brush” to paint the lemonade inside of the glass cup. Start at the bottom with the darker yellow. Paint vertical strokes on the sides and then curved strokes in the middle.
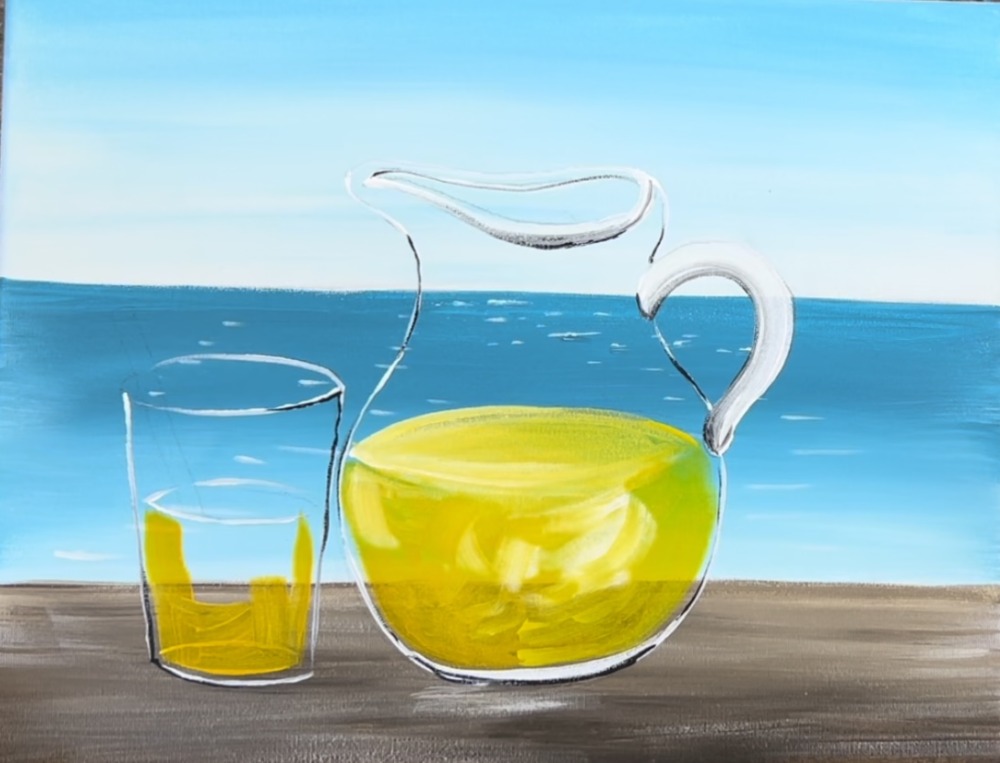
Then add the “primary yellow” and bits of white to paint contouring/ expressive strokes but not blending the yellow all the way.

This needs to dry before painting the lemon pieces inside.
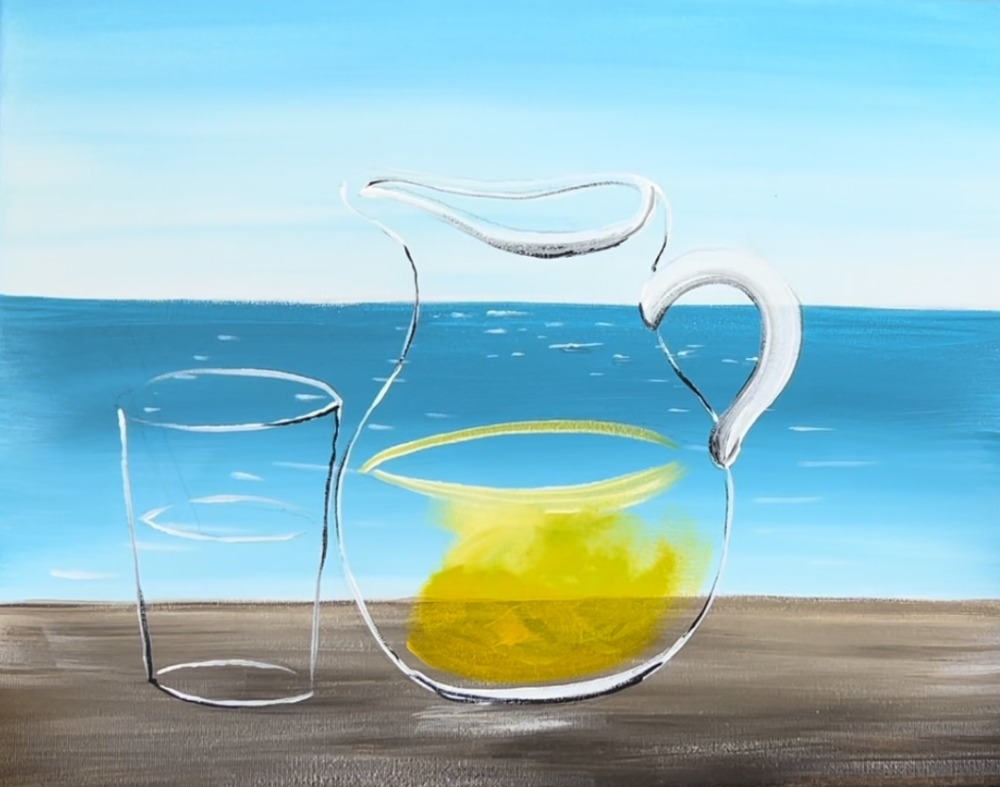
9. Paint Lemons
I used a pencil to draw this circle first to get the placement right and then painted it in. Draw the circle on the far left edge of the pitcher, leaving a small gap so it looks like it is on the edge.
Use the “#4 round brush” and the color “cadmium yellow deep” to paint the outer lemon peel.
Then paint the middle part of the lemon (the flesh) a lighter color. Mix “titanium white” with “primary yellow” to make this light lemon color.
Repeat this same process for the half lemon on the glass. Draw a half circle on the side of the rim on the right and then paint the lemon peel with the darker yellow.
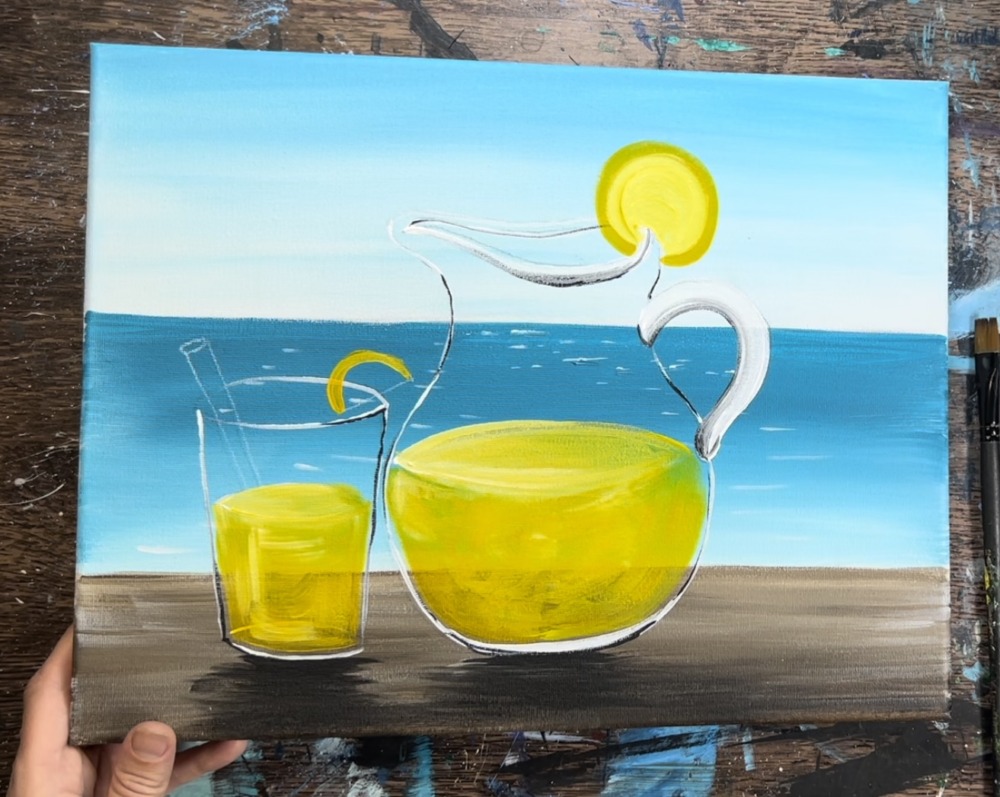
Use “titanium white” mixed with “primary yellow” to paint the inside of the half circle.
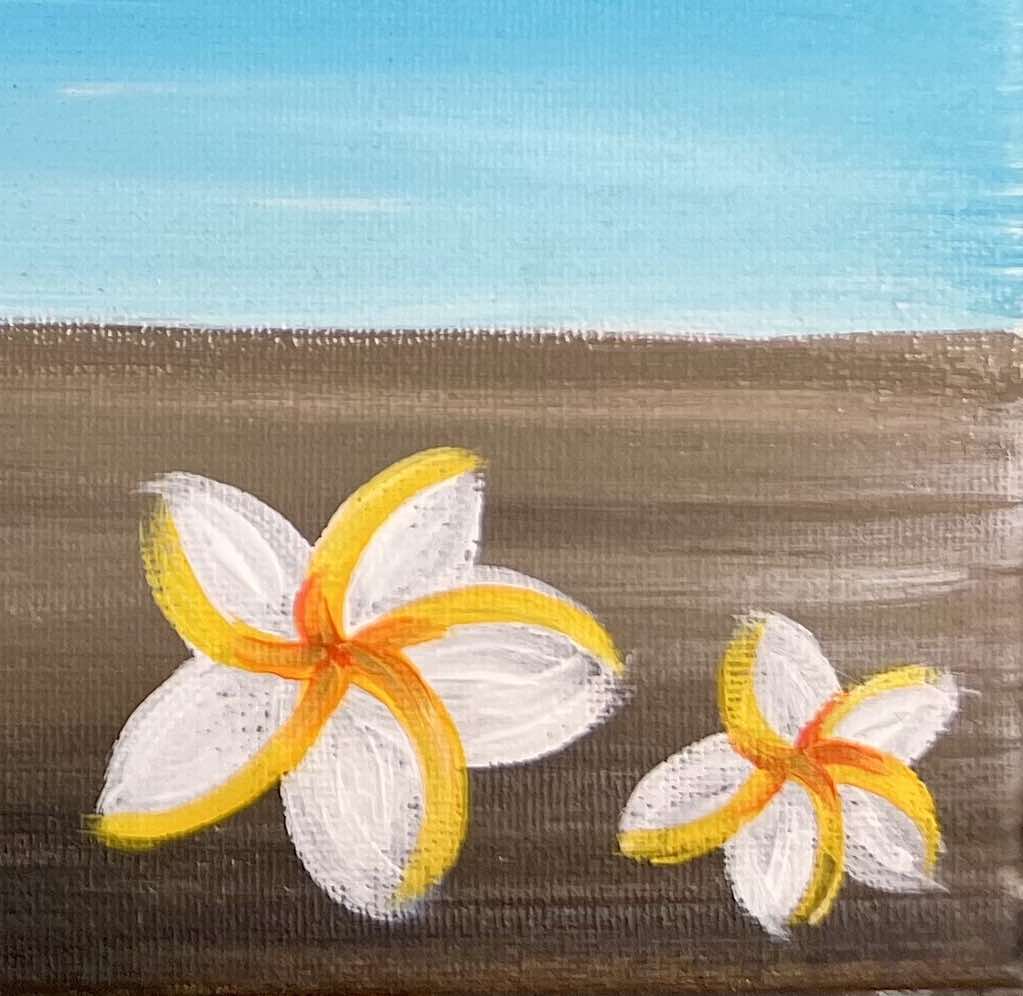
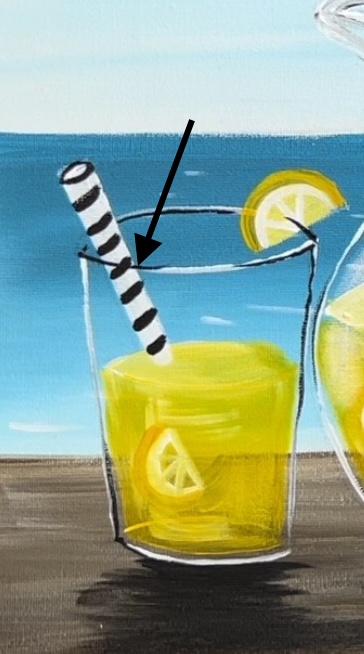
10. Paint Straw & Plumerias
Use “titanium white” and the “#4 round brush” to paint the shape of the straw. Don’t worry about it overlapping the rim or not. We can re-paint that part of the glass rim later.
Paint a five petal plumeria flower in the lower right part of the table. Use the “#4 round brush” and “titanium white” to paint oval shaped petals that go to a soft point on the tip. Each petal slightly overlaps the one next to it.
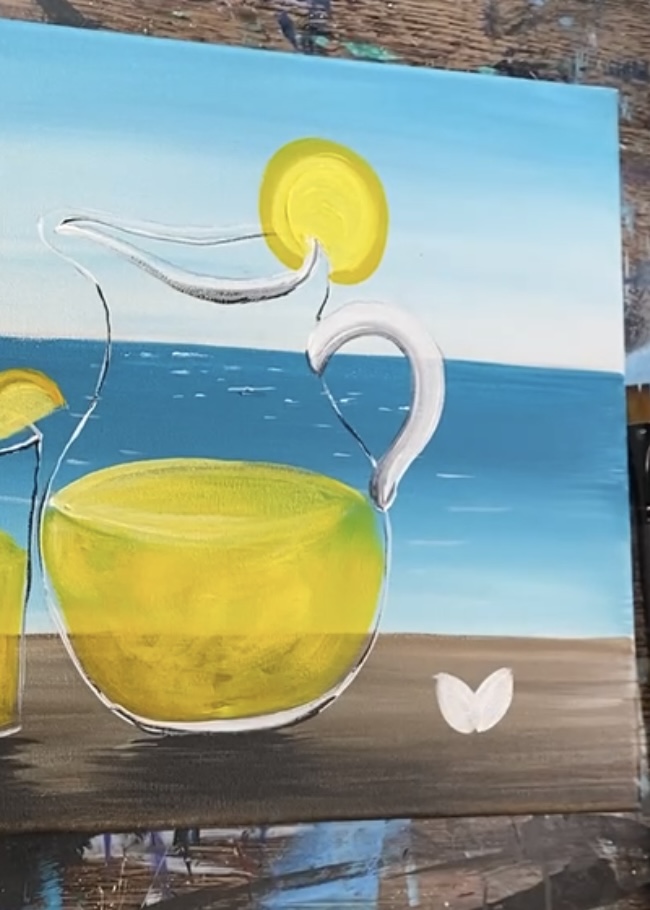
Paint each of the petals solid white.
Paint a second plumeria. I decided to make this one smaller.
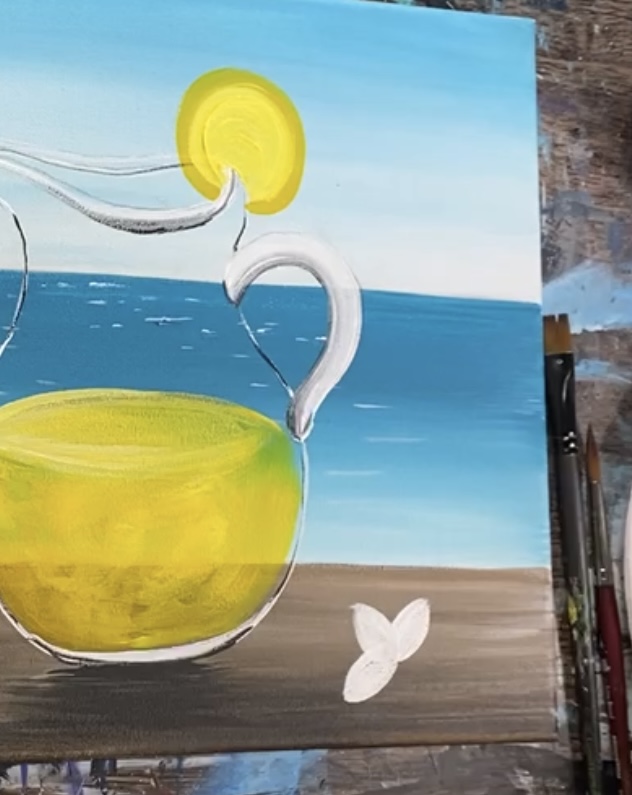
Next, use the “cadmium yellow deep” color and the “#4 round brush” to outline the edges of each of the petals. Start with the petal on the top and outline just the right side of the petal. Start each of your “strokes” in the very center of the flower and go to the top of the flower. Then go to the next petal on the right and repeat this going in a clockwise direction.
When you paint the one side of each of the petals, it will make it look like the petals are overlapping each other, much like a plumeria.
Repeat this for both of the flowers.
Then add “cadmium orange hue” in the center of each of the flowers. Paint just a dot in the very center and then blend that dot over some of the yellow without outlining all of the yellow. The point of this is to make the center of the flowers slightly darker.
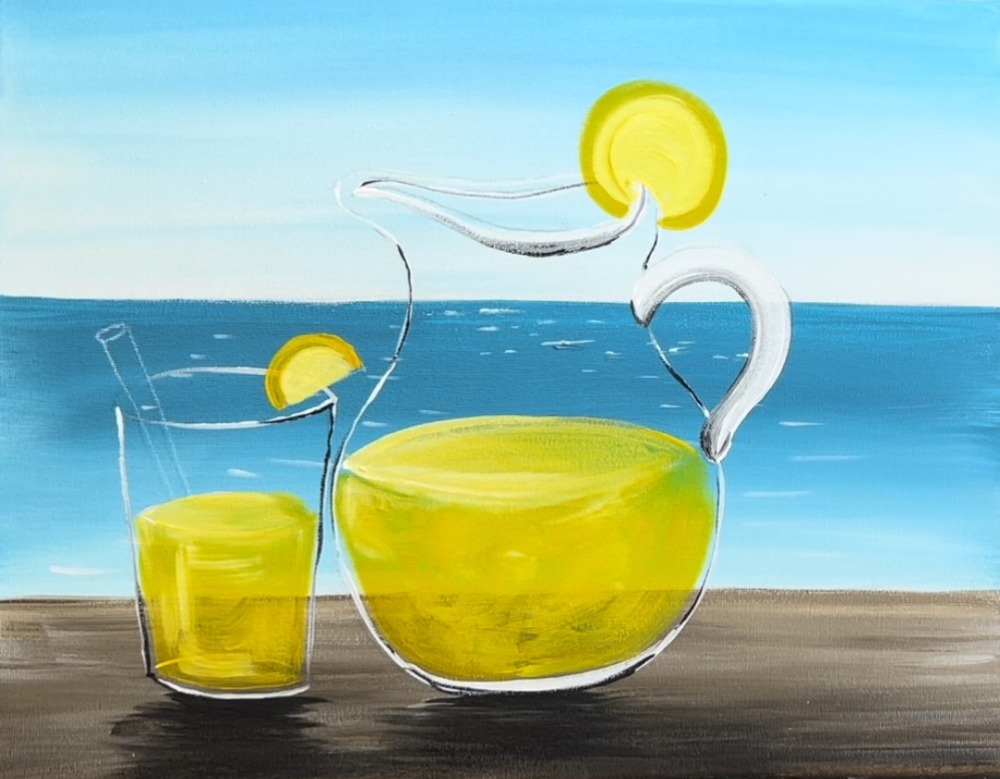
11. Paint Stripes On Straw
Next, use “mars black” and the “#4 round brush” to paint the stripes on the straw. Paint thick diagonal lines.
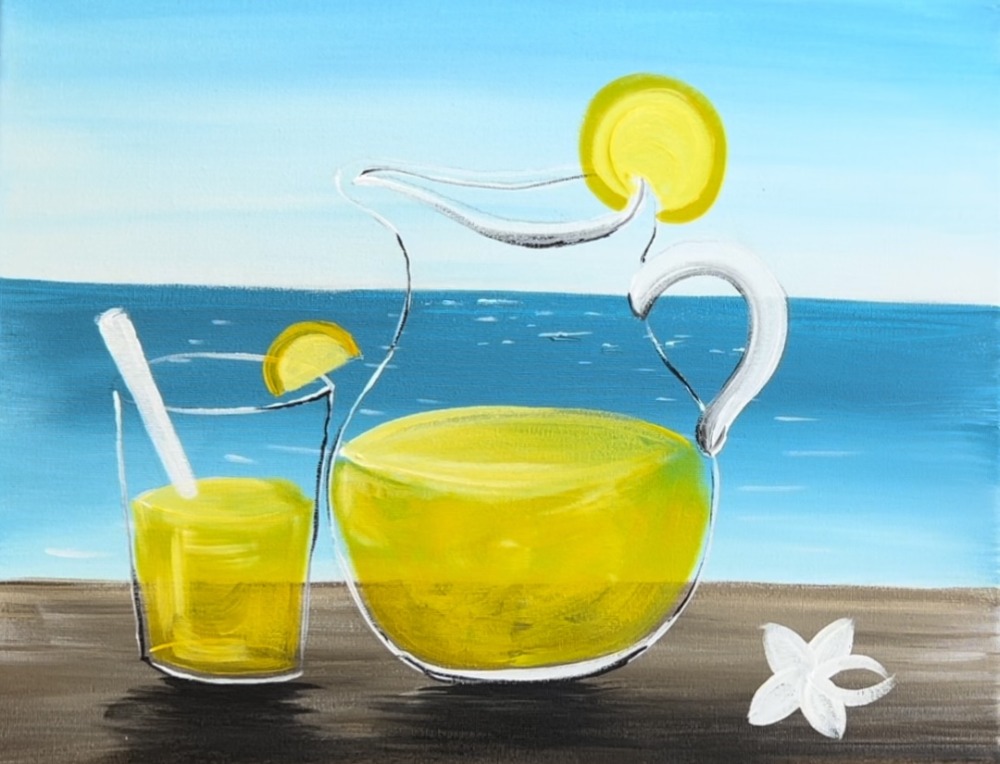
12. Paint White Detail On Lemon Slices
Next, paint the white lines inside each of the lemon slices. Use “titanium white” for this. First paint the inside of the circle. Then paint diagonal lines that divide the circle.
Paint the white lines on the half slice. Paint an inner white arc and then three lines going to the center of the edge.
13. Paint Lemons Inside Pitcher & Glass
Use a “#4 round brush” and “titanium white” to paint the lemons inside of the pitcher. Use a “#4 round brush” to paint the circle and then paint diagonal lines going to the center (a wheel shape).
Then use the dark yellow to paint the outer peel. If needed, add a little orange to the yellow so it is darker and shows up. Paint more half circle slices with the white lines and the dark yellow as the peel.
Then paint squares for ice cubes using “titanium white”.
Then paint a slice or two in the glass of lemonade.
Paint the top rim edge of the glass with “mars black” and the “#4 round” brush so that it overlaps the straw.
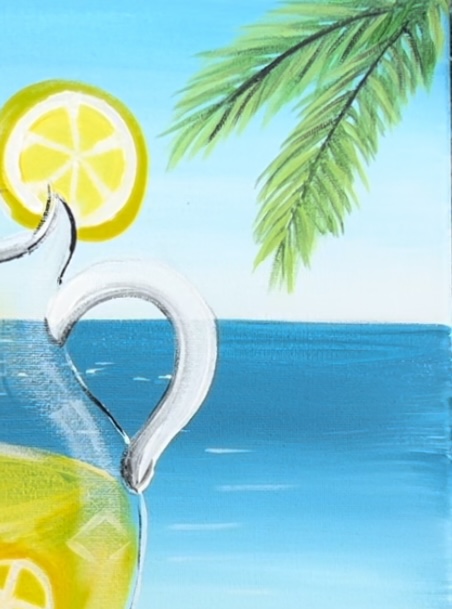
12. Paint Glair On Glass
Make sure everything on your painting is dry before doing this step!
Use a “#12 bright brush” and titanium white to dry brush the glares on the glass pitcher and cup. To do this, load just the tip of the brush in titanium white and wipe the paint off. Start by painting a curve on the inside left side of the pitcher. This paint stroke should be dry and translucent.
Then paint another glare on the right side of the glass that curves the entire inner edge.
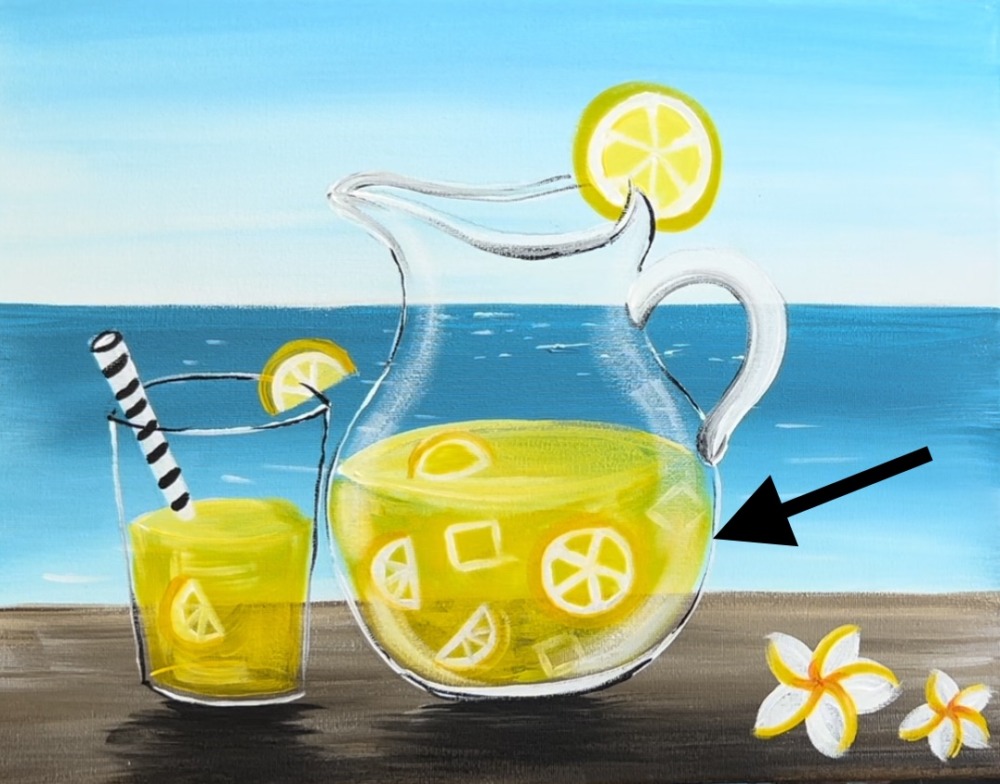
Paint vertical marks in the upper part of the pitcher. Then paint vertical glare marks on the cup.
Try not to add too much glare! Remember, this is glass it it should be very translucent.
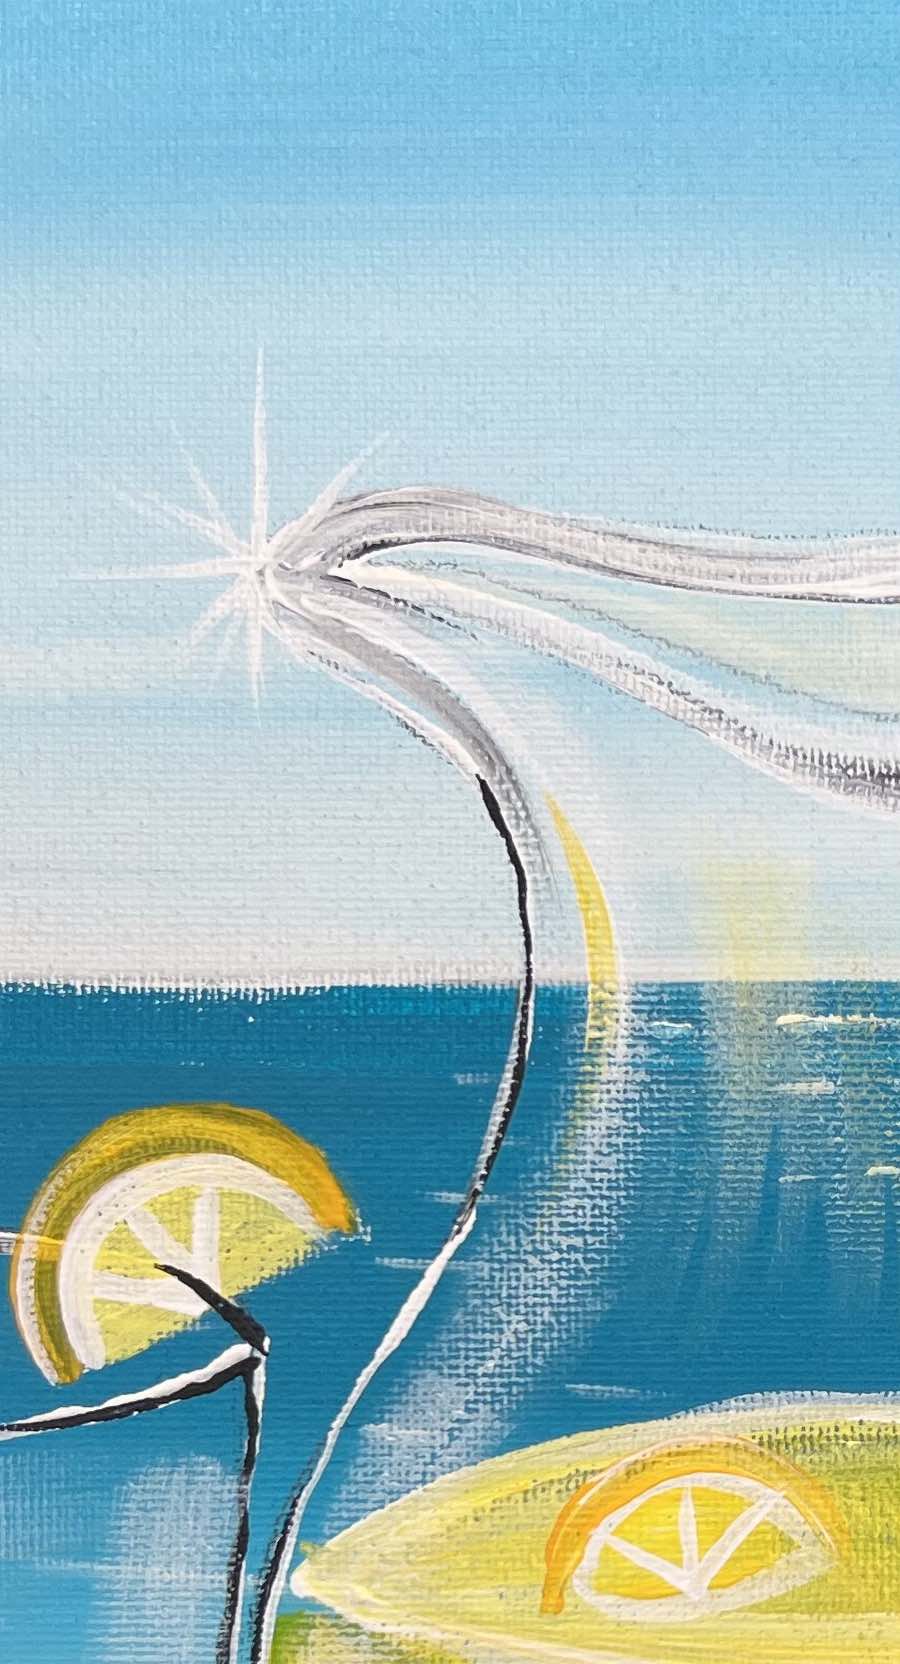
Next, paint a sparkle on the left side of the pitcher spout! I did this with a “#8 round brush” and “titanium white”. Paint a dot at first and then drag the paint to form a star.
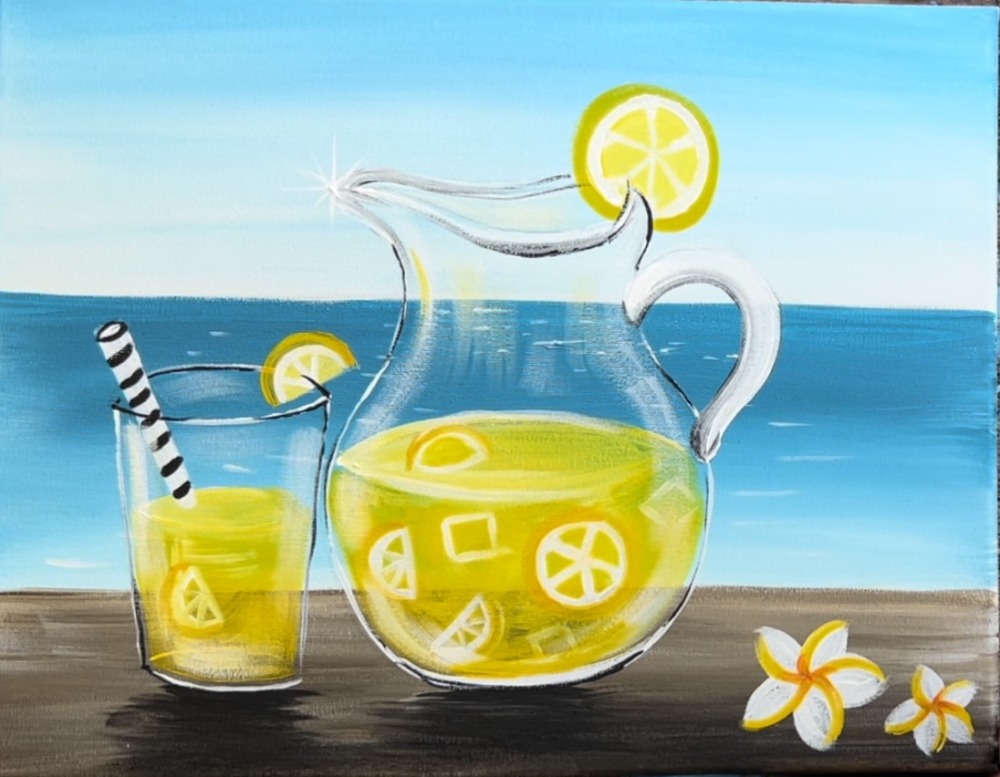
13. Paint Palm Fronds
Use the “3/8 angle brush” to paint the palm fronts. On your palette, mix a dark green. Load “light green permanent” and then mix a very small amount of “mars black” into it. This will darken the green.
Then paint the center of each of the palms as one continuous line.
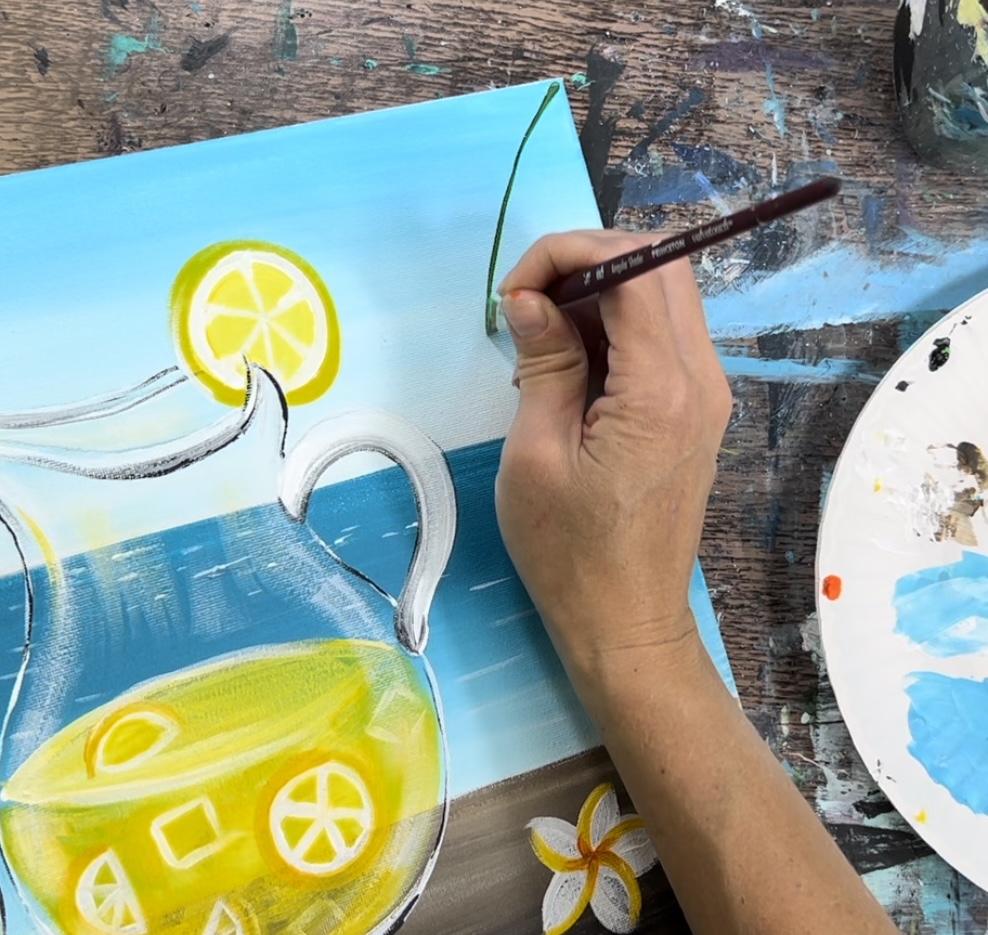
Next, paint each of the palm leaves starting from the center line and dragging your brush outwards. You can either use the tip of the bristles or the full width.
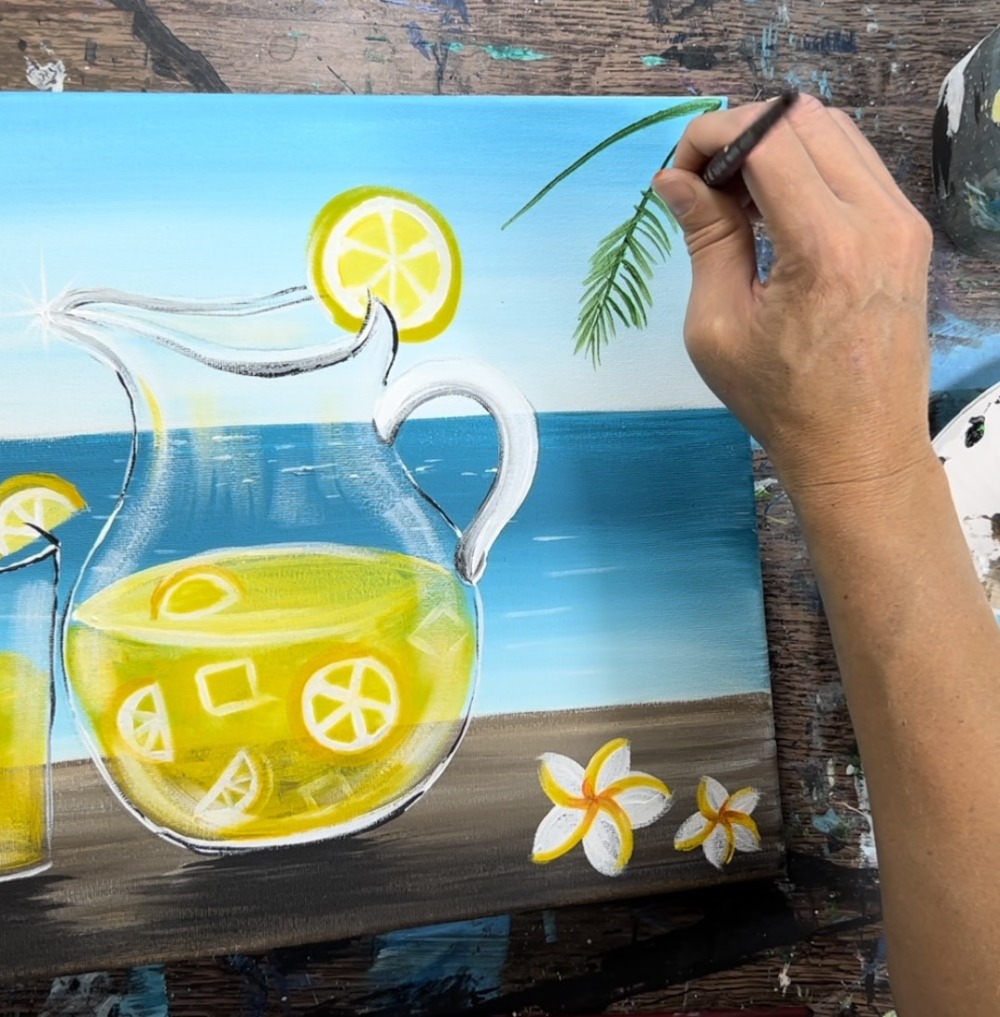
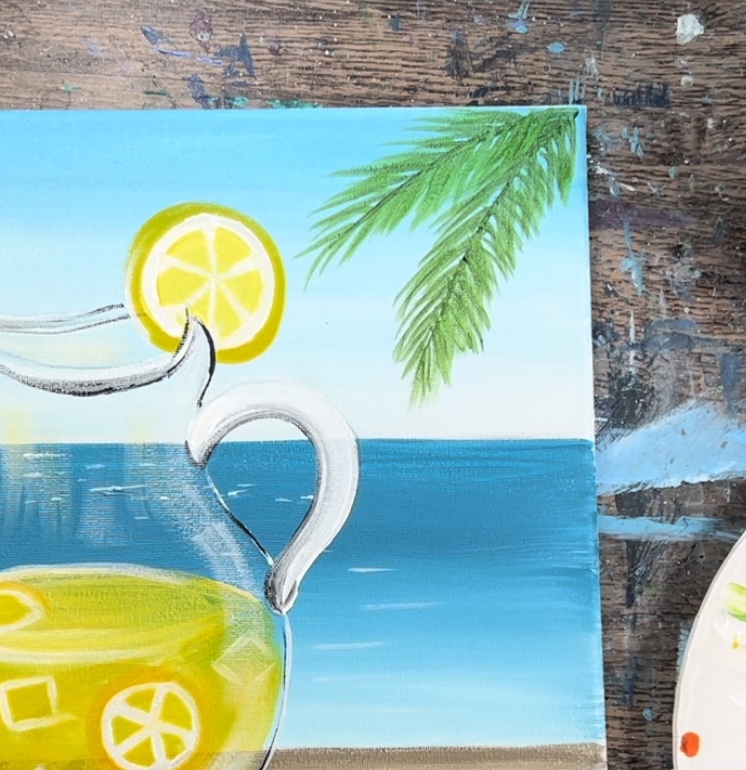
Then mix white into the green color on your palette. This will mix a lighter green. Paint a layer of lighter green leaves over your darker leaves but don’t cover all of the dark.
Optional: add more dark on the palm fronds by painting a thin line of black down the center and a few darker palm leaves.
14. Paint Birds
Use “mars black” and the “#8 round brush” to paint birds in the upper left area of the sky. Paint some of them larger and some smaller.
Then add a small amount of white in the center of each of the bird lines and blend it a little with the black.
Finished!