
Would you like to save this?
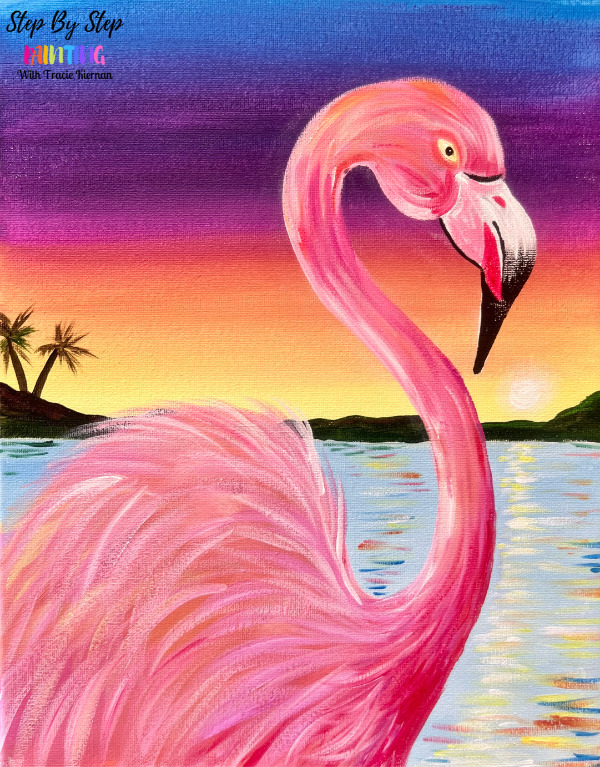
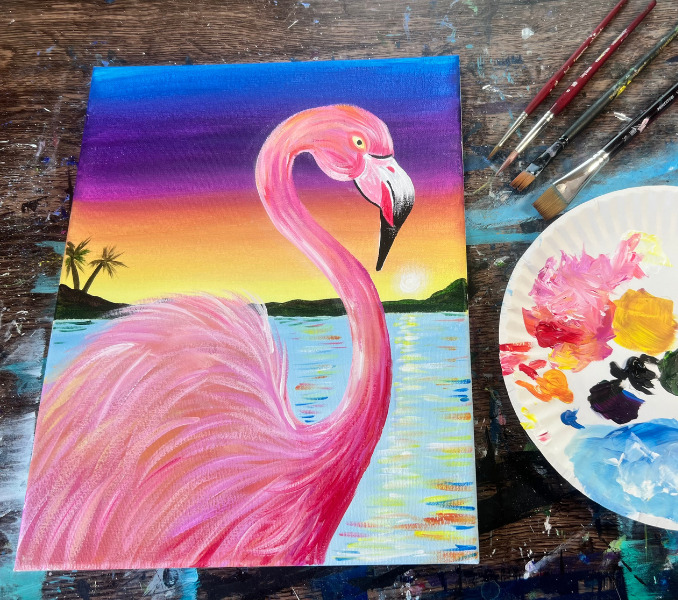
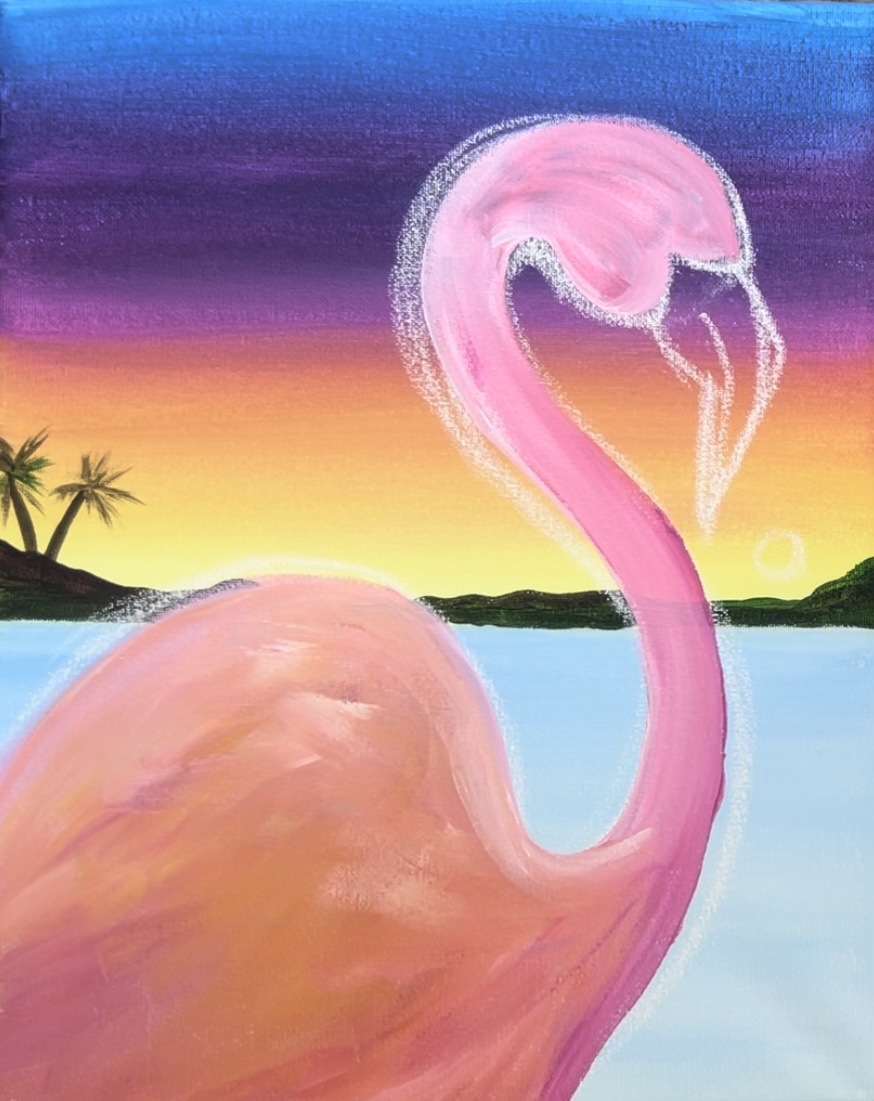
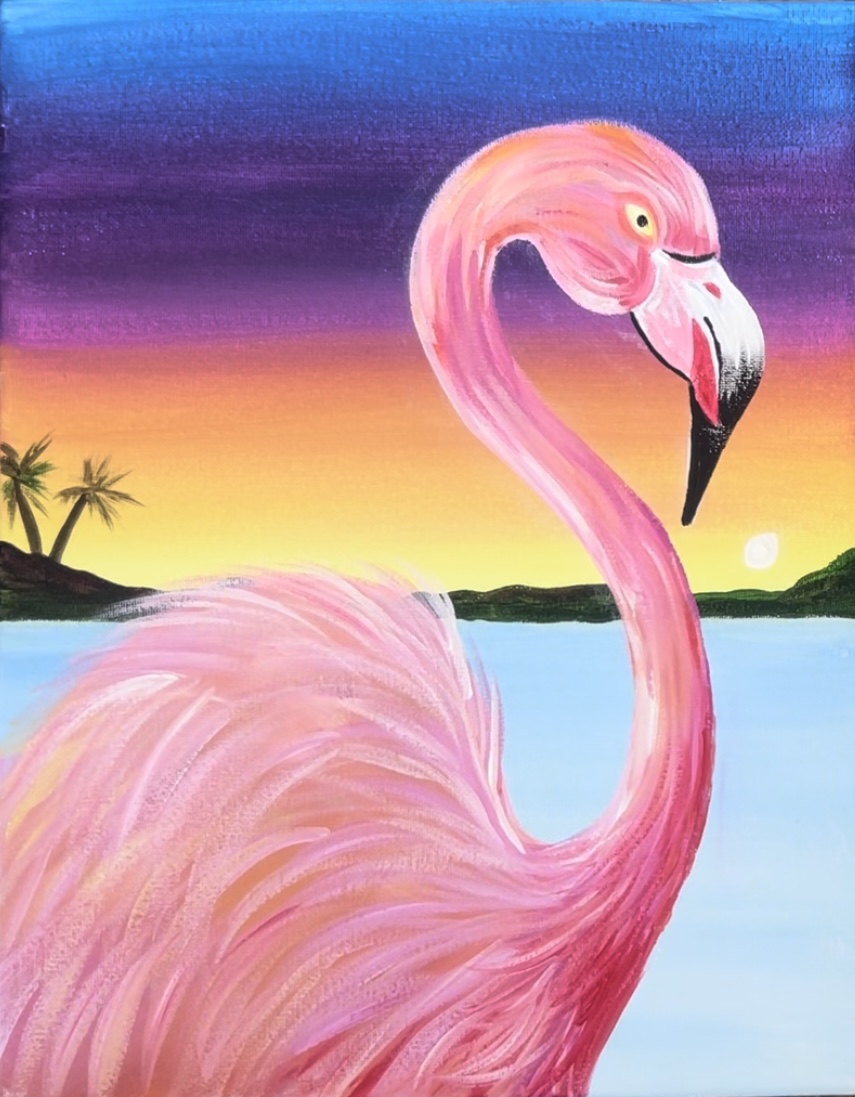
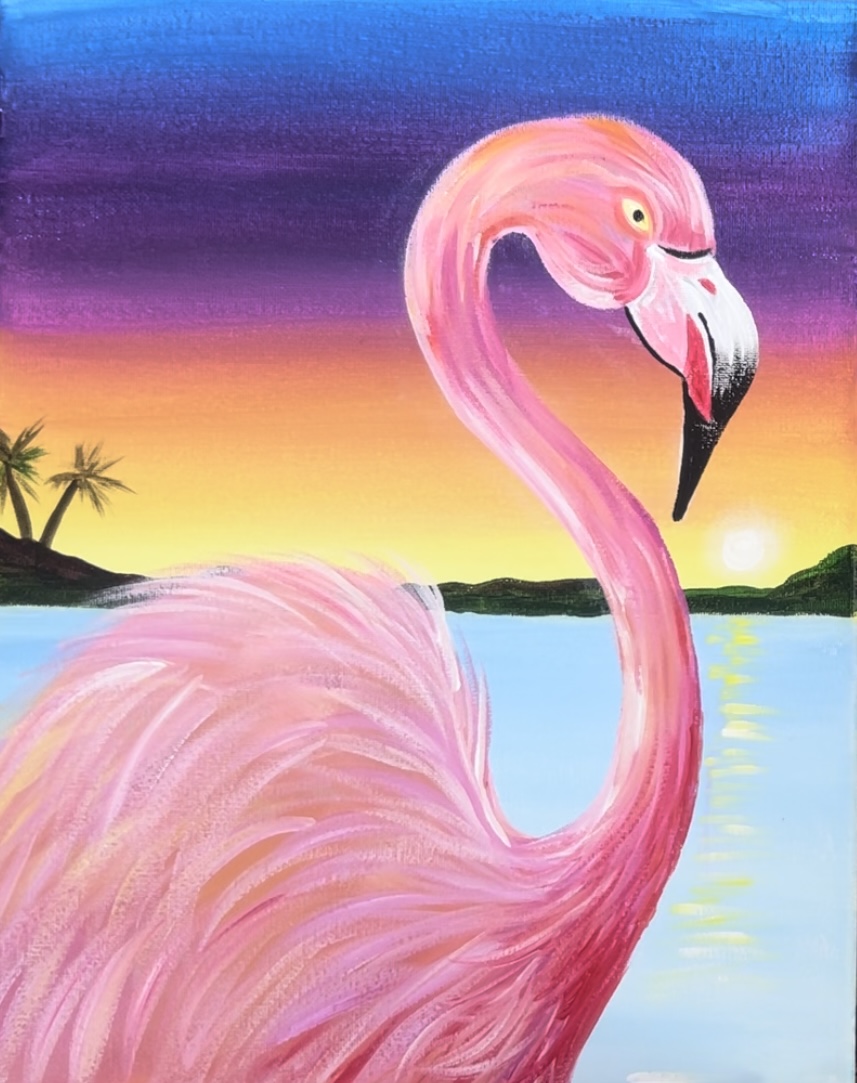
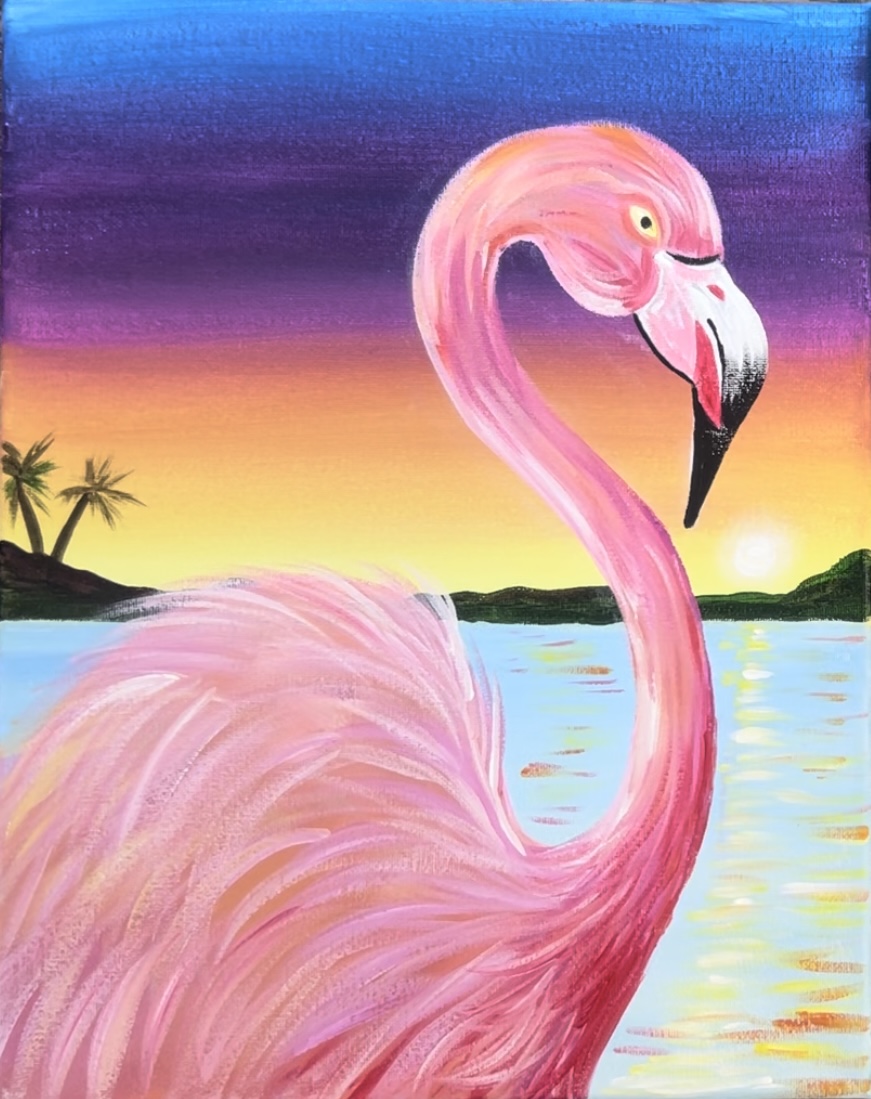
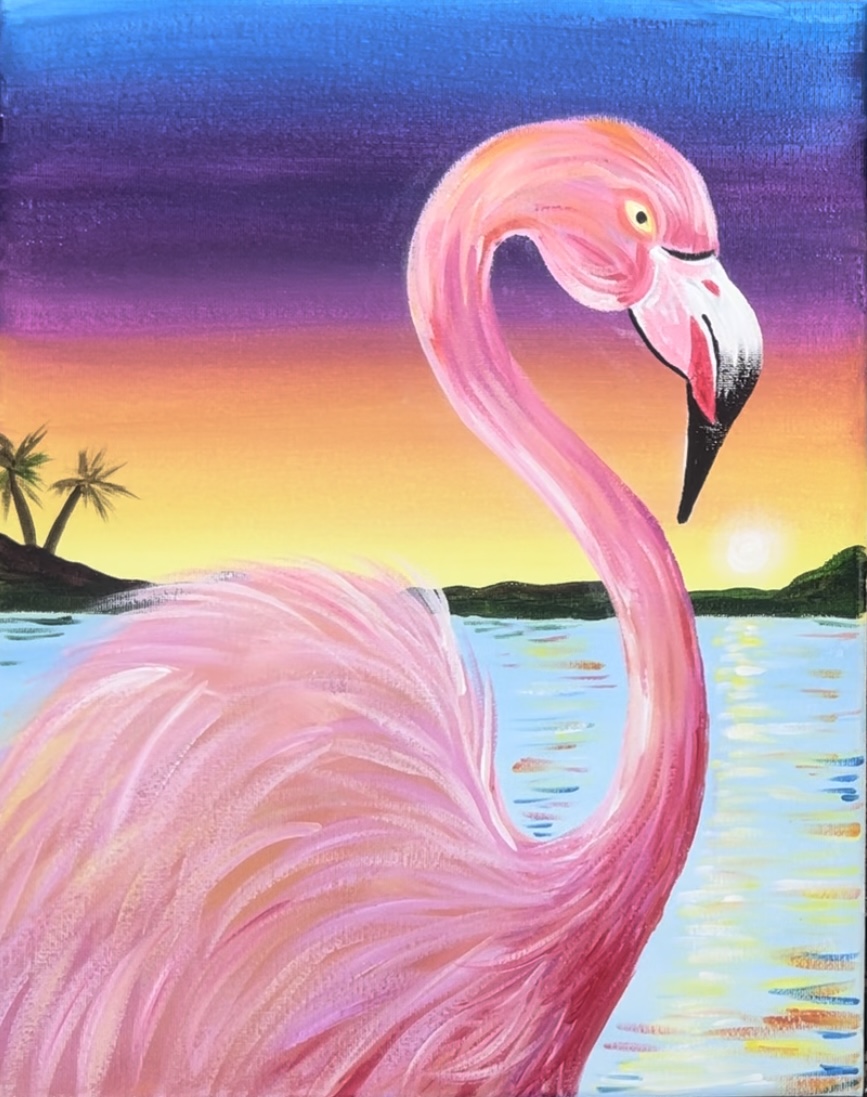
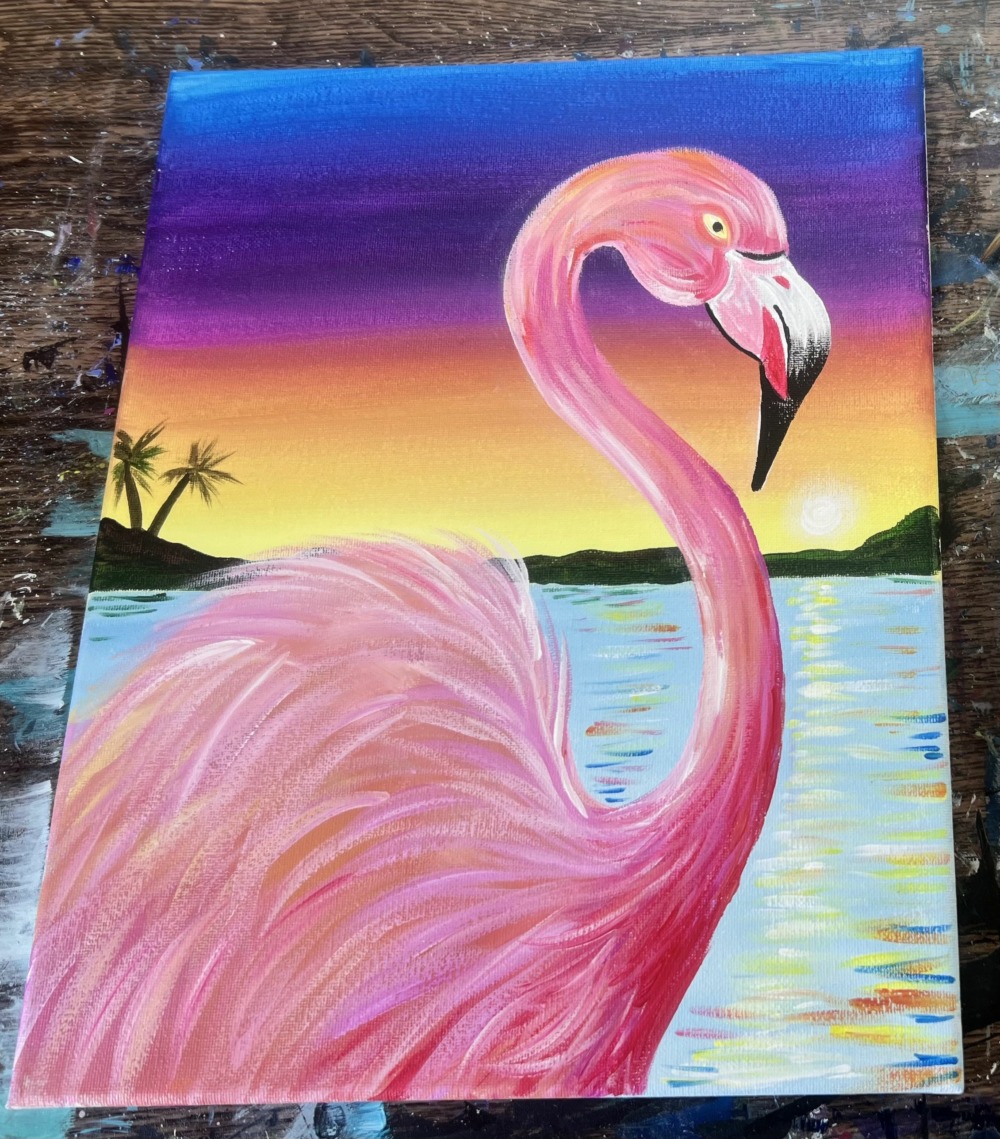
Learn how to paint a detailed pink flamingo with a vibrant sunset background.
This tutorial goes a little in depth how to paint feather texture on the bird. For the large feathers I used a #8 round brush by Princeton Velvetouch. I love that this brush can do thick and thin lines in one stroke!
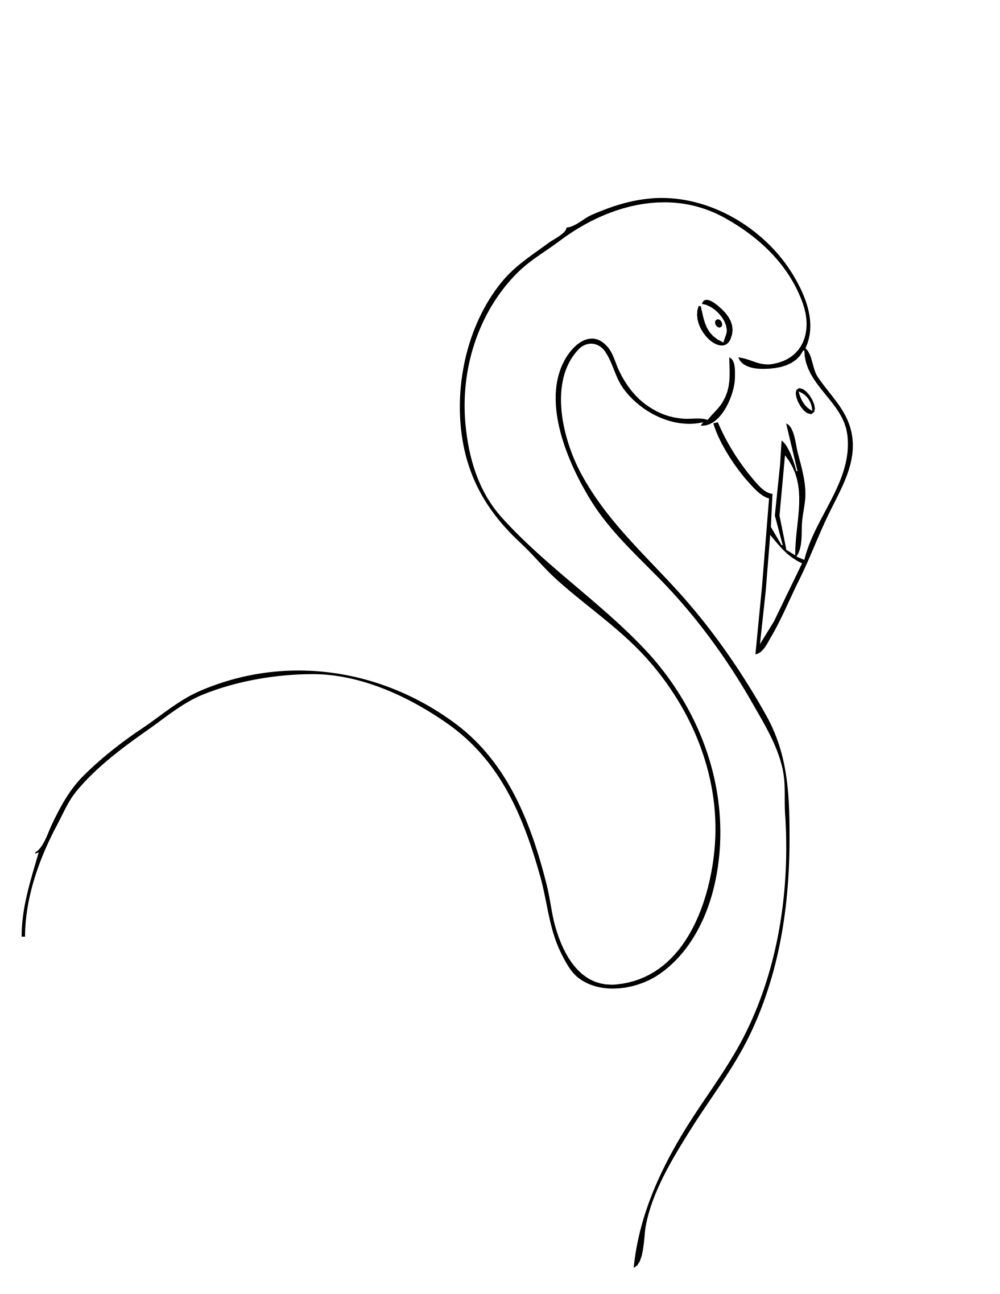
There is an optional traceable for this tutorial! If you like drawing the designs on your own, you are welcome to draw the flamingo with me with a piece of chalk!
Enjoy and happy painting!
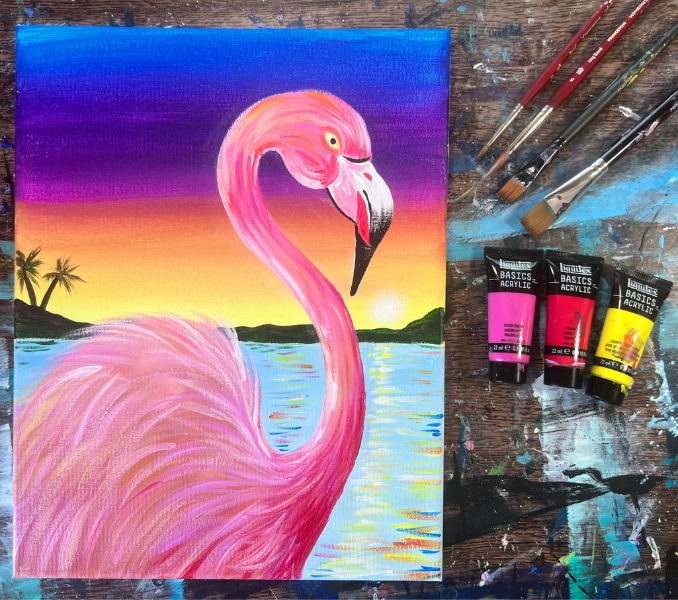
Materials Needed
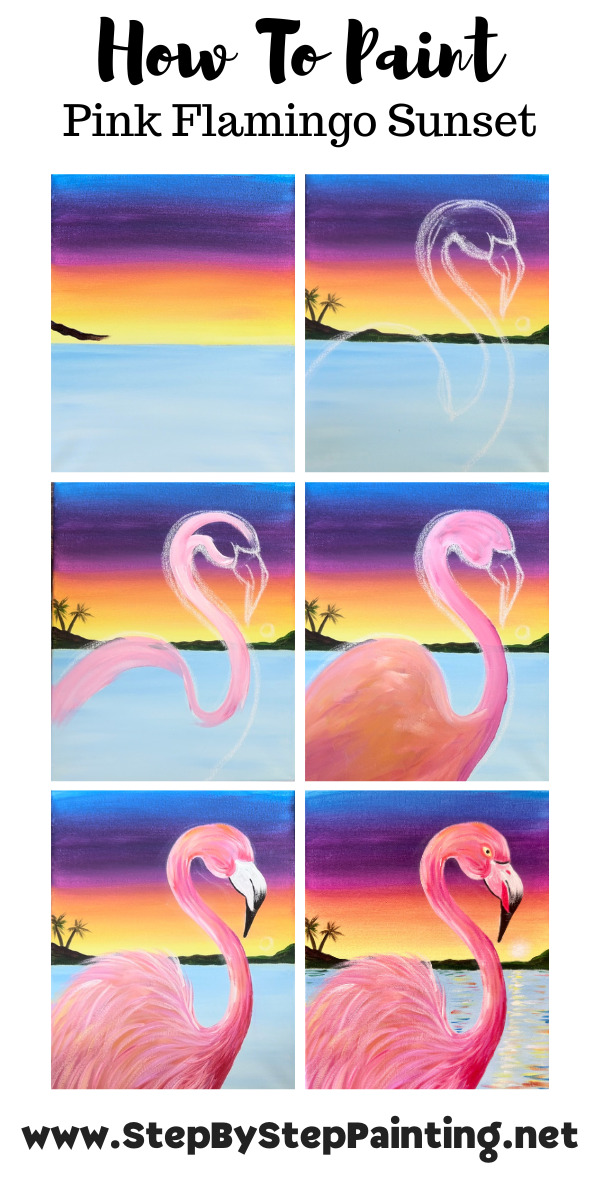
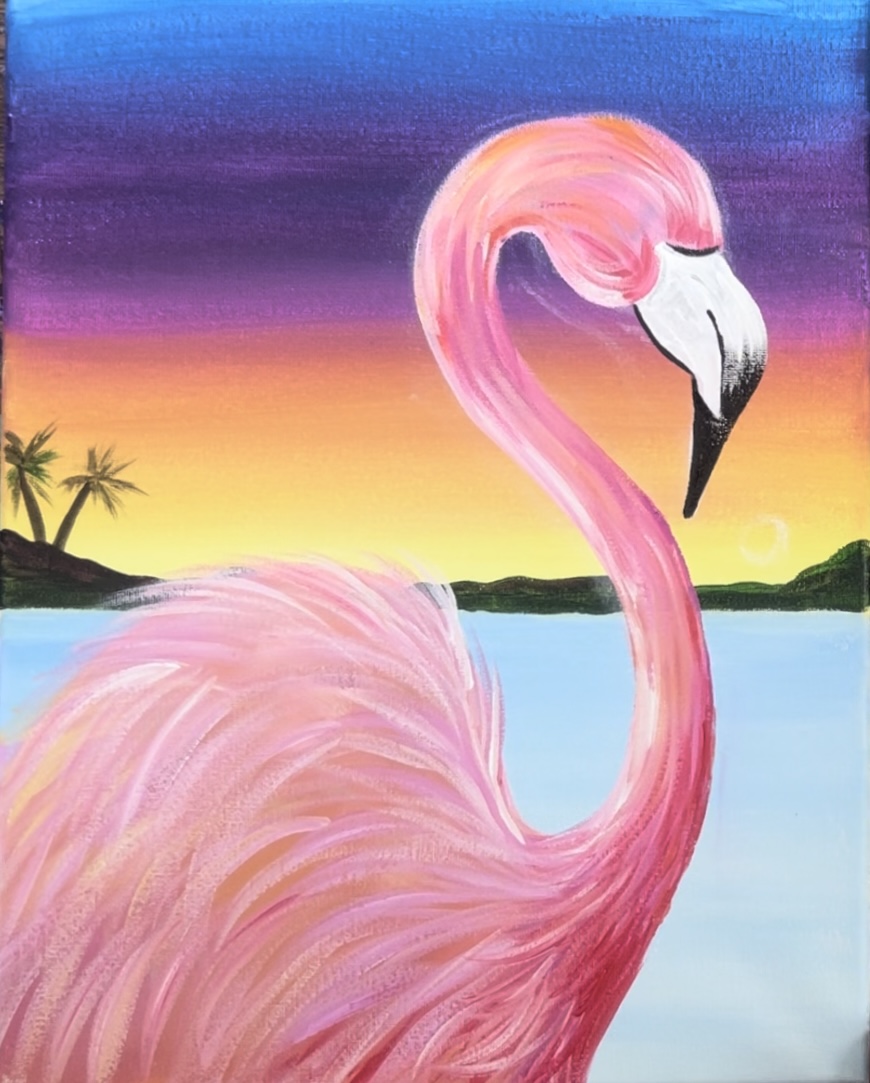
Pink Flamingo Sunset - Acrylic Painting Tutorial
Paint a vibrant sunset with a pink flamingo as the main focus. This tutorial shows you how to paint a detailed flamingo.
Materials
- 11 x 14 Canvas
- Acrylic Paint
- Chalk
- Brushes
- Optional Tracer
- Optional Graphite Paper
- Ruler
- Pencil
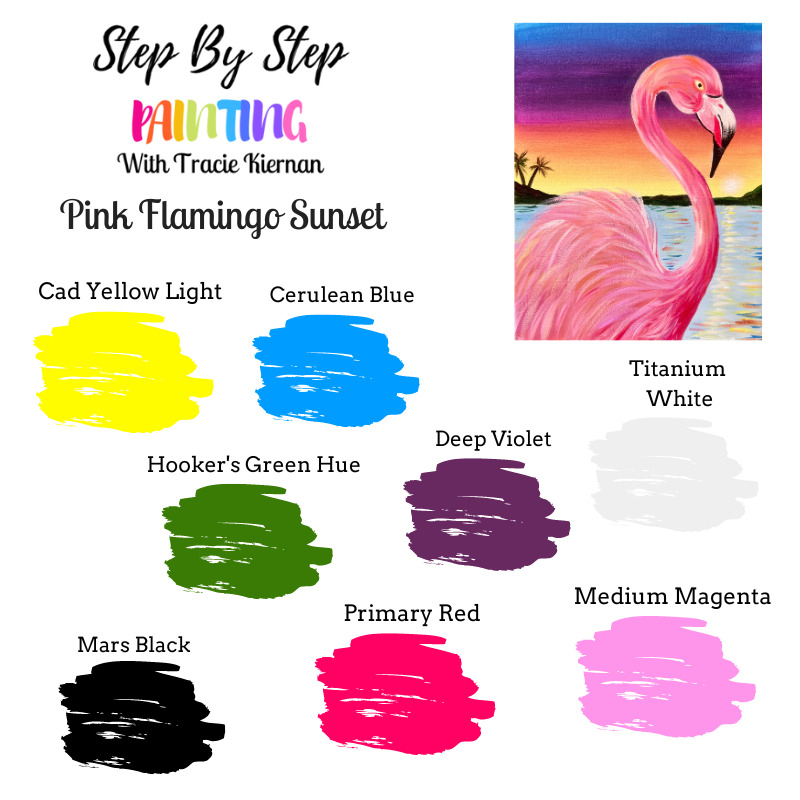
Colors
- Titanium White
- Mars Black
- Hooker's Green Hue
- Primary Red
- Medium Magenta
- Cadmium Yellow Light Hue
- Cerulean Blue
- Deep Violet
Brushes
- 3/4 Flat Brush
- 12 Bright Brush
- #4 Round Brush
- #8 Round Brush
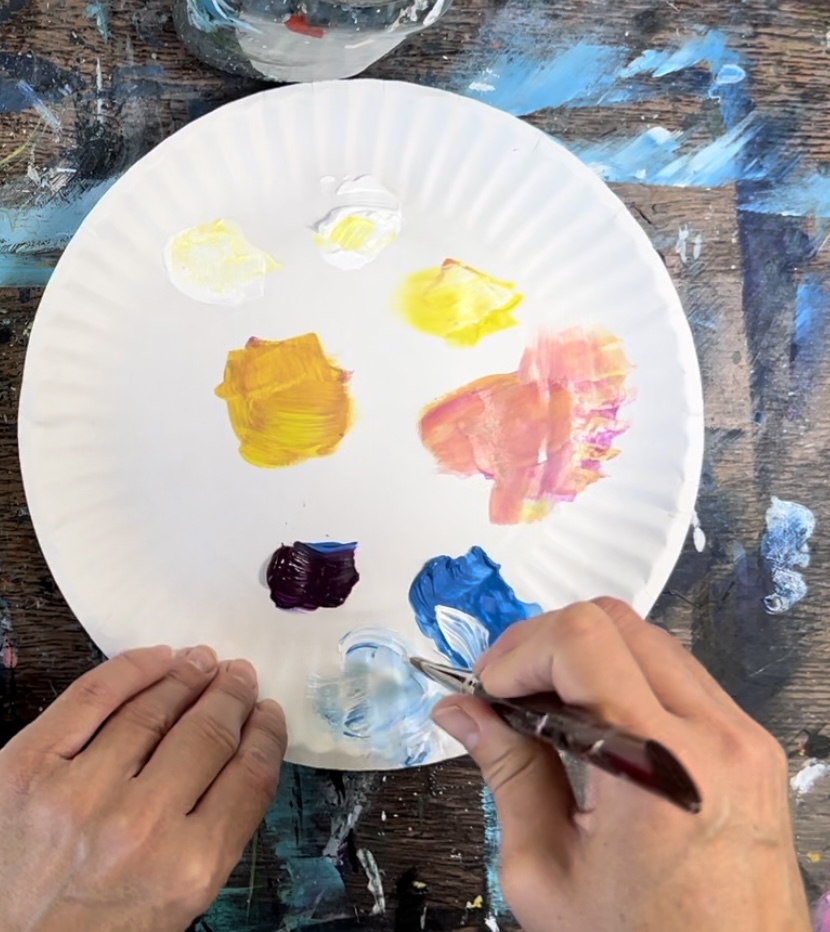
Color Palette
I used Liquitex BASICS student grade acrylics for this. If you are using a different brand, you can look at the color chart below to help you match the colors.
Craft Paint Conversion
If you are using craft paints such as the Apple Barrel Craft Paints, I would recommend subbing to these colors:
- Yellow Flame
- Bright Blue
- Holly Branch
- Purple Iris
- White
- Black
- Fuchsia
- Bright Magenta
Directions At A Glance
Traceable
This is optional. In the tutorial, we will be drawing the flamingo with chalk. However, if you prefer to use a template, you are welcome to print this and trace onto the canvas.
Video
Step By Step Instructions
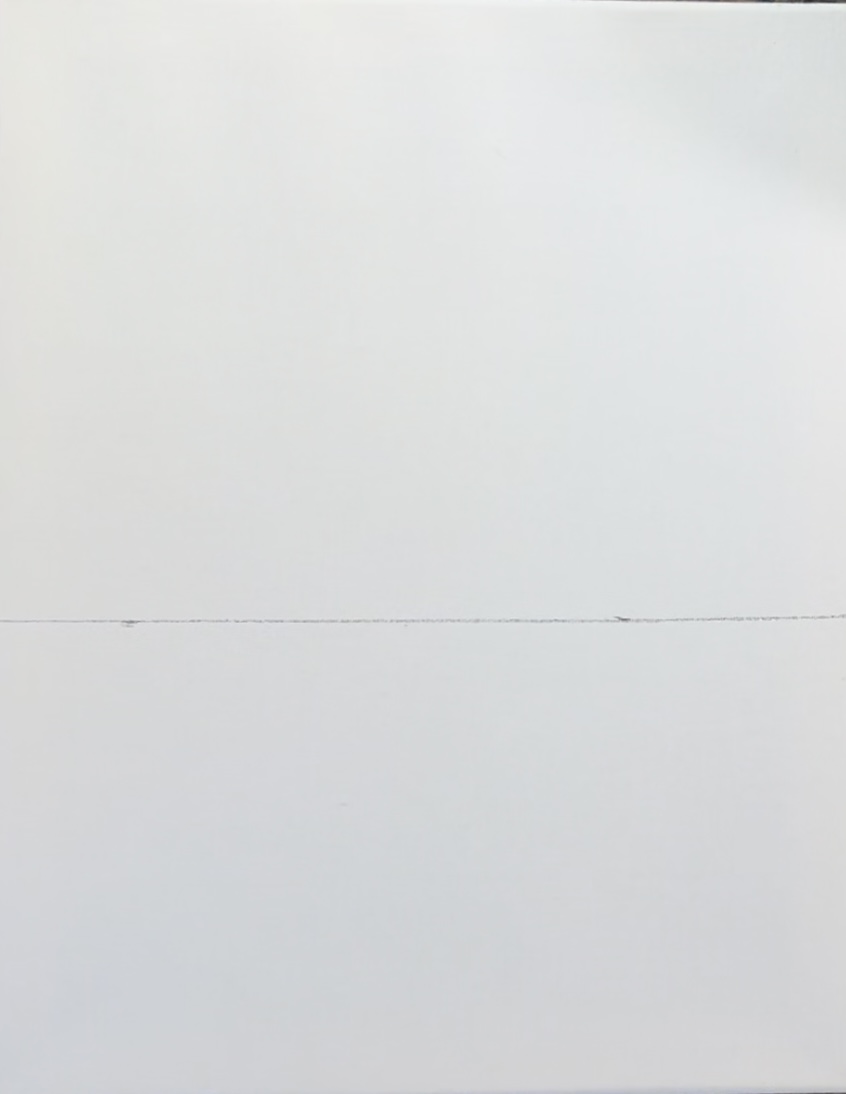
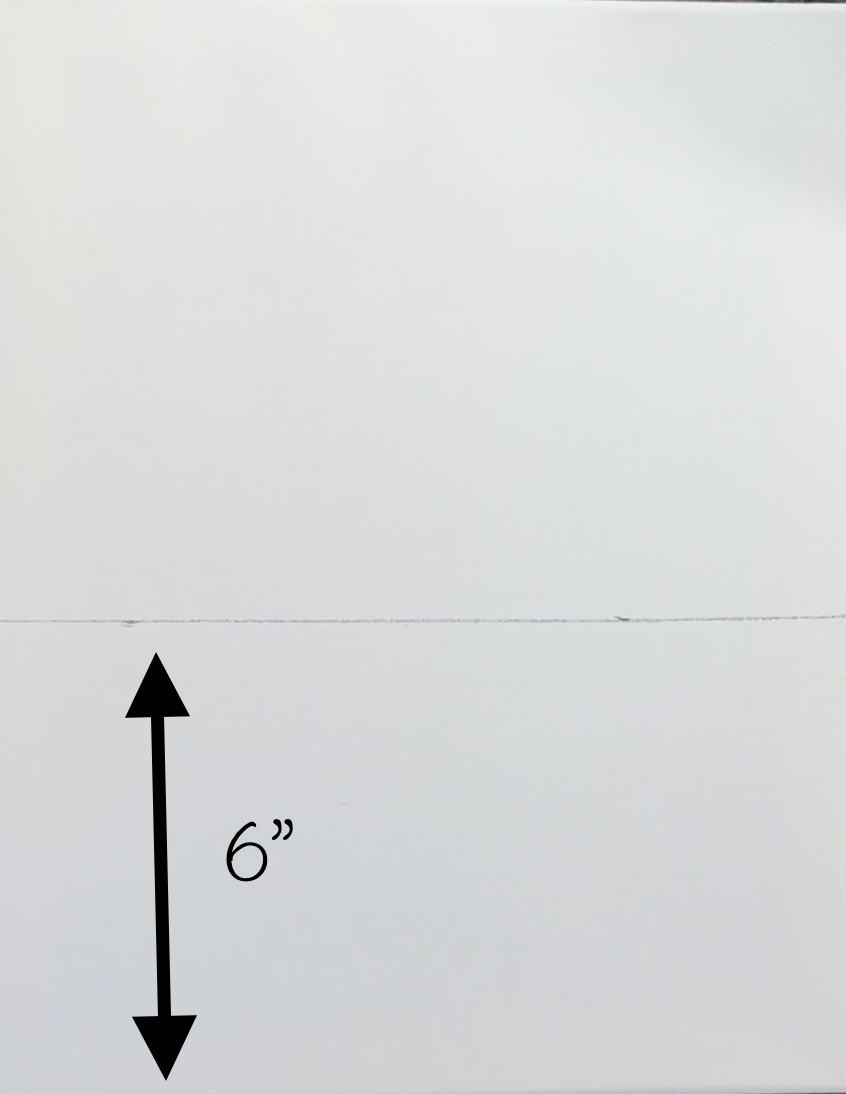
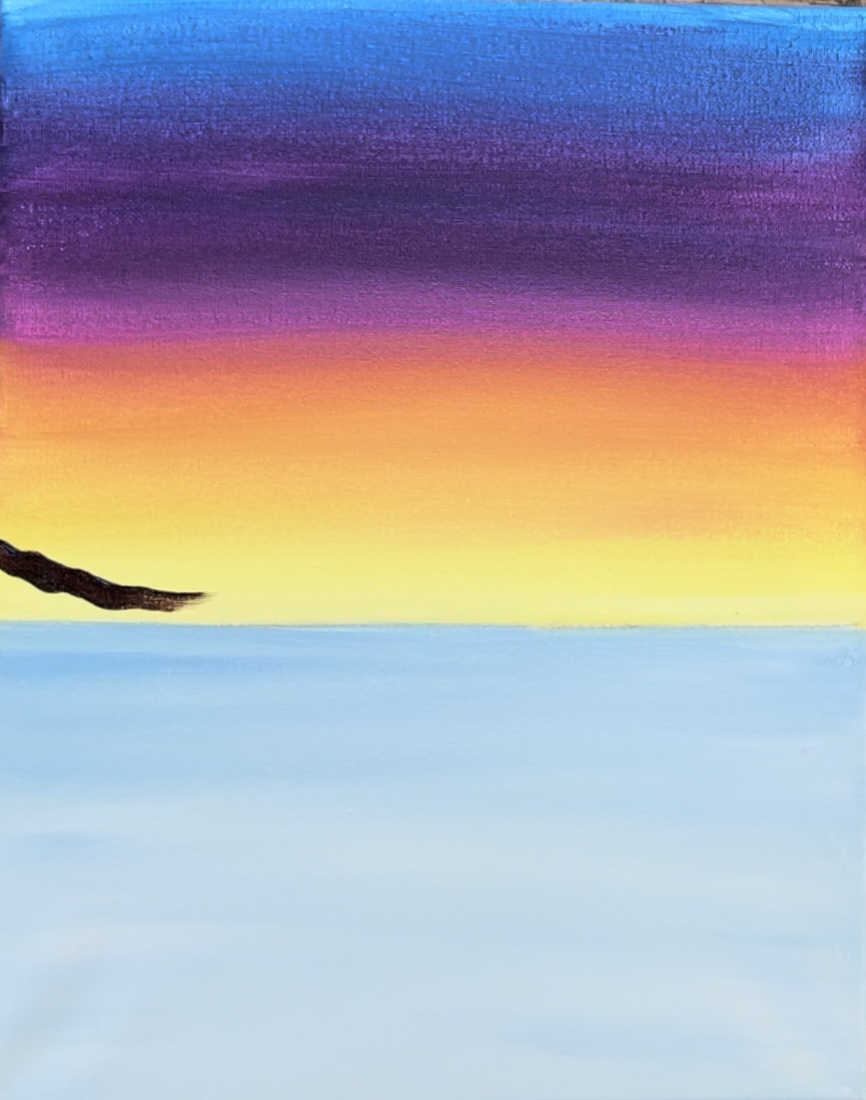
1. Paint Sky
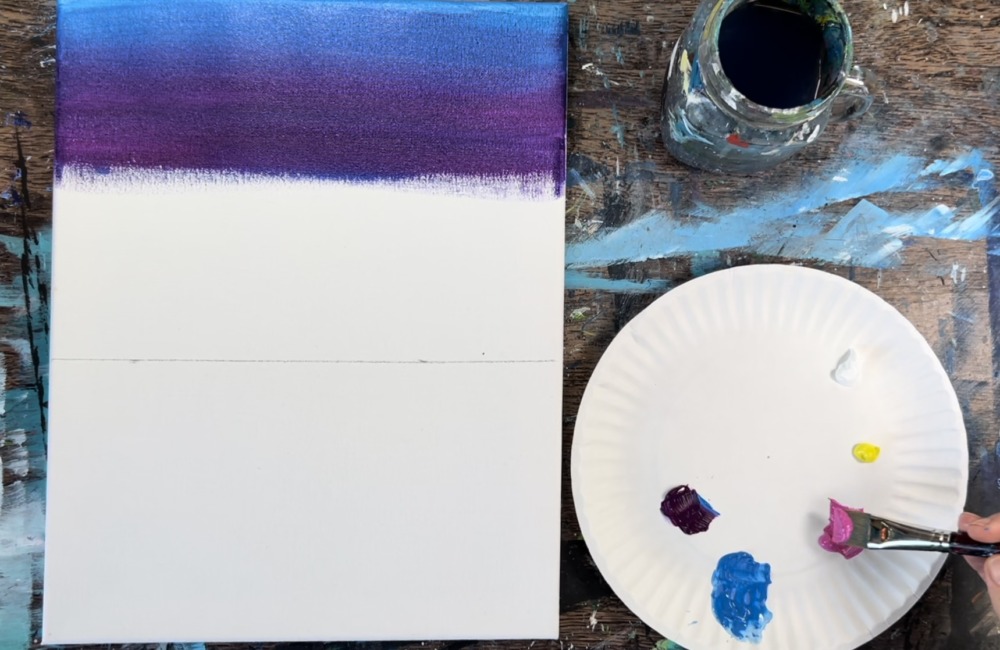
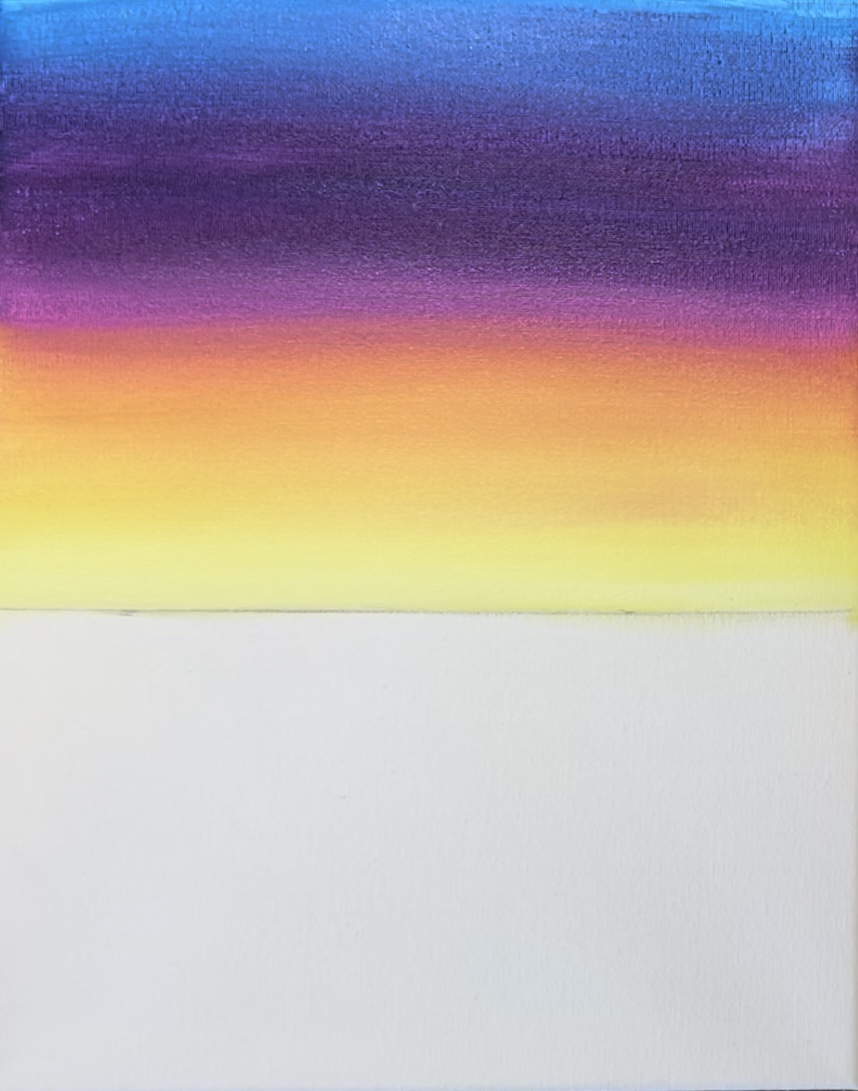
Position the canvas so that it is vertical. Then measure approximately 6″ from the bottom of the canvas. Use a t-square ruler to draw a horizontal line across the canvas. This will be the horizon line in the painting!

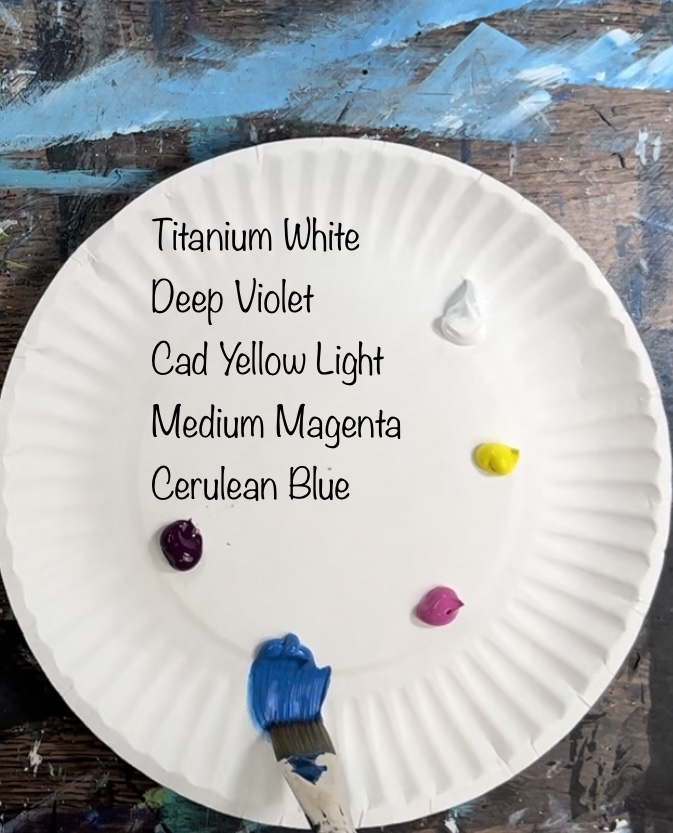
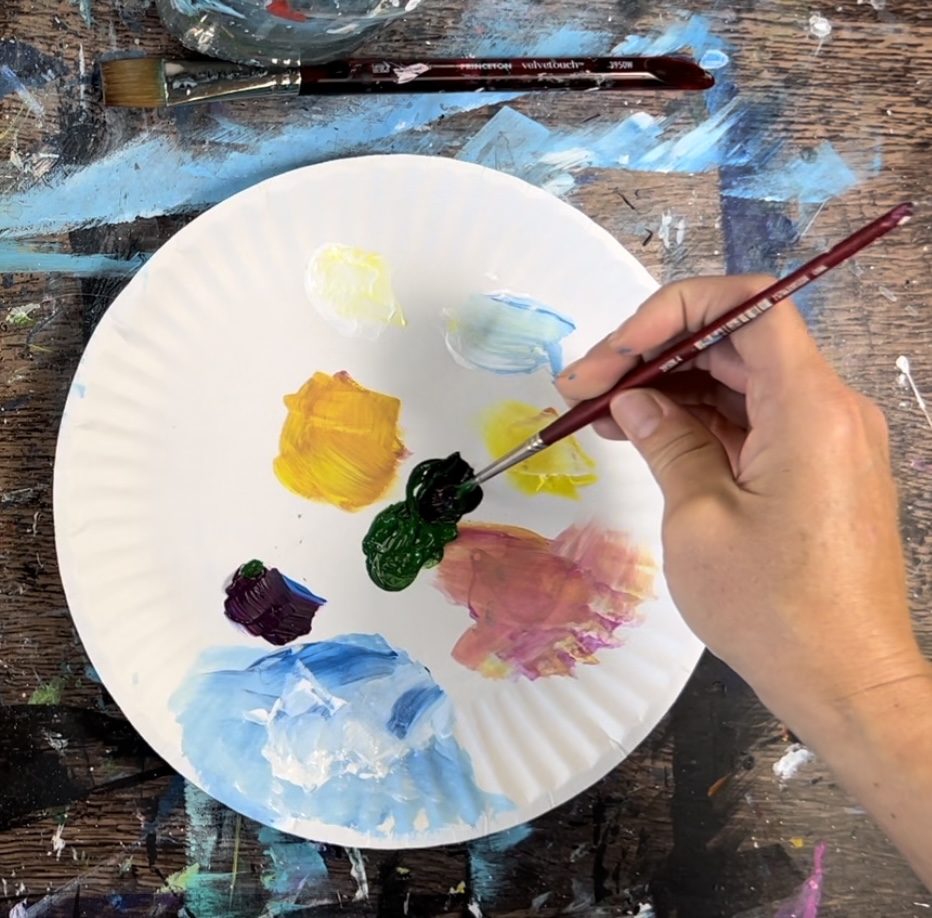
Next, load your palette with the colors: cerulean blue, deep violet, medium magenta, cadmium yellow light and titanium white.
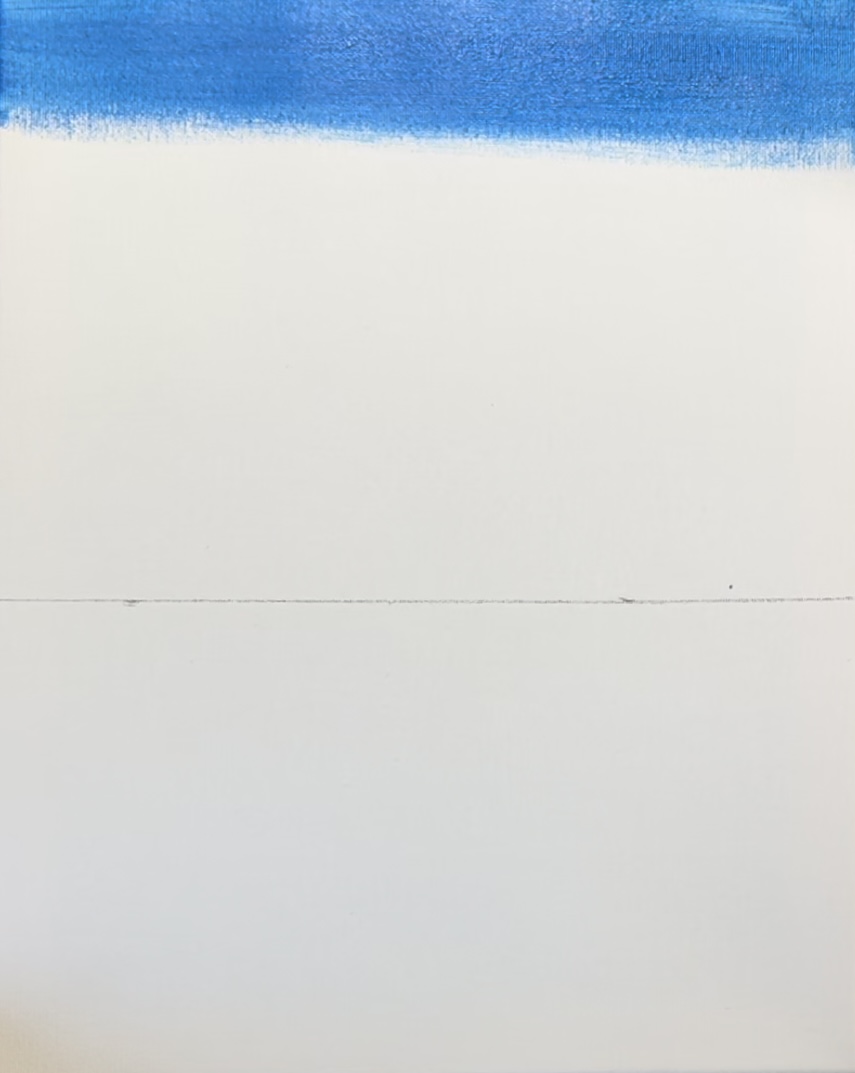
Use the 3/4 wash brush to paint the sunset sky. Start at the very top of the canvas. Use the cerulean blue to paint across the canvas. Go down about 2-3 inches.
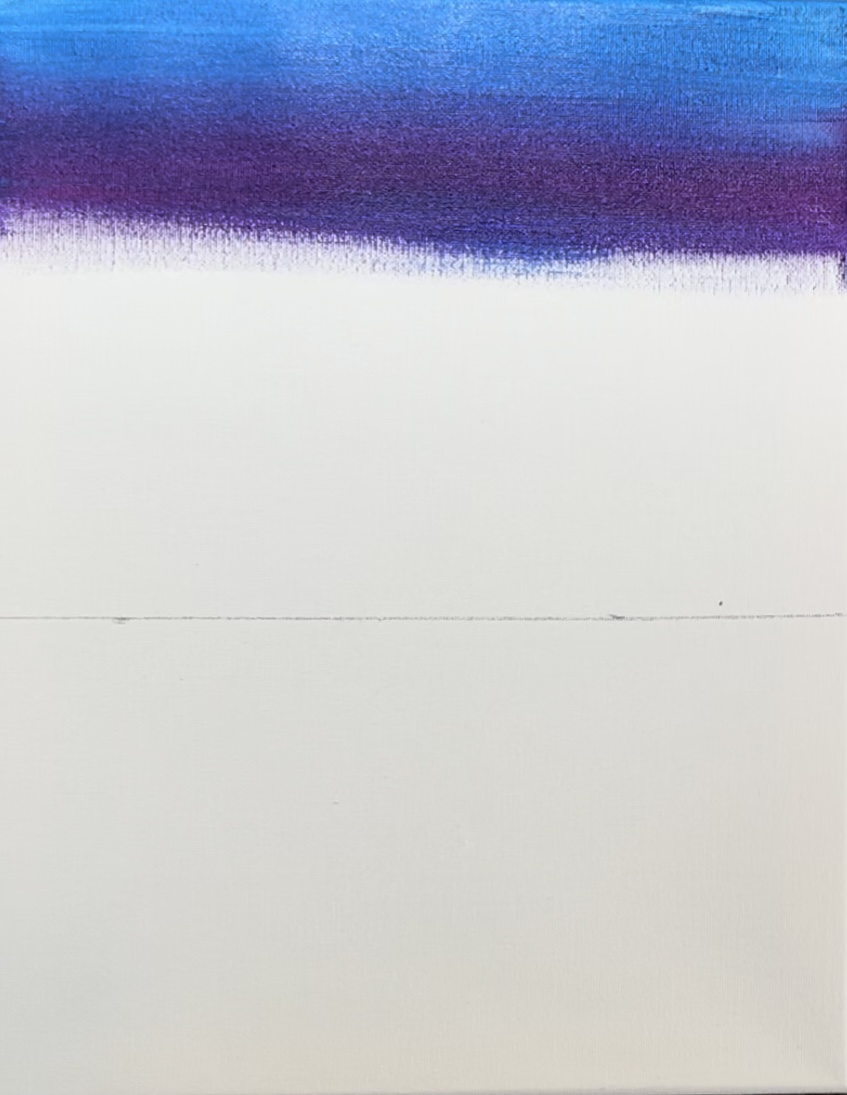
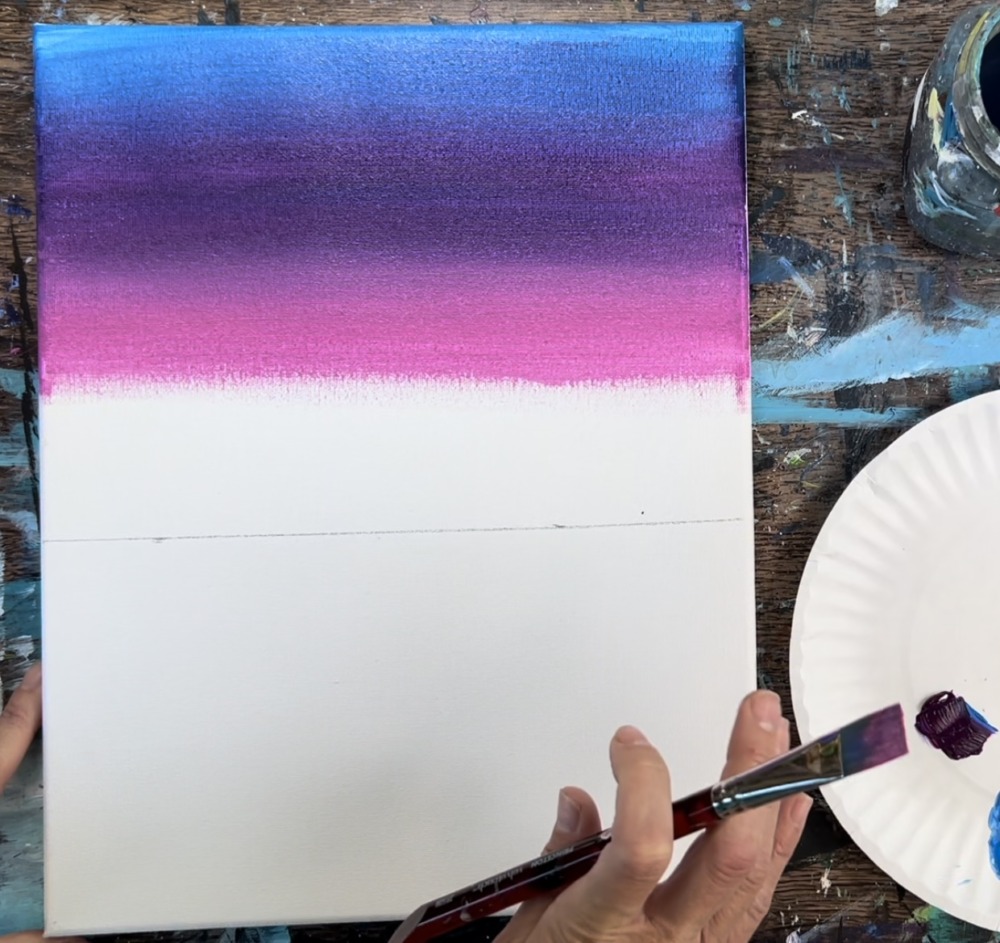
Next, without rinsing the brush, load deep violet onto the brush. Paint left and right strokes with the deep violet and blend that with the blue. Go down about 2-3 more inches with the violet and then stop.
Then rinse the brush. Load medium magenta onto the brush. Blend that with the deep violet. Go down about 2-3 more inches with this pink.
There should be a gap of about 2-3 inches left under the pink. This is where the orange and yellow will be. Rinse the brush off before going to the yellow because you may have some purple on the brush from blending.
Then load the clean brush with cadmium yellow light. Paint this yellow so that it blends with the pink on the canvas. This color, blended with the pink, will turn a vibrant orange. Then gradually add more yellow and stop so there is still a gap above the horizon line.
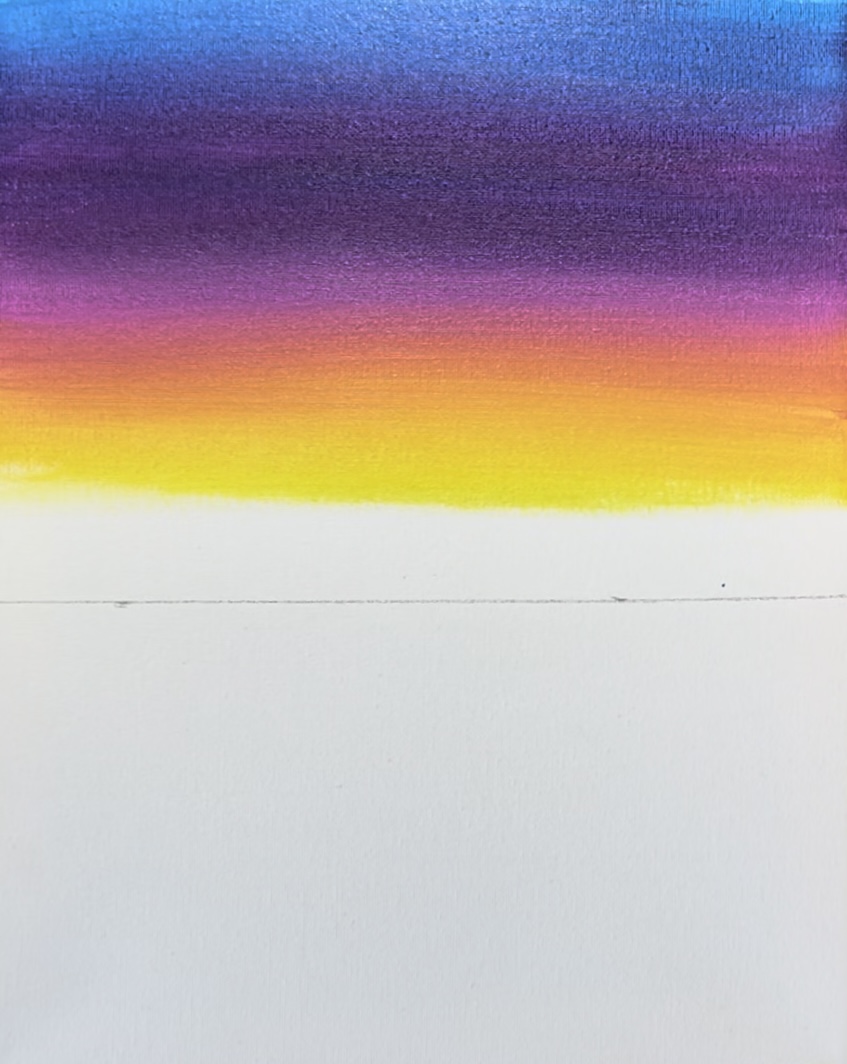
Next, load titanium white onto the brush. Blend this white on the bottom and up into the yellow. It will turn very bright yellow because of the white!
Gently blend the white/yellow up into the orange until there are no gaps left.
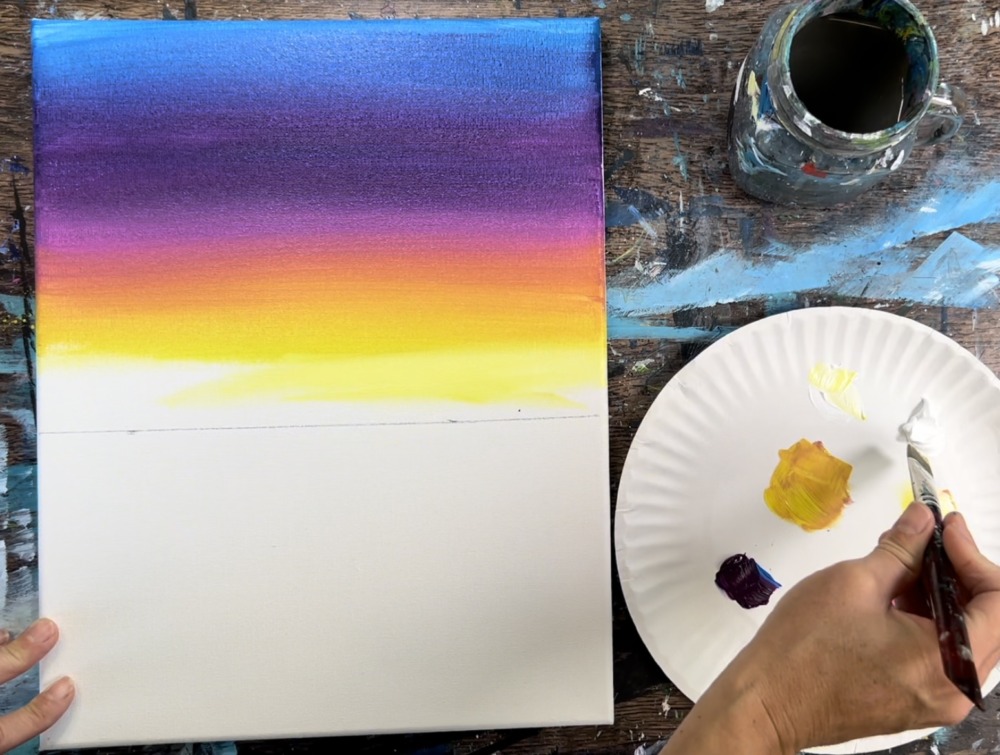
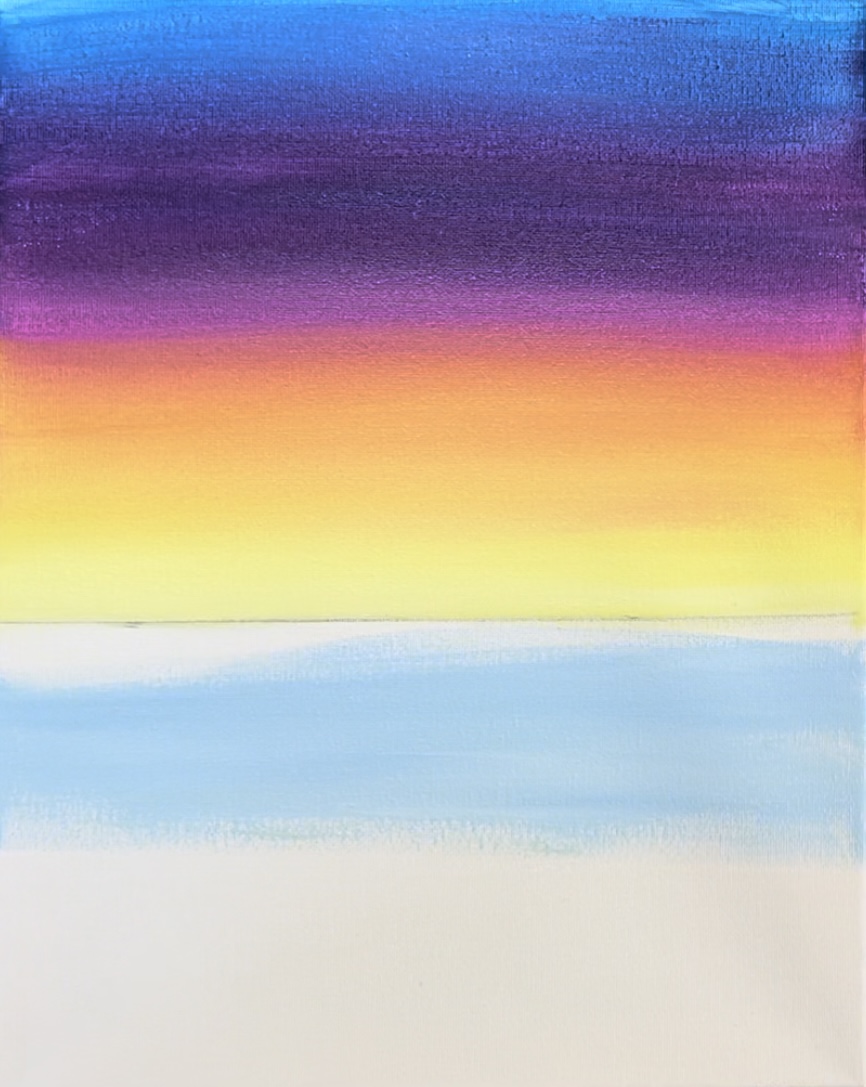
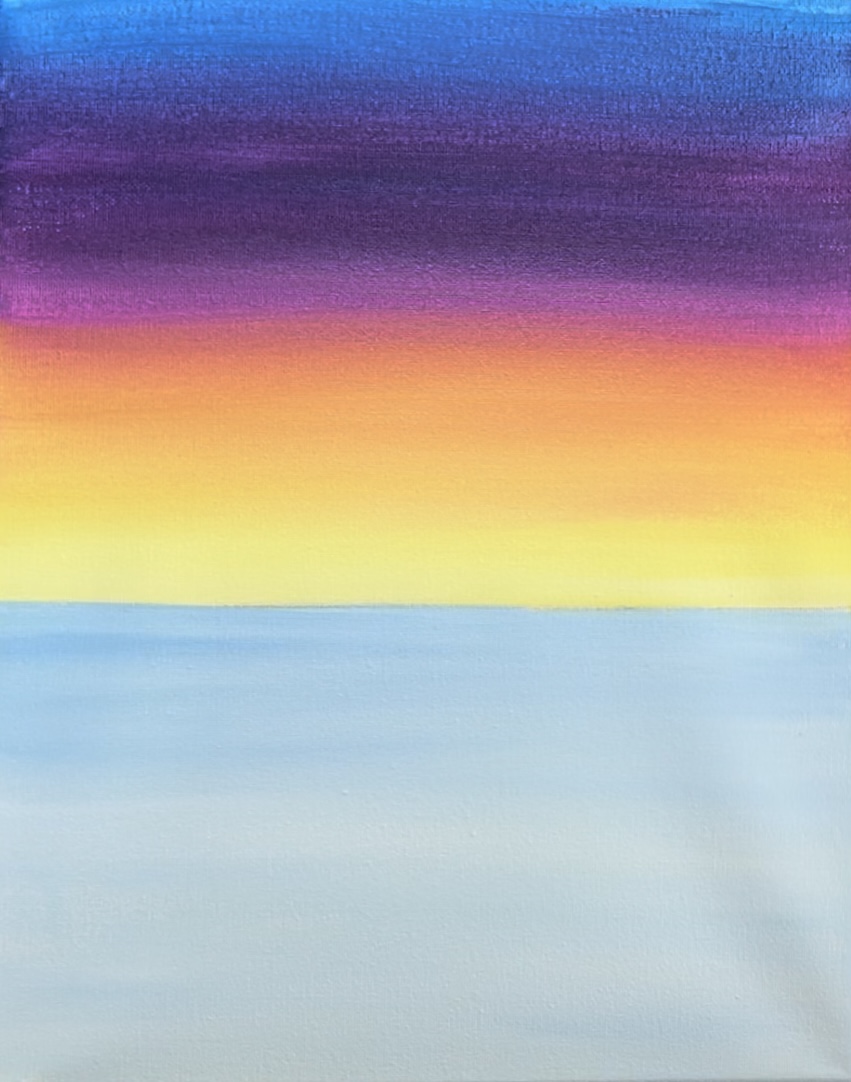
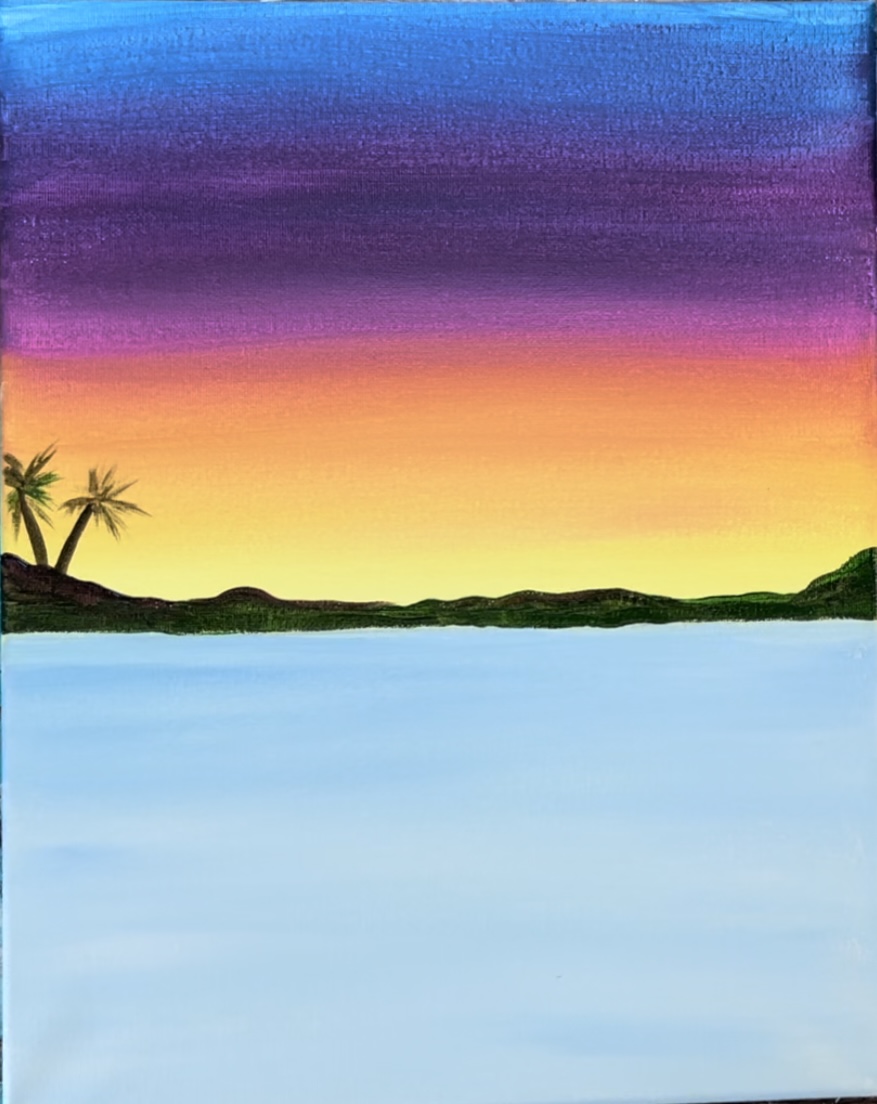
2. Paint Water
Mix a very light blue on your palette. You will need about 1 part cerulean blue and about 5-6 parts titanium white.
Use the 3/4 flat brush to paint left and right strokes across the bottom area where the water is. Fill this area with this color. You can add areas that are a little lighter and areas that are a little darker.
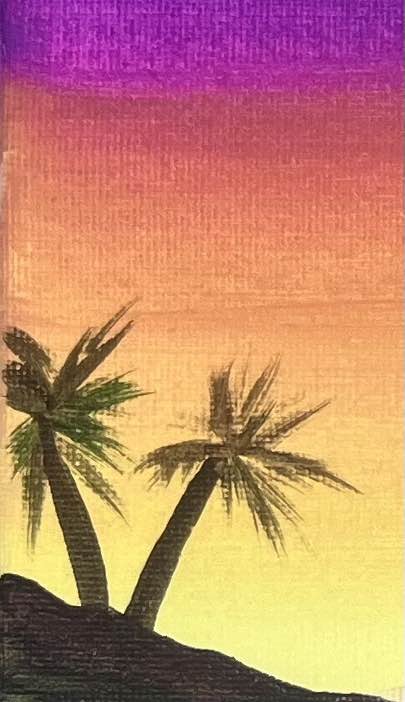
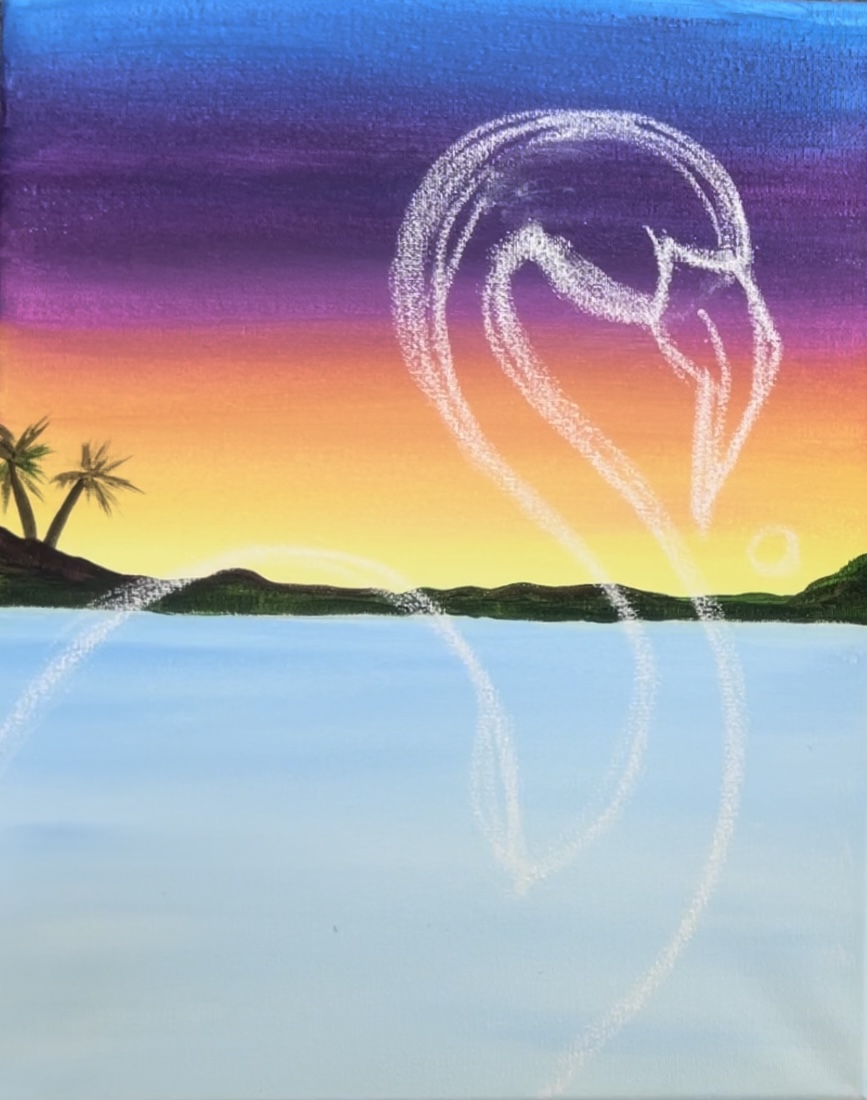
3. Paint Land/ Palm Trees
Next, load hooker’s green hue onto your palette. Use the #4 round brush to mix about equal parts green and purple together. This will make a very dark, almost black color.
Then paint the island/land formation across the horizon line. The highest peak on the left goes up about an inch above the horizon line.
Then paint the uneven/wavy line all the way across. Fill in the land with the dark color, being careful not to add any of this dark color in the water area.
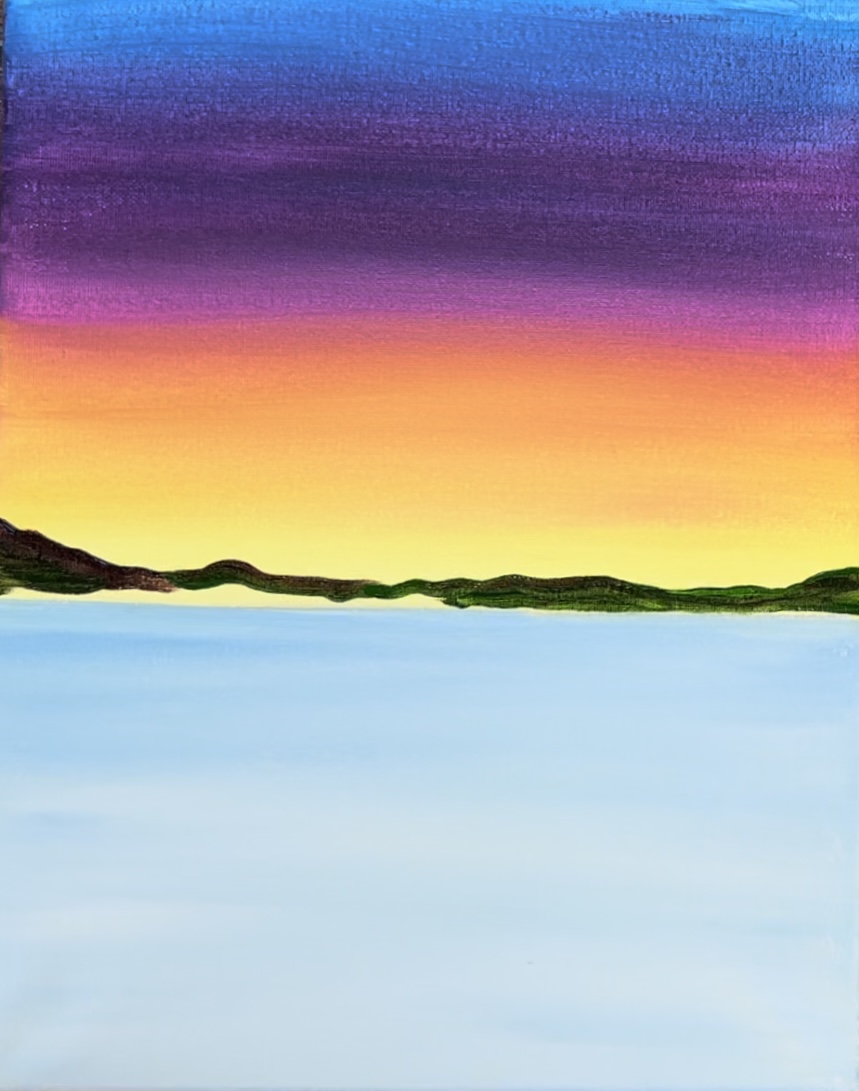
Then use the same brush and color for the palm trees. Start by painting two lines that start out a little thick at the base and then go thinner.
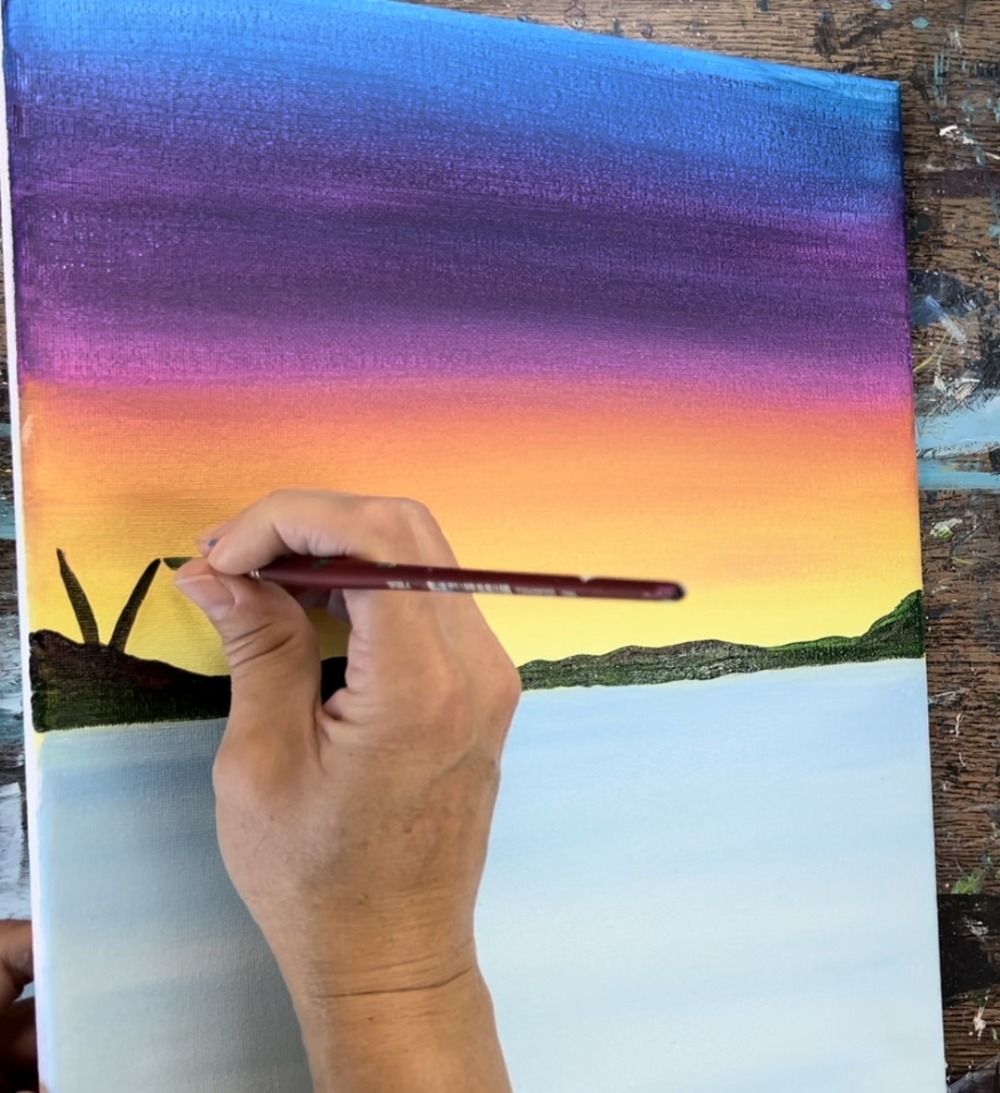
Paint the palm fronds of the palm tree. Start out by painting thin lines for the middle of each of the palms. Then drag the brush outwards for each of the palm fronds.
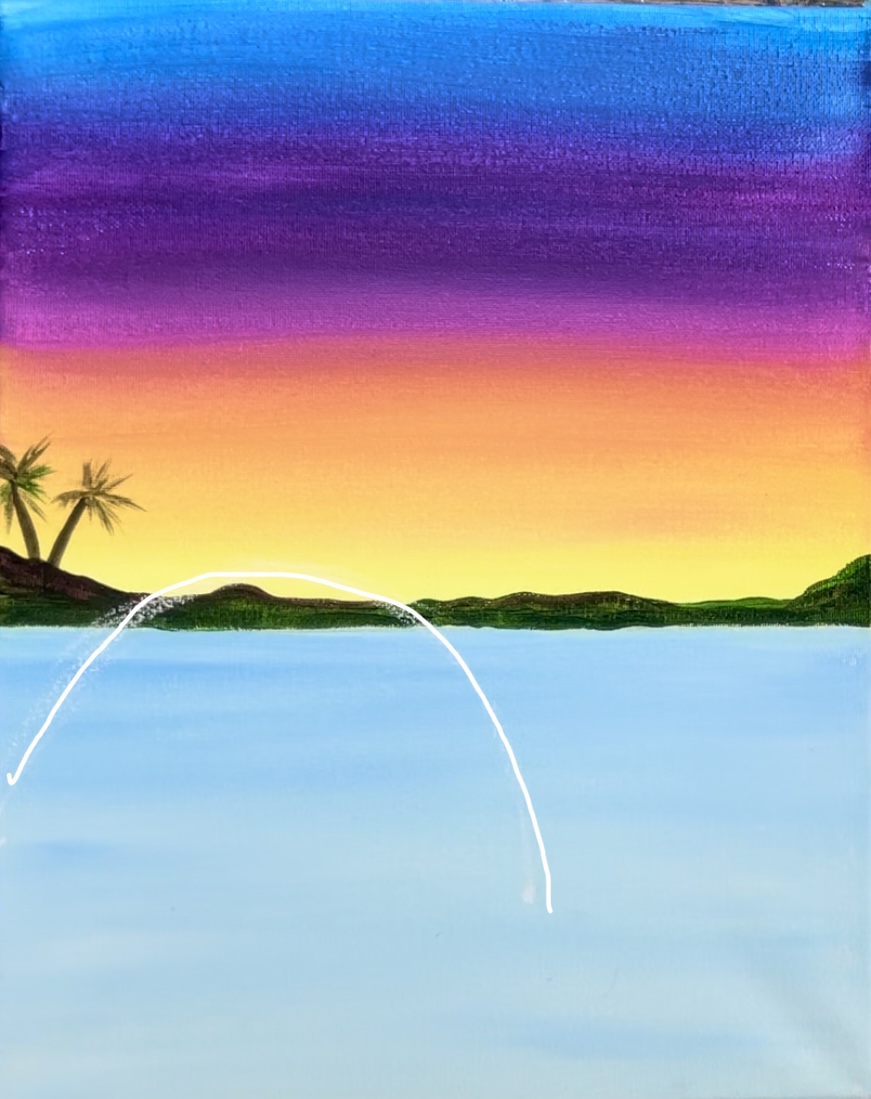
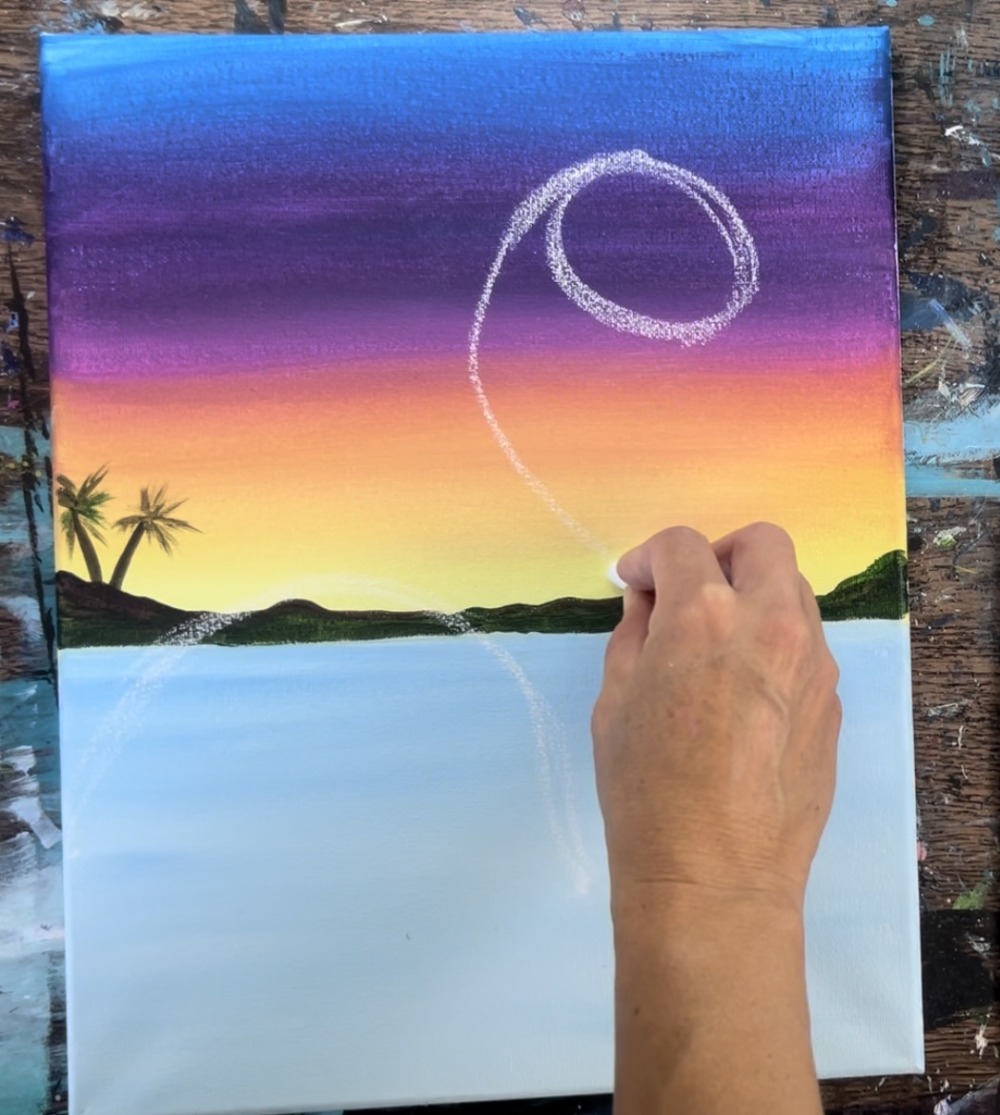
4. Draw Flamingo With Chalk
If you are using the template, print it out and position it onto the canvas so the flamingo is in the lower left of the painting. Place a sheet of graphite paper below the template and trace the flamingo.
If you are drawing this, use a pice of chalk to draw. Start this drawing by making two marks on the canvas. One is at about 6.5″ from the left and about 3″ high. Place the second point at 3.5″ up from the left edge of the canvas. These dots do not have to be exact but are helpful for drawing the flamingo’s body.
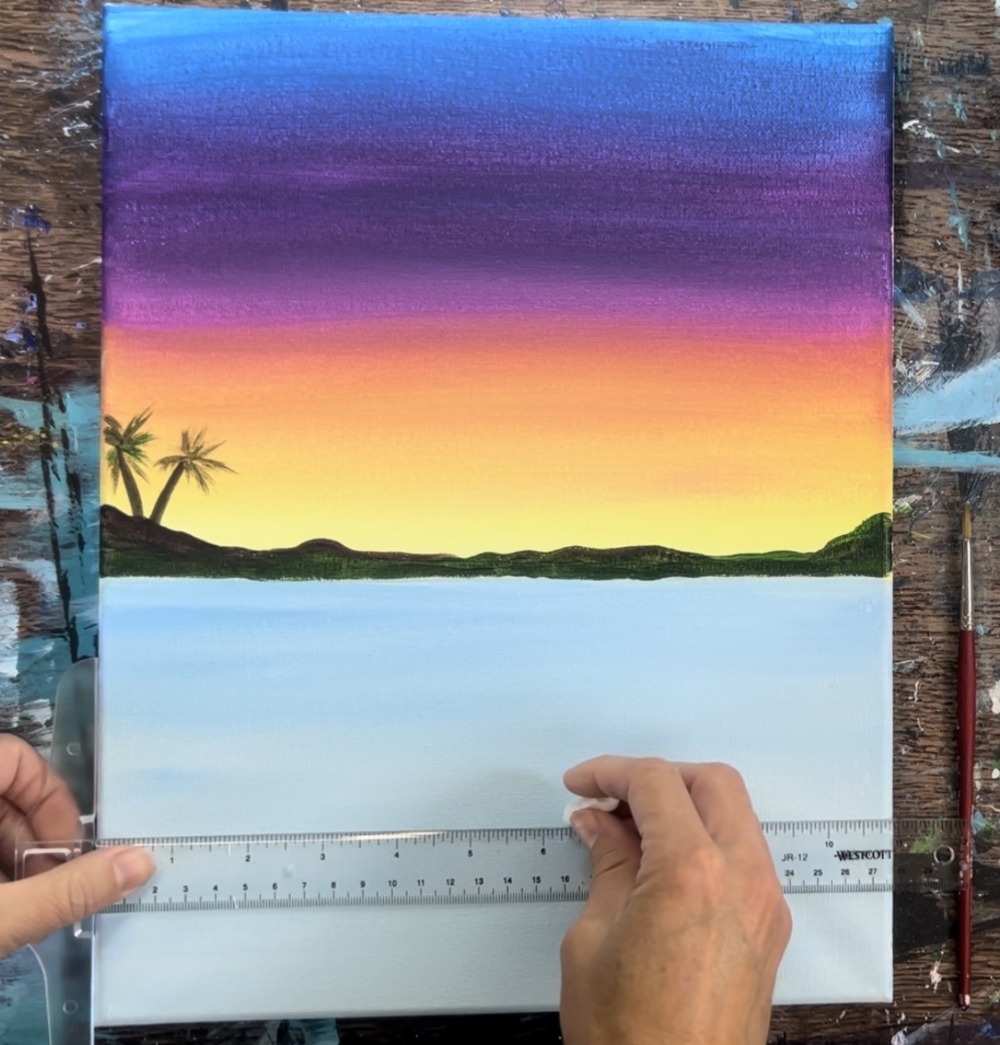
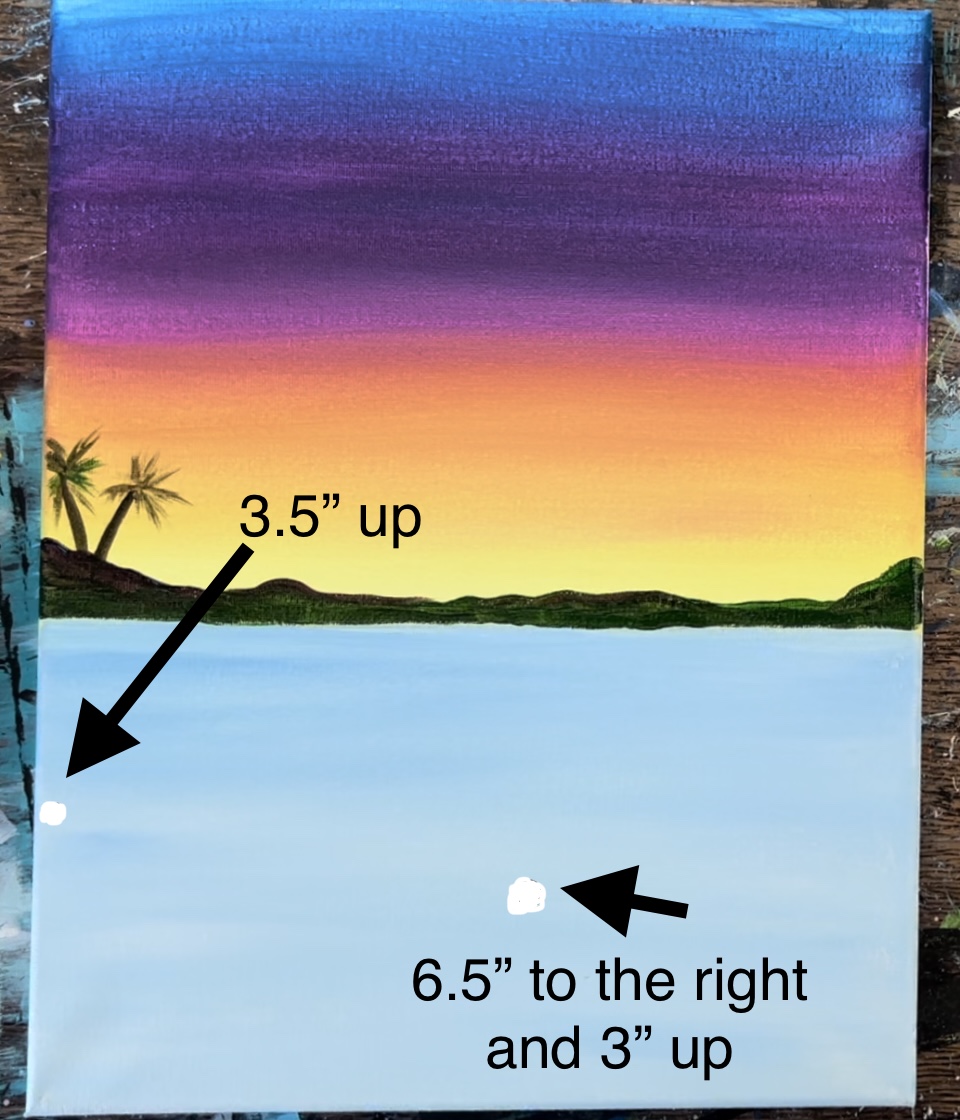
Then draw a large curve for the arch of the flamingo’s back. Start at one point and go to the other point. The height of the back goes a little bit above the mountains.

Then draw an oval for the flamingo’e head. Draw the oval so that it is slanted. The location of this oval is about 2″ below the top edge of the canvas and 2″ to the right of the canvas. The width of this oval (from one edge to the next lengthwise) is about 2.5″.
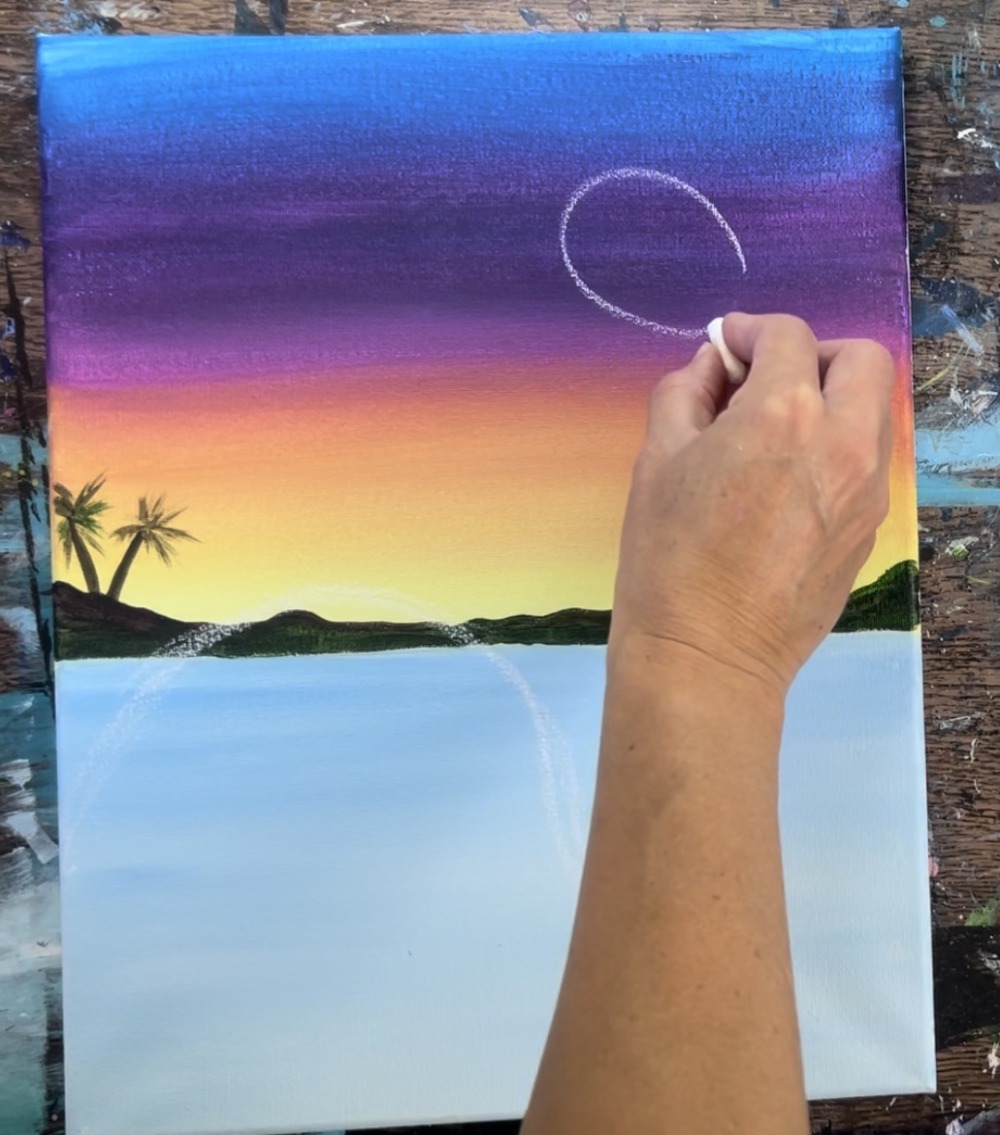
Then draw an “S” line that connects the oval on the far left side and down to the right button edge of the initial curve you drew for the body.
Next, make this “S” line into a shape by drawing a second line parallel to the first. The part of the neck that attaches to the bottom part of the head curves a bit.
The part of the next that connects to the body on the top also curves.

Then draw the beak. Draw a diagonal line that goes down from the middle bottom part of the head. Then segment that line so that it goes vertically.
Then draw a second line on the right that curves up and meets back up at the bottom of the head.

Then draw a triangle that goes inwards on the head.
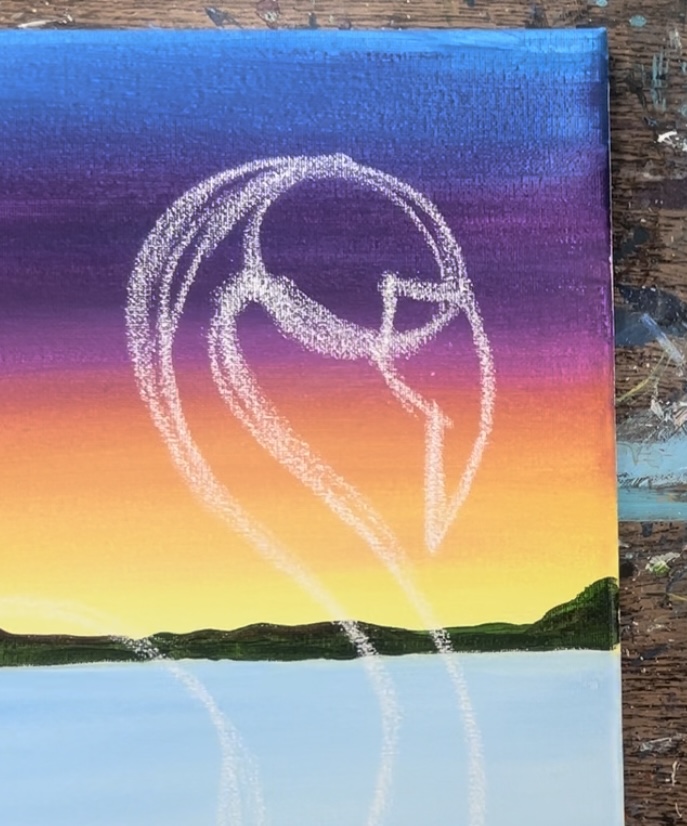
Then erase the curved line and then draw a line down the center of the beer from the tip.
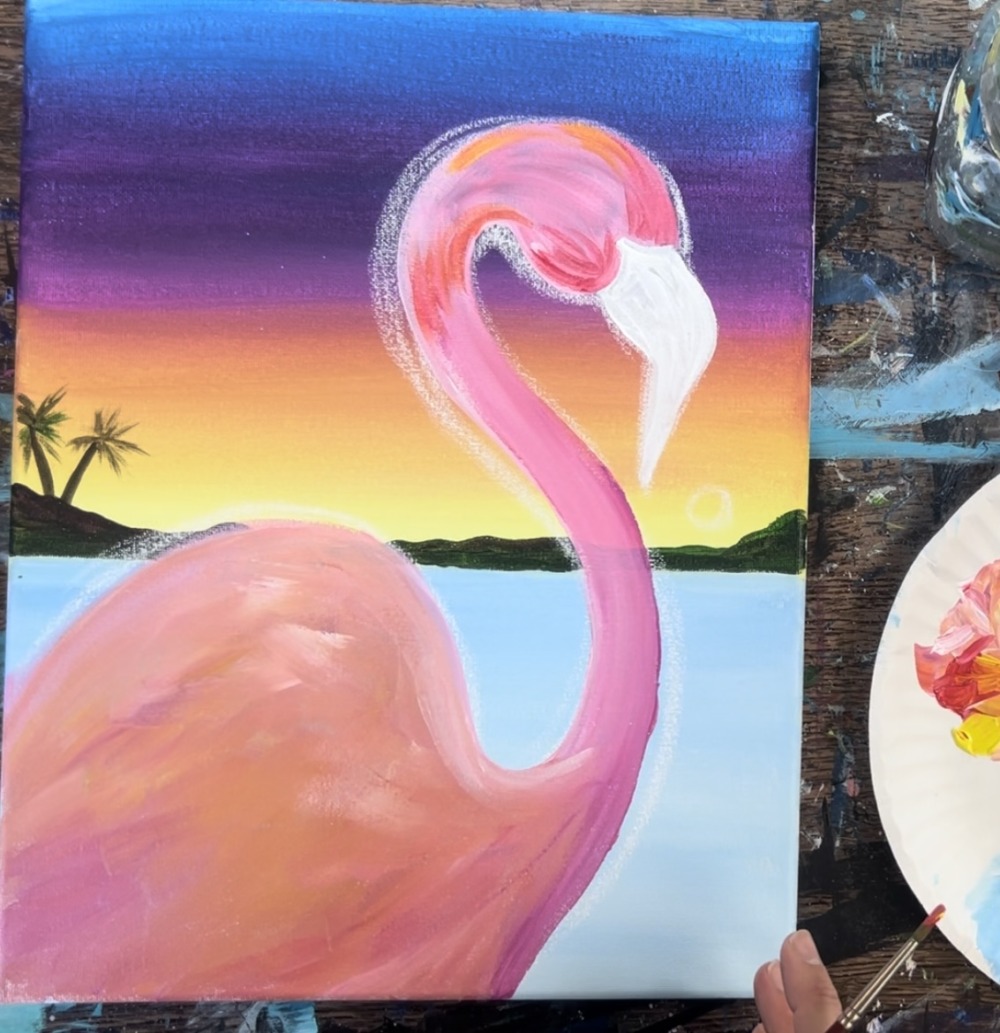
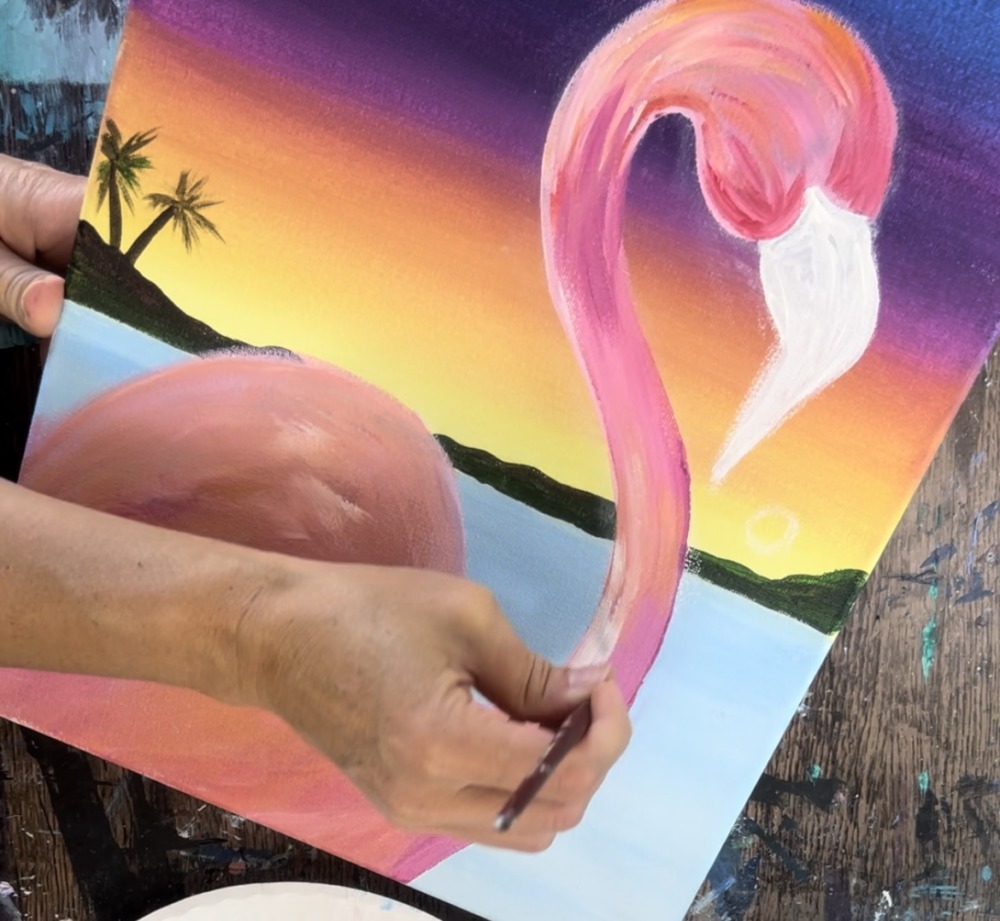
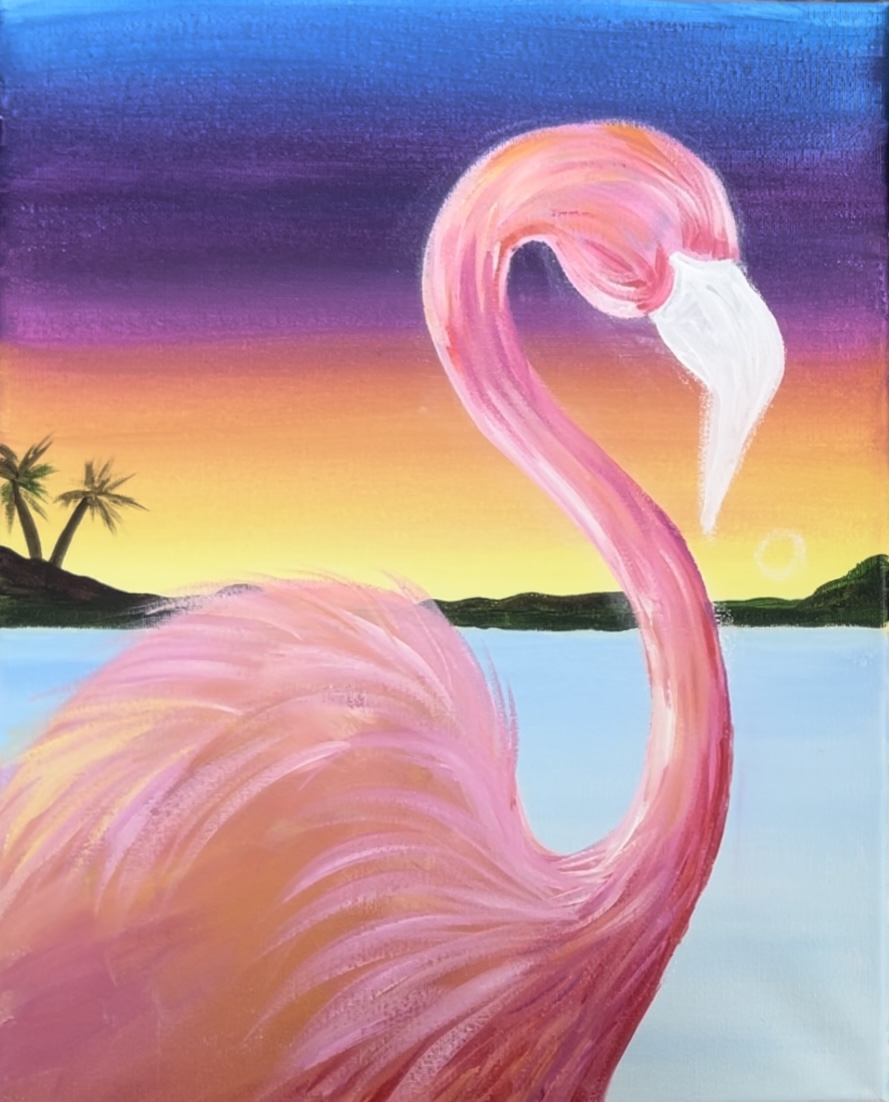
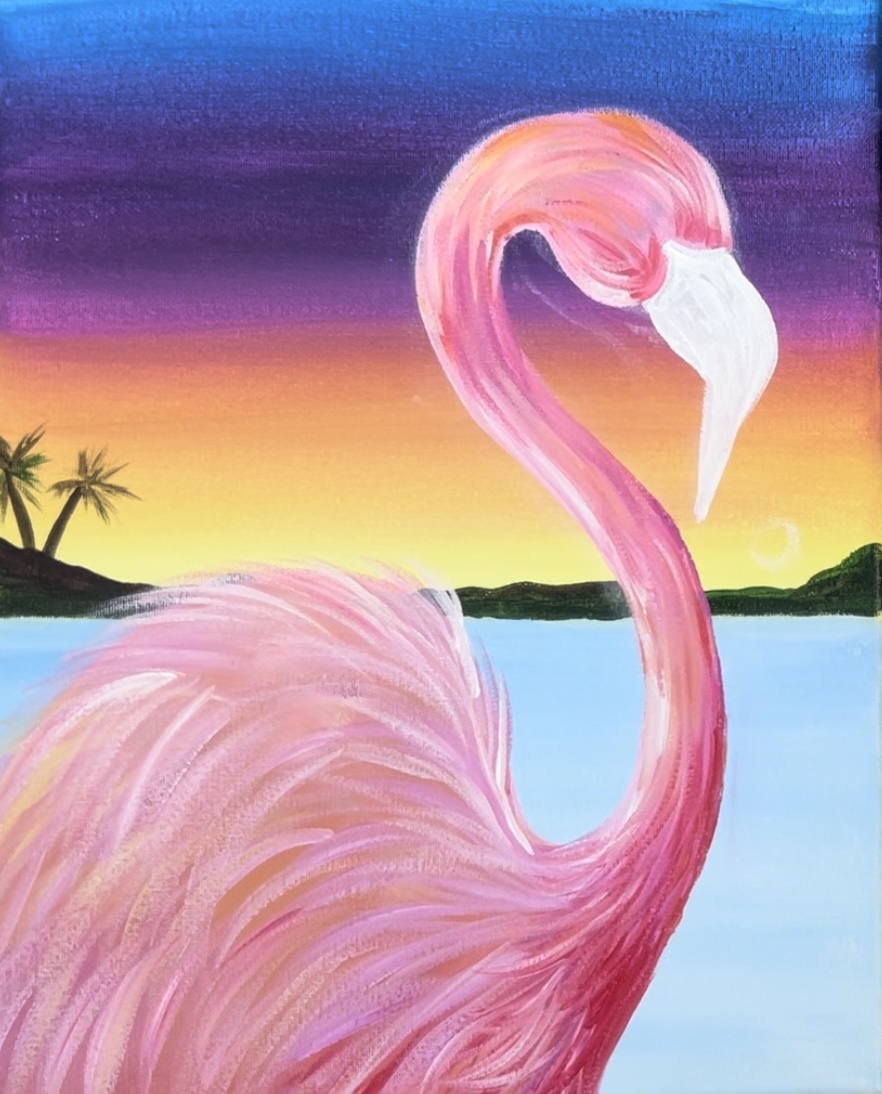
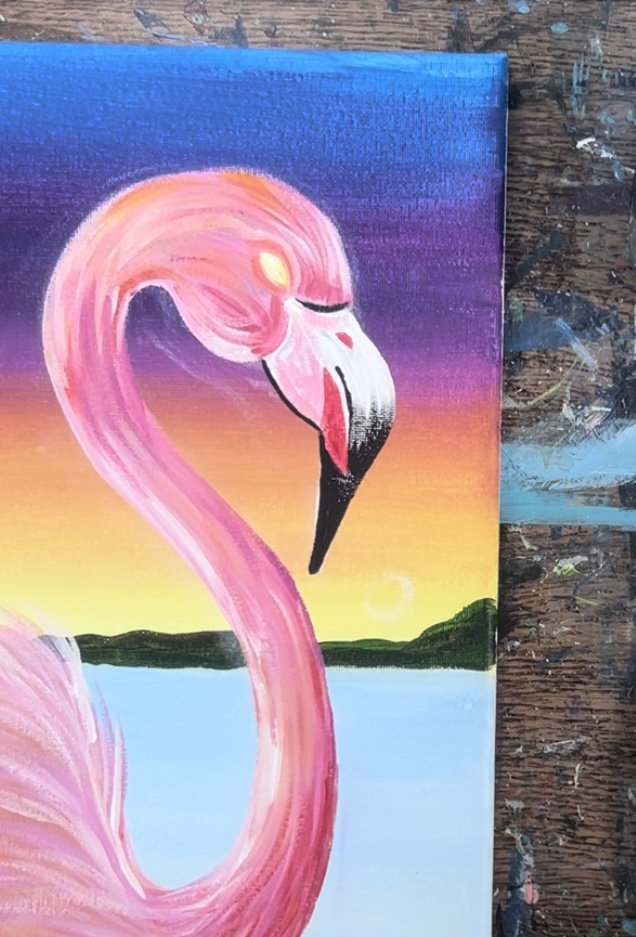
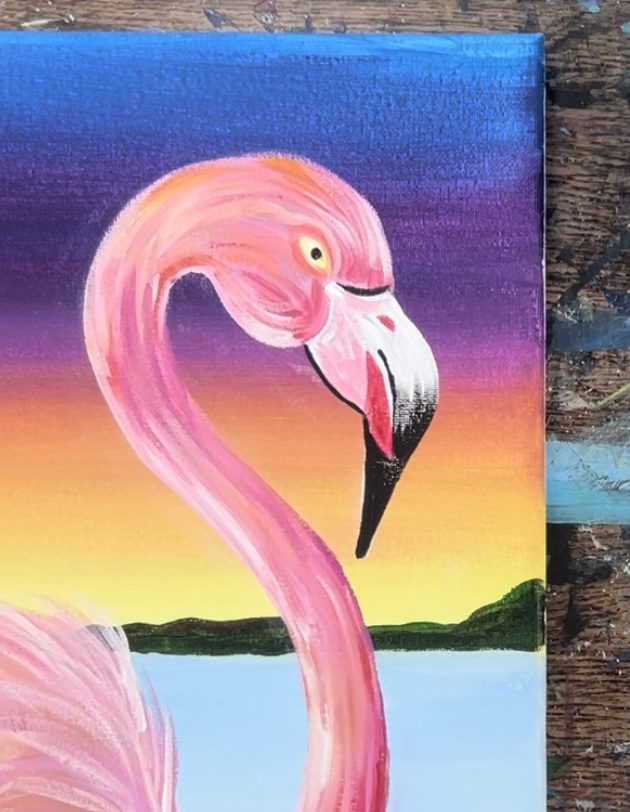
5. Paint Flamingo First Layer
Use a #12 bright brush for this step. We will be painting the first layer of the flamingo which consists of flat paint that contours in the shape of the flamingo’s neck, head and body.
Load your palette with: medium magenta, titanium white, cad yellow light and primary red. Start by mixing titanium white with a little bit of primary red. Outline the edge of the body, the neck and the head.
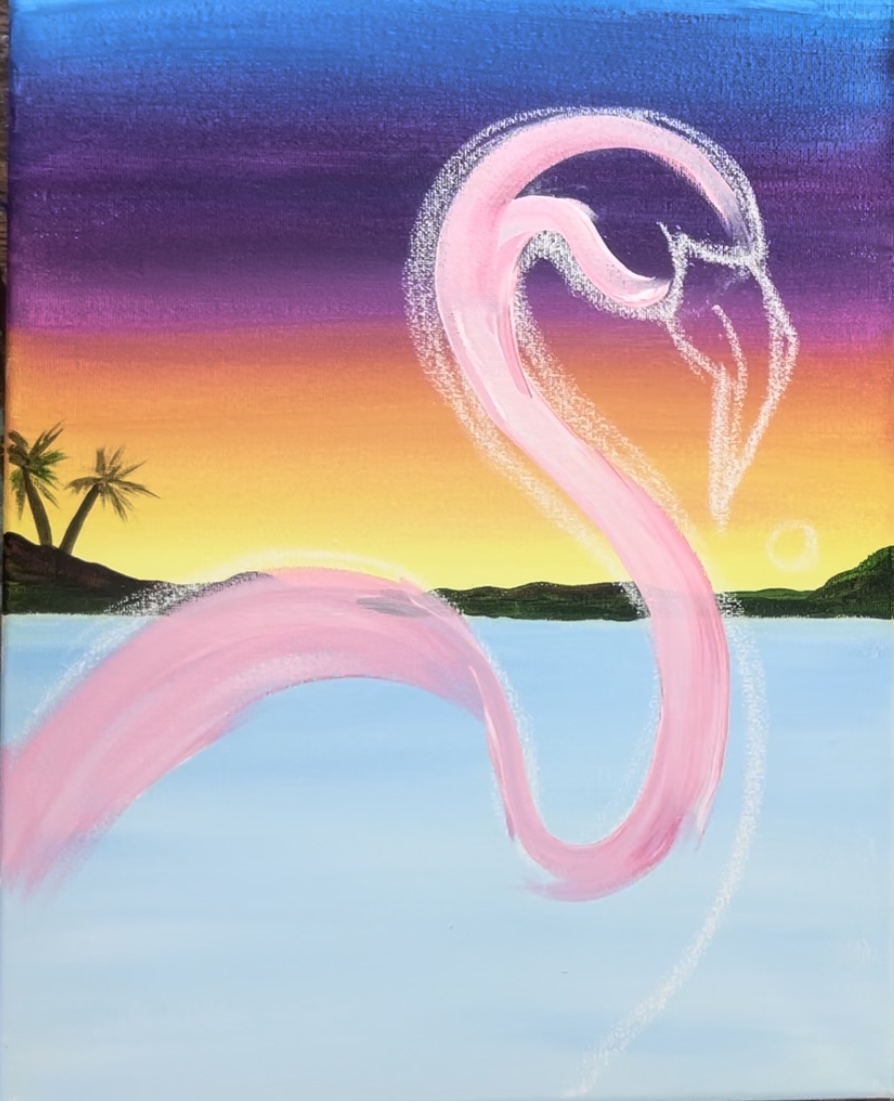
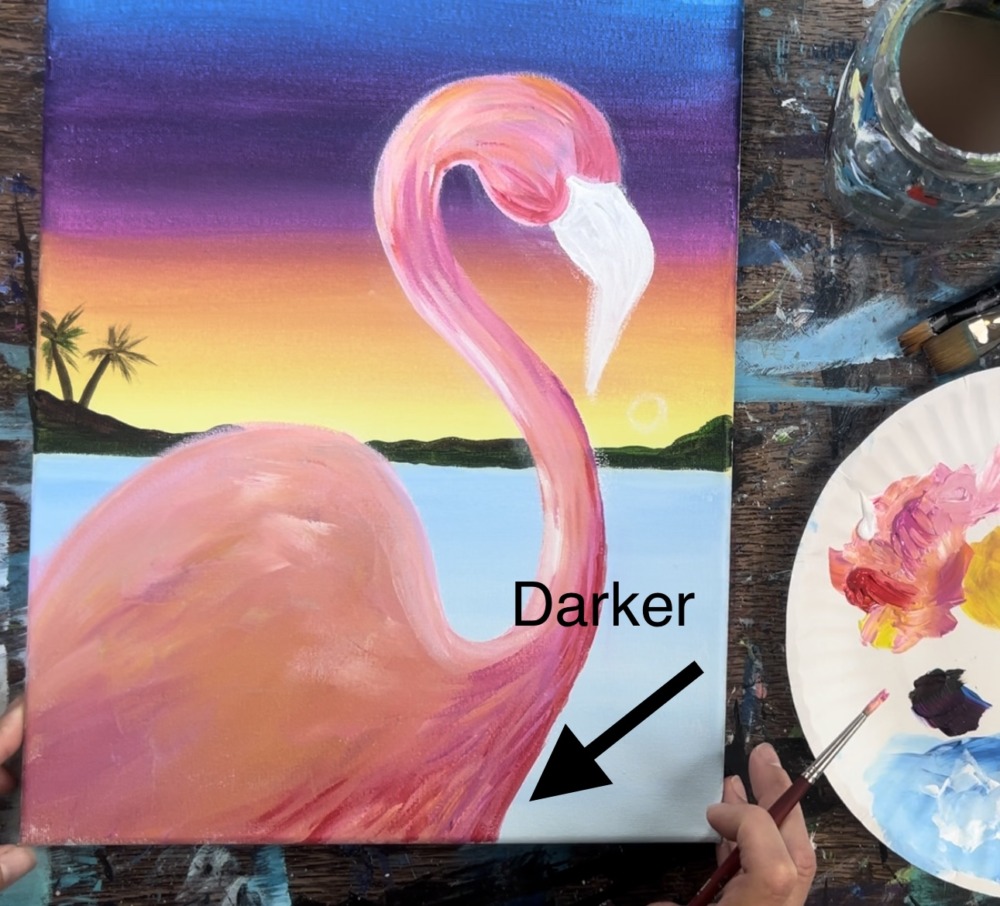
Then fill in the flamingo shape solid. Use a variation of the colors on your palette. For example, in the lower right and the right edge of the neck, blend more of the primary red so that it is darker. Add lighter colors on the left side of the neck, top of head and top of back.
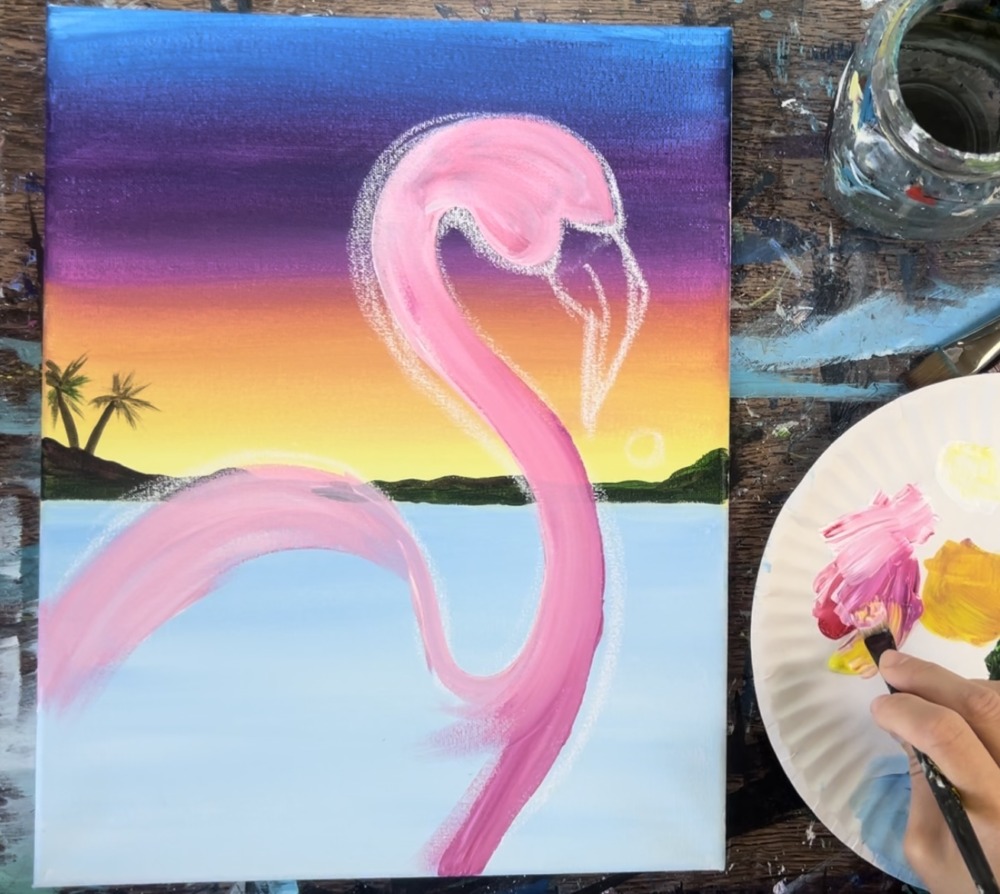
Then fill in the shape of the body using large expressive strokes. Add a small amount of cadmium yellow light into the pink and white. This will create a pretty coral color. Only a small amount of yellow is needed!

Fill the head going in a curved direction and fill the body going in angle strokes. Fill the neck in solid going in long strokes that form the “S” shape. You don’t need to blend the colors all together, they should be gently mixed.
Then use a #4 round brush and titanium white to paint the beak. Outline the shape of the beak first and then fill it in solid. Don’t worry about the details on the beak for now.
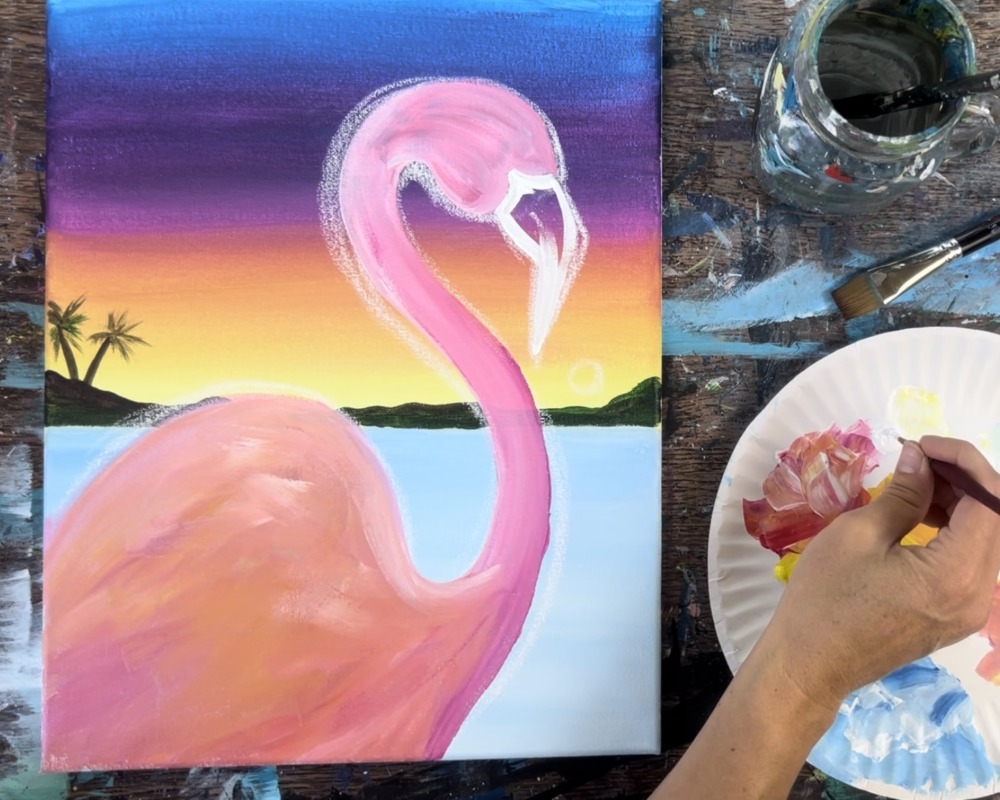

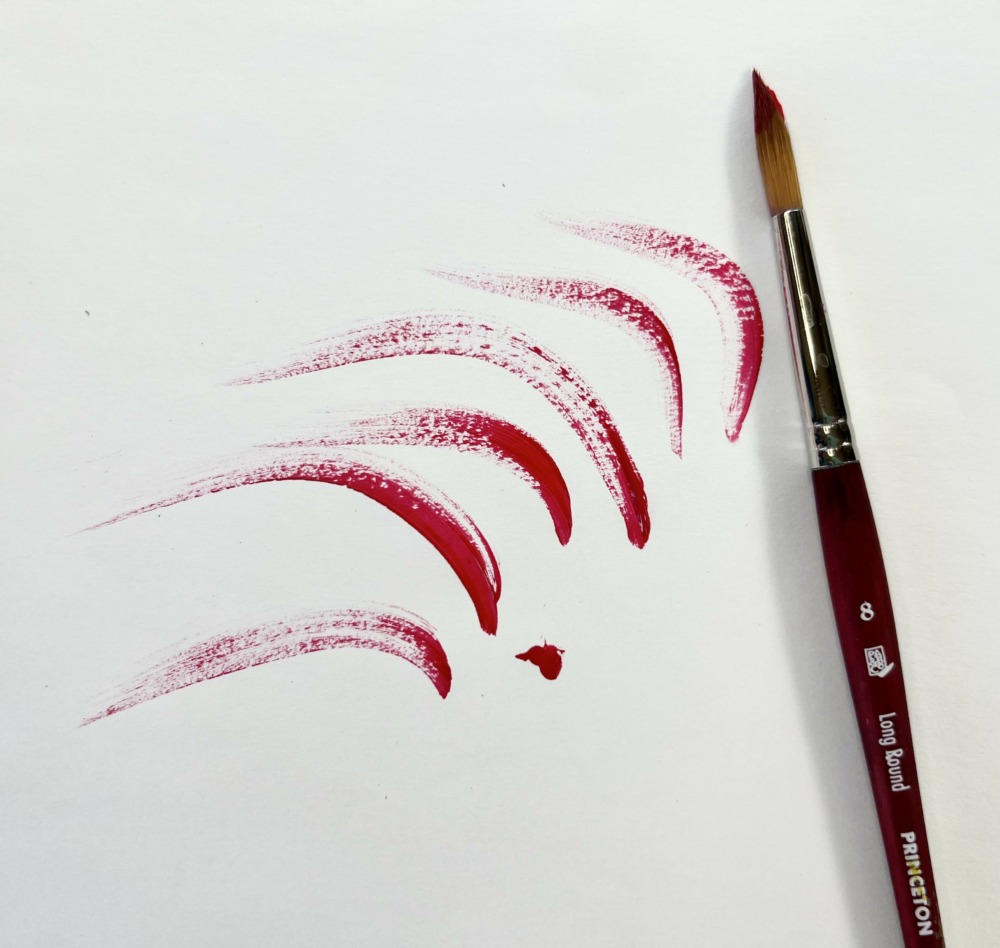
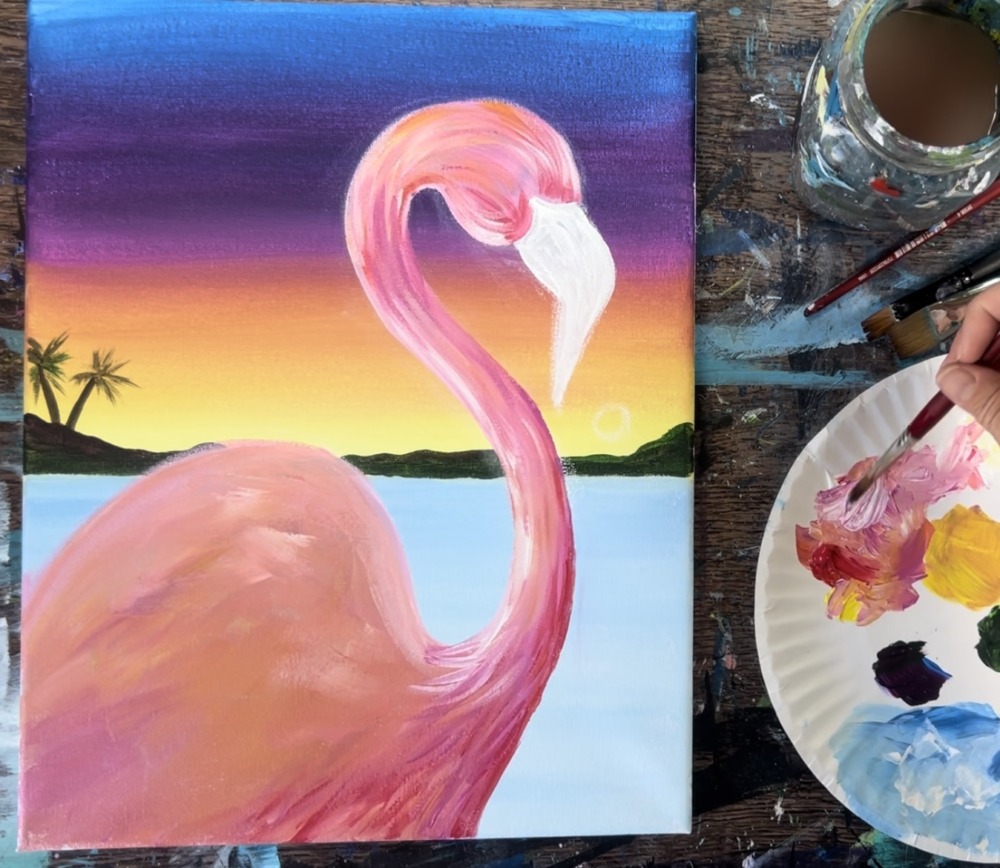
5. Paint Feather Texture
Use the #4 round brush to paint the feather texture for the head and neck. You will be using the #8 round brush for the back feather texture.
Start by loading the #4 round brush in primary red mixed with a little yellow. Paint curved dash-mark like strokes.
Then add a little yellow to the brush to vary this color. Continue to fill the shape of the head and neck with those curved dash-mark like strokes. Don’t cover all of the first layer of color. You’ll want to still see that first layer through these strokes.
Add more curved strokes on the neck with a variety of the pinks, white and yellow.
I intentionally added more white on the left side of the neck and more primary red (darker pink) on the right side of the neck.
Then add more primary red in the lower right part of the neck/ front part of the body.
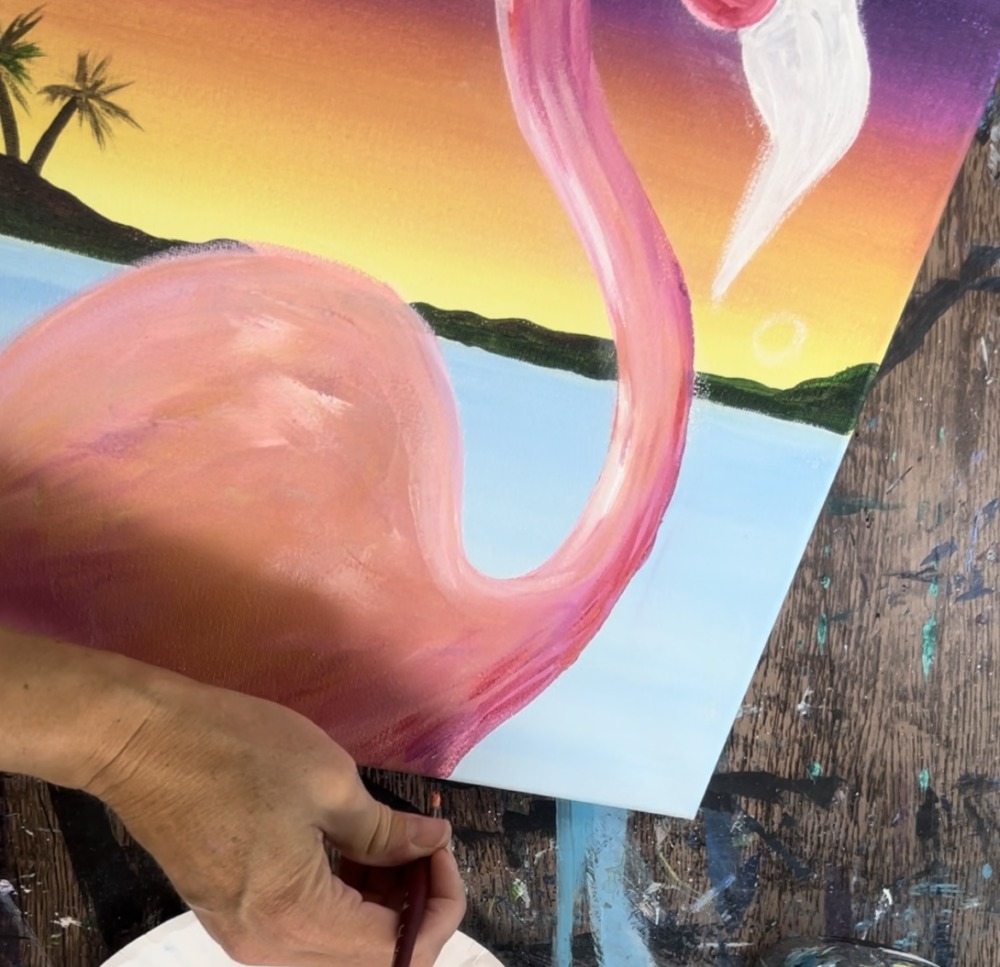
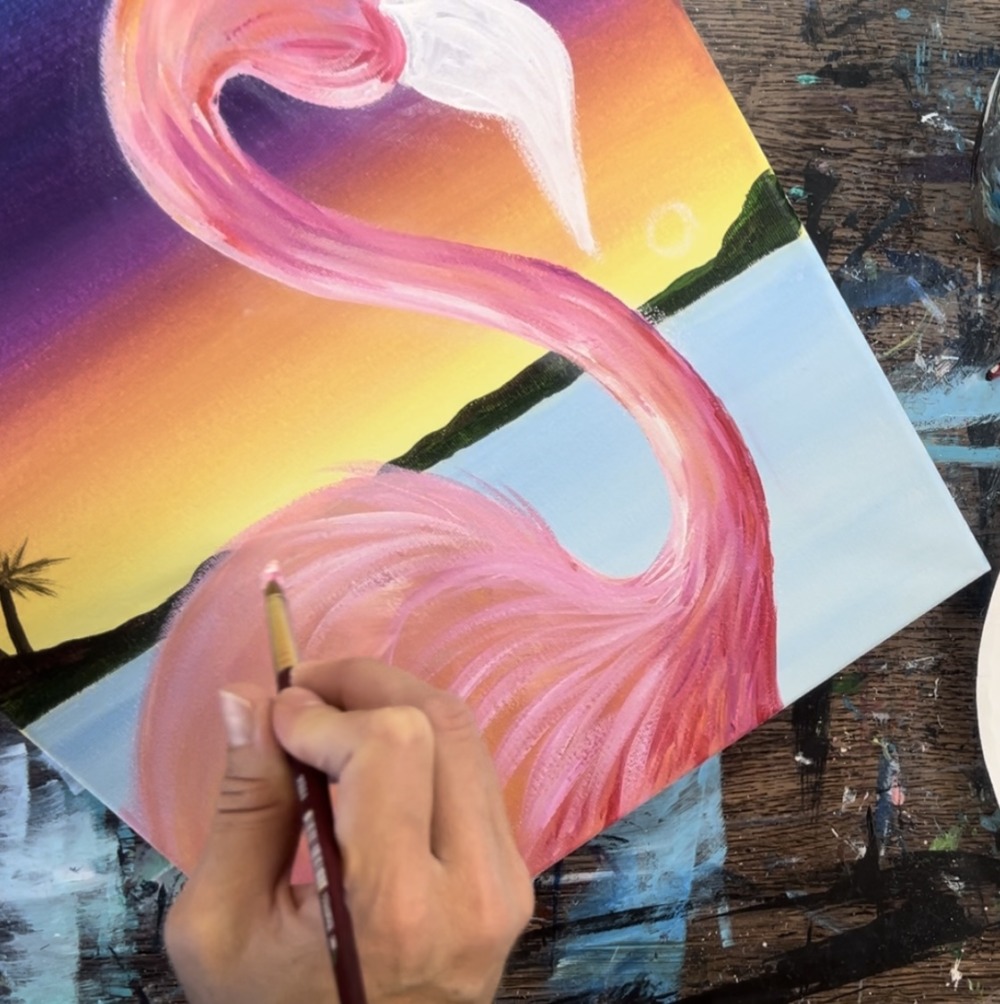
Next, use the #8 round brush to paint larger feather strokes on the flamingo’s back.

Load the #8 round brush in a combination of medium magenta mixed with a little titanium white.
Start on the right side that is towards the neck. Paint a set of curved large strokes that fan out and curve/contour with the shape of the flamingo’s back.
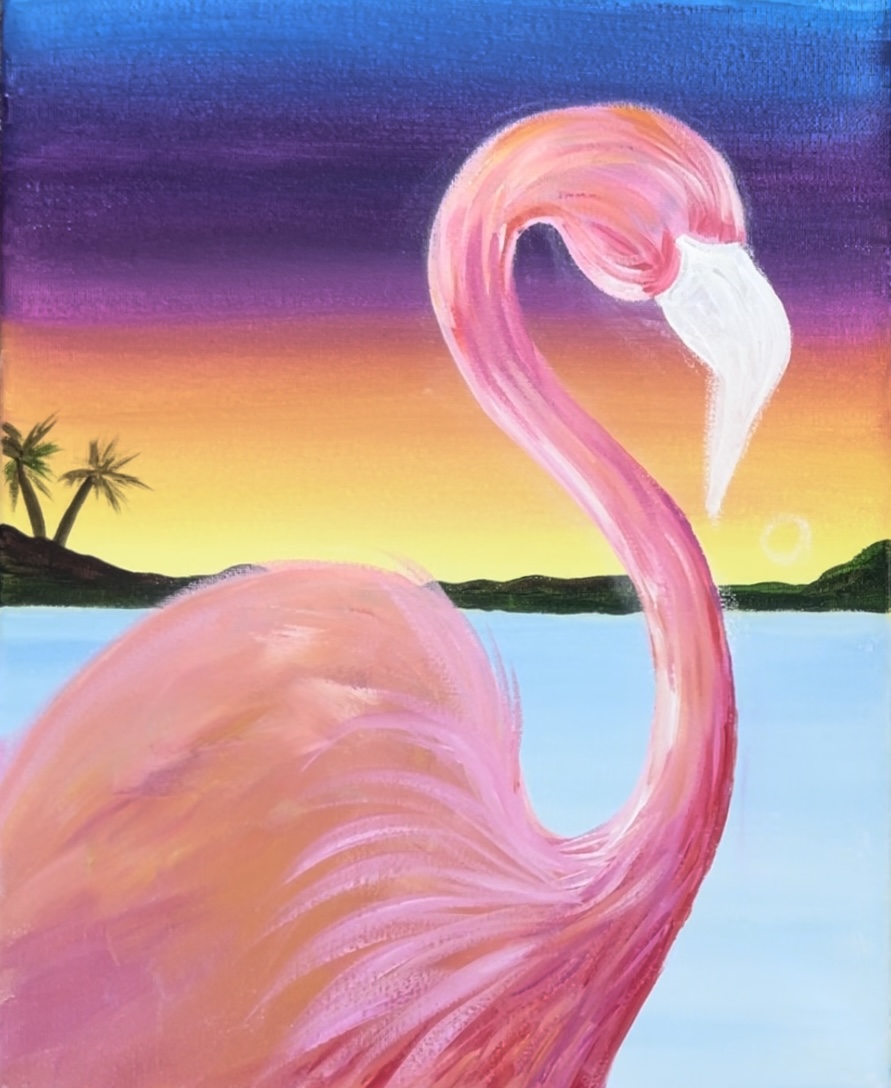
Then paint a set of feathers along the top part of the back. These are long, curved strokes using the same color. Paint a few thin feathers that go off the edge of the back so they are sticking outwards a bit.
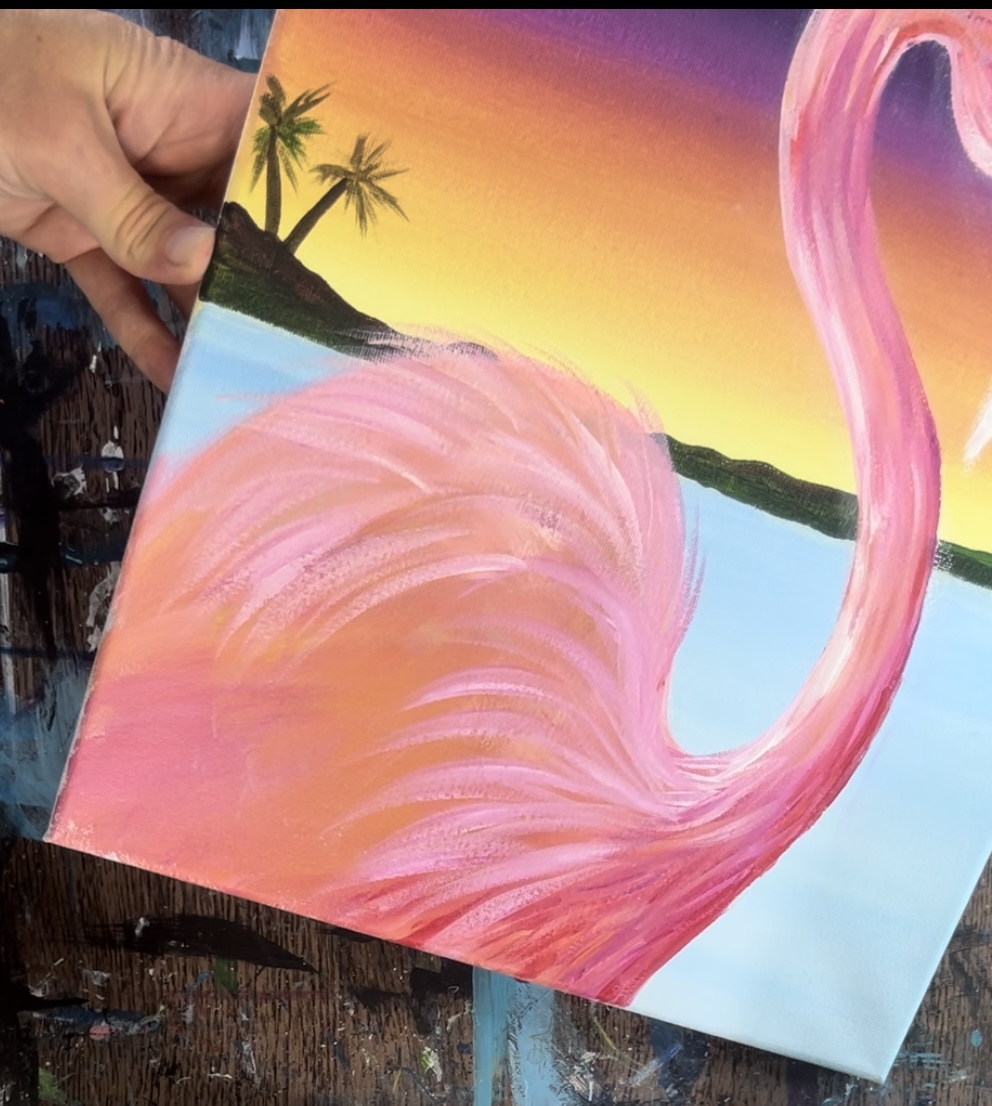
You can add a bit of yellow into the feathers as well to help vary the colors.
Fill in the rest of the flamingo with the same curved/ feather strokes. Vary the colors a bit but make sure you are using plenty titanium white so the colors shows up against the darker base color. It’s also okay to overlap feathers and create more than one layer but don’t cover up all of the base layer.
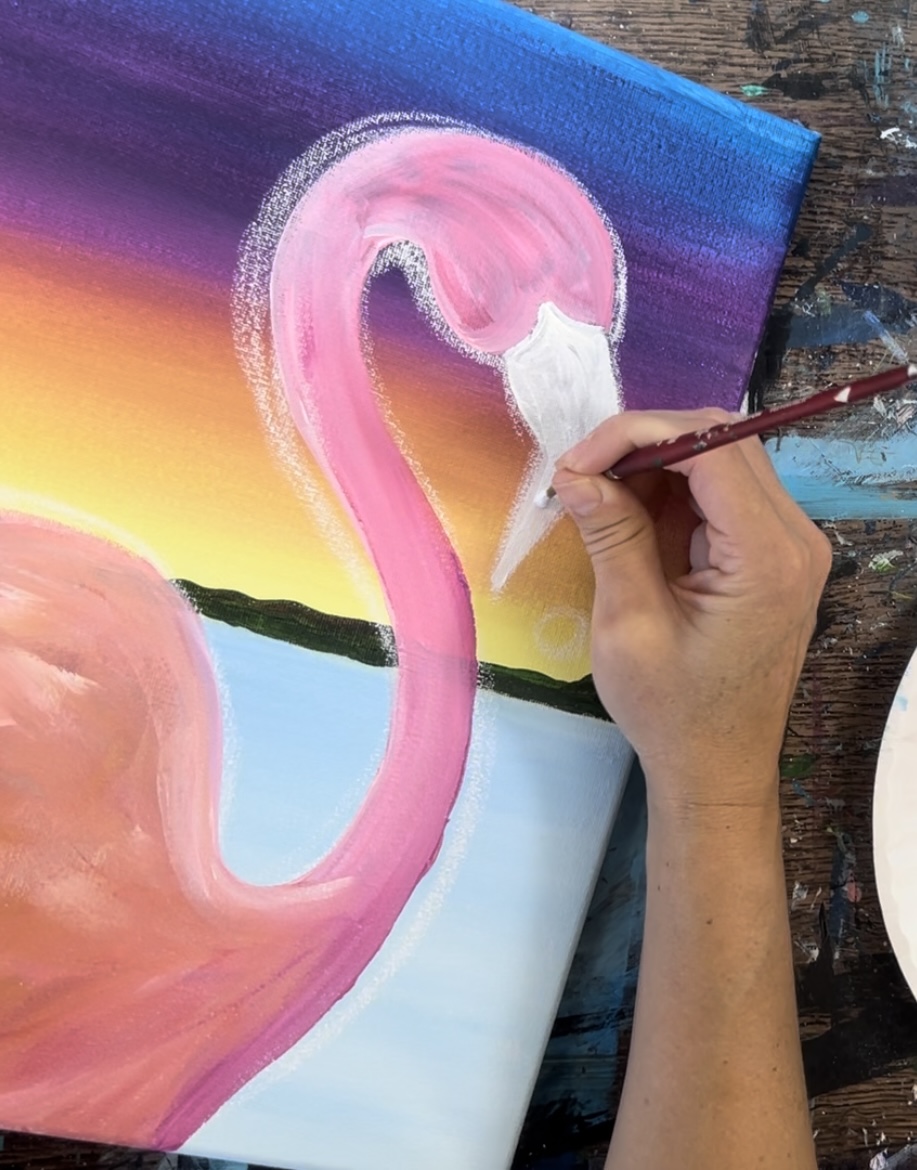
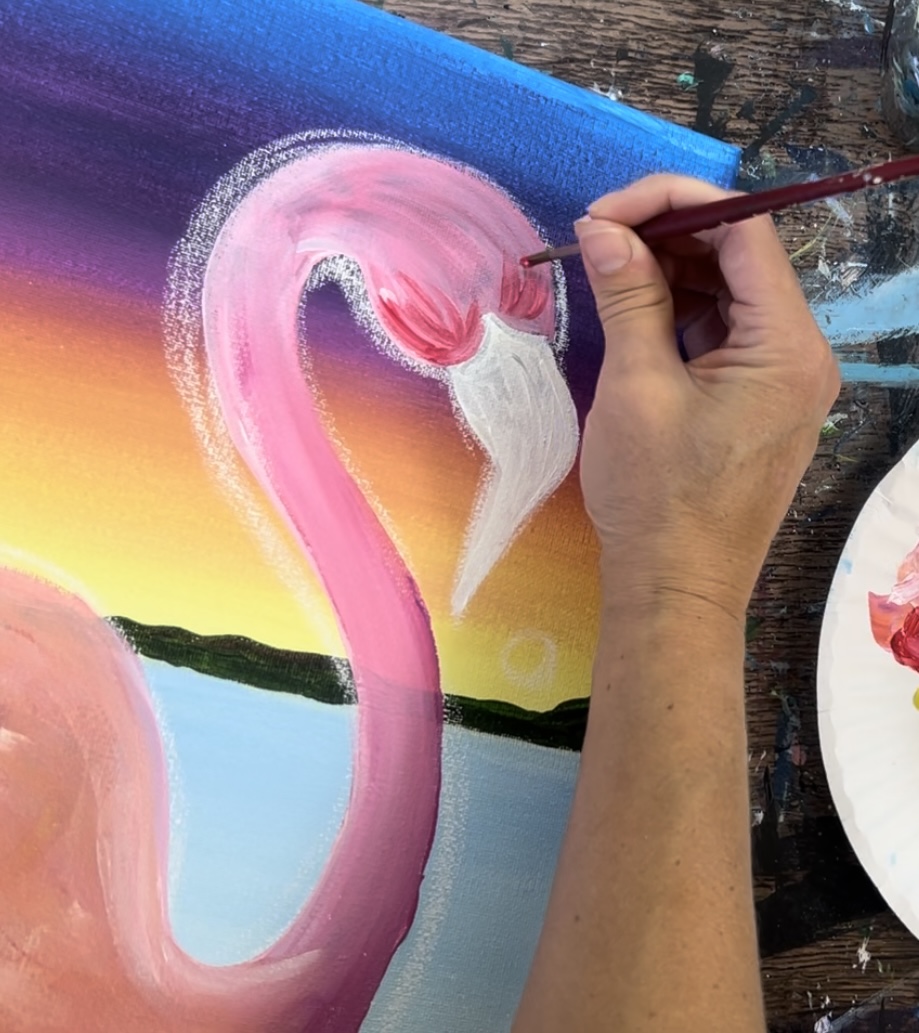
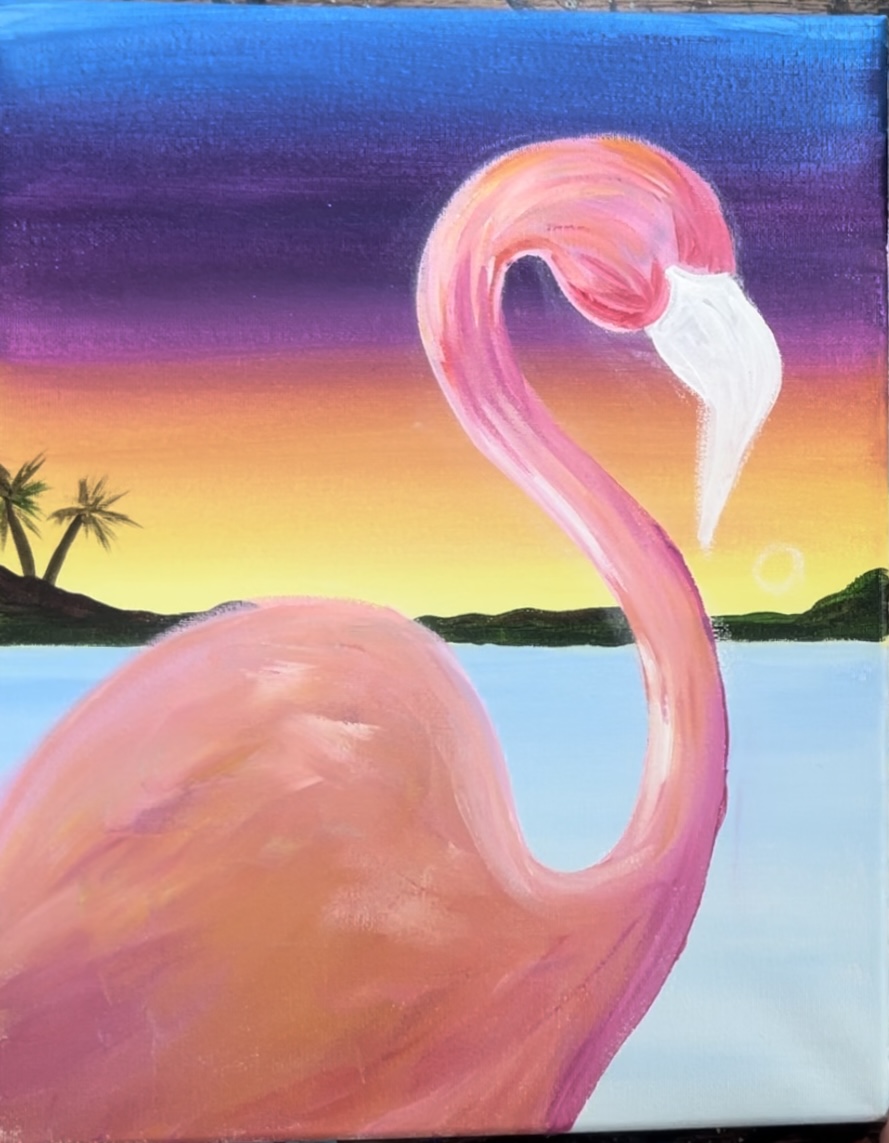
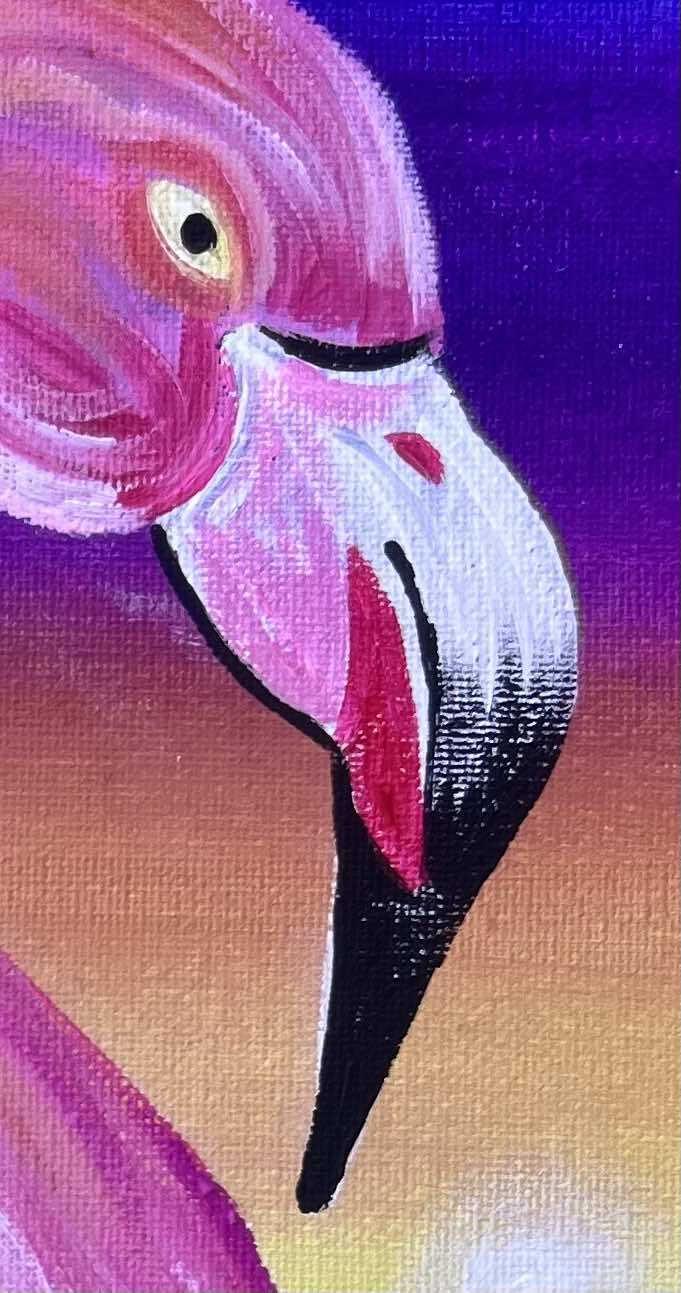
6. Paint Details On Beak
Use mars black and the #4 round brush to paint the tip of the beak with mars black. Paint a curve and then fill it in black.

Then loosely outline the bottom edge of the beak.
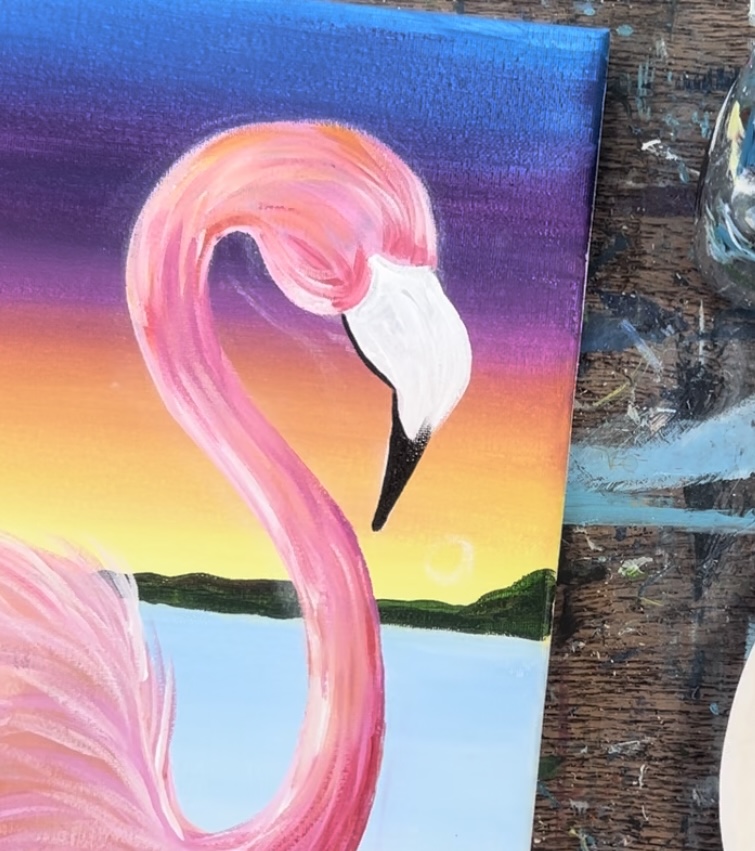
Then paint the middle line of the beak.
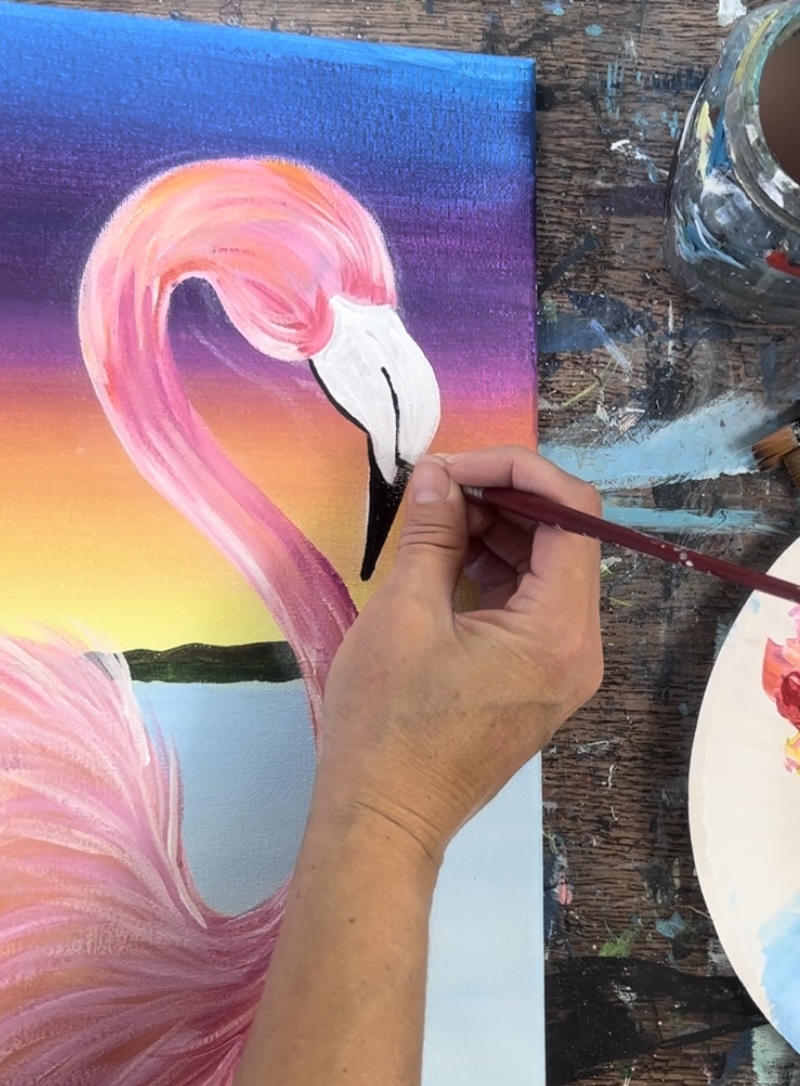
Outline the top right curve of the beak. Then “dry brush” some black on the right so it fades into the white.
Next, use “primary red” to paint a stretched diamond shape on the left side of the beak. Also, paint a ver small oval on the top right of the beak.
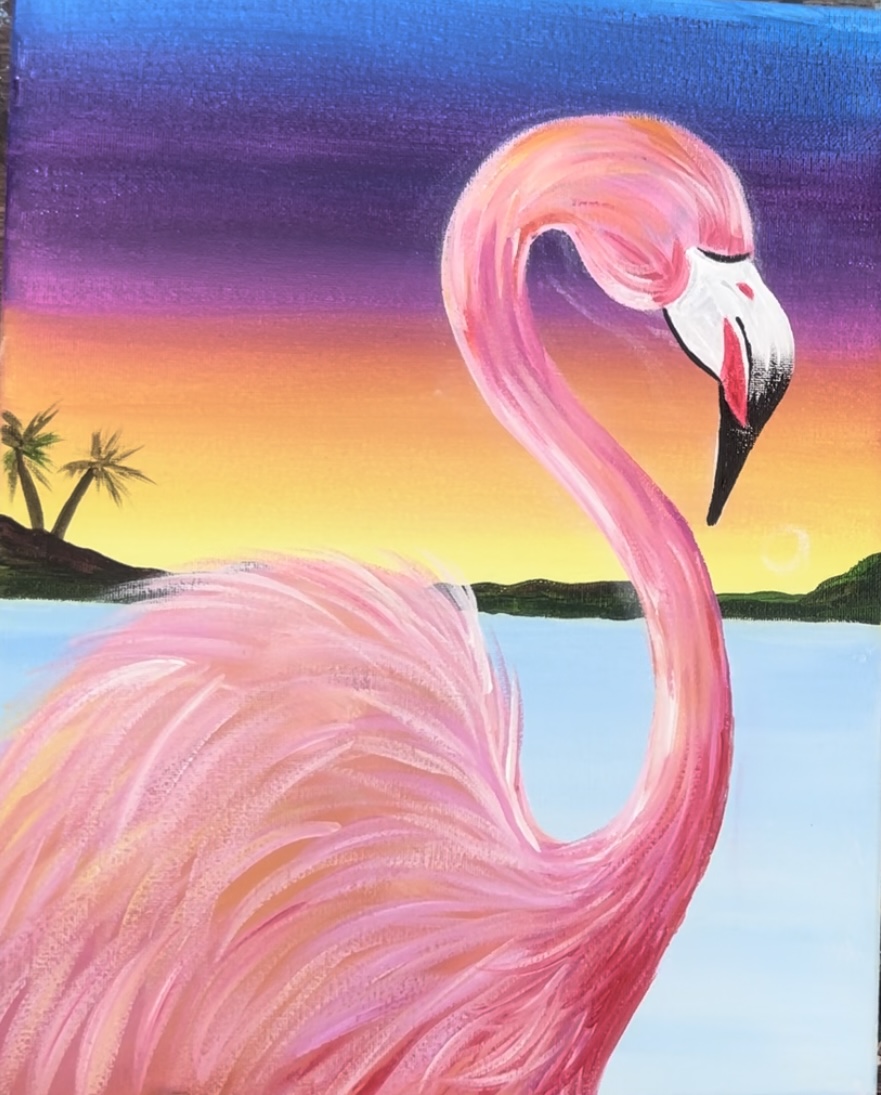
Finally, add some medium magnets on the left side of the beak leaving the rest of the beak pure white on the right.

7. Paint Eye
Next, paint a “cat eye” shape in the center of the head just next to the part of the beak that curves inwards. Do this with yellow mixed with white and use your #4 round brush.
Then load your brush with medium magenta or primary red (without rinsing the yellow of your brush). Paint a border around the eye.
Then paint a black dot inside the eye.
Below is a closeup of the eye and beak details.
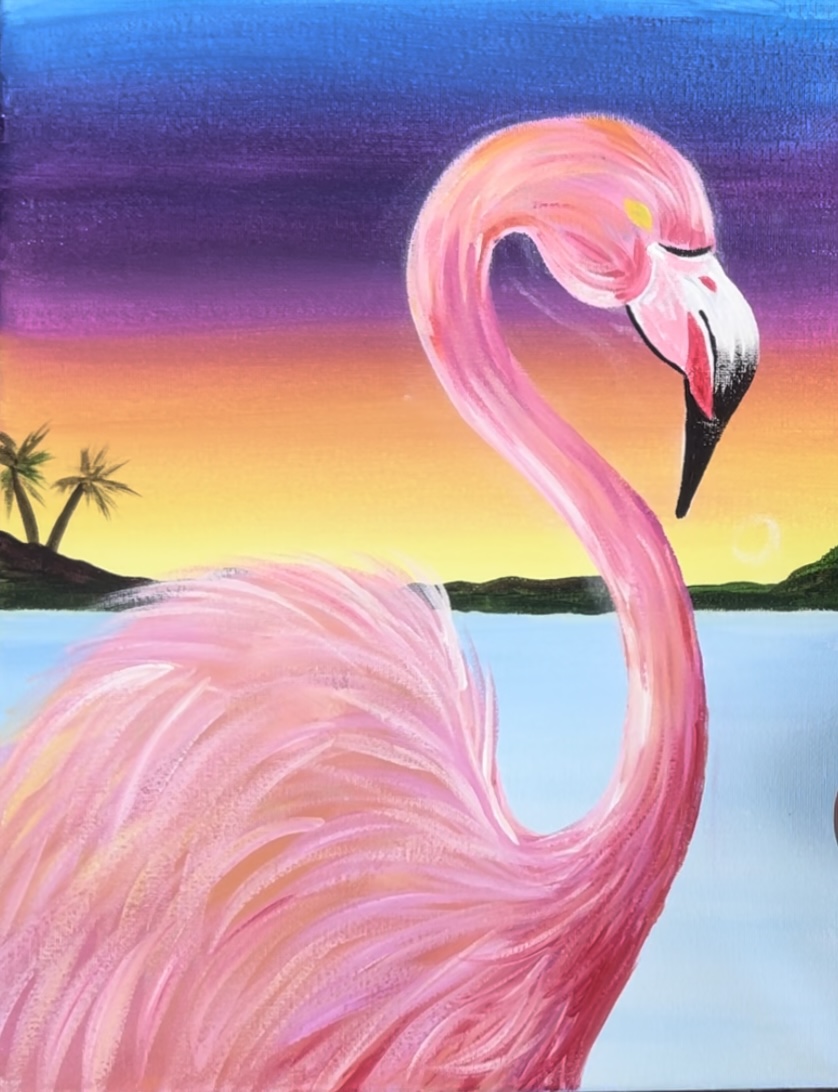
8. Paint Sun & Water Reflections
Use the #8 round brush and titanium white to paint a white circle for the sun. Then use your index finger to smear the dot and make it blurry.
Paint another smaller circle on the inside of the blurry circle. Then use the #4 round brush to paint small horizontal lines going in a vertical direction. Mix equal parts titanium white and primary yellow. Make the lines smaller and closer together further in the distance and make them larger and more spread apart closer to the bottom edge of the canvas.
Next, use a mix of the yellow, white, primary red and magenta to paint more water lines. Paint them all throughout the water area and try to keep the area just under the sun brighter and lighter.
Paint more lines with cerulean blue. You can also paint a few dark green lines just under the land in the distance.
Finished