


Would you like to save this?
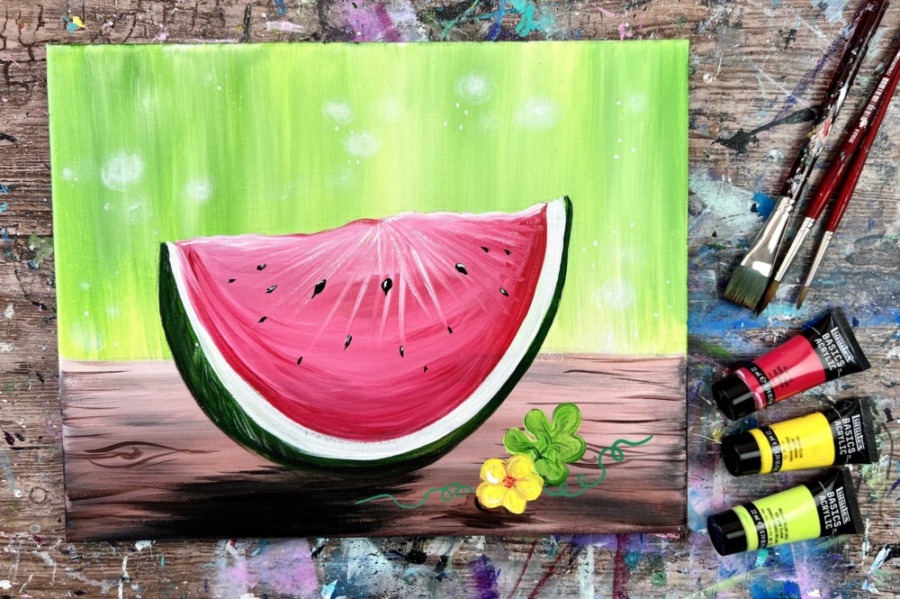
This acrylic painting tutorial will demonstrate how to paint a watermelon with acrylics.
Learn how to paint a juicy dark red watermelon on a wood table with a pretty watermelon blossom flower and fun green bubbly background.
This is a great “still life” painting you can do as a summer design or for year round fun.
It’s also a great lesson you can do with the kids while enjoying the yummy summer treat. Have the kids observe the slice of watermelon. How do the seeds look? Is the color of the flesh the same throughout or is it lighter in some areas? What is the life cycle of a watermelon from seed to sprout to vine to blossom to melon?
You can also customize the background in this painting and/ or add some other fun summery elements!
Enjoy and happy painting!
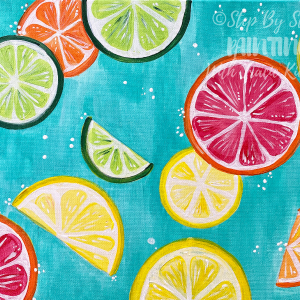
See Also…
Learn how to paint citrus slices!
Materials Needed:
How To Paint A Watermelon - Still Life Painting Tutorial
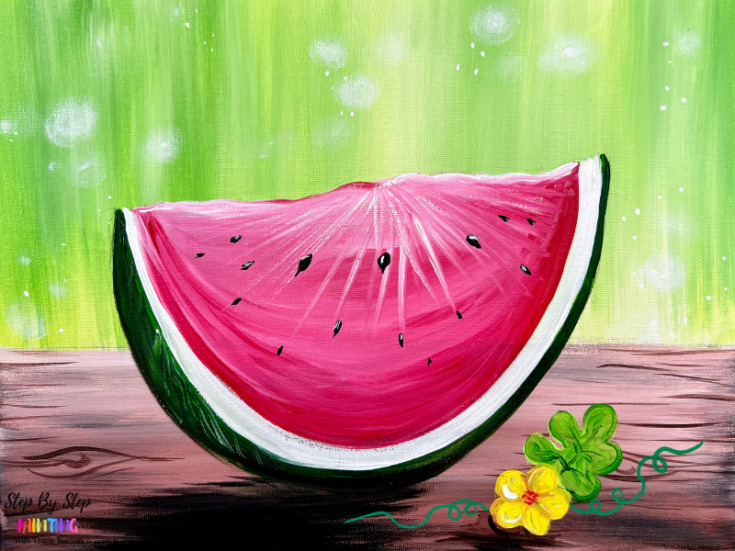
This acrylic painting tutorial will demonstrate how to paint a watermelon still life painting on canvas.
Materials
- 11 x 14 Canvas
- Acrylic Paint
- Paint Brushes
- Pencil
- Ruler or Straight Edge
- Green POSCA Paint Pen (Optional)
- White Chalk Pencil
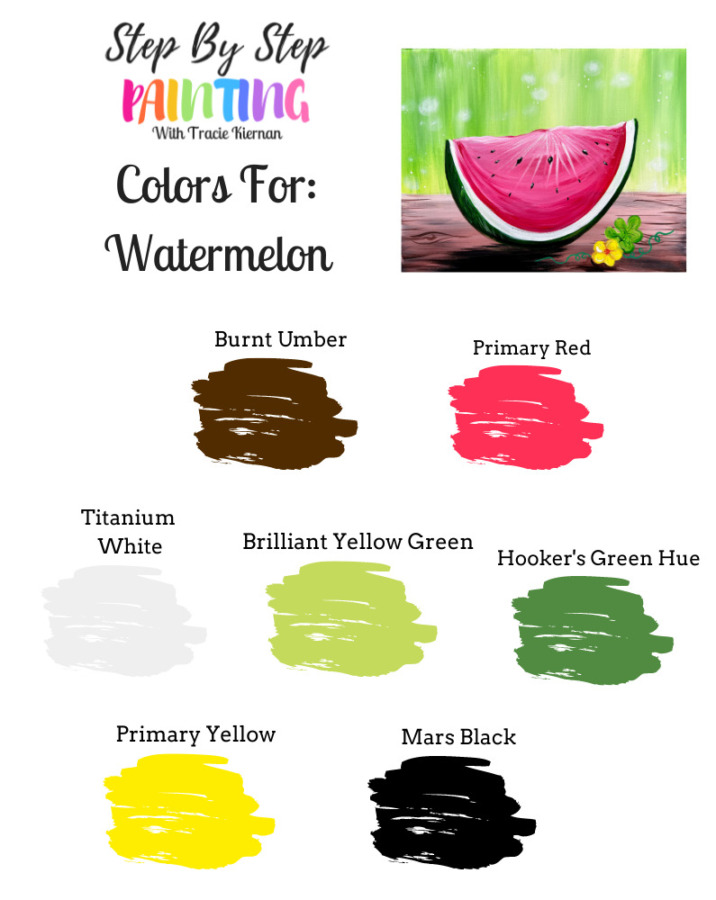
Colors
- Titanium White
- Mars Black
- Primary Red
- Hooker's Green Hue Permanent
- Brilliant Yellow Green
- Primary Yellow
- Burnt Umber
Brushes
Color Palette
This tutorial was done using Liquitex BASICS acrylic paint.
Using Craft Paints?
If you are using craft paints such as the Apple Barrel craft paints, you can substitute the colors to:
- White
- Brown Oxide
- Candy Pink mixed with Red Apple
- Caterpillar
- Parakeet
- Yellow
- Jet Black
Traceable:
Optional! This is to help you with the watermelon drawing. I demonstrate the drawing in the tutorial. Click the image or the 11 x 14 PDF template download.

Directions At A Glance:
Video:
Step By Step Directions:
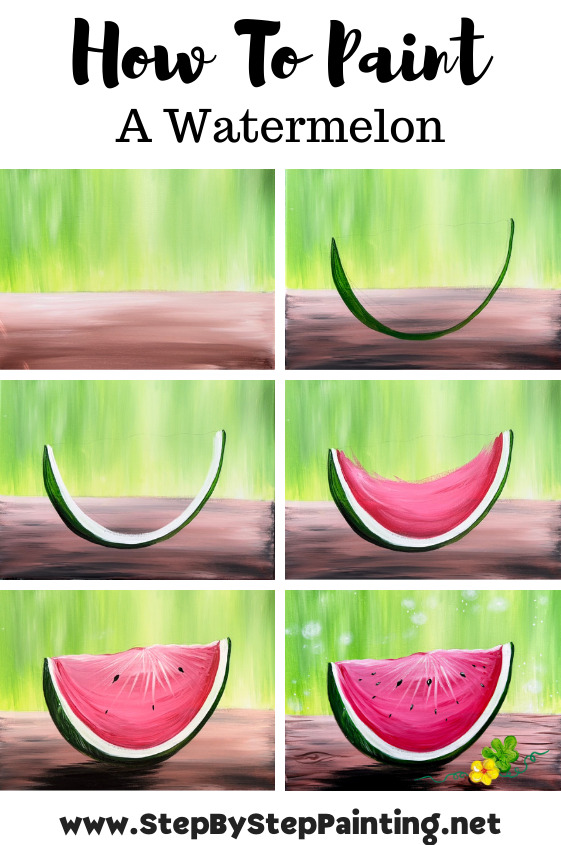
1. Paint The Background & Table
Position your 11 x 14 canvas in a horizontal mode. Measure 4″ from the bottom of the canvas and then use a ruler and pencil to draw a horizontal line across the canvas. This will be your table line.

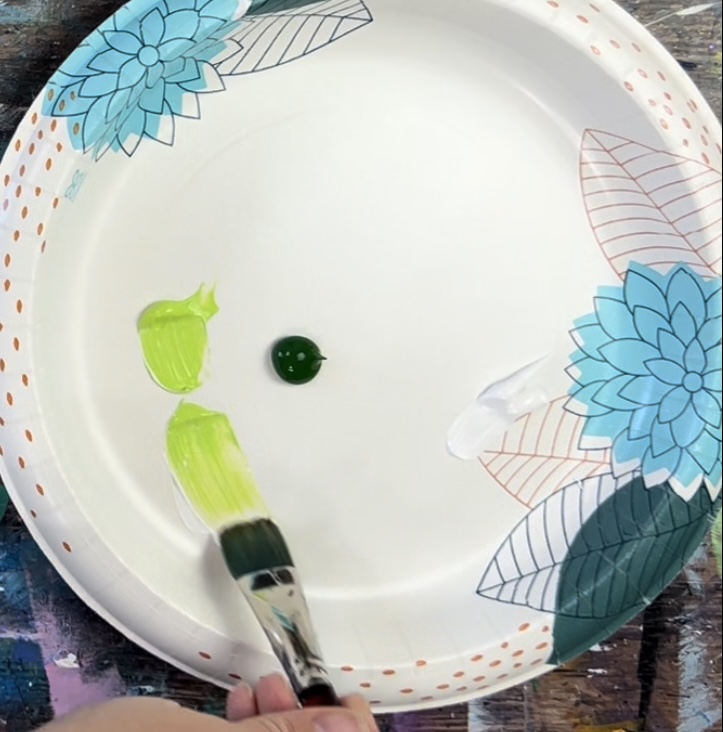
Then load your palette with brilliant yellow green and hooker’s green hue permanent. You will also need titanium white (not pictured).

Use your 3/4″ flat wash brush to double load it into the brilliant yellow green and titanium white.
Paint up and down strokes on the bottom part of the wall (above your table line). Go about half way up.

Then load your brush in a small amount of hooker’s green hue permanent. Blend with the light green.

This background is an abstract blend of the dark green and light green. The “wall” is slightly lighter and brighter on bottom above the table. Use titanium white to blend with the greens to make them brighter in some areas. Try not to over blend the greens.
Next, load your palette with burnt umber. Rinse and dry your 3/4″ flat wash brush.
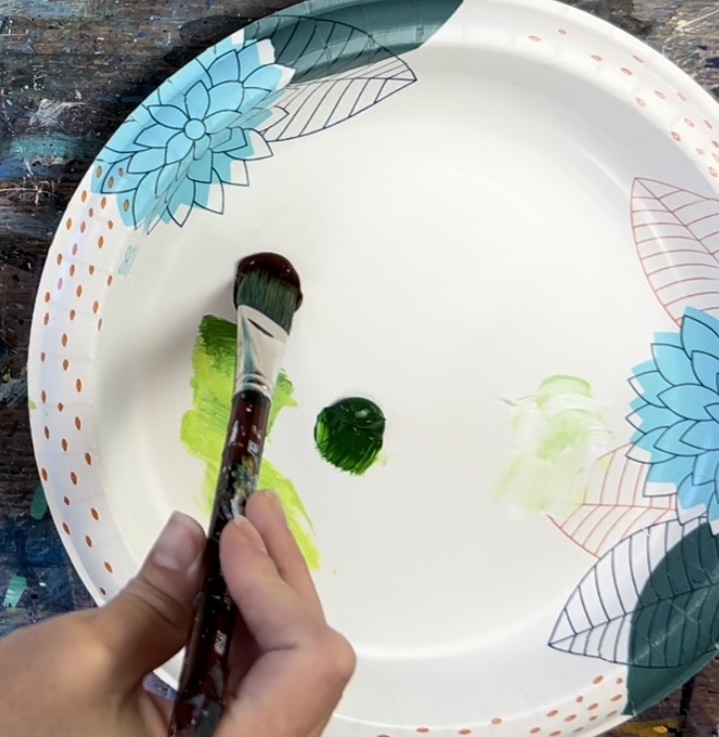
Paint left and right strokes going in a horizontal direction.

Then load your brush in titanium white without rinsing the brush. Blend the white with the brown so the brown gets gradually lighter towards the top.

Blend the white slightly with the brown on the bottom. Leave this “un blended” to create a “faux wood” look.

Next, wipe your brush off but don’t rinse it. Load your palette with a small amount of mars black. Load mars black on the tip of your brush.
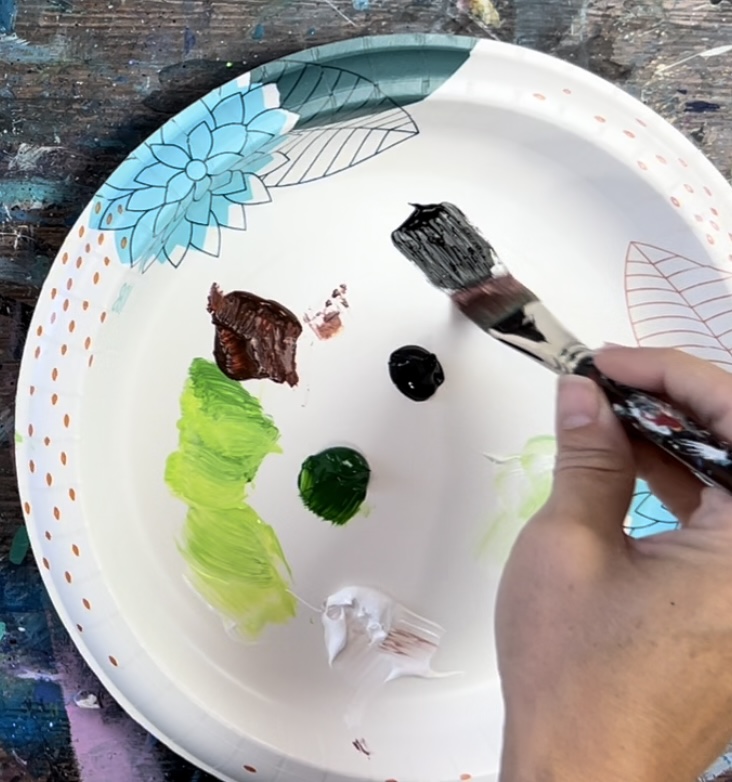
Lightly paint left and right strokes blending some of the black in the brown.

Try not to add too much black. Slightly blend it in with your browns so there are streaks of dark marks on the table to create a “faux wood” look.

Let this dry before going onto the next step.
2. Draw The Watermelon Shape
Use a pencil to draw a large half circle with the bottom touching at about the midpoint of the table area. Draw the top edge so that it is slightly slanted upwards and has an uneven/ wavy line.

Draw the outer peel of the melon so that it is visible on the left and thinner on the right.

3. Paint The Watermelon Skin & Rind
Use your #4 or #8 round brush and hooker’s green hue permanent to paint the outer skin of the watermelon. You might need two coats to ensure enough coverage over the background.


Then load the tip of your brush in a small amount of mars black. Blend black on the far left edge of the skin so it is darker and more shadowy on the edge.

Rinse the brush. Then load your palette with fresh titanium white. Paint the white rind of the watermelon. Paint a thick line that is about 1/4″ with.

4. Paint The Bright Red Watermelon Flesh
Rinse the brush. Then load your palette with primary red. Paint in curved strokes.

As you work your way up, painting in large curved strokes, add a small amount of white to the brush and blend white into the primary red. Allow the “red” to get a bit lighter as you work your way up.

The white, when mixed with primary red, will turn into a pinkish color. Add this pink color on the top edge of the watermelon flesh and blend down.

Fill the entire flesh area. Try not to over blend the white and red color.
Tip: if the background or table are showing through, you may need to apply a second or third coat of paint to the watermelon. You can also try adding in more white to allow the red to look more opaque and have better coverage.

Mix titanium white and primary red on your palette (about 3 parts white and 1 part primary red). Then use your #8 round or #4 round to paint an array of white lines starting at the top center of the watermelon and going down. Let that white gently blend with the color of the flesh (which should still be wet).


5. Add Texture On Skin & Paint Shadow
Mix hooker’s green hue permanent with a little white so that it is lighter than the color of the skin. Use your #4 round brush to paint wavy lines on the side of the skin to create the texture.


Then slightly water down mars black and add a little burnt umber into the paint. Use the tip of your round brush to paint a shadow under the watermelon. Paint left and right strokes under the watermelon and have the shadow drift to the left.

Let the shadow fade out on the sides. The trick is to make sure the paint is watered down (to almost a water color consistency) so it appears think and somewhat translucent. Also, try to use just the tip of the bristles and hold the brush lightly.


6. Paint Watermelon Seeds
Use your #8 or #4 round brush to paint the watermelon seeds. Add mars black to just the tip of the brush.

Paint small tear drop shapes going in a diagonal direction along the flesh of the watermelon.

Paint some larger and some smaller.

The larger ones are towards the top of the watermelon and smaller ones towards the bottom. Some of the seeds appear to be just a slither.

When the seeds dry, paint a white highlight on one side of the seeds.

7. Paint Faux Wood Texture On Table
Water down the burnt umber to a thin consistency. Use the point of the #8 round brush to paint lines on the table that represent faux wood texture. Paint horizontal lines and an “eye” shape for a knot in the wood.


8. Paint Bubbles In Background
Use your finger to “smear” a small circle with titanium white. Do this all through out the background for a fun bubbly abstract effect!


You can also use your round brush to paint little white dots in clusters on the background.


9. Draw/ Paint Watermelon Blossom & Leaf
Watermelon blossoms are small yellow flowers with five petals. Watermelon leaves are somewhat narrow with rounded notches.
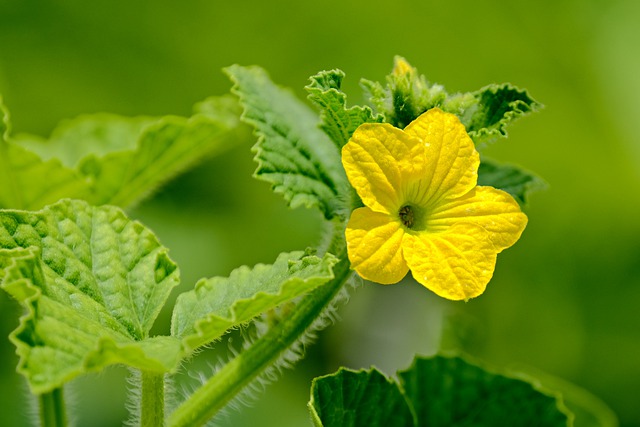
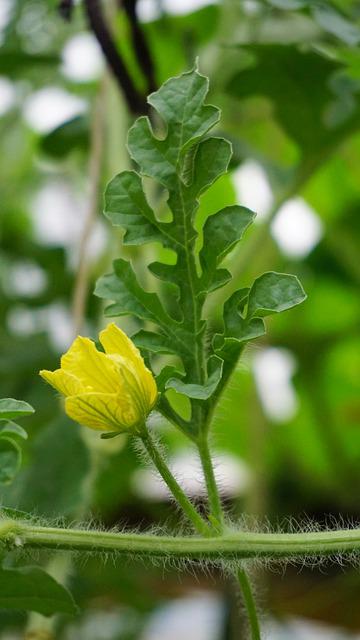
Use a white chalk pencil to draw a watermelon blossom. Draw a simple flower with five petals.

Then draw a simple leaf with rounded tips.

Load your palette with primary yellow and titanium white. Mix the two colors together. Then use your #4 round brush to paint the flower.


Add a little bit of hooker’s green hue over the leaf to darken it.

Then mix an orange on your palette. Mix primary red with yellow (about 1 part red to 2 parts yellow) to make an orange. Paint little orange dots in the center of the flower to darken it.

Then paint little white curved lines on each of the petals.

Use your round brush and hooker’s green hue to paint a center line and vines on the leaf.

Use the #4 round brush and the same color you did for the watermelon shadow to paint a small shadow on the lower left part of the flower.

Next, use your green POSCA paint pen to draw a little vine on both sides of the leaf/ flower.


10. Paint Decor On Canvas Sides (optional)
This is optional but a cute touch to a watermelon painting! On the sides of the canvas, I painted light green. Then when it dried, I painted dark green texture stripes that looked like the skin of the watermelon!


Finished!
Sign your name and show it off!

Share Your Art Here:


